


HaZmatt
Community Member
-
Joined
-
Last visited
Everything posted by HaZmatt
-
Thanks CG! Yes I remember your thread on those fenders and it scared me away from them. I ended up getting a pair of rust free fenders from Arizona and they fit perfectly. Just had a few dings in them.
-
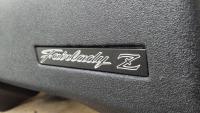
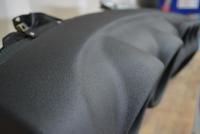
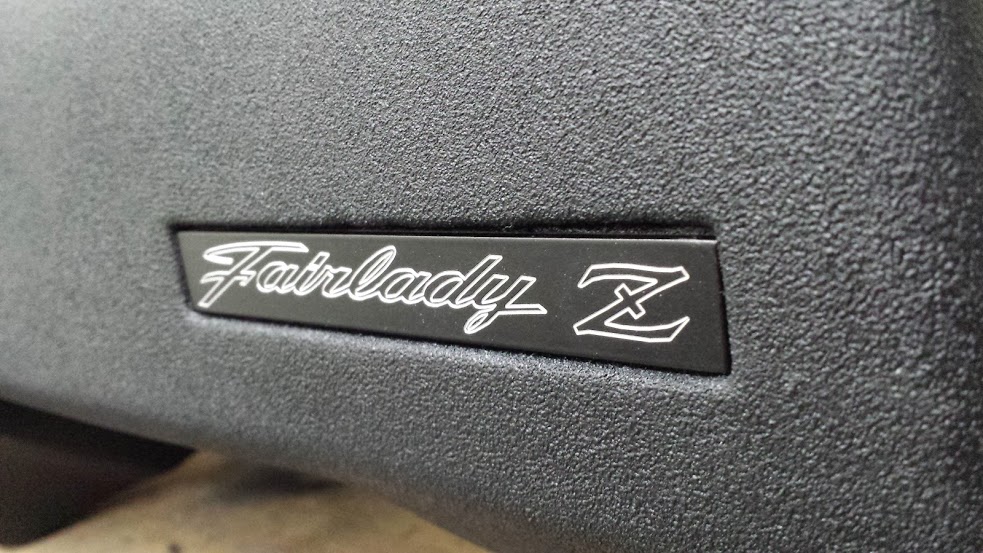
a tad more gloss i think would look better. more paint on it would smooth that texture out a little more too. excellent progress. i really like that fairlady emblem Thanks! I was hesitant on doing a more glossy finish because I didnt want it to look too splotchy. We'll see how it looks in the car next to the seats and door panels, etc.
-
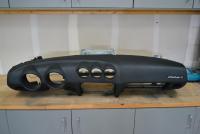
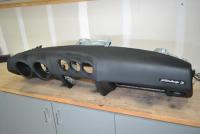
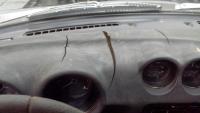
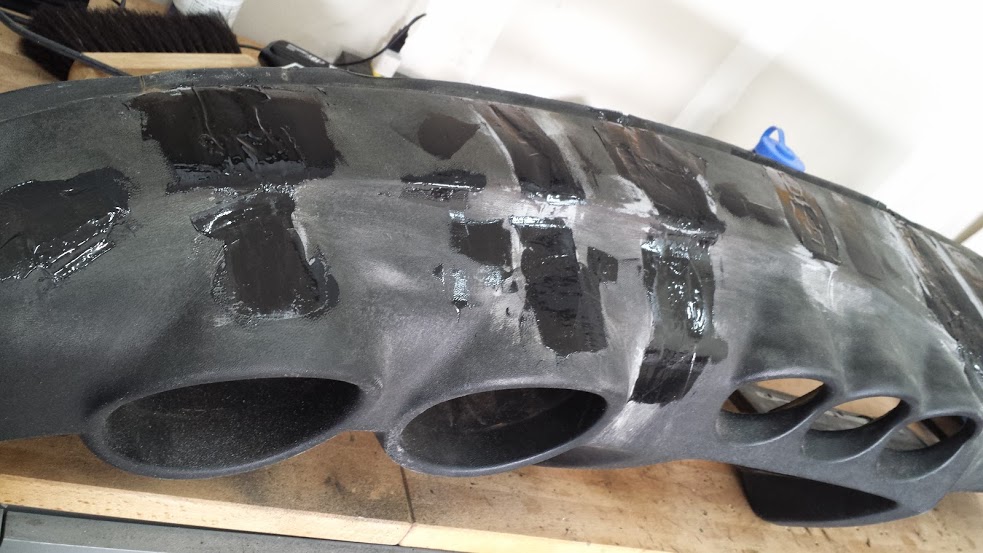
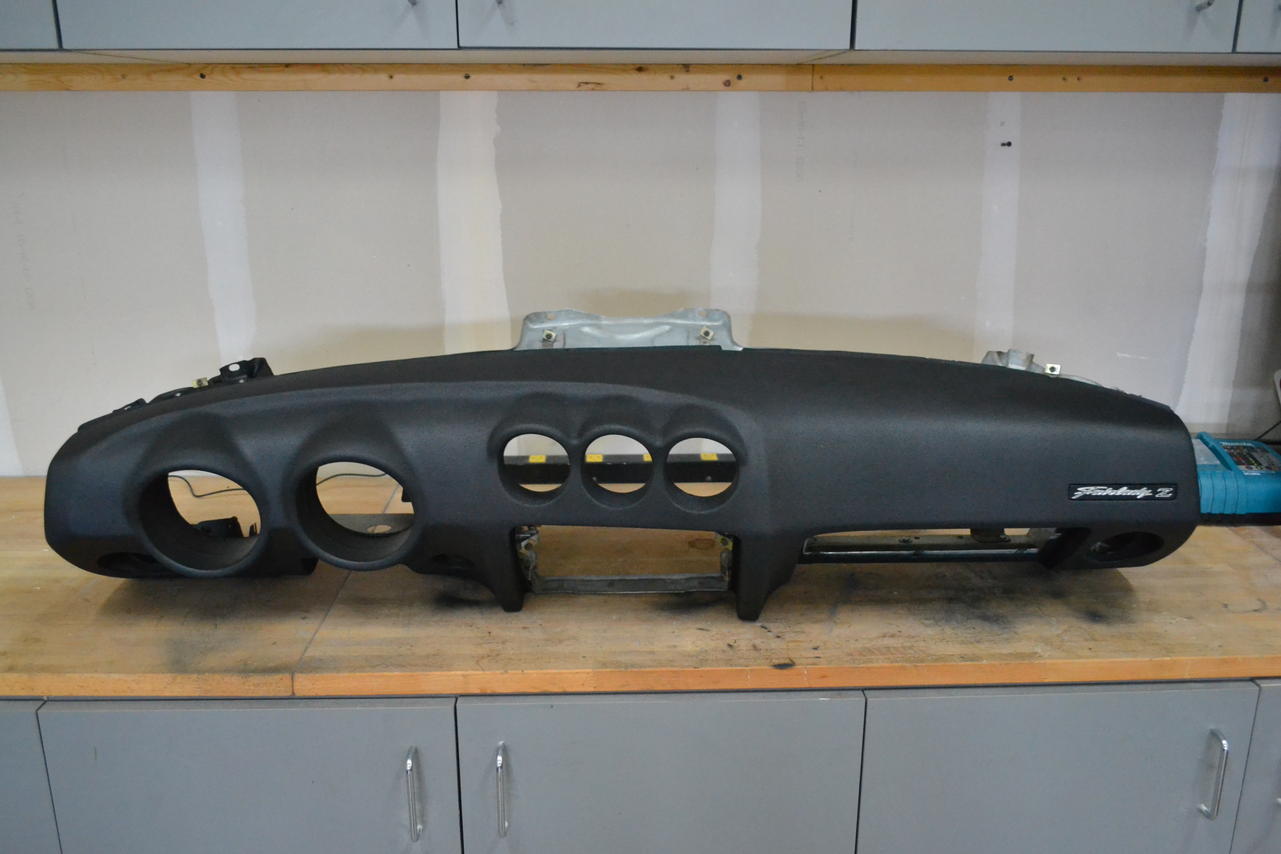
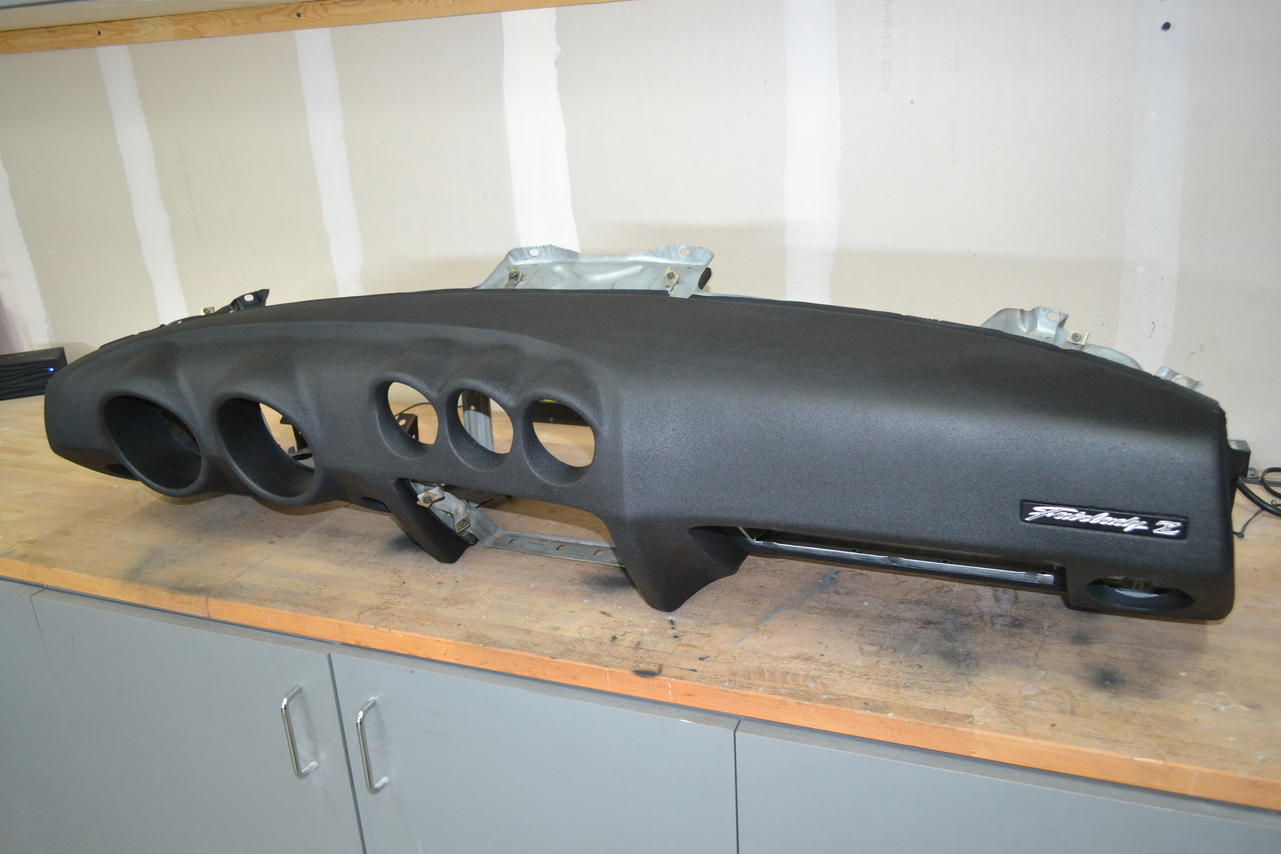
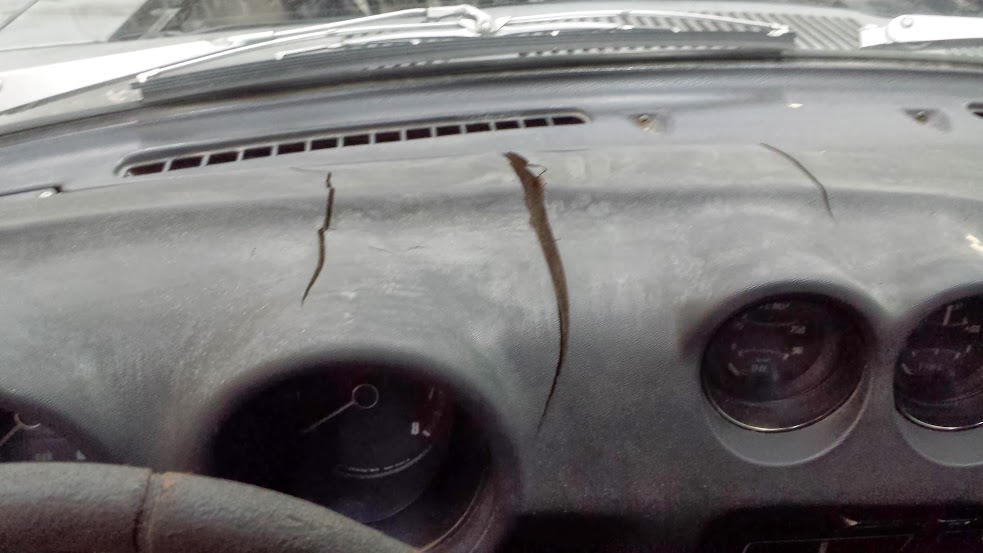
My dash was in need of some love so I followed the dash repair techniques on this forum and I think it came out really good. Not perfect but 100X better than it was. I ended up spending about $100 on materials and a good week or 2 of working on it here and there.


-
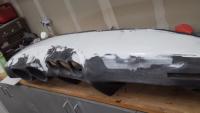
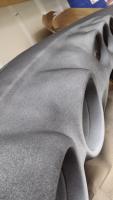
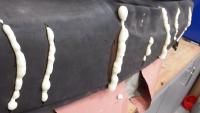
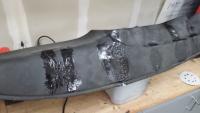
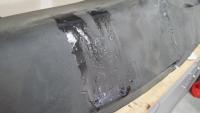
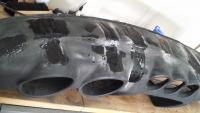
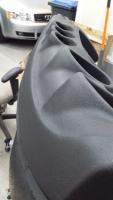
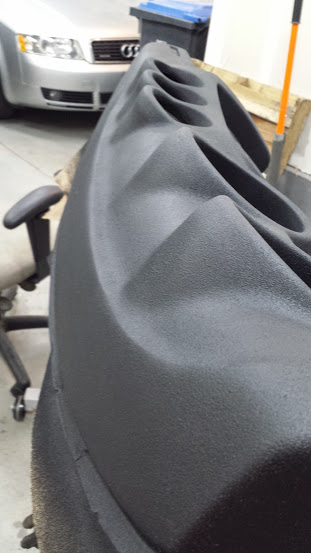
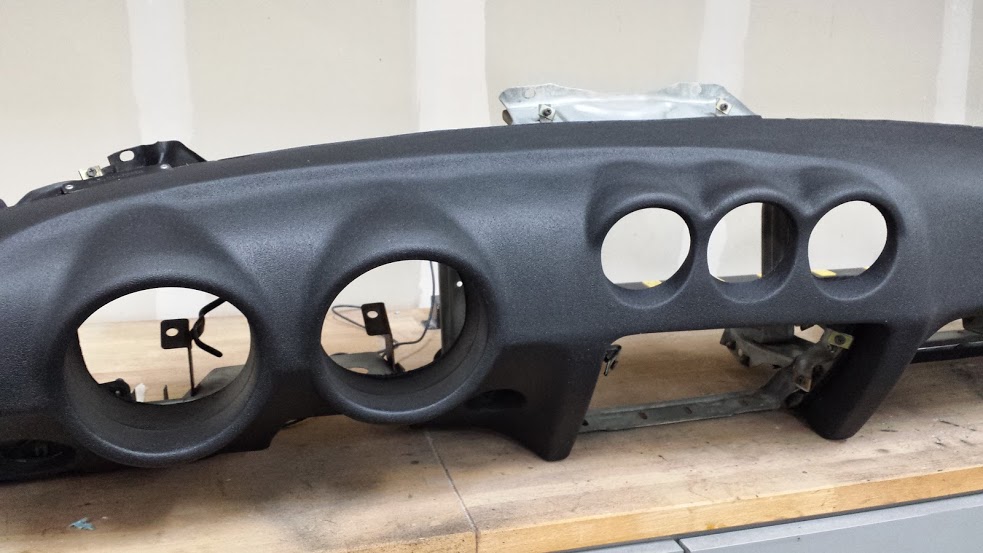
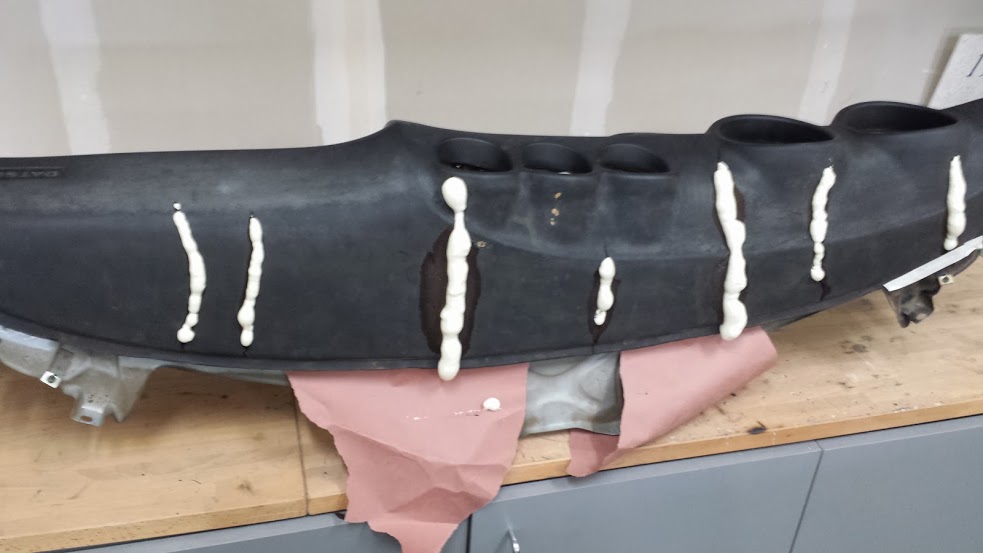
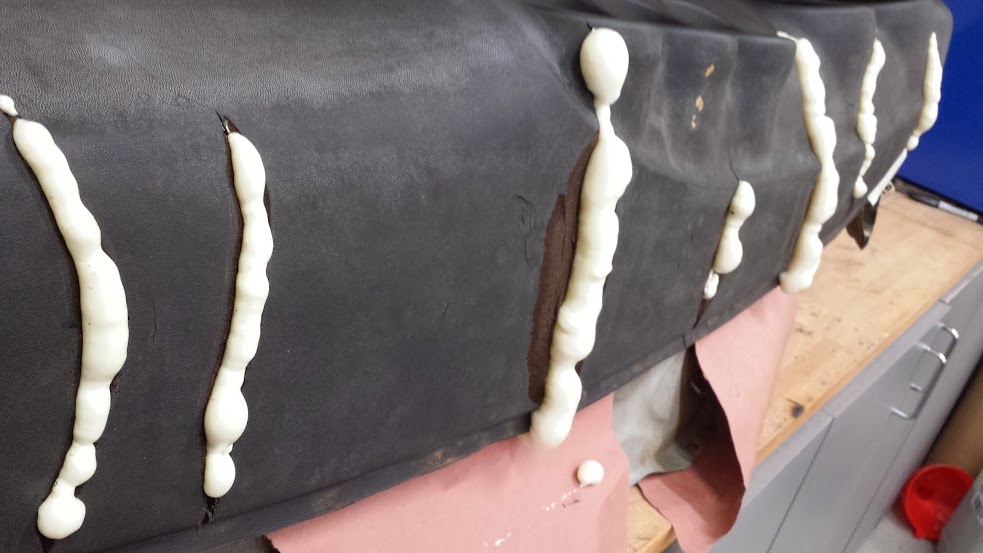
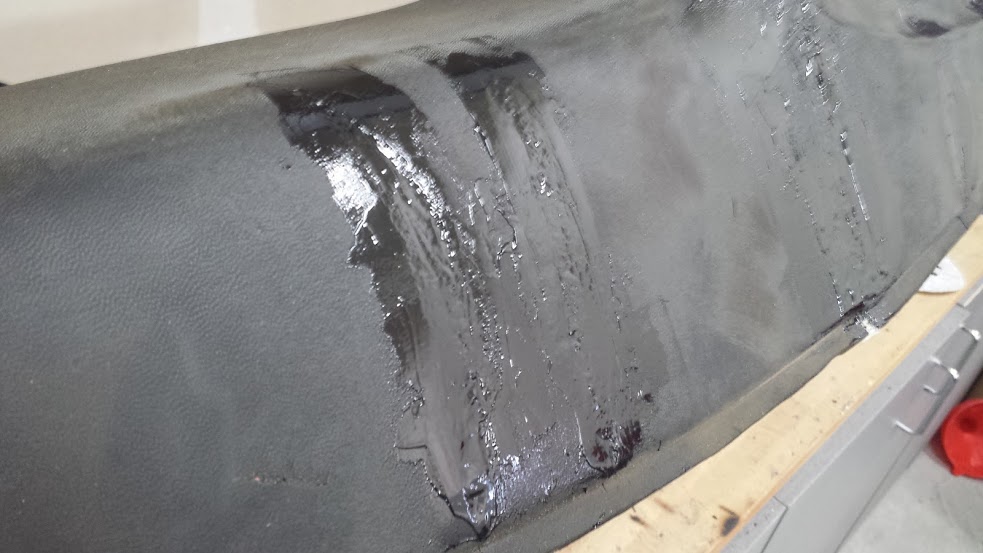
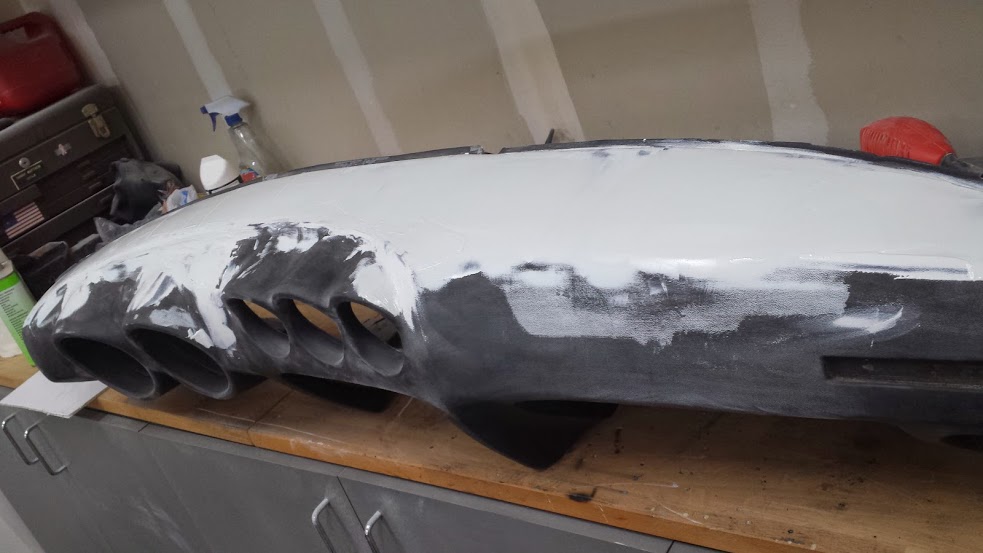
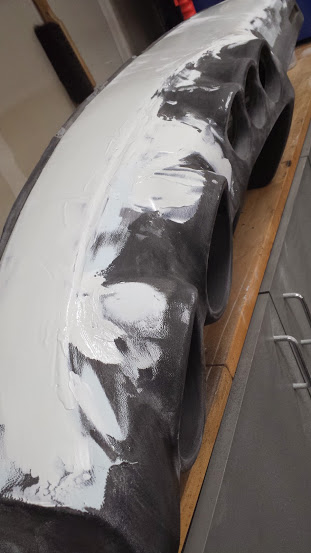
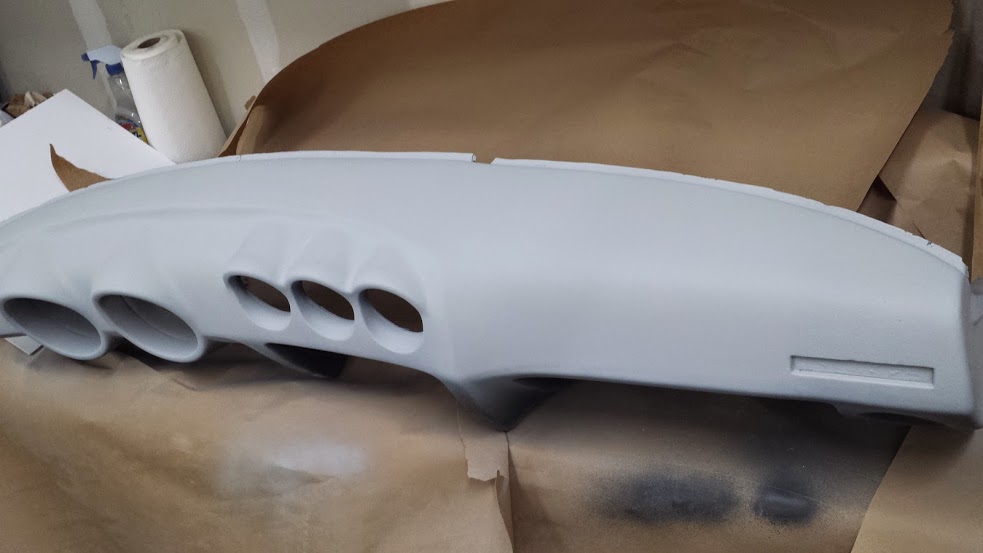
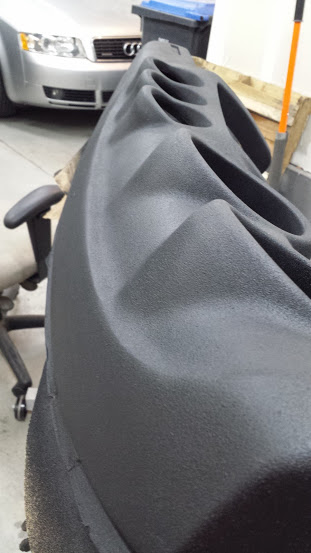
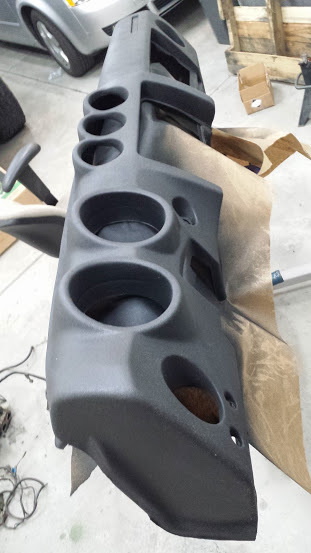
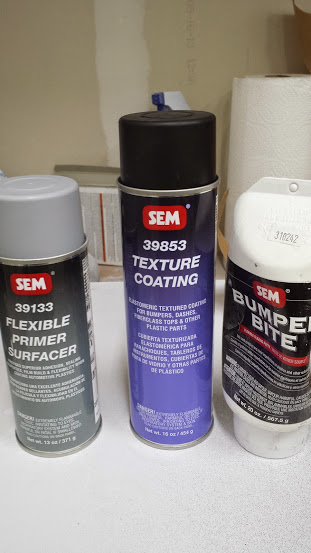
My dash was in need of some love so I followed the dash repair techniques on this forum and I think it came out really good. Not perfect but 100X better than it was. I ended up spending about $100 on materials and a good week or 2 of working on it here and there. Heres the materials I used. Plus I used Great Stuff expanding foam and Duplicolor Truck bed coating for the final coat. Used the Great stuff expanding foam to fill in the cracks that were split open. Then I used the bondo bumper repair to fill in the holes Coat #2 Then applied the SEM glaze putty. This required 4-5 coats of applying then sanding. Then primed with SEM flexible primer I used the SEM texture coating to get a decent texture Then sprayed with 2 coats of Duplicolor truck bed coating. I thought it turned out pretty good. I cleaned up my dash support. Then installed my new Fairlady emblem What do you guys think?


-
Hey thanks, I really like their stuff too. I'll have to try out their sound deadening material. Thanks Jeff! I appreciate the support.
-
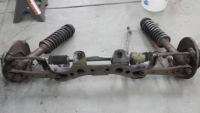
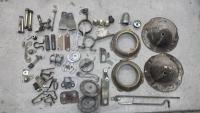
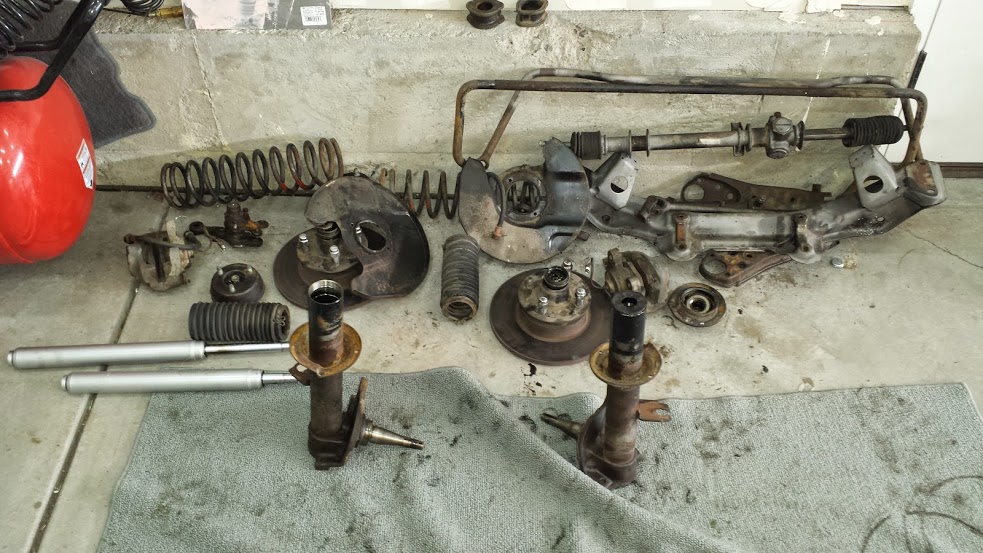
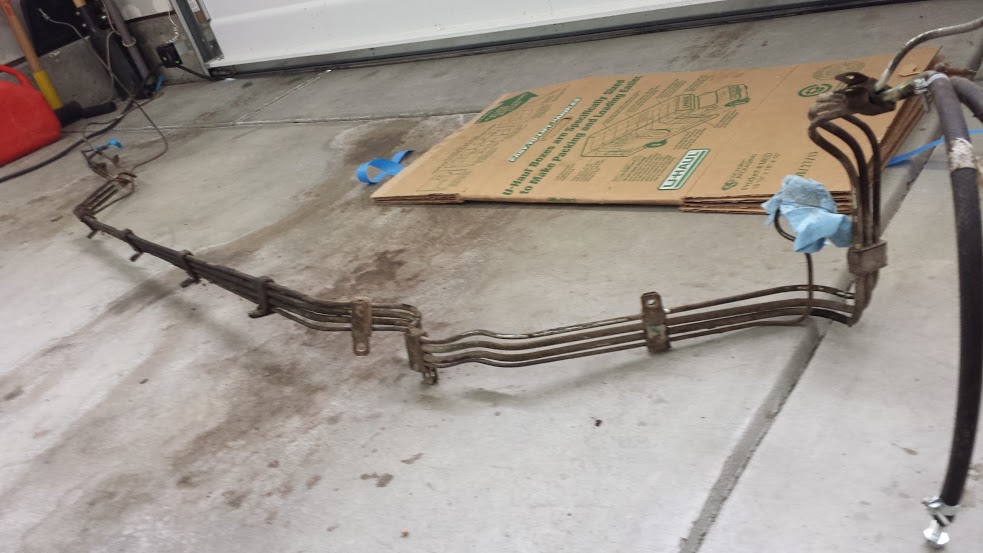
Started disassembling the suspension to send out to get powder coated. Also sent these parts out to be yellow zinc plated

-
Thanks Eurodat! I think im going to go the Xenon airdam route. I just need to source a grill and turn signal lights.
-
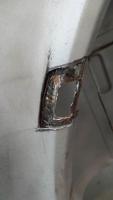
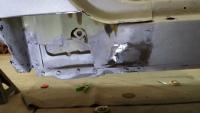
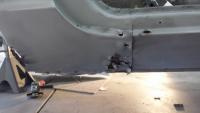
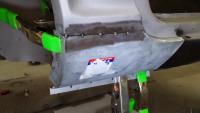
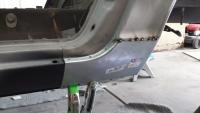
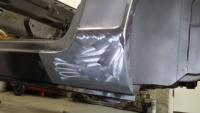
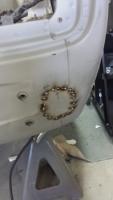
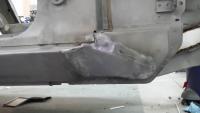
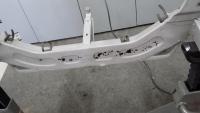
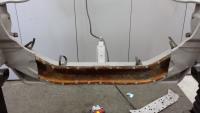
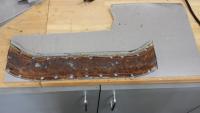
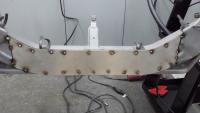
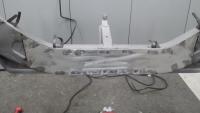
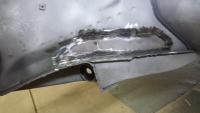
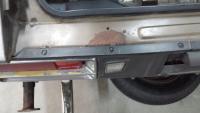
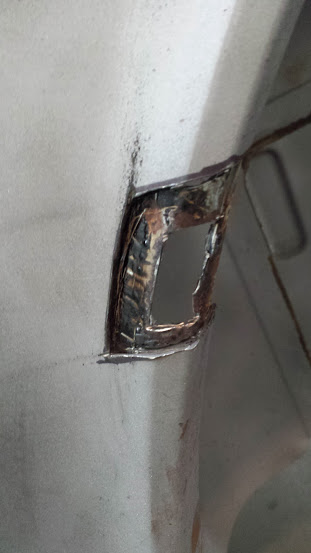
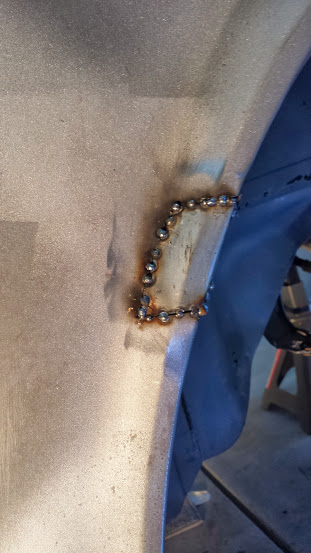
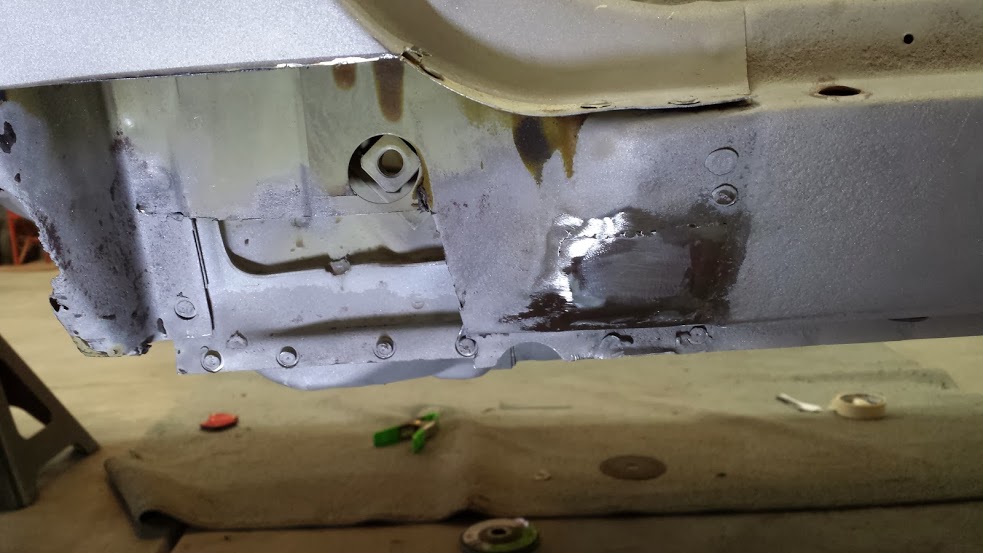
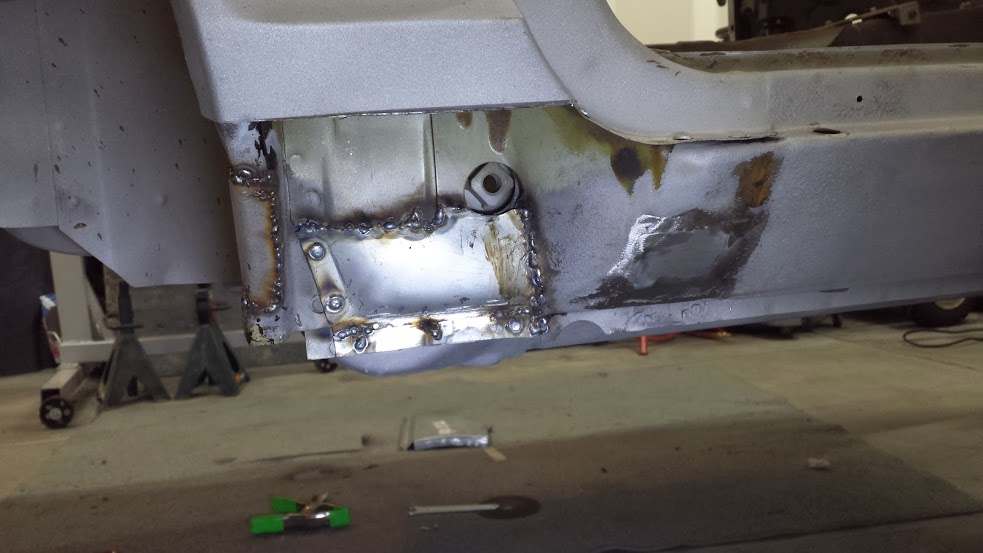
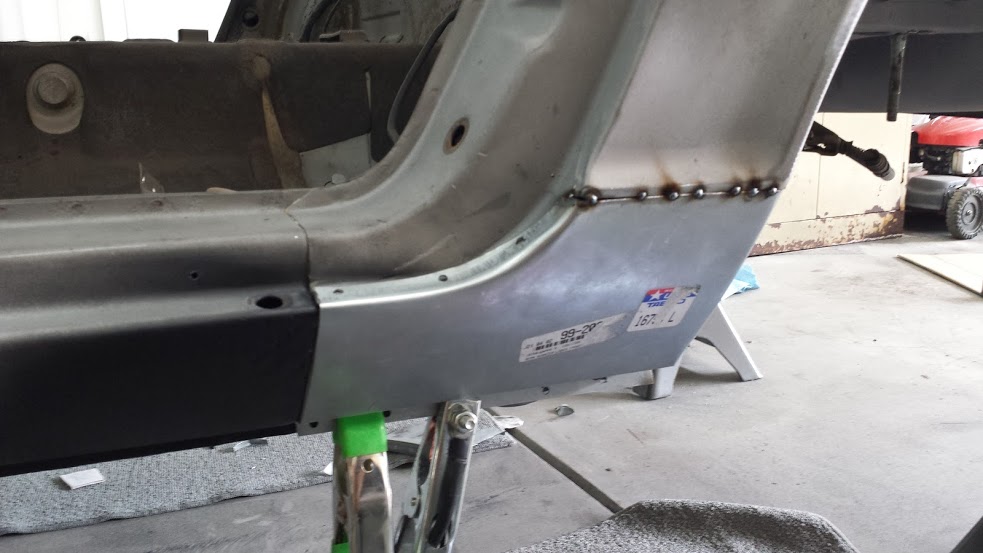
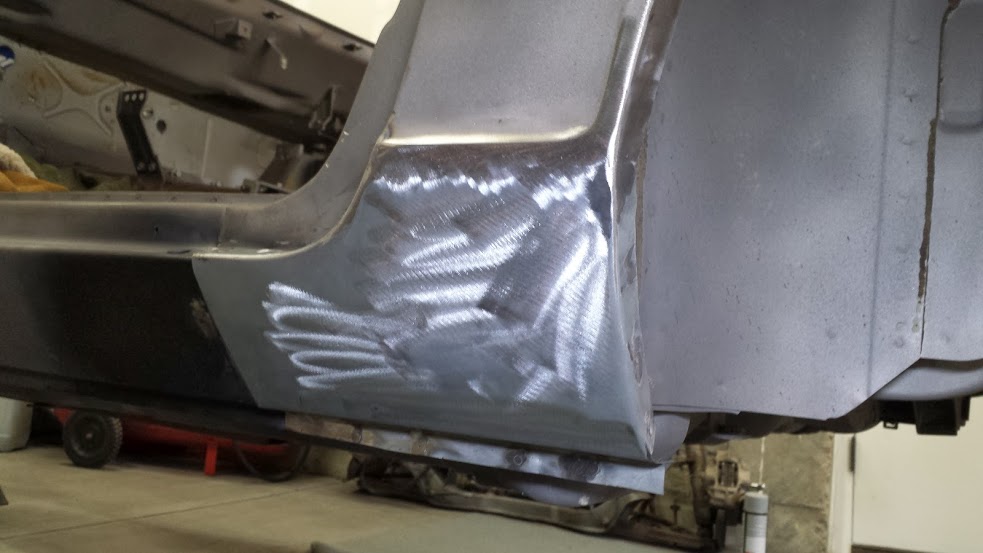
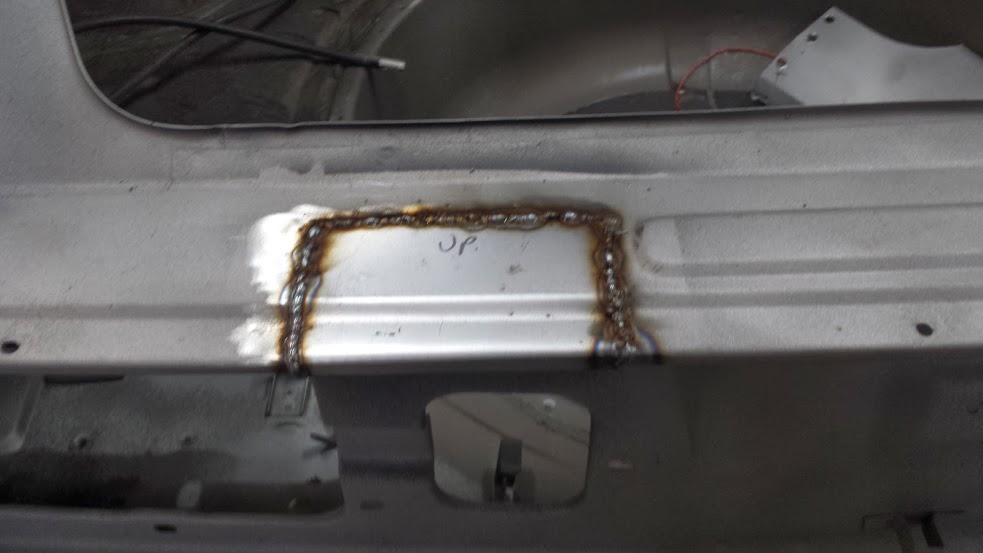
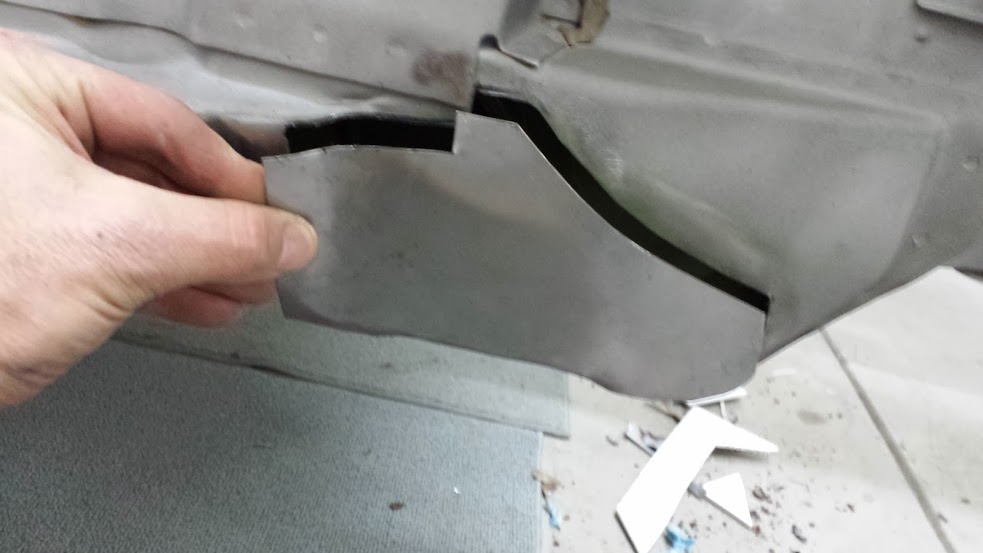
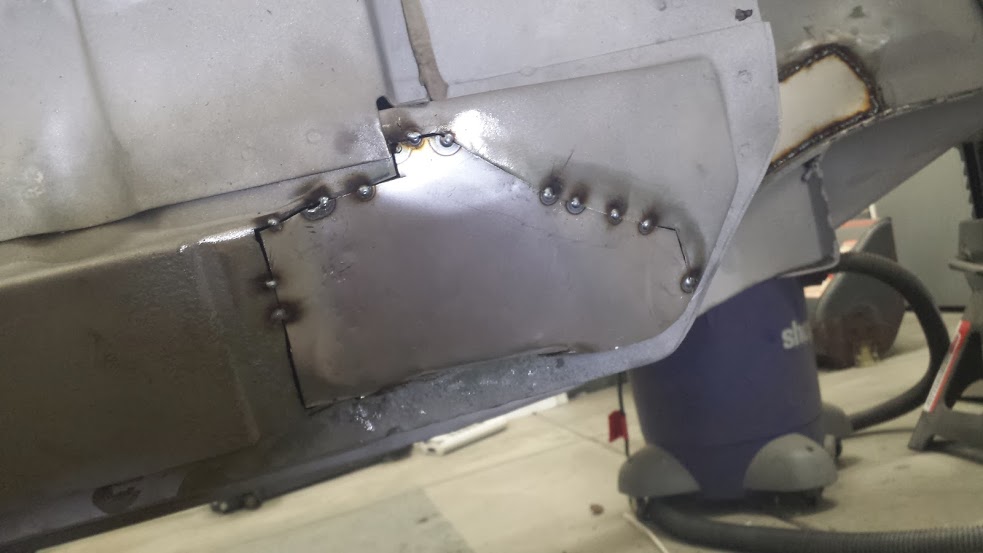
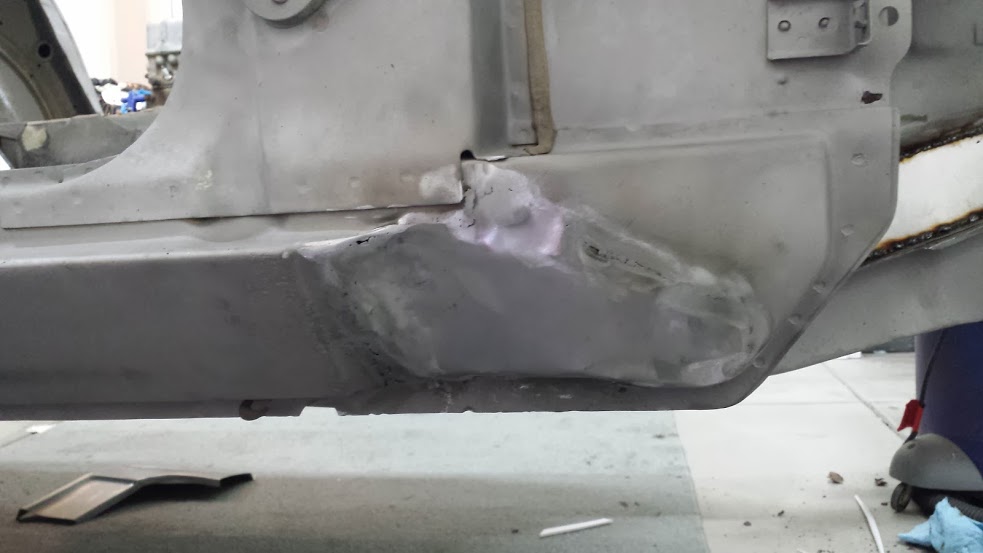
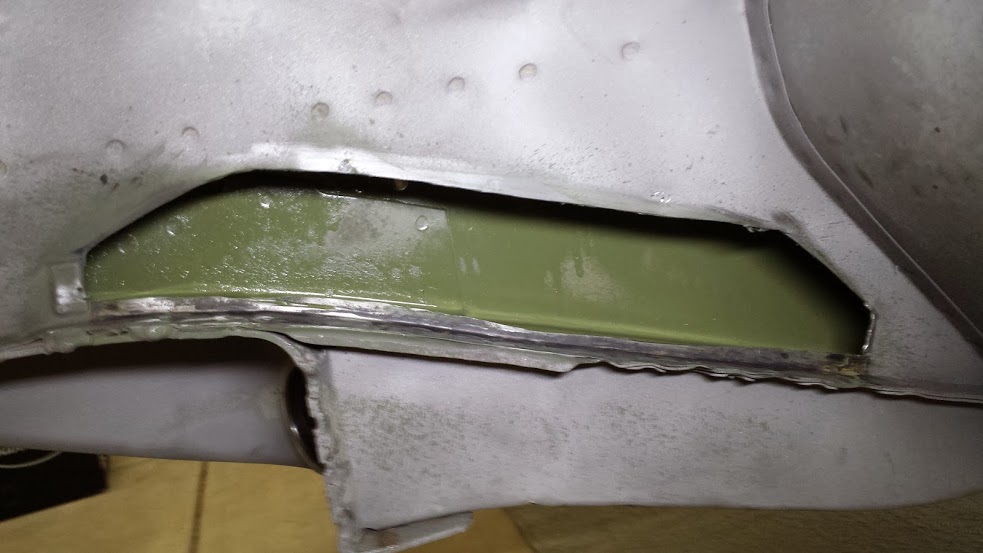
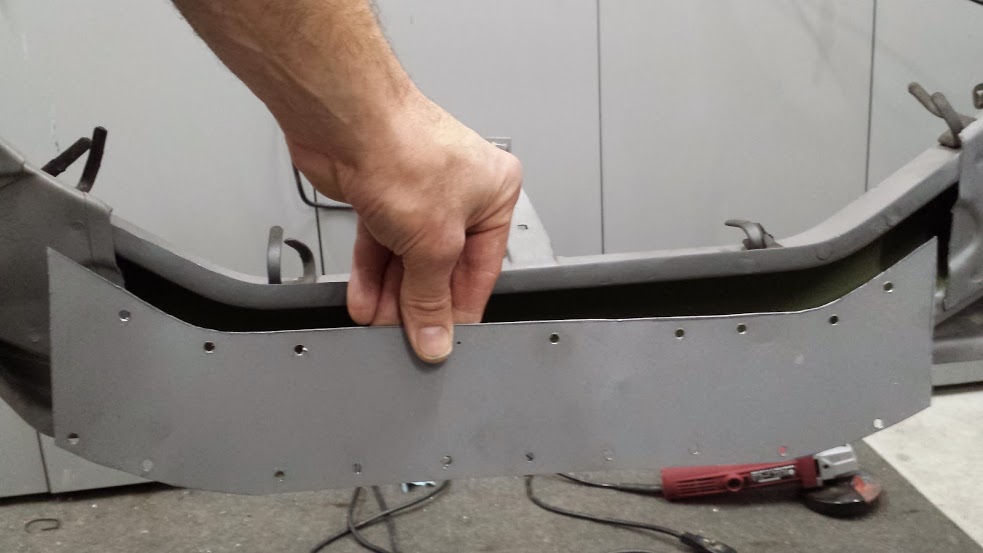
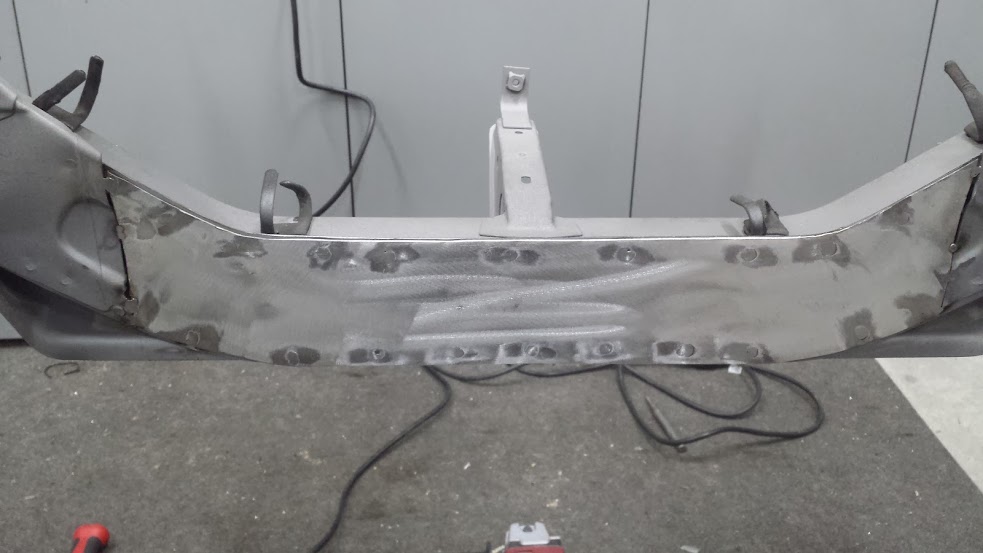
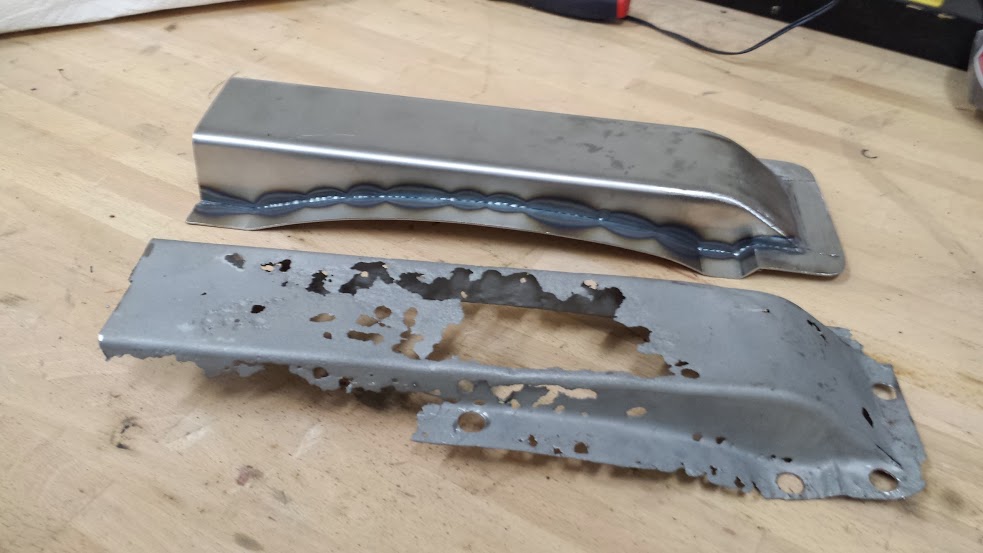
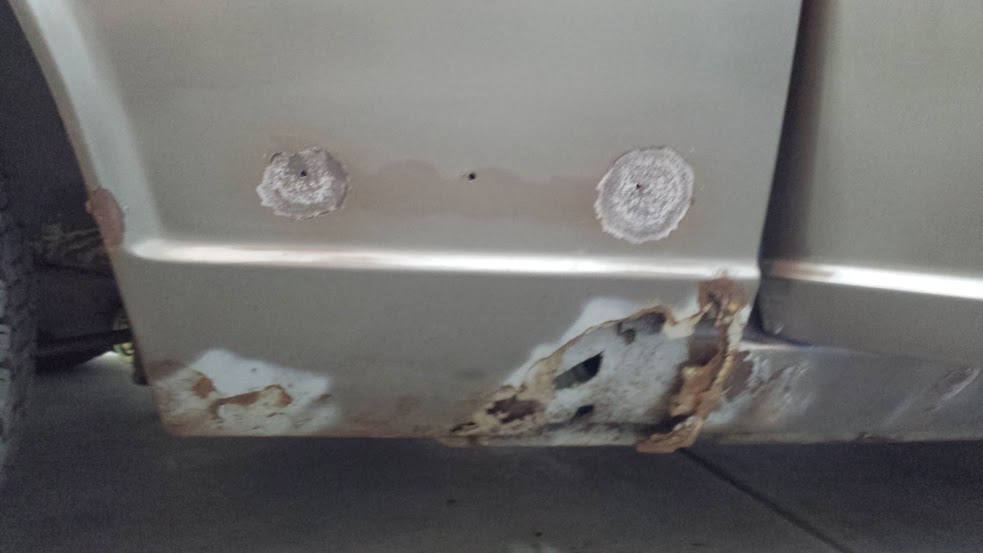
Some more misc. metal work pics Rear bumper bracket holes were filled in


-
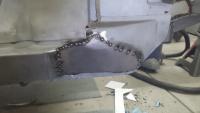
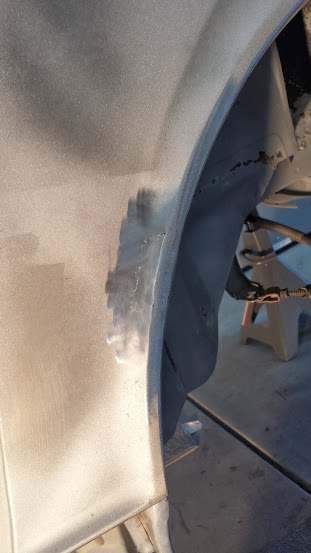
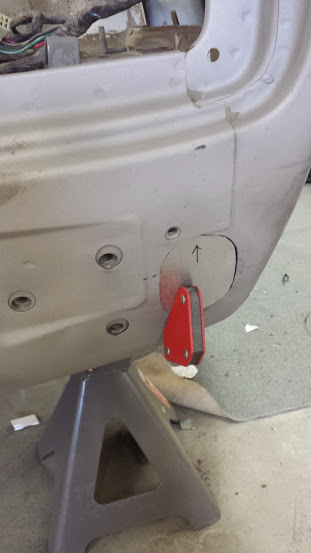
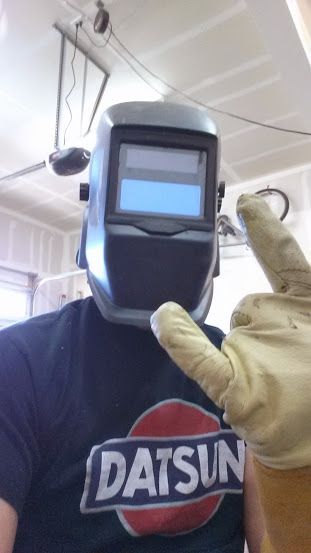
Yeah its not as hard as I thought it would be. I was pretty intimidated at first but I watched a few youtube videos and practiced on some scrap metal first. The most important thing is getting your settings dialed in correctly so you're getting good penetration. The rest is just a lot of grinding.
-
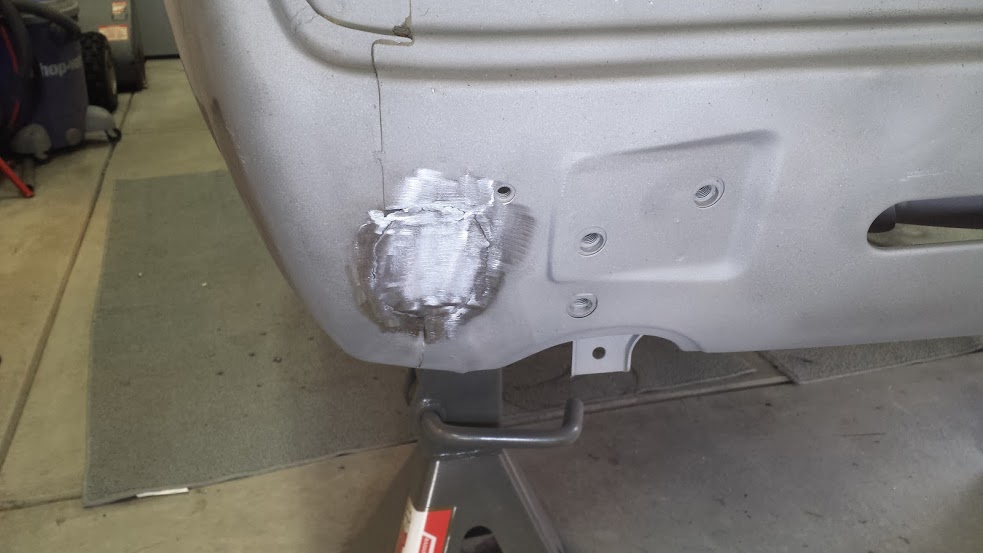
Thanks rossiz! I debated shaving my rain guards and antenna but decided against it. I will be putting on the 240 bumpers so I shaved the rear bumper bracket holes. Ill post more pics tonight!
-
Hi Captain, the car was actually brown but very faded. The media blaster I went charged by the minute so the more he has to blast off the more expensive. It cost me around $900 for everything. He did tell me that he could get most of the undercoating off but it takes a little more. Im not sure about the radiator support, I actually havent seen anyone else need to repair it. Mine may have had a radiator leak or something.
-
Yea im a strong believer in doing it right the 1st time! Thats an interesting mod he did i'll have to look into that, thanks.
-
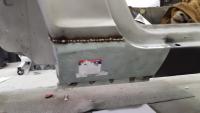
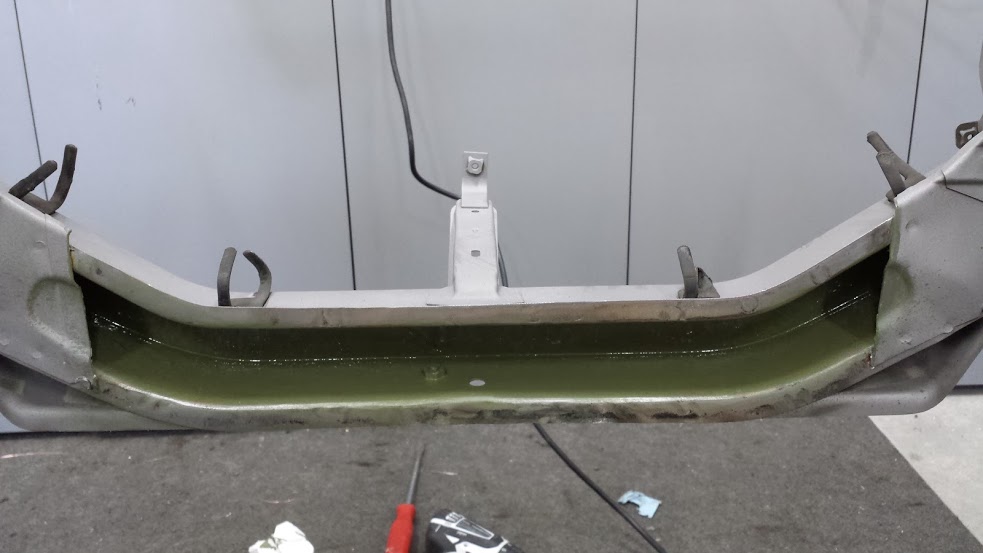
Wow thanks for all the comments and support! Thanks, yeah the Internal frame coating is a rust encapsulater so its made to go right over rust. Good stuff.
-
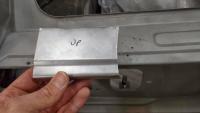
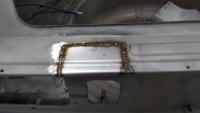
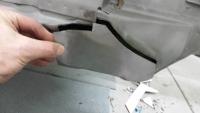
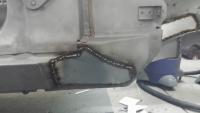
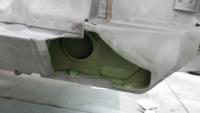
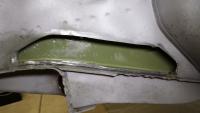
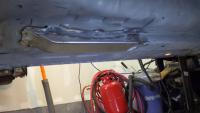
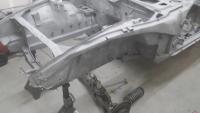
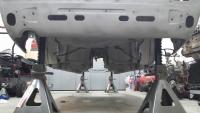
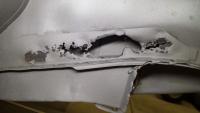
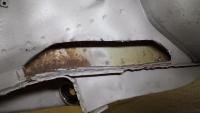
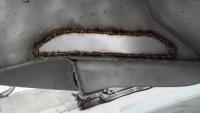
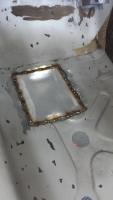
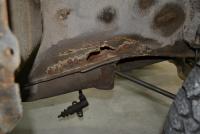
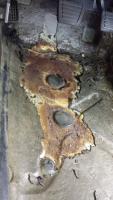
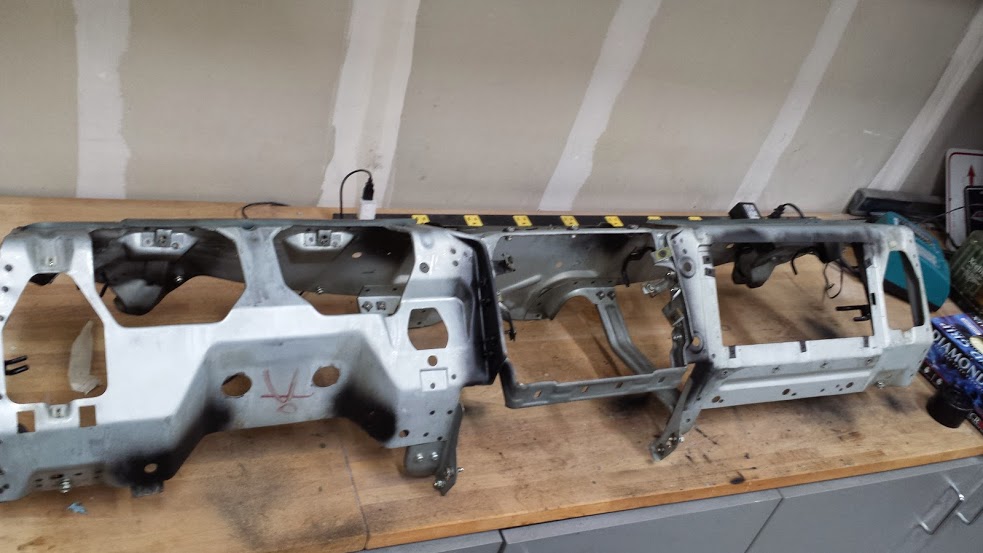
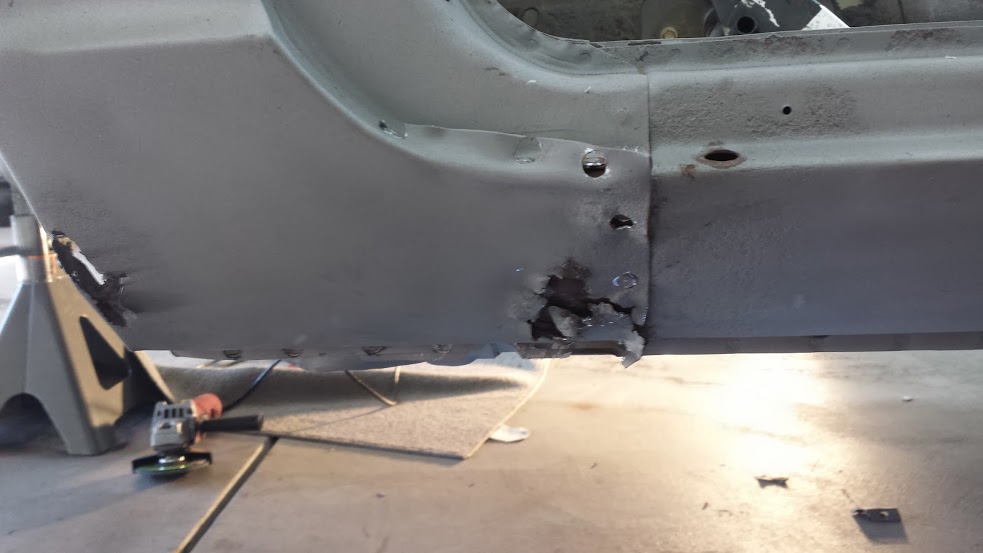
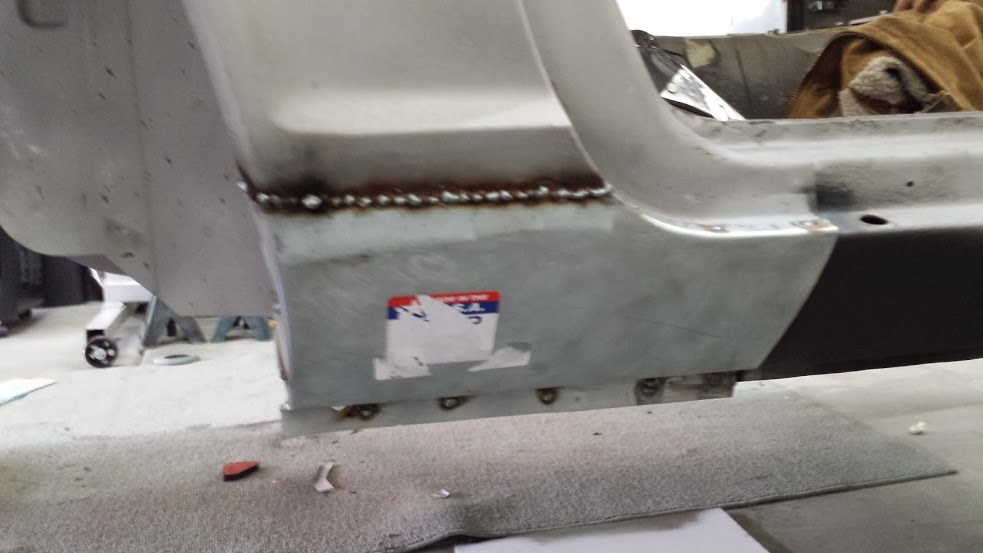
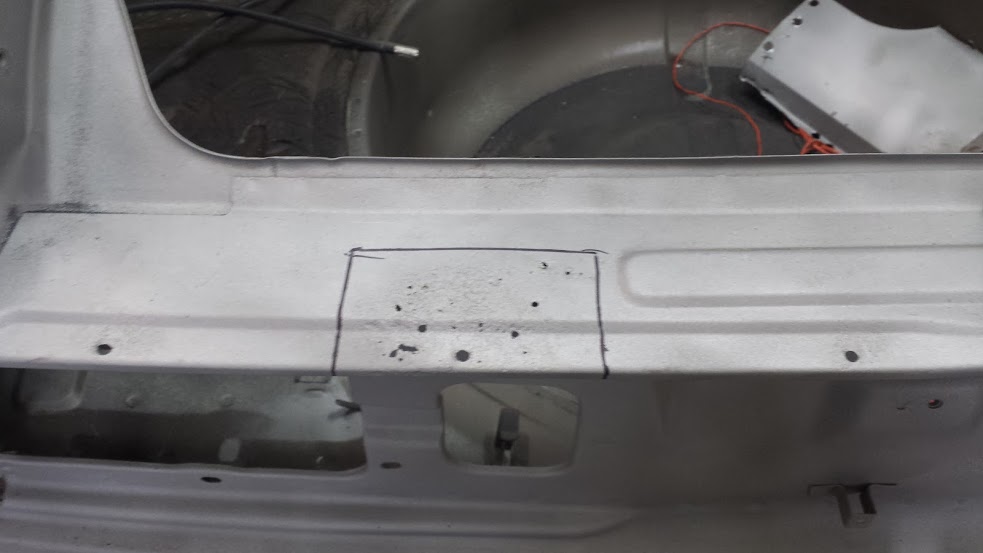
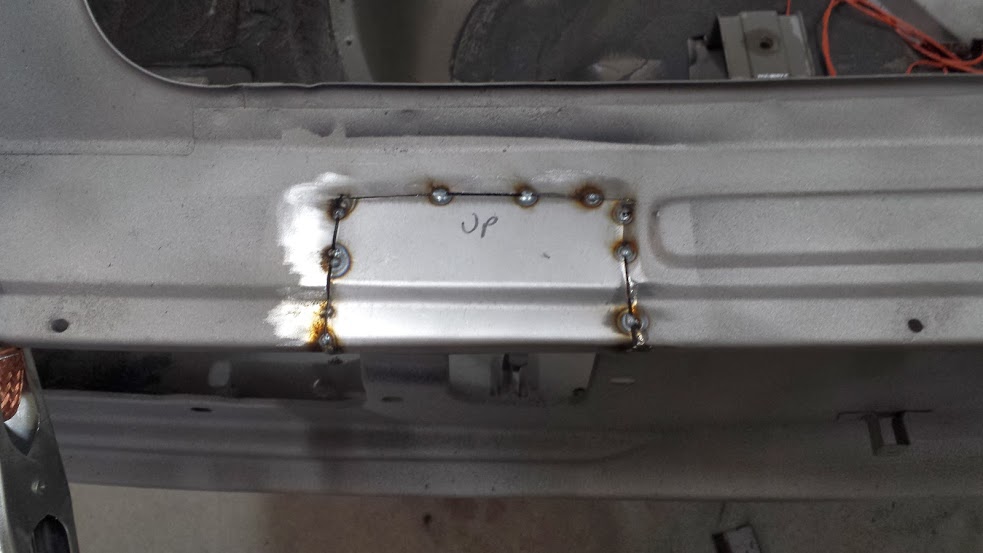
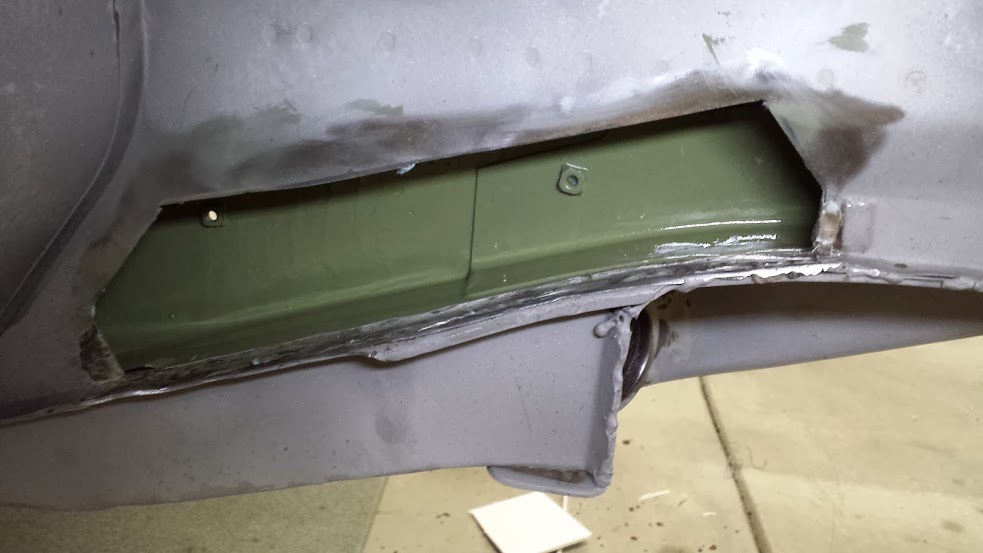
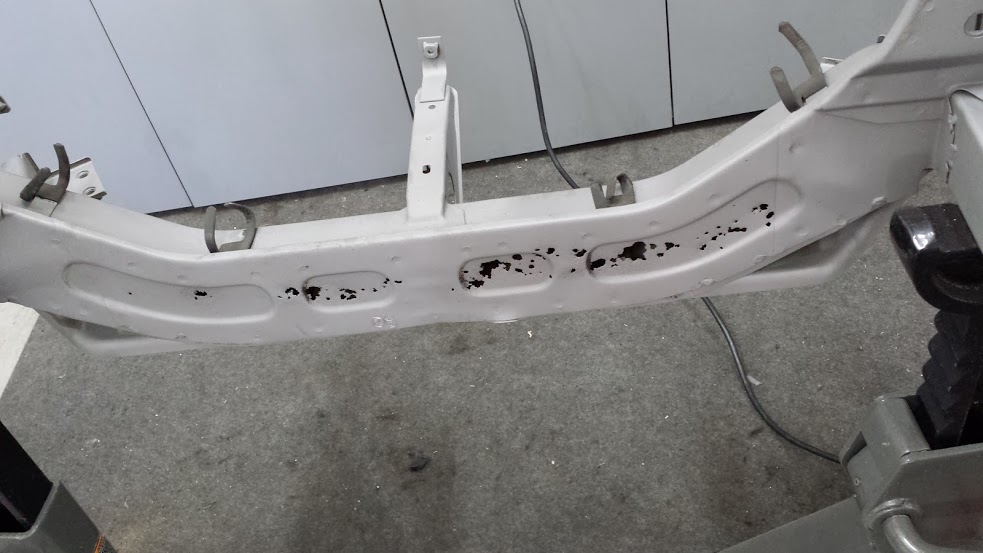
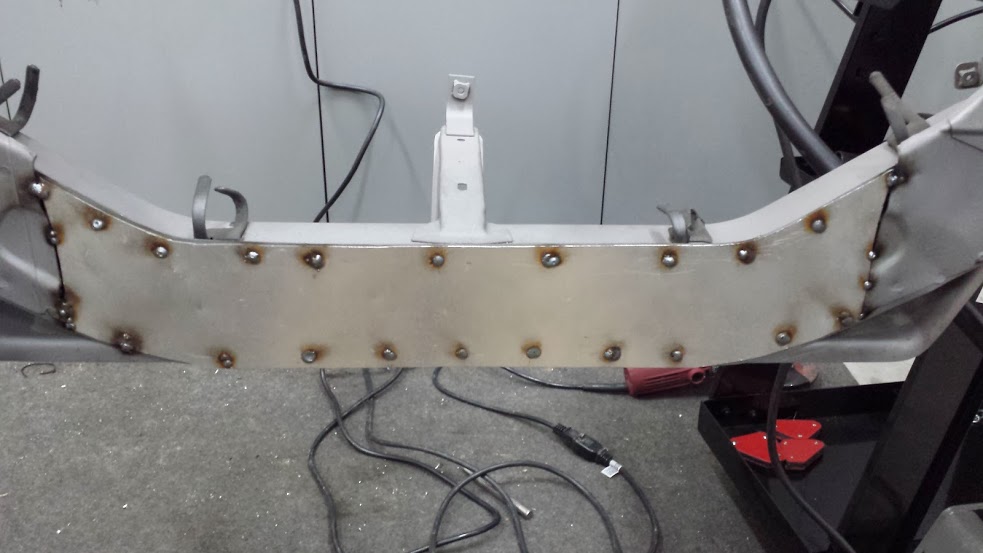
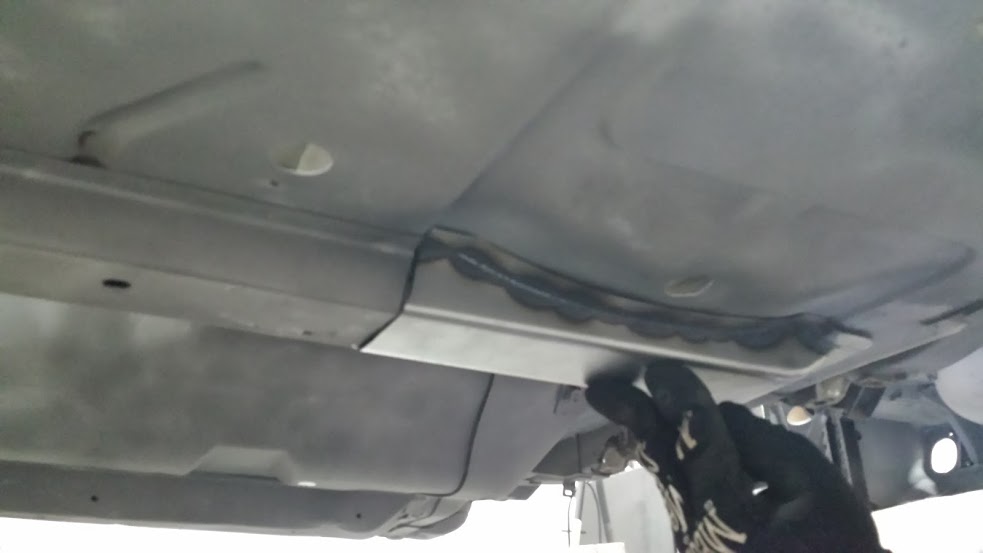
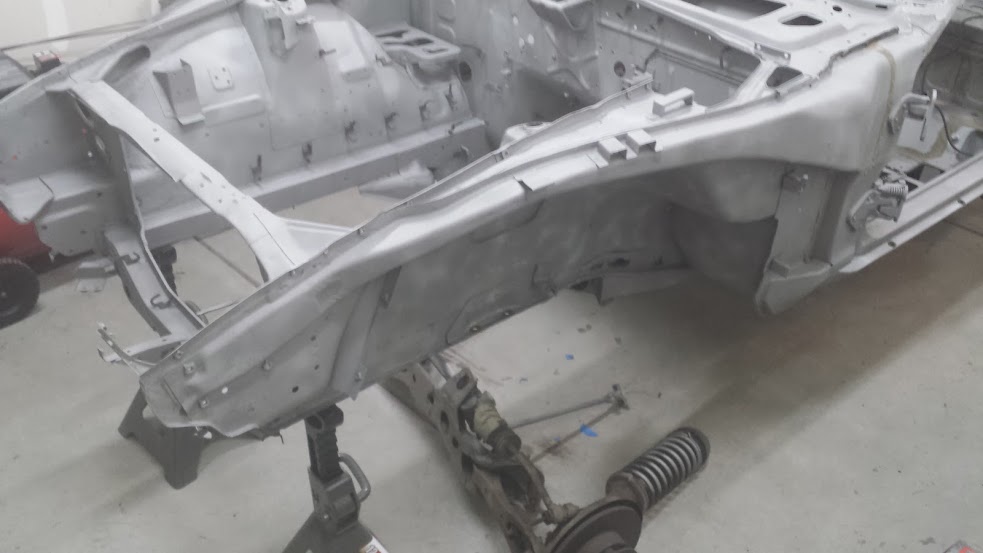
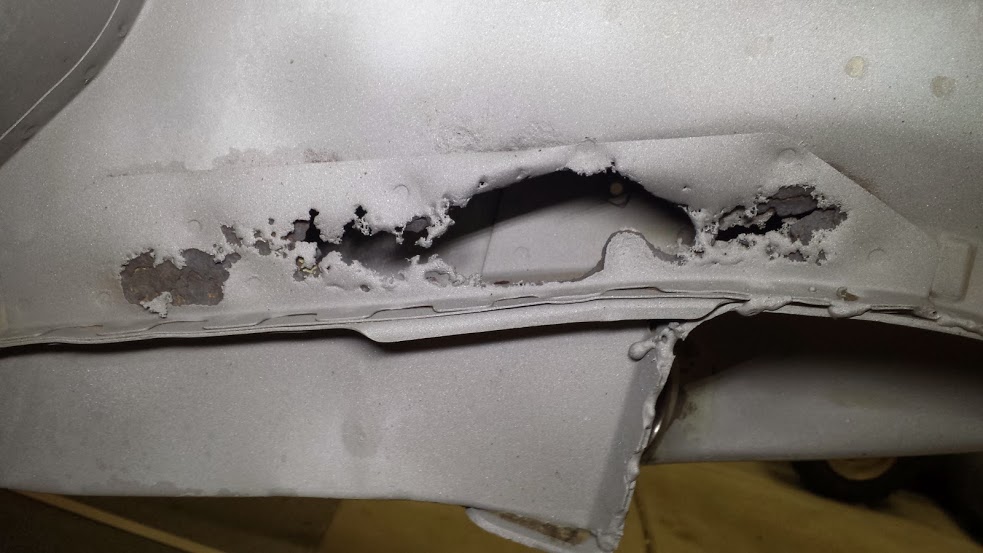
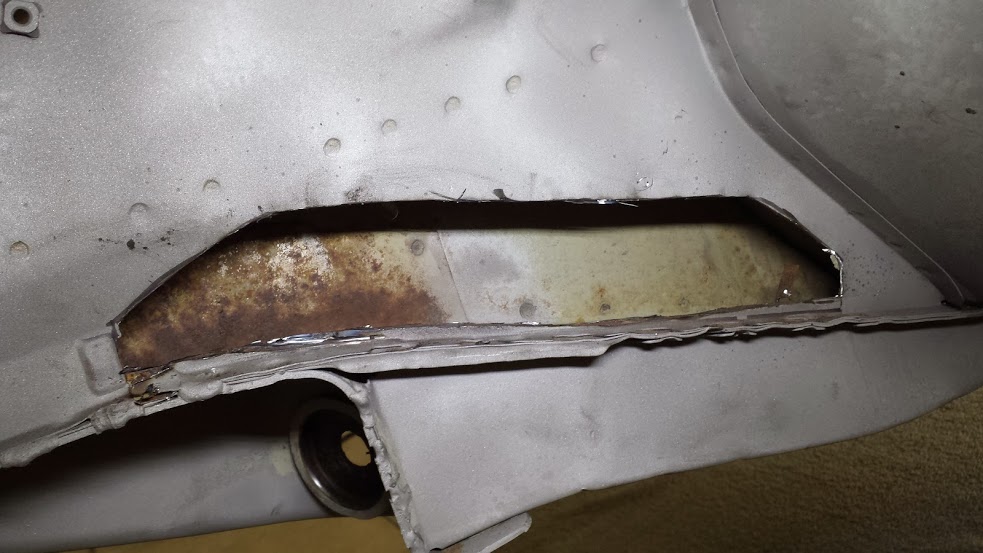
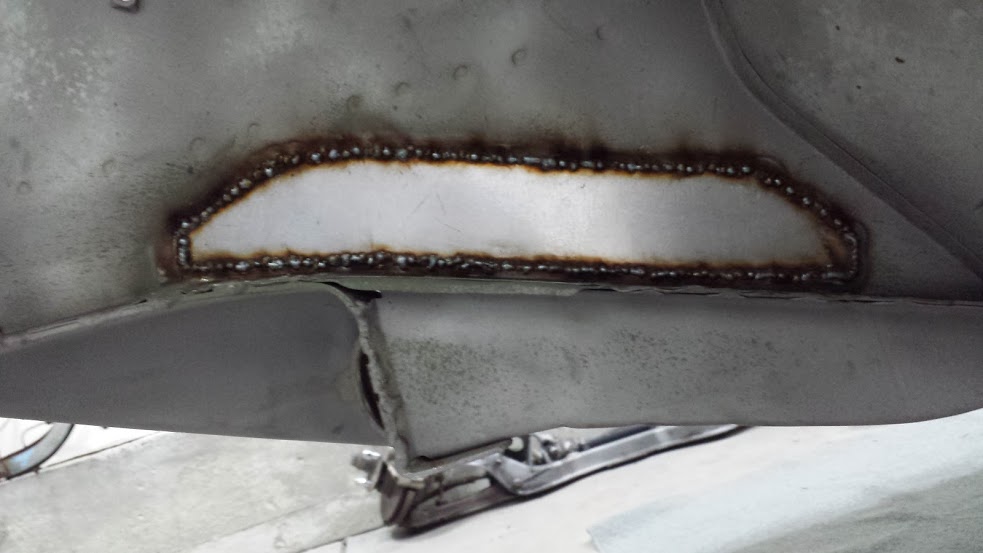
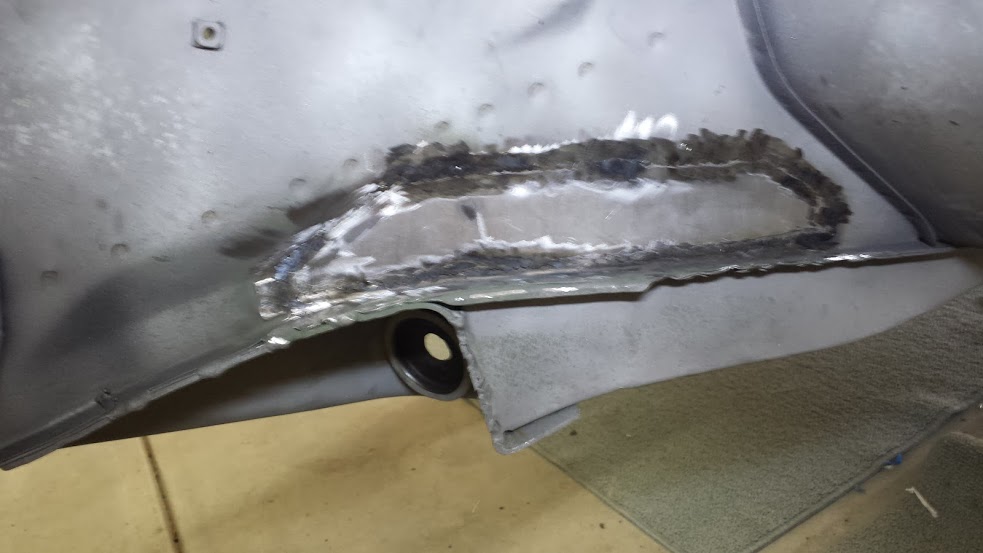
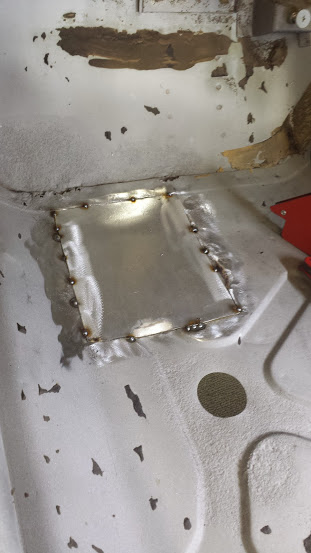
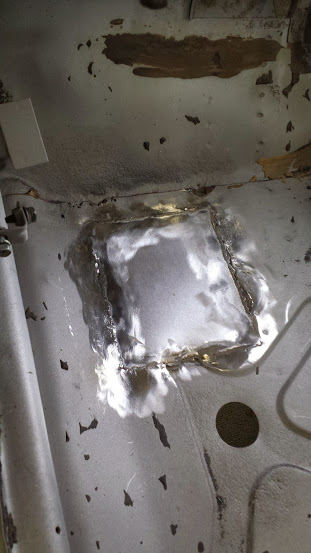
More rust repair pics All interior frame areas were covered with Eastwood's Internal Frame Coating for rust protection Heres the damaged frame rail. I got a new piece fabricated by a local fab shop


 I got the car back after a week. They did a really thorough job. It was nice to finally work on it without getting dirty and greasy. Then I worked on removing the suspension. Next I started working on the metal work. Now I haven't welded anything since shop class in high school but I was eager to learn so I went out and bought a welder and got to work! Heres some welding shots
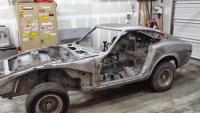


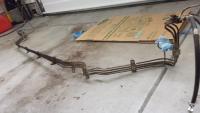
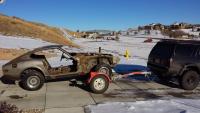
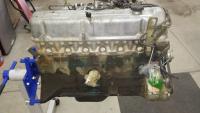
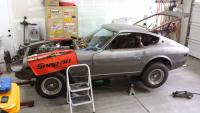
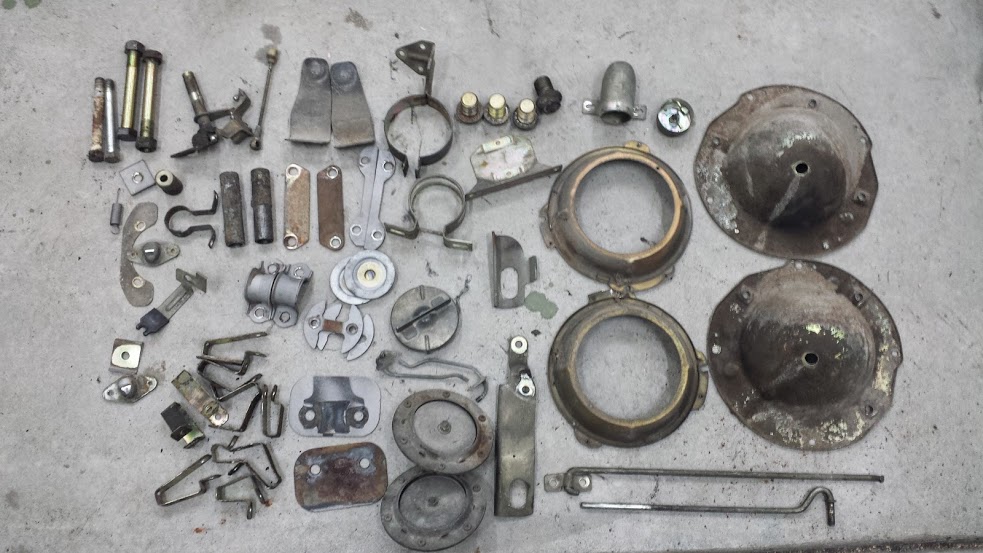
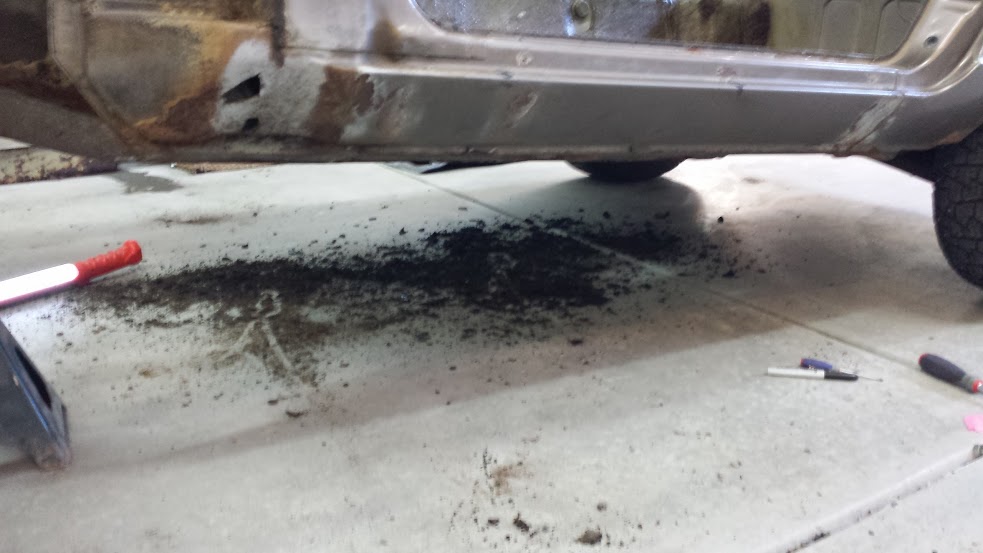
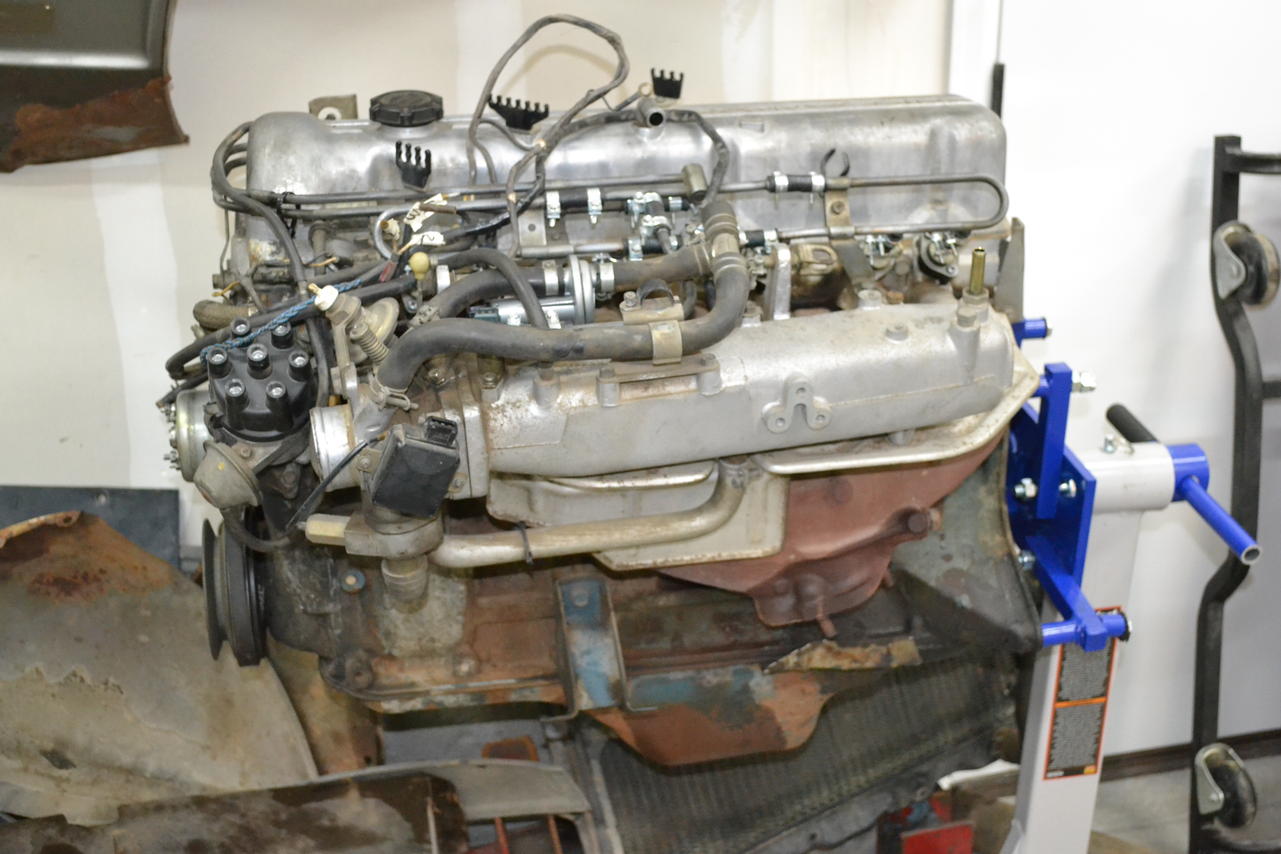
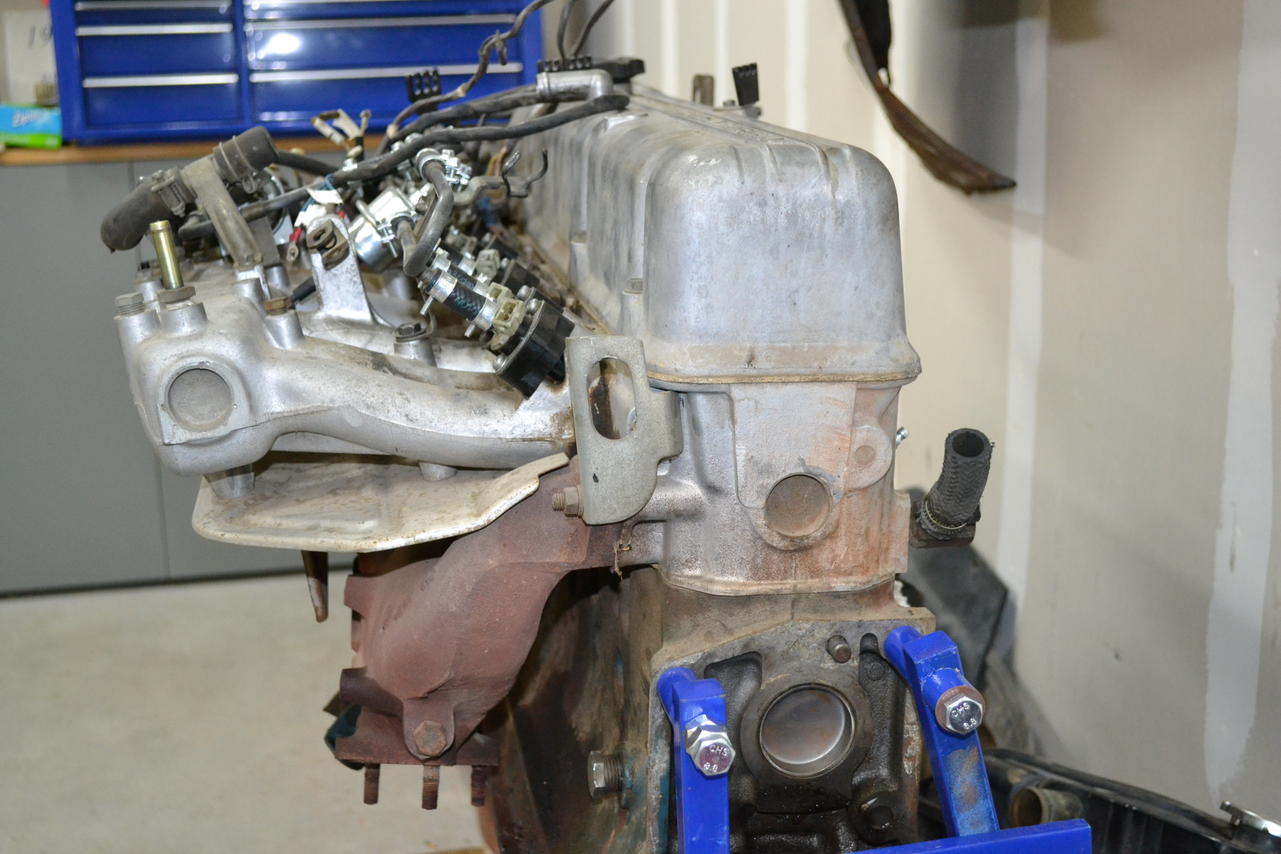
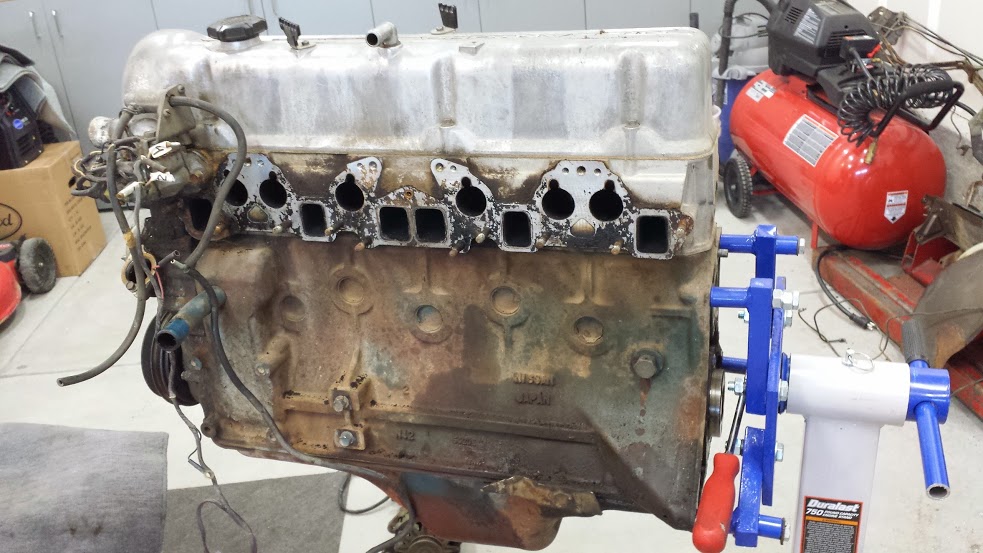
 I scraped as much of the undercoating off as I could. This was fun.... Removed the fuel/brake lines. Now shes ready to go to the media blaster. She looked pretty pathetic when I left her there so I took a quick pic. So with the car gone for awhile I turned my attention to stripping down the motor. I will be shipping it out to Rebello for a high compression 3.0 stroker set up. All parts were labeled and sorted with ziploc bags.
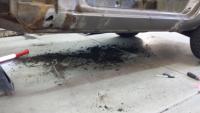


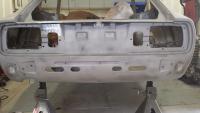
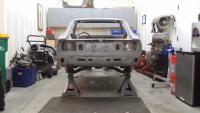
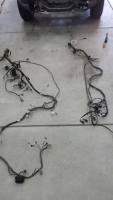
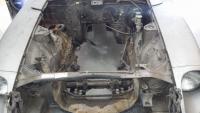
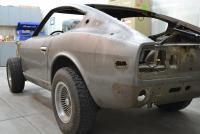
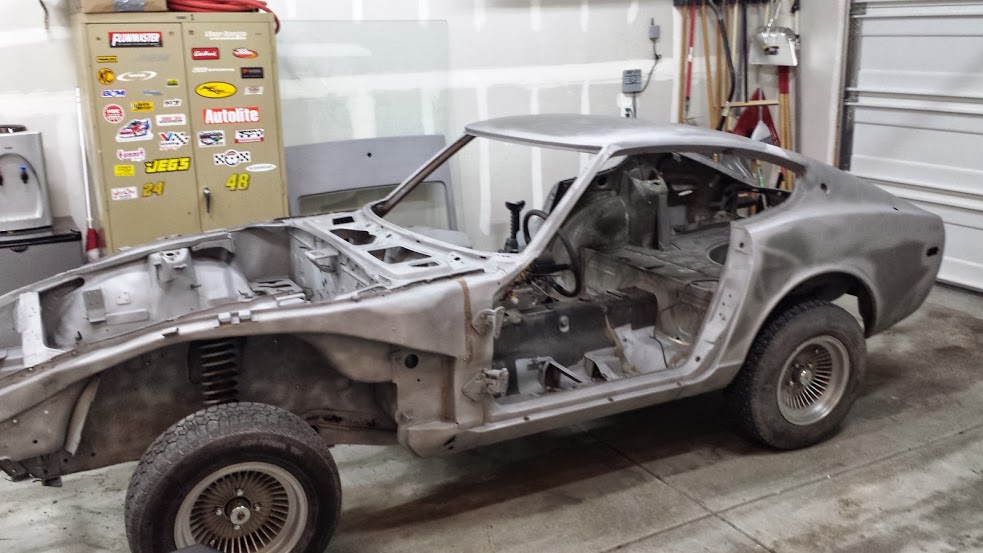
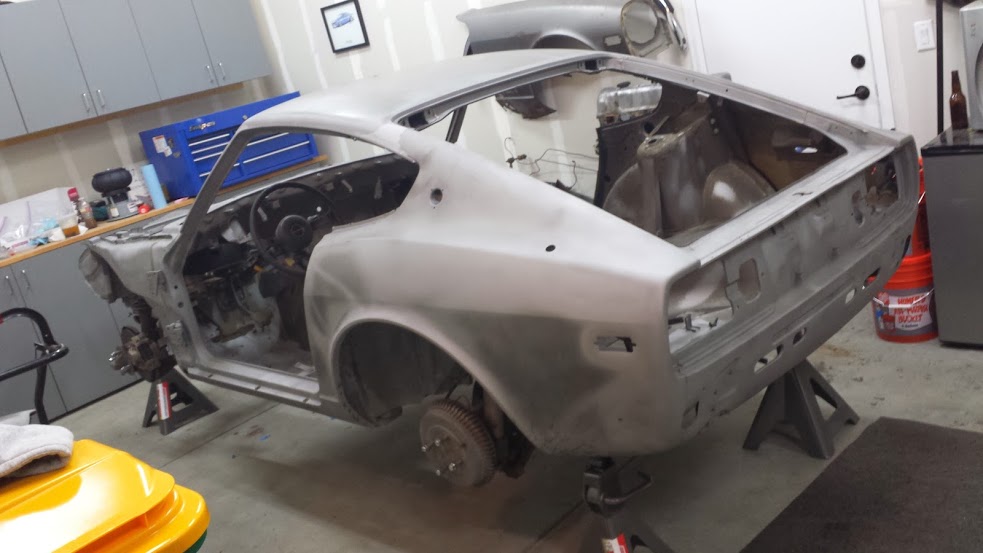
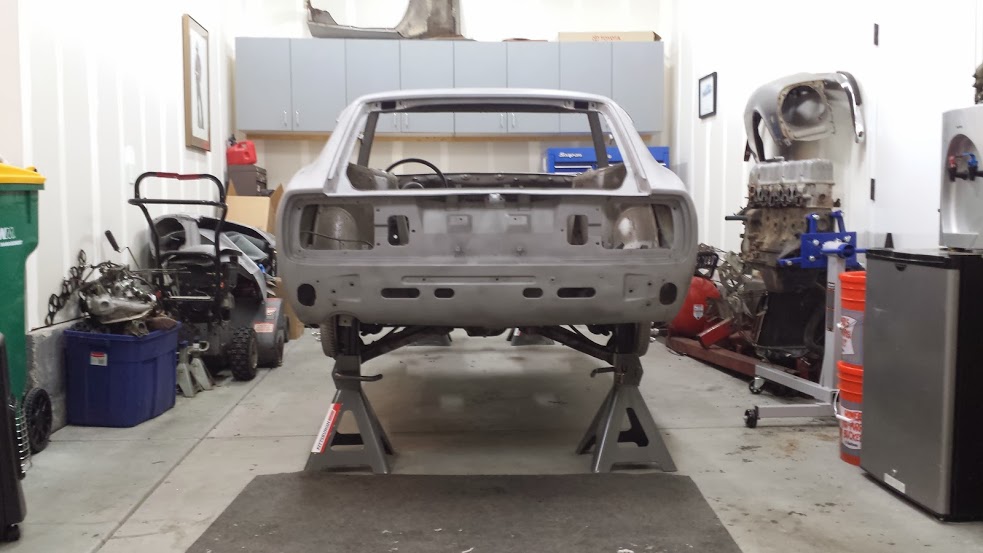
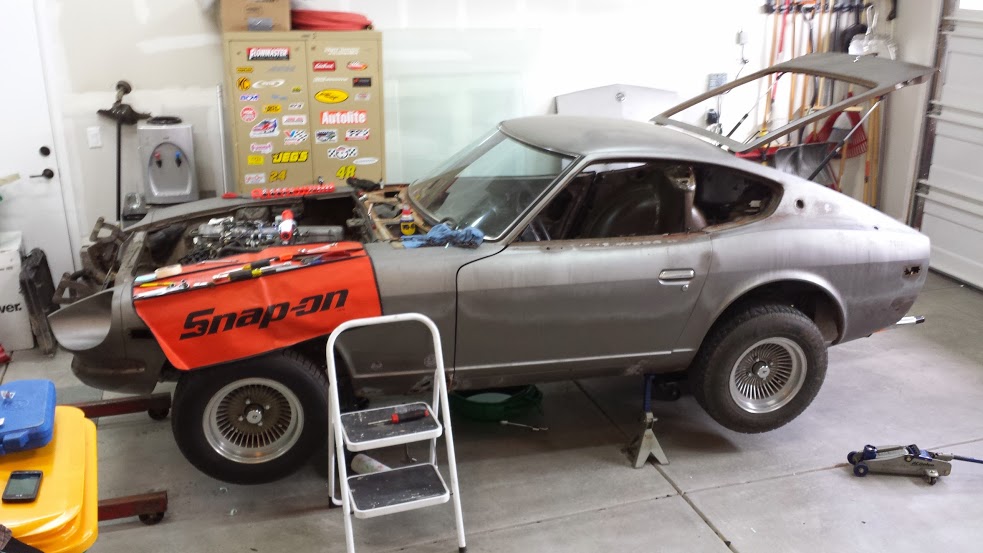
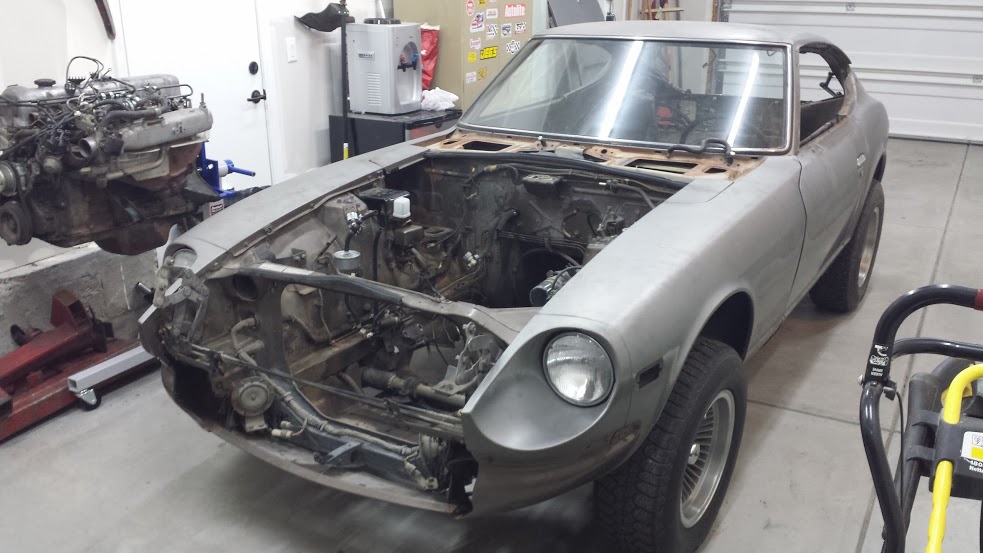
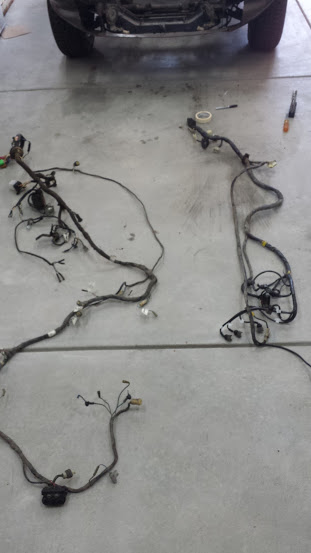
 Most of the interior is removed. Now its time to get the motor out Removed the wiring harnesses Removed glass and front body panels. Some rust porn for you weirdos
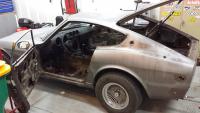


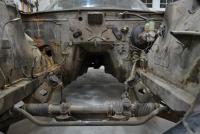
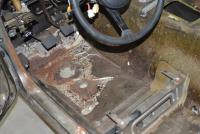
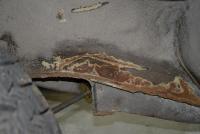
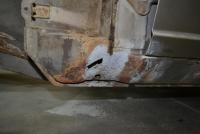
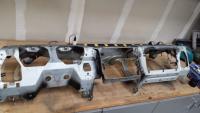
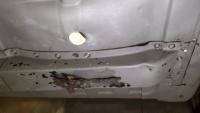
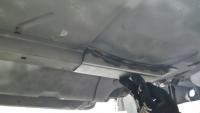
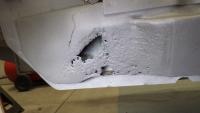
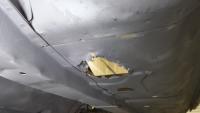
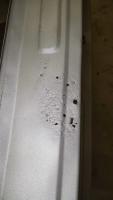
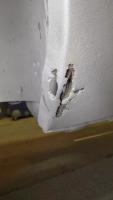
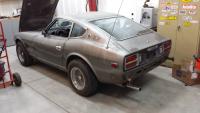
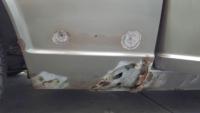
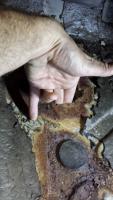
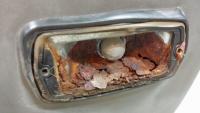
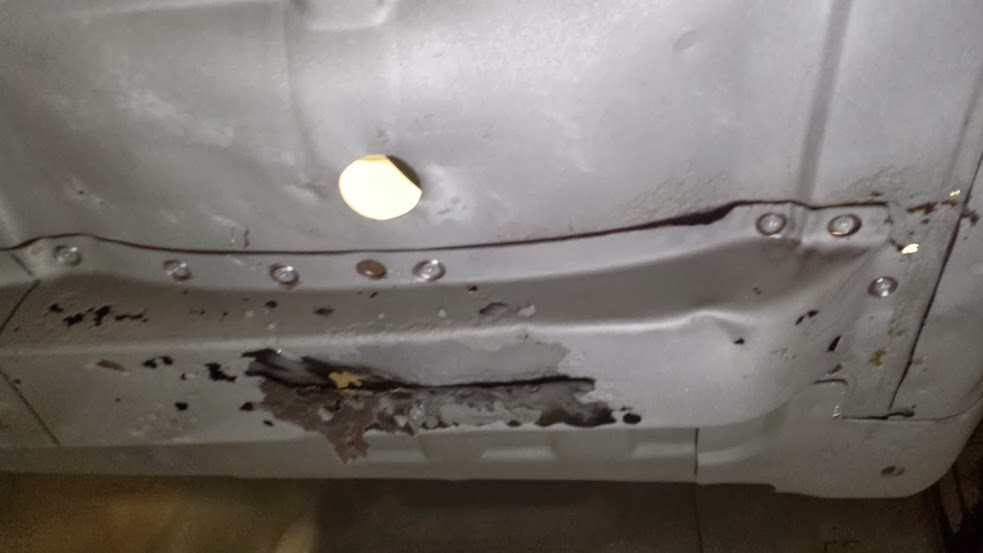
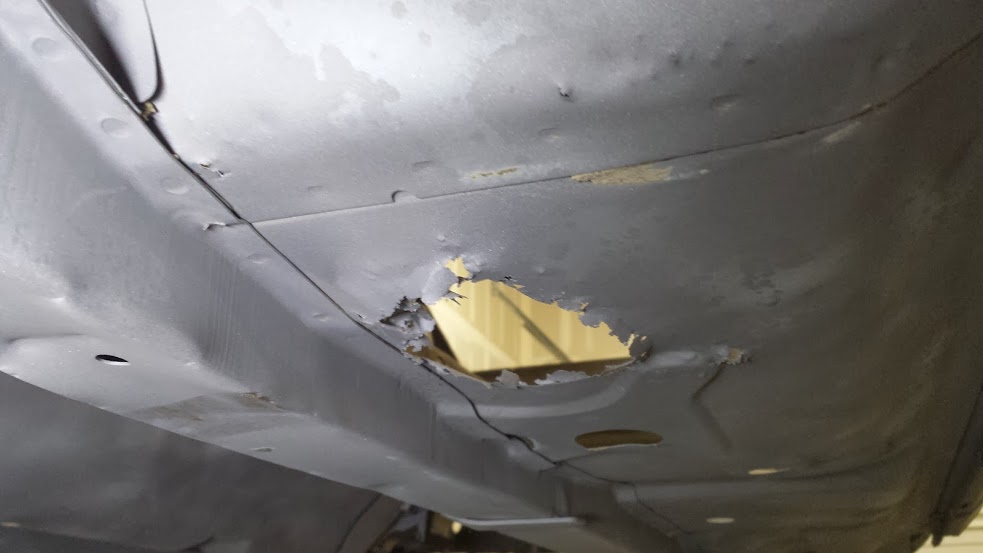
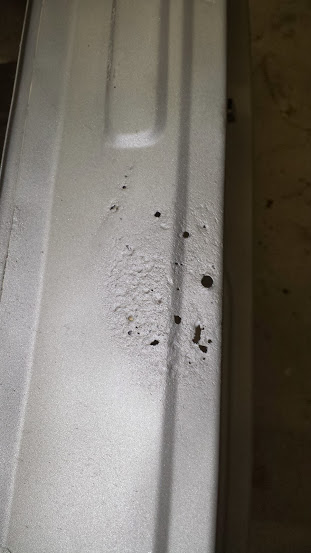
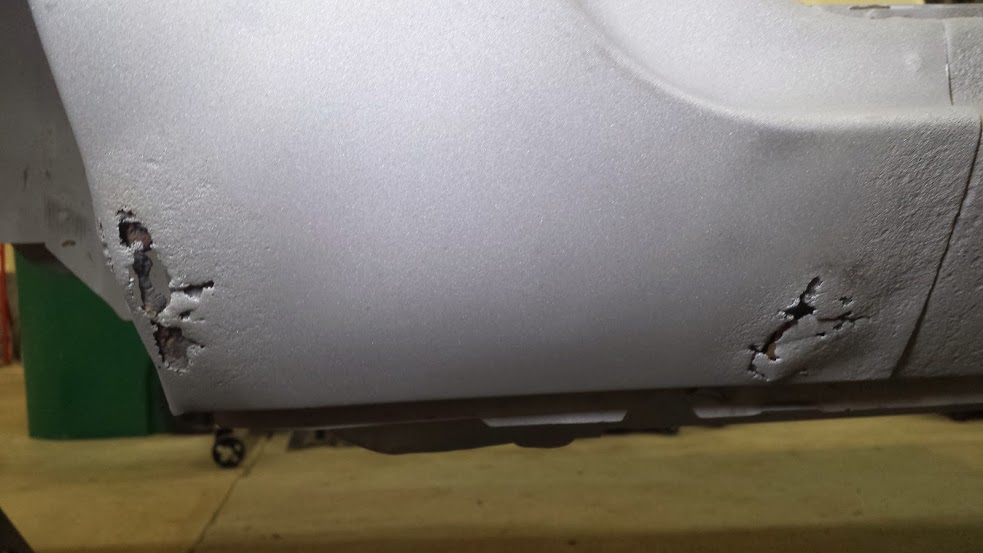
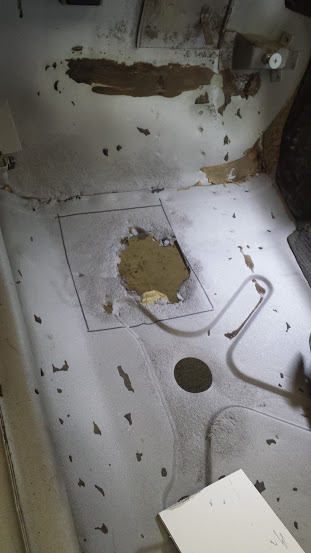
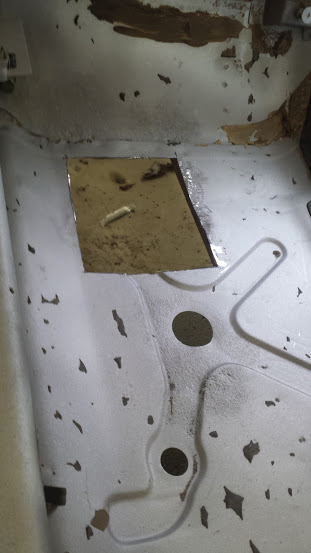
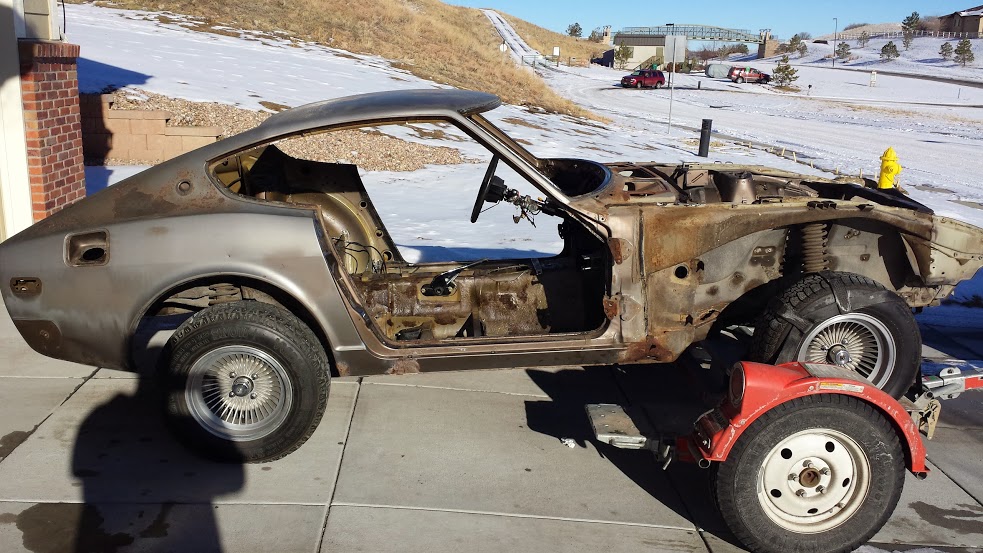
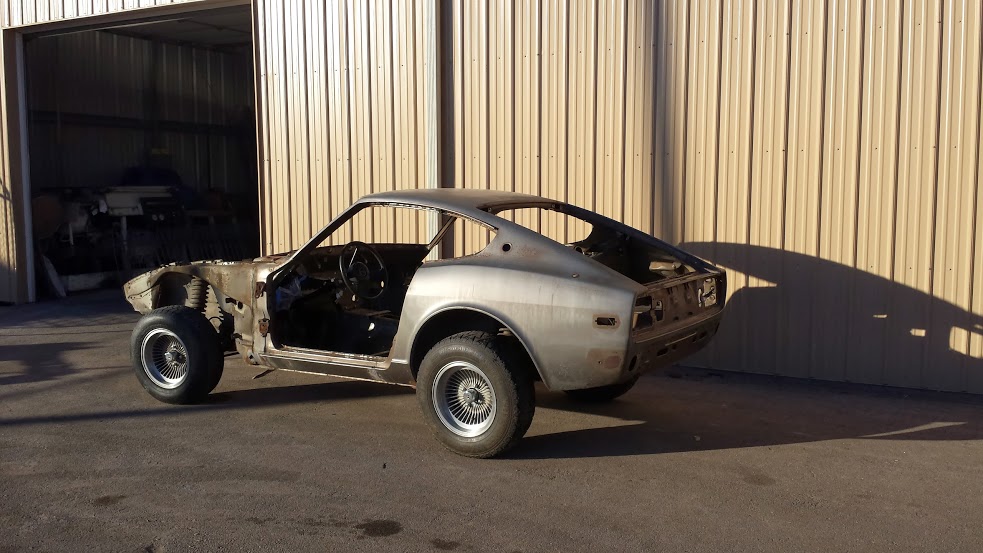
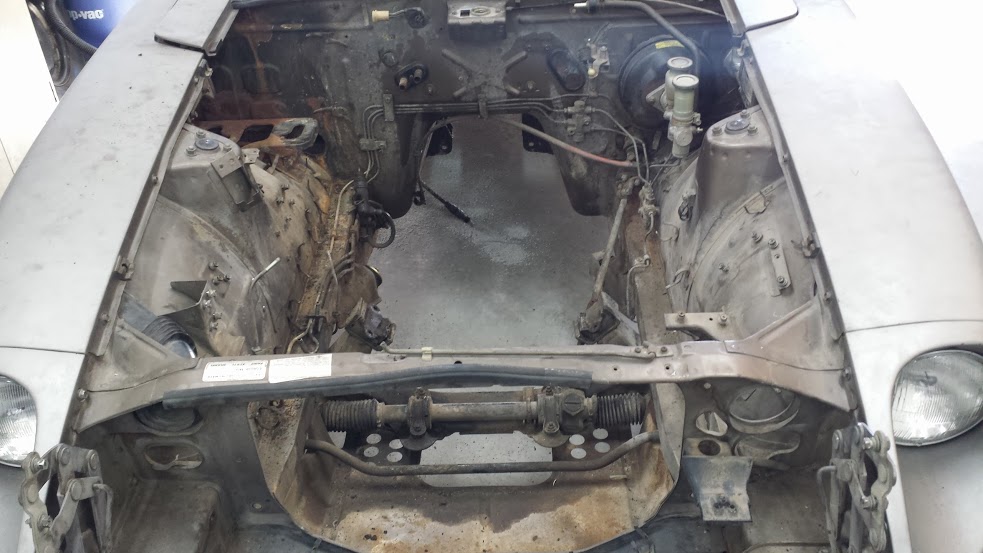
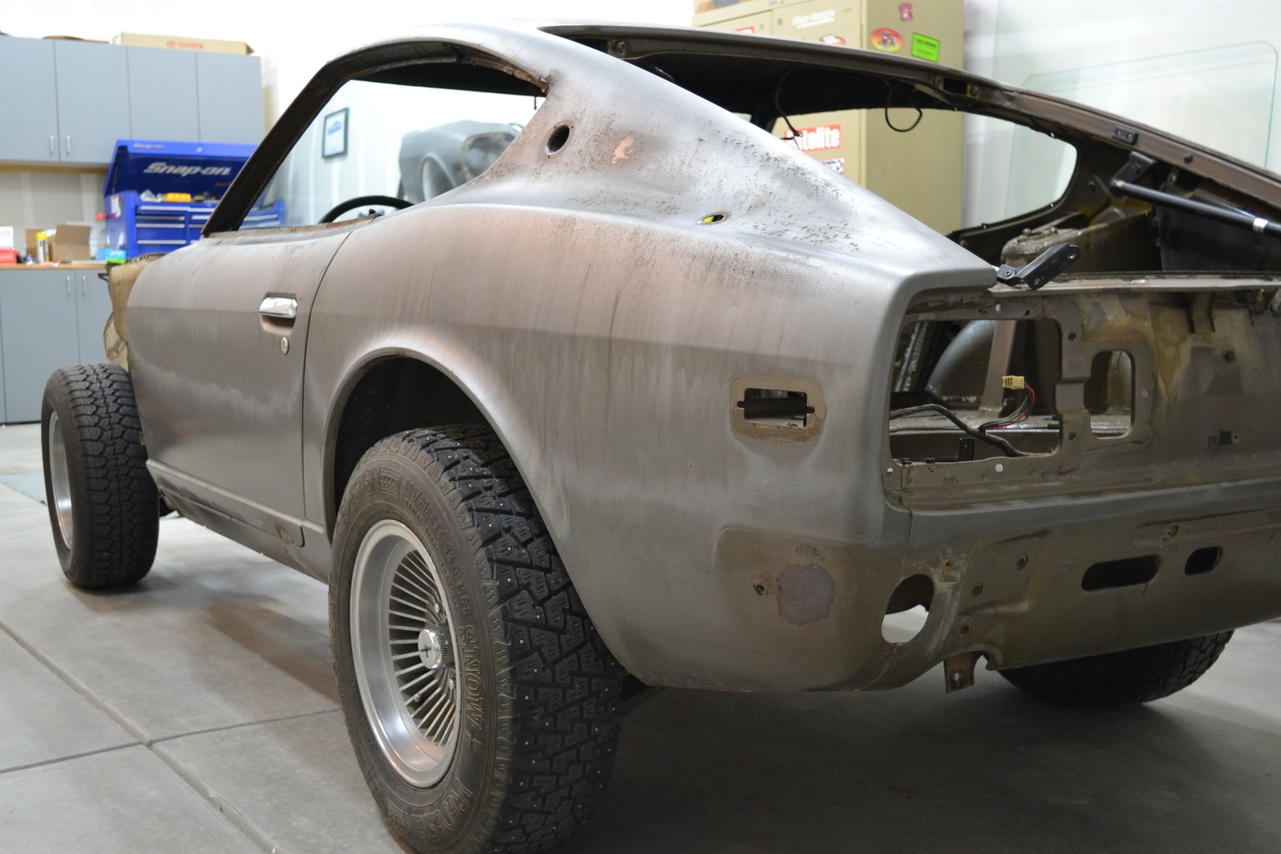
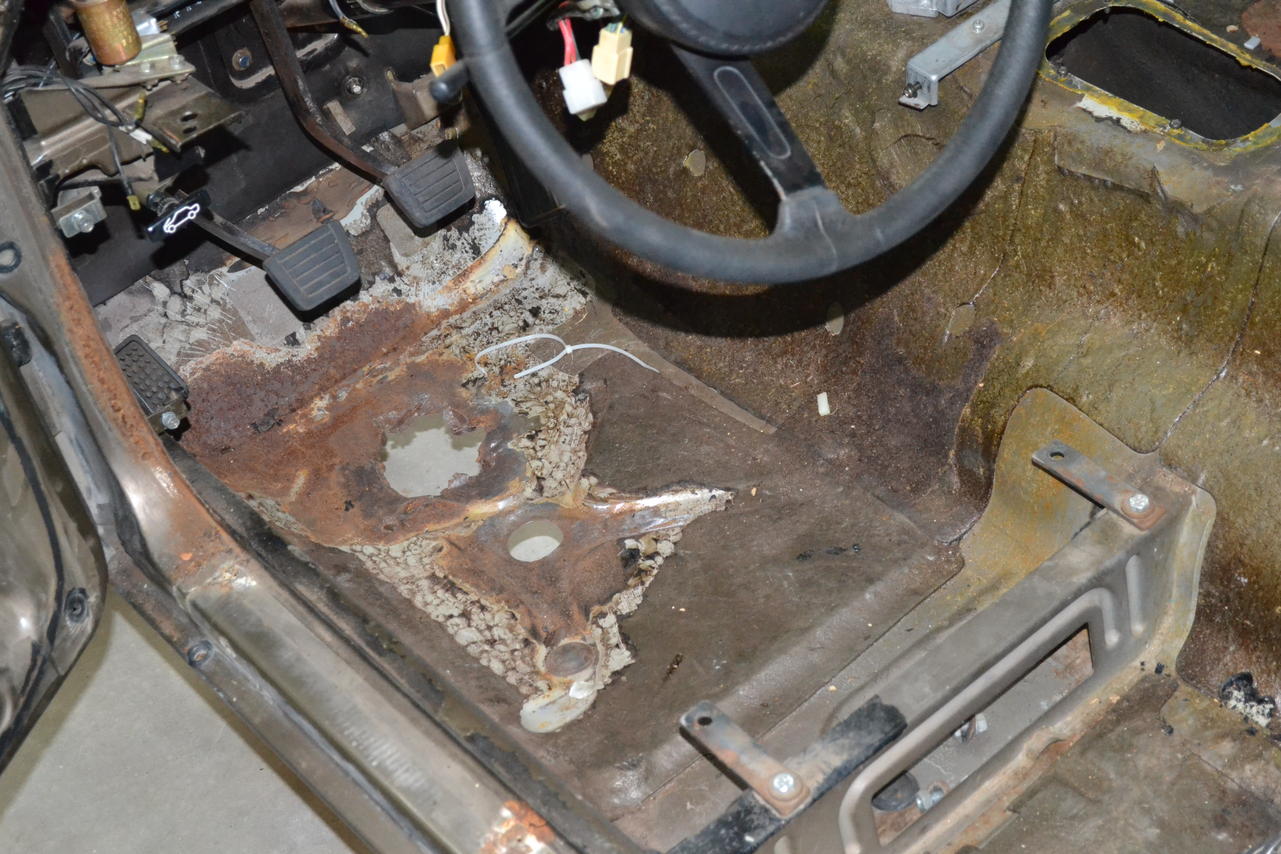
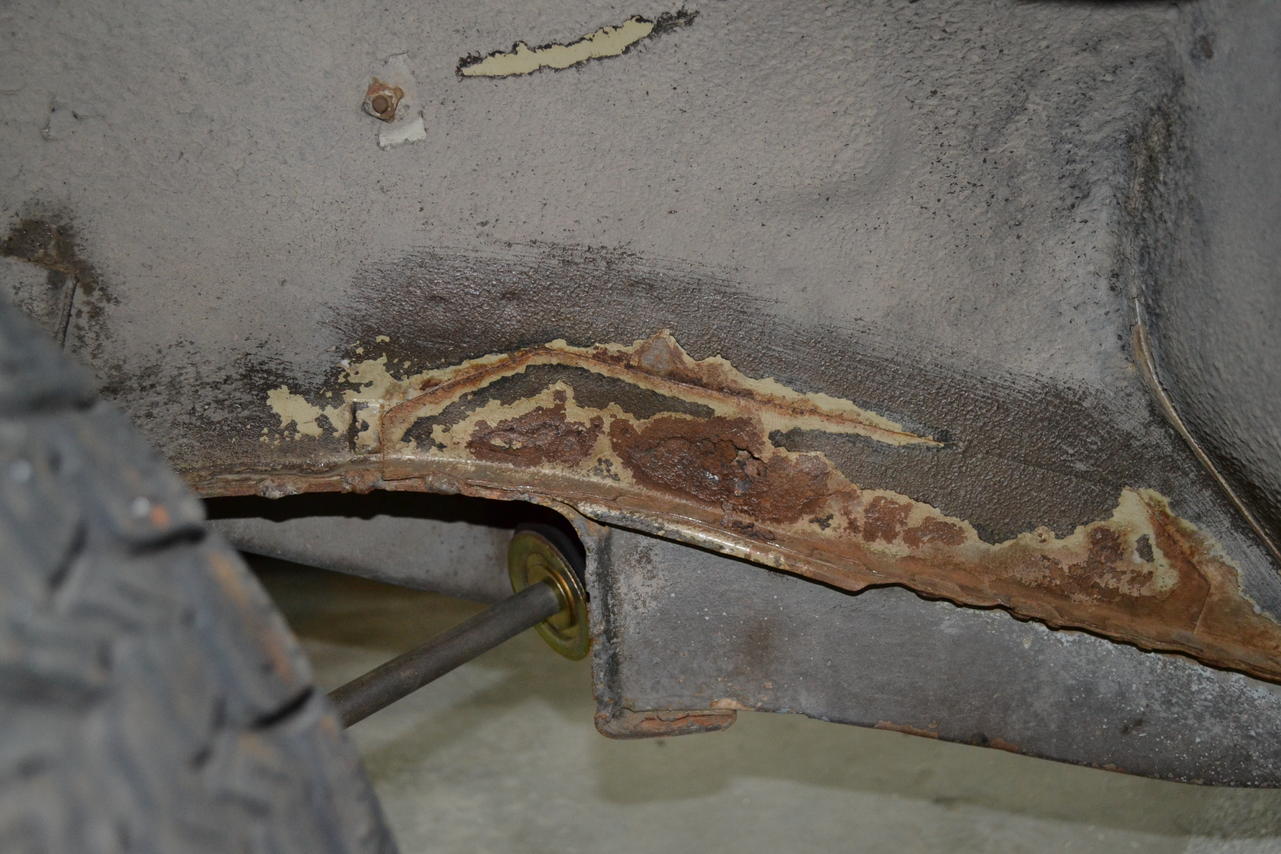
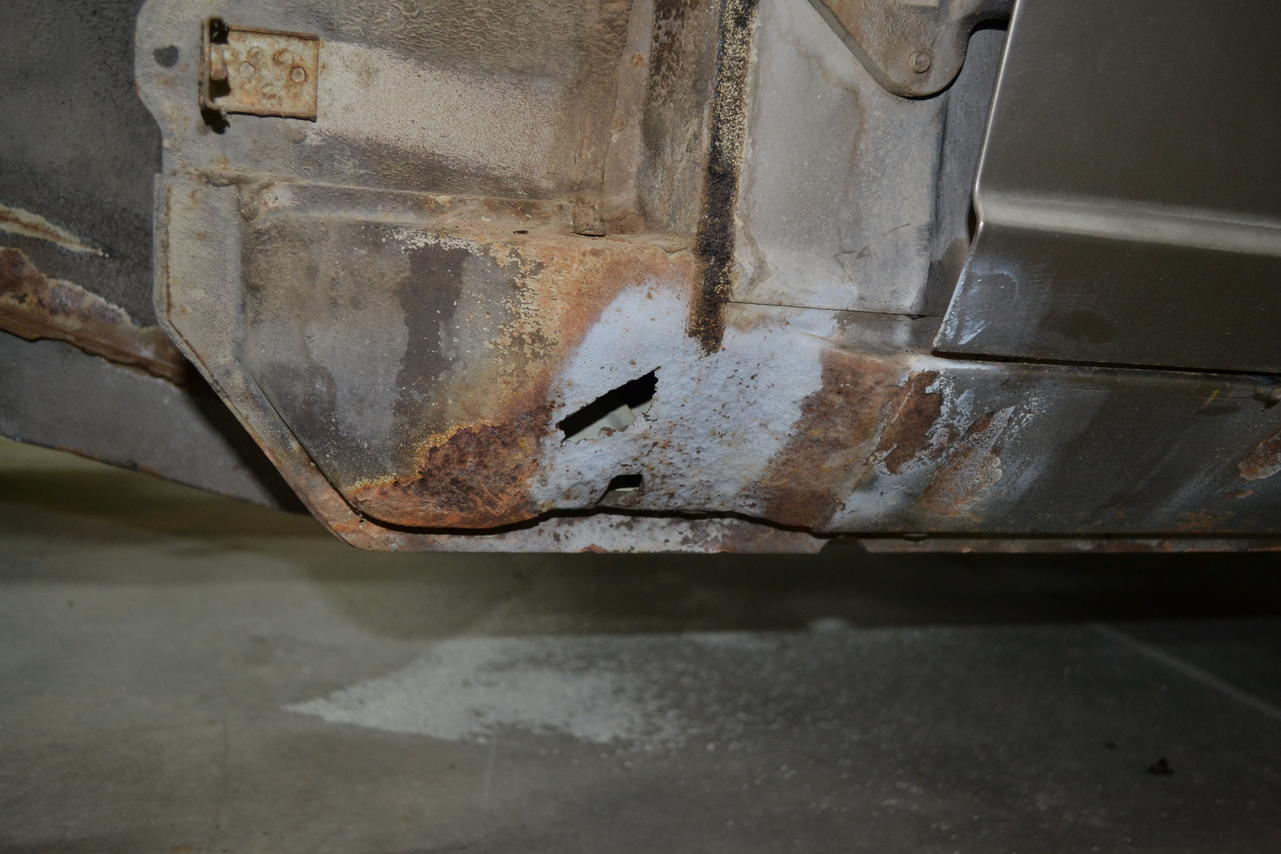
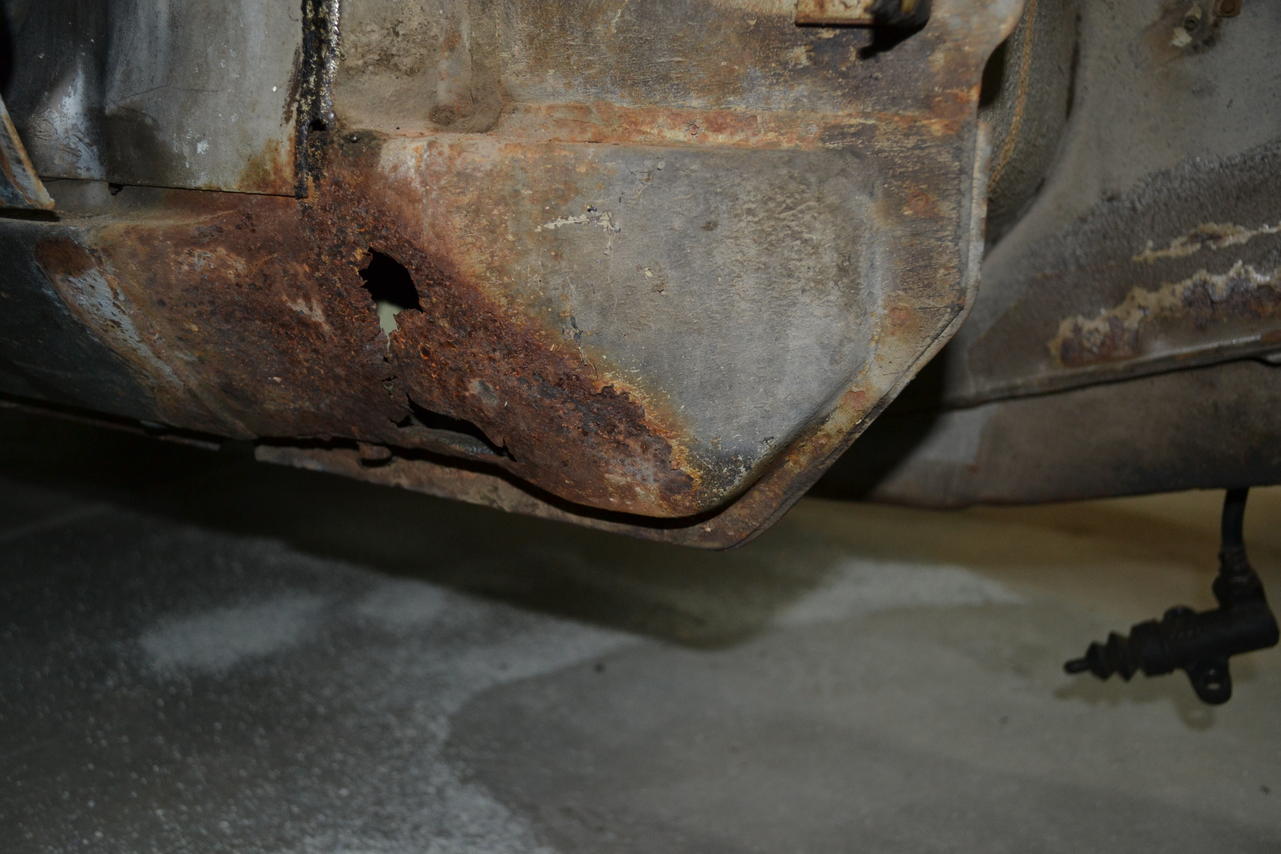
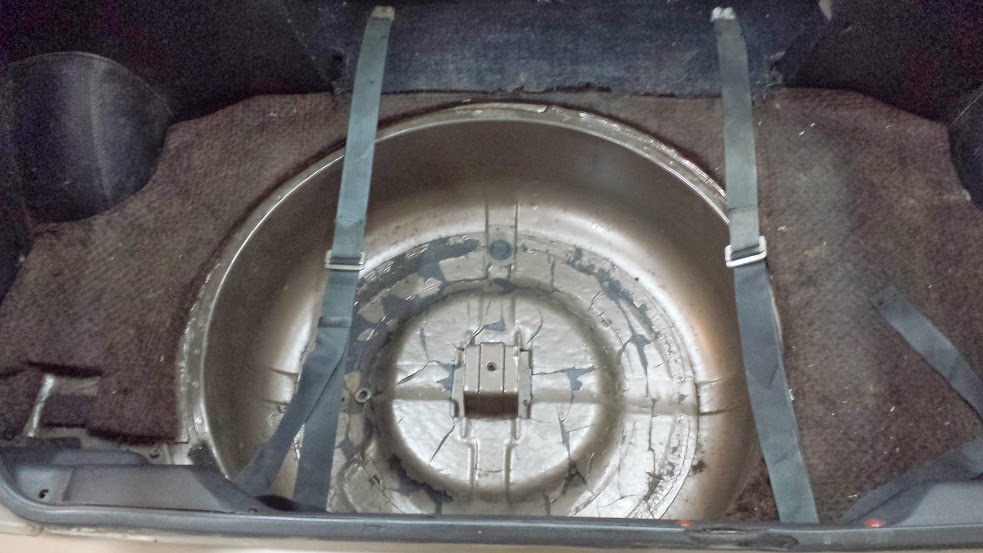
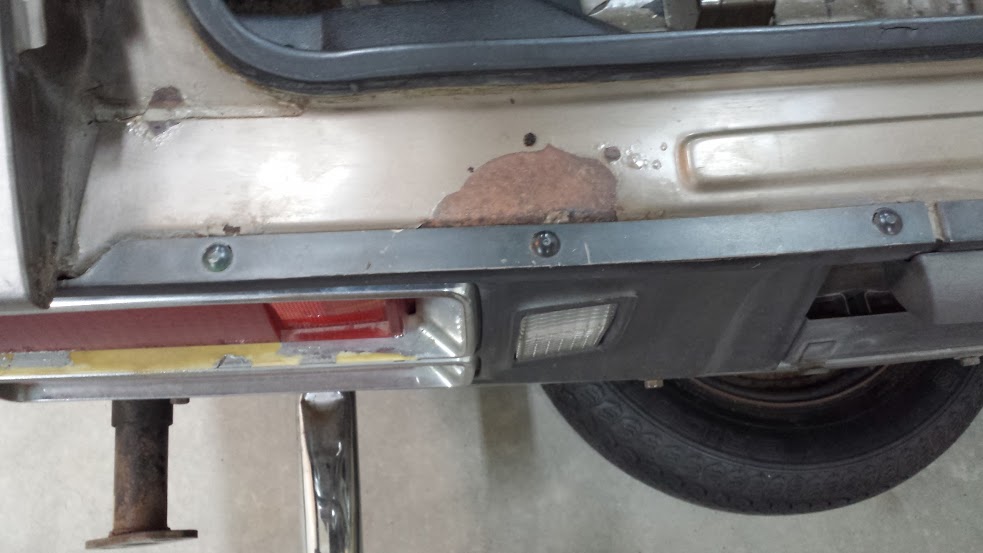
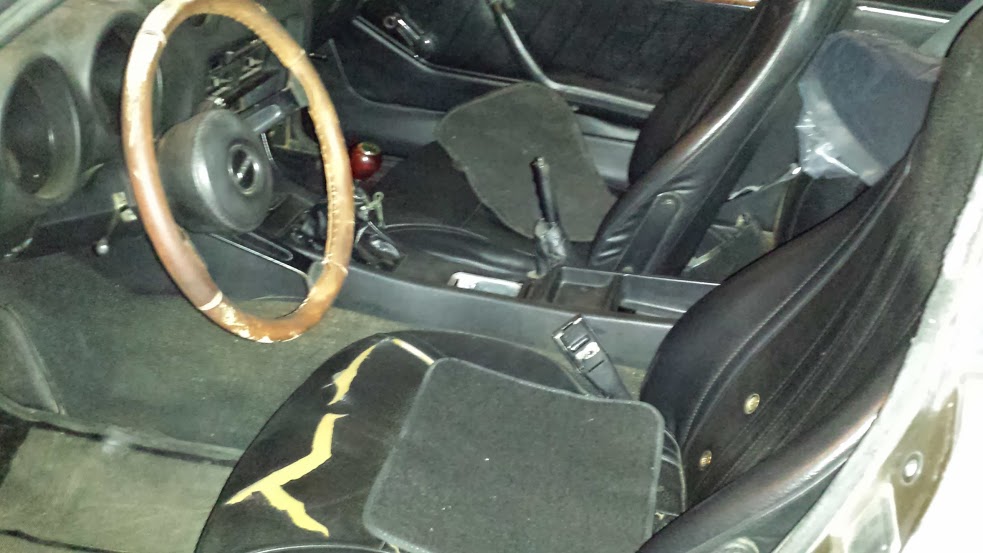
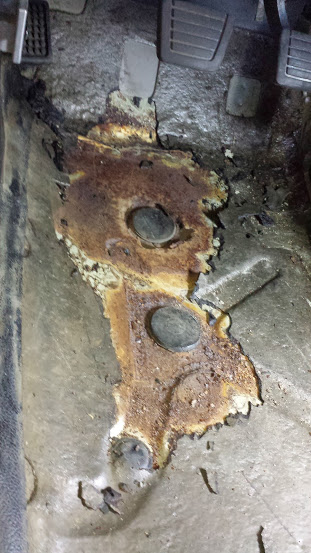
 So once I got her home I had a chance to really look her over. Spare tire area looked good so thats a good sign. Some rust on the rear hatch. Dash has the normal Z cracks. Interior is rough but complete. Also removed the rear bumper Fenders need to be replaced Drivers floor pan is pretty bad. Some more rust The drivers frame rail is rusted, both frame rails in the fender wells are rusted, the battery tray is pretty bad, and the rockers are rusted as well. There are definitely cleaner, more rust free Z's out there but it could be worse. I decided to move forward with the project and began to do a complete tear down for a full restoration.
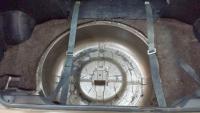

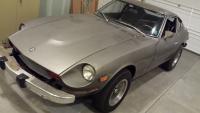
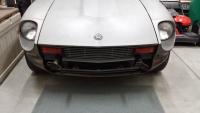
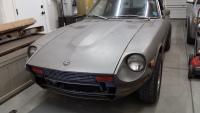
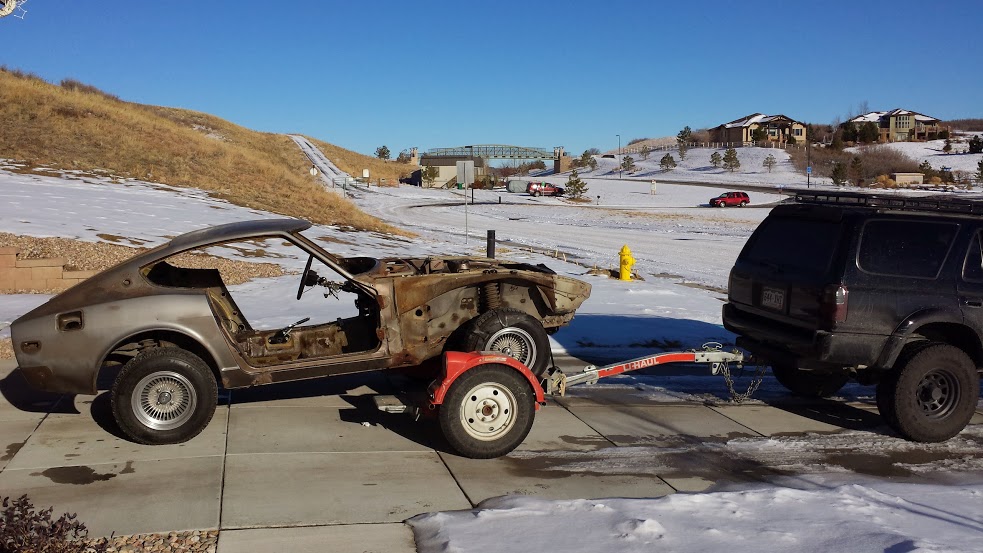
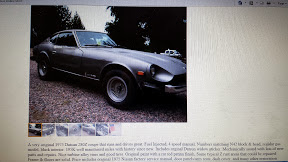
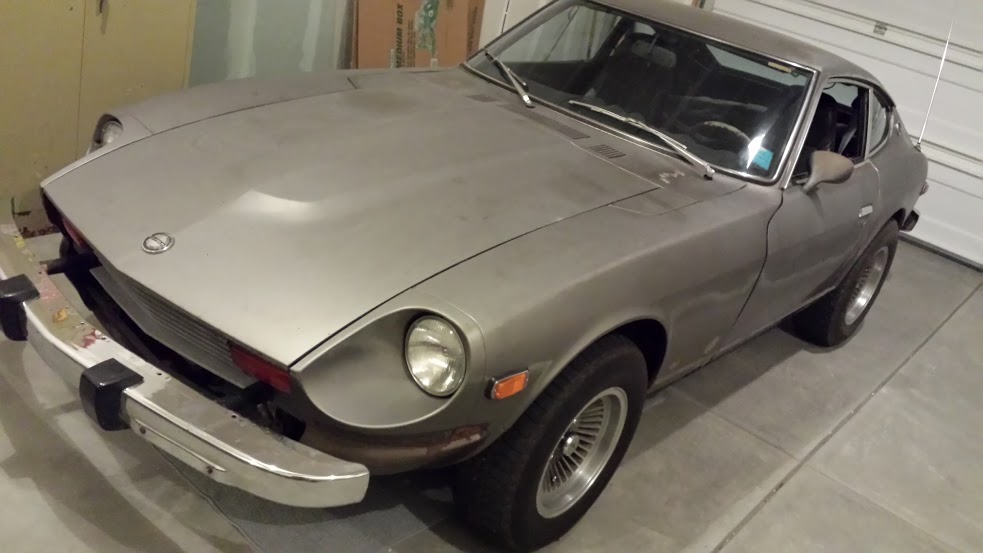
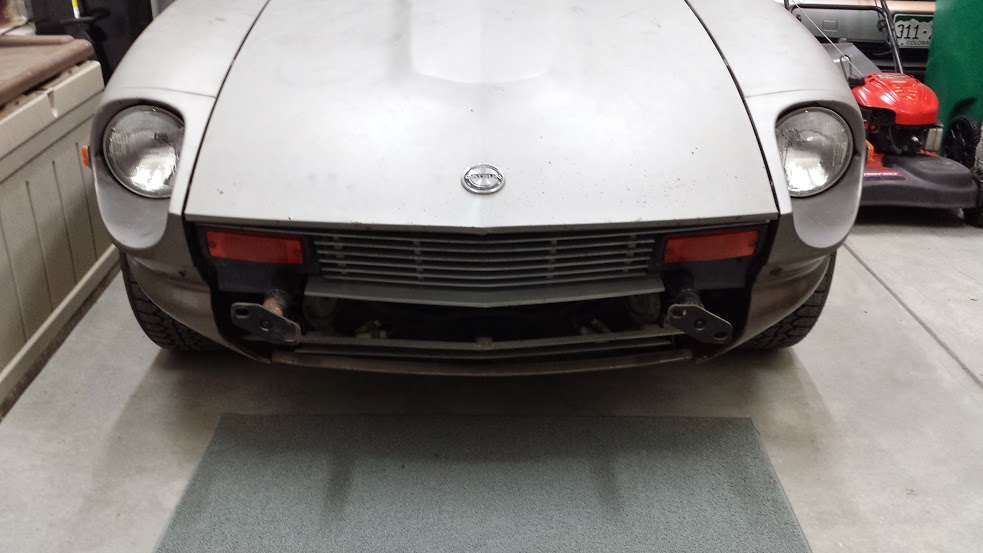
 I live in Castle Rock. Thanks for offer, I may have to take you up on that!Thanks for the comments! I couldnt agree more, this forum has awesome members with a lot of knowledge that has been priceless on this build. Im actually pretty far along on the build and im just in the process of gathering my photos so I will try and post more tonight.Hello, I wanted to post a build thread to document the process of my restoration. I have a 1975 280Z that I purchased off a local craigslist ad. Heres the ad. Ive wanted one of these cars since I was in high school and was looking for one that was in decent shape without too much rust and that was running. I went and looked at this one and thought it was in pretty good shape. It had a little rust but I was thinking most of it was surface rust. I took it for a test drive and instantly fell in love. The motor was solid, brakes worked, and it cruised down the highway nice and straight. It felt like a great starting point for my project......so I thought. Here she is the day I brought her home. First thing I did was remove the front bumper And the brackets
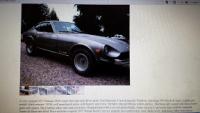
 I would recommend a paint protection film like 3M or Venturesheild.Shes a beauty!Just found this if anyone wants to try it. Looks promising. Amazon.com: Padded Dash Filler: Automotive


Important Information
By using this site, you agree to our Privacy Policy and Guidelines. We have placed cookies on your device to help make this website better. You can adjust your cookie settings, otherwise we'll assume you're okay to continue.