rossiz
Free Member
-
Joined
-
Last visited
Everything posted by rossiz
-
 aww, shucks...
 -
i'm a little late to this thread, but a key point when thinking about air horns is that they are designed to assist w/air flow and really only work optimally when that air is still (in a big air box). you will have very different conditions driving at speed with air rushing past them (through the filter elements) horizontally than when on a dyno. i spent quite a bit of time testing various configurations on motorcycles and found that just about any change in the airflow/turbulence made a measurable difference. for example: on a ducati, the carb air horn on the front cylinder points straight forward and sits behind the front tire. i was not happy about the prospect of filth flying off my tire and being gulped into my carb, so i made a round aluminum plate and mounted it 1" in front of the horn off spacers - immediate measurable drop on the dyno, even though the free air around the plate was larger than the diameter of the horn. worst possible application is exposed horns w/metal screens - aside from poor filtration, the screens cut free air by quite a bit. i did tests w/multiple sizes of screen and was shocked at how much restriction there was - power loss was significant and the carbs needed to be re-jetted for the revised flow. so that's why open horns inside a big air box (bigger is better) w/a single filter at the inlet is best for performance - provides a large volume of still air to allow the horns to do their job. you can get fancy with ram-air scoops that pressurize the air box at speed as long as they are ducted to keep the air inside the box as still as possible. of course all of this is pretty "academic" b/c the performance gains/losses i'm describing are pretty small in relation to the power/weight ratio of a car vs. that of a bike... but i figured i'd pipe in.
-
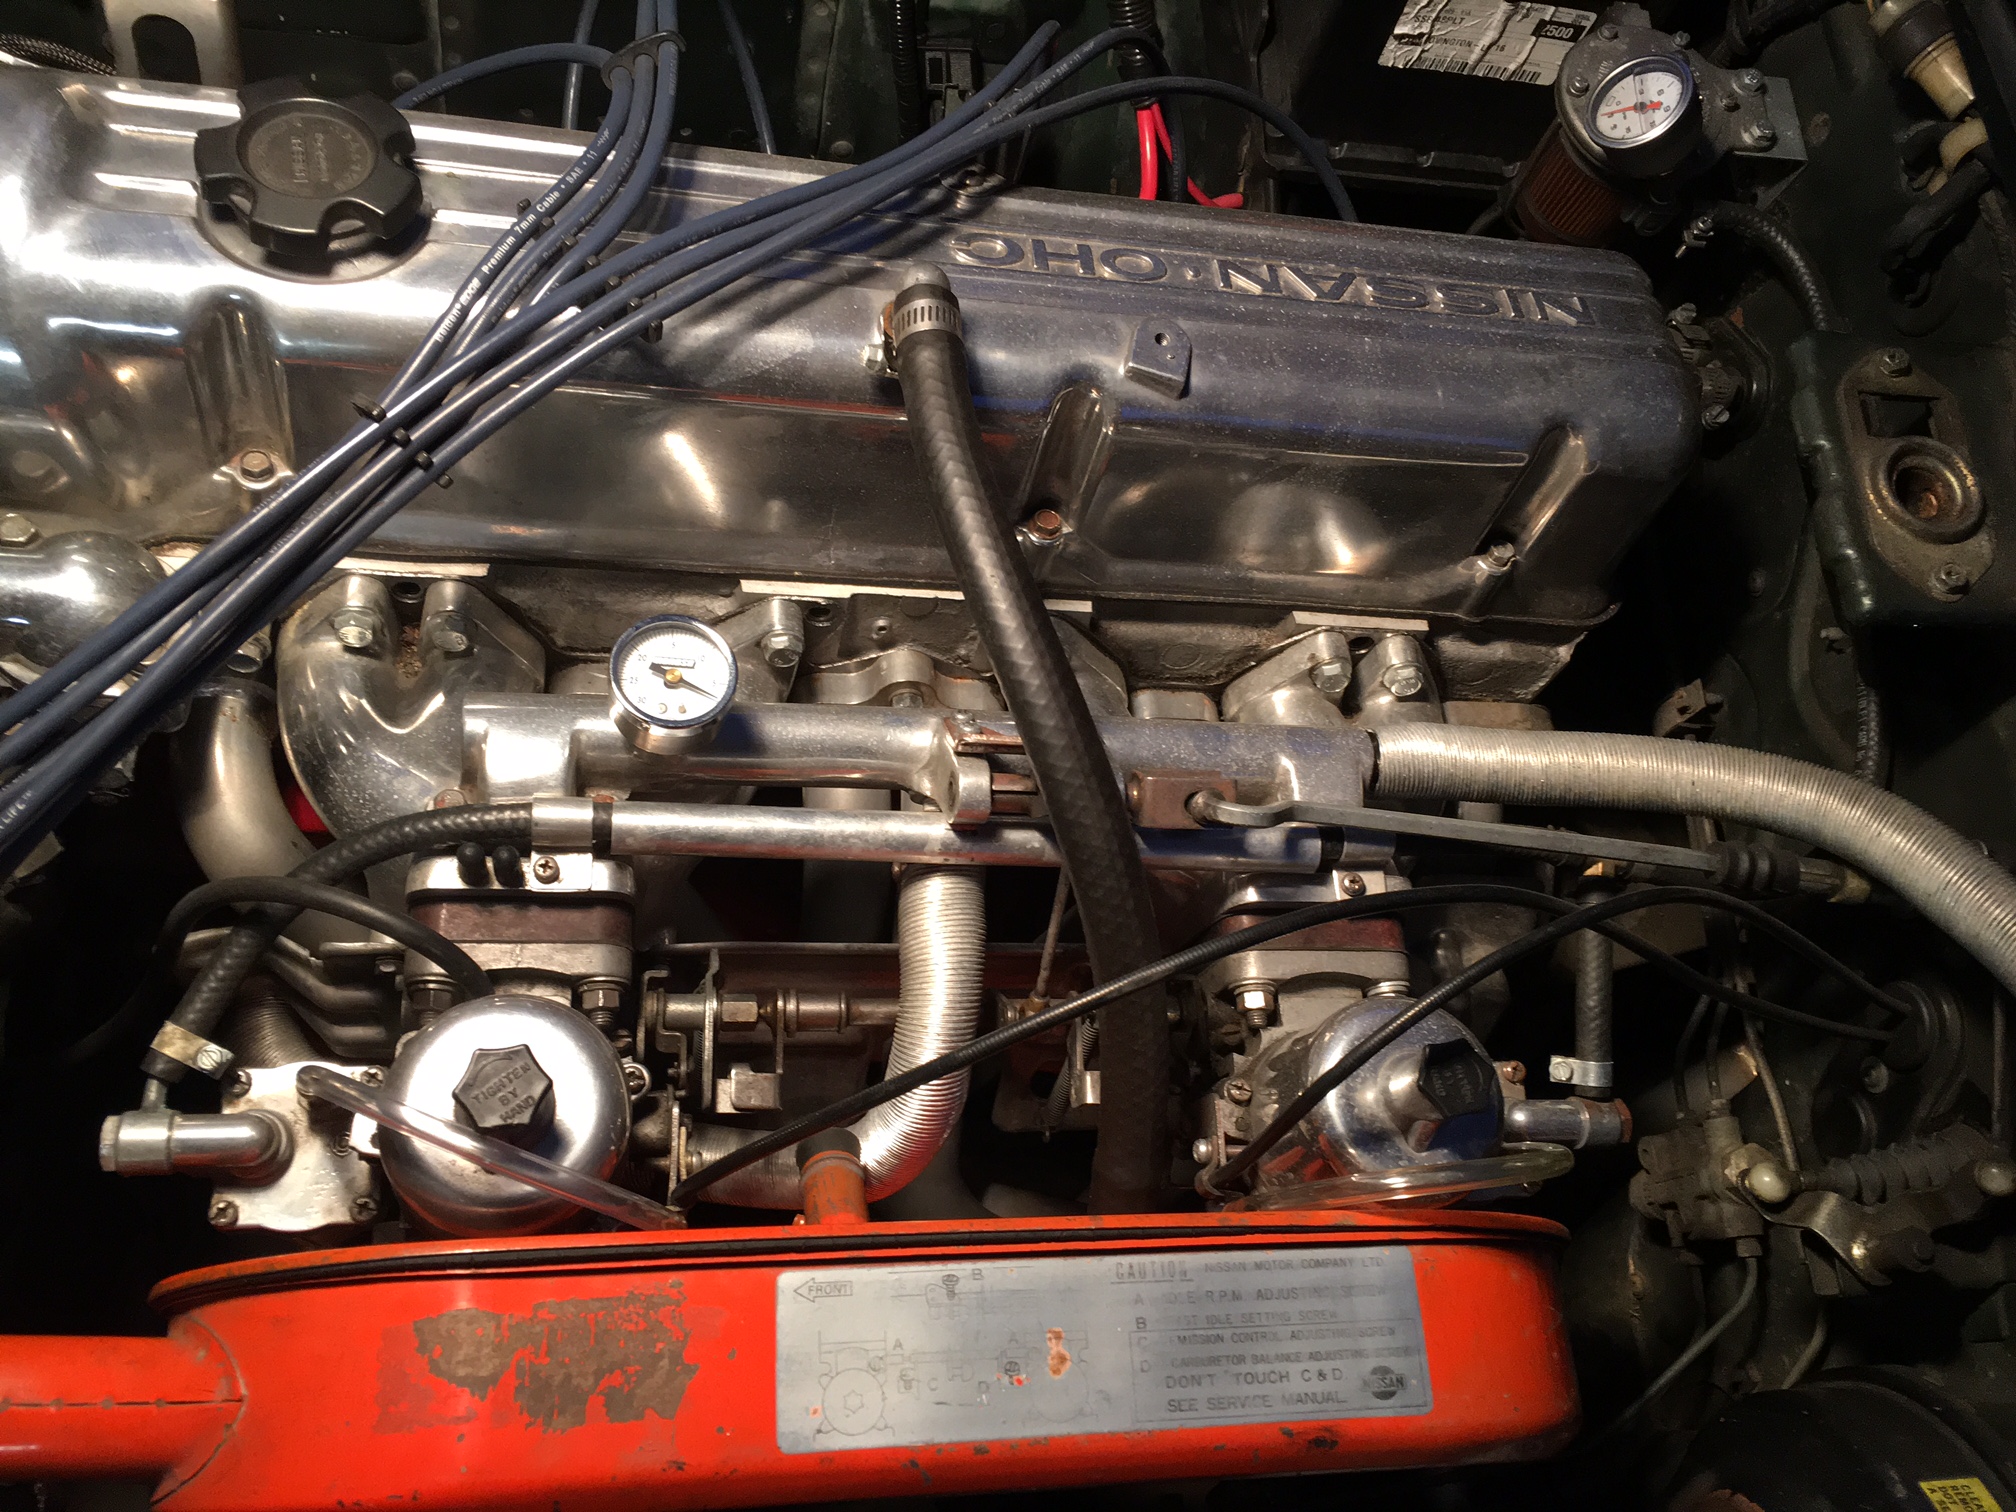
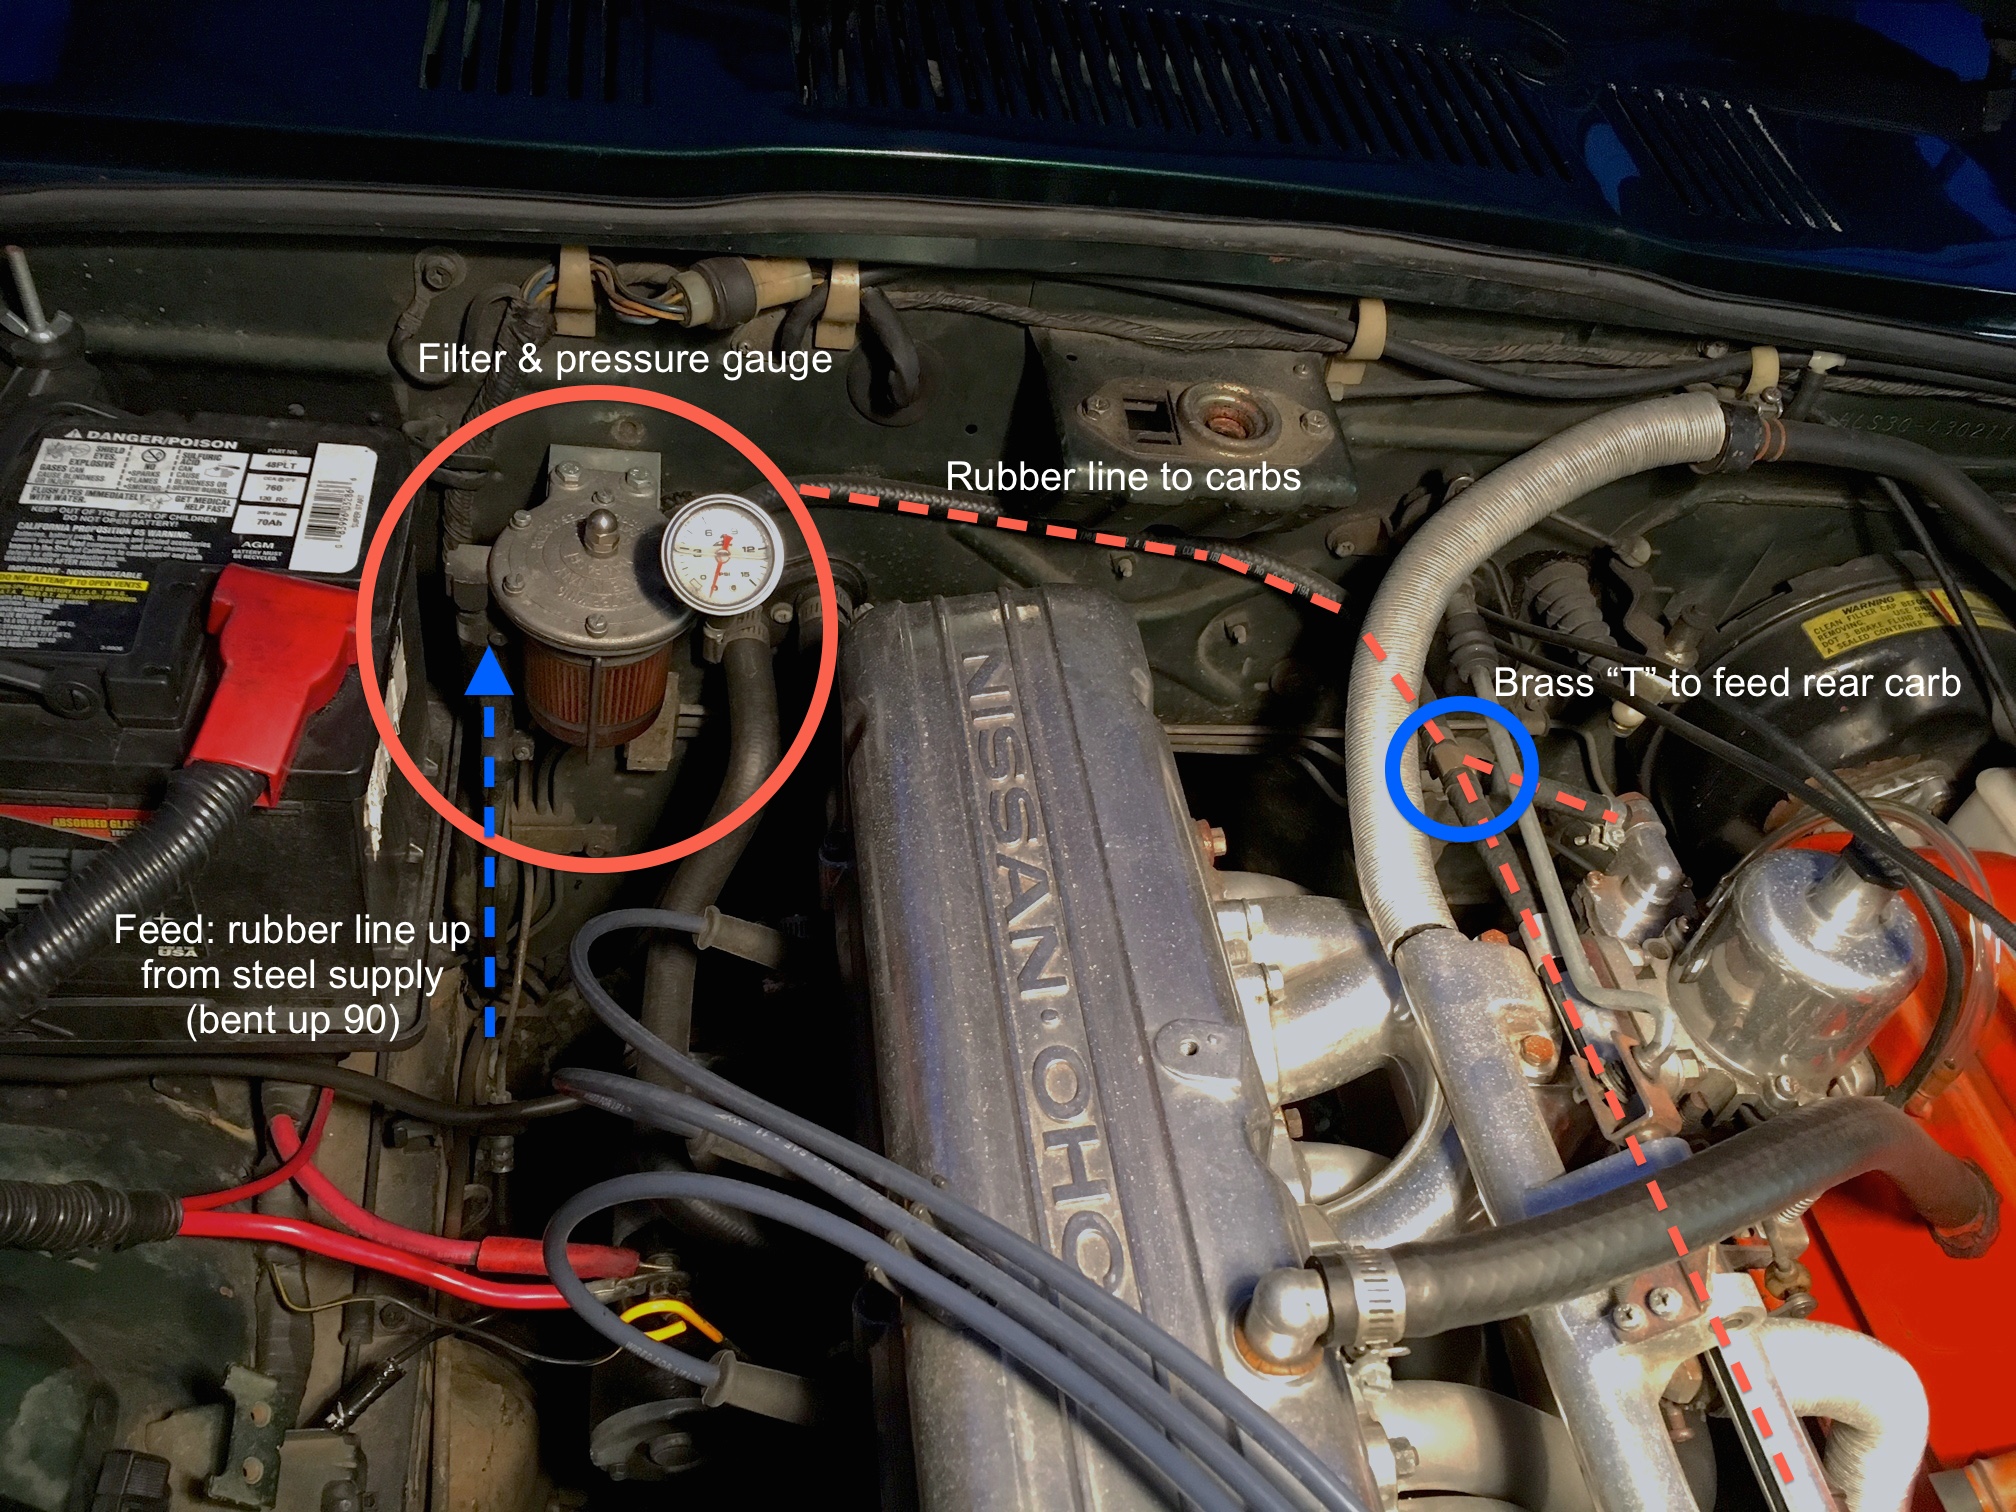
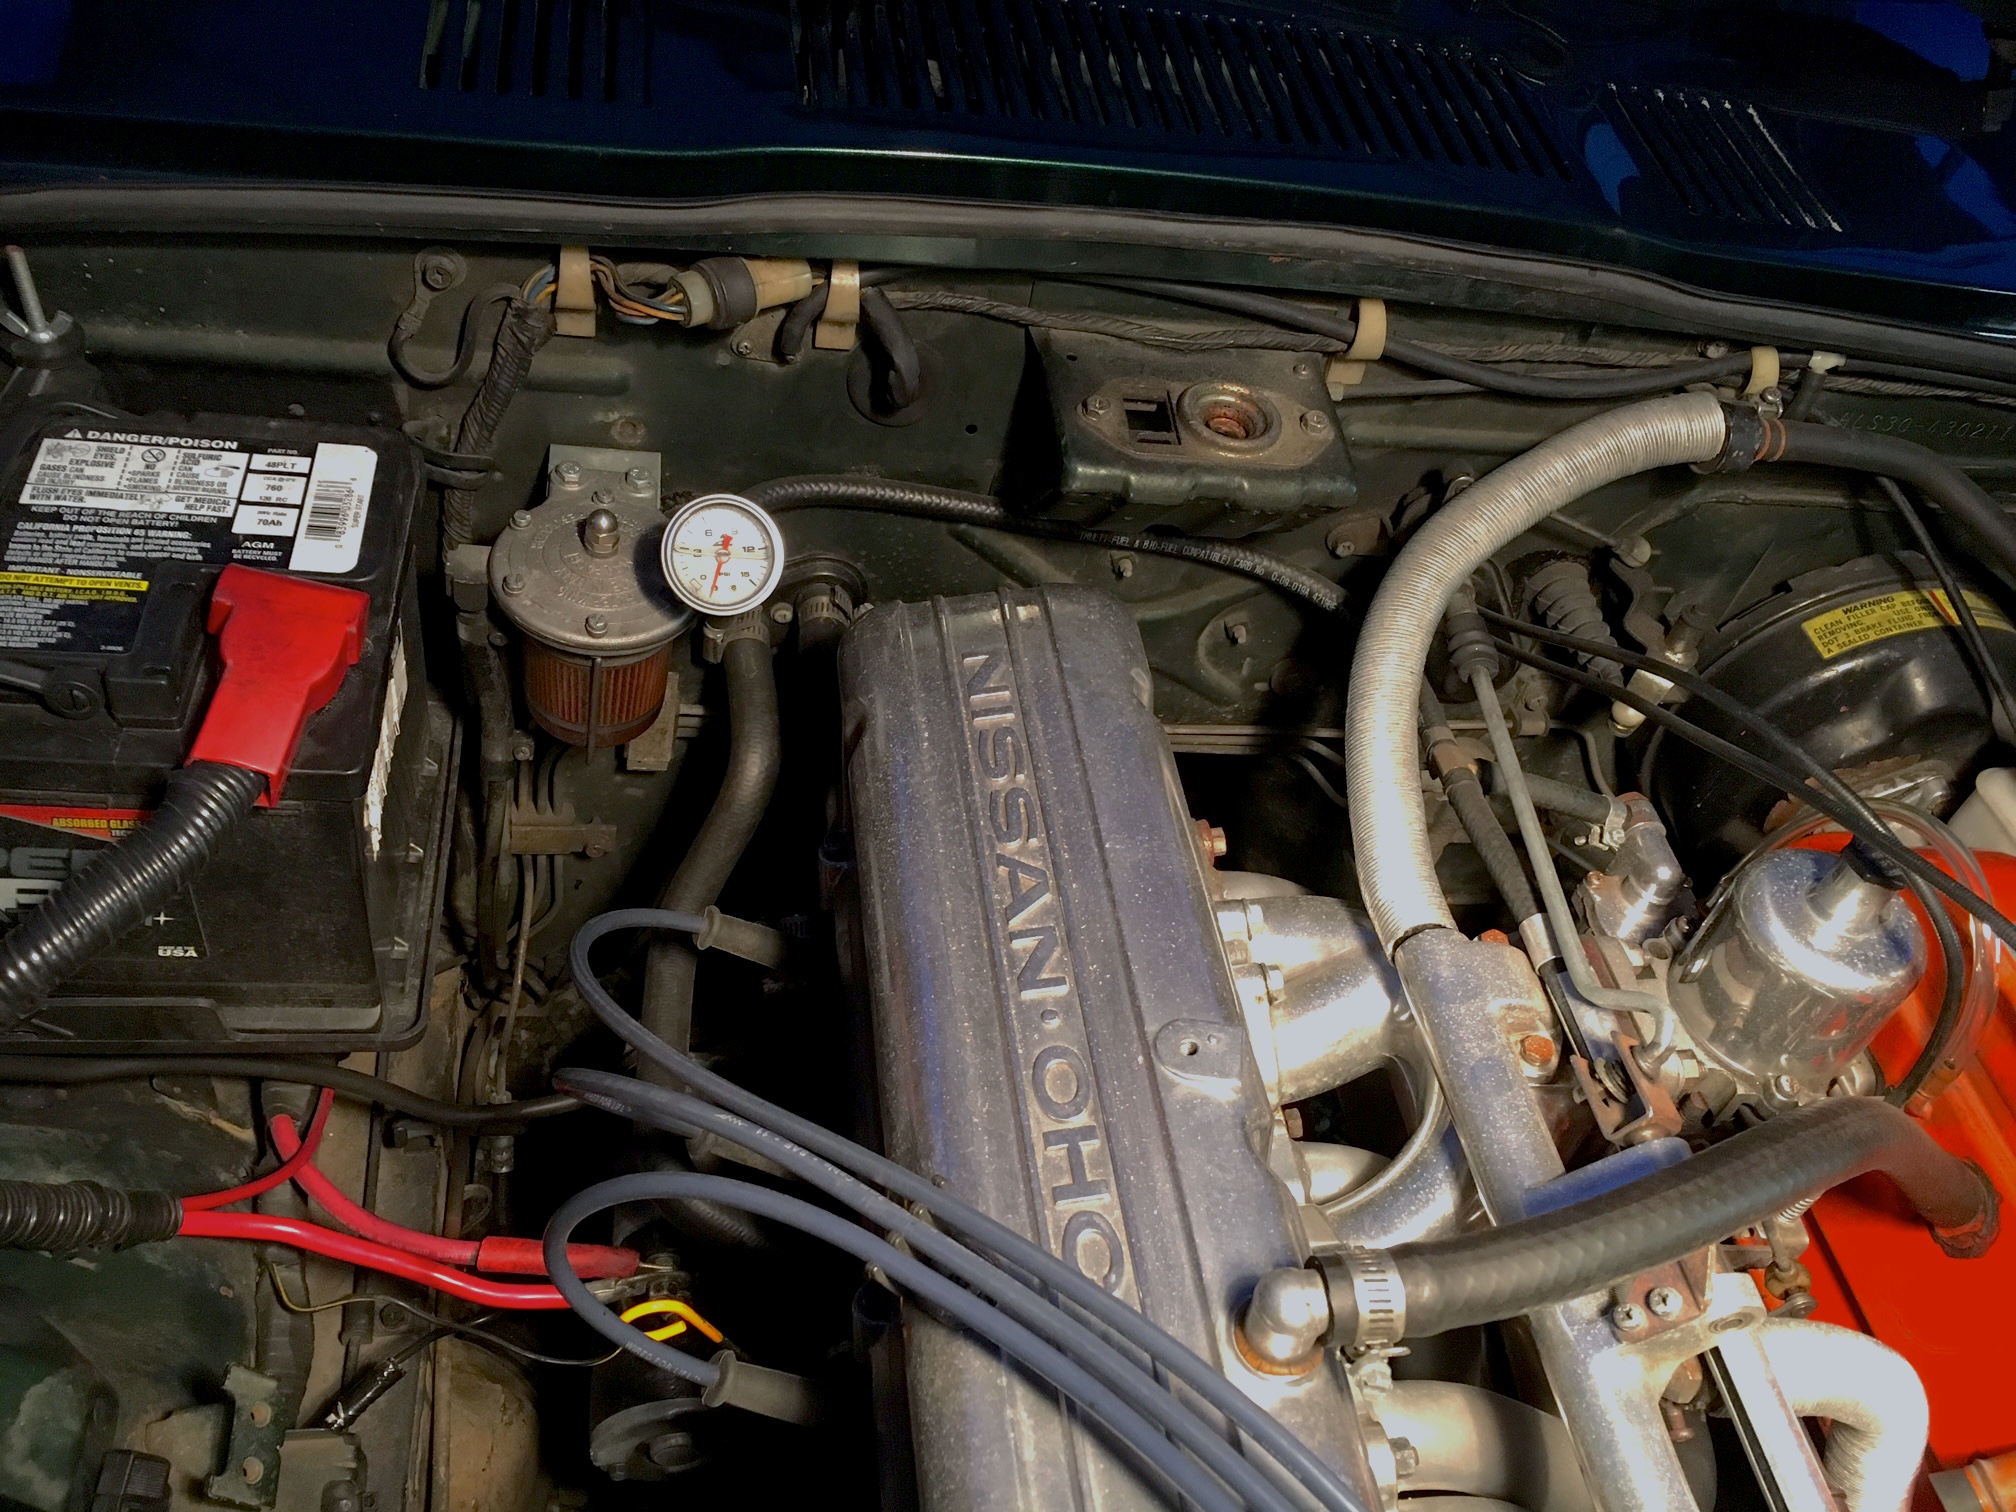
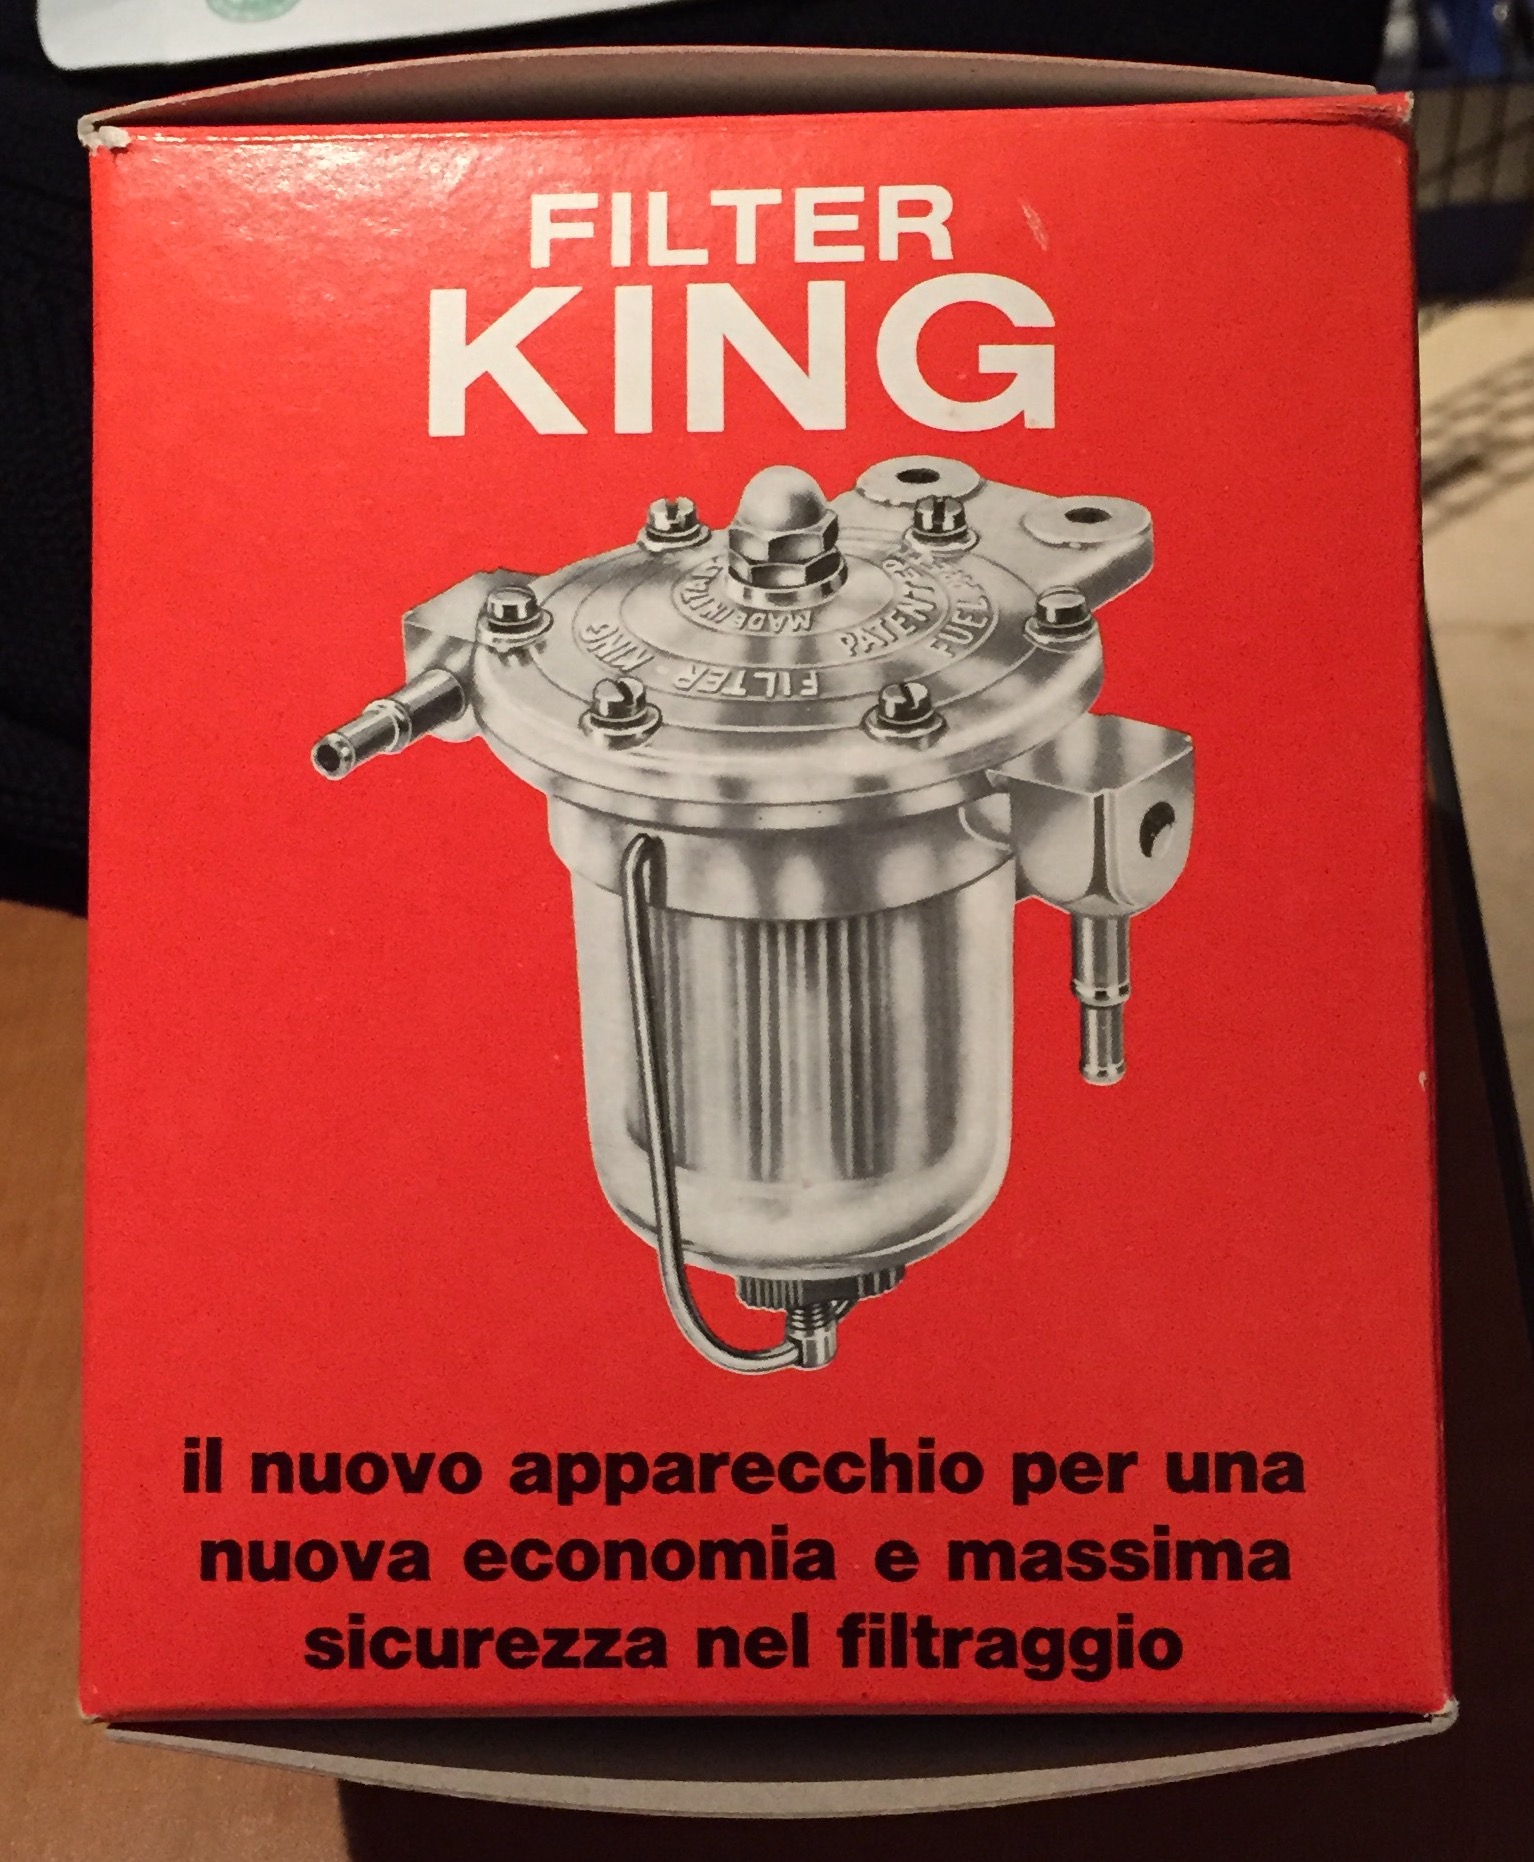
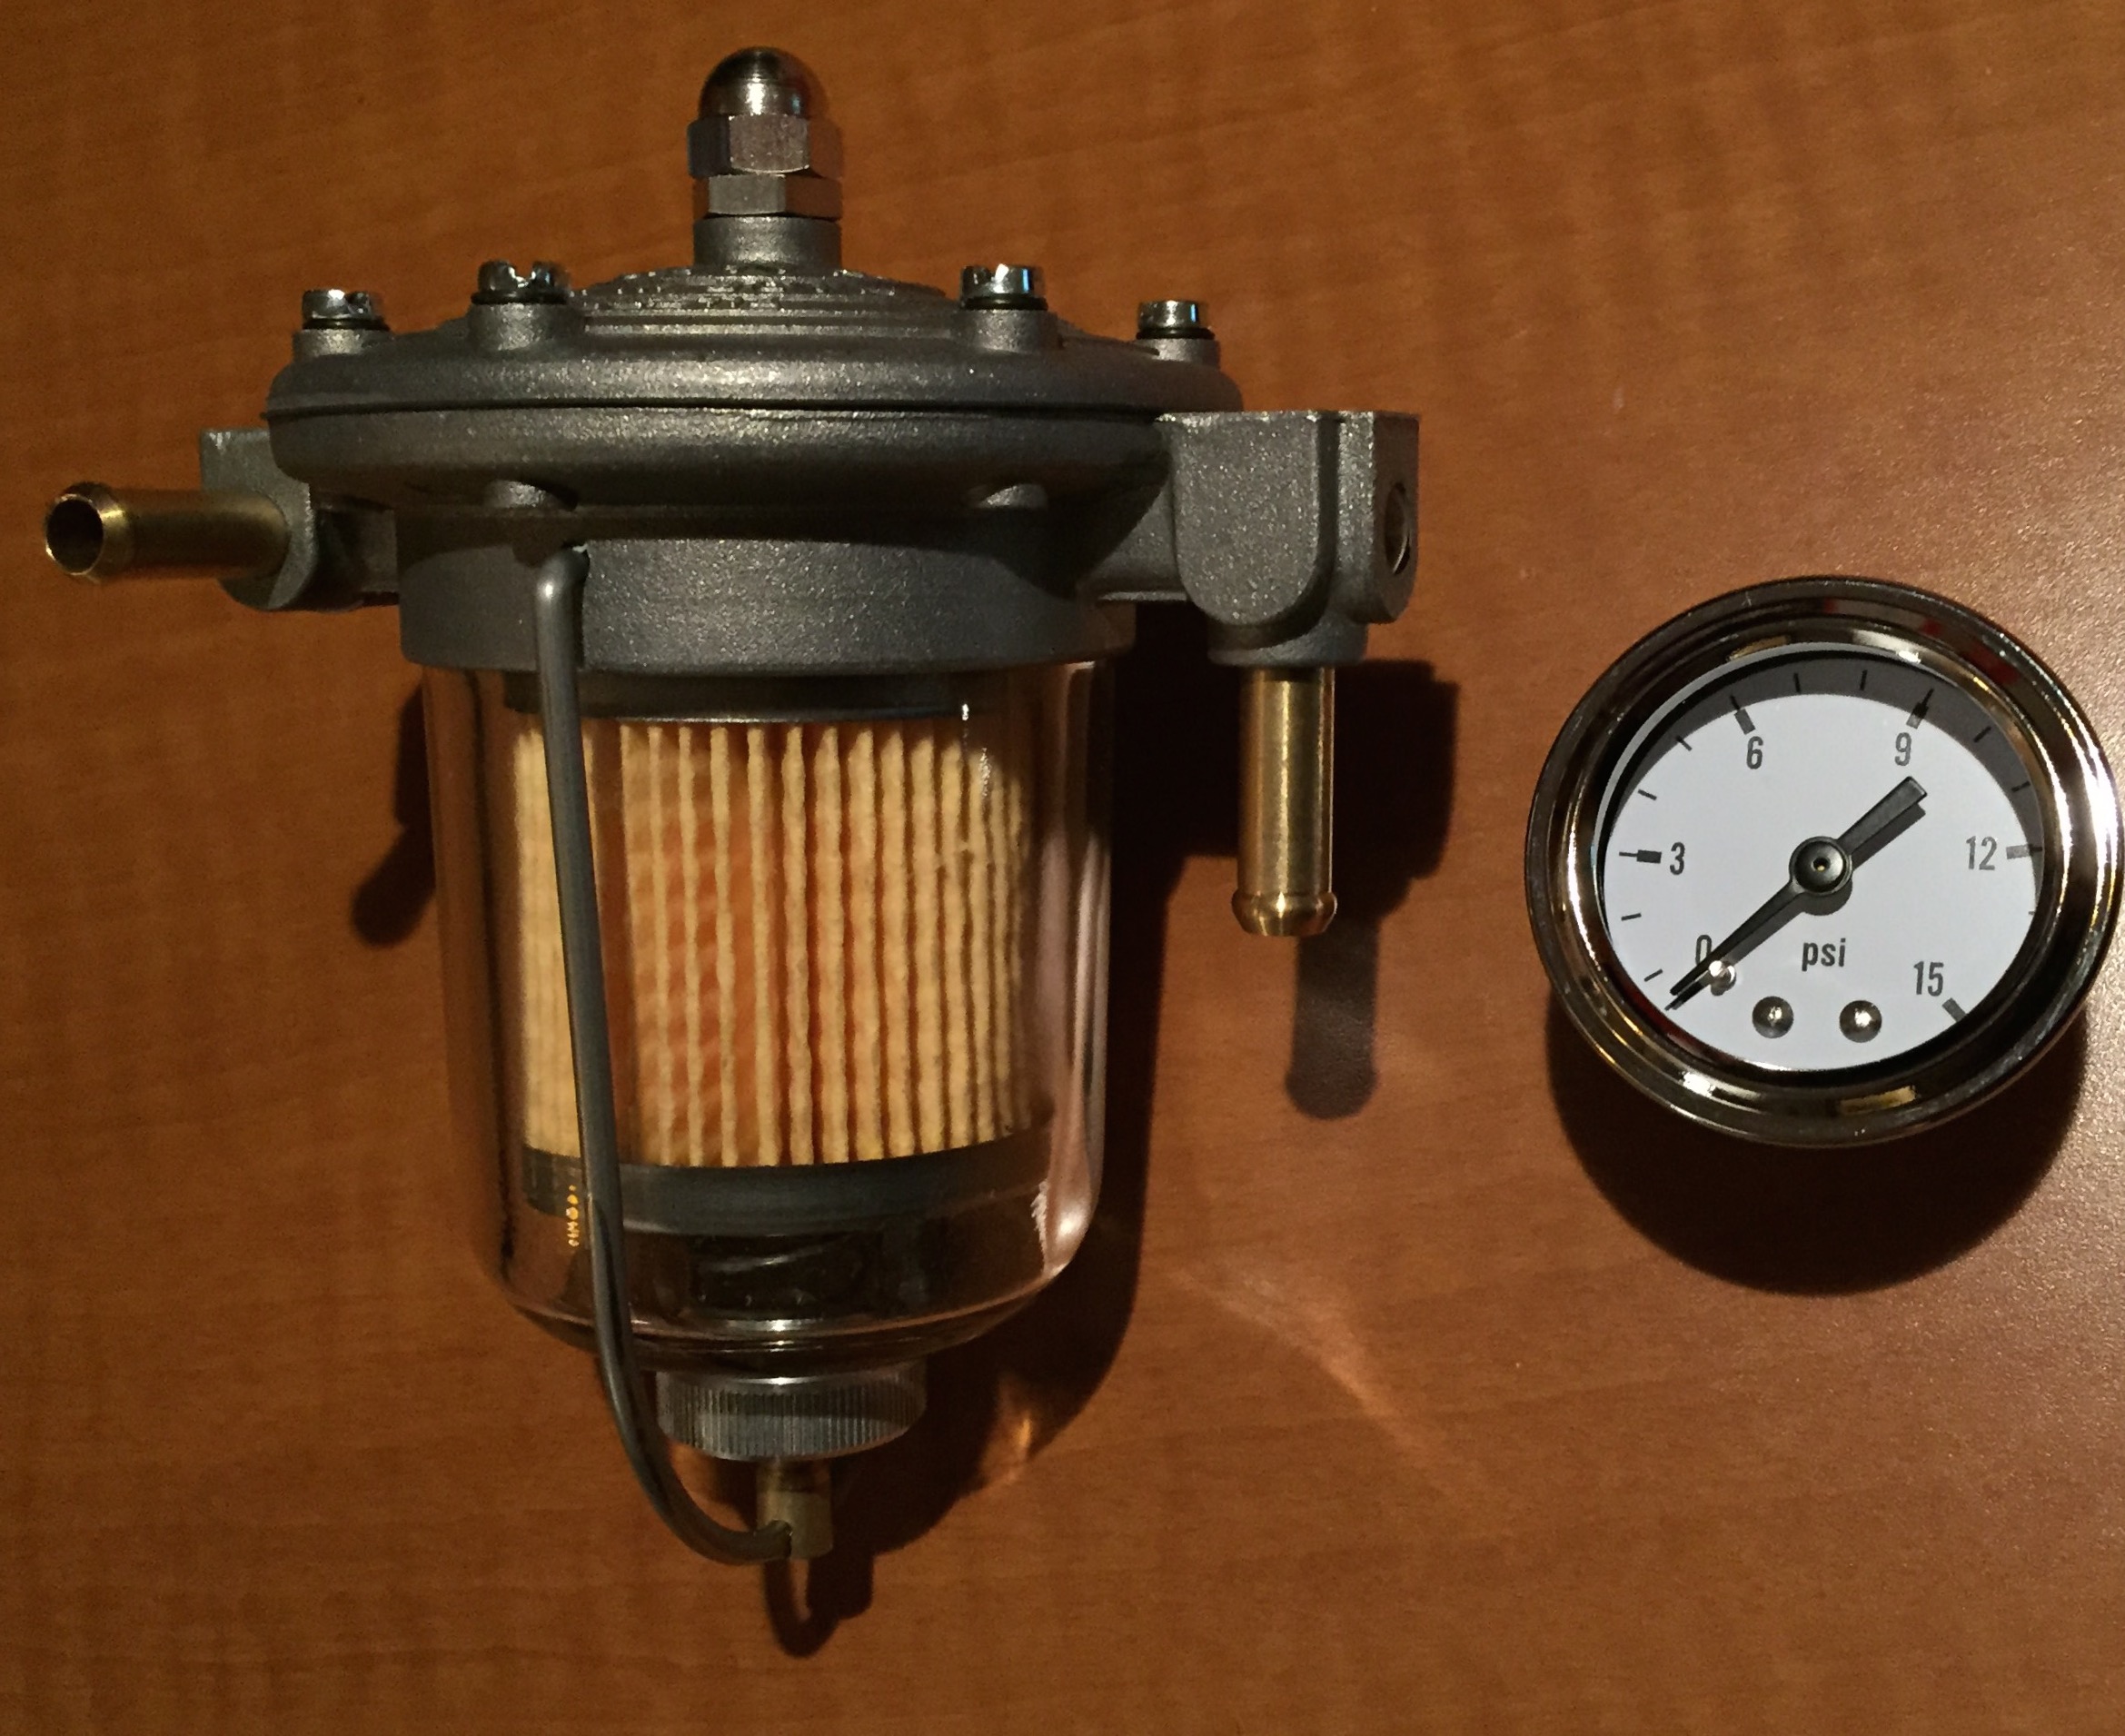
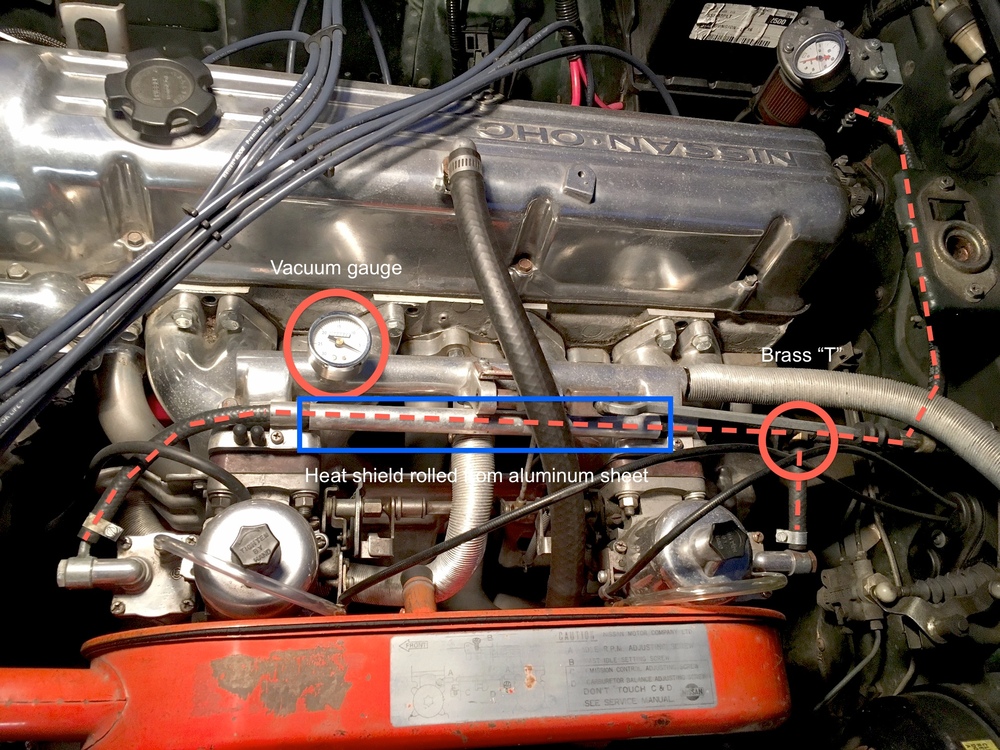
here are a few pics - no comments on my filthy bay please! it's winter and i drive her every day... kinda hard to see, so i've included a set w/notes to call out the fuel system. i cut the steel feed line from the tank/pump and bent it up 90 at the firewall, then used rubber line up to the filter. i removed the evap canister and left the steel vent/return line in place and just capped it w/a bolt in a piece of rubber hose clamped onto the end. as for the fuel pump - i used a little electric airtex unit mounted in place of the original (above passenger side rear wheel) and used the efi pump wiring to power it. the fuel filter is by "filter king" and comes in a variety of configurations - i got it w/the feed from bottom left and output from right horizontal to follow the path of my lines. comes with a little mounting bracket to fasten it to the firewall and it has a built-in adjustable diaphragm-style pressure regulator (adjustment screw on the top) i like the glass bowl - easy to see when to change the paper filter (i also have an inline paper filter at the tank, which i change every 4-6 months). you can also see i used some flexible aluminum heat shield around the vacuum line for the brake booster as it's above the exhaust outlet and gets hot. i actually bent up a piece of steel tube (old bits from the original efi rail) and slid it inside the rubber vacuum hose b/c when it got hot i noticed it would collapse. also used the same shield material on the pcv hose. the vacuum balance tube is a stock unit that i cut off all the egr and other crap, welded up the holes and ground/polished to look like a euro-style tube. i left one port on top for the vacuum gauge and fed the brake booster from the end. let me know if you have any other questions - i can't tell you how happy i am w/these little carbs, as they work fantastic and are sooooo simple. i never could get the stock efi to work right w/my modified engine and exhaust, and the su's do the job with no drama.


-
i'll snap a few for ya.
-
some light reading for you - hopefully it will be helpful: i never liked the steel fuel rails or their routing around the front of the engine, so when i started from scratch w/the fuel lines in the engine bay. i bent up the feed line that comes up under the battery 90 degrees and put a rubber line up the fire wall, mounted an old-school "filter king" glass bowl filter/pressure regulator with a bottom input/right side output and ran rubber fuel line across the firewall (up under the windshield washer hoses) over to the carbs, fed both and dead-end at the front carb. i rolled a strip of aluminum sheet into a tube and loosely wrapped the piece of rubber line in between the carbs to act as a radiant heat shield for it. the system is fed by a little electric pump mounted in place of the stock efi pump. my round-tops came with a steel heat shield which is installed. it really got rid of a lot of clutter and it works great. btw: i also ditched the vapor canister and associated plumbing/clamps.
-
i did the same thing w/my '78 - absolutely love it, wouldn't go back ever. do a search for my threads, pretty much shows everything i did. there's a plug in the firewall below the throttle linkage, i pulled it and drilled a pair of holes (make 'em tight to the cable so it won't leak) and the cables run behind the dash right into the console - easy. i don't recall anything special about the gasket, hold it up to the carb manifold and check. you will need to get yourself a carb bolt kit, i think the carbs use a couple different bolt holes - or maybe my memory is foggy... do it - you'll love it!
-
wow - KLEEEN!! she's got no sectets to hide now...
-
i have to agree w/the captain re: the aluminum - couple of concerns: dissimilar metals - corrosion the sharp inside corner transitions - stress concentration/cracking wouldn't want to be wondering about that coupler all the time, especially with extra oomph coming from that power plant. oh, and i was going for the "original" quote from the federales:
-
"badges? -- we don't need no stinking badges!!" since it's a complete re-paint, why not shave all the extras and have a total sleeper?
-
been away for a while... love this thread! thanks for making my saturday night ;}
-
i just adjusted 'em with the stock needles - runs great. at some point i'll install some sniffers in the header to see just how the mixture is across the rev range, but really that will be to tweak it for the last 10% of performance. i drive it daily and love the way it runs. i have a little airtex electric fuel pump mounted in place of the stock efi pump. sounds like a little fish tank pump - little purr in the background that lets me know it's running
-
i never liked the steel fuel rails or their routing around the front of the engine, so when i switched my from efi to carbs i started from scratch w/the fuel lines in the engine bay. i bent up the feed line that comes up under the battery 90 degrees and put a rubber line up the fire wall, mounted an old-school "filter king" glass bowl filter/pressure regulator with a bottom input/right side output and ran rubber fuel line across the firewall (up under the windshield washer hoses) over to the carbs, fed both and dead-end at the front carb. i rolled a strip of aluminum sheet into a tube and loosely wrapped the piece of rubber line in between the carbs to act as a radiant heat shield for it. the system is fed by a little electric pump mounted in place of the stock efi pump. my round-tops came with a steel heat shield which is installed. never had a single problem. granted, i don't live in phoenix, but i've driven on some pretty hot days and never had an issue in traffic or at re-start.
-
wow. i'm stunned. you probably would have saved some time & $$ starting with a set of panasports and a vin plate... but this is pretty cool to watch!
-
fantastic start - and looks like you got a good one w/a solid body. love it!
-
yup - local hardware store.
-
two paths you can take: replace/refurbish your efi or go carbs. both have their plus/minus... i did a complete rebuild/engine swap on my 78 280 and decided to go carbs because i wanted to be able to pick up performance with the engine mods (flat-top pistons, head work, header, etc.) and the stock efi is difficult to adjust - it runs quite well for a stock engine in stock configuration, but not as flexible as modern efi systems. the carb swap is not difficult, but there are quite a few things to consider: swap fuel pump (efi pump is high pressure, carbs need low pressure) choke cable, lever, mounting setup through firewall and into console (not cheap if it doesn't come w/carbs) air filter (also not cheap if it doesn't come w/carbs - and the 4bbl is down draft so you'll have to find a very short filter to clear under the hood) throttle cable revisions (takes a little doing - not hard, but certainly not just "plug-n-play") fuel lines (i chose to completely re-route, you'll at least need to do some mods) carb setup and adjustment (goes without saying, but it will take some fiddling to get right) different manifold bolts (not a biggie, but ya gotta buy 'em) that said, i love my su's because they are simple, rock solid dependable, old-school and the car runs great. but i spent quite a bit of time getting it right and i enjoy fiddling/fettling with my car... if you want to go the other route and re-furbish your efi, you can either chase the issues (electrical gremlins, plenty of time with testing equipment on your hands & knees squinting at the pins on the ecu) or i have an entire re-built efi system i could offer at a very reasonable price which is completely re-built with all new parts. not trying to be a salesman, i just know it took me 6 months of dicking around w/the efi system (find the many threads, often w/a pic of my car hanging from a tow hook) and replaced EVERYTHING one part at a time at considerable cost to get it running right/dependable and i wouldn't wish that on anyone. if i could have bought the re-built system i have sitting in my garage up front, i sure would have. the plus with this route is the stock efi runs great and you just turn the key and drive like a "modern" car - no warm-up procedure, no regular carb maintenance, you will pass emissions testing if need be, better fuel economy, etc. when it's working correctly. others have different experience, just offering mine...
-
thanks for the kind words - i've missed being in touch w/the gang. she's been running strong and dependable on the new motor and the SU's are rock solid. i've got a few more months of house projects and "other stuff" that will keep me from doing any appreciable work on her, but i'm still looking forward to rebuilding the 5-speed i have stashed and doing the tranny-swap.
-
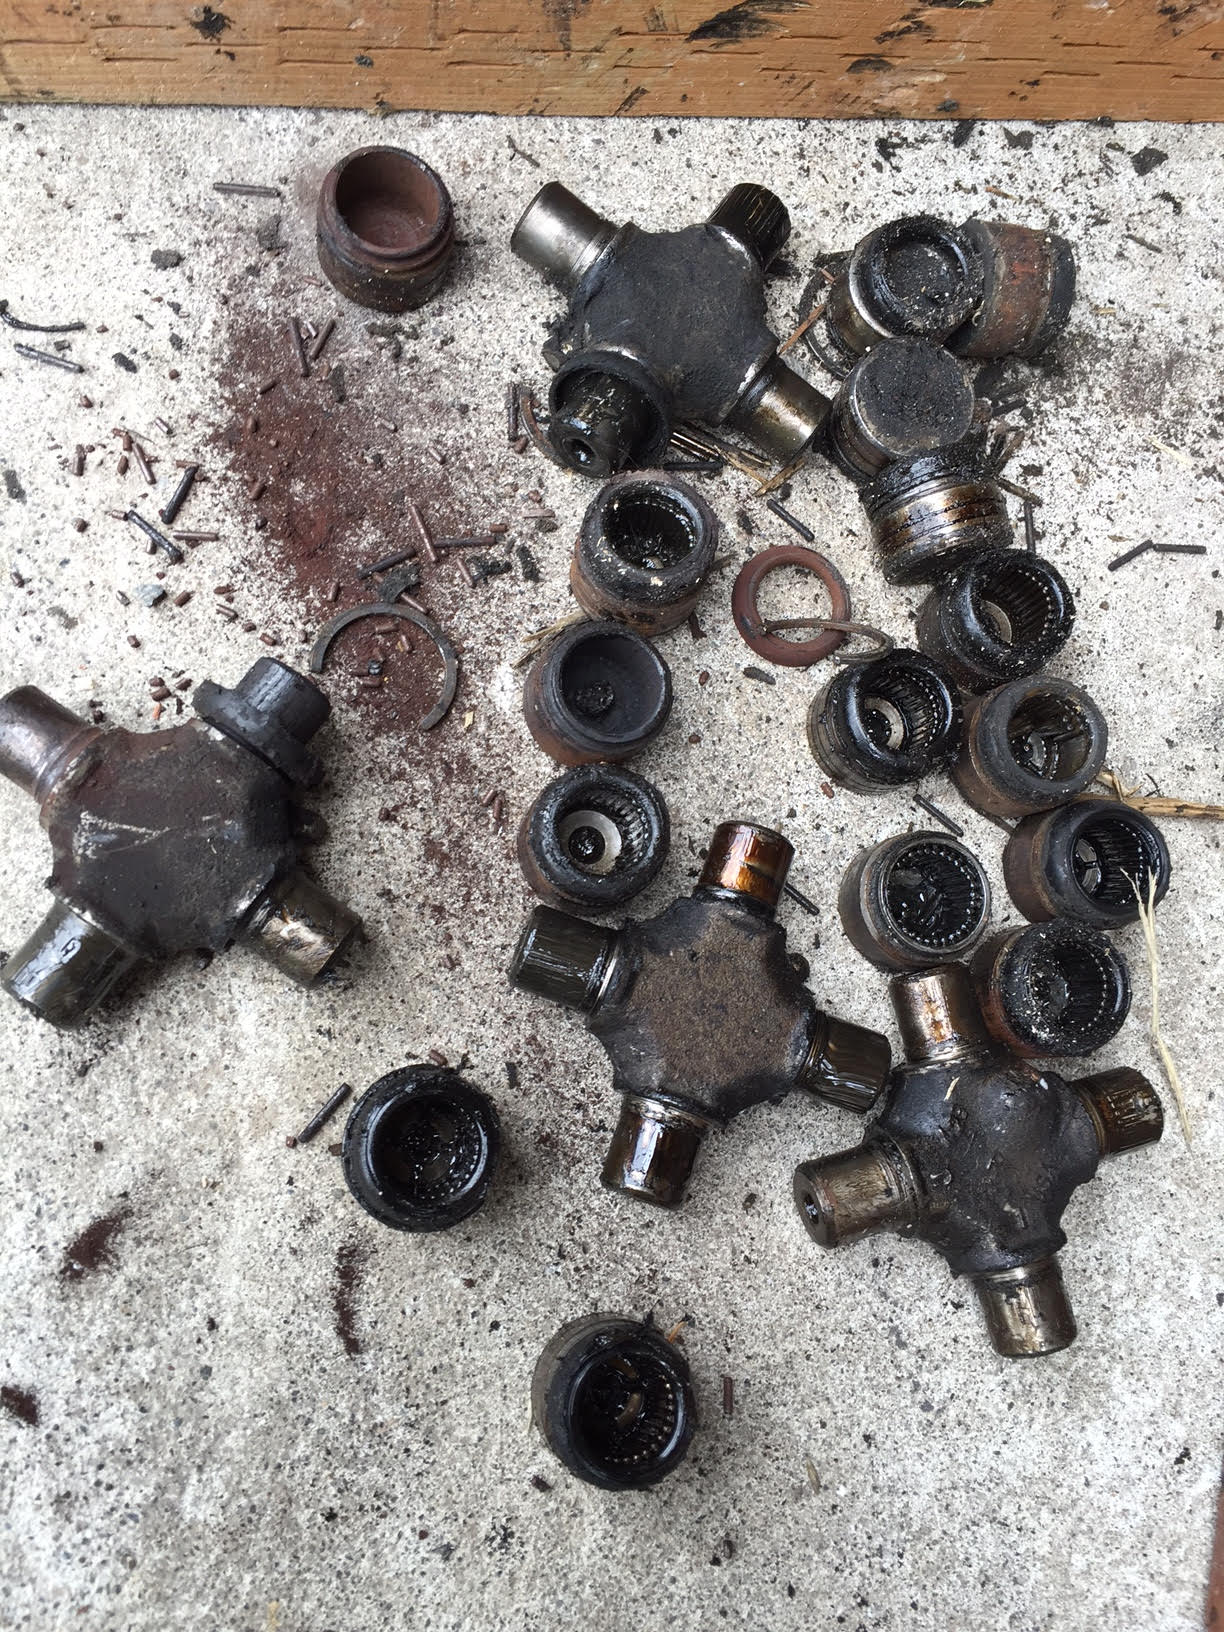
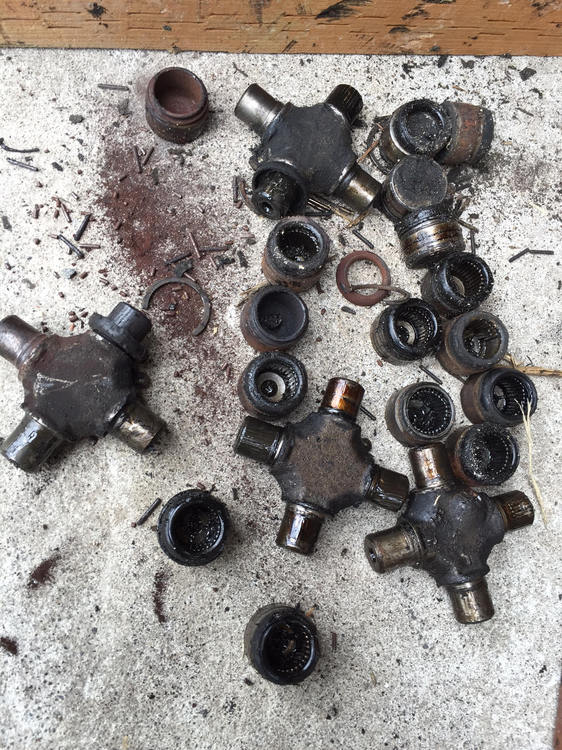
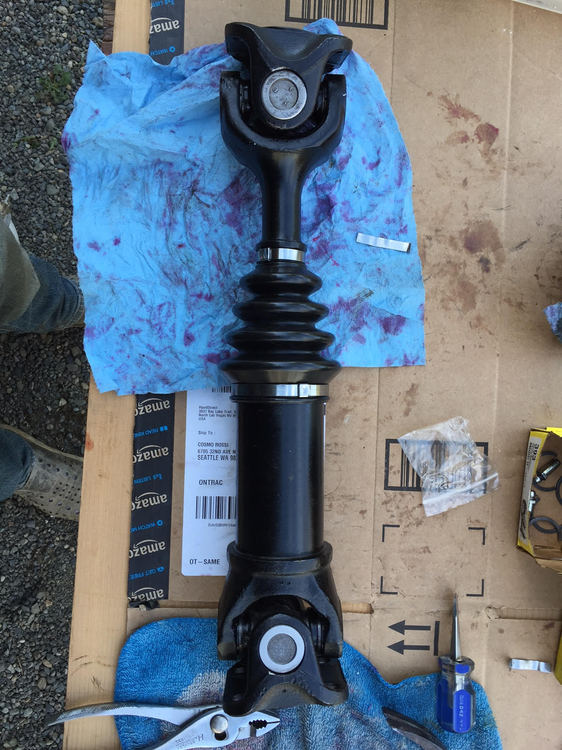
been a while since i posted - sucked into the quagmire of moving, work, summer travel, getting 2 kids off to college... all while the z has sat idle in the driveway due to horrible sounds emanating from the rear end (something my kids accuse me of on a regular basis). i finally got moved into the new place, installed some concrete pavers to allow me to jack up the z safely (gravel driveway) and immediately saw the telltale signs of blown bearings in the half-shaft u-joints. that red-iron-primer color all around the joint that comes from the factory lube escaping - i've seen this on motorcycle drive chains that blew the o-ring seals. turning the wheels produced unsettling creaking/cracking noises from the u-joints, confirming my suspicions. so i ordered all the parts to re-build the half-shafts from MSA: 4 new "heavy-duty" u-joints, new rubber boots and sst band clamps. did my research and read the very helpful blog post from woodworkerb (huge help) and when the parts arrived i pulled the half-shafts and knocked out the u-joints. they literally fell out in a pile of dust and broken bits - can't believe these parts were spinning around back there and hadn't exploded on me while on the freeway... my experience with this job was shockingly parallel to woodworkerb's blog: i discovered that MSA had sent 3 correct u-joints and one with caps that were 1mm too small. big PITA, but o'reilly's had 'em in stock (for cheaper + no shipping) and they were identical to the "heavy-duty" ones MSA sells. hmmm... the sliding bearing sets were in brand-new condition and fully packed with brand-new looking grease. i really could have left 'em be, but i went ahead and cleaned everything and re-installed with new grease and new boots. the whole project was done in half a day and the rear end is nice and smooth now. interestingly, the shimmy i had at the steering wheel at 65 is gone now. coincidence?? never thought that the rear could affect the steering, but stranger things have happened... the carnage that fell out: all cleaned up w/a fresh coat of epoxy paint:
-
Been consumed with moving, and now visiting family in MA. Gotta purge my Z stash - will be posting soon... (threadjack over)
-
-
i'm excited that this thread has come back to life - very cool! your test setup reminds me of those skids they use to test thrust on rocket engines ;} the electronics are such a pain, mainly why i went backwards to carbs because every time i got it right something else would bugger up and i get cross eyed chasing wires...
-
one of my favorite things about these cars is that you can see right down to the dirt on both sides of the engine - so simple, so much room in the bay! looking at the ground under your car, i'd put down a tarp every time i worked on it for fear if i ever dropped a small part (which i do regularly) it would be gone forever... looks great, keep up the posts
-
we had an old slot set from the 60's that had cars w/a pancake style motor - the motor itself was part of the car chassis and you could re-build them and swap parts from one to the other. the body came off and it was like being a little mechanic at the pits. i spent hours doing "performance mods" to get the fastest car, loved that set!
-
+1 on what site says above. there are two linkage sync points: at idle the linkage is resting on the throttle stop screws at each carb, adjusting them sets the resting point of the butterfly in the throttle body. the second adjustment syncs them when you are actually driving - it's the screw between the two linkage systems. these two adjustments are completely separate, so one can be spot on and the other quite off... same principle for measure/adjust, different screw to turn.
-
what ignition are you running?