rossiz
Free Member
-
Joined
-
Last visited
Everything posted by rossiz
-
 sweet!
 -
two reasons to flush the tank: 1) get rid of the crud that's in there 2) protect from the same thing happening all over again drop it, have it hot-tanked and coated and you'll never have to mess with it again. dropping the tank is done in an hour or less depending on if you run into frozen fasteners. you'll also have the opportunity to blow out your hard lines and replace soft ones, both of which will need to be done if they are original. another cheap, stop-gap alternative is to put a clear filter between the tank and fuel pump. i did this to tide me over until i do a full tank refresh. i've had to replace the $3 filter just about every couple of months. i installed an in-line shutoff gate valve between the clear filter and the tank so i can do the swap with little drama in about 15 min. but it's still a PITA and not a permanent fix.
-
-
Not funny - not even close to funny. Once the head is done, it'll be: "the trans bell housing looks like a$$ next to the head..." Before I know it I'll be polishing the moustache bar. Gonna have to join polish-aholics anonymous...
-
nice! do a search for posts about starting up a z motor after a long park - "awakening the beast" or something like that i think... some really important info on prep to avoid cam damage, which can happen in the first minute of running a dry top end. tons of info on this site to look at/drool over/get inspired by. oh, and love the color ;}
-
+1 on your great blog jarvo, i went through the whole thing (3 years!!) and picked up some great info. it's cool when folks take the time to share into the collective knowledge pool so duffers like me can learn before ruining things ;} i'm actually switching my 78 to carbs with an f54/p79 rebuild, so this post is timely!
-
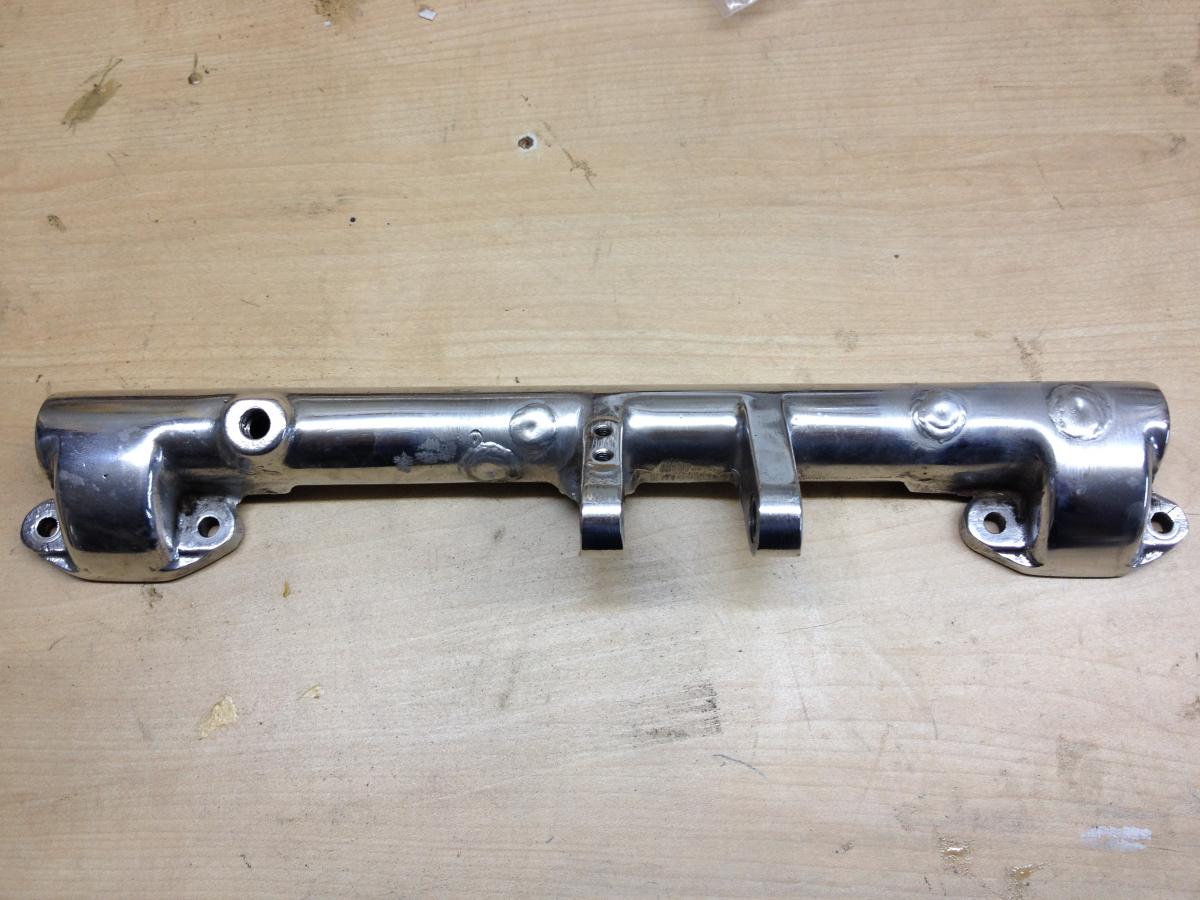
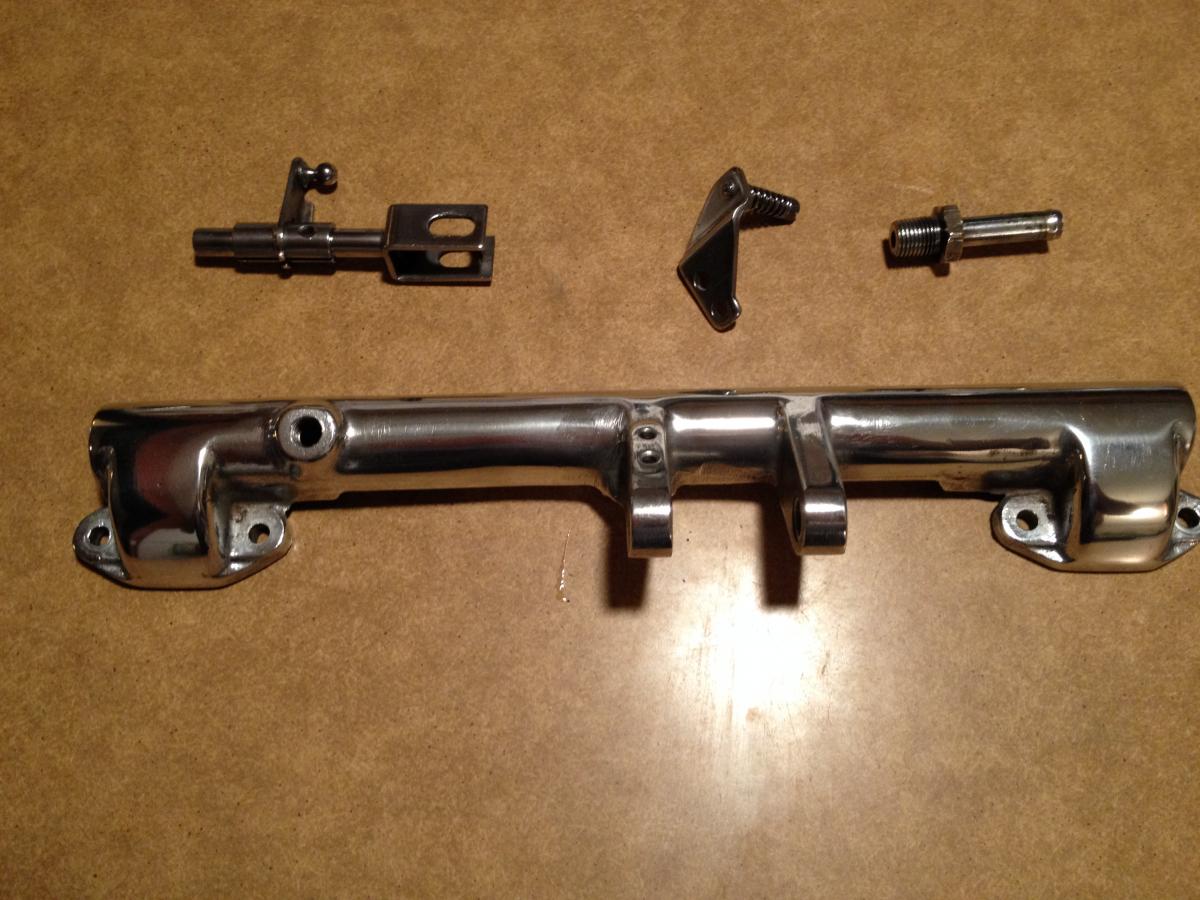
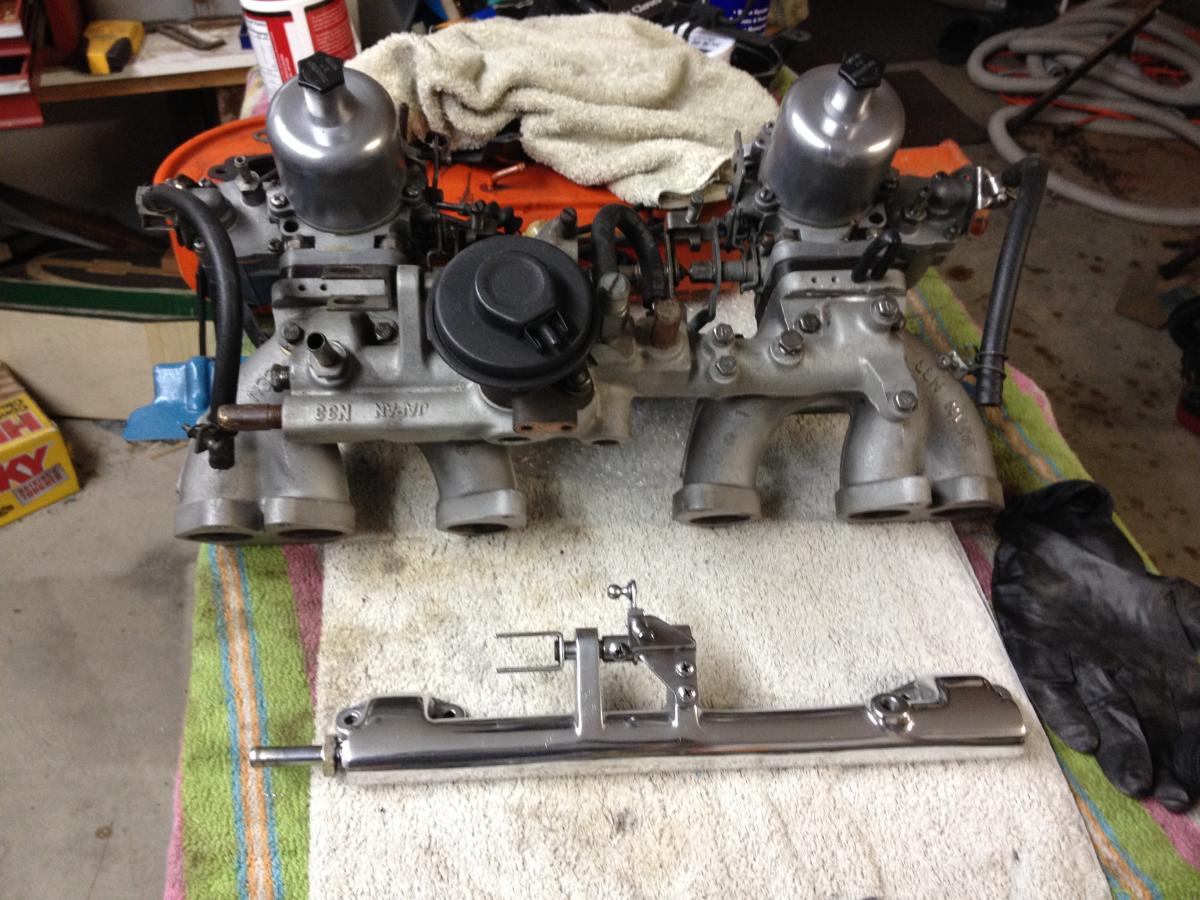
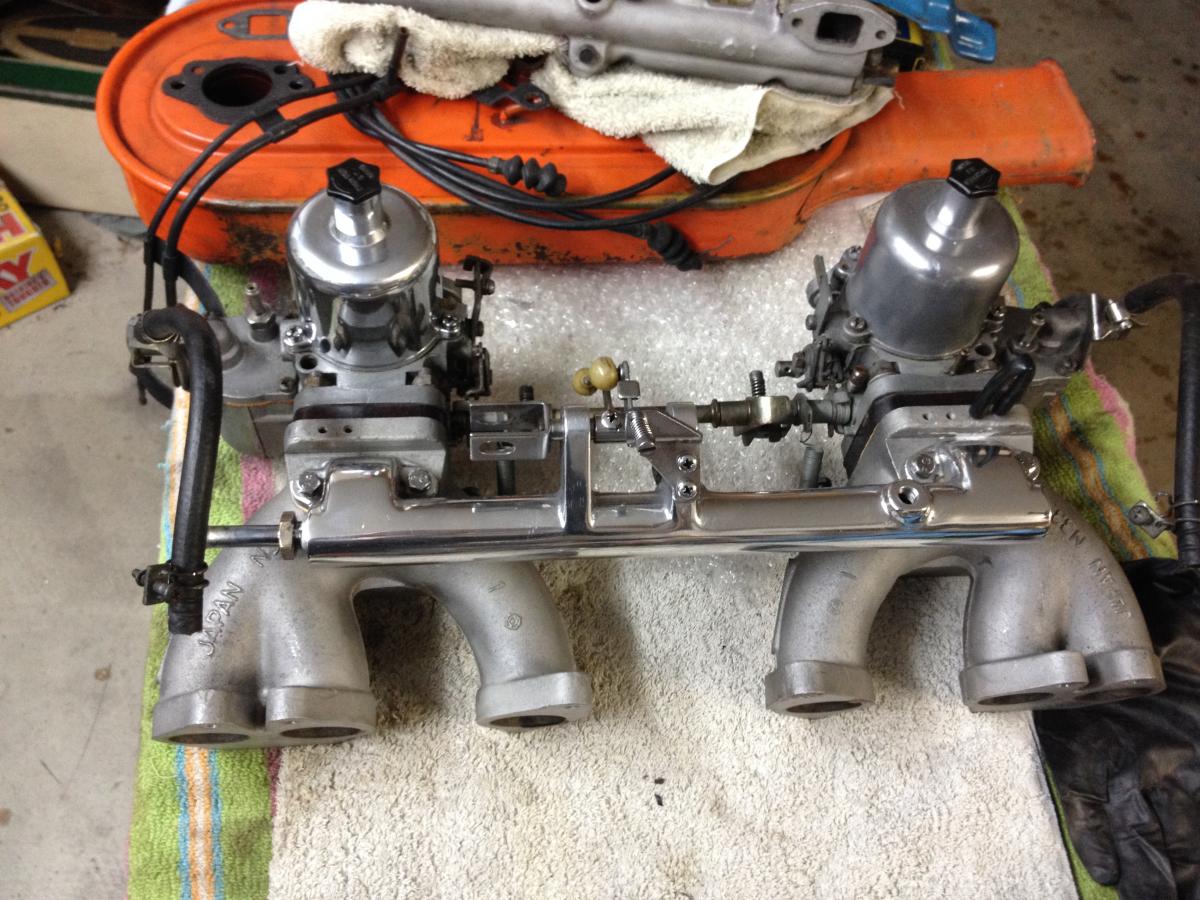
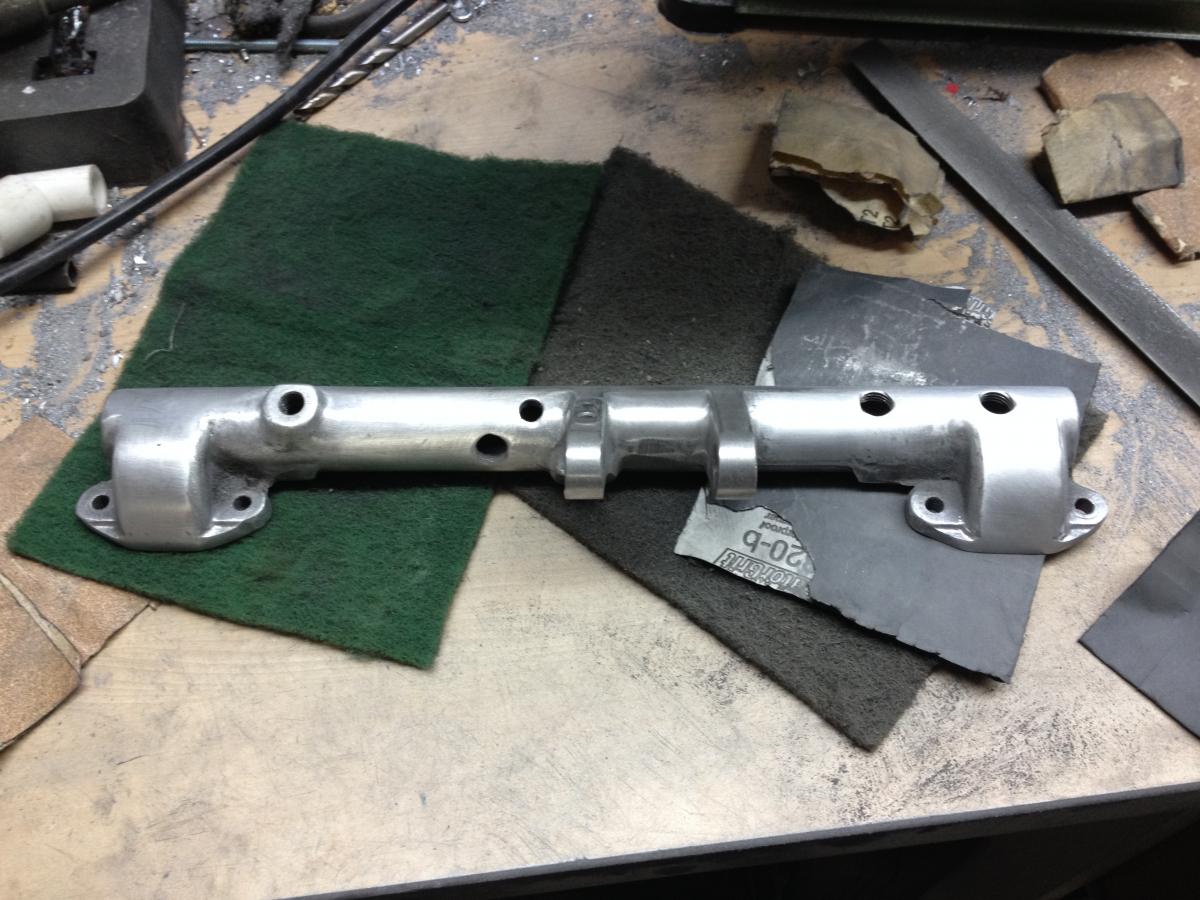
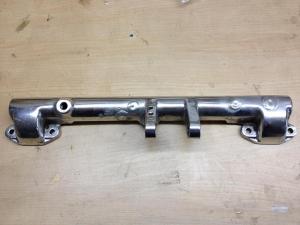
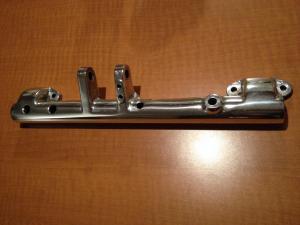
got the holes welded up, ground them down and buffed up the finished product. buffed up the linkage too just for fun. then i hit one of the carb domes - will do the other too and clean up the innards a little. put the balance tube on and discovered a huge problem... the manifolds (which used to look just fine) now look like a$$ next to the polished bits. looks like a little more cleanup is necessary... 4 holes gone, 4 new belly-buttons all cleaned up new "euro-style" compared to egr style


-
crud in the lines = intermittent fuel issue, stuff collects, then blows through intermittent electrical is often a bad ground and/or crusty connections - check 'em all.
-
nice! i thought about trying that on mine when i was in the middle of my rocker dilemma, but went with delta. yours look just as good. it would be interesting to see how they wipe on the cam - cover in sharpie and see what kind of pattern you get. would be a good measure of surface trueness in relation to the cam.
-
am i correct in reading that you're using a brake line to a clutch slave? while it should certainly work as a generic pressure line, the fittings may be designed differently. as Zed says above, no harm in cutting it down to where the crush washer does its job - be sure the sealing surfaces are good and clean, as a little bit of grit will bring heartache. of course the above advice assumes that the hose length is the same (or at least long enough) for a brake line to work in this application.
-
so nice!! i'm envisioning the movie soundtrack of the scene where the boy's long-lost dog finally comes home...
-
thanks for the kind words guys - it isn't done yet, but i'm pleased with an afternoon's work. i'll post up after it's welded and finished.
-
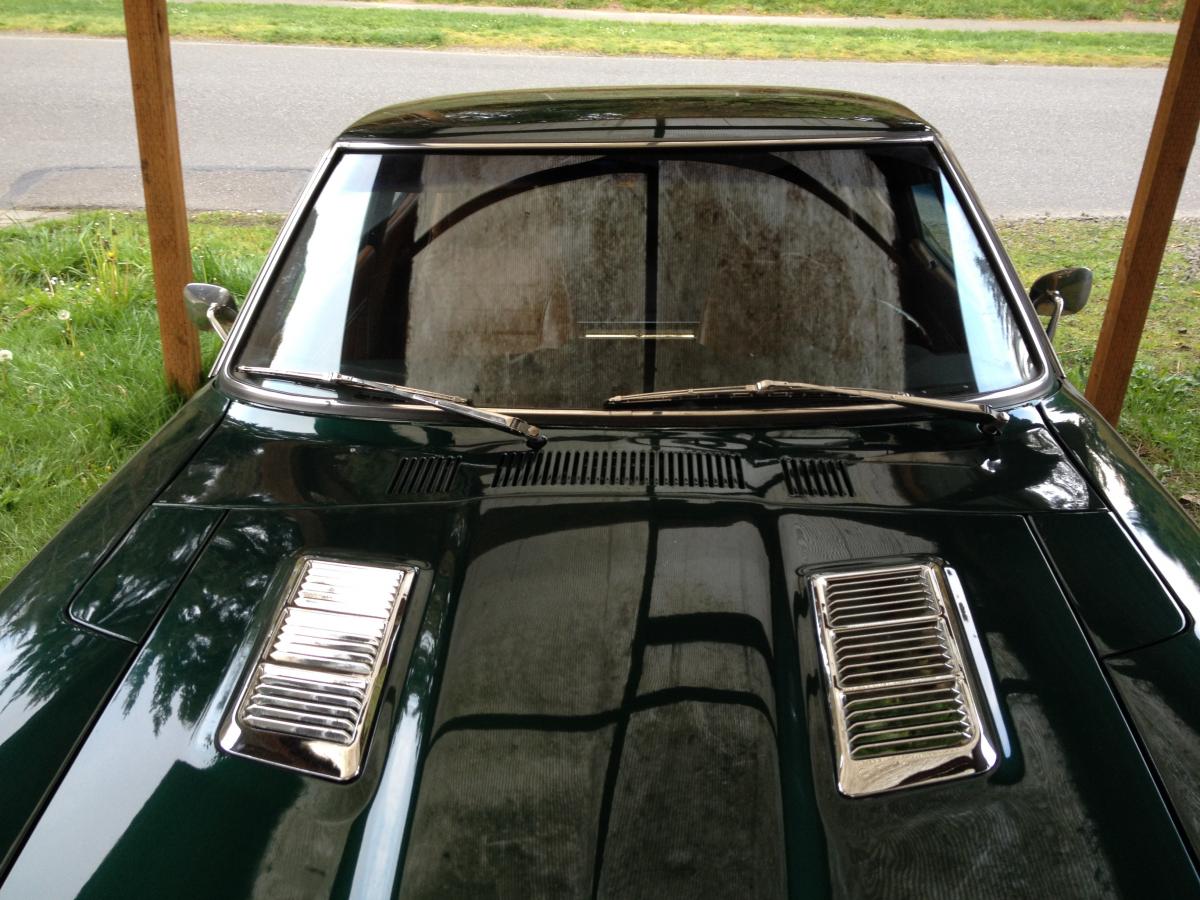
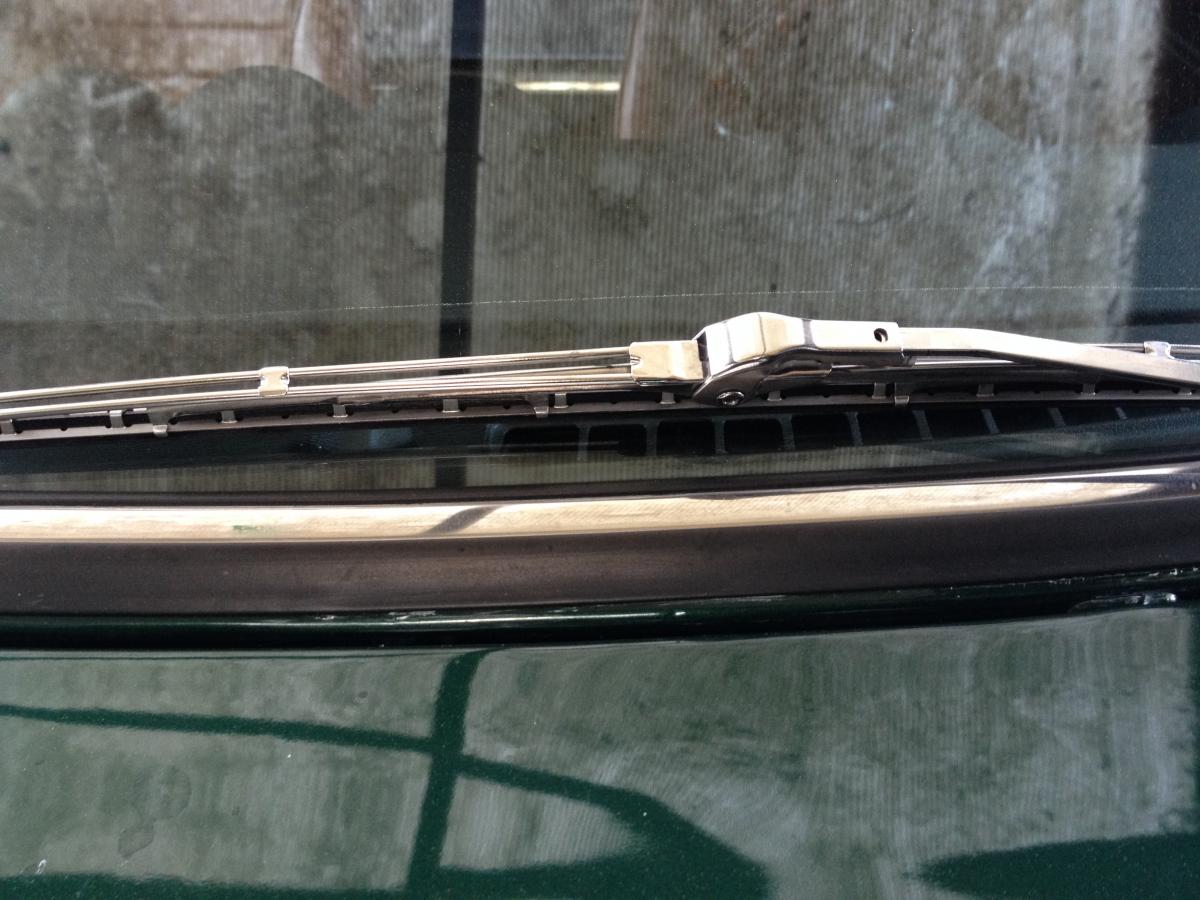
inspired by jim (s30driver) i picked up a set of nos early wiper blade assemblies for $35, buffed 'em up and popped 'em on - happy. slowly swapping all the blacked-out accents on my 78 to shiny bits...


-
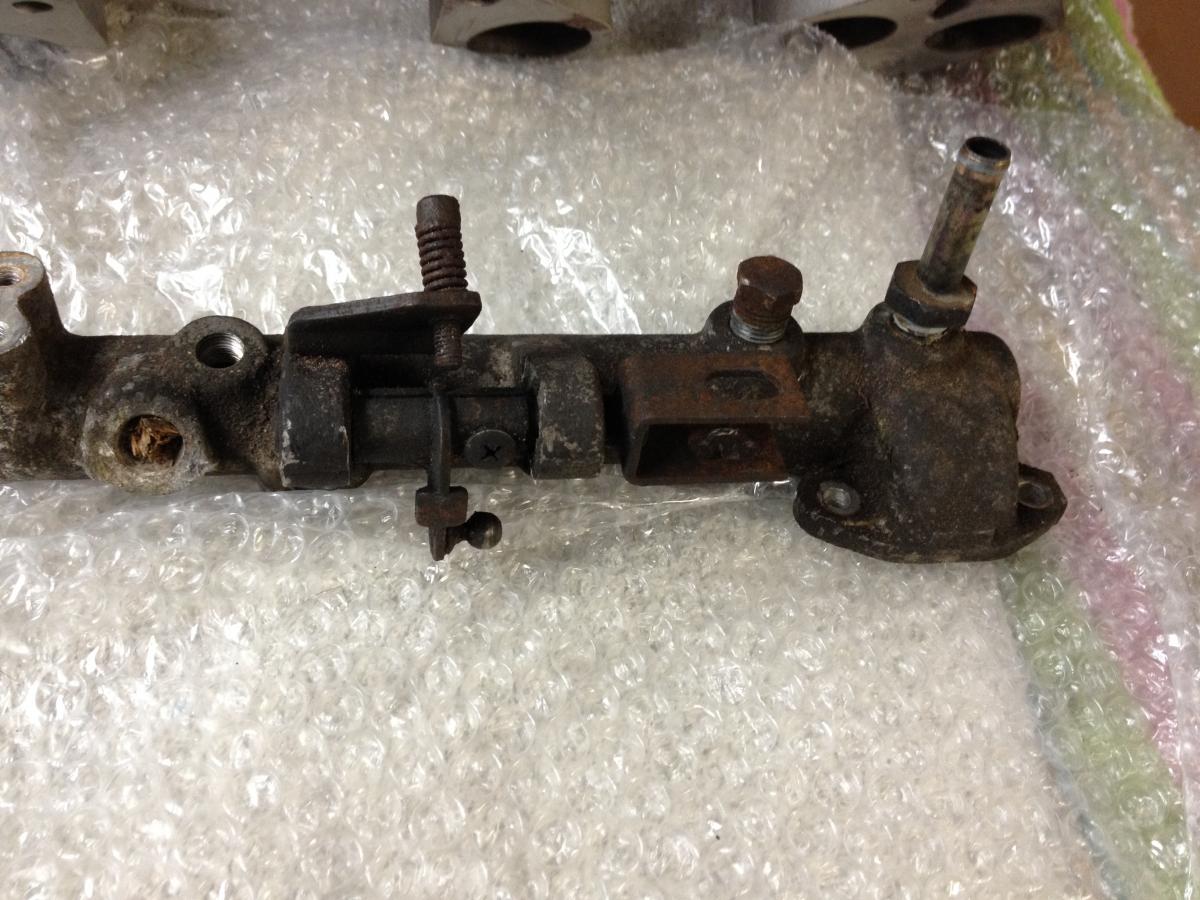
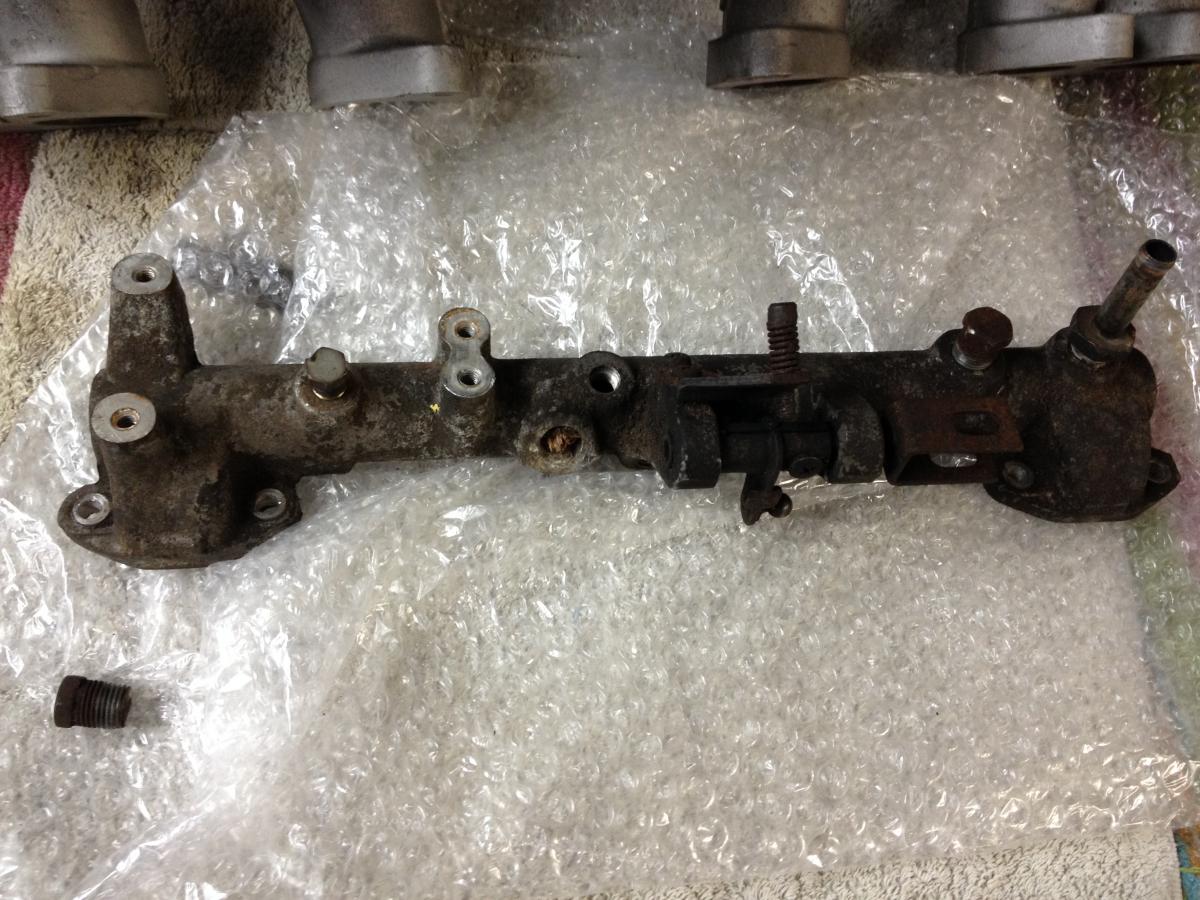
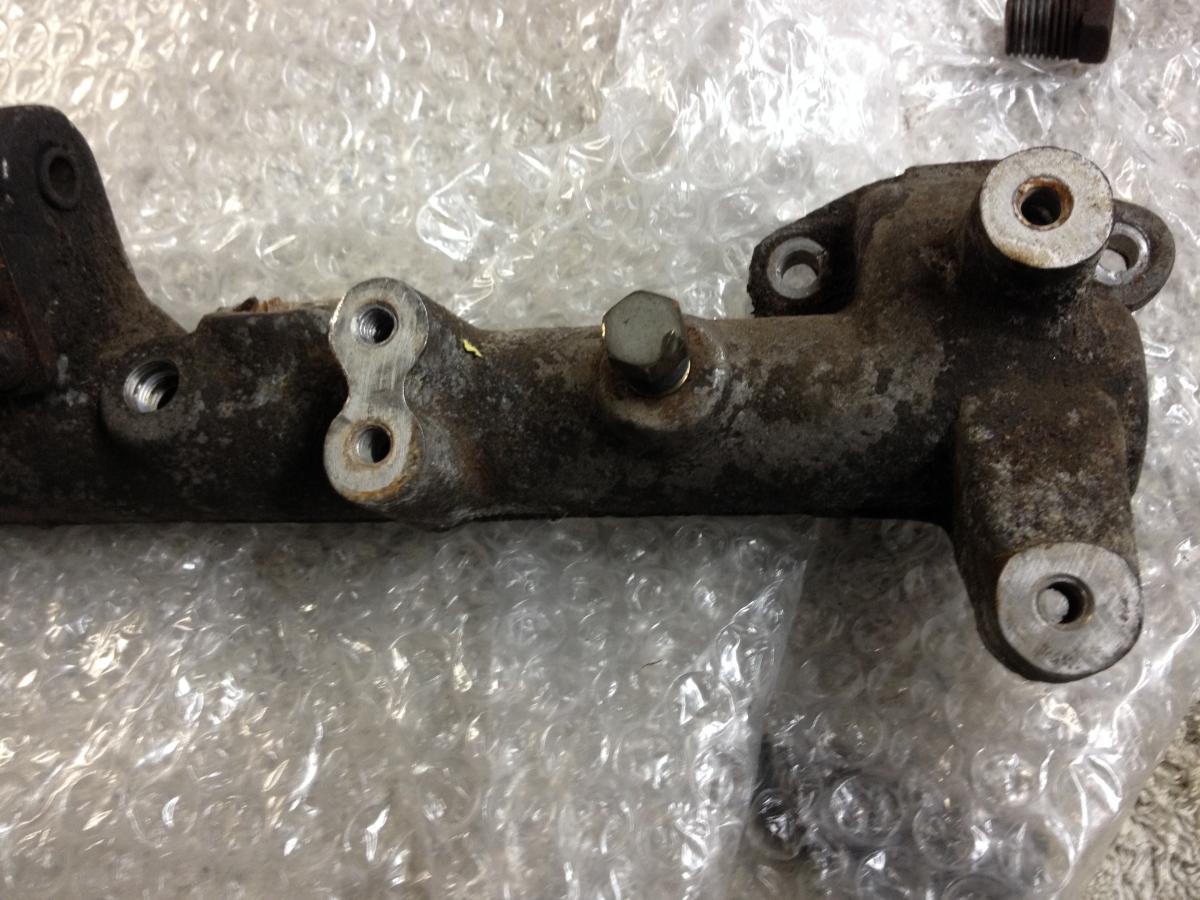
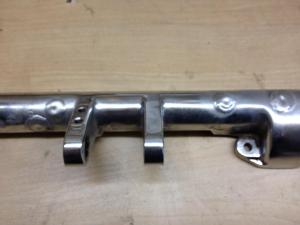
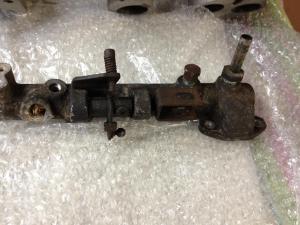
mark maras kindly provided a donor balance tube for me to strip down and clean up. i decided to re-locate the brake booster to the firewall end of the log and save one vacuum tap at the front top and keep the pcv at the center horizontal position. started off with a sawzall and hacked off the big lumps, then angle grinder with cutoff wheel to bring it down to rough shape, then a flap wheel to smooth it out, hand file to blend contours, 100 grit up to 320 hand sanding, scotchbrite then a bit of buffing. next i'll weld in the deleted holes, grind those down to match and she should be done. not show-quality work, but i'm happy with the improvement. starting point: cut, ground, filed: buffed:


-
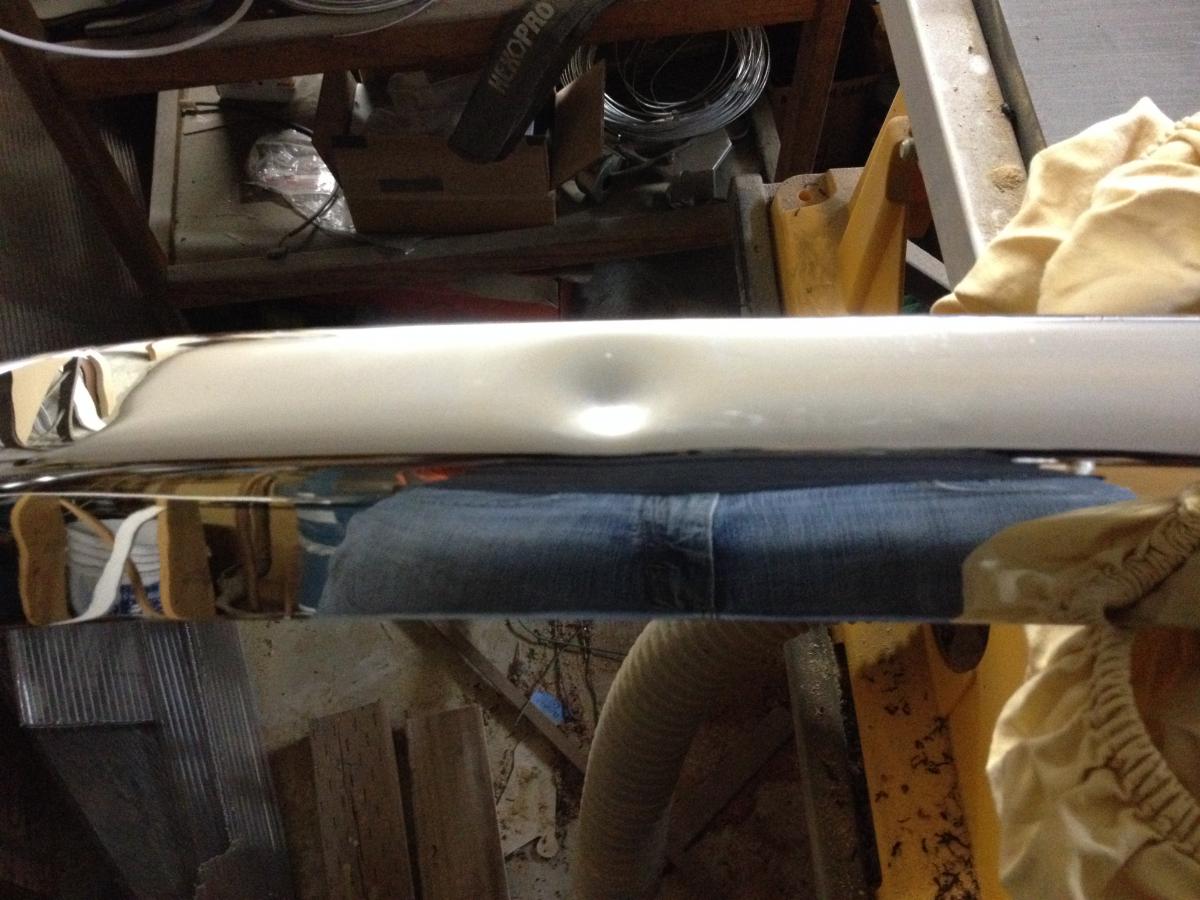
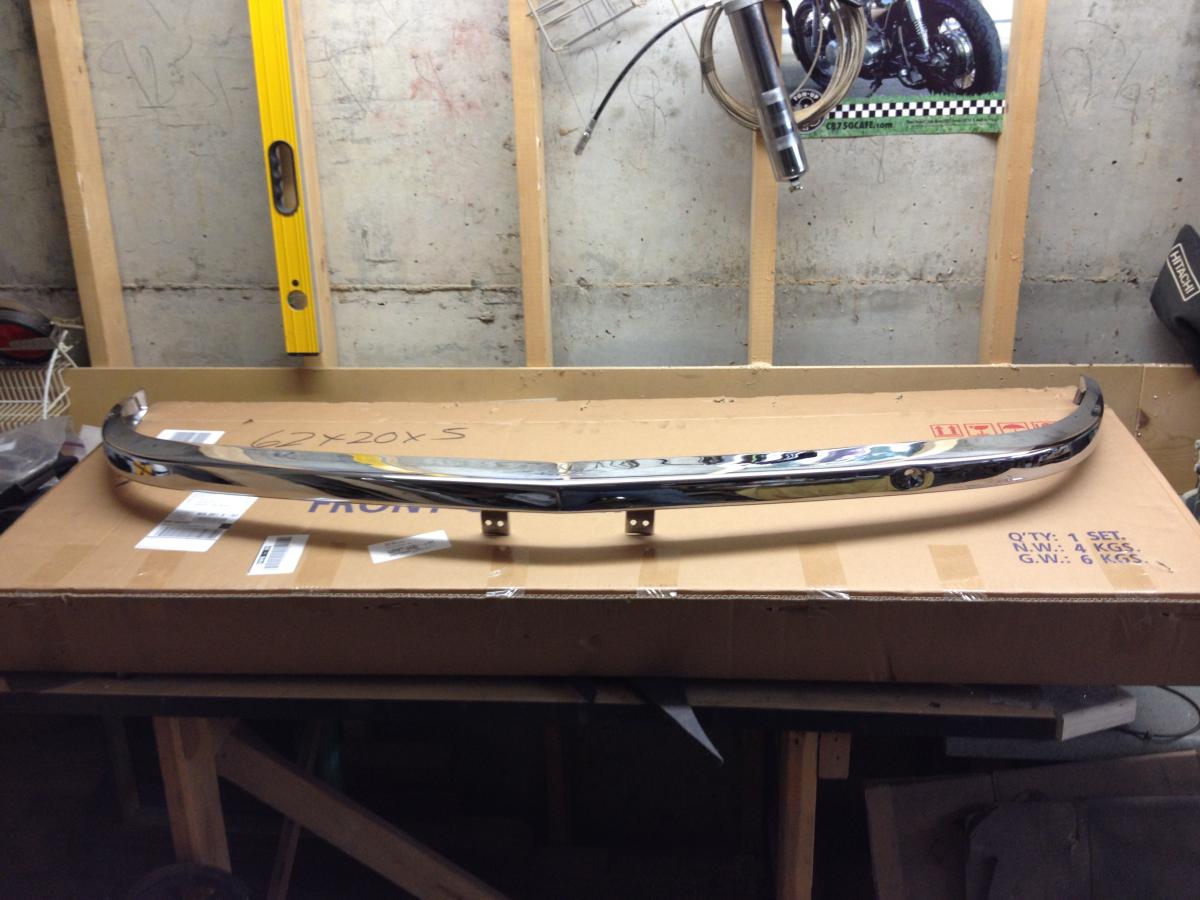
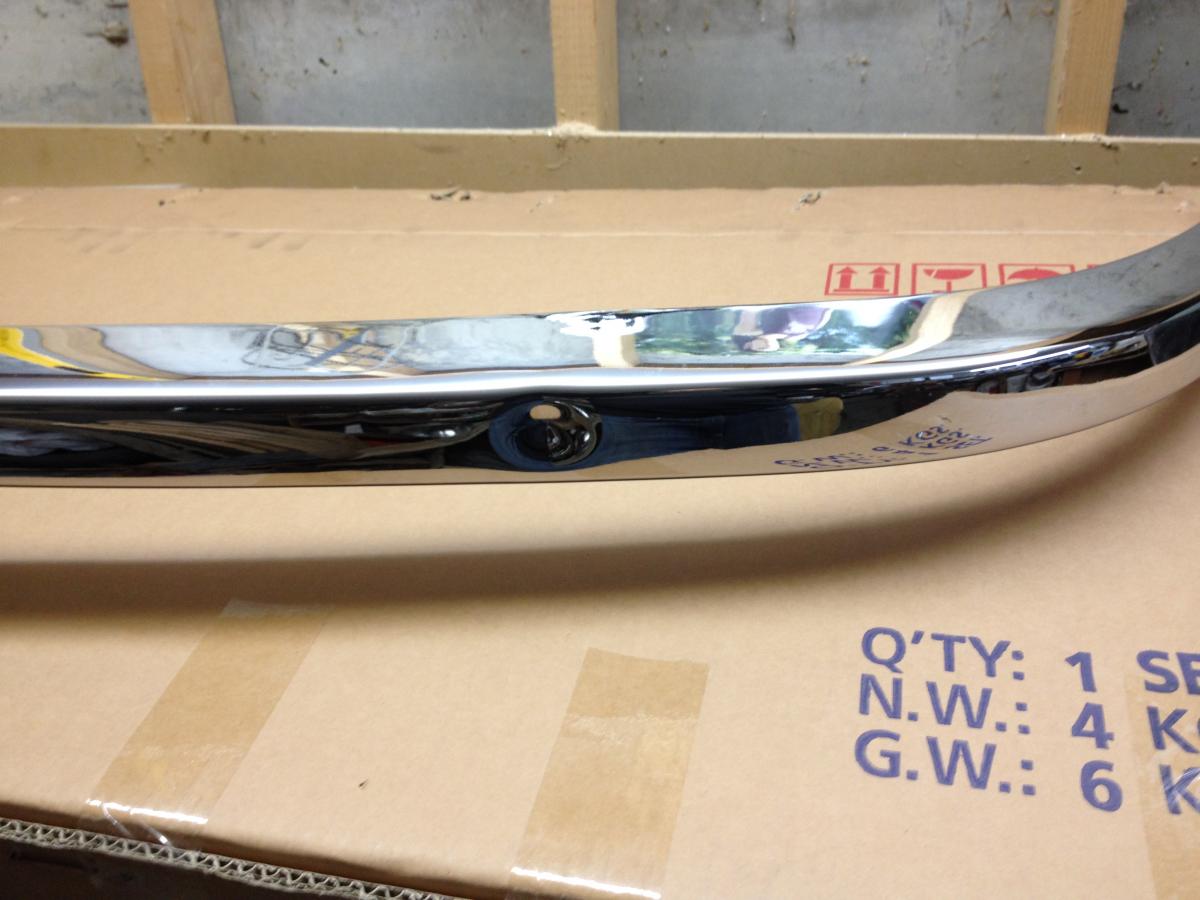
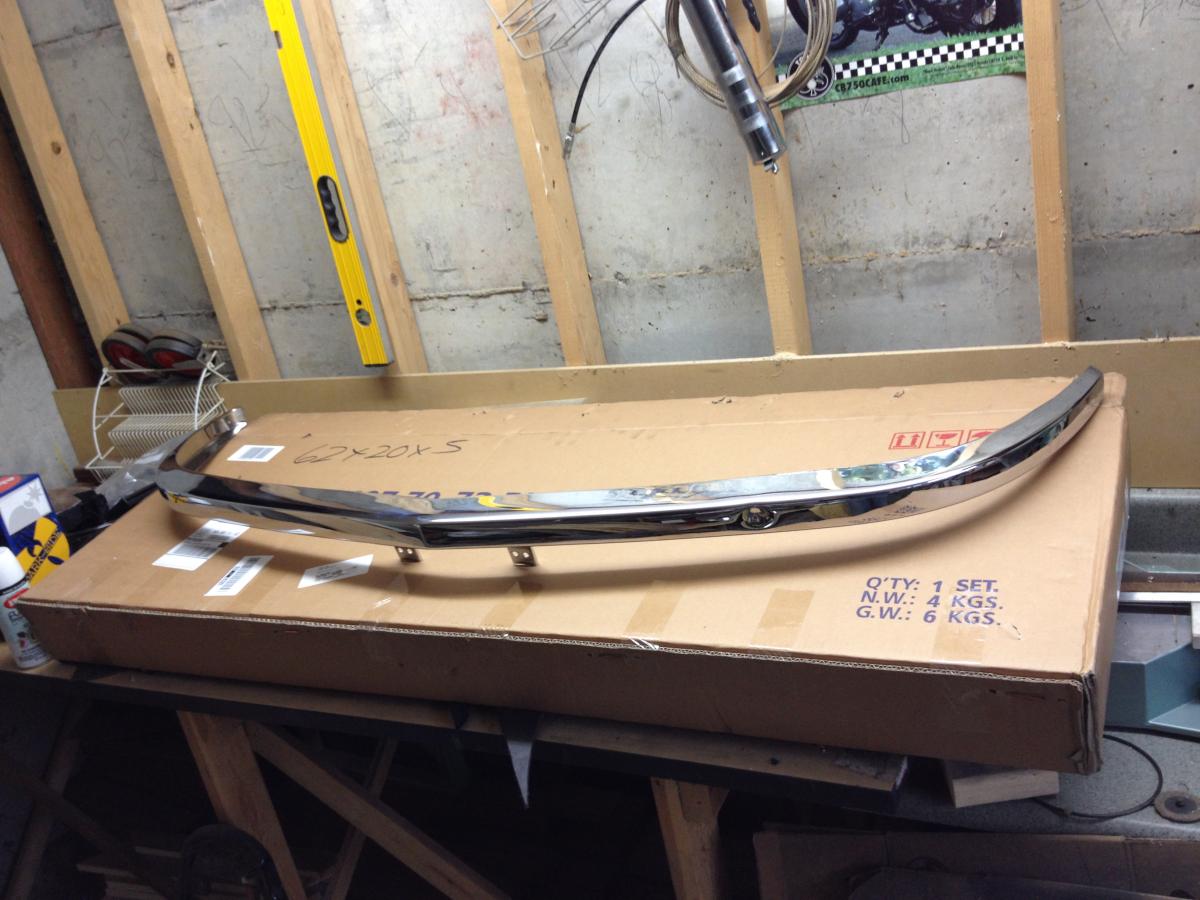
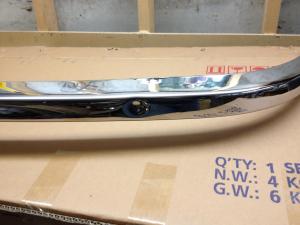
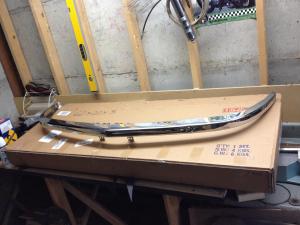
A friend backed into me, making a small dimple in my front bumper - about 1" in diameter. Rather than go through insurance, she bought me a new one. in order to re-coup some of her costs she asked for the dented one to try and sell on craigslist, but I'd rather it go to someone here on the forum. If it was up to me, I'd offer it as a "pay it forward" but I'm trying to be fair to my friend. It's a Black Dragon reproduction and is in otherwise great condition - the only damage is the small dimple in the front face on the right side. $150 + shipping, PM me if interested.


-
pretty big job for a pic-n-pull, but i could probably get it done depending on timing - pm me for details.
-
or you put the springs in back-to-front... now, how many times do i have to publicly admit to that one?? no worries - you'll forget all about it after the first sweet corner...
-
beautiful! lovely all around and looks to be well sorted - nice find!
-
We're meeting up agin on Saturday, 4/18 at 9:00 am, same place for an ACF (artery clogging feast) and car talk. Anyone interested, feel free to drop in - plenty of parking in the lot across the street from the diner.
-
I saw a bunch of pics of the green one - bodywork over the headlight buckets and square projector bulbs in the grill...
-
Ah yes... The unstoppable pack rat urge At least I'm not the only guy that spends spare evenings on Craigslist looking up z bits!
-
-
i've seen a few posts where folks have stuffed a piece of spring inside the hose that does the sharp bends to keep it from collapsing/pinching from the bend. you can usually find a good selection of springs at the hardware store. others will have more complete info on hose size, but i can't see why regular fuel line wouldn't be fine for the vents. i think the $$$$ kits are really about having concours-correct, cloth braided, OEM stuff in there, which is sure to make your z run better, boost power by 10% and score points with all the ladies...
-
a heat gun to soften up the dash cap would seem to make sense - maybe make a little tinfoil heat shield for the speedo face to avoid cracking or damaging the lens. i think if you get the cap edges softened up and manage to get over the initial lip/sharp edge you'll be home free. maybe get a sharp razor knife and very carefully scrape/trim down the outer edge/sharp lip of the cap to help you get up over it. another approach might be some thin metal sheet - they sell very thin brass sheet at my local ace hardware, i've used it for little craft projects for my kids. i'm curious as to your success - i've got a cap on mine and at some point may need to do the same...
-
euro style would be ideal - otherwise, one that i can grind down to get to the euro style appearance. anyone got one they'd like to part with?