rossiz
-
Posts
1,109 -
Joined
-
Last visited
-
Days Won
30
Content Type
Profiles
Knowledge Base
Zcar Wiki
Forums
Gallery
Events
Downloads
Store
Blogs
Collections
Classifieds
Everything posted by rossiz
-
when i re-upholstered my seats, i sprung another $50 for a pair of seat heaters. those two buttons are the "low-off-high" rocker switches for tush-toasters. very nice in the chilly weather! if you look closely, you'll also see next to the "fasten seat belts" light i drilled the little plastic blank-off plate and put in an input jack to play the iphone through the stereo. what you can't see, is the usb port wired into the ashtray
-
yikes! i wonder if it was a casualty to ethanol? in the motorcycle world we've been dealing with all kinds of material and adhesive failures due to adverse reactions with ethanol. fuel lines turning gooey and popping off fuel pumps (they are submerged in the tank) fuel tanks made of plastic (the same plastic used for decades for tanks) warping and deforming to the point where they no longer fit on the mounting hardware, fuel pump screens turning brittle and disintegrating...
-
aw shucks. funny thing is, my original plan was to buy a spare engine, rebuild it over time in my garage on a stand, then do a weekend swap. at this point though, i've done everything but the block while it's in the car! down the road i might prep a block with a set of big-bore flat tops and lightened rods, then swap it out with all the new stuff that's on my current engine. but that's down the road... i'm really loving what i've got right now, can't believe how much fun this thing is to drive! it makes a fantastic sound above 4K and pulls hard all the way up to 5,500K plus. i'm happy.
-
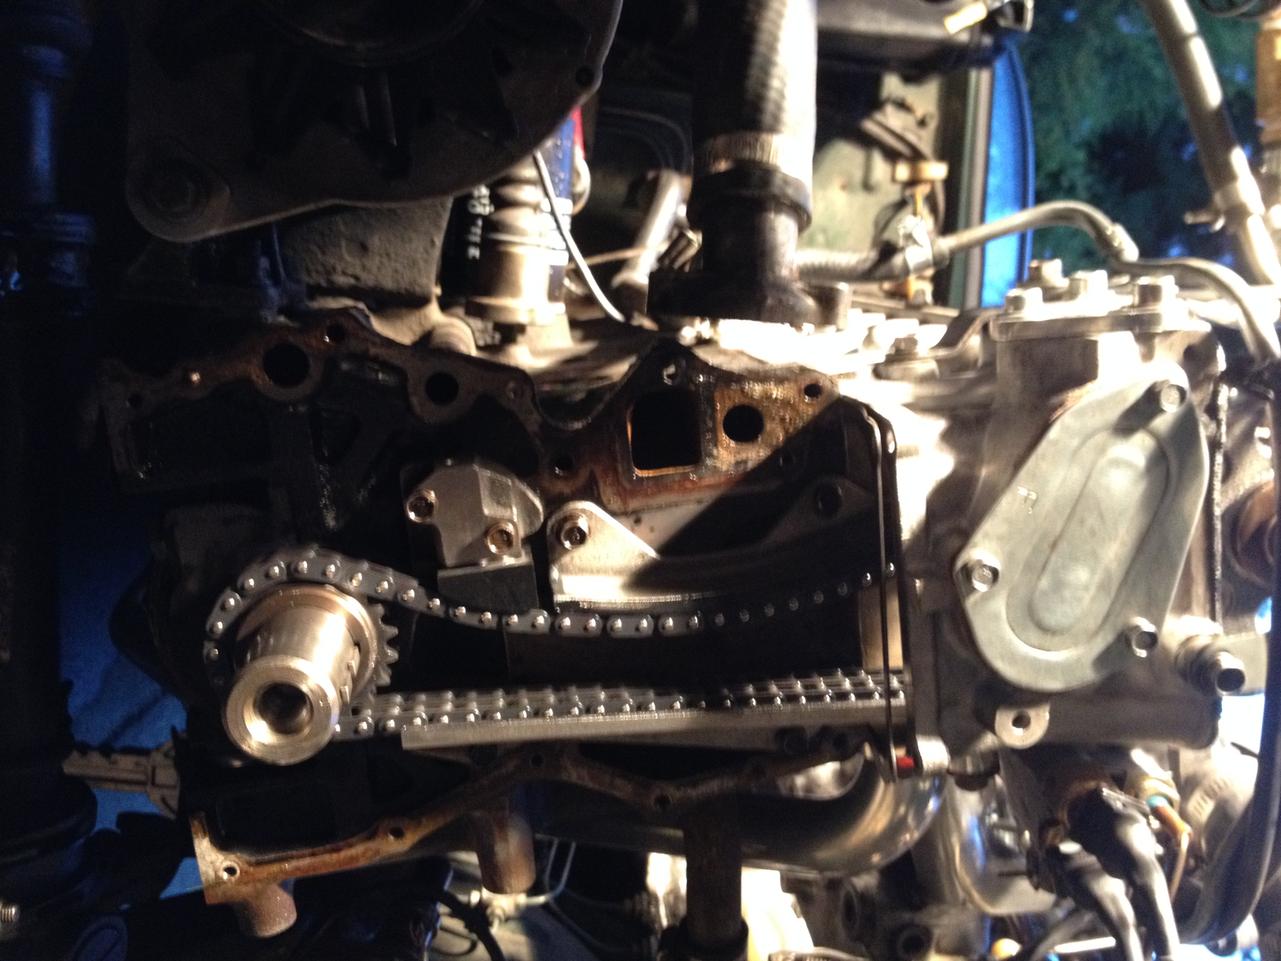
with the new chain guides, tensioner, chain & sprockets in place there is no slack - not horribly tight, just firm. i was able to lift the cam sprocket into place with no drama, then i adjusted the slack-side guide to get the top tangent with the chain, then installed the tensioner and it's basically right up against its housing - not jammed in, just set to provide full travel against the chain as things wear in.
-
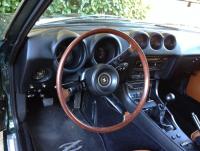
lots of nice work here, cool to see each persons recipe for the perfect wheel! i picked up a 240 wheel to put on my 280 and sanded it down with 100, then moved down gradually to 600 and finished with fine steel wool, then i wiped it clean and used lemon oil on it (furniture oil i had laying around, use it on my guitar fretboards) and then buffed it with a soft cloth. i did the spokes in some satin black epoxy spray paint i found at the auto parts store. even though the wheel isn't really wood, it took the oil nicely and behaved in a rather wood-like manner. the oil finish leaves a nice, smooth, mildly shiny appearance while maintaining a wood-like feel. i didn't want it to feel plastic or like a varnished or shellac finish and i didn't want to worry about chipping, lifting, yellowing or stripping for a future re-finish. what's also nice is that driving/handling it for the past several months has worn it smooth where my hands are - gives it a nice antique look. i didn't have a 240 horn pad and couldn't find one inexpensively, so i just made an aluminum adaptor plate for my 280 pad. works fine, and even though i'd like a 240 pad, i discovered that after a few weeks i don't notice it anymore... just another option - cheap and simple. kinda looks light in the pic, but it's a nice deep cherry color in real life
-
just the headliner - glue sticks to the foam headliner backing and foil faced sound mat. my pillars are not vinyl-wrapped, they are integral color plastic. (1978)
-
looking great - love watching the progress. btw - i also bought the headliner kit from msa but used their spray glue. it seems to be holding up just fine for me. i put sound mat on the ceiling and used pretty much the whole can. the only issue i ran into was my lack of experience doing a headliner (it's tricky and in a cramped car working upside down i made a couple of mistakes) maybe i'll be re-doing it in a few years if the glue doesn't hold, but it's been almost a year, through a winter and a hot summer and so far so good...
-

Question about Air & Seal emergency flat repair
rossiz replied to peng155's topic in Wheels & Brakes
here's one example of the little compressor - it's shorter and more expensive than the one i have, but you get the idea... Engine Powered Air Pump for Motorcycles - 5 ft Hose with Quick-Release Lever - Stop & Go International Inc Store plugger kits are cheap - be sure to get one with a "T" handle for ease of use. -
Question about Air & Seal emergency flat repair
rossiz replied to peng155's topic in Wheels & Brakes
i keep a plugger kit on hand - way better than a can of goop, and it doesn't make a mess of your rim, etc. and throw your tire out of balance. folks may tell you different, but i've run tires with plugs in them for thousands of miles with no problem - for the right puncture, it's a perfectly structural patch. of course it won't help for a big sidewall cut, but in 30+ years of driving i've never had one of those (better knock on my woodgrain steering wheel!) i have a little compressor that screws into a spark plug hole and uses the engine compression to move a tiny piston back and forth filling your tire with fresh air. i've used these for years on my motorcycle - will fill a rear tire in a couple of minutes from dead flat. $15 item - just be sure to get a long enough hose to reach the left rear! -
hmm... i didn't find that issue when i installed a set of stagg struts with eibach lowering springs in my '78 - the length was fine. are you sure they are the right parts?
-
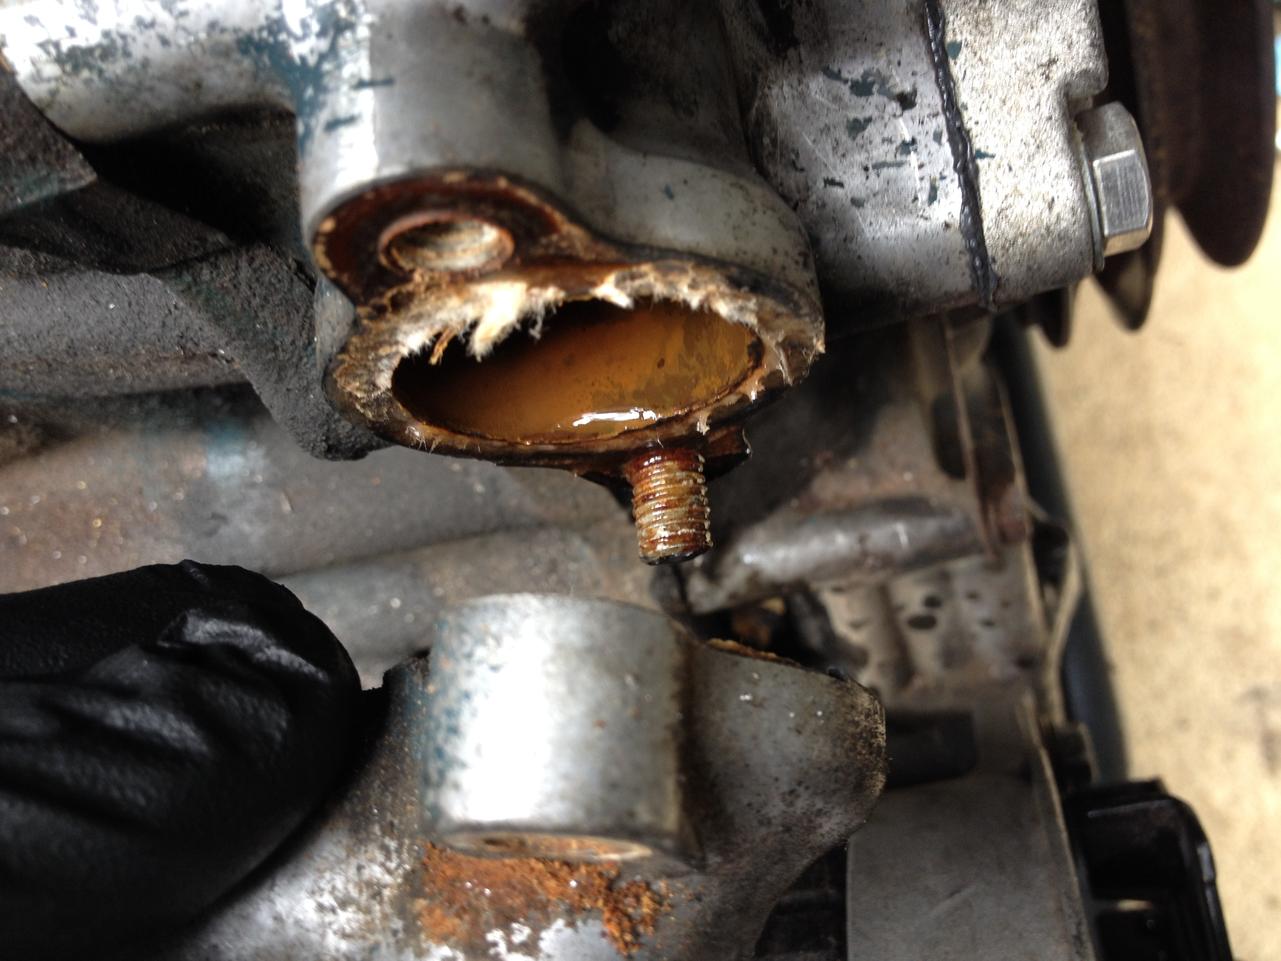
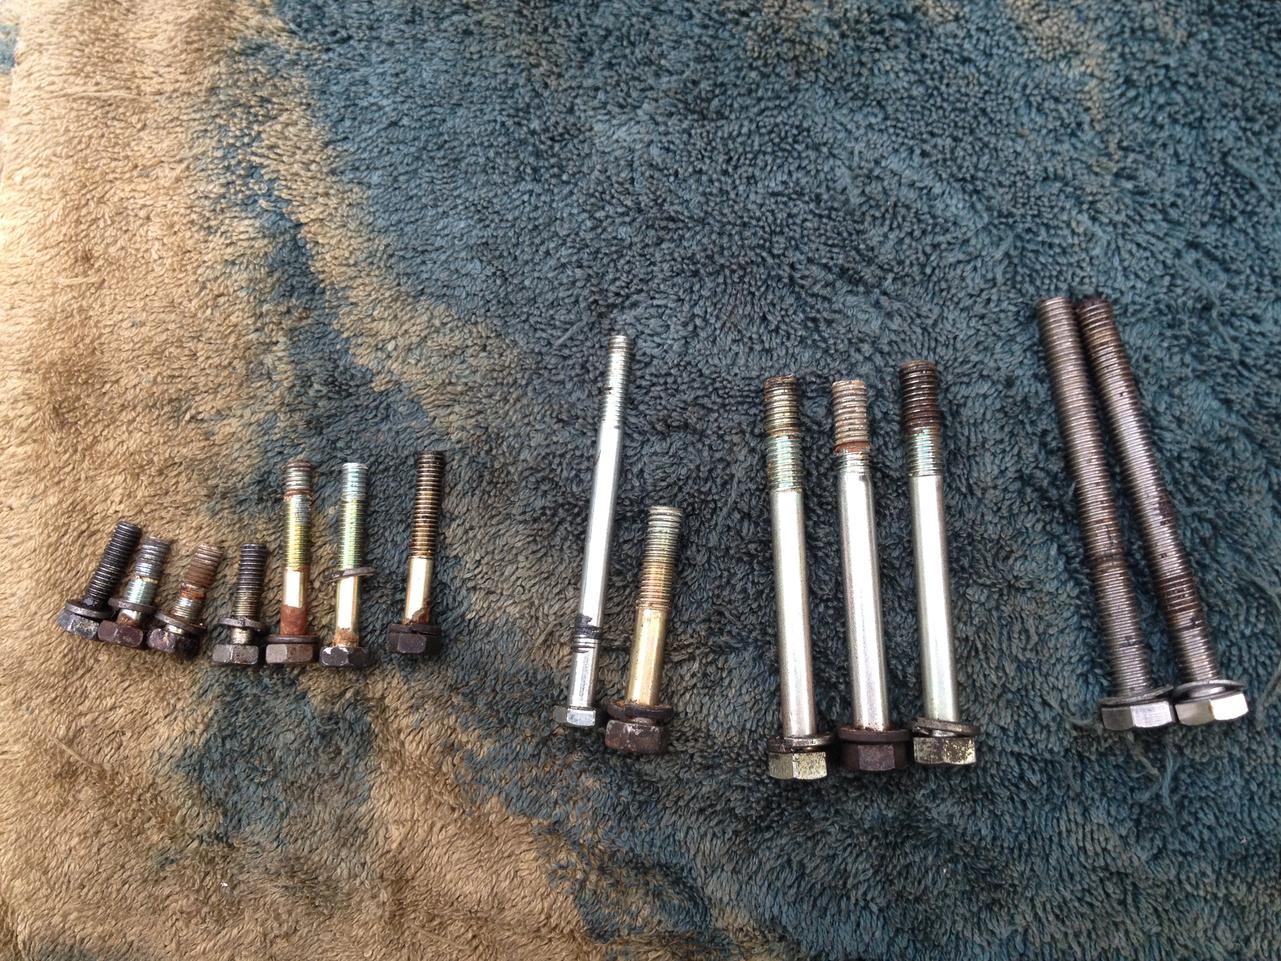
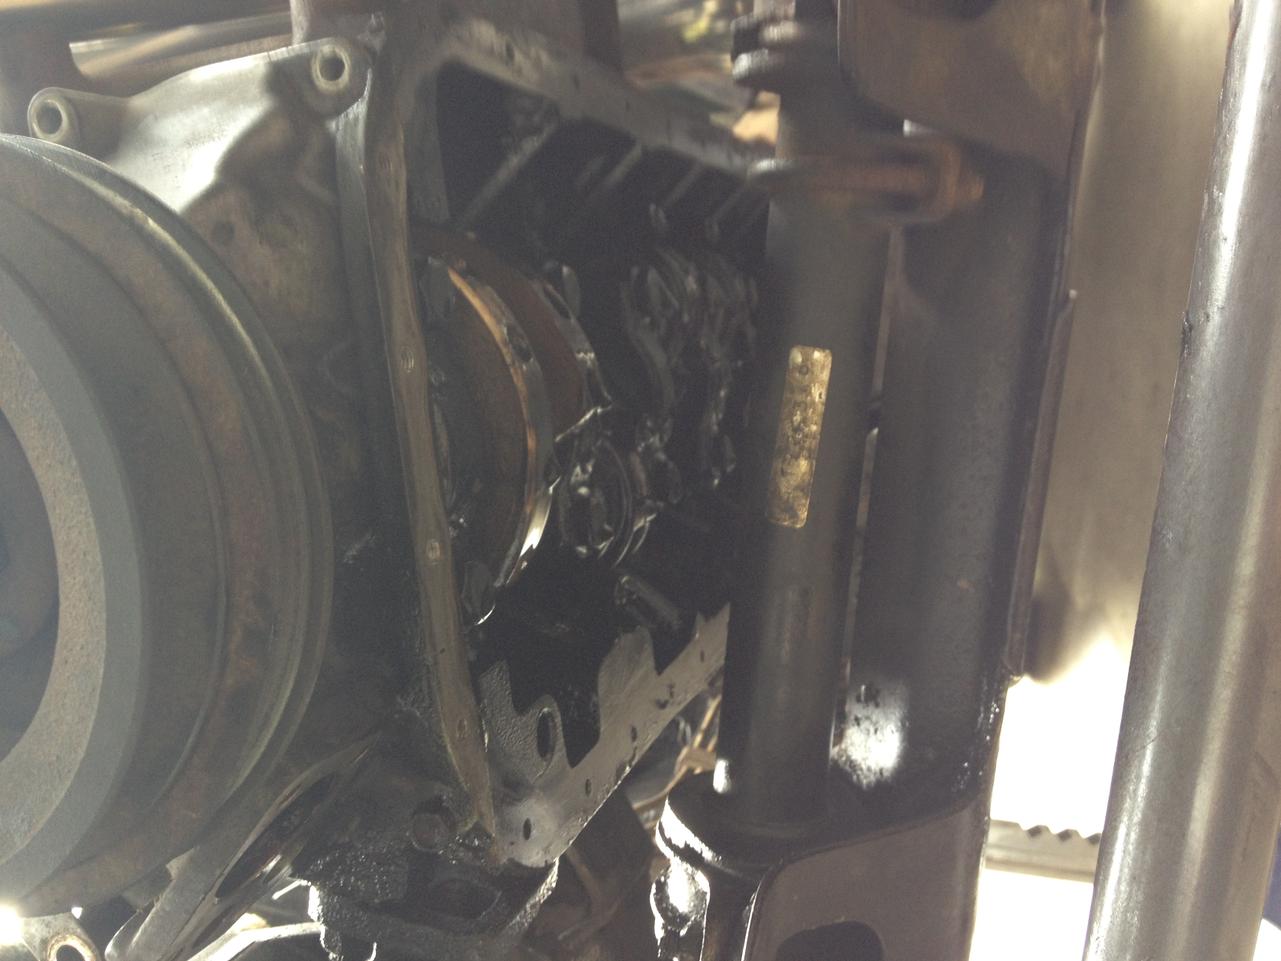
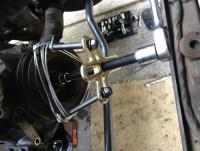
thanks for the kind words - always fun to give back a little, especially with all the help this forum has given me. no special tools - i took off the oil pan first, then simply wedged a block of wood between the crank and the side of the block and used an 18" breaker bar to loosen the pulley bolt. it gave in pretty easily, no drama. getting the pully off was a pain, primarily because the two threaded holes for the puller were filled with crud and i couldn't get them clean enough to get the puller bolts in, so i made a Rube Goldberg by putting nuts and large washers on 3 bolts and wrapping the whole mess in bailing wire to grab the outside of the pulley (i guess it would properly be called the "pullee" in this case). fortunately it wasn't suck on too bad and came off with little fuss. HA!! drama for sure. i had already broken one of the long bolts when replacing the water pump and had drilled & re-tapped it all the way through the timing cover a while back (i left the water pump on the timing cover for this whole exercise - why create a leak, eh?) and fortunately none of the other long bolts broke. i did replace them all and chased all the threads clean with a tap. the heater hose connector bolt to the timing cover broke and had to be drilled out, i replaced both of those with some leftover manifold studs i had laying around.
-
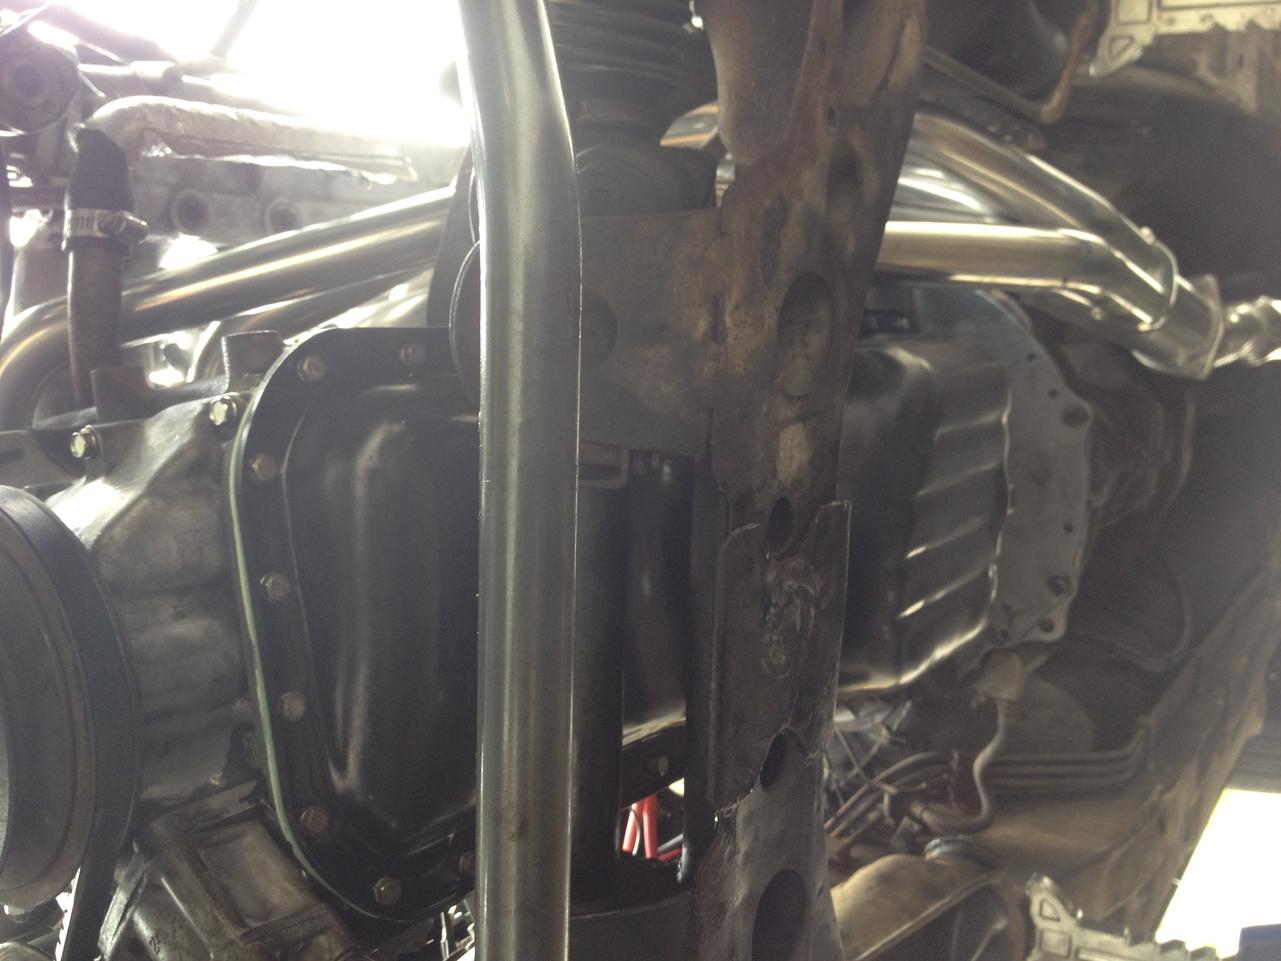
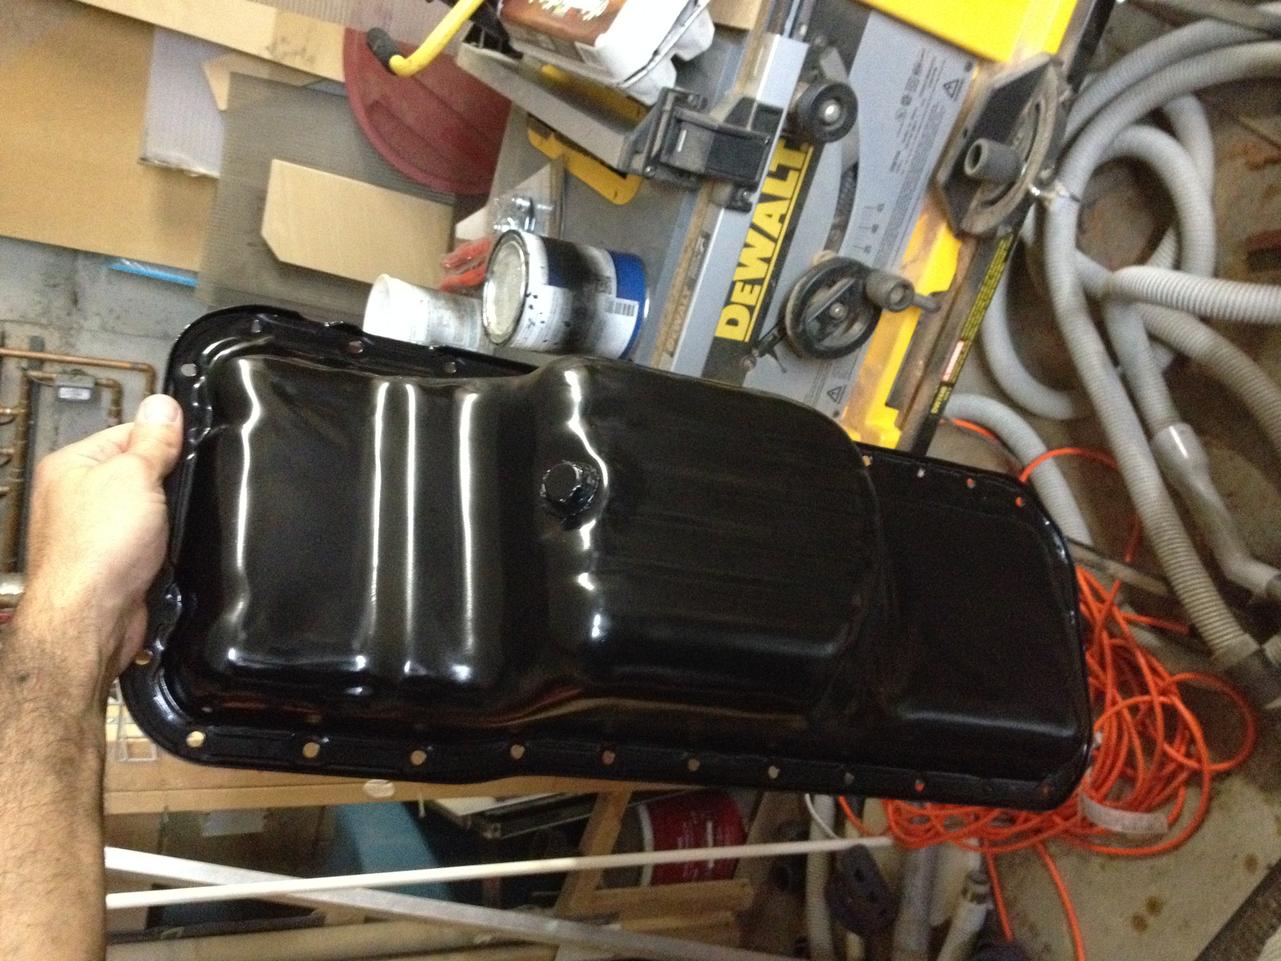
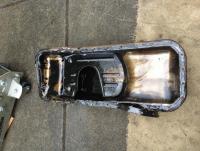
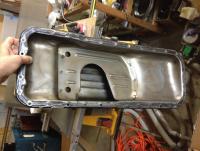
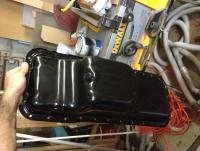
the pan wiggled out quite easily, went back in with no drama. i bought the gasket from msa - they had two versions, i bought the more expensive one which they told me is a bit thicker... it's a green gasket material - neither cork nor rubber, installed with no sealant. seems to work just fine (no leaks yet!)
-
yes cap'n, i believe you are right - it was out of the housing and at an angle, i'm guessing the "click" was when the head sheared off the plunger and the pieces fell down into the bottom. the two things that blow my mind are that the pieces never made any trouble with all the other moving parts in the immediate vicinity, and that the engine ran for 600+ miles with no tensioner whatsoever without skipping a tooth. i'll call it a great deal of luck!! the other side benefit from this whole exercise is that i've now rebuilt most of the engine - all that's left is the block
-
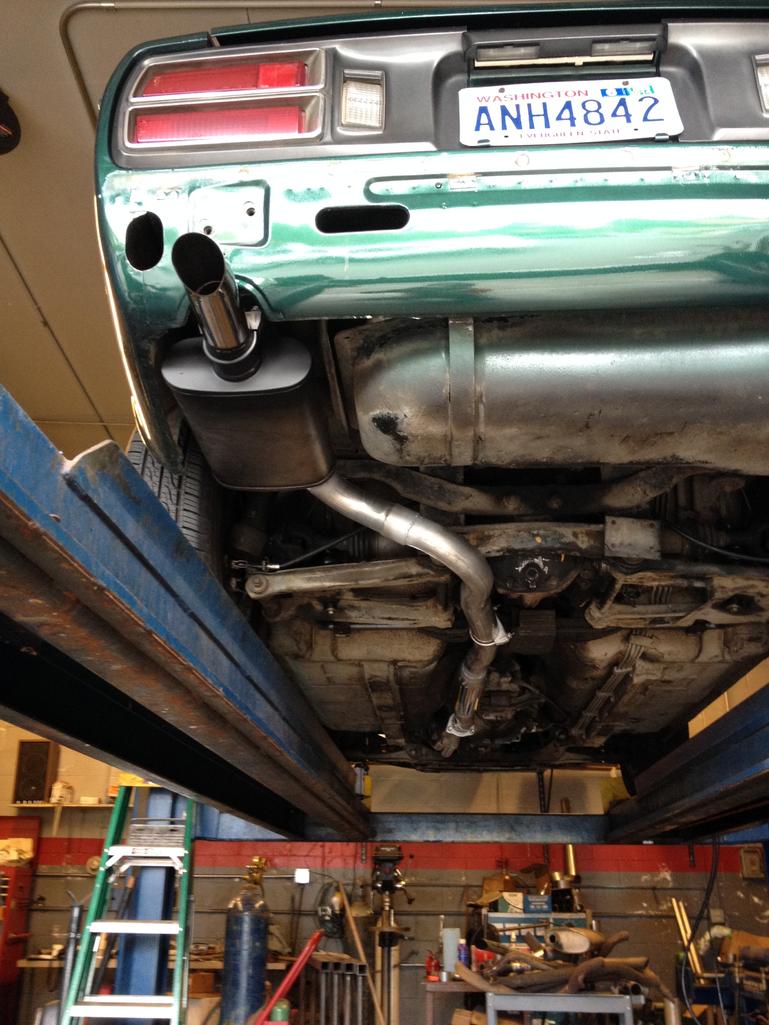
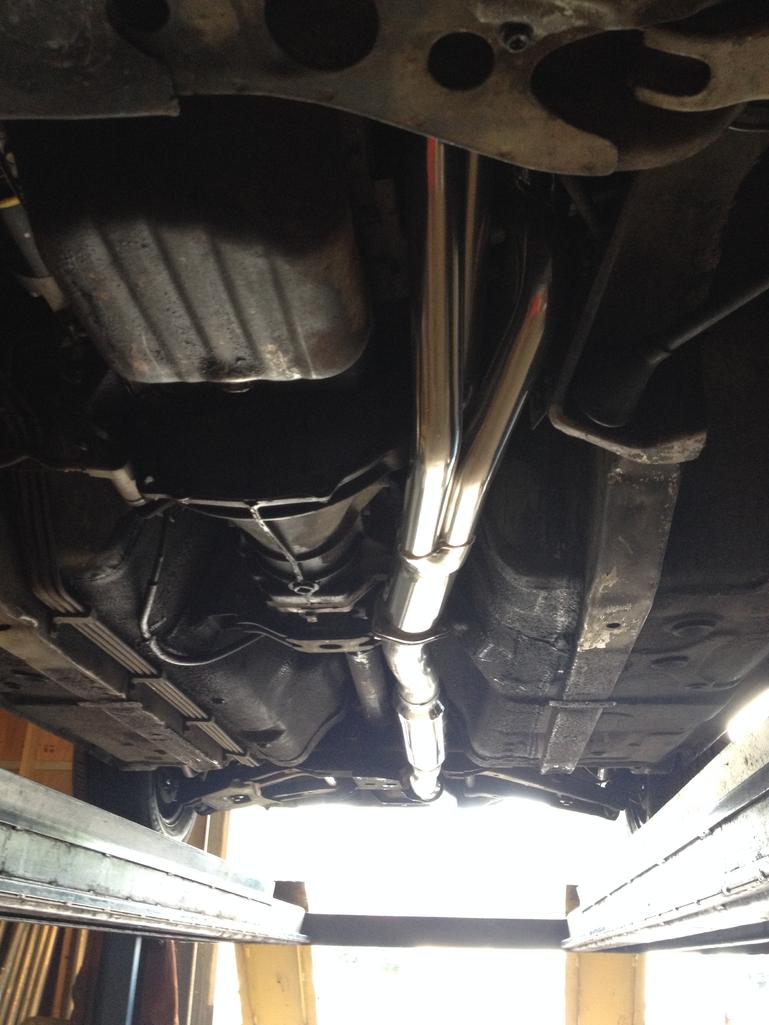
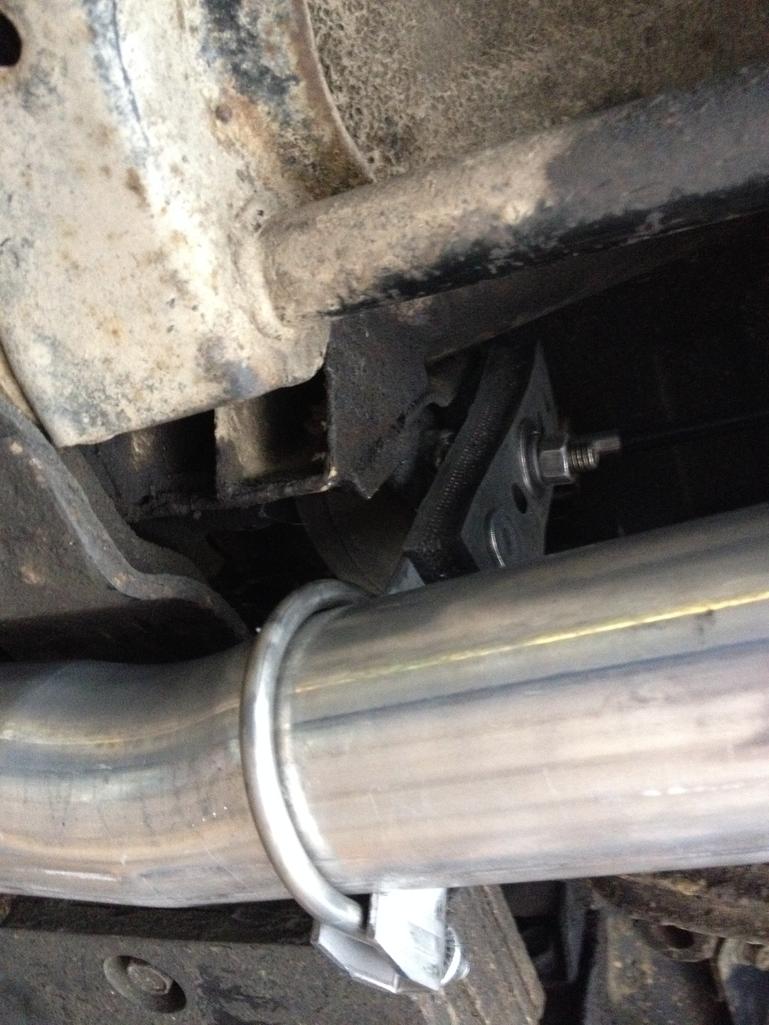
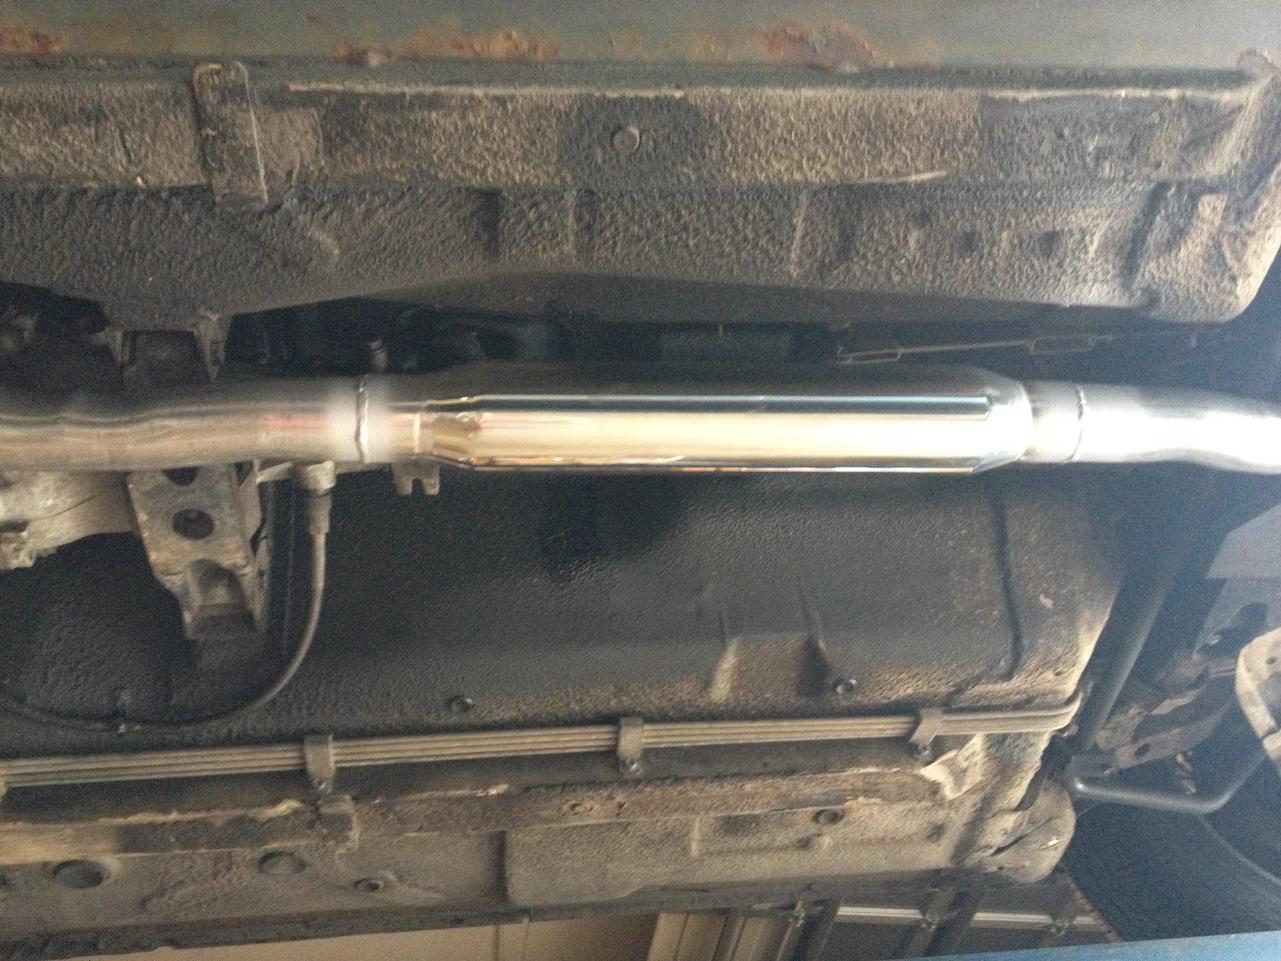
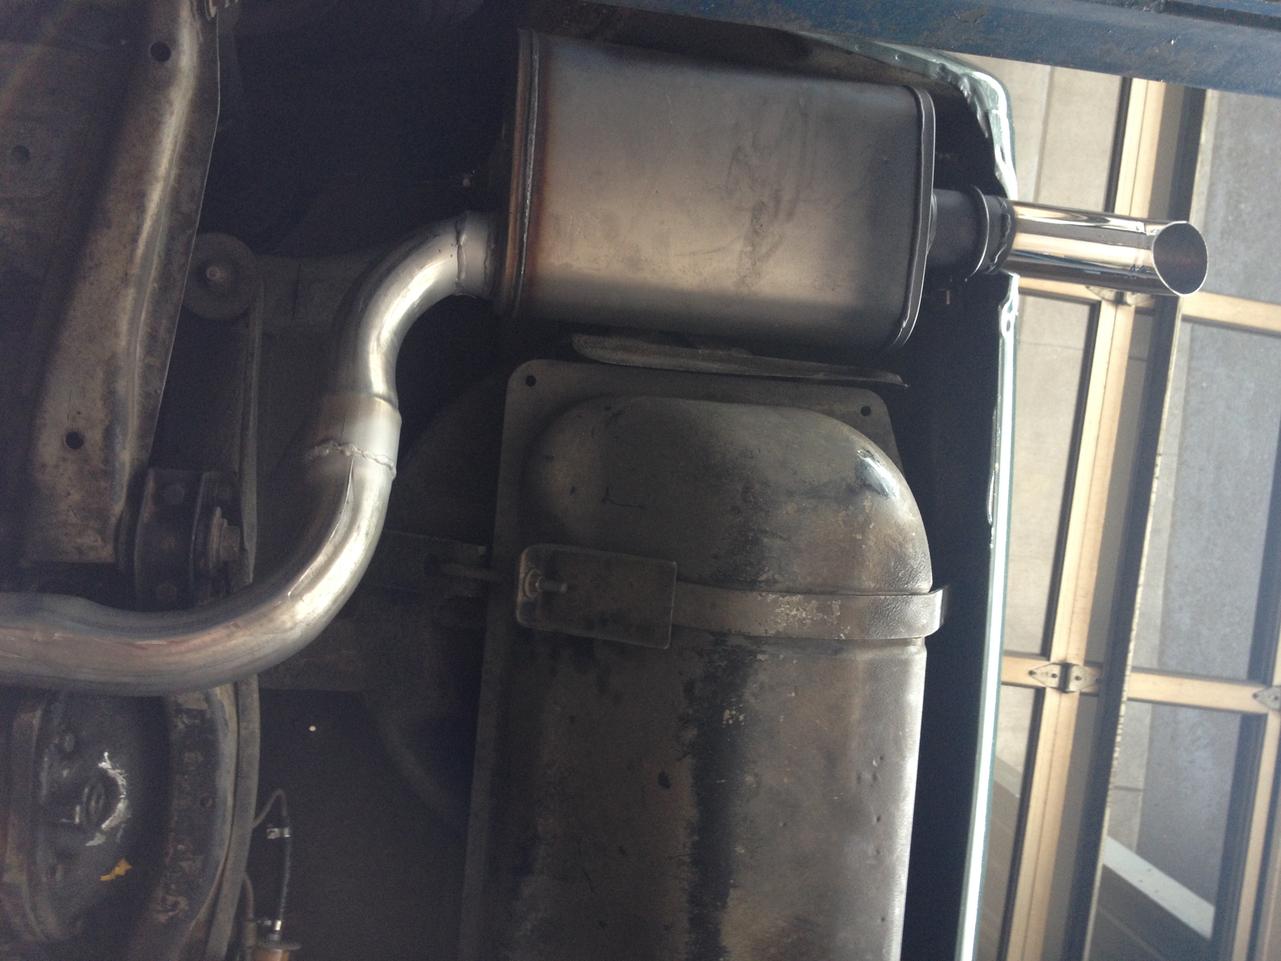
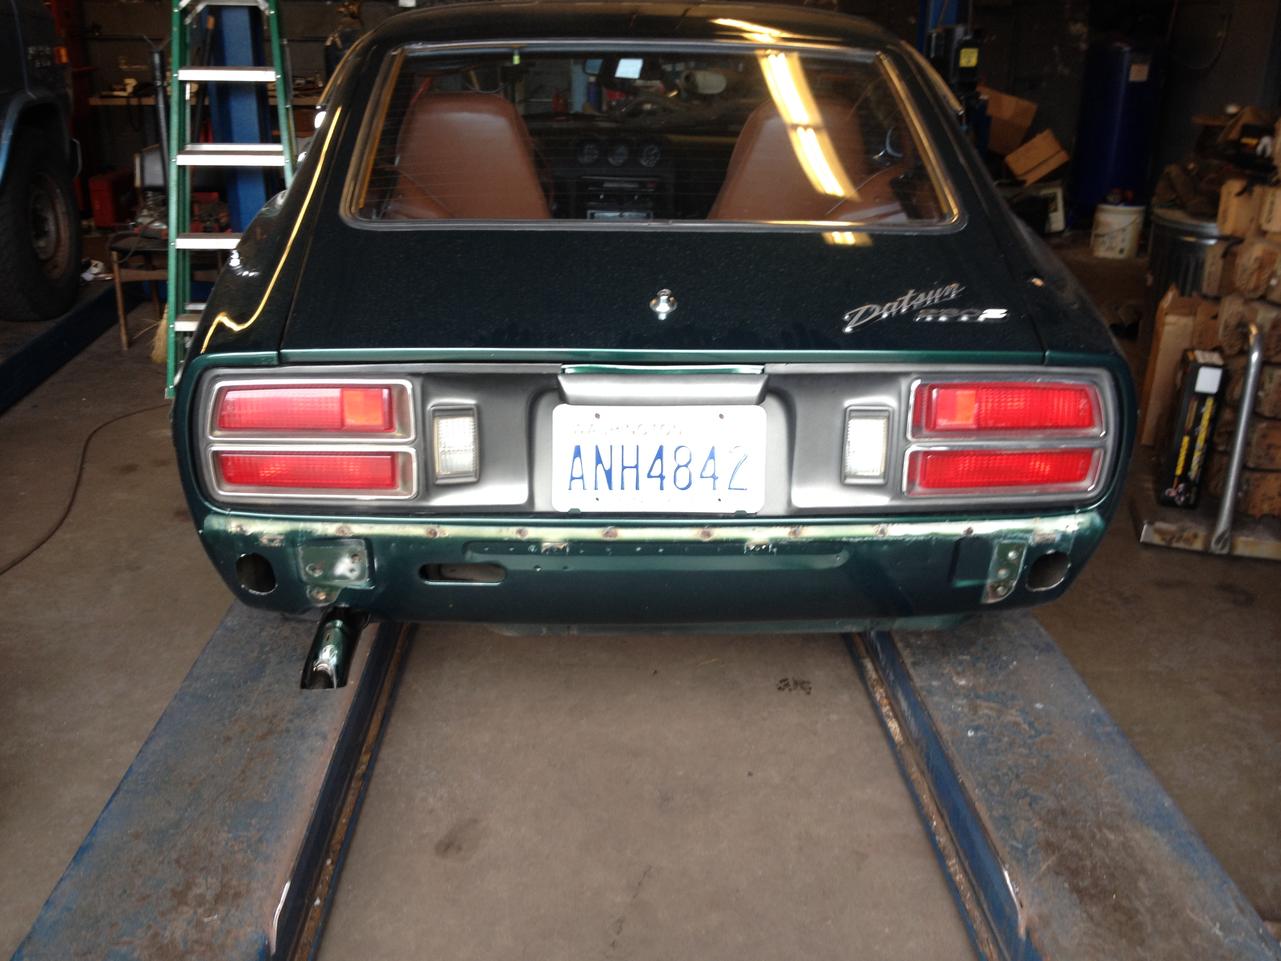
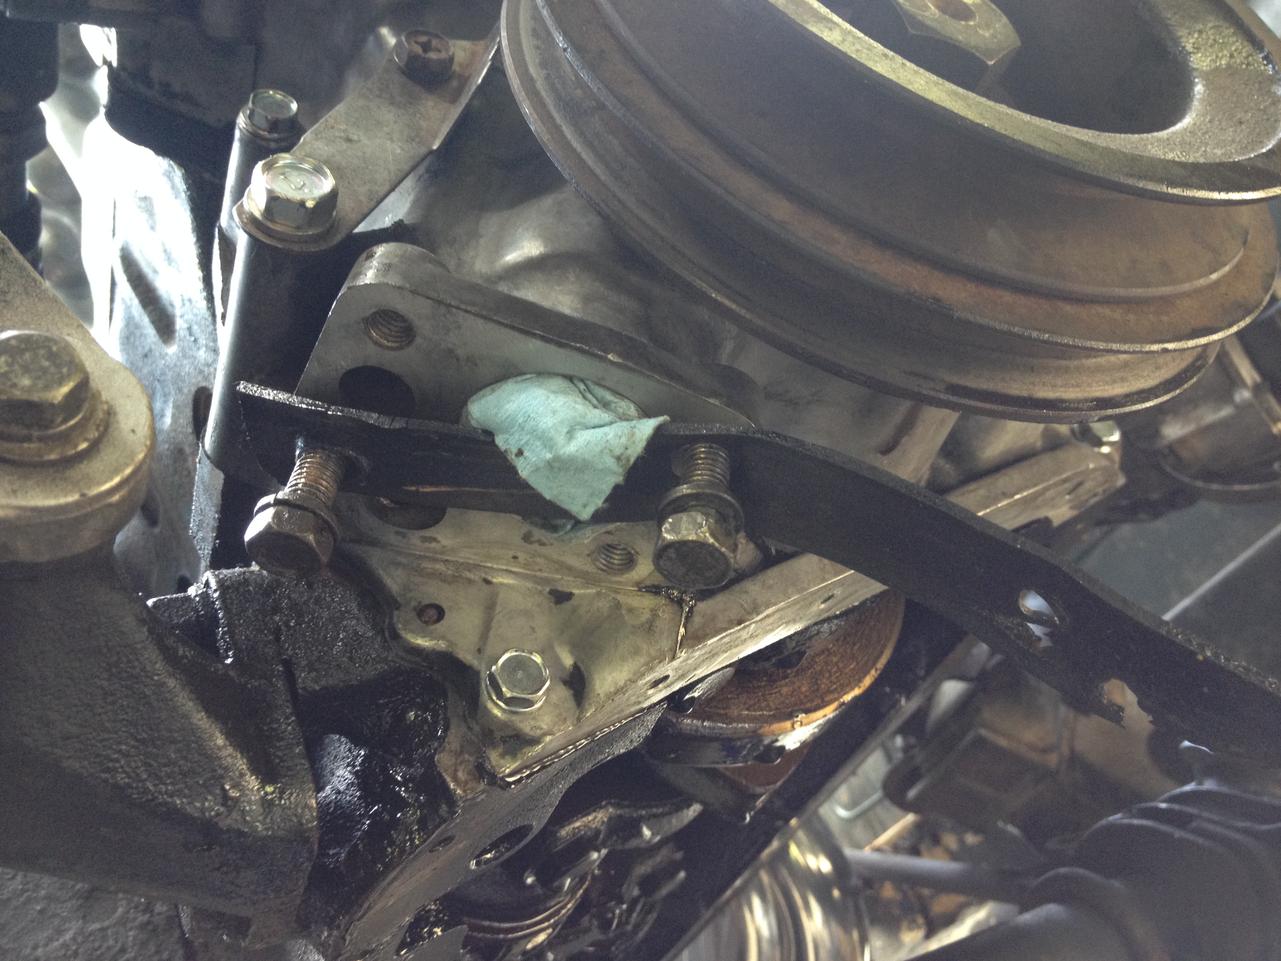
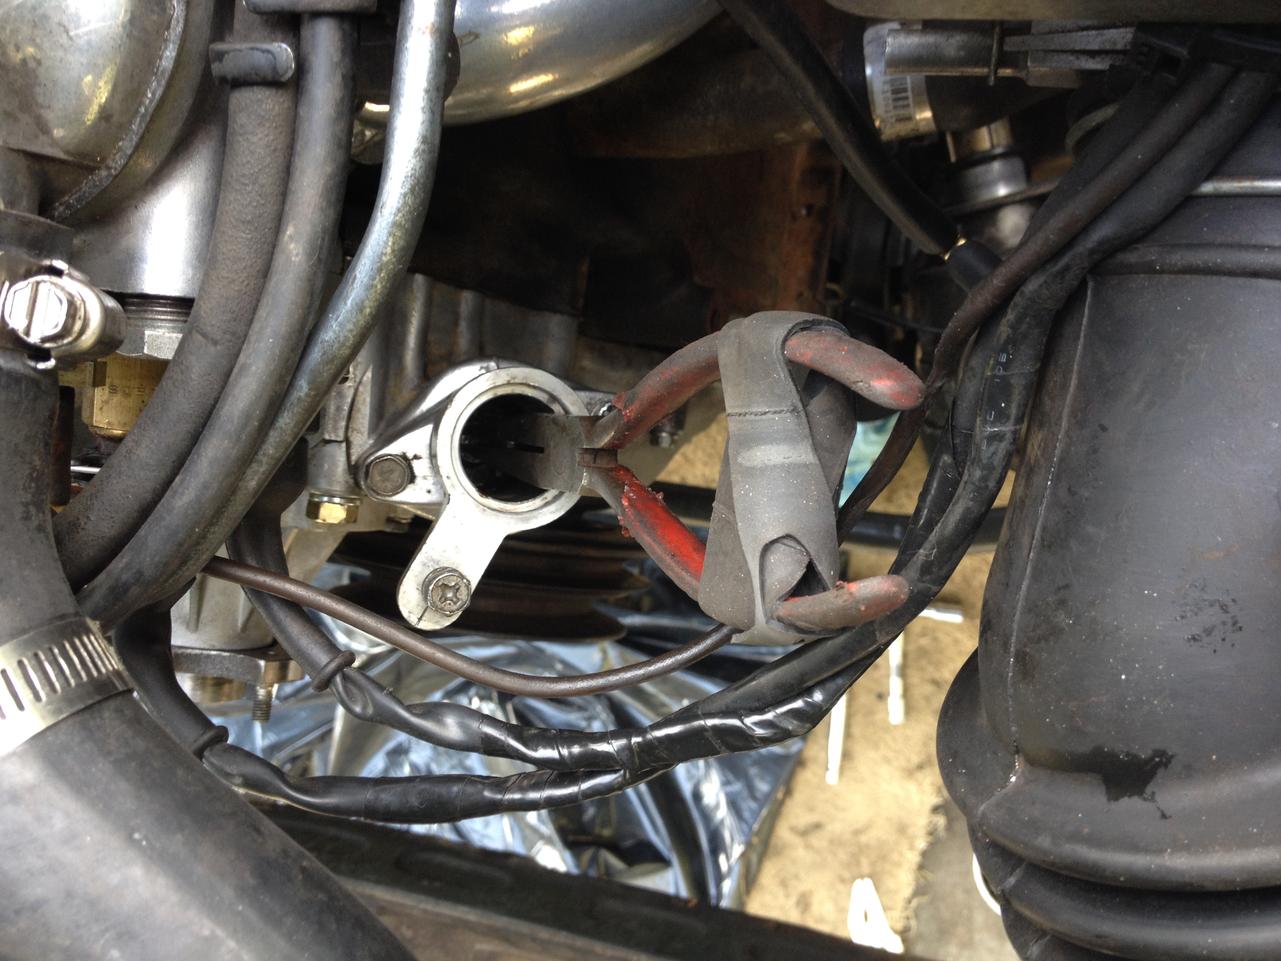
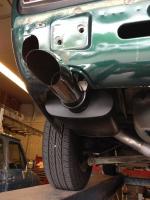
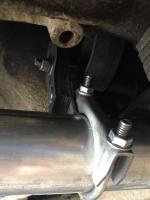
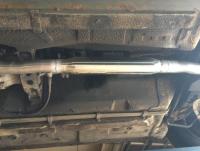
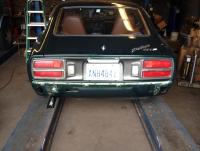
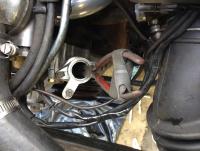
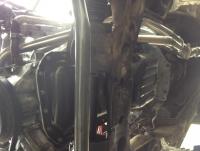
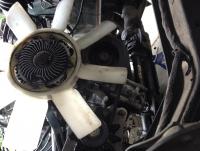
there are dozens of exhaust posts out there, but i couldn't resist adding to the mix... just finished rebuilding a good portion of my motor (n42 head, shaved intake, new injectors, etc. new cam chain/sprockets) and put on an msa 6-2-1 header. after reading up on other peoples experience i decided to have a local shop build a 2 1/2" system for me. we put her up on the lift and mapped out the routing - these cars are sooooo simple, just one run back and a couple of bends - but it's the little details that make or break it for me. went with alumanized steel piping to an 18" sst ansa resonator in the tunnel and a nice compact can at the back and a polished sst tip with a turndown and a bit of extension to get the fumes out of the vortex. he welded a flare right up to the header adapter flange so we have a nice seal there. the only tricky part was getting a hanger support behind the resonator - didn't want to drill into or weld onto the body. so we came up with a slightly unorthodox approach and welded a stud onto the head of the bolt that holds the diff strap and used that as a hanger support. a little goofy, but it's sturdy and doesn't affect the ability to remove/replace the strap since he was careful and didn't weld past the flats of the bolt head. the engine breathes so nicely now, and the sound is really intoxicating - makes me want to do bad things, even on a grocery run... the sound is low and throaty at idle, almost sbc-ish, but it picks up an awesome growl and really sings out above 4K but it's mellow off the gas so it's still pleasant to drive around as my dd. overall very happy and would highly recommend this approach. the whole thing was just over $400 and i learned a lot listening to his experience and it was fun to be able to lay out every bend for clearances and a perfect fit. i will try and get a decent video recording (need a second person) and will post for those who care to listen. view from header back resonator in the tunnel looking back towards header hanger attachment muffler view from rear tailpipe extension on the ground


-
yeah, mine engages right off the floor, which sorta feels a little weird (i'm used to more clicks too) but thats just what i've got. i think mine doesn't rattle because i have new carpet with thick rubber backing and heavy felt behind it, as well as a new leather boot cover, all of which keep the lever insulated from moving around. maybe when things settle in a bit i'll be looking for a spring fix...
-
with the key on you can pull the plug off the oil pressure sender (down low on the block, passenger side) and the pump should run - at least it should get power... as a safety feature the fuel pump is wired to shut off if there's no oil pressure, in case of an accident where the engine is shut off and a line is ruptured. there's also a fuel pump relay to check - some of the other electrical gurus will have more specifics on these, but you should be able to hear the pump running which should help you test for the bad connection. while you're at it, might want to replace the fuel filter up front - if the tank was dirty/rusty there's a good chance that filter is toast.
-
little ones are fine - you're just going to go around wire (about coat hanger gauge) in a couple of places. it's pretty basic, and hog rings by nature are self-adjusting in that they will clamp to the diameter needed. i would recommend getting a pair of hog-ring pliers - makes the job a joy as they hold the ring before applying and do a nice, consistent job of closing them. you can do it with regular pliers but it's a PITA and you risk a mis-fire and holes in your nice new seat cover....
-
per sage direction from others on this site, i keep a set of christmas lights with the ends cut, stripped & twisted for easy insertion into the injector plugs - they work great as a little test light to check for pulses.
-
neat idea - i can see how that would work well. my z came with a broken e-brake cable (the PO kept a rock in the footwell to chock the wheels when he stopped) so i replaced it with a new one there is really very little play in the cable - the system just naturally holds the lever down, without any drag on the rear brakes (wheels spin freely w/no noise when jacked up). i wonder if your issue is due to cable stretch? there's an adjuster in the tunnel to pull slack out of the cable, maybe this would stop the problem before the cable is too stretched out?
-
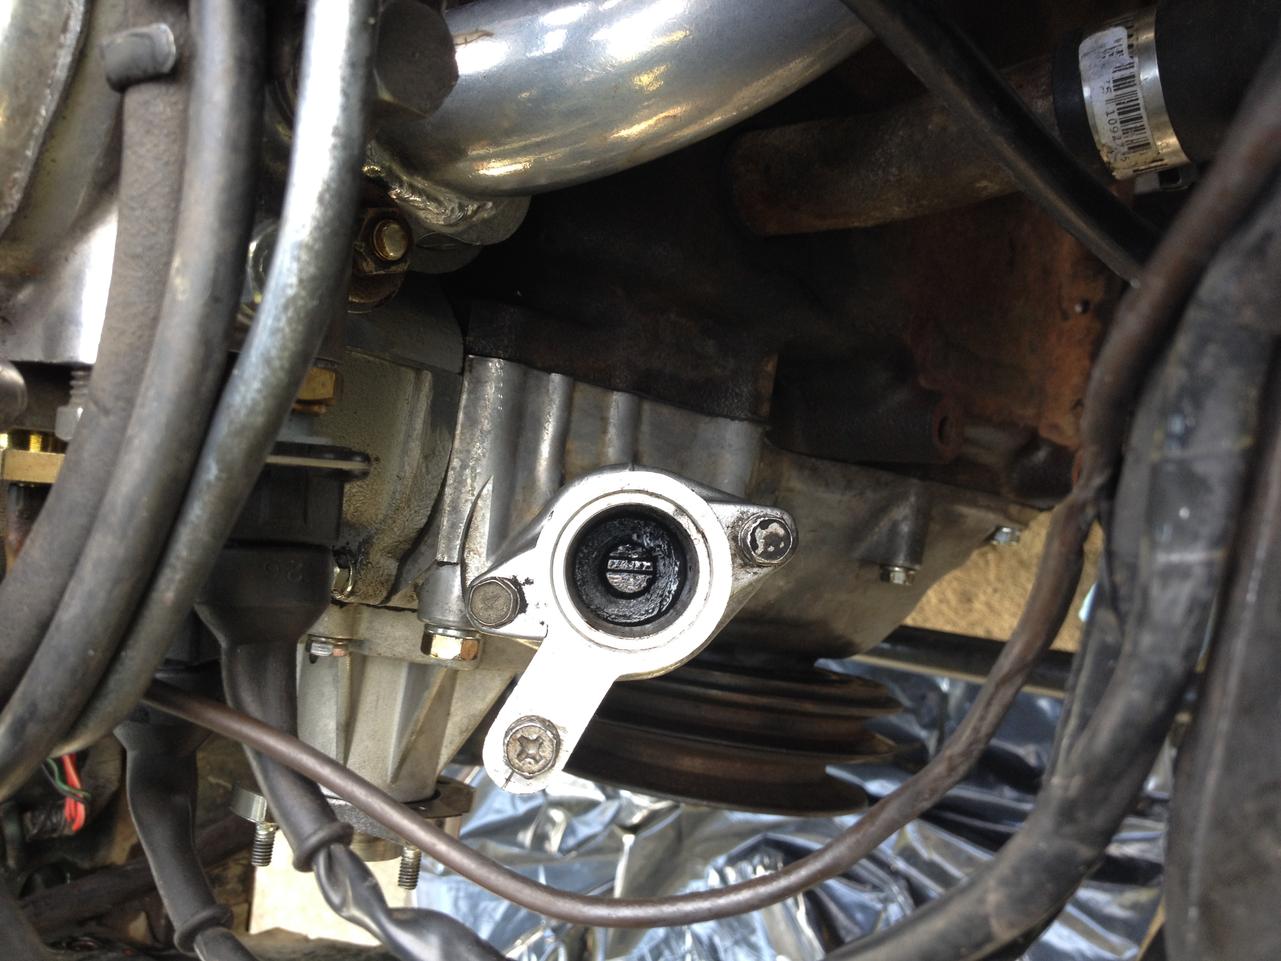
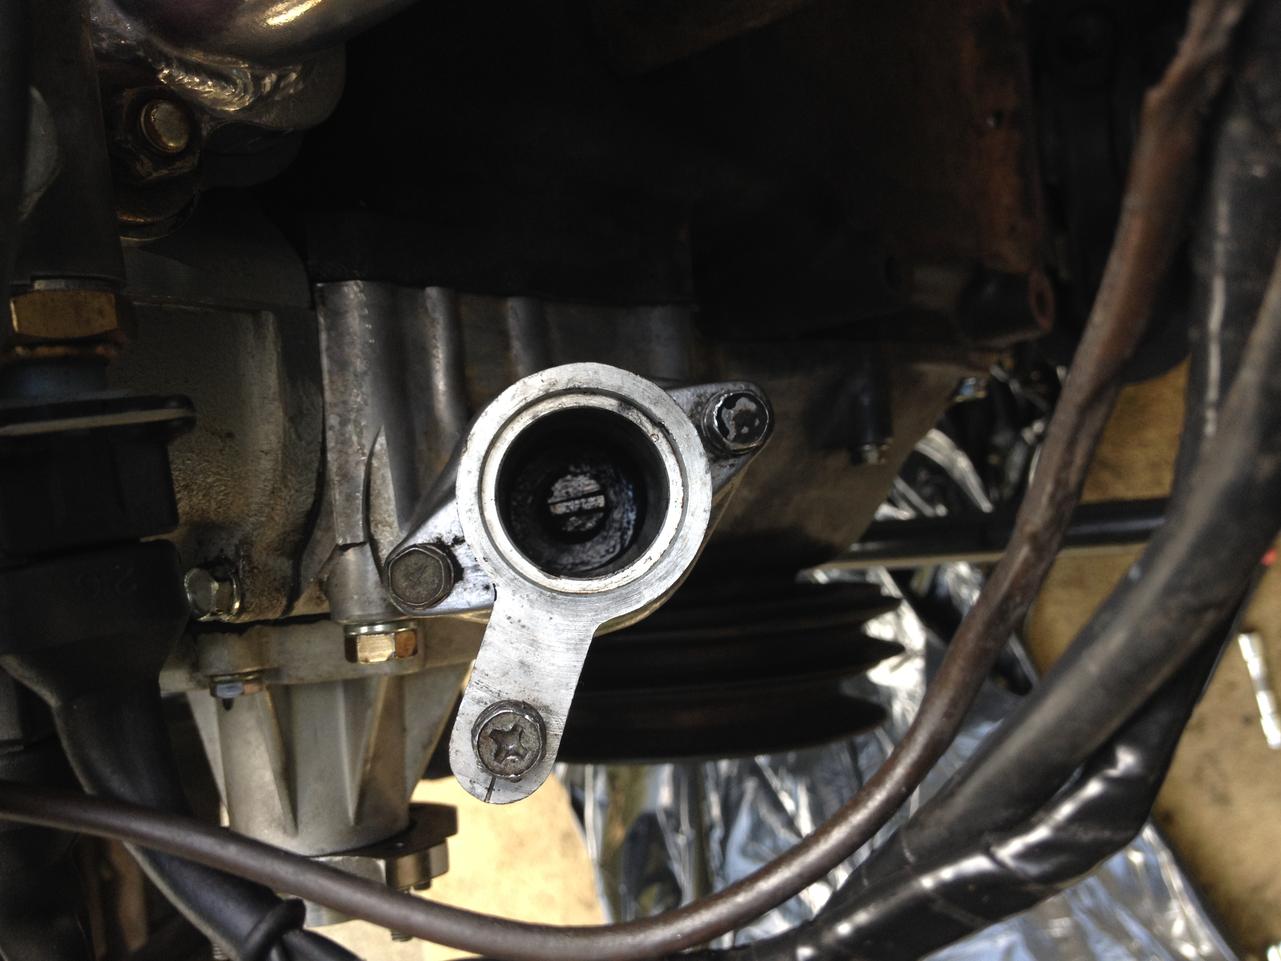
@ Diseazd: first thing i did was to set tdc comp before taking anything apart. timing mark on pulley pinned to 0 degrees, cam lobes off the rockers, kept it there the whole time. so when i took out the pump it was already set to receive the dizzy shaft tang correctly. just slid it right back in after timing the shaft - piece of cake. so i got her back together, all buttoned up, filled w/fluids, checked that everything was put back together and torqued up. fired her up and am quite pleased with the results. i'm guessing the old cam chain was stretched, because there's a huge difference in the way she runs & revs. up at around 4,500 she just sings and pulls like crazy. even sounds different, more growly than before. took her out for a test spin and wow, very nice - responsive and i must admit the sound of the motor led me down a rather childish path - all done on a closed course... :laugh:
-
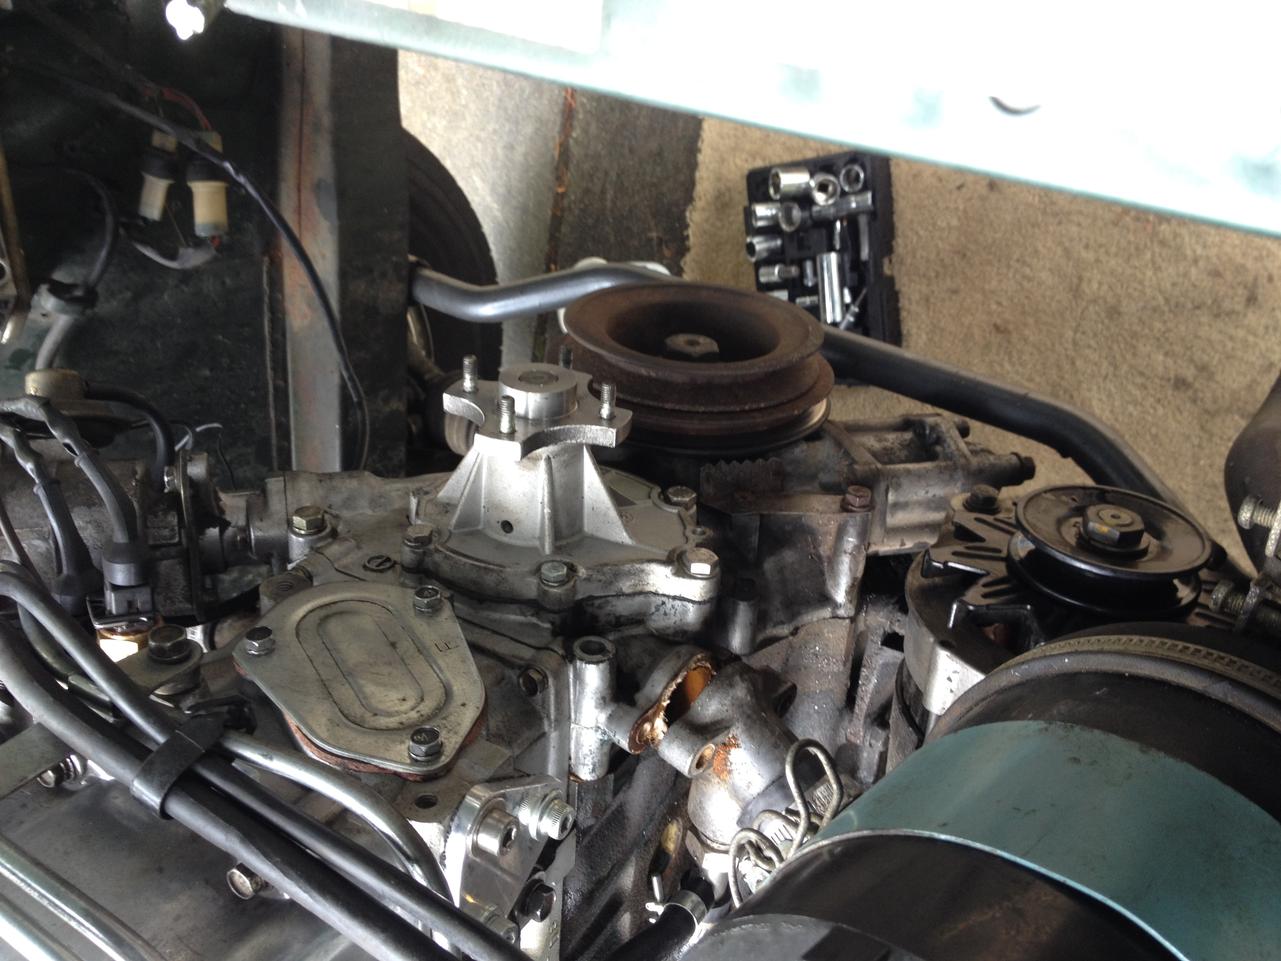
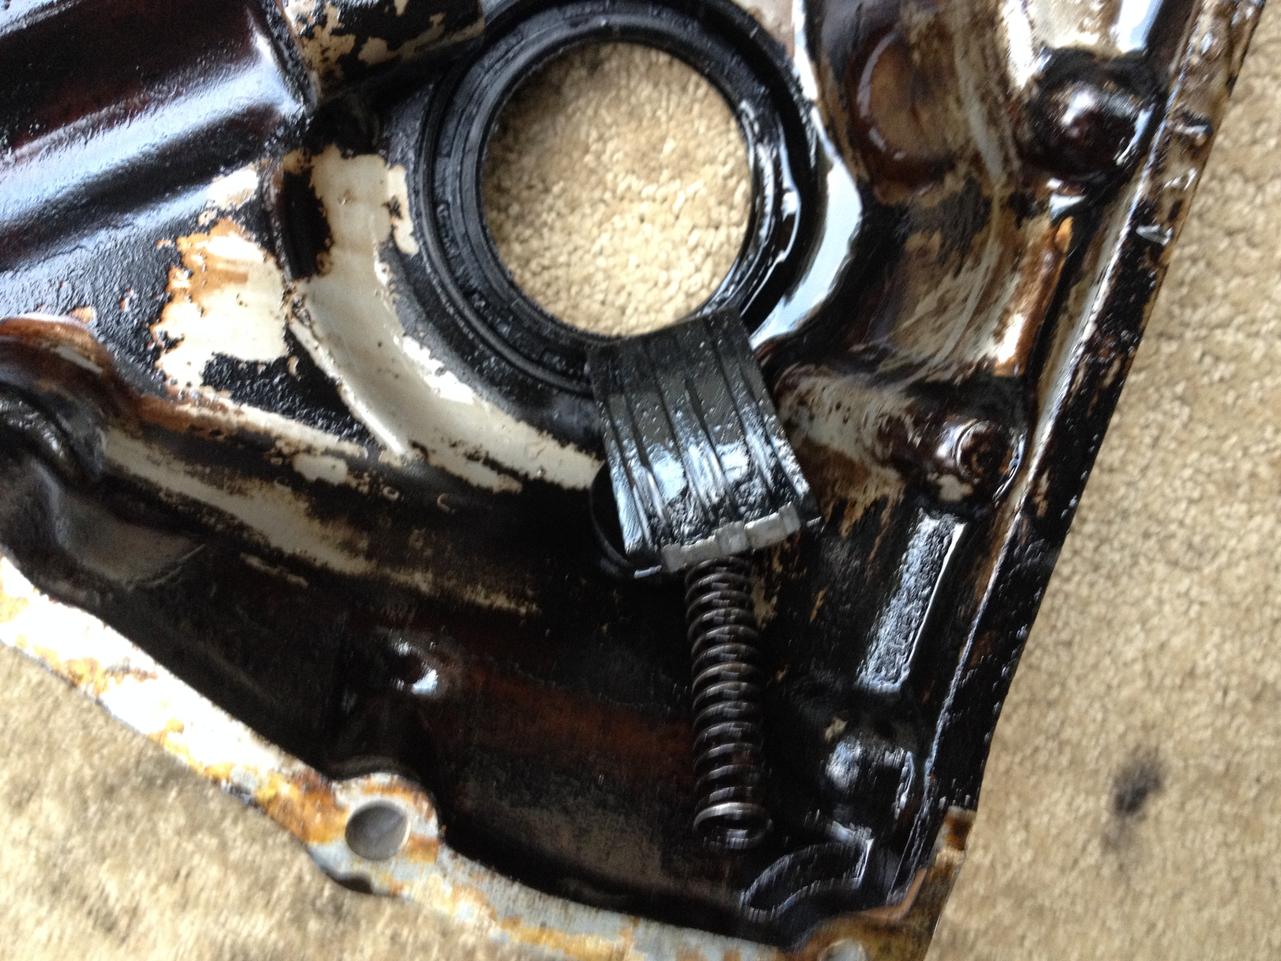
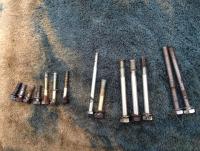
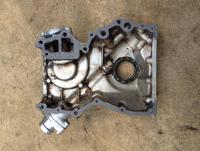
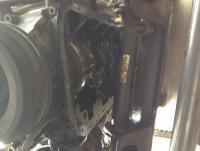
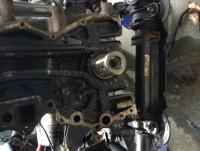
today i hope to get it all finished - will post the results broken bolt... lovely old bolts vs. new set cover all cleaned up, new seal & gaskets new parts installed holding dizzy shaft in place holding paddle from up top paddle 180 degrees out - it's offset so it makes a difference... refreshed pan in place front buttoned up


-
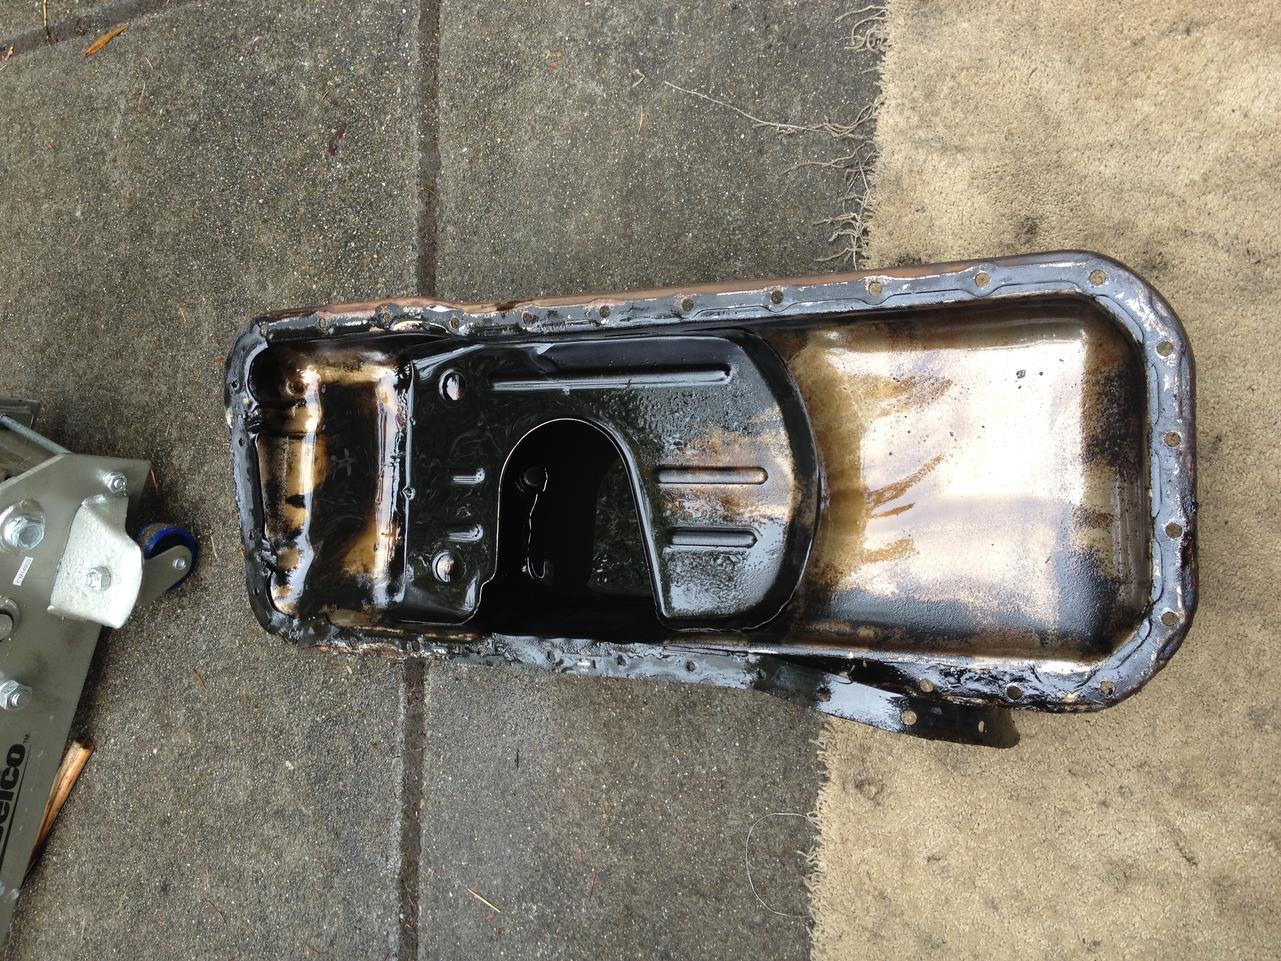
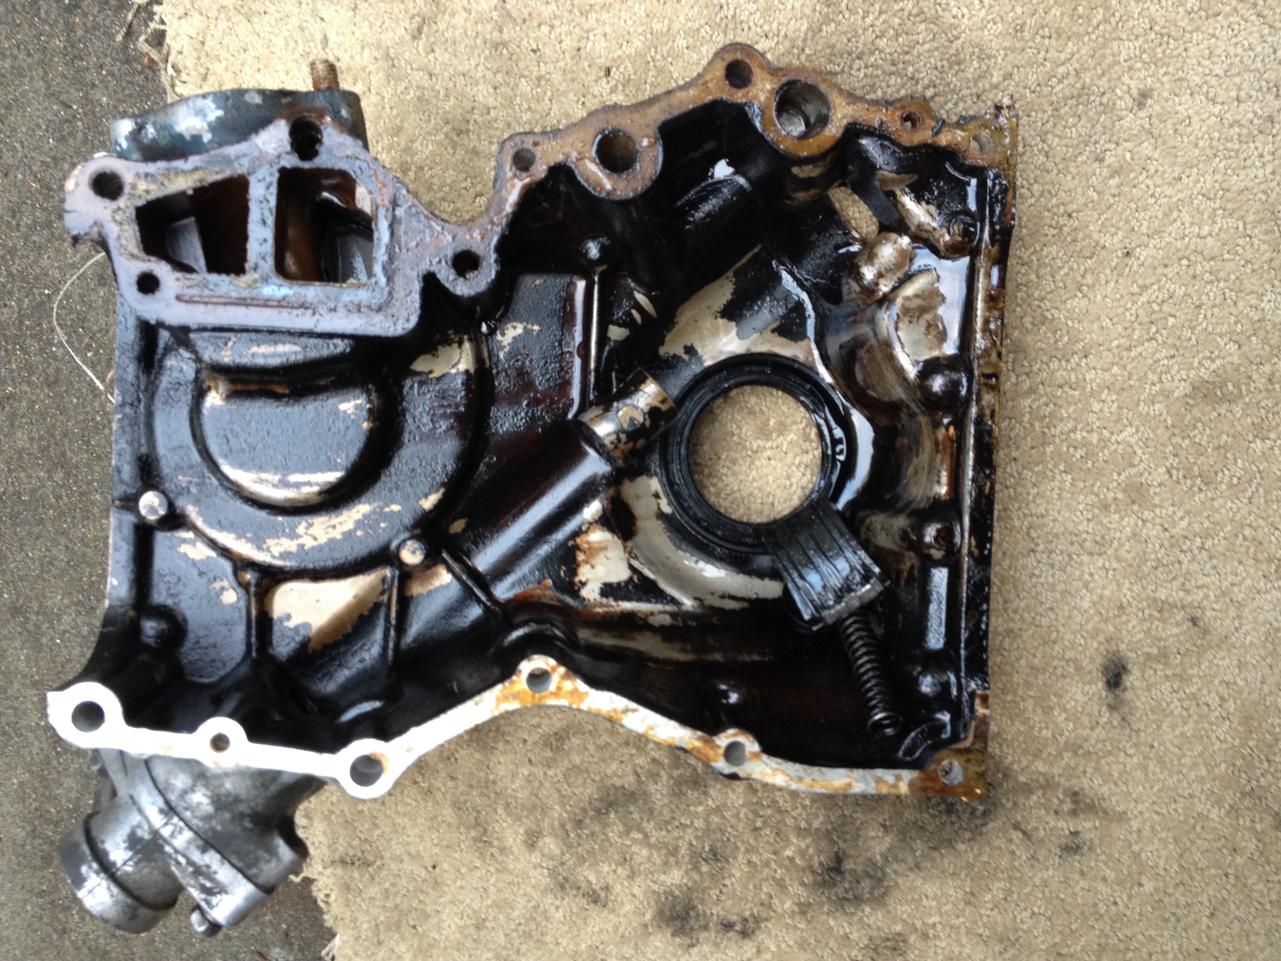
finally got started and making good progress - thanks all for the kind words and encouragement. ordered a timing kit from msa (chain, sprockets, tensioner, chain guides, front seal) for the very reasonable price of $135 and sprung another $19 for a new bolt kit. all parts arrived quickly and i set to work saturday morning. as posted by others, this job really isn't that bad - there's nothing really complicated or difficult, just a pretty basic disassembly/reassembly. i think i've spent about as much time restoring and cleaning things up as the actual work. of course i had a broken bolt (doesn't even phase me anymore) and a stubborn part or two, but nothing to really worry about. i pulled the oil pan first, but neither the chain tensioner nor any ground-up bits were in there. cleaned it up, hammered out all the dimples in the flange from the PO trying to stop a leak by cranking everything down too tight, gave it a new paint job and a new gasket. when i finally got the timing cover off, i found the chain tensioner broken in half (the head sheared off the plunger shaft) and the spring down in the bottom below the crank sprocket. took me a while to find the plunger shaft - it was hidden in a casting hollow in the block. amazingly lucky that those parts didn't get sucked into moving gears - no damage whatsoever to be seen!! there have been several others who have posted step-by-step directions (thank you all, i read them over and over) but i did discover a couple of little tips. the oil pan comes off without lifting the engine or removing the pickup - just jiggle and you're good had to remove two bushing pivots for the sway bar to drop it down for oil pump access (easy) removng radiator makes a huge difference there IS a clever way to time the dizzy shaft without a helper! the biggie was getting the dizzy shaft timed - a bit of a PITA if you have to install the pump, crawl out from under the car, look in the dizzy adaptor to see how far off the paddle is, crawl back under, adjust and repeat. so i wadded up a paper towel in behind the shaft from below, and used a piece of the old rubber oil pan gasket bridged between a couple bolts in the oil pump mounting surface to act as a stretchy sling under the shaft. then from above, i used a pair of needle nose pliers to push the shaft down, stretching the rubber sling until it cleared the drive gear on the crank, then moved it a tooth and it sprung back up into position - voila! a simple way to move it one tooth at a time until it's in the right position. then i wrapped my pliers with a strip of rubber (from an old motorcycle inner tube i've cut up and keep on hand - very useful material) to make an improvised needlenose clamp, locked it onto the paddle up top to keep the shaft from falling down and was able to pull out the paper towel and mount the oil pump up underneath. of course i put the whole thing together with the paddle 180 degrees out the first time... but it was easy to re-do it. oil pan off nothing in it... other than sludge improvised puller setup (nuts, washers, bailing wire) did the trick cover off - goodies inside tensioner was worn anyway find waldo - can you see where the tensioner plunger was hiding? pan all clean new paint


-
funny! these things are STILL dribbling out one at a time every so often. high speed, fan on high, hit some rough road and plop!. odd thing is that now they're almost always the little round "hole" pieces, vs. the "donut" ones. perhaps the critter had his stash organized by size, shape and color? or maybe the big ones were on top as the little ones vibrated down to the bottom... anyway, i'm gonna see if i can do some investigation this weekend while i'm tearing apart the front of the engine - i'll let ya know what i find.
-
mine was a "rust free car" too - then when i went to change the headlights and took out the wheel well liner i discovered some rot up in there. it totally bummed me out for a while, but i just cut it out and patched it up (luckily the patch is hidden so i could do it myself w/relatively poor bodywork skills) and moved on to other issues. truth is, i love the car just as much and being in it for the long haul means that ya just get over it. in the end, the more you do, the more it's really YOURS. ...at least that's what i keep telling myself, as i prepare to pull the timing cover this weekend
-
very smooth - well done!