rossiz
-
Posts
1,109 -
Joined
-
Last visited
-
Days Won
30
Content Type
Profiles
Knowledge Base
Zcar Wiki
Forums
Gallery
Events
Downloads
Store
Blogs
Collections
Classifieds
Everything posted by rossiz
-
wise words. bigger fish to fry - there's a whole car in front of you!
-
nice! looks like an enviable starting point
-
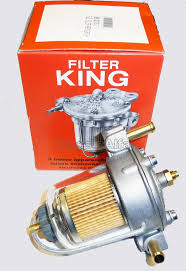
bought one for a motorcycle build a few years ago, it leaked before the engine ever fired up. unfixable, unusable. glad you found the culprit! i installed this on my firewall - genuine old school clear glass filter w/large cartridge and solid design. big enough to see what's going on in the bowl and built in regulator that doesn't restrict flow.
-
good stuff - sounds like you made his day with that meeting. it's funny how provenance plays so strongly in the value of a car - race history, famous owners, etc. a triumph scrambler owned by steve mcqueen will take in shocking $$ whereas an exact duplicate, in better mechanical shape significantly less. i guess those of us who care somehow find a connection with the spirit/memories of a vehicle that goes beyond the metal. i'm the third owner of my z, and purchased it from an older gentleman who had bought it for his wife back in the early 80's and sold it a few years after she passed away. when we test drove it together, it was so cool to hear the stories of how the car was a part of their lives for so long. her name was Priscilla, and while my headstrong and often difficult project has been referred to as "Lillith", the car will always be Priscilla to me.
-

Recommendation for new radiator and elctrical fan for 280Z
rossiz replied to Marios280Z's topic in Engine & Drivetrain
just a thought on your wire path - my 78 has a double blank-off rubber plug for the holes in the firewall that were for choke cables in previous model years. it's on the drivers side above the pedals/below the throttle linkage. i know this because i pulled my efi and installed carbs, using this rubber blank to route the choke cables. you can poke a hole through the rubber (it's thick) and pull a wire (or choke cable) through with an air/water-tight seal. easy-peasy and no messing w/the dash. -
i know it sounds like a lot of work, but you will be much happier if you pull the head. replacing the cam is a job that is best done on a bench. while not complicated, it requires time and patience to get the rocker wipe patterns right and it's a good bet your top end is full of carbon. get a copy of tom monroe's "how to rebuild your nissan & datsun", a set of new head bolts (courtesy nissan), a top end gasket set and a cam chain tensioner keeper tool, and a valve spring compressor, then clear off a bench, but down a towel and a couple of short pieces of 2x4 to lift it up off the valves and you're in business. or you can do the (kinda) quick and (not really) easy path, replace the cam, hope for the best and maybe be back here in a short while anyway...
-
pulling the head is a bit of a chore the first time, mostly because you will probably encounter a few frozen fasteners and it's uncomfortable to go into unknown territory, but it's really pretty straightforward. with the right tools and some help it's an afternoon's work for a shade tree mechanic. i resisted until i warped one (plugged up cooling system) then dove in and got it done. you will learn a whole lot pretty quickly and a re-built head (done right) will really wake up your engine. and of course, there's the pride of knowing you did it yourself coupled with the confidence of knowing it's not going to blow up on you...
-
Recommendation for new radiator and elctrical fan for 280Z
rossiz replied to Marios280Z's topic in Engine & Drivetrain
yes, freeze plugs are a press fit. they are either brass or steel and must be destroyed to remove. most of the time you can use a drift pin punch or large screwdriver and hammer one edge until it pushes in, pivoting the plug until you can grab the edge that popped out with some pliers and pull it out. it's a pita to get them out when they stick - i drilled a 1/4" hole in the stubborn ones and hammered the tip of a cats paw in and pried them out (always exciting to bring carpentry tools into the engine bay). there is a drain plug on the drivers side of the block, back by the fire wall down about halfway - it has a square fitting. you can get it out and peek in to see the condition of the water jackets and if you're satisfied all is ok leave the freeze plugs alone. i would use a good light and a piece of coat hanger to dig around and be sure. the crud/sludge i found was primarily in and around the freeze plug area, as this is towards the bottom of the block where things settle. if a PO ran with just water (no coolant, which has rust inhibitors) and ever used some stop-leak stuff (designed to coagulate and seal off small leaks) the mixture can become a poopy stew that can block the cooling system. -
Recommendation for new radiator and elctrical fan for 280Z
rossiz replied to Marios280Z's topic in Engine & Drivetrain
congrats on getting the water pump off without drama - the long bolts that double to secure the front cover have a tendency to corrode and snap (no fun). the 280zx 2-terminal sensor goes in the P79 head by #5 plug, but the electrical gurus will have to chime in on how it alters the signal. -
if bits went down the timing chain hole, you'll want to pull the oil pan and see what's down there. you can pull the pan with the engine in the car -it's tight but doable. get a good light and magnet to fish for anything in the front cover area. if it were me, i'd pull the head and get it surfaced, cleaned up, do the valves and new cam. the top end of these motors is where it all happens.
-
i've battled this same issue - total pain because you don't want to over torque the caps and risk damaging the plug by twisting the shaft in the insulator. my solution was to pull the caps off and just slightly crush the top of the cap with some vice grips - just bring it slightly oval at the top, but leave the bottom round so it threads on easy most of the way and acts like a locking nut when the top contacts the threads. it takes some finesse to not overdo - you don't need a lot, just enough to get it to grip.
-
install one of these :}

-
the cam does indeed look damaged, not sure if the wear area of the lobe is ruined or not - the lobe is wider than the rocker arm contact surface, you should be able to see the wear marks on the cam to tell. replacing a cam is not a huge deal, couple hundred bucks, but i'd be more concerned about finding every single bit of metal that came off it, as well as all the parts to the valve train that came loose - including the valve guide seal and the little spring at the top that holds the seal around the valve stem. this happened to me last summer (there's a thread on here somewhere about it) and i was fortunate to not only have no cam damage but found all the little bits. pray to whatever god you hold dear that nothing found its way down the "hole of doom" (cam chain/front cover) or you'll be in for a long afternoon or two. all that said, just know that these engines are tough, and there's nothing that can't be replaced or re-built.
-
i used that square blank to mount an input jack for my other media into the stereo (iphone, etc.) looks very discreet and the kids love it.
-
good things happen to good people - well done! can't wait to see it come to life.
-
the first "competition" pan gasket i got from msa was several months back when i was dealing with the original engine and the front cover ordeal - pulled the pan, cleaned it up and replaced the gasket from under the car. it was a reddish color, thick and synthetic. the second one, also from msa, went into my rebuild and felt like the same material but it was green - not sure about the color difference, but they both sealed perfectly the first time.
-
Thinking about installing an BMW M6 engine in my Z
rossiz replied to grannyknot's topic in Build Threads

-
Recommendation for new radiator and elctrical fan for 280Z
rossiz replied to Marios280Z's topic in Engine & Drivetrain
block drain plug is on the drivers side by the firewall below the manifolds. i had a ton of crud in my system (rust, old stop-leak crud, etc) so i pulled the frost plugs and used a pressure washer to blow it all out - tons and tons of nasty pudding came out. a set of frost plugs is about $25 and easy to find online. be sure to count the ones you pull out, some sets come short a few plugs (don't ask how i know) and that's a pain. -
both times i've ordered the "competition" gasket from msa - it's synthetic (not cork) and a little thicker than the stock one, i think around $15 or so. both times (two different engines) it sealed perfectly with no leaks. the first engine was still in the car, so i cleaned best i could with a rag and solvent, but not perfect (the pan was cleaned and straightened) the second was a rebuild on a stand so much cleaner. not sure if i'm just lucky or if this gasket is the ticket, but so far so good.
-
Recommendation for new radiator and elctrical fan for 280Z
rossiz replied to Marios280Z's topic in Engine & Drivetrain
like rcb said - aluminum is different from brass in that it will fatigue and crack from vibrations and flex. rubber isolators should do the trick, you can get some rubber grommets from a decent hardware store (they use them in electrical applications for wires through a metal box, as well as in the plumbing dept. for various seals) just take care that you don't use something thick enough to push the radiator too close to the fan - the engine moves under load so you need some clearance. -
sealant is only required to fill in voids, which would be the result of damage to the block surface or a distorted pan (usually the pan). the gaskets, whether cork or synthetic, are designed to be compressed slightly, but not crushed into place (which usually comes from over tightening) i've had good luck with two oil pans using the following method: - use a piece of 1/4" aluminum flat bar clamped in a vice as an anvil to get up inside the flange, then go around the perimeter tapping out all the distortions to get the gasket surface dead flat. it's about patience, not force - the sheet metal deforms very easy so you can use a small hammer. - put in all the fasteners finger tight before torquing any, then go around and tighten them evenly, a little at a time until you get them all to spec (which is not very tight). - re torque after a day or so, as the gaskets squish a bit. use the same method of going around the pan a little at a time. the key is not to over tighten, as this will dimple the pan and then it will leak for sure. and if it does leak, you can bet you over tightened...
-
you are right to chase down vacuum leaks first - unless the system is tight, you'll be chasing your tail trying to adjust things that may be just fine... i would suggest replacing every hose under the hood that's more than 5 yrs. old for several reasons: - vacuum hose is cheap - tiny cracks from dry rot are hard to see and can open up when you move/flex a hose that looks fine - dry/hard hoses don't seal well at the fittings - a bunch of small leaks can add up to a lot be sure to check the pcv hose underneath the manifold - this one gets a lot of heat from the exhaust manifold and can disintegrate. also check your vac advance and fuel pressure regulator, as they have rubber diaphragms that can fail. another hidden spot is the rubber flex-boot between the afm and the throttle body - cracks can hide in the little valleys and may be on the bottom of the boot where you can't see 'em. not all the hoses are the same size/diameter, so you may want to cut some 1" pieces off a few of them and bring them with you to the parts store - be sure to measure the cut end, not the enlarged end that is stretched out from the fitting. and replace the hoses one by one, referencing the fsm for proper hookup. it's not uncommon that they are hooked up incorrectly (especially by a mechanic who uses zip ties on fuel pumps).
-
blue's info is excellent. if you're running su's, it is a fairly straightforward process. be sure you have adequate fuel supply to the carbs (pump, filters) then number 1 above all is float levels - get 'em right, or you'll chase your tail w/the other adjustments.
-
just an fyi - beware re-torquing head bolts that have sat for 30+ years and been exposed to corrosion such as in your photos. very easy to snap one. last time i checked, a new set of turbo bolts from courtesy nissan are less than $75 and way cheaper than dealing with a broken stud buried in the block. if you do replace the bolts (recommended) be sure to chase the threads with a good quality bottoming spiral tap (don't waste your time with a fluted hardware-store one as they chip/break as well) so you get a nice, accurate torque. yes, pulling the head is a day's job the first time you do it (gets easier once you've dealt w/all the rusted, crusted bolts) but in the end you'll have a nice clean head, new gaskets at the head, manifolds and t-stat and after you clean off all the crud you'll find in there you'll be happy you did it. i've got a thread on here showing the poop that came out of my block when i did just this (my PO ran straight tap water and my coolant was rusty like yours) and it was shocking how nasty it was inside the block. if you're leaking around the head, it wouldn't surprise me if the PO used some "stop-leak" additives at one point, which tend to make a nice, goopy jelly-like mess in there. i wound up using a pressure washer to blow it all out of the freeze-plug holes and down through the coolant galleries in the top of the block. do a search for my thread and you may want to consider doing this work...
-
old school - love it!