rossiz
-
Posts
1,109 -
Joined
-
Last visited
-
Days Won
30
Content Type
Profiles
Knowledge Base
Zcar Wiki
Forums
Gallery
Events
Downloads
Store
Blogs
Collections
Classifieds
Everything posted by rossiz
-
yup, agreed. synchros are the likely culprit at this point. i fabbed up an adjustable clutch rod and wound out all the free play up to ~10mm and the clutch is brand spankin' new. the detent springs & balls were fine - i checked 'em against the ones from my 4sp which works perfectly. it still grinds horribly when shifting under load (both up and down). gonna swap my 4sp back in and contemplate whether its worth re-building the 5sp - never cracked a tranny open before and not sure if it's better to just buy a re-built one... sux because i really want to drive that new engine!
-
zed, thanks for the helpful posts. the tranny was empty when i got it - probably sat for a year in total between when the PO pulled the engine/tranny and when i filled it (last week) with redline MT90. by throw i don't mean increasing the total amount that the rod moves, but getting the starting point of the throw closer to the engagement point so the available throw is all useful vs. wasting the first 1/2" of rod travel. gonna go out and check the detent springs - who knows, they may be missing...
-
chas - thanks for the helpful posts, i had read that earlier and it was next on the list. i ordered the correct adjustable throwout rod and will now try to source the check balls & springs.
-
update: bled the clutch and flushed out what looked to be 30+ year old fluid. it shifts through all gears now, but not well under load. i think i still don't have quite enough throw at the slave rod to throwout fork. i'm going to pick up the correct adjustable rod and wind out some of the slack. if i shift gently it goes through all the gears smoothly, but it grinds horribly if i try to upshift or downshift under load. the lever and bushings are from my 4sp - i had replaced all 3 bushings recently.
-
put a sst acorn nut on the end of the clutch actuating rod and it fit fine. go her all together, did a double & triple check, filled w/fluids and gave the key a twist - she sprang to life immediately and after a few minutes at 2500 rpm to make the cam happy i took her out for a lil' spin. the good: the engine runs absolutely amazingly - the balancing and lightened flywheel let her spin up super fast and she's so smooth it's like night and day from the previous motor. idle feels like a new car - you can think it stalled it's so quiet/smooth. revs up to 7K in a blink and sooooo smooth - no vibes at all. the old lump used to rattle the shift lever and make the rearview mirror blurry after 5500, this one is like silk all the way up and pulls great. the bad: transmission woes... i started another thread for advice on this one. 1st whines, almost impossible to get it into 2nd - misses into false neutral, pisses me off - the only part i didn't mess with is the tranny (just replaced front & rear seals) and it's all catywompus... will bleed clutch and if no suitable advice comes i'll have to swap in my old 4sp which works great.
-
5sp from '81 zx non-turbo came with an engine that i re-built, was said to be fine, so all i did was replace the front & rear seals before installing. noticed 2 things during install: 1 - the return spring plug was removed and in a bag of misc parts along with the shift lever pin & boot. the plunger was missing, so i poached the one from my '78 4sp along with the matching springs & plug. 2 - when i checked shifting (before putting in boot cover) the striking rod pulled out exposing the o-ring seal. the stopper guide pin was out (i found it in the aforementioned bag of goodies). i rotated it back/forth a bit until i could jigger it back in, then installed the pin & e-ring. car shifts horribly, 1st is fine (whines) very difficult to get it into 2nd (misses into false neutral) third is fine i do need to bleed clutch, as i think i pulled in air when the slave cylinder expanded out when tranny was removed. did i pull something out of engagement/alignment when the striking rod pulled out? am i dropping this tranny or do these symptoms sound fixable in situ?
-
somewhere on here i have some pics in a thread showing the poop that came oozing out of my block when i pulled the freeze plugs... nasty. i used a pressure washer and pointed the nozzle down all the water galleries from the top (head off) and then into the frost plug openings and it took almost an hour of constant back-and-forth to blow it all out till the water ran clear. PO ran straight water, so no anti-corrosives to keep things from rusting + i'm guessing some stop-leak got in there at some point as well. i used por15 engine enamel and was very pleased with the results. you brush it on and it self-levels to a nice smooth finish - much easier than spraying and you can really work it into all the nooks & crannies and no shadowing as with spray. it put on 3 coats (one can was way more than enough) and it's a really nice thick, durable finish that they say is chemical & heat resistant. pretty decent range of colors too (though not the "perfect" nissan blue).
-

240z Valve Train Tapping After Head Work - VIDEOS Inside
rossiz replied to Hardway's topic in Engine & Drivetrain
congrats. yes, valve lash is surprisingly critical - fortunately it's easy to do and costs nothing but a little time. -
To Dream the Impossible Dream (Redwing's Z cars)
rossiz replied to FastWoman's topic in Open Discussions
i agree with the carb swap to get the 280 running more affordably - while the efi can be made to be quite dependable, there are just so many variables that can go wrong and the diagnostics (though simple by today's standards) are an order of magnitude greater than a set of su's. if you add up the relays, injectors, sensors, afm, harness connections, fuel pump, vacuum system, etc. it's a daunting prospect. a low-pressure fuel pump, a carb re-build kit, some fuel line and a few misc. fittings will get the swap done for less than $100 (minus labor, of course). i have a big hunch that the all-too-common rusty/cruddy gas tank is involved in her situation as well. the low-budget, get-her-running solution is to get a half-dozen in-line filters between tank and fuel pump and keep an eye on them and change 'em out every couple months when they fill up w/crud until she has the $$ to drop the tank and clean it out. this is, of course assuming that the bottom end and valve train are in decent shape (not clattering away and/or burning all sorts of oil). -
-
a very simple thing to check: there are spiral hoses (like little versions of the hose that comes out of your clothes dryer) that duct the system. they have a foam seal that disintegrates and then they fall off their ports. get your yoga pants on, put your head under the dash upside down and look up on either side of the console and you'll see 'em. mine were both disconnected and just hanging there - an easy fix if you're lucky.
-
Thinking about installing an BMW M6 engine in my Z
rossiz replied to grannyknot's topic in Build Threads
wow - serious surgery! it will be interesting to see the new config and how you get the shape to hold the right amount of oil. i'm enjoying this thread - very cool. btw, i'm sure you've looked into this, but why not just hook up a megasquirt so you can set up your engine management and wire loom exactly the way you want and not deal with the legacy issues? -
Project Boondoggle (or, so I went and bought a Z!)
rossiz replied to charliekwin's topic in Open Discussions
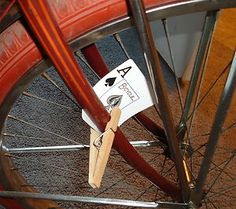
looks like great work - congrats! i ran into the same problem with boots too big to clamp. i wound up re-using 3 of my oems, but the 4th oem was split so i had to use the new one - i cut out a v-notch to allow it to wrap tightly with a band clamp. just cut a little at a time and keep testing until the ends meet - too much and you'll wind up with a hole. not perfect, but much better than the split one... -
dropping in the new lump


-
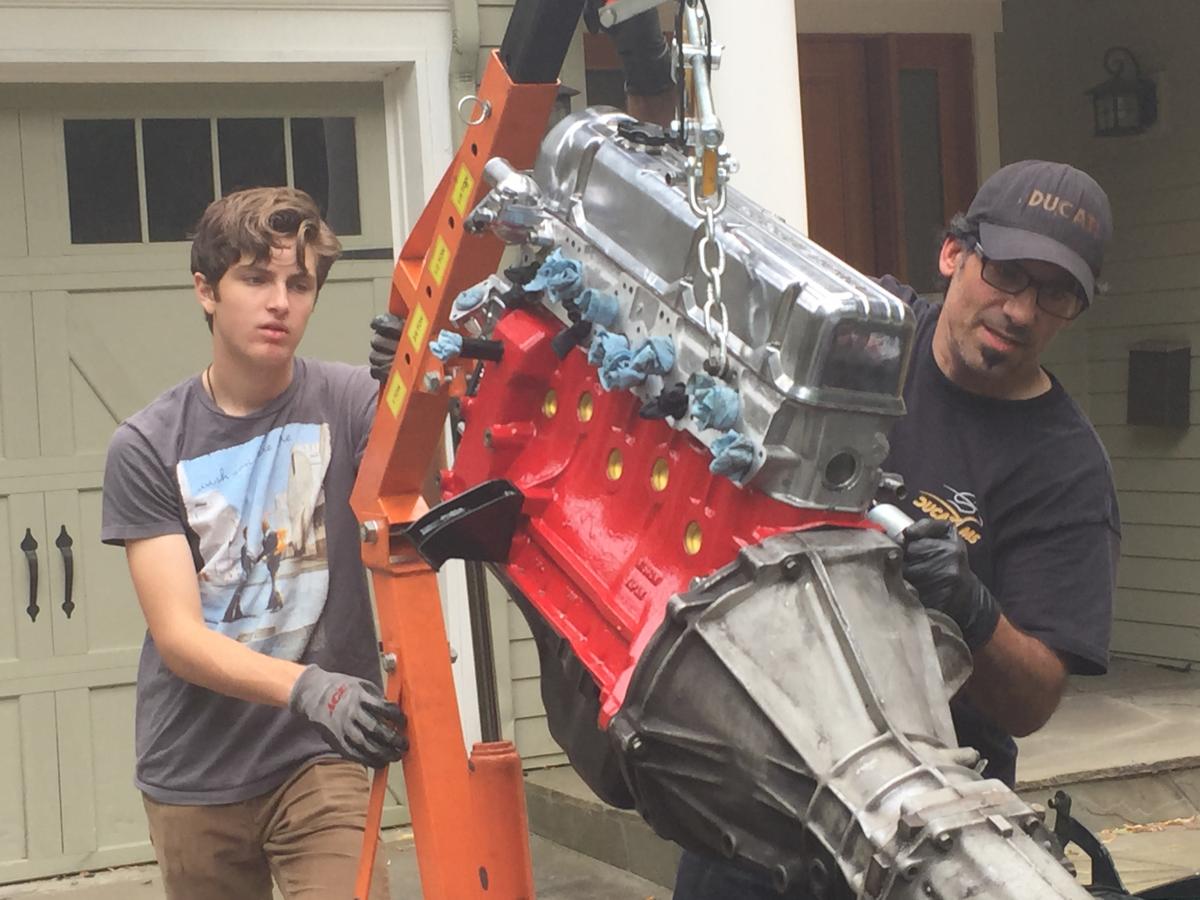
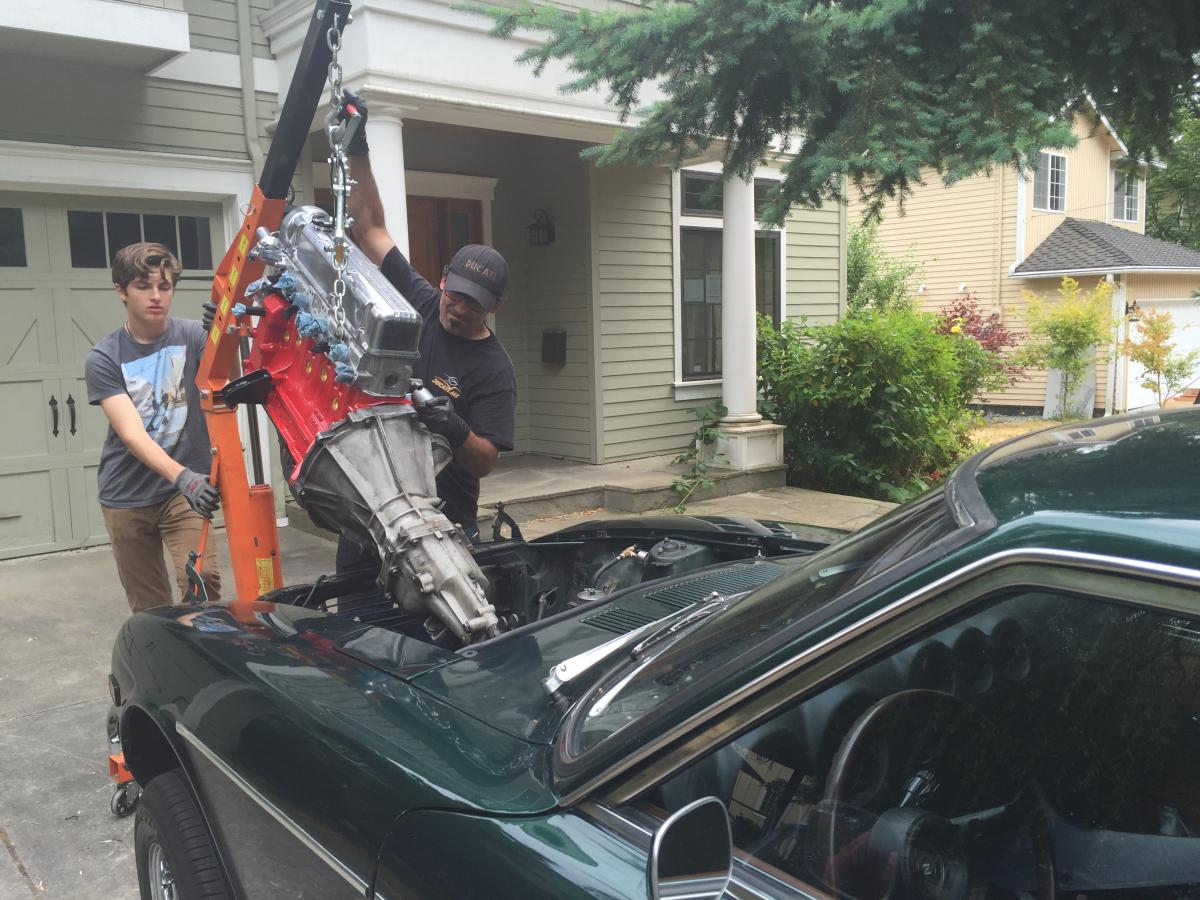
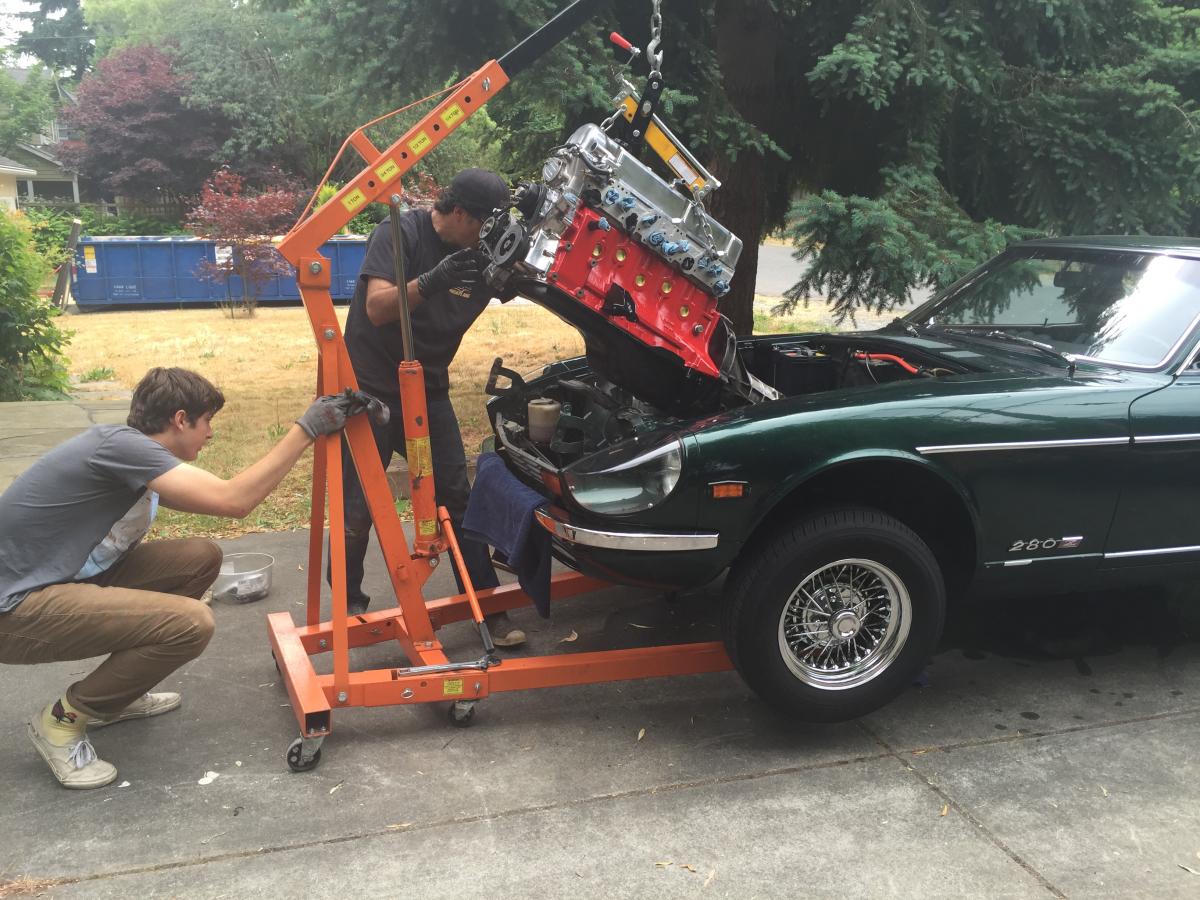
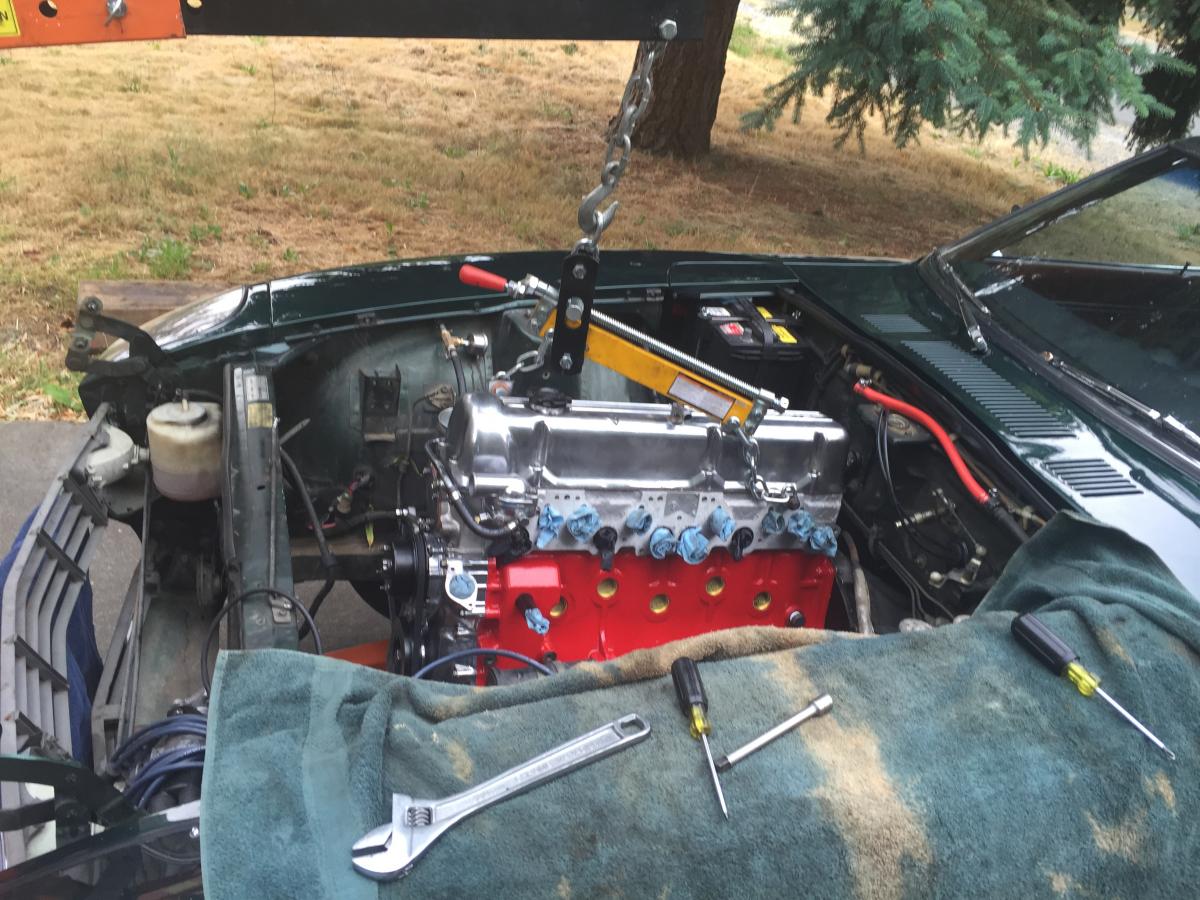
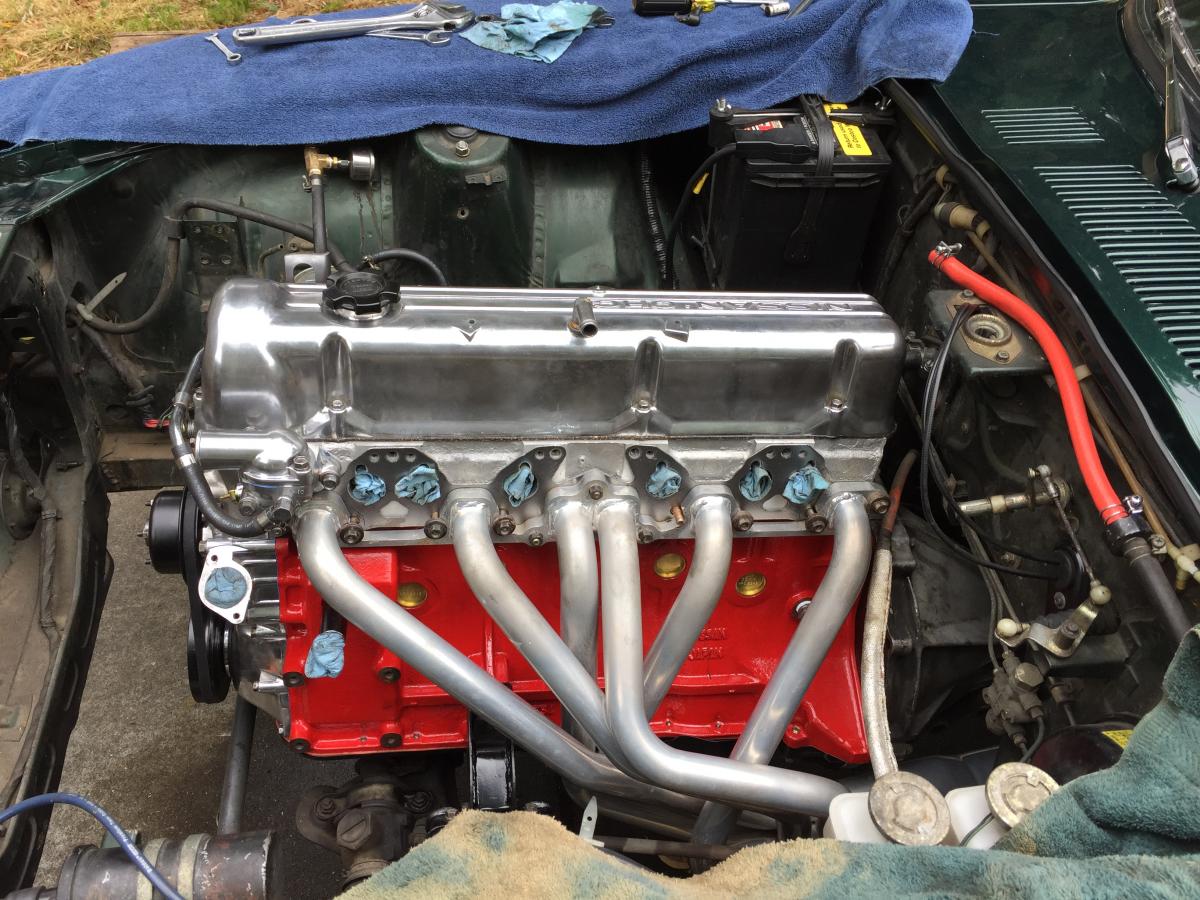
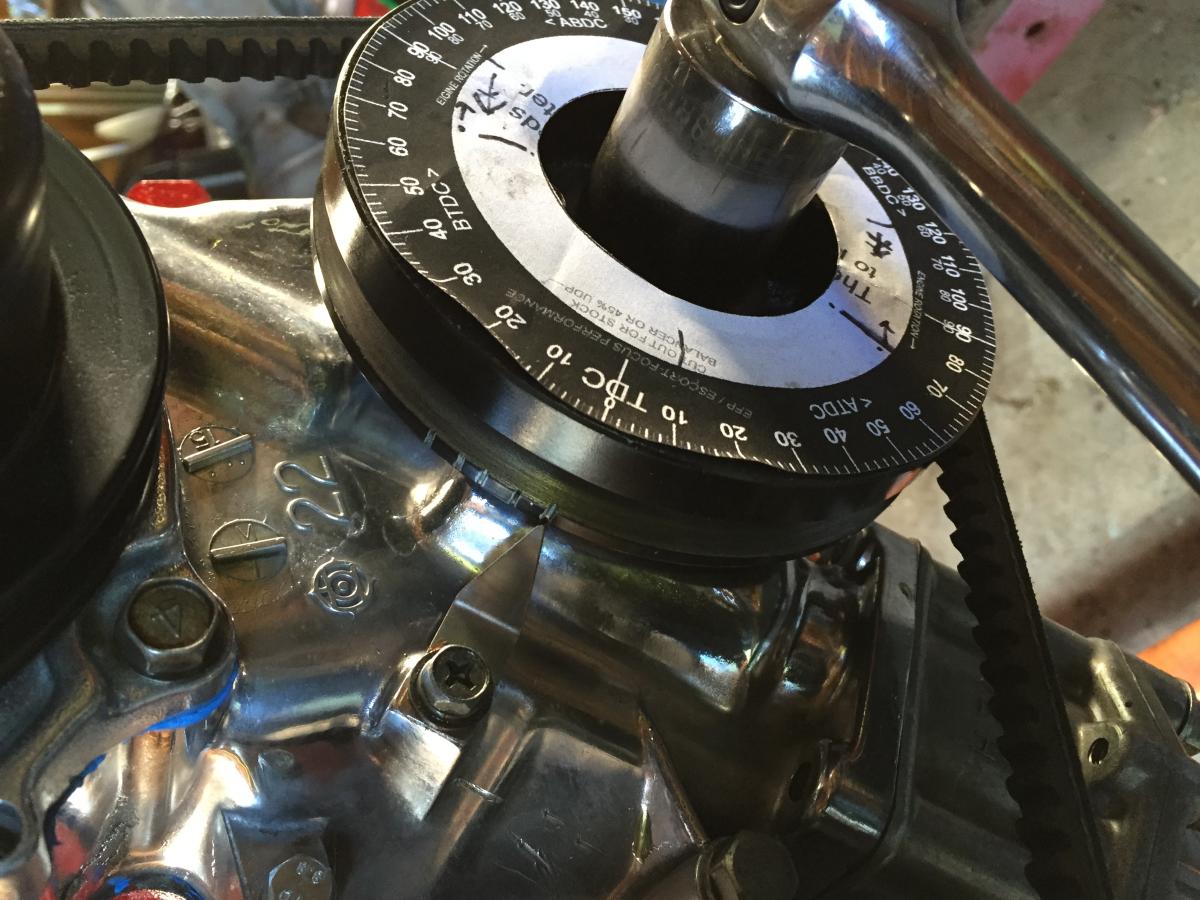
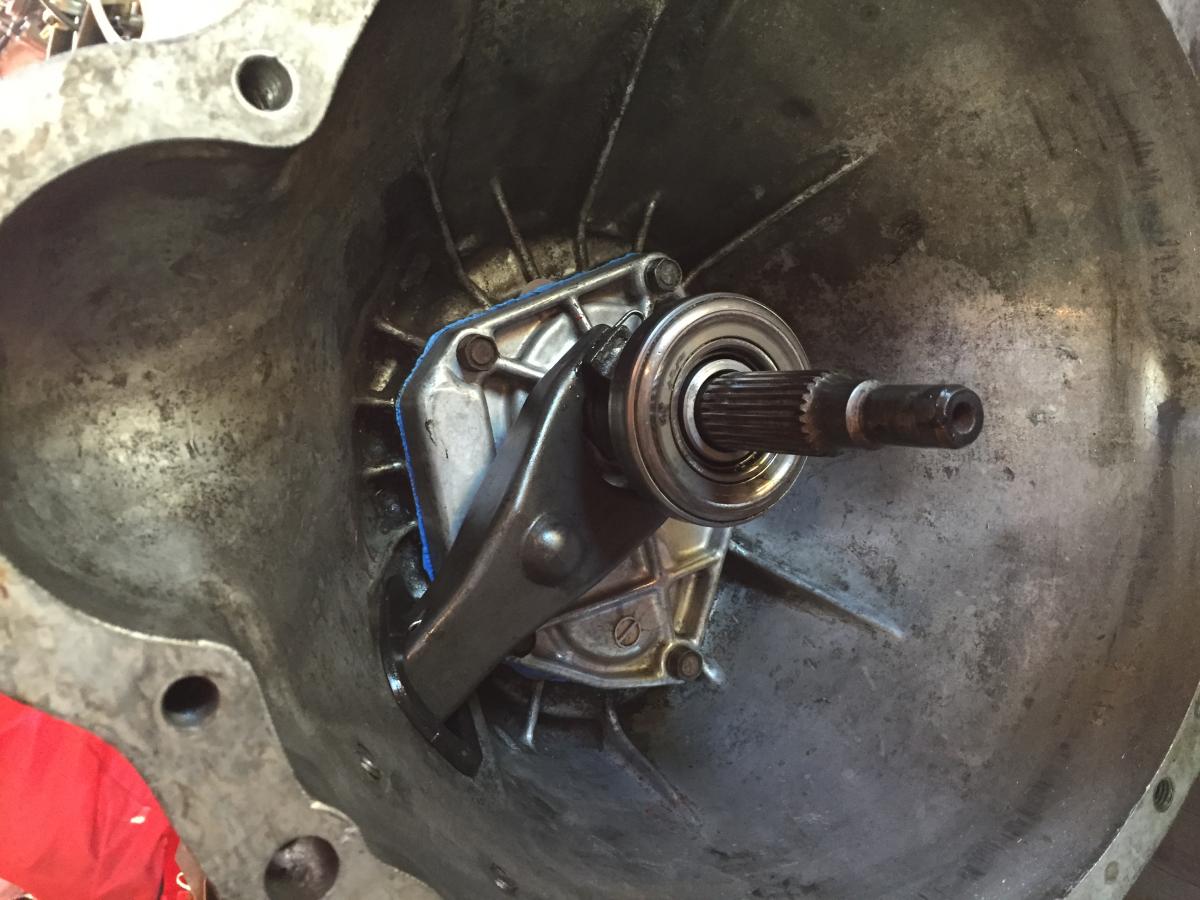
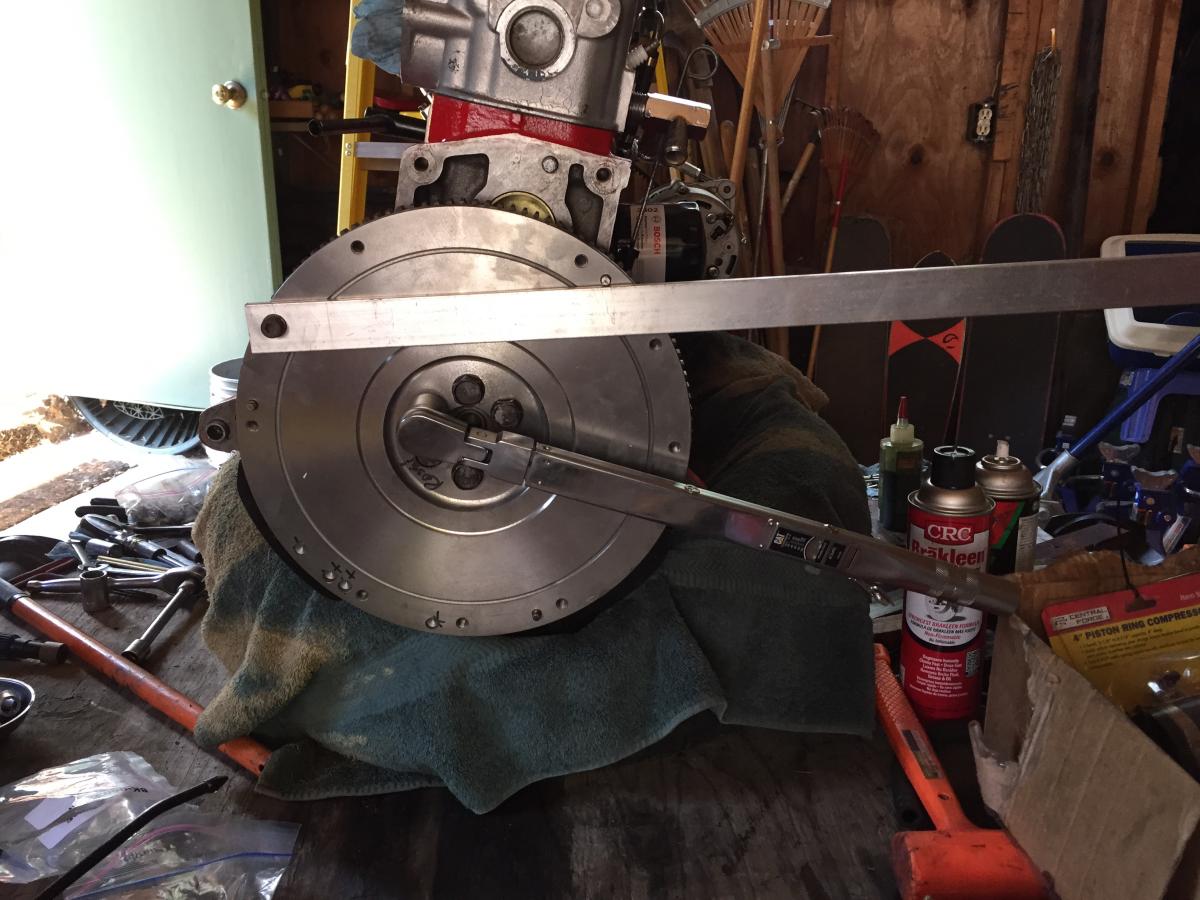
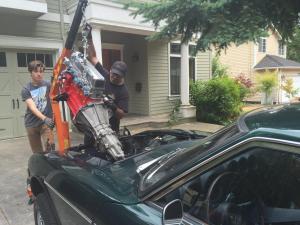
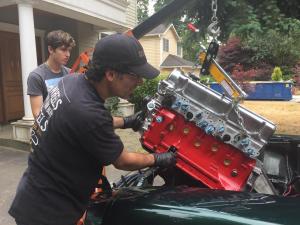
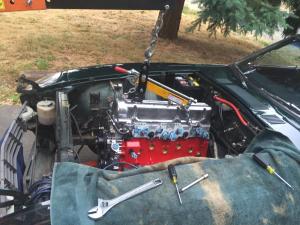
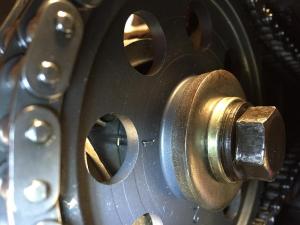
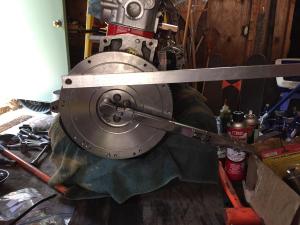
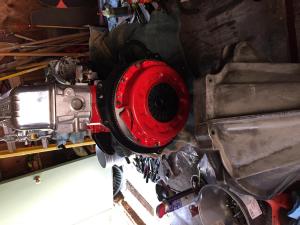
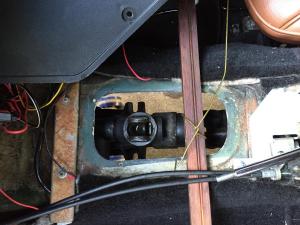
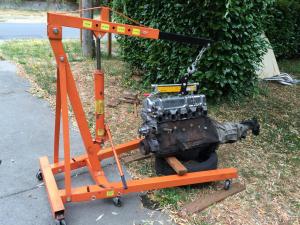
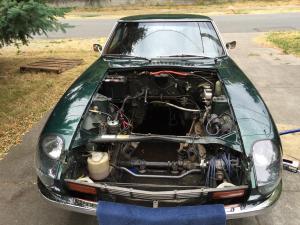
progress - getting closer. the original timing marker was set up for the much larger diameter pulley on the 3-row setup and the degree marks weren't accurate with the smaller single-row one i'm using. used a piston stop and degree wheel to nail TDC and fabbed up a single pointer out of a piece of sst band clamp. cam timing is pretty spot on, which makes me happy given the head shave and adjustments. replaced the front and rear seals on the 5-speed and got it all buttoned up, new flywheel & clutch mounted then mated up the tranny to the block. notched the speedo gear housing on the opposite side so i could flip it and make it work with the 5-speed. then it was the big day: yanked the old and dropped in the new. trickiest part was the fact that the hoist boom was a little short and wanted to hit the front bumper. a few new holes and i got an extra 9 inches on the boom (insert male enhancement joke) and all went well. i didn't want to remove the drive shaft, so i hung it from a wire and kept it at the right height. it actually worked and i was thrilled to get the new motor in, drive shaft into tranny and all the mounts installed. one thing i didn't notice until the new motor was installed is that the throwout arm is different - the 4-speed has a pin that comes out of the slave cylinder which fits into a dimple in the throwout arm. the 5-speed arm has a hole in it instead of a dimple... so the pin i have won't work. another little thing to figure out. setting timing cam gear tranny front seal & throwout bearing replacement locking the flywheel for torquing clutch installed hanging drive shaft old engine out ready for the transplant


-
240z Valve Train Tapping After Head Work - VIDEOS Inside
rossiz replied to Hardway's topic in Engine & Drivetrain
i've always found that the hot lash adjustment finds quite a few needing adjustment as things move around with expansion. i wouldn't rely on the cold adjustment, it just gets you in the ballpark. -
pull off your valve cover and take a look at the wear pattern on the upward facing surface of the rocker arms where the cam lobes wipe across them. the wear marks should be centered in the rectangular pad.
-
looks like there's a little more rust than readily meets the eye - those paint bubbles are just the tip of it. not saying don't get it, just go in w/your eyes open as there may be some questionable bodywork under the paint or they didn't do adequate prep work. i'd be more concerned about the bodywork than the transmission - you can do that swap cheaper than the bodywork and re-paint.
-
i did exactly the opposite with my 78 and have been replacing all the black plastic with chrome for more of a 60's look. you have the brightwork around the windows, the mirrors and the wipers to pull it all together, so you really can go either way.
-
Putting my '78 into hibernation for a while
rossiz replied to jeremy93ls's topic in Open Discussions
here's a trick my PO taught me: throw a bag of real toasted oats cereal and years from now pieces will fall on your feet as you drive. seriously though, you'll want to protect from critters and insects (not sure how sealed up your garage is) that can nest in, munch on and hoard inside air intakes. clean it very well, give her a coat of wax, spray WD40 on a rag and give anything that might corrode (exposed polished alloy) a light wipe. make sure it is dry, dry, dry (carpet backing holds water forever) get a car cover and keep the windows down a few inches under the cover - that will allow some air circulation so you don't get mildew inside. oh, and if you do the charcoal trick, ya might want to stay away from the "match light" variety -
so... you're stuck with your head in your hands wondering when you'll have a head in your hands... sorry, couldn't resist seriously though, bummer to be all ready and missing parts. i feel your pain...
-
those little "condom" caps are a must. the keeper groove in the valve stem is cut sharp and it's really easy to tear or slice the seals as they slide past. i saved one that came in a pack of seals i bought for my previous head, just in case - and it was a good thing b/c the new seal set that came with my re-build gasket set didn't come with any... not sure if you can buy them alone, but you might be able to make some out of a drinking straw cut into short sections if it's the right diameter - heat up one end with a flame and shrink it to start the seal over top.
-
looks great - i applaud your prep and layout. nothing more satisfying than assembling clean, organized parts. why will you mount the tranny after the motor's in? seems like an easier connection to the spindle when you're not on your back. i'm about ready to mount mine up so your thoughts would be appreciated.
-
Definitely check your rocker wipe patterns - I've been through that pain twice...
-
Paint done, trim installed, bumpers on.......
rossiz replied to The osteopath's topic in Open Discussions
love it! the side graphic is very cool...