rossiz
-
Posts
1,109 -
Joined
-
Last visited
-
Days Won
30
Content Type
Profiles
Knowledge Base
Zcar Wiki
Forums
Gallery
Events
Downloads
Store
Blogs
Collections
Classifieds
Everything posted by rossiz
-
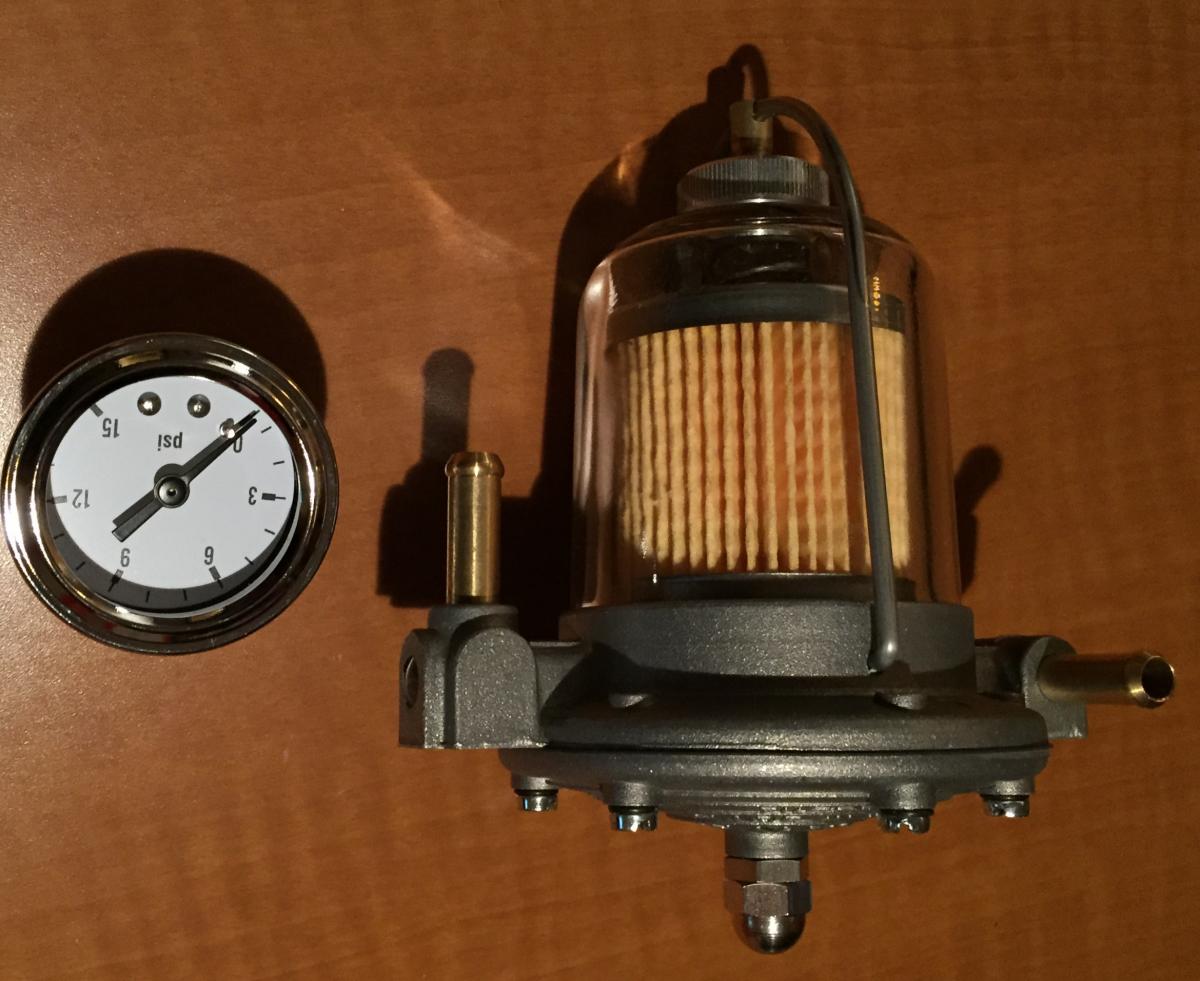
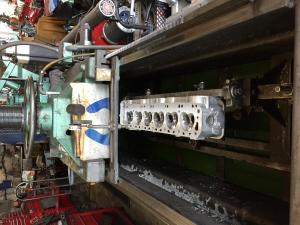
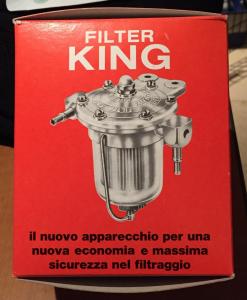
been hankering to get things put back together but thwarted by a slowdown at the machine shop (not their fault) and then my back went out (again) so i've been out of commission for the last 5 days... hoping to have the head done and all balanced parts back by the end of the week and with any luck my back will be good enough to be able to start working again. the slowdown at the shop comes from me changing up the work a bit - started off having them lighten my stock flywheel, then went and bought a 2+2 clutch/flywheel setup and they're gonna shave that one as well. then i added the head shave & surface work, so they got a little out of sequence and some other jobs slipped in. that's how it goes though... stopped by today and saw the head in the milling machine getting cut to hit ~9.75:1 CR. they had to deck the top a few thou' to get it flat but otherwise it all looks pretty good. in the meantime i got the su carbs installed on the current motor and she runs nicely - so i should at least be in the ballpark when i do the swap. these little goodies arrived - will be part of my fuel system revision:

-
nice - looking forward to the results!
-
if it were cam related, it would probably occur once every other revolution but it sounds like it's every revolution so more likely directly connected to the crank/flywheel/clutch. i don't like that sound at all - definitely an interference (parts hitting each other) or oversized clearance (something too loose). it's a pita, but you can drain it (save the oil) pull the pan and turn by hand to check the bottom end.
-
just kidding on the time commitment - we all gotta fit in our hobbies around our responsibilities i believe the Bad Dog rails for the 280 weld in over the top of the existing ones to add stiffness, not sure if the 240 ones are the same, but i reckon it could be done that way which might save a bunch of labor ripping out the old ones and getting the body straight. i don't think the sway bars stiffen up the body, they just reduce body roll in the suspension. there are bolt-on body braces for the strut towers (both front and rear) but i have no direct experience with them and have read quite a bit about their relative effectiveness/ineffectiveness - you'll have to do your own research on that one.
-
an hour a day?? i do that and more on my dd!! seriously, these things are an addiction and should be treated with the same care as any other addiction... the hardest part is trying to explain to the family when they ask if it's almost done, that it will never be 'done' - in fact that isn't the point. if i wanted a car that was 'done' i'd buy one off the lot - this is something that's sole purpose is to provide delight (while getting me back and forth to work so i can pay for it) and as such it's an eternal source of "projects" looking forward to seeing your build - i'm guessing you won't be happy with the strip-to-metal unless it's media blasted. reinforcing the rails is a good idea regardless of the power train. i believe Bad Dog rails are a pretty straightforward weld-in option. these cars are pretty twisty-bendy as is - mine is a 280 (more metal than a 240) and frame is completely rust-free and yet when i put the rear up on jack stands it flexes enough that the doors don't close correctly...
-
thanks mark - the snoopy dance image is a hard one to let go of... i'll be chuckling all day about that one the distributorless ignition system is going on the new build - that will take some time to set up, so i'll do the initial install with the zx dizzy and then do the swap. i'm trying to do the engine in stages, setting up one system at a time and proving it out (carbs first on the current motor, then new motor w/existing dizzy, then the DIS) vs. doing it all at once and having to deal with the nightmare of having to troubleshoot/tune everything at once. the DIS also requires some programming, which will be easier once the engine is basically running and tuned.
-

A Different Headlight Relay Upgrade - 4 Relays
rossiz replied to Captain Obvious's topic in Electrical
wait a minute... you mean i gotta take out ALL 5 of those little screws that hold the clamshell together, unplug BOTH wires and then plug 2 of em back together?!? i need a beer after just thinking about that! seriously, great work and we all benefit. thanks for sharing the brilliance - you are a true luminary. -
Thermostat Temp Sender Vs. Head Temp Sender...
rossiz replied to rossiz's topic in Engine & Drivetrain
cool - just as i thought. that will make things simpler for me as well (always a plus) since i can just poach the sensor from my current motor and pop it into the new build. thanks for the reply! -
thanks cap'n - i fabbed up a quick 'make-do' clamp to get me going but it will be great to have the proper bits on there!
-
i put the msa sway bar kit i put in my '78 - very happy with it and good price: http://www.thezstore.com/page/TZS/PROD/classic20g/23-4102
-
the p79 head on my engine build has a 2-wire temp sender at the back on the plug side. the car is a '78, but will be set up with su's so no ecu. question is: should i use the head-mounted 2-wire sender or the T-stat mounted one for the gauge in my dash? if so, how do i wire it?
-
try "Pizz"
-
The official "Post pictures of your wheels" thread
rossiz replied to Ptero's topic in Wheels & Brakes
the 225/45-15 calcs out to be about 1 1/2" smaller diameter than oem 190/70-14, did you do this on purpose? if so, what are the reasons? -
thanks for all the kind words - i'm happy to have a simple mechanical system that i can understand and adjust, and it's a bonus that it appears to be working well so far. the actual transplant was fairly painless (with the exception of spending several hours fiddling with the floats and the sore neck i have from installing the choke setup) but the work this weekend follows several weeks of work and research. i watched the 'just su' video a couple times, read a ton of su tuning/setup posts/blogs/etc. and got to know the hardware by doing a complete clean, polish & re-build. even after having thought through it dozens of times, i still had to run to the hardware store twice for various bits and pieces. best tip i can give: glue the float bowl gaskets to the lids. they are a royal pita when they get wet and start to curl up. i used some permatex on mine and it held up long enough to do my adjustments (about 20 times) and towards the end they were starting to peel around the corners a bit. blue - thanks for the list, it really sums it up. i've completed 1-4, will do 5 tonight, 6-8 are the points i've yet to tackle and will get into that when i have the O2 sensors hooked up so i'm not groping in the dark. for the damper oil, i just bought a $1.99 bottle of the carb oil from msa (looks like vegetable oil to me...) and just filled up the reservoirs. not very scientific, but a starting point.
-
first real road report: drove her to work this morning (16 miles) and i'm pleased to say i'm extremely happy with the carbies!! cold enrichment about 50 degrees this morning, not exactly frosty but definitely cold enough for the efi system to have needed the csv and temp sensor enrichment circuit. half choke, no pedal and she started instantly - actually startled me. revved up to 2000 so i tapped the choke forward a little till the idle was at about 1500 and pulled out of the driveway. interestingly, the choke enrichment does a better job of cold-running than the efi systems ever did. used to be, it would start right up on the csv but run like a dog until the temp gauge started moving. wouldn't rev over 2500, stumbled and stuttered, sounded awful, but i was used to this and just limped the first few blocks until she warmed up. with the chokes engaged, she ran just fine from dead cold - revved fine, ran pretty much completely normal and as she warmed up i just tapped the lever down. idle rock-solid steady at 800 rpm and silky smooth. the efi would hunt a bit, kind of a 100 rpm drift which i could never pin down to a specific condition or fix. performance pretty close to where i was with the efi - i didn't get too crazy on my morning commute, so i'll need to rip around my local test roads to do a better butt-dyno comparison. in normal driving, it's identical to the efi - smooth, no stumbles, burps or farts. when i get the dual-lambda setup in place i'll be able to really check on the needles (using the sm set sent with my zt rebuild kit) fuel economy it just so happens that i had a full tank prior to the swap, so i should be able to check by the end of the week and report back. have to say i'm impressed with these little buggers!
-
great info blue - couple questions (in red) below:
-
i get emails almost daily advertizing all kinds of extenders... how do they know anyway?? one thing to think about though - unless you raise the fulcrum point (where the bushings go in the ears on the tranny) your throw will get considerably longer. you can mock it up with a simple piece of pvc pipe stuck over the existing shifter and cut to approximate length to make sure you're ok with how much arm movement will be needed.
-
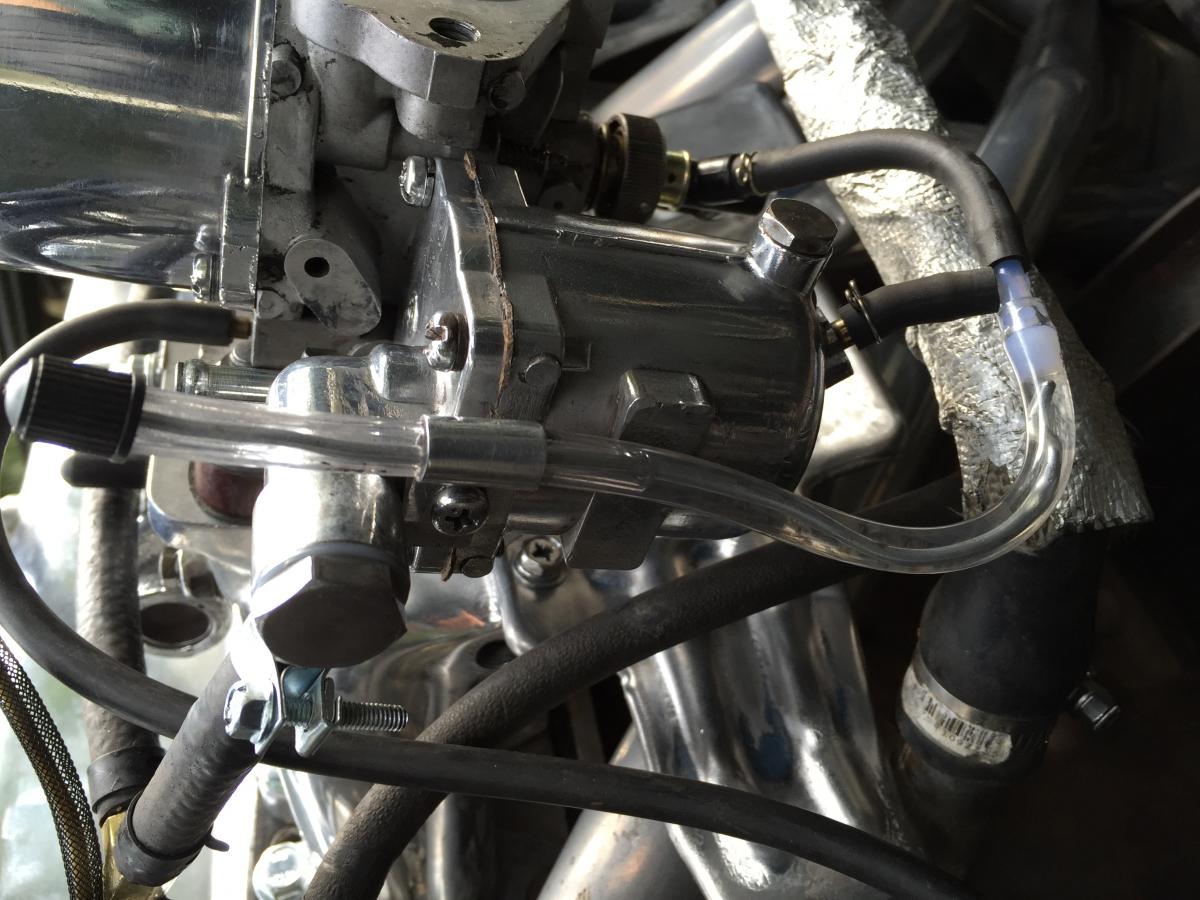
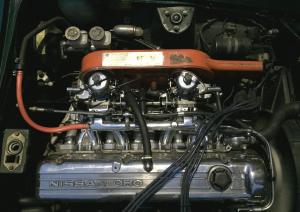
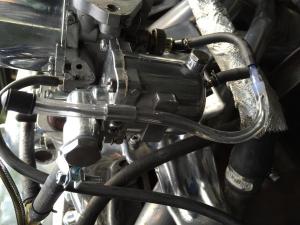
managed to have a productive long weekend in spite of the temptations (beer & brats, etc.) turned back the z technology clock a little: ripped out the efi and associated spaghetti/plumbing and installed the su's. the worst part of the whole process was installing the choke lever... i picked up one of those tunnel-mount plates in order to avoid breaking the underside of the console (the choke lever set came with the telltale chunk of broken plastic mounting post still attached to the mounting screw) and it was a bit of a pain to set the layout on the tunnel so the choke lever would line up in the console slot. every time i have to do work on the interior (especially under the dash) i wish to god i had a chevy van instead... contortions upside down, holding a flashlight in my teeth, having my glasses fog and dropping the fastener on my forehead for the 5th time... but eventually it worked out just fine. i had purchased a 240z choke cable fire wall grommet but it turns out i didn't need it. what i had assumed was a metal blank-off plate next to the throttle linkage turned out to be a dual-opening rubber blank. so i just drilled two holes in it and the choke cables go through with a nice airtight seal. getting the manifold off was cake thanks to the multiple head swaps i've done and i went ahead and pulled the afm, charcoal cannister and associated mounting brackets as well. i left the wire harness in for now, coiled up and tucked out of the way by the windshield washer bottle. i'm using the stock fuel filter & lines for now, but will revise when some parts come in. next was swapping out the efi fuel pump with a cute little airtex unit. mounted it up near the moustache bar and looped the fuel line over to the existing hardline. i left all the efi wiring/relays/etc. in place, so it all works exactly as previous - just a lot less pressure. the airtex pump is so quiet, i had to put my hand on it to make sure it was working - nice. i then got the carbs mounted up and checked the float levels. interesting side note: i had done this previously in my basement using water, with the fuel pump wired to a power supply and a juice glass as a see-thru bowl. even though i had both set dead-on to 23mm they were quite off when i put them on the car. not sure if it has to do with the density difference between gas and water, the tilt on the car or what, but i eventually got them both to 23mm (again). i used some clear vinyl tubing as a temporary sight glass which was quite helpful these first times around. she fired up quickly and after warm-up i synched them at idle and high-speed w/the old unisync that i've had for decades in my tool box. worked a treat. took her out for a test drive and was sorely disappointed... no power, burbled and popped horribly on decel, wouldn't rev, no fun. it sounded like the mixtures were way out of sync, and i couldn't get them to match up. decided to do another float level adjust, but this time i figured i'd go for the fuel in the jet nozzle rather than the height of the float bowl. read on one of the blogs out there that the recommended fuel level corresponds exactly to 1cm (10mm) below the bridge, which you can check by turning down the jet adjusters 10 full turns (1mm each) and fuel should be right at the top of the jet nozzle. turns out that i needed the rear bowl to be set about 5mm higher (18mm down, vs. the 23) in order for the nozzle to get its fuel at 1cm down. not sure why... she ran much better and is now quite driveable, although still not perfect - i ran out of daylight so will need to do more testing/tuning. next step will be setting up the dual-sensor afm so i can get a better idea of what's going on vs. just reading plugs. stay tuned... carbs on - ready to run temp sight glass setup
-
i have the stagg struts on eibach springs on my '78 and like them. not a track setup, but great for spirited street use. my z is a dd so i need commuter comfort as well and this does the trick. the biggest single handling improvement, however will come from a set of thick sway bars. totally transformed the ride by pulling out almost all the body roll. makes for a very fun car in the corners.
-
a broken watch is right twice a day ;} seriously though - the clock in my '78 keeps absolute perfect time, dead on to my iphone after over a year, and yet the digital clock on my stereo picks up 5 min. a month. congrats matthew - ya got a healthy project she looks straight and doesn't appear to have a lot of PO bodywork. when i got my z i was fully intending to do a sbc swap because i know that motor well from my teenage years and always liked the glug-glug-glug sound. i was advised to try out the L6 first, as it is a great motor with lots of character and i have to say i'm glad i did. something about the hard-pulling revvy nature of it coupled with a raspy exhaust note just really seems to fit the car. it grows on you.
-
wow... didn't even notice that big ol' open tube! while you're at it, check the pcv hose (underside of manifold down to block) it runs right over the exhaust manifold and the heat bakes it until it cracks & disintegrates. another huge vacuum leak spot.
-
i believe the distance between the contacts is related to the point in the throttle application that the contacts close. in other words, it's not just a measurement of the gap, but a measurement of the timing of the switch closure in relation to your throttle position. bending the contacts can get you the gross adjustment if it's way off, then loosening the screws and twisting the assembly gives you fine adjustment to get it right where it should be.
-
first thing i noticed is an un-capped vacuum port next to the brake booster. vacuum leaks and crusty electrical connections are your first 2 biggest enemy. the third is chopping up the system too much - all the sensors need to work together or you will not get good results.
-
new sneakers - nice!
-
Wow, who knew?? Thanks so much cap'n - I'll pm you.