rossiz
-
Posts
1,109 -
Joined
-
Last visited
-
Days Won
30
Content Type
Profiles
Knowledge Base
Zcar Wiki
Forums
Gallery
Events
Downloads
Store
Blogs
Collections
Classifieds
Everything posted by rossiz
-

Project Boondoggle (or, so I went and bought a Z!)
rossiz replied to charliekwin's topic in Open Discussions
been there - feel your pain. i found quite an interesting array of "treasures" when i gutted my interior. my favorite: seat belt retractor was not working correctly - took it apart and found a couple of fake fingernails (painted) stuck in there. lovely. keep posting pics so we can all vicariously enjoy the progress -
i had the head off at the time and used a pressure washer (no chemicals, just water) down into each water passage and blew muck out of the frost plug holes, then went laterally between frost plug holes, it kept puking out crud and goop for almost 1/2 hr of flushing, then eventually ran clear.
-
the biggest single improvement in handling on my 78 was a set of thicker sway bars - i gotta thank blue for that suggestion. the stockers are like hairpins in comparison. body roll is gone, the thing just squats and bites in through chicanes and is so much fun to rip around in. i can only imagine the improvement of adding one entirely...
-
a gallon of coolant and an electrical repair kit + a flashlight. it's gonna be an epic adventure! we'll miss ya out here... ride safe
-
i'd pull 'em all out and flush the block - you'll be shocked at the crud that will come out. then replace with a set of brass ones. they're cheap and you will be much happier knowing your block is getting good circulation. you can drive one side in and the other pivots out, then grab and yank w/pliers. stubborn ones you can drill a hole in and tap a drift pin into it then pry it out. somewhere on here i posted a thread showing the goop that oozed out of my block when i pulled my plugs - it'll inspire you.
-
ouch - some things can't be un-seen... or un-imagined...
-
looks great - i'm jealous of the progress!
-
i've had to do the same thing - much easier than it seems. the pan is made from thin sheet metal and it will flatten as easily as it distorts due to overtorquing. if you have nothing flat to use as an anvil, go to the hardware store or home depot and pick up a piece of 1 1/2" or 2" x 1/4" steel flat bar - they sell 4' lengths pretty cheap, and it will be useful to have around. lay the bar flat on a concrete surface and put the pan upside down on it and use a ball peen hammer to work your way around it. lots of light taps are better than a few big hard ones... you'll get a sense for it pretty quickly. it will get nice and flat and you can run a sanding block over it to knock off any peen marks or texture from the steel flat bar, then a fresh coat of rattle can and you'll be good to go. fun!
-
so the carbs are super simple, but he devil's in the details w/the needle and damper oil. no such thing as a free lunch in the world of tuning... i'm thinking about putting a pair of wideband sensors in the header to tune mine with the new engine build - hope to avoid hours of trial and error.
-
how do these needle grinds compare to the stockers? or is one of the ones shown what came as oem?
-
how cool is that?!? (the car recovery - not fastwoman's dongle, of which i have no knowledge whatsoever...) what an awesome story!
-
Project Boondoggle (or, so I went and bought a Z!)
rossiz replied to charliekwin's topic in Open Discussions
congrats on the purchase - let the fun begin! mine is a 78 with the 240 bumpers. black dragon and futofab both sell them for ~$400 shipped (each) or you can go 2x that $$$ for harrington stainless out of the uk. if you want a quick, cheap option i have a basically new 240 front from black dragon with a small ding in it - pm me if you're interested. -
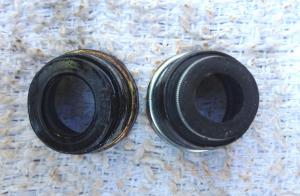
fasteners Fastener "head stampings" or ID numbers/letters
rossiz replied to Careless's topic in Open Discussions
my 78 has the sems style valve cover bolts -
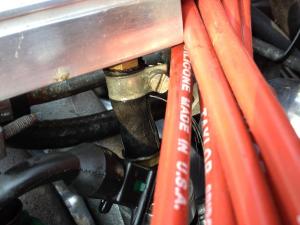
+1 on ztherapy - they have a specific high-silicone hose for this application, which will hold its shape and not put stress on the nozzles.
-
huh... who knew? seems odd though, as the one with the flats facing up would seem to hold water if those two tiny drain holes near the spindle ever got plugged, and doesn't the arm sit in at an angle with the hub end down with no load? this would put those drain holes up top - unless the hub end of the section is open... anyway it seems goofy to me.
-
if you tack around the circle, cool in between hits, keep the bottom in a bucket of water, should be fine
-
great info cap'n - truth be told, i've been looking at/wondering about that mysterious little silver barrel ever since i was a kid tuning up the 3.5hp briggs & stratton on my miinibike and never quite understood what it did. just knew it was some kind of magic part that was somehow necessary and prayed i never had to be able to explain it to another kid. it was just something that came in the box of points and you replaced it with your tune-up. fast-forward to a few months ago when i replaced my rotor/cap and i was surprised to see a condensor mounted near/wired up to my coil with no points in the distributor... the good folks at o'reilly couldn't locate a new one, so i just cleaned the contacts, said some magic words and put it back where it was. brought me right back to grade-school days...
-
those coilovers do look pretty sweet - and perhaps the smaller diameter spring will allow a wider tire? i just picked up a pair of 240 top isolators for $40 on ebay, will swap 'em in soon and do a before/after to show difference. i've got eibach progressives and the rear is slightly higher than the front, so i'm hoping this will do the trick. i liked the way jim (s30driver) stance is with this setup so figured i'd give it a try.
-
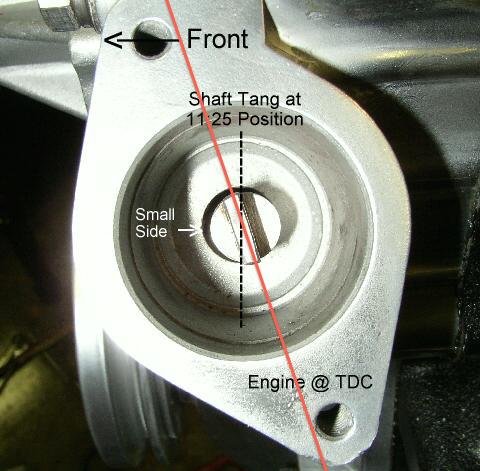
i always got flummoxed by the clock analogy - for me it's easier to lay a straight line from rear side of one bolt hole to front side of the other and line up the tang that way...

-
nicely done. installing my headliner was second only to replacing the blower fan in generating the greatest cuss-per-minute rate. what a total pita. working upside down, gotta cram those edges under the perimeter trim, one-shot or nuthin w/that contact cement, mine looks a little wavy... i hope yours was less stressful - you sure made it look easy!
-
beautiful work - love it!
-
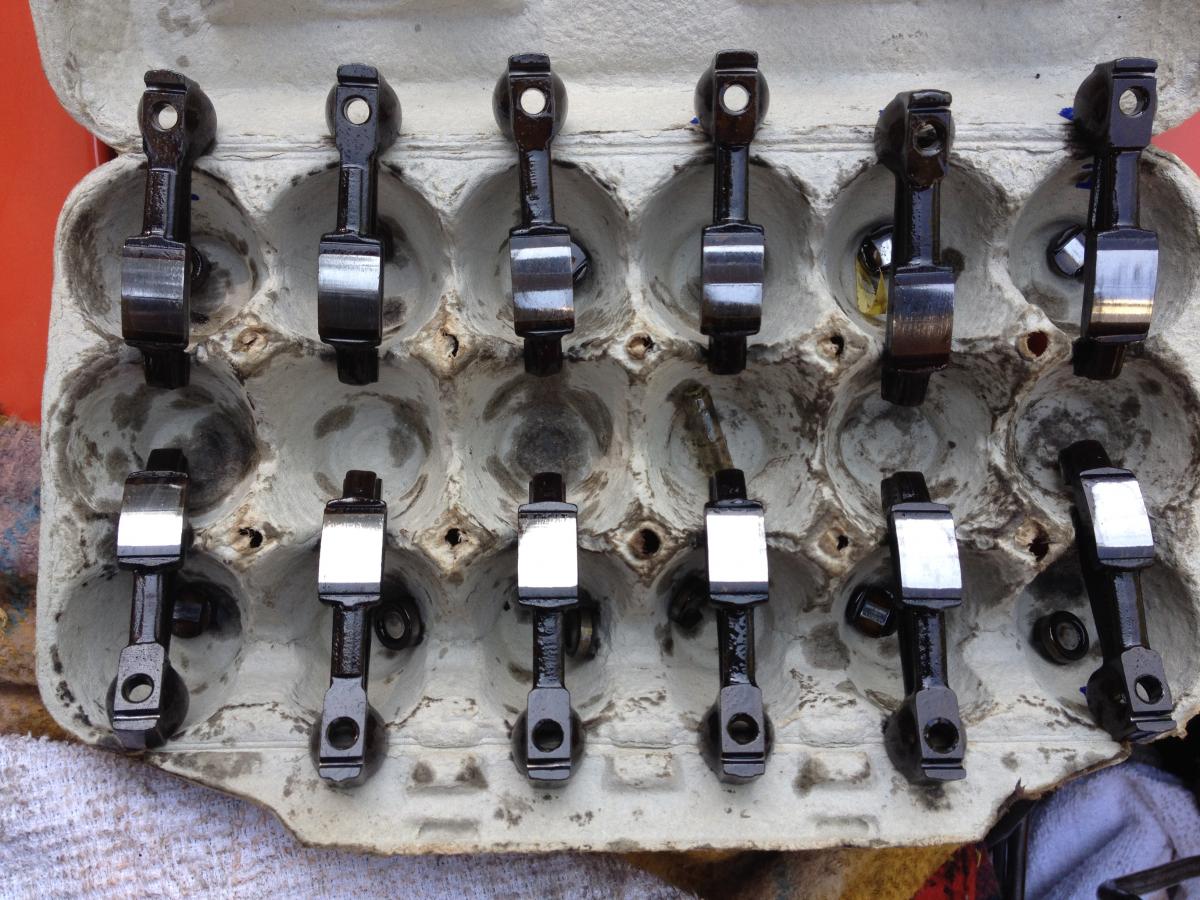
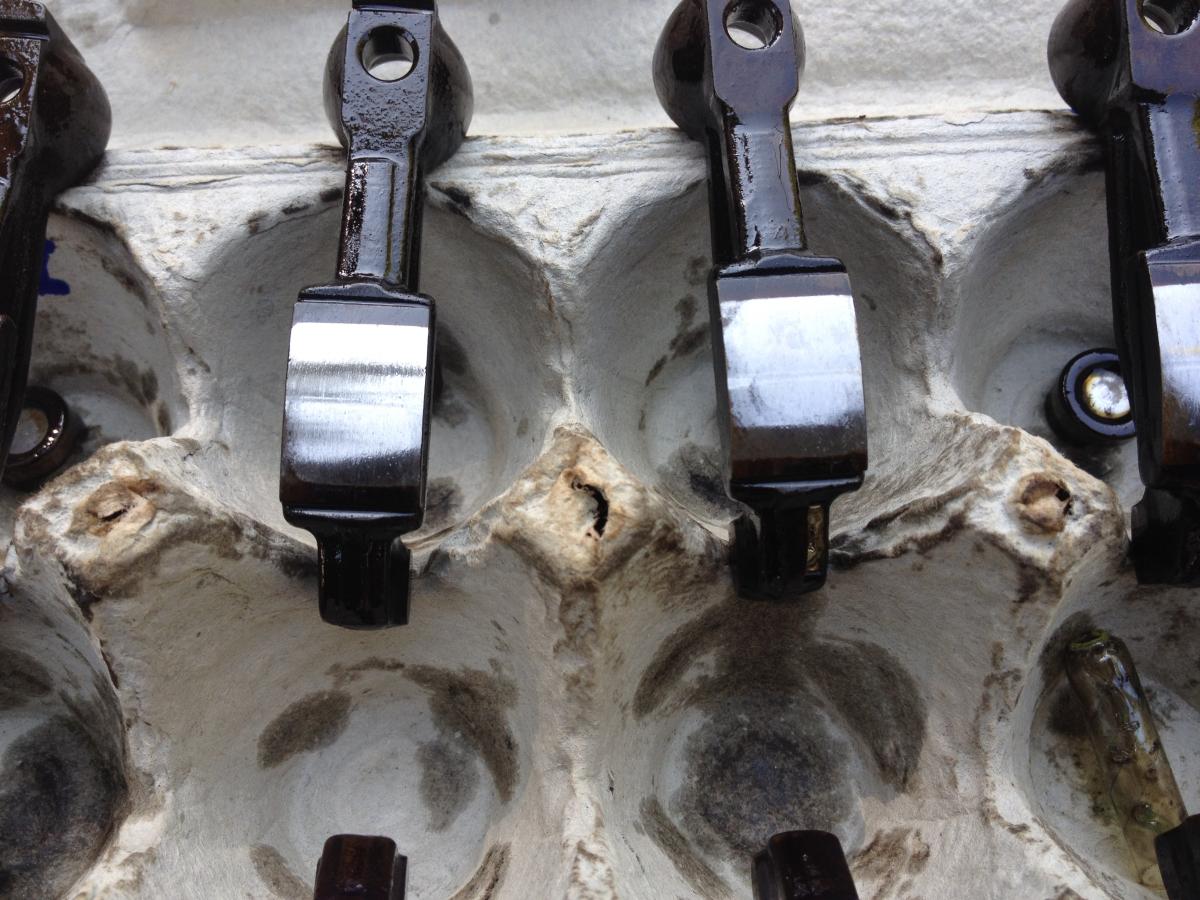
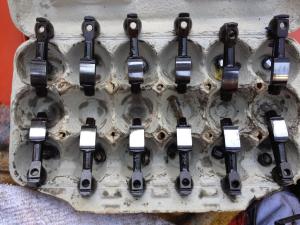
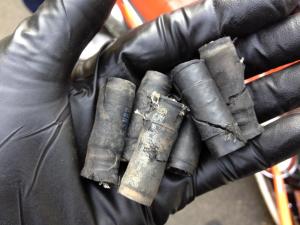
after breakfast we headed back up to seattle (glorious morning for a drive) to replace jim's aging valve guide seals. he had been noticing a puff of smoke on cold startup as well as some smoke during high vacuum driving conditions (long downhills under engine breaking) and we were hoping this was the culprit. the project went smoothly and we didn't loose any valve keepers in the hole of doom... i had read a post about using vinyl tubing to hold the valves up in lieu of rope so i picked up $1 worth of the stuff at ACE and it worked a treat. much easier than stuffing wads of rope in the cylinders and much easier to get it out. the old seals were completely useless: rock hard and stretched out like an old sock - they practically fell off. While we were at it, we did a compression test (170, 170, 170, 160, 170, 170) and used the little scope camera to peek in at the bores. the pistons were a little cruddy on top (no doubt from those old seals) but the bores looked great. we finished, fired it up and were pleased that she ran well and no puff of smoke at cold startup - mission accomplished! we were about to close the hood i noticed what looked like a blonde hair waving in the air stream of the fan off of one of the injector hoses - i reached down to pull it off and realized HOLY SHITE: it was a fine stream of gas squirting onto the manifold! we shut it off immediately and saw that 4 of the 6 injector hoses were leaking and dripping right down onto the exhaust manifold which (thankfully) was not yet hot. seems they were old and cracked, and during the valve work we flexed his fuel rail around a little and the cracks opened up and started pissing fuel. pulled 'em all off and went straight to o'reilly's and picked up a couple of feet of new efi hose and had 'em all replaced in short order - no more leaks. really scary, as jim's getting ready to do a 2,400 mile cross-country drive and that would have been a very unsafe situation. shudder to think that a beautiful z could have gone up in flames for lack of $9 worth of hose - something to check regularly!! all in all, a well spent sunday, valve guide seals - which one would you rather have? nice rockers - perfect wipe pattern, perfect finish (must be using the right oil...) disaster narrowly averted: old hose: all done:


-
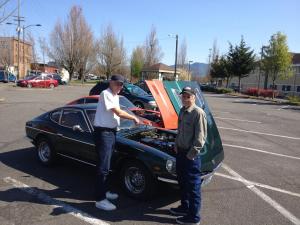
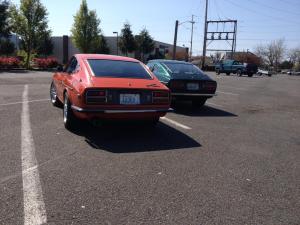
Yes, another successful meetup - and the wait staff was excellent (can't let these pics leak out or Mark's wife will cut off our supply of homemade jelly!) the feast: the scenery: car talk: 2 is a start - we need to get more zs in the lot!


-
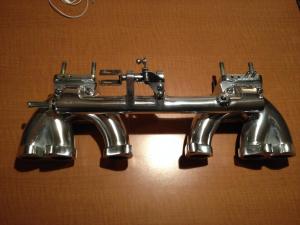
intake manifolds cleaned up - carbs will get some love when i rebuild them...
-
head to the auto parts store and pick up 10' of vacuum hose (bring a piece in w/you to get the right size) and spend some quality time w/the FSM and replace every vacuum hose in the engine bay in its correct routing. remember to check the pcv hose (runs from the block to under the intake manifold) as these get dried out/scorched from the exhaust manifold and disintigrate on the underside. the efi system requires the vacuum systems to be tight and correctly functioning. can't stress this enough - get all of that done before you chase your tail with trying to tune. while you're at it, unplug, clean and re-plug every connector you come across - including the injectors & cold start, especially the ones that go from the sensors at the upper coolant port on the top of the head. the signals from these sensors (temp, thermotime) have significant effect on your efi.