rossiz
-
Posts
1,109 -
Joined
-
Last visited
-
Days Won
30
Content Type
Profiles
Knowledge Base
Zcar Wiki
Forums
Gallery
Events
Downloads
Store
Blogs
Collections
Classifieds
Everything posted by rossiz
-
fantastic! love to see a home-brew project with such great results. the color looks really nice in the pics - it looks like there might be some metallic in there? share a few shots in the sunlight congrats on having the huevos to take on such a big project by yourself - inspiring!
-
how very cool!! i've been looking forward to progress - love hearing the process.
-
i agree w/cbuczesk - check the rack clamps & bushings. mine were in place but very worn and when i turned the wheel back/forth w/the car parked to load the rack in either direction, i could look down into the engine bay and see the rack lifting up & down 3/4" and side-side the same amount. made for very sloppy steering and a wiggly steering wheel at certain speeds.
-
i noticed the porch was empty when i got home last night - was hoping a z-restoratioin thief hadn't intervened! i've got a squishy wheel to donate to this cause as well, maybe we can get a pool of folks who have replaced them (gotta be lots by now) and if someone were to make a CNC pattern they could bang out replacement wood surrounds in bulk and maybe sell a really cool item!
-
round - came from an N47 head.
-
all done on a closed course, with professional drivers. obey all posted traffic regulations at all time. not responsible for accident or injury caused when used for un-intended purposes your results may vary..........
-
if you replace even one bulb - get a full set and replace them all while you're in there. it's not a particularly complicated job, just a pita and if one is out, the others are on their way... also, you can get brighter (slightly higher wattage/output) replacement lamps which help a great deal. some folks have also painted the inside of the gauge cans white to add a little more reflectivity which seems to make the light a little brighter and more evenly distributed (bunch of threads here to search). plan on an afternoon mucking around with it, then be done with it for another 20 years
-
there are lots of folks who keep a z as a DD - including me. although, to be fair i've got other options (wife's car) if i need to do a project and it will be off the road for a bit. the key is to remember that it is an old car, so it will need some love and some new parts. but once you've re-built or replaced the common stuff, these cars are really simple and quite stout. i was amazed that after 140K miles, the cylinders still have their honing cross-hatches. the weak points are electrical, structural rust and rust-induced fuel system issues, all of which can be sorted out (although i would avoid serious structural rust if possible - too much $$ and work for me). parts are pretty readily available - there are some bits that are rare, but lots of aftermarket stuff to keep you running.
-
test links - let me know if this works (best listened to with headphones or good speakers): Comparison Control Sample (lexus going by) https://drive.google.com/file/d/0B5oXDE1nMrAuYmtHeTc4S1lFWkk/edit?usp=sharing Revving at the curb https://drive.google.com/file/d/0B5oXDE1nMrAuMGlraEdJNnpHdDA/edit?usp=sharing https://drive.google.com/file/d/0B5oXDE1nMrAuMTBocDMxWnd4dUE/edit?usp=sharing Flyby #1 https://drive.google.com/file/d/0B5oXDE1nMrAuYVpxYTVDV0tVbTQ/edit?usp=sharing Flyby #2 https://drive.google.com/file/d/0B5oXDE1nMrAuRDZGXzlkMDdzbVU/edit?usp=sharing
-
i would think you could just peen over the edges of the yoke at the perimeter where the u-joint cap is, you won't need very much at all to hold it in place, especially with a press-fit to begin with. i'm guessing if you use a punch in 4 places you could get it to work just fine. or just use a ballpeen hammer and go around the edge with the other end of the yoke supported on a vice.
-
wow - looking forward to the "after" pics
-
that's a sobering post... while there are stronger ramps out there, our cars are pretty light and the ramps are only carrying one wheel load (roughly a quarter of the car weight). i don't think i'd be rolling my old '69 skylark up on these (loved that car) but i'm feeling pretty far below the limits with a z. also, i believe the structure of a pressed metal ramp is highly dependent on its geometry, so it's critical that the ramps are on a solid, level surface. if they are allowed to distort during loading due to uneven surface or a portion sinking in to softer material (hot asphalt) then yes, once they lose their design geometry they can collapse. i've heard of people being crushed when jack stands fell over - again, if not loaded evenly, say perhaps with the frame rail sitting off-center in the stand jaw, or if allowed to sink into a soft surface they will want to tilt and can collapse quite suddenly as well. i wouldn't exactly call using a ramp correctly, for the proper weight rating to be "rolling the dice".
-
way cool - i like the way that works. i can see a setup with the ability to shut off the pressure and/or vacuum independently via a couple of simple valves it would be a nice diagnostic tool - especially with a dual-scale dial that would also read in-hg. love it!
-
ok, wow... that's really cool - where did you pull the vacuum? would this be a good tool to cross-check for vacuum leaks? what if i have crappy vacuum in my system (even w/no leaks) would that screw things up and give false fuel pressure readings? and, of course - cost and source must be shared, please...
-
took her out on a small, inclined straight down the street (blue knows this little drag strip) and had my buddy record a couple of runs as well as one revving at the curb. i'd love to post but can't seem to figure out how to load mp3 files - anyone know the trick??
-
is the stuff on the back of the valves gooey/gummy or powdery/crunchy? just seems like oil from the pics vs soot... are all the valves equally cruddy or is it localized? if all the same it might suggest the oil was coming in through the intake manifold (pcv) vs localized leaning towards individual valve seals.
-
i have an inexpensive (harbor freight) floor jack with low-clearance lift point - works great for getting the car way up on jack stands. with my stock front valence and the eibach progressive lowering springs it juuuust squeaks under in the front and i need to go in from the diagonal to have handle pump clearance - the first few pumps are tiny, but as the car goes up i gradually move up to full swing of the handle. the ramps are super quick/easy to do a quick job like swapping out the pre-pump fuel filter (a regular task for me). the advantage of ramps (and the reason i bought them) is that you can lift the car with the suspension loaded, so things like sway bar, control arm bushings, etc. can be set & torqued correctly under load. jack stands enable the opposite - letting the wheels drop to swap suspension/wheels/etc. just a different tool for a different job. and for me, the ramps are quicker to pull out and roll up onto (i store them under the porch) vs. my jack and stands, which are in the shop, so the lazy factor comes into play...
-
CO: now that you mention it, i do remember your post - guess that qualifies for "independent verification" James: that looks like a good solution, i'm glad to hear yours has held up for so long. i thought the silicone was just to keep the needle steady against vibrations for more accurate reading (my needle flutter was pretty big so you always had to guess and average reading over a couple psi), and that the injector pulses would still have the same effect on the internal gearing, but without transmitting it to the needle. so i figured while it may look better, it would still wear out. thanks for that suggestion, i'm gonna order me up a marshall gauge and treat my engine bay to a nice sst component!!
-
i have the same $40 metal ramps - they work fine on an exterior concrete driveway (brush finish) i have the eibach progressive lowering springs, so about 2" lower than stock, no front air dam. tricky part is getting up on them when you're alone - i use a mirror to see when i'm up on the flat spot (actually a slight hollow). you can actually feel when the wheels drop in, but the fear of dropping off the back makes me want to watch!!
-
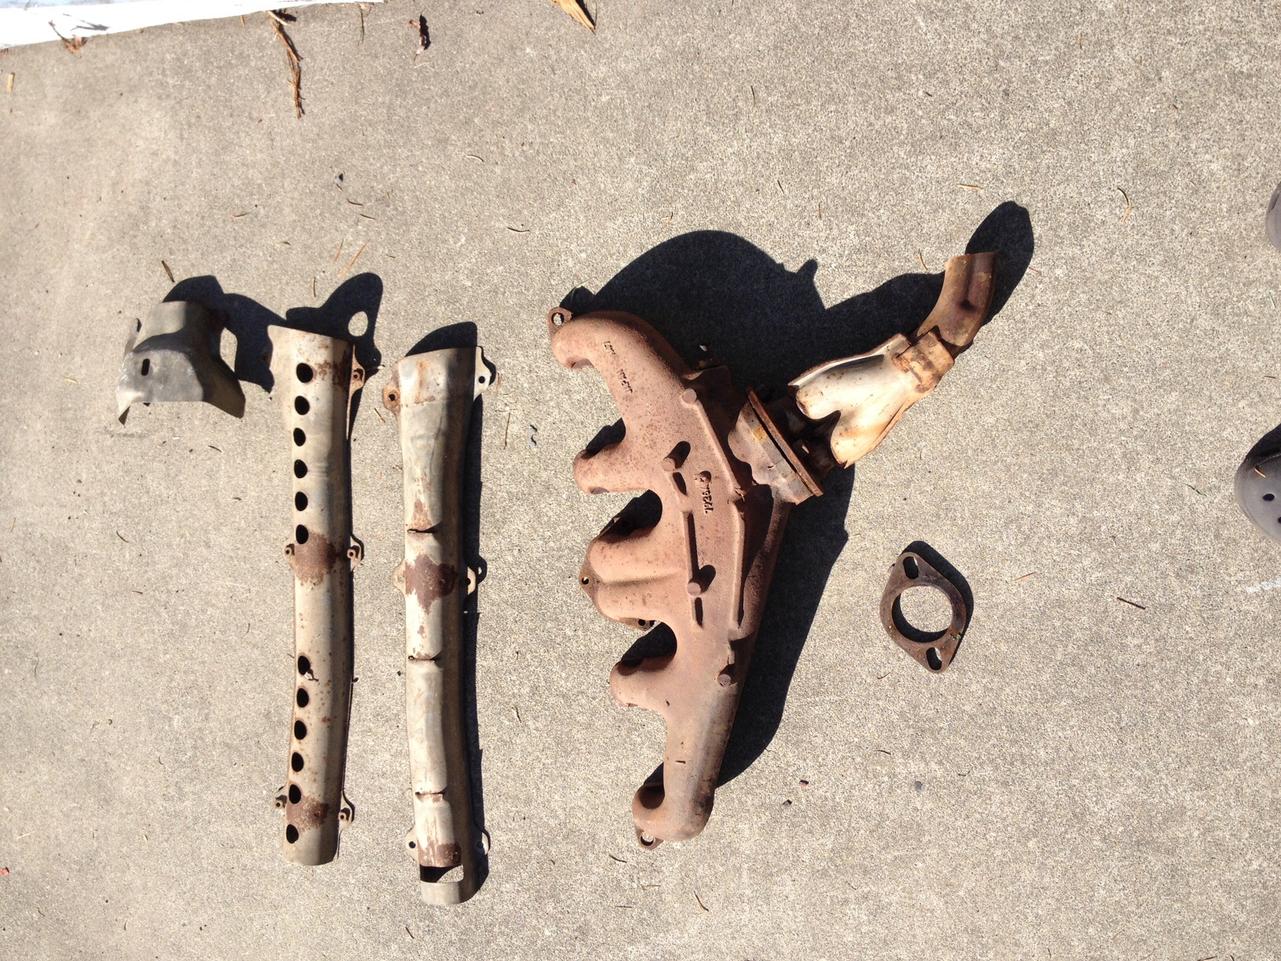
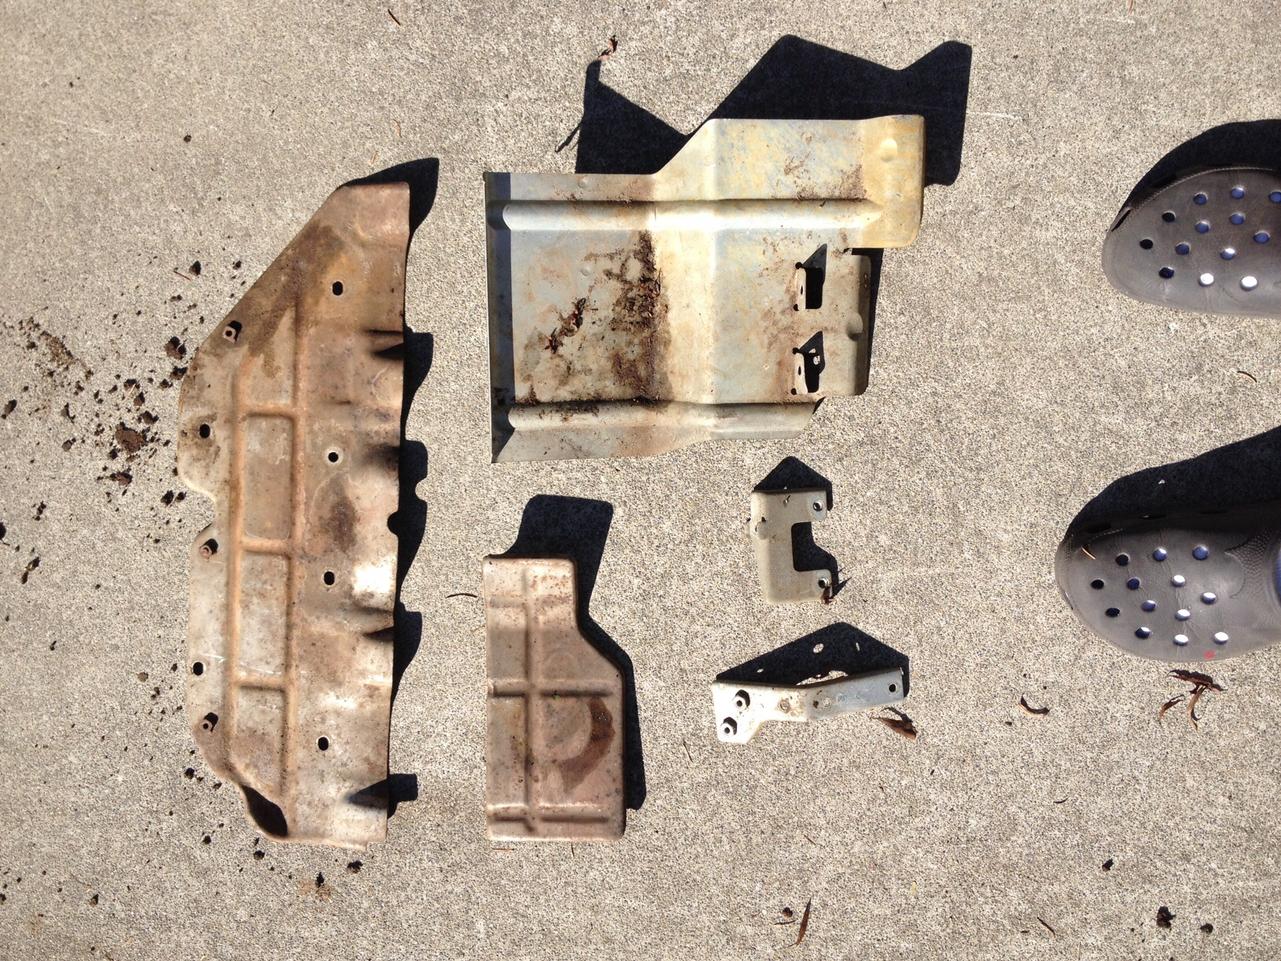
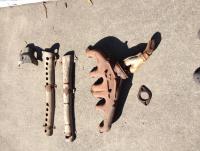
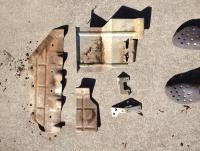
found homes for the bumpers, louvers and dome light - the rest is still up for grabs... a few more bits to add to the collection: exhaust manifold exhaust downpipe heat shields intake manifold & other heat shields (full set) love to get this stuff gone - anyone??
-
i thought so too, but their really isn't much vibration where it's mounted - right against the fuel filter, with rubber fuel line on either side of it. if you saw the needle flutter, you'd get it right away. the new gauge w/new filter is pretty rock solid now.
-

240z rebuild / restoration right down to the shell
rossiz replied to grannyknot's topic in Build Threads
fwiw - i installed a new headliner with the spray adhesive provided (from msa) last winter and it's been great so far. i wound up w/a few wrinkles due to my poor skills, but they are not horrible - and they have not changed over the summer. the key is prepping the underside of the roof (total pita to get all the old crud off) and using new foam, as the old stuff will keep tearing apart and just ain't gonna cut it. -
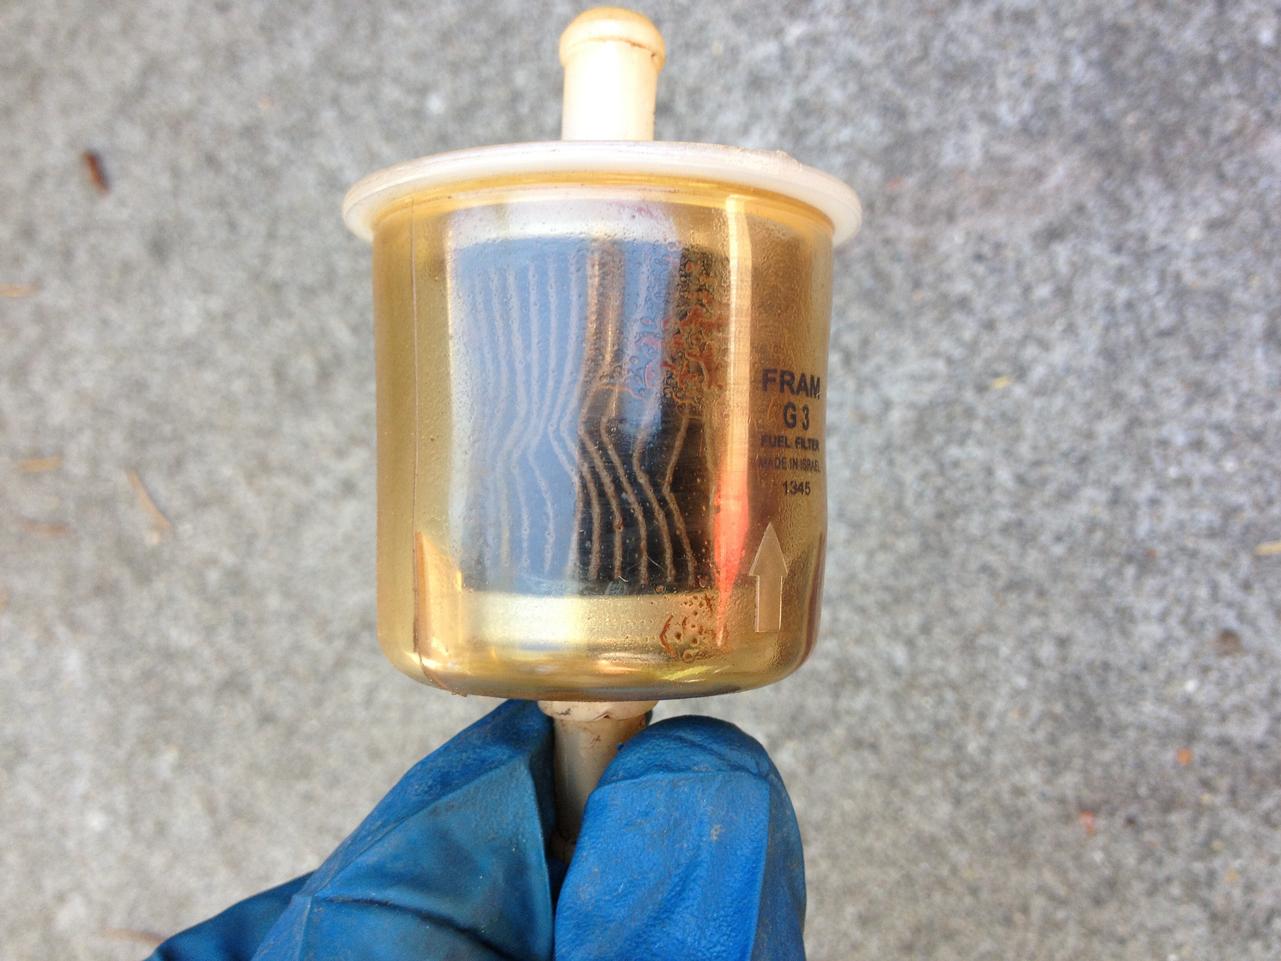
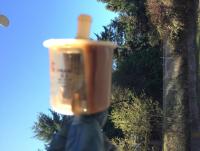
The car has been running really well, but just recently I've been having a strange hesitation at WOT above 4K where it kinda feels like a rev limiter is cutting in. Turns out I was having a fuel starvation issue due to a pre-pump filter that was packed with crud. It was flowing enough to run at moderate throttle, but couldn't supply enough for peak demand. My tank isn't horrible, but clearly there's some rust in there - I swapped out the big one up front, and installed the pre-pump filter when I first got the car. I replace this little guy every couple of months (clearly not frequently enough!) I was also began having starting issues - both times the car was on a severe incline (nose up) with less than 1/4 tank and i couldn't get it to fire, then pulled the oil pressure sender with the key on to run the fuel pump and primed the rail a bit, then it started. Not sure if the nose-up attitude affected the fuel pick-up? I don't quite know the configuration inside the tank... The culprit

-
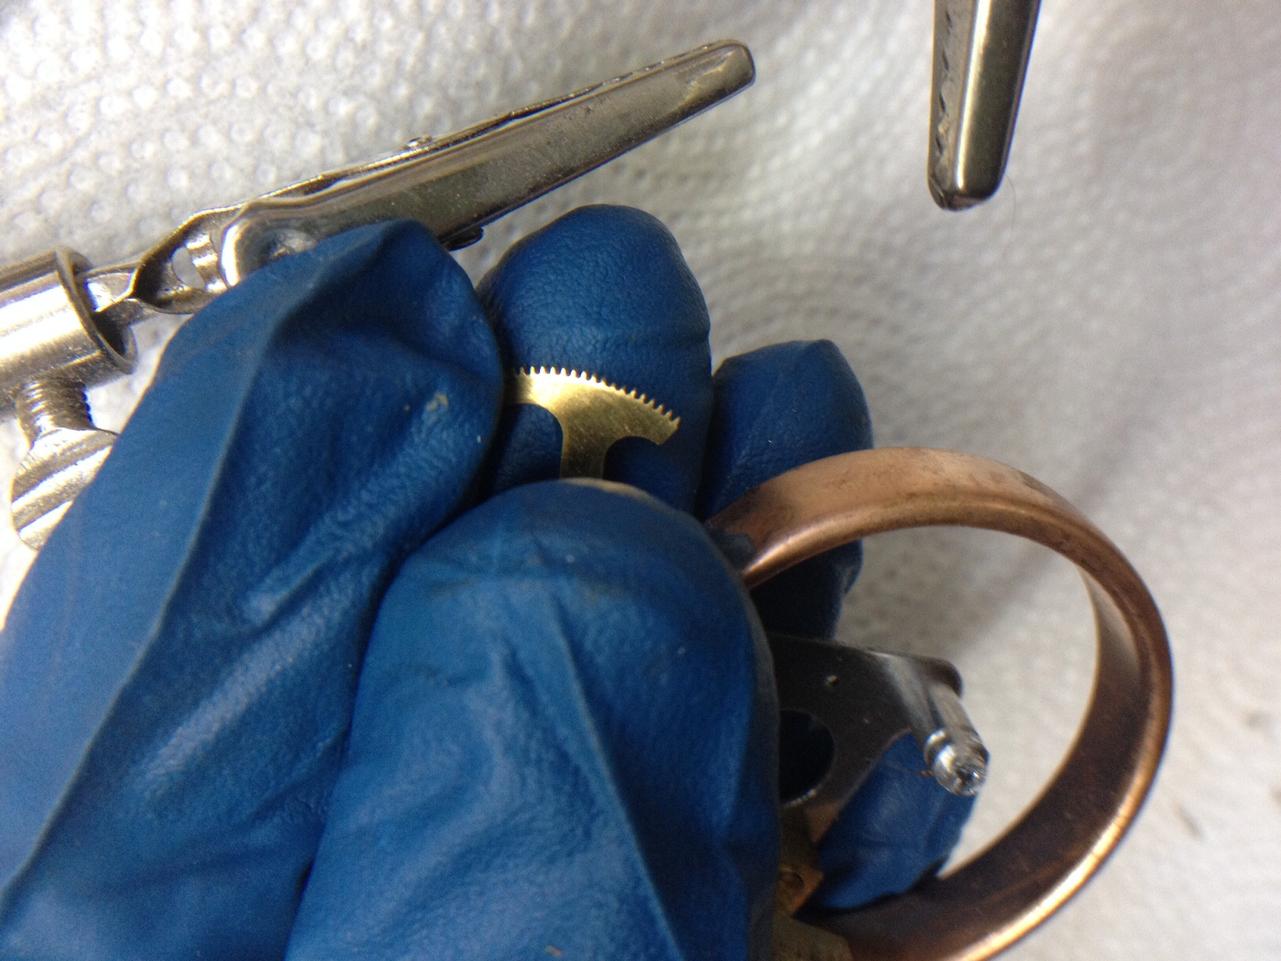
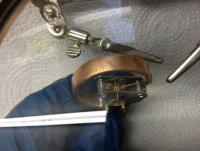
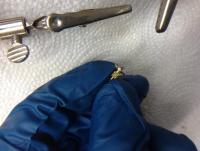
So I was having some hesitation at WOT and some funny starting issues which felt like fuel delivery problems (they were, due to a clogged pre-pump fuel filter) and when I went to check my fuel pressure, the gauge had crapped out - again. This is the second one I've had, and both lasted a couple of months before dying. My gauge is installed with a brass T fitting just after the fuel filter in the engine bay, and I've been using generic hardware-store variety pressure gauges ($10) so no huge disappointment, but I wanted to find out what the problem was. Probably because my pre-pump filter was so filthy, the pump was working hard to keep up pressure (which was causing the stumble at WOT) so every time the injectors fired the pressure would drop instantaneously, then pop back up, causing the needle to constantly flutter by about 1-2 psi. This constant fluttering actually caused the little brass gears inside the gauge to wear out, till there were no teeth left at the mesh point. With a new pre-pump filter in place, the new gauge is much more steady, so I'm hoping it will last a little longer this time. I am, however, thinking of just getting an electronic sender unit and wiring a gauge inside the cabin to more easily monitor pressure. Gauge inner guts Gear that drives the needle - all teeth worn out in the center Gear that pushes needle gear - look closely for missing teeth in the center

-
great progress! there are a few really simple, inexpensive things you can do to quickly upgrade the driving experience - just to address the "touchpoints" that make the car feel nicer to drive. these things made a huge difference to me: restore the steering wheel - lotta threads on this, you can do it in a couple hours. just sand down the "wood" part with incereasingly fine paper then you can either spray it with various clear coats or just wipe on some lemon oil. then some steel wool and a rattle can of satin black to the spokes and it will look/feel awesome. next is to cover the seats - either a set of new vinyl (a little more spendy) or just get a set of inexpensive pull-over covers . a quick way to enhance the driving experience and keep the fun factor up while you power through the other, less-enjoyable tasks...