rossiz
-
Posts
1,109 -
Joined
-
Last visited
-
Days Won
30
Content Type
Profiles
Knowledge Base
Zcar Wiki
Forums
Gallery
Events
Downloads
Store
Blogs
Collections
Classifieds
Everything posted by rossiz
-
at the local o'reilly auto parts store (yup, they know me by name there) and wound up parking next to this cool buggy based on the plates, i think he's about as far from home as he can get short of alaska/hawaii... best part was having to give him a push across the parking lot for a bump start :classic:
-
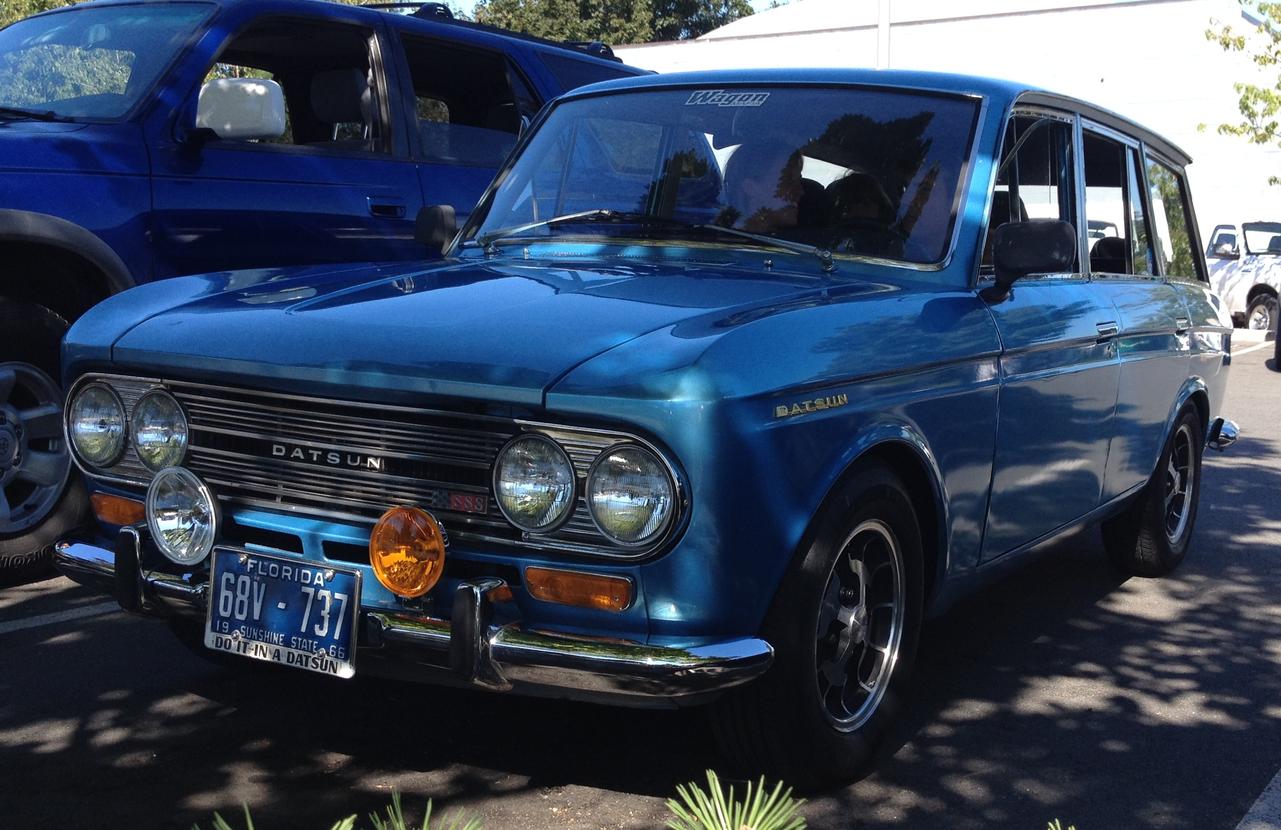
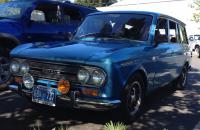
nice! very cool color too
-

Headlight Problem-No low beams-possible bad combination (dimmer) switch
rossiz replied to keith.abergel's topic in Electrical
funny - i should have piped up earlier, might have saved you some trouble, but thought i was the only one who made that mistake! i tore apart my whole harness, added extra ground connections at the headlights up front, took apart the entire combi-switch, everything, and when i was upside down under the steering column putting it all back together i accidently bumped the directional lever and VIOLA!! couldn't believe the whole time i kept twisting the right hand part back and forth expecting it to go from low to hi beam... perhaps i should have read the owners manual that was in the glove box. welcome to the club my brother -
Road to my first Z, looking to avoid potholes
rossiz replied to IceWilly's topic in Open Discussions
++ to kuryby above the other thing about bodywork vs. engine work: lots of engines around, a good running motor doesn't HAVE to look good, you can do it yourself with a manual and some time and pretty basic tools in a basement. a decent re-build will run well and last you many years. body work requires serious skills/experience to do WELL (of course anyone can do a quick bondo patch, but i sense you're looking for long-term quality) and paint requires a significant shop investment and expensive materials = $$ for a really nice job. even small short-cuts in body/paint will have you pulling out your hair in a couple of seasons with rust-through and other issues. there really are good examples of these cars out there, just need to look and be patient. best of luck - looking forward to seeing your story unfold once you find the right car. -
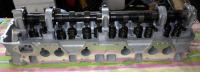
thanks cap'n felpro top end gasket kit pissed? no, annoyed? yes. i'm not too worried about the little stuff, more concerned with the cam/valves/surfacing - all of which appear to be well done. tapping holes and cleaning threads should certainly have been part of their scope, but compared to what i would have had to deal with taking my chances on a used head and doing all the machine work, i'm still ahead. wait - is that a pun?? actually, the stud situation was pretty gnarly - the PO had dealt with the #6 stud sheared off at the head surface by drilling a second stud hole off to one side/slightly below, and the two holes were actually siamesed/connected (the broken stud/plug shared half the threads). they must have slotted the manifold flange to fit the re-located stud. the re-surfacing was so clean that i didn't even notice it at first... i reversed the situation - cut a bolt and used it as a plug in the second hole, drilled out the broken stud, re-tapped the original hole so i don't have to modify my new header (if/when it ever arrives). all in all, fun with tools in my basement and a little more pride of ownership!
-
i was relieved to see it was on 1 no new timing chain for this go-round, just gonna see which position gets my marks lined up the best and go from there.
-
@ s30driver - didn't bother welding the egr passage, just filled the open end with jb weld. simple solution, though not as elegant i suppose... thanks for the kind wishes on the new head, i'm in the mood for some good results at this point!
-
yes - found another injector, oddly it cost almost as much for the last one as the whole first set! still a bargain though. the fuel rail is an experiment, may wind up building a higher volume rail later, but wanted to give it a try and see how it works - cost was nothing but a little time, so why not? we'll see how this odd combination of parts fares with the hot-start issue...
-
getting closer... all new injectors (thanks Zed!), o-rings, hoses, clamps are in, throttle-body and linkage cleaned up, just waiting for the exhaust header to arrive so i can put her all back together. at HuD 91gt: sorry, just noticed your post - the polish job is really just about time and elbow grease. i cut out the webbing with a combination of sawzall, hack saw, die grinder and hand file, same with the vestigial tabs for the egr. then it was much time with small sanding disks on the die grinder (scotch brite of various grits) and some hand sanding and steel wool, then a little bit of clean-up with a buffing wheel. it's far from perfect, wouldn't really call it a polish, more of a bright cleaning. you can spend forever getting it mirror-beautiful, but my car is a DD, not a concours specimen. i was just going for the "nice!" effect vs. "wow!!"...
-
got back from vacation and msa headers did not come - currently expect to ship on 7/11, which happens to be the day i leave for another trip... so i spent a bit of time going over the head and checking things out. chased every threaded hole (found 3 stripped ones for the valve cover and #6 exhaust stud was mangled - fixed w/helicoils) and pulled all the rocker arms to check the cam movement. to my delight, the cam spins beautifully. will do a cold valve-adjust and hope to button things up over the next couple days. the intake is pretty much rebuilt: wire-brushed out the runners (TONS of crud came out), webbing removed, ground and smoothed out, all new injectors, o-rings and hoses, Blue-style "hillbilly fuel rail" and a good clean-up of the throttle-body & hardware. the exhaust will be completely new as well - msa 6-1 header, 2/5" back to a resonator in the tunnel and new can out back. looking forward to getting her back on the road - can't wait to hear her snort w/this new head and the new exhaust system!!
-
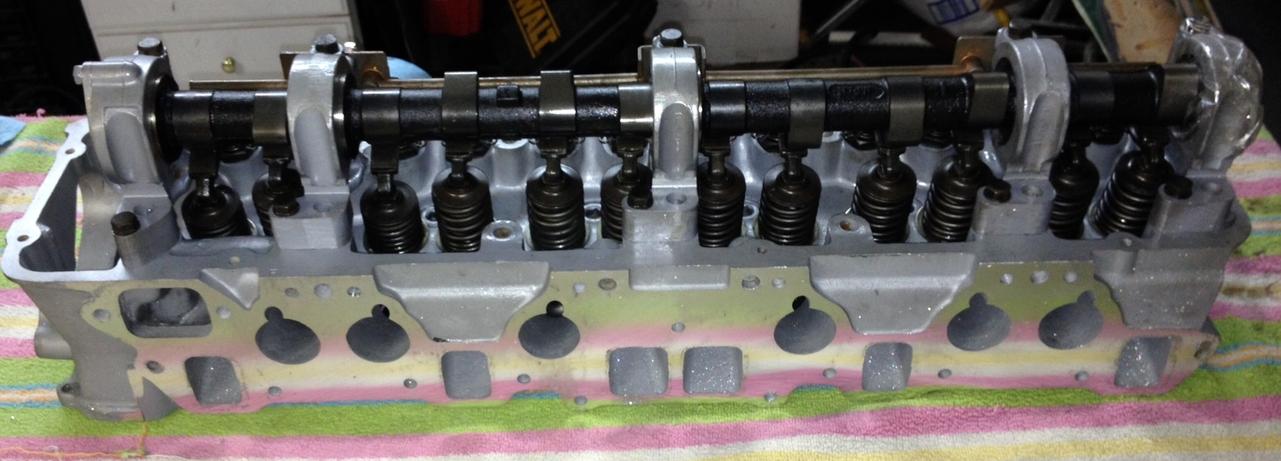
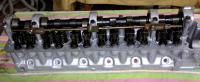
thanks for that - good info. i have a head that was cleaned and prepped and i'm going over it carefully to see if there's anything i need to do before going through the trouble of installing it. so far it's just been fixing a few threaded holes and doing a little bit of flow work on the combustion surface, the rest looks really good.
-
wow, bummer... did they say what made the other heads "not serviceable"? i'm going through an N42 myself right now and am interested in what to look for...
-
i used the msa kit that came w/their bigger sway bars. the (poly) bushings supplied were bigger (maybe less squished out?) than the original rubber - the nut wouldn't thread on, was about 1/8" too short it seemed... so i left out one of the bushings and cranked the nut down w/washer on top of stack and it put some initial "squish" into the bushings, then i was able to thread the nut on a few threads and torqued it down until the nylock ring contacted the bolt. after a few days of driving i wound up taking things apart to re-do springs (a separate issue) and found that the bushings had "settled" into a more compressed state, so i could re-assemble and this time i torqued the nut about 1/8" past the top of the bolt. things have stabilized since then - no continued compression. so i think the bushings need some initial "squish" and then settle into a spot where they are happy. at least for me... oh, and plenty of grease all over the links and bushings to keep things nice and slippery and avoid any binding.
-
mine were completely stuck and no amount of pounding or even a puller would budge them. the pickle fork was an $8 tool and worked literally in seconds. it's a tapered/wedge shaped 2-prong fork that you put between the tie rod and the end and give it a couple of whacks with a 5 lb. hammer. no worries about ruining the threads either. the only way to go in my book...
-
wait... did i hear someone say CHEERIOS??? mint green? welcome to the fellowship of strange z droppings ;}
-
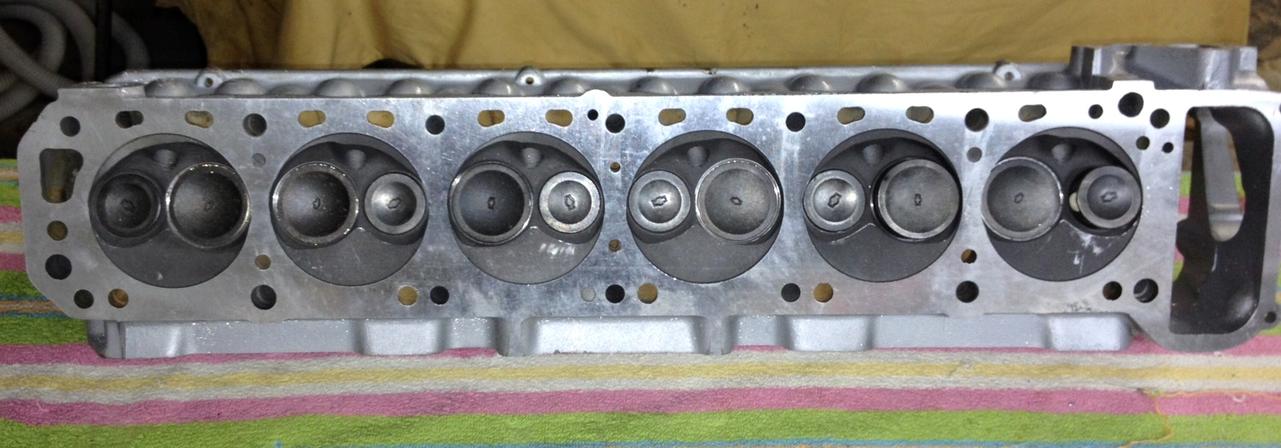
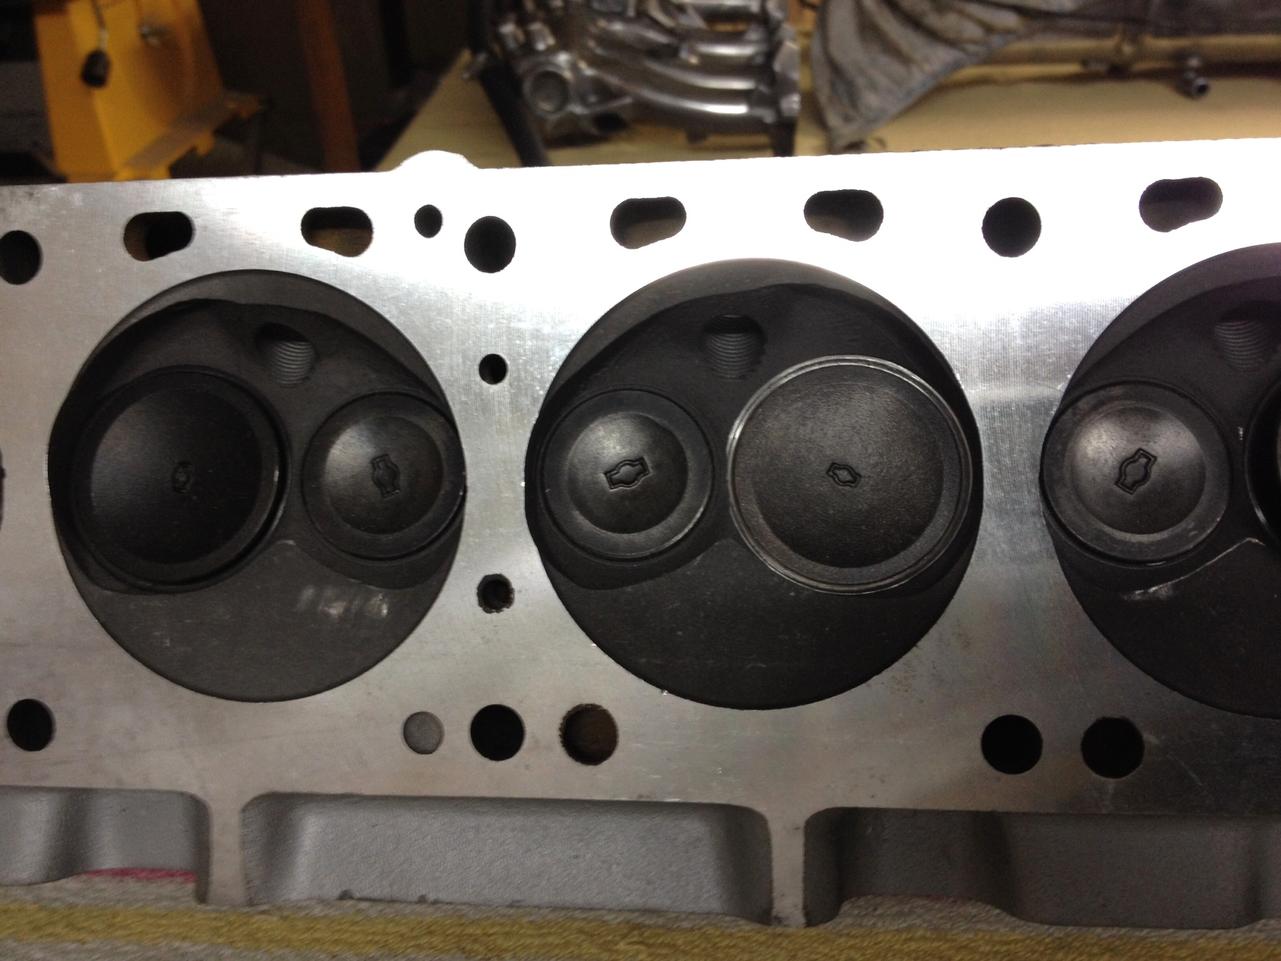
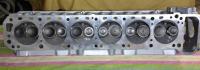
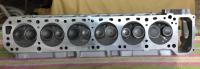
had some fun cleaning up the combustion chamber - traced the head gasket to set the outer limits and blended away all the perimeter sharps while singing johnny cash (bad pun intended). then i spent an hour w/the dremel and smoothed out all the transitions around the valves to de-shroud and help flow. will it make a huge difference? the world may never know... but it was a great way to spend the afternoon :} once that was done i got my taps out and chased all the threads, set the studs, mounted the thermostat housing and front cover plate and popped the whole thing in a bag where it will live for the next week while i'm away visiting family in massachusetts...
-
thanks zed, well aware of the wipe pattern and will check.
-
thanks for the cautionary notes - i'll check as i go. have to say it really does look good though. all threaded holes are perfect (including plugs), surfaces are very nicely machined and the whole thing is really clean. i'll check valve lash and wipe patterns just to verify the setup, then drop all the adjusters and verify the cam spins nicely. back out at the block, i got the water pump broken bolt/thread issue taken care of (pita) and it's installed, radiator is back in and everything is prepped to receive the head. my injectors came as well, so i got them all put together (new hoses, seals installed) and loosely fitted to the manifold. still waiting on the header though... tomorrow i'm gonna scribe the head gasket to the head and see about a little carving with the die grinder...
-
nice! always cool to meet the man behind the products - so easy to forget that there actually IS a real person behind the things we purchase these days. i picked up a couple of tools yesterday from a local "mom & pop" industrial supply house (no storefront, just a sign painted on the metal siding, dot matrix, perforated continuous feed perforated full size receipt printer) and it was so refreshing to see a business run by owners. they stayed 20 min. late to let me get there (traffic) and even though i was just buying a couple of taps, i was treated with great service. do snap some pics of the frame rails in place - would love to see how they came out.
-
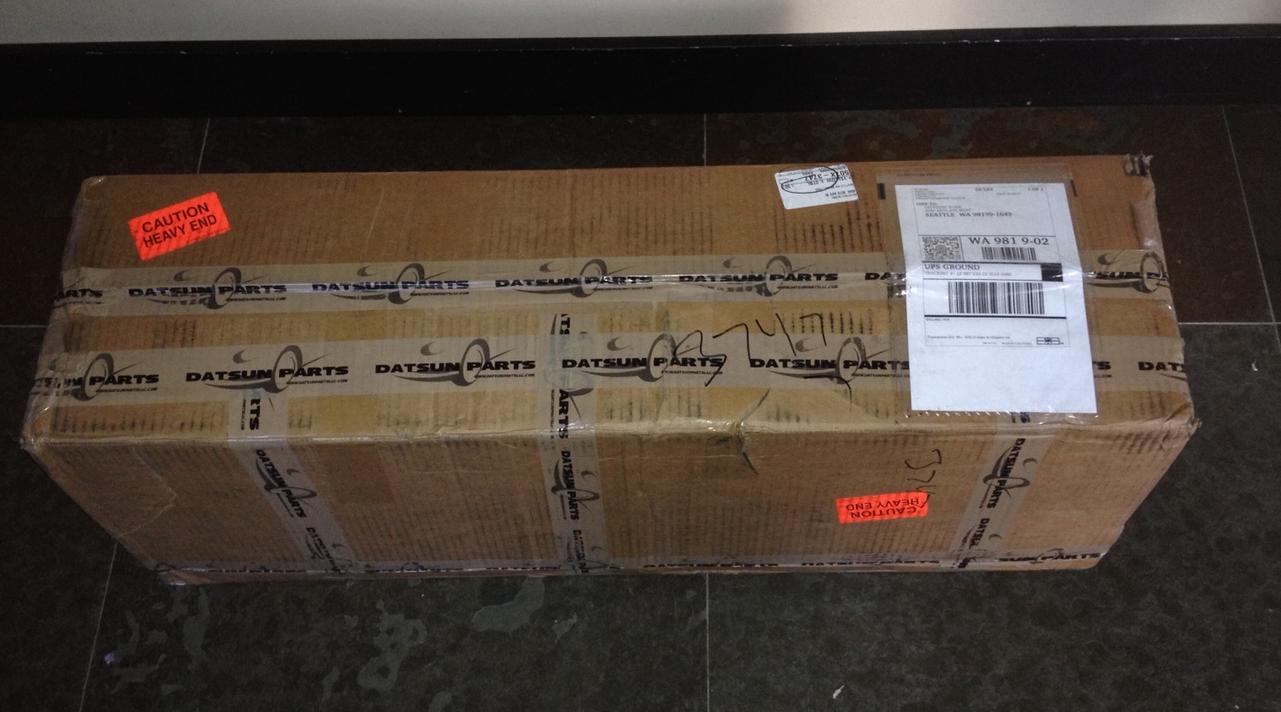
came home to a wonderful sight! very happy with the condition - well packed and nicely prepared. looks like they did everything they said they would. picked up an extended tap for the water pump bolt and got that all straightened out last night, also picked up a beautiful spiral fluted bottoming tap for the head bolts and chased all the threads down to get rid of carbon/crud. went to a local industrial tool supplier and got them, along with a new T-handle. the beauty of high quality tools cannot be underestimated... the taps cut like butter and the precision chuck in the new handle is just a dream to use. this afternoon i'm going to slap on the new water pump and start cleaning up the combustion chamber side of the new head, then maybe tomorrow it will go on the block. the goal was to get her running before my trip to massachusetts on friday, but still waiting on the replacement header from msa (back order) and my new injectors, so it looks like it will be another week before we see her fire up.


-
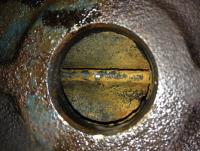
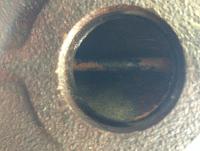
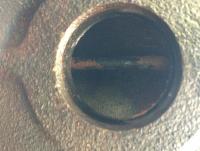
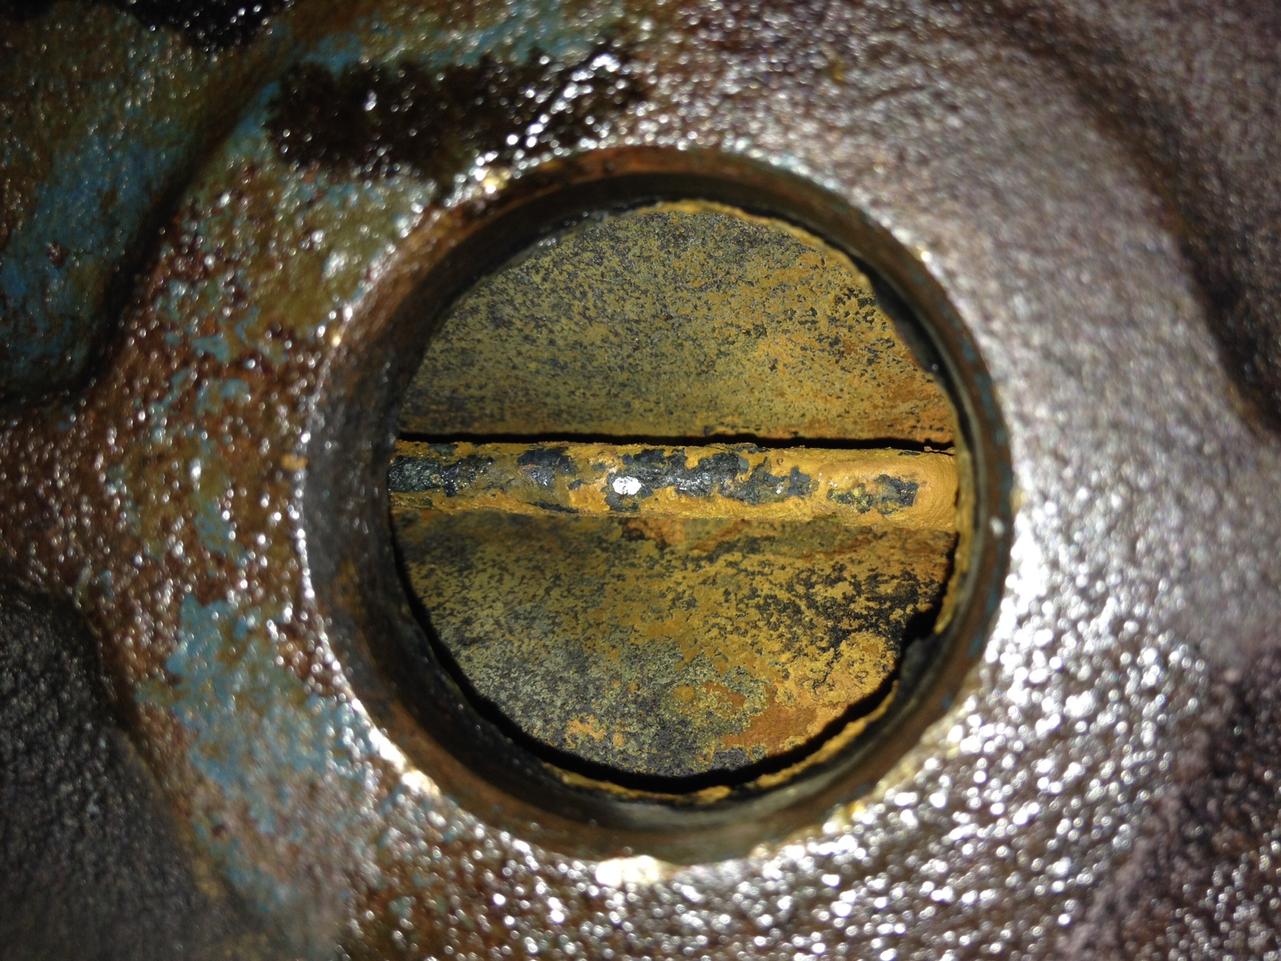
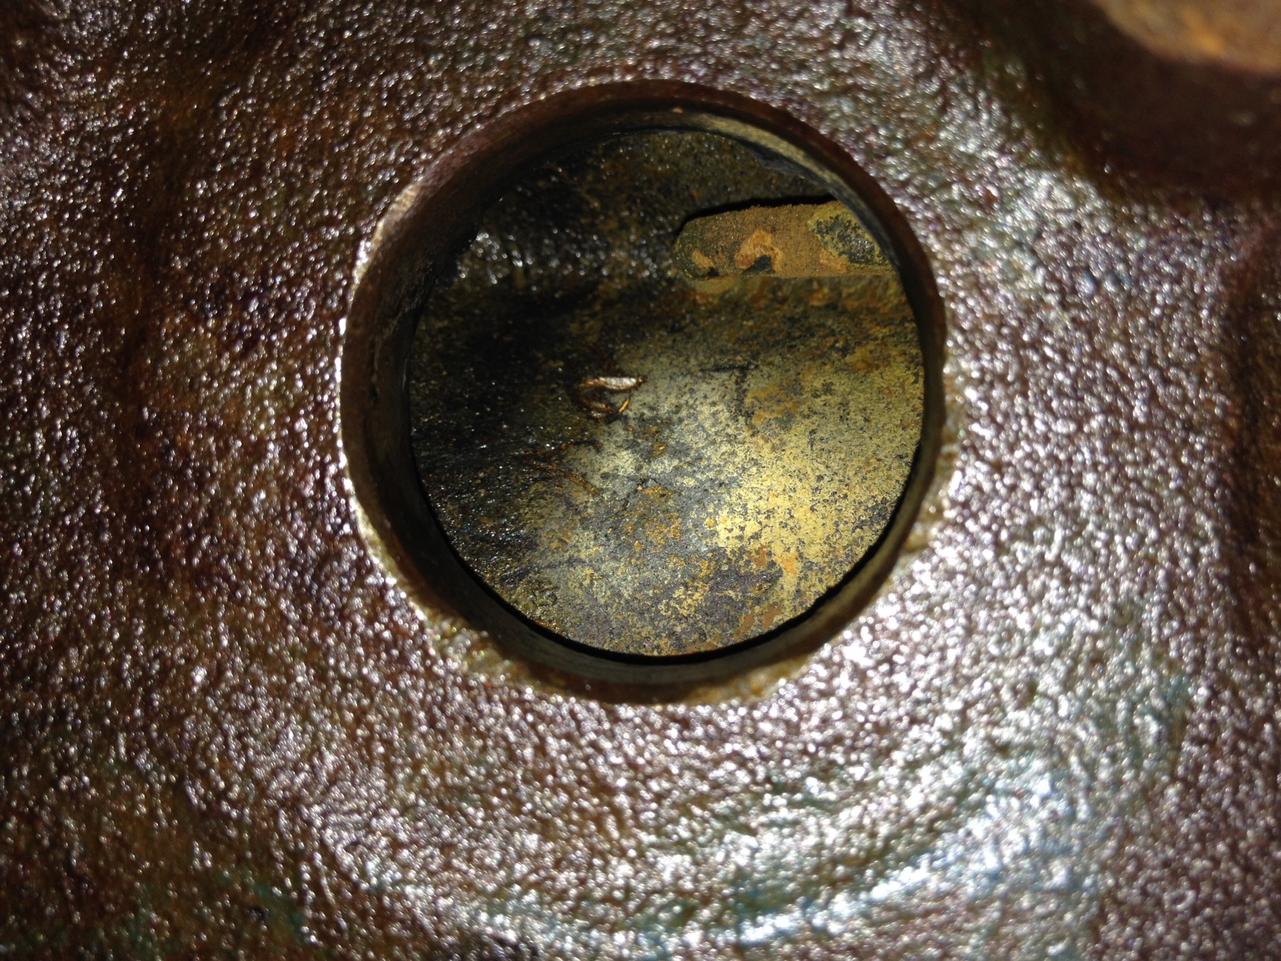
a while back the z was making a funny whining sound, and i thought it might be the water pump, so i bought a new one but never got around to putting it in. so while she's all torn apart i figured it was a good time to do so, and check for crud and/or worn impeller. the good news: the old one was in decent shape - a little play in the bearing, but nothing horrible. the bad news: one of the long 12mm bolts snapped in the block on the way out - all were rusted/crusted. probably a good thing this was discovered now, because the pump would have to have been replaced sooner or later and this bolt would have broken when i was expecting a 1 hr. project... so out came the radiator and go get the drill, couldn't back it out because my easy-outs aren't long enough to reach in there, gotta go get an extra long tap to put some new threads in... while i'm at it i need a tap to chase the threads for the head bolts, and probably grab a tap to do the larger studs for the manifold... according to shipping tracking, head should arrive today :}
-
there's a single linkage going from the e-brake handle back to a saddle that the e-brake cable loops around - basically takes 1 pull input and splits it into 2 to both ends of the cable at each wheel. at the connection between the single linkage and the saddle there's a threaded rod that you can wind in/out to adjust cable play. it's a bit of a pain to get to as it's above the exhaust and propeller shaft, but it is do-able with both in place.
-
if you want to do it yourself - and keep up with it over time, invest in a set of speed-bleeders, it's a very well-spent $20. these replace the nipples at the wheels and have a little spring/ball check valve in them so you just open them 1/4 turn, put on a piece of hose to a drain bottle and pump the pedal - the valve keeps air from going back in. here's a link to some at summit racing - check that they will fit your car. i got a set from summit for my 78 280. http://www.summitracing.com/search/product-line/dorman-brake-speed-bleeder-screws?SortBy=Default&SortOrder=Ascending&tw=speed%20bl&sw=Dorman%20Brake%20Speed%20Bleeder%20Screws
-
i believe the sway bar should rotate freely in its bushings, so it wouldn't present any resistance to the car settling. are you sure the springs are set correctly in the perches? also, are you sure you have the correct springs (front in front, rear in rear)?
-
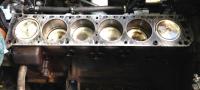
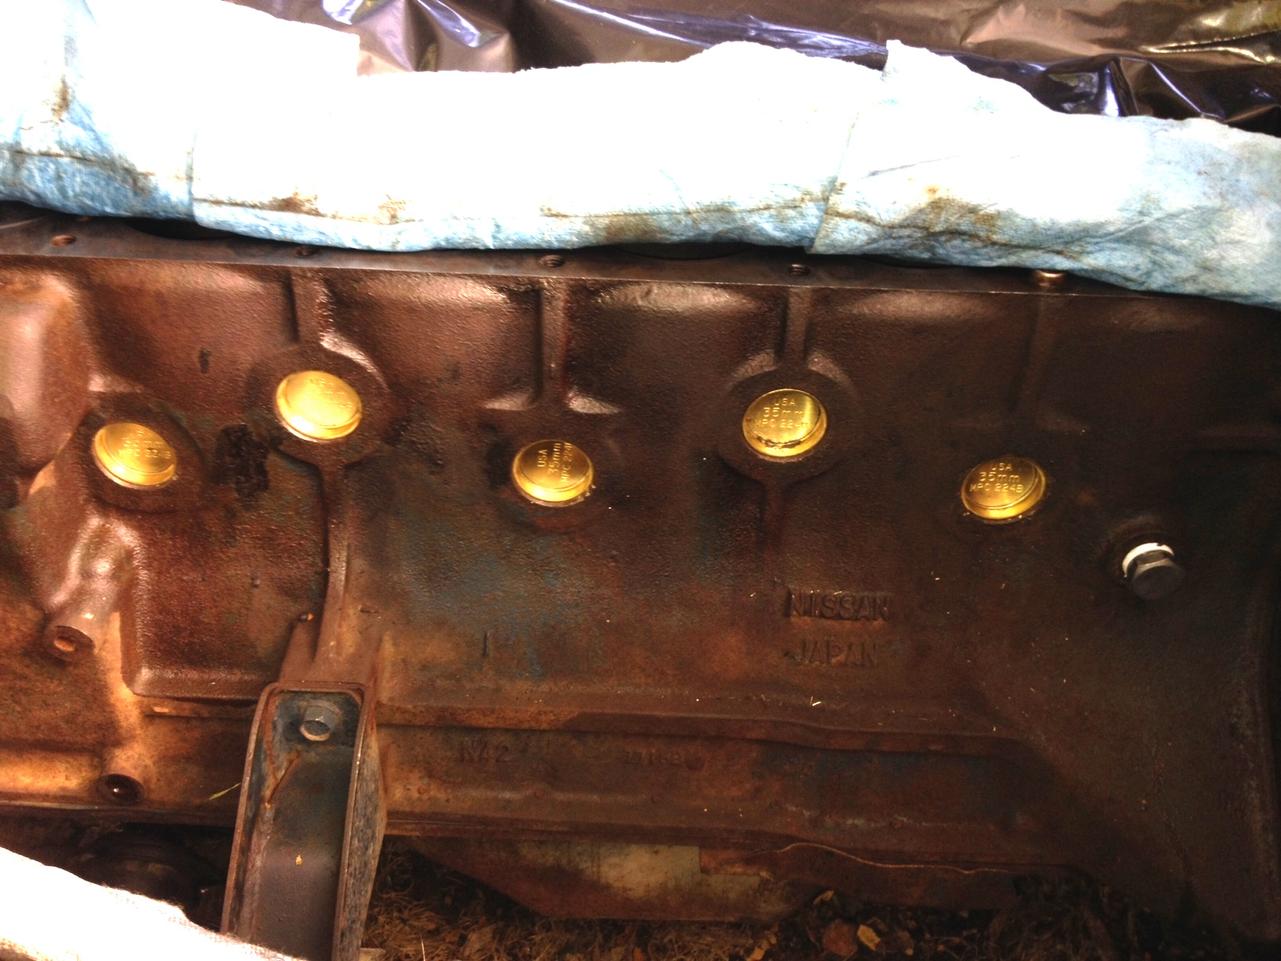
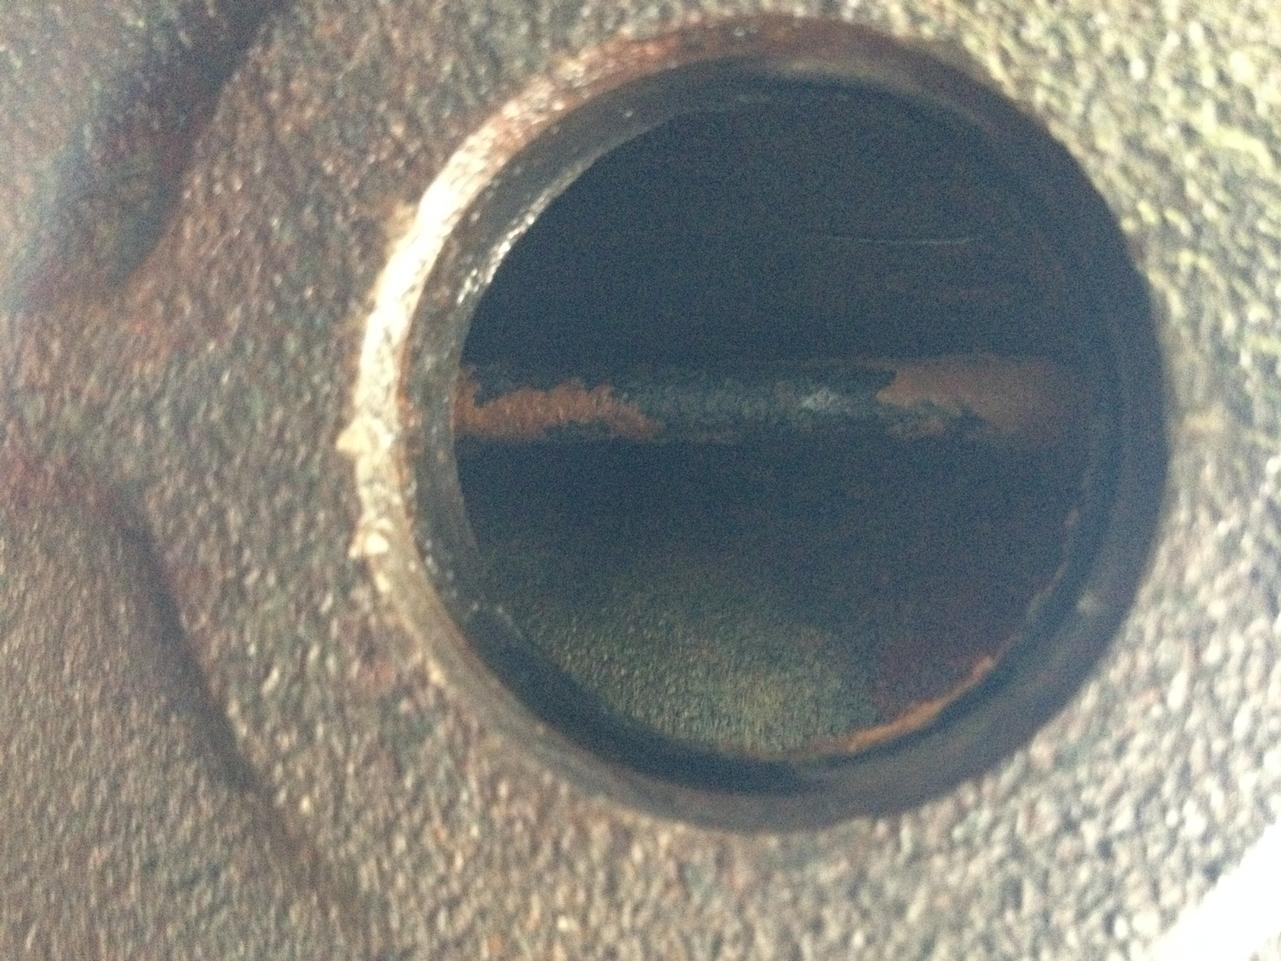
yes, that was some nasty, nasty funk in there. the car was run w/out antifreeze - just water, and i think a box of cheerios was tossed in for good measure. the hardest part of the cleanup was getting the frost plugs out - had to use the "ugly tools" (catspaw, claw hammer, drill) but once it was all opened up it was just a matter of flushing, scraping, flushing, and more flushing. all clean and buttoned up now, and i scraped off the old head gasket and surfaced the top of the block in preparation for the new head which is supposed to arrive on tuesday :classic: i exchanged the header to an n42 to fit the new head - the guys at MSA were totally cool and took pity on my plight, didn't charge me shipping. when the head arrives i'm gonna do a little bit w/the die grinder - mostly de-shroud the valves and take off sharp edges, check the ports against the manifolds and adjust as necessary. block ready for new head all buttoned up all flushed out - no more poop!!