HuD 91gt
Free Member
-
Joined
-
Last visited
Everything posted by HuD 91gt
-
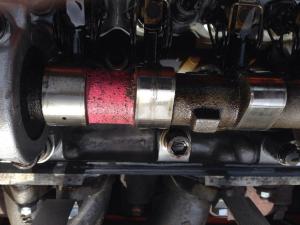
Zed head, there was some slight rust on the cam. I knew this when installing the motor and one of the reasons I am planning to Rebello cam kit. I was planning on running this for the time being, so I tossed in some cheap 10w30 I had laying around. I figured I'd change the oil in a couple hundred miles. The rust can't be good for it. I finally took the car for a little drive in the city and the plot thickens. I have some pretty decent clouds of smoke of the white/blueish colour when coming to a stop on deceleration. I'm trying to decide of I should pull the whole motor, be without a car for a few months and do a whole rebuild, or may just try and pop in some valve stem seals when I order a cam kit. I shouldn't be frustrated as I knew it was a risk putting in this unknown engine, but I still am. Definitely a puts a downer on the day. I also think I may need a driveshaft, Or perhaps get this one rebalanced. Which doing the swap, I had the front of the car jacked up, and a jack supporting the rear of the transmission when I disconnected the tranny mount. I dropped the front of the car, before I pulled the engine and forgot about the tranny jack. Could have put some Decent stress on the driveshaft u joints I'm sure. I feel a slight wallow now when driving, but it could be completely in my head. Add me to the growing list of engine frustrated classic z car members.
-
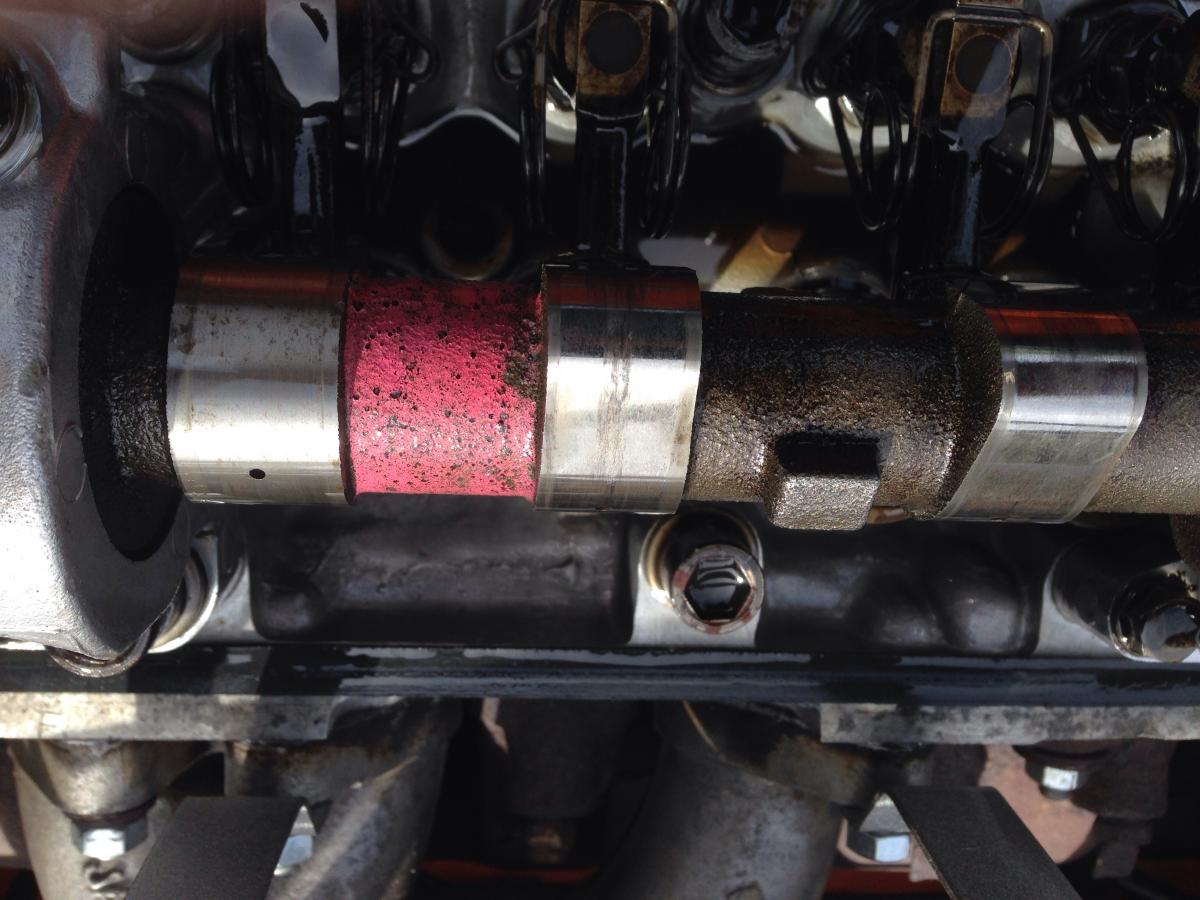
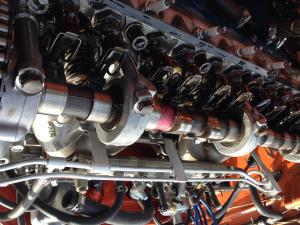
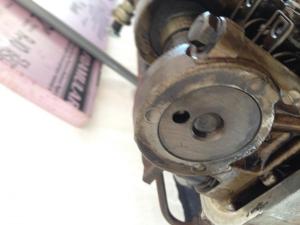
Yeah, after looking at both cams, they look very similar to the naked eye. I don't see any other markings in the L24 cam to say it's a regrind. Maybe I'm just imaging things. Here are the pictures of the wear on my L28 cam.
-
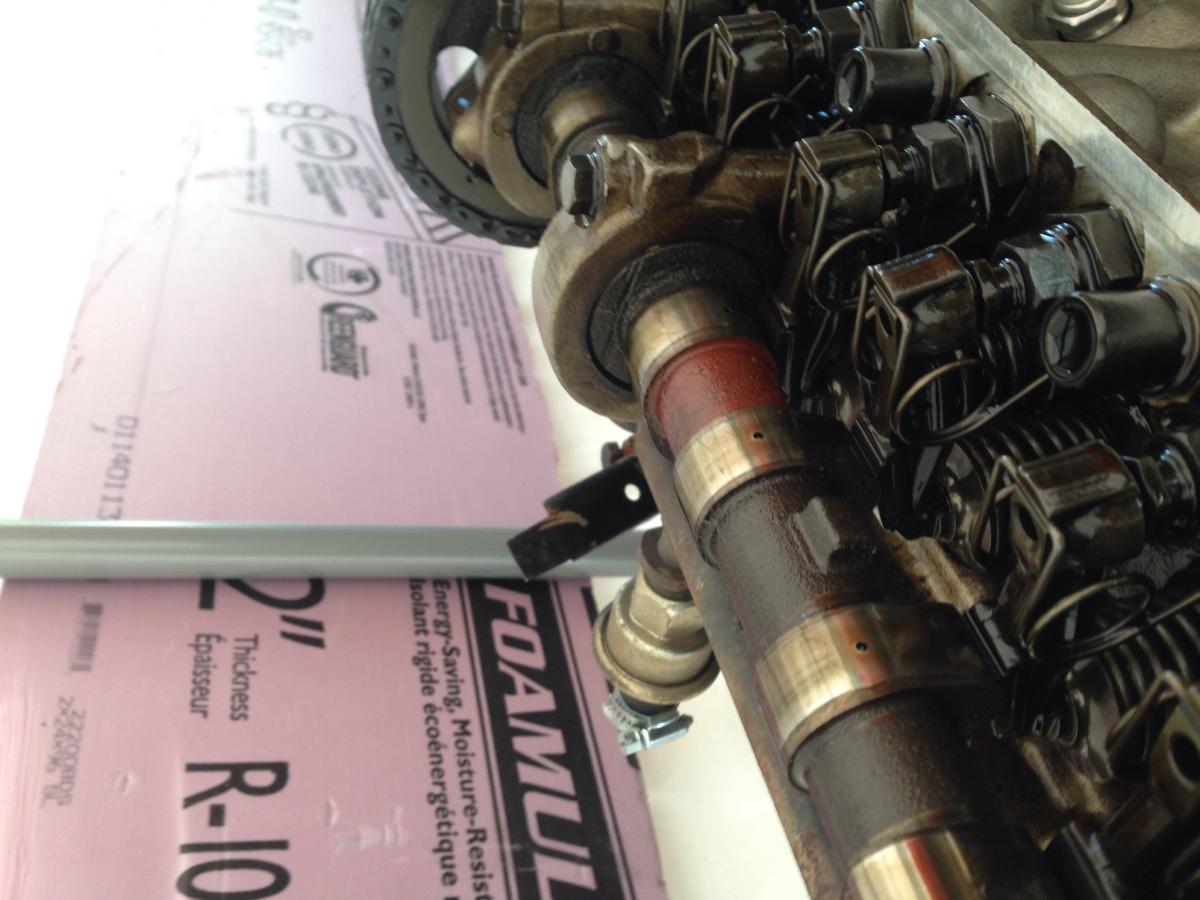
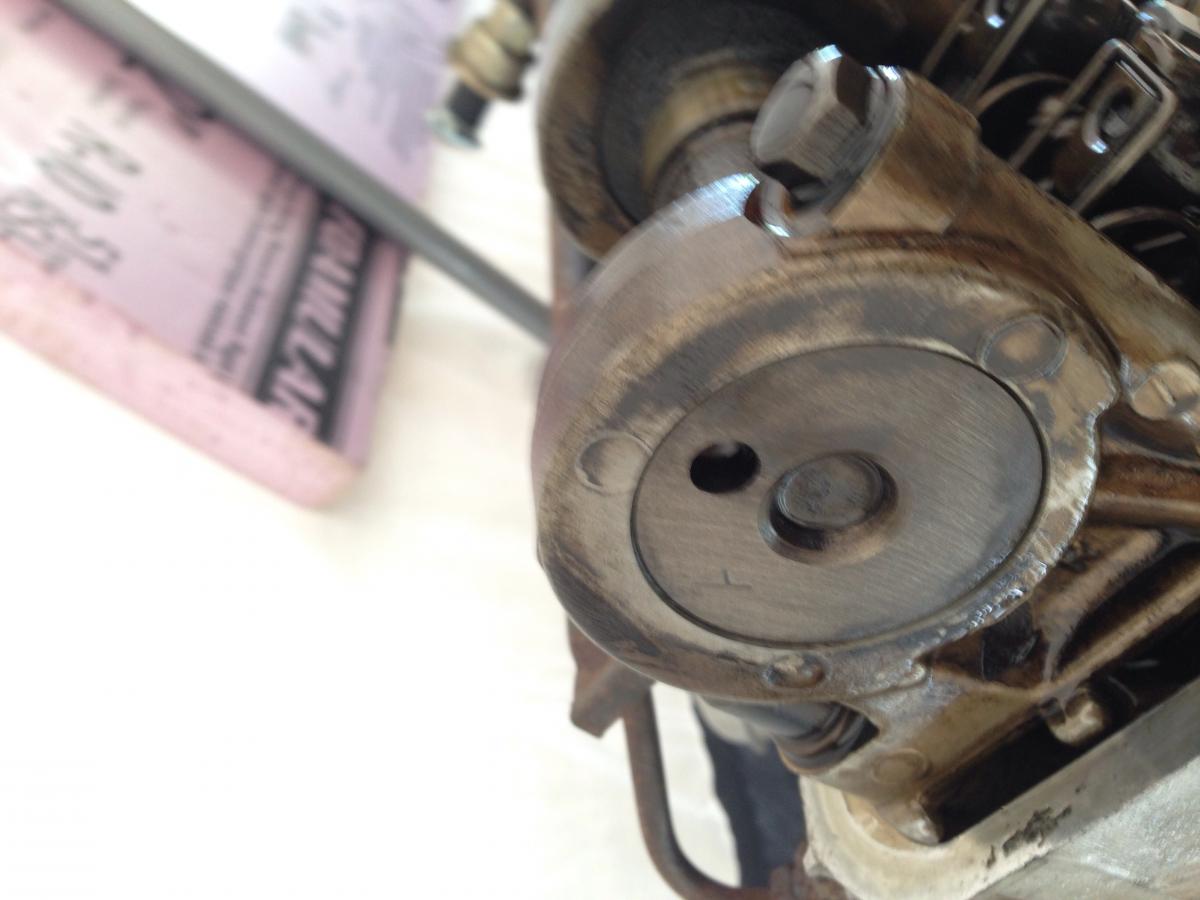
I pulled the valve cover on the old L24 (the one I think may have a different cam), and it is indeed an A cam, that is internally oil (holes in the bottom of the lobes). Here are the pictures. I guess my only way of seeing if it is a regrind is to somehow measure the bottom of the lob. I'll get pictures of what my other cam looks like shortly.

-
The cranks bolt came off like butter with the impact gun... The crank pulley. That was another story. But we managed in the end with a hammer and some wood, with some help from the starter as there wasn't many good angles to get it from. Thanks for the help guys, and the incredibly quick replies!
-
Replaced the seal, and after consulting the how to modify book I removed the oil slinger. I hope that was the right choice. So far she's not leaking and I'm pretty happy. This motor certainly has a little more go!
-
Thanks guys, I'll pull the valve cover and take a look. I bolting the whole assbly and just swapping over sounds brilliant! I'll take some photos as well.
-
Hello all. I just put in a F54/N47 combo into my 240z. The cam/rockers have some burn/wear marks on them. My original plan was to run this for the time being, and send in the old L24 cam off to rebello for their cam kit, and the rockers off to delta for a refresh. I'm now thinking a smarter idea would be to send the N47 cam/rockers away for a refresh since they are not in the best shape. Not having done any head work before, can I swap the cam, rockers, springs retainers and lash pads from the l24 head onto the l28 without any drama? I assume I'd have to check the wipe pattern no matter what as the seats may be different heights? The bonus side to this, is the l24 has a much lumpier idle, I think it may be an aftermarket unit. Is there anyway to check this? Cheers guys
-
Perfect. No extra tools required! The impact gun should get the crank bolt out I'm sure. If it doesn't, I guess the valve cover is coming off!
-
Siteunseen, I haven't pulled the pulley yet so I don't know but I will certainly check that out once I pull it. Thanks for the detailed responses guys.
-
Good to hear it sounds like a pretty simple job. I've ordered the part, but I haven't pulled the pulley yet. So I don't know if I have the oil slinger. Is there a safe way to pull off the oulley without a puller? Is it safe to to some light tapping to remove it?
-
Thanks for the suggestions. I looked deeper into the manual, and since my car was originally an automatic, I had to jump some wires which are in auto cars only. It ended up being those became disconnected. I still don't know why it was relieving voltage at that point, but maybe it was just a very poor connection between the two? Long story short, she runs but has a massive front seal leak. I'm going to have to start a thread about that one shortly.
-
Hey guys. Just putting in my new L28z after some drama, we got the new engine into the bay. With a new started installed it was cranking over intermittently. We thought it was the new starter, but installed the old and it's the same issue. If a jump a wore from the battery directly to the ignition terminal on the starter it cranks right over. With a voltmeter, the wire from the ignition is only showing 7-9 volts. I assume this is my issue? (I would get 12 direct to the battery). Looking at te wiring diagram te black wire with the yellow strip (wire which connect ignition to starter) shows that it run direct to the key ignition. When I check for connectivity across the circuit I get nothing! Am I looking at this diagram wrong? Missing something?
-
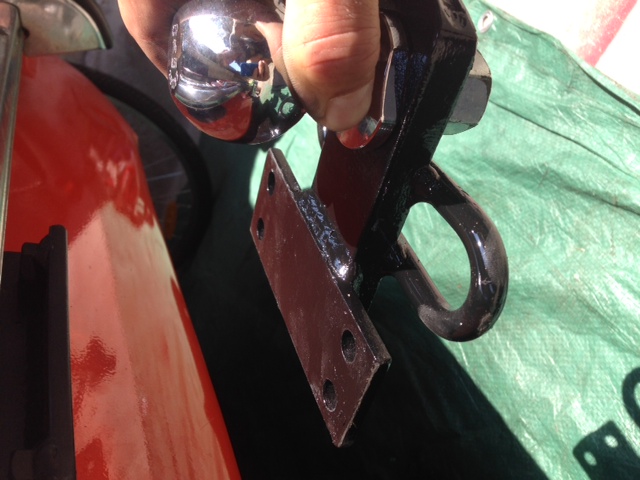
Took her out for her maiden voyage with new hitch, trailer and engine. Made it around the block, and out for a 120km drive tomorrow to my friends where the swap will happen this weekend. Wish me luck. This picture makes me all tingly inside.
-
Bah, too late! Just had the one above custom made and it wasn't cheap! Thanks though
-
-
-
Almost finished my electric fuel pump. Had to bypass the oil pressure switch for the time being as I can't seem to get it threaded in. I wanted to post this video as i purchased yeh same airtex pump, and I just wanted to know if this is normal. The pump doesn't make a continuous hum, but rather a dadada noise with the hum in the back ground. Anyone else come across this? I have a filter between the tank and pump (pictured) as well as in the stock location.
-
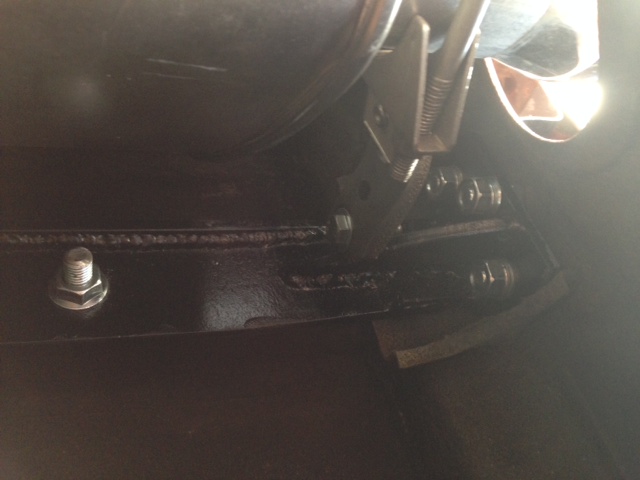
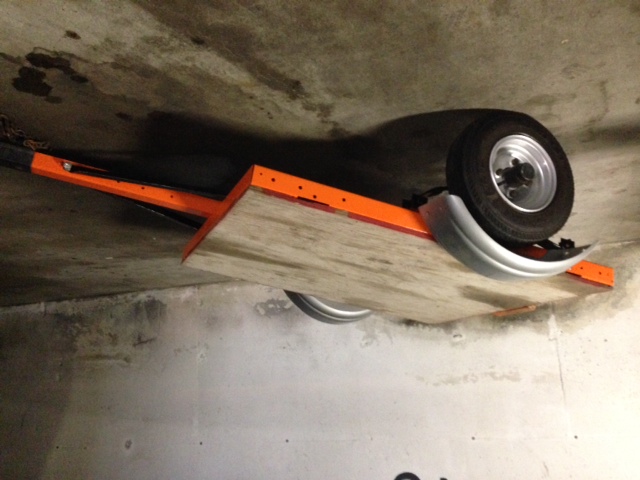
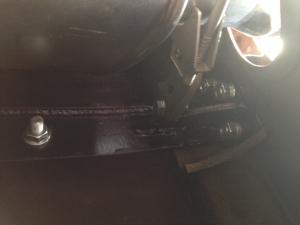
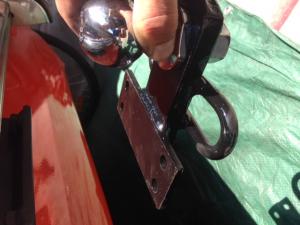
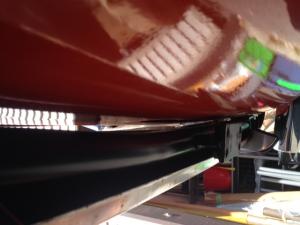
Just picked up Crush from Mobilehitch.ca. Pretty happy with their work, and customer service. Shane was very easy to work with. Despite a little miscommunication about pickup times, which left me without the car for a few days i'm really happy with the work. Completely custom. Main objectives were to be sturdy enough to tow the little 4'x4' trailer, and be as concealed as possible. I'm happy with the outcome. The "receiver" portion bolts on and off so I can keep it as clean as possible when not in use. And lastly, they tied into the bumper mounts, and also tied into a bit of the unibody frame. They only did this one one side as to not have to drop the tank. If it flex's we will drop the tank and do it on the other side as well, but I think it will be ok. I also refurbished an old trailer I found on craigslist. Should look decent behind Crush.

-
Oops, I guess yours is the opposite problem. The slave cylinder I purchased comes with an adjustable rod. It's exactly the same as the one you have, but longer, and threaded. A nut screws onto it and adjusts the length. I assume to adjust as the clutch wears?
-
When I did my auto to 4 speed swap, I had to fab a piston, instead of the threaded rod on my slave cylinder as my 4spd had a dimple as well. My slave cylinder was made for the hole (Adjustable). Nailed the right length the first time, so i didn't have to fiddle with it too much. Another option would be to drill it out I guess.
-
You were talking about new wheels. I think it depends on that decision. Personally, I love the look of an Aluminum wheels and chrome bumpers. Classic look.
-
Painted the block and buttoned her all up. I do believe she is ready to be bolted in.
-
Thanks Bonzi. I wish I had known this earlier. Oops. I have a feeling i'm opening a can of (hard tuning) worms with this little project. Maybe i'll experiment anyhow since I have all the parts. I purchased 5/16" line, but it sure looks a lot larger then whats on the car now. Z forums may have led me astray. Although, with the little hole controlling the flow, the fuel line size shouldn't matter? Bruce, thanks for letting me know. I probably should just purchase one, but it's more fun to make your own.
-
I should clarify, I purchased 5/16" fuel line and was going to use this for the entire "rail", back to the stock hard lines (which run back to the tank), where they would then differ in size. Or is there some sort of spring loaded valve which makes the fuel run to the carbs and blocks the return line until the float valves close?
-
Well, after input from the forum, I think datsun designs the rubber lines for a reason. Easy removal, vibrations etc. I have cancelled that idea, but have purchased all the parts to make a new stock su fuel line. The one thing I did not take into consideration is the smaller return line. Is this thinner diameter return line, causing the path of least resistance to be to the carbs, thus filling the fuel bowls? If I run the same diameter line back to the frame rail (where it will then get smaller), will my carbs be getting fuel or will the fuel automatically take the return back to the tank because it offers little resistance? Anyone understand how the return works?