


heyitsrama
Free Member
-
Joined
-
Last visited
Everything posted by heyitsrama
-
 Sorry to resurrect such an old thread, but it might be better than fragmenting another discussion about the RT style mount used as a strap replacement (aka snubber) mode. im trying to think if running the mount in this configuration is contributing to noise from the rear end entering the cabin at highway speeds. I did remove 3/4” of the rubber mount when I installed it, but I still recall having to use a jack to squish everything together when fitting the front diff mount. I was thinking maybe this is contributing to the problem. i really like the RT style mount, there is no knocking from the diff moving around, yet still it’s a bit loud.
 -
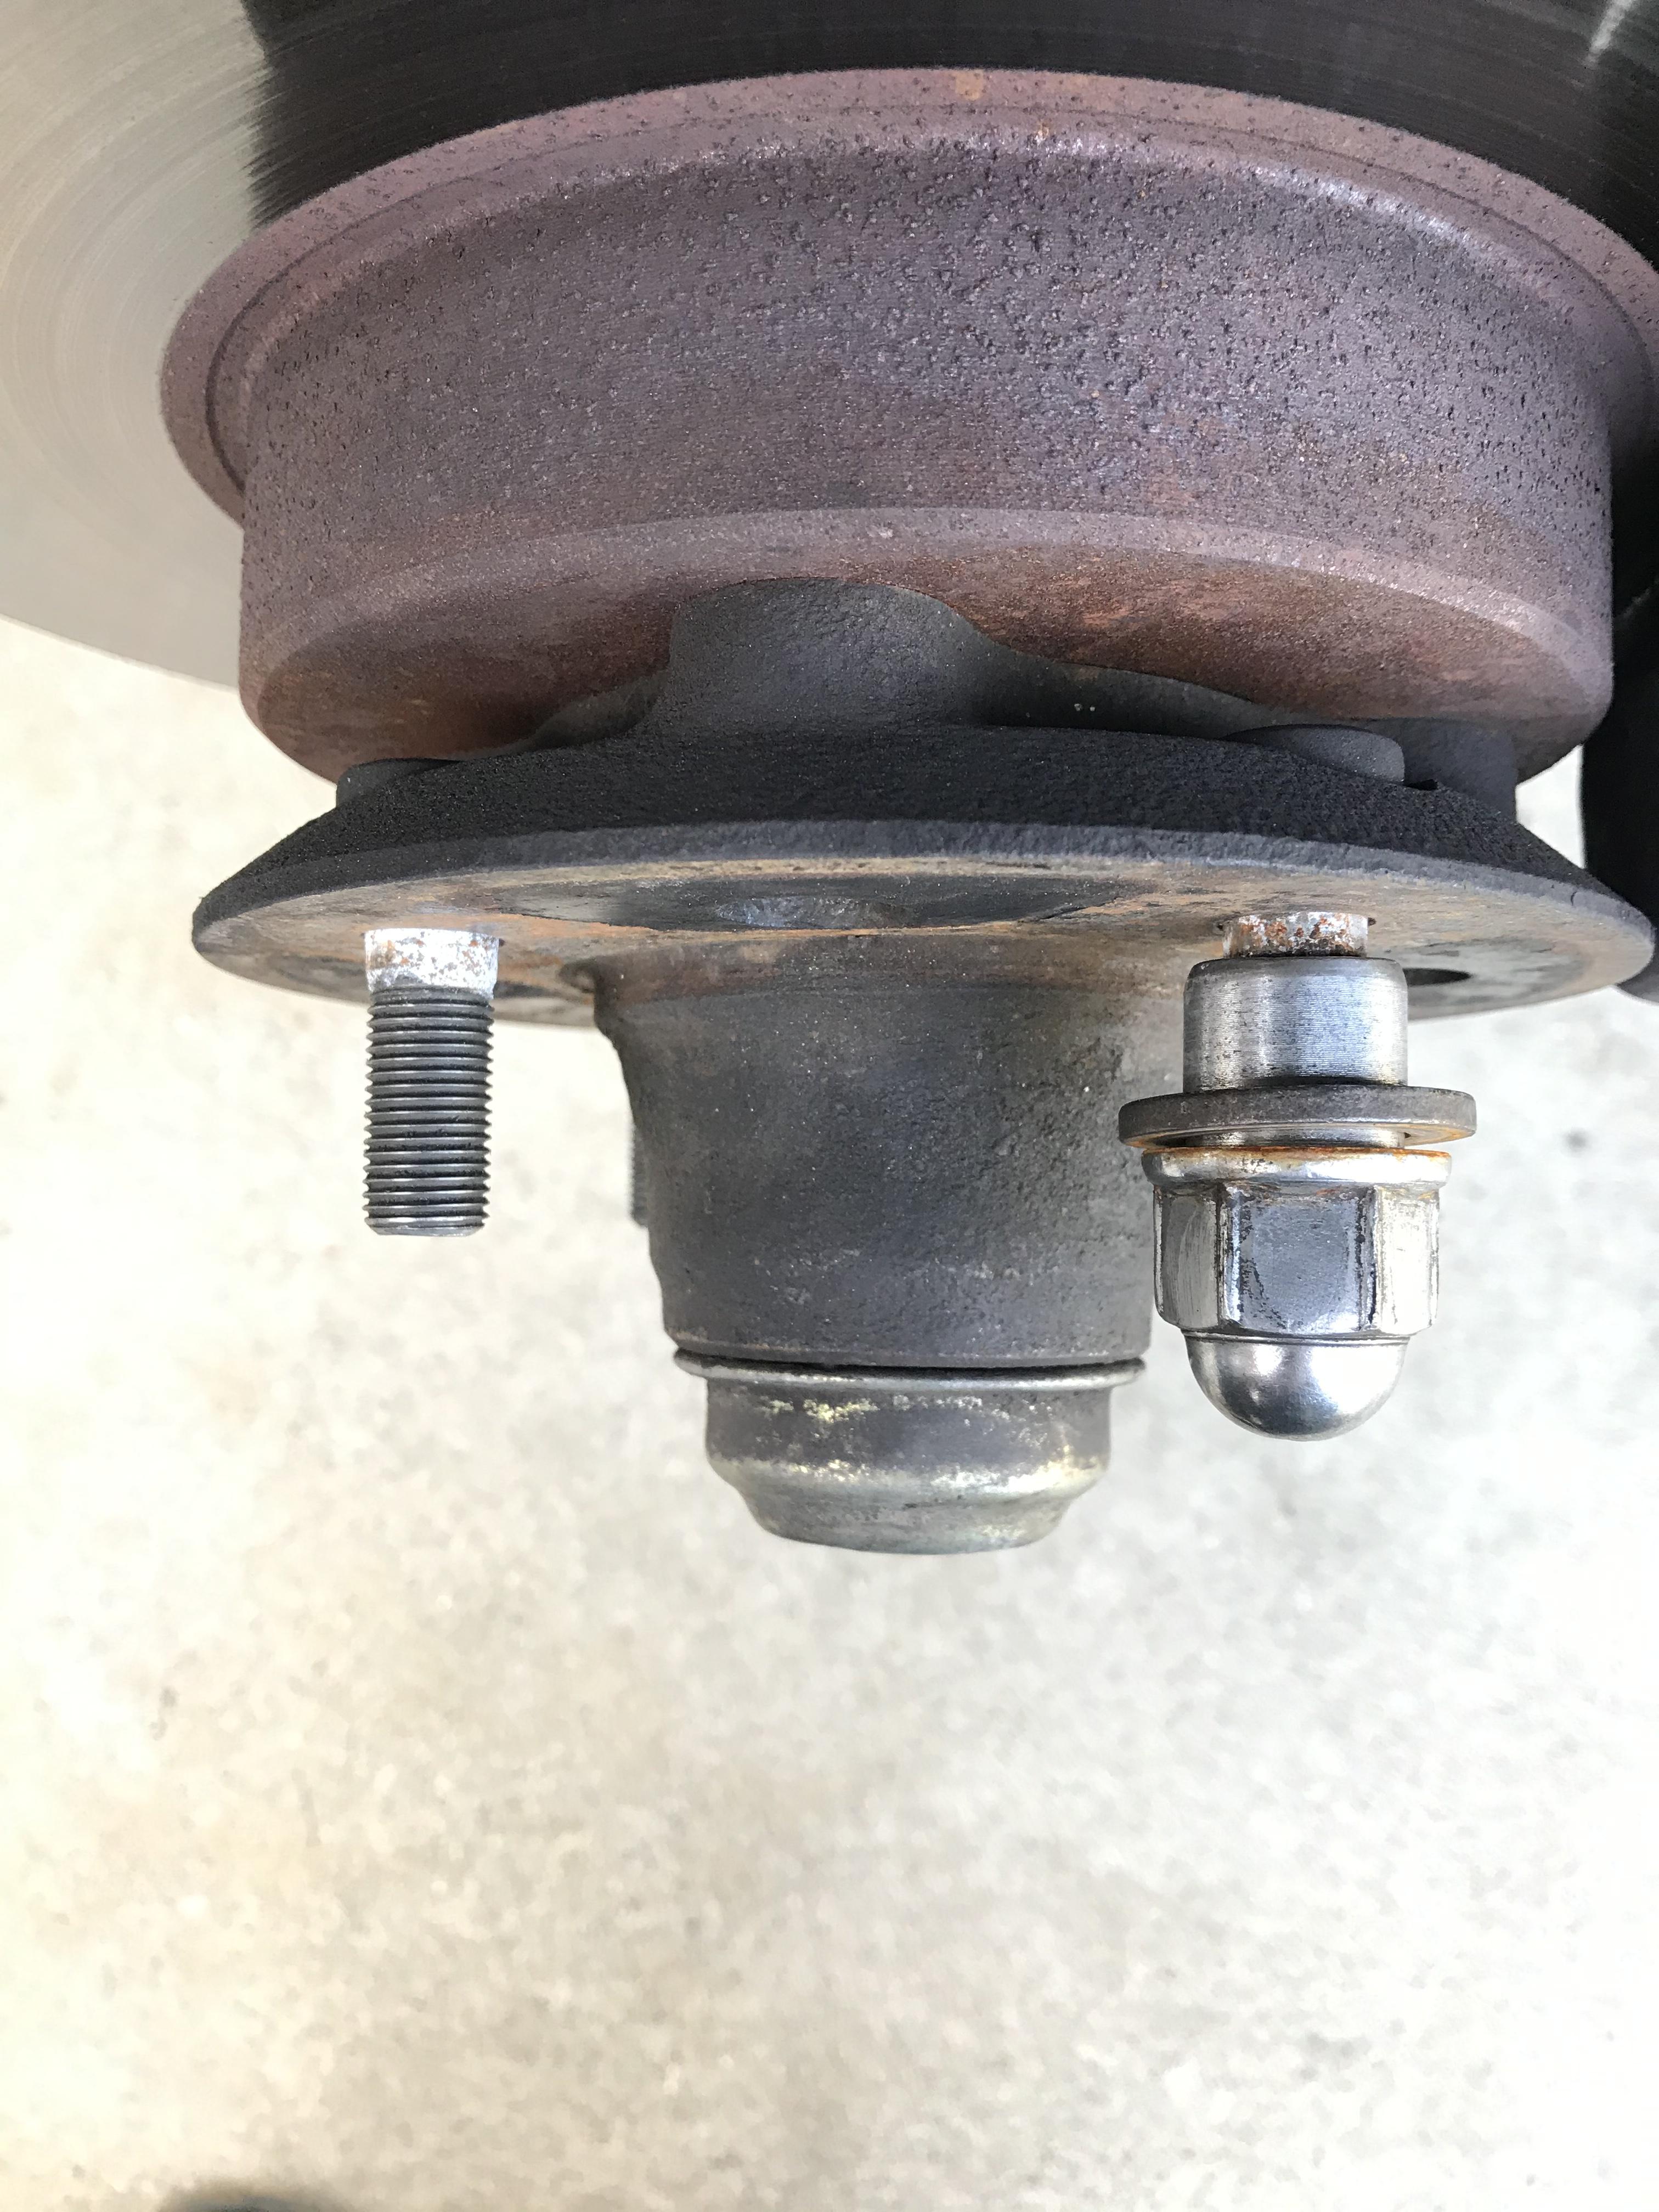
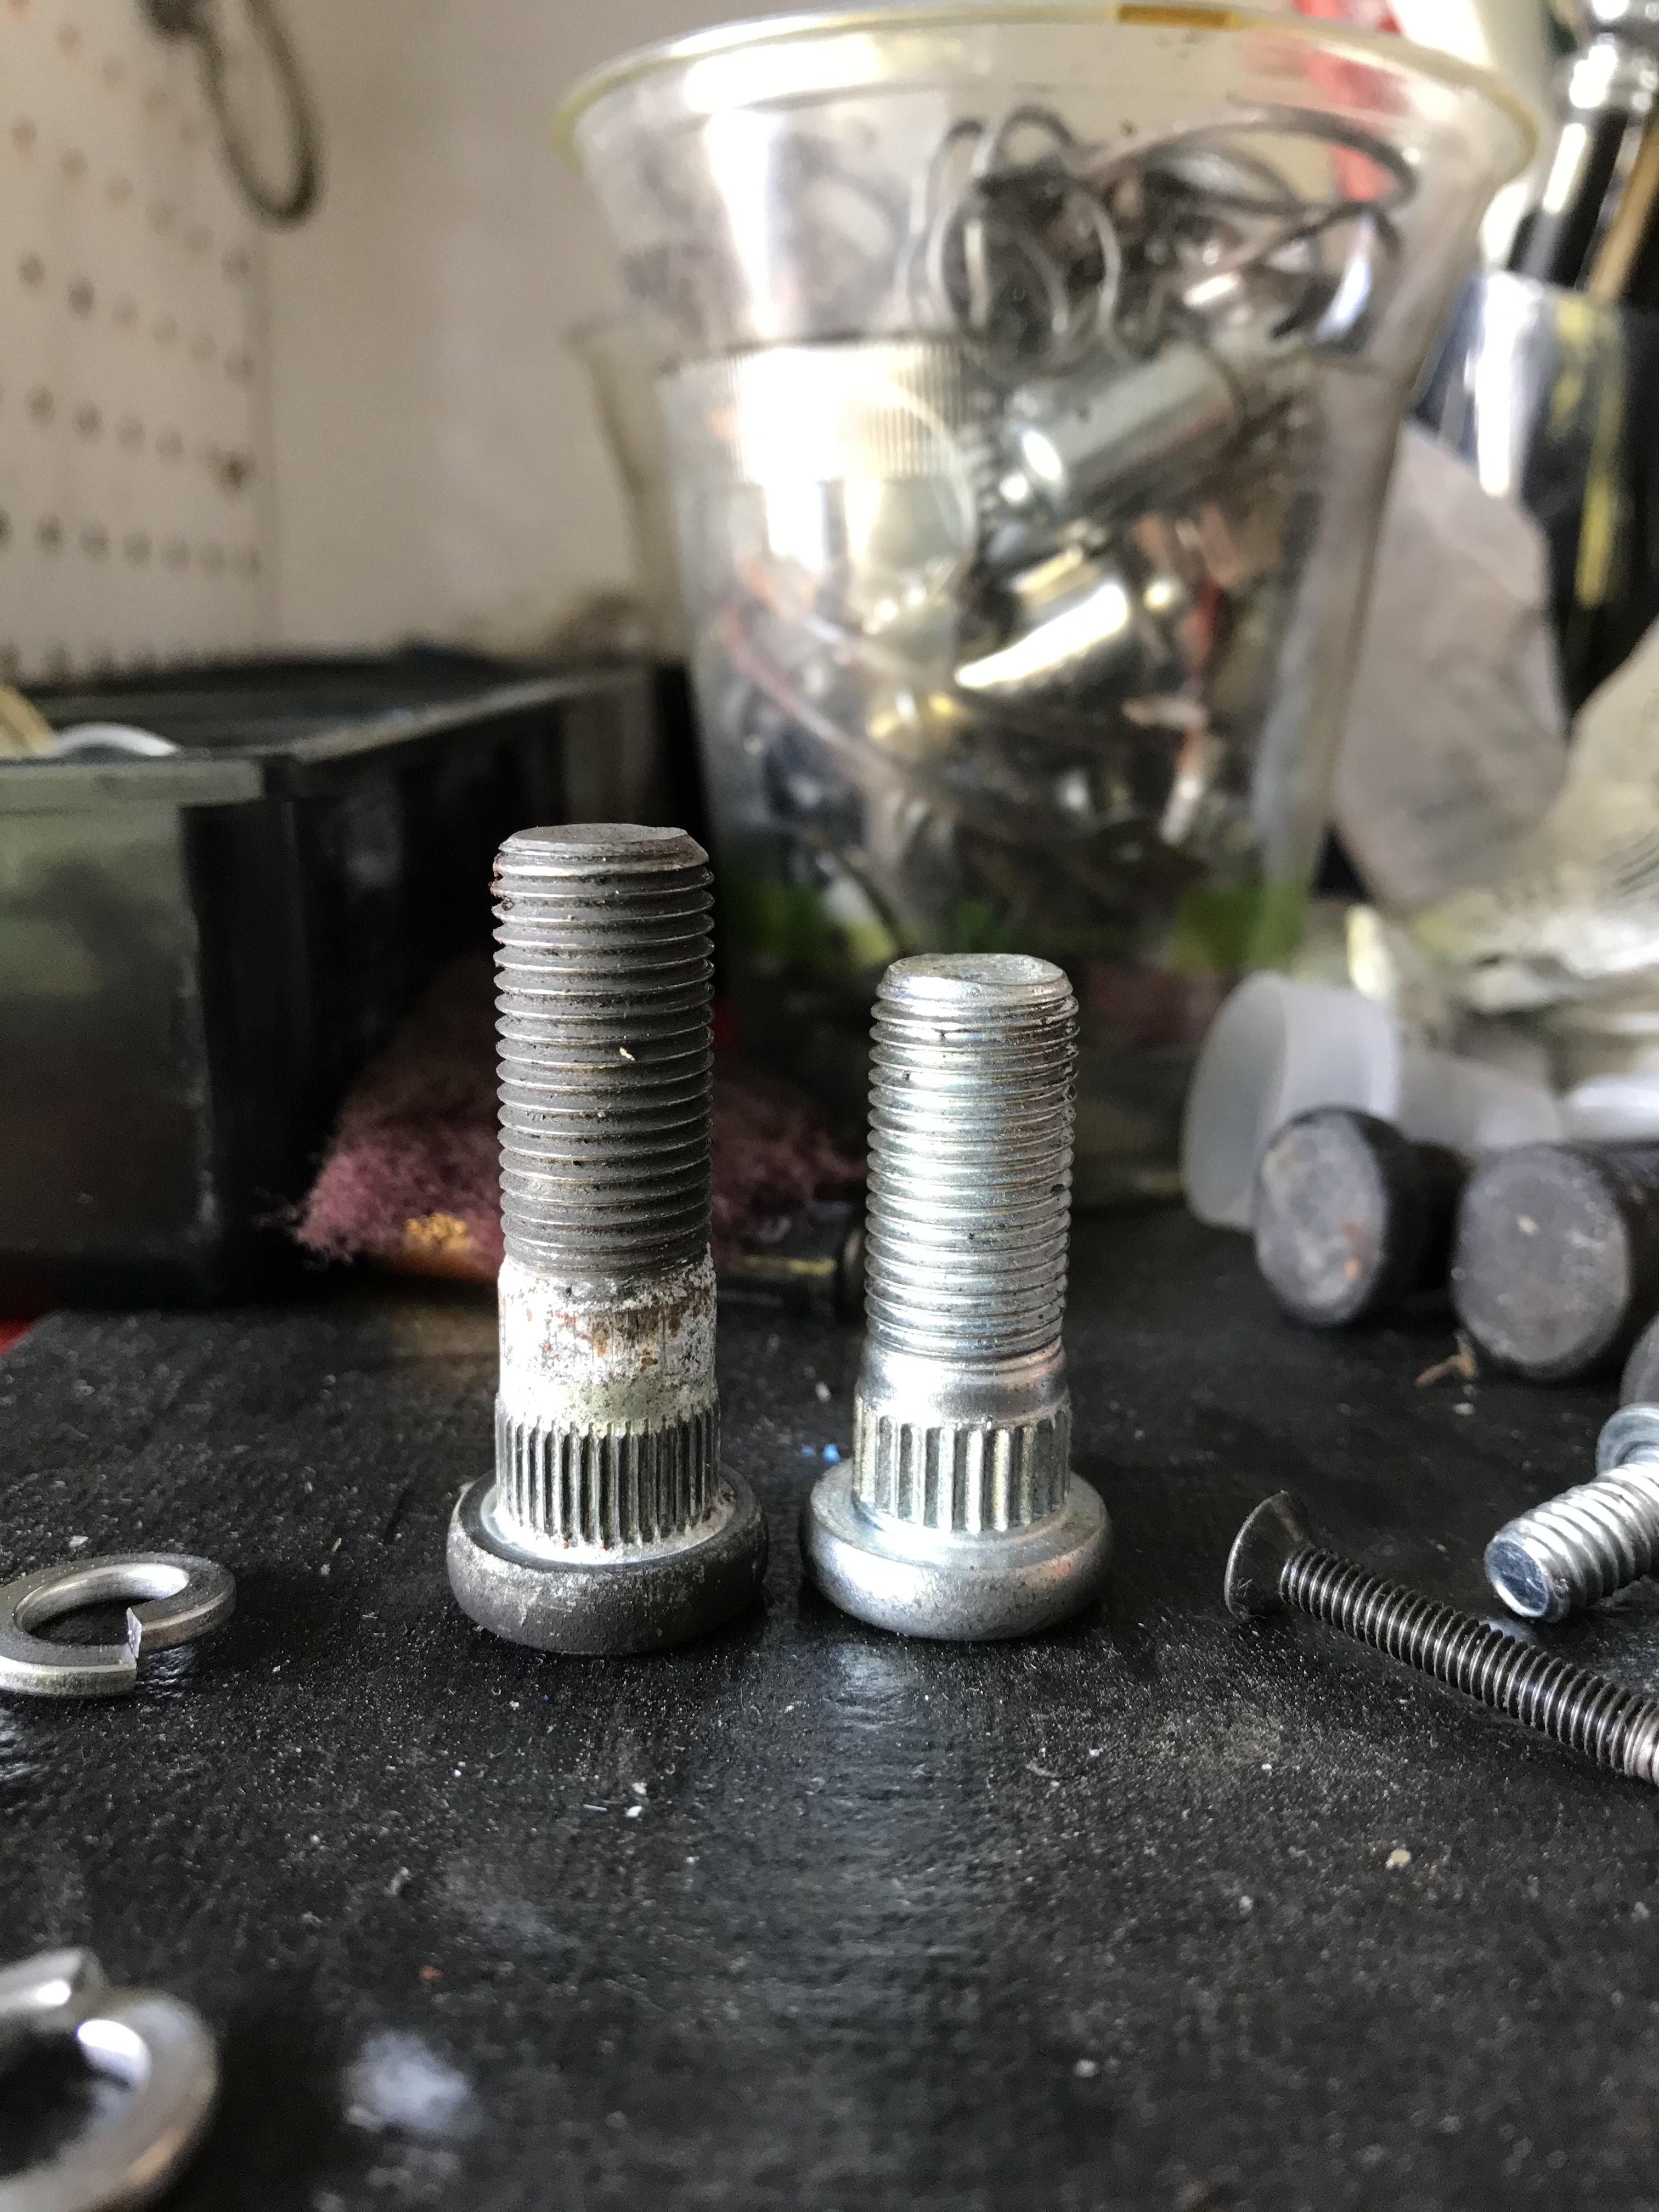
I think I found the stupid shimmy in the steering wheel after a LONG time looking for the source. Stupid driver side nuts never sat flush. I think there was always play between the wheel and hub. I even had replacement studs in my parts bin. jeeeeeeeeeez


-
Some cars don’t have a fuel return line, what year is the car? dustyyyyyyyy or as some people say “patina”
-
Well you fixed the problem, but the return lines were added because of heat soak that can occur, this causes the fuel in the fuel rail to vaporize and prevent it from getting into the carb. Did they remove the whole line? It’s a bit of a pain in the arse to get to the whole thing, I’d be surprised.
-
Who is the resident Weber 32/36 wizard on here? 🧙♂️ The issue of the motor that still running after the ignition being off can be from having too much fuel in the system. This also might be linked to issue # 1 from your post. It seems like the state of the carb might mean it needs to be repaired. For the reasons 1 and 4. (air leaks can be checked by shooting carb cleaner at the car while the motor is on, and listen for a change in RPM) I think Weber 32/36 need 3/5 psi of fuel (from what a reference manual says online) the OEM SU carbs use 4-6 PSI if i recall correctly.
-
It's butter smooth now. Thanks for a help yall 🙂 probably going to be some more stuff to sort out later.... like always.
I was not able to notice any play in the u-joints. I attempted to follow the service manual and some videos i found online. I just got the driveshaft back from Southbay drivelines, the gentleman there said it was 1/3oz out on the rear, and 2/3oz out on the front. Shall put it back together later tonight. @Captain Obvious so whats kind of force is generated by a 1oz out of balance driveshaft?
Tweeds brings up a good point. @calvinhg you should check out that car! Remember to take photos yourself.
Get the car that you like. Mirrors are not too bad to replace. Hold in the fender might be a bit annoying. I wonder how the kit was installed.
Well giving it a good inspection is going to be worth the time and/or money. A thorough inspection too, get under the car and look for patch work. does the seller have more detailed photos? AC is nice.
It certainly looks like it has all the bells and whistles, is it local? Can you check out the body for rust?
nitrous oxide switch.
@dutchzcarguy I found a spare driveshaft off my 73 240z that’s in the garage. I’ll pull it out later and see how they compare. Might even do it after work today. What is not fun is installing and removing the exhaust multiple times. @AK260 I’ve not seen any of the driveshaft bolts or half shaft bolts loosen themselves. The snap rings have been doing a good job holding them back. The only thing is removing the bolts for the driveshaft that’s almost behind the diff mount is a COMPLETE pain. No special adjustment on the clutch for the fidanza / 240mm clutch combo? I bled the clutch it was the only “adjustment” I did. I used everything new, the clutch collar was matched to the 240mm pressure plate.
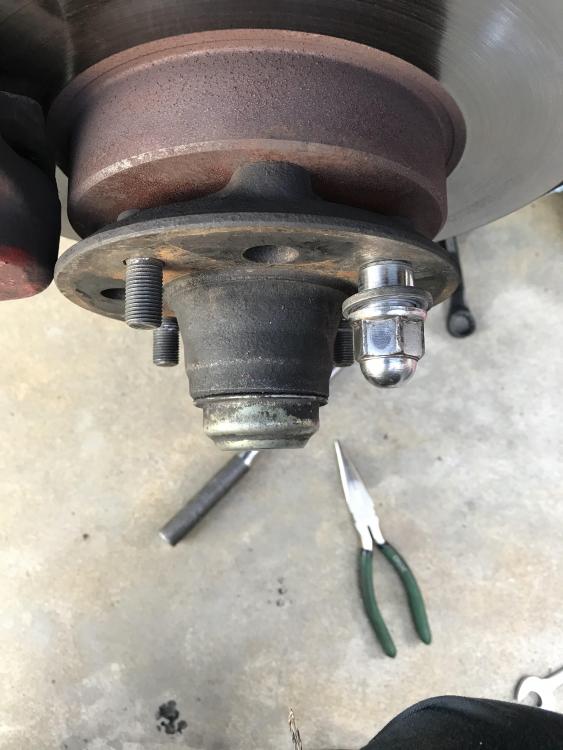
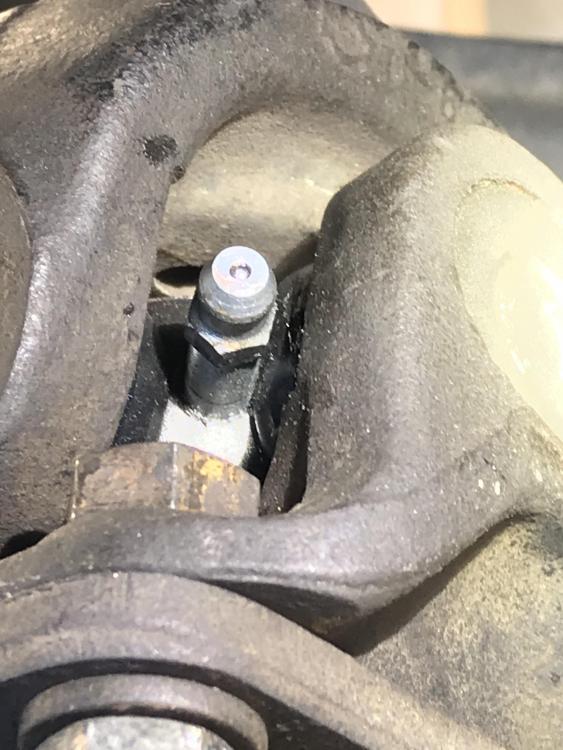
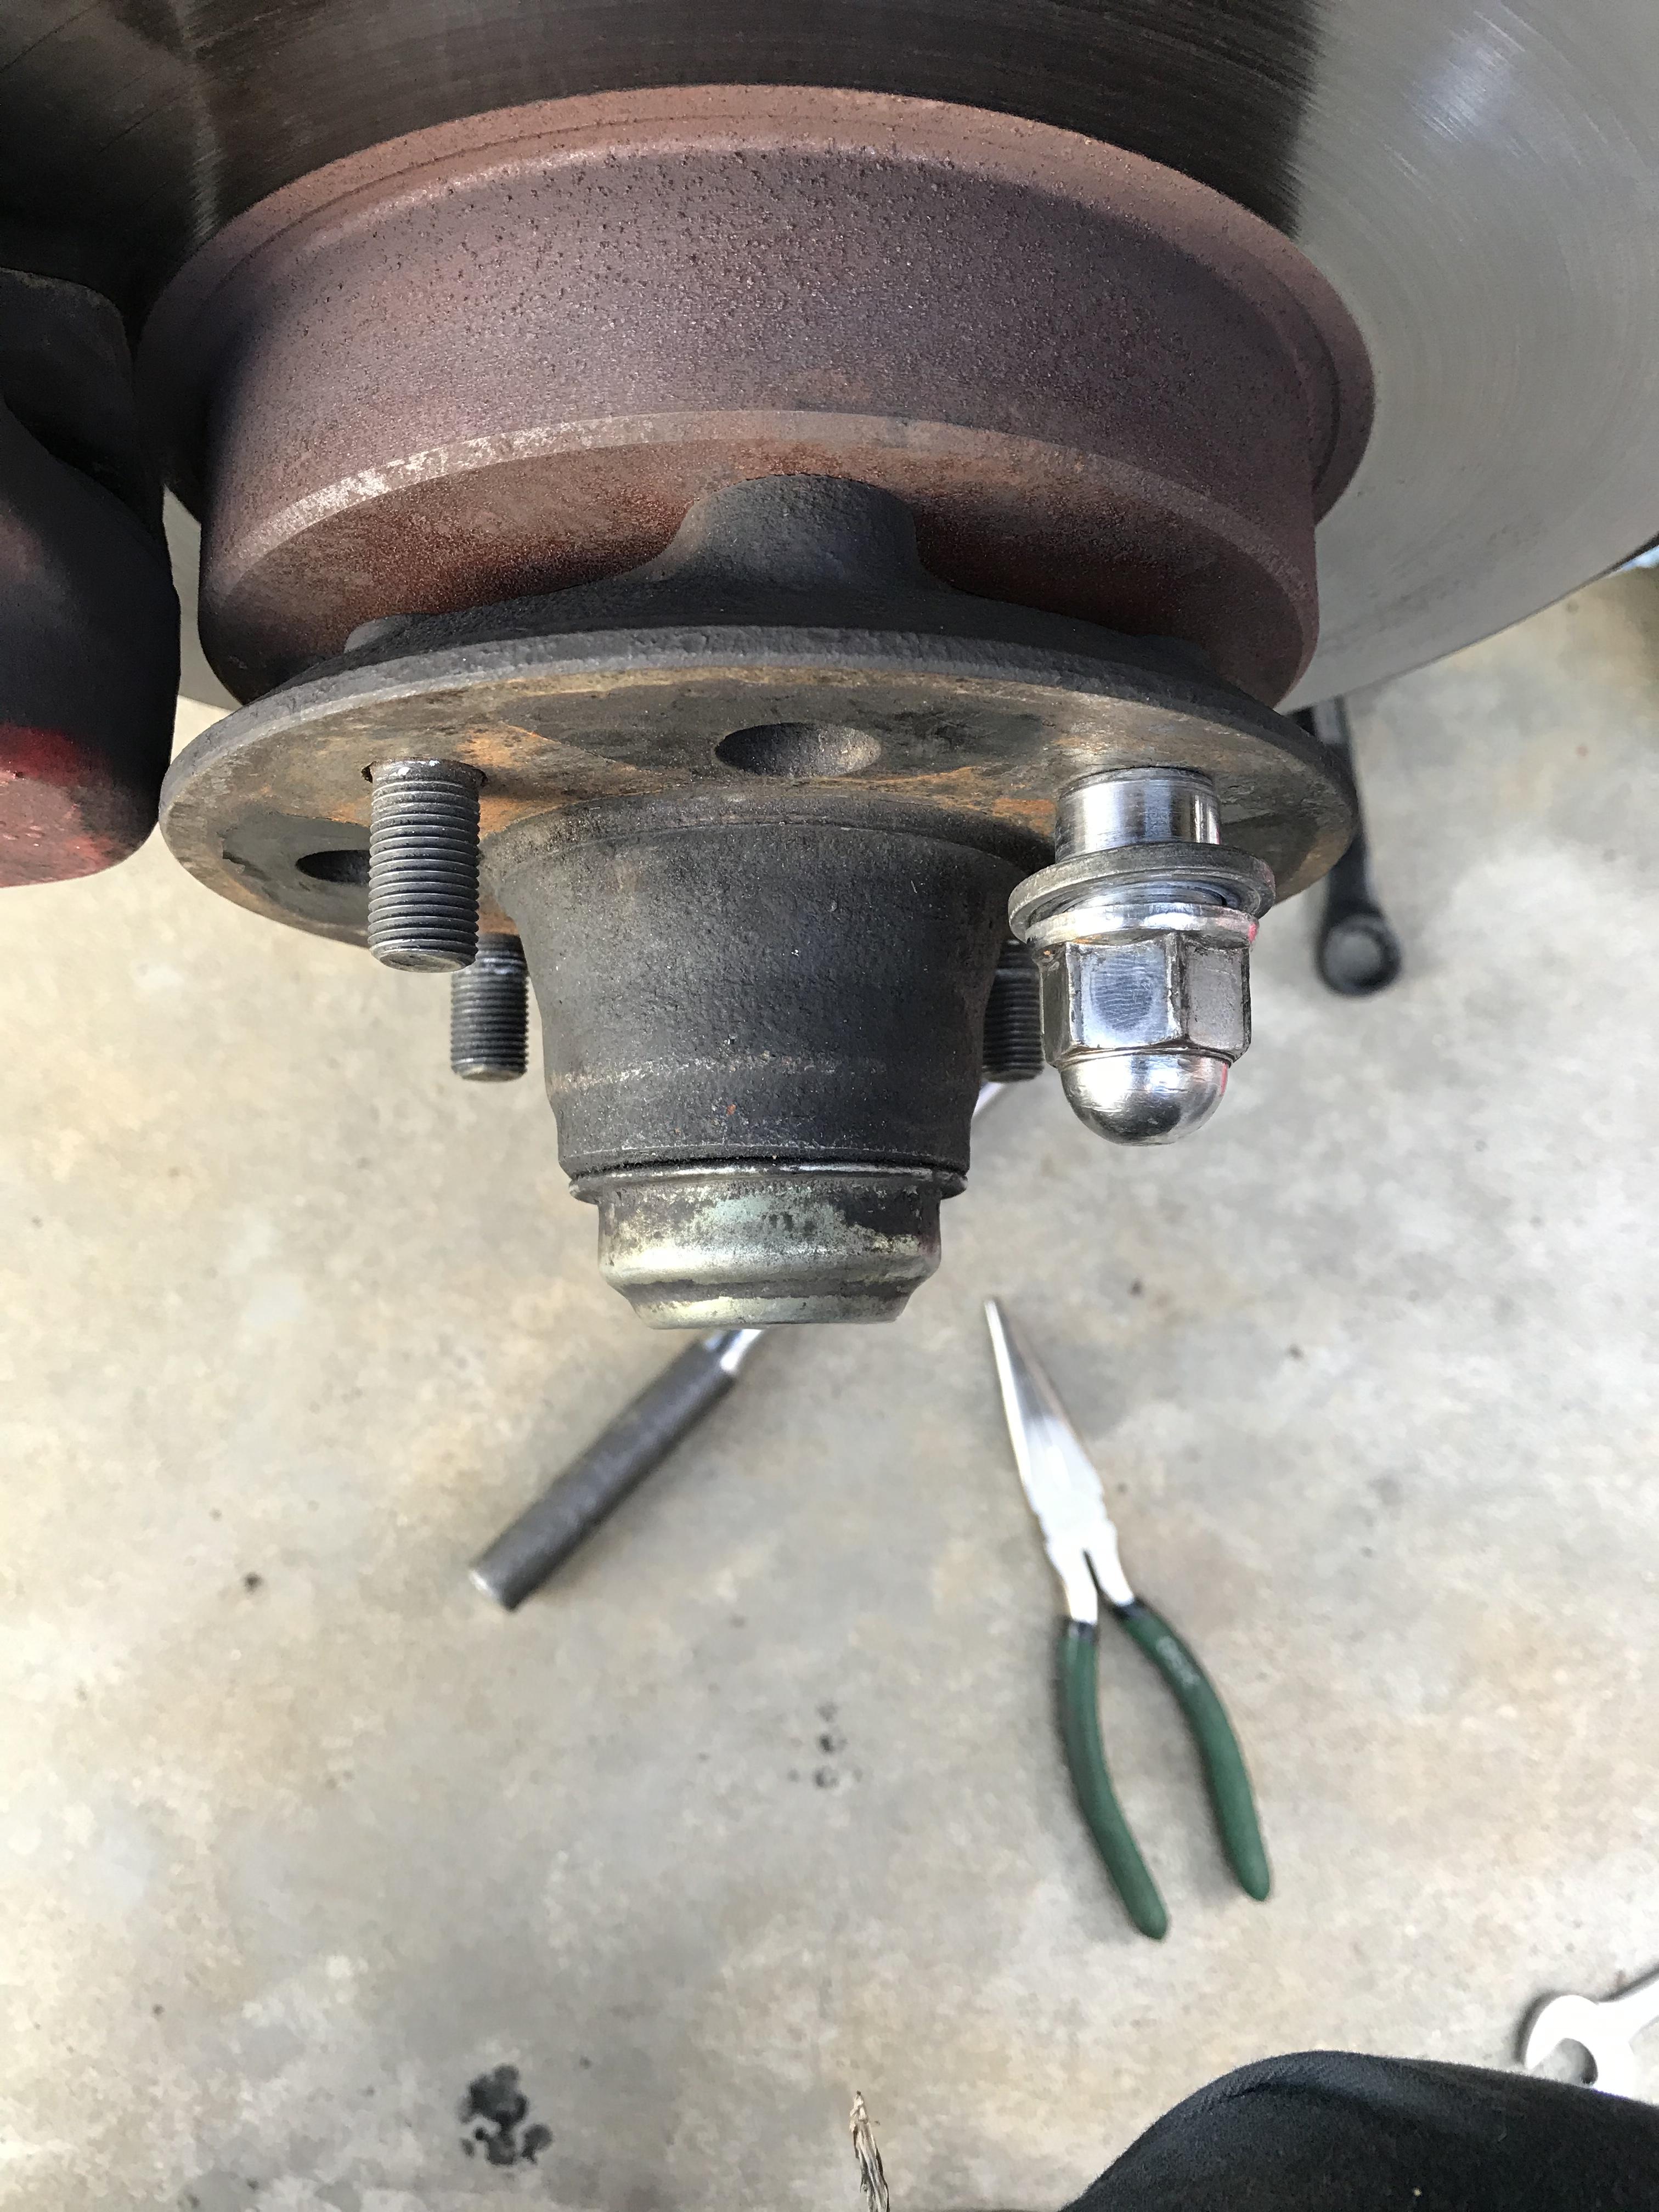
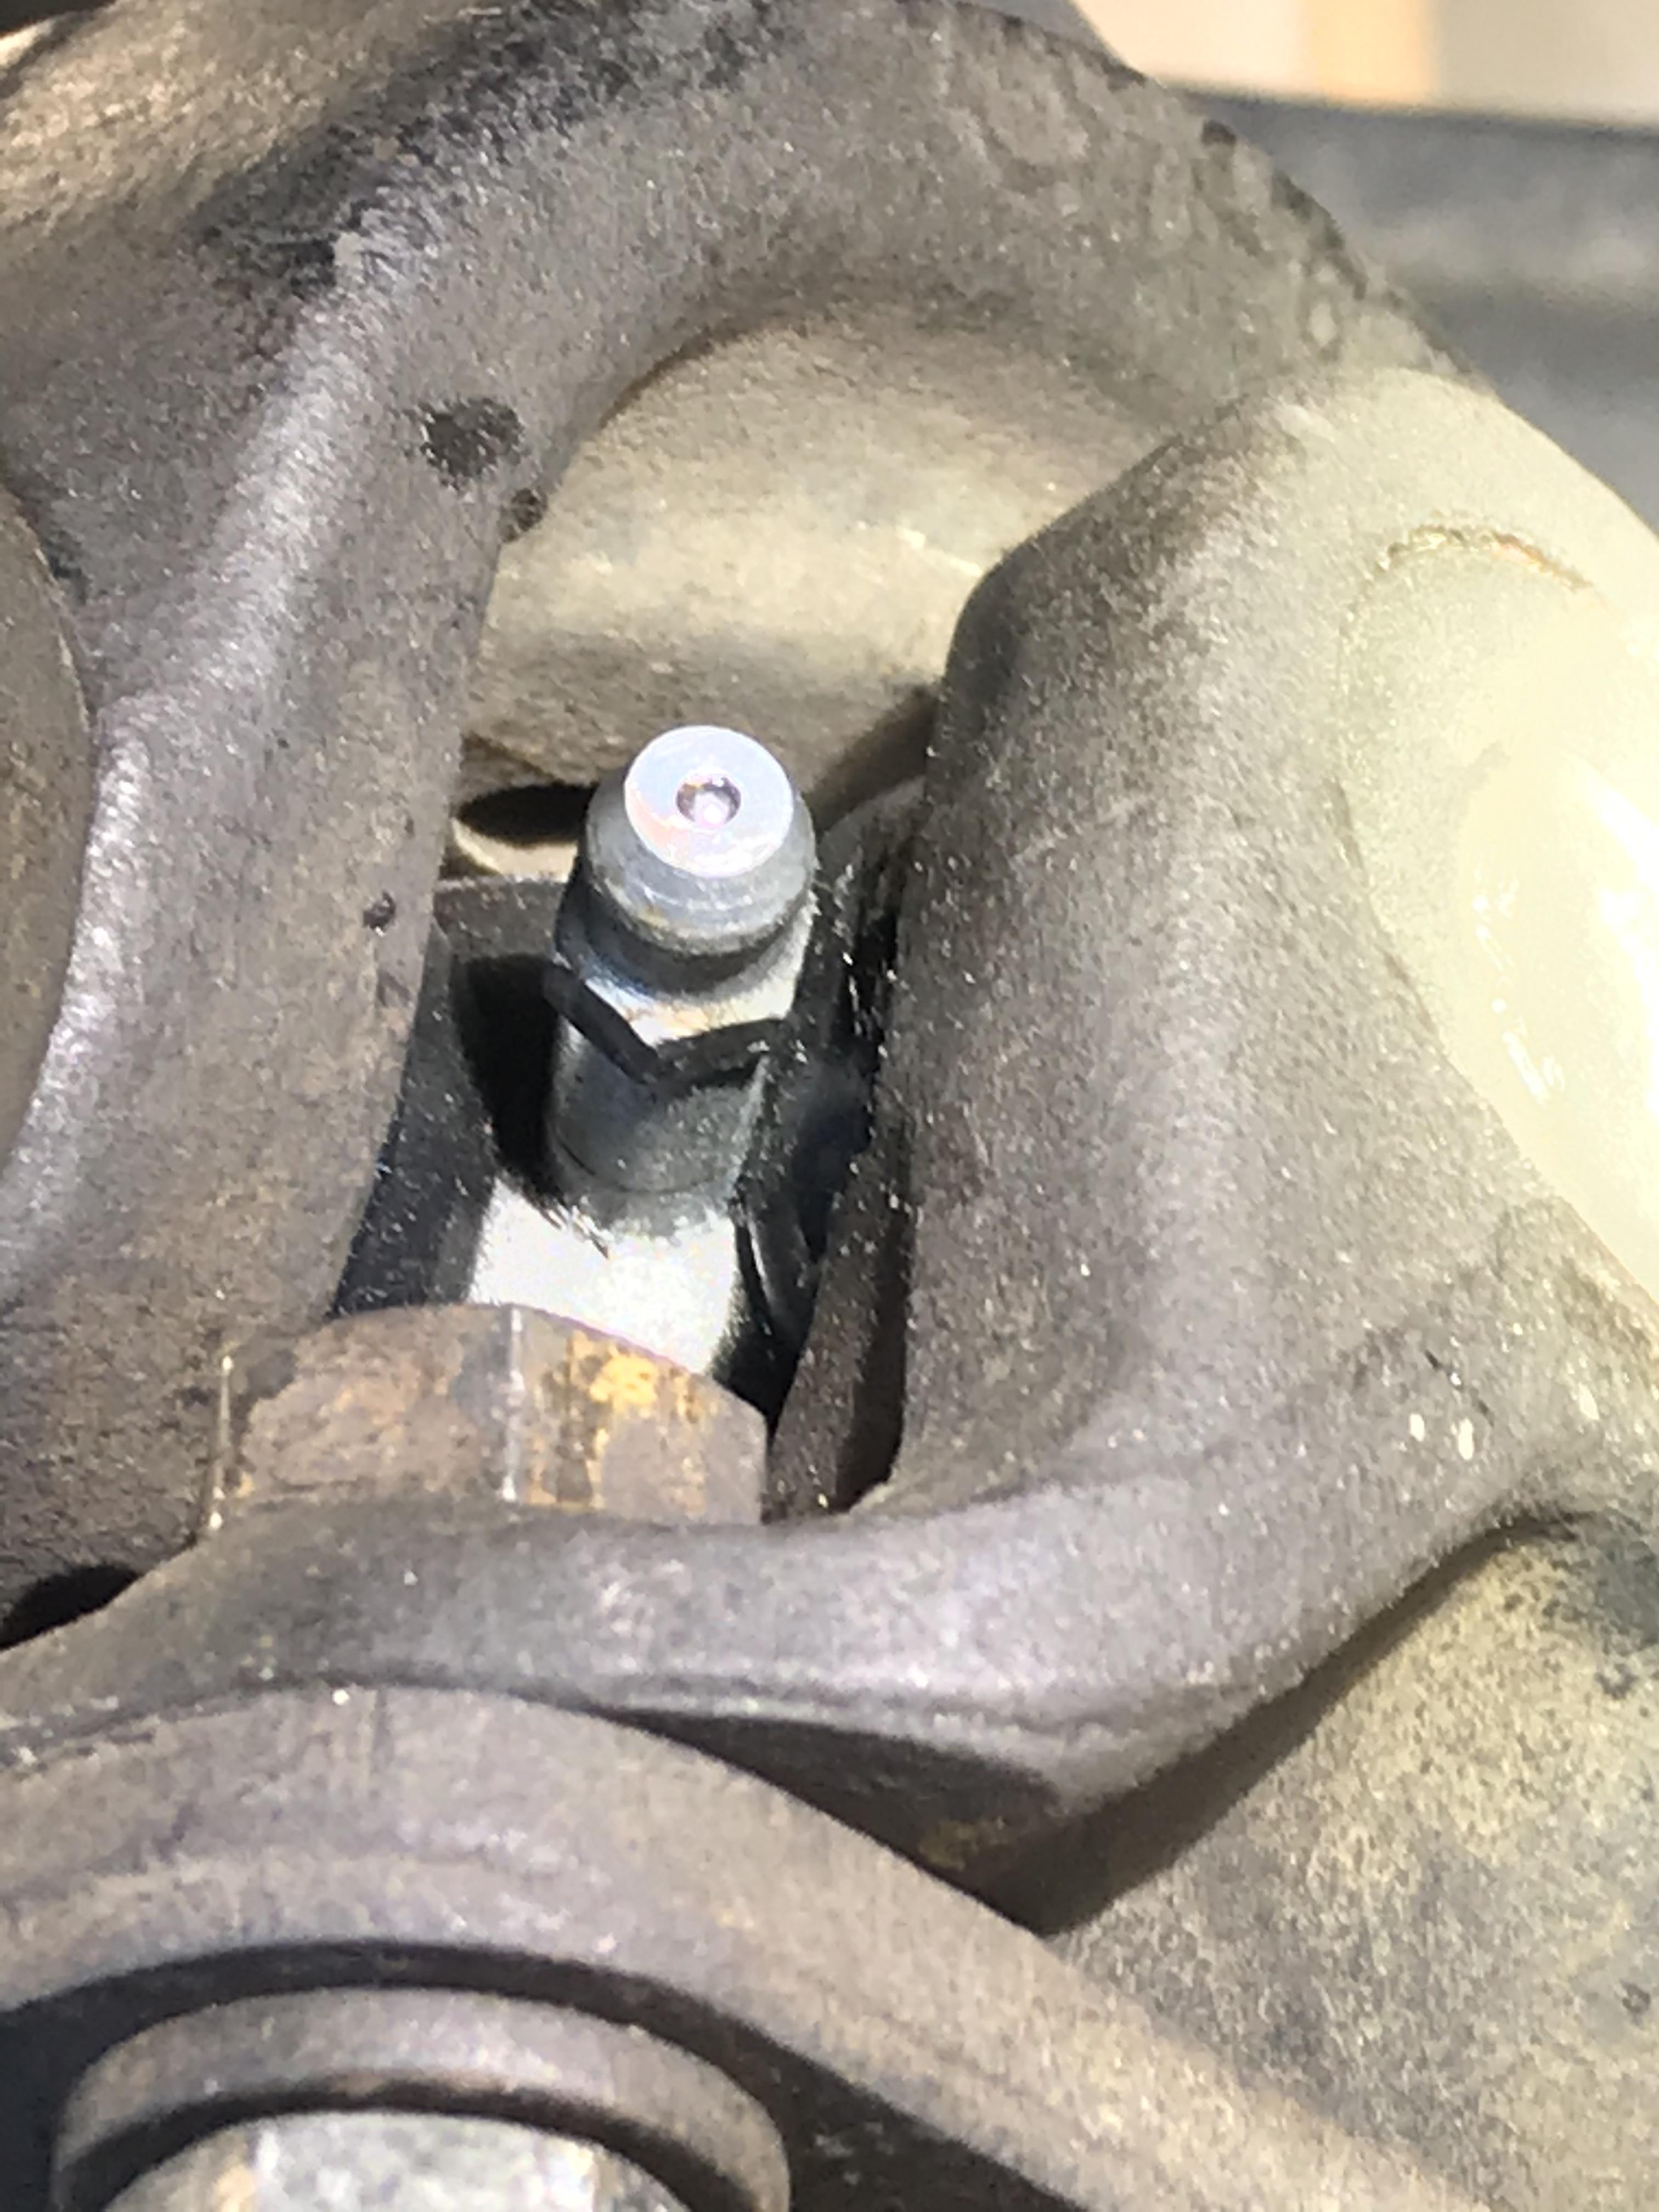
I decided that I did not want to pull out the drive shaft today, because I did not want to drop the exhaust from the header. Really hate that the OEM exhaust does not have a flange at the end of the down pipe. I feel like I should add one... I found multiple things, one the driver side half shaft needed to be tapped slightly to get looser along one of its axis. I also found that grease fitting that was in the body on the GMB half-shafts has a slight interference with the rubber on the end cap. I went to the hardware store and got some of those Allen key end caps that fit into the threads to block it off. I used 1/4x28 - 1/4” long end inserts so that there is less chance for contaminates to enter the joint. I can spin the brake drum and I’m not able to feel the bind spot anymore. there is still a vibration at 60mph+ so I think ill have to drop the exhaust on Saturday morning and inspect the drive shaft u joint on the yoke that goes into the gearbox. The one that is on the differential did not seem to bind at all. At least it’s getting better..... @Zed Head smart to have some backups laying around, I can’t find any Zs at the junkyards around here. Pickings are super slim, and usually there is competition for parts.
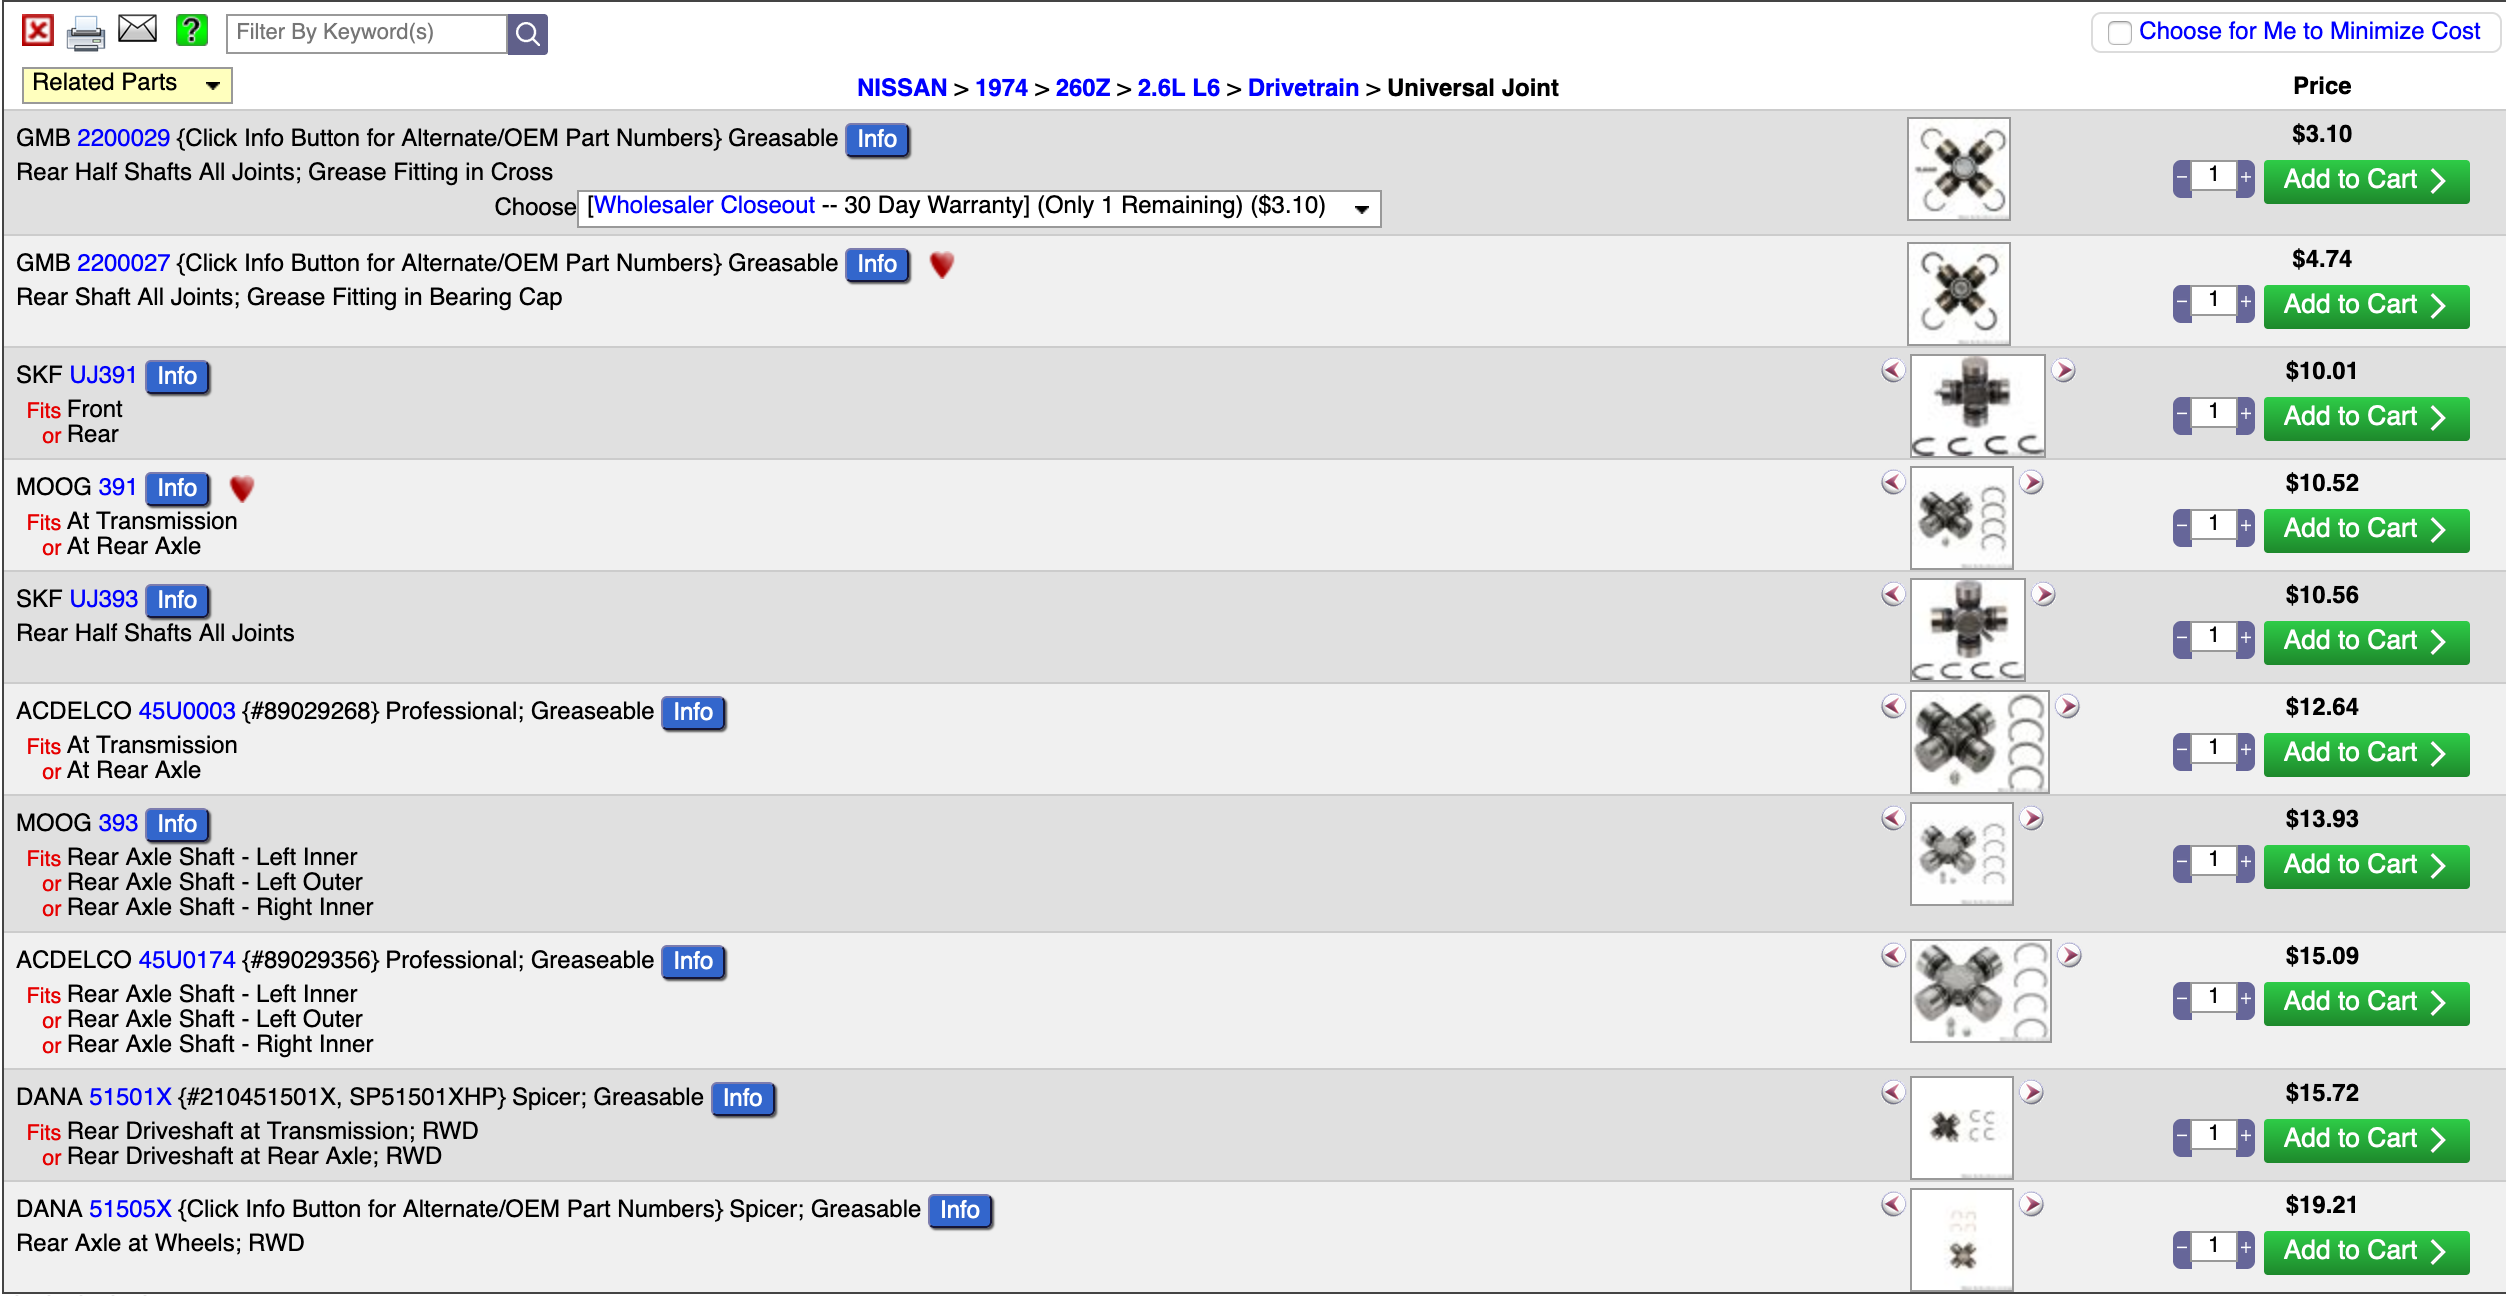
 I was looking at some of the Dana/spicer ujoints from rock auto, it seems like they have black grease covers on them now. There’s a screenshot in my thread with some part numbers you can refer to.
I wonder if i installed the wrong type of ujoint on the driveshaft, it looks like some are specified for the rear axels and NOT the drive shaft. From my records I had 2x Beck / Arnley 1020361 and 4x GMB 2200029 When I opened the B/A 1020361 box the u joints were stamped GMB. Per this thread, it looks like 1020361 are for the driveshafts, hopefully no mixups on the install...
I was looking at some of the Dana/spicer ujoints from rock auto, it seems like they have black grease covers on them now. There’s a screenshot in my thread with some part numbers you can refer to.
I wonder if i installed the wrong type of ujoint on the driveshaft, it looks like some are specified for the rear axels and NOT the drive shaft. From my records I had 2x Beck / Arnley 1020361 and 4x GMB 2200029 When I opened the B/A 1020361 box the u joints were stamped GMB. Per this thread, it looks like 1020361 are for the driveshafts, hopefully no mixups on the install...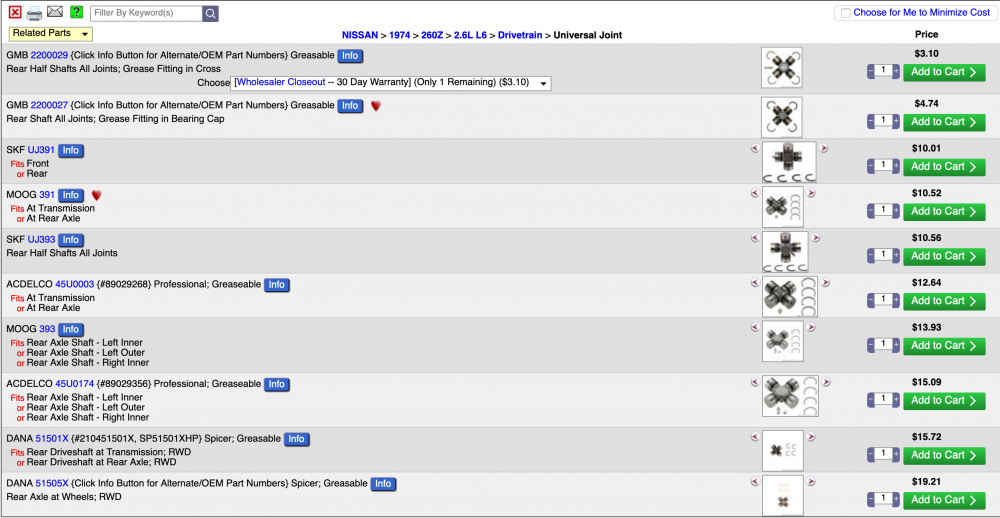 Have pictures? I recently replaced mine with GMB u-joints and there are vibrations I need to sort out, might have been my installation. Make sure to stamp all the yokes/flanges and how they fit back together, I think I messed up the balancing on mine.
@Captain Obvious They don’t mention anything about the ujoints putting the u joints back in the same orientation. I’ve heard that from other people as well, that the manufacturing for the ujoint is most likely going to be balanced as their production methods have gotten better. all the joints that I bought were made in Japan, so I feel good about their production quality. On the passenger side half shaft I found that one of the u-joint was binding (it had a lot of resistance to movement in two directions) so after pulling it out I beat on the ear with a dead blow to get it to be looser. Perhaps the other 2 shafts should also be inspected for this binding. @EuroDat the endplay inspection seems straight forward, is it “ok” to have less endplay or none? Or is that not really a possibility?
Have pictures? I recently replaced mine with GMB u-joints and there are vibrations I need to sort out, might have been my installation. Make sure to stamp all the yokes/flanges and how they fit back together, I think I messed up the balancing on mine.
@Captain Obvious They don’t mention anything about the ujoints putting the u joints back in the same orientation. I’ve heard that from other people as well, that the manufacturing for the ujoint is most likely going to be balanced as their production methods have gotten better. all the joints that I bought were made in Japan, so I feel good about their production quality. On the passenger side half shaft I found that one of the u-joint was binding (it had a lot of resistance to movement in two directions) so after pulling it out I beat on the ear with a dead blow to get it to be looser. Perhaps the other 2 shafts should also be inspected for this binding. @EuroDat the endplay inspection seems straight forward, is it “ok” to have less endplay or none? Or is that not really a possibility? Alright I guess it all comes back out tonight and I’ll inspect the endplay. Really wish I did not replace anything now, I think all the joints were good.
I recently replaced all 6 u-joints on my car as part of the `if its not broke, i should break it` phase of finding and fixing stuff on my car. To make matters worse I'm beginning to suspect that the driveshaft / half shafts are "out of phase" because I did not make any markings or keep track of the yoke orientation on any of the shafts when I assembled them. Is my only real option to get everything balanced? I feel and hear vibrations when at highway speeds.. I dont think figuring out the phase is something that I can do in the garage is it?
LS swaps are not that cheap, you might be able to do it cheaper if you grab a car that came with an LS to swap all the stuff over. Then parting out that car. But still your going to be in the hole for all the other stuff that you’ll need. fixing that l28 might be the cheapest of the options. Although that much for a head gasket is asking a lot, shops have to make money though. If your inclined the DIY route will certainly save you a bunch of money, I think @siteunseen is at the ballpark, without getting into machining costs, $500 will get you pretty far with a l28. the nice thing about that route is when it comes time for fix that l28et you’ll be more knowledgeable of what needs to be done on it.
Are you using the OEM style bushings? If so I don’t think you need them.
I drove the car around the block to see how it feels... Oh boy the shifter feels way better. @EuroDat I think your onto something about not using brass bushings in the shifter. When experimenting with an extra shifter that I had I noticed that the brass bushings that I made are not an interference fit to the striker rod ears like the new OEM ones are, I think this also accounted for some of the rattle that i heard. I do want to install the brass one back in at some point to see how it compares to new bushings. But I am pretty happy with the setup so far. I'm not sure if the leaky seal was also contributing to rattle, it feels like in theory it could because the striker-rod was just floating around the seal in the housing, if anything it might have tightened up the shifter feeling, it no longer feels like there is a "one-two-click in gear" its more of a solid throw.
I wonder if you can TIG it with an appropriate feed rod. Might have to manage the heat as well, don’t let it cool off too fast. Shaping them after will be interesting, might be able to file it down slowly. Hopefully we can see some lights on that Christmas gear tree you have.. maybe during the holiday season 😛
Alright I guess it all comes back out tonight and I’ll inspect the endplay. Really wish I did not replace anything now, I think all the joints were good.
I recently replaced all 6 u-joints on my car as part of the `if its not broke, i should break it` phase of finding and fixing stuff on my car. To make matters worse I'm beginning to suspect that the driveshaft / half shafts are "out of phase" because I did not make any markings or keep track of the yoke orientation on any of the shafts when I assembled them. Is my only real option to get everything balanced? I feel and hear vibrations when at highway speeds.. I dont think figuring out the phase is something that I can do in the garage is it?
LS swaps are not that cheap, you might be able to do it cheaper if you grab a car that came with an LS to swap all the stuff over. Then parting out that car. But still your going to be in the hole for all the other stuff that you’ll need. fixing that l28 might be the cheapest of the options. Although that much for a head gasket is asking a lot, shops have to make money though. If your inclined the DIY route will certainly save you a bunch of money, I think @siteunseen is at the ballpark, without getting into machining costs, $500 will get you pretty far with a l28. the nice thing about that route is when it comes time for fix that l28et you’ll be more knowledgeable of what needs to be done on it.
Are you using the OEM style bushings? If so I don’t think you need them.
I drove the car around the block to see how it feels... Oh boy the shifter feels way better. @EuroDat I think your onto something about not using brass bushings in the shifter. When experimenting with an extra shifter that I had I noticed that the brass bushings that I made are not an interference fit to the striker rod ears like the new OEM ones are, I think this also accounted for some of the rattle that i heard. I do want to install the brass one back in at some point to see how it compares to new bushings. But I am pretty happy with the setup so far. I'm not sure if the leaky seal was also contributing to rattle, it feels like in theory it could because the striker-rod was just floating around the seal in the housing, if anything it might have tightened up the shifter feeling, it no longer feels like there is a "one-two-click in gear" its more of a solid throw.
I wonder if you can TIG it with an appropriate feed rod. Might have to manage the heat as well, don’t let it cool off too fast. Shaping them after will be interesting, might be able to file it down slowly. Hopefully we can see some lights on that Christmas gear tree you have.. maybe during the holiday season 😛


Important Information
By using this site, you agree to our Privacy Policy and Guidelines. We have placed cookies on your device to help make this website better. You can adjust your cookie settings, otherwise we'll assume you're okay to continue.