
heyitsrama
Free Member
-
Joined
-
Last visited
Everything posted by heyitsrama
-
 It looks like it was made by Ishihara-Johnson http://crank-scrapers.com/Datsun-Nissan_L_SERIES.html $129 new! It looks like it comes with an additional scraper that works on the upstroke. This guy is using the same brand `IJ` scrapper, he sets to 40thou of clearance! Quite close
 -
This is pretty sweet how close does it get to the weight on the crank?
-
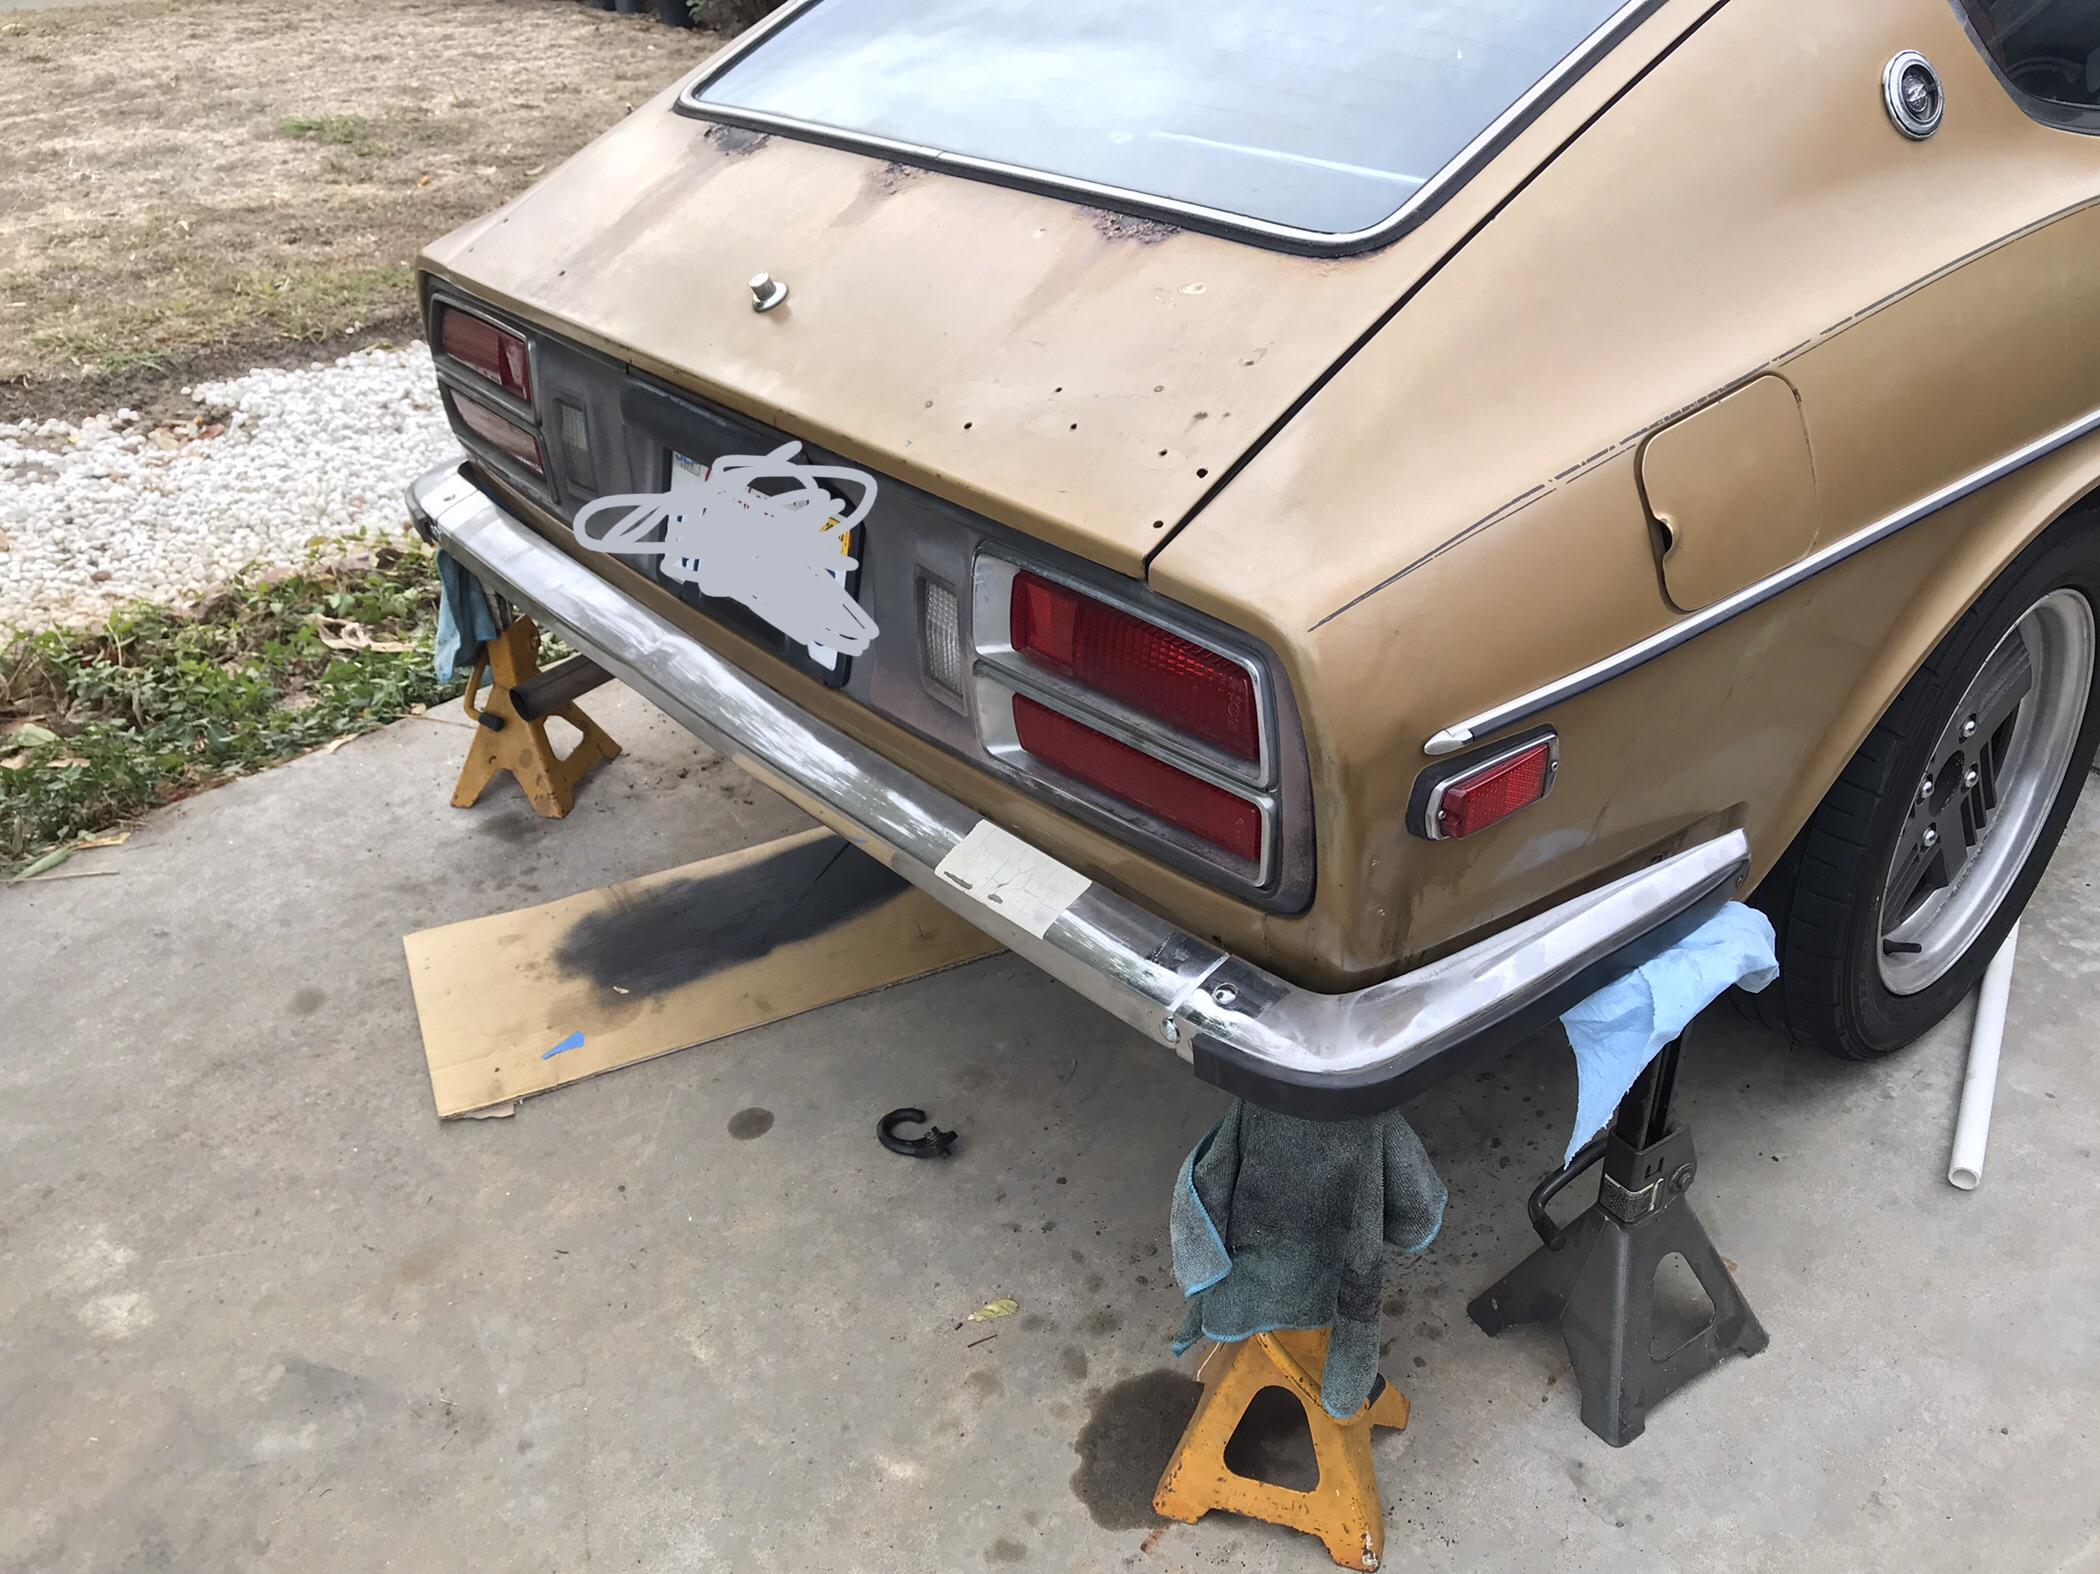
@Freez74 is that Allen bolt on the top of the bumper through a hole that you added to the bumper?
-
I’ve been trying to make custom HVAC control panels for weeks, does anyone know what material these are made out of? I’ve been doing laser engraving on transparent acrylic. This seems way more thin, almost like a sticker. very clean!
-
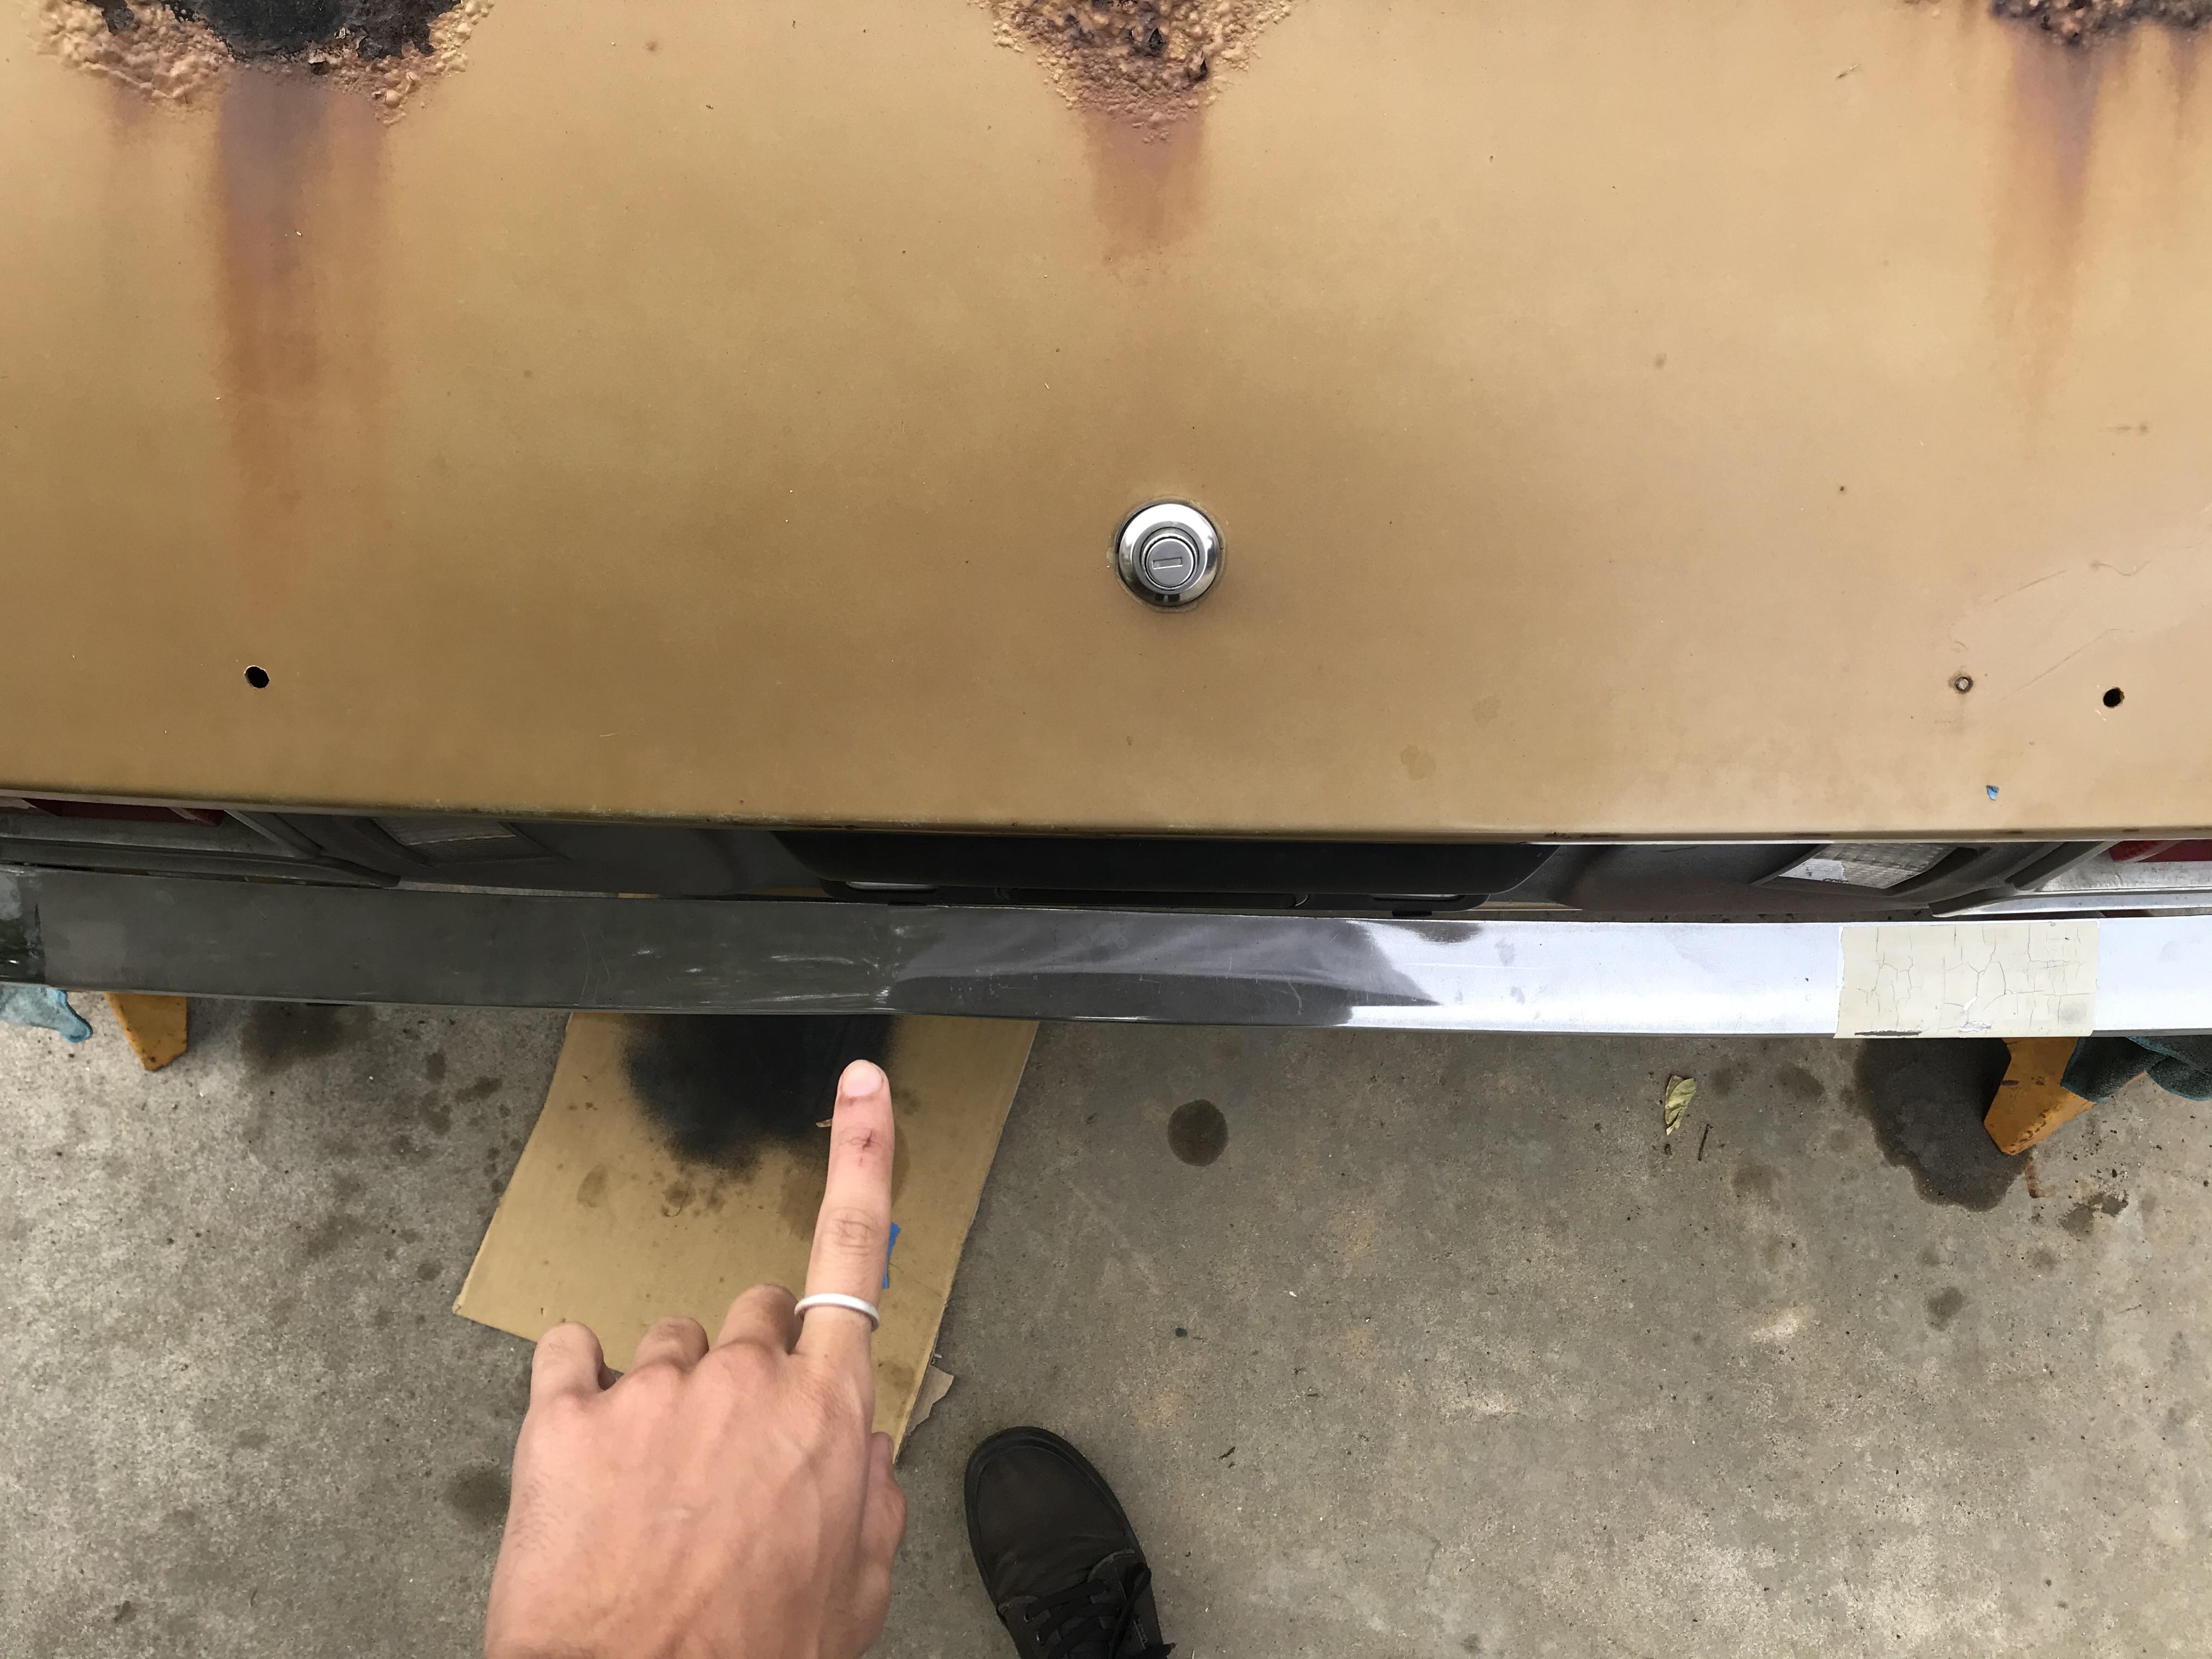
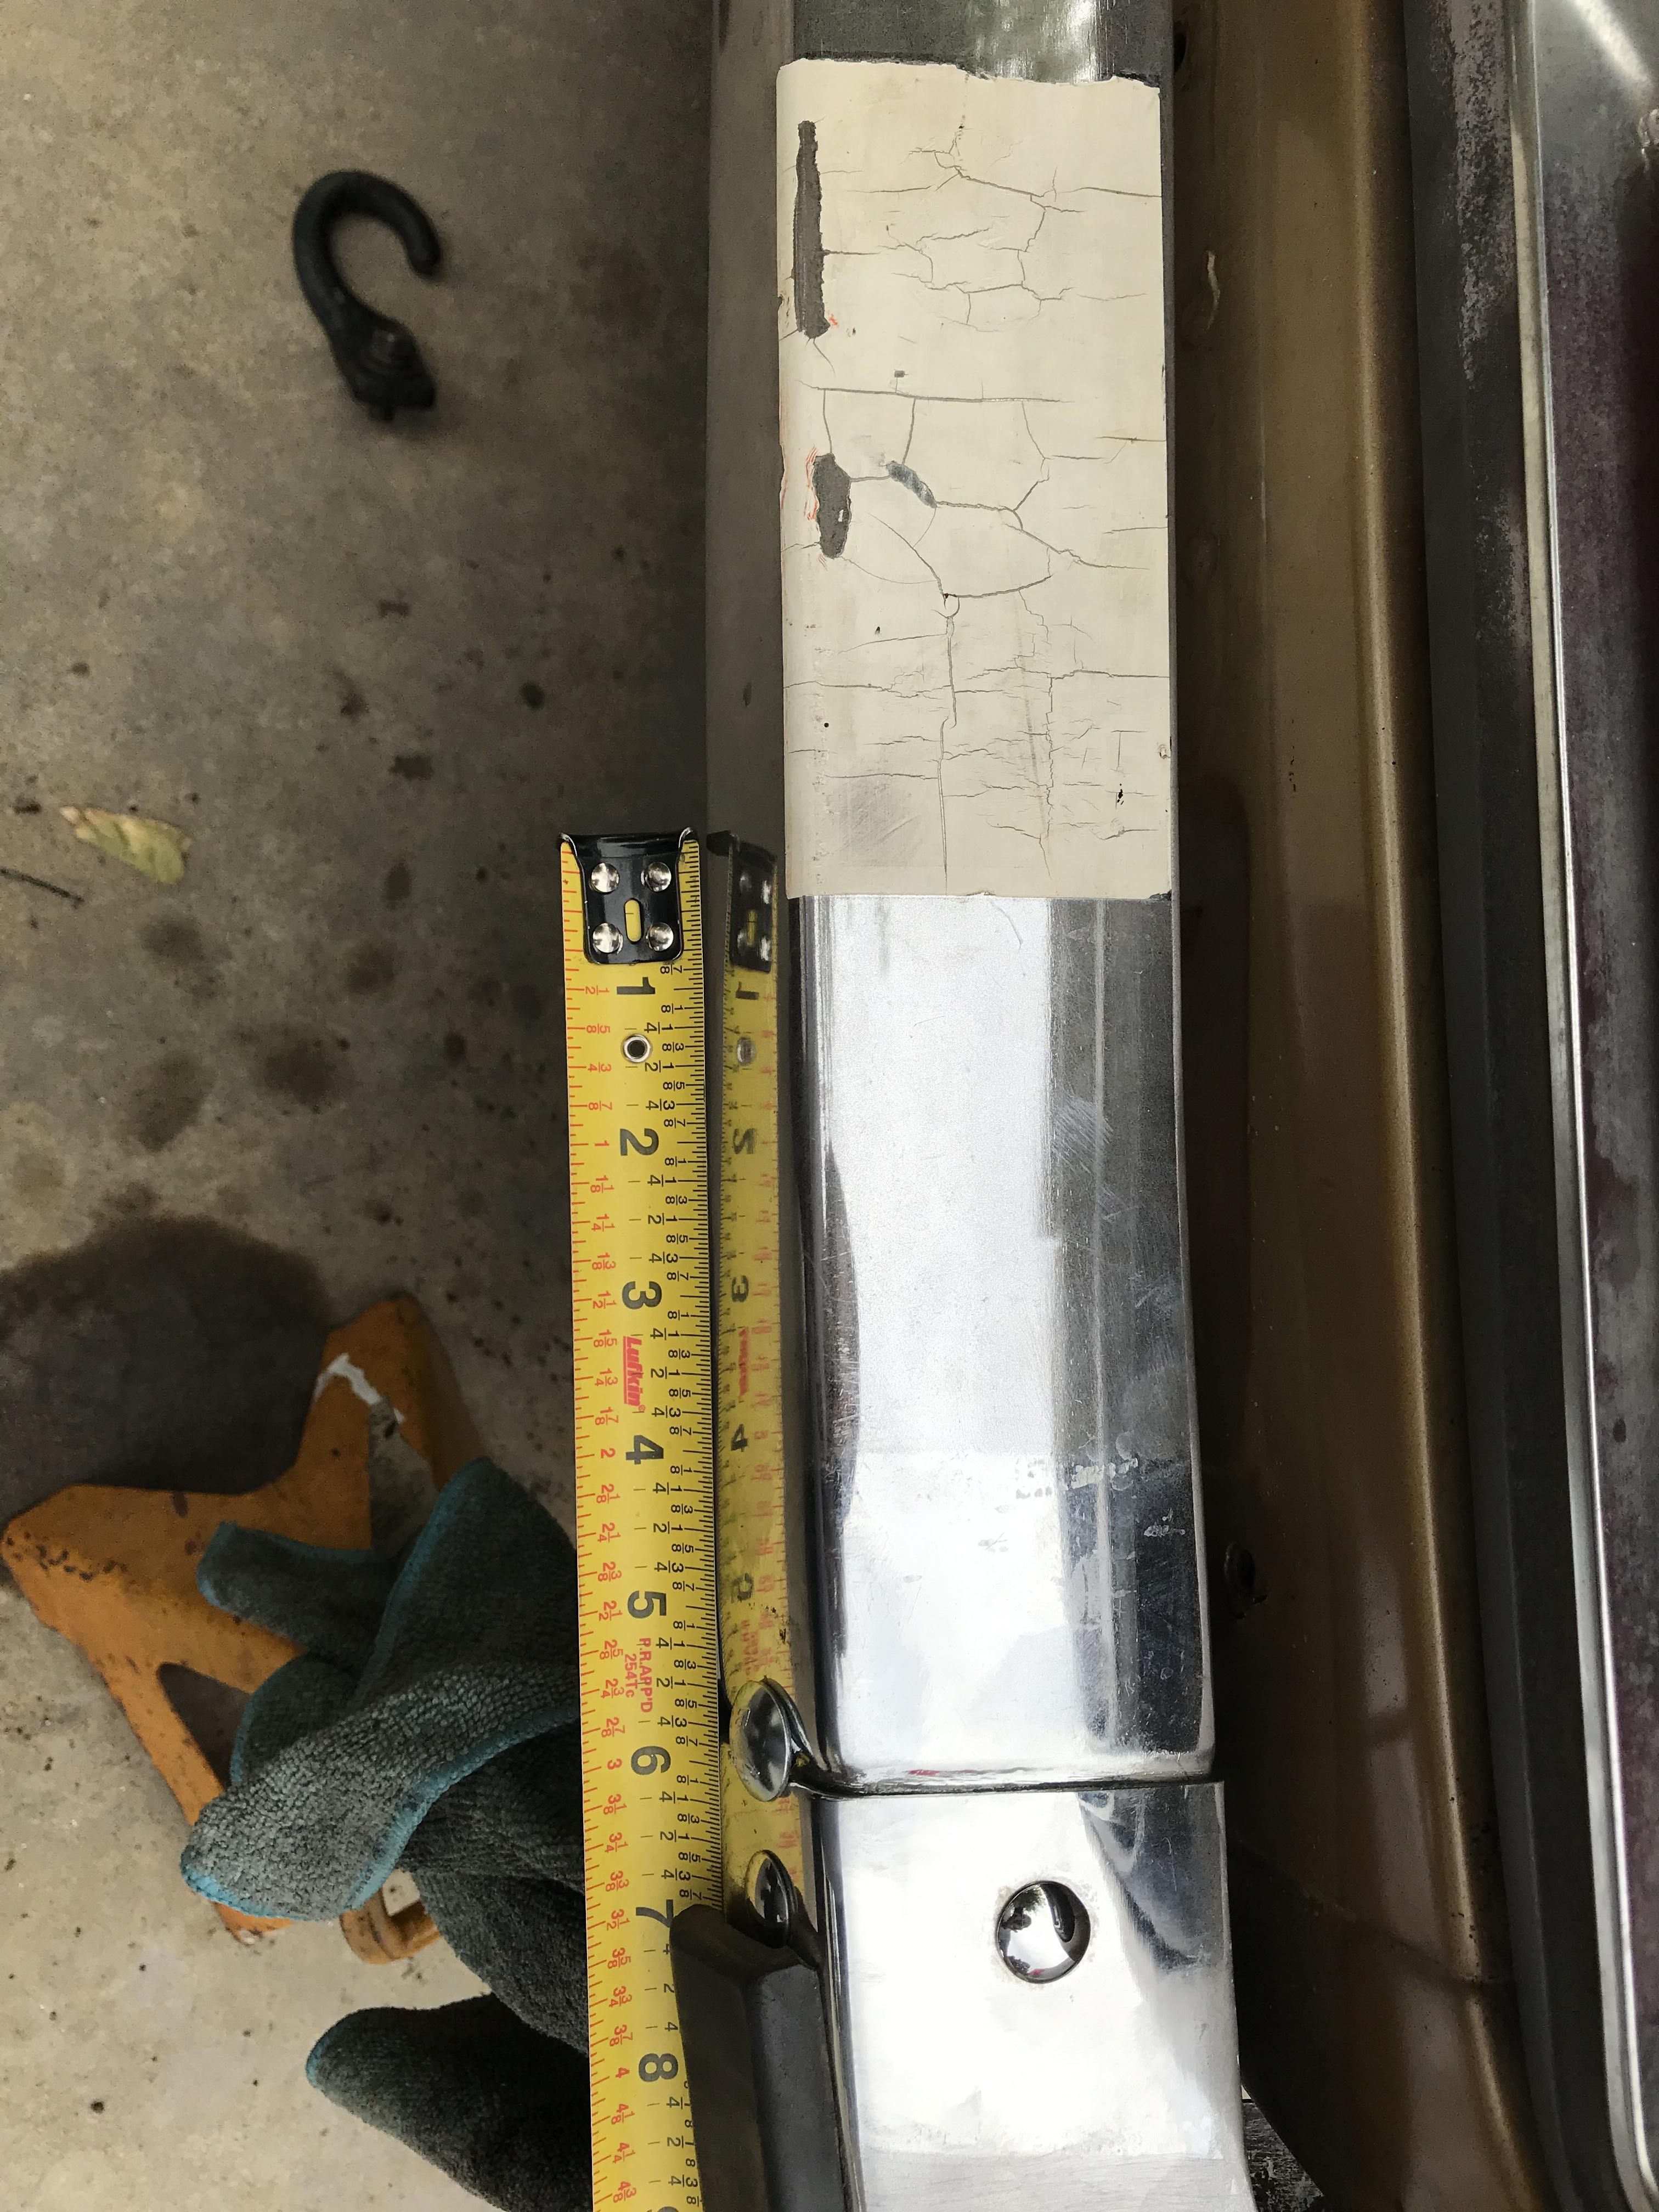
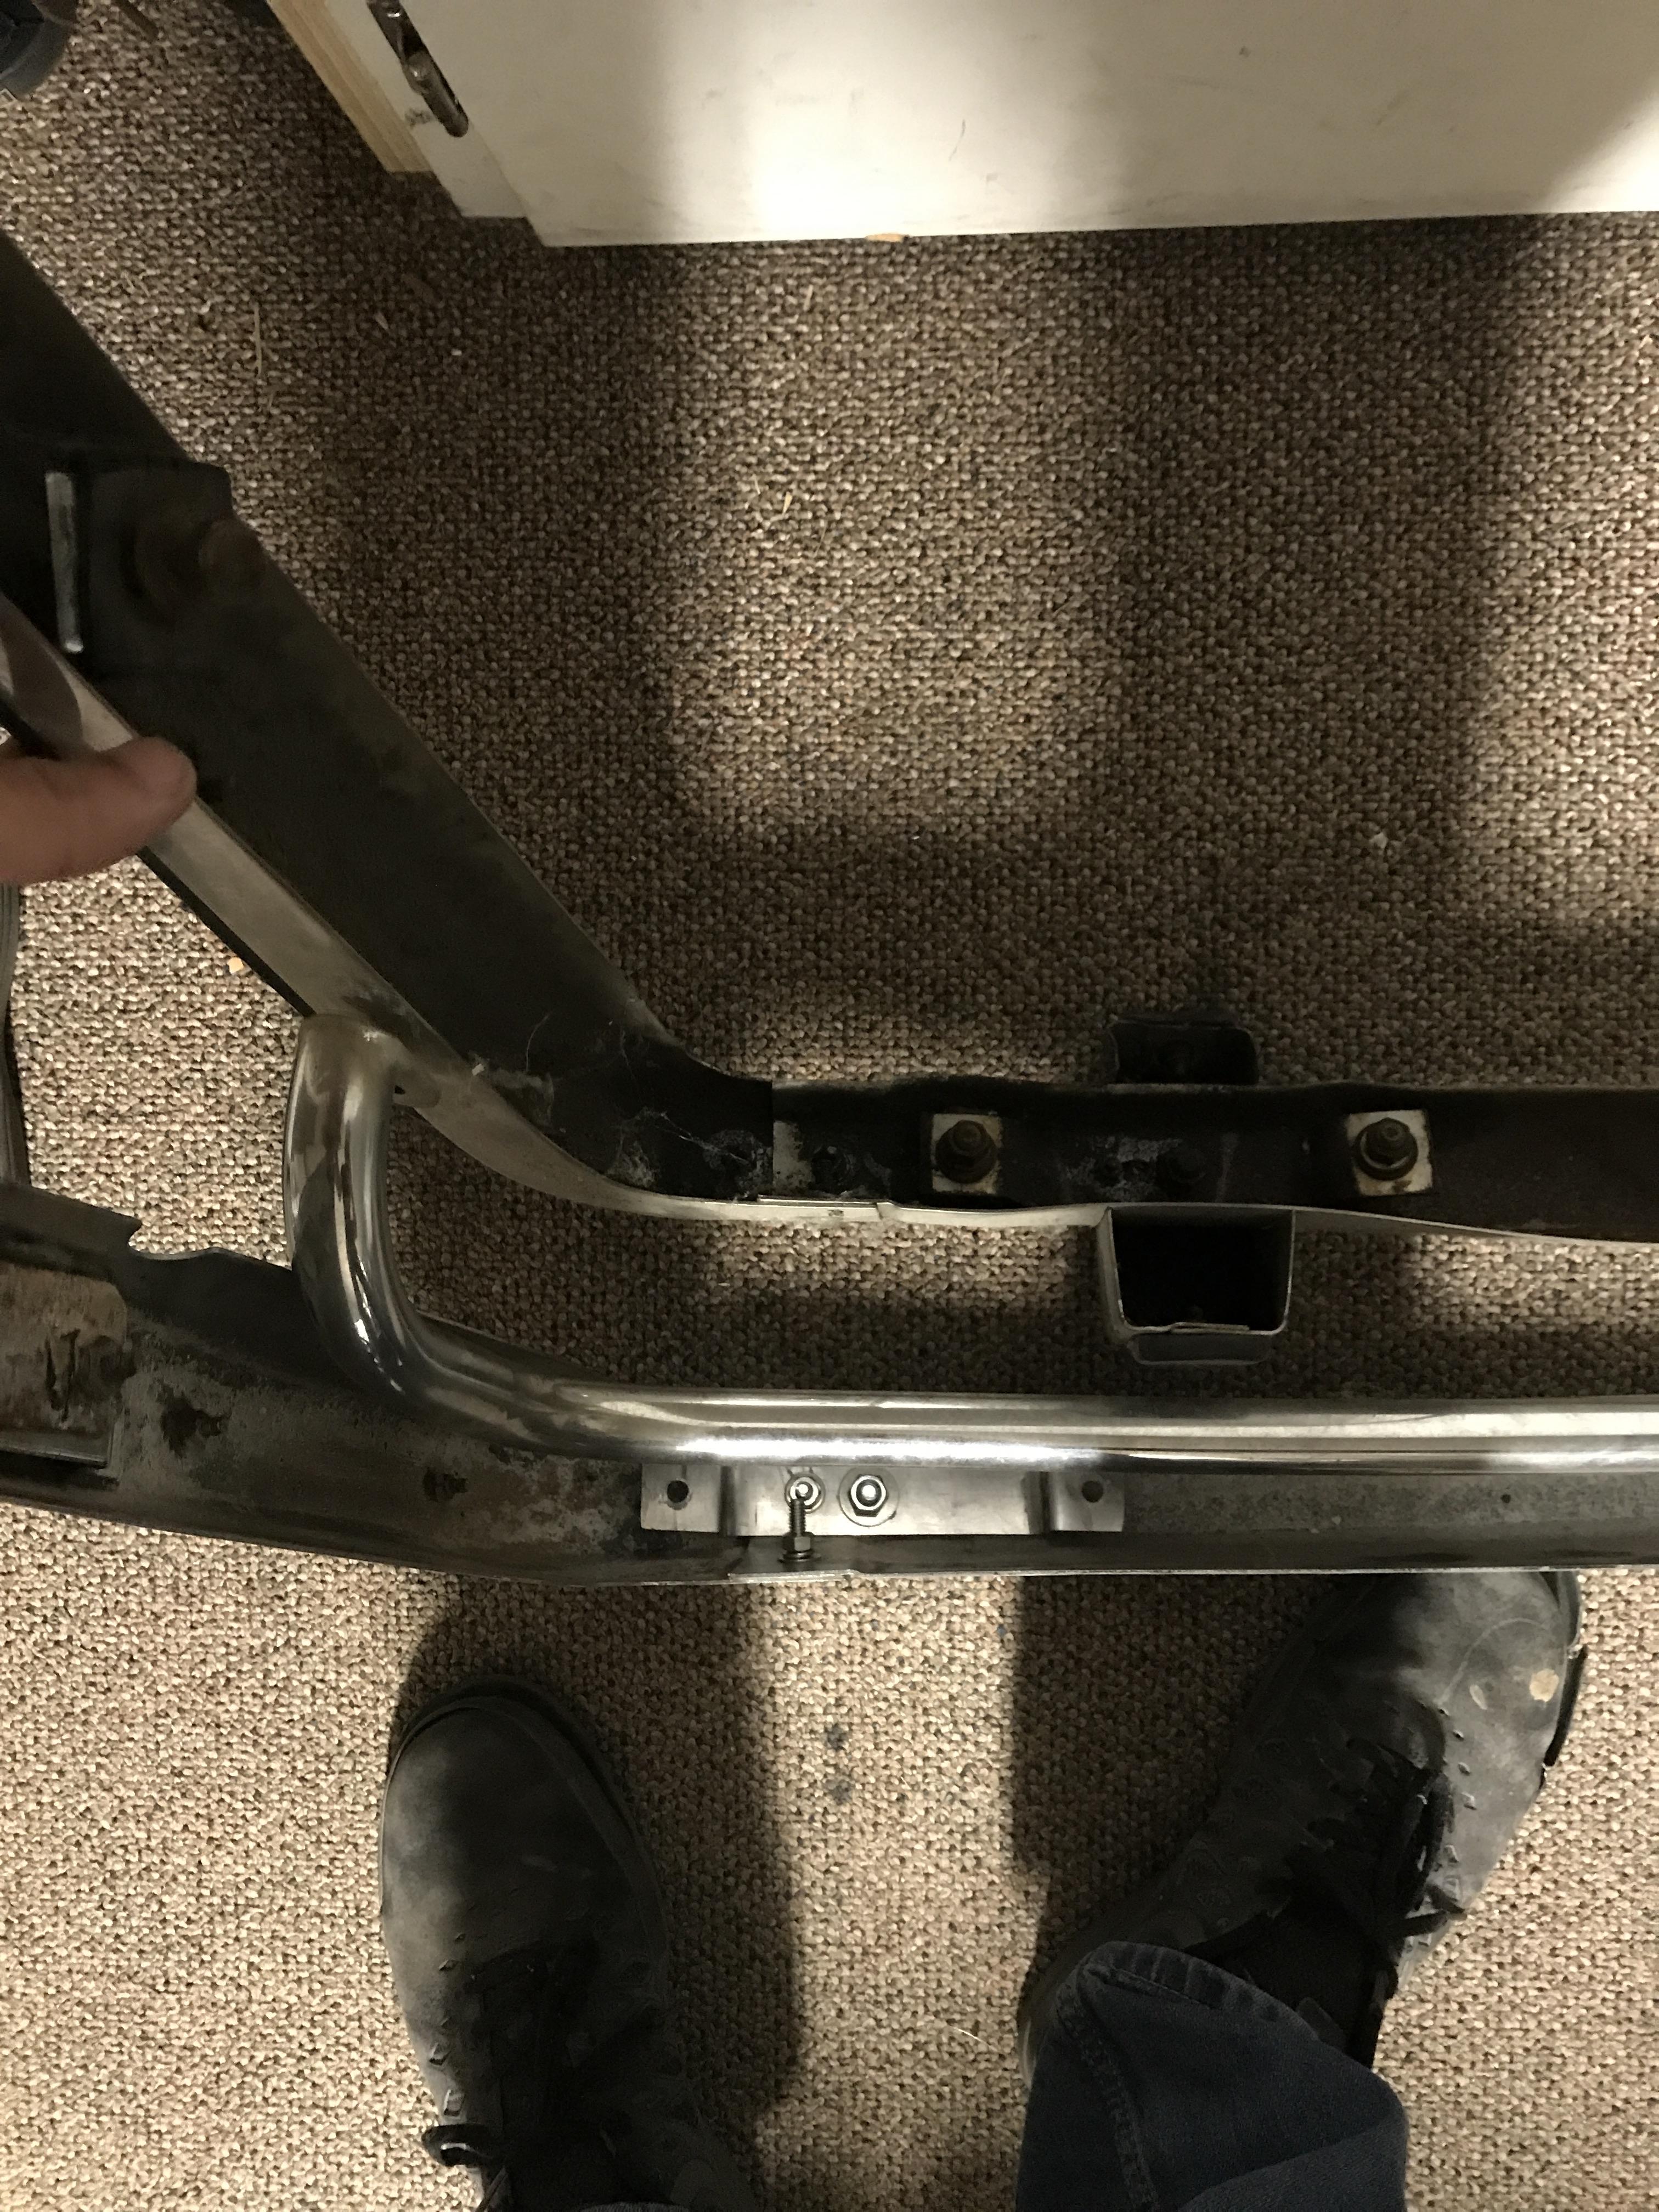
It looks like there is a small dimple that needs to be pulled out of the bumper.... does the chrome finish not like betting beat on with a hammer? Maybe can push it from the backside? The mount points seem to be way off ~7in to where the actual supports are. the strut faces are visible from the bottom, if you are laying down in the street looking at the car 😂


-
What was strange is that it looks like it is possible to do it. I think I was trying to mount it too low, on the ends of the struts.. perhaps you HAVE to use the body mounts as well. Alright back outside we go. https://forums.hybridz.org/topic/69280-260z-flush-bumper-conversion/ Does this seem too high up? @cgsheen1 do you have a picture of yours?

-
@cgsheen1 that sounds like quiet the challenge, my buddy offered this lift I’ll have to take him up on it the next time I do this, working on the slanted driveway is fun till the sockets roll away.. but then again I’ve done all the work on the driveway >.> I just mocked up the 260z bumper, a much larger gap in between the body and the sides of the bumper along the quarter than the 240z bumpers..... maybe I can adjust it. Seems like a lot of this is wasted effort. 😪 should have just got the 240z bumpers 😐
-
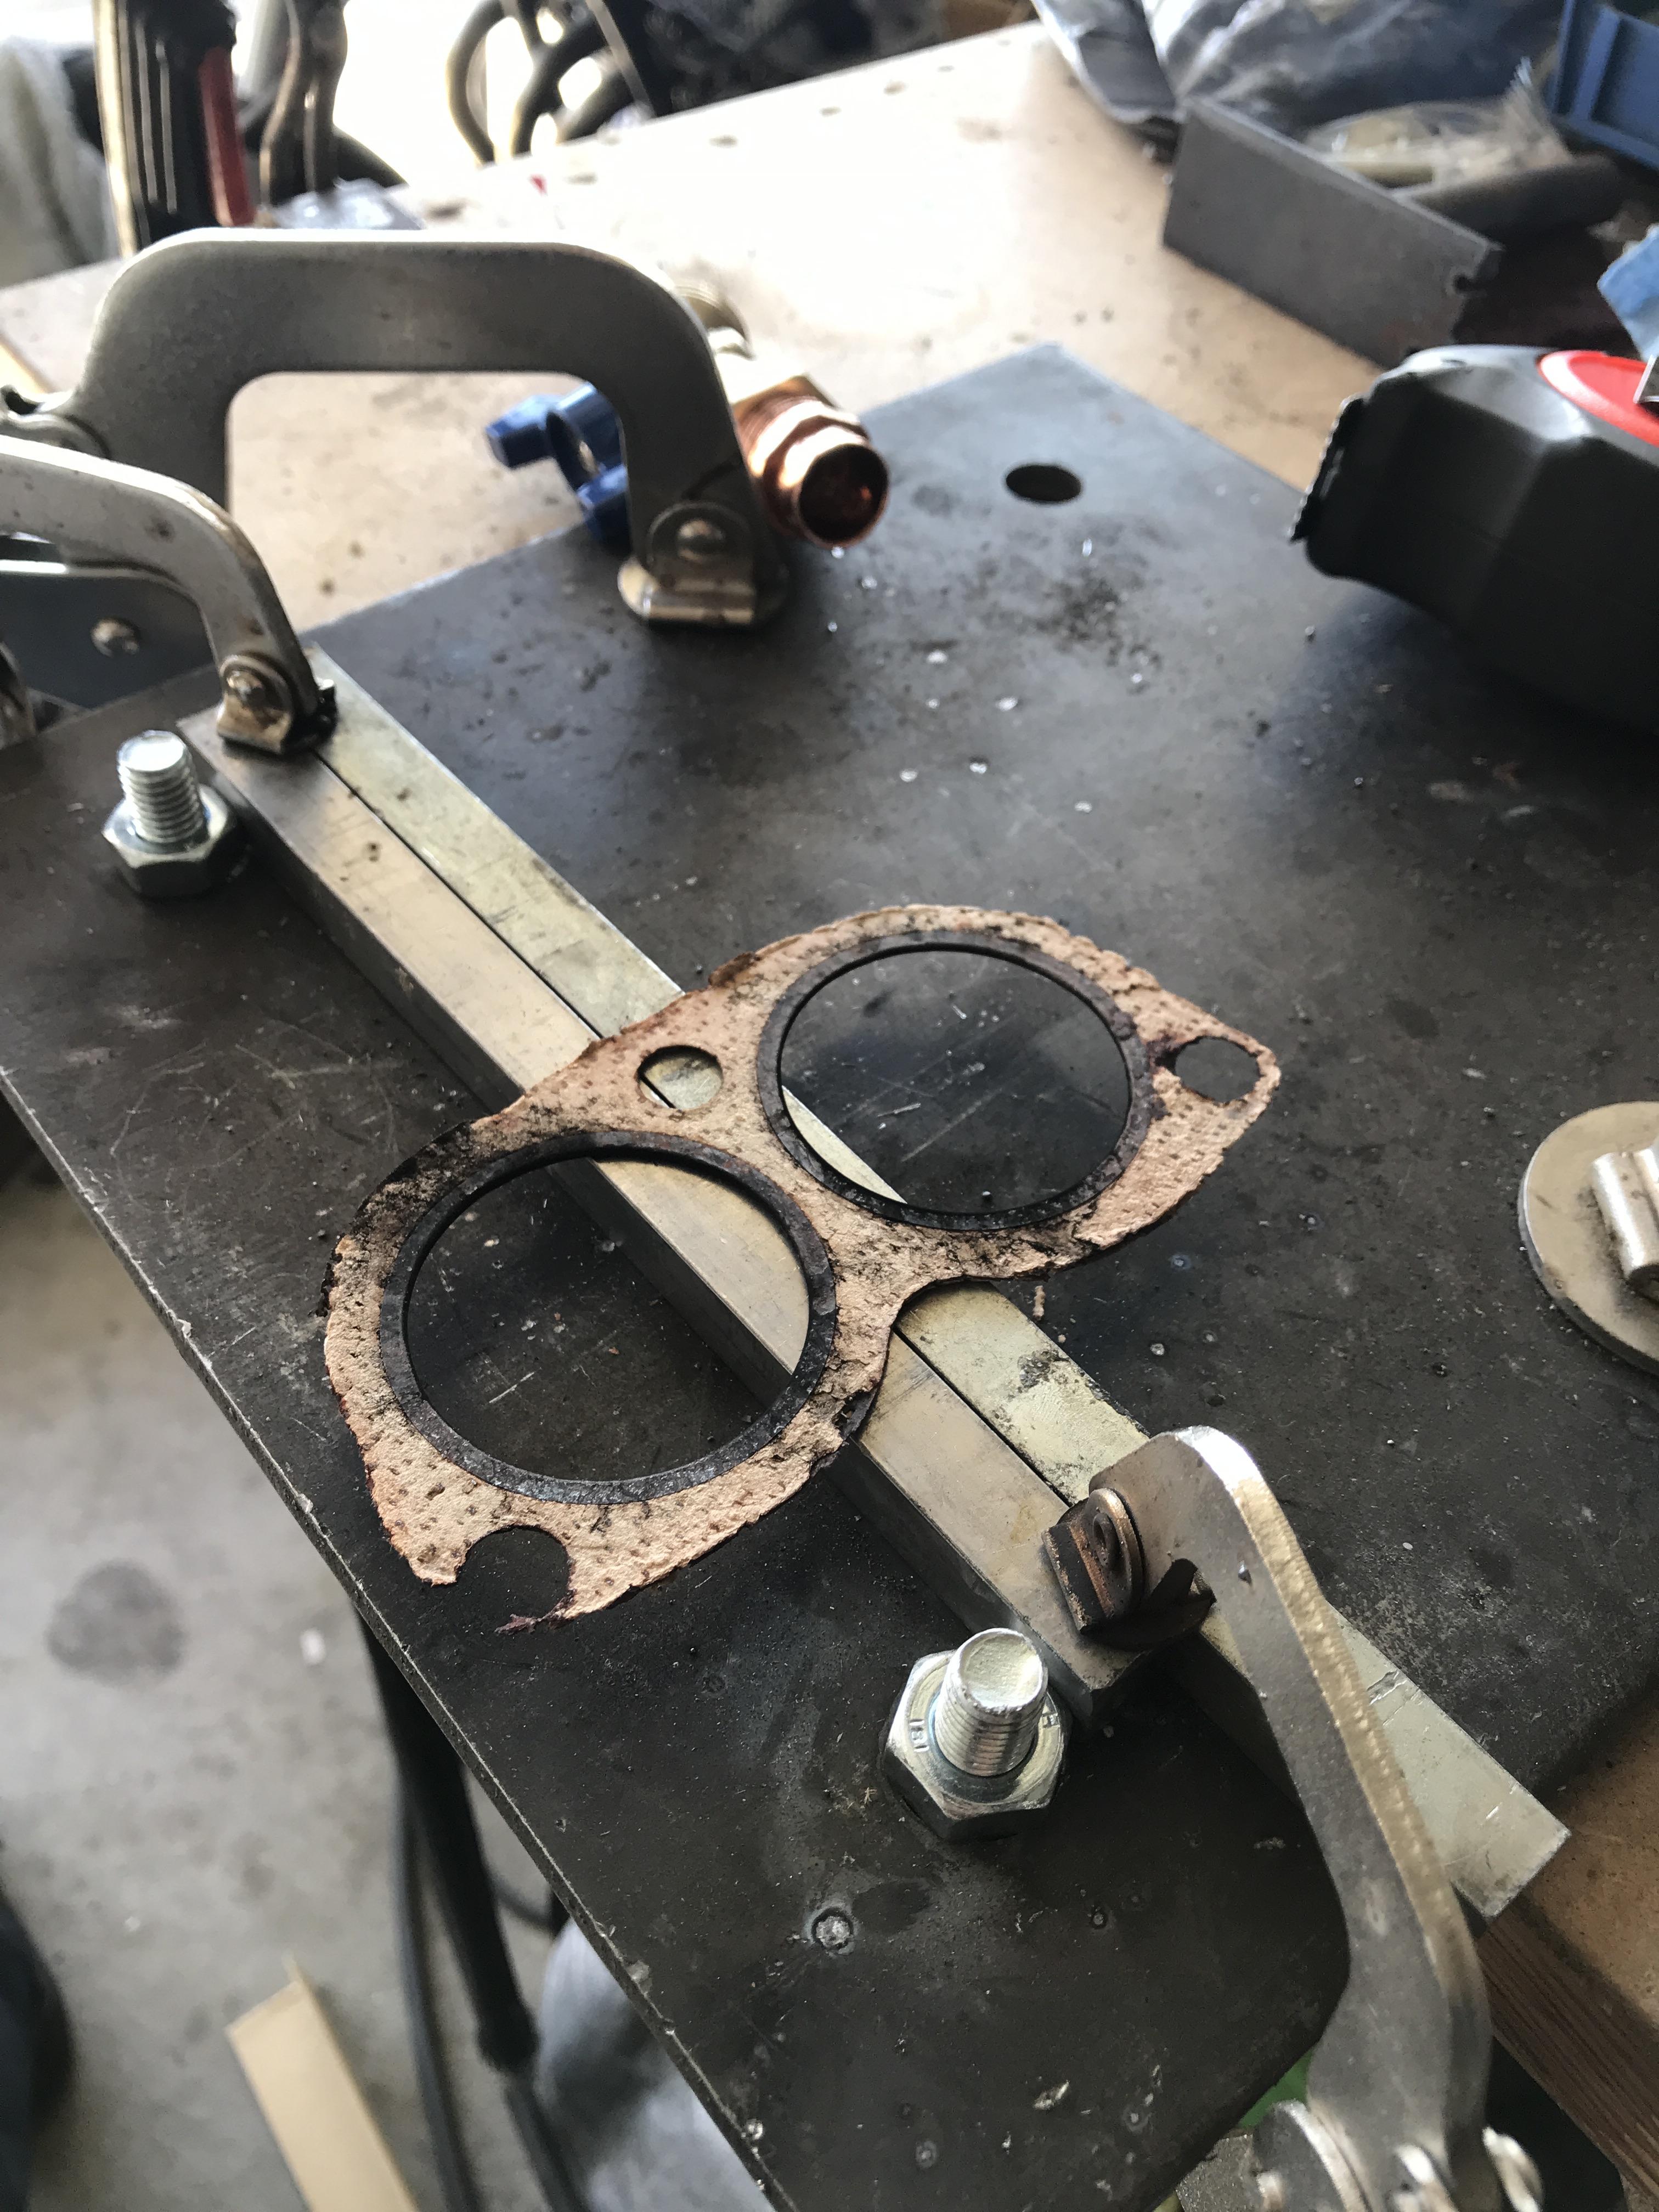
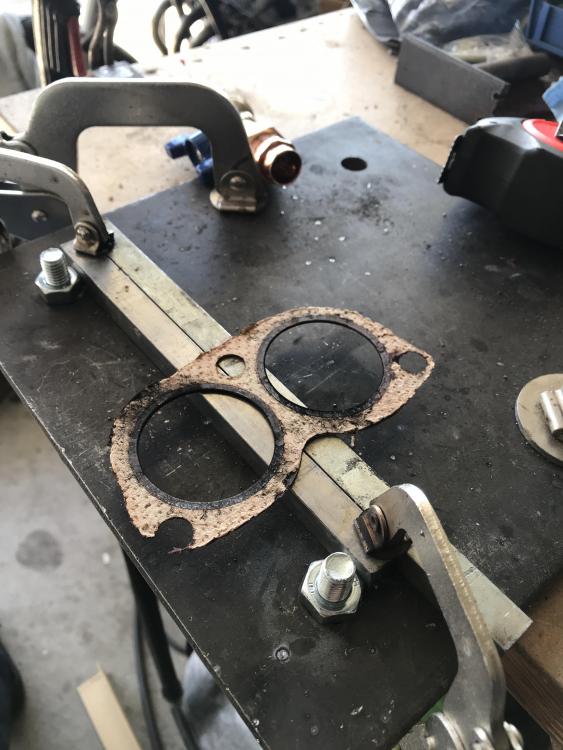
Welp the header gasket looks like it’s toast. All work stopped now.... Need to find a gasket....
-
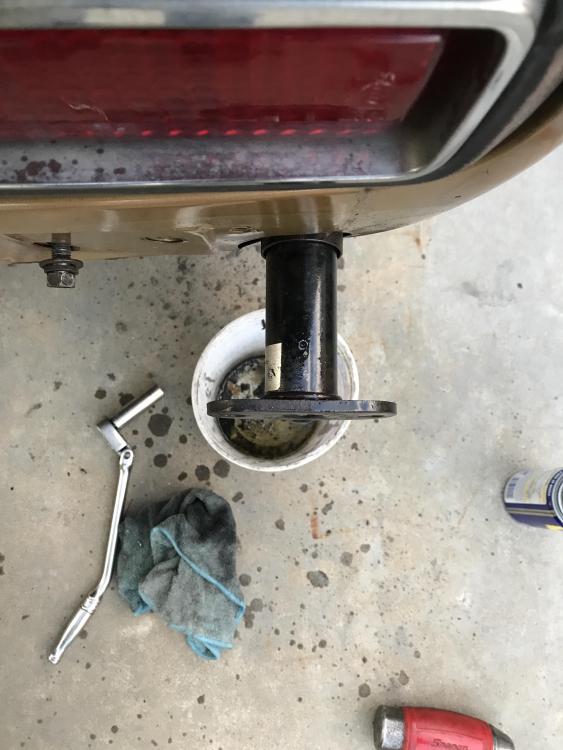
@Captain Obvious I should have checked this thread before I started working, but I pulled the driver side strut out, had to drop the exhaust from the header back (really should get a sectional exhaust this sucks). when I removed the nut from nut there was a significant amount of air that came out. I can now depress the strut I did not have to do anything else. For the next person reading this thread, put painters tape on the edges of the hole so you don’t ruin the paint on the back. @cgsheen1 The problem is you really have to move and twist the strut mount to get it out, if I was going to do it again I would saw off the tabs/face/Falange on the strut and then hit 3 bolts under the car 3 on top (inside the trunk) and slide it out. You might be able to just lower the tank this way.... I guess I’ll be doing it again if I get those 240z bumpers..... alright back to work get this exhaust on and get the 260z bumper on to see how it fits. @Freez74 you have pictures of the mounts you made? I suppose it would be similar to the one Steve mentioned.
-
This guy seems to be taking all of his track equipment with him. Fast forward a bit into the film. The question I have is where do you mount the tow ball off of?
-
The deepest spot I got my drill bit is 3” i, I’ll drop the mount and try it tomorrow, I tried fitting my hands back there and it feels like there is a plate covering access to the nut. thanks for the thorough explanation @Captain Obvious I appreciate it 🙂
-
On the driver side I drilled 2 holes where you are holding the tube in the second image, I also drilled out the screw hole on the face but am still not able to get the strut to collapse.... If I try to pull the strut out is it going to be a pain to get it reinstalled? Perhaps I need a deeper punch to break through whatever membrane/seal is back there. I was thinking of removing it and trying it on the shop press, seems to be more accessible.
-
@SteveJ I need up fabricating my own brackets but I messed up because I copied the body side mount from the 240z, I did not realize that the holes are offset on the 260z/280z body. I suppose I can remove the struts out of the car, but am not looking forward to dropping the tank. I can make mounts for the 260z body but the issue is that the mount position on the bumper is further out than the 240z, there might be some awkward bracket that I can make, but it seems like keeping the struts is easier to do..... are the struts super heavy? what’s the point of threading in the m6 bolt? Should it be in the face of the strut? Or along the shaft? I was able to shove a pin into the passenger side bracket and appeared to pop through something that make it able to push down, no luck on the driver side. 73 240z on the top, early 260z on the bottom.

-
Howdy, I’m trying to flush mount a rear early 260z bumper to a early 260z. From other threads I have read that you can drill out a leak hole for the oil, the push the shock inward and weld it into place. I drilled a hole in the strut l, drained a significant amount of oil out of the strut, but the strut does not stay depressed, it seems like it keeps popping outward. I beat on it with a dead blow hammer, I can see that it moves inward then comes right back out. Is there a trick to this that I’m missing?
-
I like to keep mine nice and bright on all exterior lights, EXCEPT the license plate lights, they look better in that old yellow.
-
When I was installing my RT mount I decoupled the driveshaft from the diff, loosened the sway bar/diff and moved things over to install. It was a complete pain in the arse IIRC. Might be easier/faster to just drop it. I think with a strap upgrade it can just be fished through. The nylon should be easier to install than the rubber.
-
@Captain Obvious might be have some information for a nylon replacement strap it looks like there is some references in this thread, although the images are missing 😕
-
You might not need to replace those bushings yet, give it an inspection like Eurodat recommended... If the noise (clunking) is coming during a start, chances are its the diff strap, its ment to catch the diff as it moves upward due to the torque applied to the diff. There are other options for the diff strap. 1. replace the worn out rubber with something like a nylon tiedown strap 2. DIY your own RT style mount, you'll need some scrap steel, a drill, a disk cutter, and access to a welder, the bushing is generic. Make sure to leave a gap for the fuel lines. Personally I would consider #2 if you have access to the tools. 2/3 times I've had clunking its been the front diff mount/strap, the other time it was the damn gland nut on the strut tube.
-
https://www.energysuspensionparts.com/7.1102 Those look like energy suspension bushings, it says that they are interchangeable on their website. For the OEM bushings http://www.carpartsmanual.com/datsun/Z-1969-1978/axle/rear-suspension Don't forget to inspect/replace the diff strap. 🙂 https://technoversions.com/DiffMountHome.html
-
-
I really want to switch to a turbo motor... someone knock sense into me or I might just do an LS swap. 😟
-
I tried that, the adapter pissed me off esp the splicing (also looks bad). I think the lower housing for a 280z can be used, they have a couple of spots for temp senders.
-
Add it to your profile on their site, they usuallly automatically add it to the order, I’ve gone to their store in OC and they add the discount there too don’t even have to ask.
-
http://www.pwrbrake.com These guys can rebuild your booster for you.
-
It it closer to what Dave posted in post #19?