ConVerTT
-
Posts
422 -
Joined
-
Last visited
-
Days Won
15
Content Type
Profiles
Knowledge Base
Zcar Wiki
Forums
Gallery
Events
Downloads
Store
Blogs
Collections
Classifieds
Everything posted by ConVerTT
-
I am repeating myself and others - great car, great price!
-
“Creating the Perfect Z” - MZR featured on Speedhunters
ConVerTT replied to NVZEE2's topic in Open Discussions
I love this video, especially the first minute ....??? -
Calling old timers: can you tell me about these?
ConVerTT replied to ConVerTT's topic in Open Discussions
It looks like they are Carroll Shelby Mini-Europas (“fake” mini lites).... http://www.914world.com/bbs2/index.php?showtopic=79552 Still not sure if they are Al or Mg though ...so the science project is still on ? -
Calling old timers: can you tell me about these?
ConVerTT replied to ConVerTT's topic in Open Discussions
Thank you! Science project tomorrow ? -
Calling old timers: can you tell me about these?
ConVerTT replied to ConVerTT's topic in Open Discussions
Thanks for shortening my evenings homework ? -
Great find. Keep it. Love it!
-
Calling old timers: can you tell me about these?
ConVerTT replied to ConVerTT's topic in Open Discussions
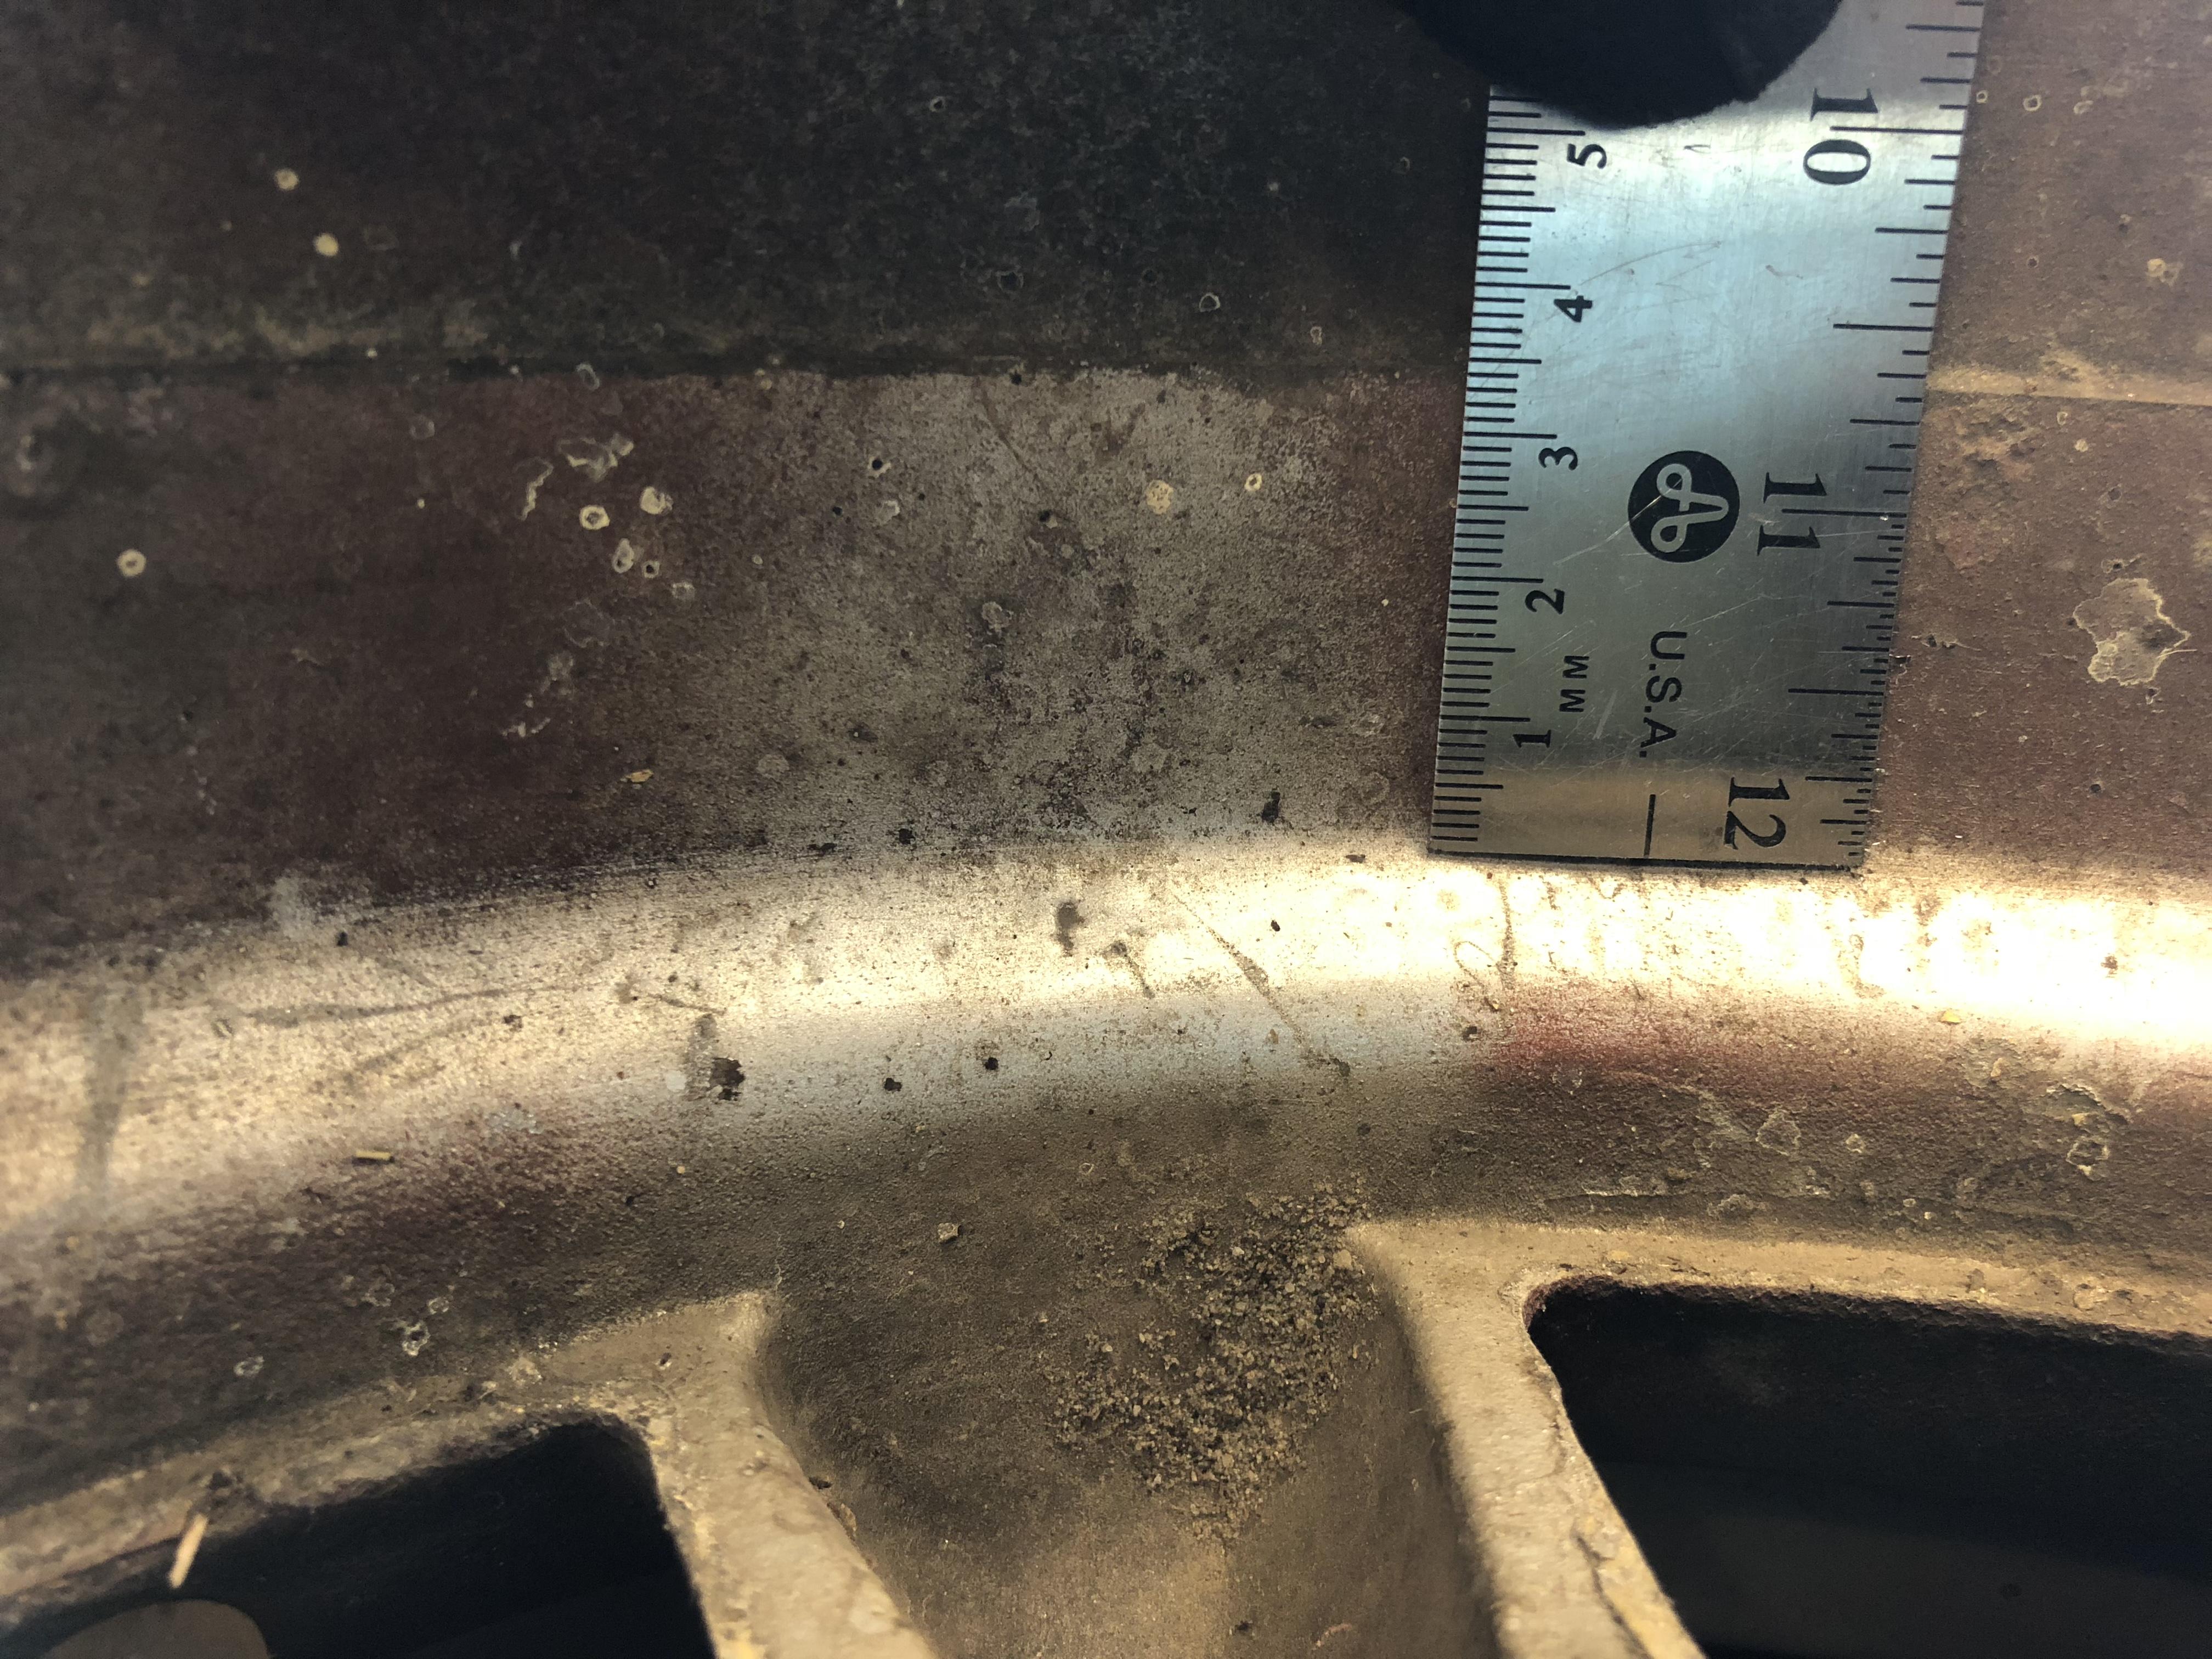
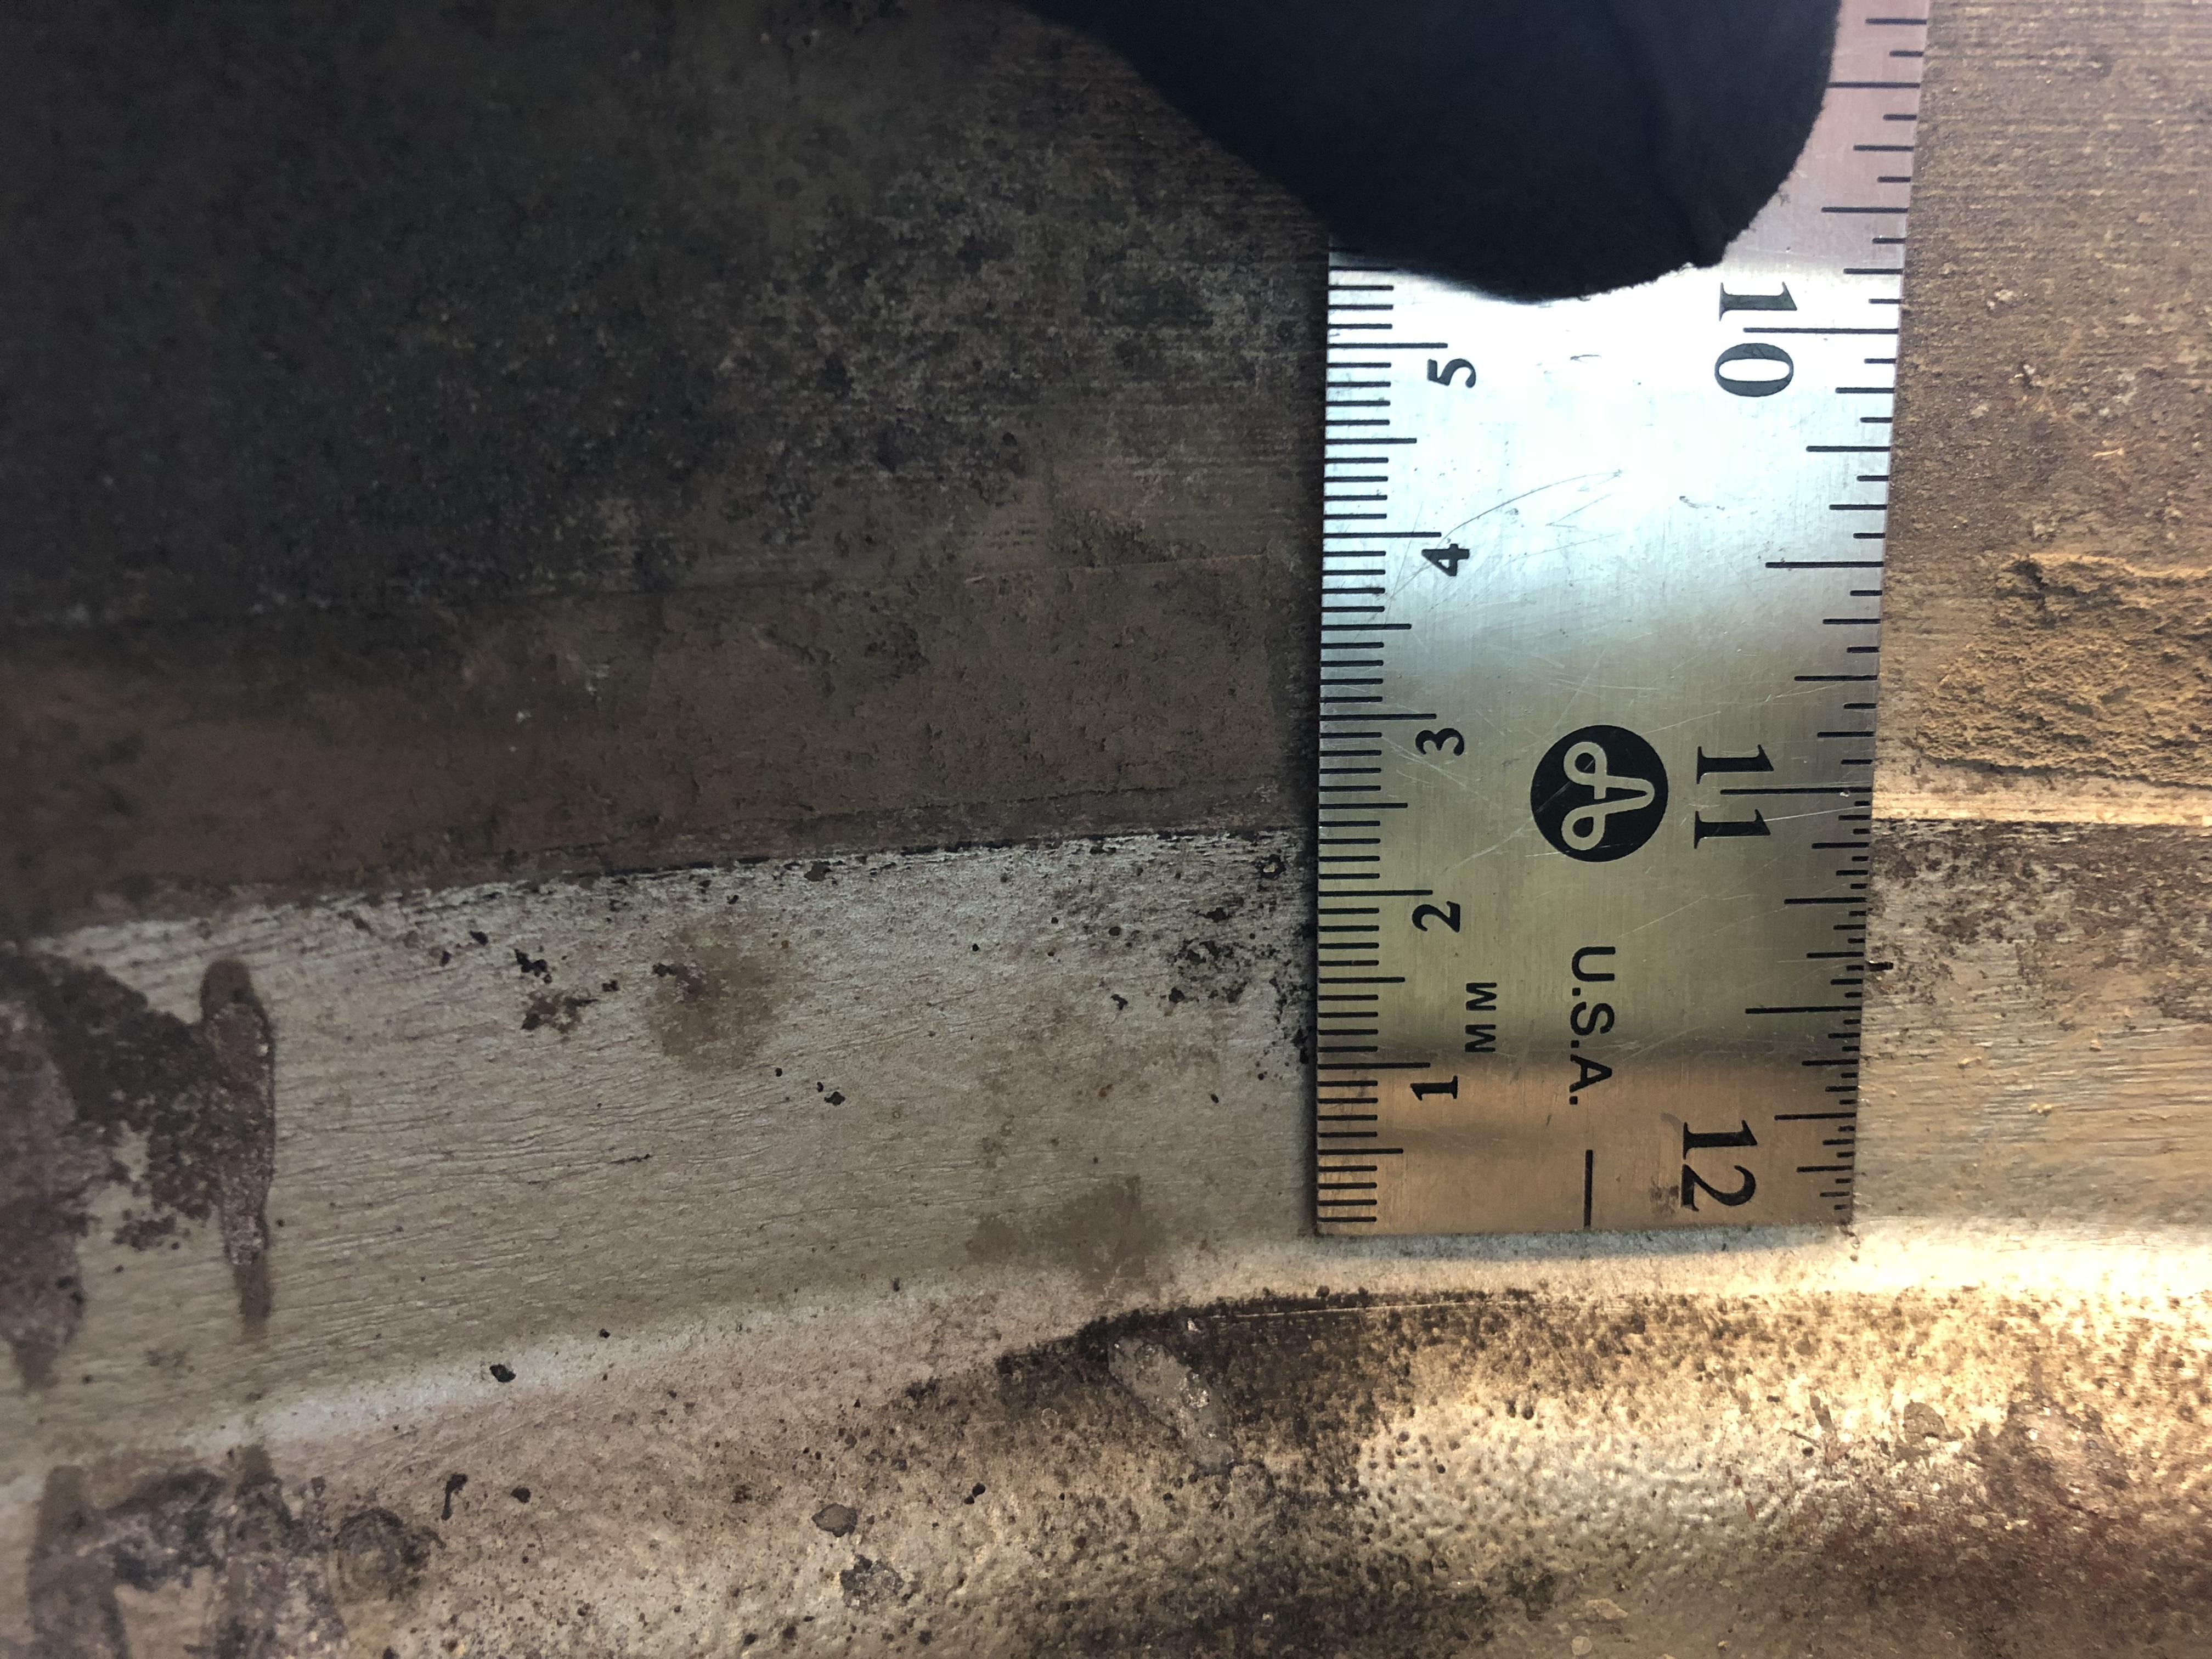
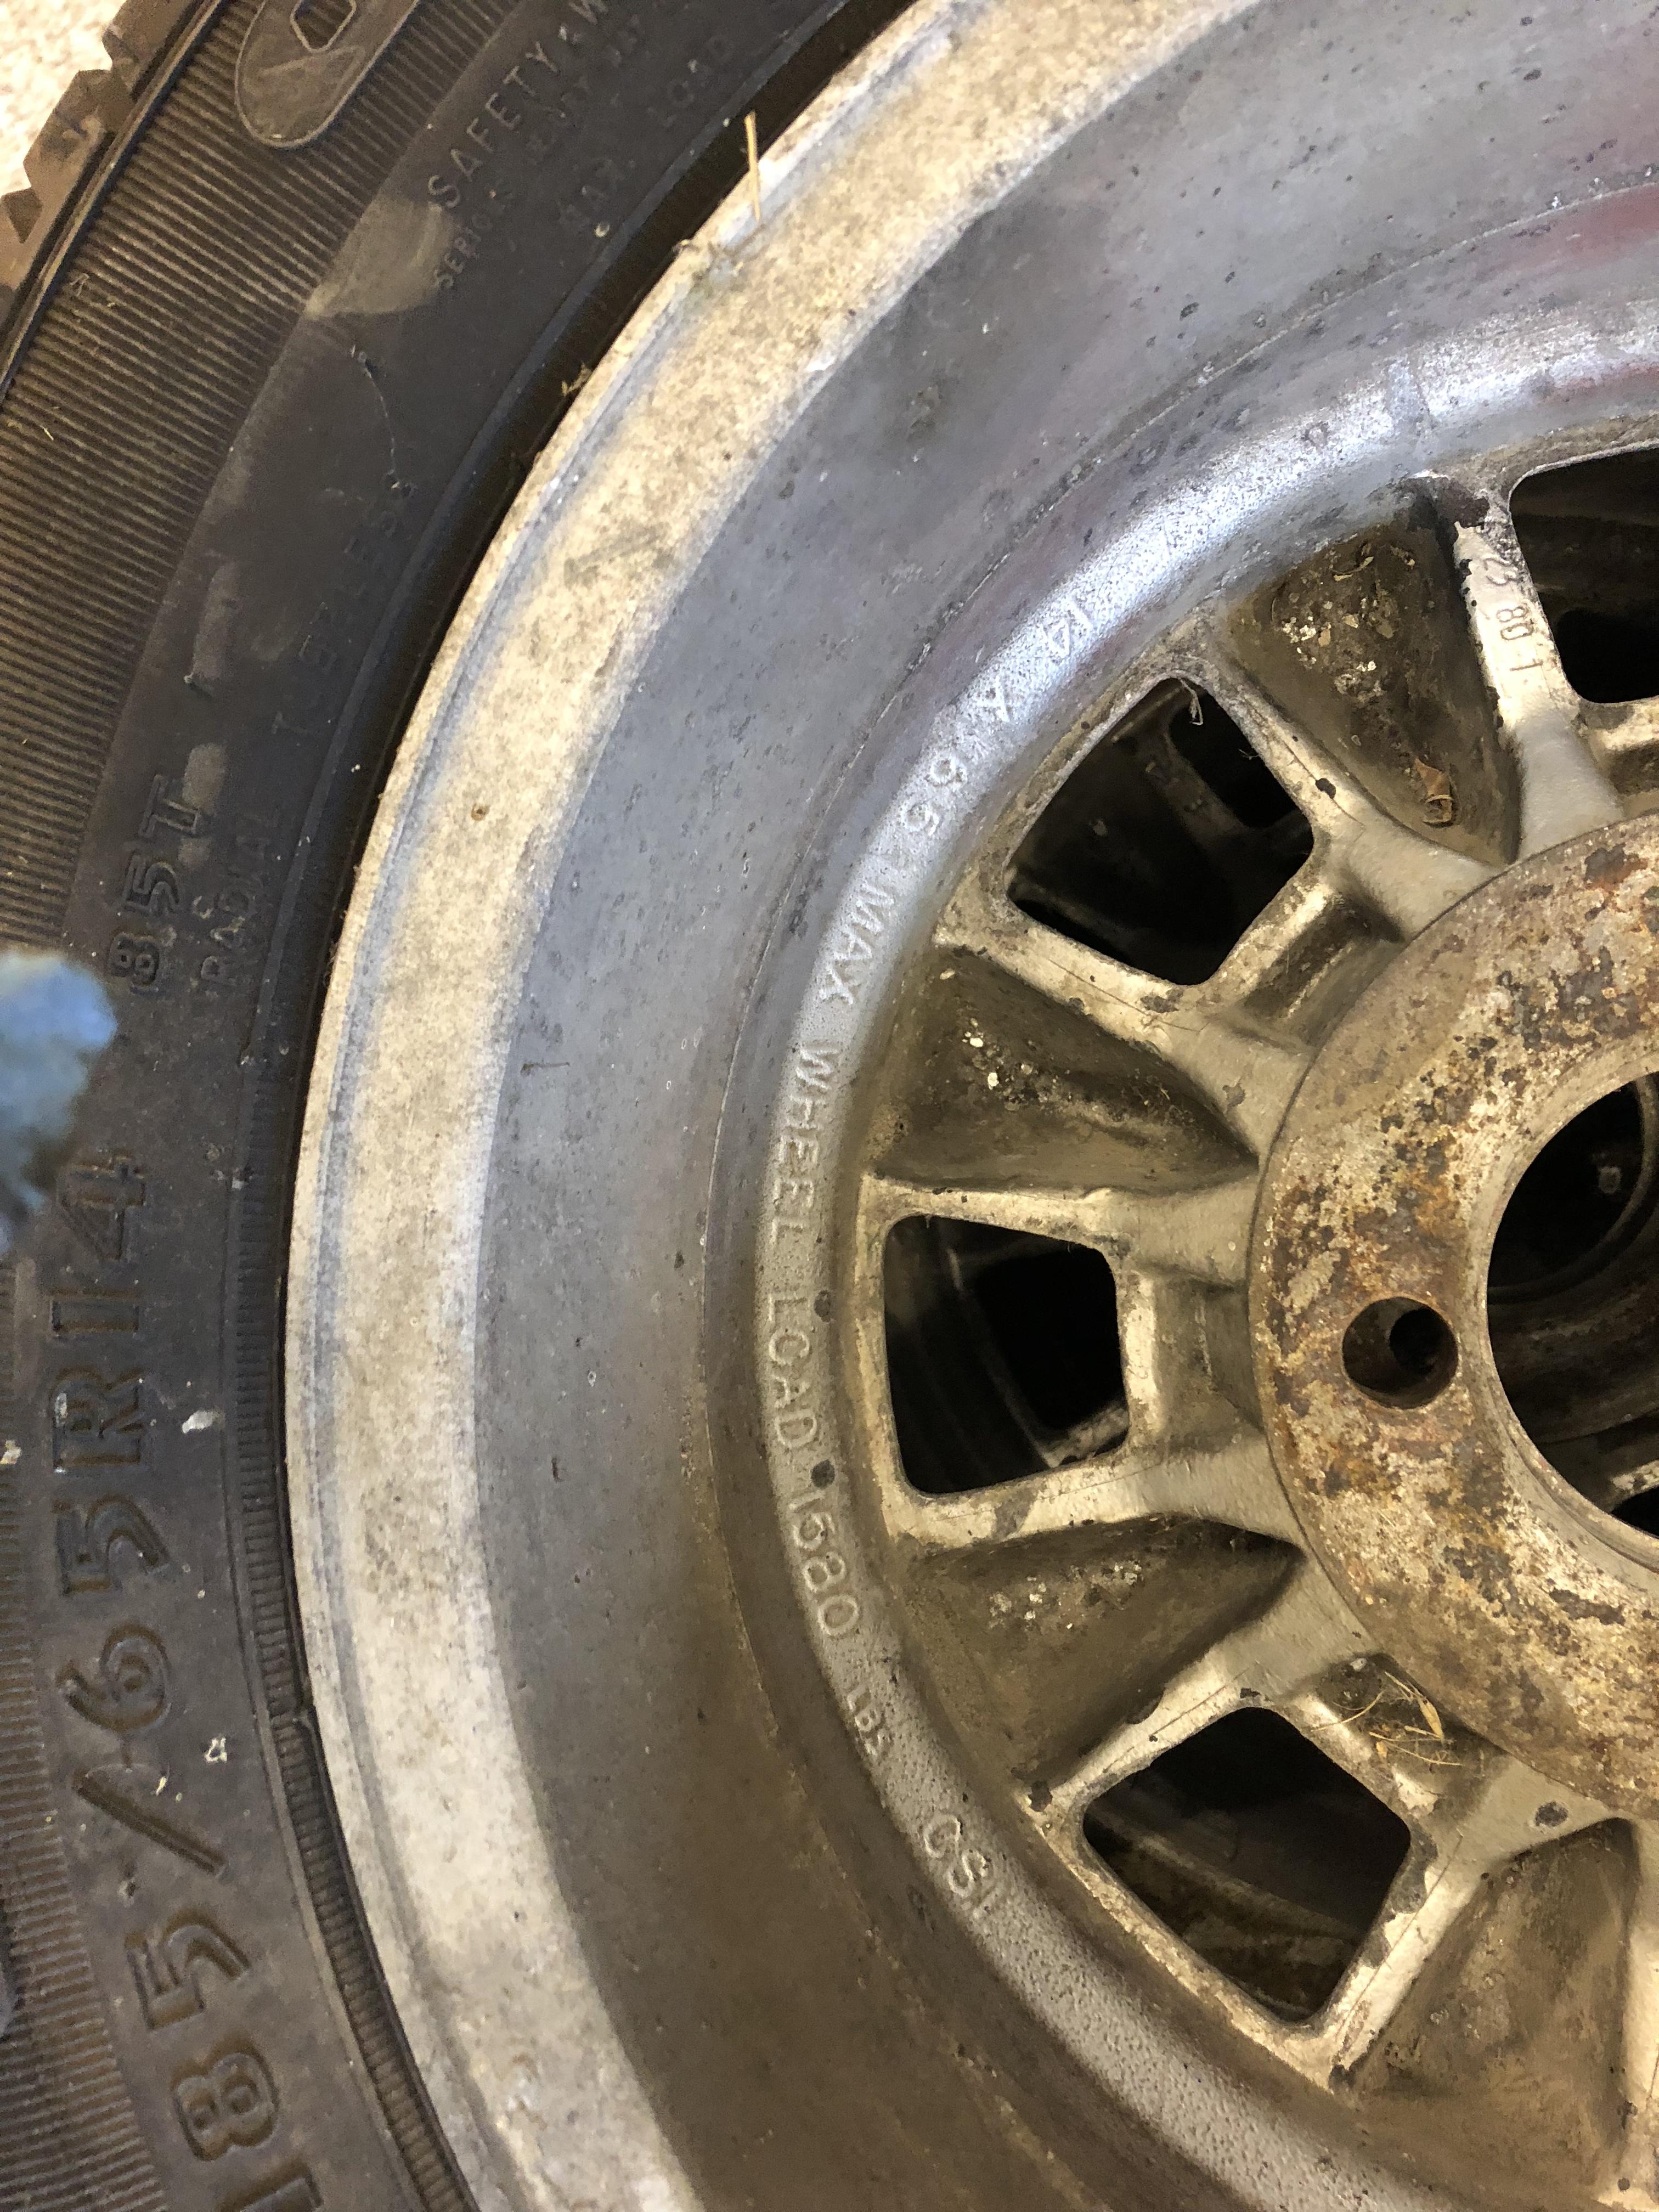
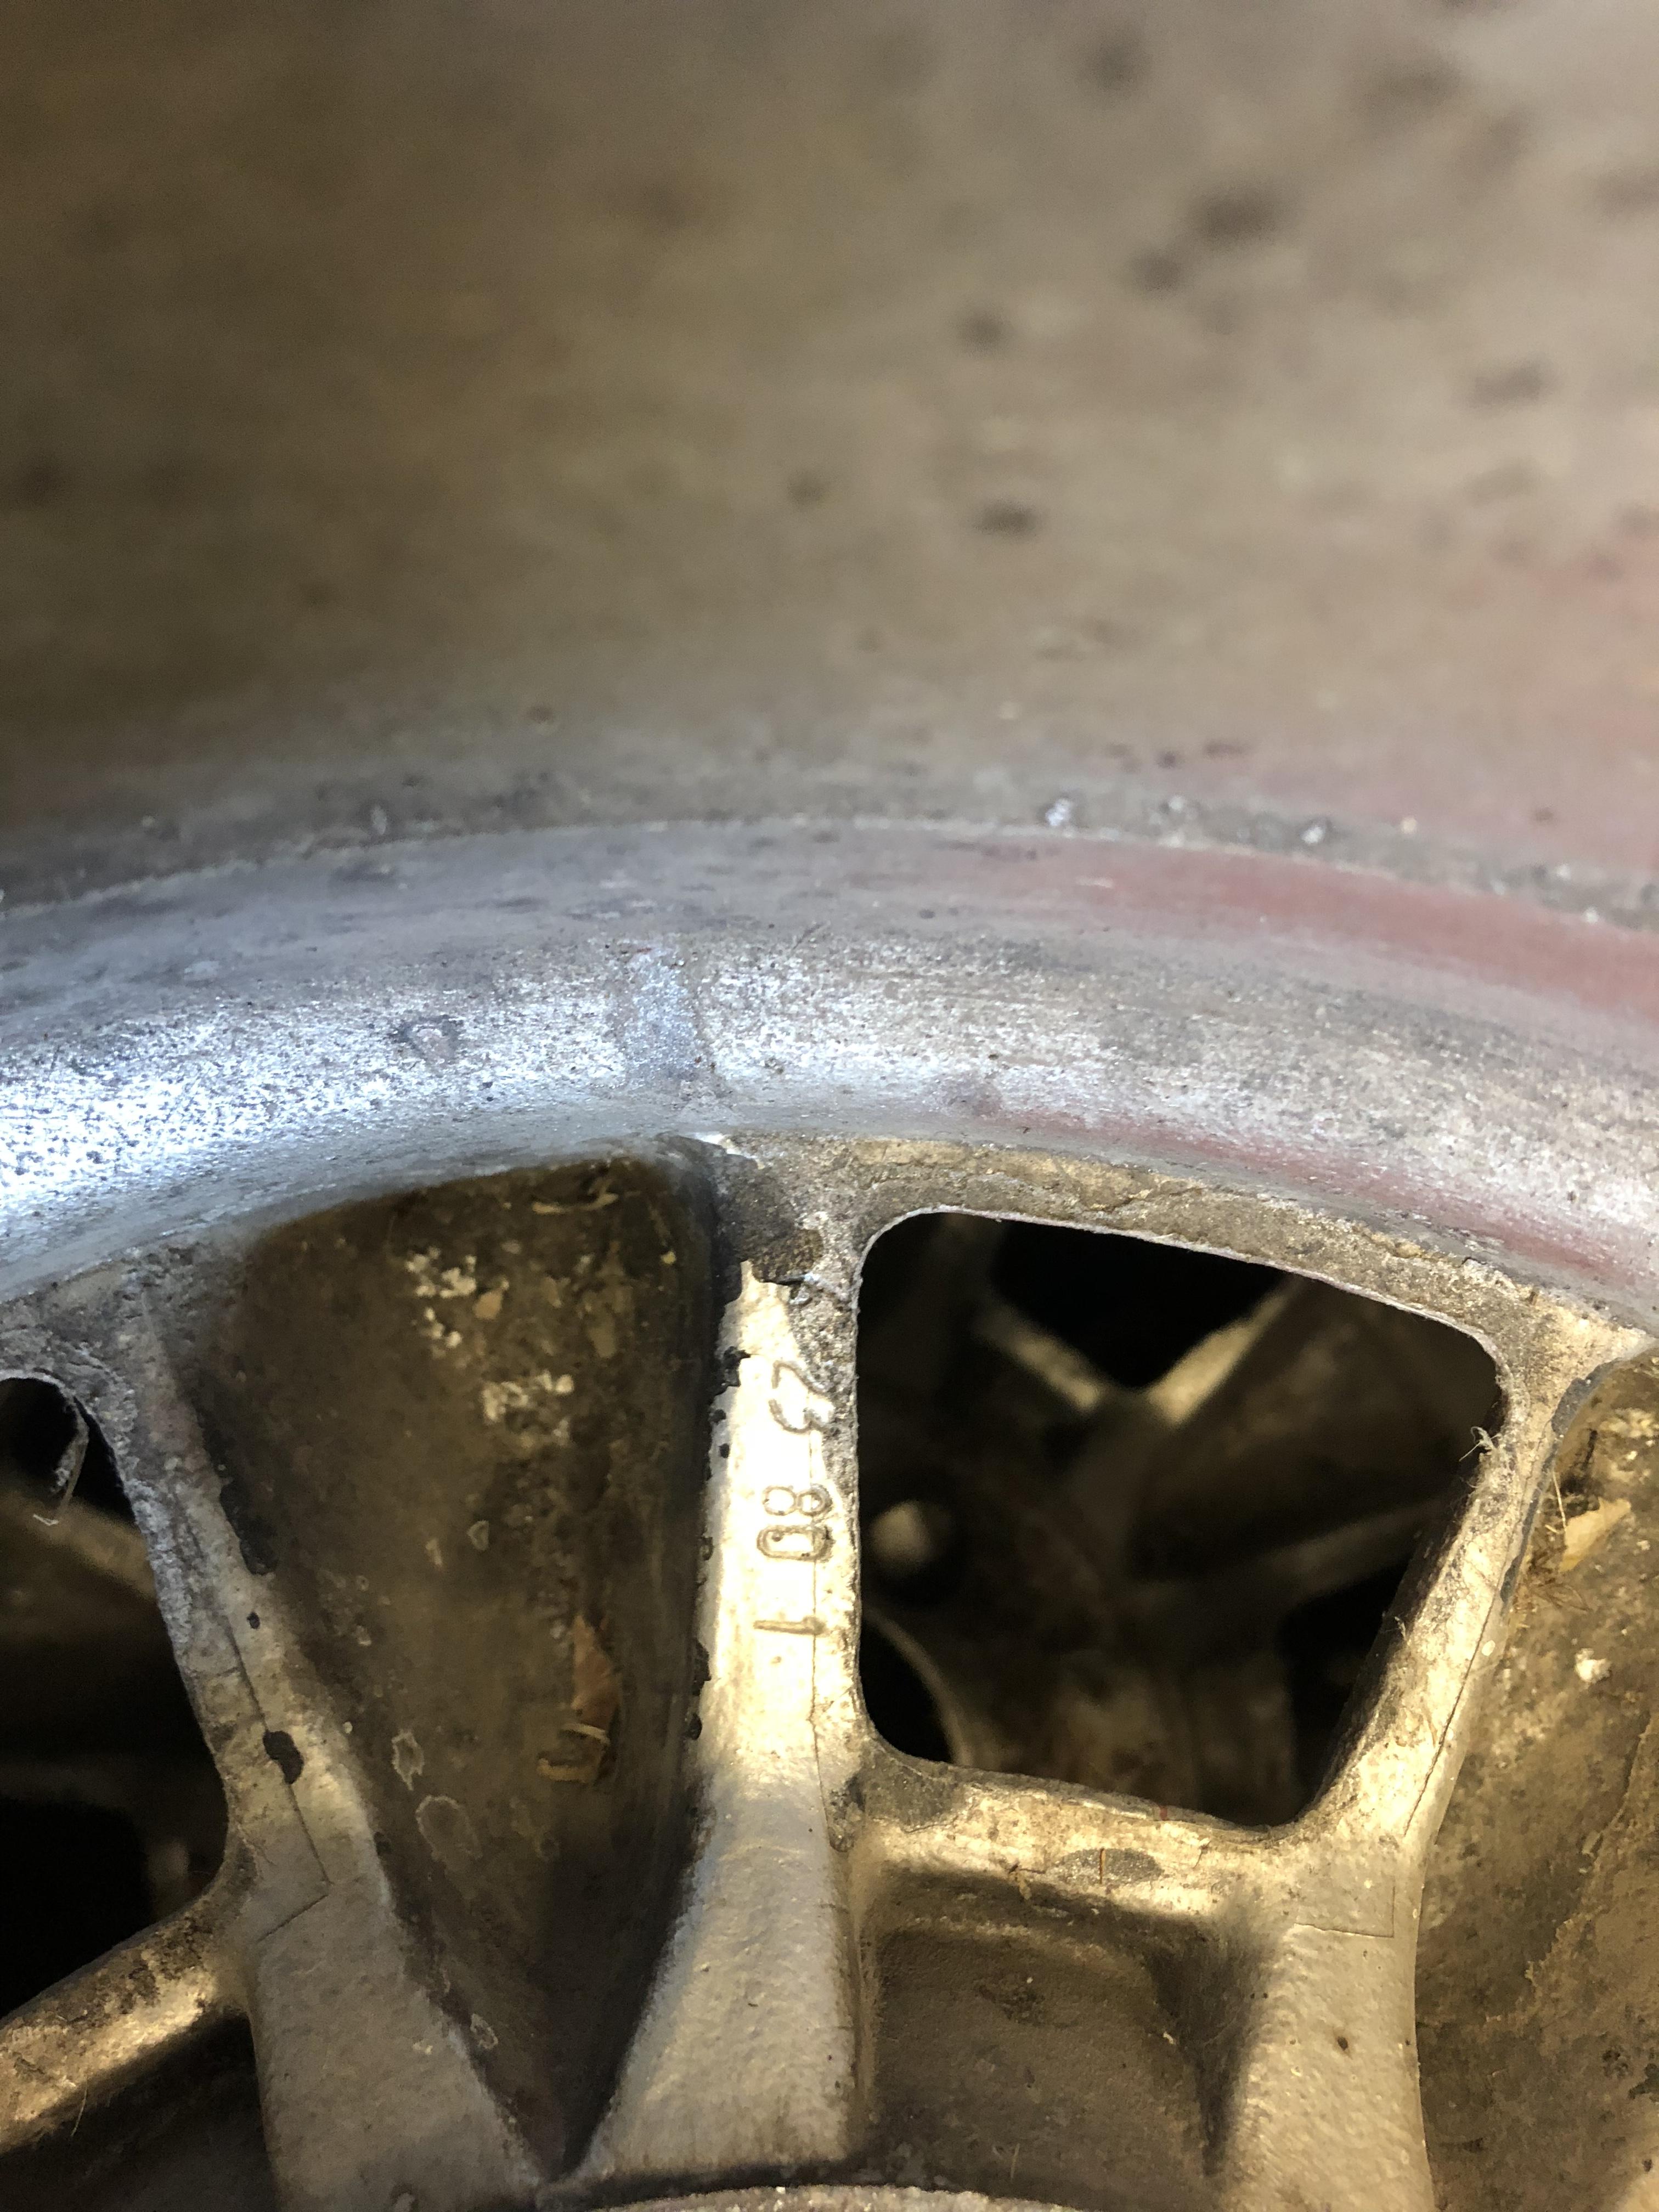
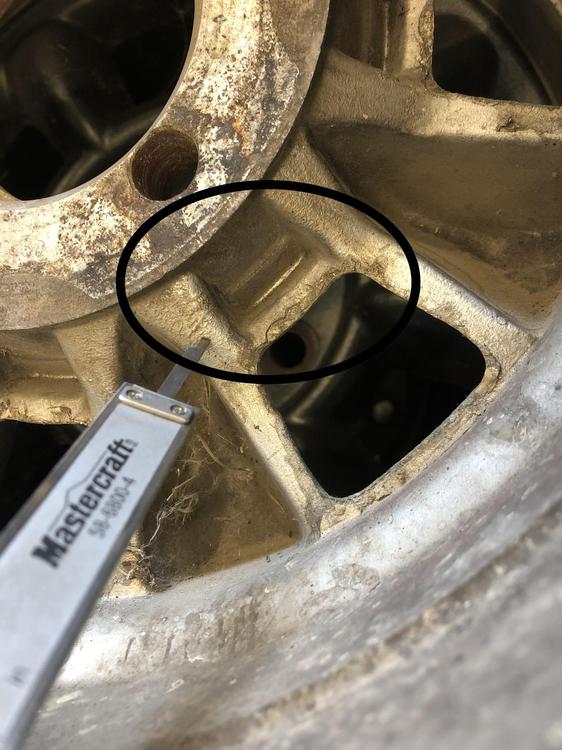
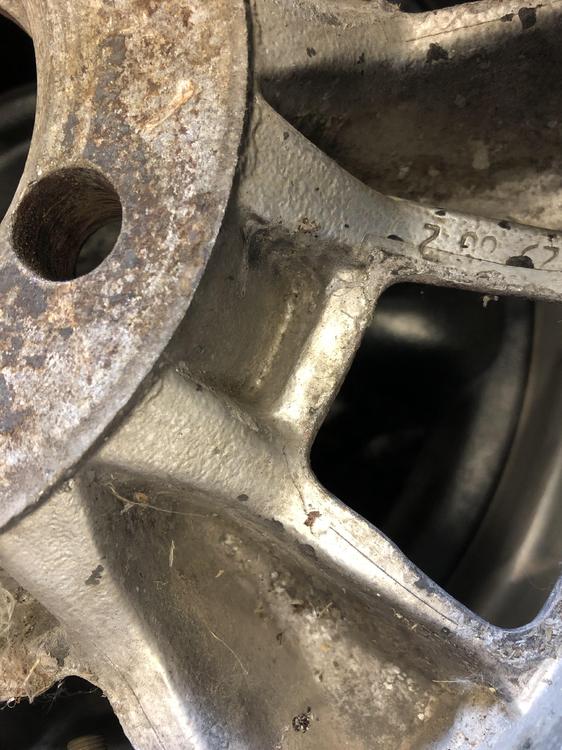
Well.. whatever they are, someone felt that they were worth copying. One of them is a forgery ...A good forgery, but a forgery nonetheless. Here are the details. 1) Font 3 wheels have this font and are stamped “CSI” The 4th wheel has this fatter, less precise font and no “CSI” stamp 2) Date stamp Three wheels are date stamped. The forgery is not. 3) casting Three look like this ... And one looks like ... (ridged area in the circle) And three ... and one ... Hmmm...the plot thickens ...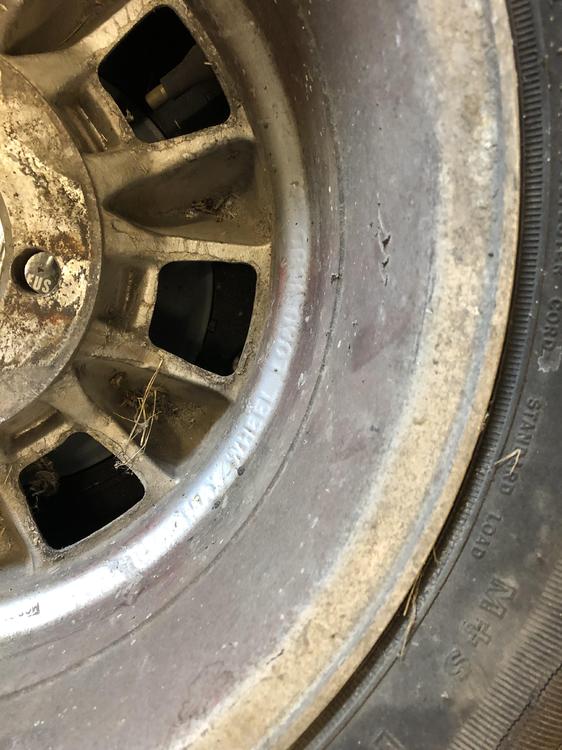


-
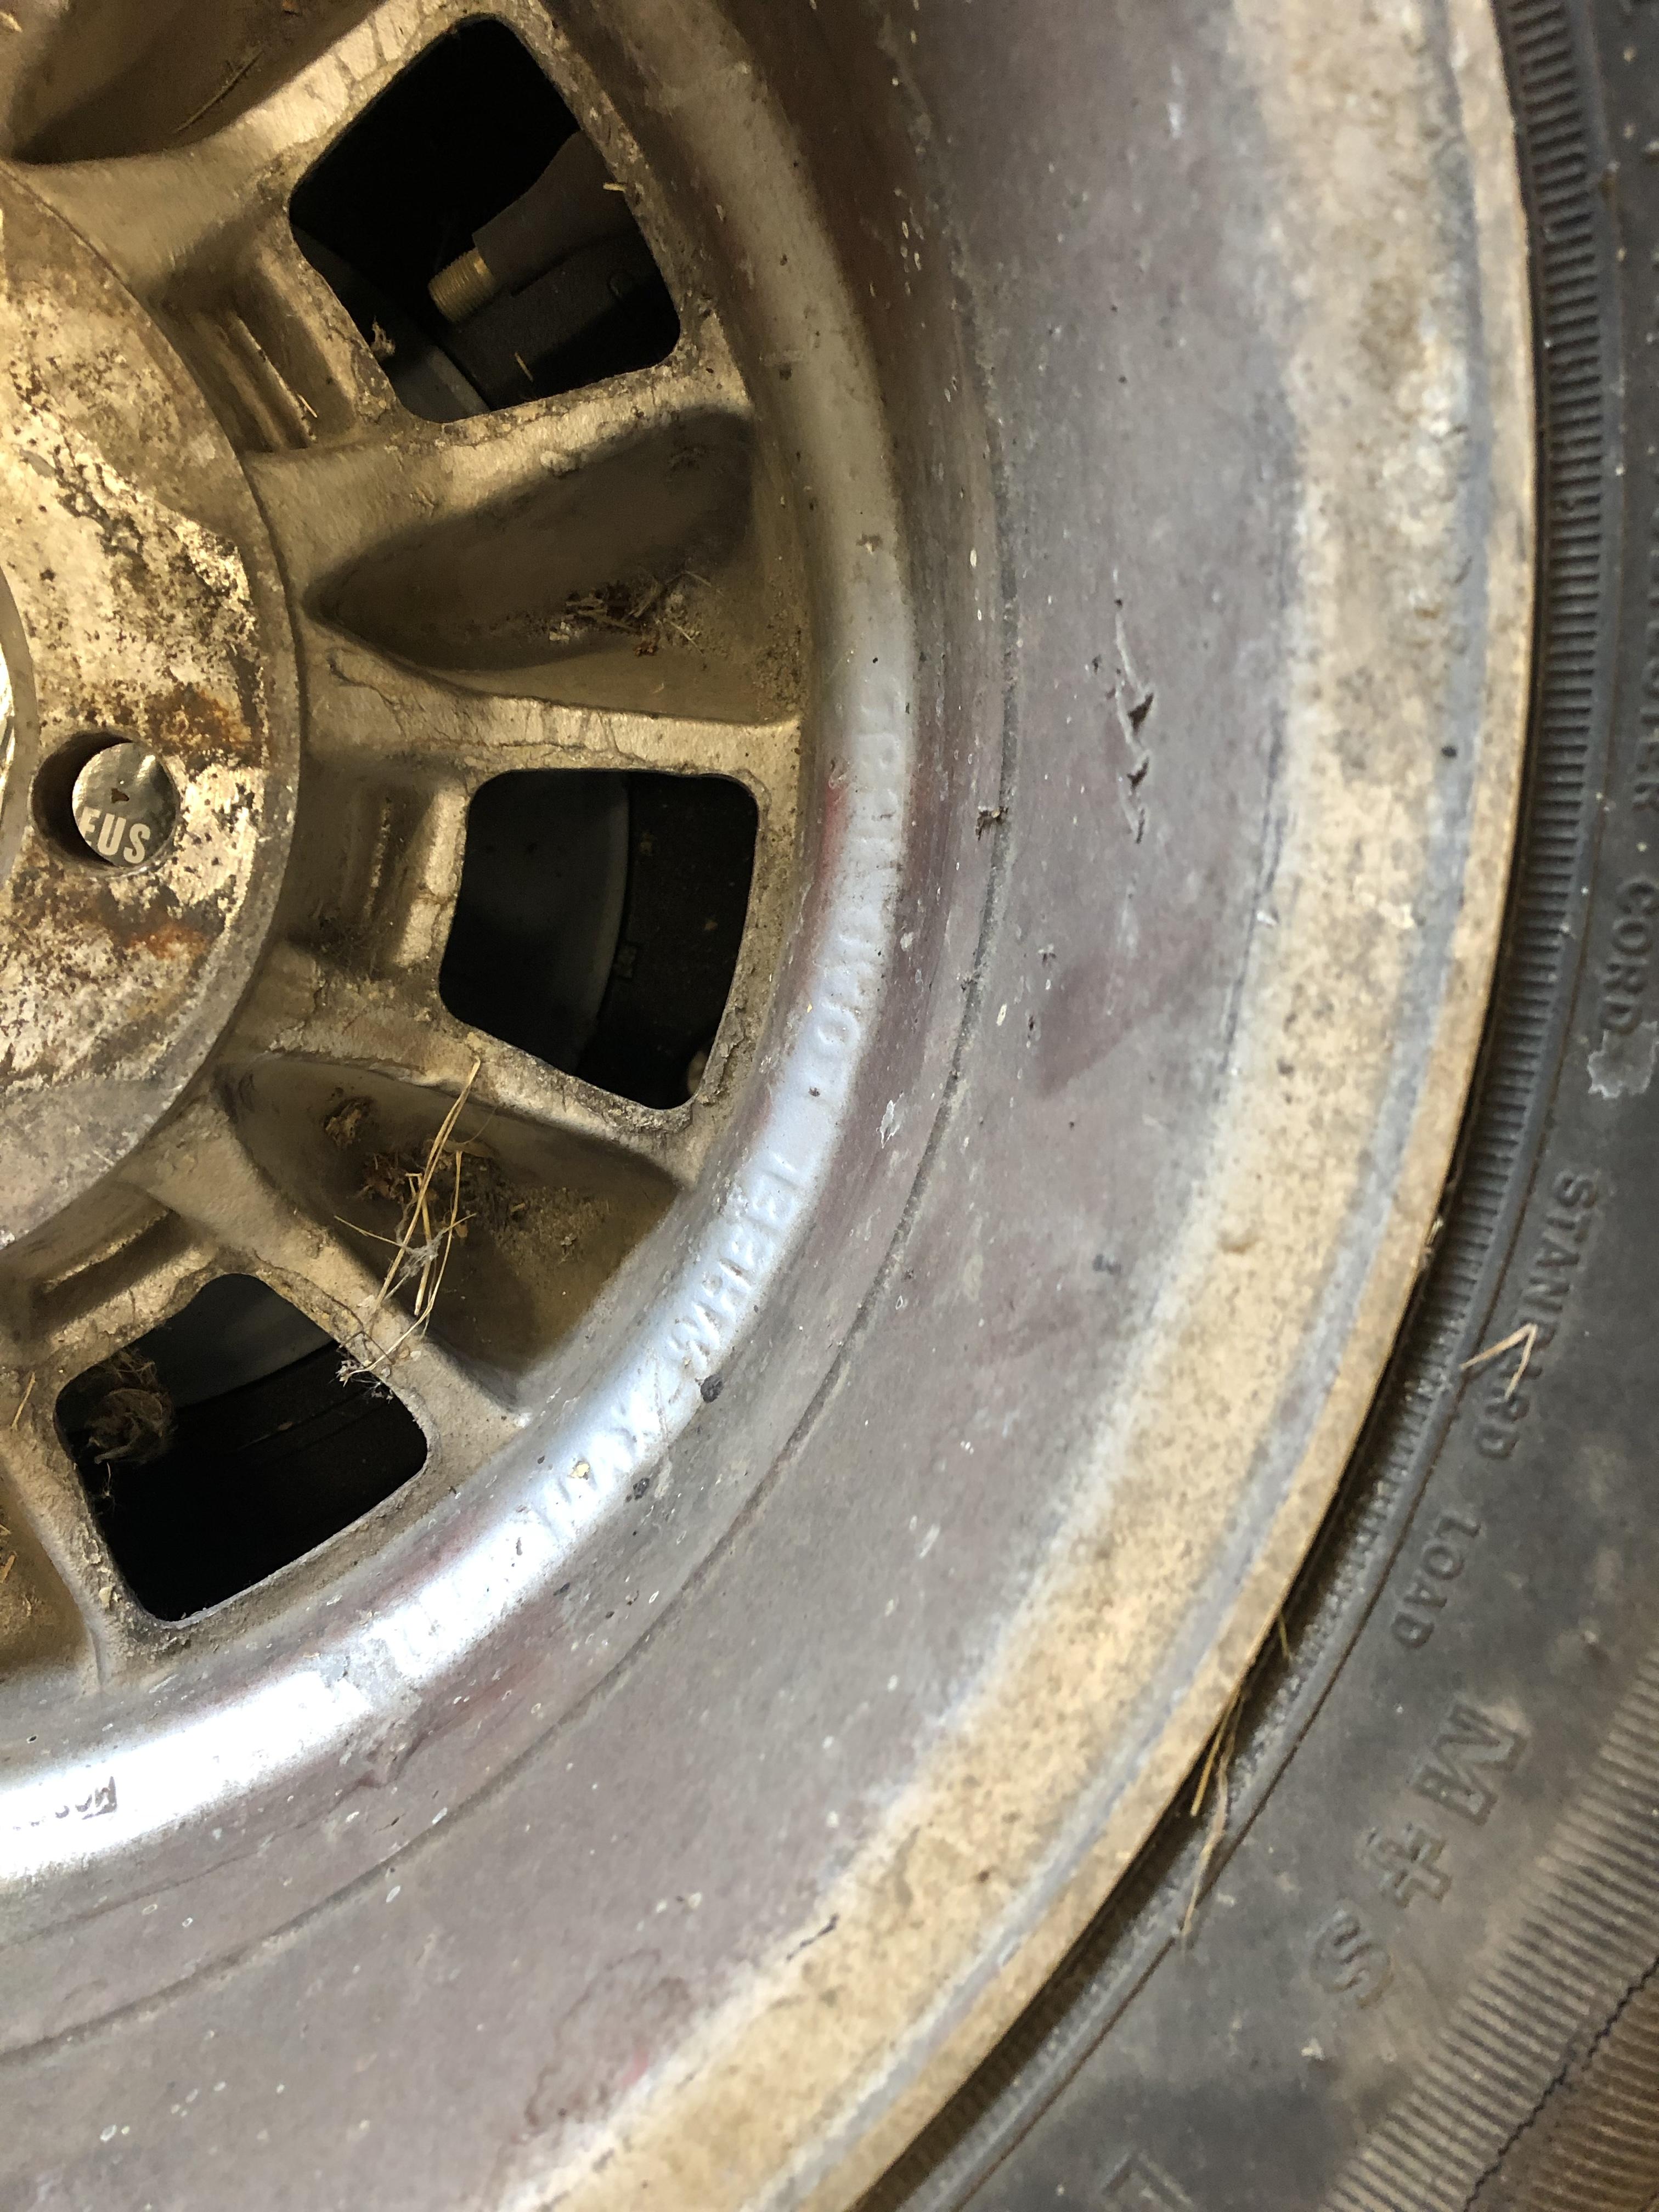
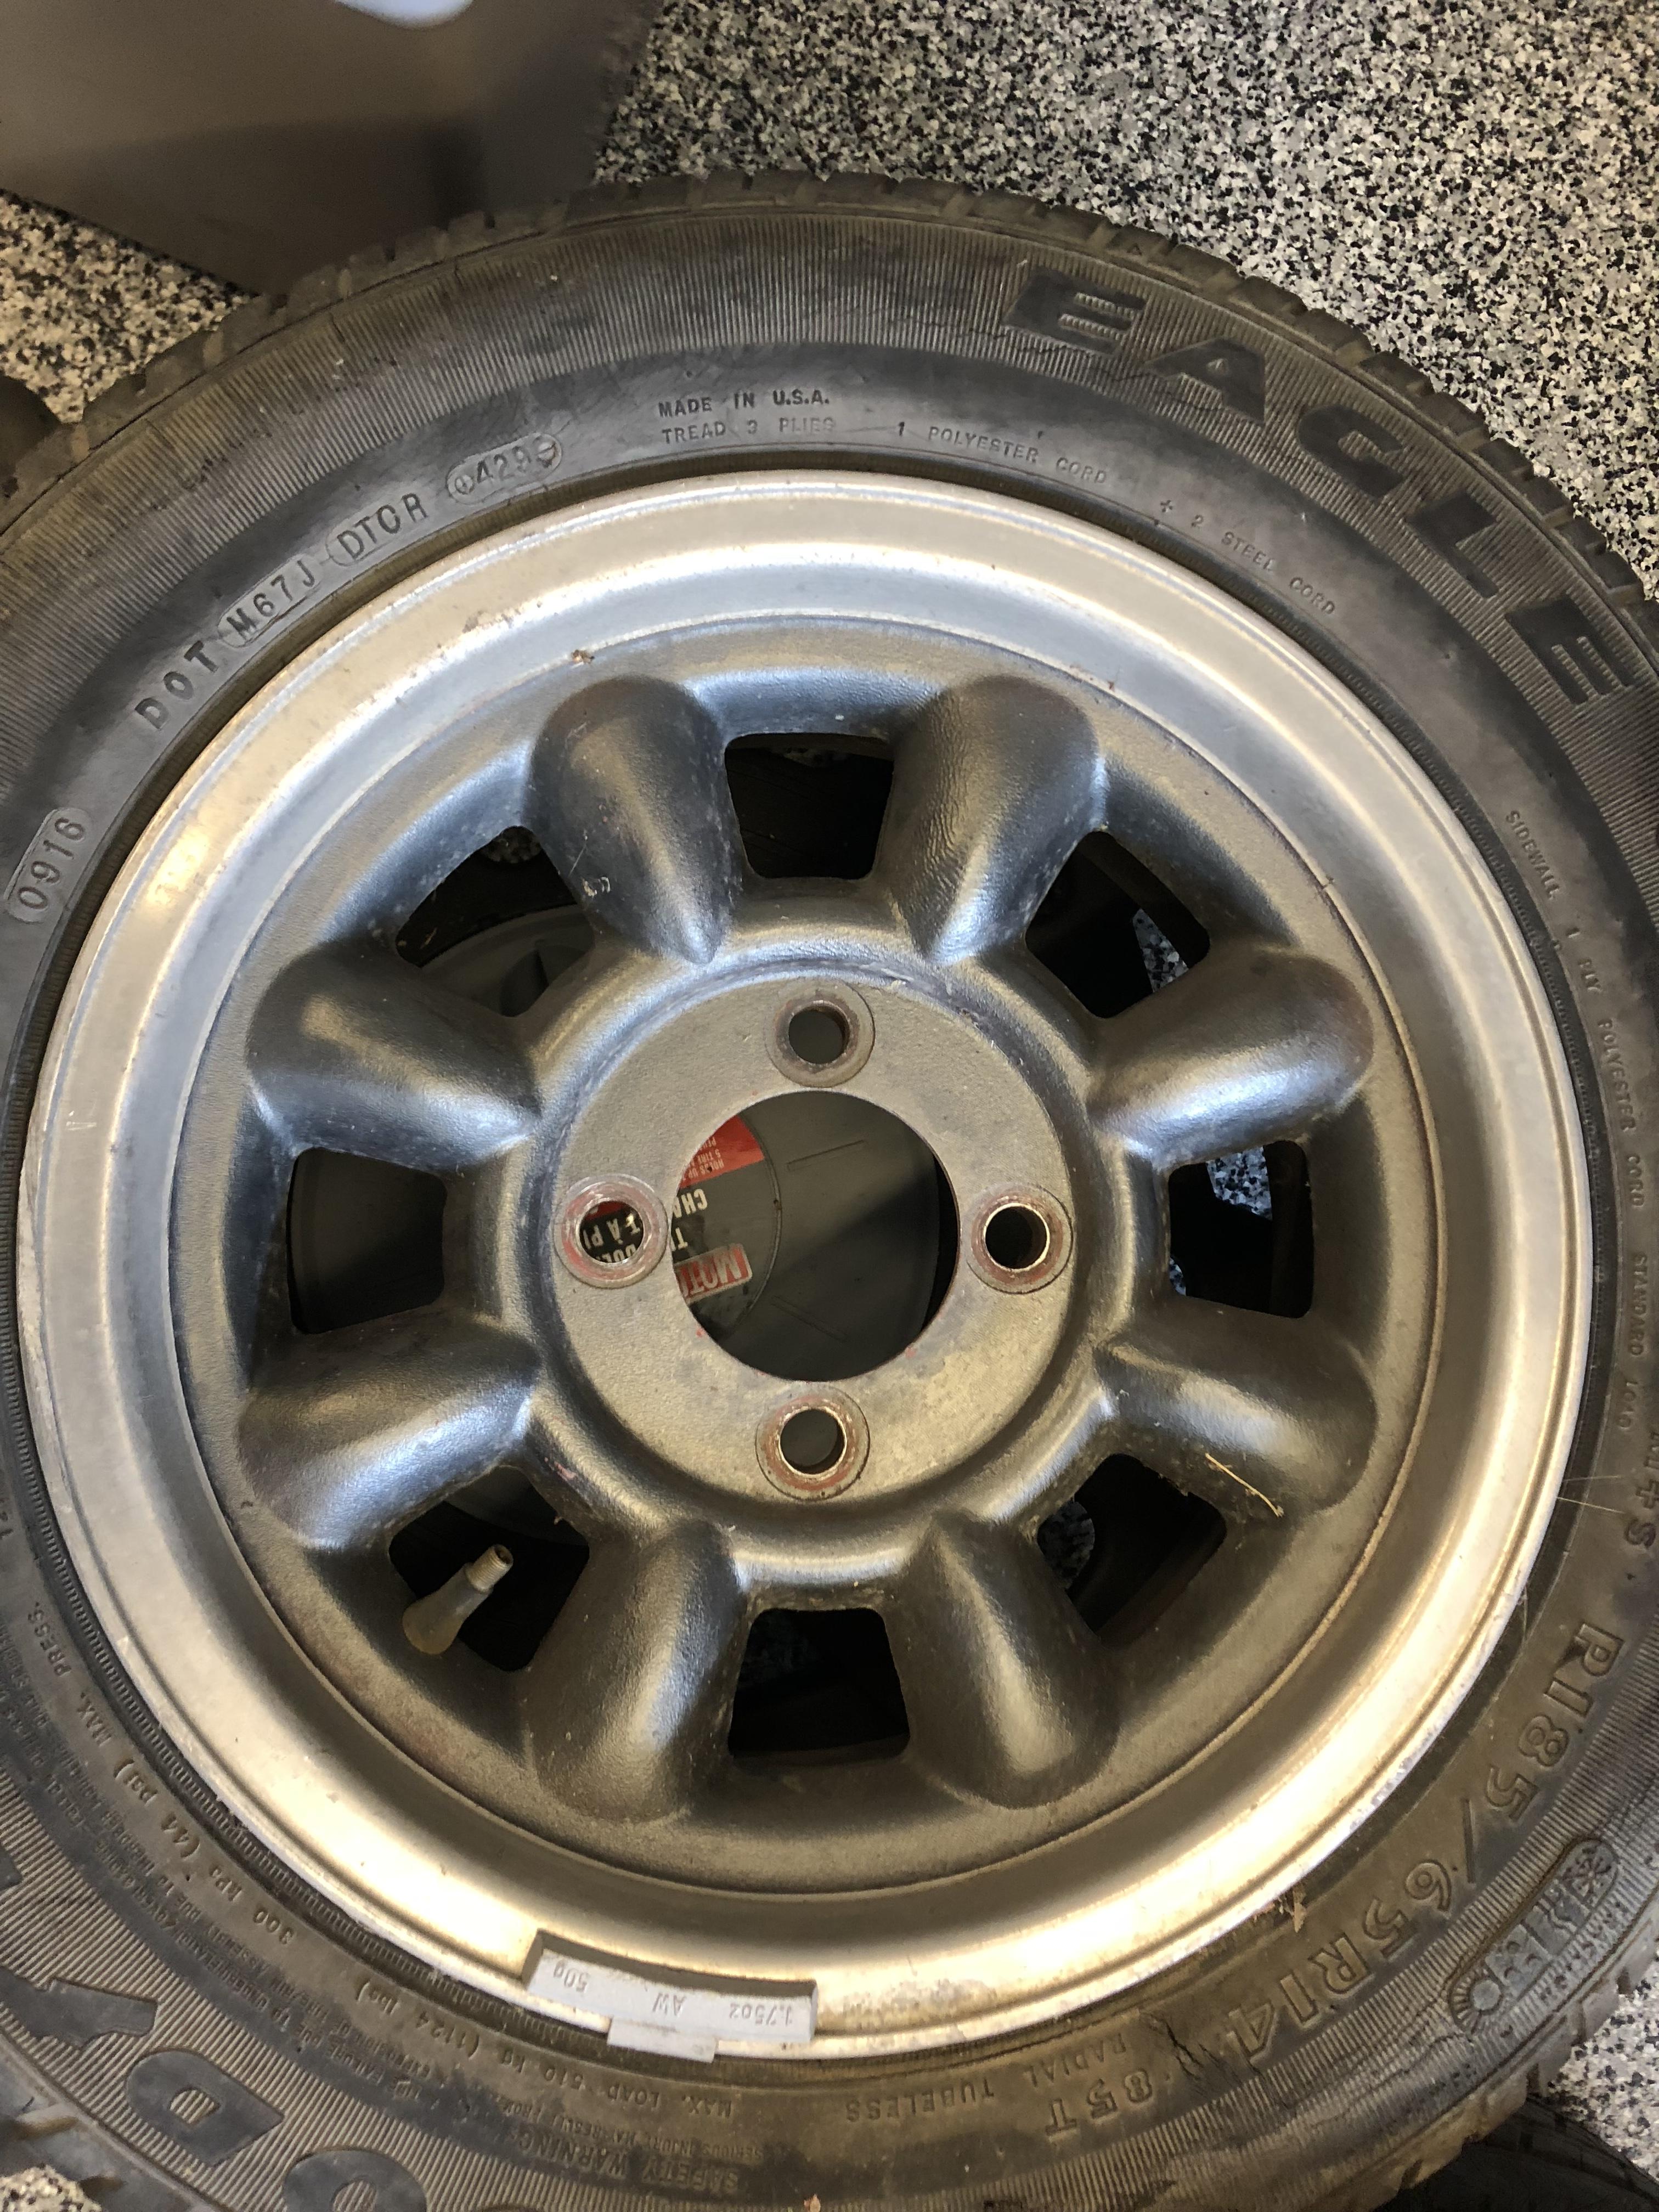
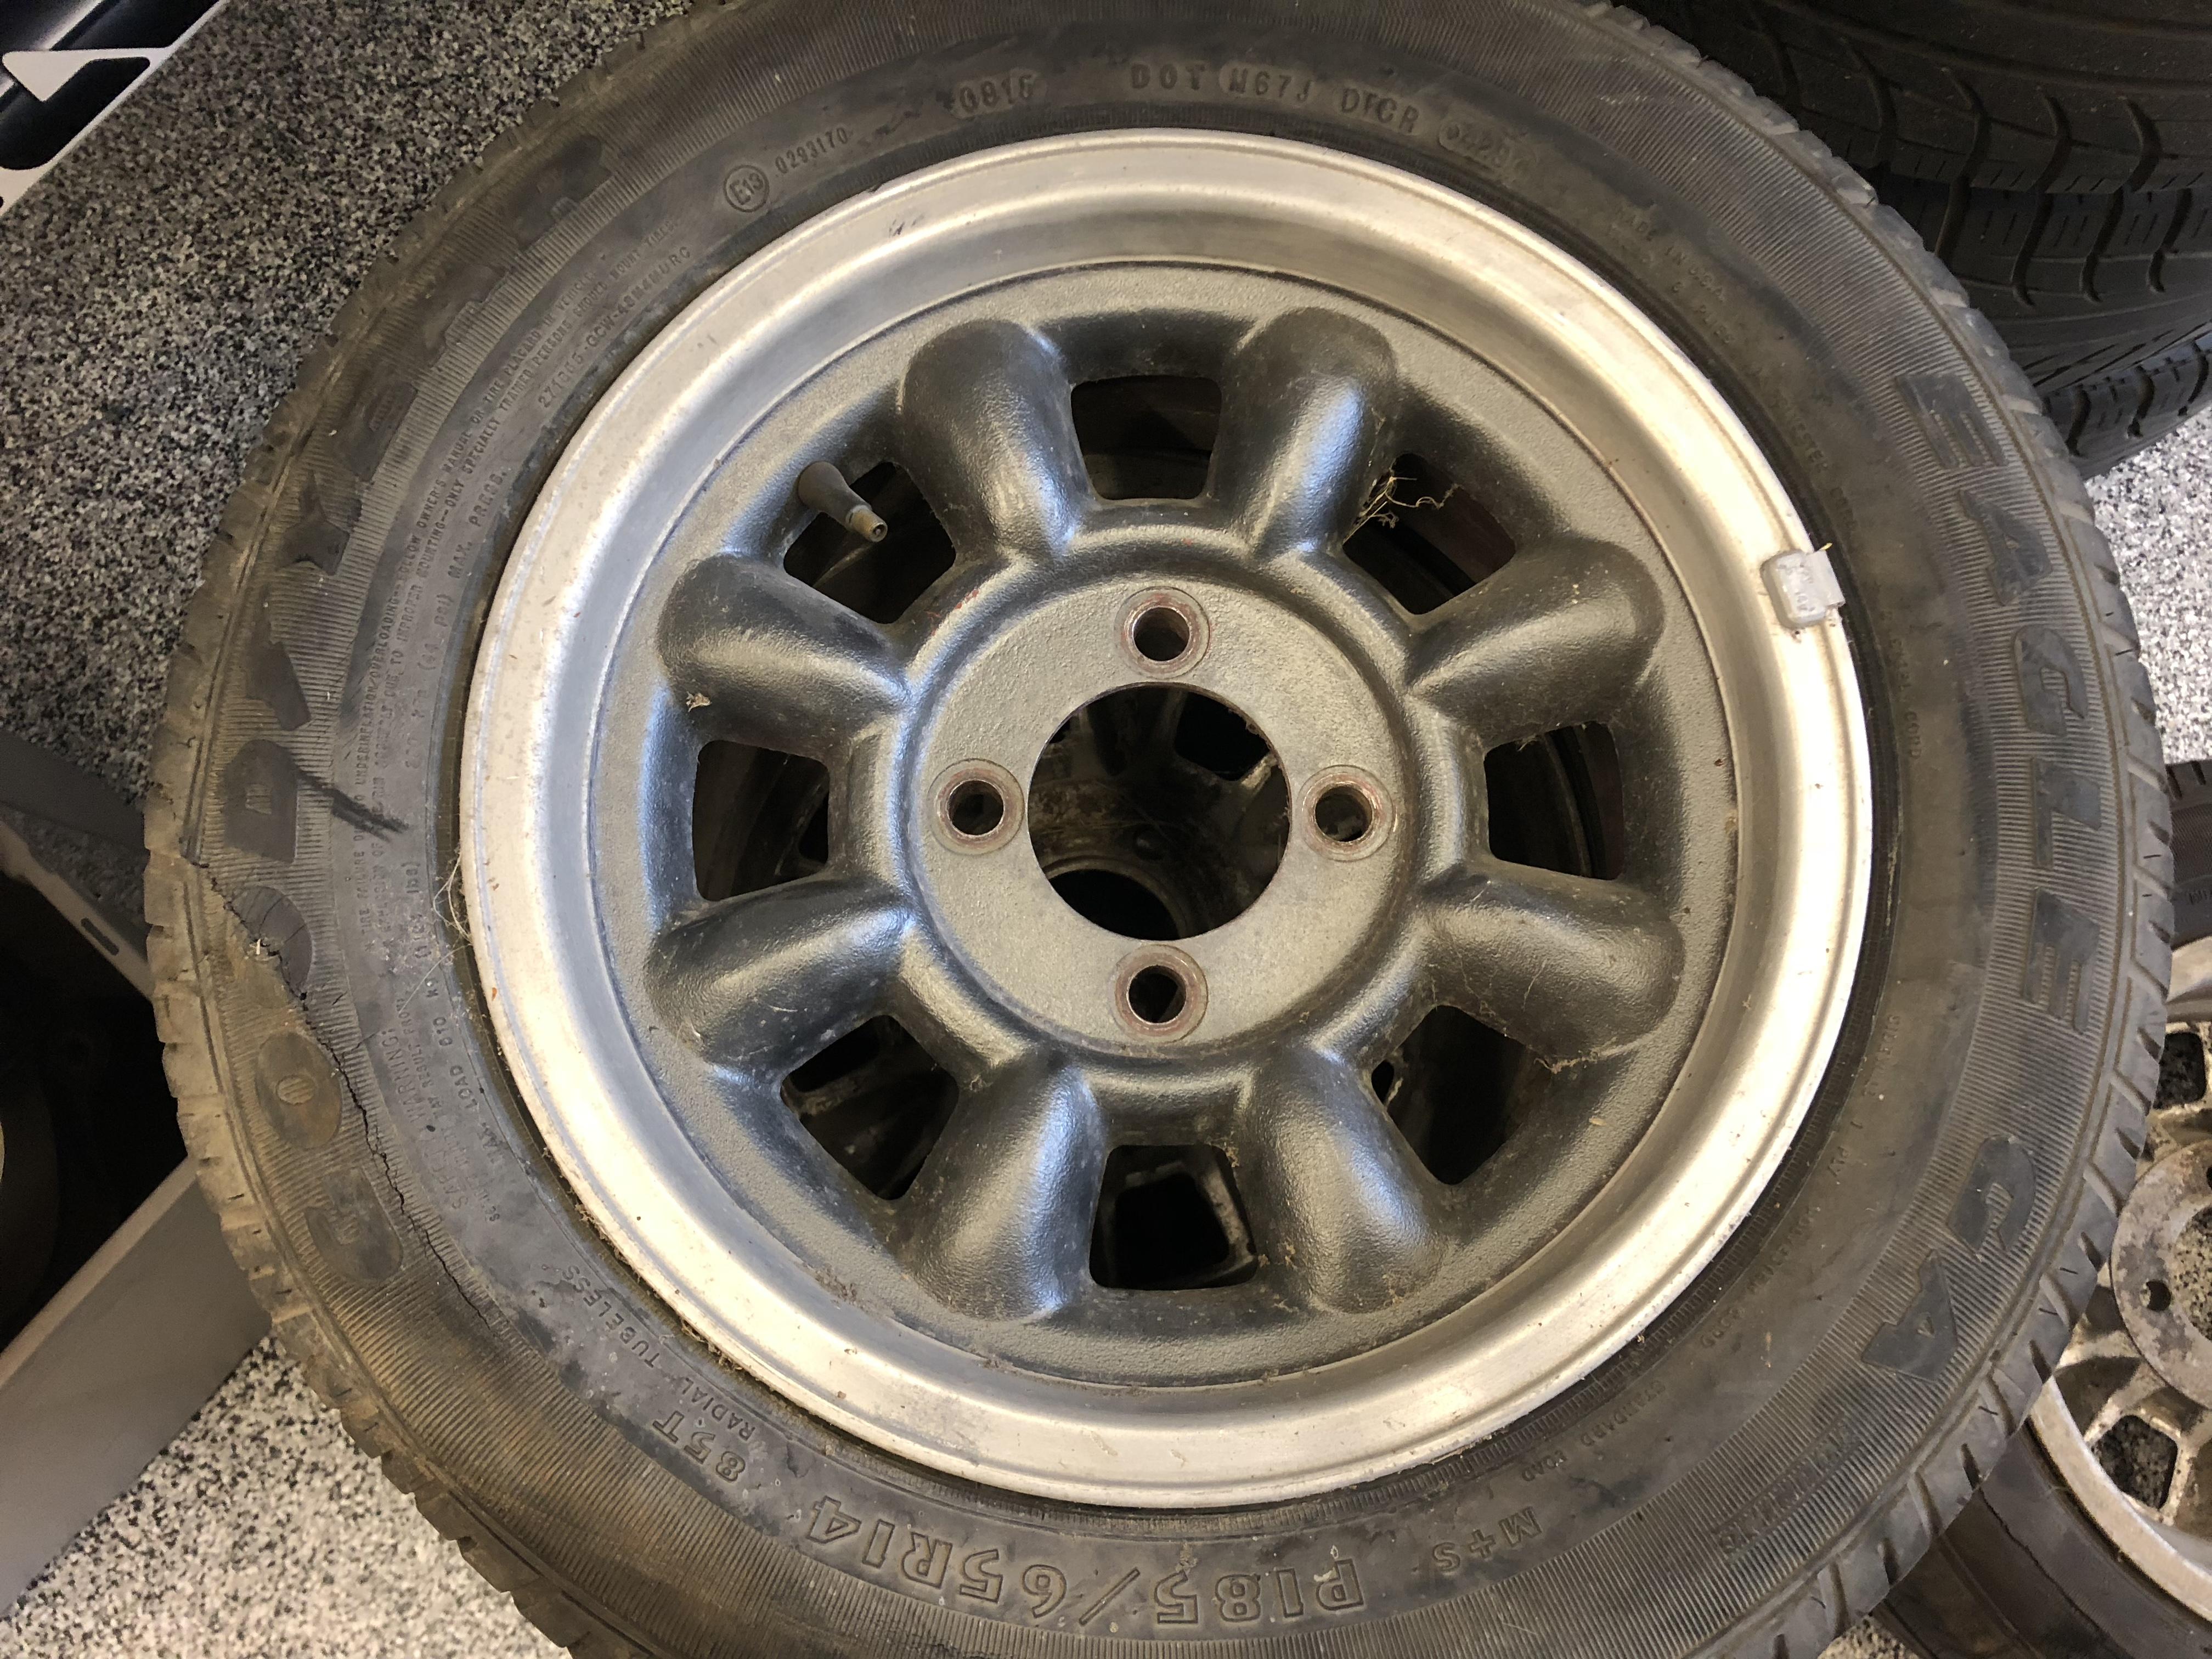
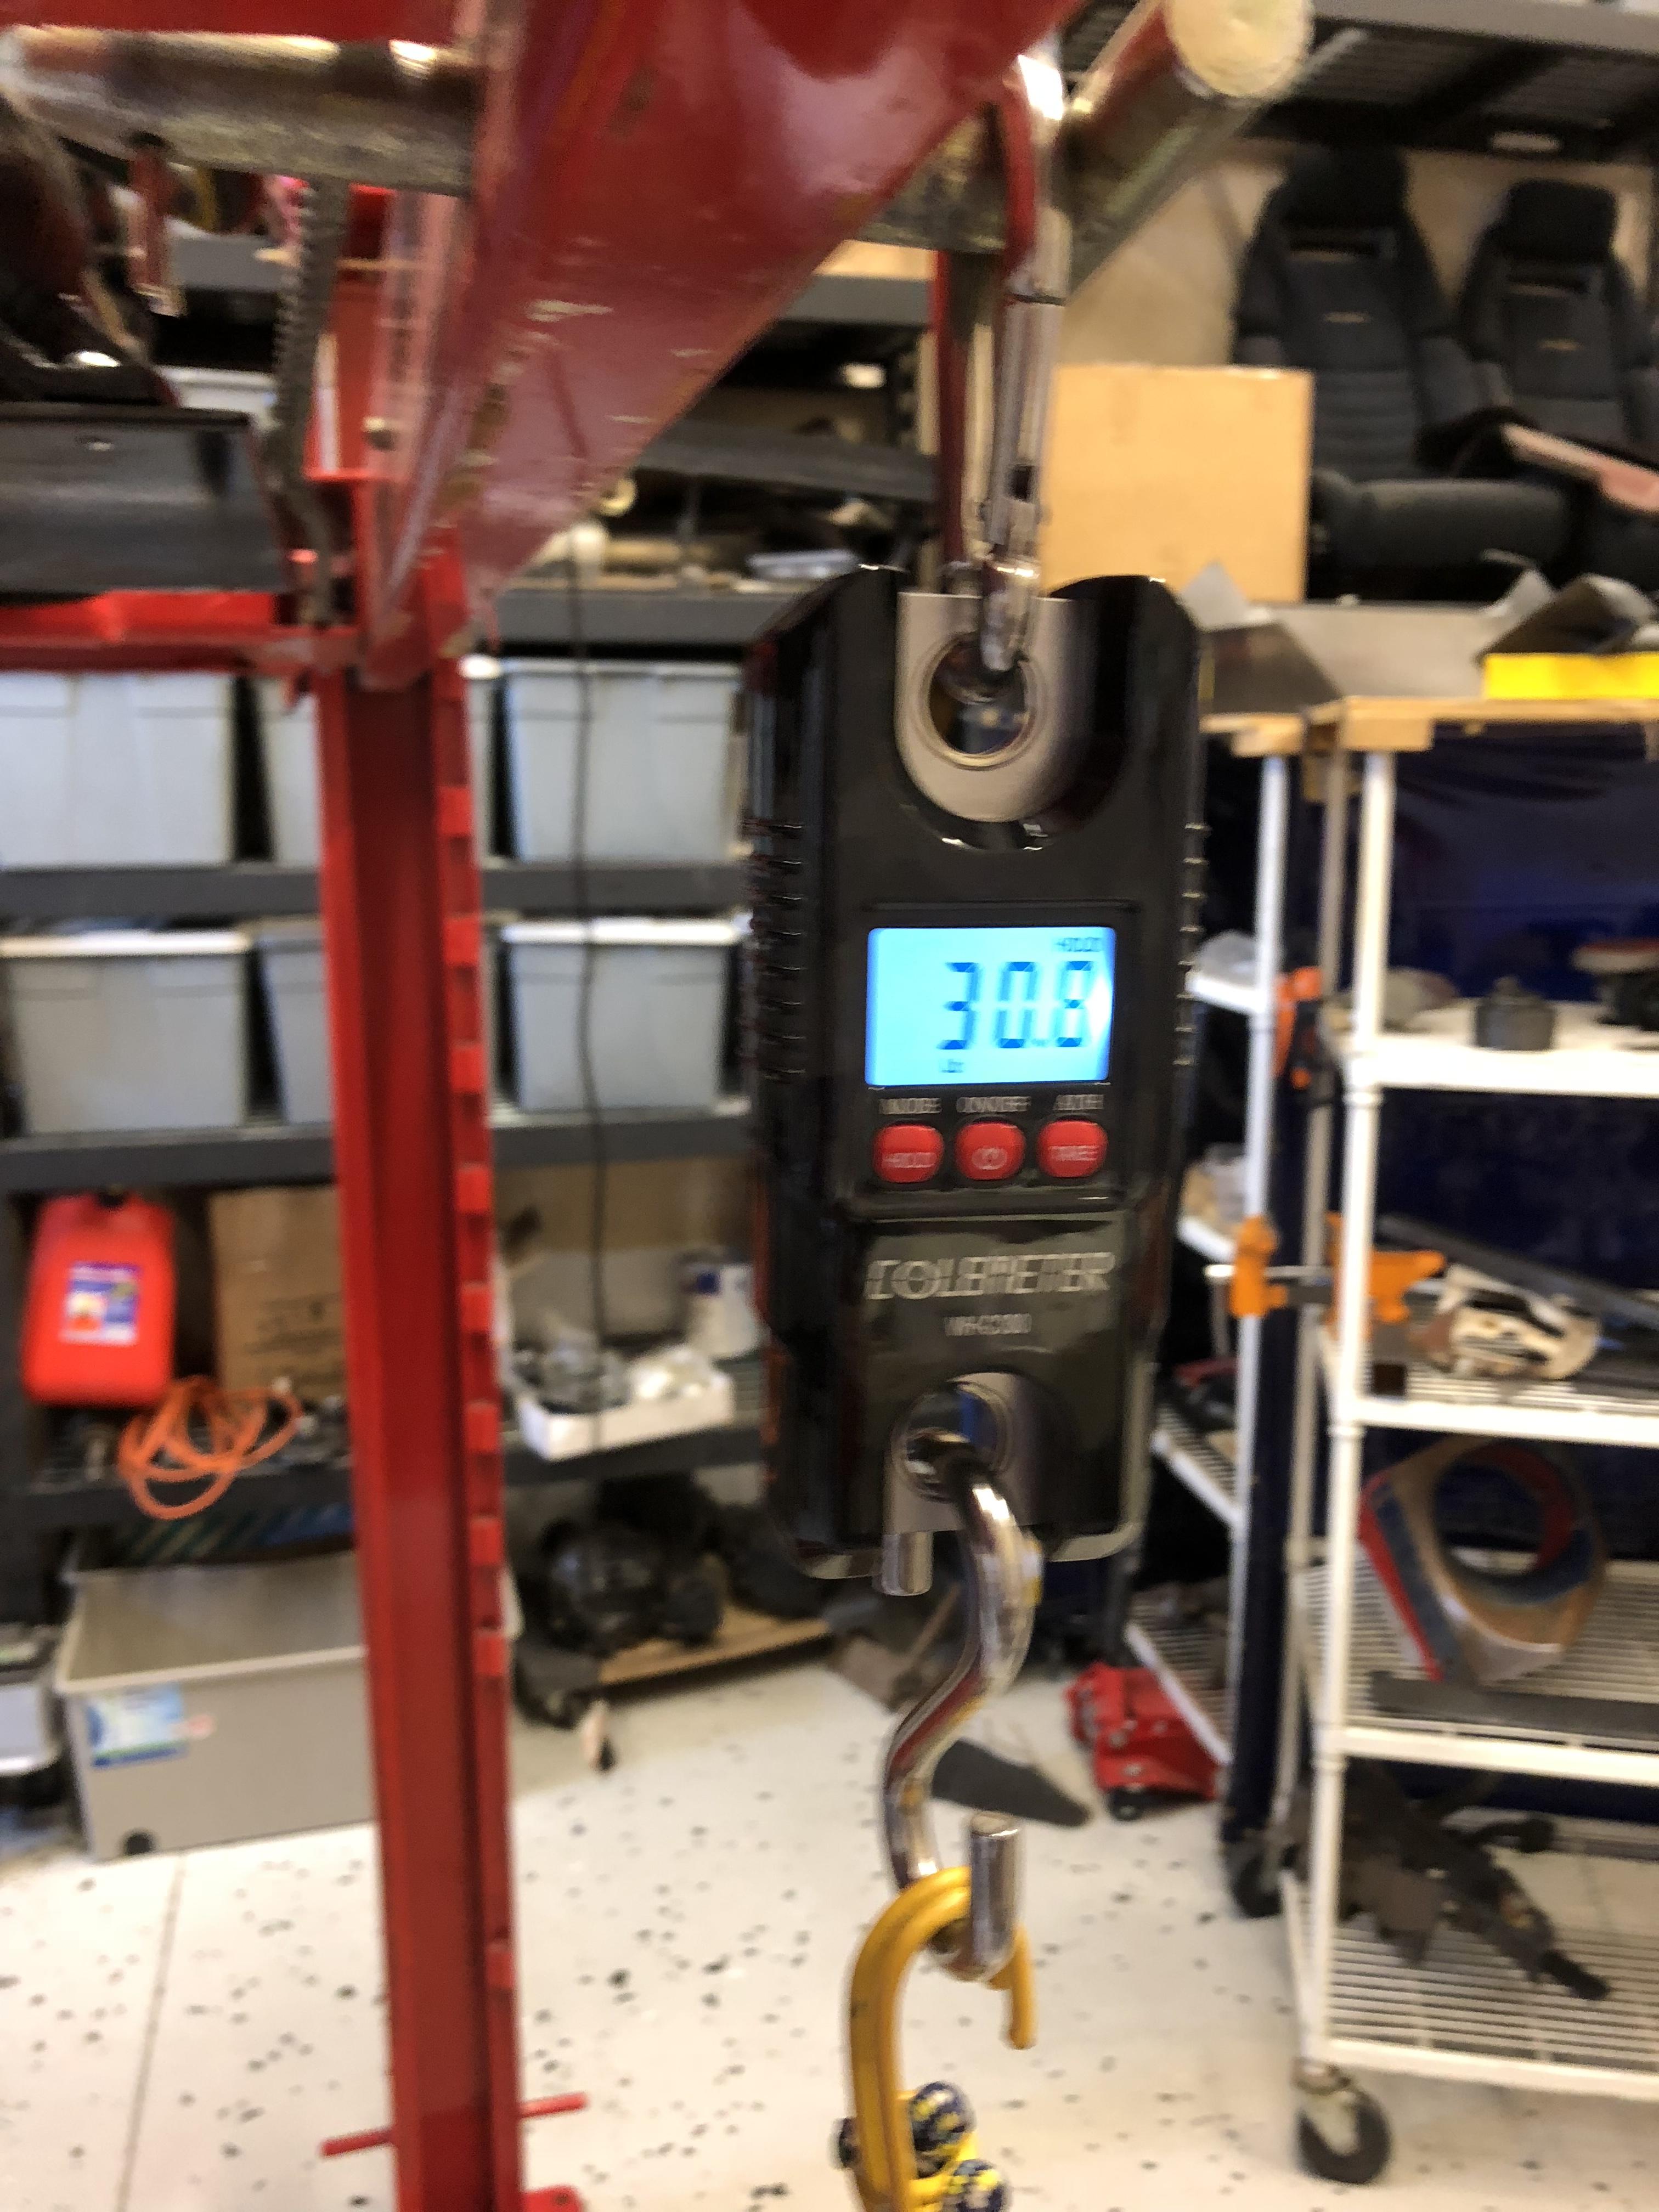
These wheels were on my 72 when I bought it. I figured they were just cheap knockoffs and I didn’t pay any attention at all until this morning when I moved them. They are very light and are some kind of alloy (non-magnetic), which seemed odd given their (apparent) age. These are the only markings: it looks like “14x65 MAX WHEEL LOAD 1580 CSI “ and a serial number or date maybe “ 6 23 80 1” They weigh in at 30.8 lbs with the rotted old 165/65r14 eagle tire still on, so I figure the wheel must be in the 13 to 15 lb range? The Can anyone fill in the details for me? Are these anything unusual? Or nothing special? Thanks


-
And the adult Meccano is very light to reposition. The whole assembly can be pulled with one hand...
-
Thanks! Home Depot Canada had the 8 ft lengths on for $13.20 a piece, which I thought was pretty cheap .....cleaned them out ?
- 439 replies
-
- 1
-

-
- 72 240z
- frame rails
- (and 1 more)
-
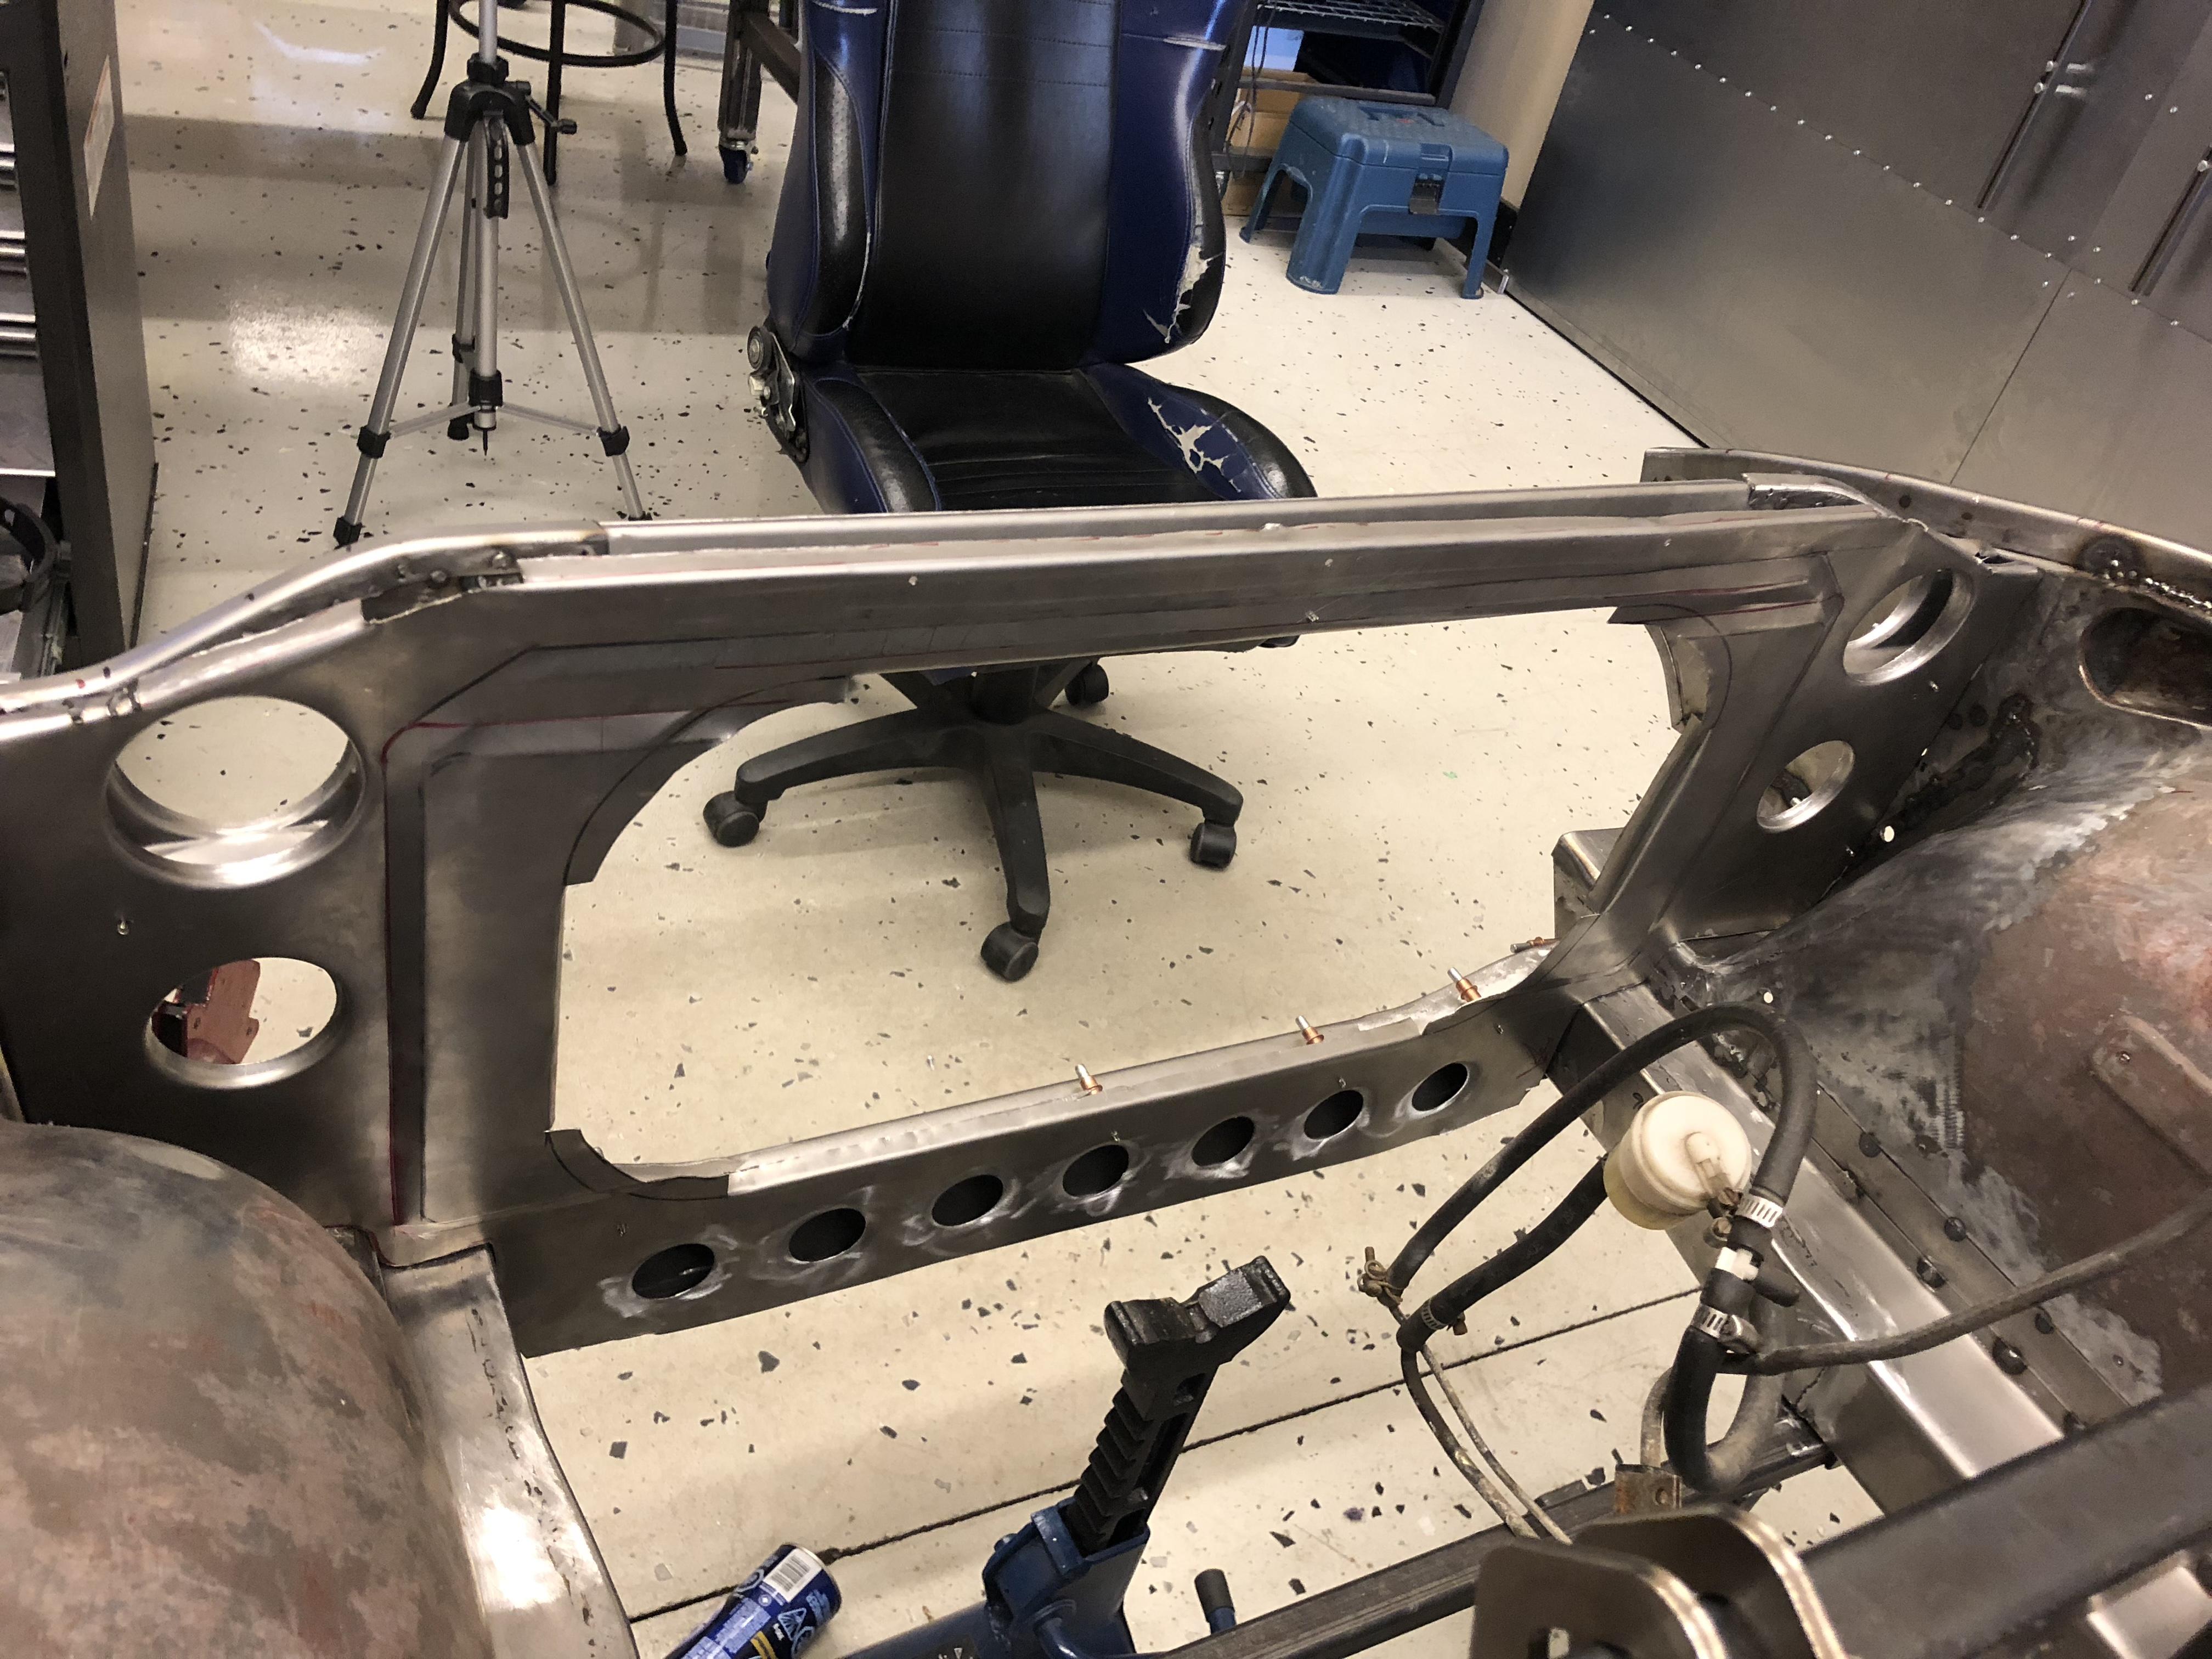
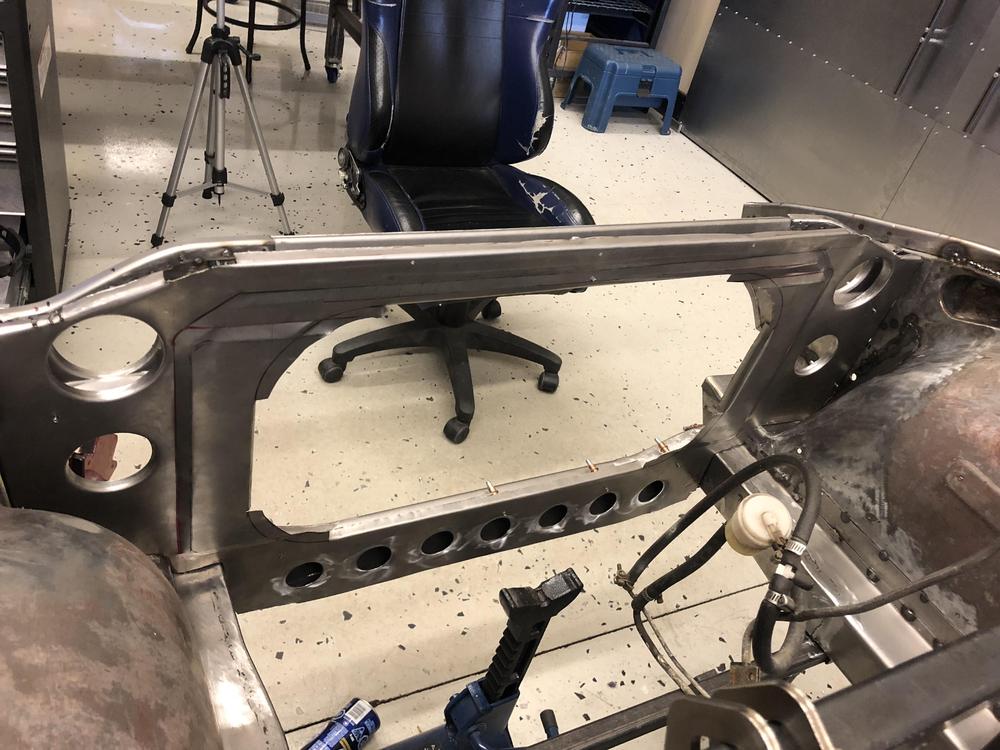
It looks fantastic! And I have also been thinking about the lizard skin so thanks for that ... And so ... I HATE to bring this up ... but I think those rails are from a 73 + car, not another 70...because of the 3 holes along the front lower section of the rails for the bumper mount ....
-
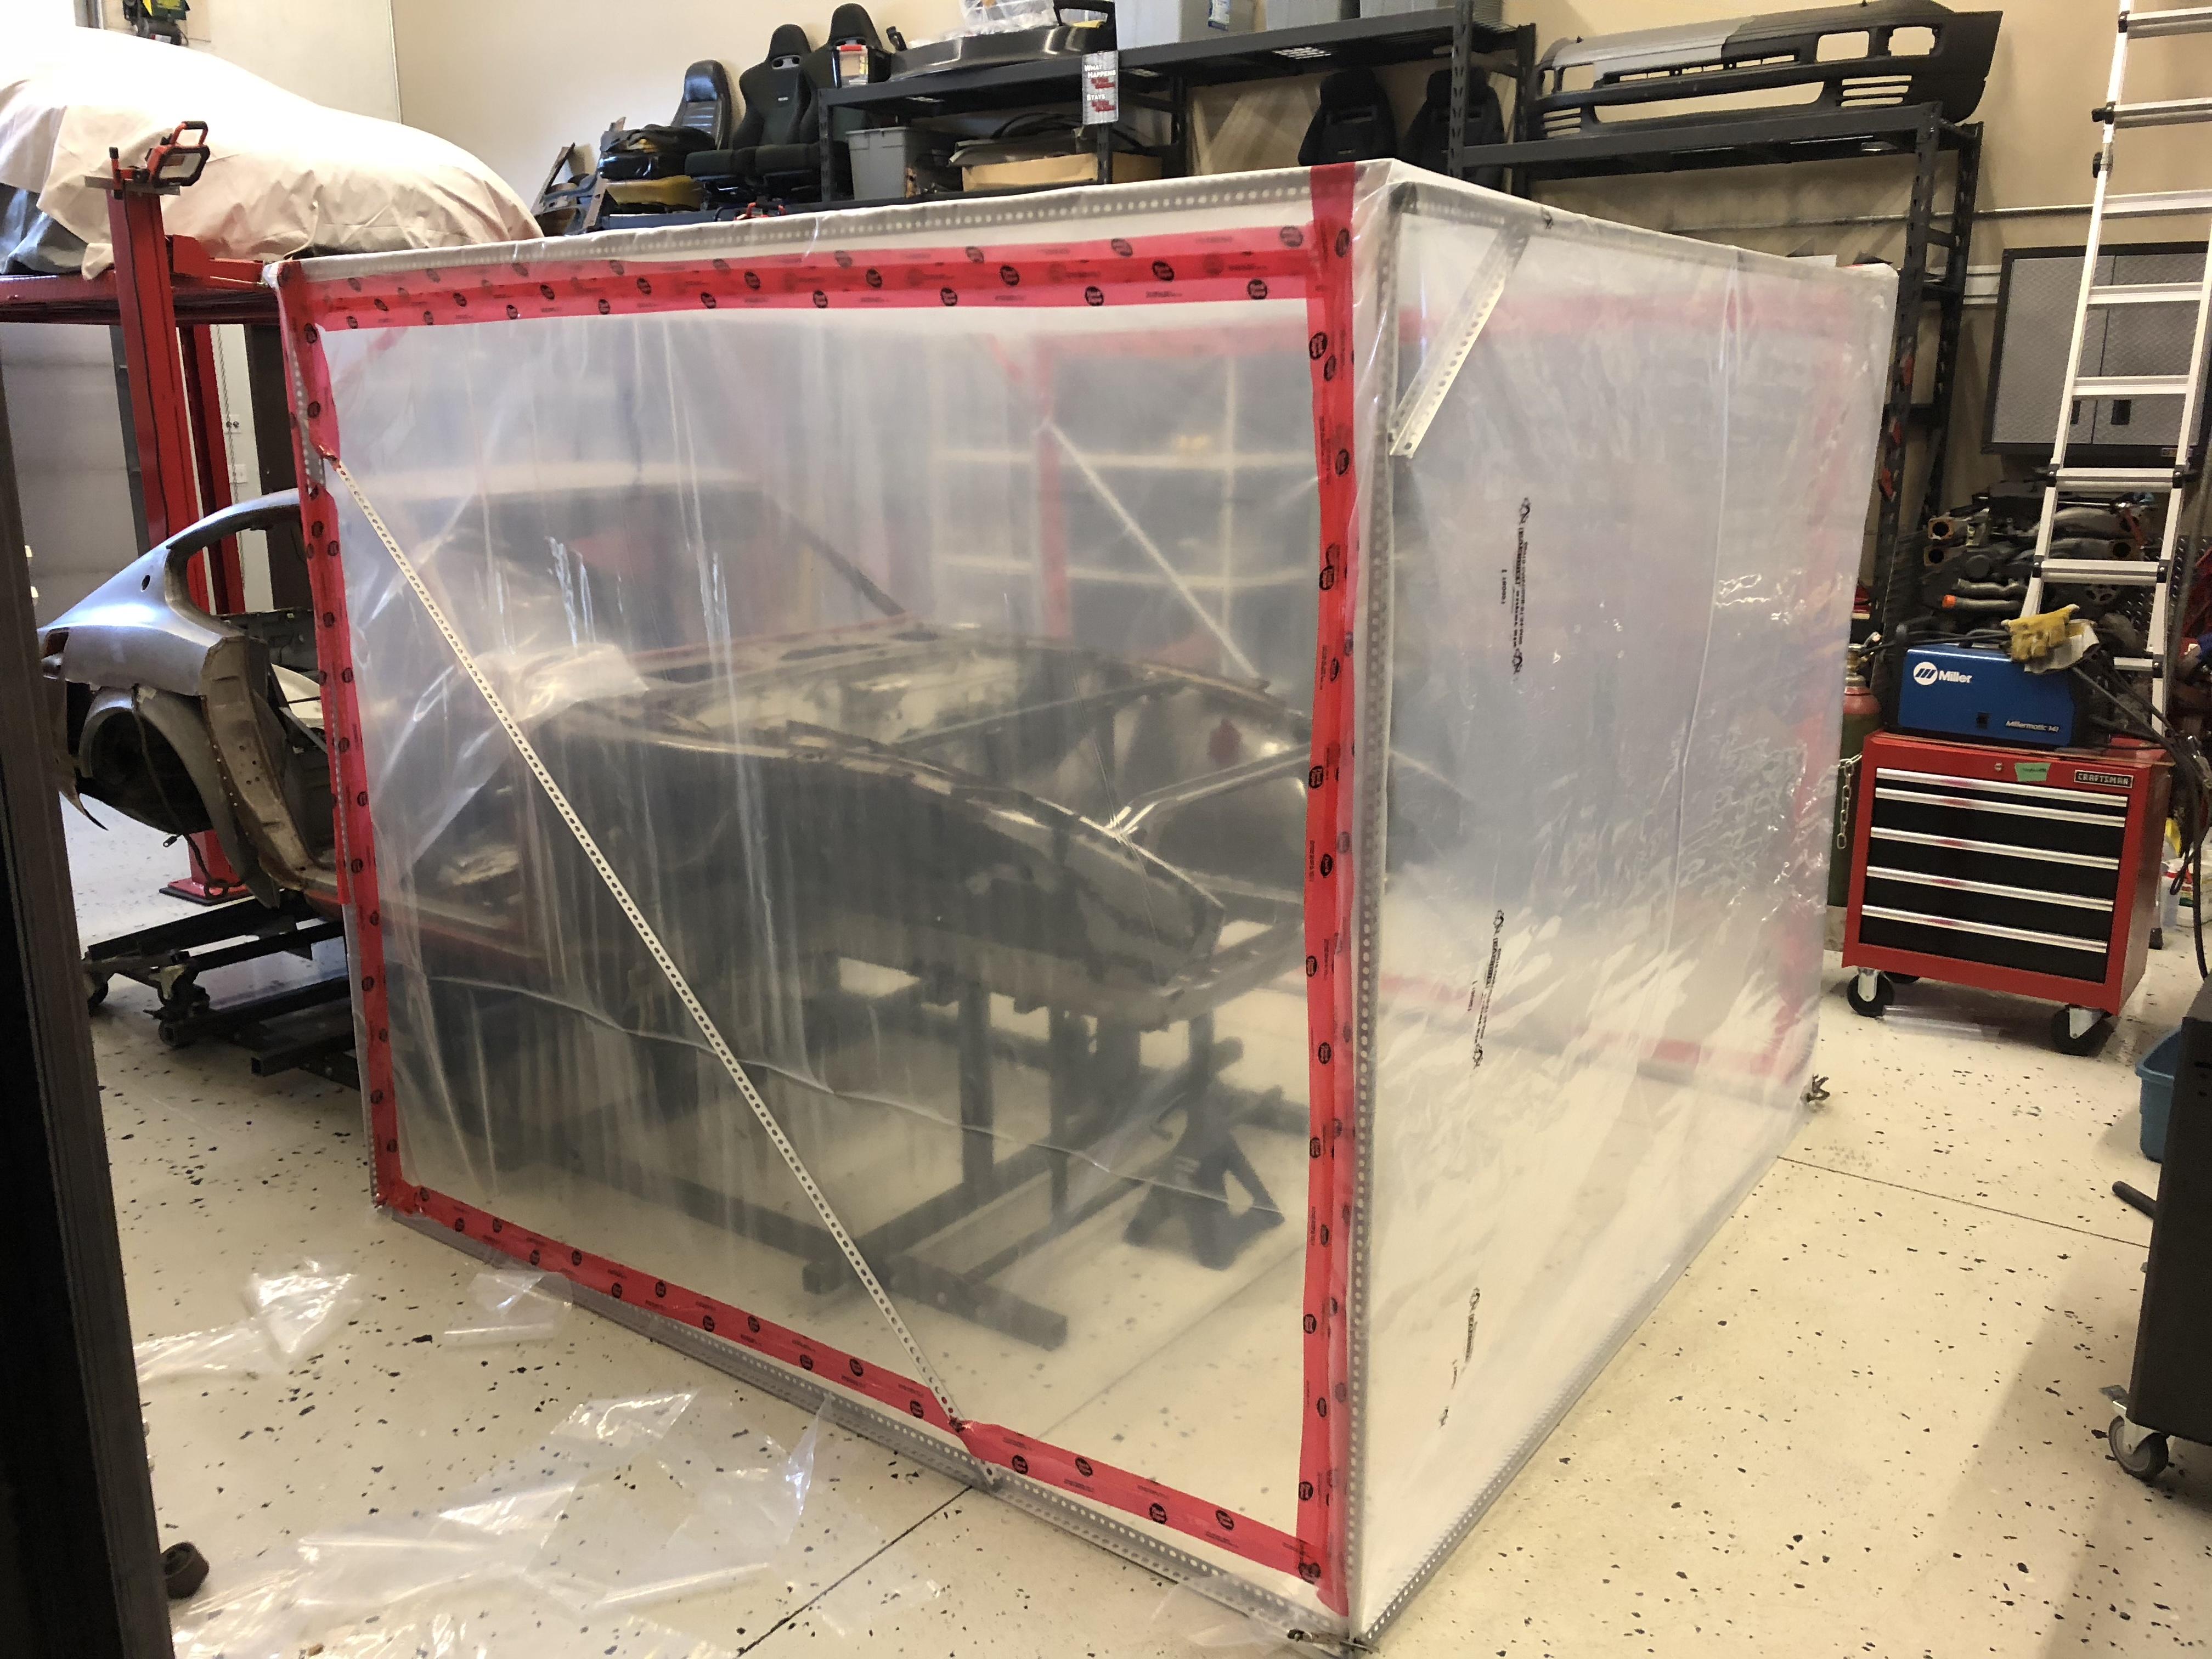
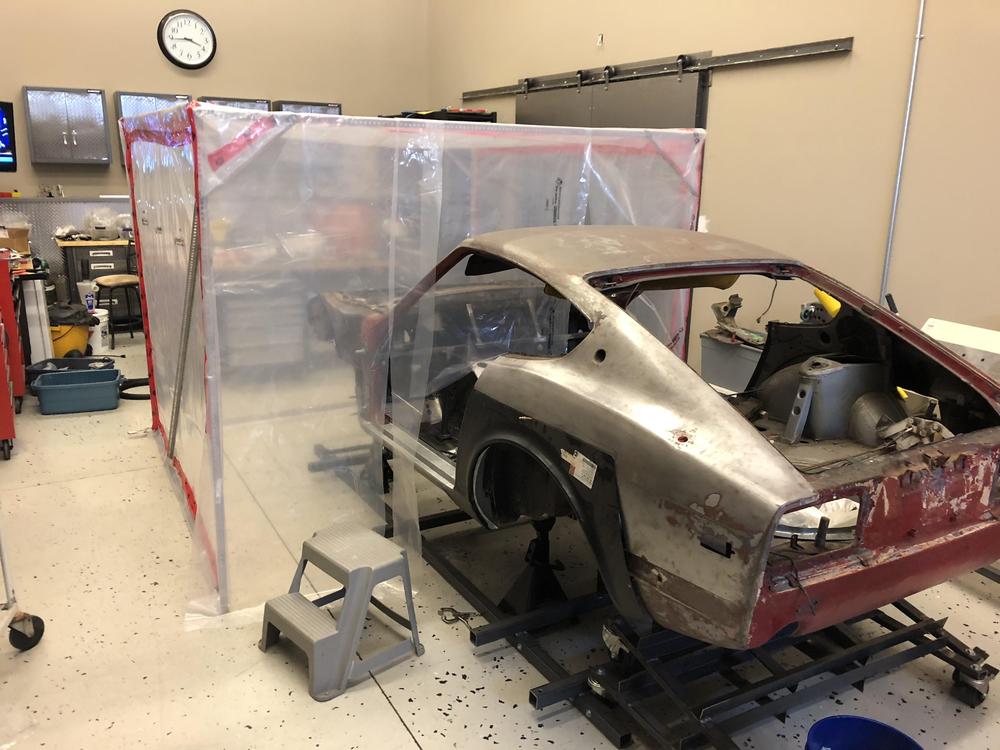
So I need a little bit better dust management now that spring is sprung, so I can take the covers off the summer cars and still grind away (literally) on all the weld cleanup that I need to do on the front end... Enter dust booth V1.0. ... Made from 1 1/4 angle iron (Meccano for Adults ?) and 6 mil vapor barrier. I might add a fan and filter - we’ll see how it goes... and yes it will double as Part A of the modular paint booth when the time comes ???

- 439 replies
-
- 3
-
-
- 72 240z
- frame rails
- (and 1 more)
-
Fair point - I did mischaracterize it as a refresh. It is an older rotisserie restoration as opposed to what most would call a refresh and it is pretty clean and period correct. And if I look at the green as $20-25 over the white 72, then yes it seems reasonably priced. But I must admit that I am stunned at gross number of $65....
-
Thanks! So I don’t know but I have quite a few hours into it (including some “grrrr-just walk away time”) so I imagine it wouldn’t be cheap.
- 439 replies
-
- 1
-
-
- 72 240z
- frame rails
- (and 1 more)
-
Agreed- and the refresh is decent but not excellent so that seems really strong at 60...
-
More Forgery-ing ?...
- 439 replies
-
- 3
-
-
- 72 240z
- frame rails
- (and 1 more)
-
Feeling good about 1970, green, and buying those quarters if this holds up ....
-
Hmmm - Billing’s ain’t to far from Calgary ...
-
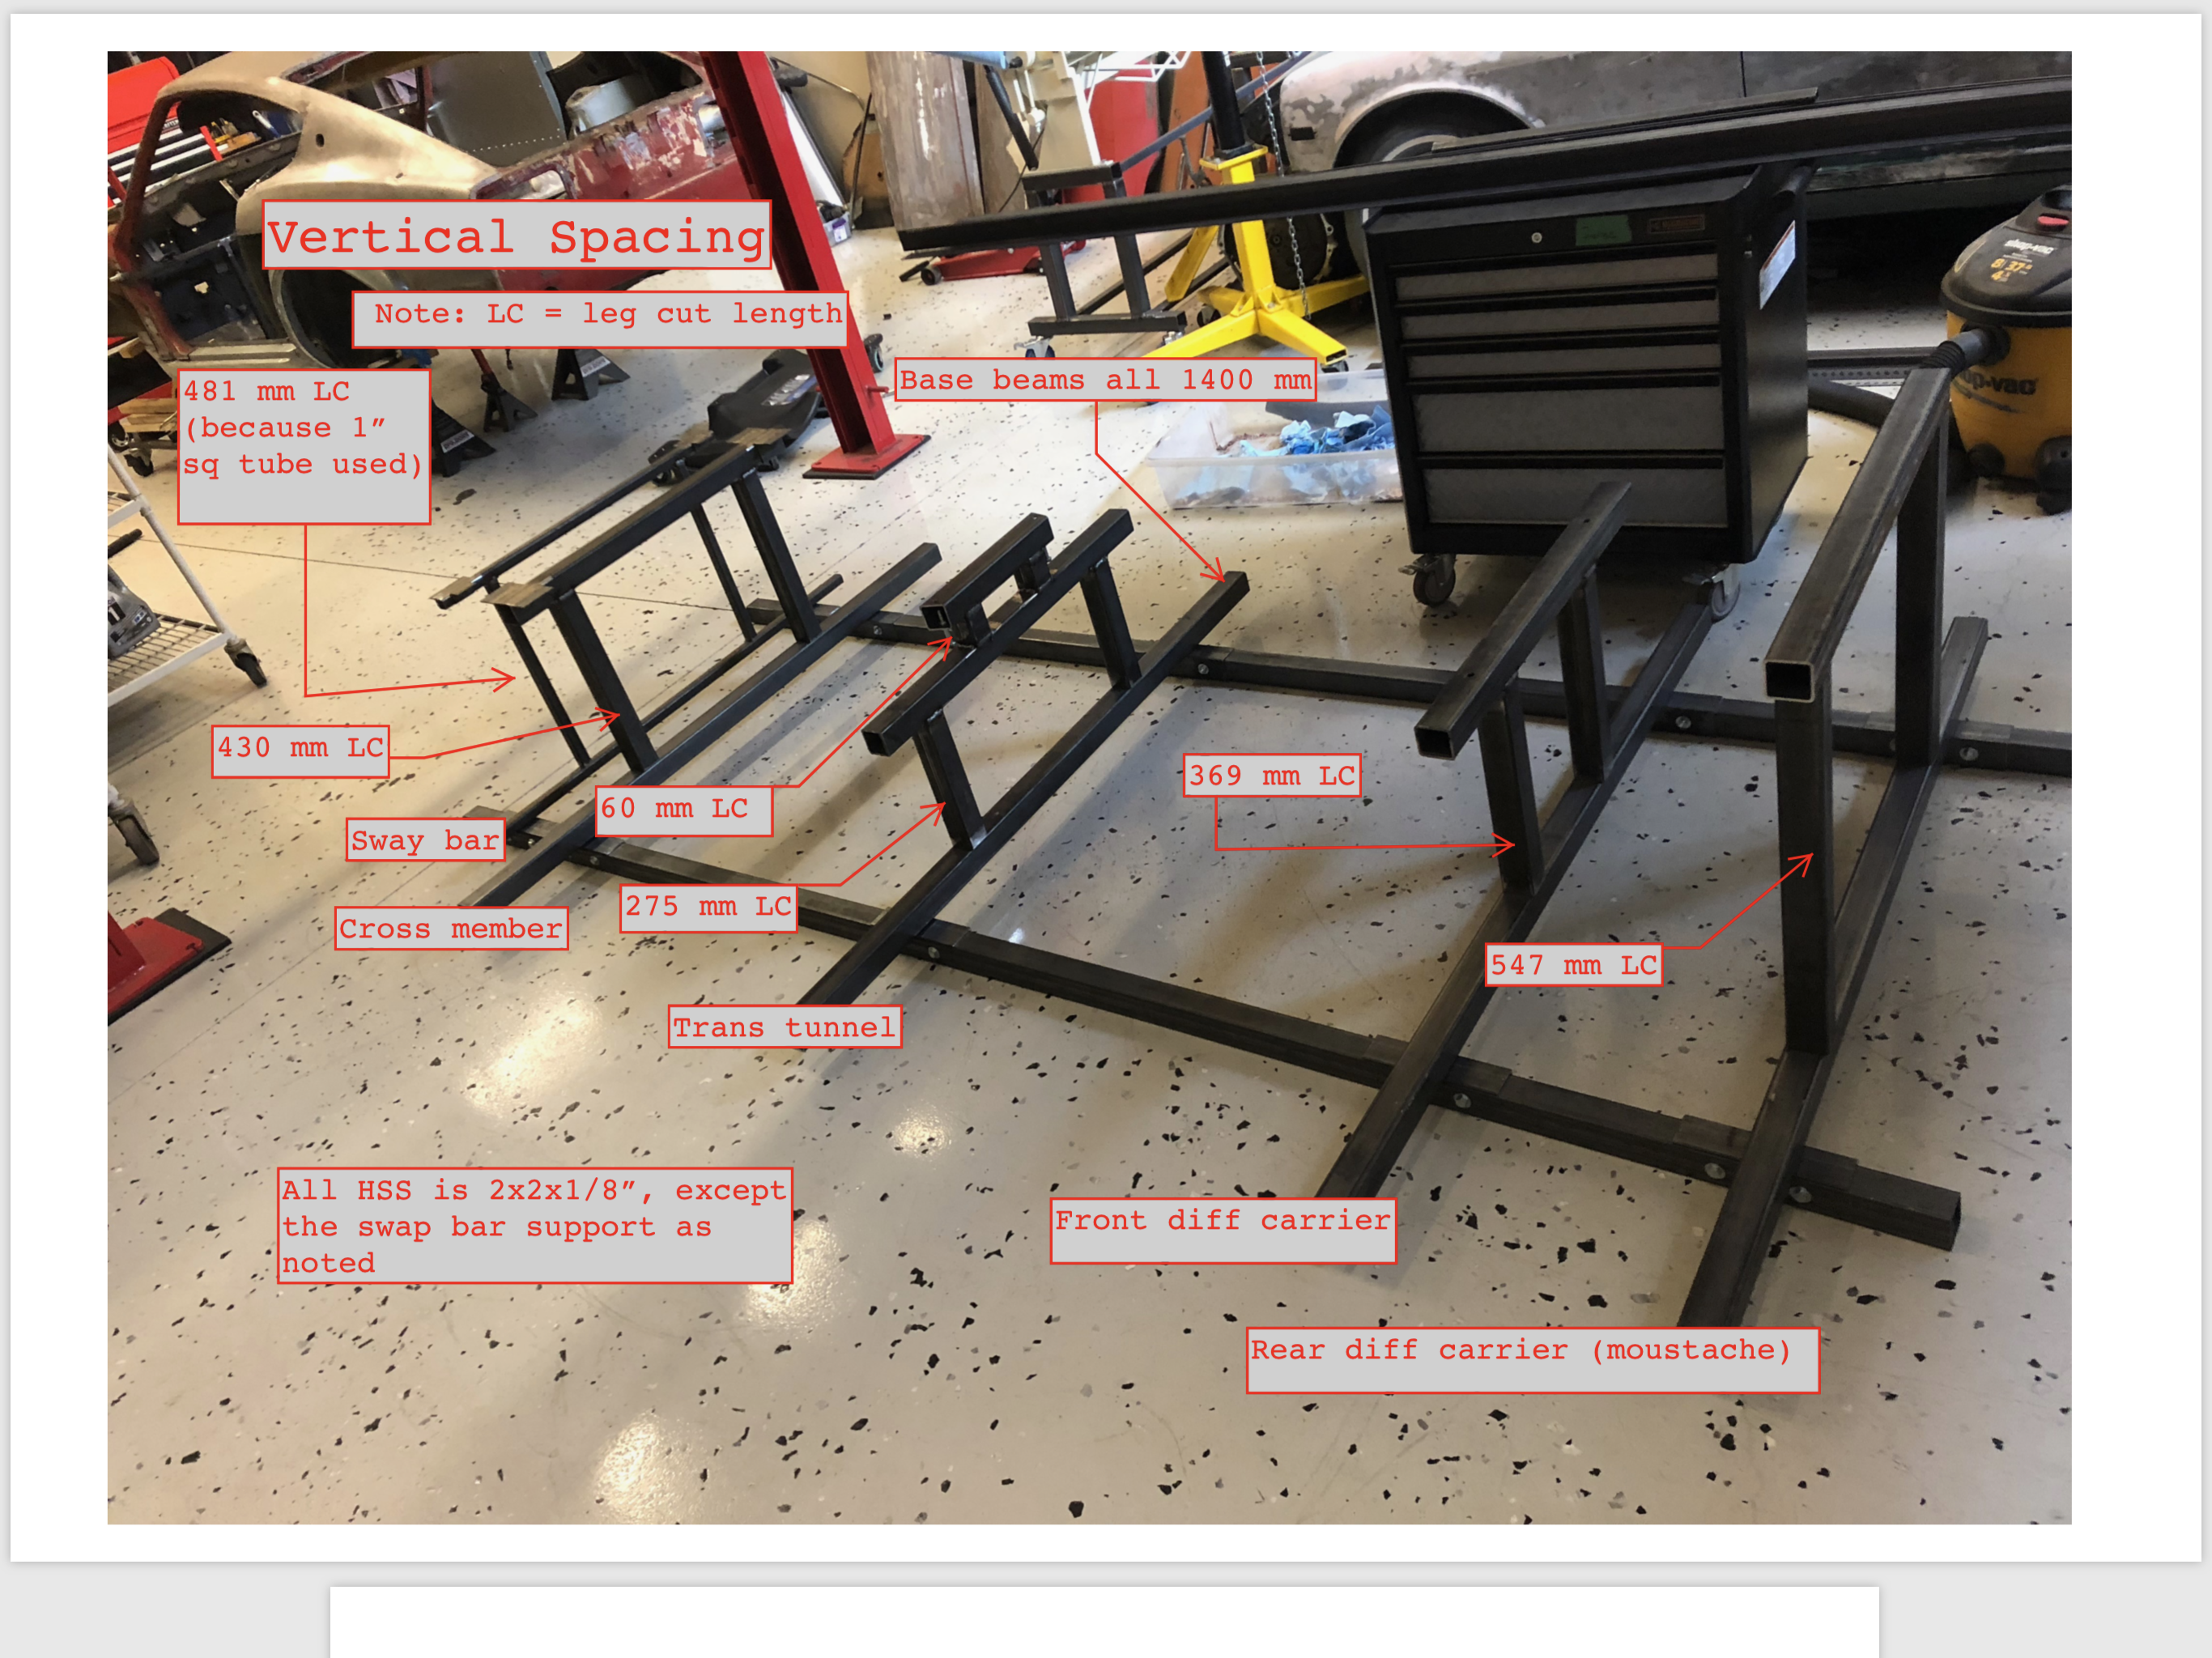
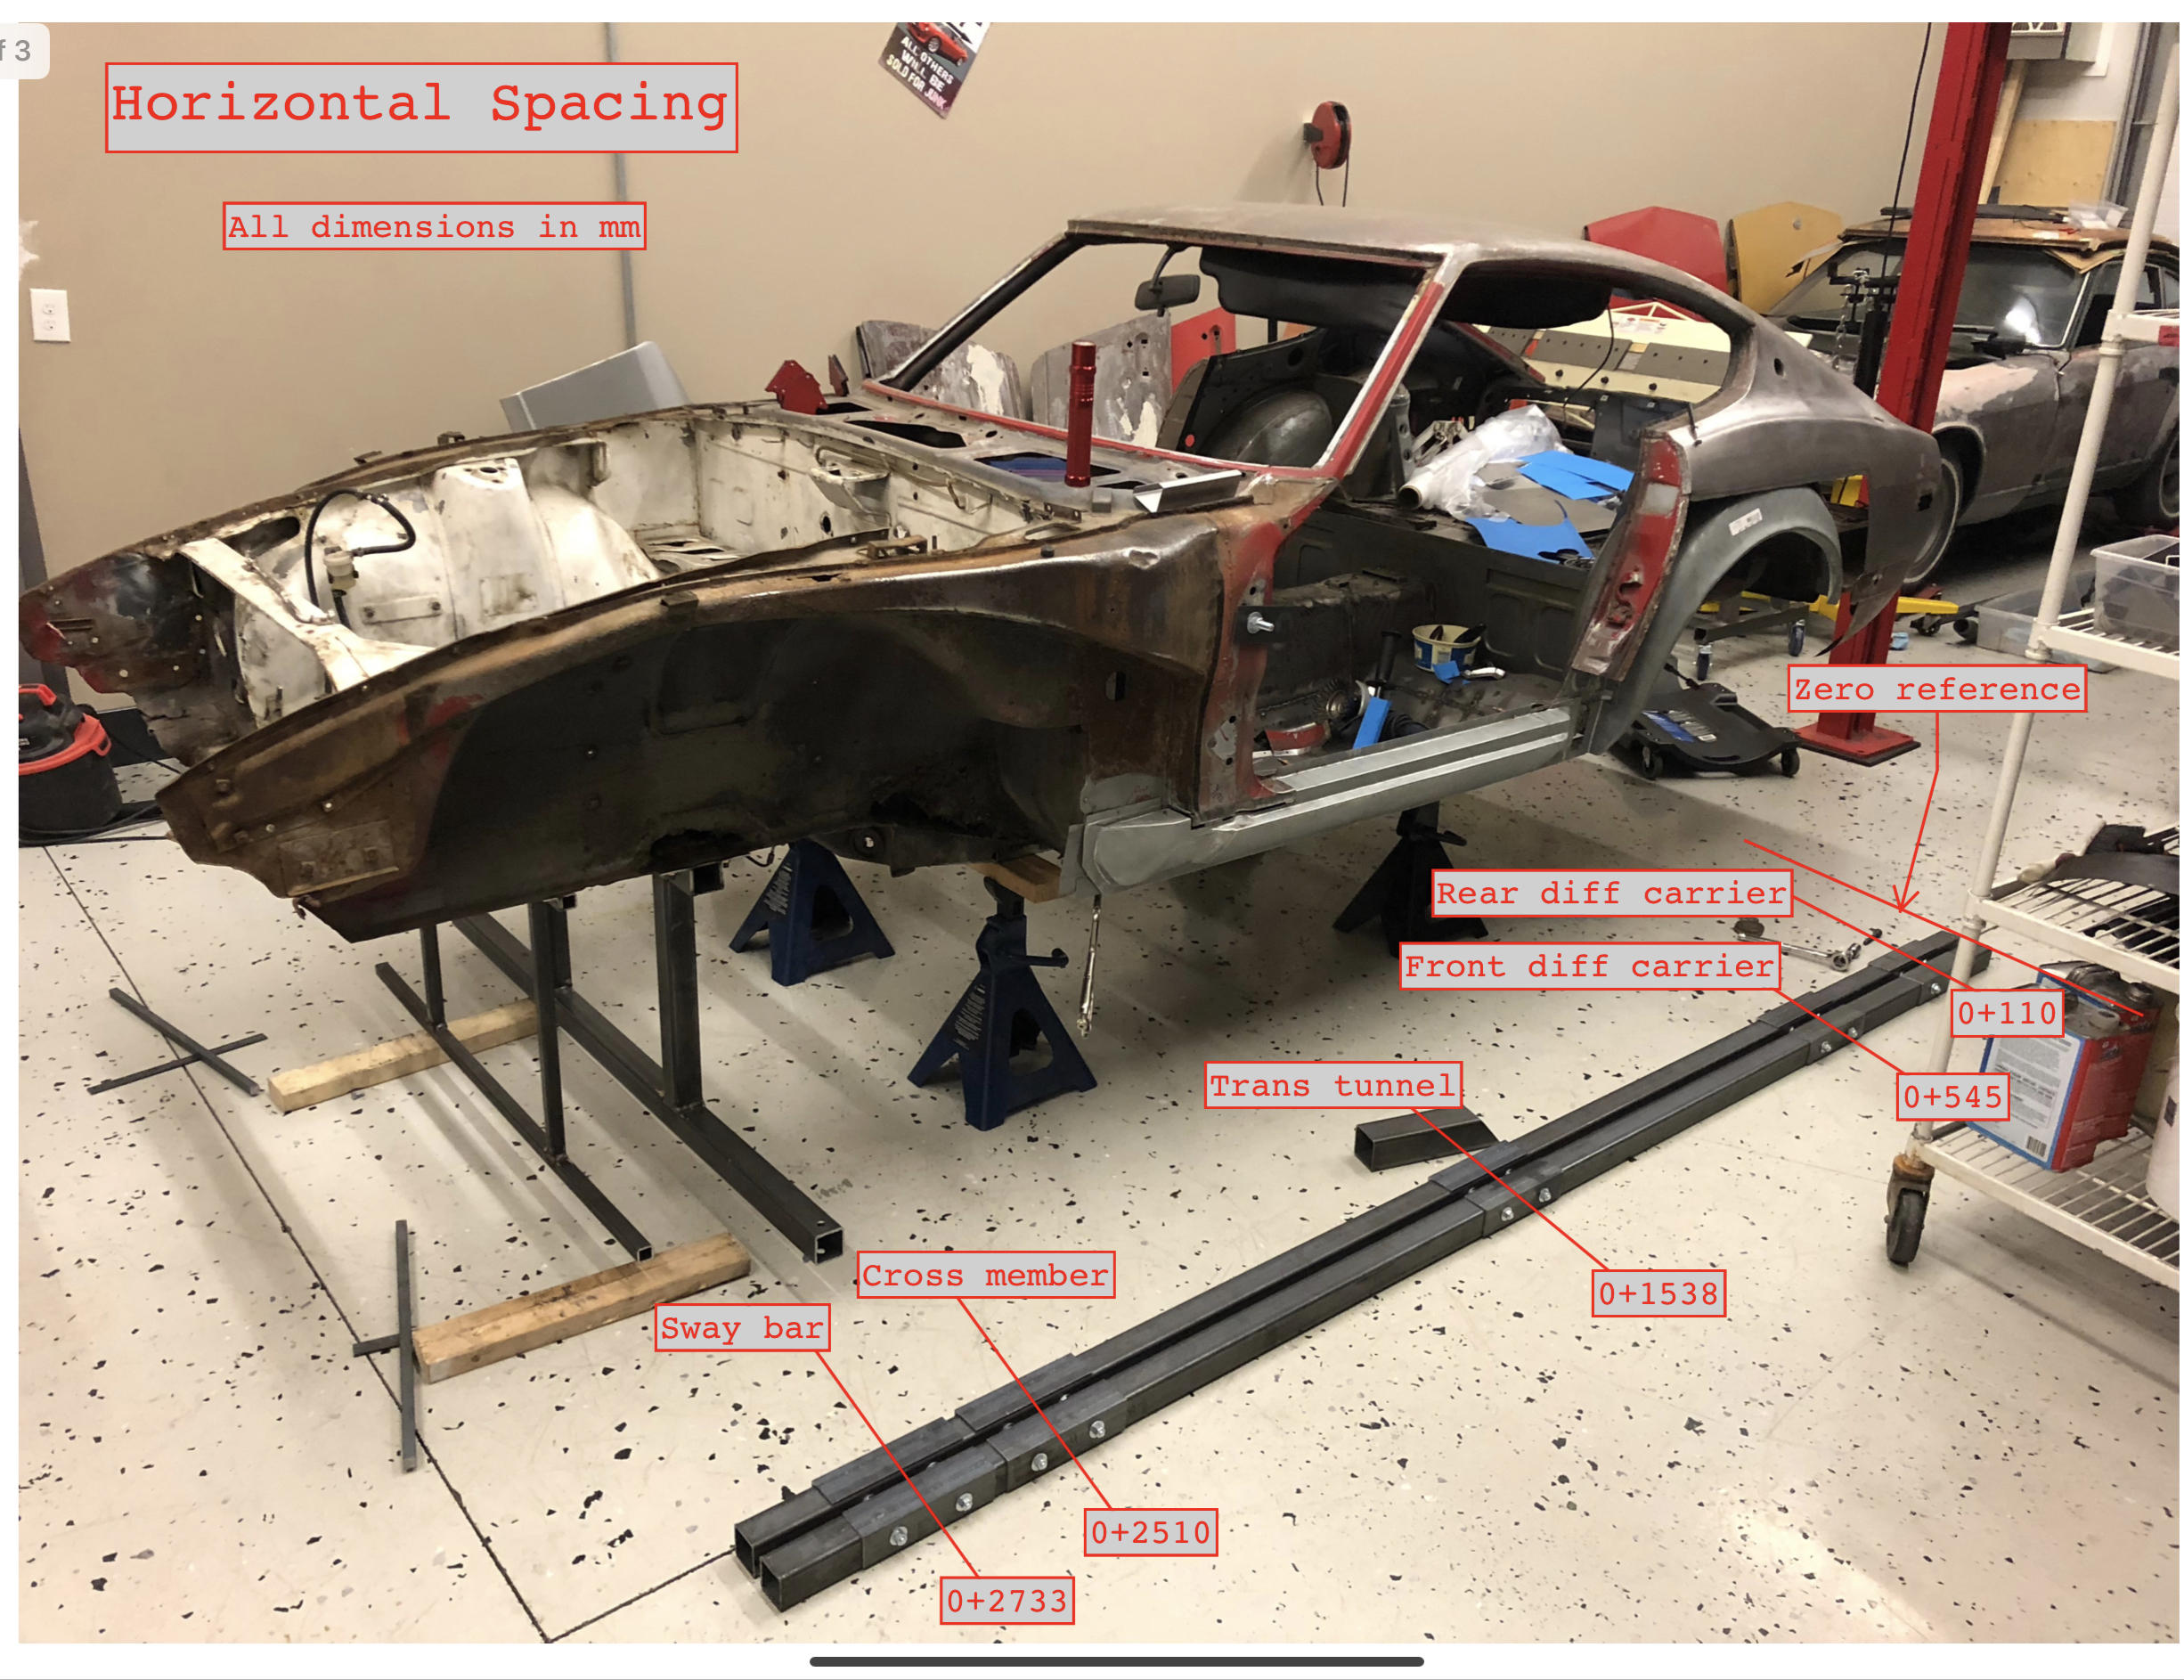
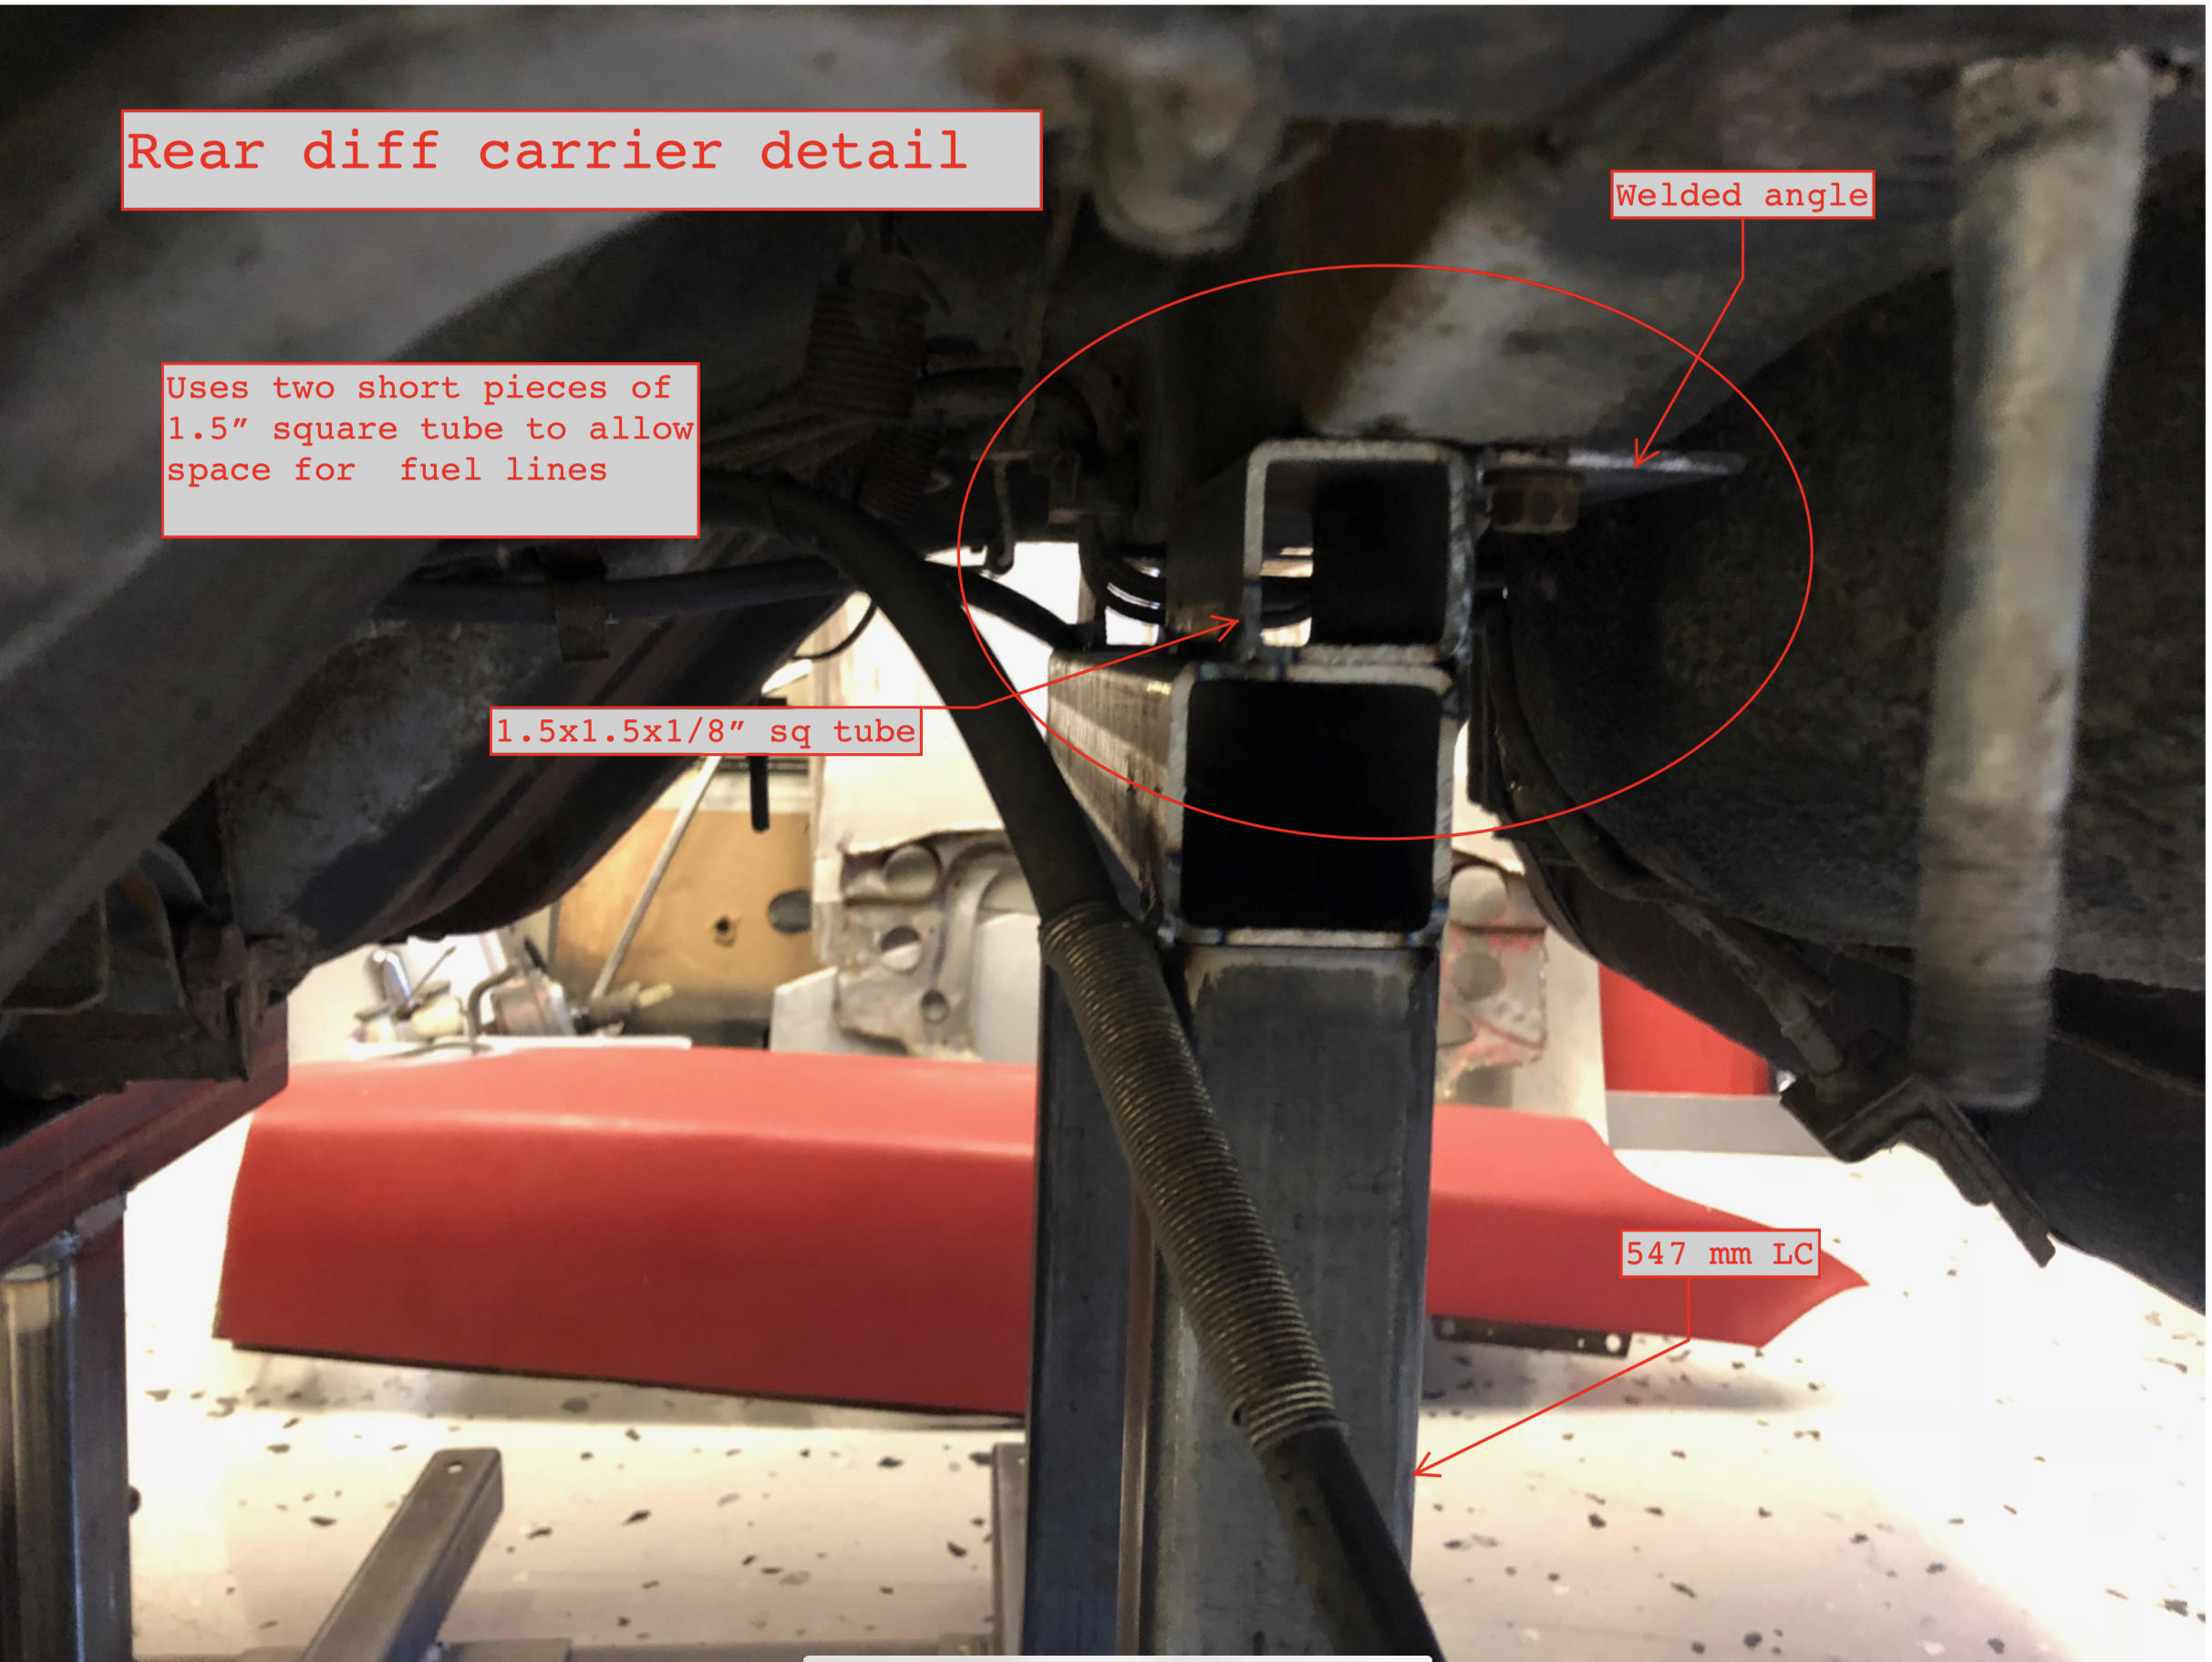
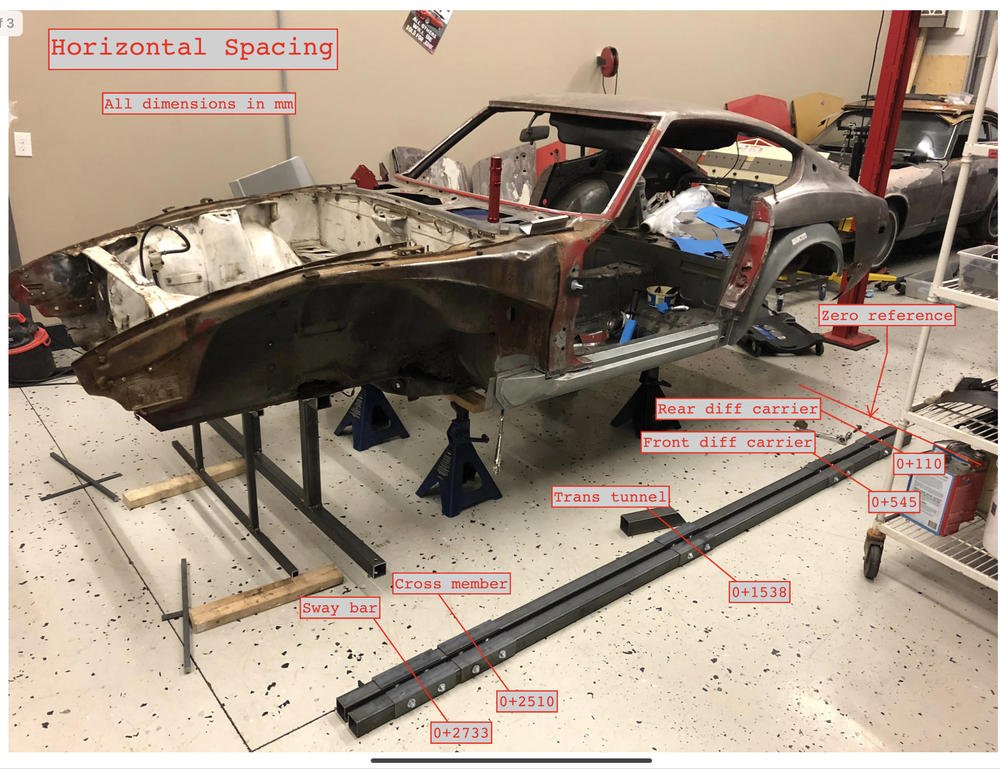
A couple of folks have asked for plans for the jig. I’ve marked up a few pics with all the key dimensions. Feel free to post here or PM me with any questions.... Hope this this helps somebody ....


-
Might have to delete this whole thread ?
-
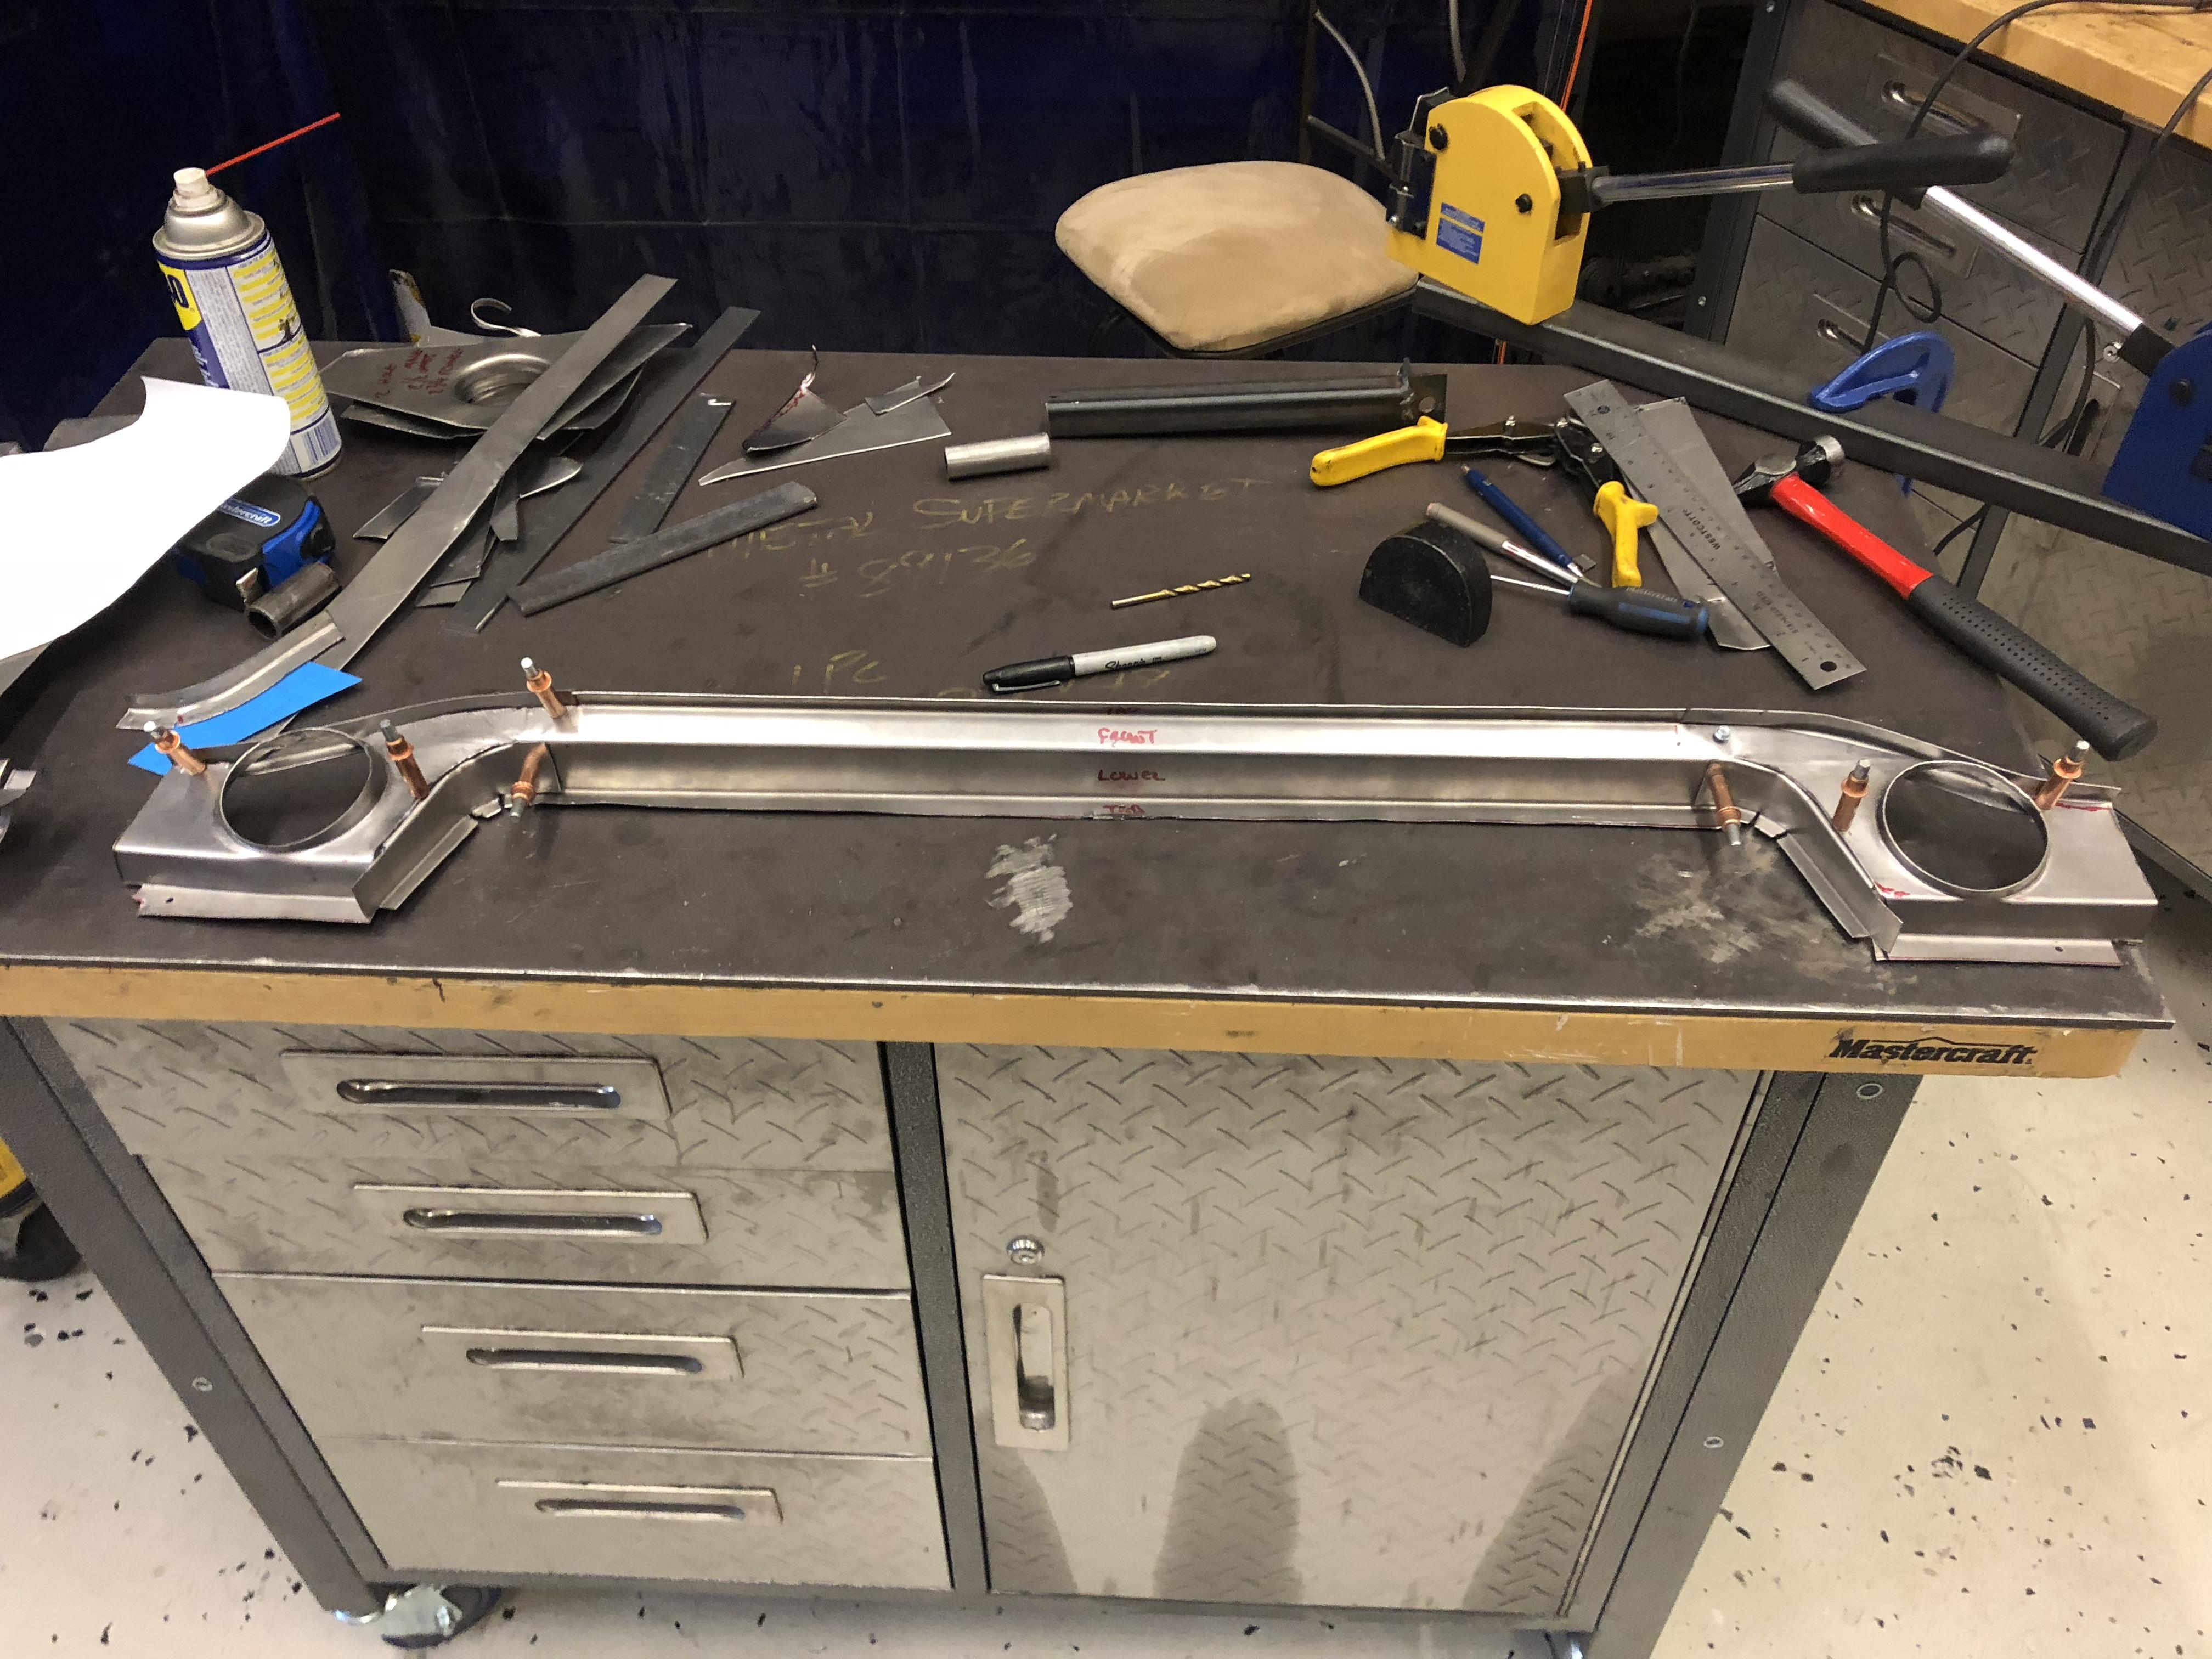
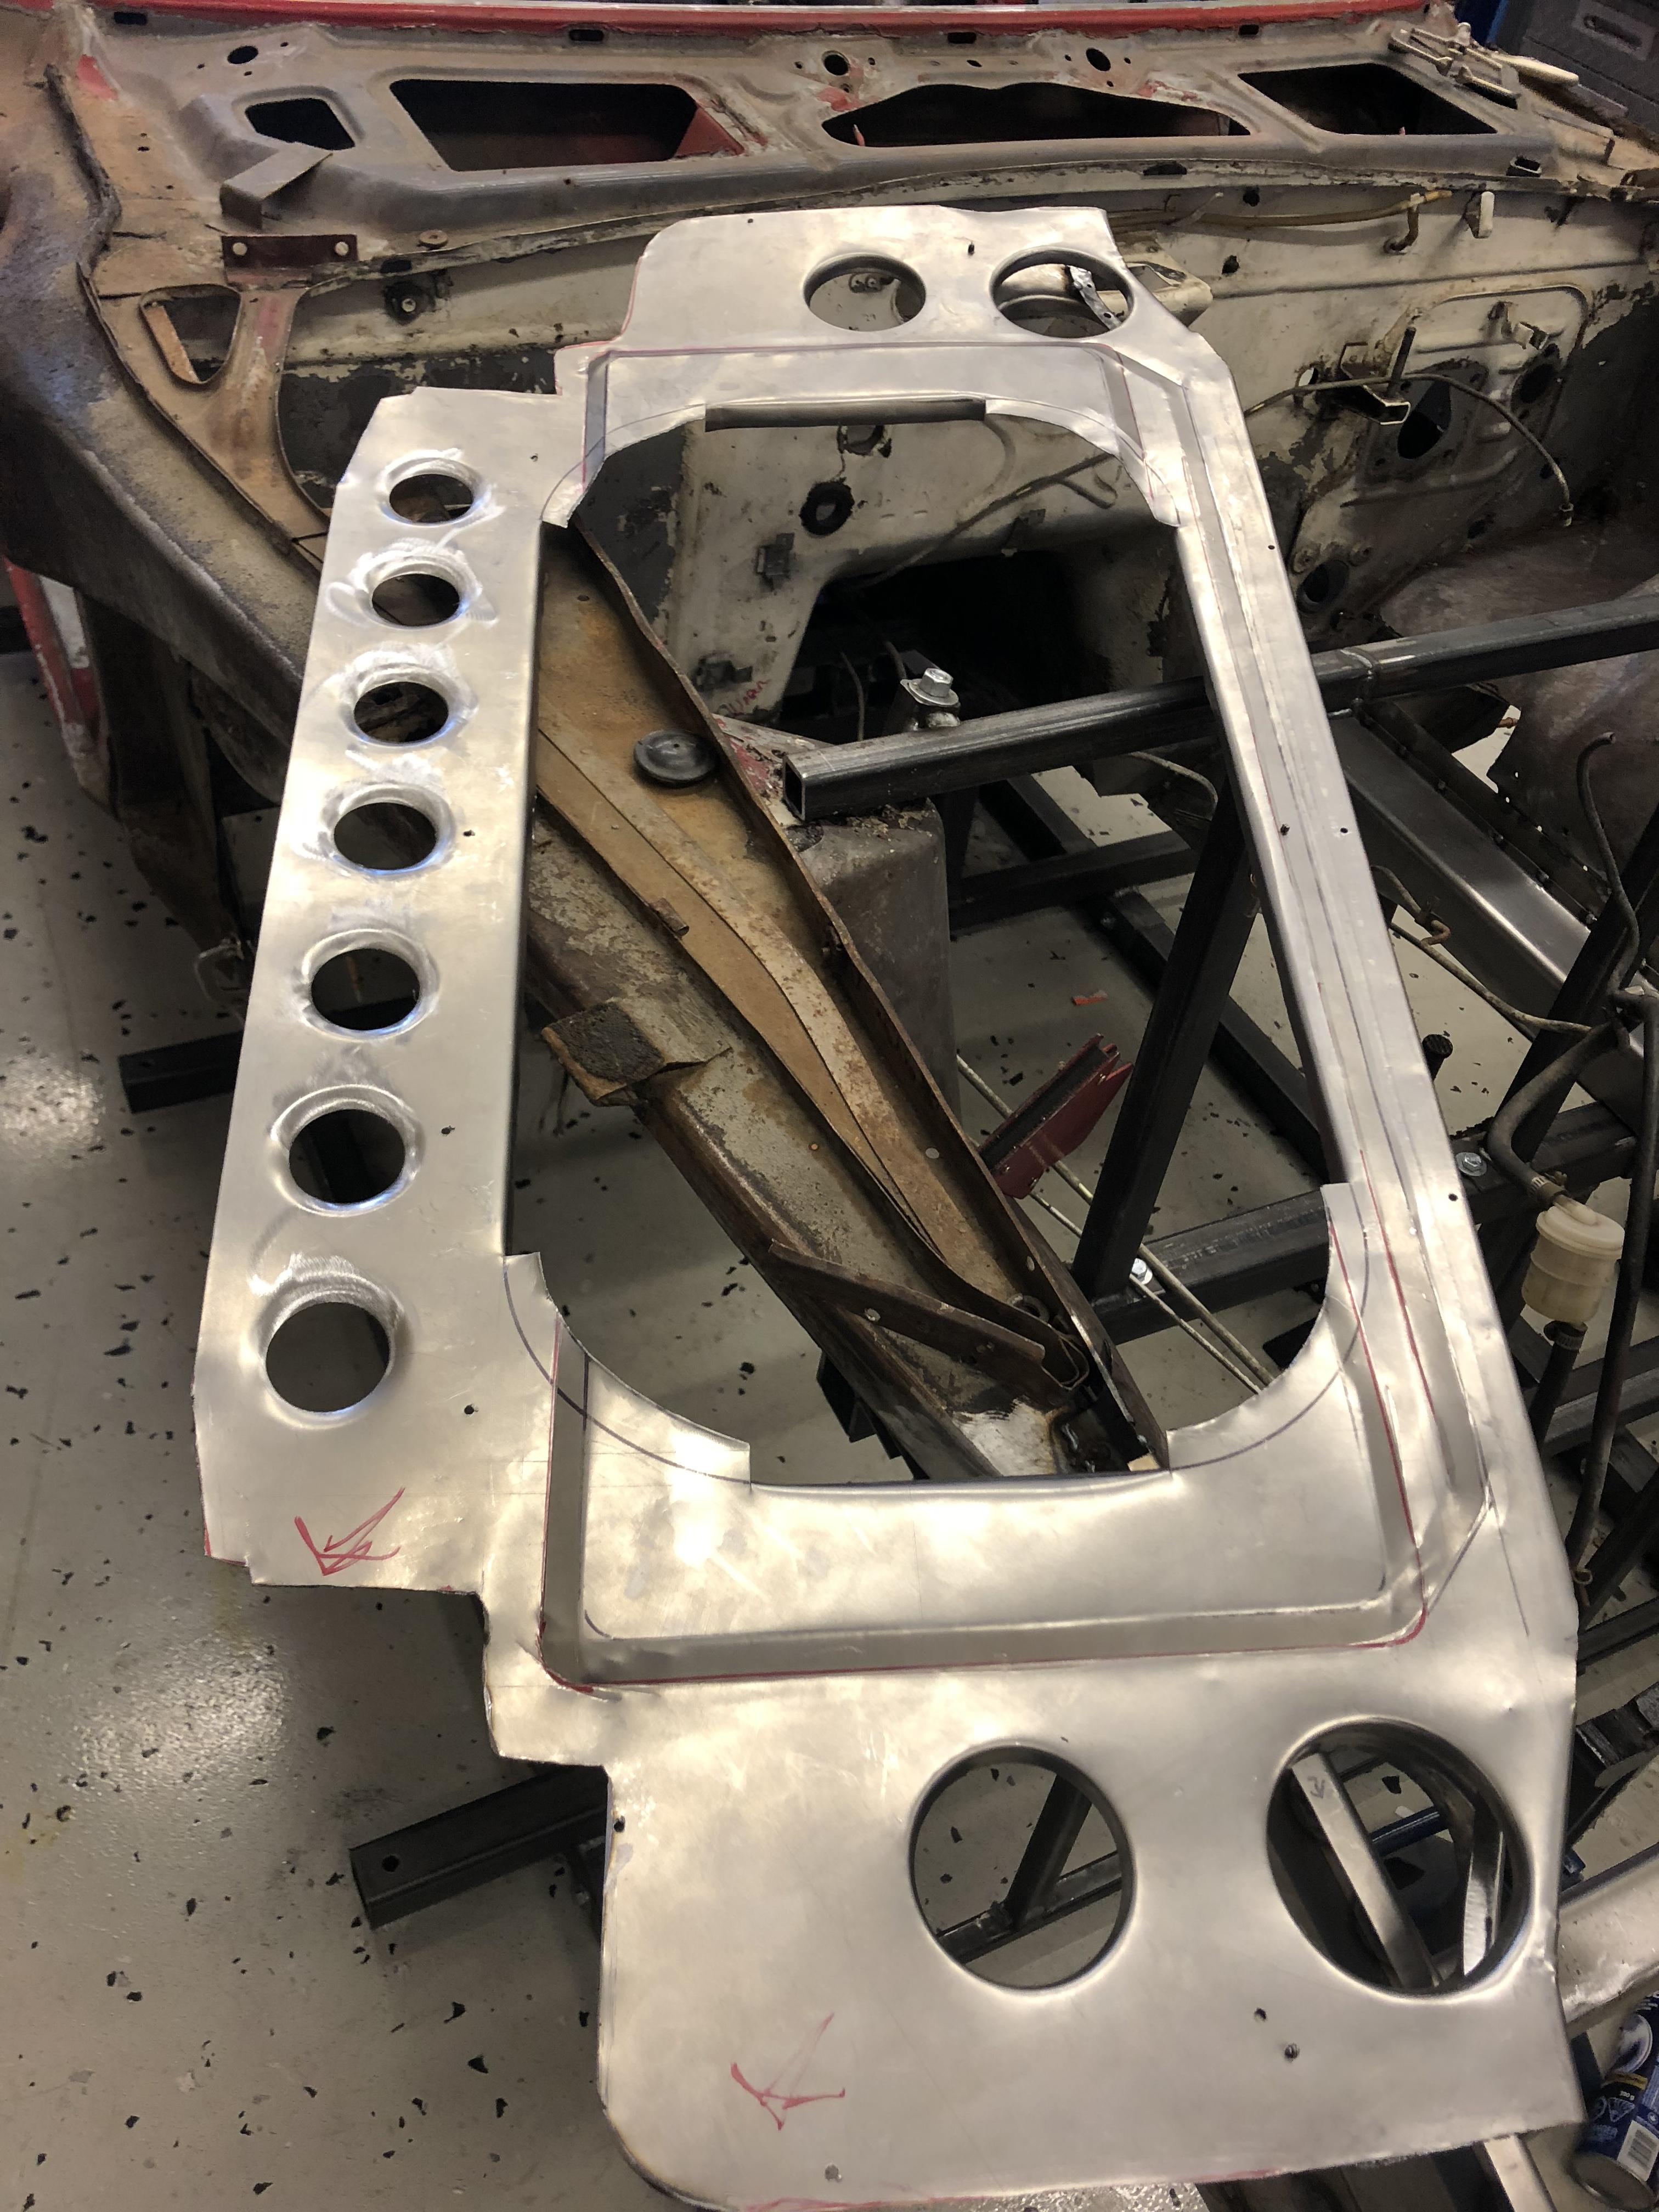
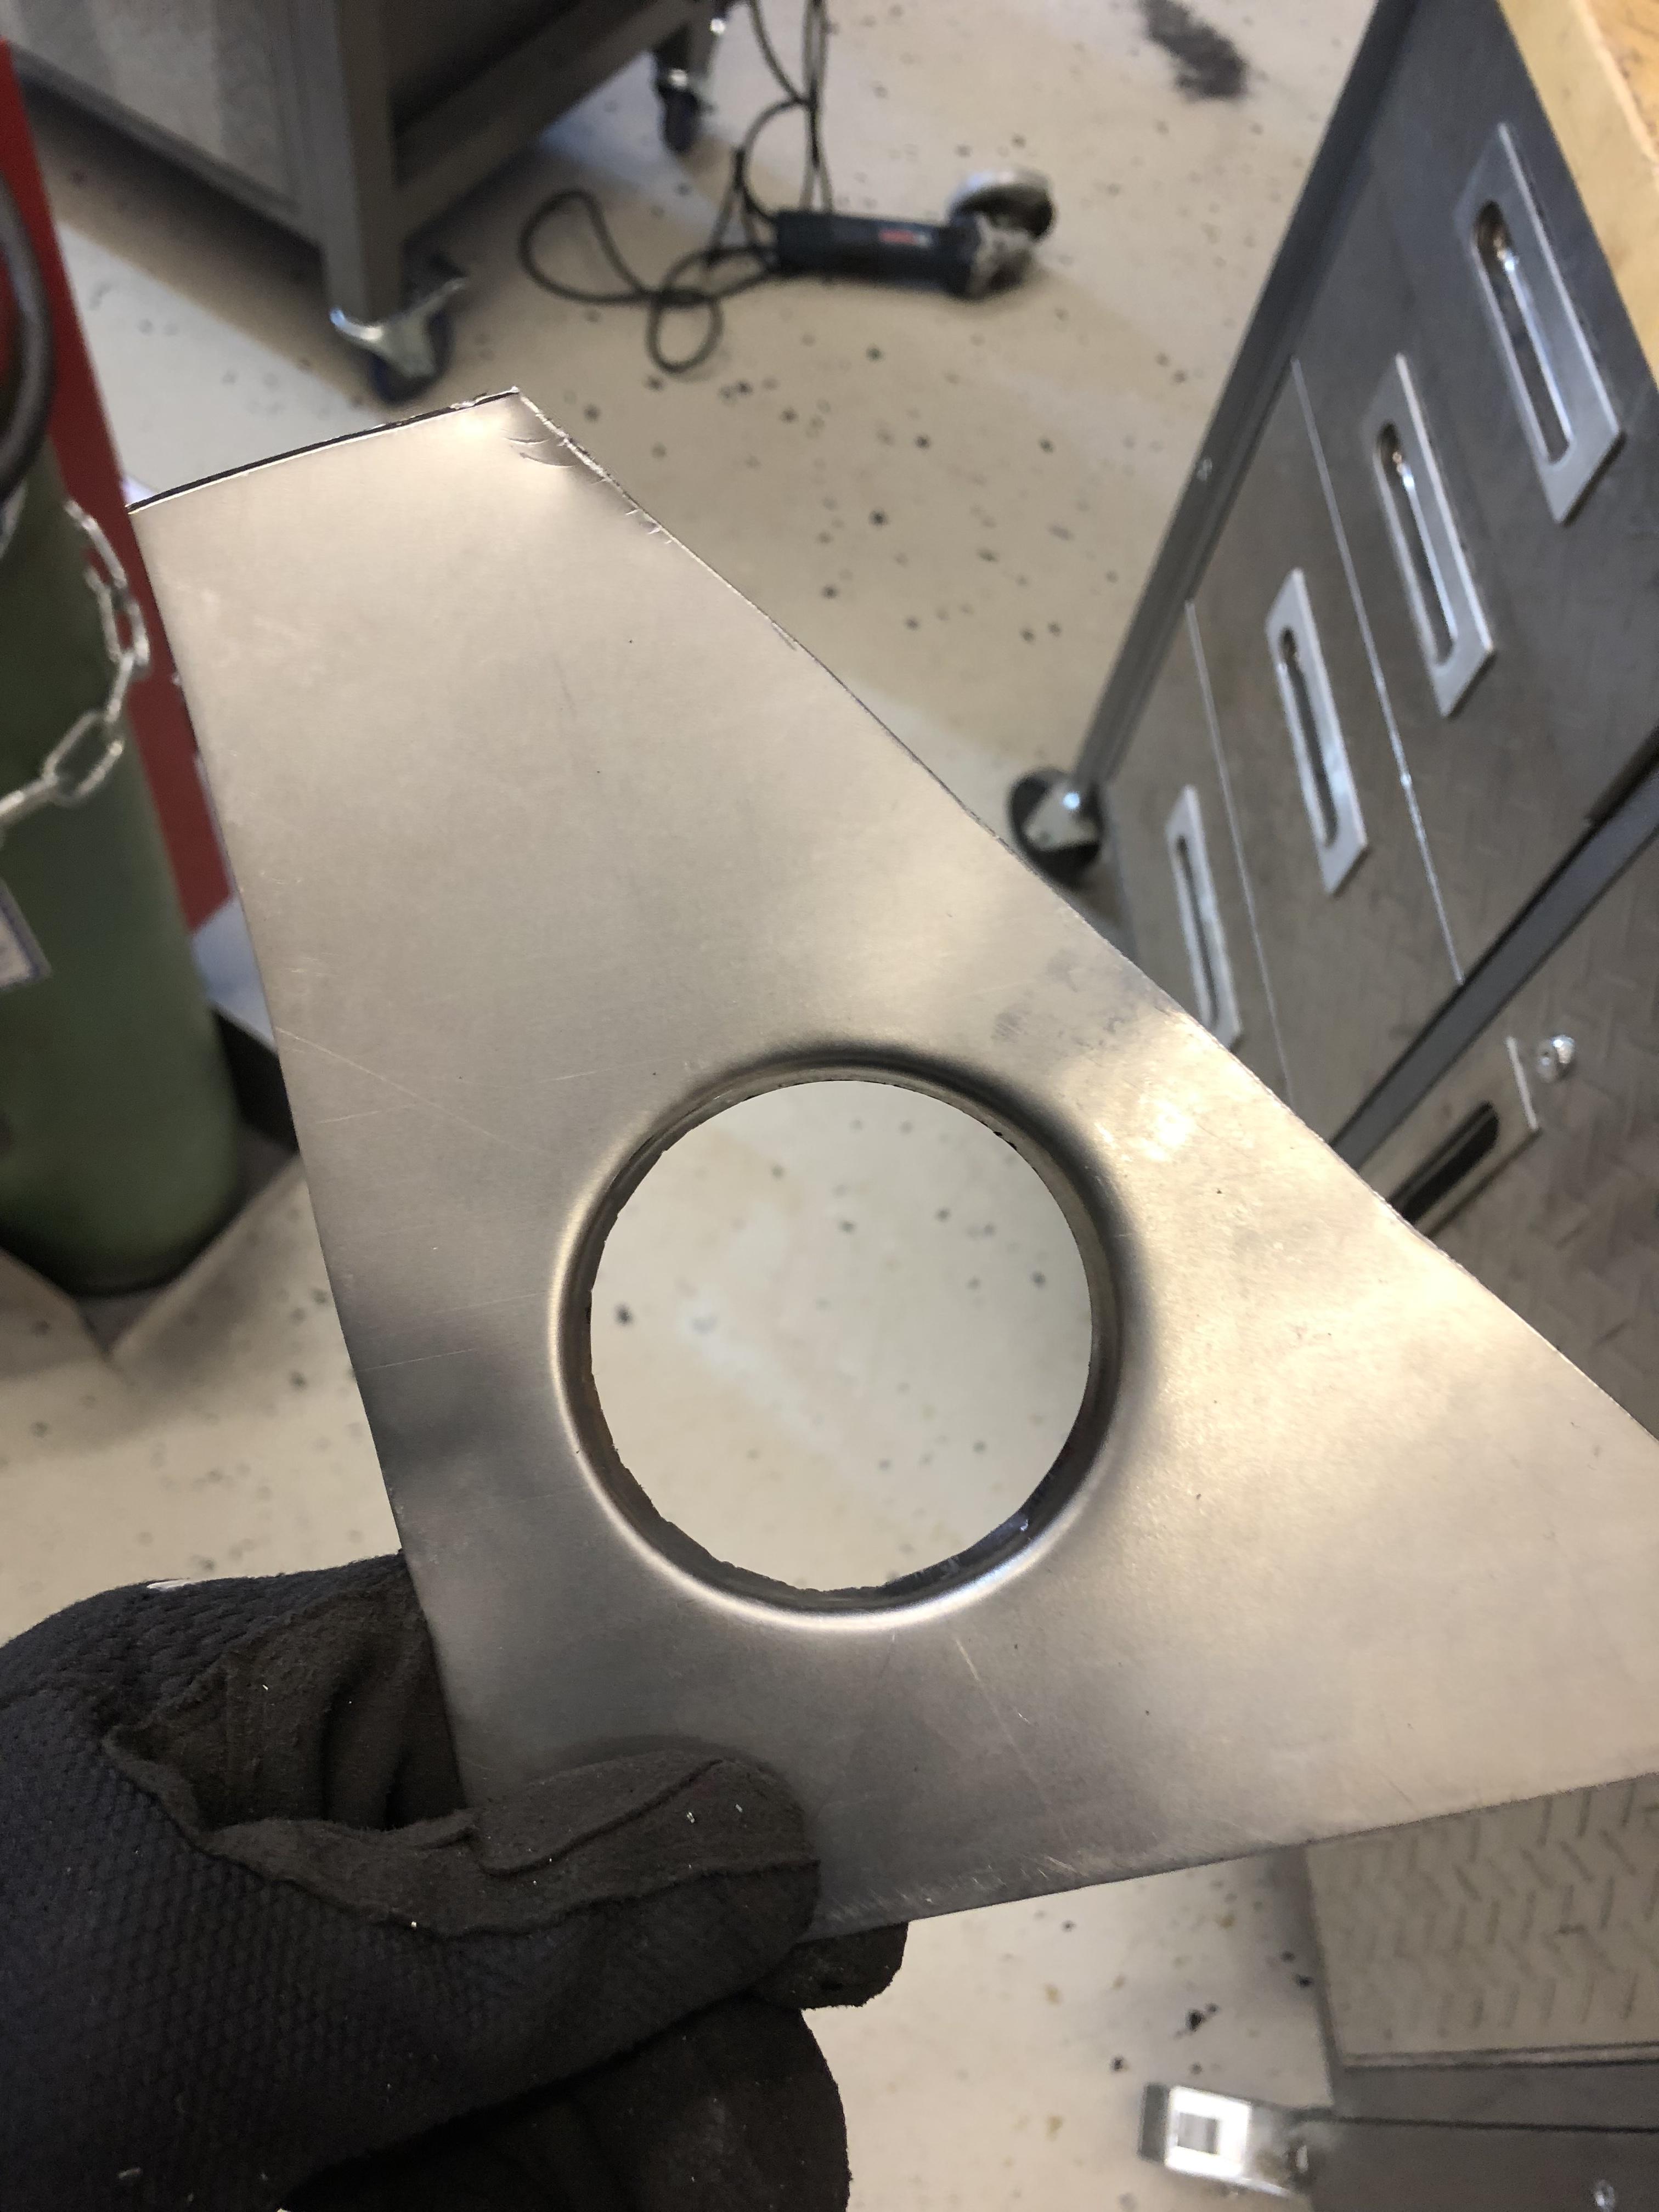
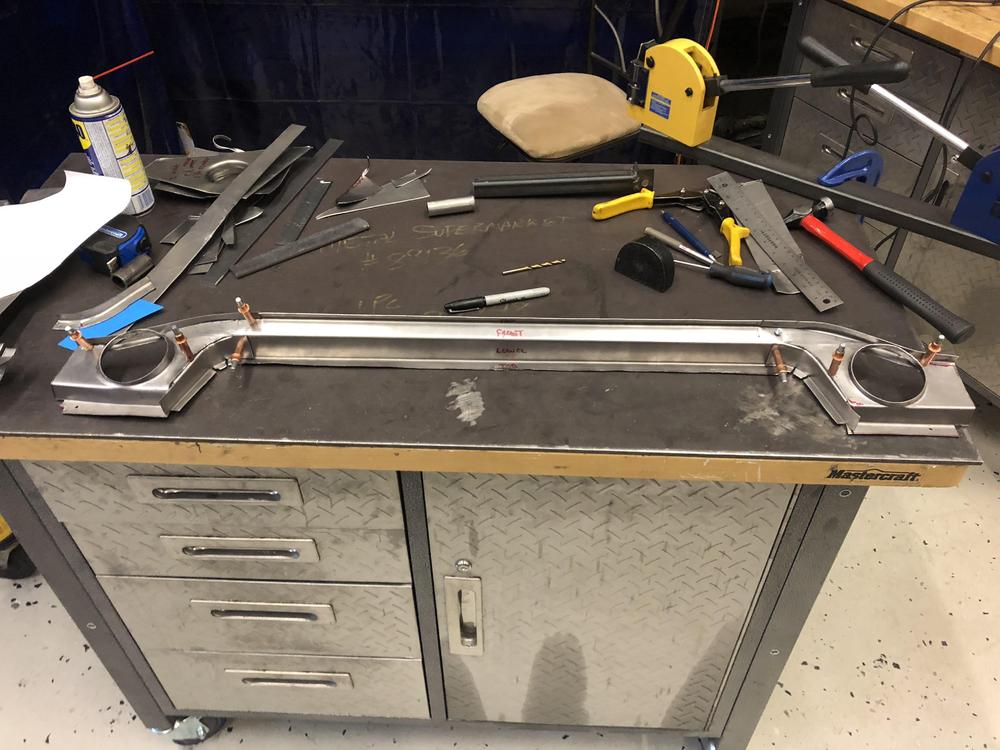
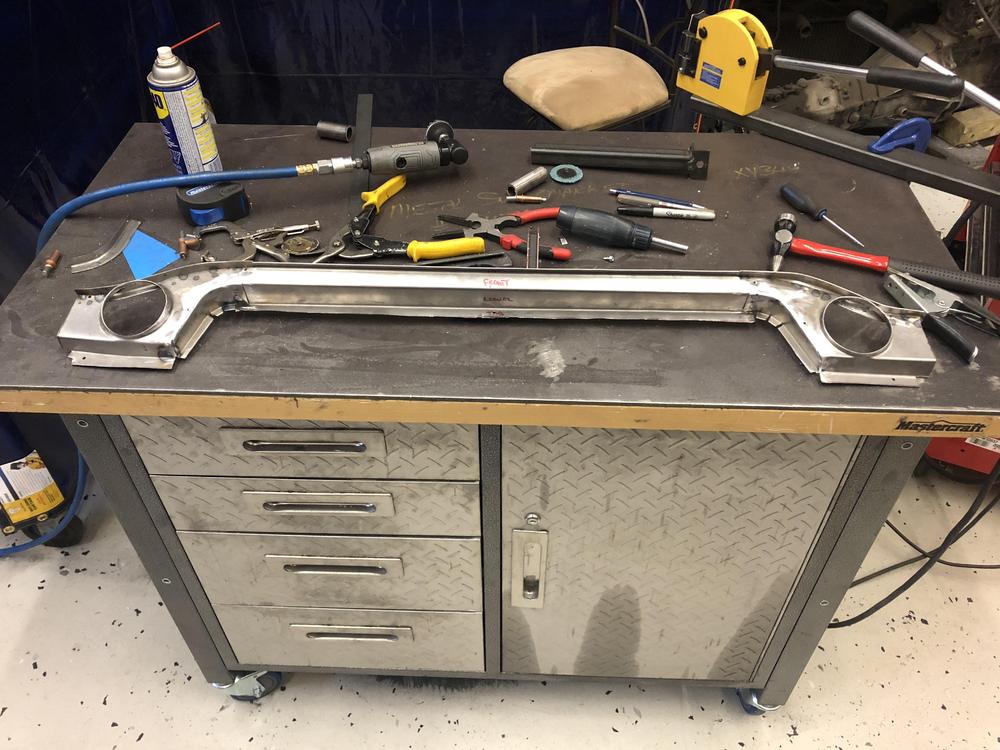
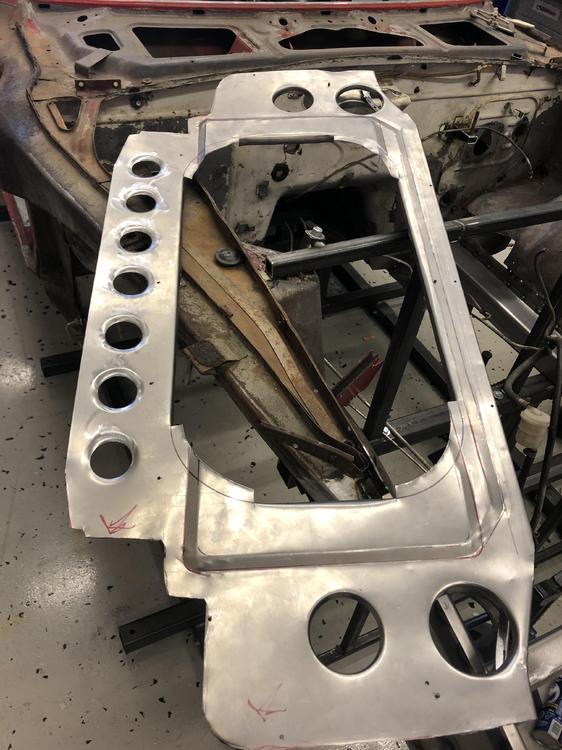
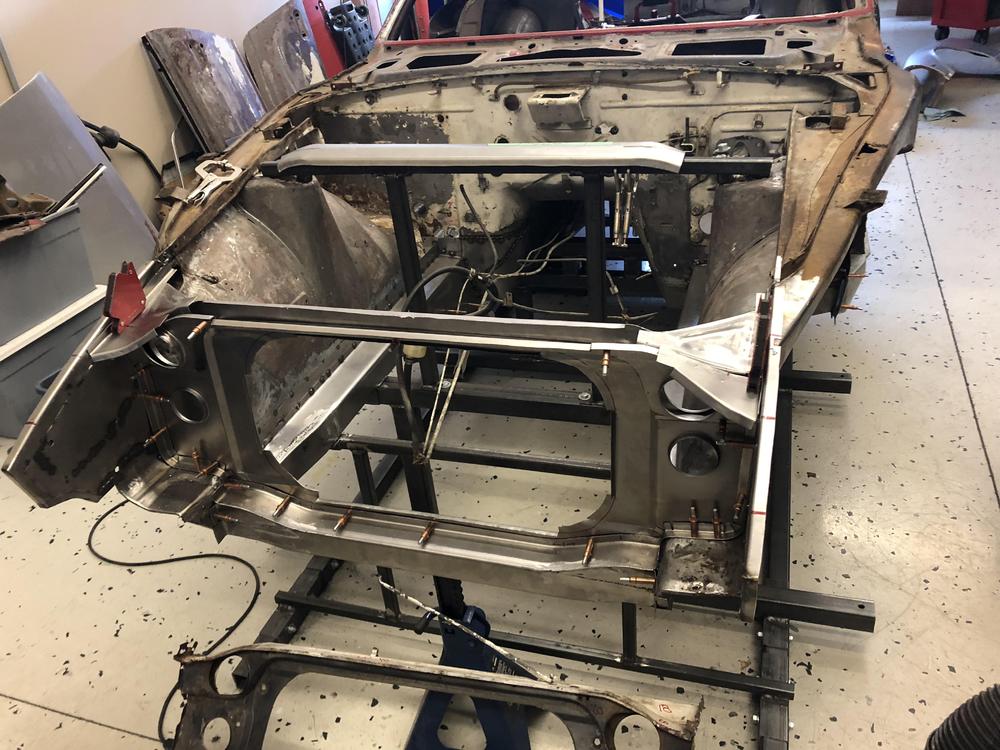
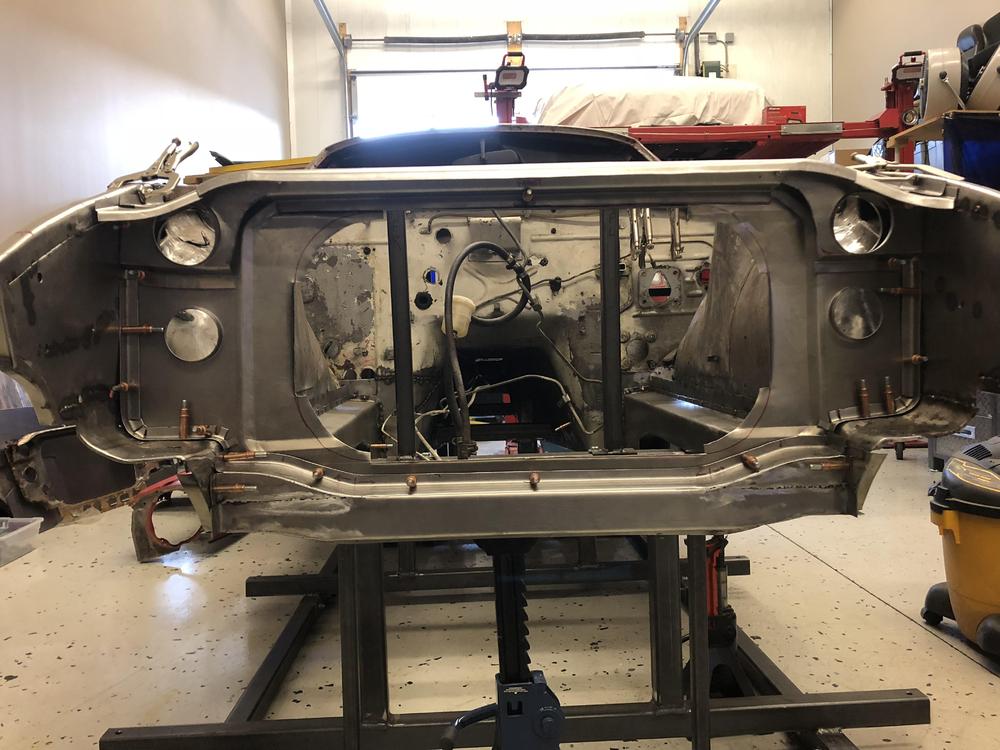
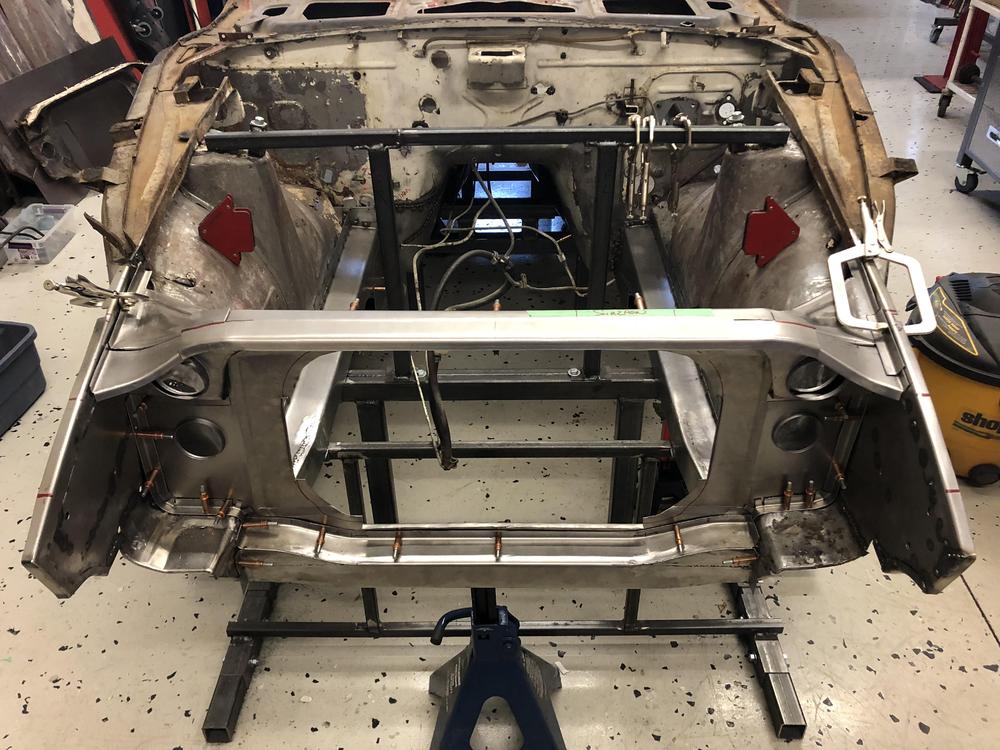
Finally got all the major pieces fabbed up for the rad support. Pretty tricky piece but almost there .... Punching oval holes was hit and miss so I need to decide what to do with the two bottom holes? I might just punch round ones and then drill / dimple die the 6 holes on the back of the lower rad support... Hope to wrap this up on the weekend ....
- 439 replies
-
- 1
-
-
- 72 240z
- frame rails
- (and 1 more)
-
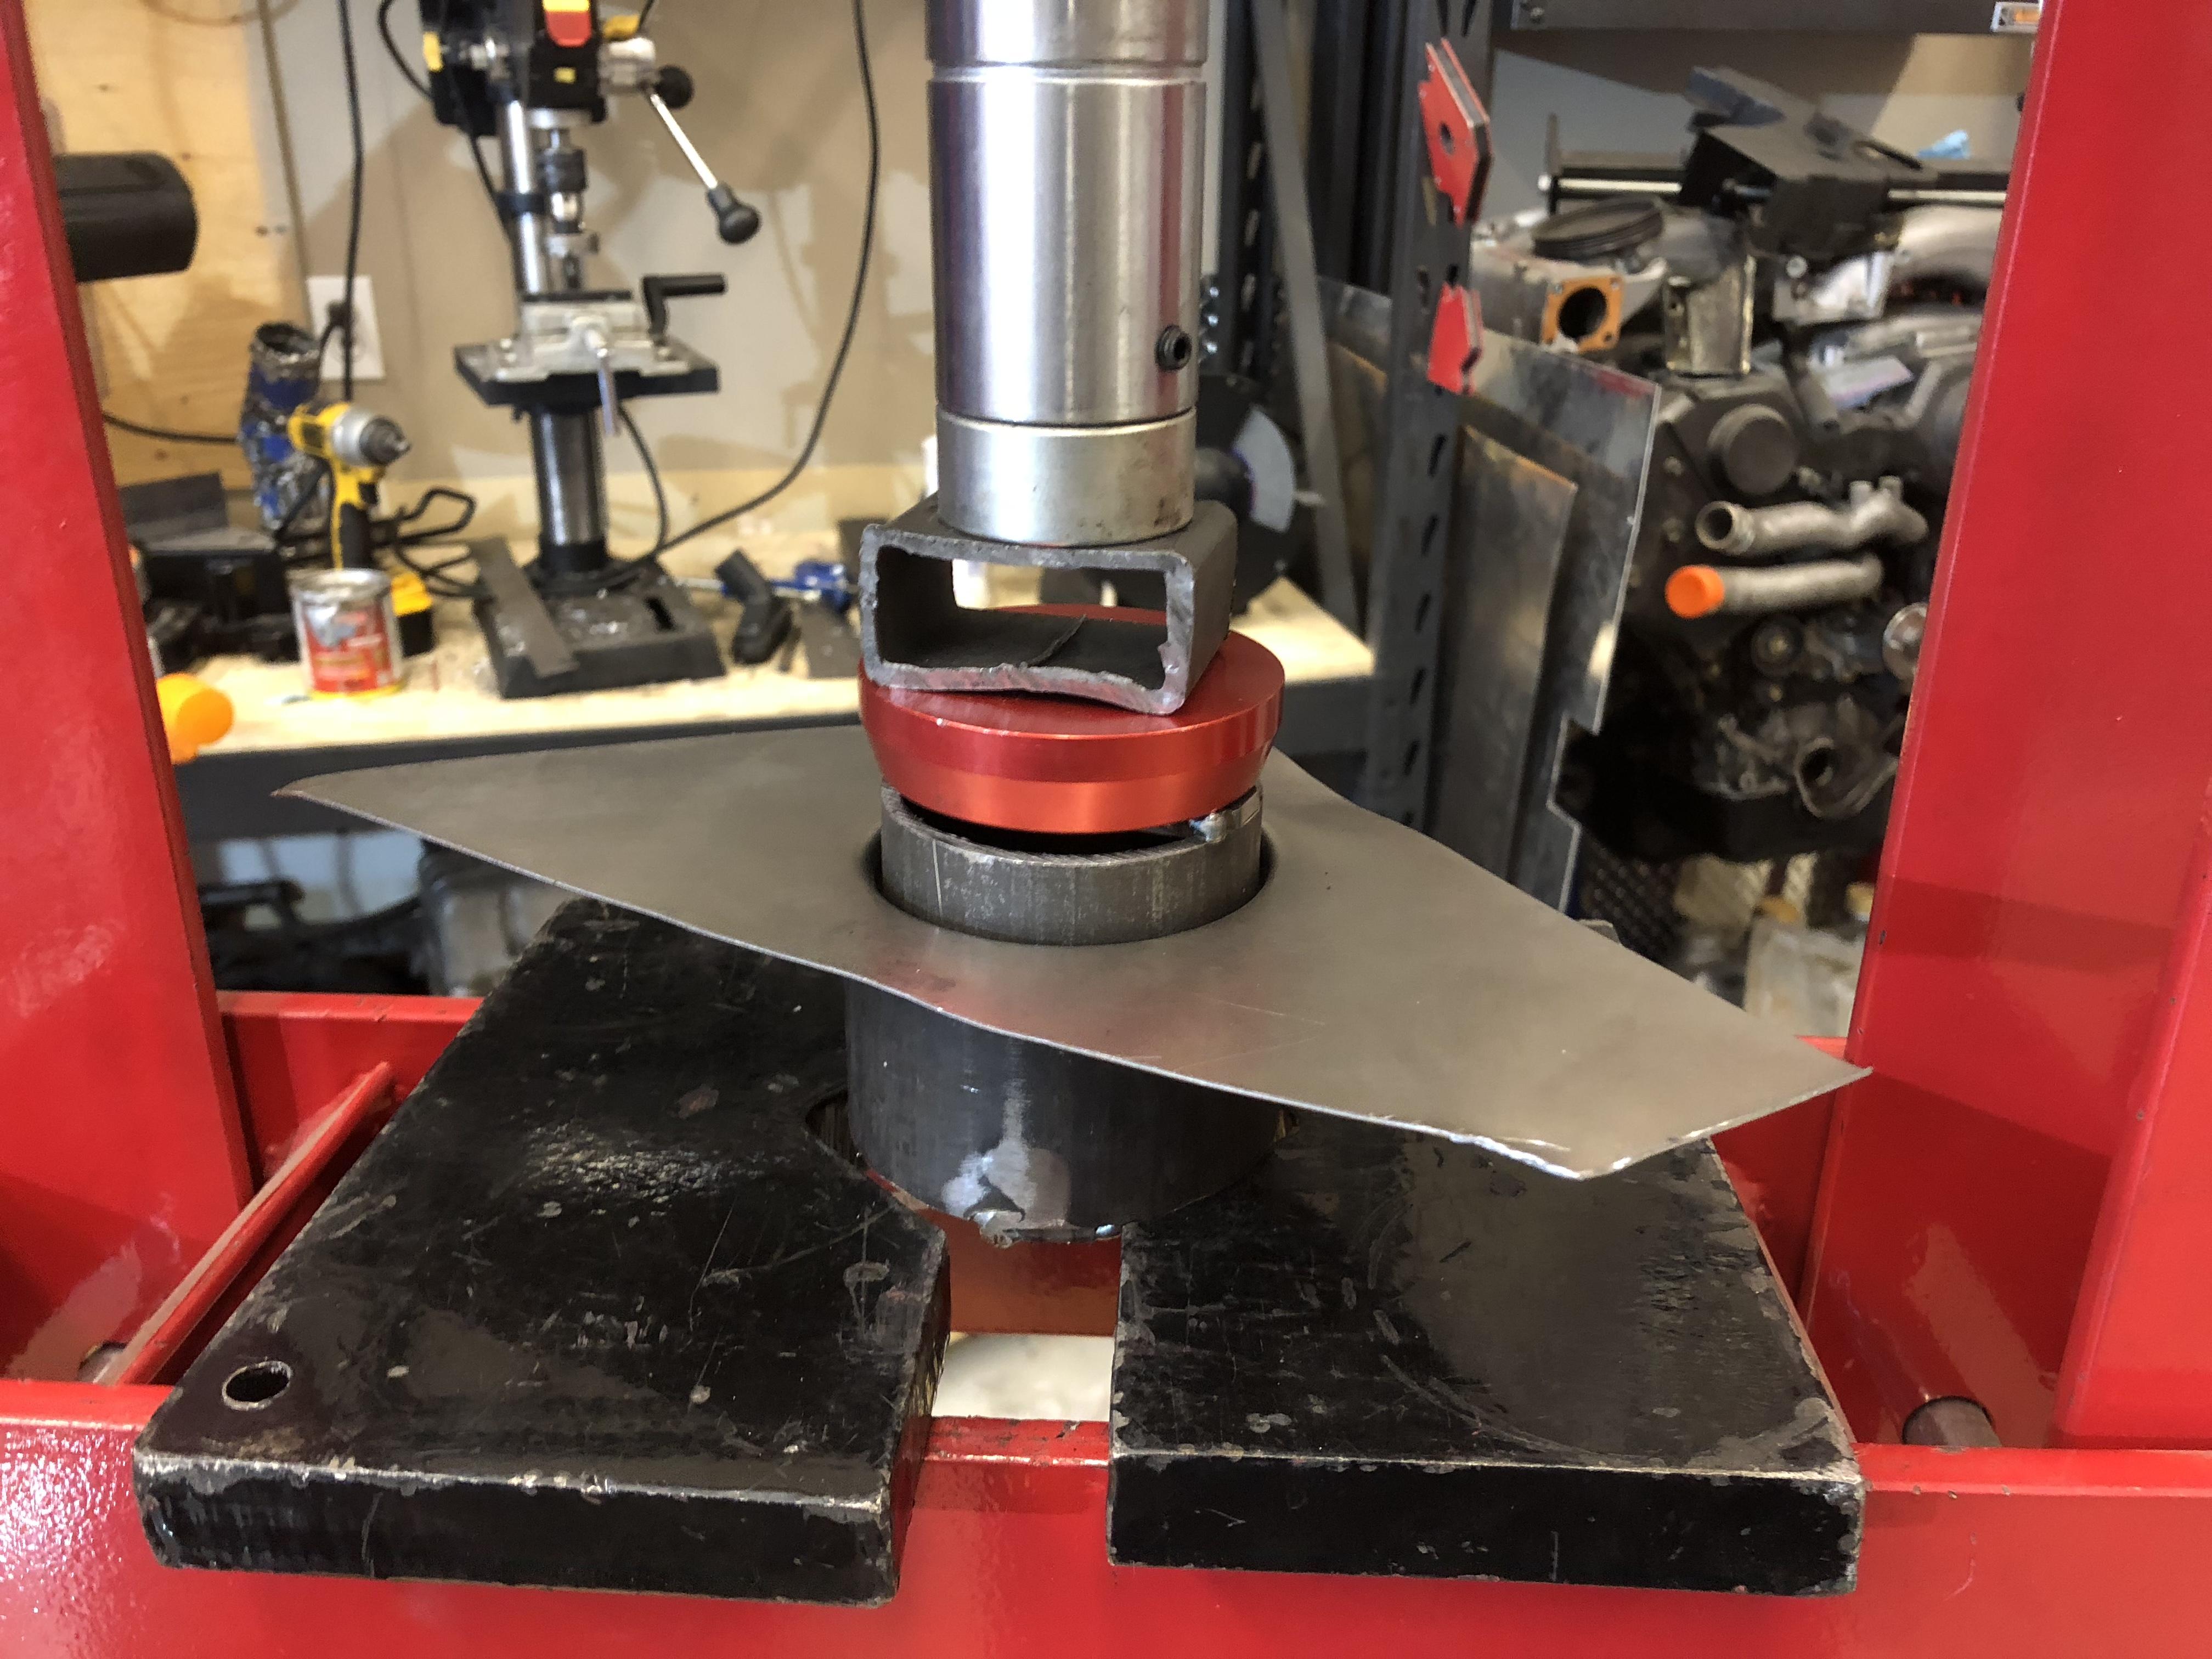
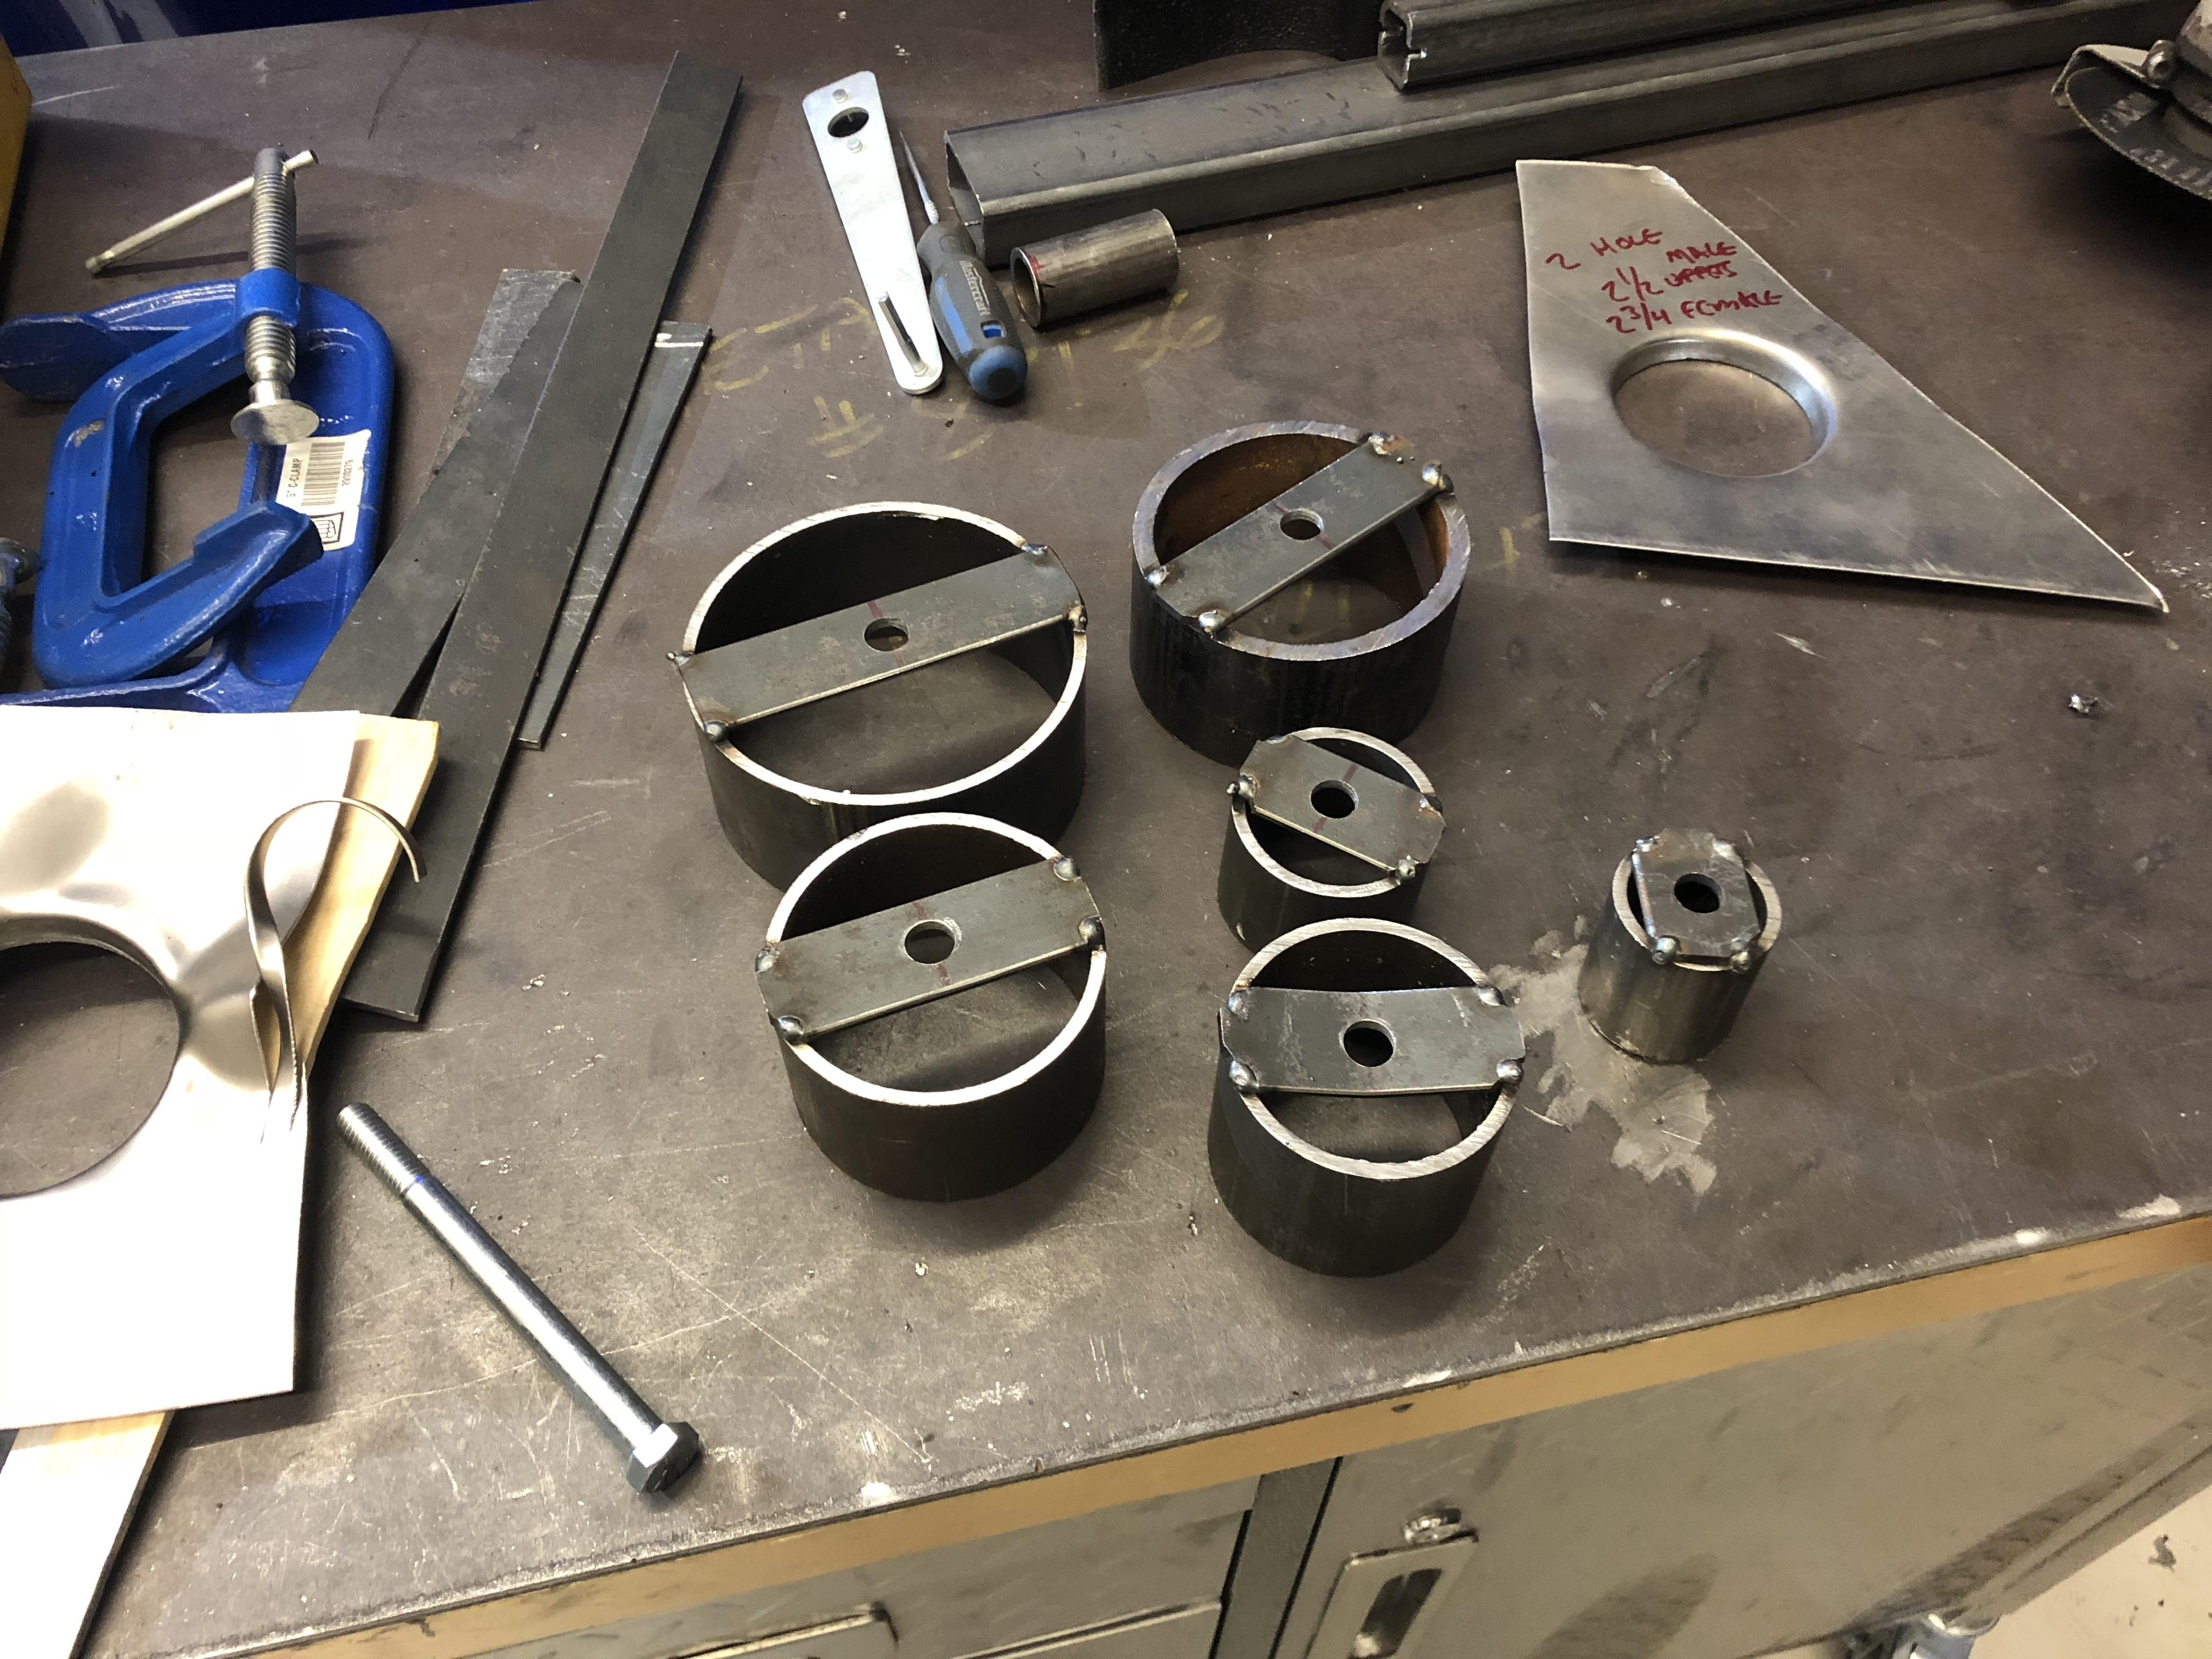
Haha - good questions! So yes the hand-written note was the successful formula that resulted in the correct form with the least distortion of the surrounding panel. Small holes can be punched without drilling but the larger holes worked better (less deformation of the surrounding panel) by drilling the hole first. The hole in the strap is to slide a pin through to line up both sides. After that the press will “tell” you if you are out of alignment as you will see the metal start to deform unevenly, or the die will start to tip to one side. All the dies are 1/8” wall thickness except one that is a little thicker because the metal supplier didn’t have 1/8” in stock. I didn’t shape the edges of the male or female dies. The gap between the dies causes the metal to stretch in the gently curved profile. There are actually 3 different size holes in the rad support (4 actually but I am only doing 3), so 6 (3 sets) of dies in total. Whew! Hope this helps ....
- 439 replies
-
- 2
-

-
-
- 72 240z
- frame rails
- (and 1 more)
-
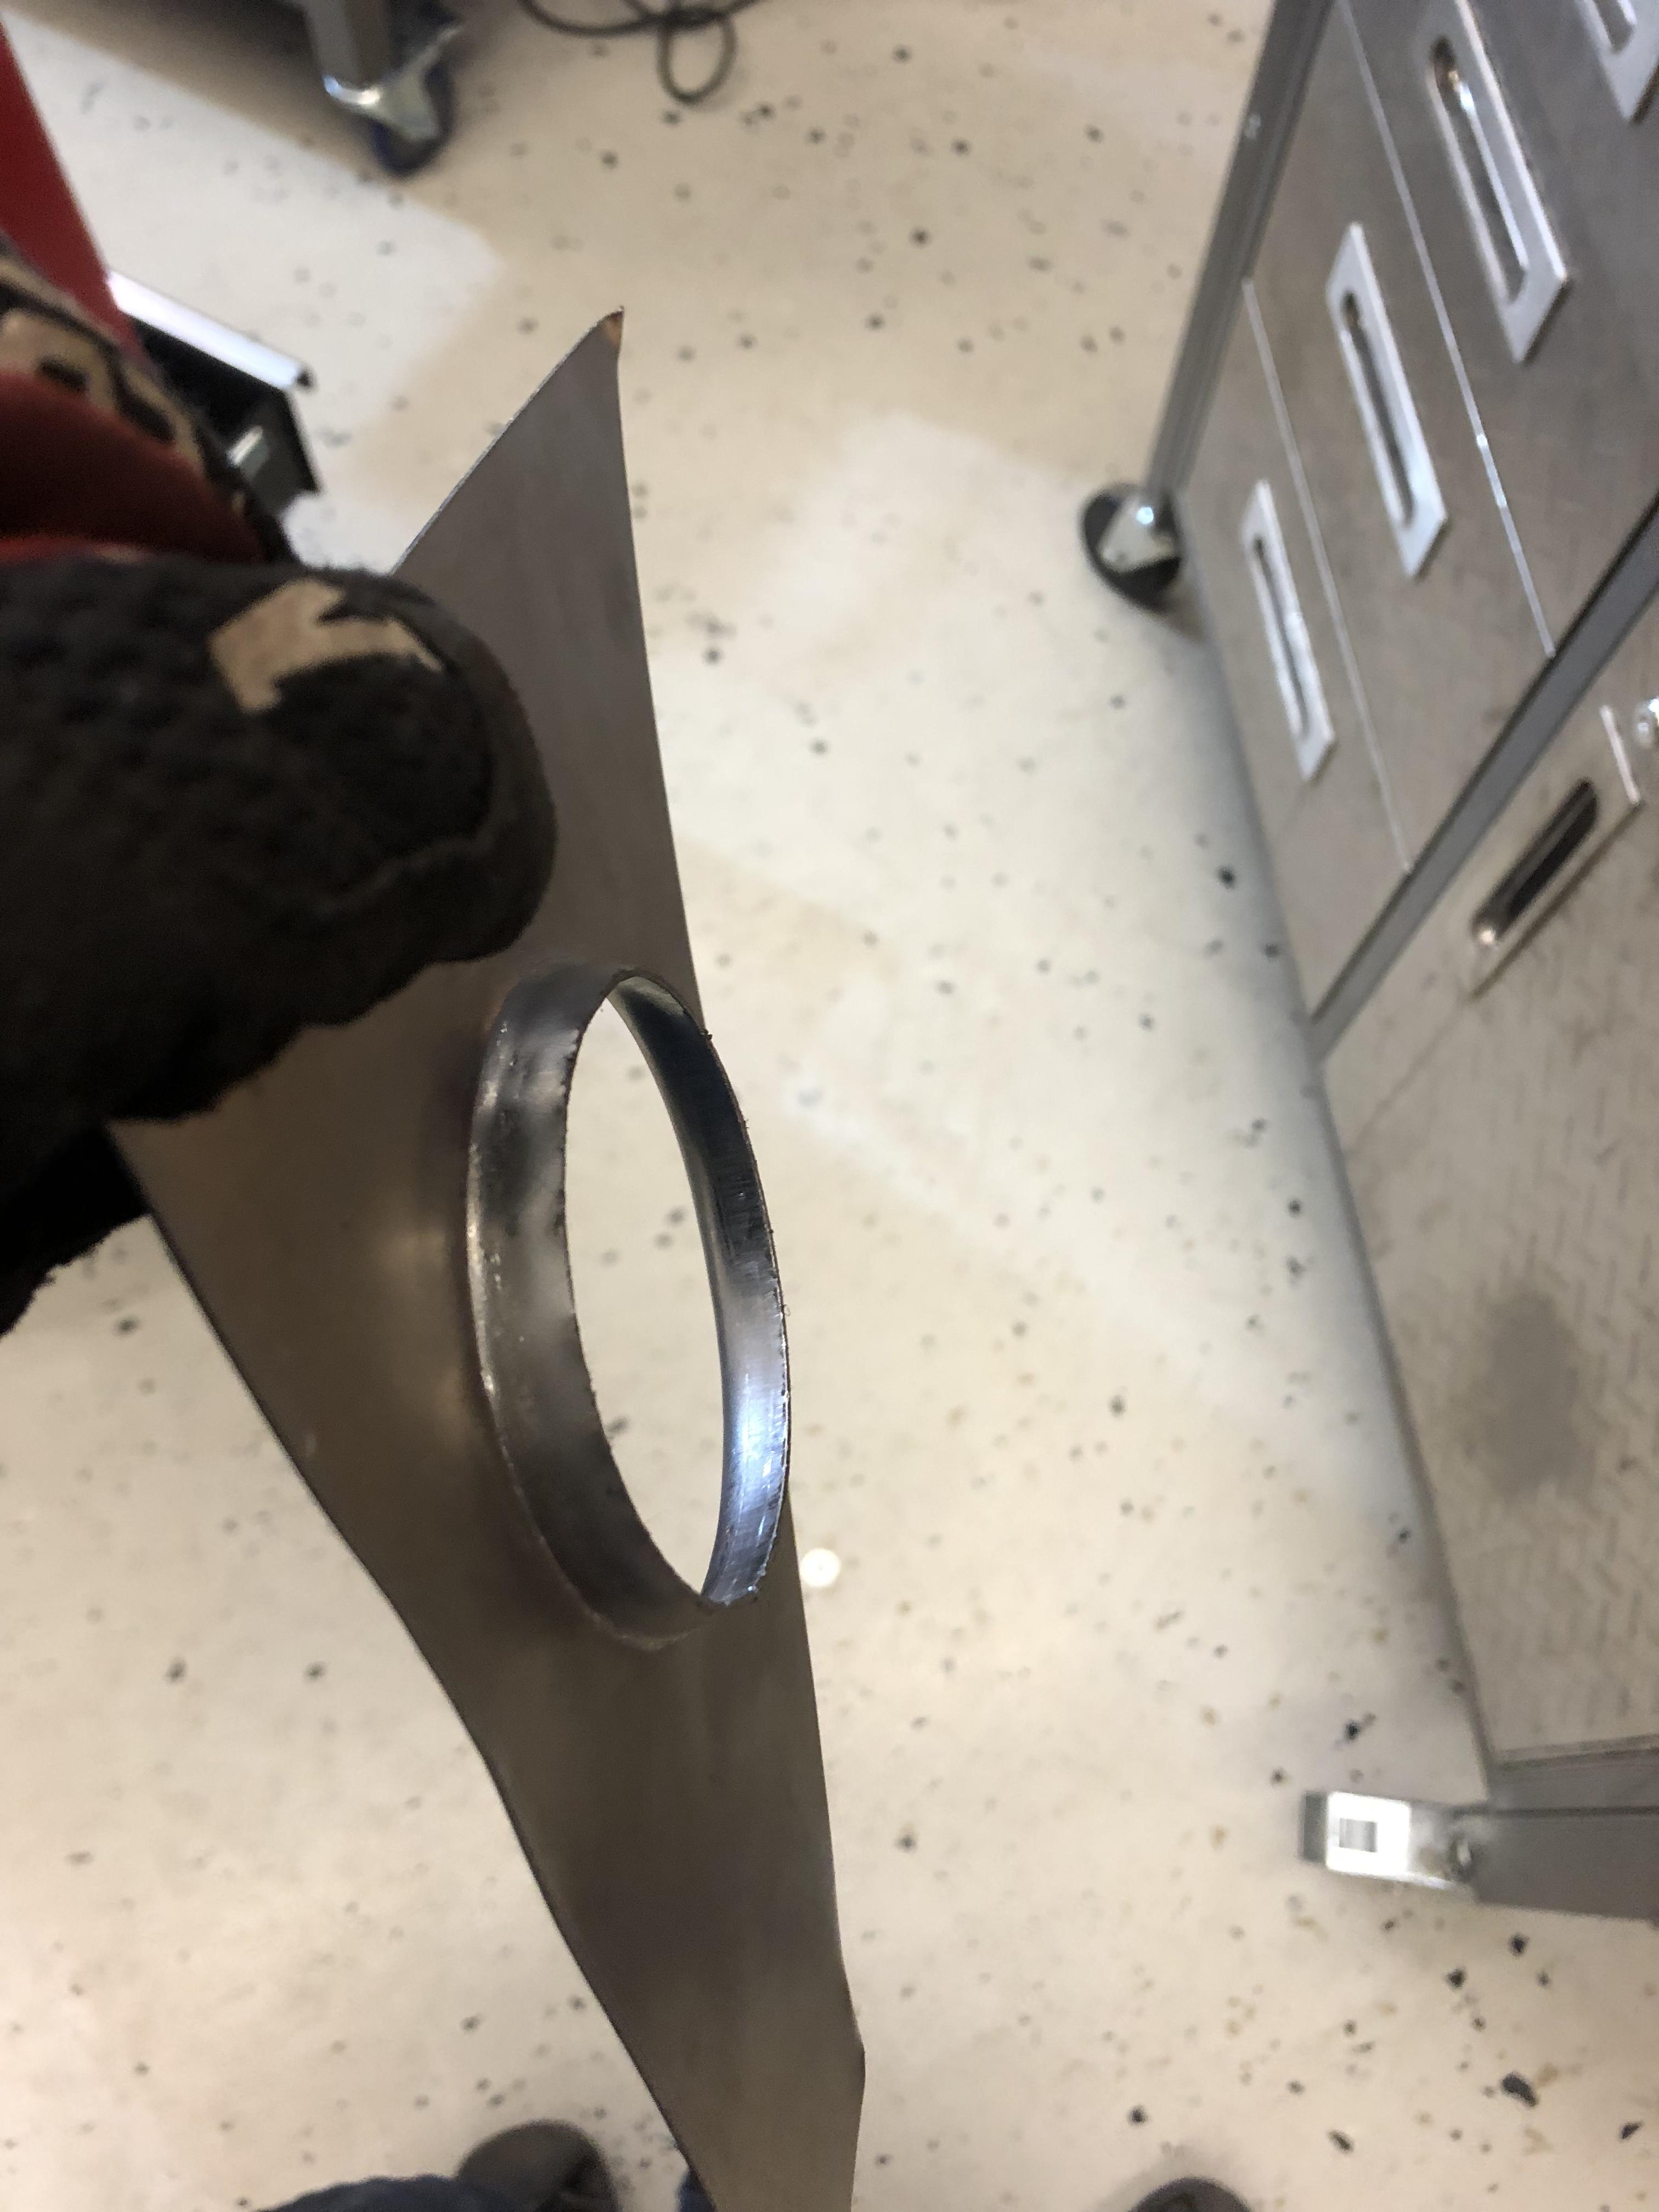
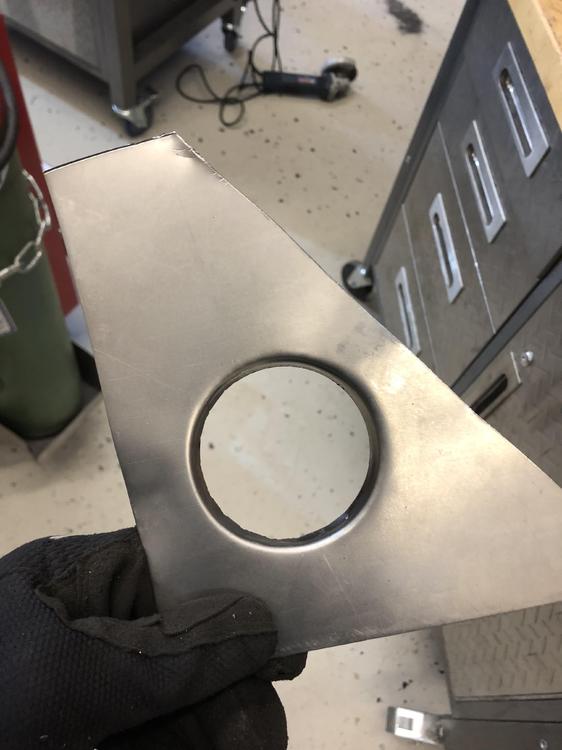
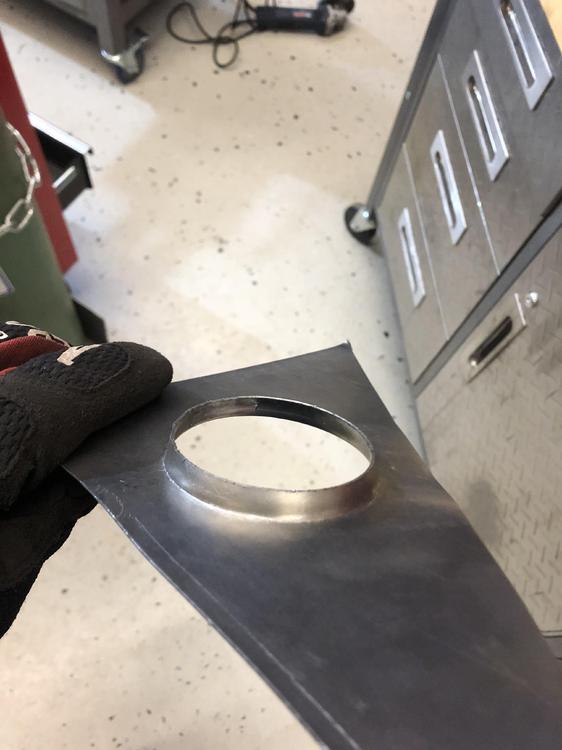
So the holes in the rad support aren’t really a match to a typical dimple die. I did some testing with some round tube sections and came up with some cheap home made dies to punch and roll the holes.... Testing ... Success ... That’ll work. I am going to try to make an oval set as well for the lower section of the rad support. I am not sure an oval will work, but curious to find out ... aside: I was amazed at how easily a 1/8” wall tube will punch a hole through 20 gauge sheet...something to think about if you are planning on reinforcing your front frame rails by inserting a section of 2” square tubing ....


- 439 replies
-
- 2
-
-
- 72 240z
- frame rails
- (and 1 more)
-
Thanks ! Yes speakers are both there. I am not sure if they work, but you are welcome to them ...
-
I’d wondered why they did that too....