dutchzcarguy
Free Member
-
Joined
-
Last visited
Everything posted by dutchzcarguy
-
 Hi Dave, Nice to see these ECU's opened up.. I did last year a Non turbo.. they are completely different.. I would mot worry to much about the capacitors.. yes maybe the electrolite ones there are a few but the parts nissan used in these ecu's are high standard. I understand that the problem you have is that it will not rev above 2000 rpm's ?? Maybe the ecu get's foulty signals and want's to protect the engine.. As an electrical engineer i think it's not your ecu that's the problem. You should check the signals it's getting from the engine.. If the other "new"ecu is from another 20e (turbo?) then it could work also it's just that there may be some differences in rpm points were the 2,8 ltr go's not or even further with injecting etc etc.. Btw, nice test stand! Mart.
 -
I bought some OEM ones in 1994.. They stayed in the "warehouse" till 2000 and used them on my 240z. After about 20 years so around 2020 one of the brakepads came lose on one brakeshoe! They were original nissan as i ordered them myself at nissan. So they don't last forever.. But hey who knows how old they were before I got them.. Btw.. no fun having some lose parts in your drum, Luckely i was just 100mtrs from home and went back and installed some other ones.
-
Yeah.. why not.. i was only looking for the name of those rubber thingy's you put in the nice round hole(s).. But first i would clean the complete floor as there are often more holes than you think.. My first 280zx had had every 2 years a new layer of undercoating.. when i had it 10 years it was about 20 years old and the technician that checked my car for MOT (Dutch=APK) said to me he could poke right through the bottom at 17 places or so... It had rotted from the inside.. I never needed to put some undercoating on it.. it had a layer of half a cm.. personally i hate undercoating.. grease is best i think, it wipes off and you see more through it when something is wrong. My latest 280zx has some kind of "silolak"on it.. it's not done by me.. but it's increadable stuff. I ones took of a little bit on the brakeline and after 40 years the original greenish paint nissan used on them came from under it.. in unbelievable good condition. I wish i knew what the pre owner used. Silolak=silolacquer.. "Silolak" in english can be something like: paint for silo's? My translator program just says silo for a silo.. it's a big round standing up tank for pig or chickenfood.. a silo.. long ago they were made of steel and they rusted like hell as some foods can attack the steel.. so they had made a paint called silolacquer
-
Looks good but i hope that stripe just above the middle of the picture in the lip of the coolant/thermostatholder isn't a crack? 🙊
-
Oh Ps.. My 240z is very flexing.. More and more rubber! (Just kidding!)
-
An easy way to get rid of those holes.. Take a holesaw and.. as you can't center them with the center bit.. first make a hole in a flat piece of wood and then hold the wood over the hole in the floor of your z.. then dril a nice round hole out of the bad rust hole.. ad a rubber lid in the hole and your ready! 😉 check the rusty hole for what diameter drill you need. NO welder/welding needed.
-
Take it off (Big JIS screwdriver needed) and listen during a drive if it's gone. wouldn't surprise me if it's still there! My 240z squeeks and rattles all the time.. These car body's do a LOT of warping during driving in the length of the body.. it's normal. I found that the Inner lining around the roof (Those plastic covers) are a "nice source" of rattles and squeeks.. You can get rid of them by using a little grease or WD grease product. Maybe some polishing of the plastic parts will also do the trick. Let us know what you found.
-
How about the original servicemanual? 😁
-
Hahaha... I do drive in the wet.. but my sill aluminum strips are lying in my sellar (also known as the big pile of parts store!) So they don't get wet! I drove my 240z most in the winter as i really really don't want to restore a 300zxtt !! (A 240z restore IS MMUCH simpler!) As for the noise dampening of the strip under the door.. haha.. i hear my engine and (not really original) exhaust drowning out everything, so i'm not bothered by a little ambient noise.
-
I never had those on my 2/71 240z. never missed them, where are they good for? noisedampening? collecting water so the door rusts even faster?🙊 Lot of you guys are in dryer clymates, but over here.... I wouldn't install them even when i had a brand new set lying around! The rubber that's around the door is sufficient in my eyes.. (It's like the extra rubber in the top of the tailgate. NON-existent on my car also..) 🤣
-
Didn't read of anyone telling to be very careful with the domes and those needles.. they are normally not removed by "unqualified personnel" , so be careful. Then.. I think it's not uncommon to have some difference in the carbs.. Normally they are on 2,5 rounds clockwise (seen from above) but you could open the front carb a bit more, but first as Gundee says, look for a leak in air.. Also look if the pistons come up equal when you rev the engine to say 2-3000 rpm. (you can see them when the filter is off)
-
I would do the bottom partialy. and make a little hole in the middle to let water out (in the cover) otherwise it will stay wet. Sometimes we want to do something too good/well.
-
IF you use weatherstripping, make sure you have the non open structure. So it does not take in water, you can check that with dipping it into water. (And then squeeze it) I would use some small pieces of rubber that you glue on the important corners. that way you have no chance for rust between the weatherstripping!
-
Ehm.. i think it's a "not original" hole? maybe one day you find out for what it was made.. i would put in a big rubber (closed) tulle.
-
When i hear the word: Pertronix... I get silent.. because i have said it many times.. (most times junk) 🤮
-
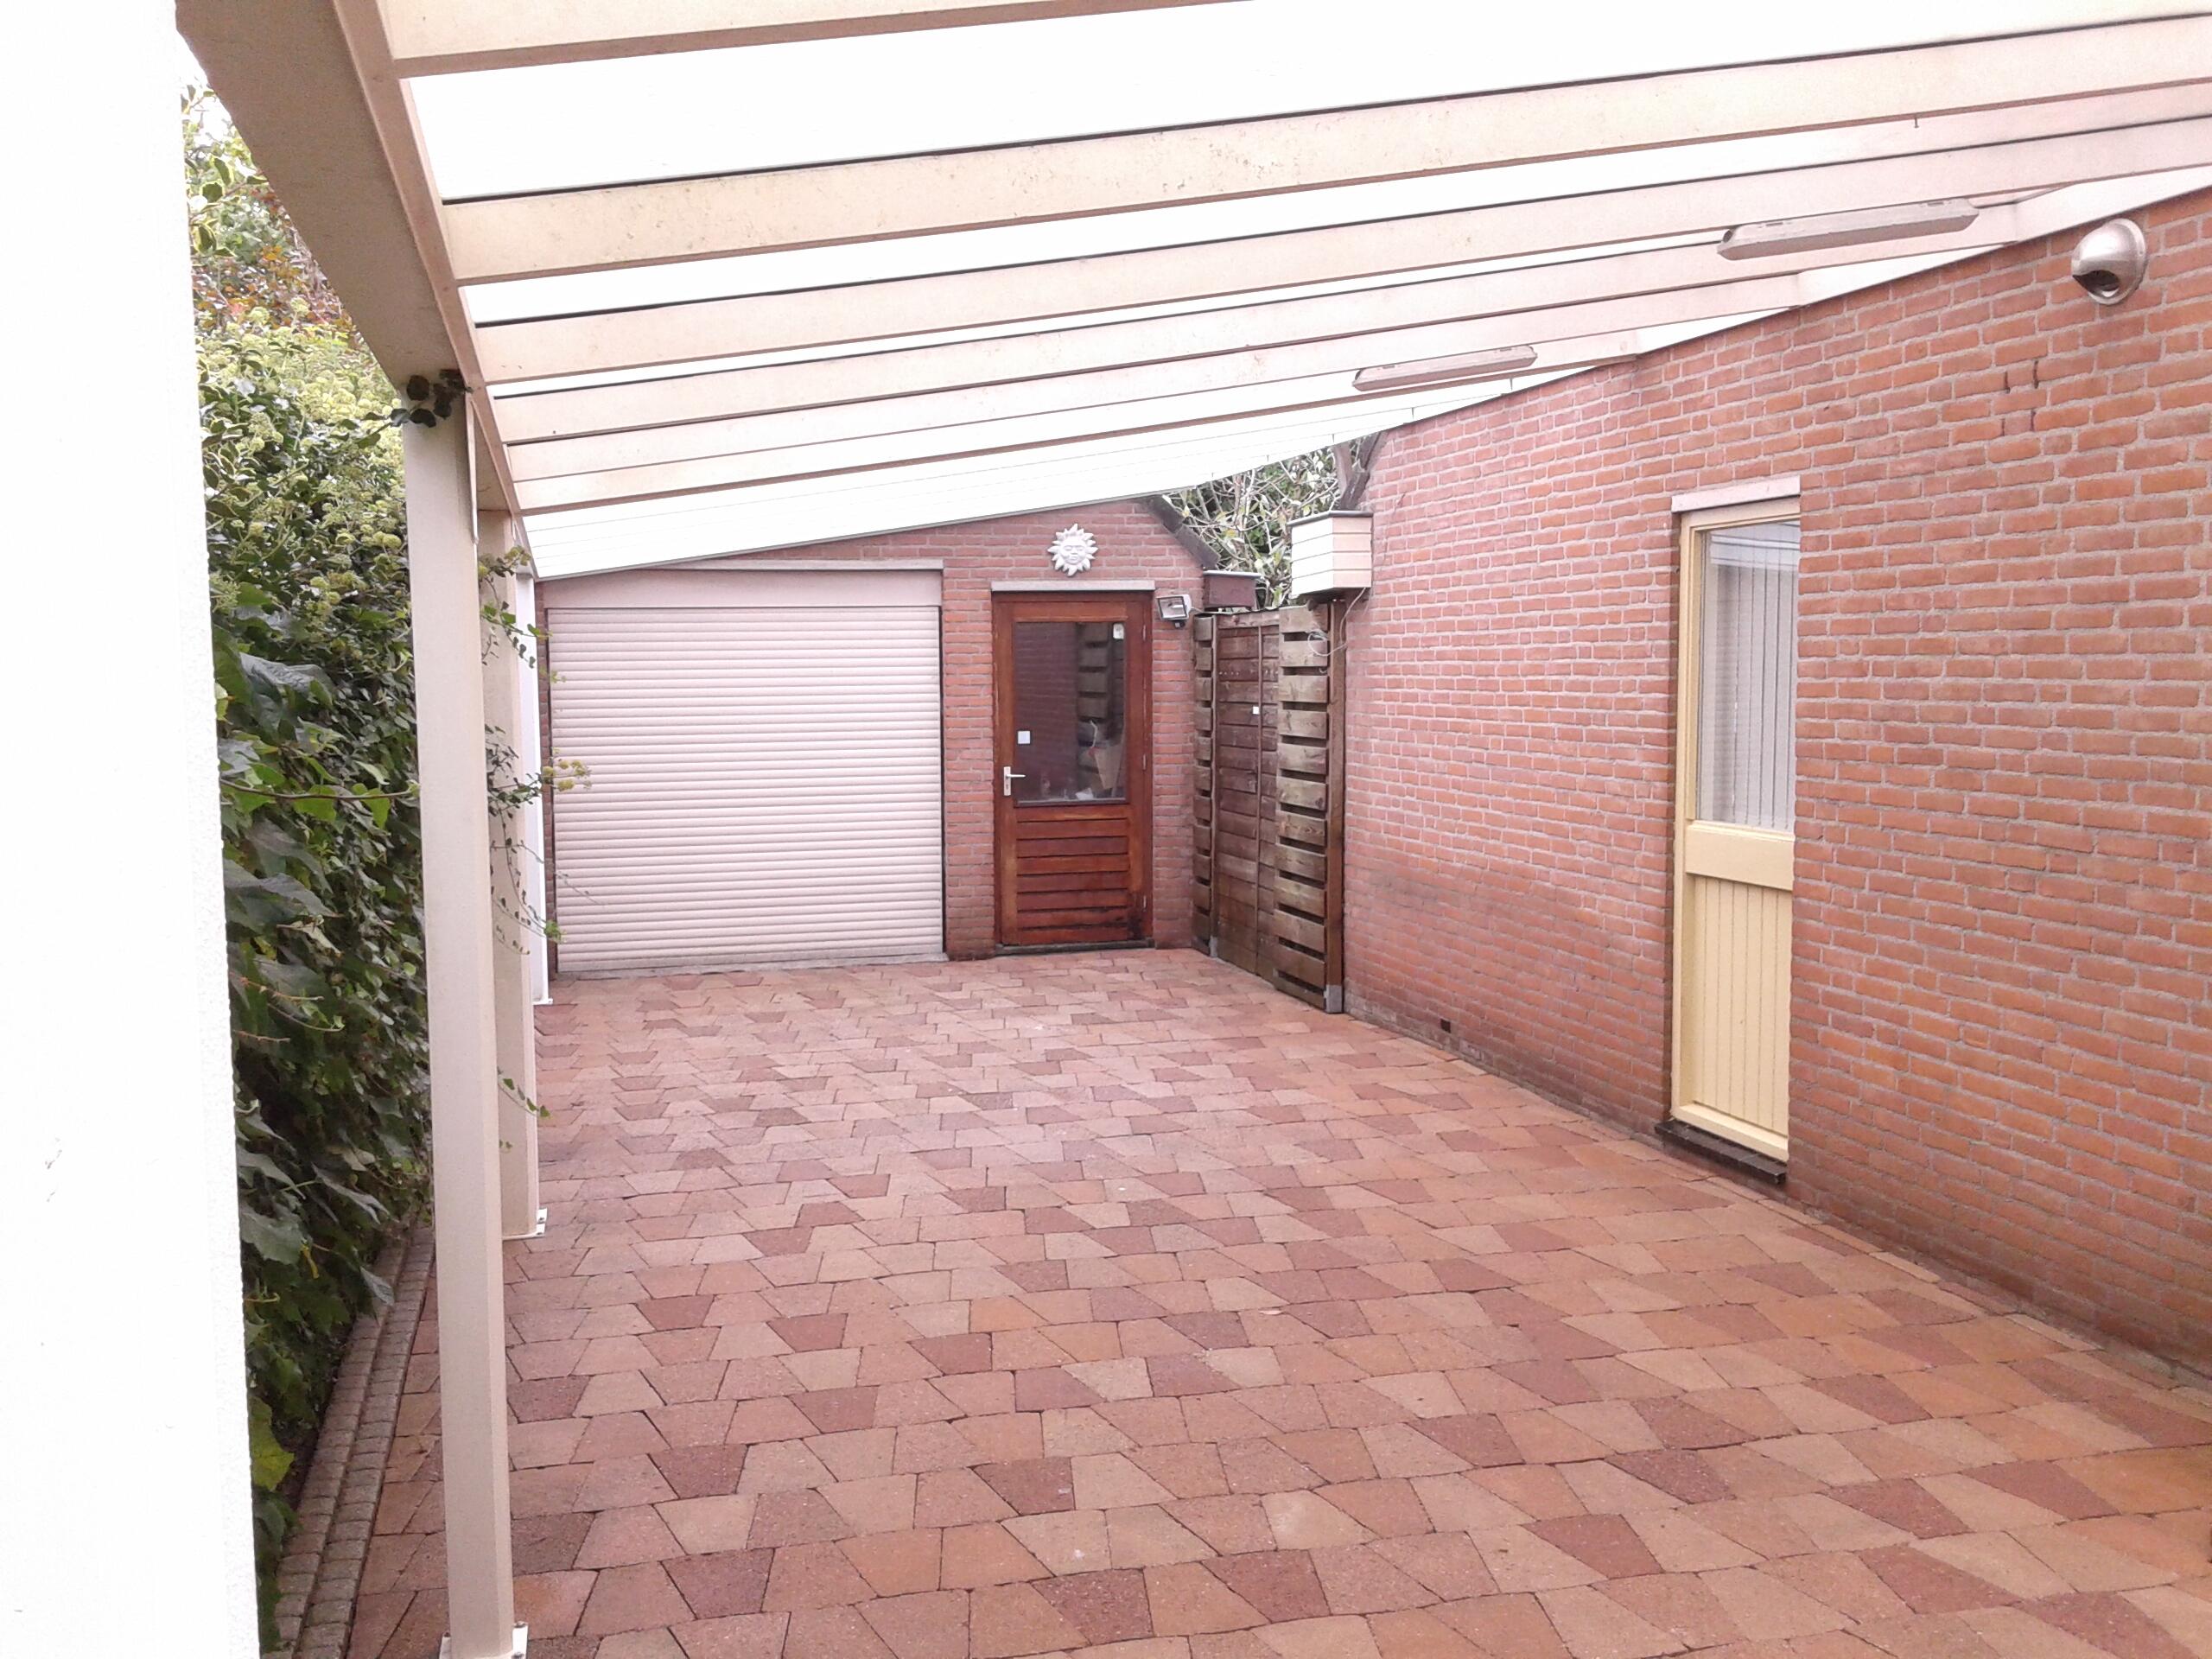
Hi Guys, some news.. I installed in a few month's my extension on the carport and also installed my heatpump for the house and partial the heatpump for the garage! Did it all myself with a lot of patience but i'm happy to let you see this next picture! A giant carport of 4x 11,5 mtrs or 13 x 37,7 feet! Almost 500 square feet! 👍 I've got now place for 4 cars.... wait a minute? I only have 3? I can buy myself another one!! 🤣 I need to put in some lighting in the new part but no hurry. First i have to install the garage heatpump.. that's half a days work i would say... but when? i don't know.. before this winter i hope. When that's done i can concentrate on the 280zx again as the engineroom is still a mess.. oh well we get there, some day.. 🤠

-
As your engine is such a mistery i would do a cold and then a hot compression test on it .. you may see some strange differences? Also.. just a thought! 🙂
-
I would never do that to a 1970's car.. these early ones have/are made of, very thin steel and will bend like a banana.... Get yourself a later 280z chassis at least!
-
Maybe you could put a picture here of the tools you need? Maybe someone has them but does not know that they are the needed ones? I follow your work on this because i recently bought a diff in parts with new bearings.. and.. i have to put it together some time (i guess job 2987 that i need to do some time..) 🙈 Before i bought it i looked it over how to build the diff .. i remember something like you have to paint some teeth and let it drive the other teeth over the painted ones and look at the "dents" in the paint.. not at what the paint does to the clean teeth.. ?? In pic 1 is that with the indents? They have to be in the middle of the teeth's so it's not a bad start.. You need a small shim to correct it to the middle, i think there is a way to determin on what side you have to ad a shim.. As i said i need to do this some time but also never opened up a diff.. it's interesting to see though.. Edit.. Also try to stop the outgoing axle when turning the ingoing axle (Maybe someone needs to help you with that) then you get better indentations in your (fresh thin layer of) paint.
-
A LOT of times people that constructed something, most times the first 3 or so times they make modifications in the design.. I know of people that said that.. It's normal.. I had it a few times ... you learn a lot during the creating proces.
-
Dare i say it.. now everyone is asking him/herself.. what does he want to say: oh well.. It's: So never then? ( Not that i think you never end the car, it's just like that one thing many people want to improve on their car.. but they never get to it !! ) 😂 I got 1 or 2 myself? (More like a 100!! 😢)
-
Put in the new mounts and check the angles.. i think you worry to much.. 😬 A little angle in the axles is good.. If you had over 400 pounds of weight in your neck for 50 years you would be also a lot smaller! 🤣
-
Btw.. i can see that the old one is not in a good condition in your last foto.. rubber has let go of the steel.. top in pic.
-
After 40-50 years of drying.. and fichting the weight.. they get smaller.. it is possible that it dried 2/16 or 1/8th of an inch..
-
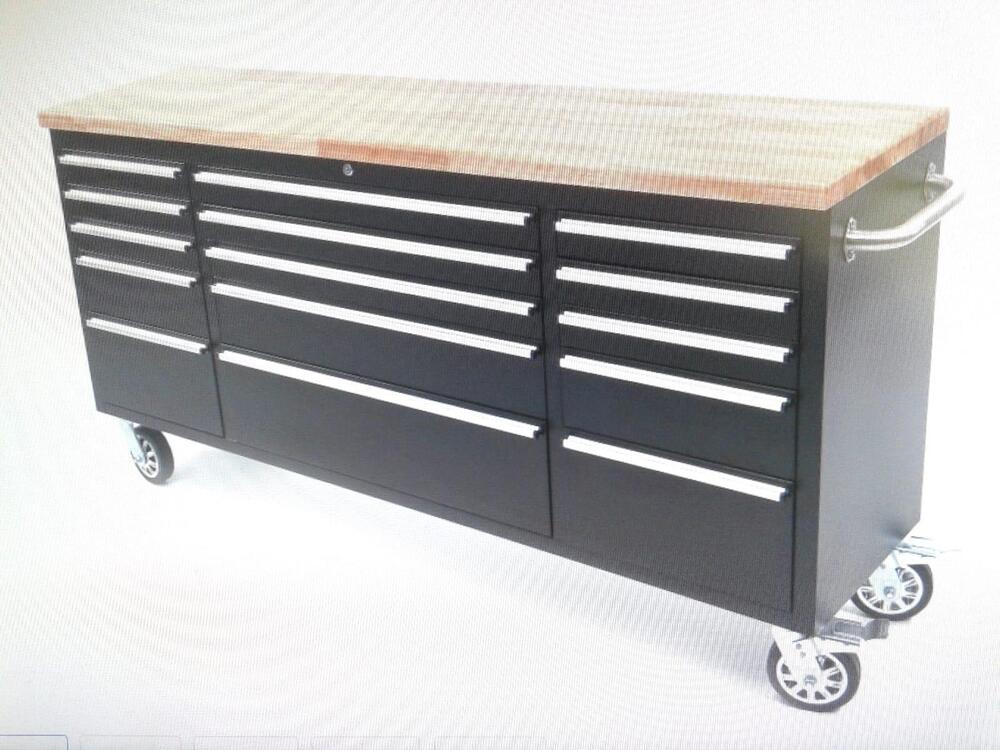
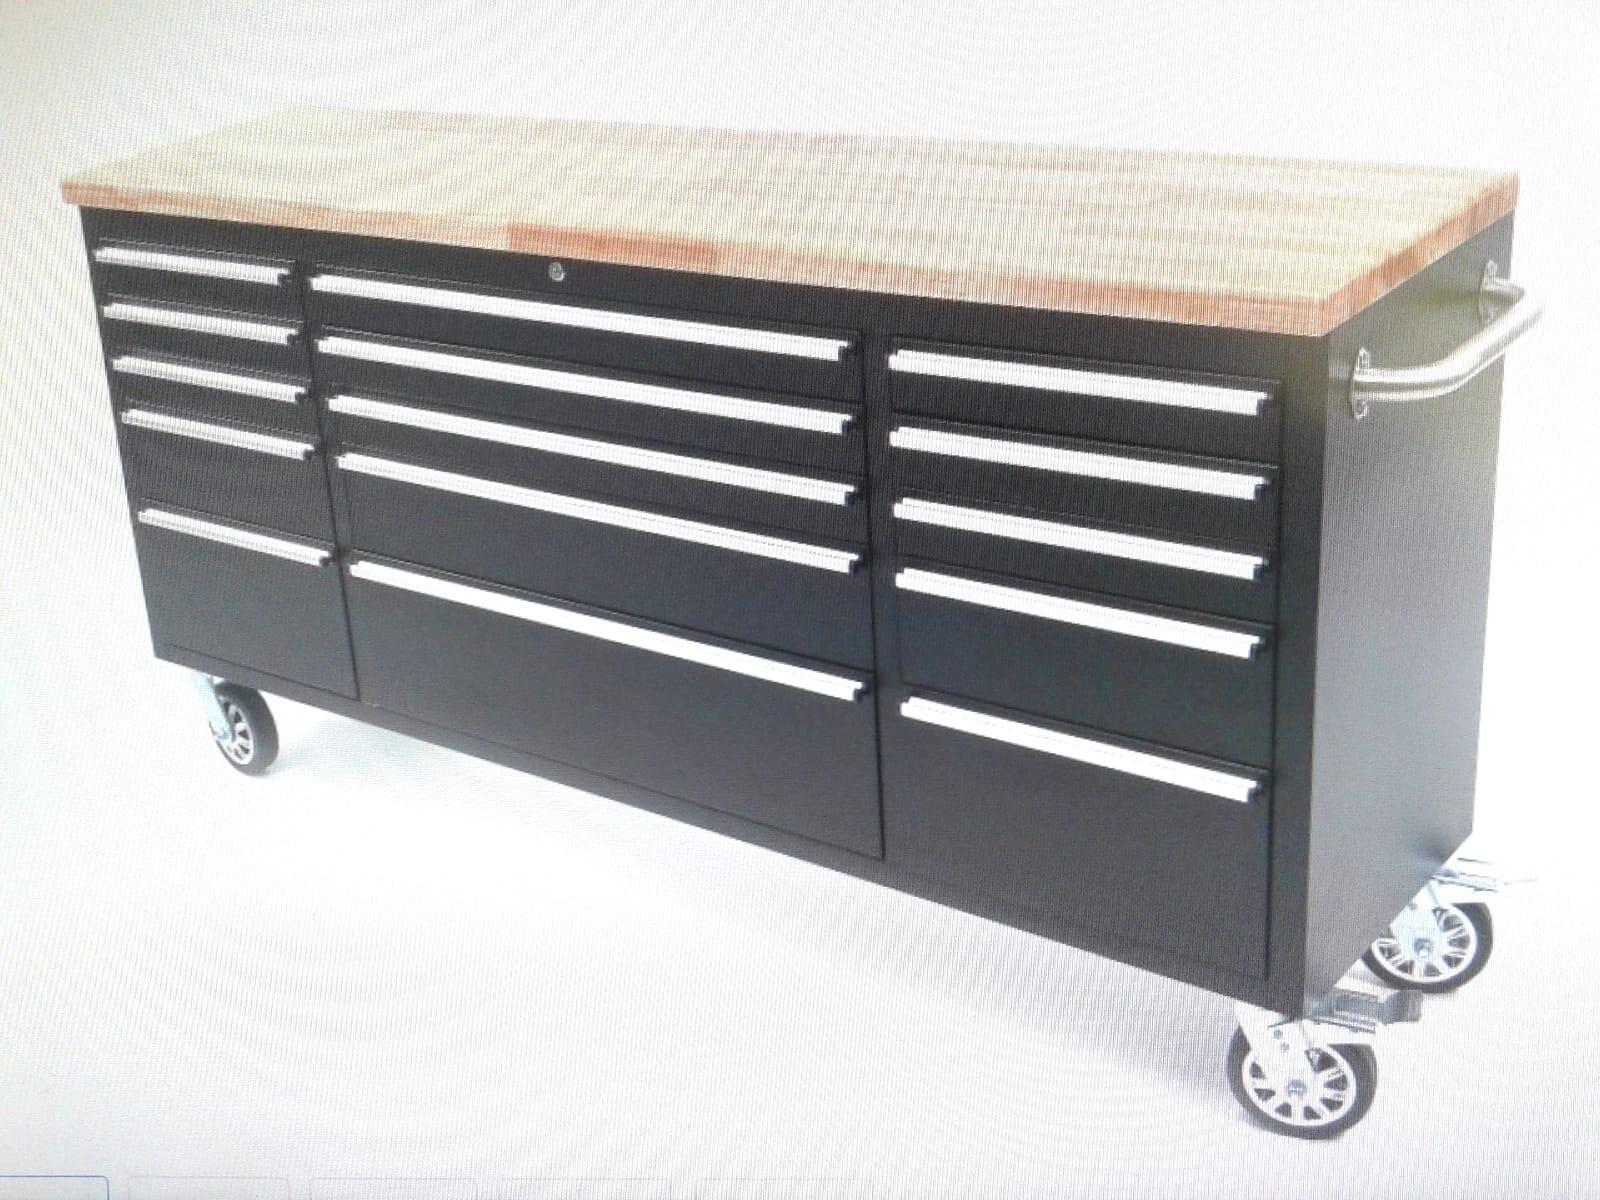
I sometimes buy from HBM. Few month's ago bought this bench/tool box, a bit expensive but a good quality product.. (I removed the HBM sticker though!)