
KenFirch
 Subscriber
-
Posts
265 -
Joined
-
Last visited
-
Days Won
5
Content Type
Profiles
Knowledge Base
Zcar Wiki
Forums
Gallery
Events
Downloads
Store
Blogs
Collections
Classifieds
Everything posted by KenFirch
-
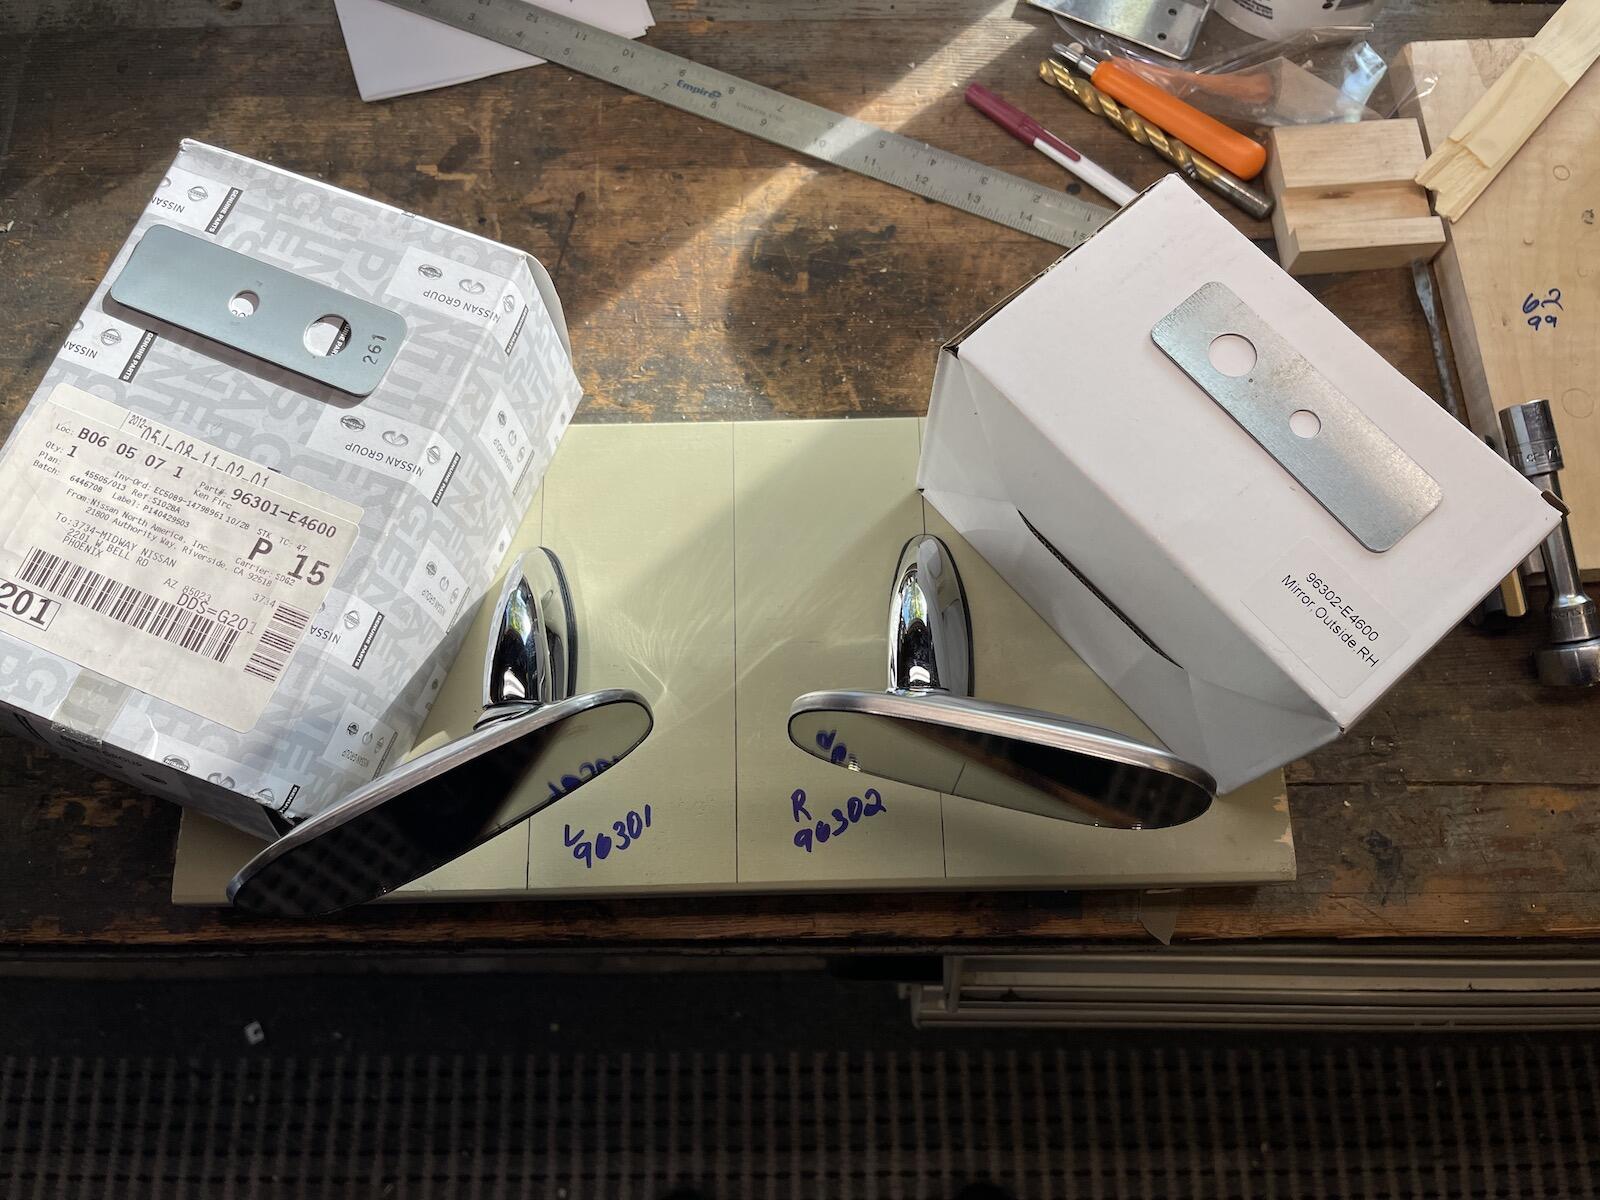
Bummer, I just received the 96302 RH mirror from eBay, and it looks like it doesn't adjust inward as much as the new 96301 mirror I bought from Nissan last year! Actually, if I were to mount the Nissan mirror on the right side, it can be adjusted a bit more more inward than the repo. I may take the repo apart and figure out a modification to "adjust" it.

-
Okay, I just bought one too, hopefully works as said. One of my winter projects is to add RH mirror and replace LH mirror, which annoyingly vibrates out of position. I've had the door innards apart years ago, but can't remember if there's a way to change/add mirrors without removing door glass. Doable?
-
Haven't a clue. Mine shows no signs of ever having an automatic. Not sure what difference between AT & 4SP could even warrant a change in that area of wiring. Misprint maybe? I see a few of them on BAT pics, even earlier years, look the same.
-
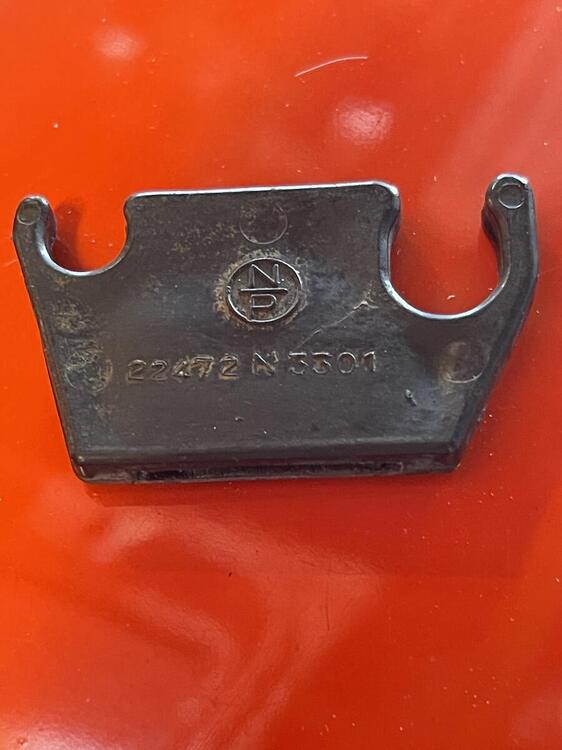
Yep, 22472-N3301. I'm not finding it either on the web, except for here: https://www.carpartsmanual.com/datsun/Z-1969-1978/electrical/wiring/to-jul-76/23 Maybe only a July 73 thing?
-
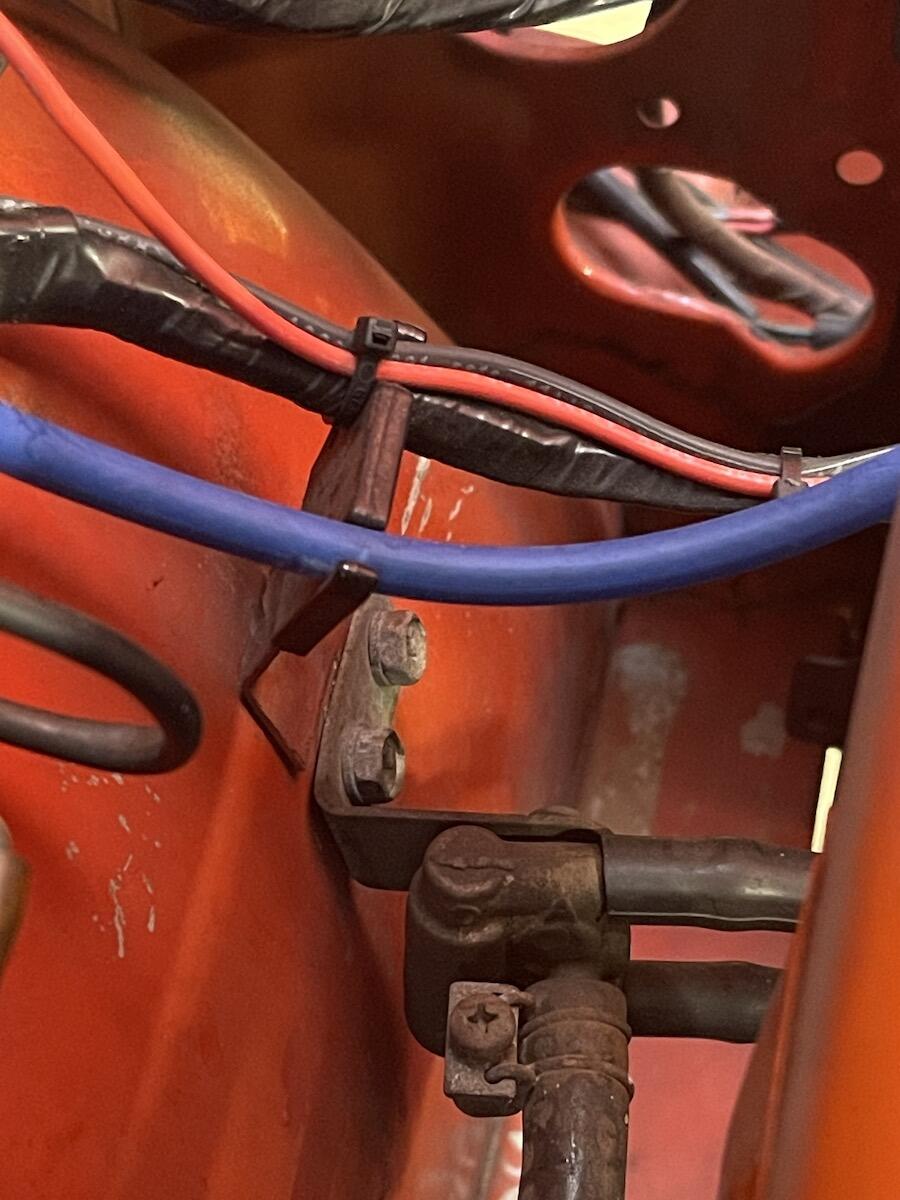
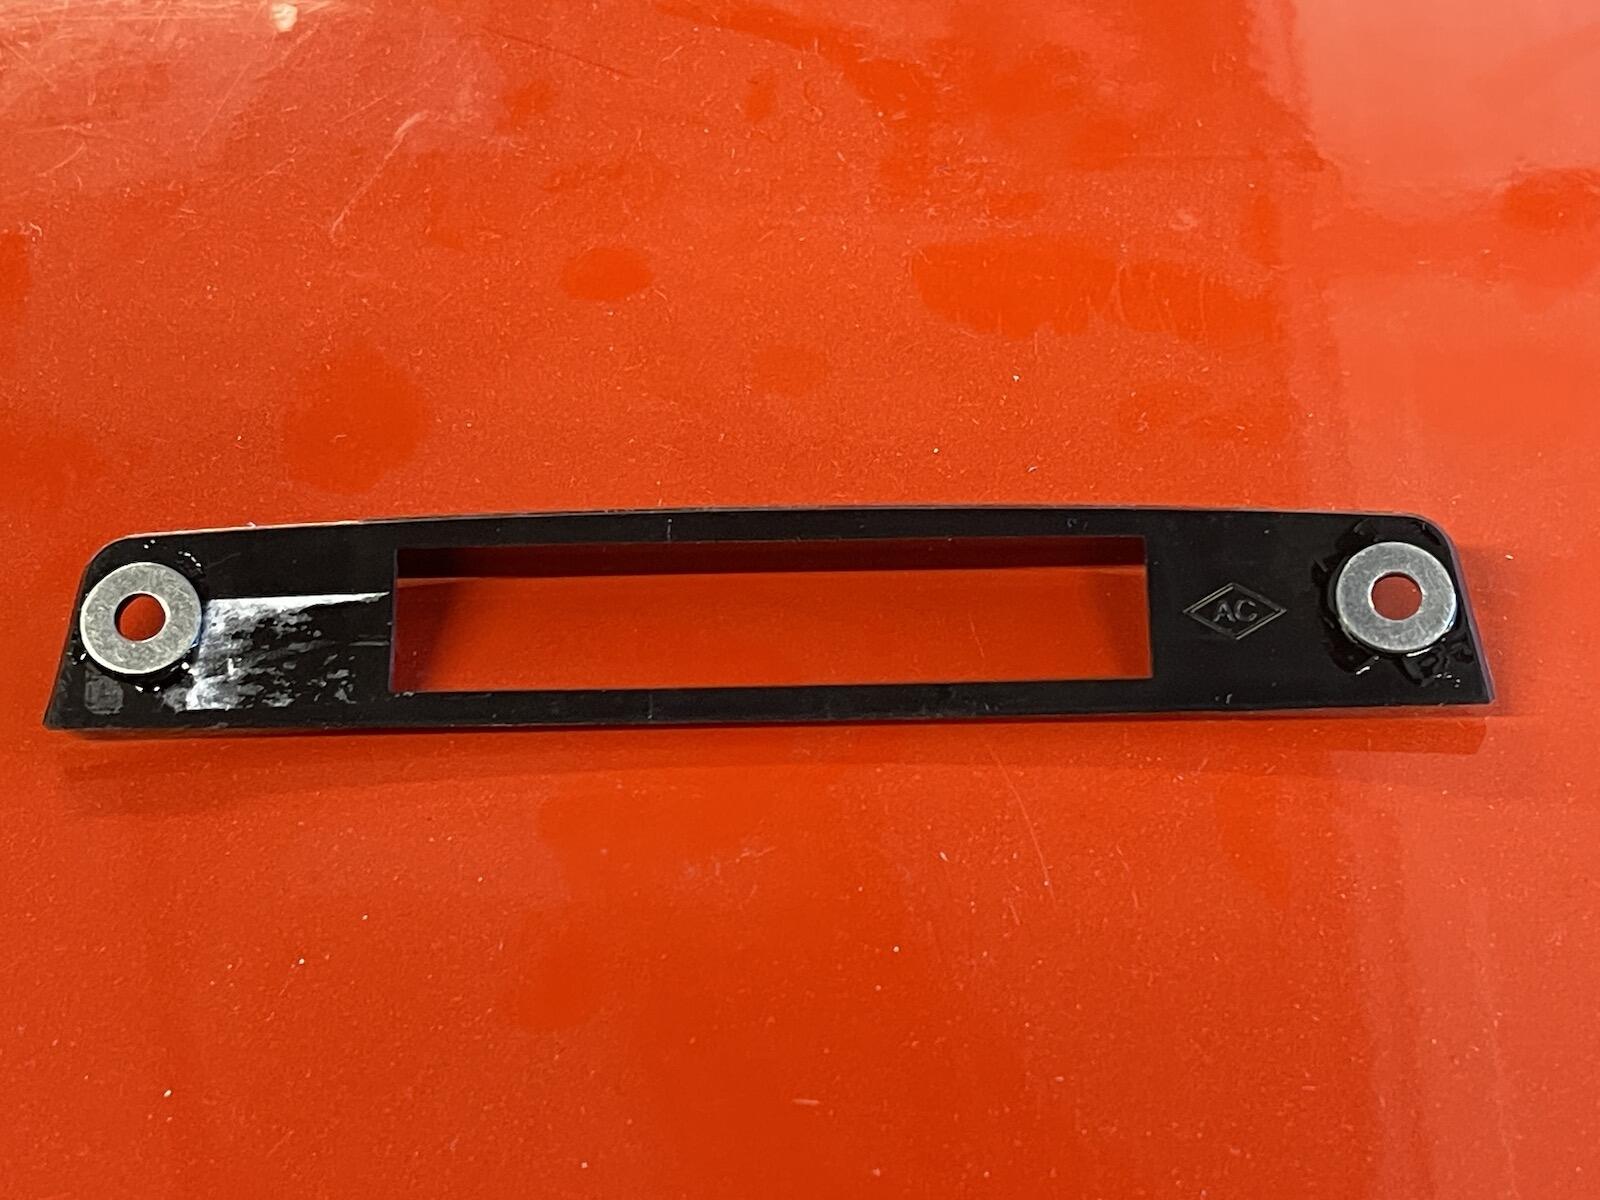
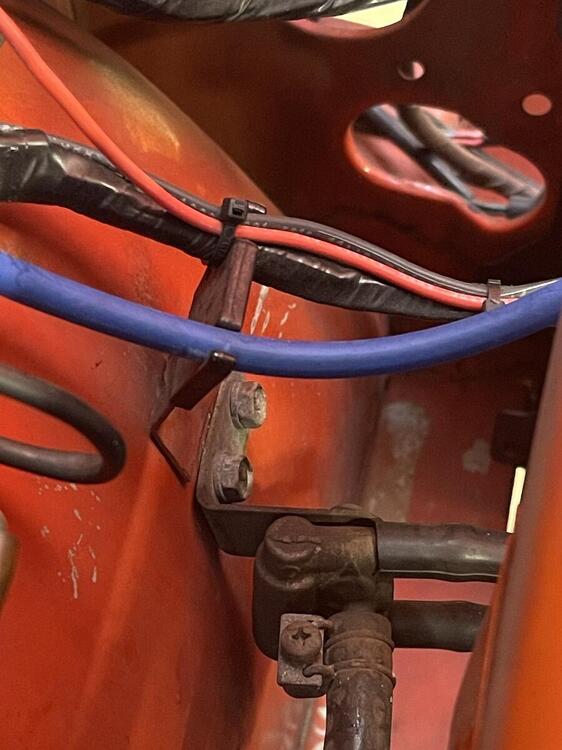
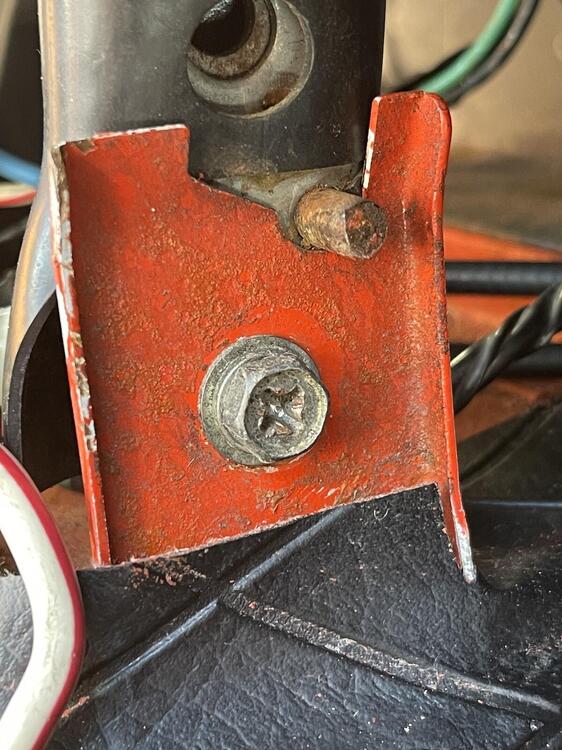
My 73 has a wire clip for the coil and distributor/water temp sender wires on that tab. Here's the part No.
-
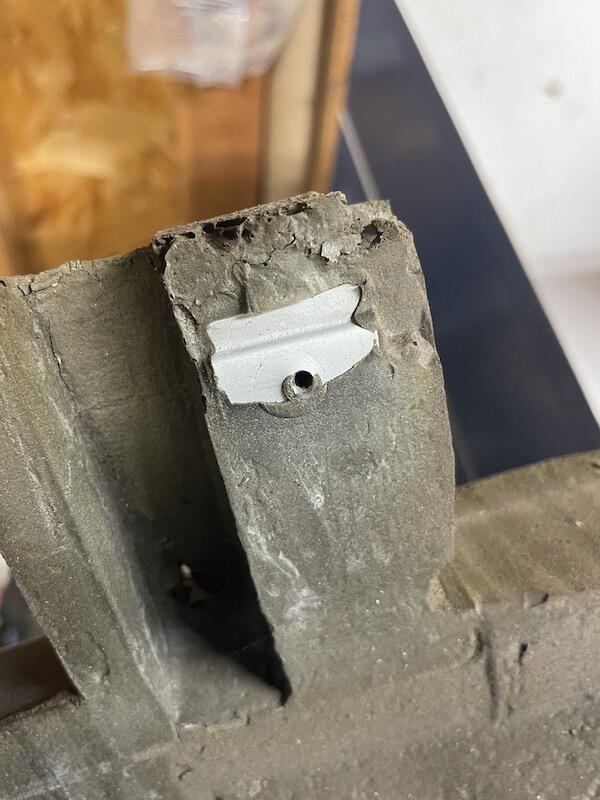
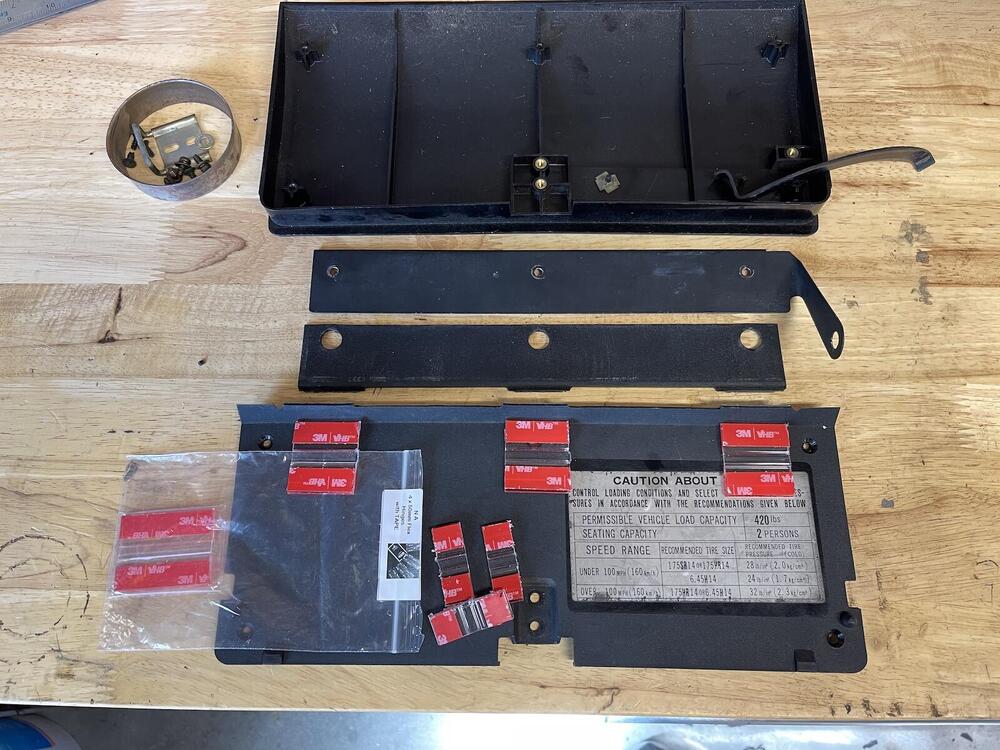
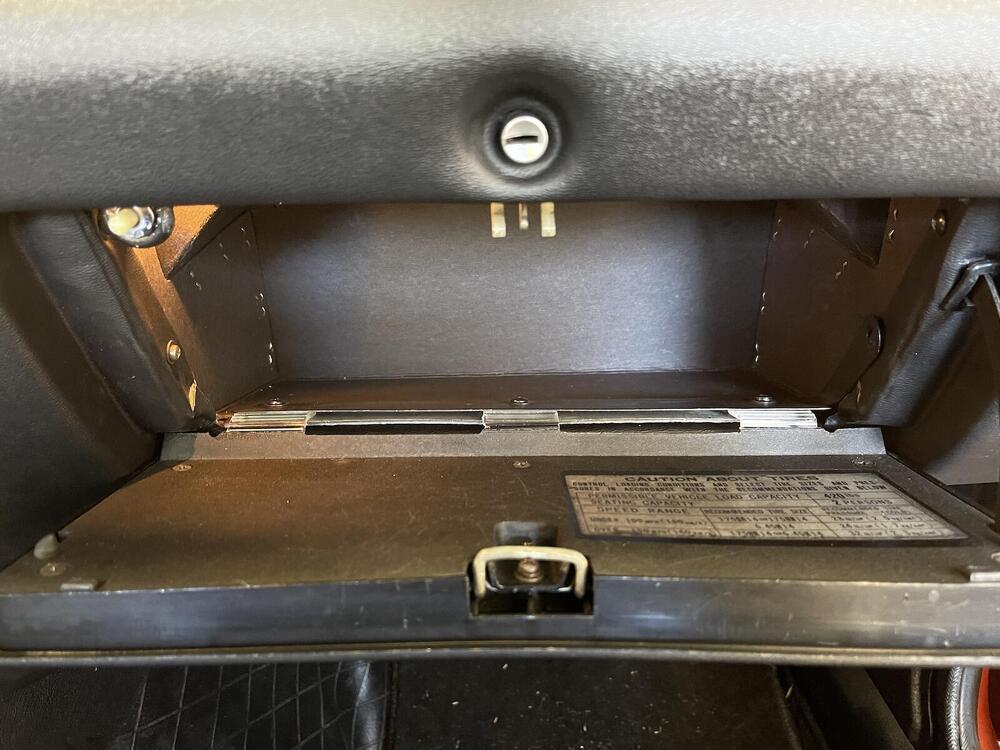
Those 3 metal brackets look like the ones embedded in the foam dash pad for the screws. There are 5 of them on the lower edge, at least on my old 73 dash.

-
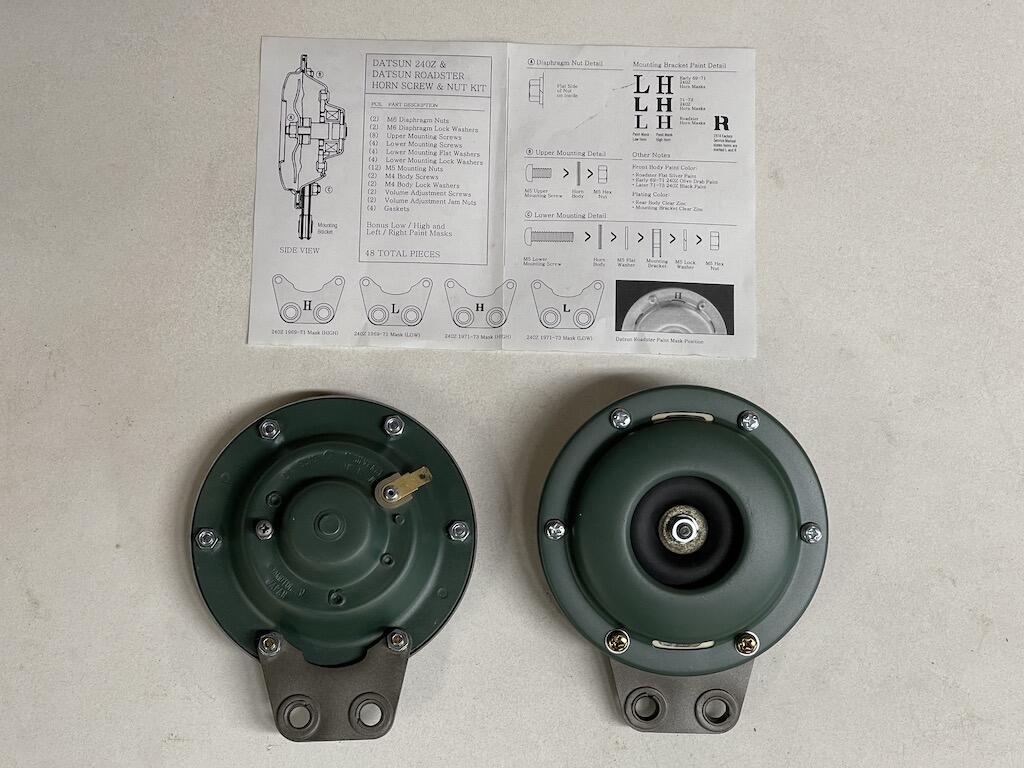
I used Steve's info to rebuild mine with the eBay kit from the guy in Canada. I don't like those sticky gaskets. The green is off, but it's what I had. Individually they sound okay, but I need to hook the pair up together and fine tune, and drive my neighbors nuts.

-
I would think mixing different weights of the same make oil would be okay, but not ideal, or convenient. Here's a handy ZDDP chart if searching for another. I can't believe what oil costs nowadays! https://www.speedwaymotors.com/the-toolbox/zddp-content-chart-high-zinc-oil-list-brand-breakdown/32479
-
I like that additional documents/photos can be posted in the ad: https://downloads.ctfassets.net/x8mrk904j4k6/3Zs8lzU5xie53bmNV1wxub/0742bd63f493bbe027d7154f1247cf38/Restoration_Photos.pdf I wish that you could filter and view just the completed auction results though. You would think Hagerty would see the value of having recent and past sale results available. After all, they do tout their Valuation Guide, and nothing better than real world results.
-
I see Resurrected Classics has a 70-72 Steering Column Cover Set. Does anyone have any comments on fit and finish? How is the 73 different? Thanks
-

Fuel rail and radiating heat from the engine block..
KenFirch replied to Dadsun's topic in Open Discussions
Here's another thing that didn't work. It helped a little, but didn't completely get rid of the stumbling engine problem after idling in traffic in hot weather. I wrapped the fuel lines in DEI's Vapor Lock Sleeve hoping to fix the problem. Not quite the solution, still looking. And it looks funky!
-
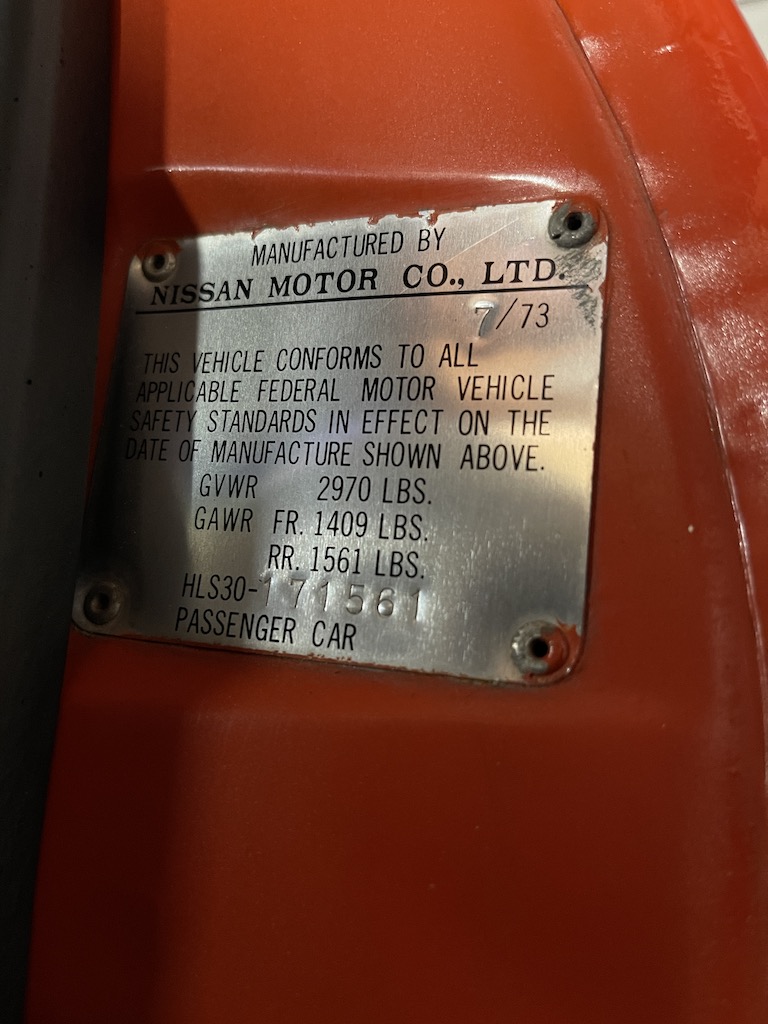
Happy 4th everyone! 🇺🇸 And happy 50th birthday to our Z. Not sure how many 240Z's were built after ours, but I'm guessing 260Z production was starting to ramp up. Cheers! 🍻


-
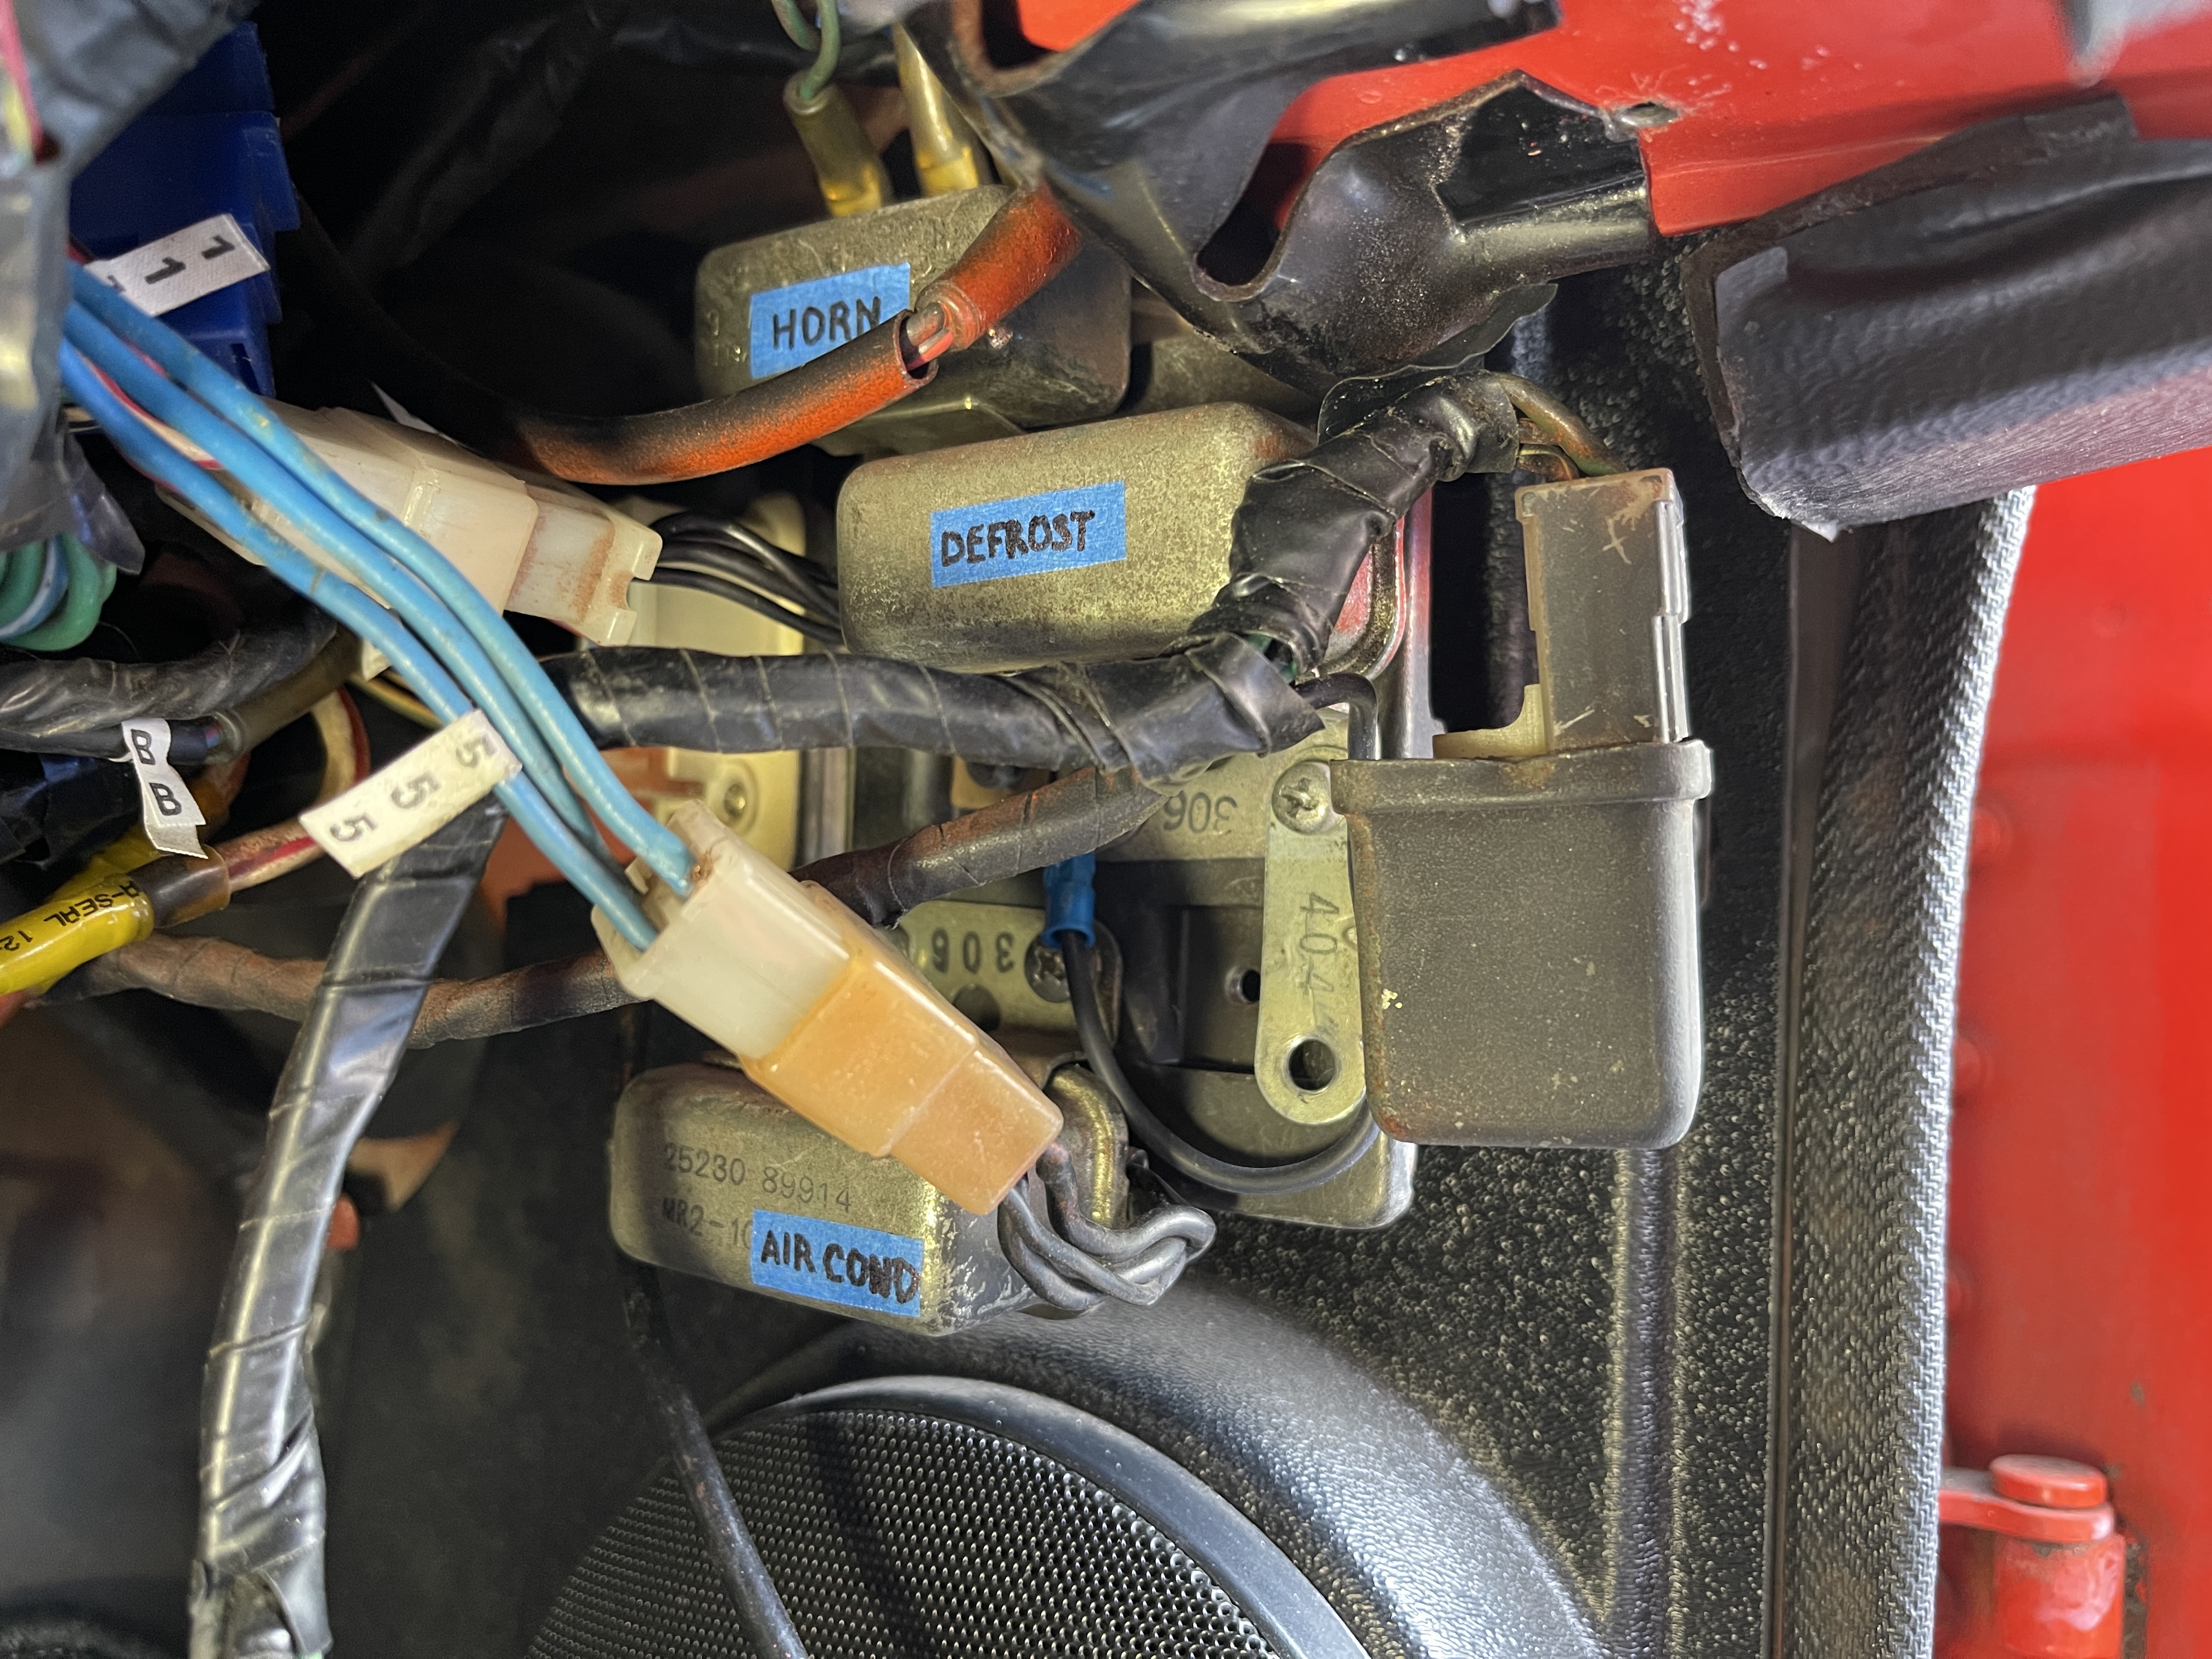
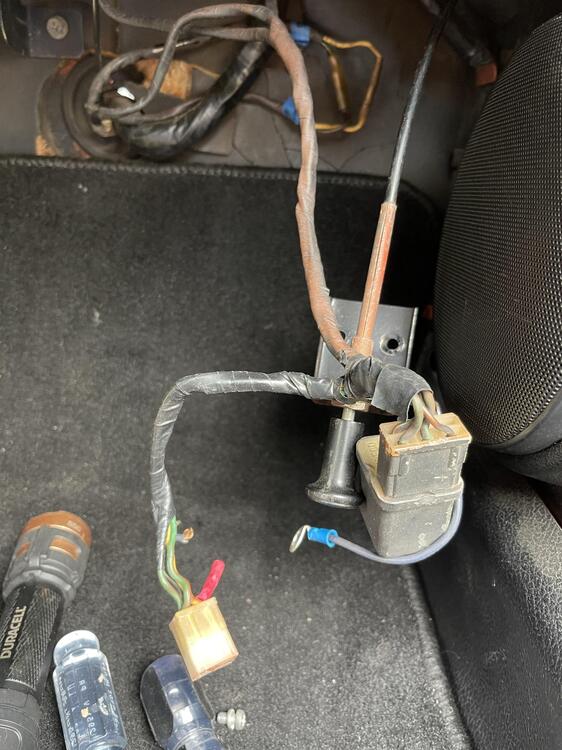
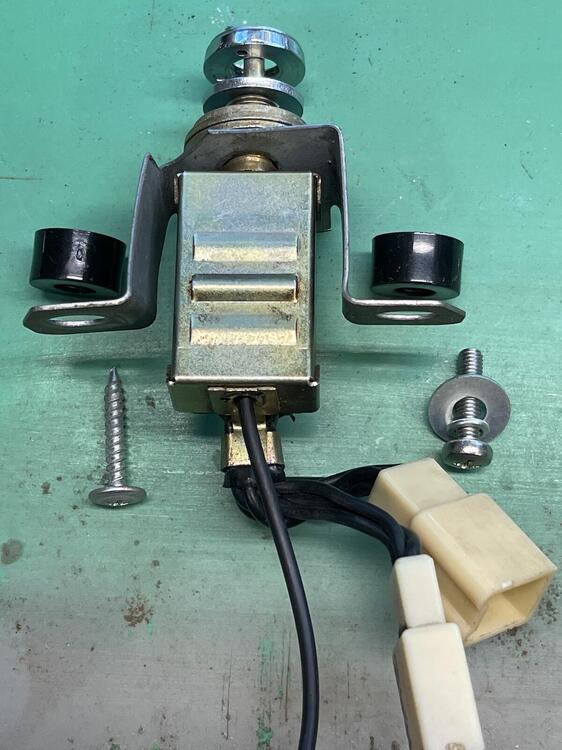
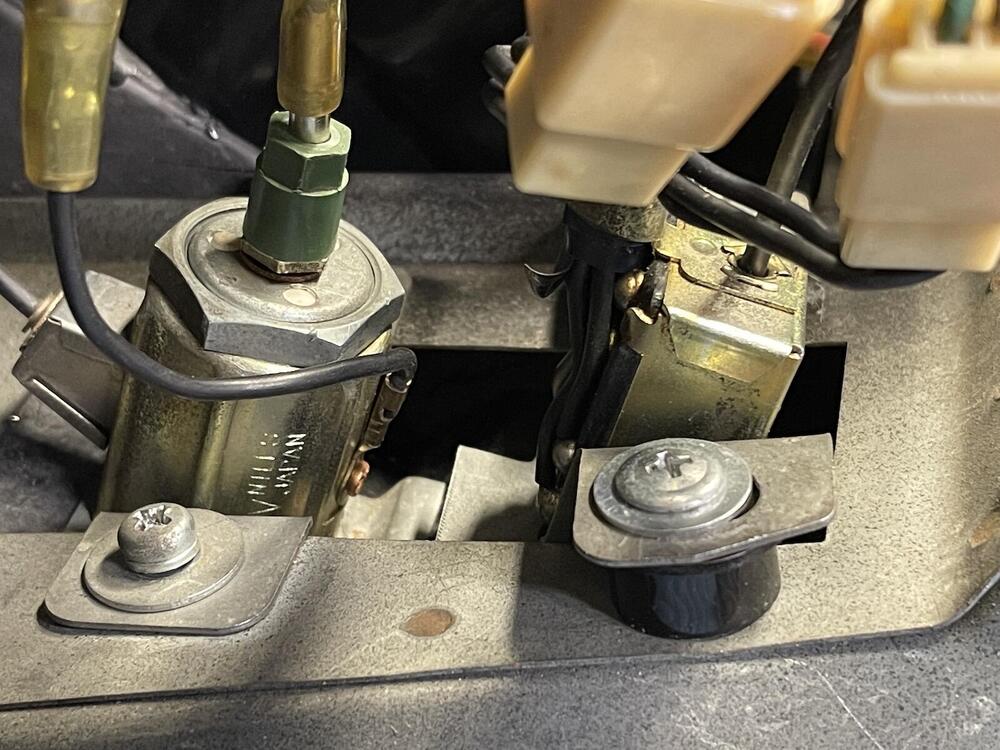
Okay, took some time to cleanup the relay bracket, some were screwed in the wrong location, and labeled them. It looks like relay A is missing, but B is there. This must be part of the fuel pump harness fix, goes out to the starter solenoid and fuse box/ignition. The relay A connector looks a bit hacked. Maybe I'll remove it altogether some day. Battery seemed fine this morning, engine cranked over as usual. Thanks for the help! Ken

-
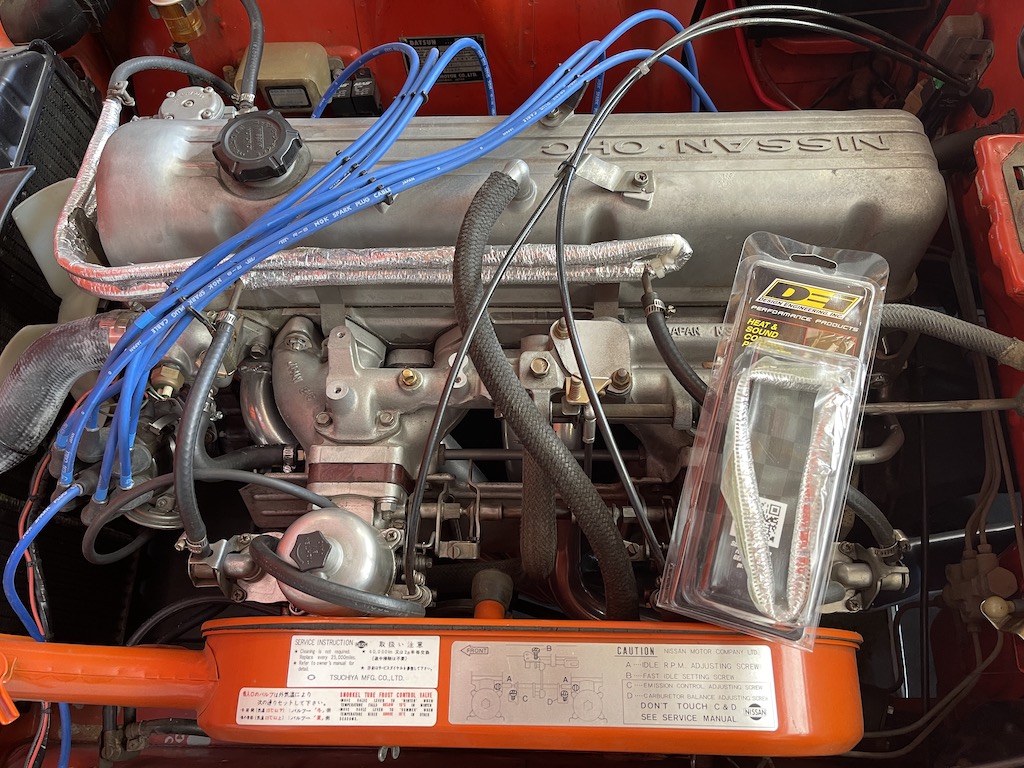
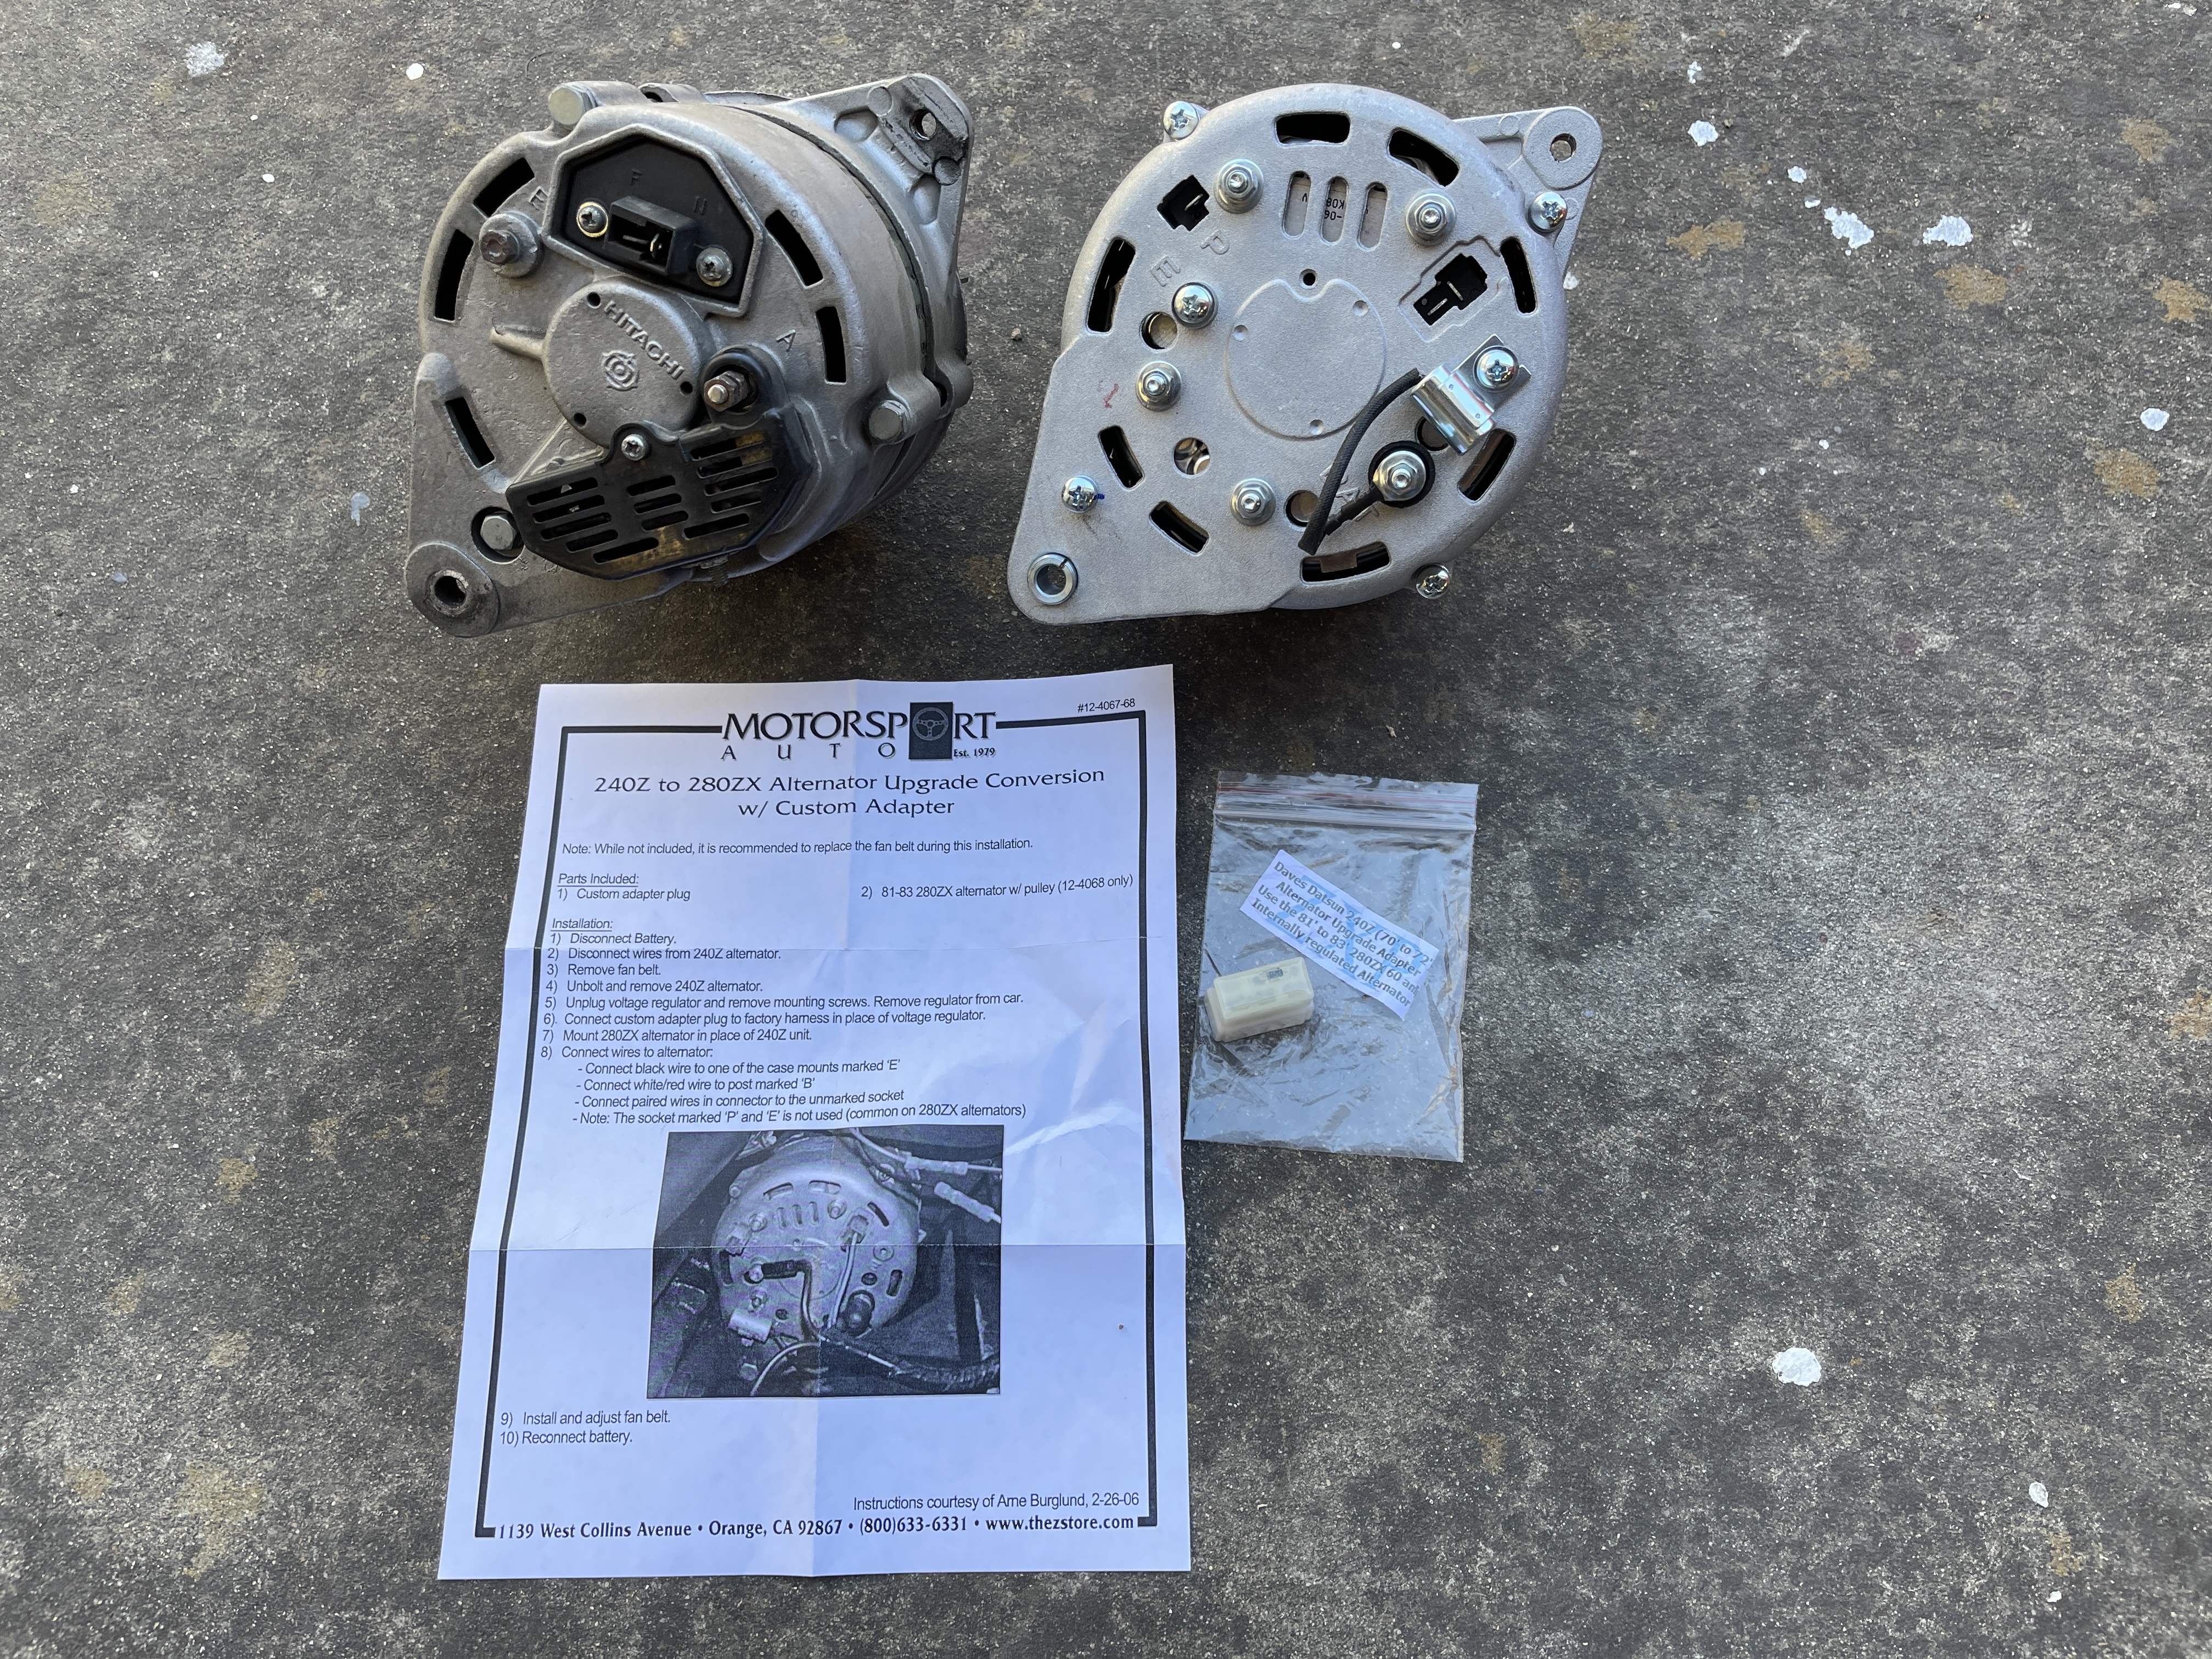
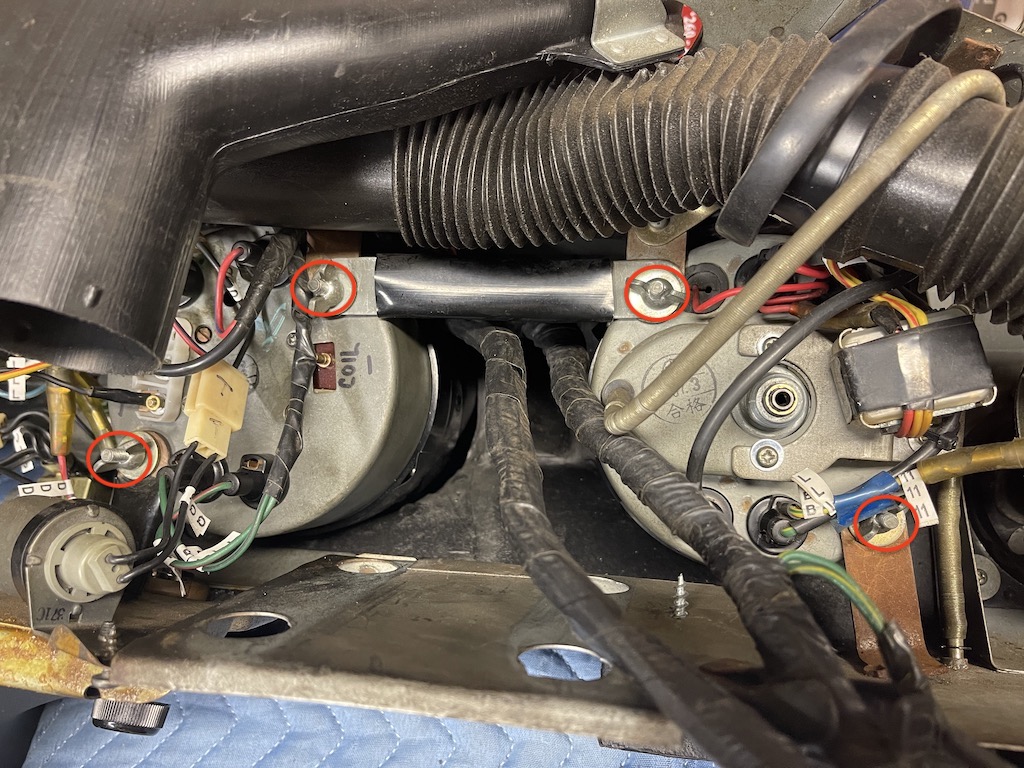
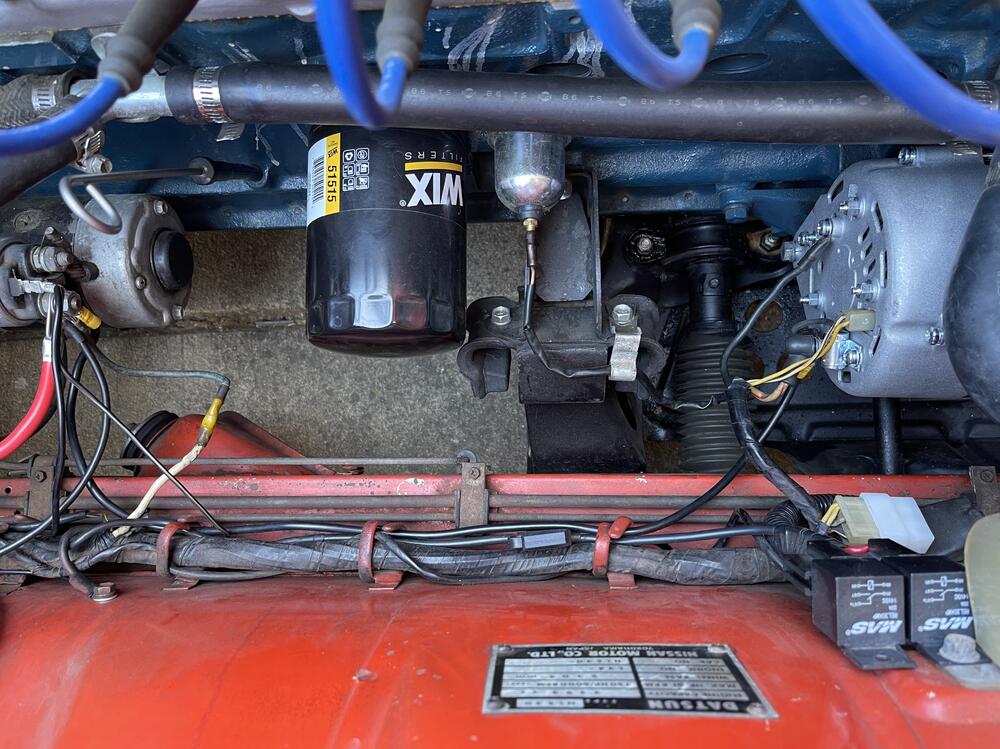
My alternator recently gave out in my 73 Z, so I ordered the MSA 60 amp upgrade kit. I decided to give their alternator a try instead of sourcing one locally. Of course they warned me it's made for 70-72 Z's, and additional work is needed for a 73, have a pro install it, no warranty, etc. There are a handful of threads here for a 73, but some with broken links, and some with unanswered questions. Maybe this thread can be used to consolidate 73's. From what I gather, for a 73: Install new alternator and connect per instructions. The regulator plug (Dave's) is the same for 73 as 70-72. Extra wiring is required if you are running an electric fuel pump. I am not, just the mechanical one. Thread here for electric fuel pump wiring, with safety wiring. If the car has had the "vapor lock fix" or "electric fuel pump modification" or "V-3 modification" done to it, which added some wiring to a fuel pump relay. I'm not sure if cutting off the "yellow wire" is needed only if the fuel pump relay exists. I couldn't find a fuel pump relay on mine. Is this step needed only for cars with the modification? Add an 8 gauge wire between the alternator BAT connector to the starter solenoid where the positive battery cable connects to. So here's the old and new internally regulated alternator, Dave's plug, and instructions, from MSA. Here's the installed setup. Seems to work fine. My starter connection is getting a bit crowded with all the relay connections. The Pertronix seems to be work better, but maybe it's my imagination. Amp gauge moves a tiny bit at idle, and little more with hazards on. Anyway, I just want to make sure I'm good and won't burn my car down! 😏 Thanks! Ken

-
I ran a Mallory Unilite conversion in an old Mustang years ago, and the Unilite module would eventually get hot enough to quit working. Using some sort of heat sink grease between the module and distributor plate would usually fix the issue. I also used thin fiber washers around the 2 module screws to further isolate it from the heat, and another washer under the outside edge so it kind of sat on a thin bed of grease, and kept it level. It looks like new replacement modules now come with that grease. Might be a cheap fix to try.
-
This looks like it could be a decent project. Sold by the Sacramento Auto Museum, so probably an accurate description of it's condition. https://sacramento.craigslist.org/ctd/7556052058.html


-
Did anyone ever figure out if these will fit under the fuse cover? I've got the MSA blade $etup laying around, but it's a shame they didn't make it smaller and fit the stock fuse cover. Also searched and can't find the ones mentioned in the pinned thread above.
-
You've probably already figured it out by now, but there are 4 wing nuts holding them in. Suggest getting speedo in place first making it easier to reconnect speedometer cable.

-
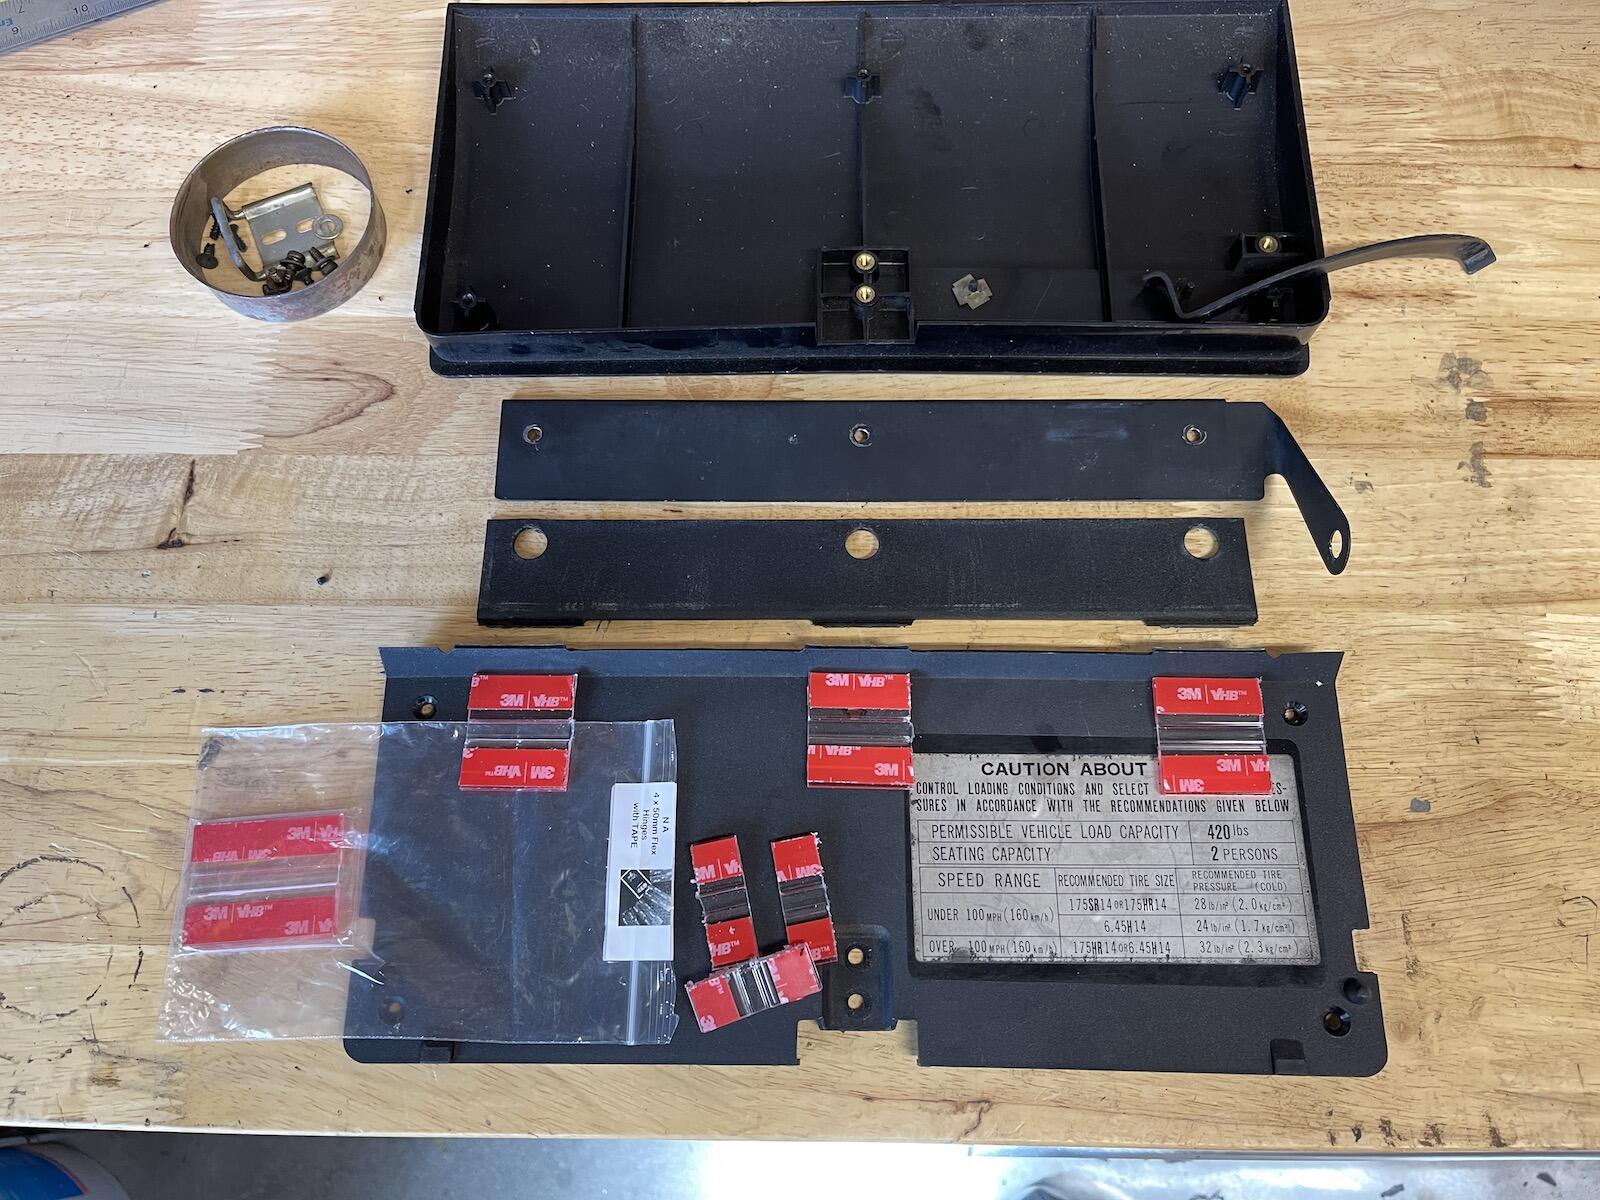
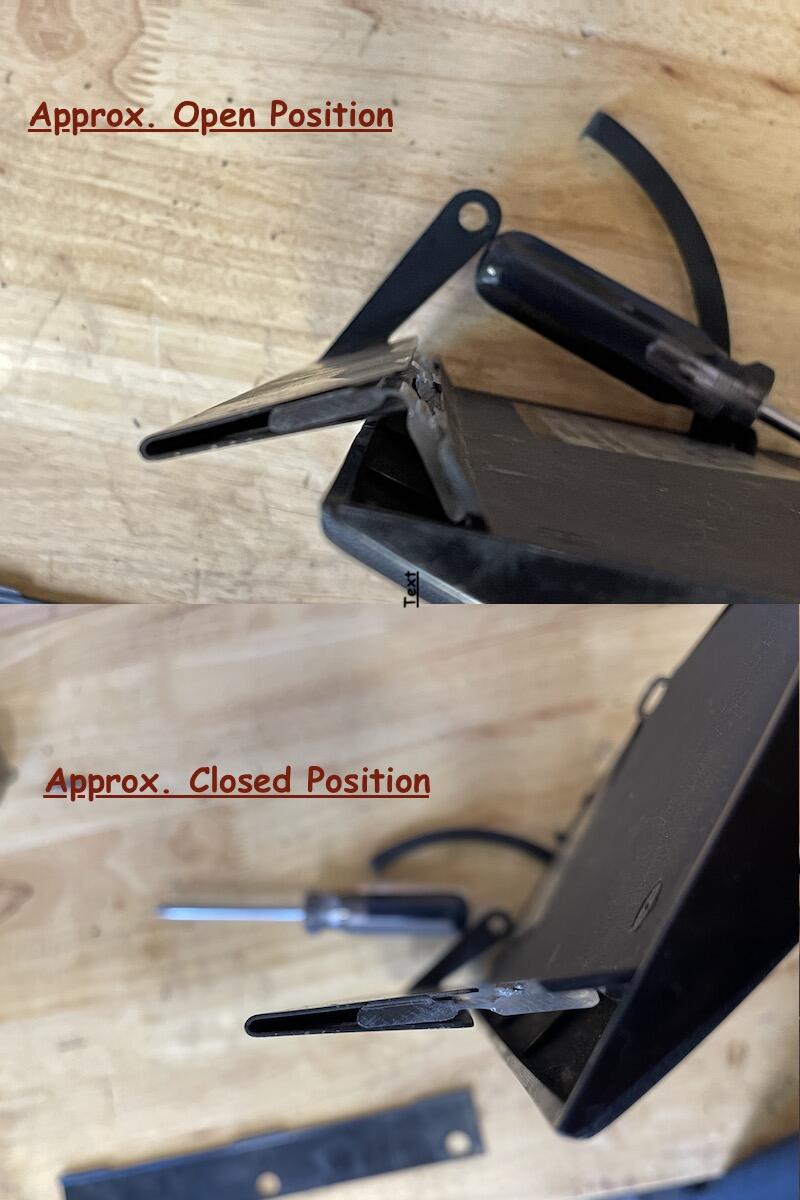
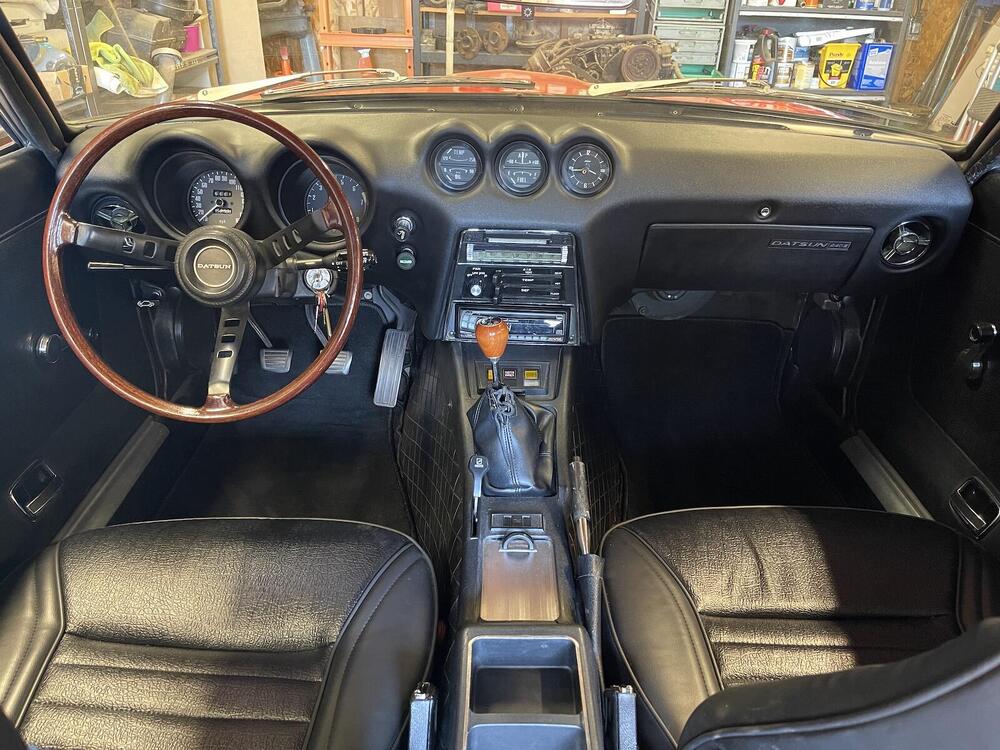
Finally got it all back together! Had a few issues, nothing serious. My horn and dome light aren't working, I'll try to fix those later. I did have to run a new separate wire for the tach out to the coil, so tach works fine now. And I broke my glove box door! 😡 While installing I latched it close without taking the time to adjust the latch correctly. Of course it got stuck and I had to resort to prying it open with some plastic pry tools. As soon as it popped open it promptly broke those plastic flex hinges. I figure I could just get another off eBay, or order a 3rd party metal replacement inner door, until I saw the prices. My first thought was to use some small steel hinges to fix, but that seemed a bit heavy-handed. So, I ordered some plastic flex hinges off of Amazon. Original is also a flexible plastic hinge, which I'm surprised lasted ~50 years. I cut new hinges to approximate length of the original hinge. Used a utility blade to flatten out the area where the door side hinge adhesive will stick, 3 places. I pried open the channel so the hinges would fit inside, but not too far that it won't act like a vice when removing tape from adhesive and installed. This will make the channel about 1/16" thicker than original, and I did use slightly longer screws when installing on the dash. I removed the tape over the hinge adhesive and assembled. I did pry open the channel so I could slide hinge into position. And I marked the horizontal alignment to match old position, then glued door in place. Here's the back side. The old broken side of the hinge, which use to fit inside the channel, is not used, on the shelf. Side view of hinge. Installed. Too bad those hinges don't come in black. One other thing I did was epoxy a washer on the back side of my new map light bezel, so hopefully it gives the screw something to push against and won't crack again. Done, except for the dome light and horn. I'm very happy with the way new da$h fit, although it was quite a project to install it. Car has collected a lot of dust while sitting, time to go blow the dust off it!


-
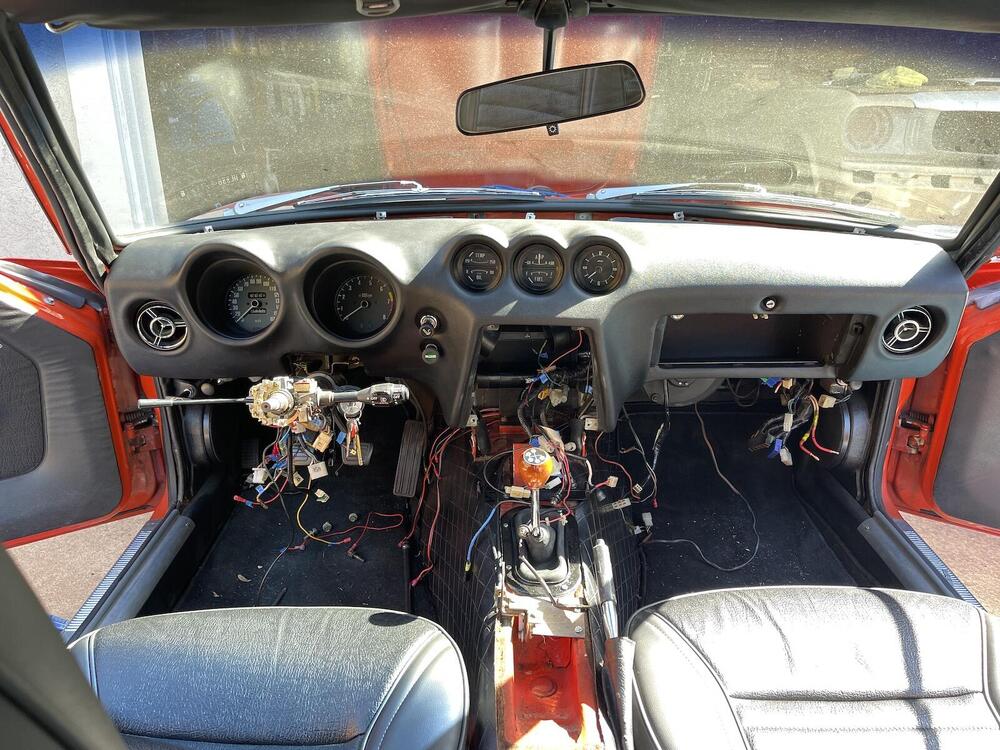
I got the dash bolted back in place. My wife was sporting enough to help me lift it into position, took all of 10 minutes at the most. Not sure if all year Z's have this, but this 73 had a pair of pins on the bottom dash mounting brackets that cradle into the tunnel brackets. Once resting there, just tilt dash into position and get a bolt or two started at the top. Checked that wire bundles were routed where they should be, and tightened all bolts. So that part was easy enough. Now to get everything connected back up without having a smoke show later.
-
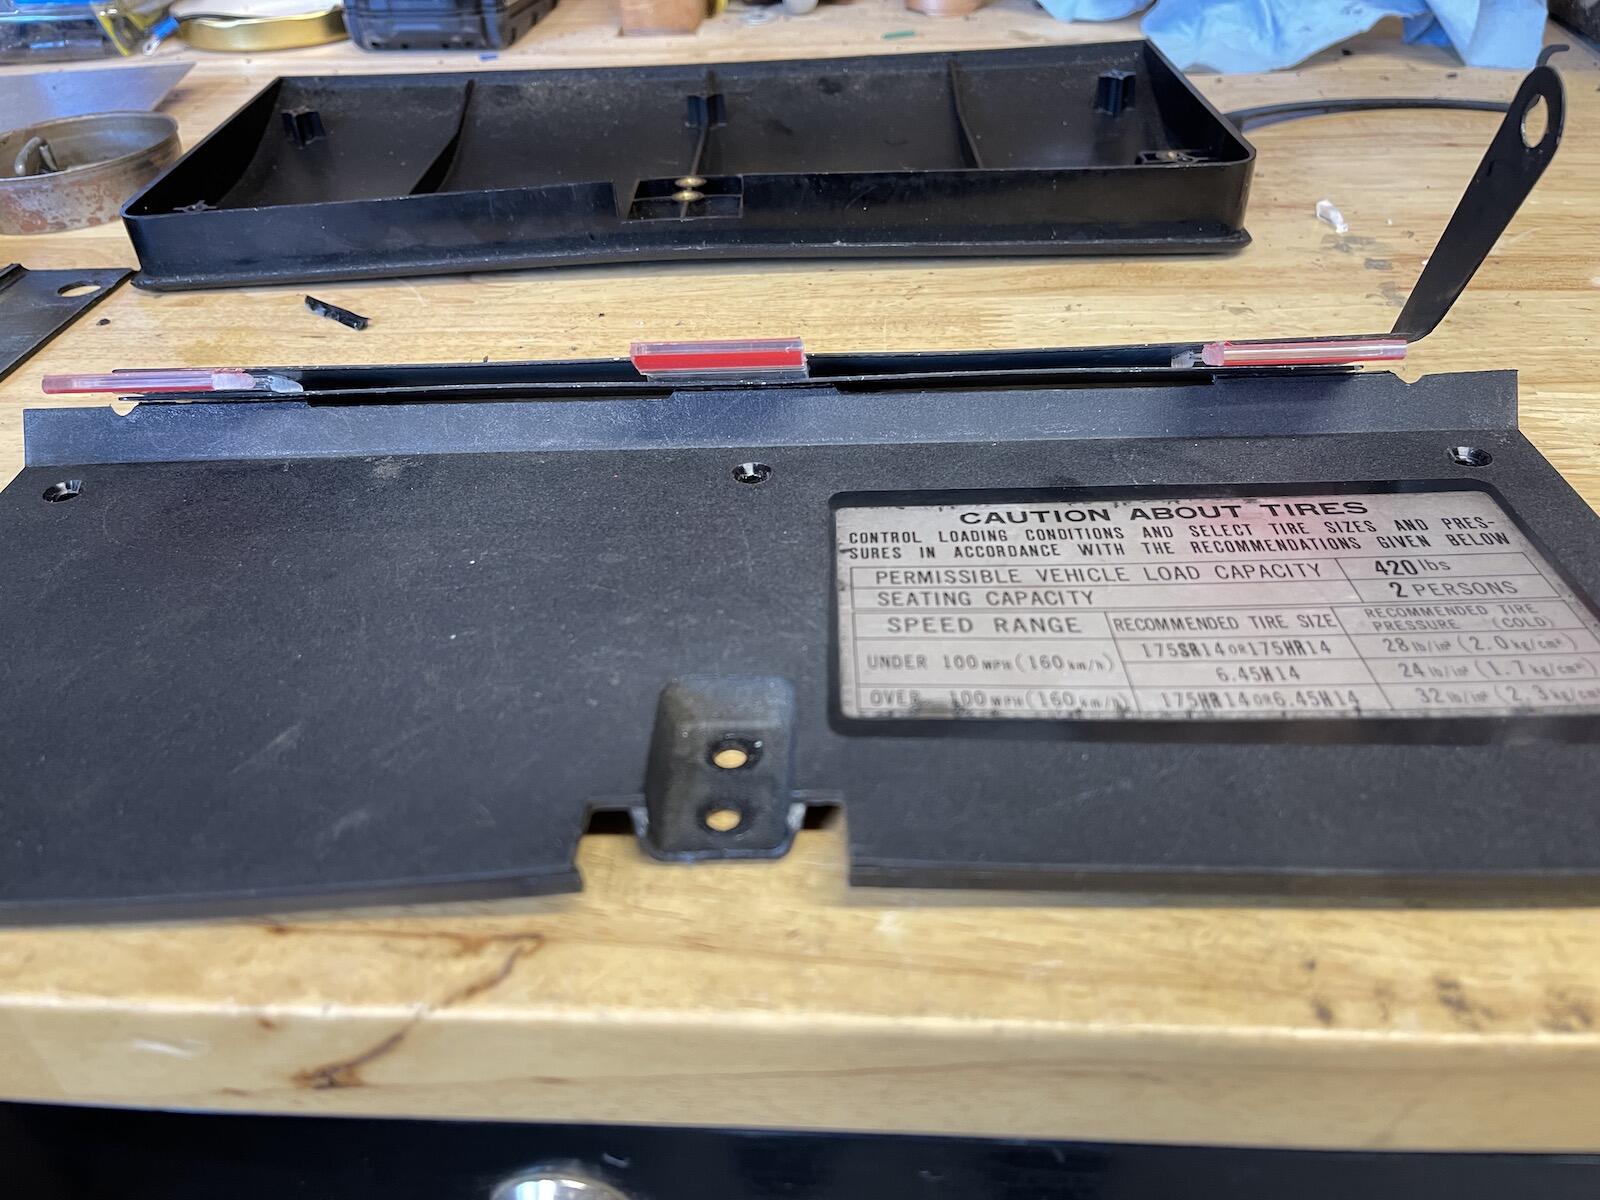
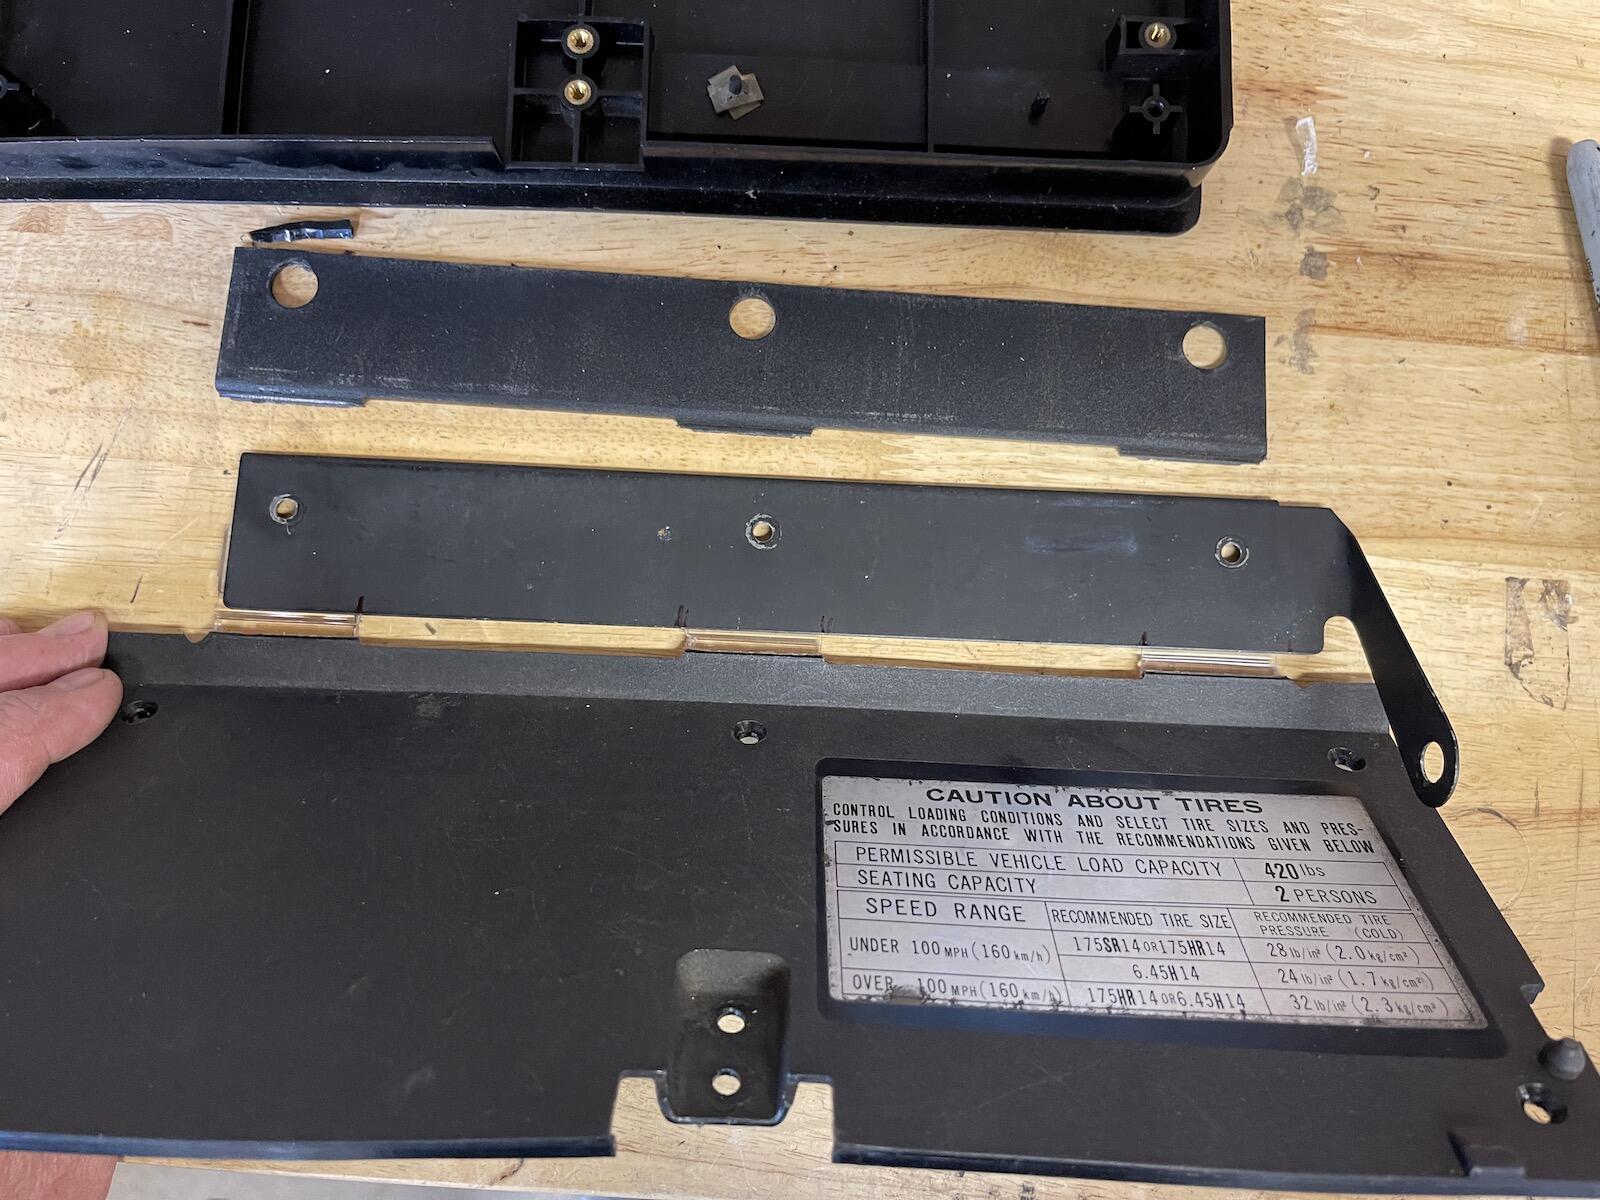
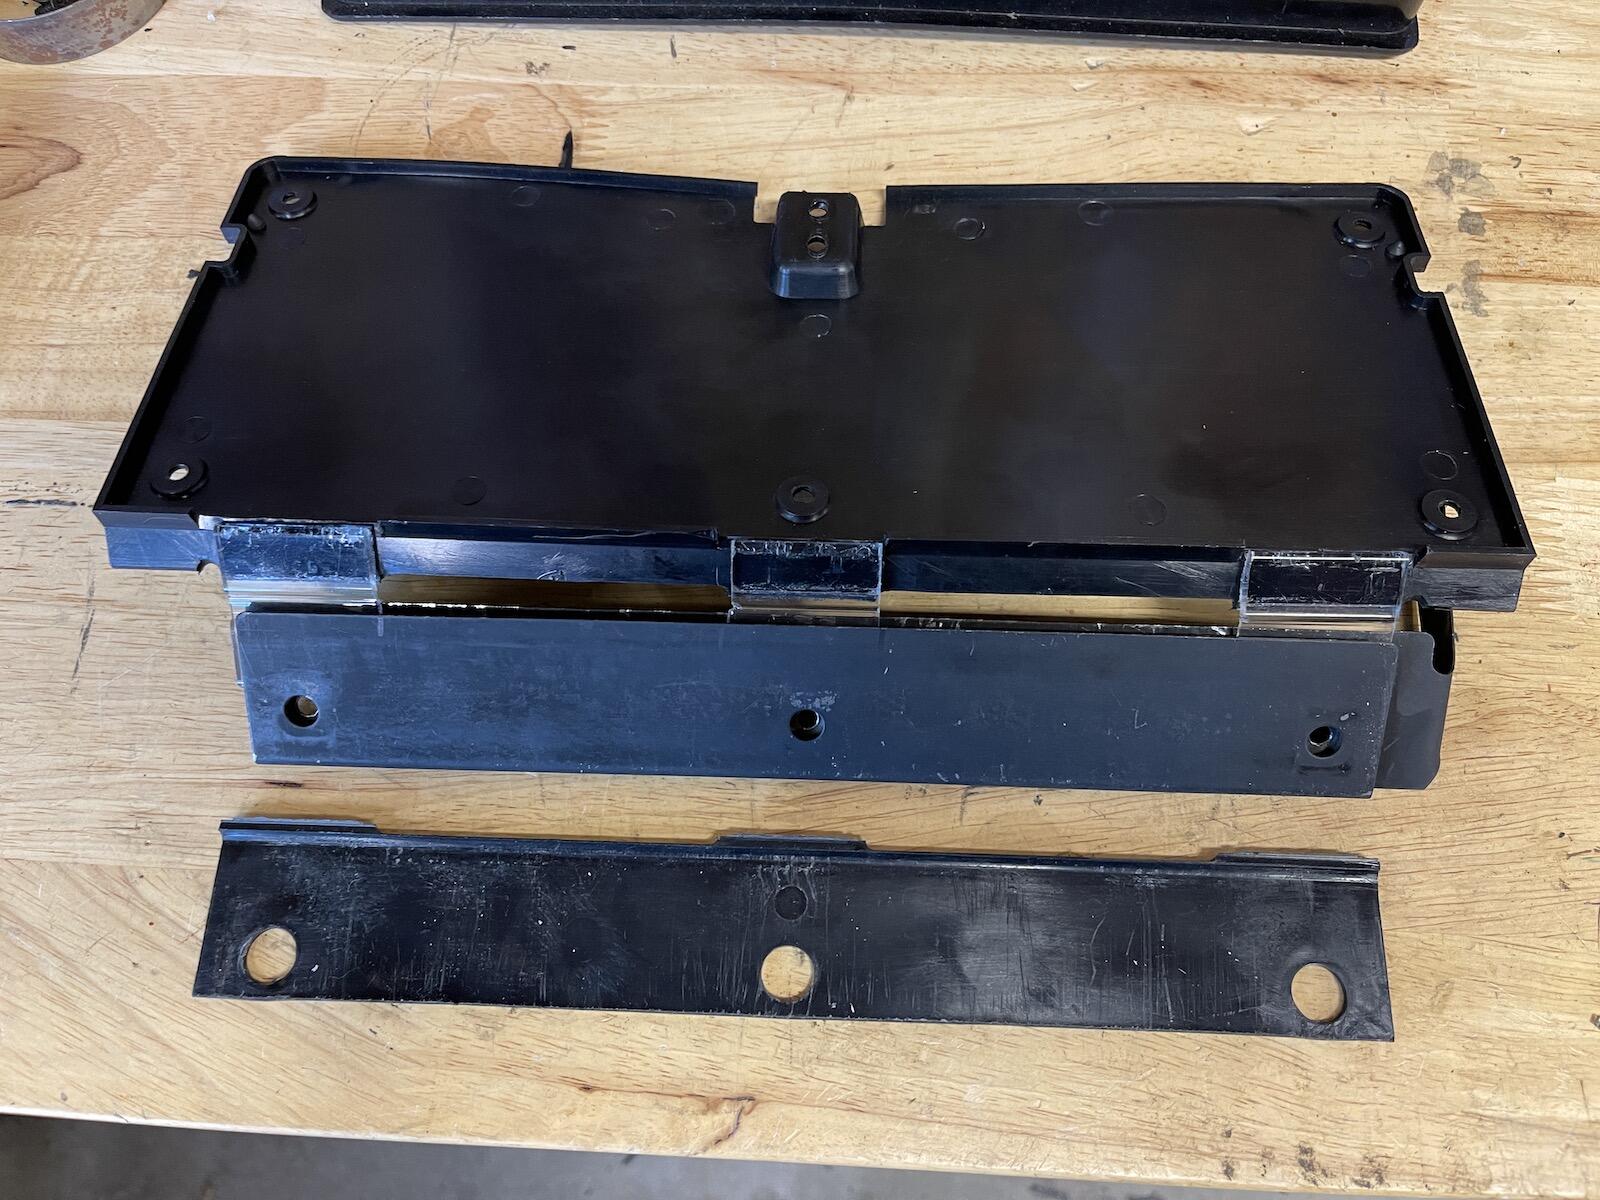
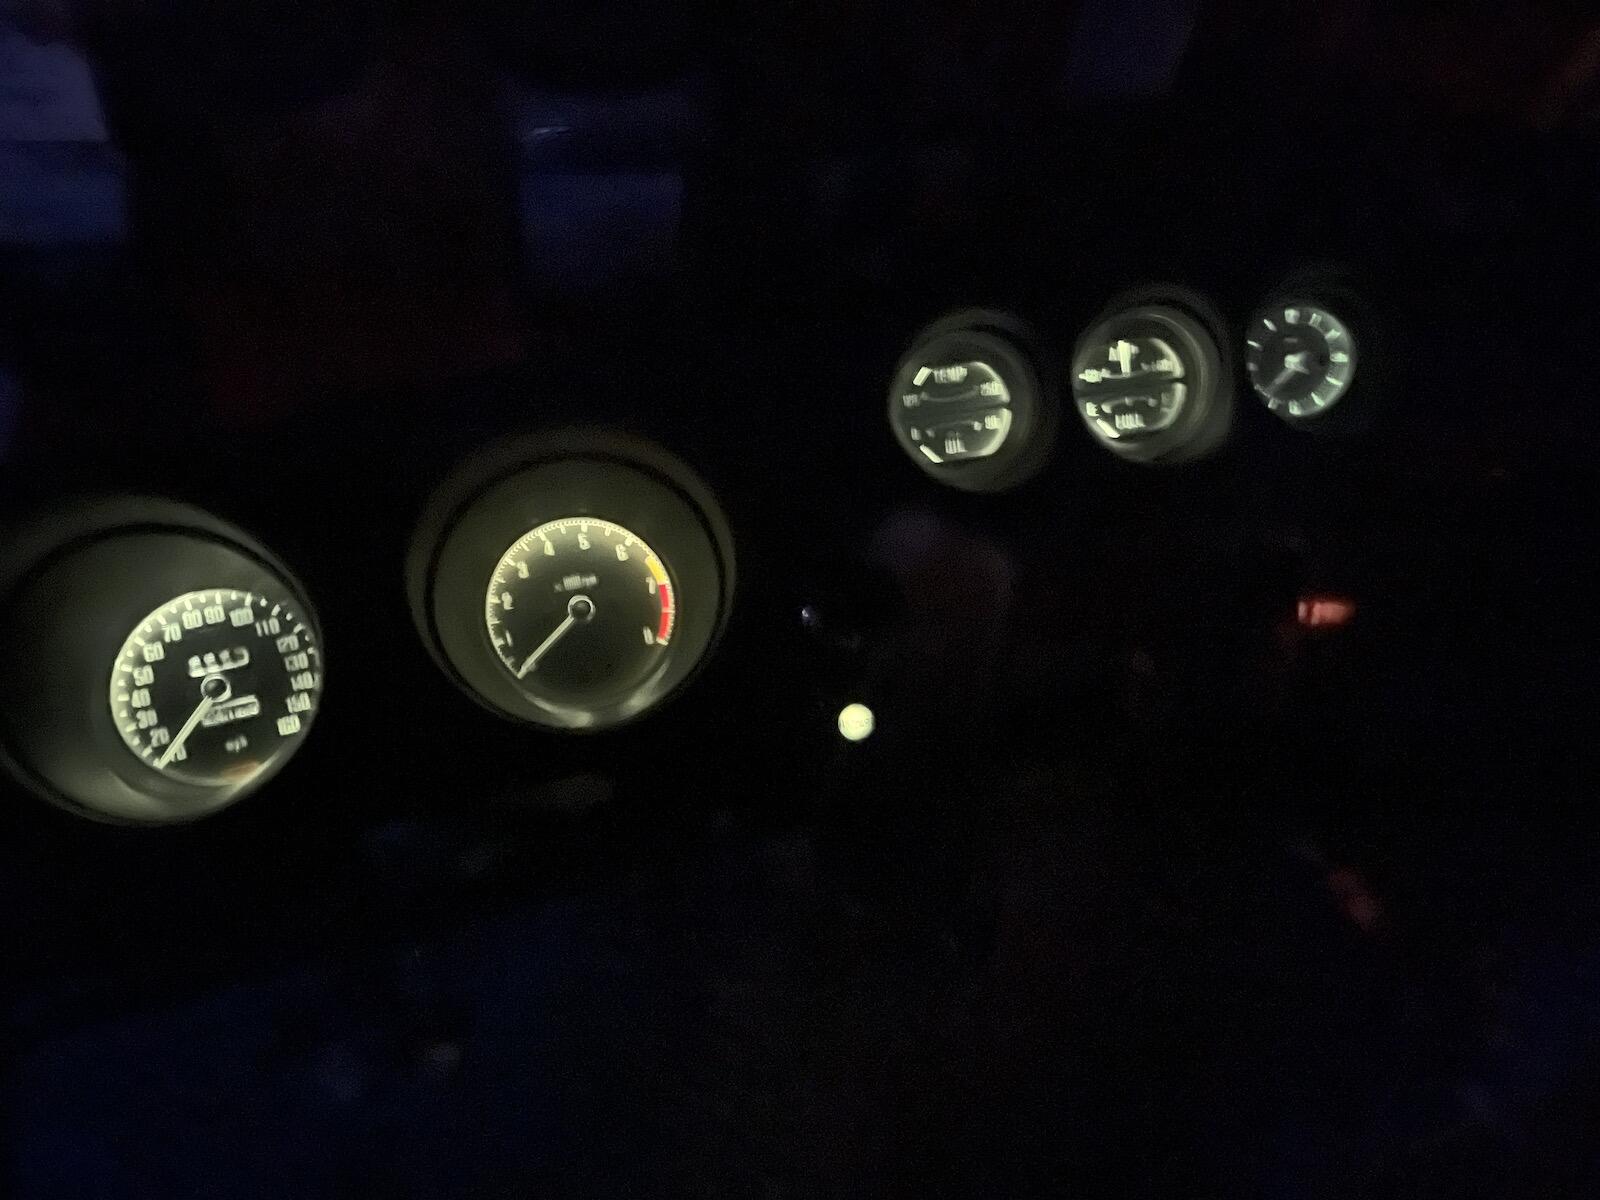
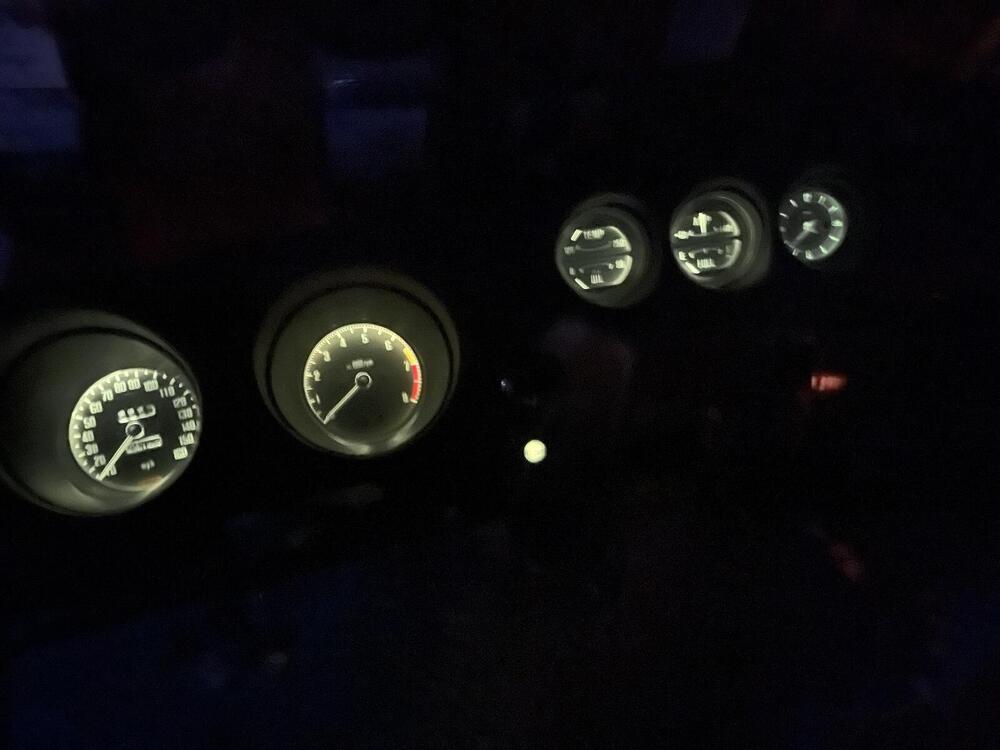
Changed all the dash bulbs using this kit from Z Car Depot. I prefer a dash that's not so bright, where I don't need to wear sunglasses at night 😎. So, used old school incandescent bulbs. Bench tested all gauge lights to make sure they all work and have good grounds. I'm ready to put this dash back in the car.
-
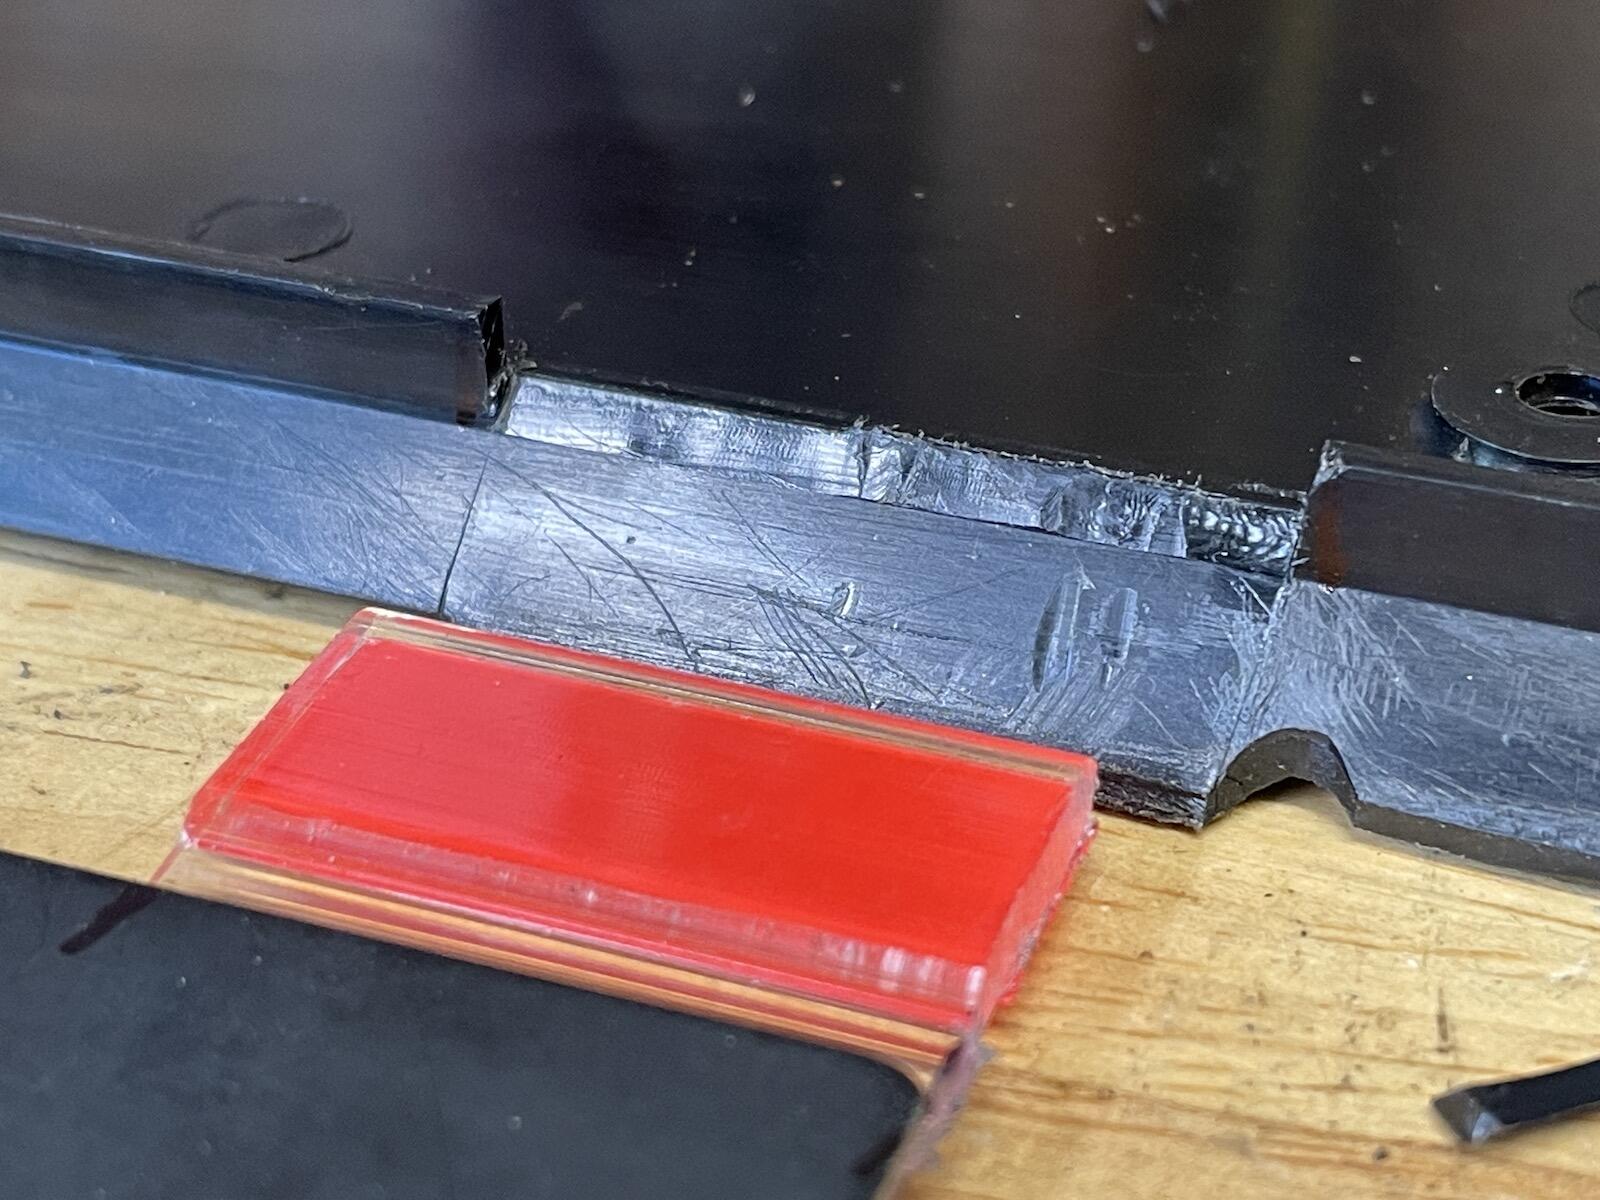
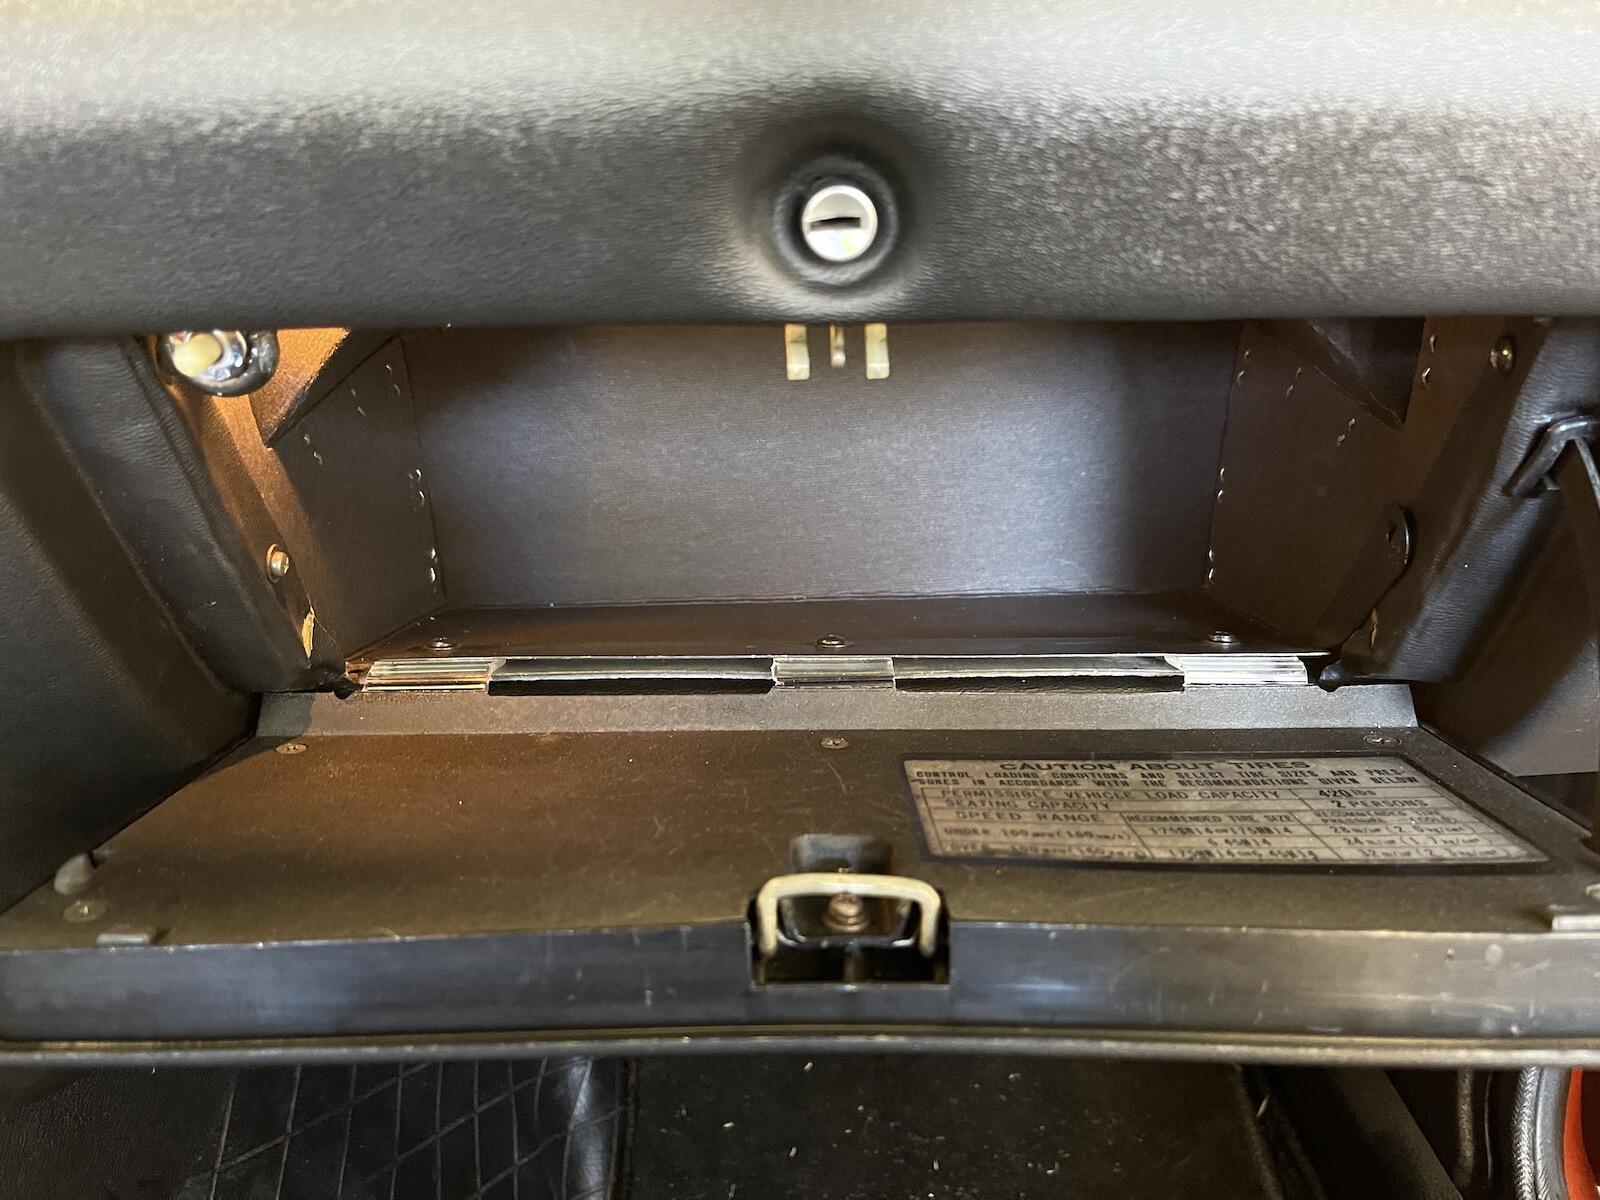
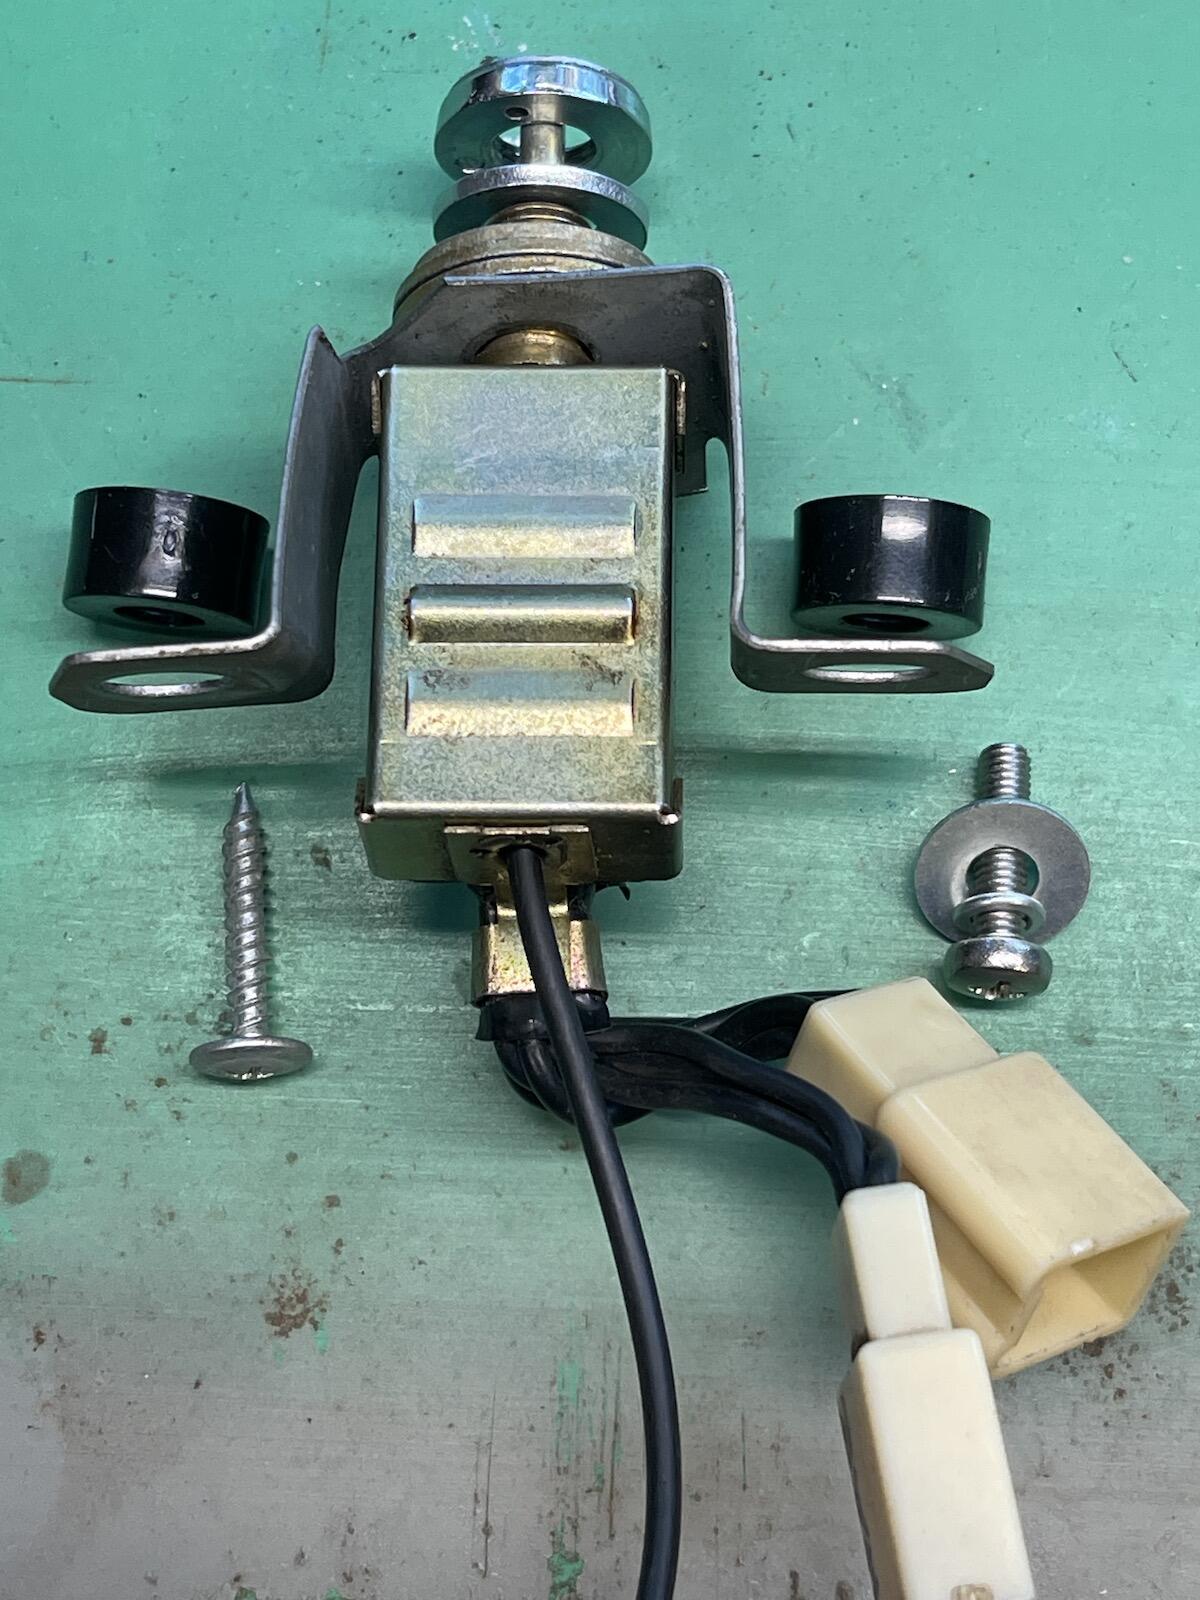
While waiting for a few small parts, I decided to redo the Lighter and Hazard Switch mounting. The rear mounting bracket made the hazard switch stick out about 3/8" of an inch too much, showing a lot of the brass threaded stem above the spanner nut. The lighter socket fits fine, but the switch bracket needs to be pulled back away from the dash to have a solid flusher mount. I saw this link which talks about the same problem and fix. First, I cut the bracket with some tinsnips, and after drilling a new hole for a sheet metal screw, and bolted the lighter half back in place and mounted the lighter socket. I rounded up some spacers for underneath the bracket, add added some washers to the stem so it seats against the back of the dash. I also added a washer beneath the spanner nut so it doesn't twist directly against the new dash material when tightening. Not sure if the factory had one there, and mine was missing, but it seemed like a good idea. Used my snap ring pliers for the spanner nut, not the best tool to use, but it worked. Got a longer M5 screw and drilled another hole for the sheet metal screw. Mounted back in place. It does feel more solid too.

-
Thanks, ordered.
-
I'm going to try to reinstall the dash with everything connected behind the new dash, wiring, vents, glovebox, etc. So all I'll need to do is connect the harness at the right side relay area, fuse box, center console, and ignition switch. I'm not sure the new glove box can be folded like origami to fit through the front opening. But it was nice not having a glove box in the way when I removed the dash. I'm going to try installing it this way, but plans may change. I mounted a small push button and bracket (circled in red) to adjust the new clock when needed. I think I need to hunt up another person to help me get it in place, it is fairly heavy.


-
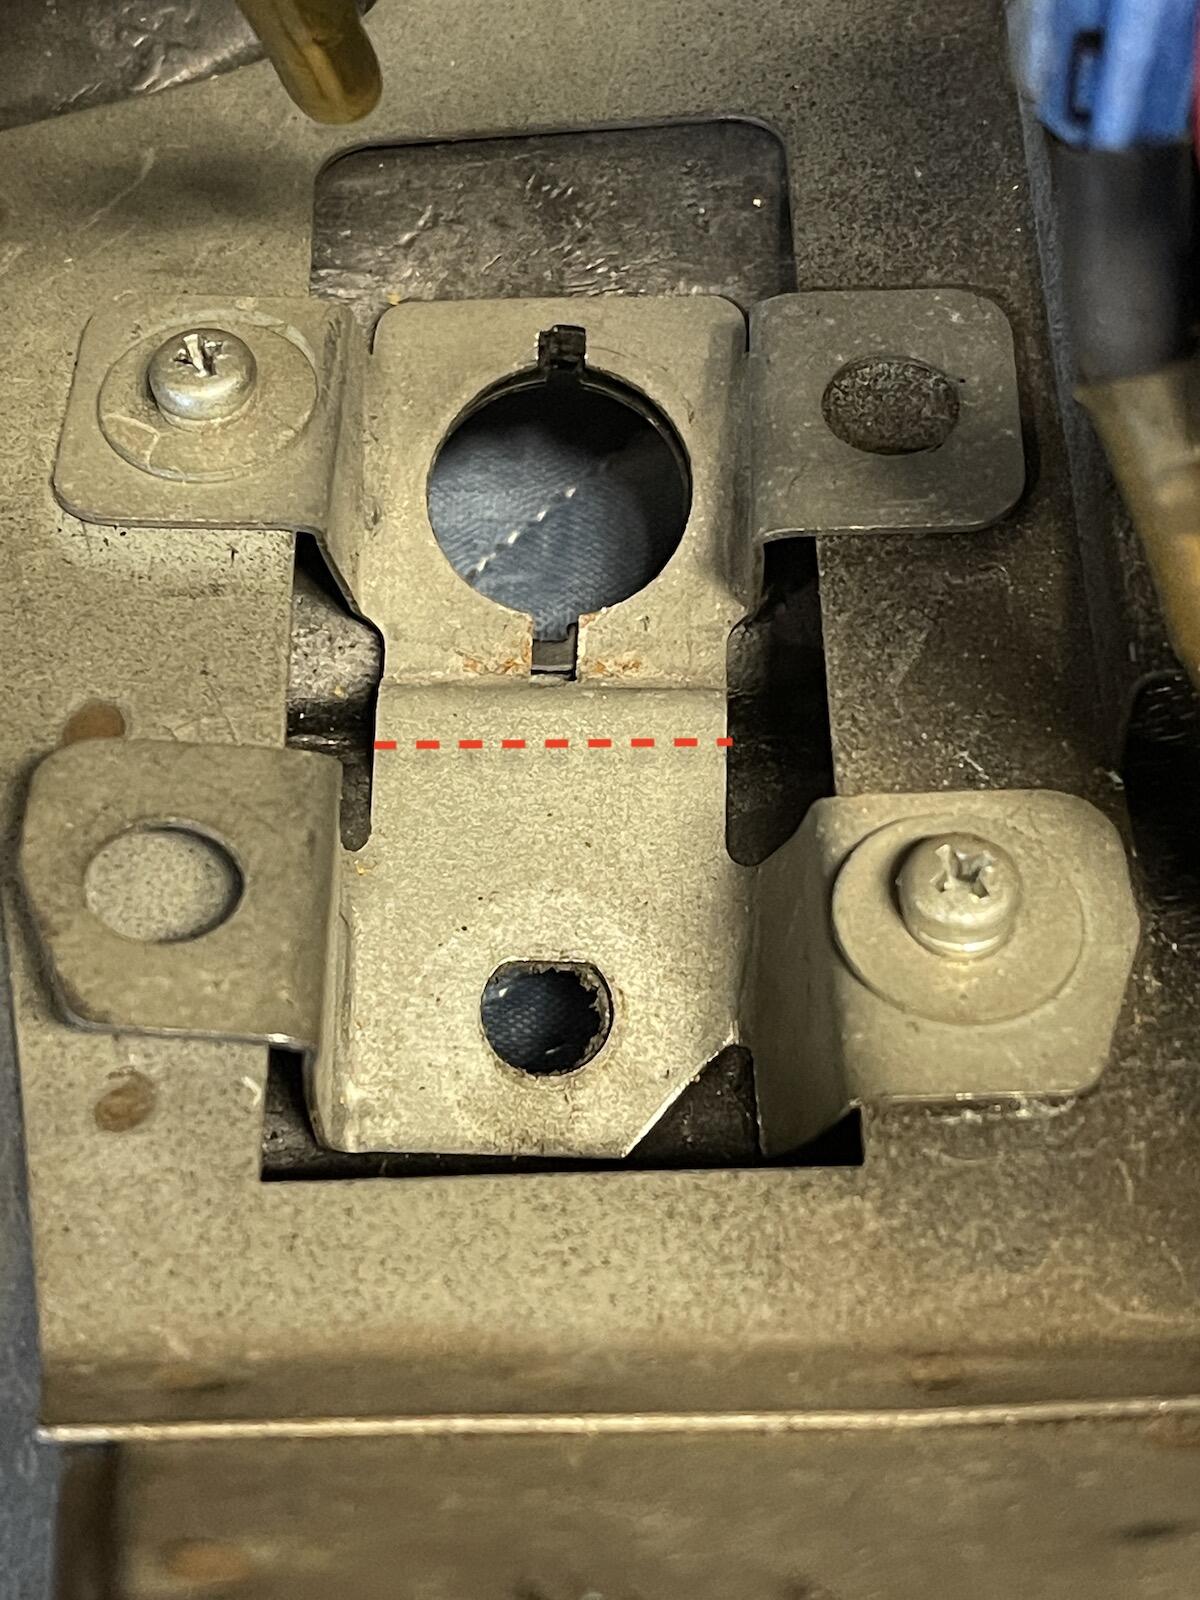
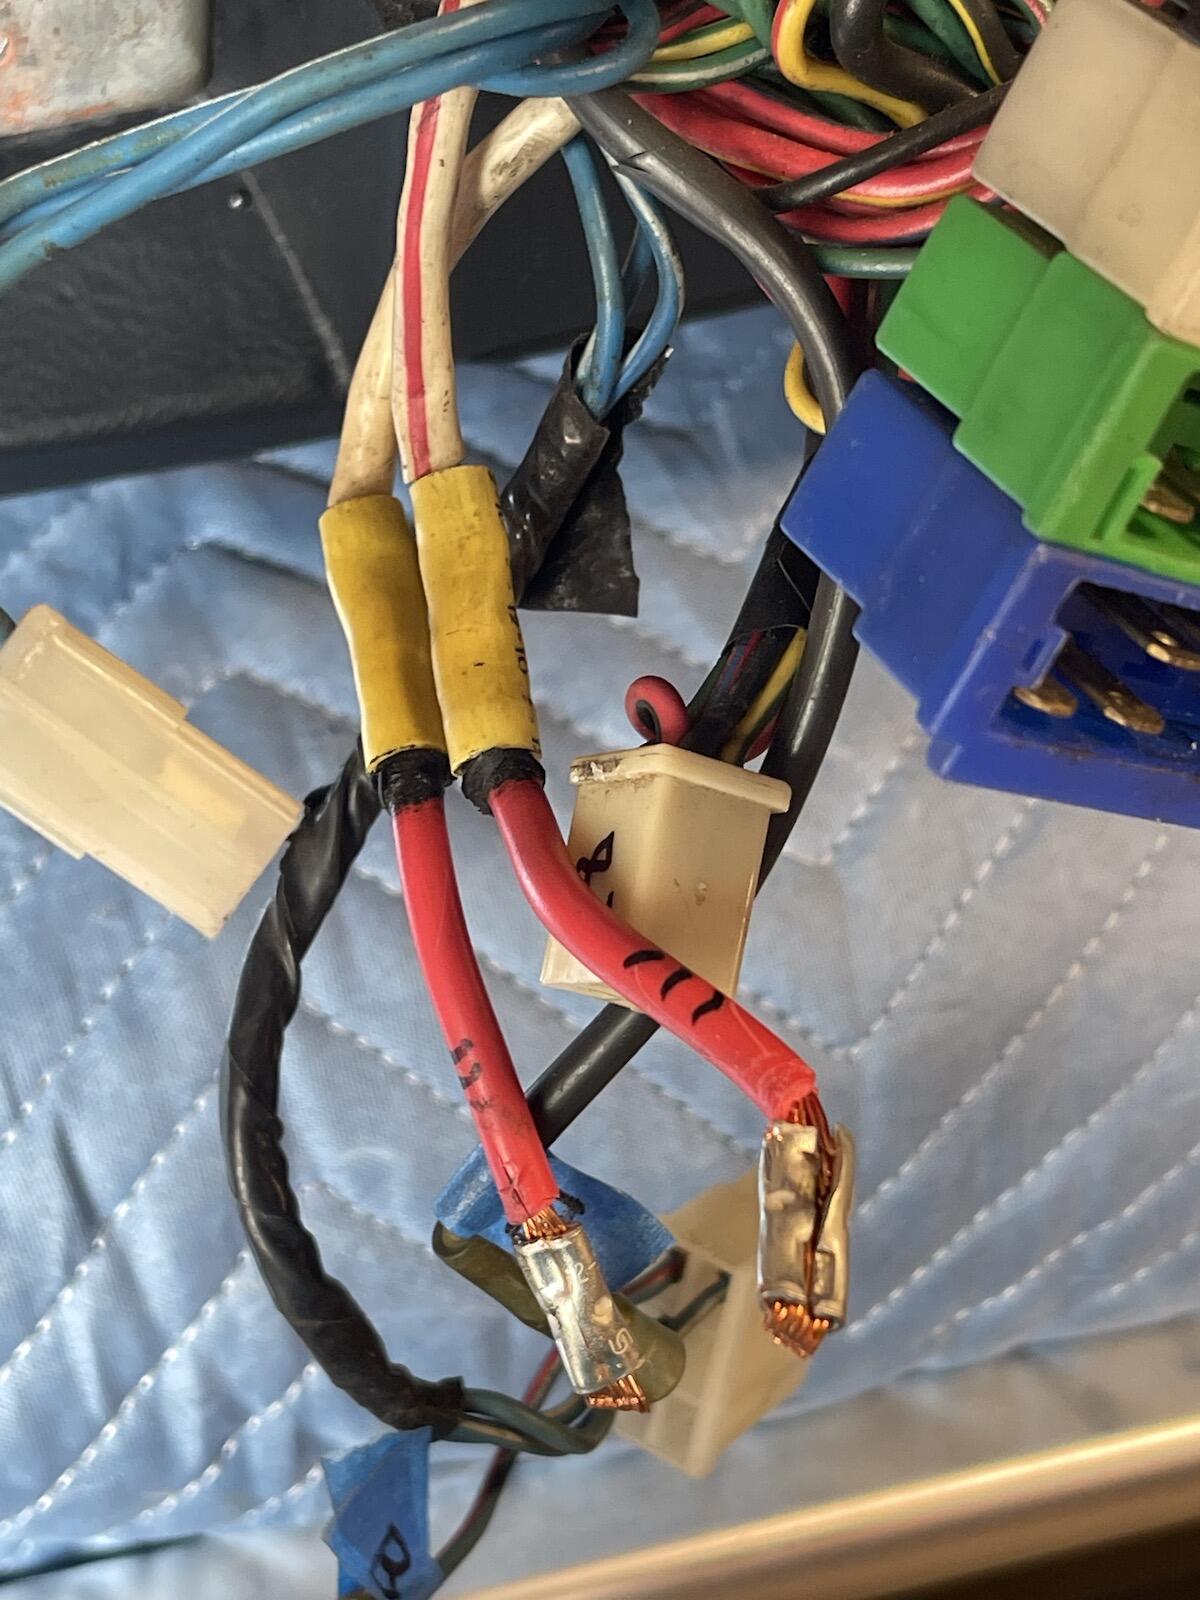
Quick question, what's the best way to reconnect the two power feed wires to the cabin? When someone else removed the dash in the past, they spliced in a short piece of red 10 gauge wire with 4 crimp butt connectors. It would be handy to have something I can easily disconnect if the dash ever has to come again. But obviously these need to have good quality connectivity. I'm not even sure how the factory did it. Any ideas of what the best way is, please let me know. Thanks