wheee!
Free Member
-
Joined
-
Last visited
Everything posted by wheee!
-
 ...internally regulated 120 AMP alternator with Heim joint tensioner... GM 12Si alt. In my thread there is a "how to" on modding the mount.
 -
If you are looking for more of a project, and less of of a pristine restored car, you will be more likely to find something in your price range. Under $20 k is a project with rust and issues... Plus $30k is more of a rust free survivor or restored driver
-
https://www.youtube.com/watch?v=TfnDq4R6hOQ
-
Make sure you specify the year clearly several time’s... I got three sets before I got the right ones! But they were beautiful.
-
Fuel tank straps are from Skillard
-
...and I am embarrassed to note this is a Canadian car...
-
-40 here. Pic your own temp scale as it’s the same in both....
-
-
With the two hoses going to the can, and a filter on the top like you have it, you should have little issue with the carbs. Fuel injection on the other hand....
-
Nice post Zed. I know about the container he bought as I am looking at the same one for my build. It is a "in" and "out" system with a small filter on the "in" side inside the can allowing the "out" side to have oil free air. There is a port blocked off on top that you can add a small filter to allow the can to breathe if you are not recirculating. My thoughts being that the valve cover can go both ways, so use the top "oil free" hole and allow any residual oil vapour to fall gravity wise to the bottom of the can while it is in "valve cover output" mode.
-
None of the stock components are re-used basically. I will have new heater lines, new vent hose, all new evaporator and condenser, new blower etc etc This will be a modern replacement of the old system. It should provide a nice quiet, leak free version of the old basic functions, but also give me AC! Of course, that means a bunch of new lines and a compressor and drier and yadda yadda yadda, but it will be worth it.
-
Jeff, your routing of the crankcase PCV and the valve cover breather may be wrong. The PCV outlet on the block is out only, and the valve cover vent is bi-directional . The little oil catch can you set up is an “in and out” you have one of the lines on the “out” port which defeats the filter mechanism inside. You will also have no positive breathing through the filter in the can! When all pressure is going in, it will effectively block ALL BREATHING from the block. If you install a filter on the "out" port and then route the valve cover hose to the top of the can, the air can move freely to the valve cover and still get clean(er) air from the can. The block will then be able to breathe. Some people just add a small filter to the valve cover to allow air in and out as needed. Then just run the PCV from the block to the catch can "in" port, block the "out" if you're not going to the intake, and put a filter on the top of the can to allow air to move out of the block. This will result in unmetered air going to the top of the engine and defeat the "circulation" of the engine air, but some people do it with no negative effects. Then again, this will probably set off a storm of posts from other viewpoints...
-
-
-
-
-
-
-
-
No, they are available. But to Canadians, they are almost unobtainable for a reasonable cost. Some suppliers list them, even at a reasonable cost (under $20 each US) but then they want up to $90 US to ship them!!! Canadian suppliers claim no stock and no one can seem to order them. Part number EMPI 86-1164-D is the replacement part. If anyone can order them down south and ship them up... I'm in for a couple! Various Z car suppliers have them too, but with small orders like this, it is prohibitively expensive to ship. Most want to use Fed Ex or UPS instead of USPS. When those packages hit the border, they get hit with brokerage and duty and taxes. Duty and taxes I have no issue with, it's the brokerage and document fees that are stupid. I had a $20 item ship to me from the states via UPS and arrive with $64 in fees attached...
-
-
That is a great trick! I didn't think of that. I saw many videos on pulling the boot over the entire knuckle with a cone, but didn't want to damage the "unobtanium" boots that were in pristine shape. By turning them inside out, it also lets you clean out all the old grease easily. I will try and get a pic of the cut off portion of the funnel I used. Worked super well.
-
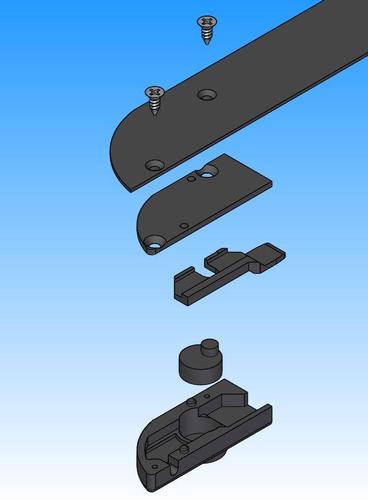
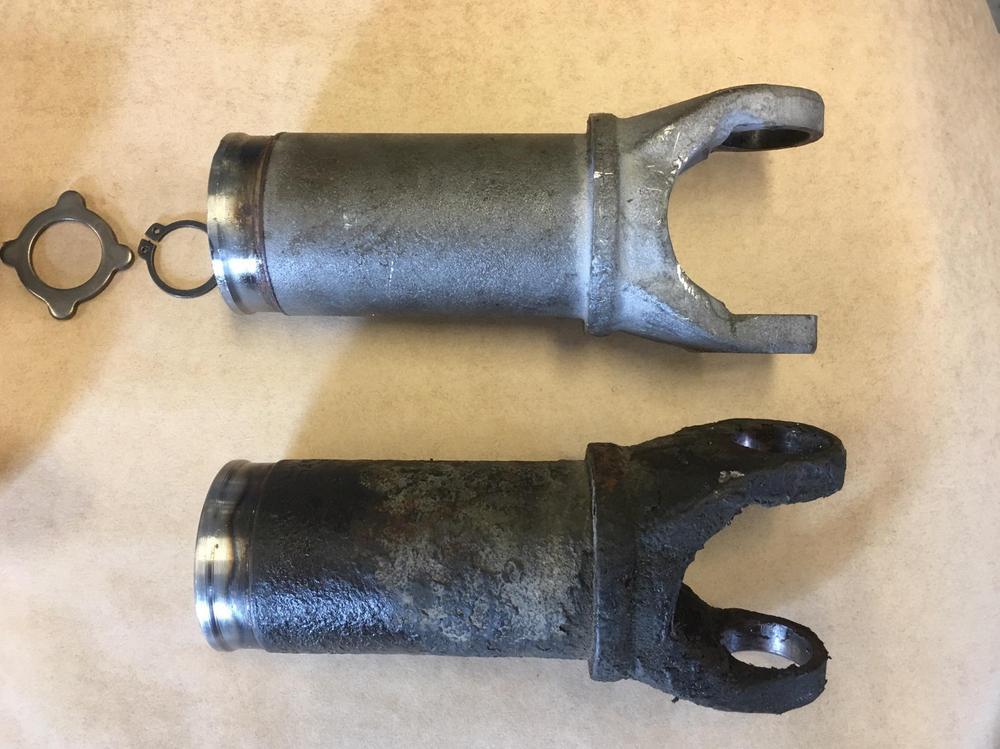
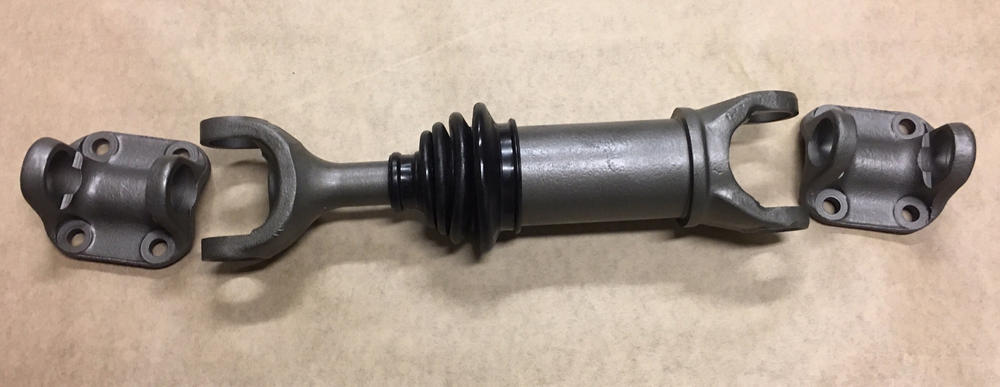
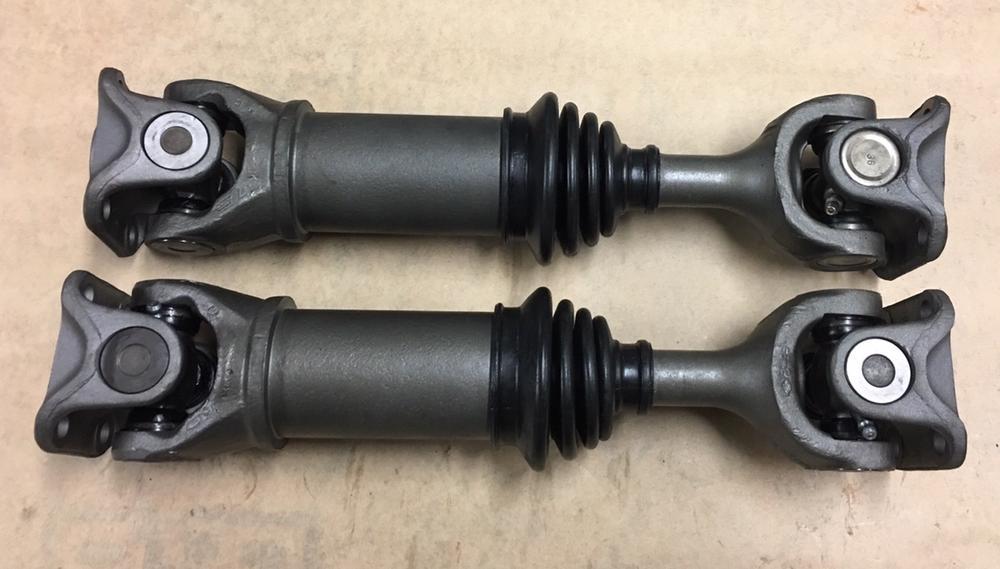
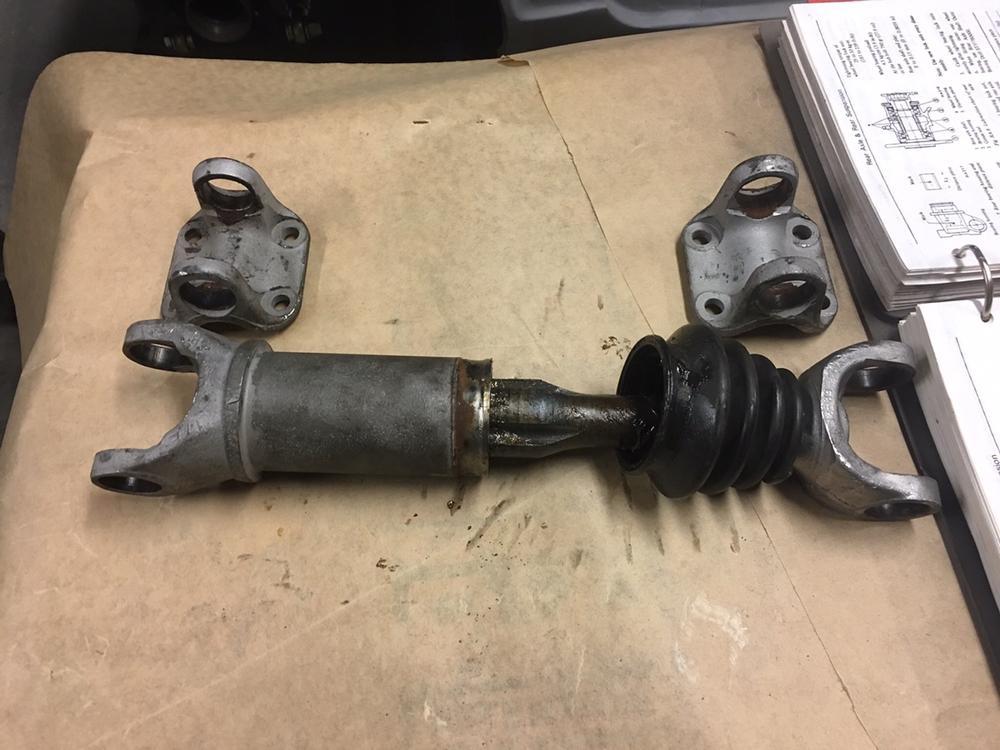
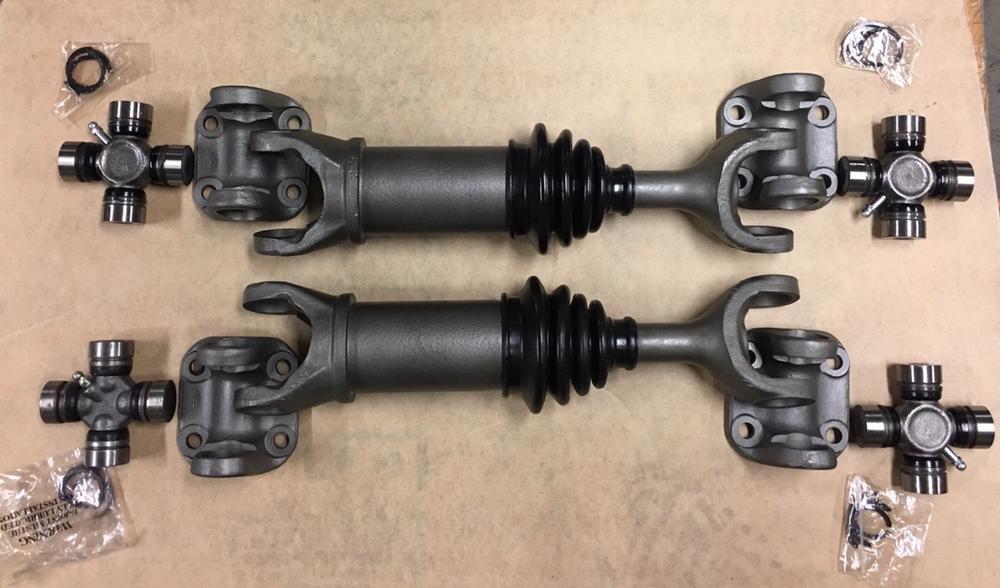
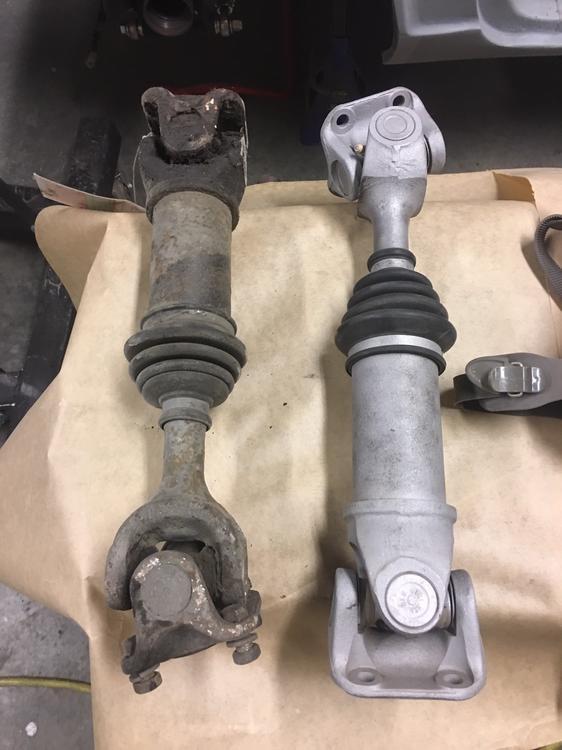
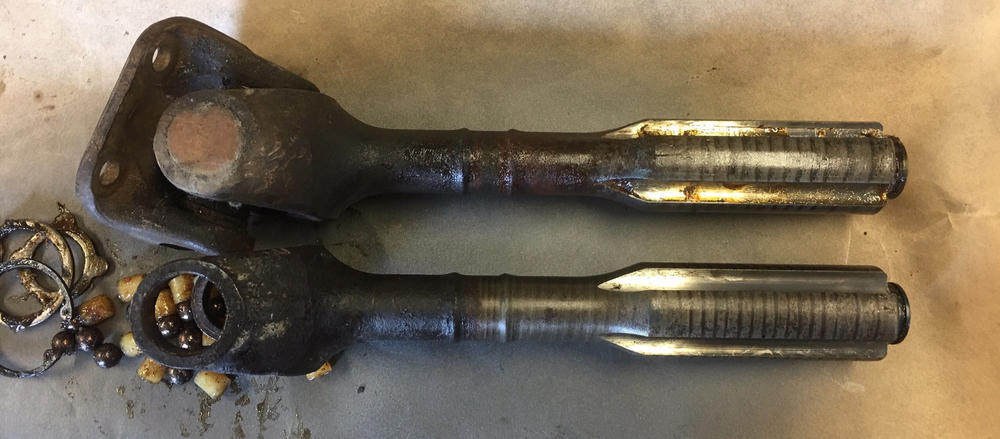
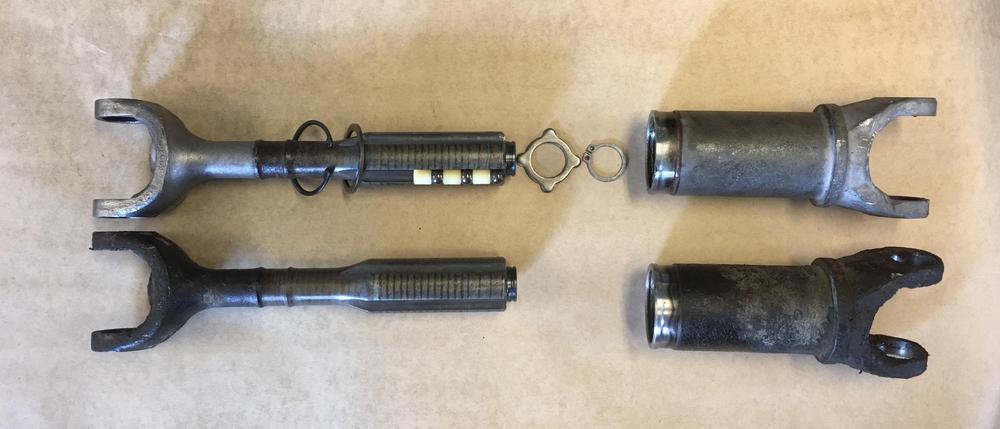
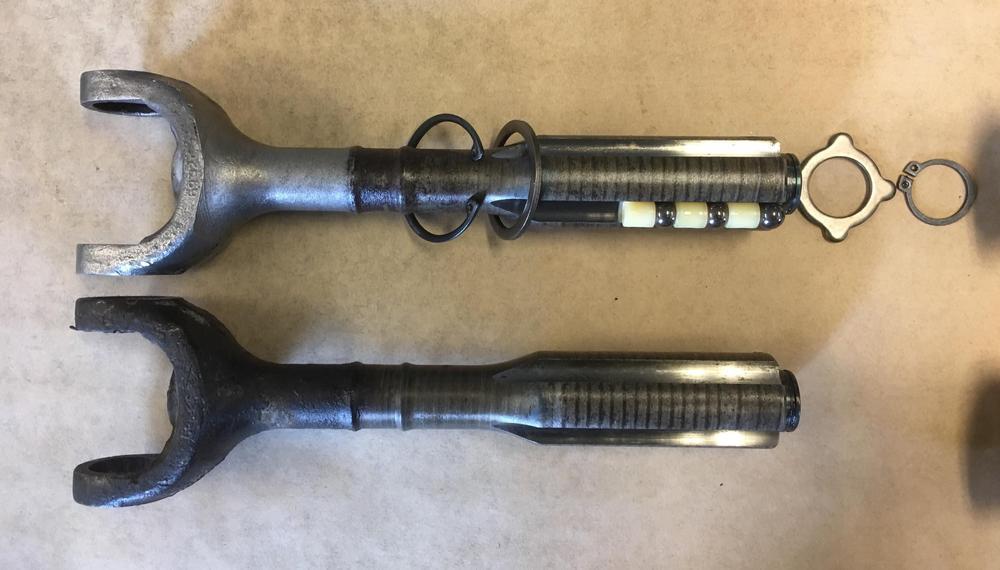
Let me start this thread by saying that I was not looking to solve a mystery or bust a myth when I started this procedure. I just wanted to rebuild my tired old 76 280Z half-shafts! I think there was a very common myth that the S30 half-shafts were different sizes. The driver side being shorter than the passenger side. Even though the distance from the wheel hub to the differential differs (more-so with the R200) from side to side, the half-shafts are IDENTICAL! The amazing amount of lateral play in the shaft allows it to expand or contract almost three inches. ...on to the pics! First a shot of the shafts after I ran one through the media cabinet next to the other. The removal of the u-joints is straight forward, several well documented methods on line if you need help there. Now the science! Here you can see that the axles are identical in each dimension. Also note the layout of the snap rings, retaining rings and the balls and spacers. And for those that were still disbelieving, a shot of a 240 half-shaft next to the 280 half-shaft. 240 shaft with the u-joint still attached. Then on to refurbishing! You will need 4 new u-joints. SKF UJ393, MOOG 393, or Precision 393 will all work or any variation thereof. I media blasted the shafts and protected the bearing surfaces while doing so. I then painted the exposed parts in Cast Iron engine paint from Duplicolor. Love the look! I re-used the old boots as they were in great shape. After blasting the shafts and painting them, I turned the boots inside out and fed the wide side over the bearing shaft. I used the cut-off top of a funnel to aid the narrow end going over the shaft and up into position. Worked excellent. Leave the boot inside out for now. Slide the upper retaining ring and snap ring on to hold the shafts together, tuck them up by the boot. Refer to the above pic for proper order. Attach the lower retaining ring and snap ring. Put the cleaned spacers and bearings into a zip lock bag full of a good quality bearing grease and ensure they are coated nicely all around. Place them in the channels in the correct order, ball bearing at the bottom, spacer at the top. The grease will keep them in place. Add about 10g of grease to the top of each channel. Carefully slide the shaft back into the axle while ensuring the ball bearing and spacers are supported by the retaining tabs. Make sure the shaft is orientated correctly, the same direction as the axle end! Try and keep the bearings at the bottom of the assembly as it goes together. Holding it vertical helps. When the shaft is in the axle, add another 30g of grease to the top of the shaft, concentrating on the open groves of the axle that did not receive the bearings. Use the retaining ring to push it all together and seat the bearings. I used a screwdriver and hammer to tap the retaining ring flat. Worked great, didn't need much pressure. Reattach the snap ring to the axle at the top. Wipe up the grease you got everywhere... and pull the boot back down outside-in , ensuring the top fully inverts and seats in the groove, same as the bottom. Attach your favourite brand of cv boot clamp over the boot ends and securely tightly. Mine had not arrived in time for the pictures. Proceed on to installing the u-joints, being careful not to damage the pretty paint! Grease the u-joints and you are done! Another 40 years of glorious torque! Thanks to Jim @zKars for his guidance and wisdom.
-
-