dmorales-bello
Free Member
-
Joined
-
Last visited
Everything posted by dmorales-bello
-
 Nice work. Can you post a link to the PWM?
 -
Yes. I'm pretty sure dropping the steering column is necessary. I have a ZPowersteering unit installed so it was absolutely necessary in my case. I think I did post the process but can't recall if it was here or on the HybridZ sister forum.
-
Hey, pal! Yeah! Long time. No updates on the Z (thank Goodness) other than periodic maintenance, but no upgrades needed. I do enjoy it immensely. Drive it around on Sundays when it's not raining, of course! Also take it to some local meets on occasion. That Z is certainly one of my sources of pleasure. I do surf the forum now and then, and keep up with all you guys do. You never know when I'll be in need of all that unfathomable crowd source knowledge.
-
I installed one on my '78 280 during the pandemic lockdown and it helped me keep my sanity. It's a relatively long process if you've never done it before. Probably a good 6 to 8 hours of labor to pull out the original dash, instruments, label and organize all the harnesses, and reassemble it all. It turned out pretty close to perfect. The Vintage Dash unit is a superb reproduction of the original, with better, more durable materials. With good care it should last several decades. The final result is well worth the effort.
-
I really don't feel the front speaker pod on the driver's side blocks the dead pedal at all. However, I wear size 10.5 shoes which are not extremely large and my normal driving position is with my left knee bent and foot resting on the carpet and not on the dead pedal. The rear speaker pod has to be moved forward to lift the deck board. I do have it fixed to the board itself with two 3" screws (one screw on each side towards the top edge) that go through the pod itself and into a couple of the metal tabs that normally hold the stock plastic piece that covers the rear lights and that you need to remove to install the MSA speaker enclosure. Pretty easy to fix and remove. Sent from my SM-S908U using Tapatalk
-
Here you go: https://r.tapatalk.com/shareLink/topic?url=https%3A%2F%2Fwww%2Eclassiczcars%2Ecom%2Findex%2Ephp%3F%2Ftopic%2F58305-Revised-Stereo-Install&share_tid=58305&share_fid=83168&share_type=t&link_source=app Sent from my SM-S908U using Tapatalk
-
I used them on my build and have a post describing them. I'll try to look it up for you later when I get a chance. They added much needed front staging for the sound system and are definitely worth the price. Sent from my SM-S908U using Tapatalk
-
I'm good! Thanks anyways. Sent from my SM-N986U using Tapatalk
-
That's what I tried to point out before. It's the odometer reset cable which is held in place by a set screw. Loosen the set screw and it will easily pull out. Sent from my SM-N986U using Tapatalk
-
Remove the screw at the 12 o'clock position in the tach bezel and another screw under the dash at the 6 o'clock position and push it from behind (hand under the dash) until you can disconnect the tach harness. Set the tach aside. Now repeat similar procedure with the speedo removing the bezel screw and the under dash screw. Insert your hand through the empty tach opening unscrewing the speedo cable first, then push the speedo forward and loosen the small set screw holding the odometer reset cable. Finally disconnect the harness and remove the speedo altogether. Sent from my SM-N986U using Tapatalk
-
You need to disconnect the speedo cable, odometer cable and all electrical harnesses. My approach was to remove the tachometer first, then through the empty tach opening proceed to disconnect the speedo and odometer cable before removing the speedo with its electrical harness. After that you should be able to pull the dash completely. Sent from my SM-N986U using Tapatalk
-
Once you corroborate that all the electrical sources of failure check out, you can also pull the sender from the tank, bend the floater arm downward about an inch (toward the bottom of the fuel tank) and reinsert in the tank. That should allow your fuel gauge needle to move to the right with the same amount of fuel in the tank. It will take some experimentation but you should be able eventually to get the gauge needle to go fully to the right with a full tank of gas. Sent from my SM-N986U using Tapatalk
-
I described a tool I made especially for that task using pvc tubing. I couldn't come up with the link in my search but perhaps one of the guys here remembers it. Sent from my SM-N986U using Tapatalk
-
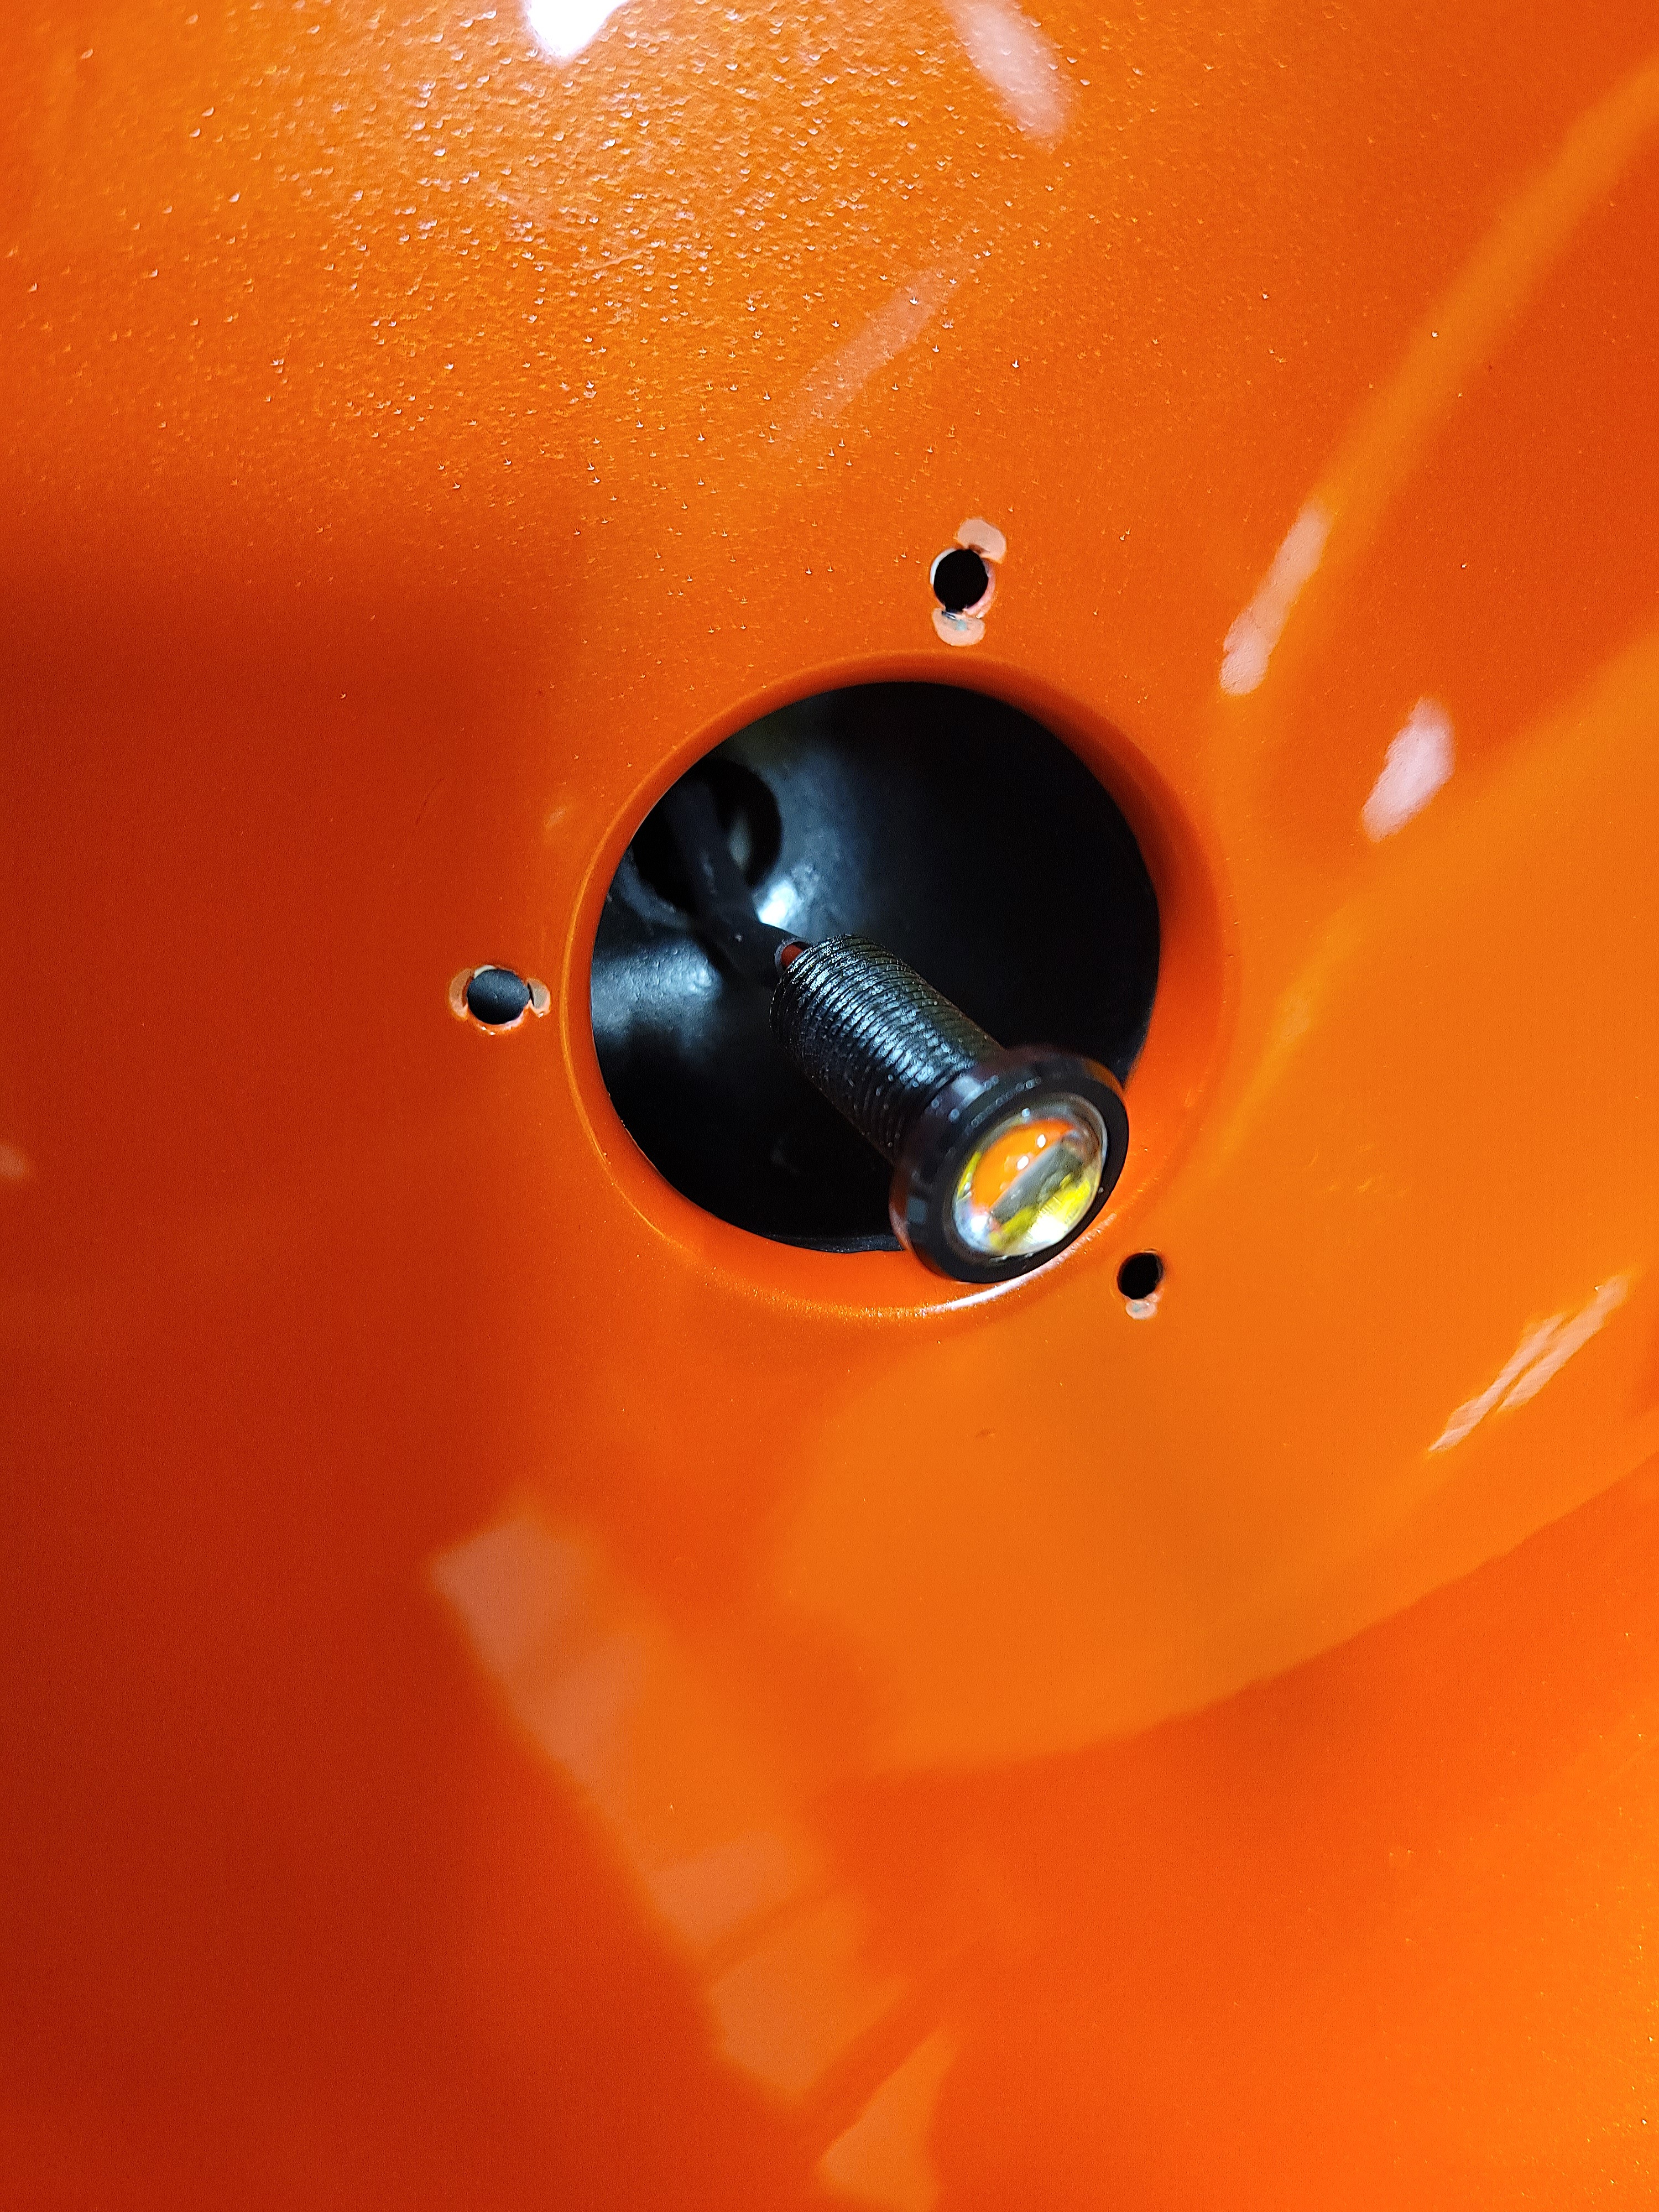
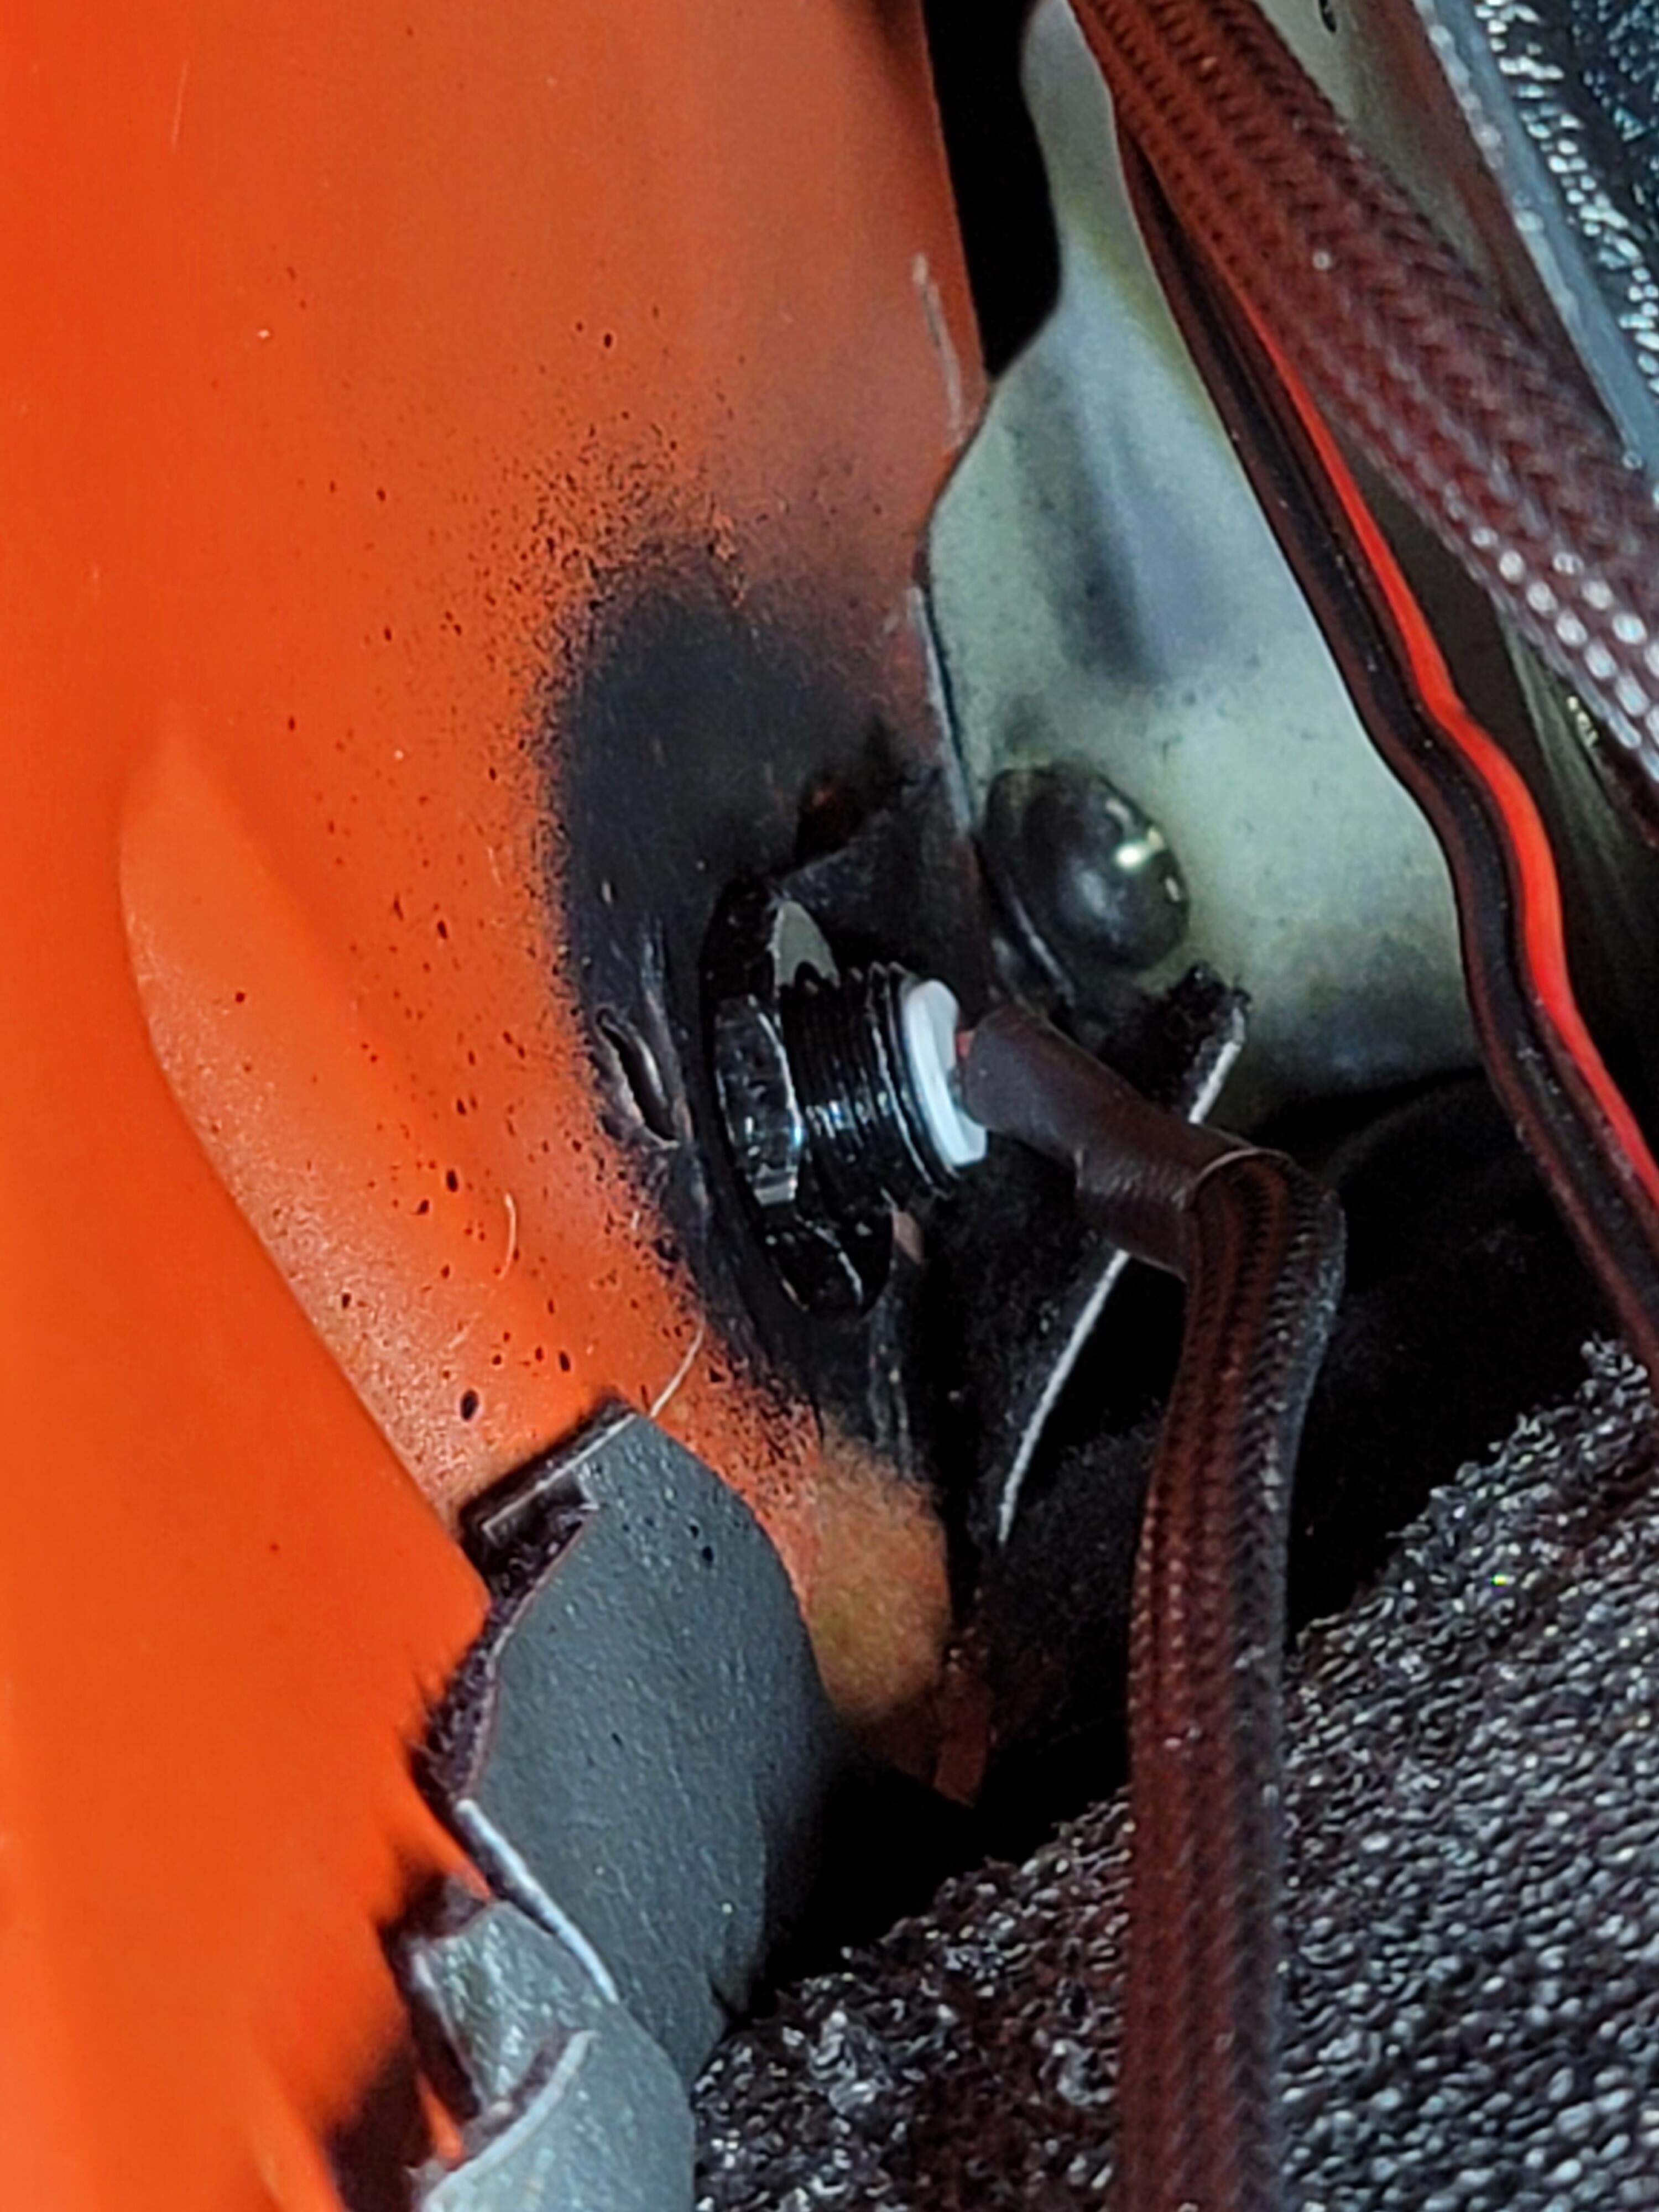
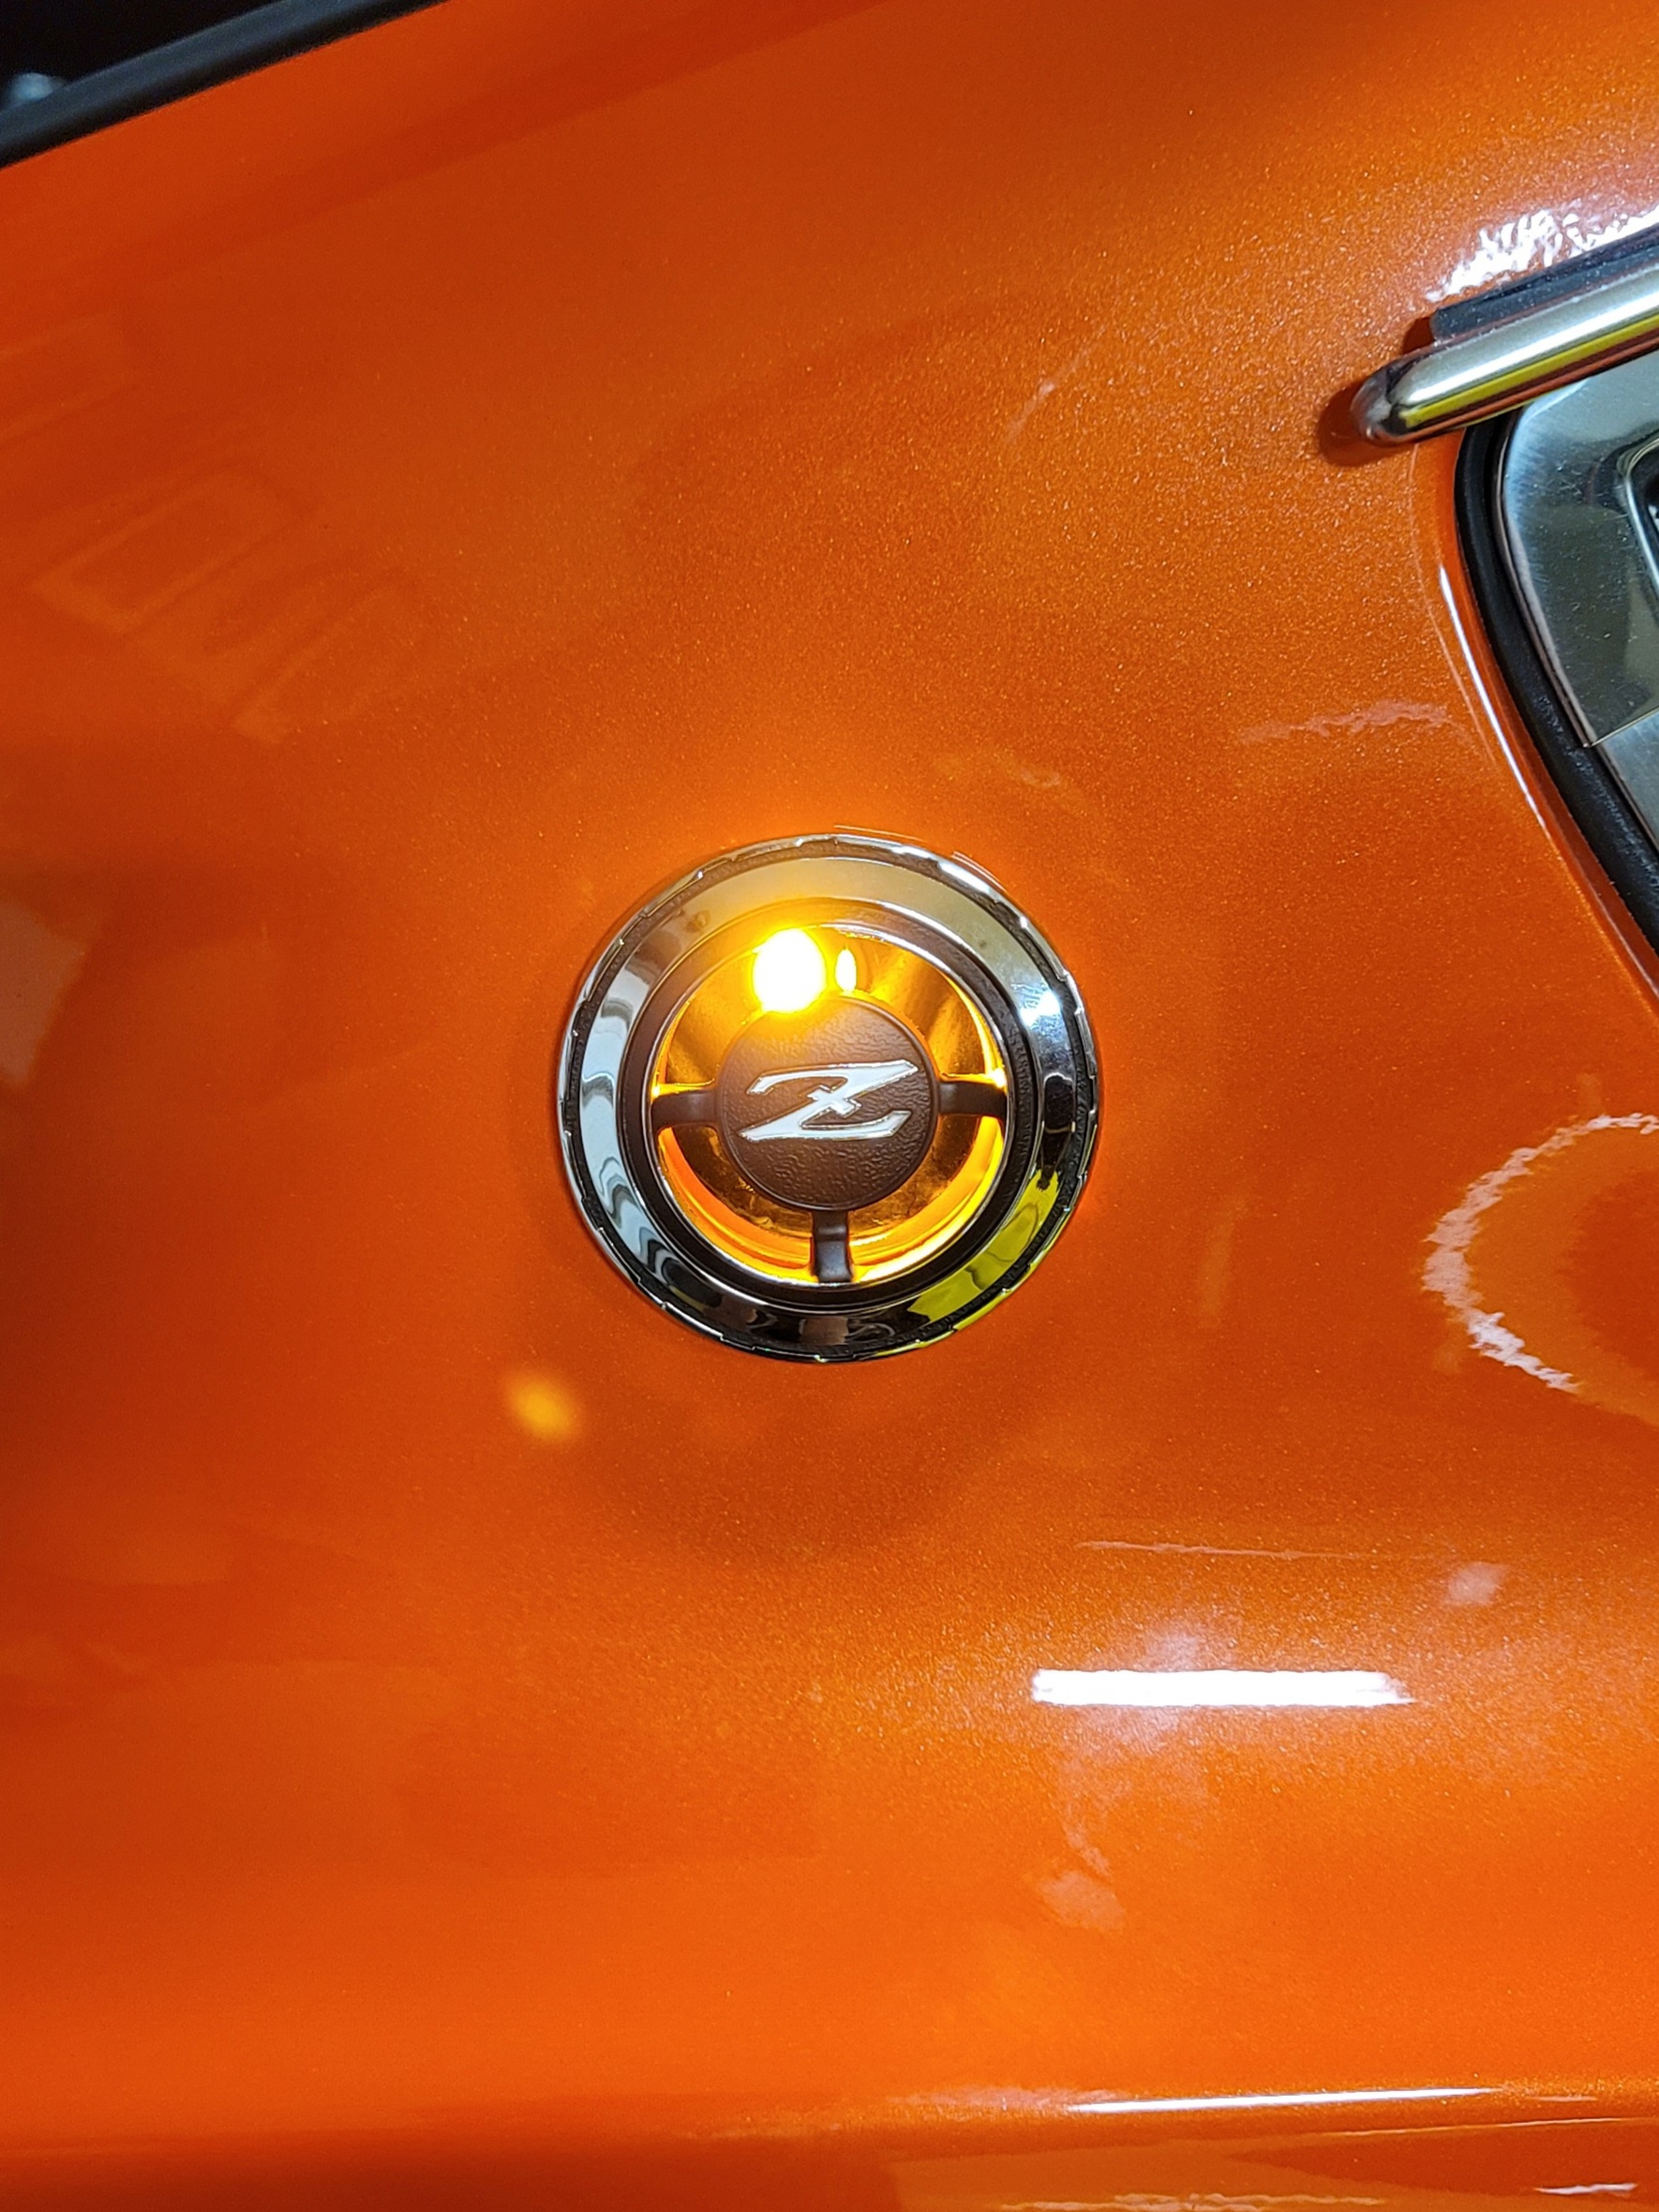
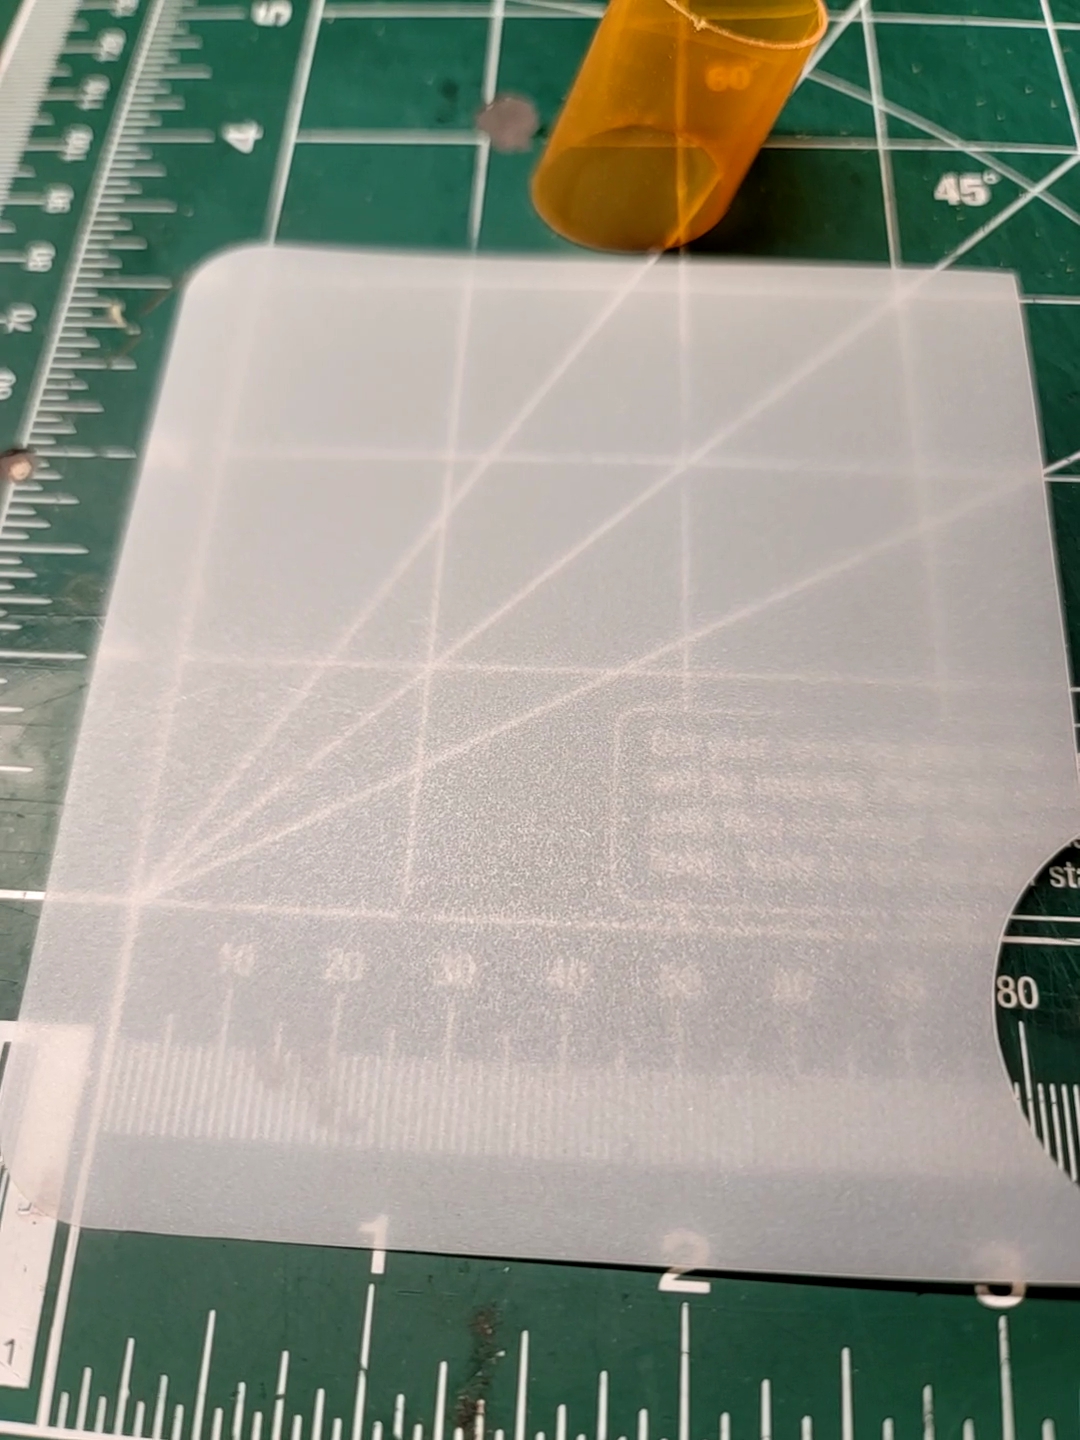
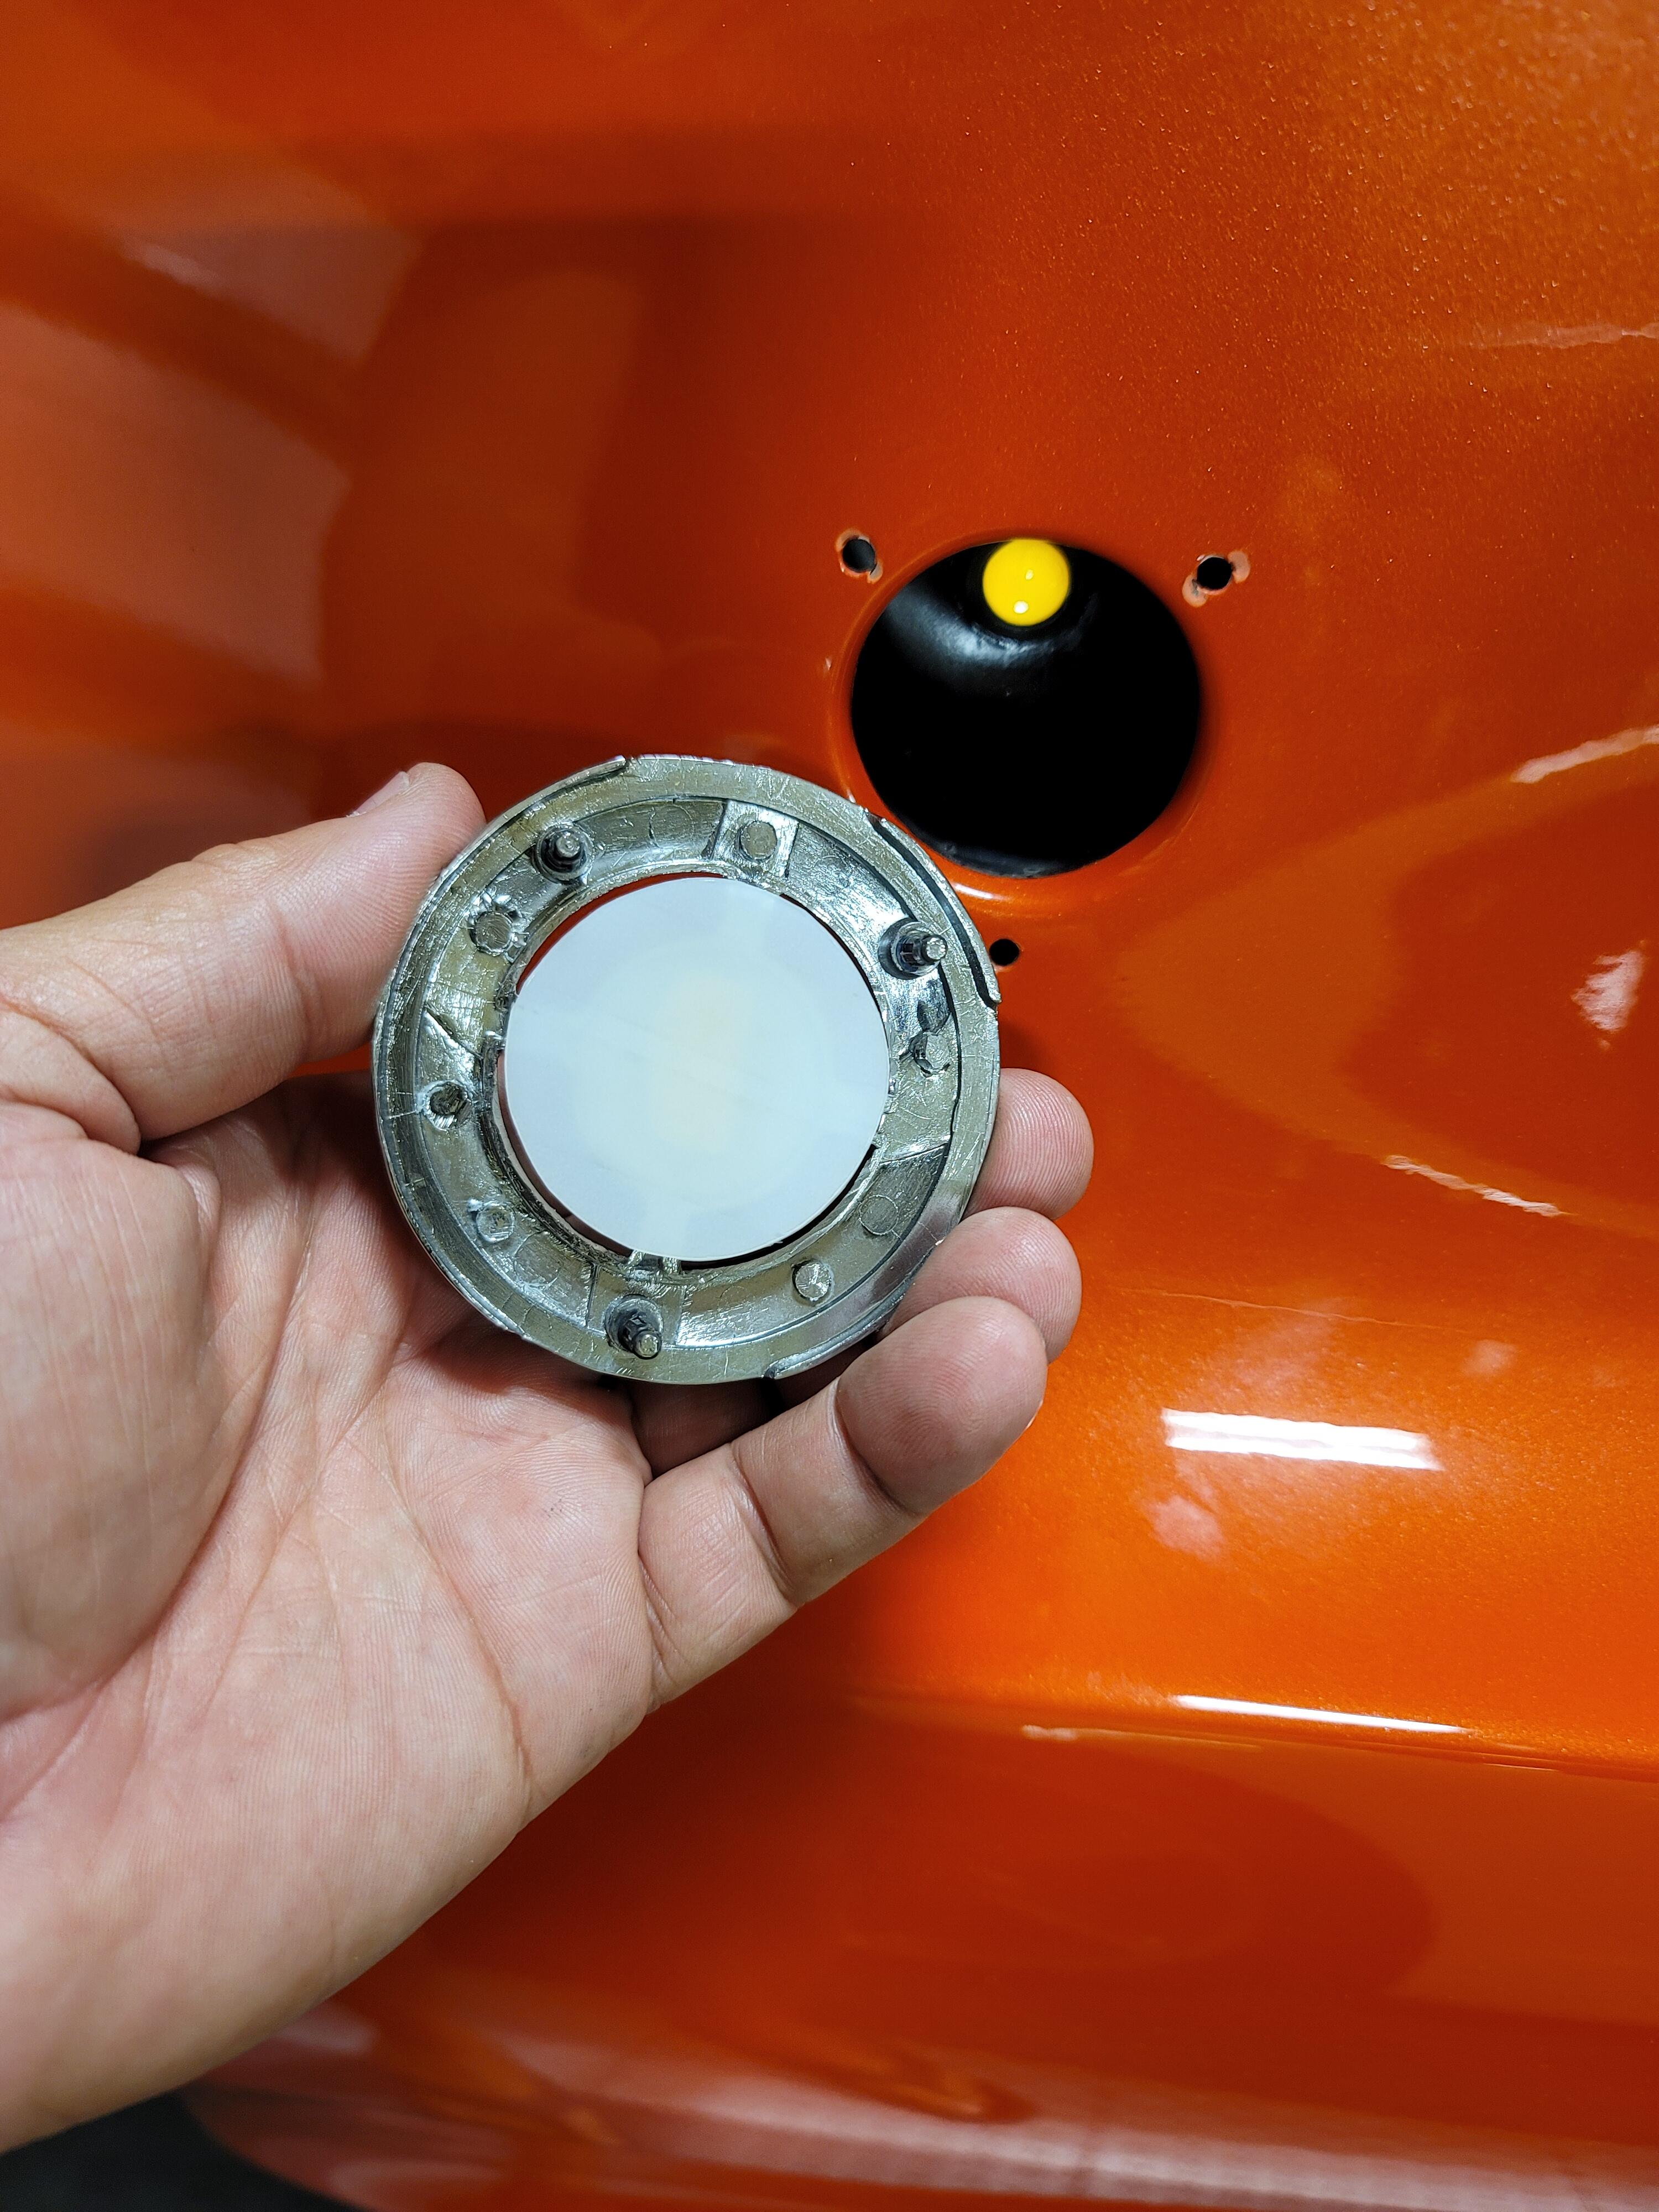
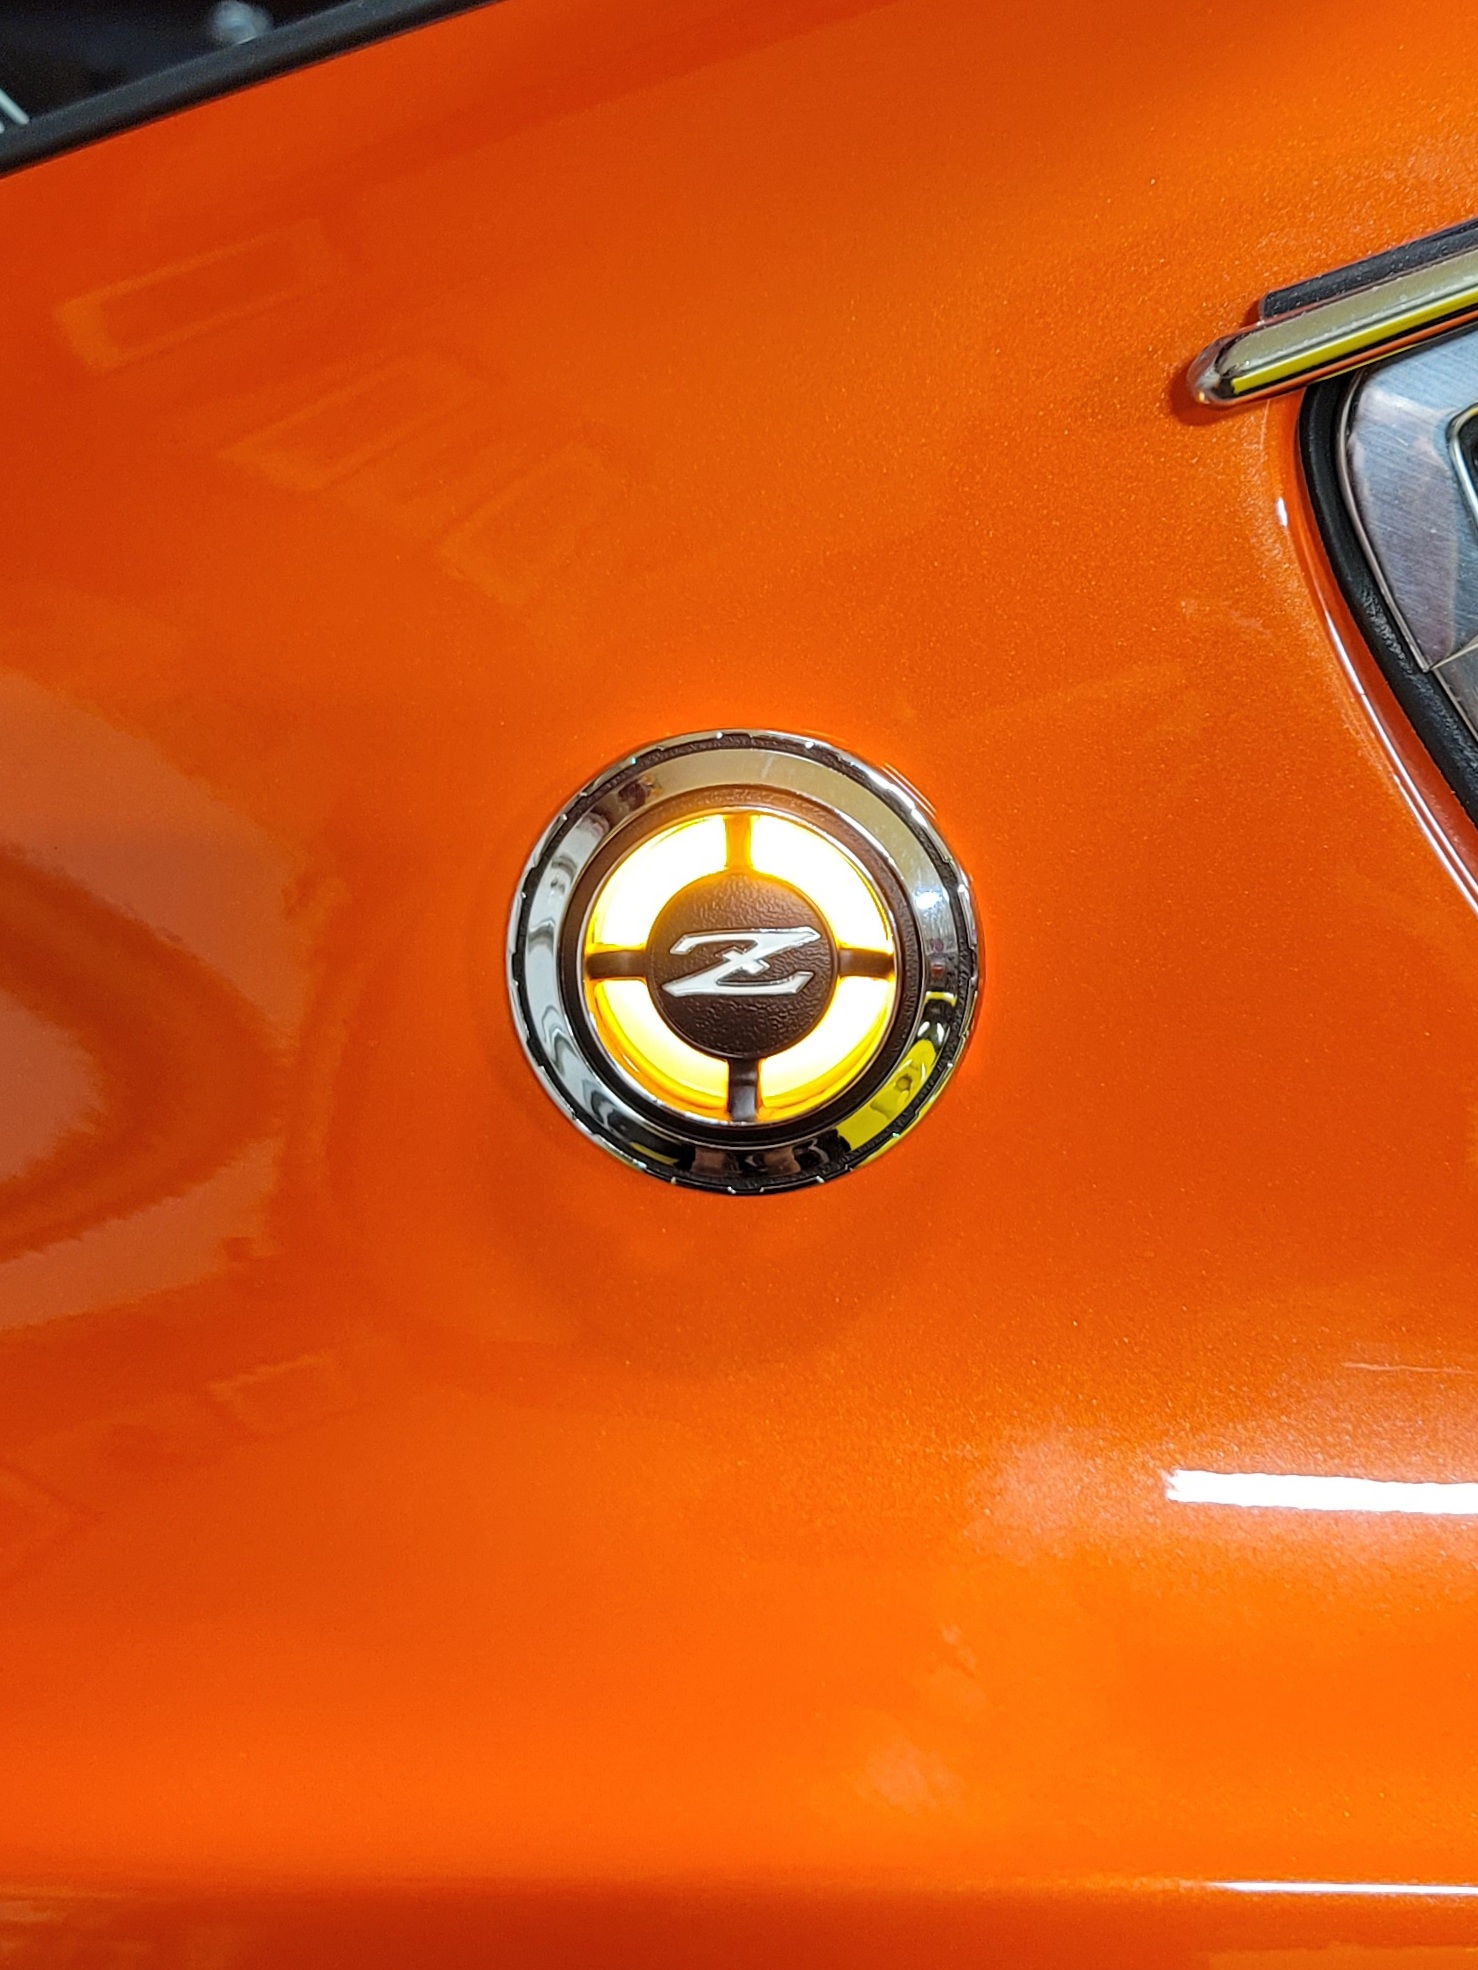
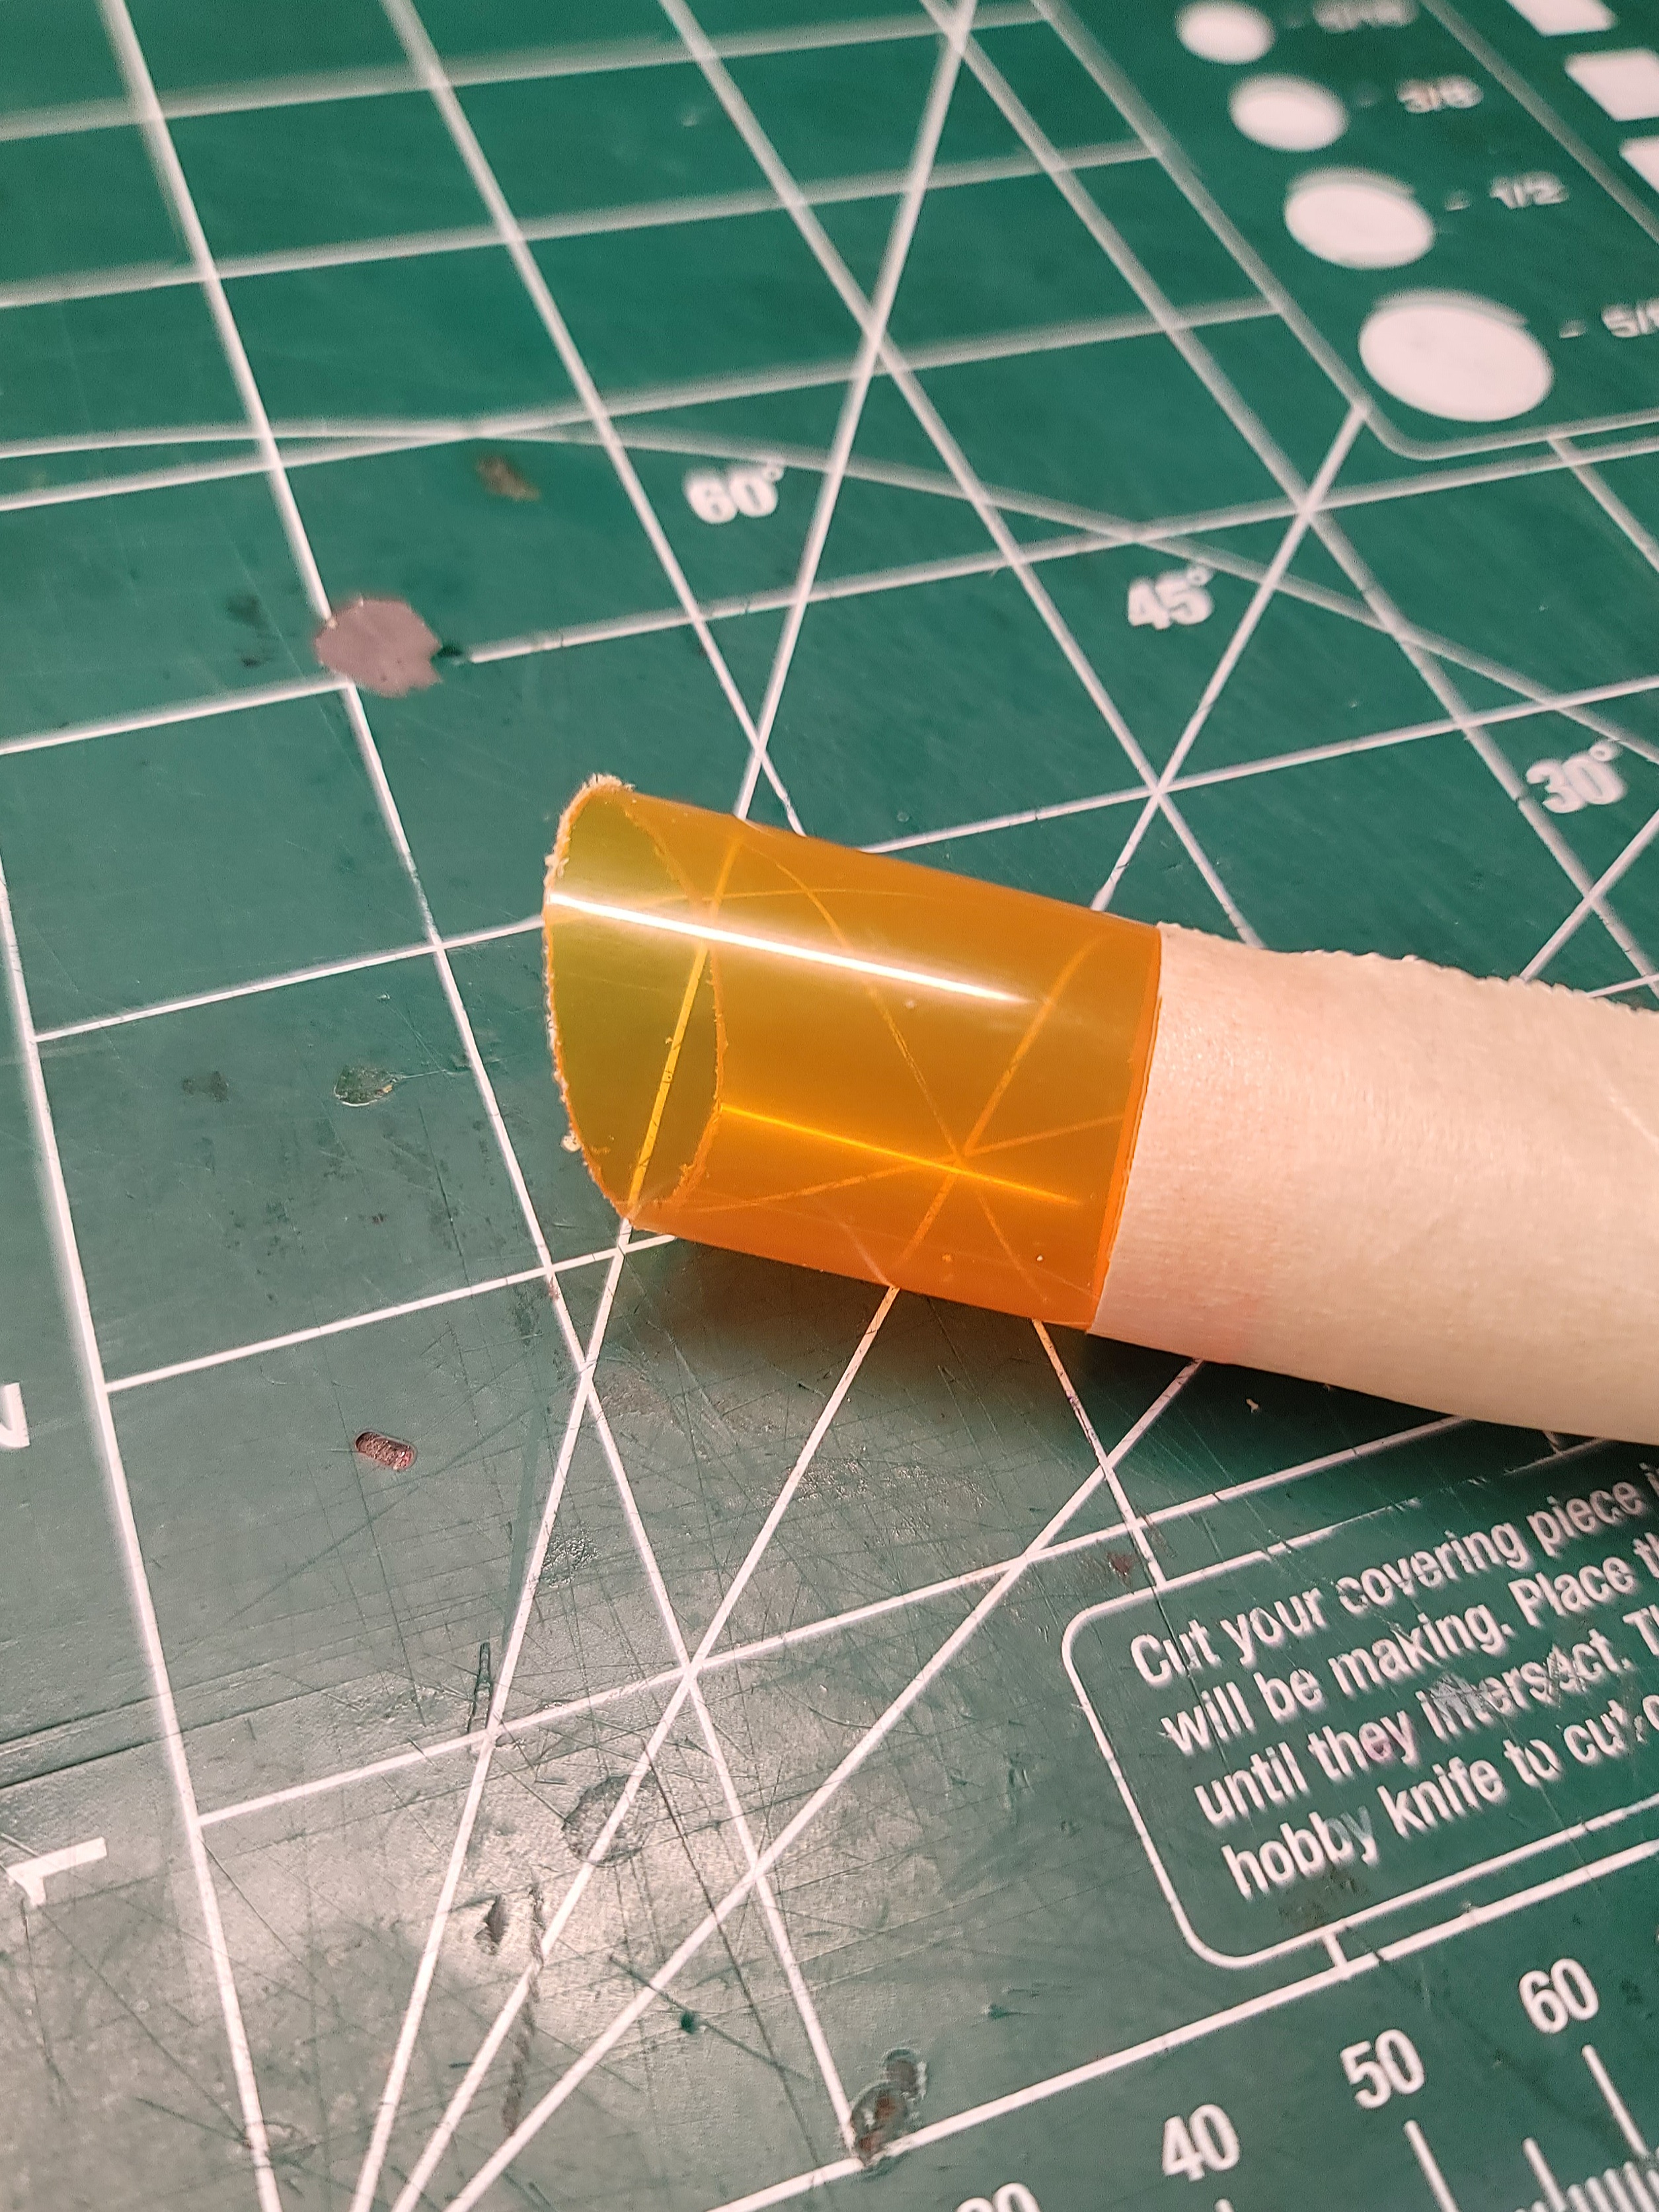
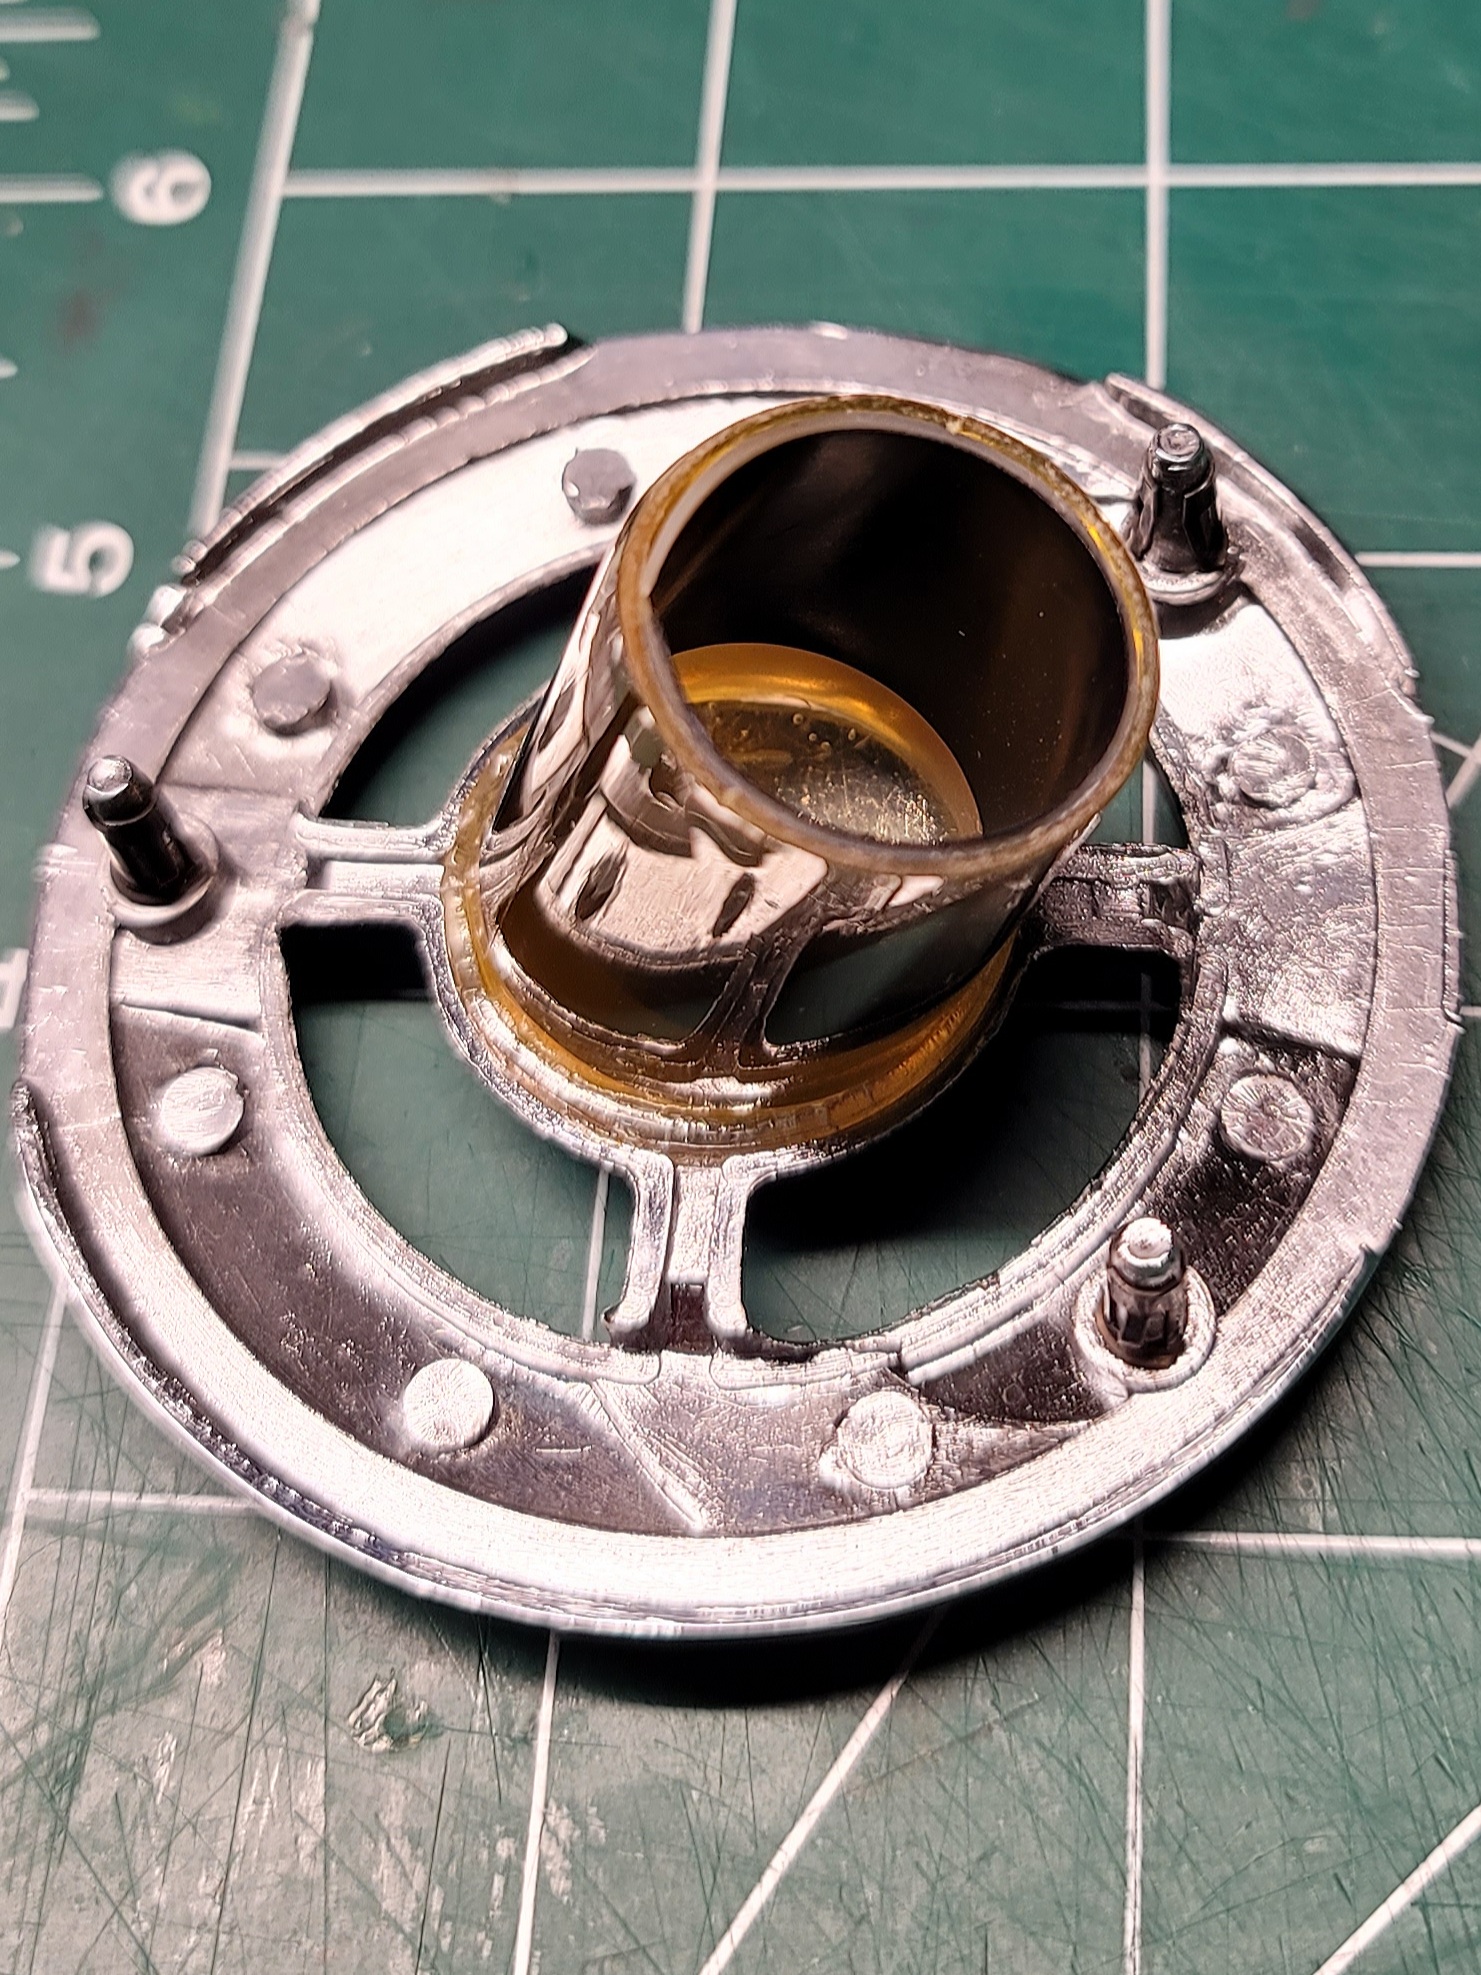
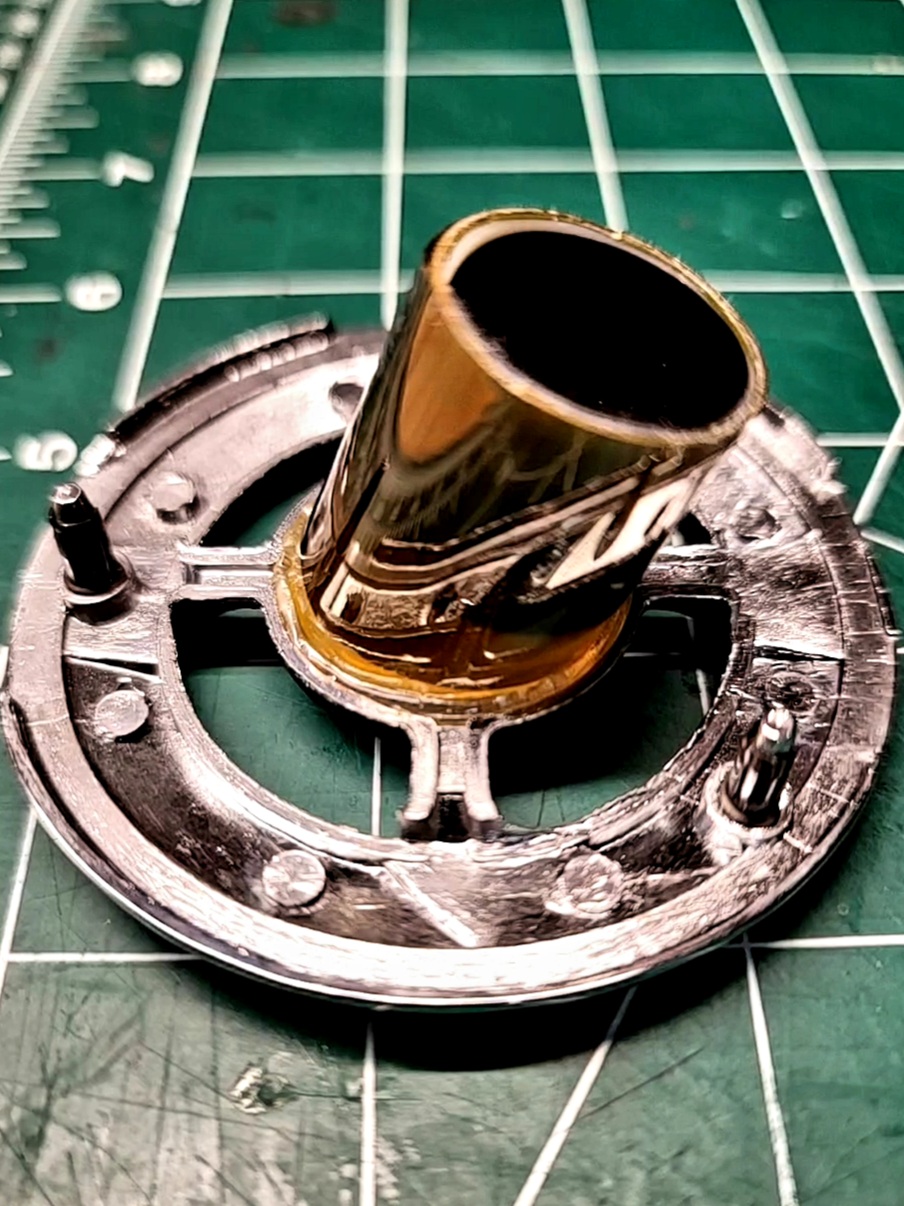
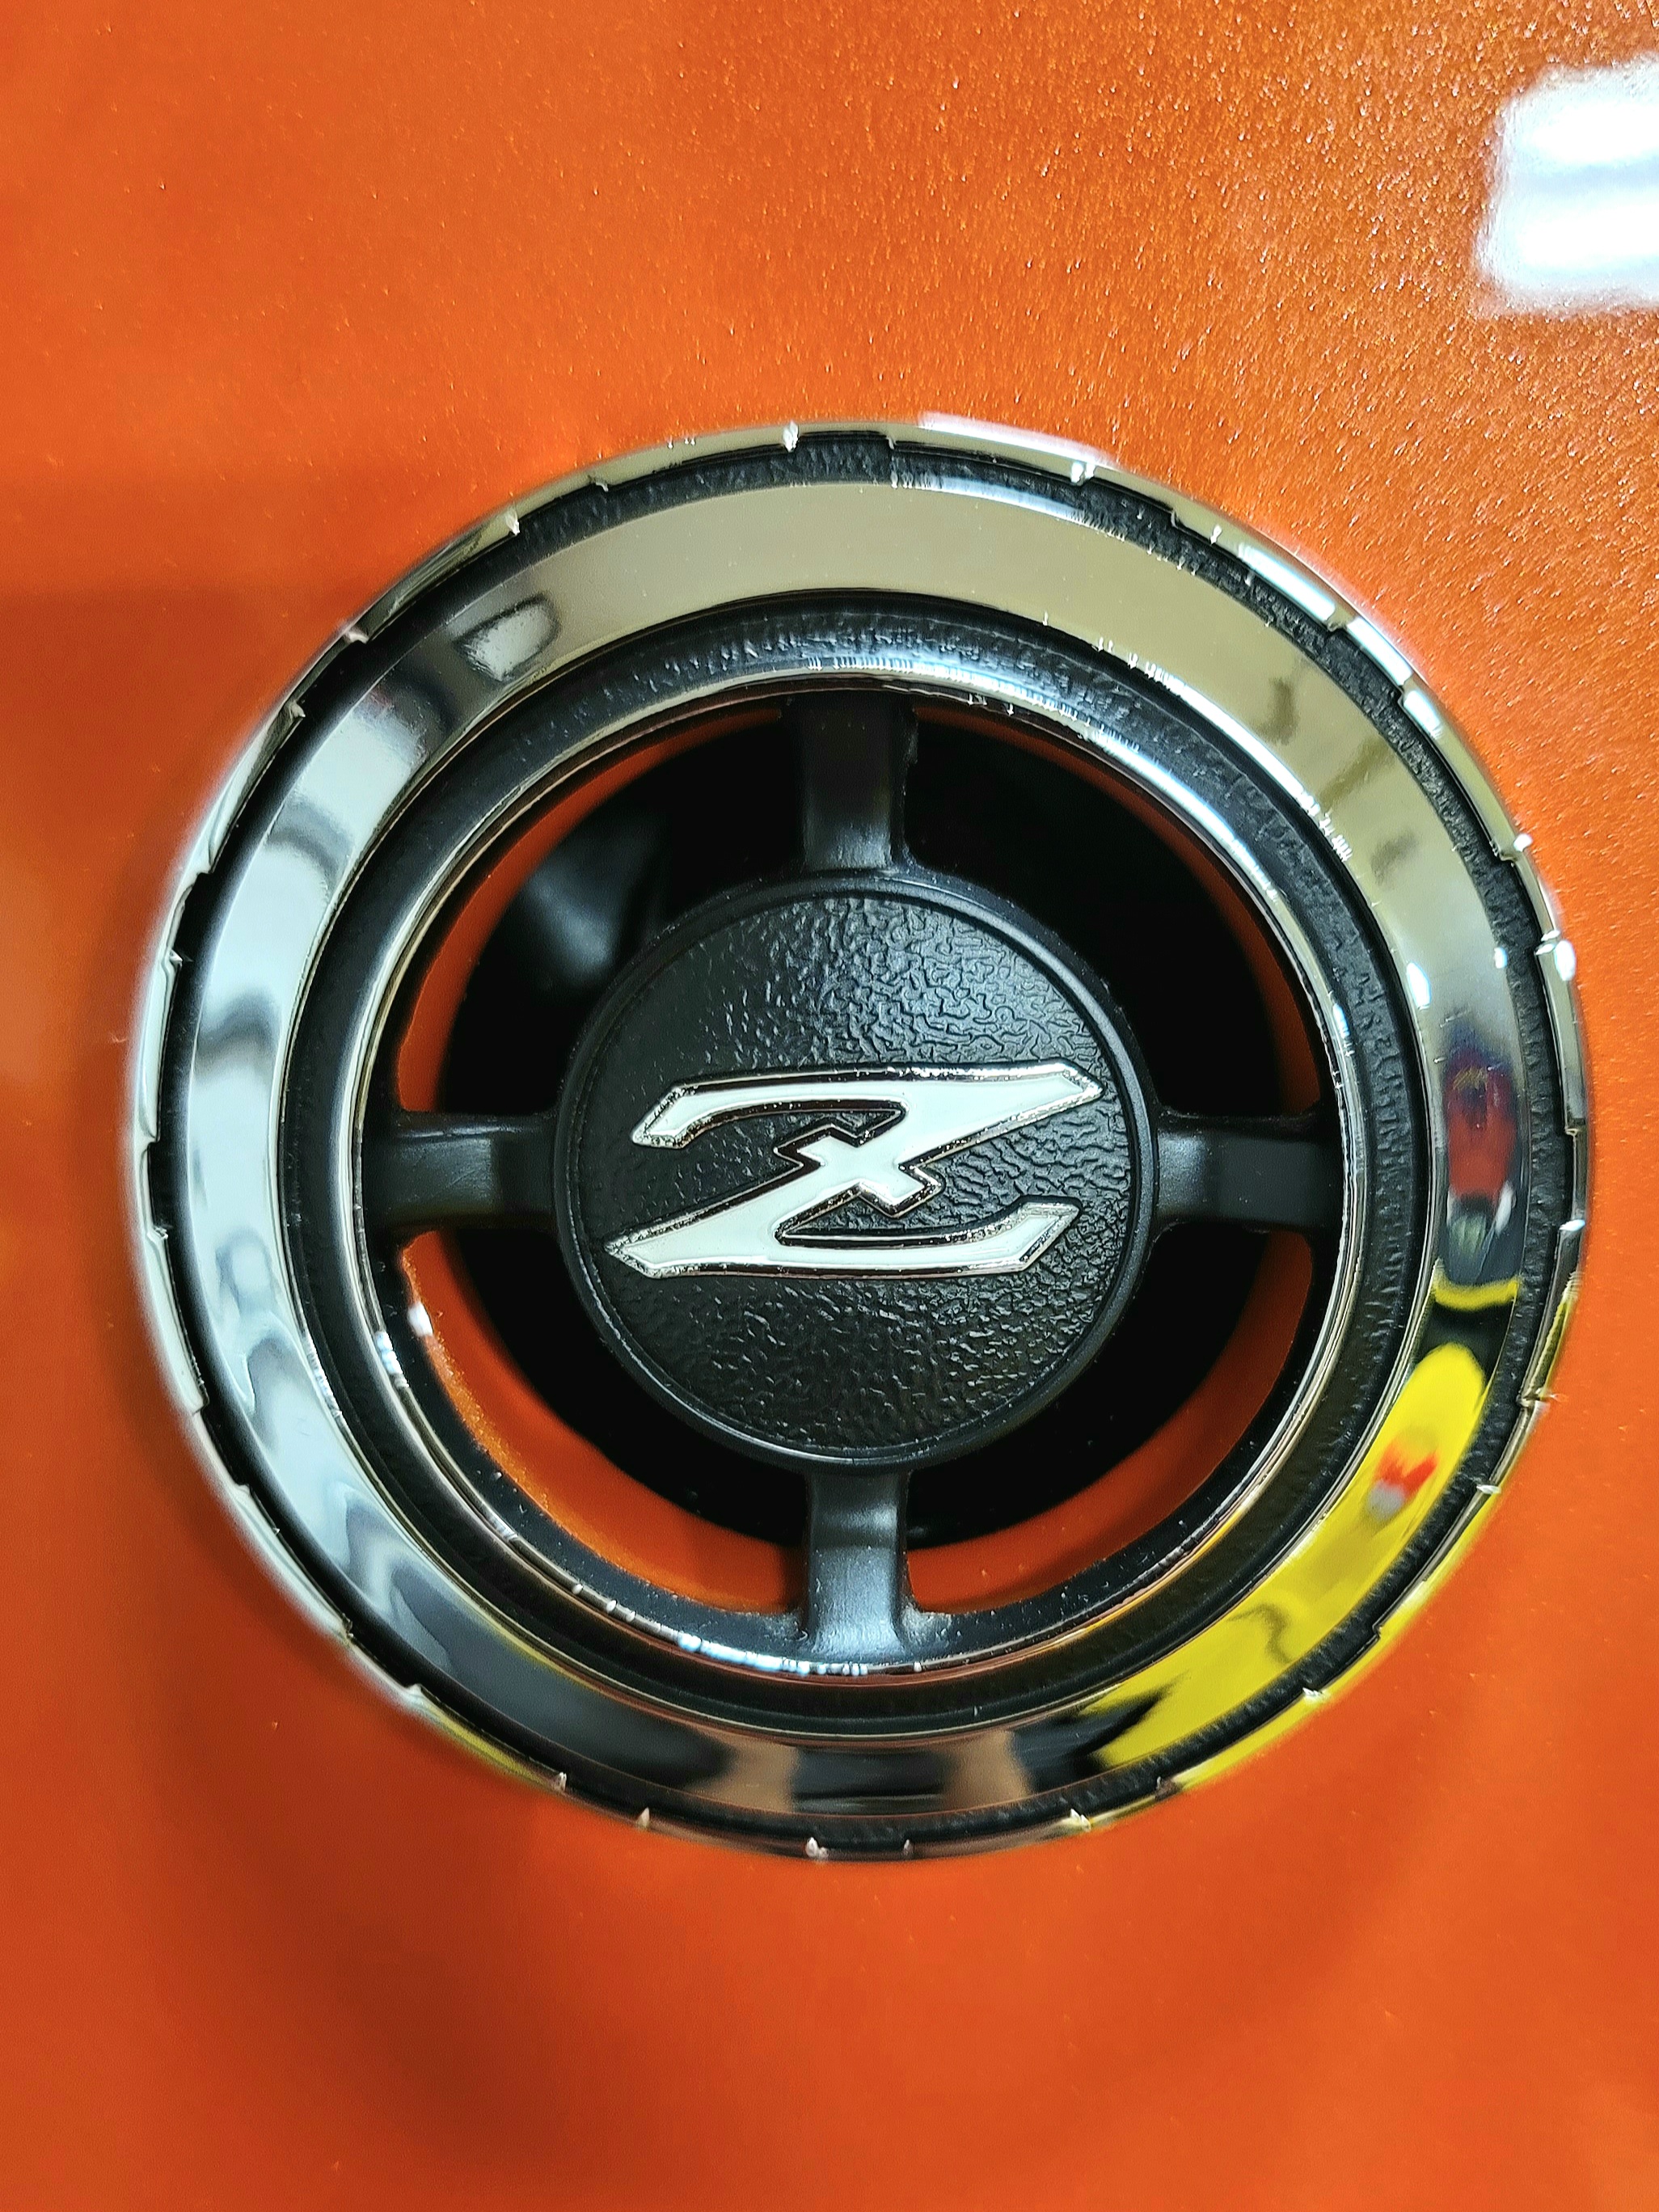
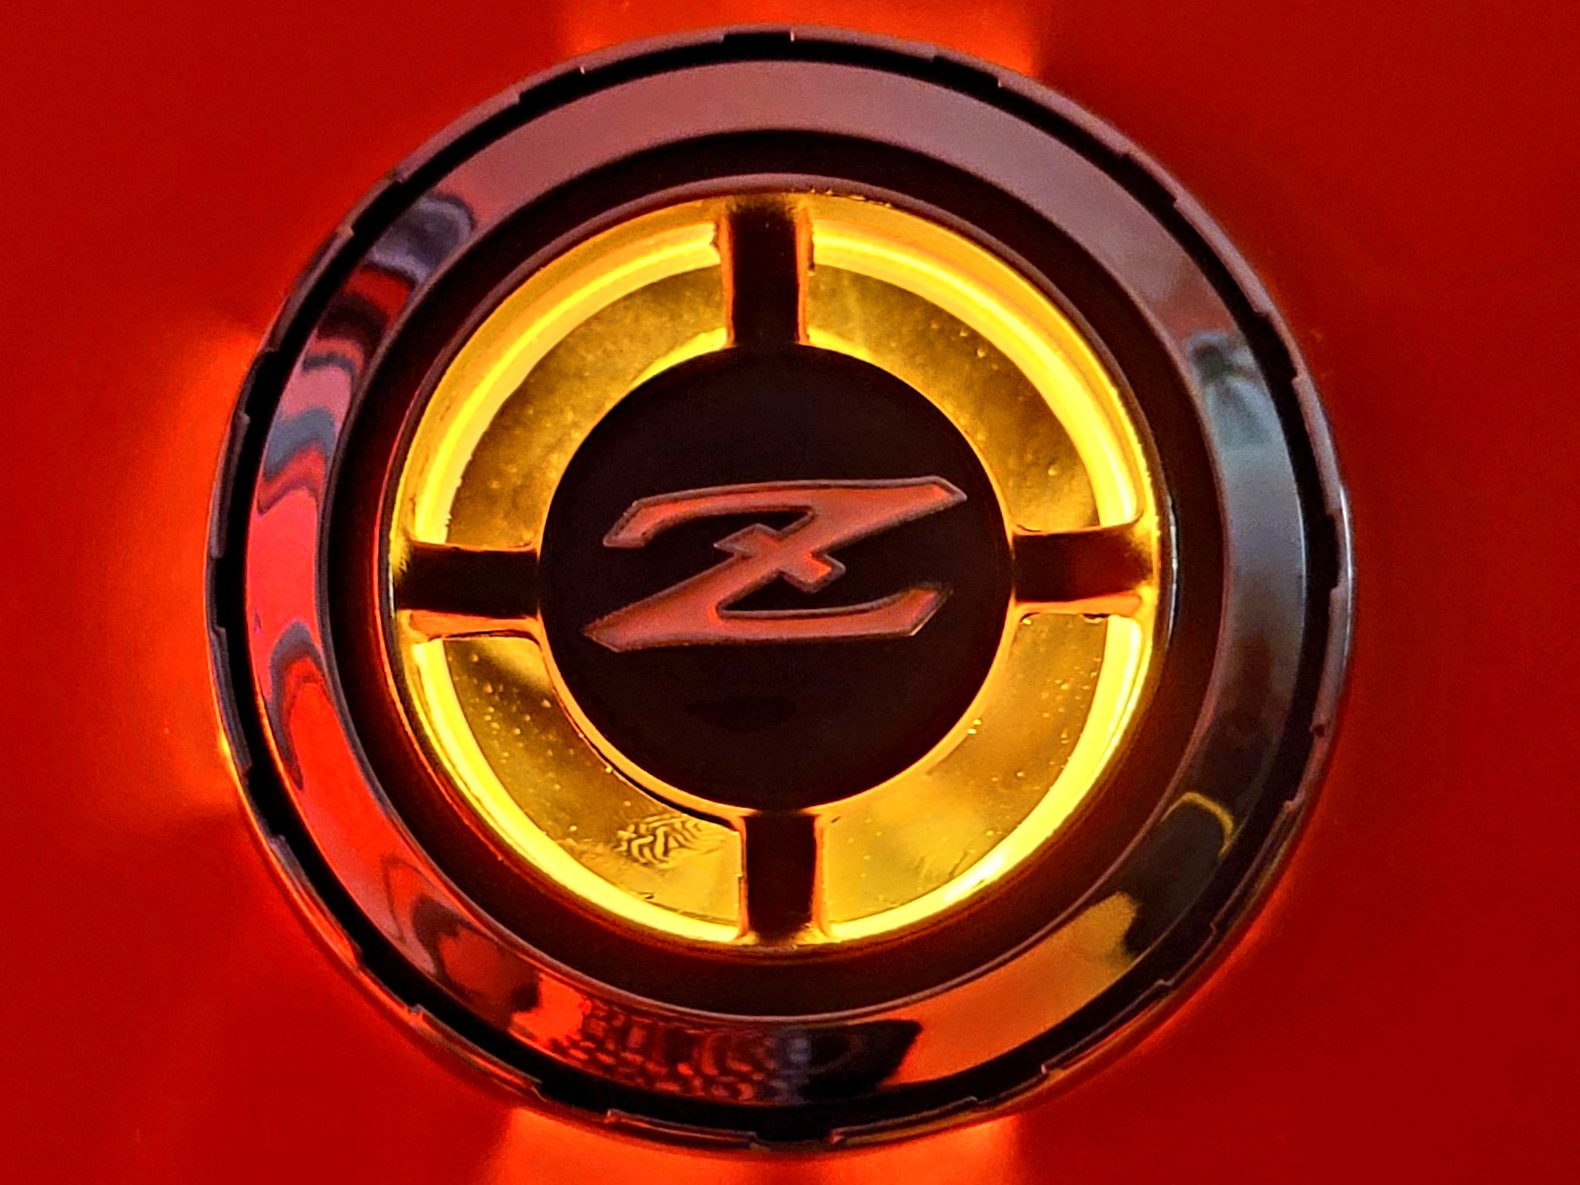
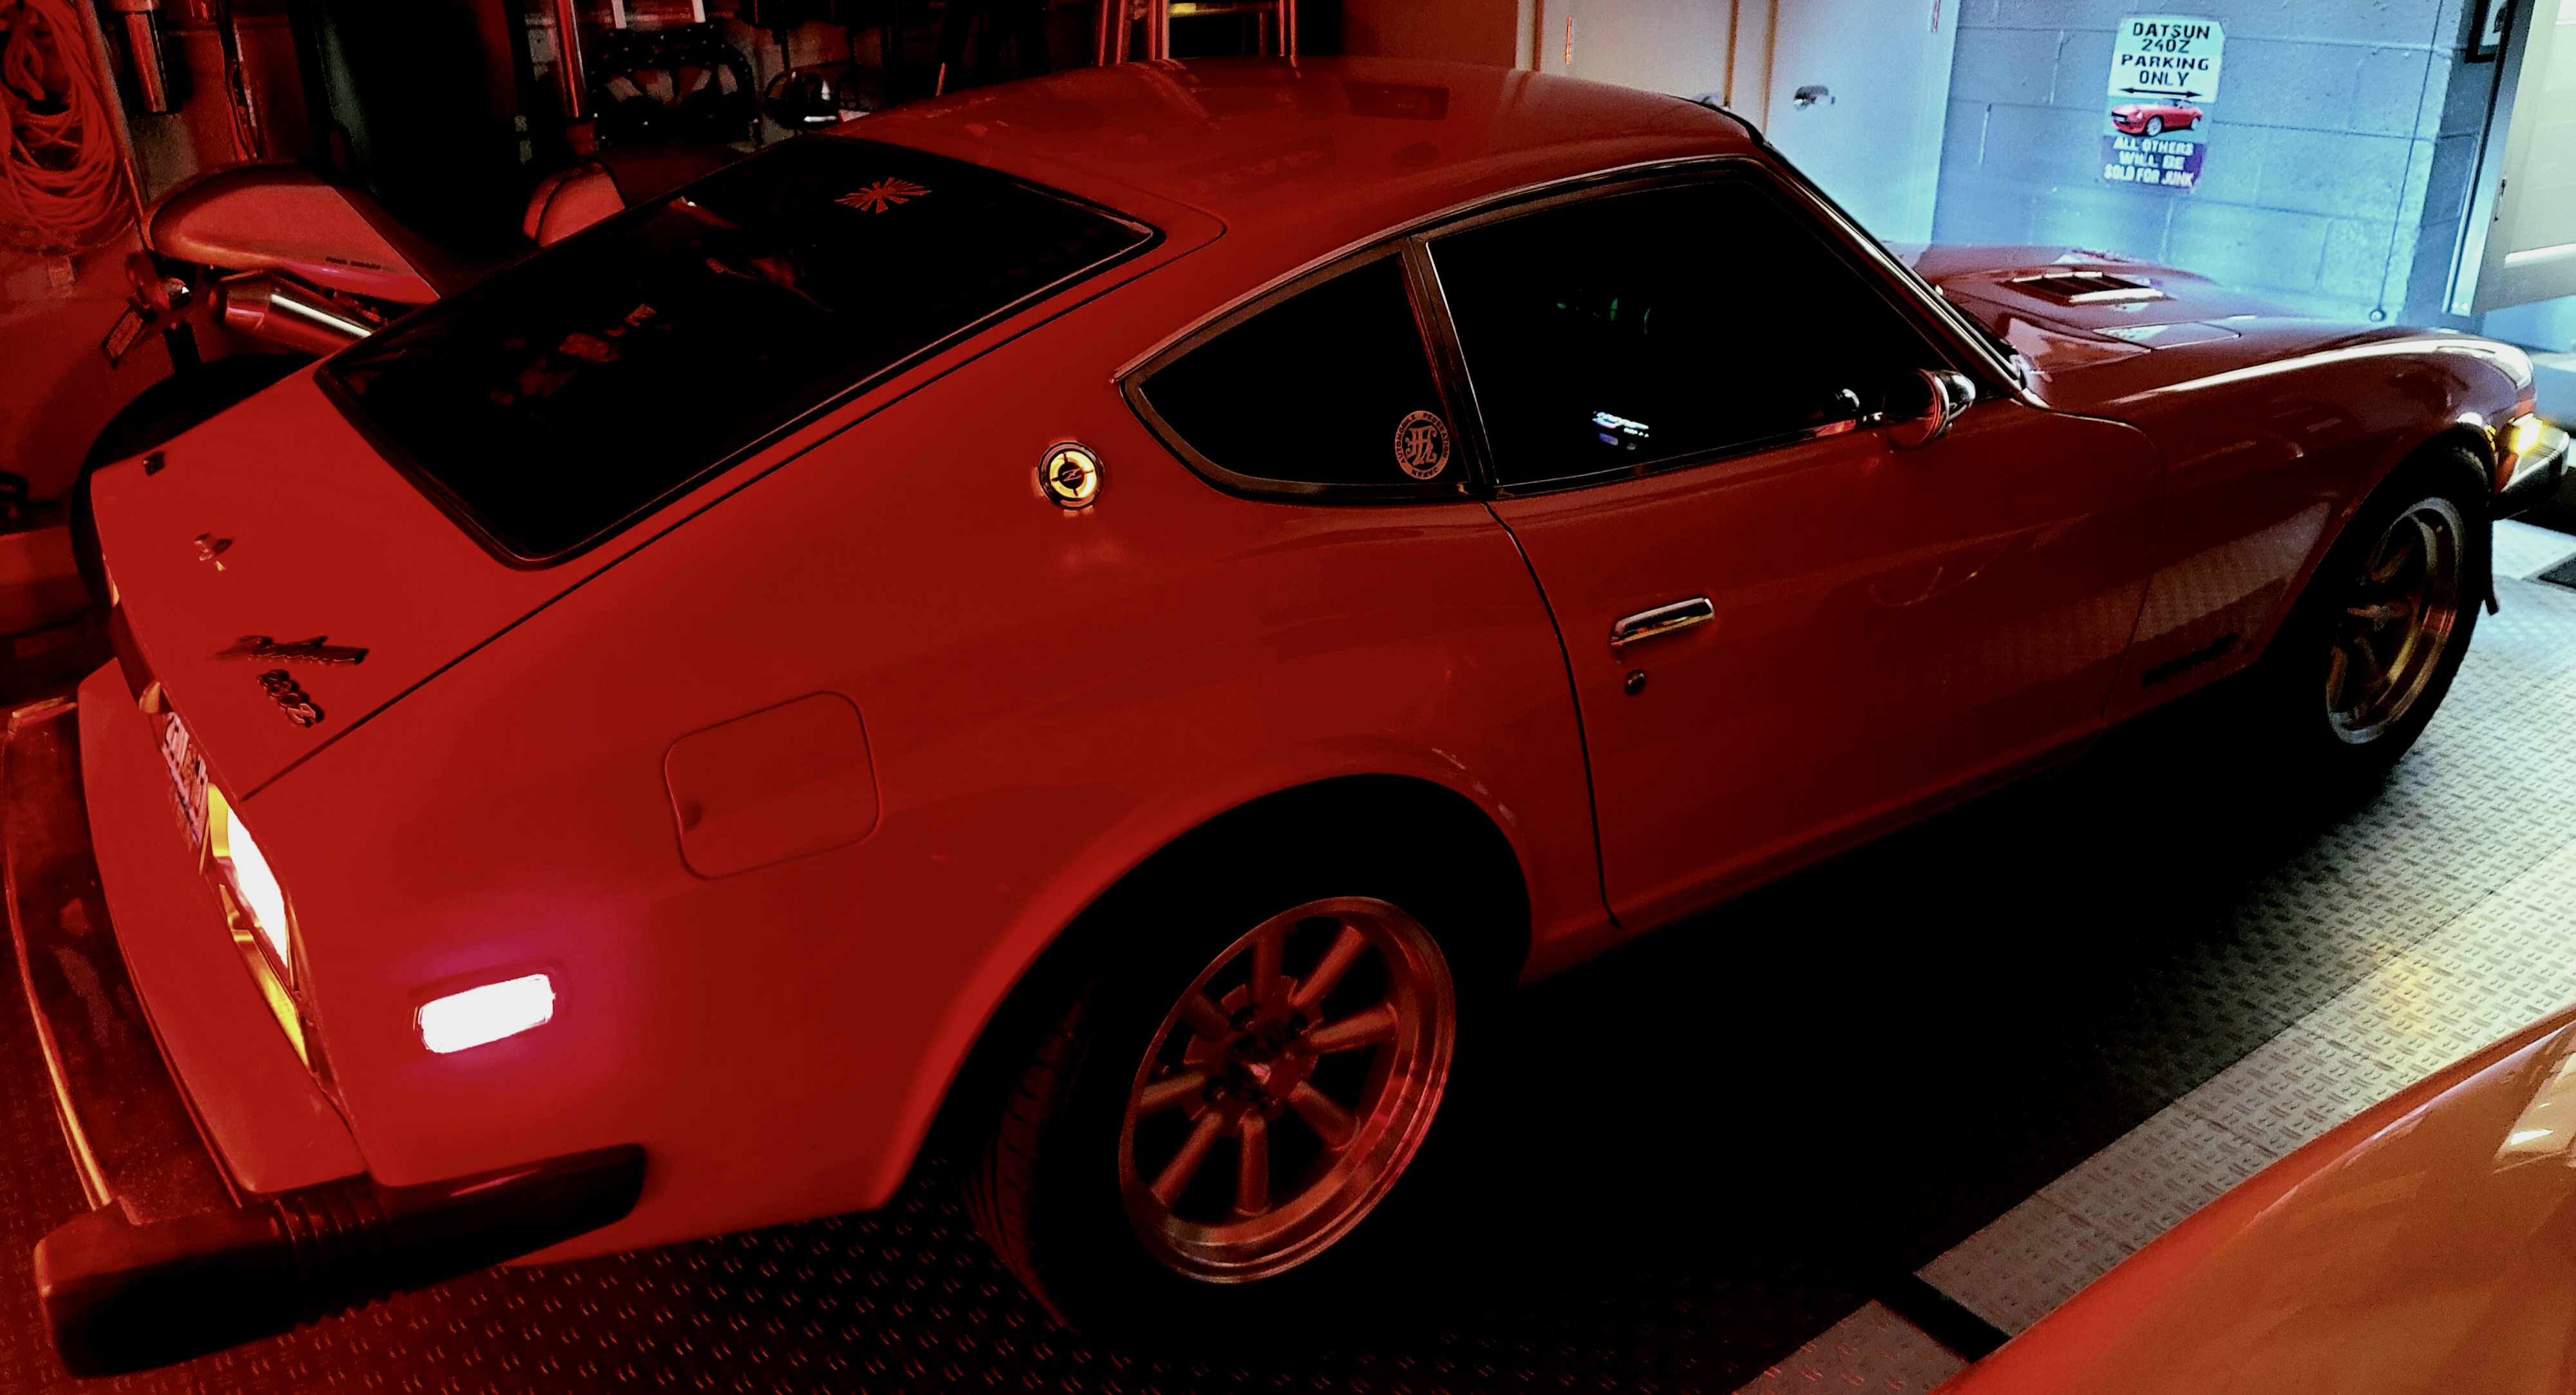
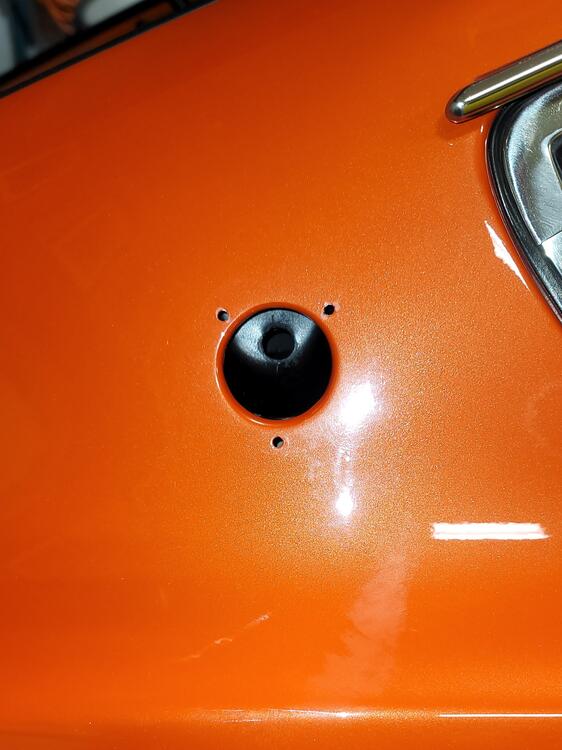
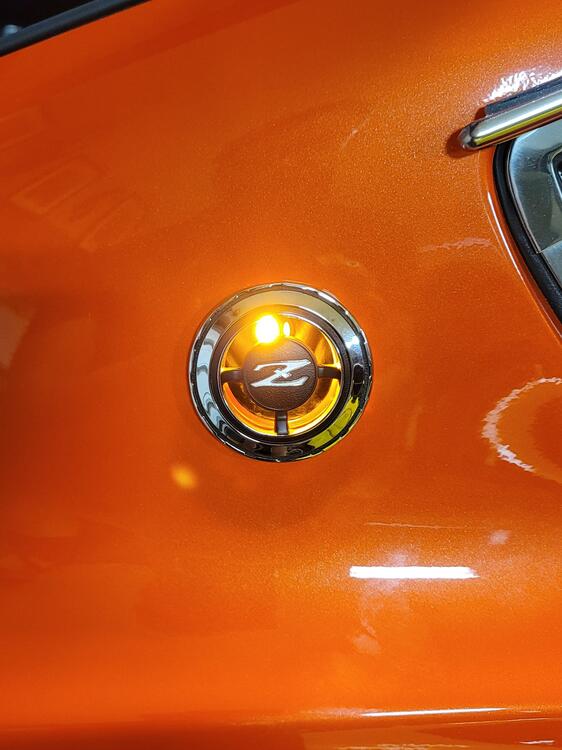
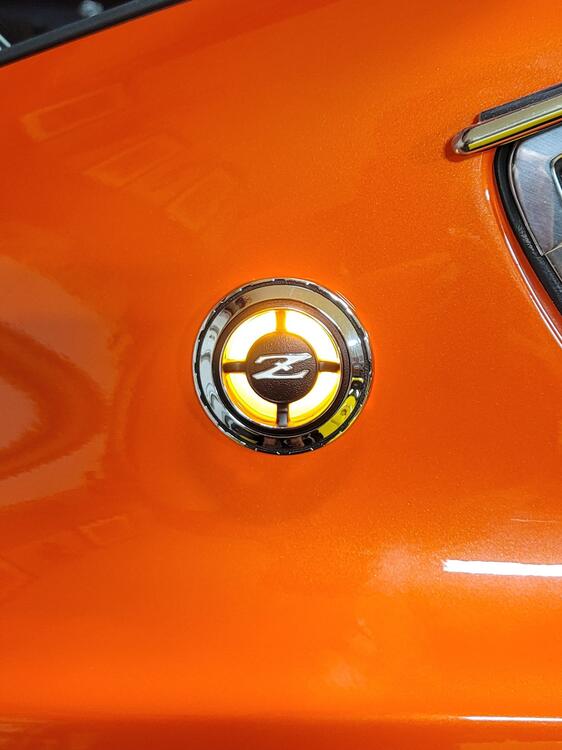
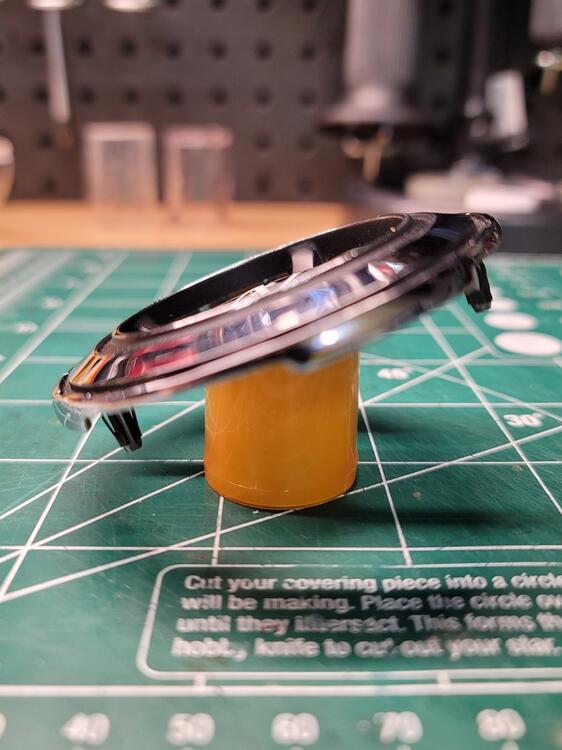
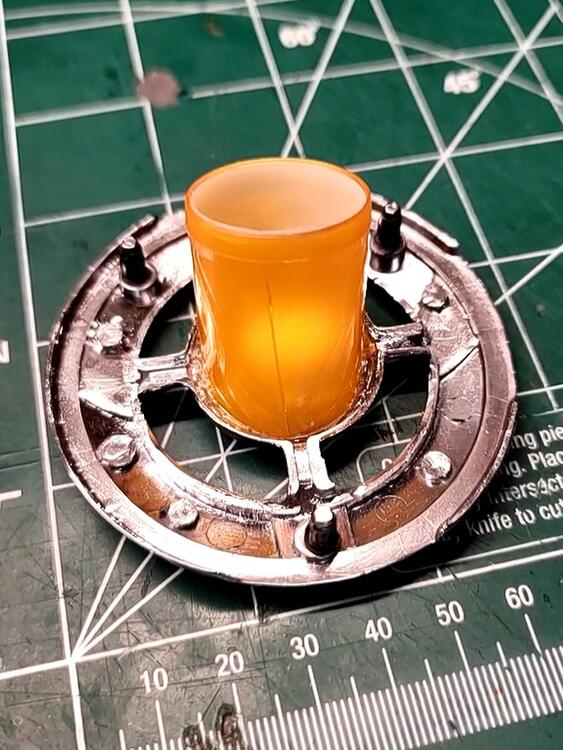
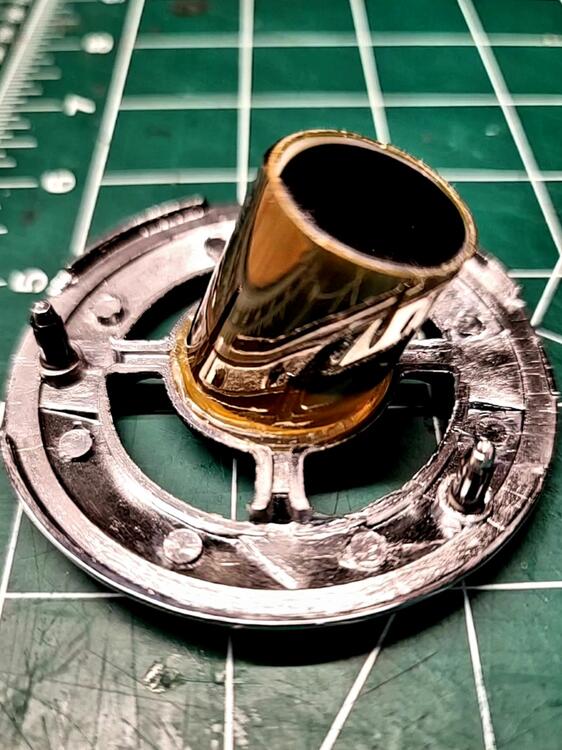
I came across an IG post that caught my eye in which a fellow 280Z owner had LED lighting behind the Z emblems rearward of the quarter windows. Turns out a garage in Las Vegas that does a lot of Datsun work (Harmon Restoration) had done the work for him and would sell a kit with an amber LED bulb for each side which included all wiring with proper Datsun plug connectors for a seamless installation onto the rear lights harnesses. Since I love LEDs and this looked like a novel idea I ordered one such kit which I received a couple of weeks later. Their original kit was meant to work as an auxiliary turn signal light but I didn't like that idea, doubting it's legality and usefulness. I asked them to wire my connectors so they would work in conjunction with the parking lights, which they did. First I checked the lights by plugging them into both tail light harnesses (all good), then I loosened the interior plastic panels so I could run the new wire harnesses forward. After prying the Z emblems off, I carefully drilled 5/8" holes at the center of the vent holes and a second steel panel immediately behind it. I lightly sanded and repainted (satin black) the vent holes making sure the raw metal edges were covered inside and out. After applying a generous quantity of black silicone sealant around the light stalk, I installed it from outside and secured it with the included nut from inside the cabin. I finally put my interior panels back in place and reinstalled the Z emblems. When I tested the installed light the LED was way too bright, even brighter than the parking lights, and the glaring bulb was very visible in many angles! Not what I had hoped for at all! After some thought I came up with 2 light diffuser ideas. The first was a simple circle of "frosted" .5mm thick white plastic glued to the back of the emblem. It looked great when illuminated (although still too bright for me) but the white plastic was plainly visible when the light was off. Additionally, this option may have obstructed the air exiting the cabin to a certain degree. My final option was to construct a cylindrical "diffuser" which would hide the LED, direct light to the back of the emblem, reduce the intensity of the light, not obstruct airflow, and be pretty much invisible when the lights were off during daylight. I used a 3/4" amber translucent plastic tube (small prescription container), cut out to the correct length and angle. I then introduced a piece of the frosted white plastic inside the cylinder to diffuse the light, but covered 2/3 of the inside of this plastic with black duct tape allowing light to exit only at the end immediately behind the Z emblem. Lastly, I covered the outside of the tube with a layer of mirrored tinted window film so it would allow light to exit but reflect the black paint from the vent holes on the outside, rendering it close to invisible once installed. The diffuser was then hotglued to the back of the Z emblem and reinstalled on the car. It worked as intended and I now have subtle amber indirect illumination behind the Z vent emblems that don't telegraph any alterations during daylight or when the lights are off. I realize this isn't orthodox at all but I really like the cool factor on my restomodded 280Z. Sent from my SM-N986U using Tapatalk


-
[emoji16] Sent from my SM-N986U using Tapatalk
-
Wow, Cliff! Thanks for the compliments! I'm honored in receiving such high praise from you. I have considered swapping out to the smaller 240Z bumpers many times, even purchased the mounting plates, but every time I think of doing body work and paint on the rear of the car I talk myself out of it. [emoji38] Sent from my SM-N986U using Tapatalk
-
You can also line the inside of the lamp (even refinish a corroded lamp reflector) with air conditioning silver foil tape which has adhesive backing and conforms to the curved shapes very easily. Very simple to do and that definitely increases the reflection of the bulb and the perceived brightness. Unless you're going for absolute originality, the advantages that LEDs give your electrical system made them the choice for me. I only kept a couple of incandescent bulbs in the dash so the light dimmer still works. Sent from my SM-N986U using Tapatalk
-
So it seems like the EFI relay in question changed location from the '76 and '77 280Zs under the driver's side dash above the hood release to being housed inside the engine bay within the steel "black box" by the passenger side strut tower and the fusible links. Is it still the exact same relay as in the previous 280Zs? Will the Bosch 120 work in the '78 to replace the OEM relay? Sent from my SM-N986U using Tapatalk
-
They look really shiny and smooth! If you're not sure which way to go, you can have them vinyl wrapped in whatever color and finish you want to try (like satin black) and if you don't like it after a while you can simply remove the wrap with no damage whatsoever on your pretty chrome. Sent from my SM-N986U using Tapatalk
-
Not really. You can clean and polish your original plates if you want them to look good. If they're not beaten up, they'll work just fine. I opted for a new stainless steel set of plates for durability and looks. Sent from my SM-N986U using Tapatalk
-
Oh! OK, now I understand. I'm so happy she still has her current Z! Sent from my SM-N986U using Tapatalk
-
I'm happy for your friend and for the car but kinda sad Jai had to sell it. She really loved that car and it meant a lot to her. Sent from my SM-N986U using Tapatalk
-
Beautiful job, great color. Is it still Jay's ? Sent from my SM-N986U using Tapatalk
-
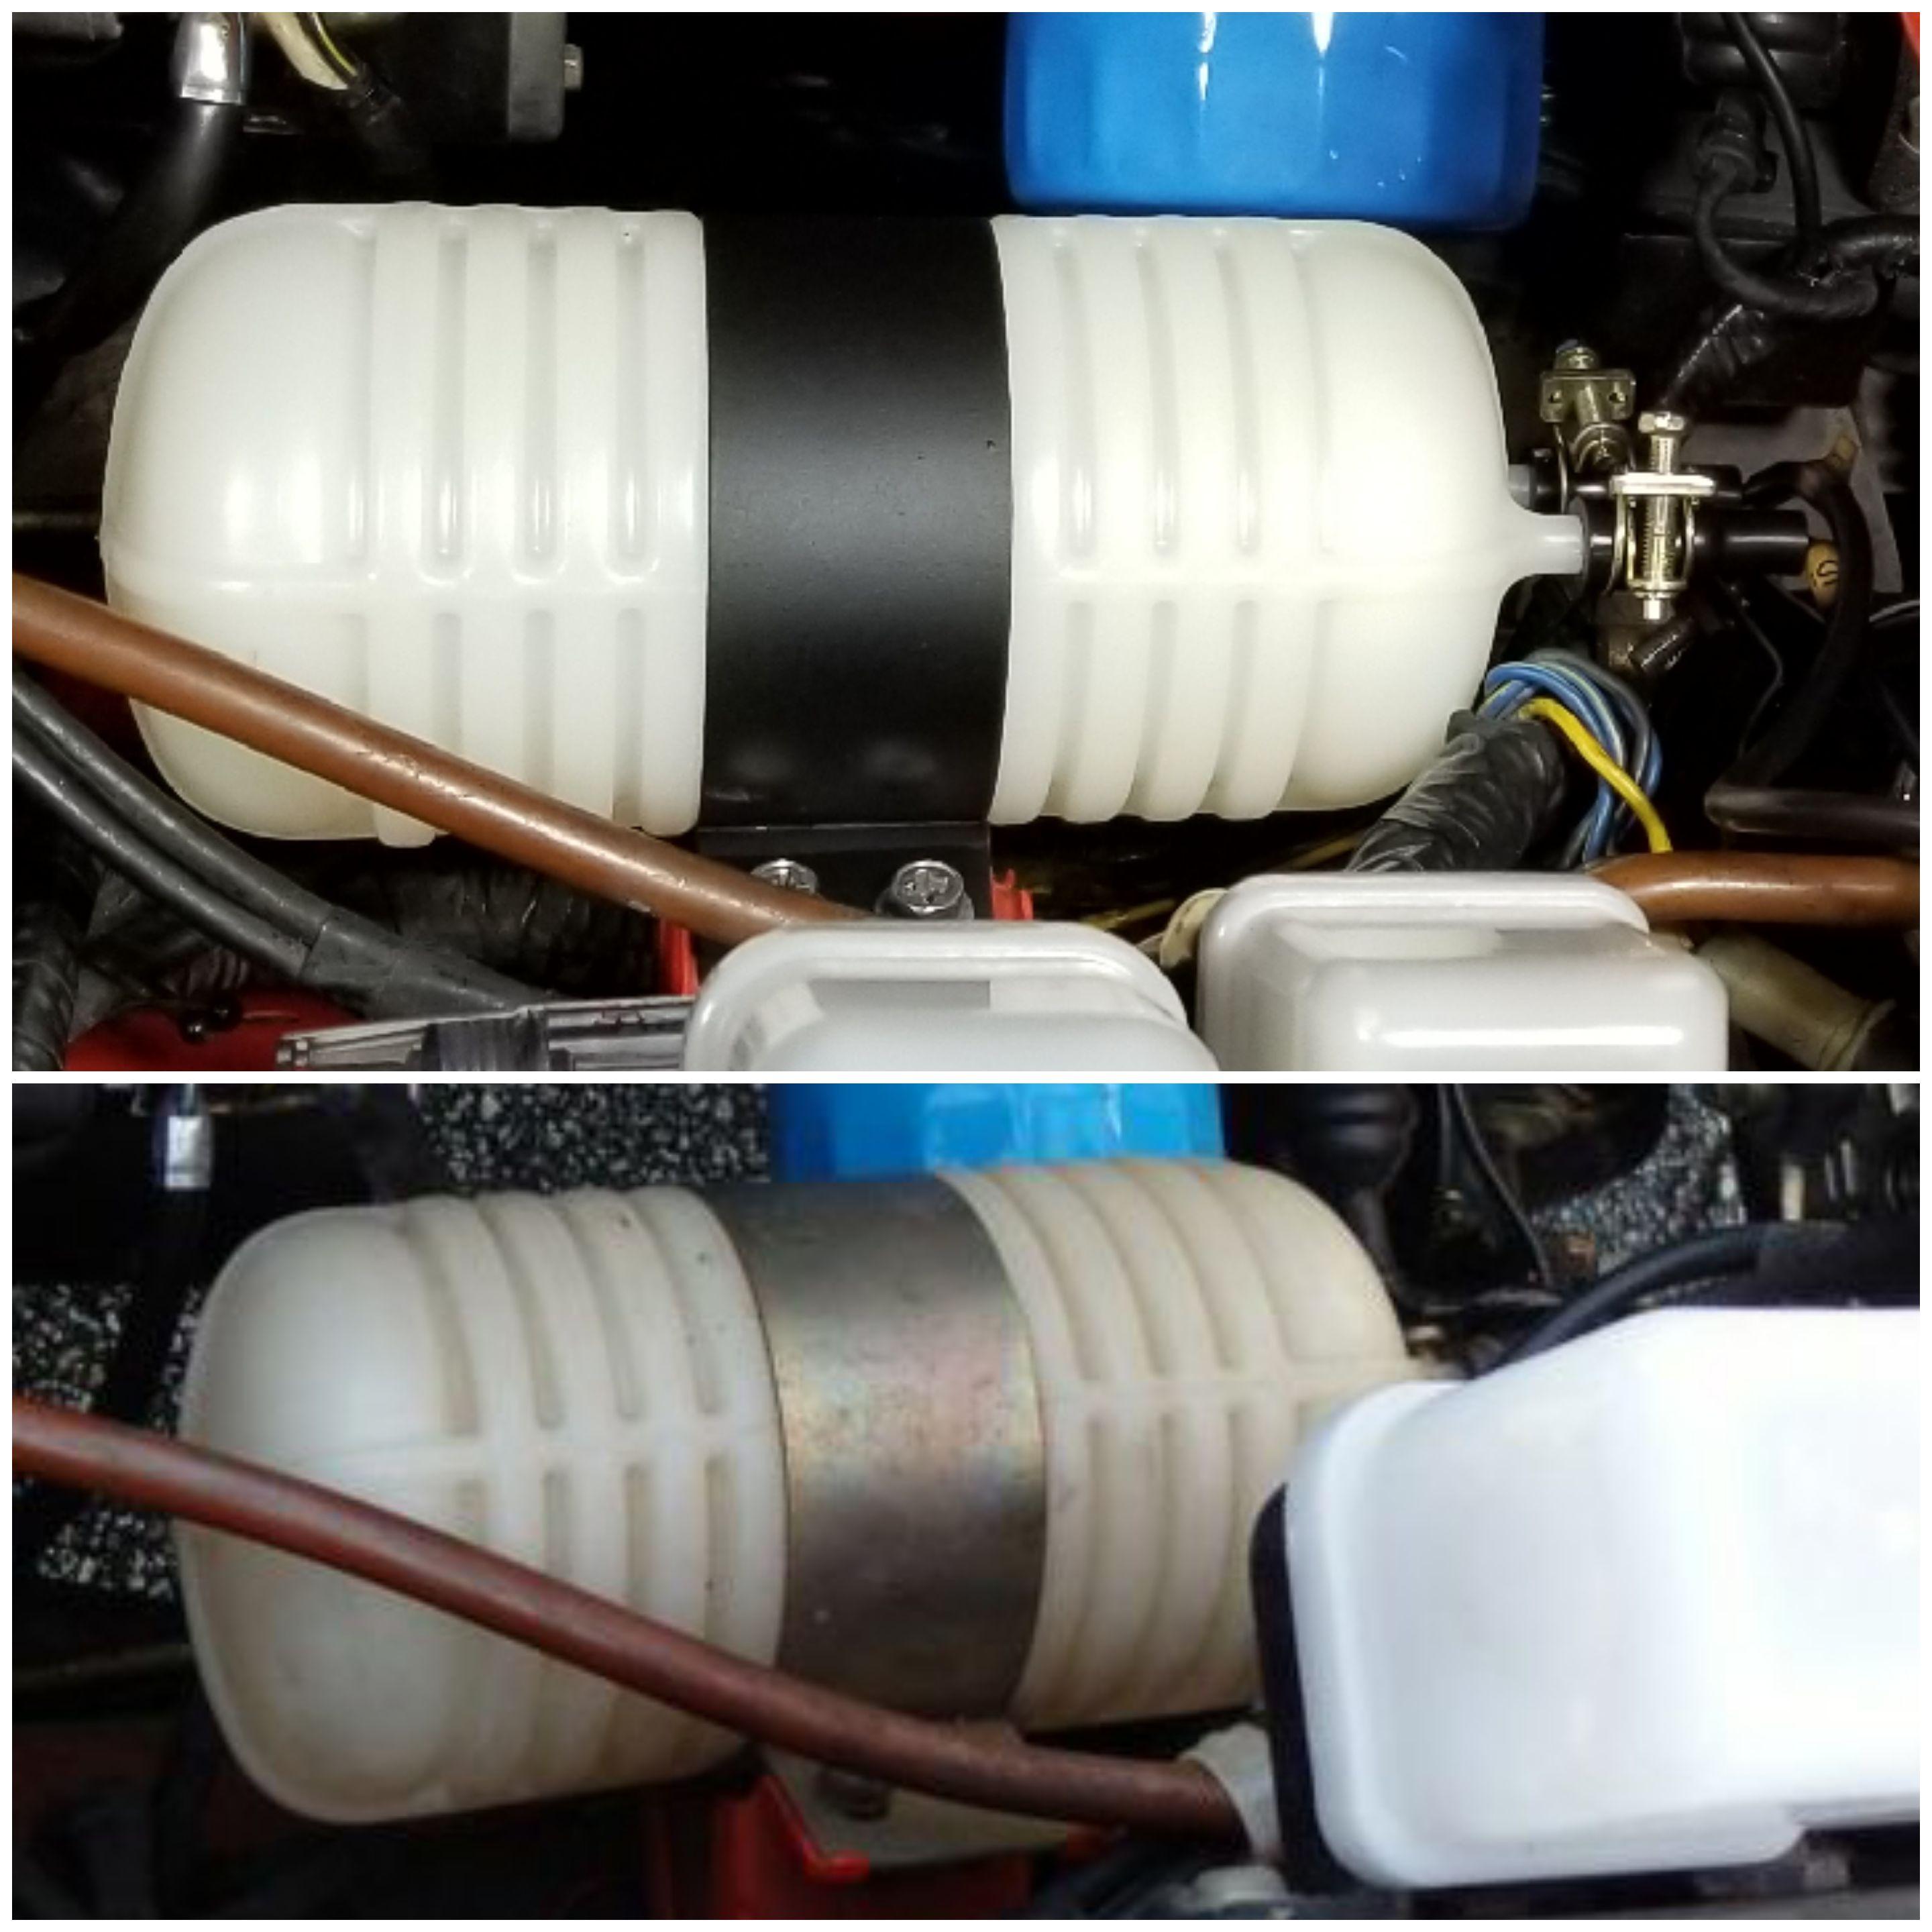
I used this method on my vacuum tank and it worked extremely well. Here's a comparison "before/after" pic. Top pic is after.

-
It sold for a bit north of 38K. Not bad considering the original auto tranny was swapped for a 4 speed (cool but not original to the car), after some rust repair the paint in the rear of the car didn't match the rest, rear deck carpet seemed to have shrunk somehow, etc. I think the whole car needed a good paint job to look really good but then the parts with original paint would be gone. I'm not sure how that would affect value. Sent from my SM-N950U using Tapatalk