charliekwin
Free Member
-
Joined
-
Last visited
Everything posted by charliekwin
-
I'm feeling pretty good about that. Sent from my Nexus 5 using Tapatalk
-
I'm doing a Euro stitch for sure and will glue down at least the back part of the cover where the finger dents are. I may glue more of it but will feel that out as I go. Opinions on gluing covers seem pretty evenly split. Sent from my Nexus 5 using Tapatalk
-
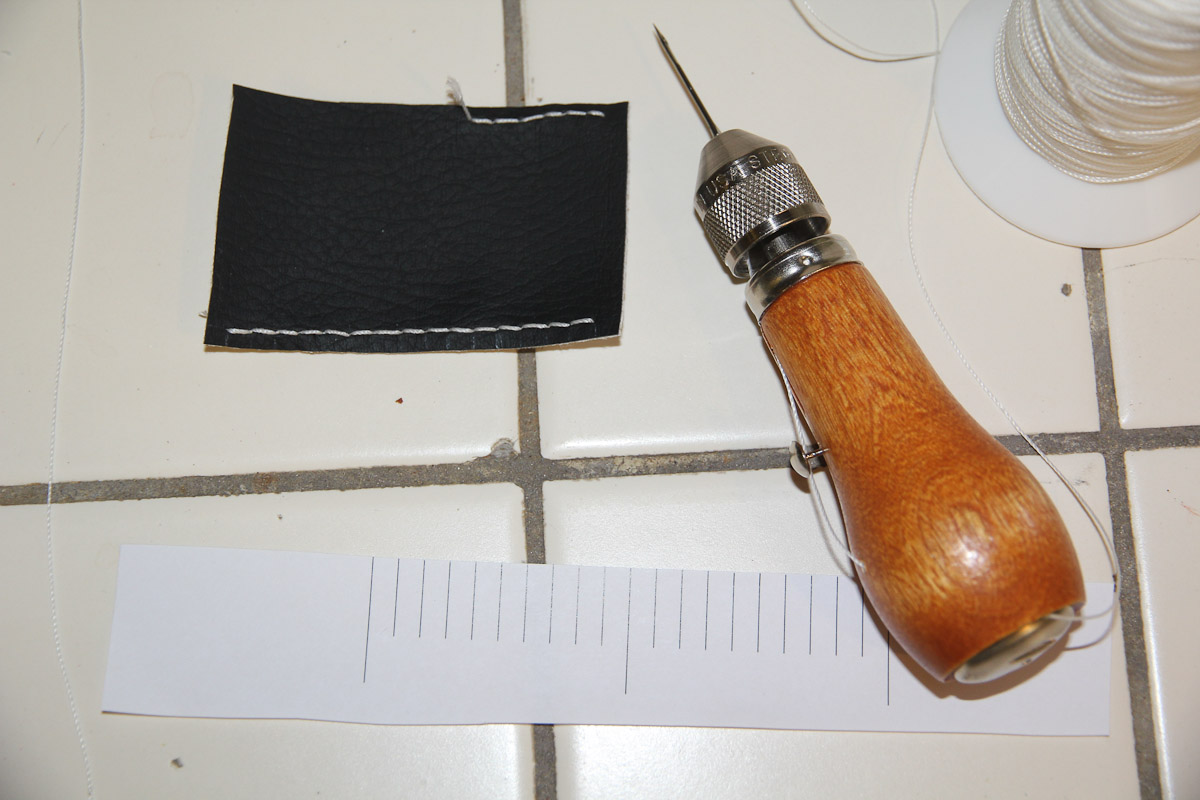
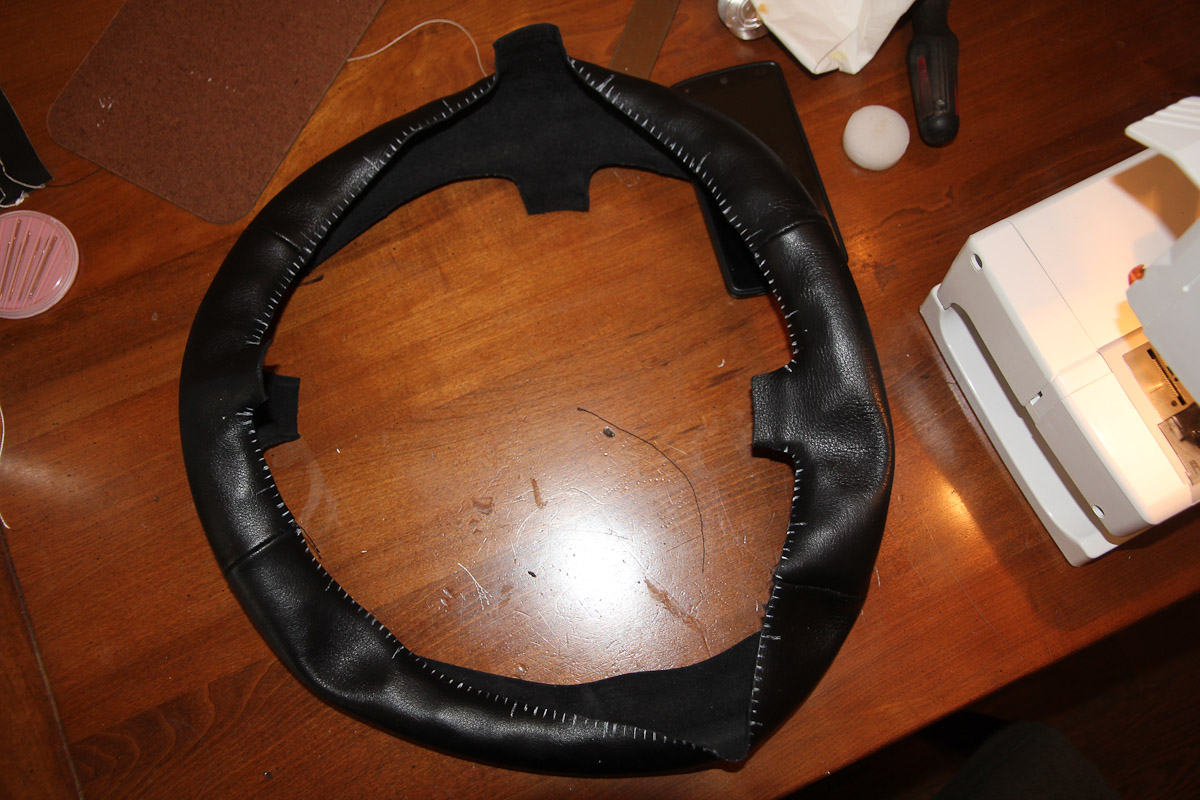
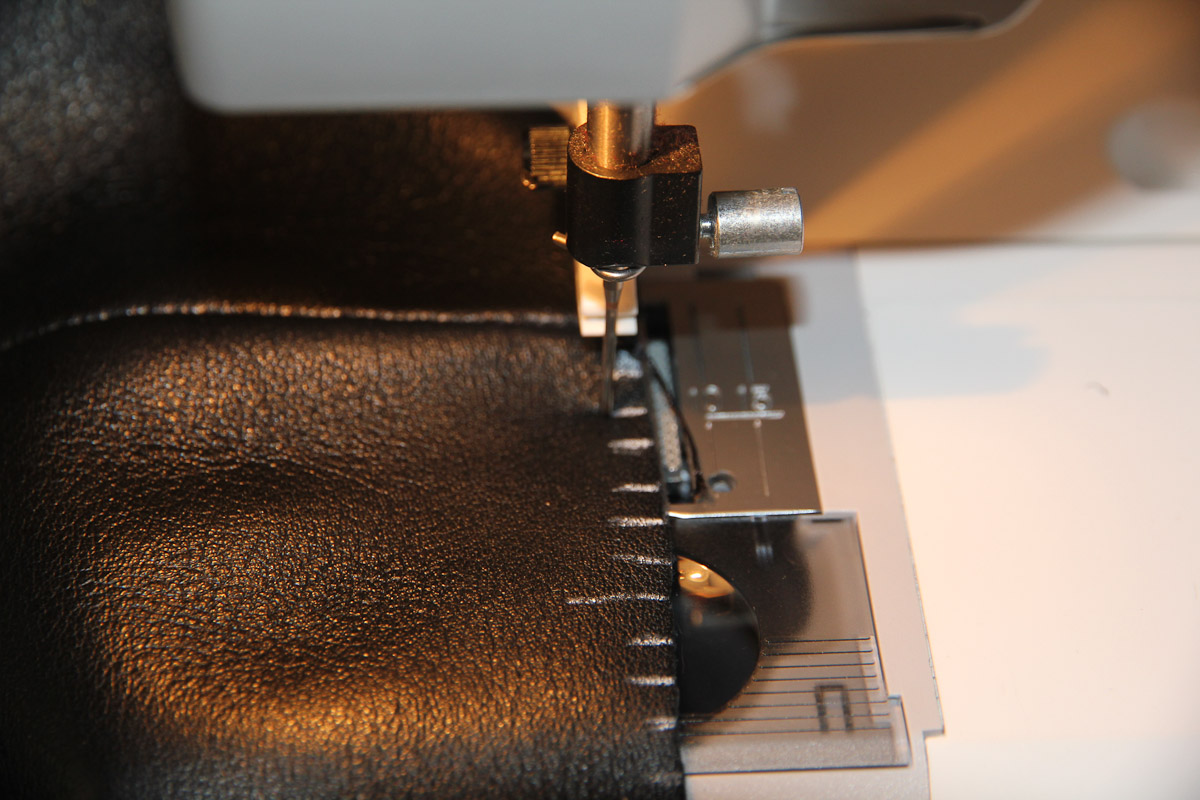
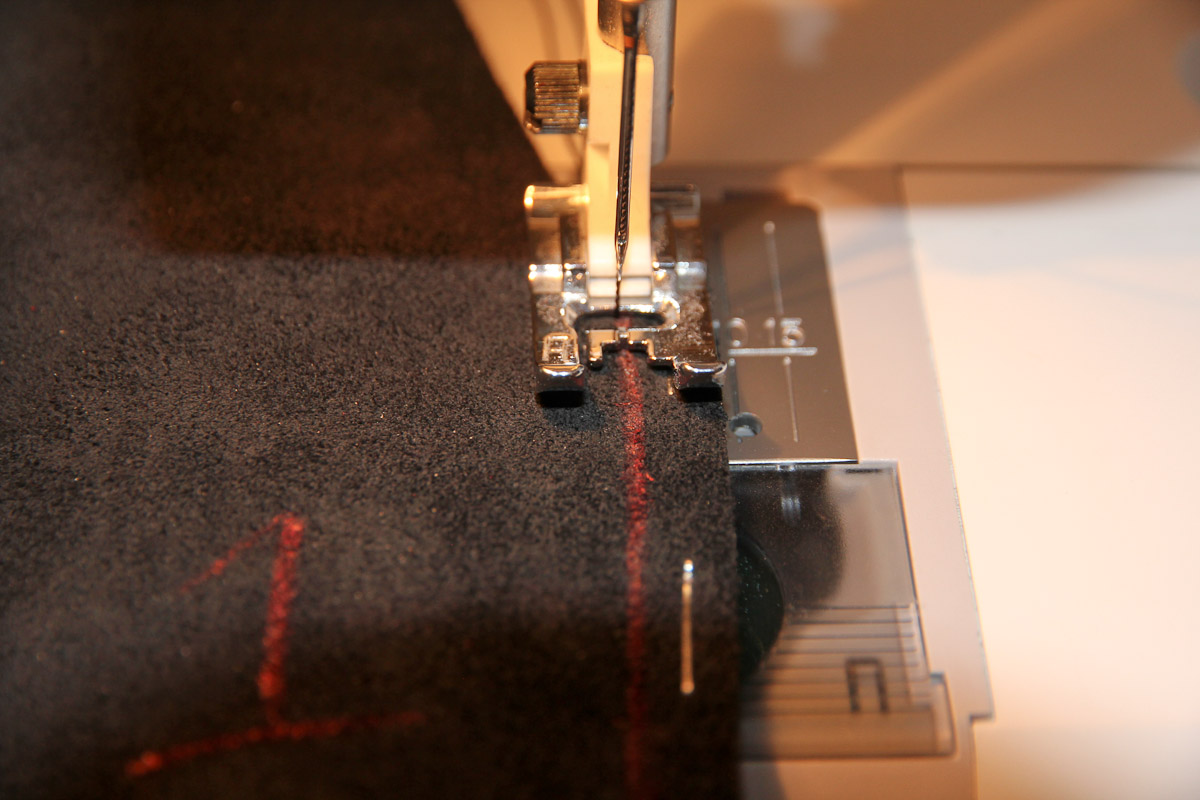
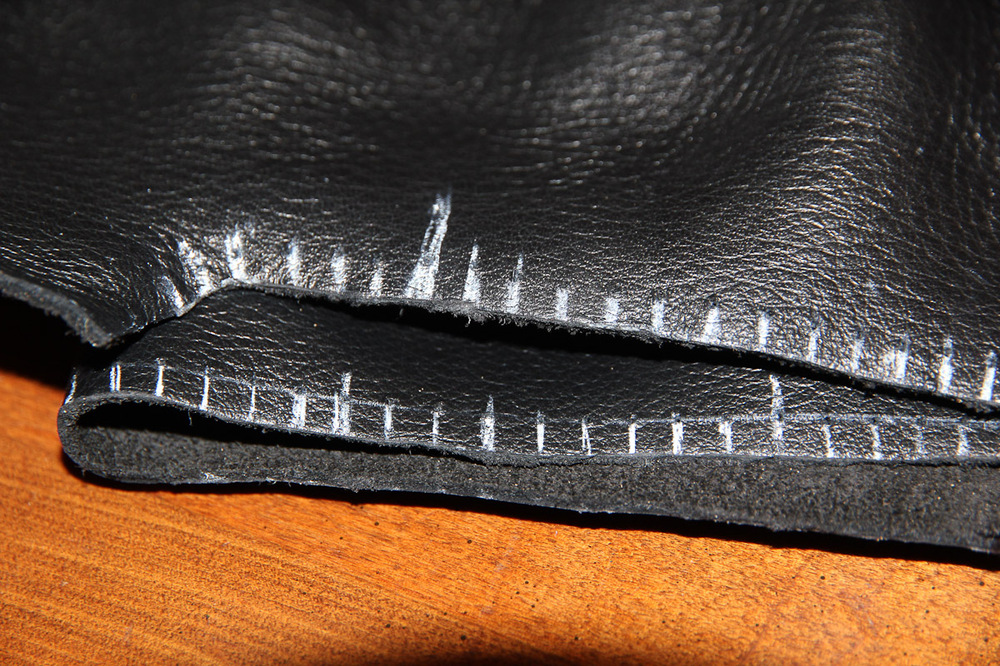
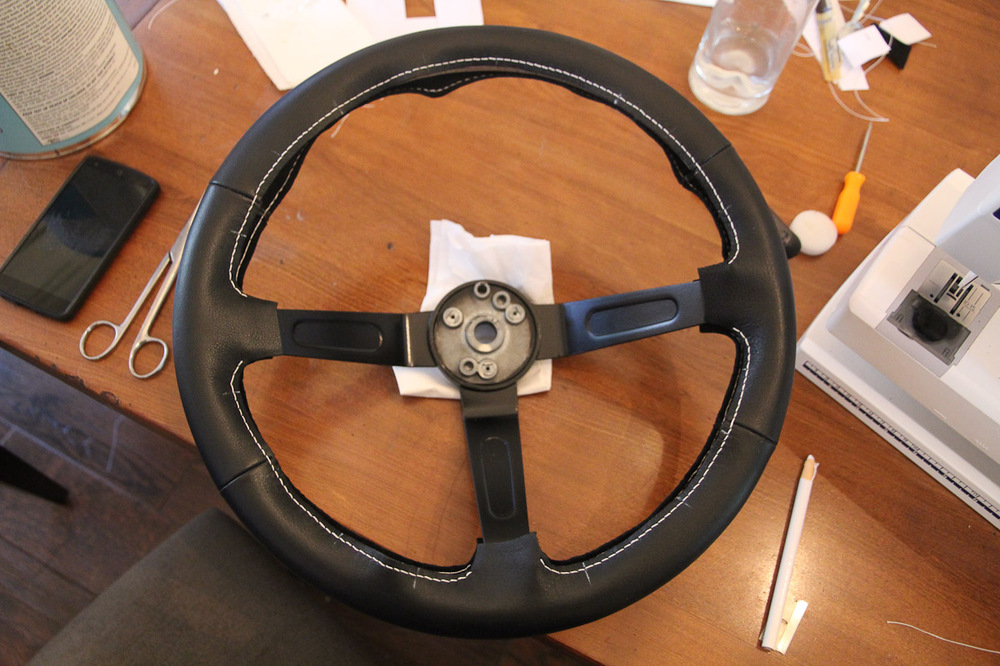
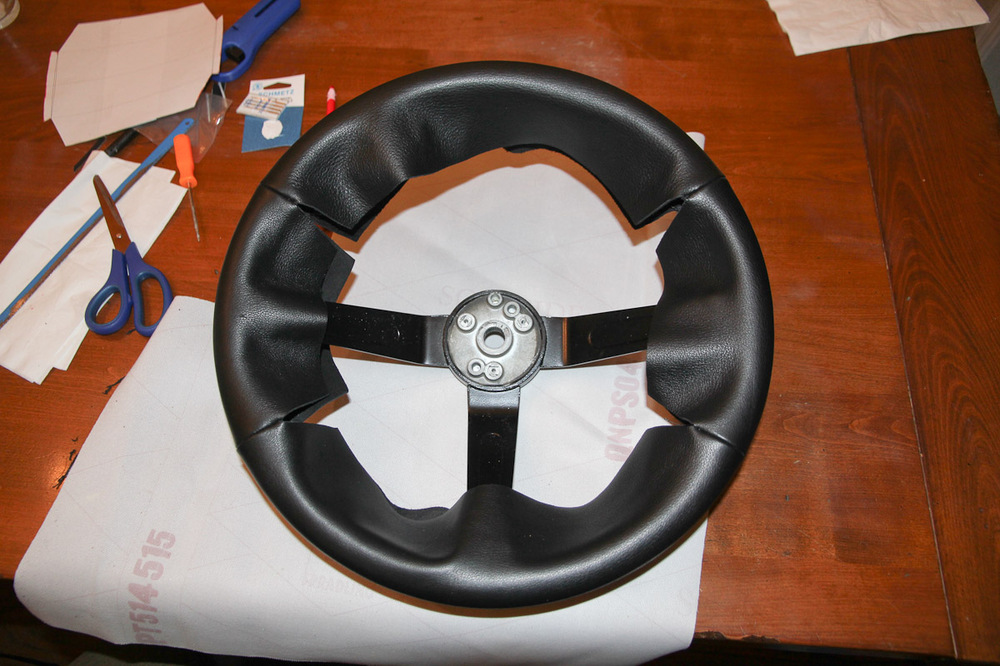
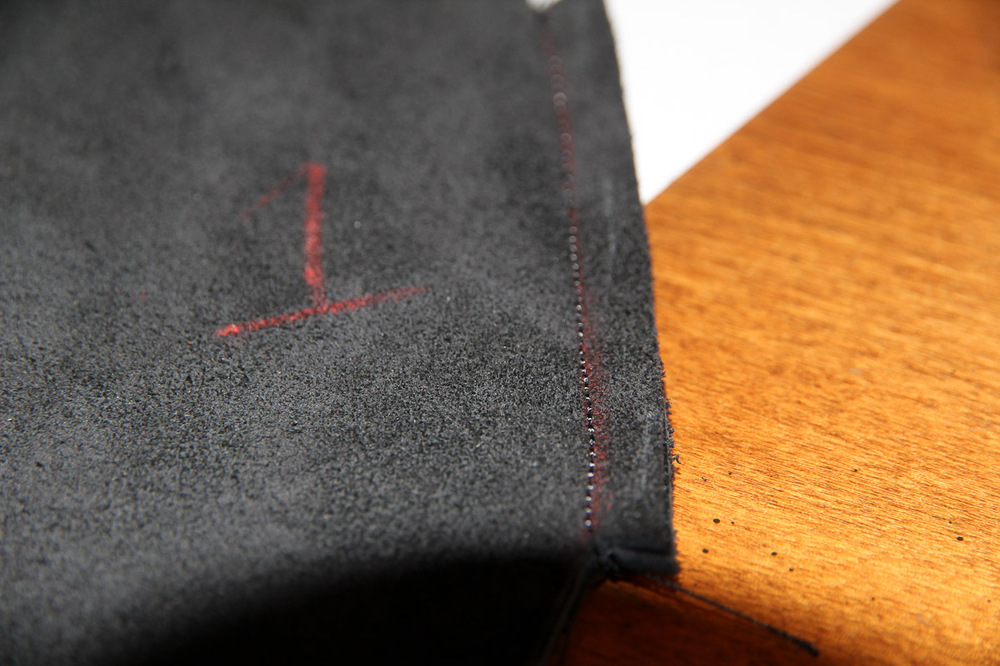
My Speedy Stitcher came on Saturday afternoon, and...that's what I've been doing this weekend I did a test row of stitches on some vinyl to see how it was going to work and look, and the results (while slow) were good, so I decided then to do the whole thing by hand. First job is to mark all the holes. I printed out a 5mm 'ruler' at the office and used that and a finely sharpened Sharpie grease pencil to do all the marking; following the procedures outlined in Cesar's (cechaflo) videos. I tried to avoid looking at the clock too much, but just the marking probably took almost an hour. Instead of trying to punch through the leather and stitch with the awl, I used the machine to pre-punch each of the holes. Taking off the presser foot helps with visibility and there are markings on the machine to help keep everything aligned. There's no thread in the machine and each hole was punched turning the machine by hand. Doing this was a huge help when it came time to do the actual stitching. The awl comes with a couple of needles, both of which are BIG. Fortunately, a regular Singer-style needle will fit in the chuck, so I used the same needle in the awl that I used in the machine to punch all the holes. Then, it's just a lot of stitching: push needle in, pull back, feed the bottom thread, pull needle out, tighten threads by hand. And repeat that almost 400 times. (I'm a desk jockey by day but I go to the gym and lift heavy and am very grateful I have some decent callouses on my hands, because there's a lot of thread pulling involved!) The toughest part is that it isn't a movement that lets you get into any kind of rhythm or can be sped up. Each stitch took somewhere around 20 seconds, but I had to take breaks and keep myself distracted now and again. All told, I think it took about 5 hours over two days. The wheel itself also got a quick repaint, since it was chipped up pretty badly during the build-up process. A lot of work, but hey, that's looking pretty good!


-
The guy in the back who clearly looks like he wants nothing to do with any of it is my favorite part of that photo.
-
It is a cool job! It's actually the exact job I had planned for myself when I was younger...until I got about halfway through my undergrad major courses (physiology) and suddenly realized I didn't have the passion for it that my fellow pre-med students did. I just stuck with technology and ended up in health care anyway.
-
I bought a Speedy Stitcher on Amazon this morning. What's an extra hour or 4 in the long run anyway? I've wasted more time on less in my life! What's your speciality, Dr. Dave?
-
Arg, Cap, that's not what I want to hear! :-P
-
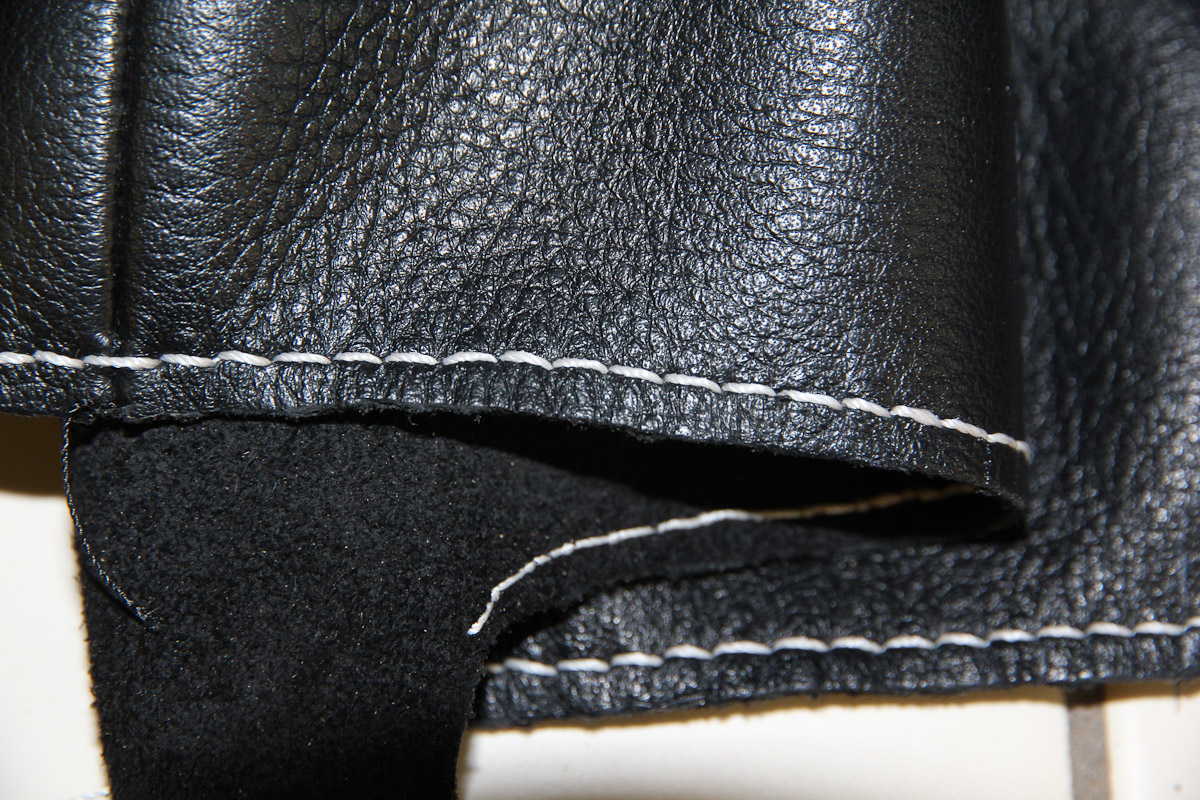
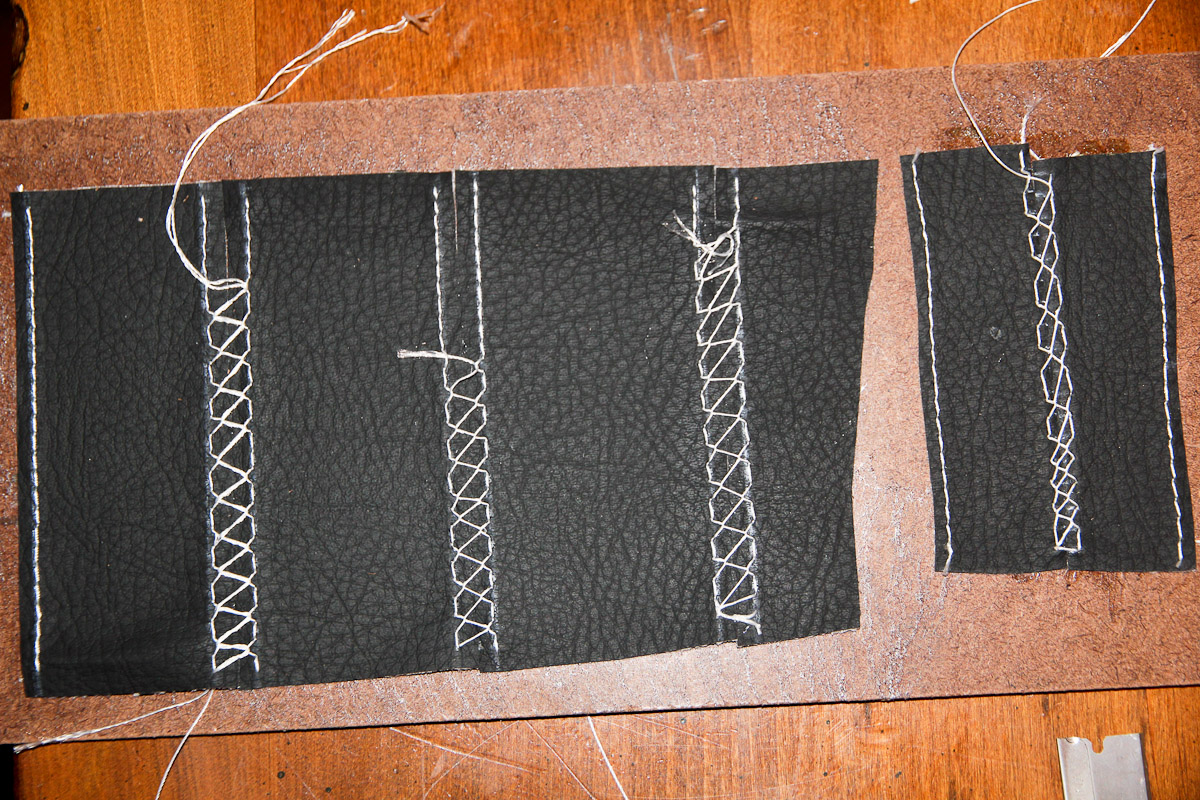
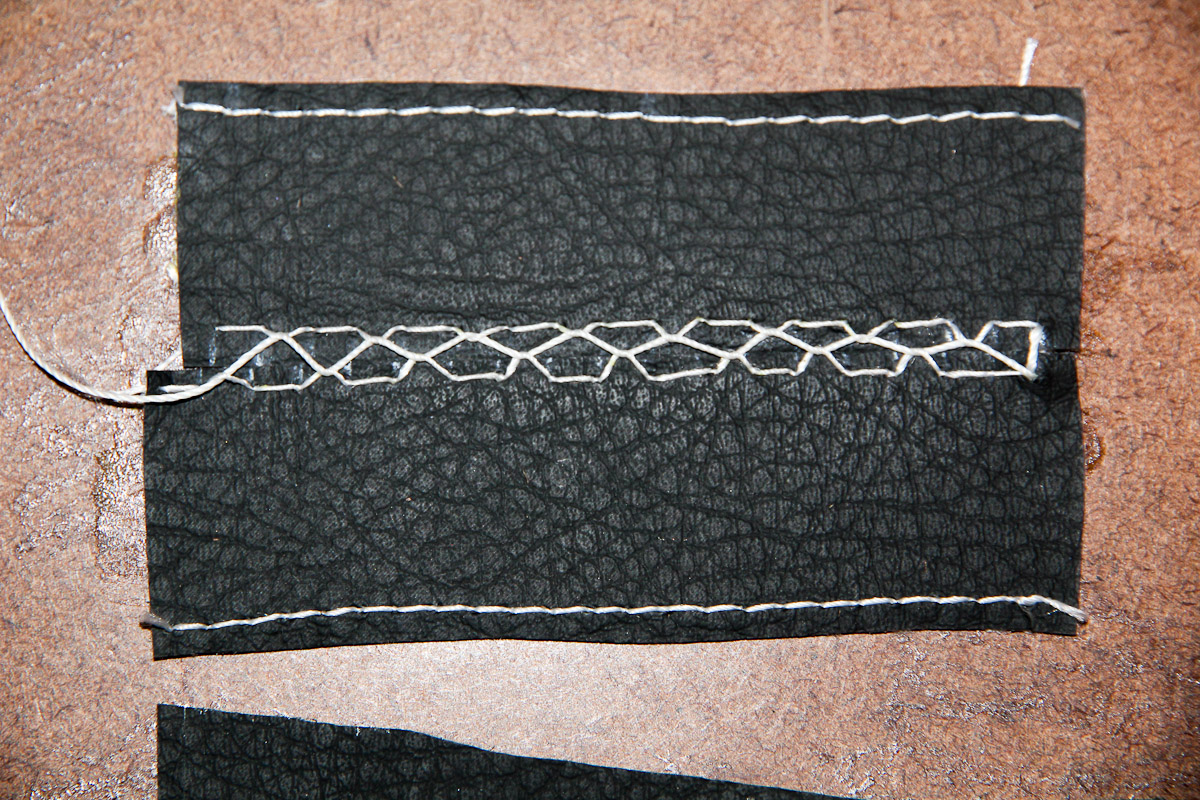
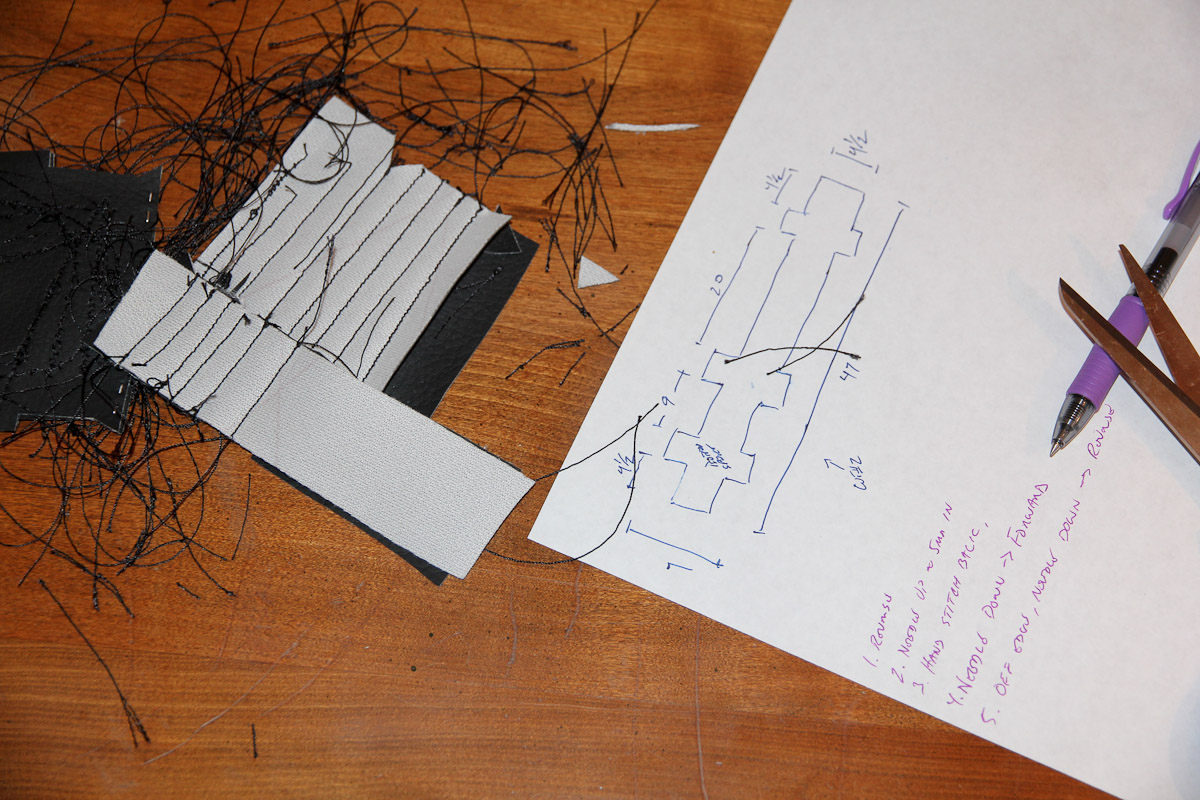
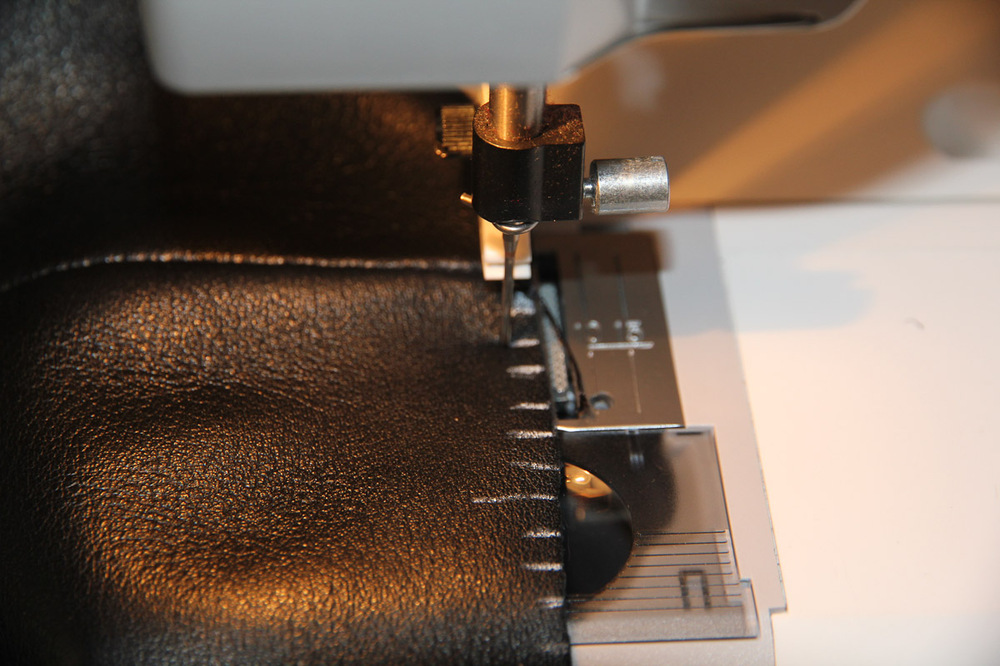
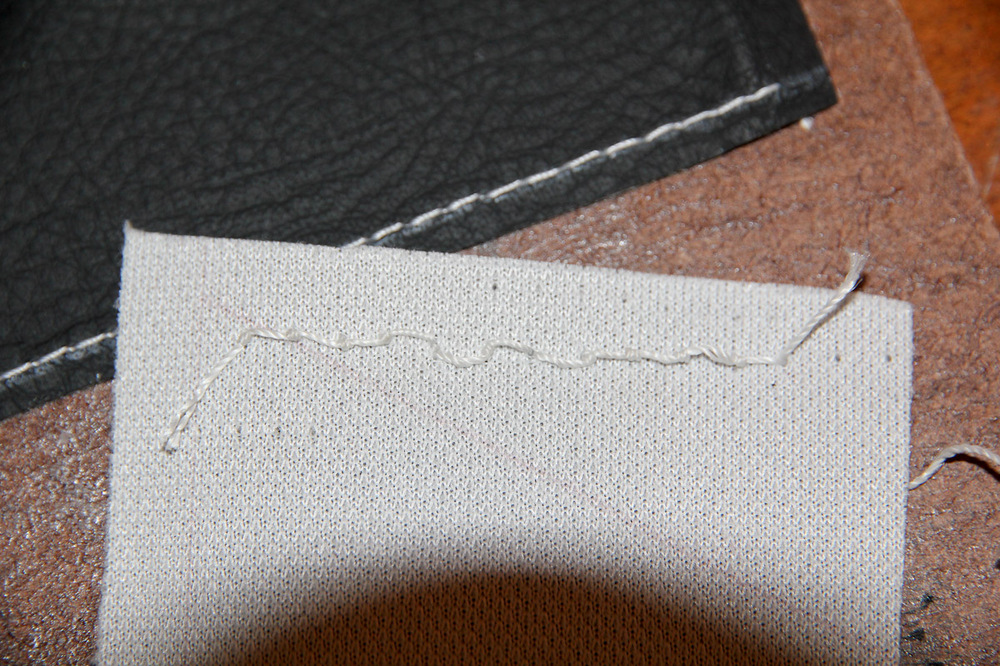
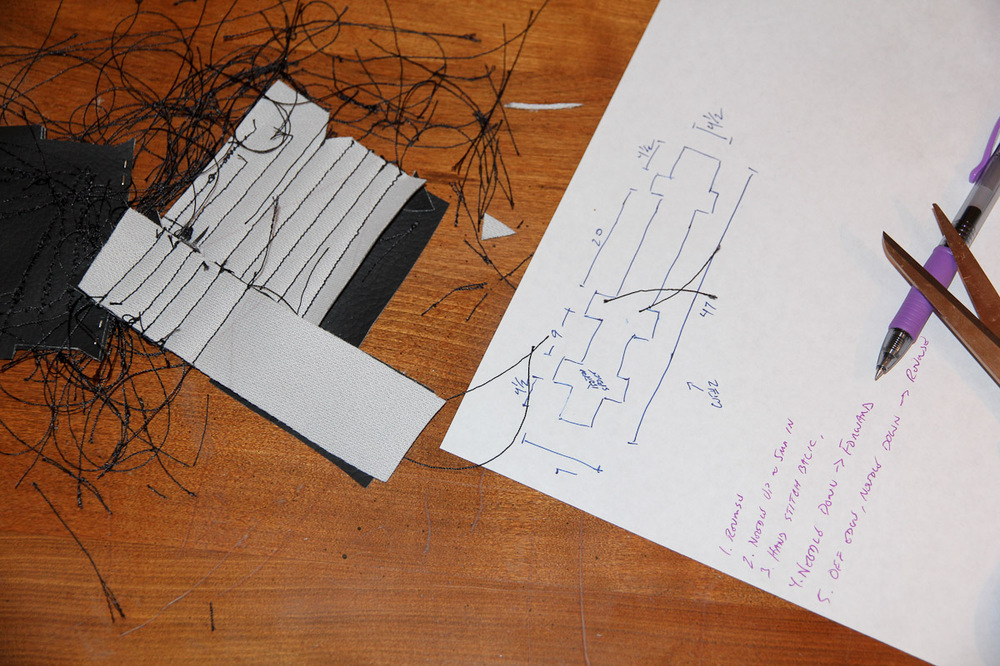
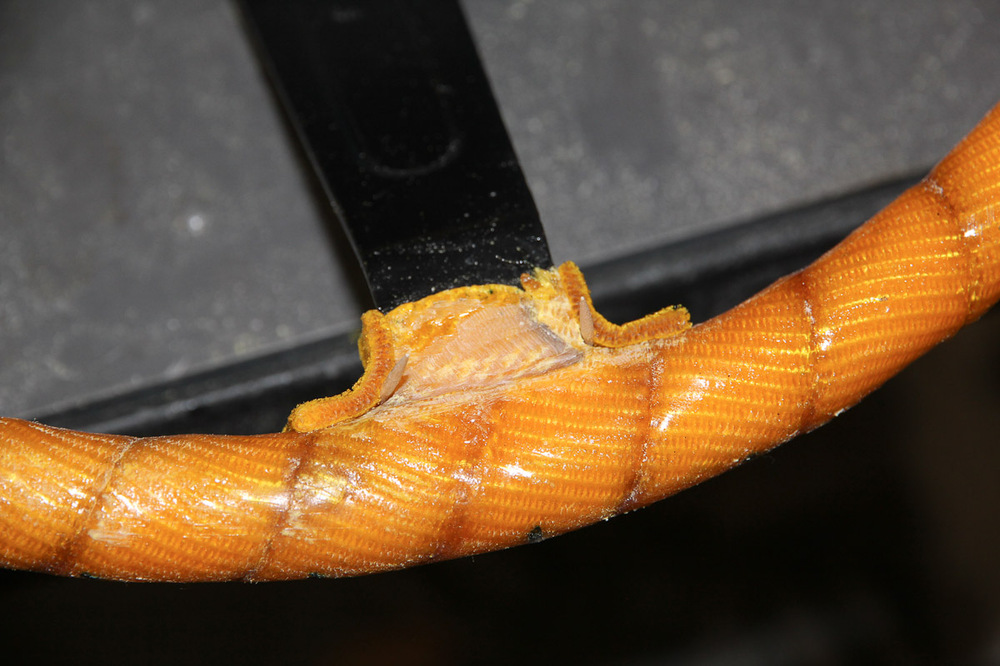
A little update on stitching, because posting about it is better than actually doing it. Frankly, this seems like the part I'm most likely to screw up. I (wisely!) tried a few test runs with some scrap vinyl to get a feel for what I was doing. Getting straight, even stitches on the machine -- even doing them all by hand -- is hard. Some of the first tries were rough. I have T90 thread that I used to start with, but it's not quite as thick as I'd like, so I bought some heavier 210 thread, which looks nice, but is too big for the sewing machine. You can see the size comparison as well as the best my mother in law's machine will do with it. I'm on the fence now...I could use the 90 in the machine to run the stitches, then use the 210 as the interlocking thread (as pictured). That looks okay, but I'm worried about making them straight and even. I do think I might go with this particular diamond stitch, though (Google image search has done nothing but make me question my decision making on this particular element!) Or I could buy a stitching awl and do it all by hand. I could use the heavy thread and presumably get nice stitches, but it would take almost forever.


-
Four Seasons is a major aftermarket manufacturer of AC components. They have a parts catalog online; if you look at it, you'll see they make stuff for just about everything. Based on my research last year, they're pretty well regarded for their parts (I had a compressor blow up in my G35 late last year and replaced it with a Four Seasons unit). Good to see a big manufacturer still making parts for our cars!
-
I have a 5 and 2 year old that only eat a piece at a time. And yes, the half-eaten apples get wrapped like that too! I'm not sure you'd want to pay me what my time costs on the wheel. Materials are reasonable (probably will be in it for <$100, including stuff like grease pencils and needles that I won't need for anything else), but the time isn't. I haven't kept track, but by the time it's done, I wouldn't be surprised if it ends up taking 20-30 hours. If I did a few more, maybe half that, but I can now see why custom wheels cost so much. I don't factor in labor for my cost, but for anyone else: buy a Nardi!!
-
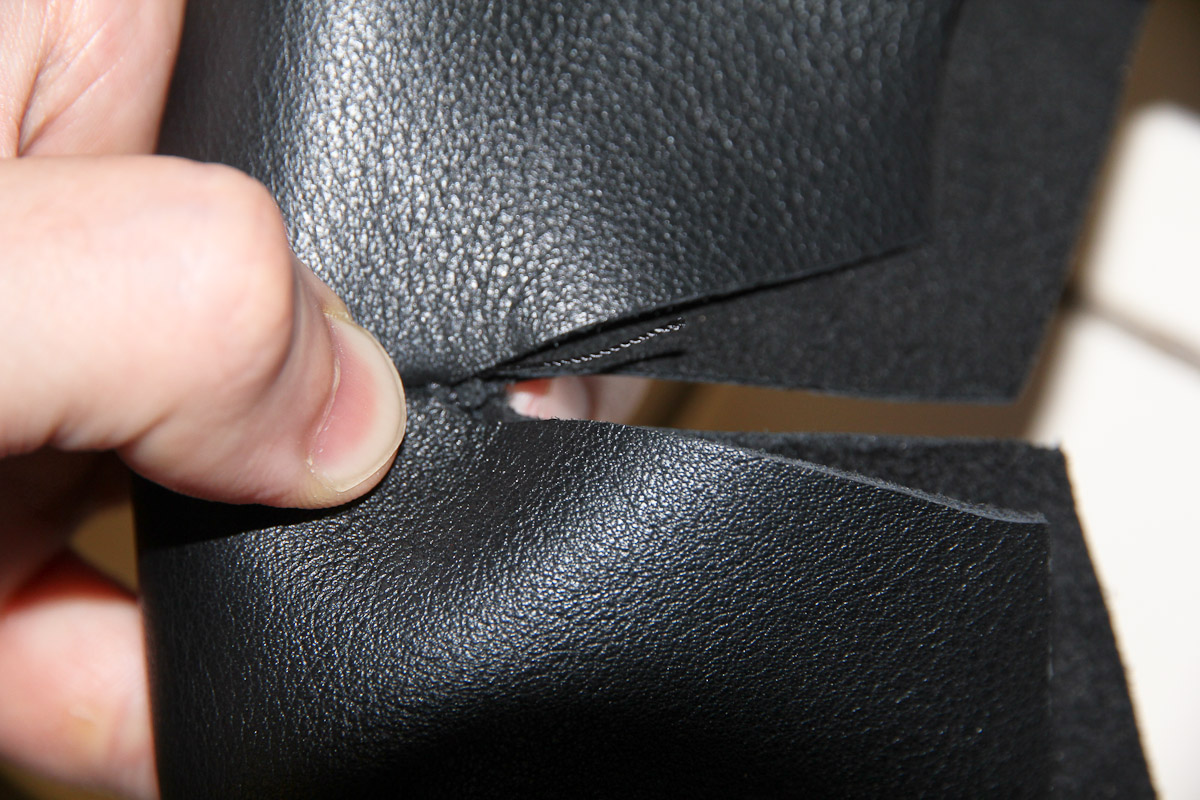
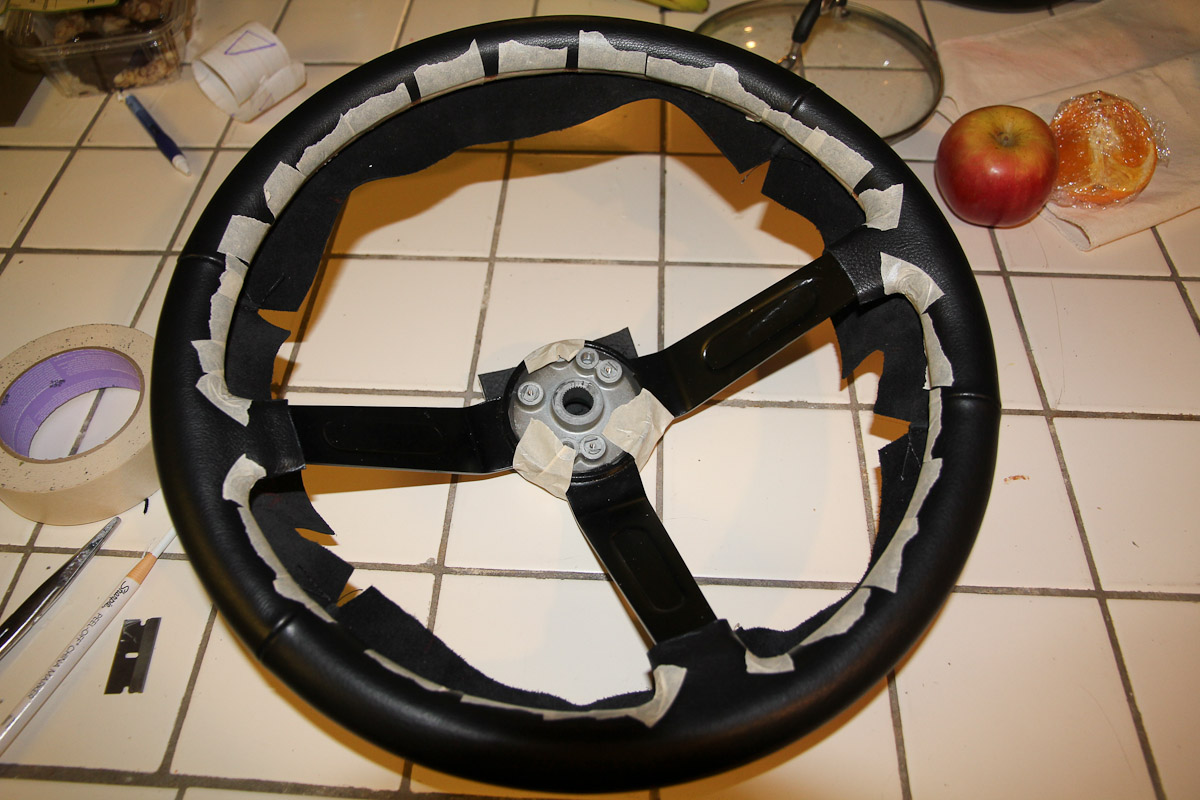
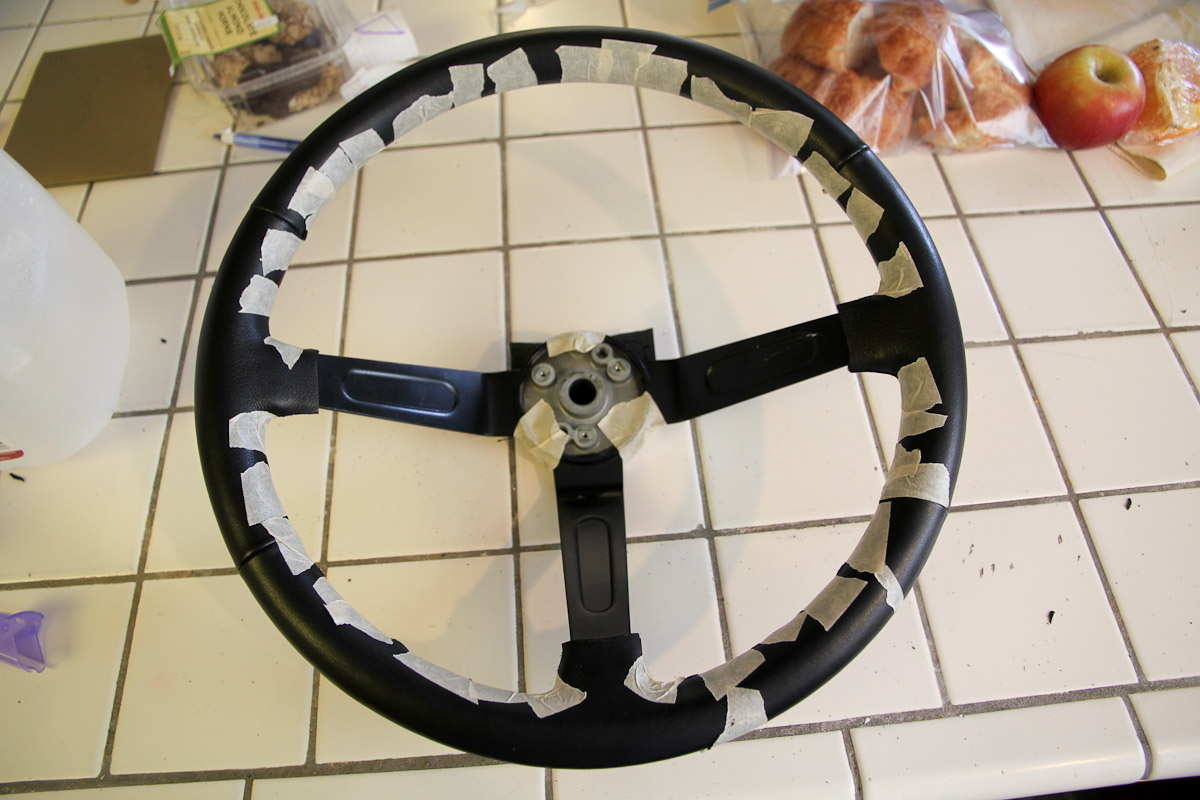
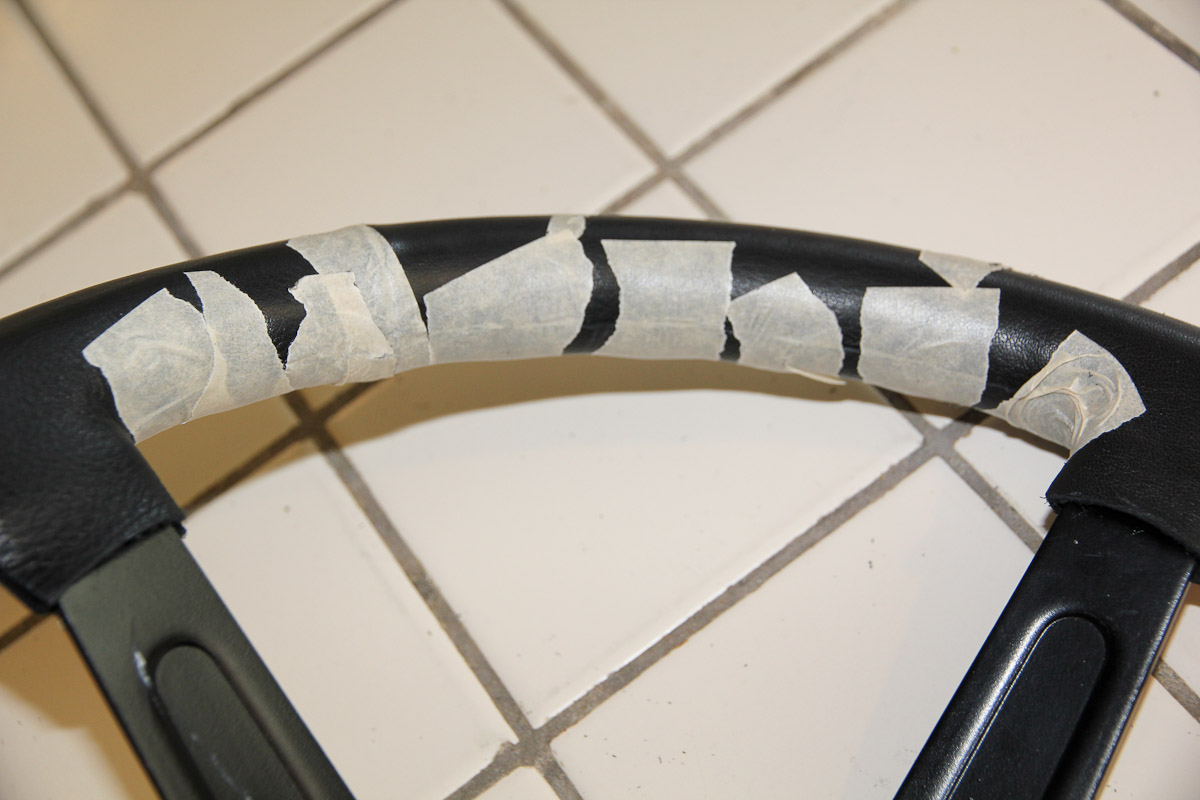
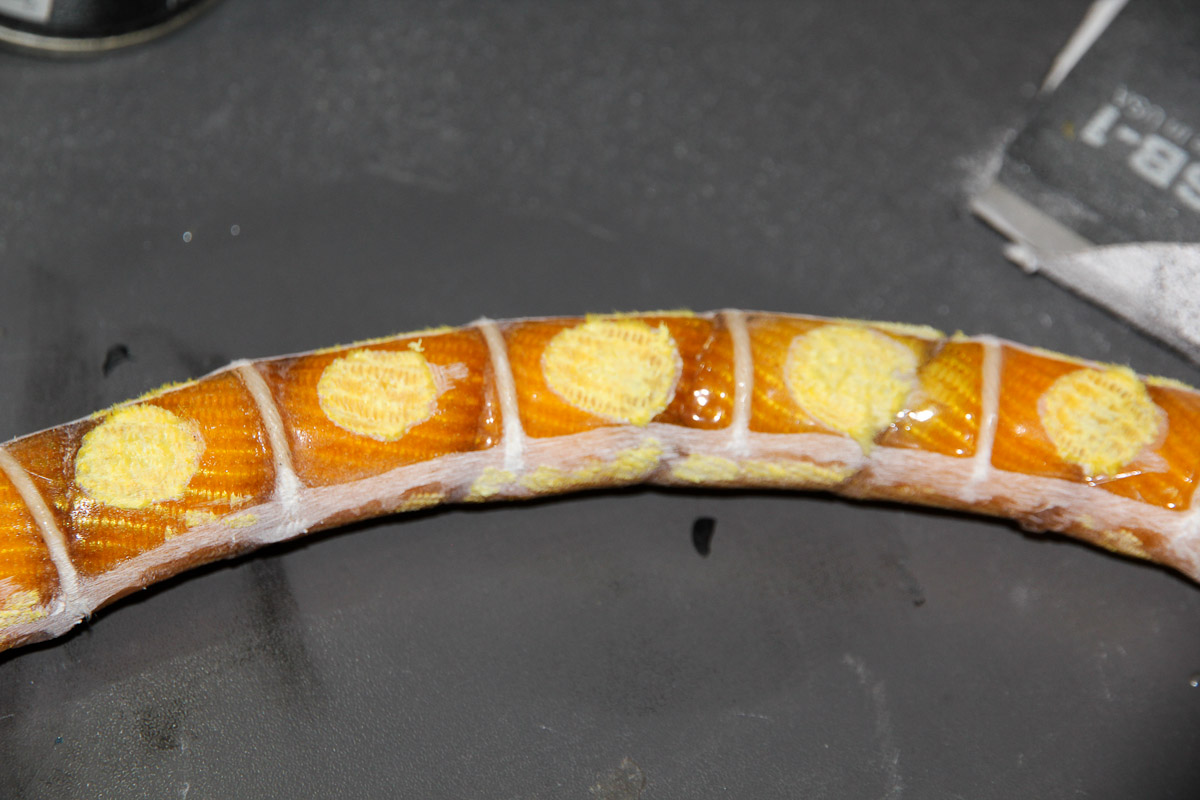
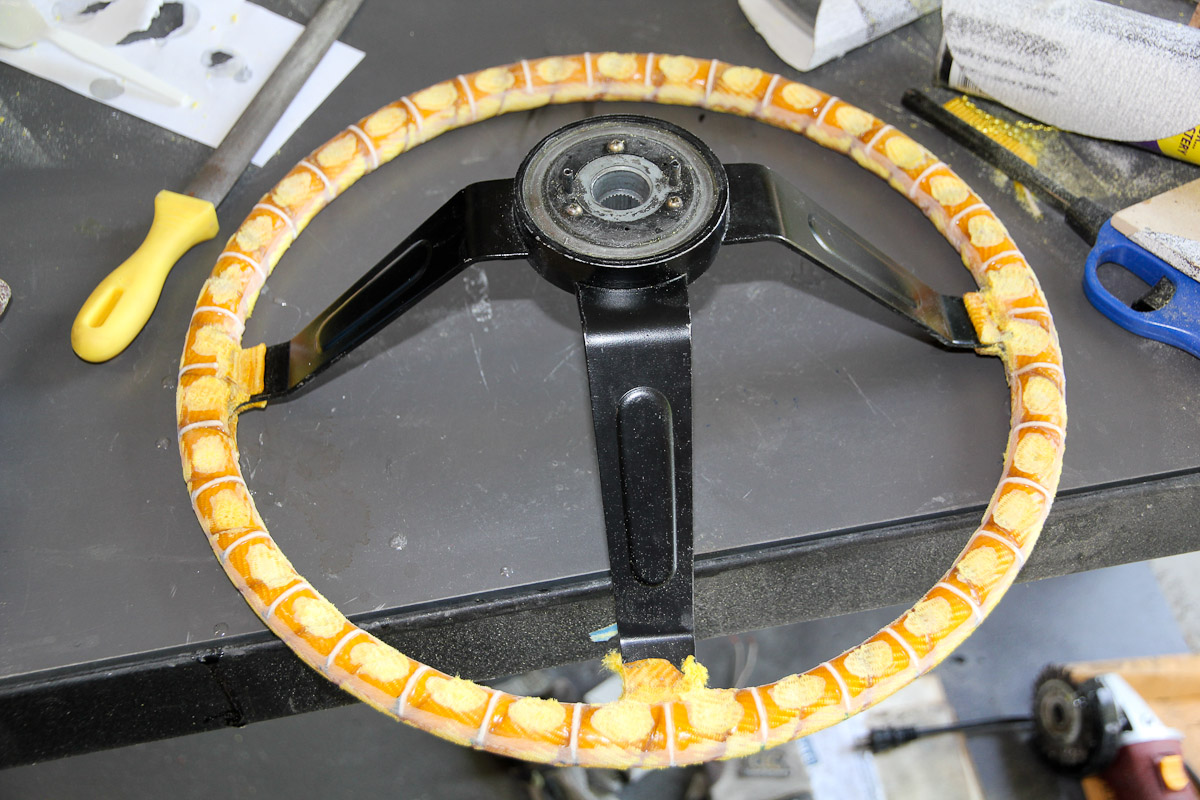
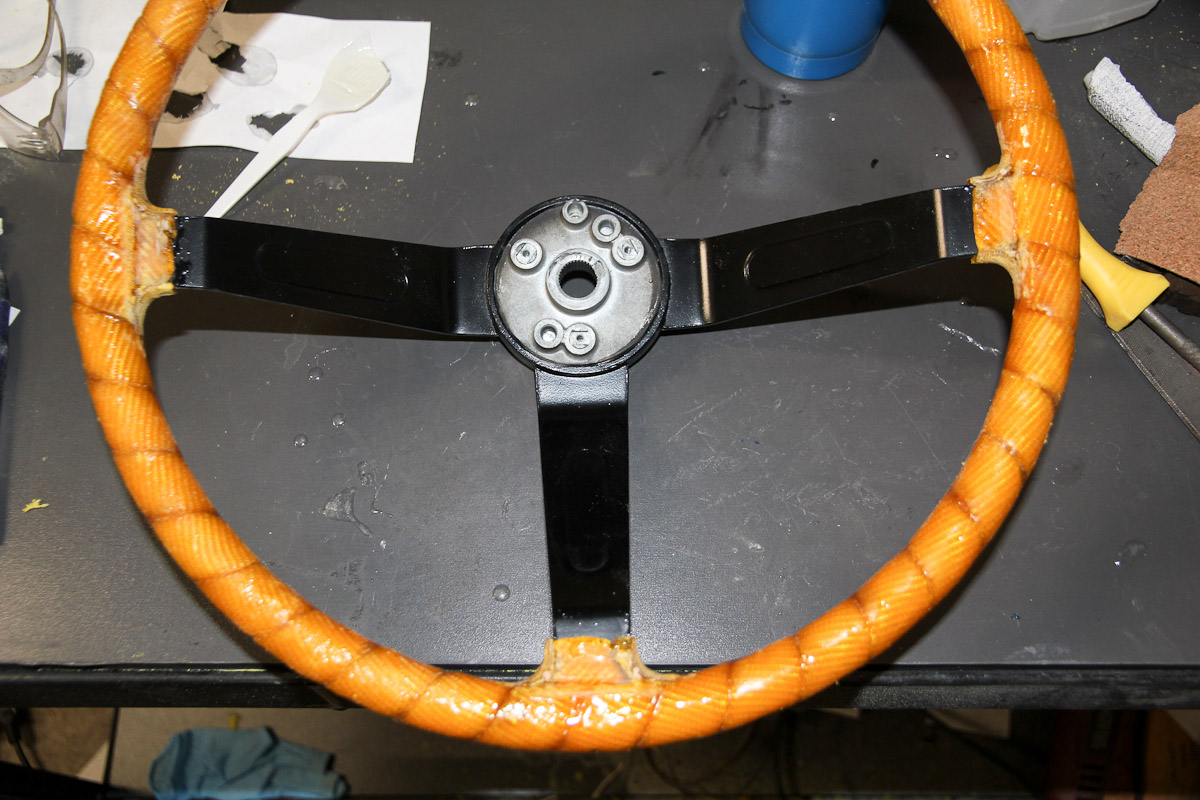
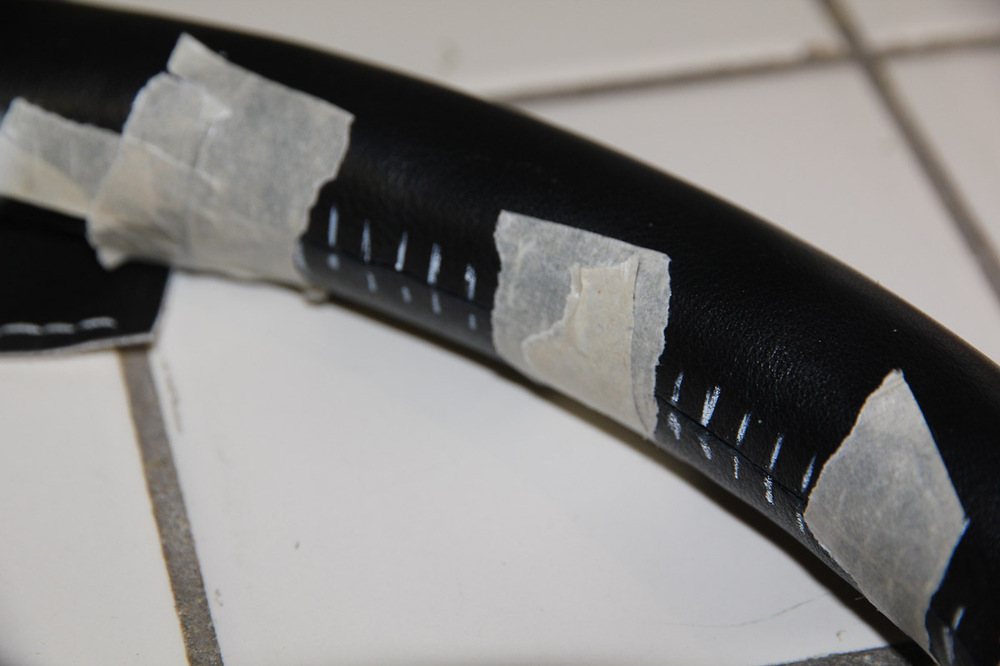
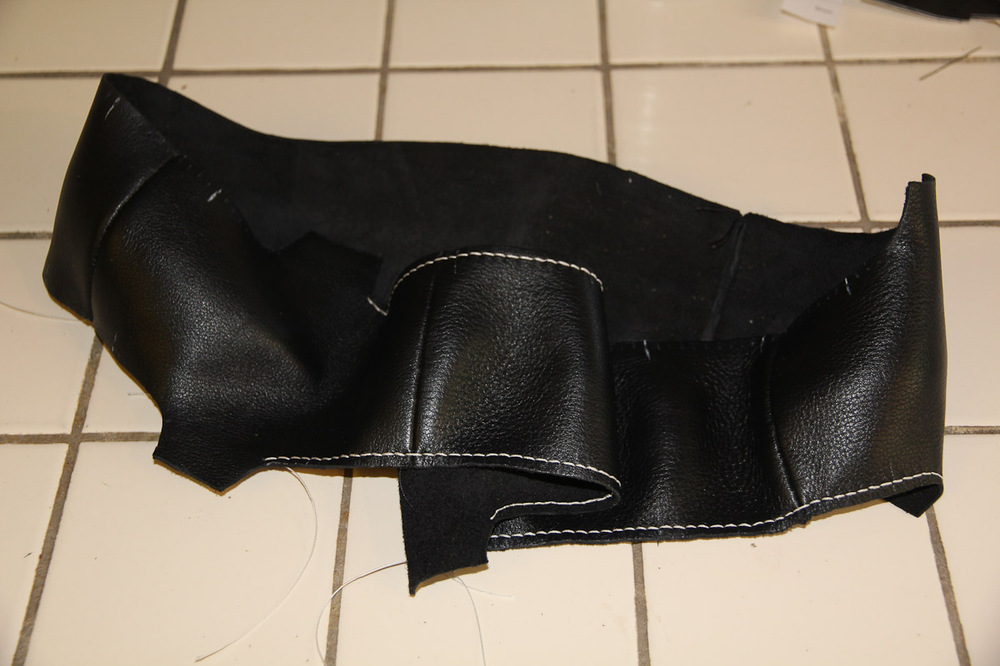
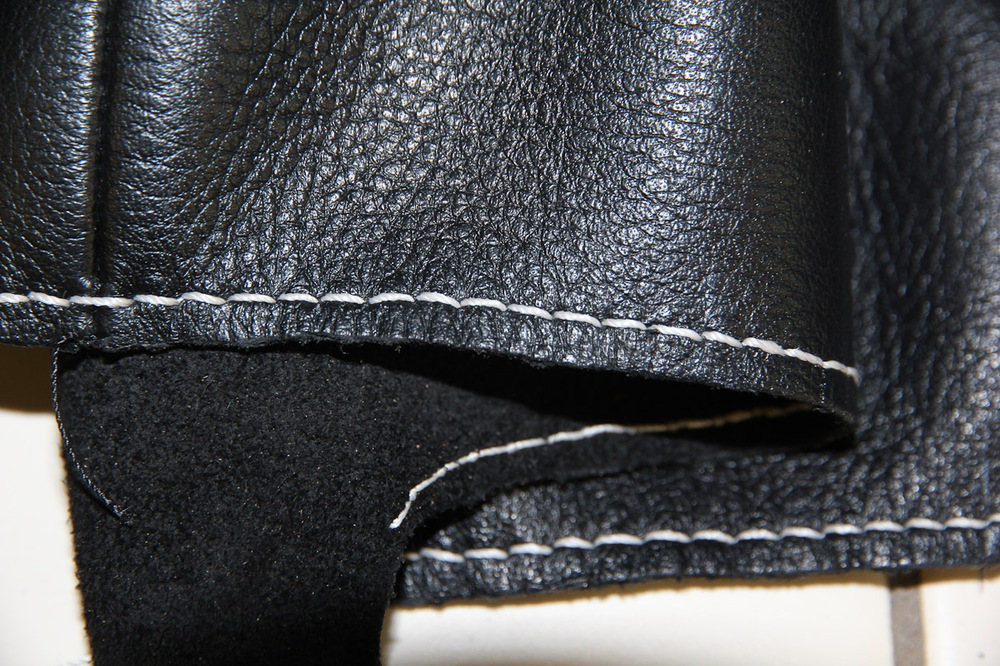
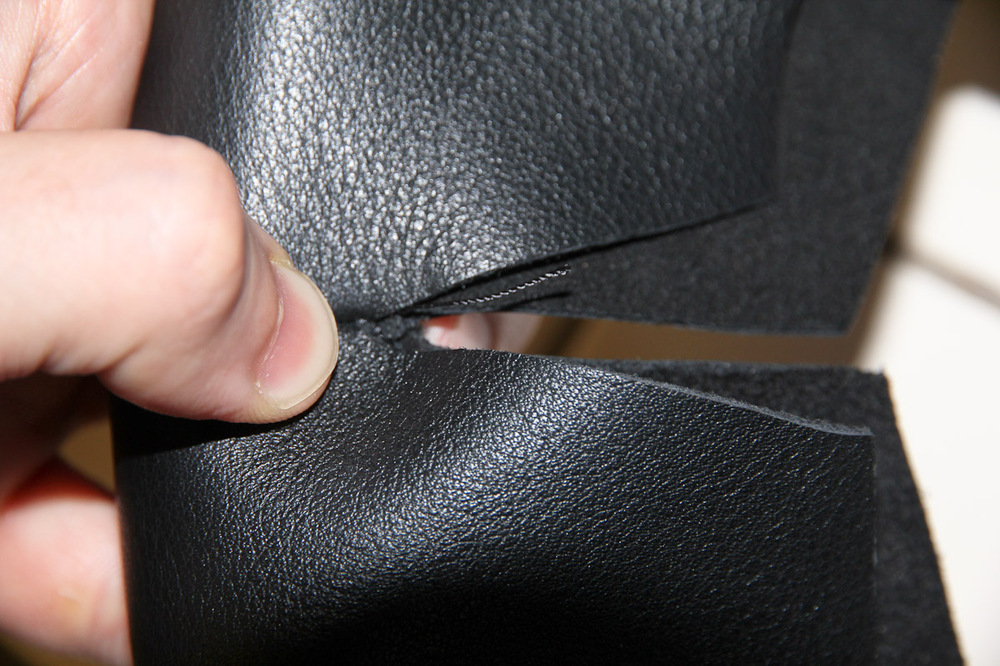
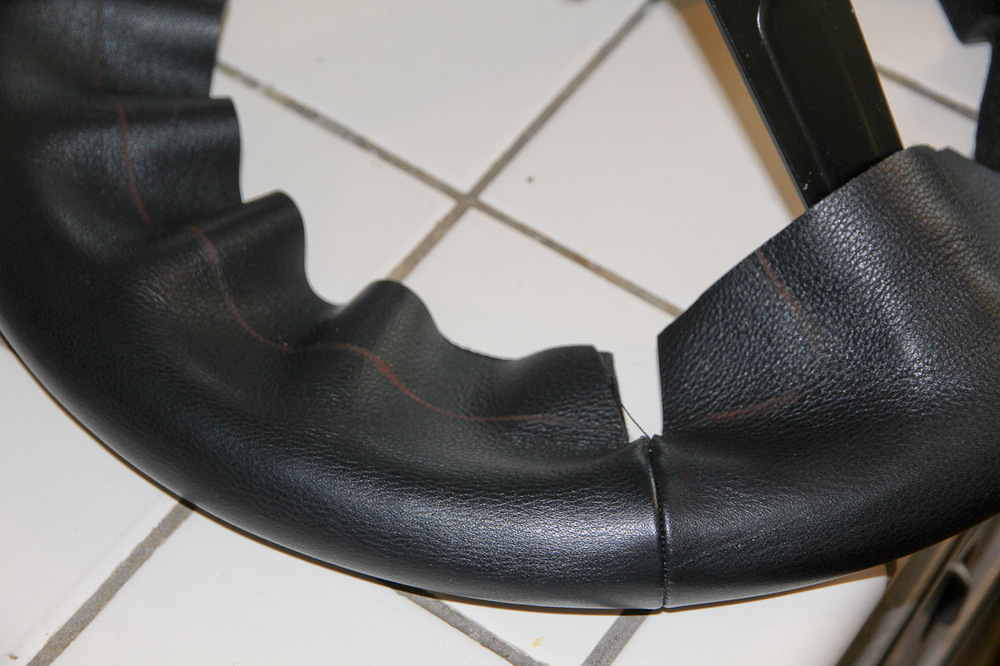
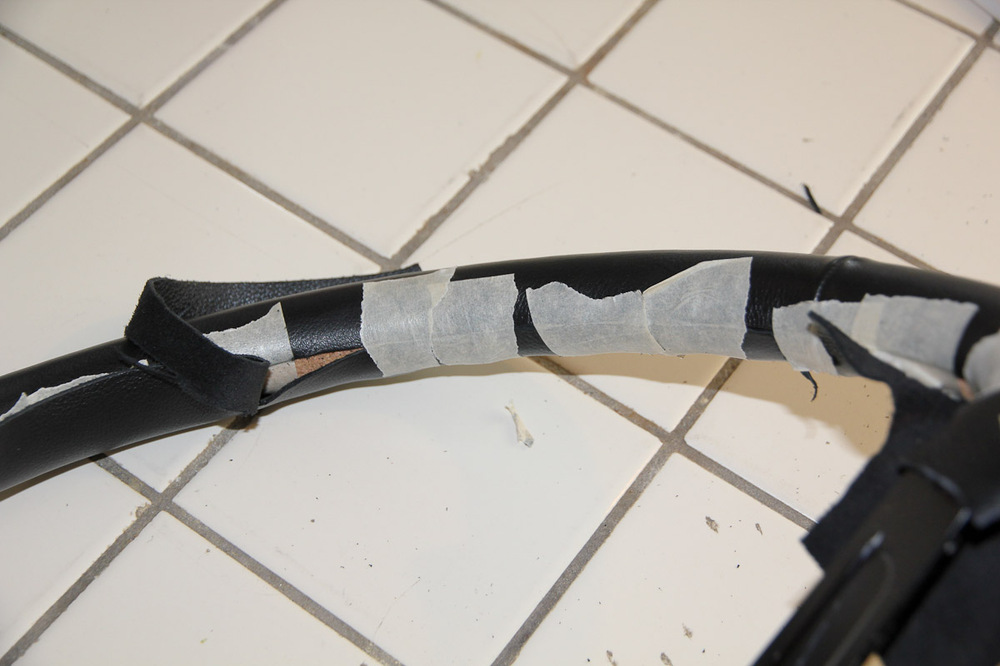
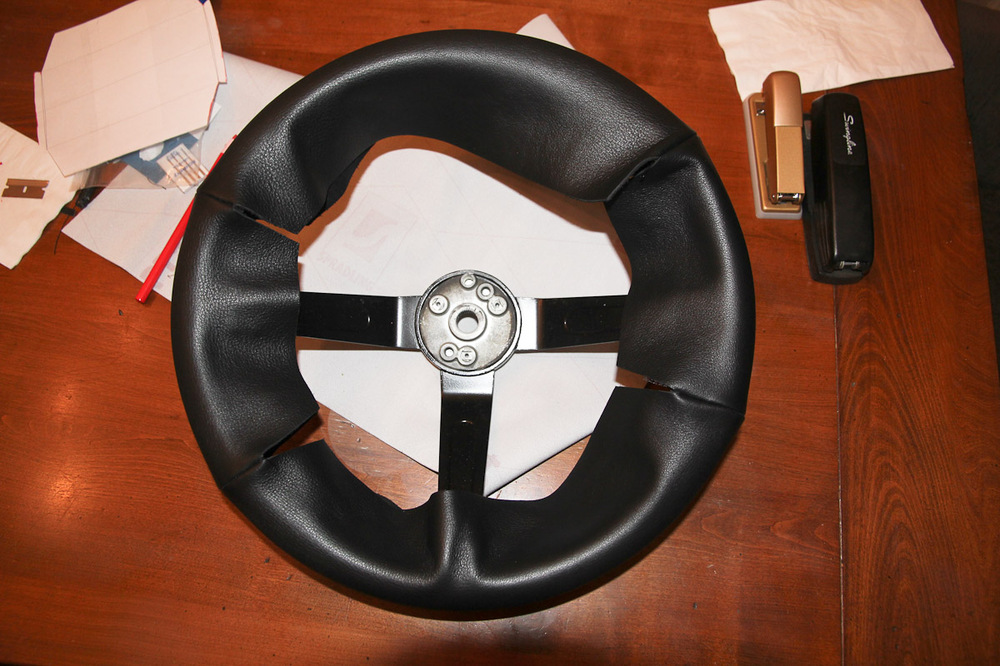
Moving along with the wheel...so the problem I ran into was that the leather band was a little too wide for the size of the grip. You can kind of see in the photo, but I had about 1-2mm of overlap where I stitched the pieces together. I ended up putting another layer of the cork sheet around the outside edge of the wheel, and that was just enough to make up the difference. It's maybe just a bit thicker than I'd have liked, but the wrap fits better, so that's a trade-off that I'm willing to make. That done, the next step is trimming. First, a rough trim to remove the bulk of the excess material. Then, painstakingly making my way around the the whole wheel, cutting the leather back so it meets up with the line I scribed at the beginning. Check and recheck, taping everything along the way. And repeat on the back side. The edge of the leather helps as a guide, but it's still slow going. I didn't check the time, but I'm certain the trimming alone took 3-4 hours over the weekend. I'm starting to think this might really work...it actually looks like a real steering wheel cover!


-
His videos are outstanding, too. I'd probably wouldn't have even considered this little project if I hadn't stumbled across his channel a while back. I don't know if he has a site for his shop, but he's responsive on YouTube. He did put up this site some time ago as well: http://upholsterytrainingprograms.blogspot.com/
-
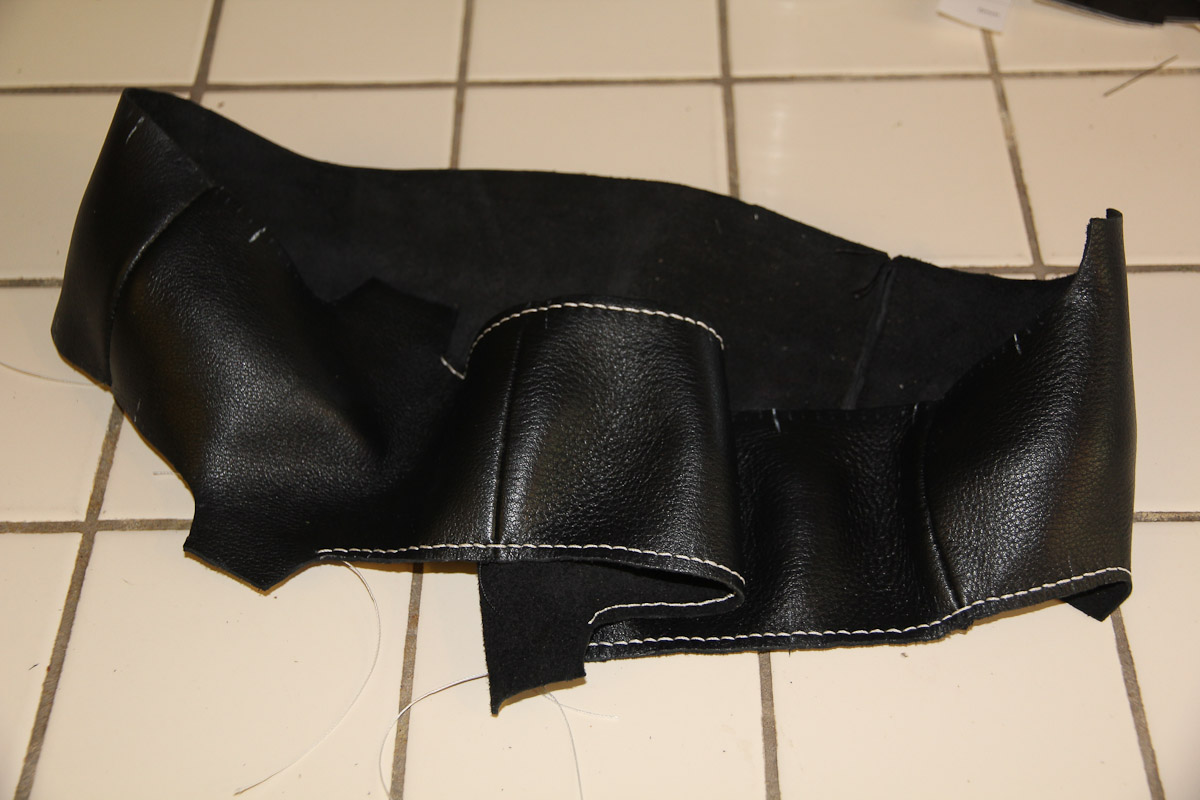
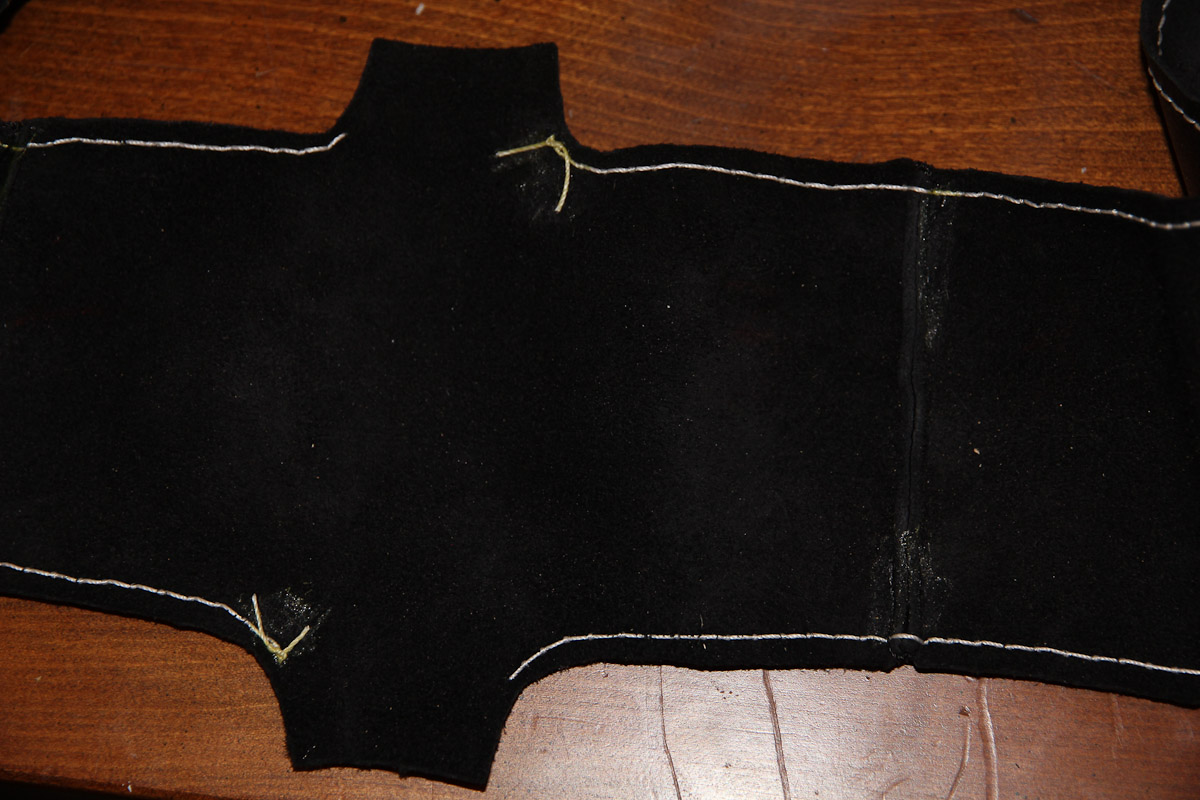
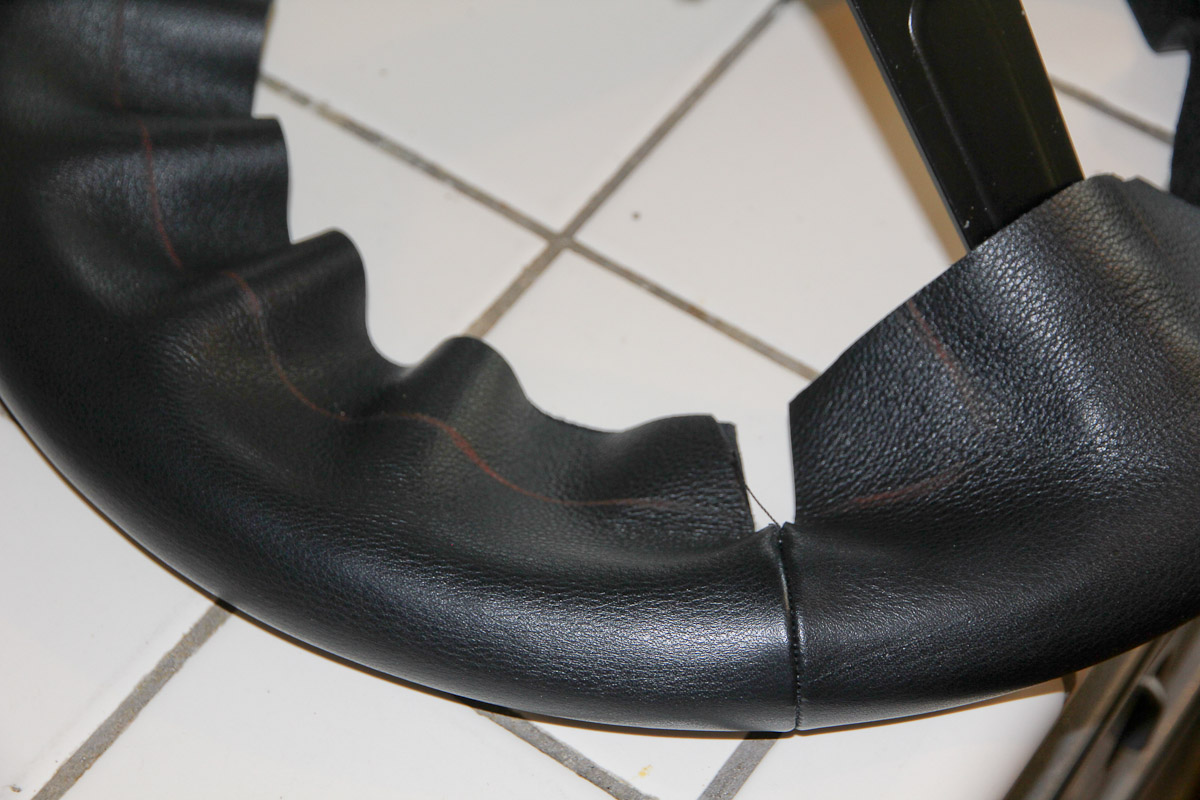
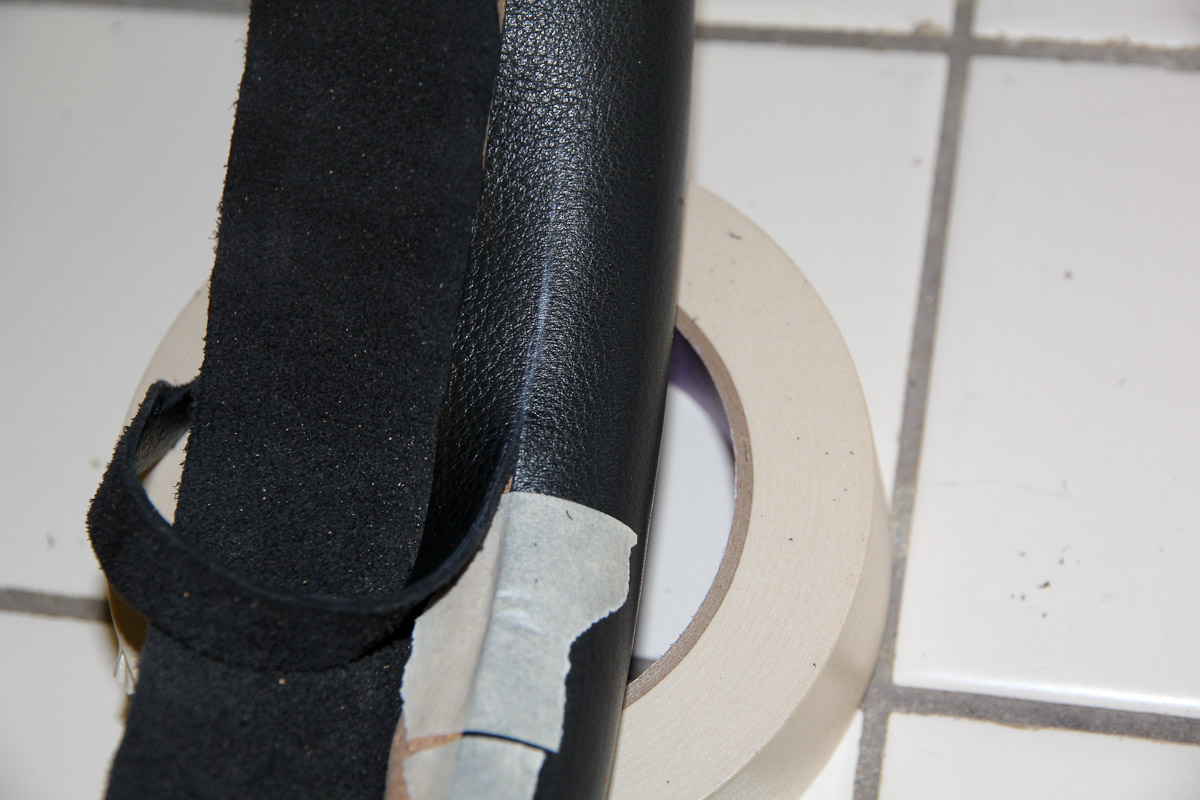
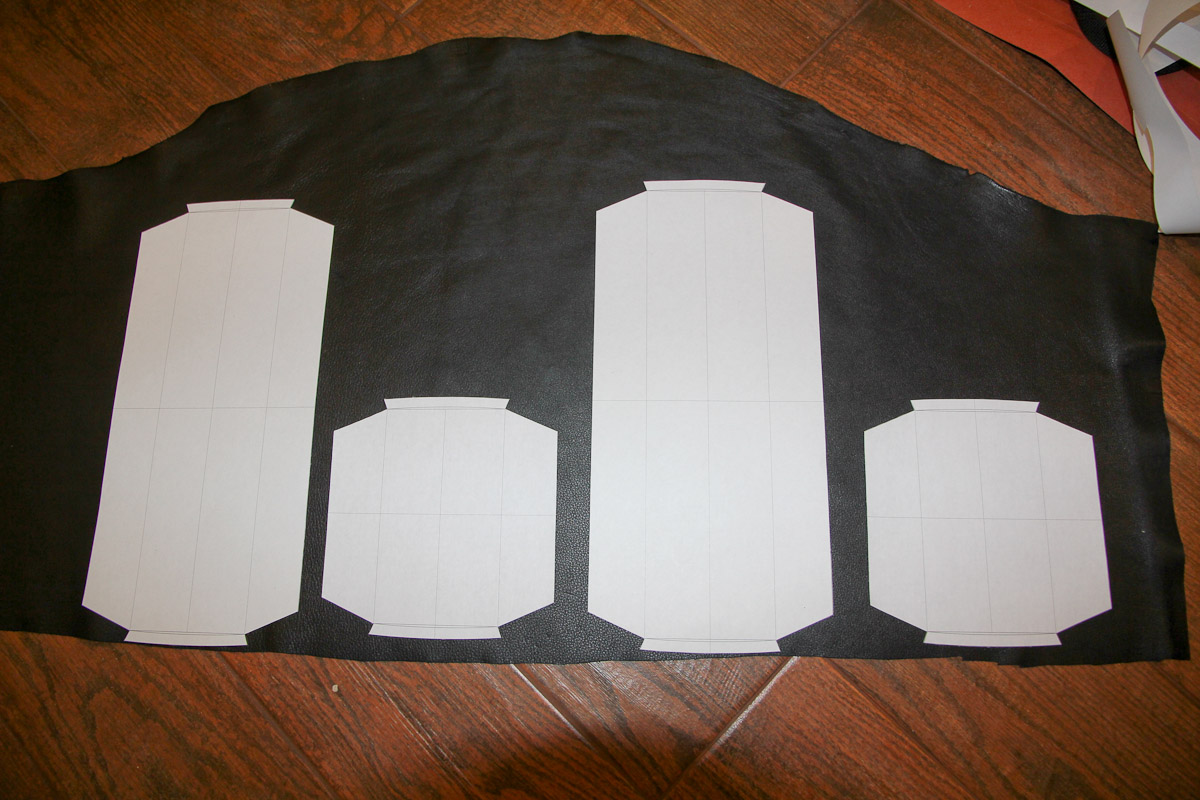
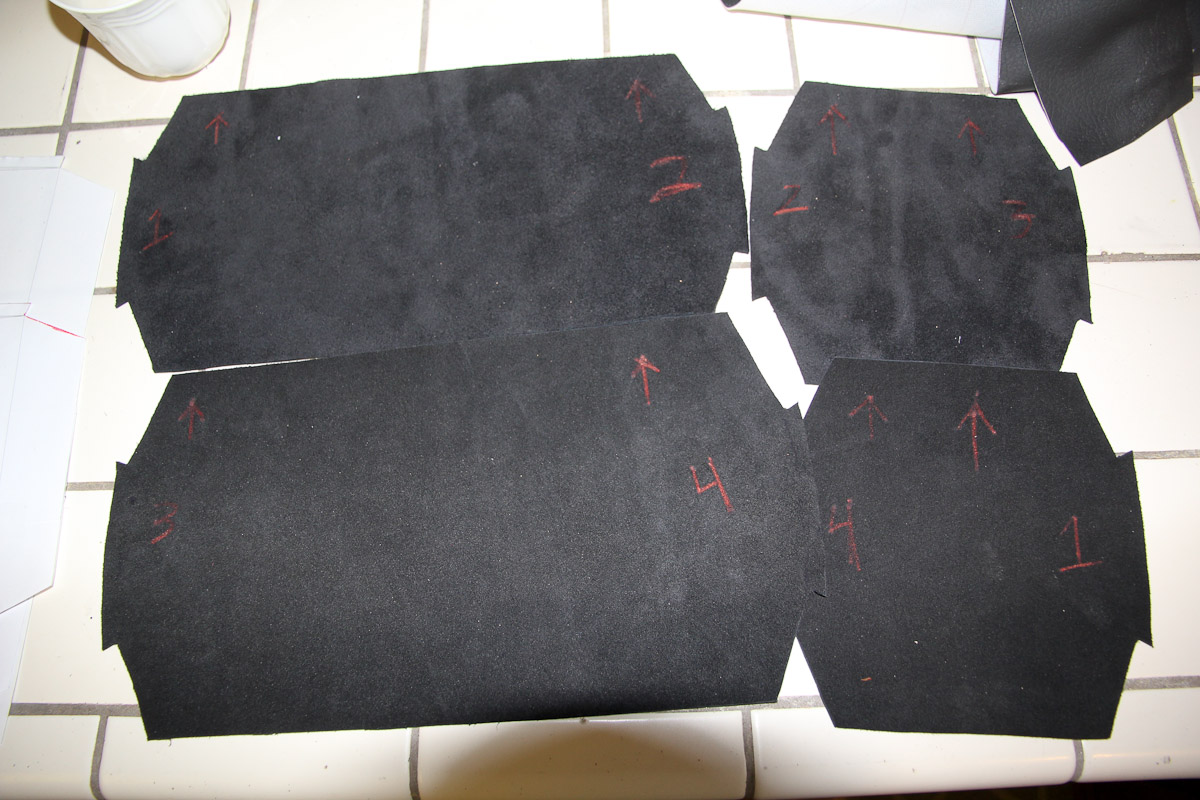
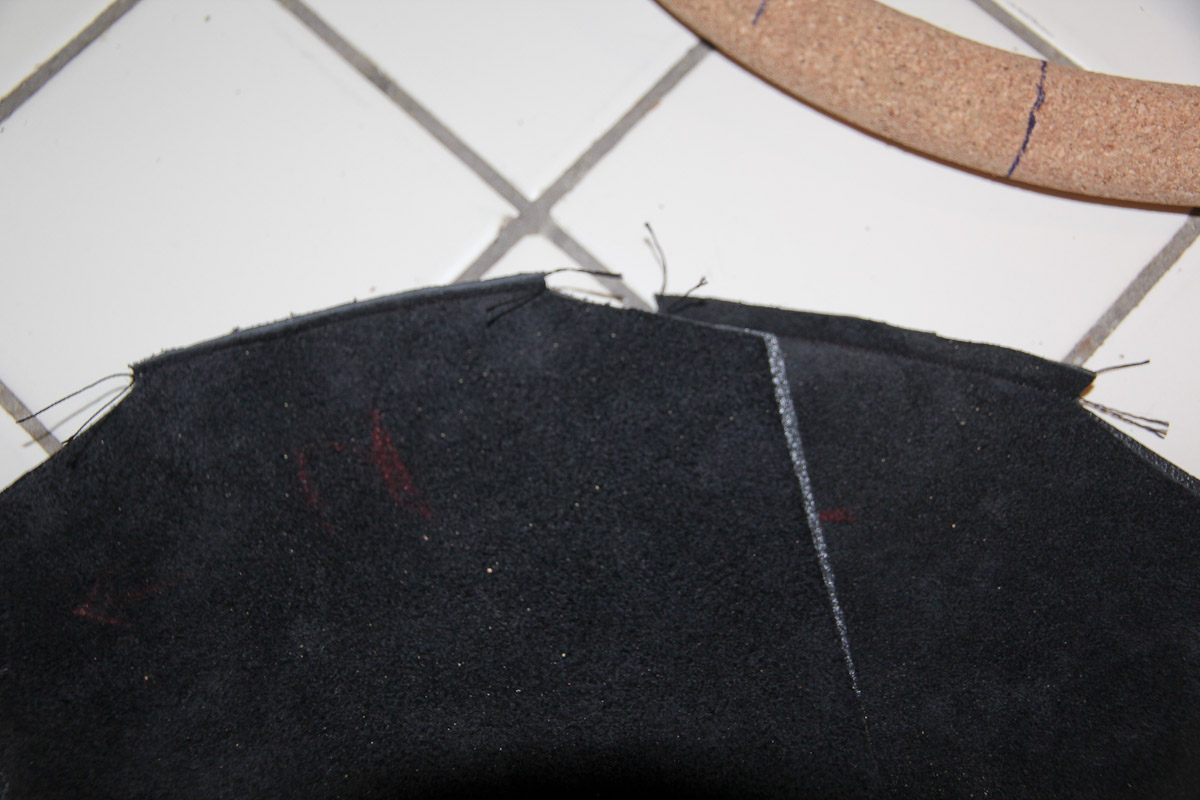
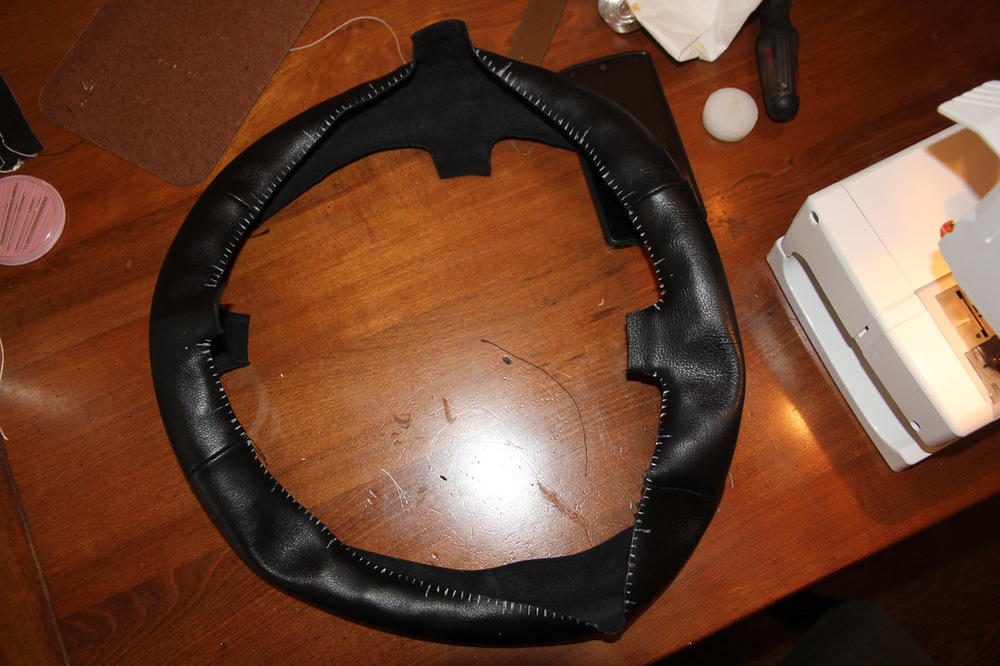
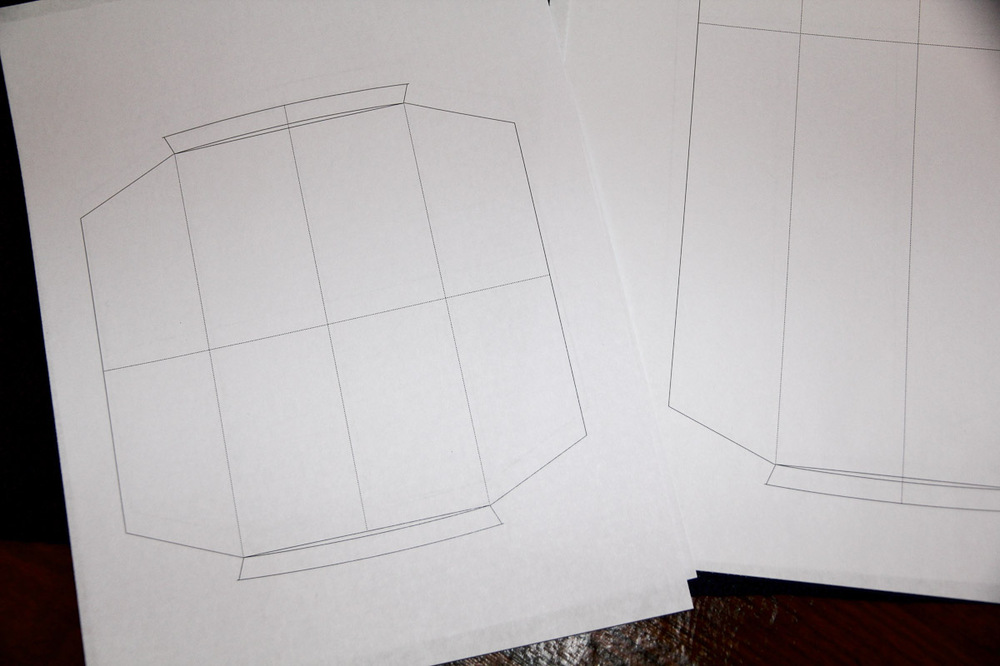
The steering wheel wrapping is underway. There's an upholsterer down in (I think) Mexico who goes by "cechaflo" that posts videos on YouTube. He does some pretty incredible work, and I watched his steering wheel videos a number of times, so all credit goes to him: https://www.youtube.com/user/Cechaflo The first step was deciding on the seams. I ultimately decided on four seams, because there's no sense in making the first time any easier than it needs to be. Actually, that decision was a combination of the direction of my leather piece and my own preference to avoid asymmetry in the wheel. I marked off the seam locations as best as I could (tougher than expected) and measured everything following the cechaflo tutorials. Then used Illustrator to lay out the templates and got to cutting. Everything marked on the back side to make sure I lined it up the same way. The last time I sewed anything was -- I believe -- in my 7th grade Home Economics class. So a bit of practicing and step-by-step instructions were in order. I don't have enough leather to screw this up. The four seams actually went on pretty well, and I have a leather band to show for it! The seams create bulges on the wheel. There are two ways of dealing with that. One is skiving the ends, another is cutting a groove in the wheel. I went that way, and it worked out pretty well. The next step is to trim everything down to size. The only hiccup I'm running into now is that the leather wrap is a little bigger than I think it should be. There's a bit of excess around the grip, which I thought would be taken up by the stretch around the circumference, but that hasn't happened. I'm pretty happy with the size of the wheel, so I don't want to pad it out too much, but another strip of cork around the outer side may be needed here, since cutting the leather would open the seams. Other than that, so far, pretty good.


-
I never even knew about the buzzer until I put my new dash in. Guess it had been disconnected some time ago on my old one. First time it went off, I actually said out loud "what the hell is that!?" thinking I broke something. That's a smart swap!
-
I do...I'll drop a color layer on tomorrow when I get in to the office. But I'd go with body color. Black air dams, to me, always look like the project is incomplete.
-
I'll echo Zed's comment about that switch being a mystery. A PO mutilated the wiring on my hazard switch and just jumped a few of the connections to make it kind of work. I tried to fix it, ended up with no lights at all, and spent 30 minutes trying to decipher wiring diagrams before going on eBay and getting a used switch for $20. That fixed everything.
-
I got mine a little more than two years ago in Rancho Cucamonga. Poor car had been through a string of owners before I got it. Based on the documentation that was left in the glove box, it had some 4 owners in as many years and was stolen and recovered up in the high desert a few years back. That accounts for less than a fifth of the car's life; no idea about the rest of it!
-
Here's a good article from Moto IQ on tires: http://www.motoiq.com/MagazineArticles/ID/3974/How-to-PROPERLY-select-and-size-TIRES-for-PERFORMANCE.aspx Sent from my Nexus 5 using Tapatalk
-
I have all my cars insured through Costco via Ameriprise. I think the premium on the Z for full coverage is about $70 for 6 months. I've used Costco since my wife and I got married some 10 years ago. For full coverage on all our cars, we're paying ~$1,000/year. Everyone else I checked was about twice as much.
-
I put 225s on there and haven't had any problems rubbing. 215 should be fine too. 225 is a fair amount of tire, but options at my budget were better with that size. My car is on Vogtland springs, dropped about 1.25" all around.
-
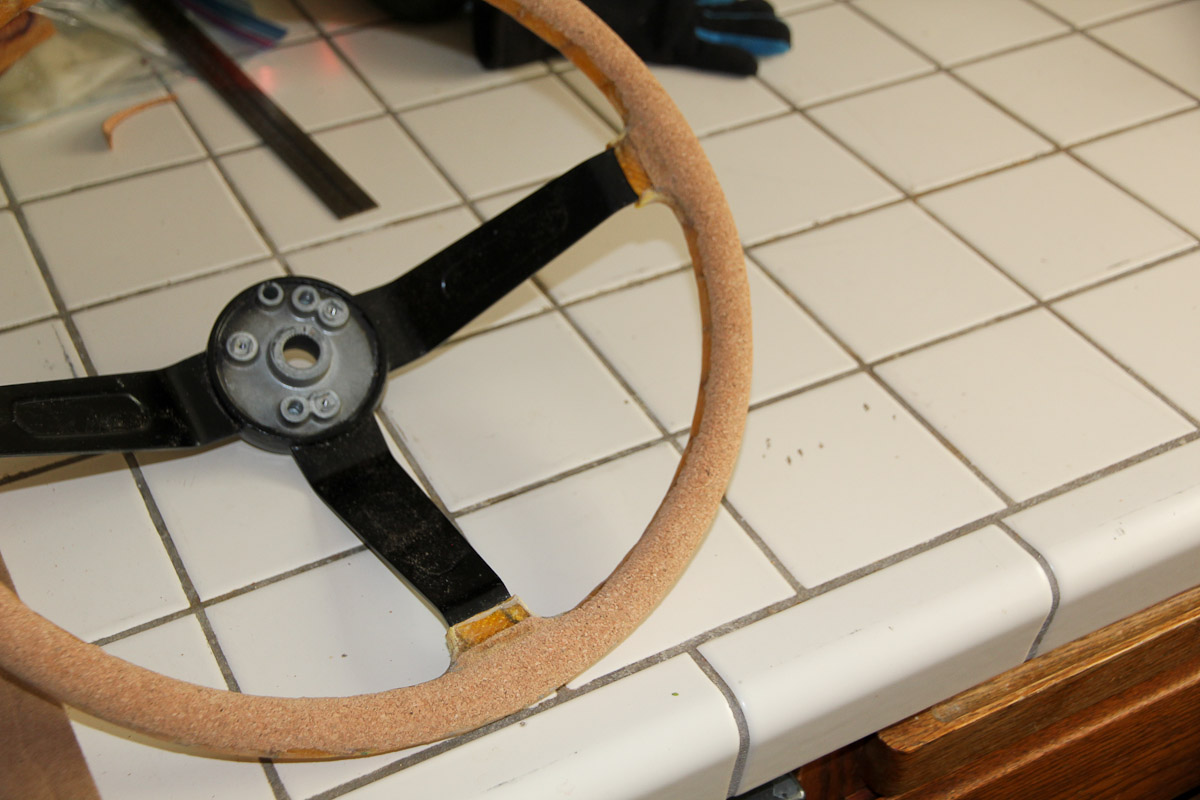
I think you're right Cap. The cork sheet is soft and tears easily; I don't see how it could withstand the abuse a steering wheel gets. For any future people that would like to try it, I wouldn't even know where to begin with respect to finishing. It would look nice if it were darker, but I don't know how well staining would work given cork's general reluctance to absorb liquids (that's why it's used for, well, corks). The stuff doesn't even work well with polyester resin! High-quality handlebar tape would likely work, but would have a different look.
-
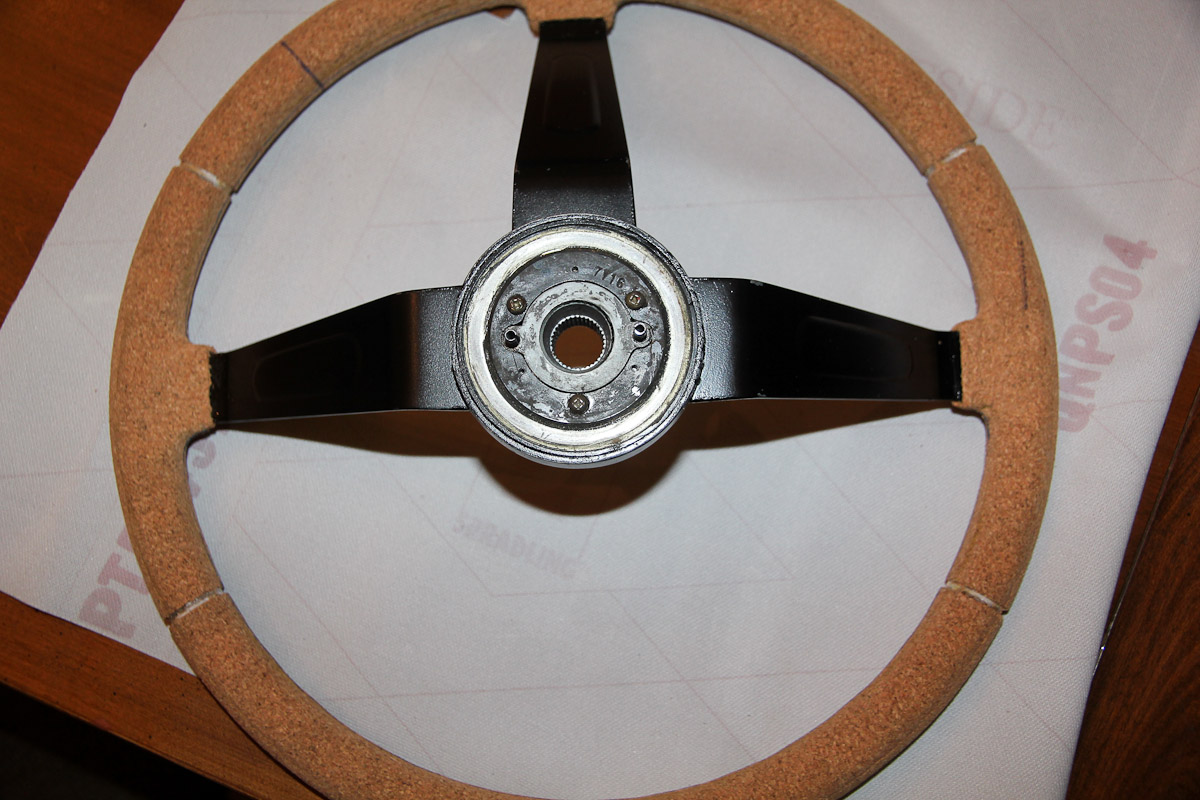
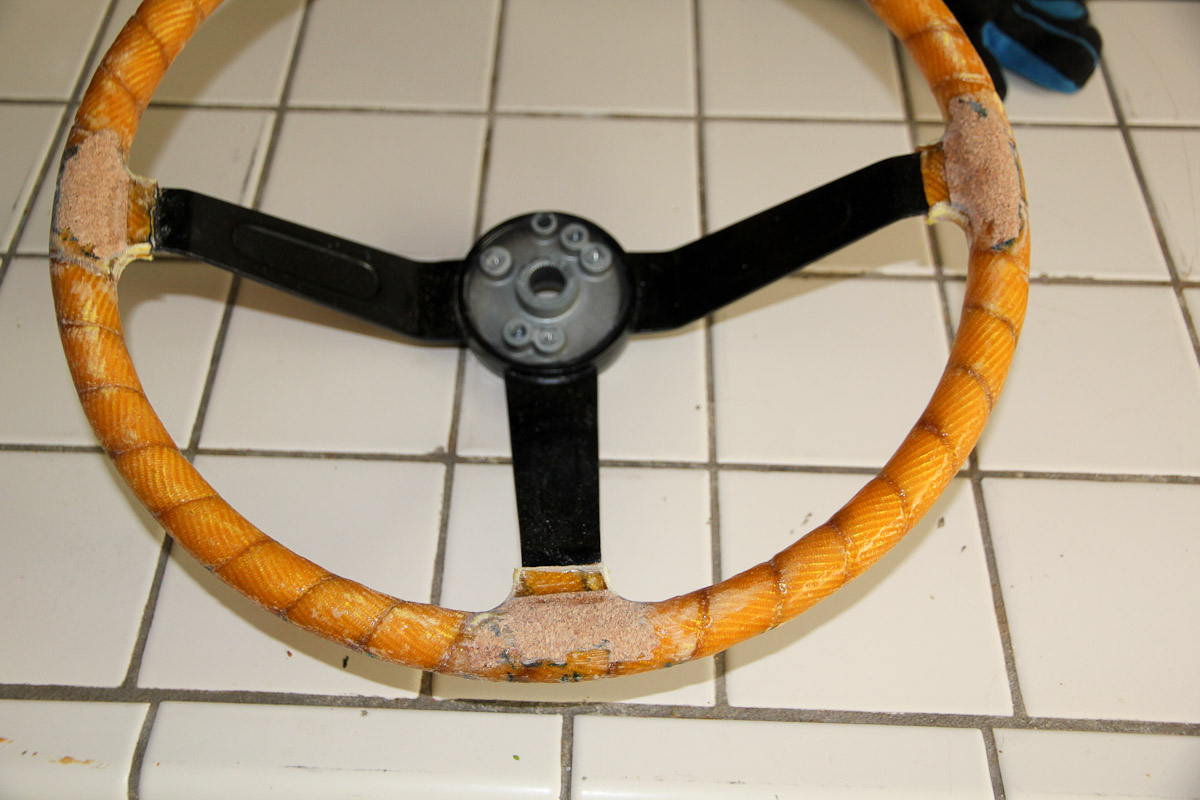
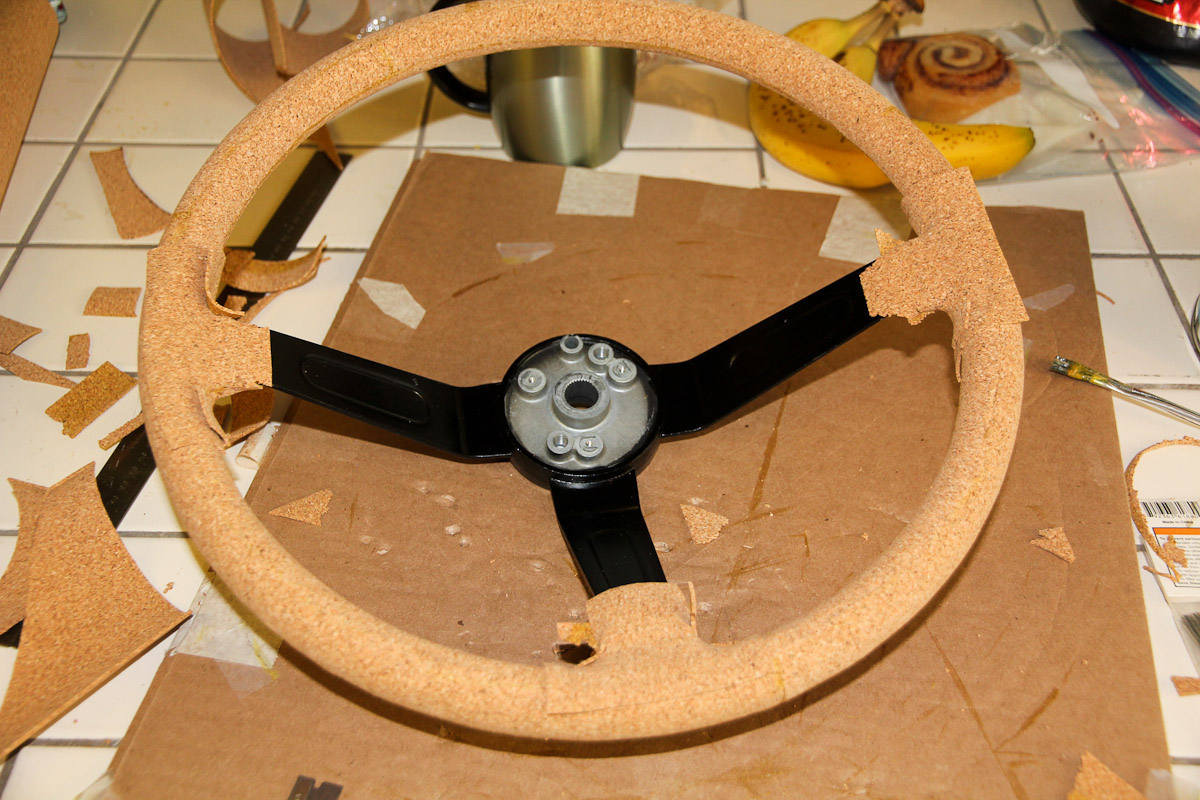
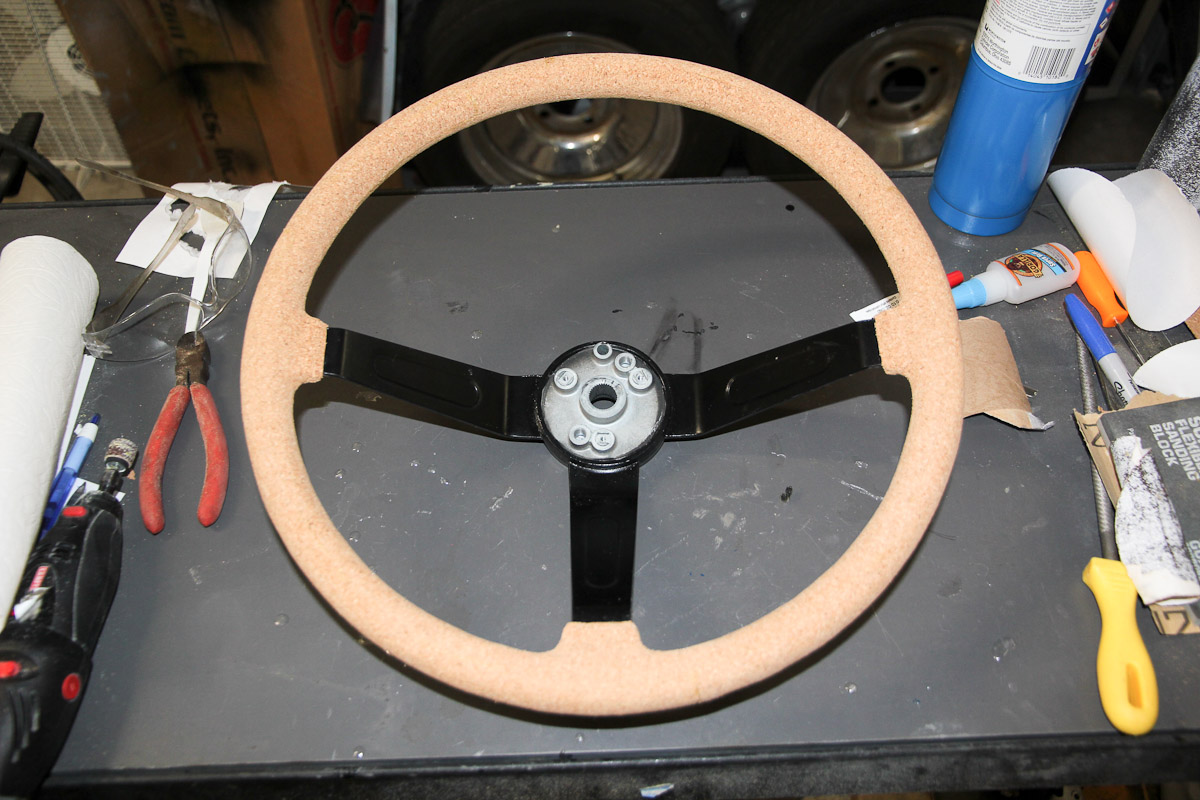
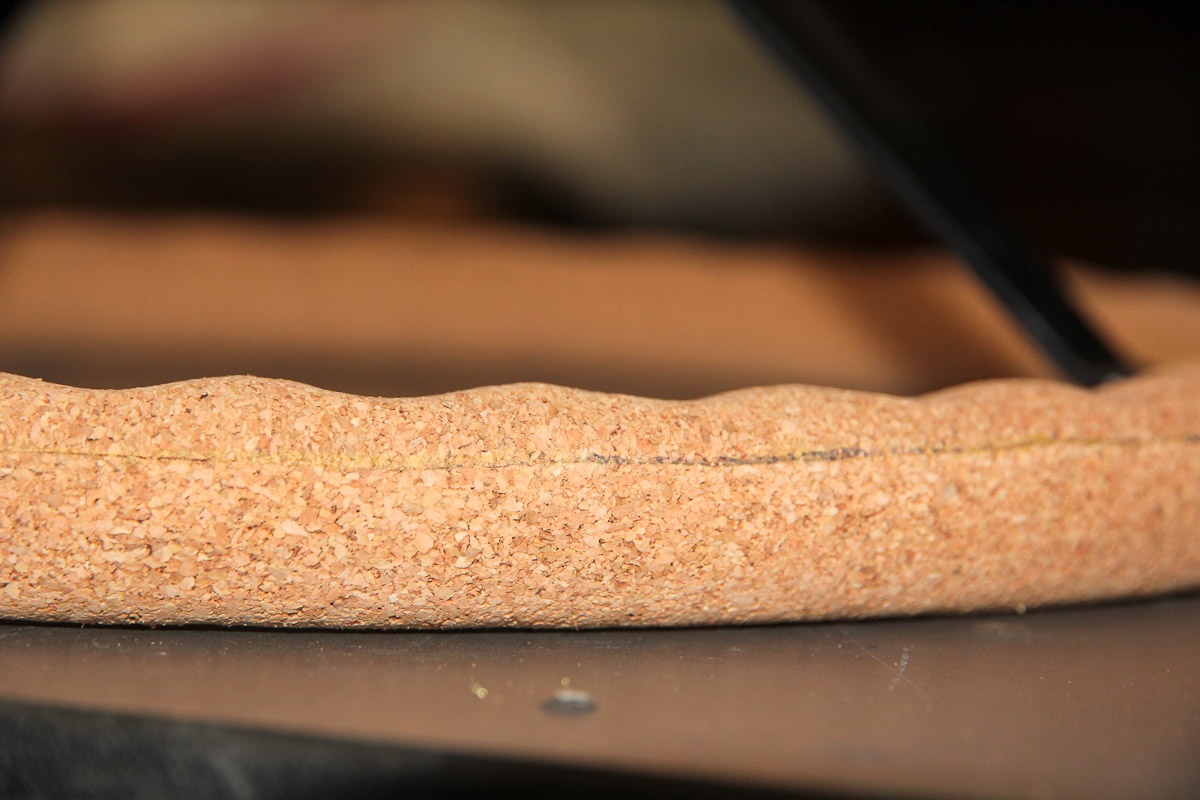
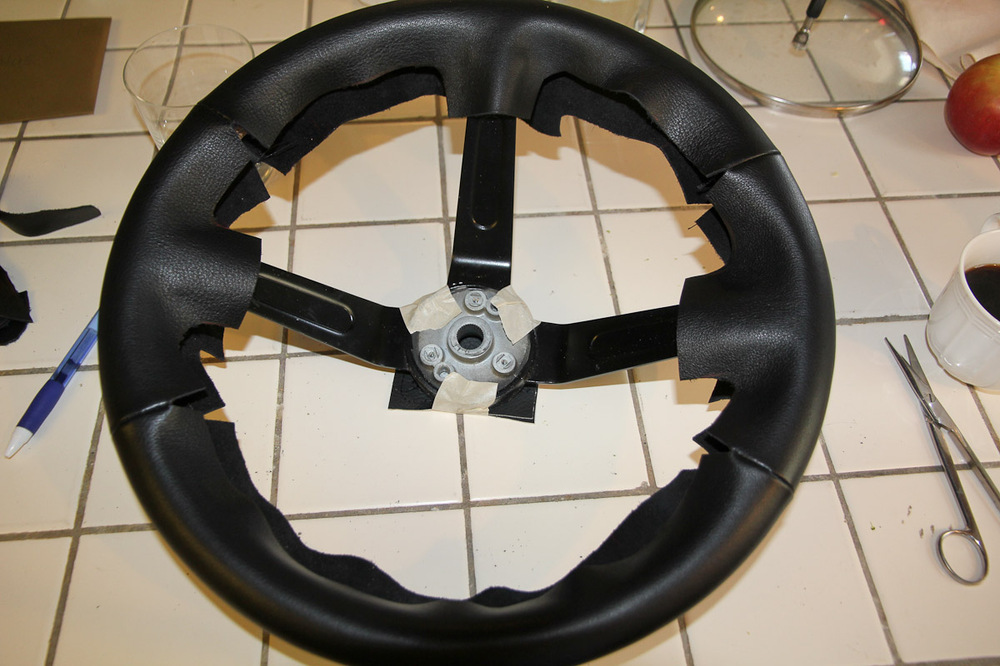
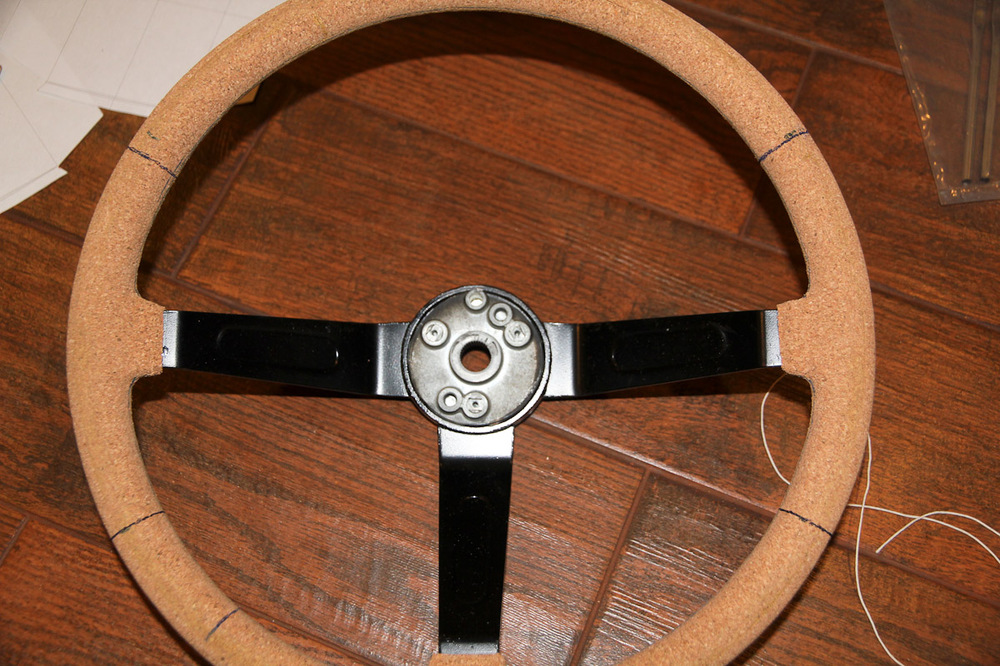
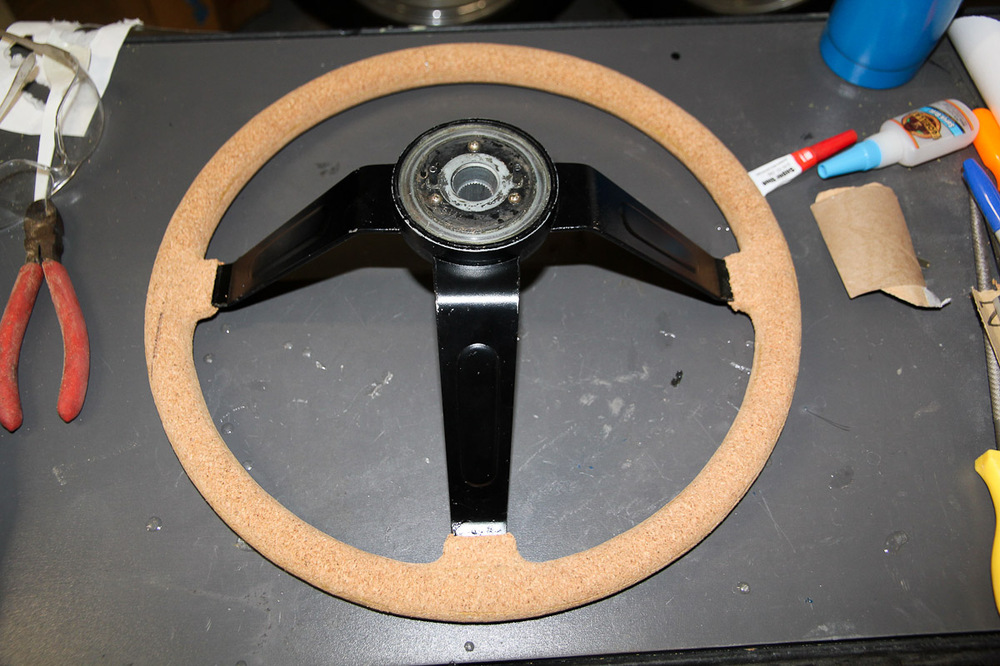
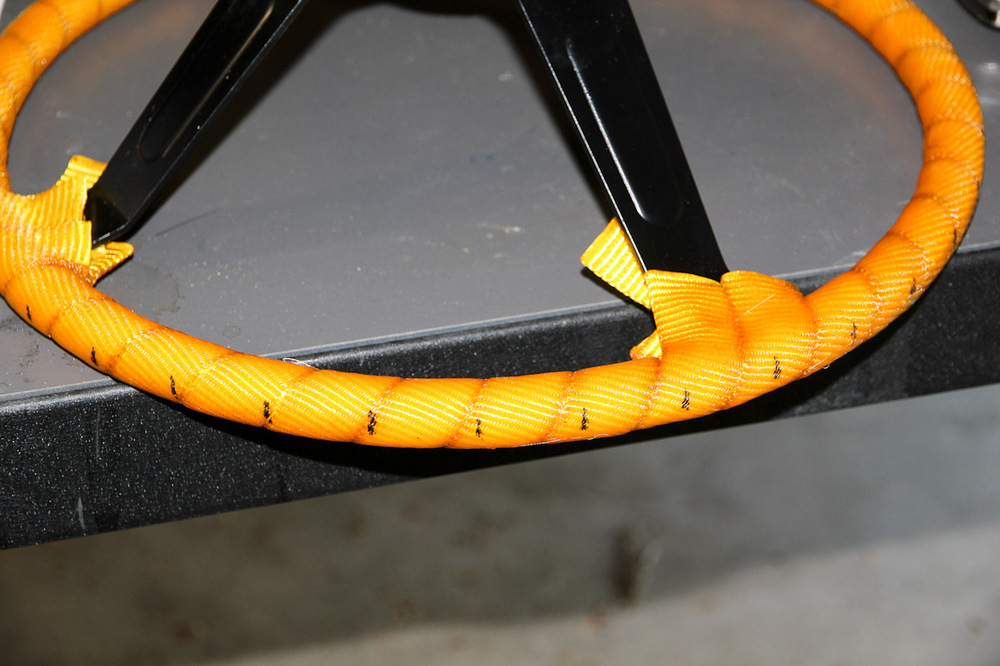
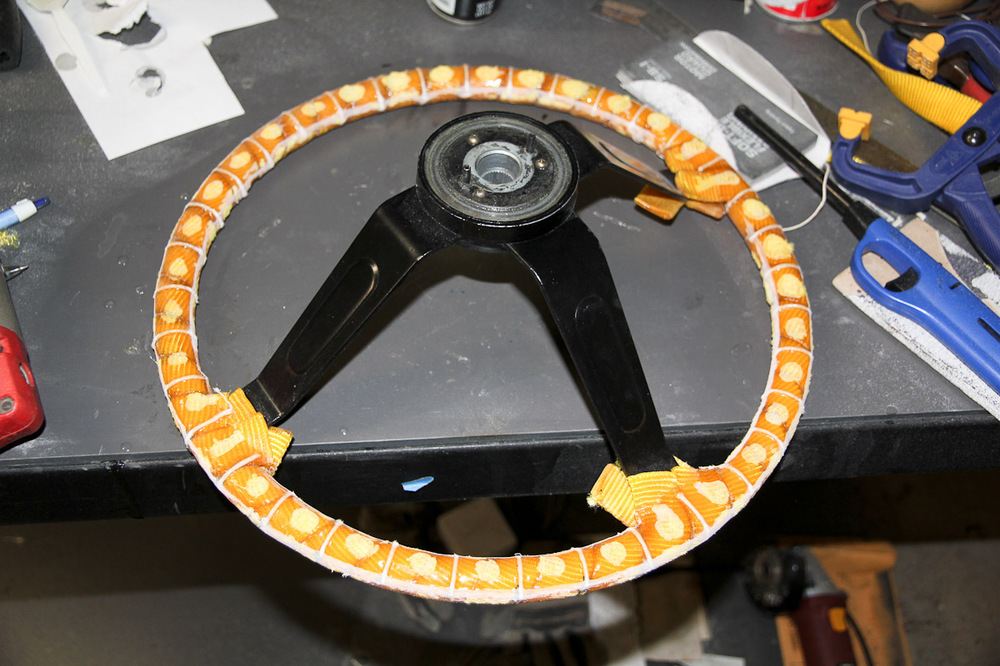
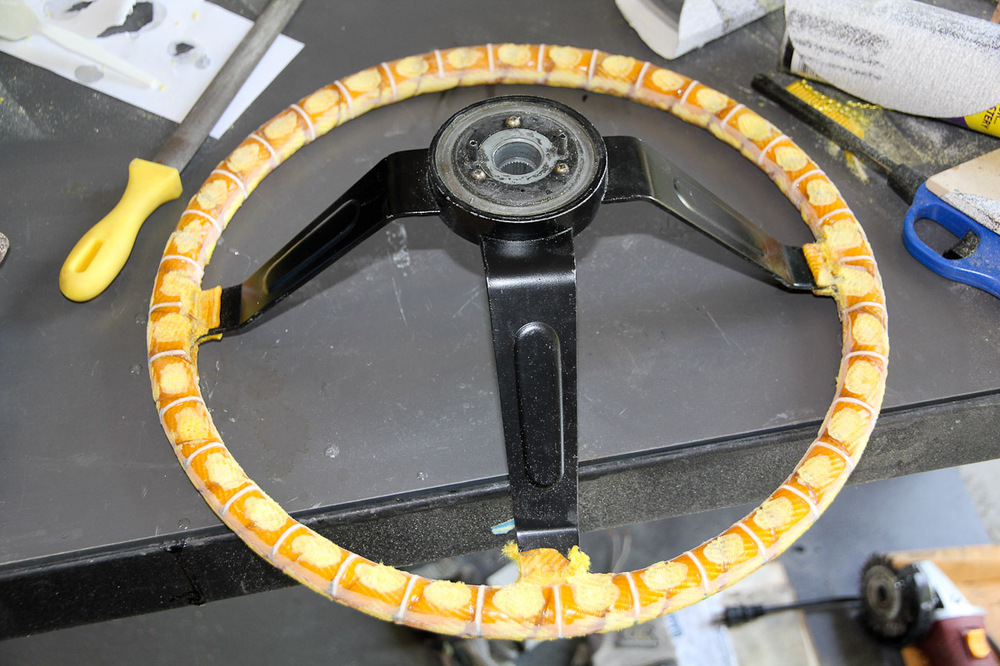
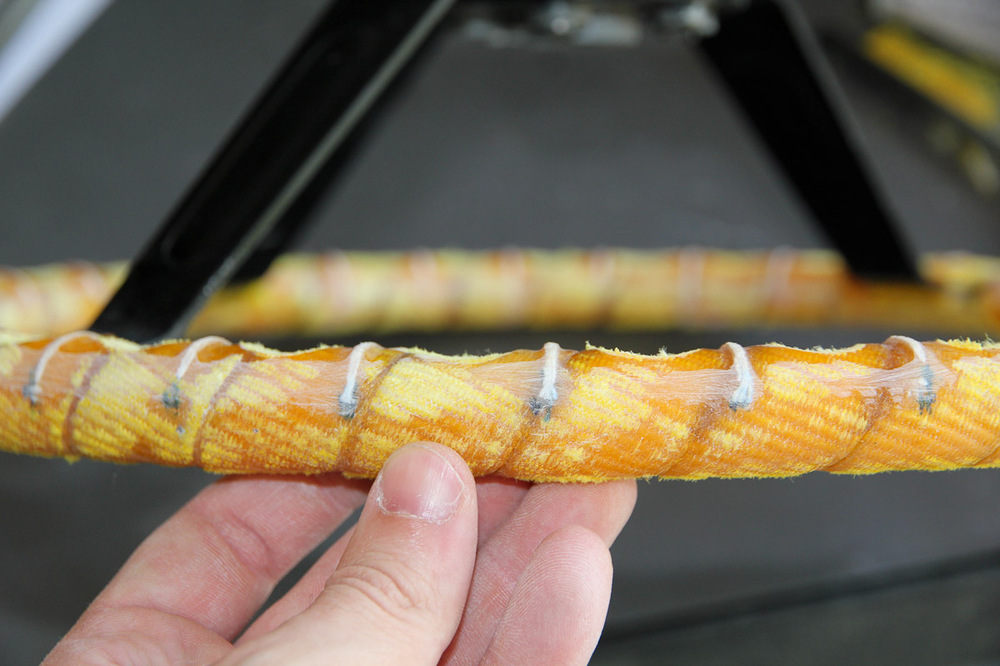
Warning: tons of pictures of a steering wheel lie ahead! I had one wrap of the webbing at the last update, so added another one and put a coat of resin over it. That gave me enough of a base to work from, so on to the finger indentations on the back. First measured the circumference and then marked off 36 lines and tied kitchen twine around each one, which I hoped -- too optimistically as it turns out -- might do much of the job in creating the indentations after coating it with resin. It didn't, but the profile did help in keeping the indentations centered. I quickly gave up on trying to make any kind of jig and did them all by hand using a Dremel tool, hand drill with a couple different sized sanding drums, a couple of files, some hand sanding and a propane torch. For all that effort, at least they came out pretty well. By the way: doing 36 of anything is terrible. The I had to dress up the spokes a bit and do some final cleanup. This part of the job is finally done! The webbing would be way too hard if I just put the cover over that, so I had to cover it with something that has some give. I thought about bicycle handlebar tape, but it's 1) rather expensive, and 2) has tapered edges that would show through the leather. Good bar tape is cork based, so why not just use that? Turns out OSH sells 1/16" cork sheets for just $10. Onward! The profile on the spoke junctions ended up being a little flat, so first I padded those. Then I wanted to bring a little more height to the wheel profile since the indentations knocked a lot of it off, so I glued up a ring on the top face. My original plan was to wrap the whole wheel handlebar style, but the cork isn't flexible enough to work around in the indentations, so I wrapped the whole thing in strips, then sanded anything that needed a little help. Considering that I haven't done something like this before, that I mostly used stuff laying around my garage, and that the internet as a whole seems surprisingly lacking in information on steering wheel restoration, I'm pretty much thrilled with the results so far. I sure hope the leather part goes even half as well.


-
I don't have any particular affection for the stock door cards, so getting an original (or quite close to it) replacement isn't a concern for me personally, though that obvious won't go for everyone. Hopefully the arm rests won't look conspicuously out of place.
-
I had a vague recollection about the holes being the big difference, so thanks for that feedback. I'm emailing as well, but maybe trust the members here a little bit more
-
I'm considering these for my Z: https://www.interior-innovations.com/index.php/welcome/product_detail/187 I ordered the seat covers and shift boot from them and am very happy with the quality, so I assume the door panels would be equally good. The price definitely is. Before ordering, some questions: Has anyone ordered a set and can comment on them? They're titled as 260Z, but should fit a 280, right? I got white stitching on my seat covers. I'm thinking about having matching stitching on the door panels but can't make a decision on what to do. (Maybe just around in the center panel and not on the diagonal slats?) This one's a matter of taste, but I'd welcome the input!