charliekwin
Community Member
-
Joined
-
Last visited
Everything posted by charliekwin
-
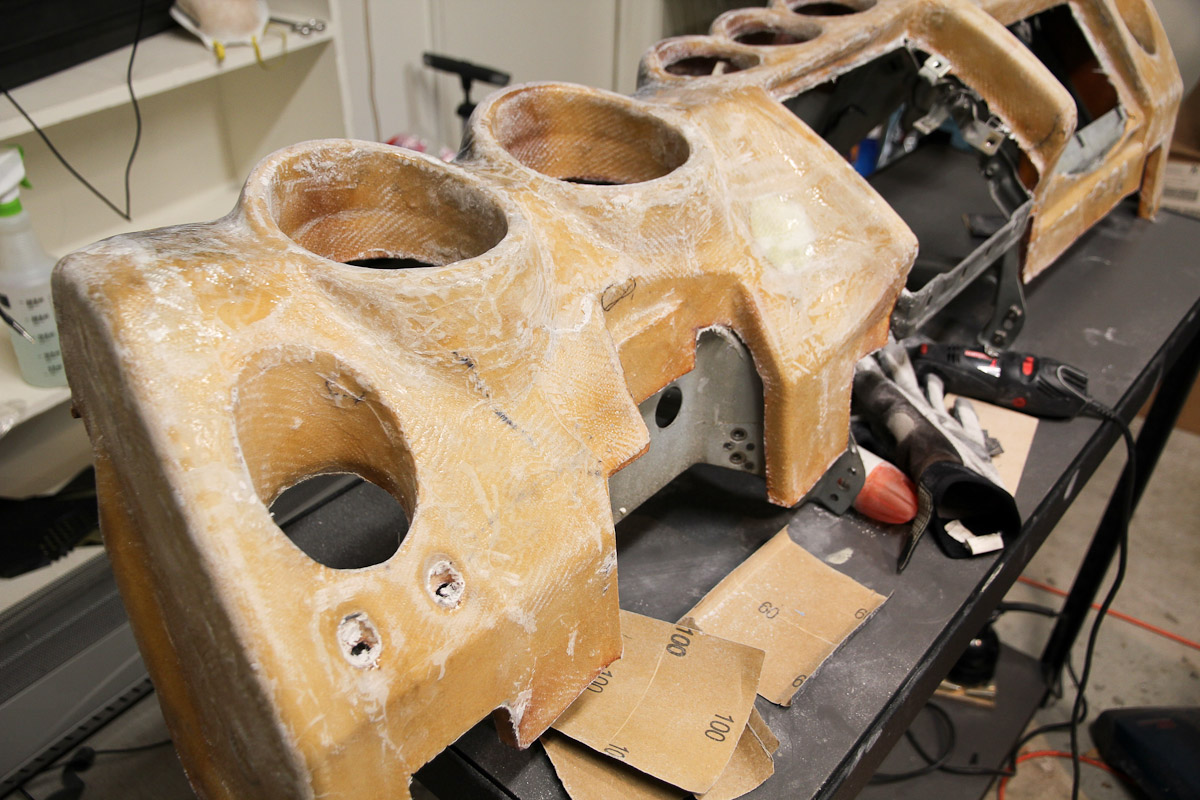
So I've been sanding. Lots of sanding. I smartly went and bought a palm sander from HF that's been pretty effective, and then I sanded with that. Then sanded some more. But it's starting to get close. I brushed on a thin layer of resin to even out the surface a bit and it's looking not bad. Well, back to go sand some more.

-
I just ordered a laundry list of seals and other bits and pieces, all for ~$200, which seems like a steal. I know I'll need them eventually. I'd like to put 240 bumpers on mine one day, but that's just too much to justify as an impulse buy.
-
Echoing what others have said, I'm sad to see you have to let it go. I read every post on your build log and it was certainly inspiring. BaT or eBay are good options. Please don't take this as a slight to your car, because it isn't, but I don't think BaT will get you $25-30. Most of the cars there seem to be in the teens, with this 73 (http://bringatrailer.com/listing/1973-datsun-240z-14/) that went for almost $28 being an outlier. Of course, with auctions, what matters most is getting at least two people who really want the car, but that's never a guarantee. Good luck!
-
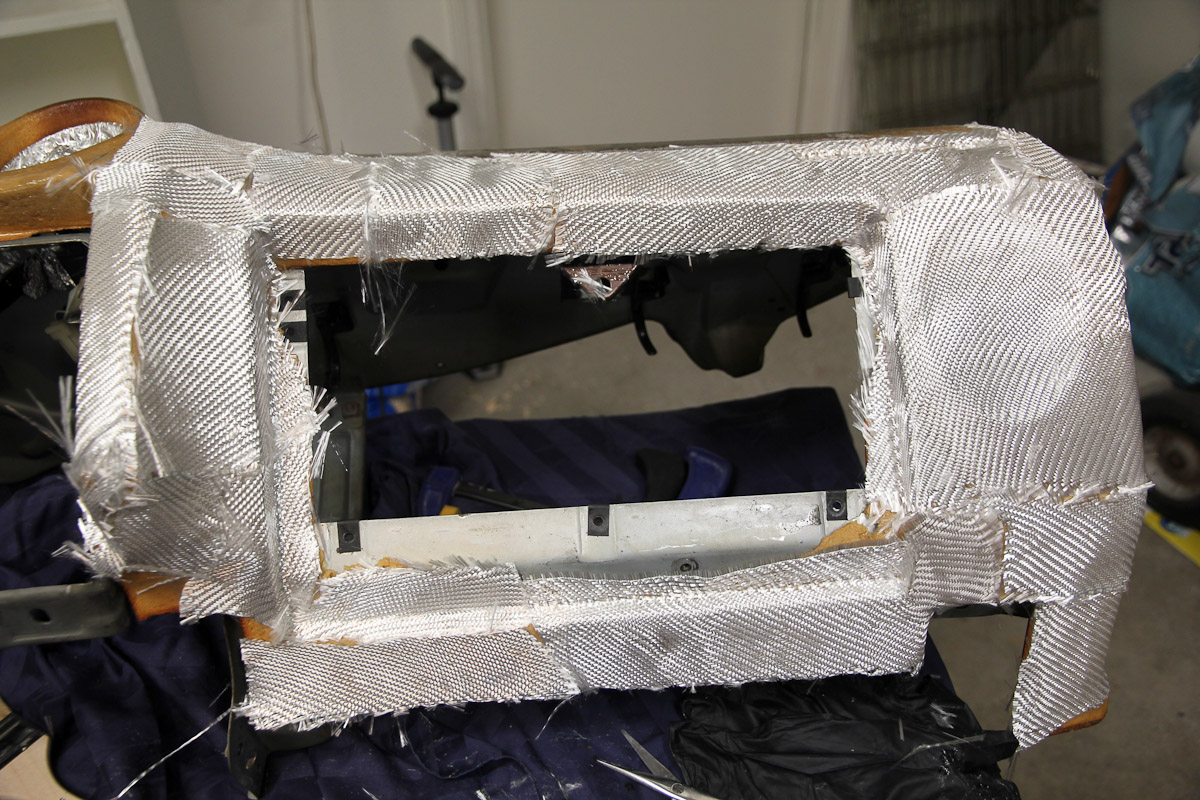
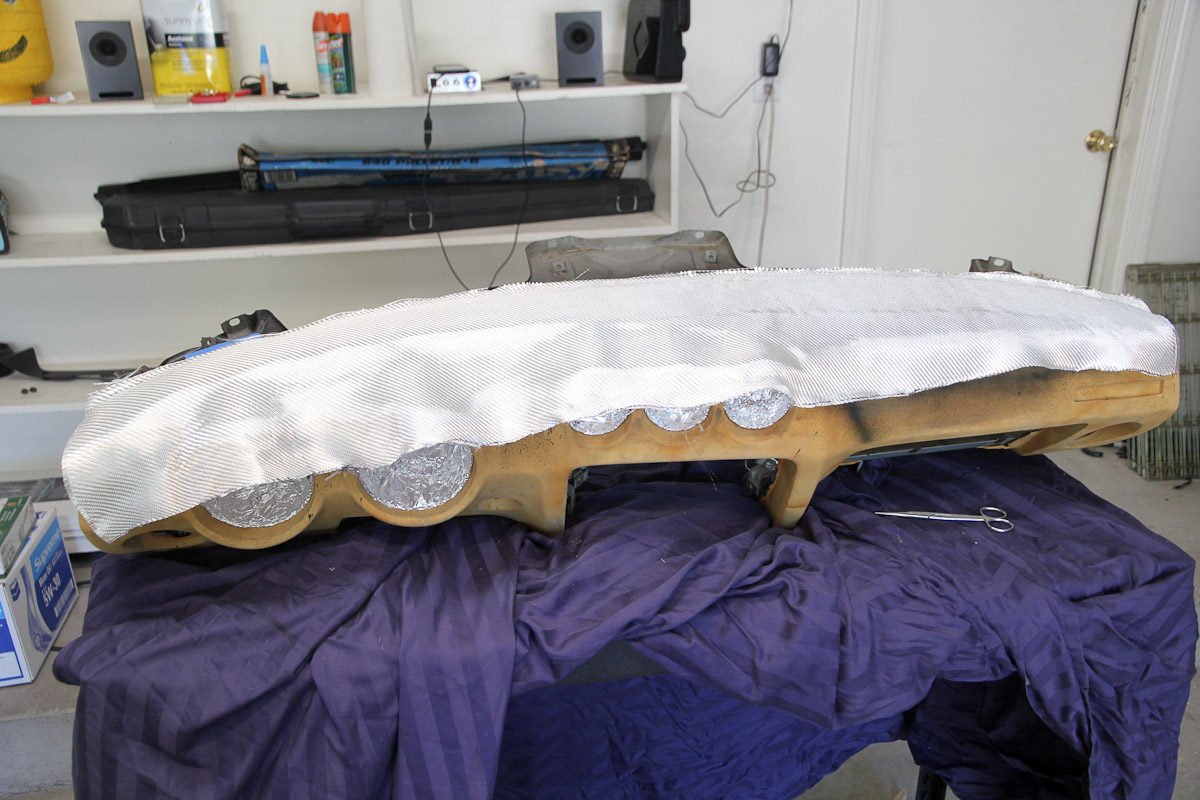
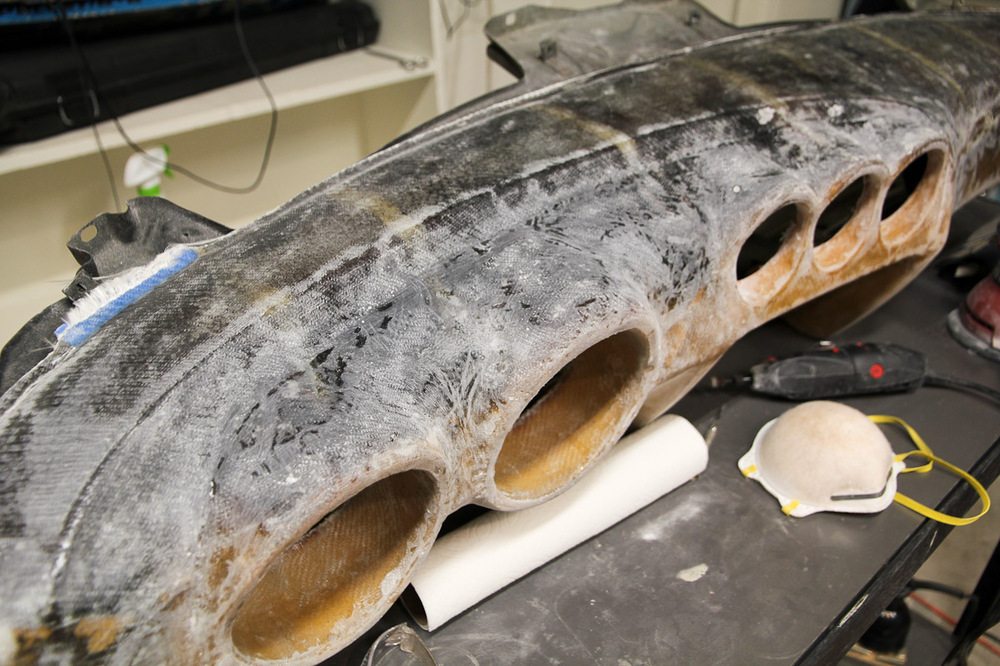
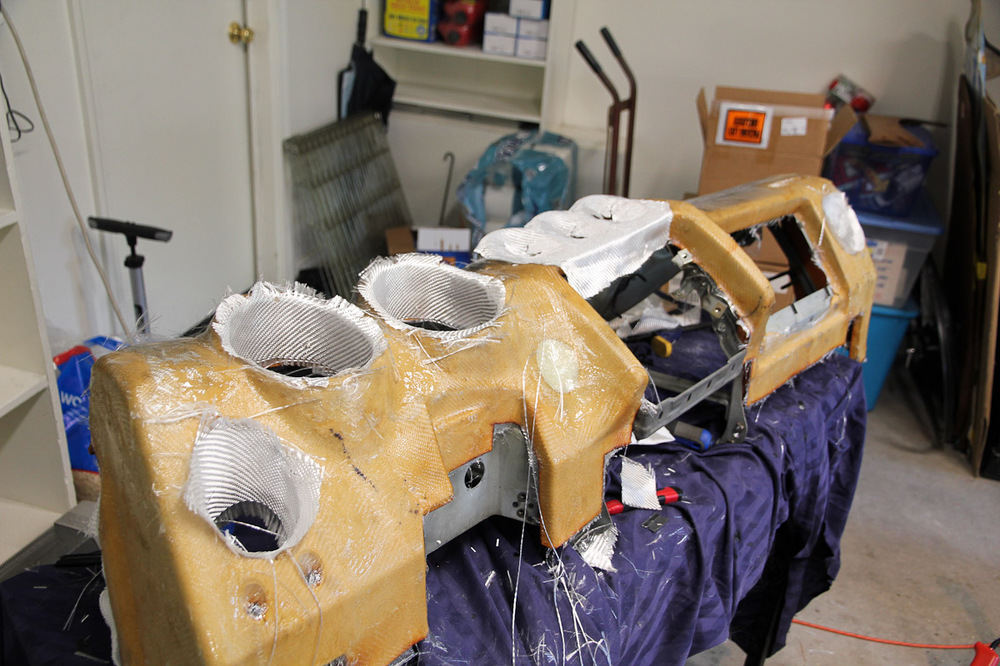
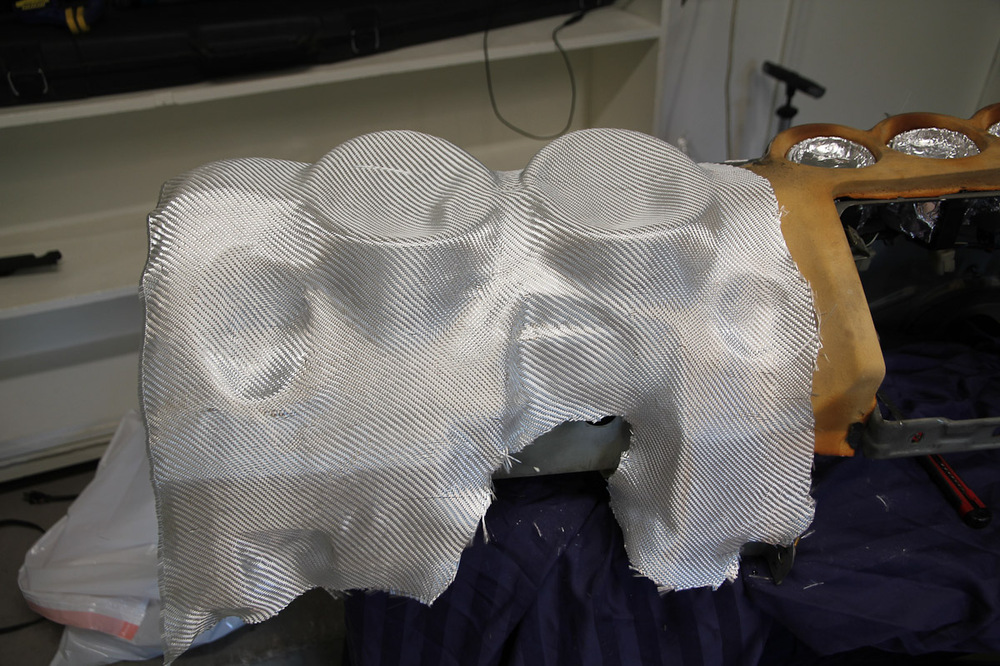
It's been slow going the past couple weeks. Seems like life keeps getting in the way. At least he fiberglass part of this project is basically over with now. Using smaller pieces, though not as pretty, made for better results. I also realized that I've never smoked a cigarette in my life and have no plans on starting, so there's no sense in keeping the lighter. Got the whole thing covered with cloth and at this point, it's what I would generously call a hot mess. Trimmed everything down and marked all the voids and other areas that needed to be re-glassed. Fixed them all up, and got to sanding. Here's what it looks like this evening. Plenty of work left to do...


-
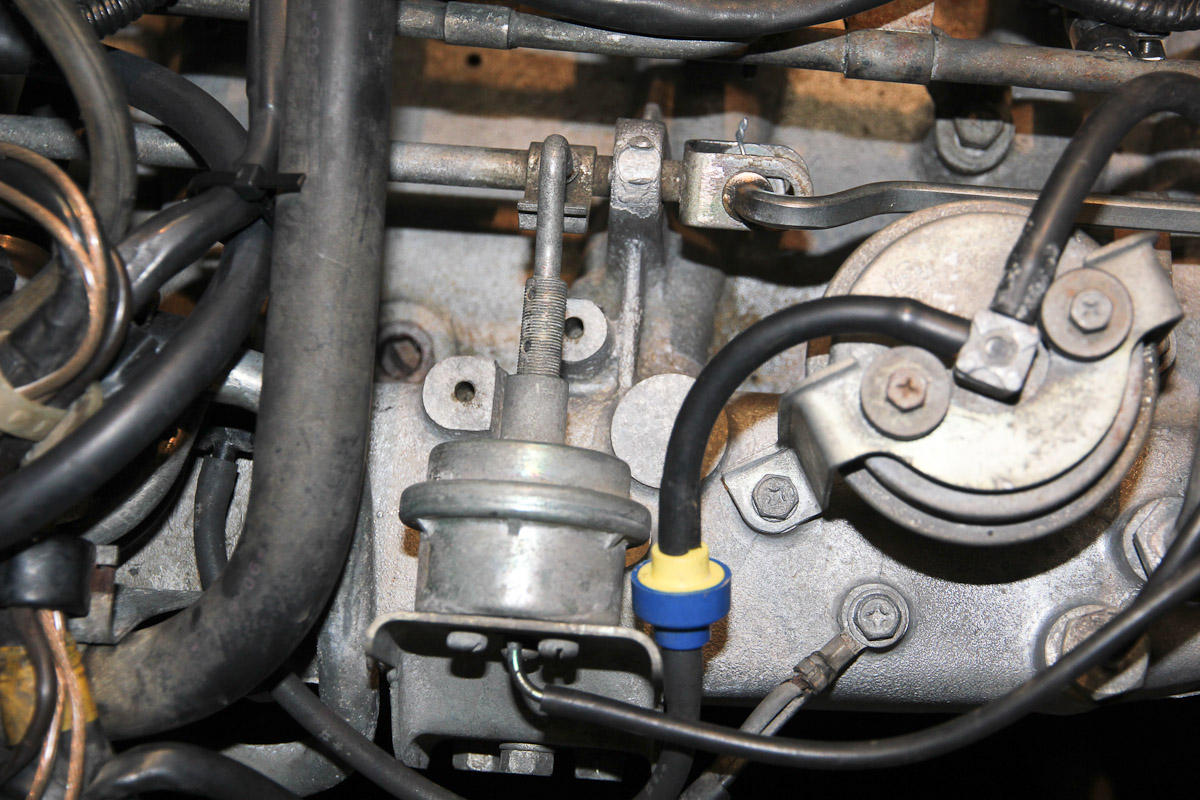
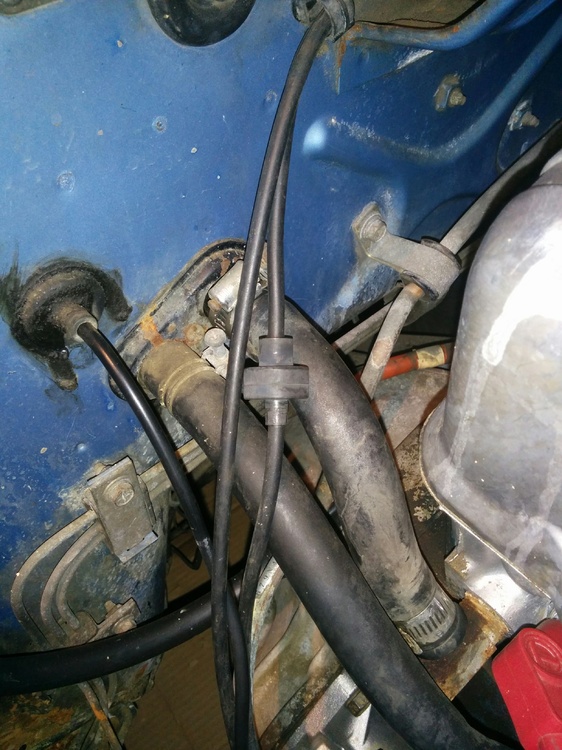
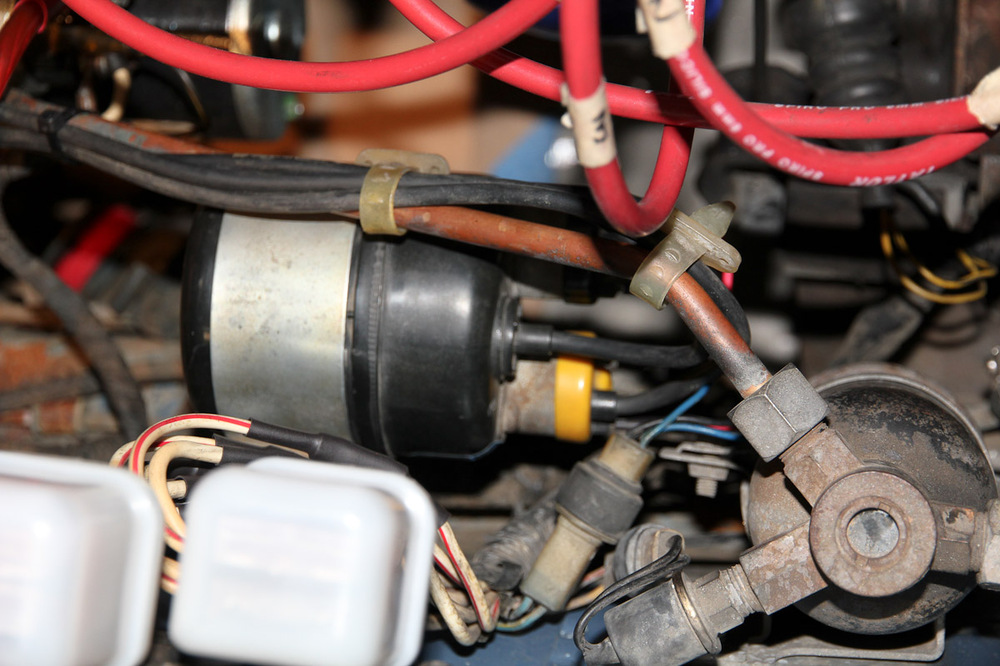
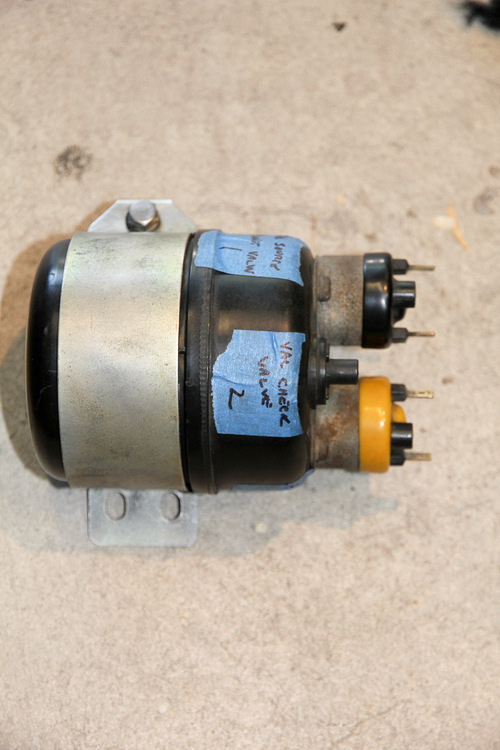
I moved the check valve (which I now realize was unnecessary) when I swapped in the ZX tank. It was originally located up by the bracket like the photo above, but didn't have a retaining washer. Given the provenance of my car, I wouldn't be surprised if it had be futzed with. HVAC mode switching didn't work prior to swapping tanks, either.
-
I'm not sure how helpful I'm going be, but here goes: here's how the check valve is positioned in mine, with the wide side towards the vacuum source. That's how it was set before I swapped the tanks. I blew into both ends and air wants to flow from the wide side to the narrow side, but that seems like it might be backwards, AND I now believe the valve has gone bad, because it does flow *both* ways -- just maybe half as much the other way. All that said, the HVAC controls still work, but looking at the first post, I'm realizing now that a check valve is integrated with the tank itself, so the one I have pictured below is probably just acting as a coupling. So...uhh...you're welcome?
-
Hey, I just did this swap a couple weeks ago! I kept the old 280z check valve, but I can double check it when I'm at home if it's any help.
-
How about blueztips.com ... ya know: blue's tips, blue Z tips... (Frankly, doesn't matter what you call it, it'll get a permanent home in my bookmark bar. I can't tell you how many times I've referred to the site as I've worked on my car, so thank you!)
-
Maybe this stuff would work? https://www.amazon.com/Endurance-BioBarrier-Mold-Prevention-Spray/dp/B00EP1NRWI/ref=sr_1_1_a_it?ie=UTF8&qid=1474501559&sr=8-1&keywords=endurance+biobarrier
-
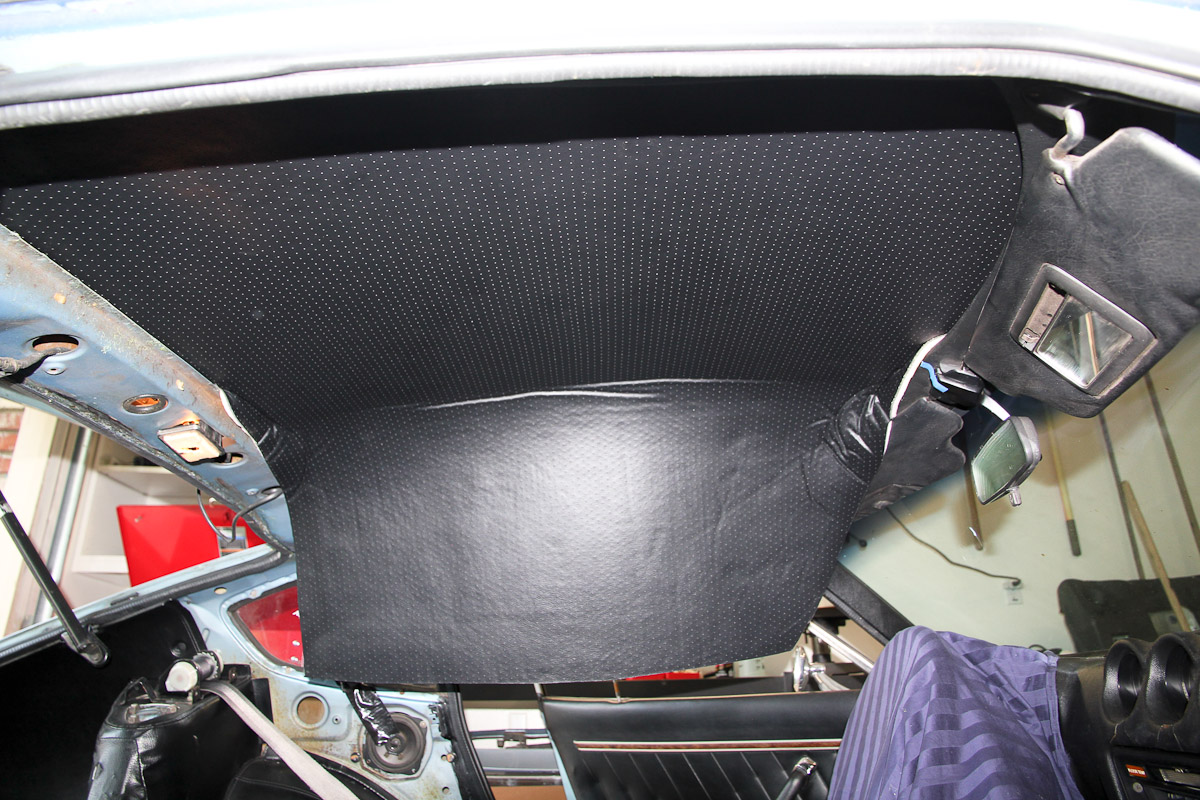
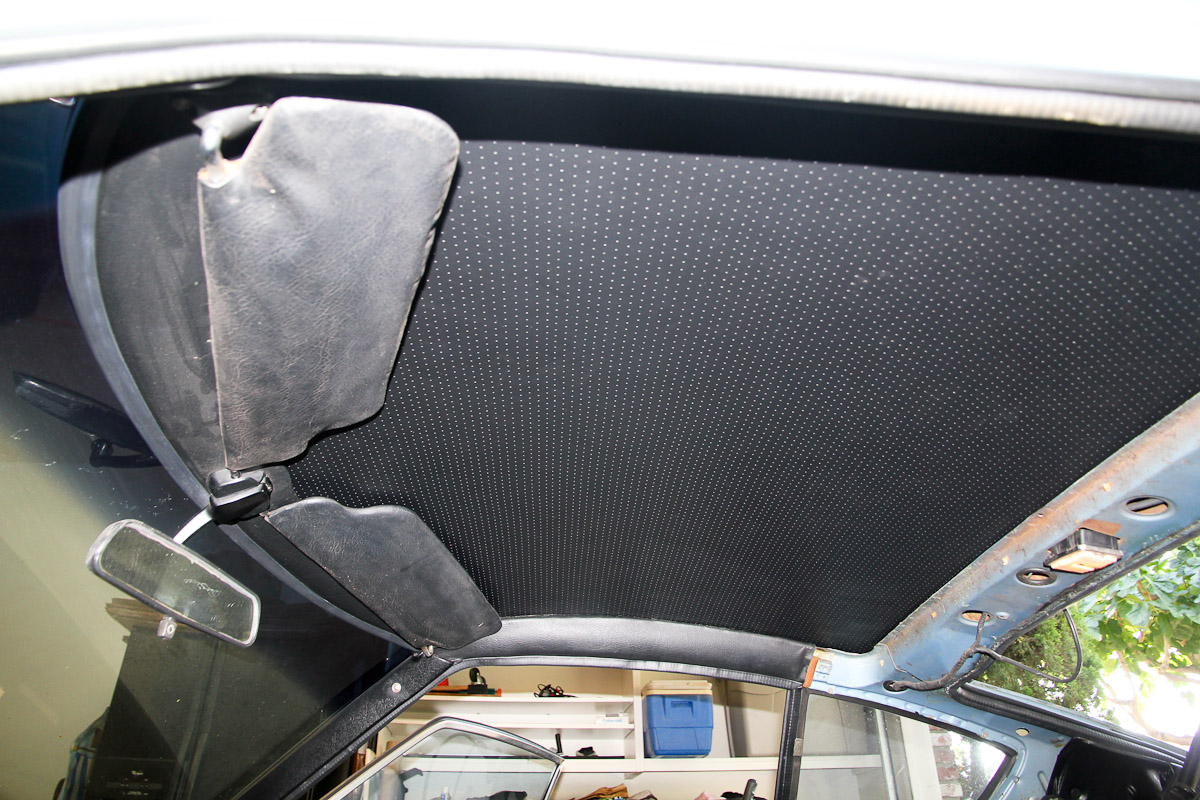
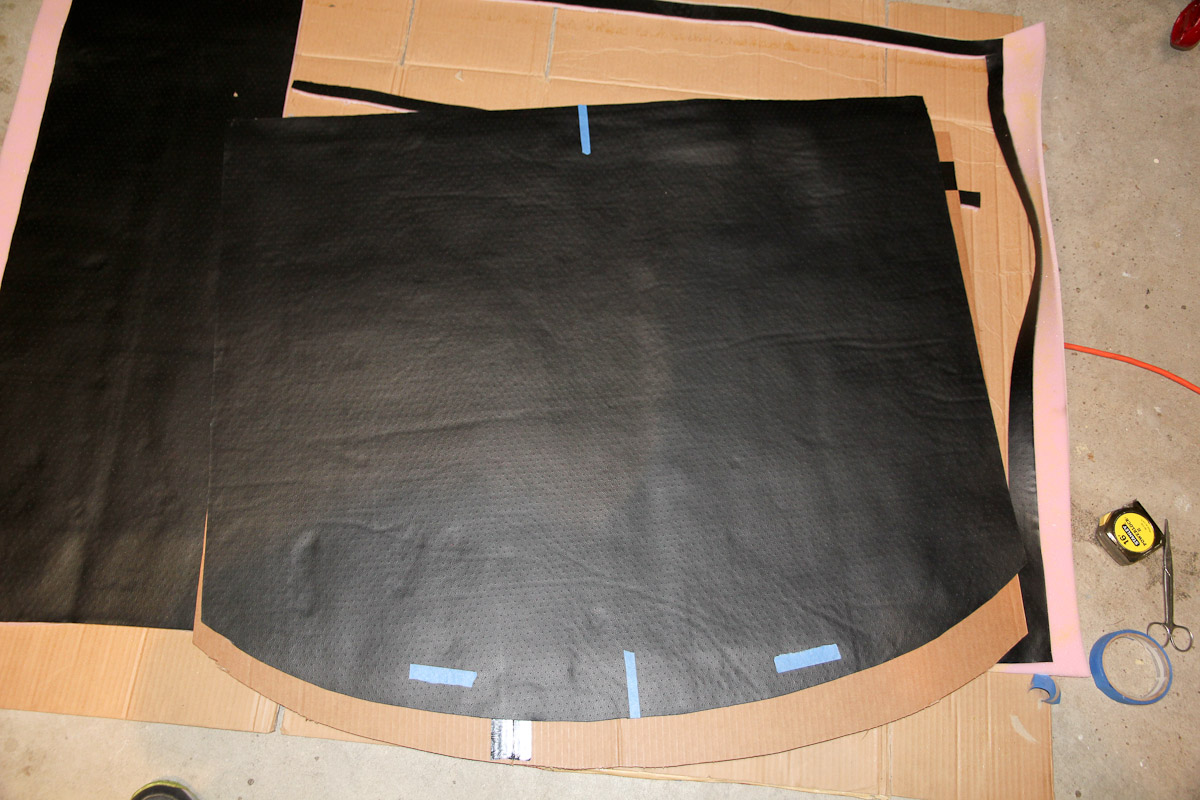
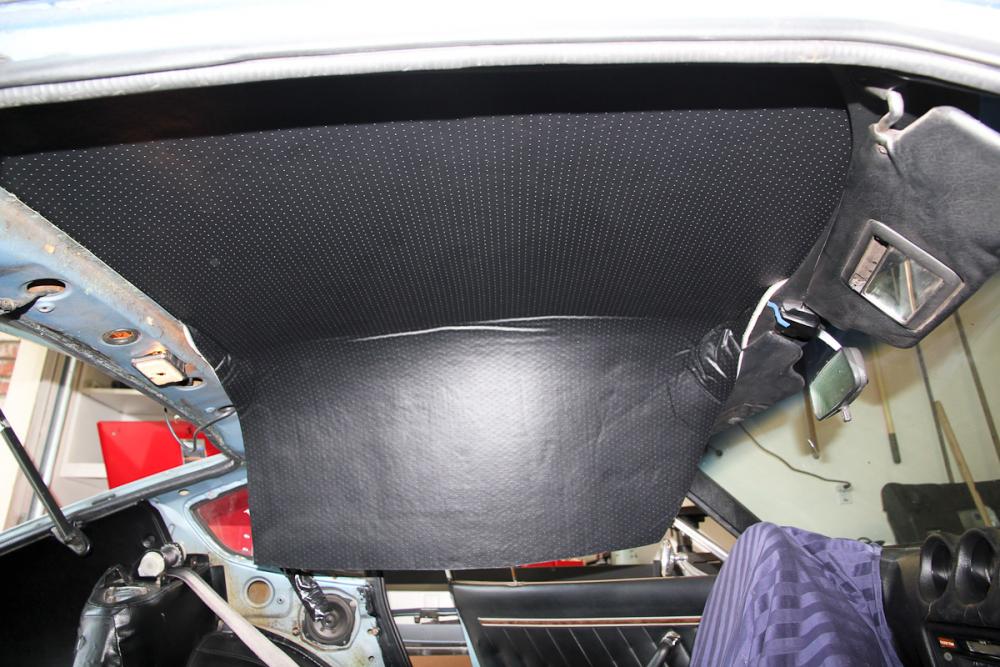
I did the headliner in mine a few months back and didn't find it to be very difficult. I marked the centers of the roof and the headliner as well as the location of the front lip with masking tape so I'd have reference marks to work from. Then I masked off an 8" strip right down the middle of the headliner and the matching strip in the car and sprayed adhesive. My wife helped me line up and hold the headliner in place and starting at the middle of the roof, pulled out the wrinkles and pressed everything into place. I just let the sides hang down and starting with the passenger side, sprayed glue on the headliner and roof and repeated the same process: pull tight and press in place. Then repeated on the driver side. I used a panel removal tool to tuck up the edges and followed up with a rolling pin (improvise!) to make sure everything was pressed on tightly. I was only able to get a couple pictures -- you kinda have to work fast -- but they should give you an idea. Good luck!


-
I've used Duraglass (another fiber-impregnated filler) before with good results, but have only used it on non-flexible surfaces. Depending on how much filling I have to do -- hopefully not much -- I wonder if I can get away with using that stuff instead of a special flexible filler. At least I don't need to worry about having a *perfect* surface. Grannyknot: resin won't stick to plastic; the bag would just peel off.
-
"Hmm, I guess this is why they use vacuum bags during fiberglass layup" -- that was my thought on Sunday afternoon when I was working on it. Smaller sheets of cloth did go on quite a bit better, so I think I can get away with it (that's fortunate, since it doesn't look like regular consumer vacuum storage bags are quite large enough). It certainly isn't going to be pretty, though.
-
At least I'm mostly just in it for time and effort right now. But if I end up flocking the whole thing (a possibility, for sure) I'm gonna be rather annoyed with myself for doing all the extra work!
-
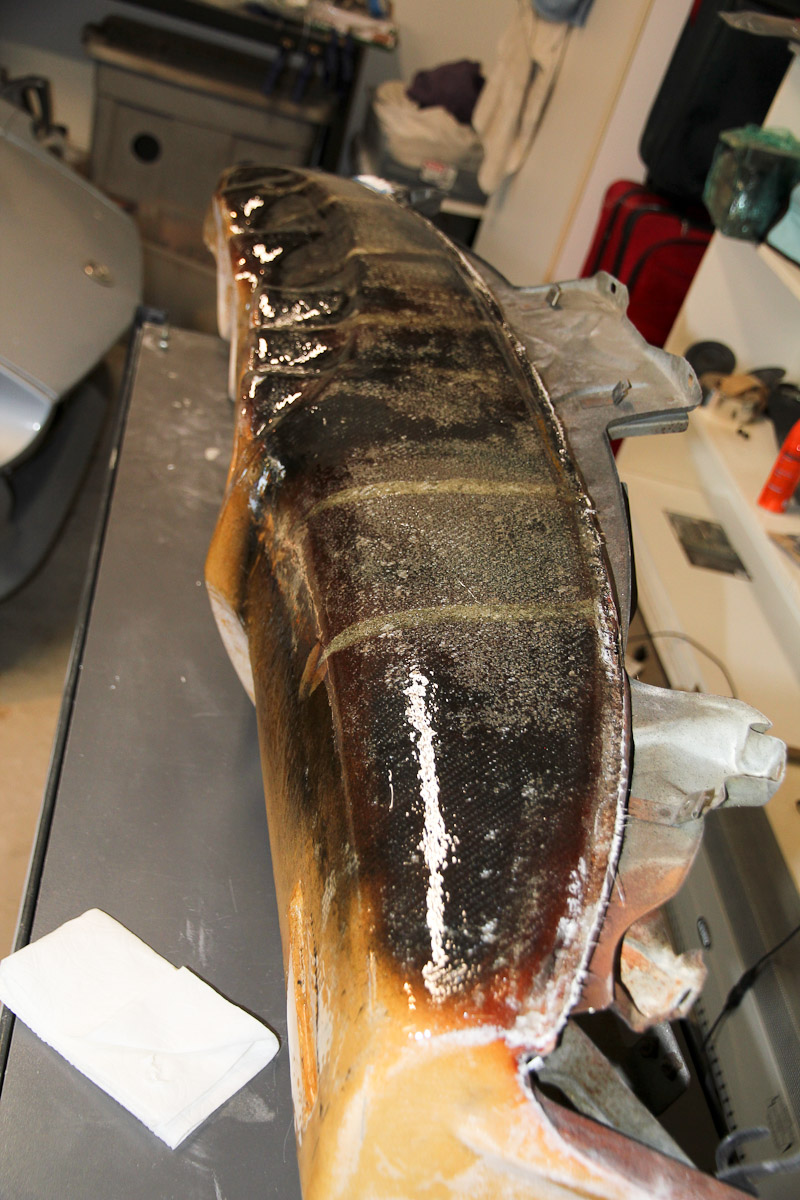
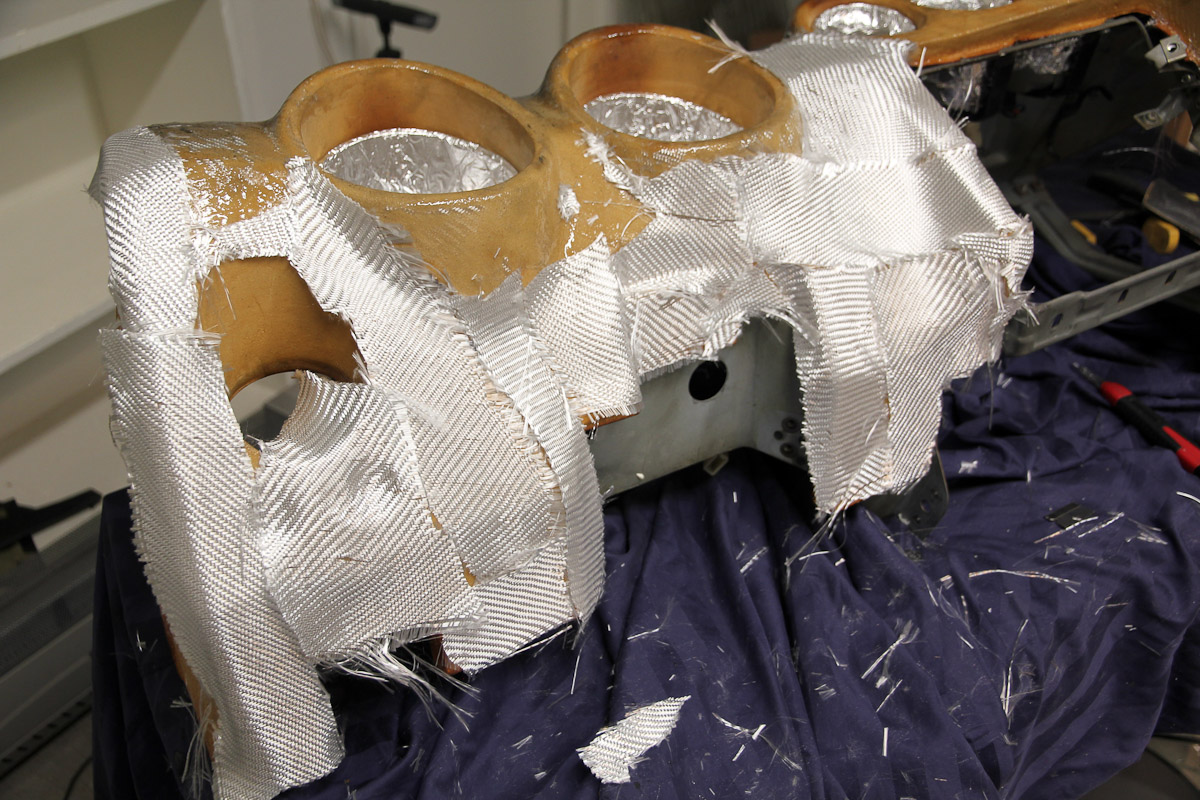
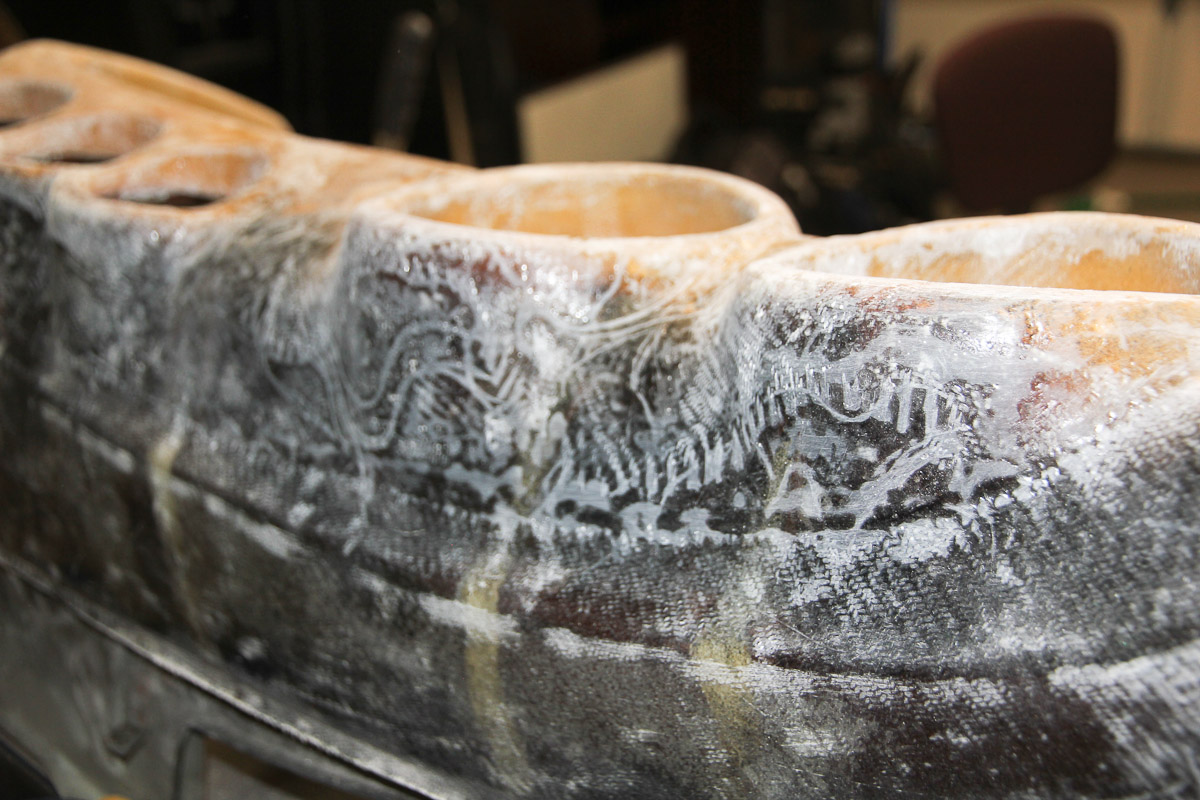
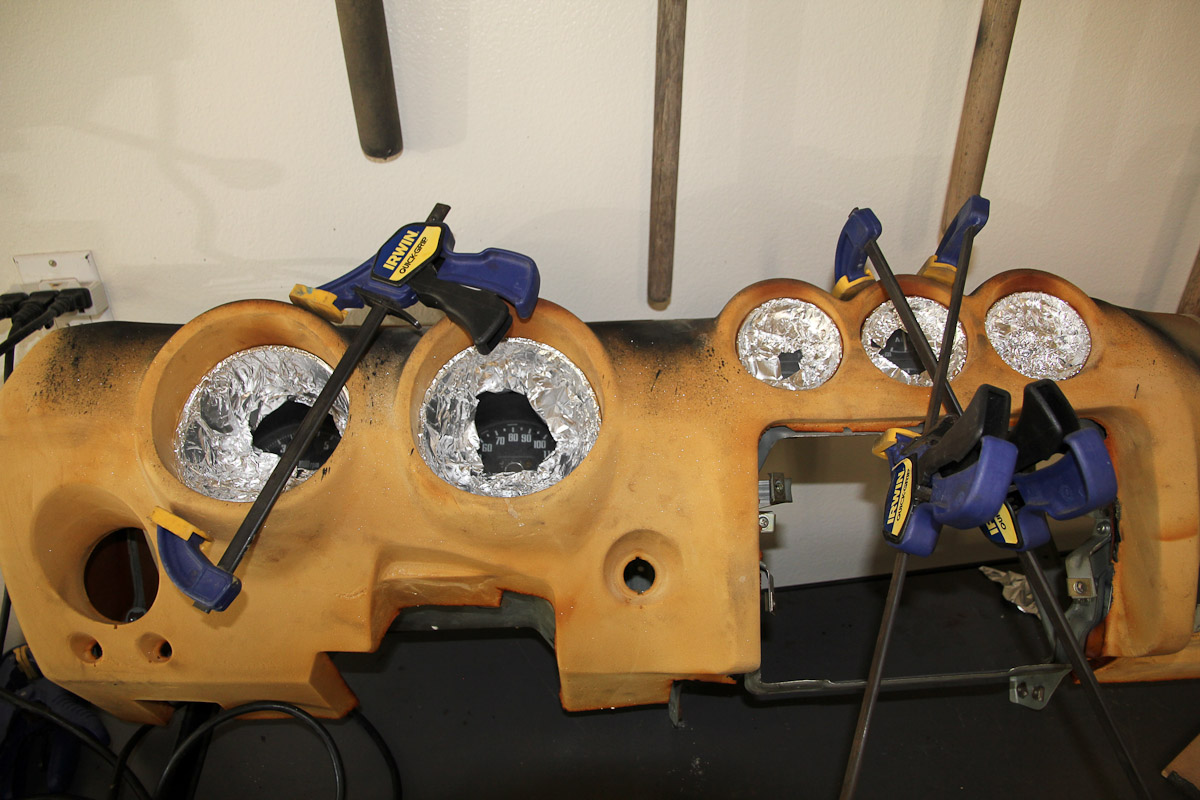
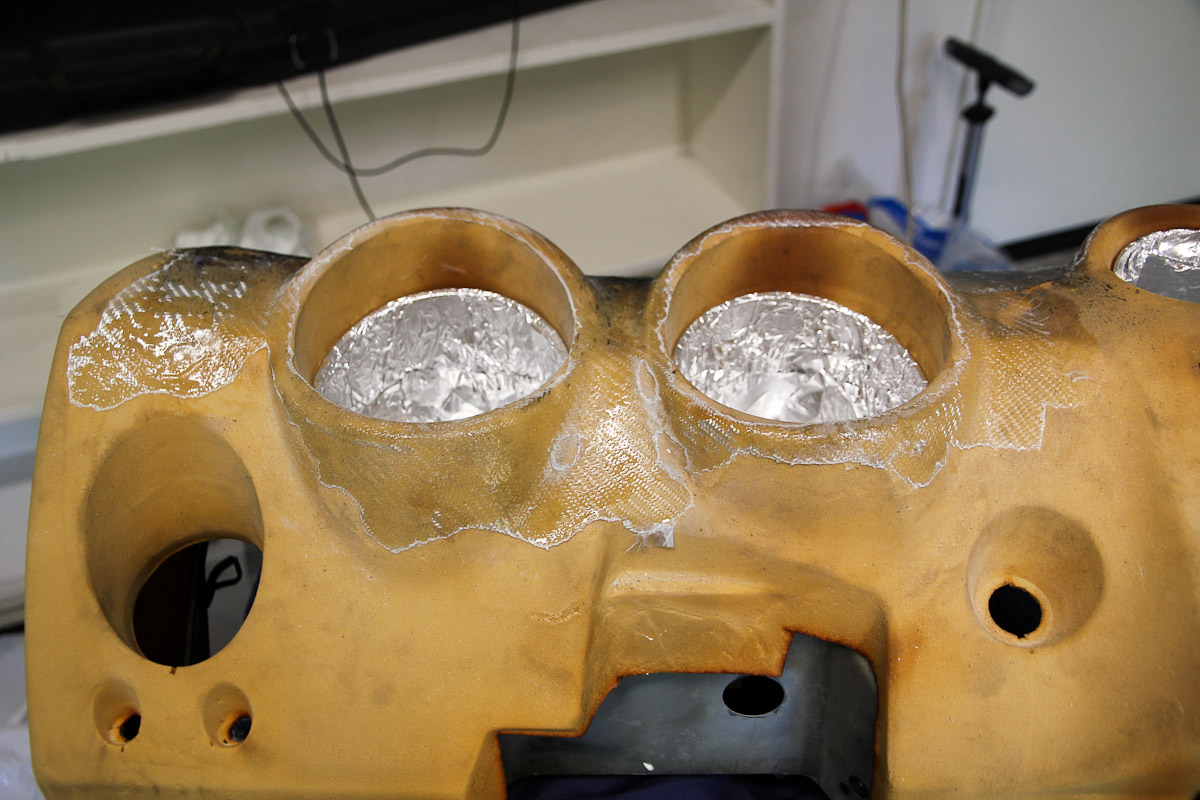
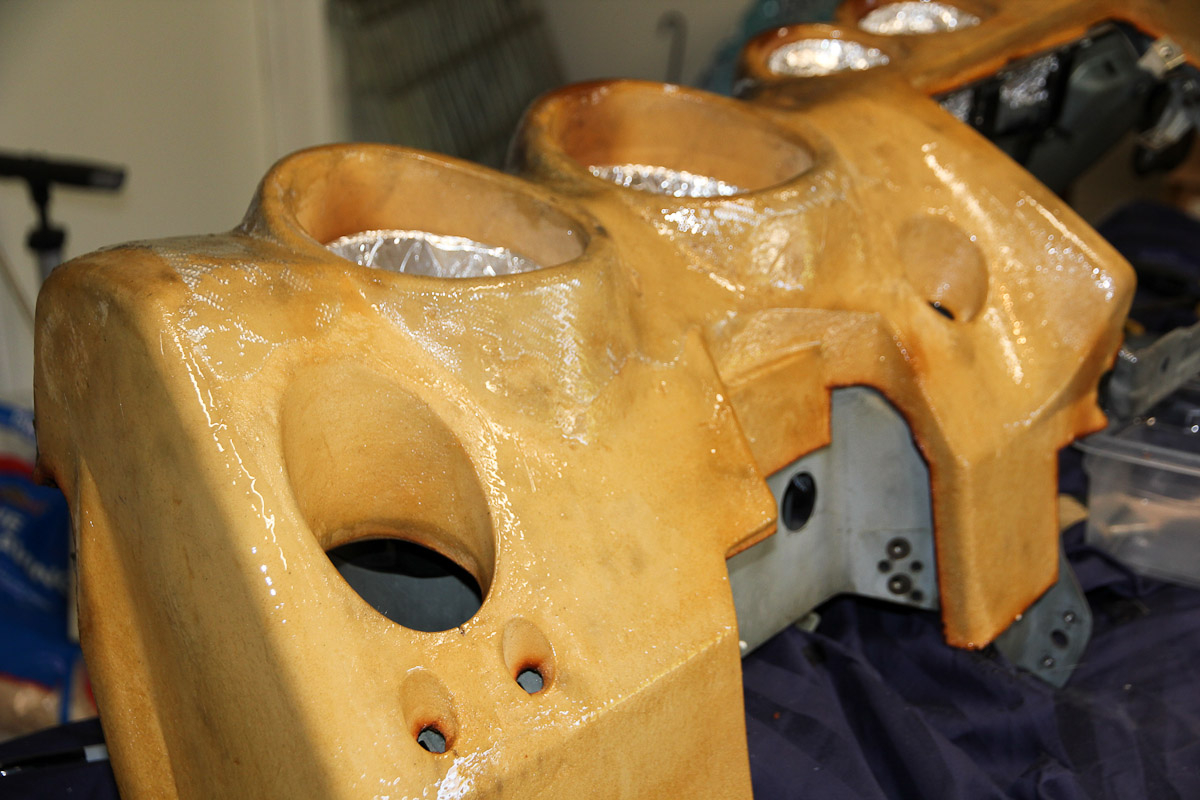
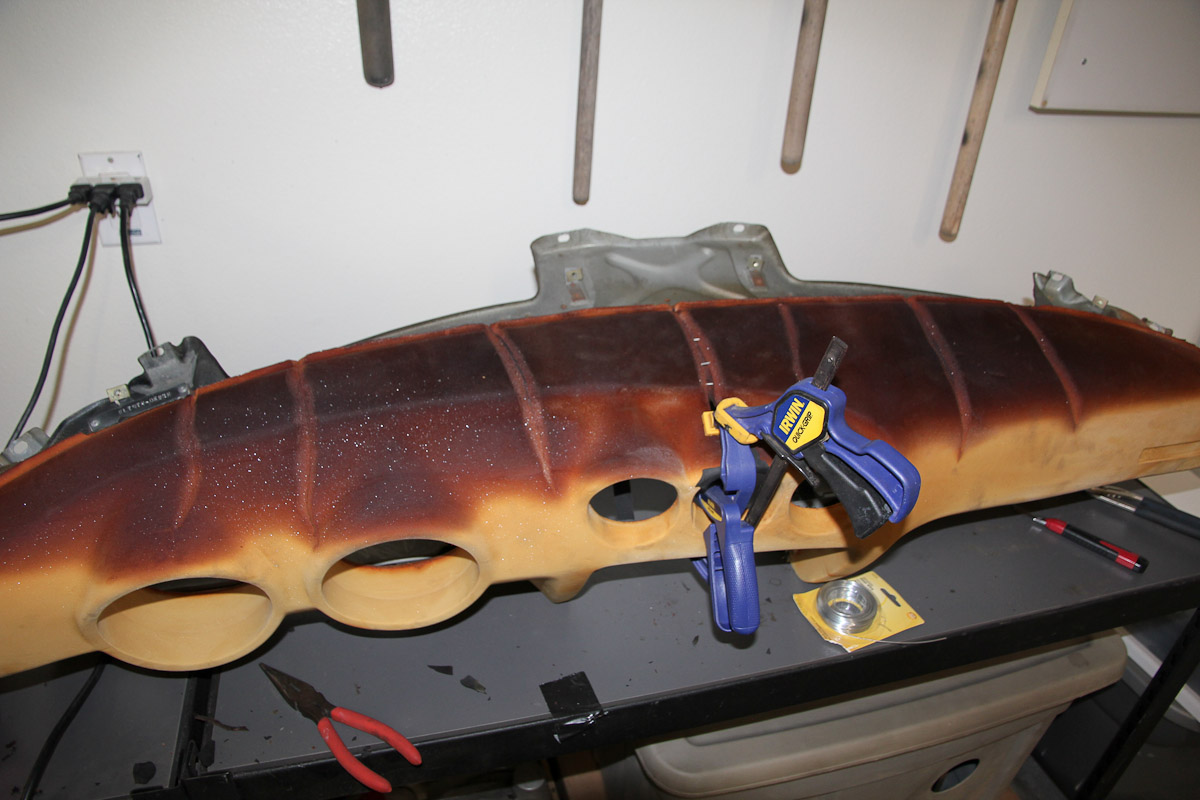
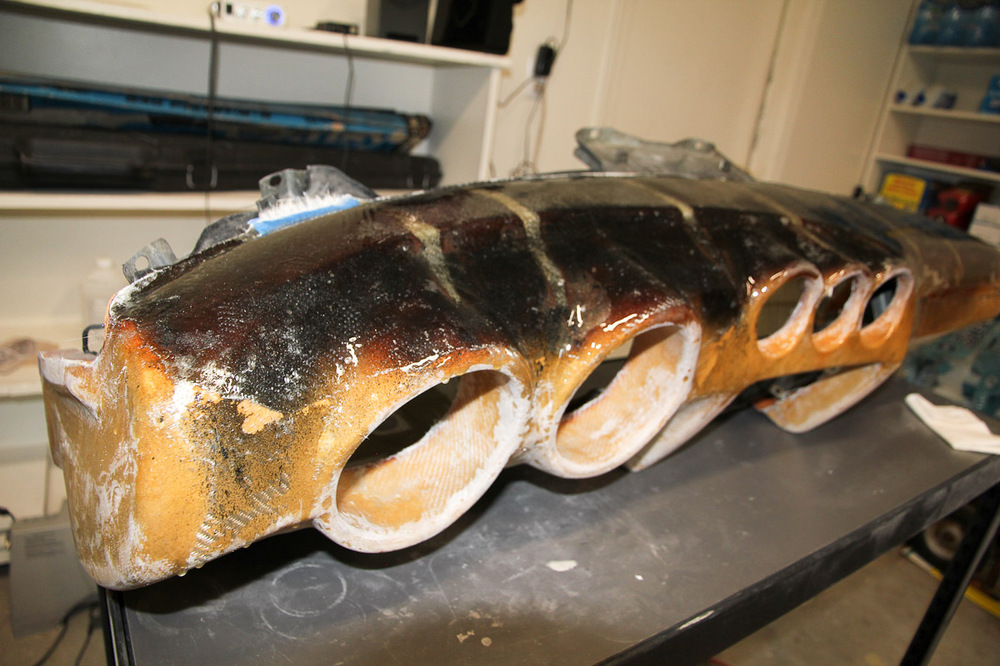
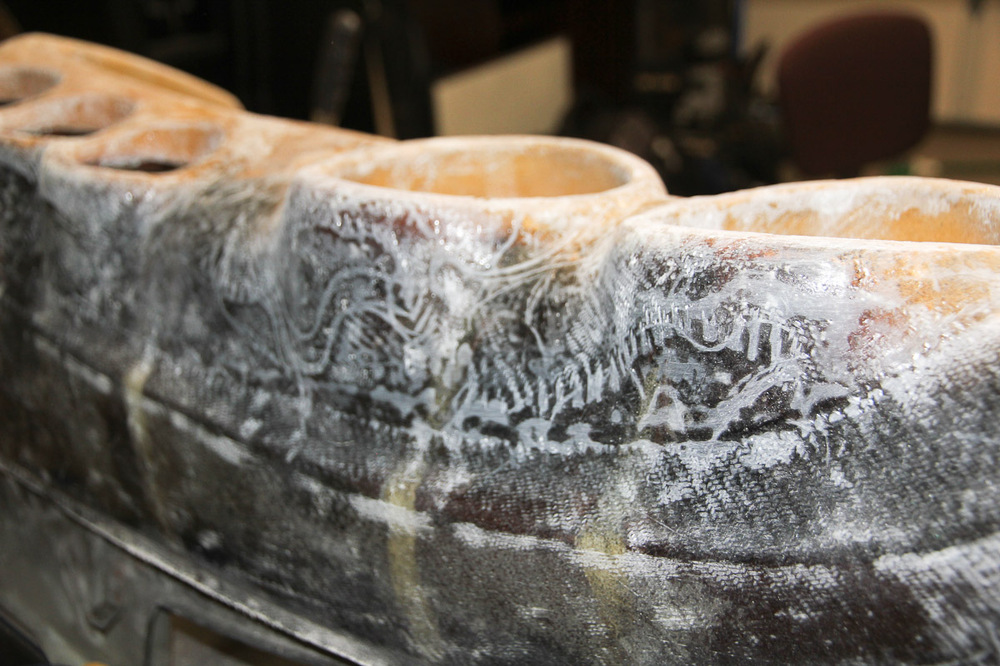
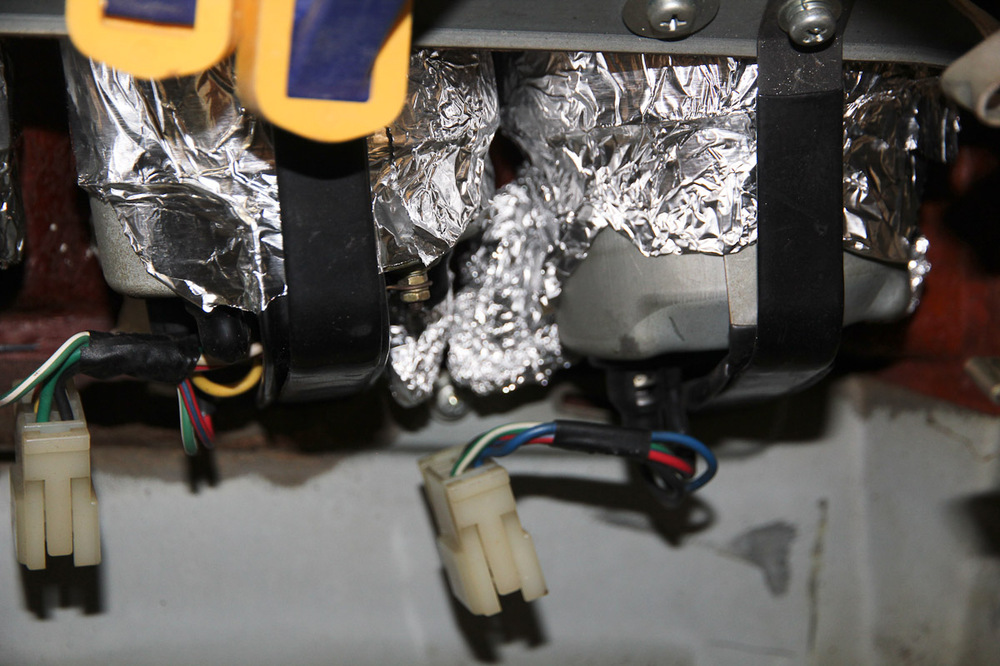
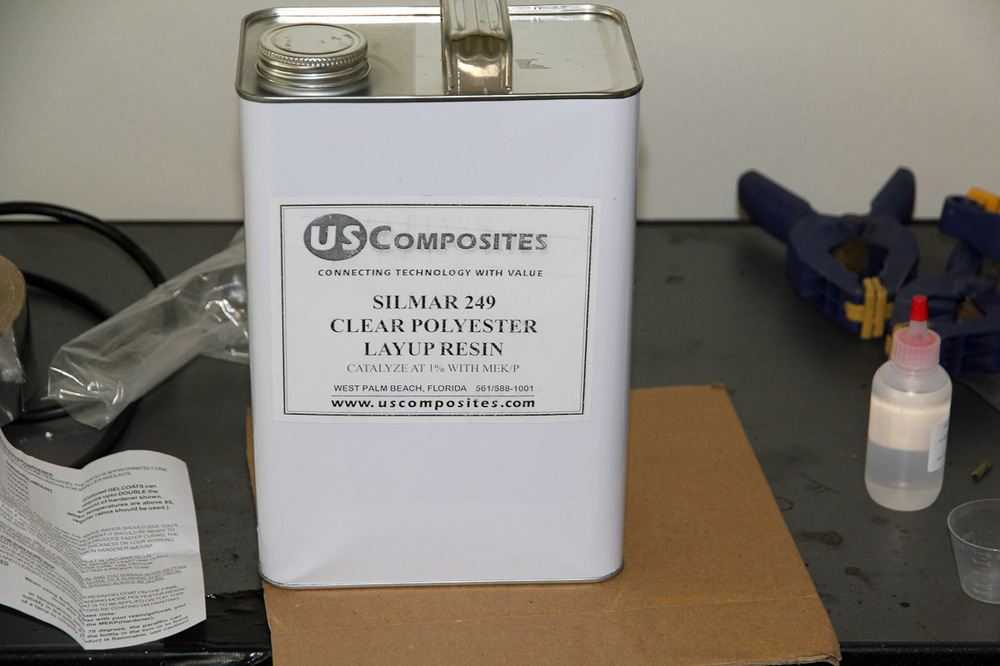
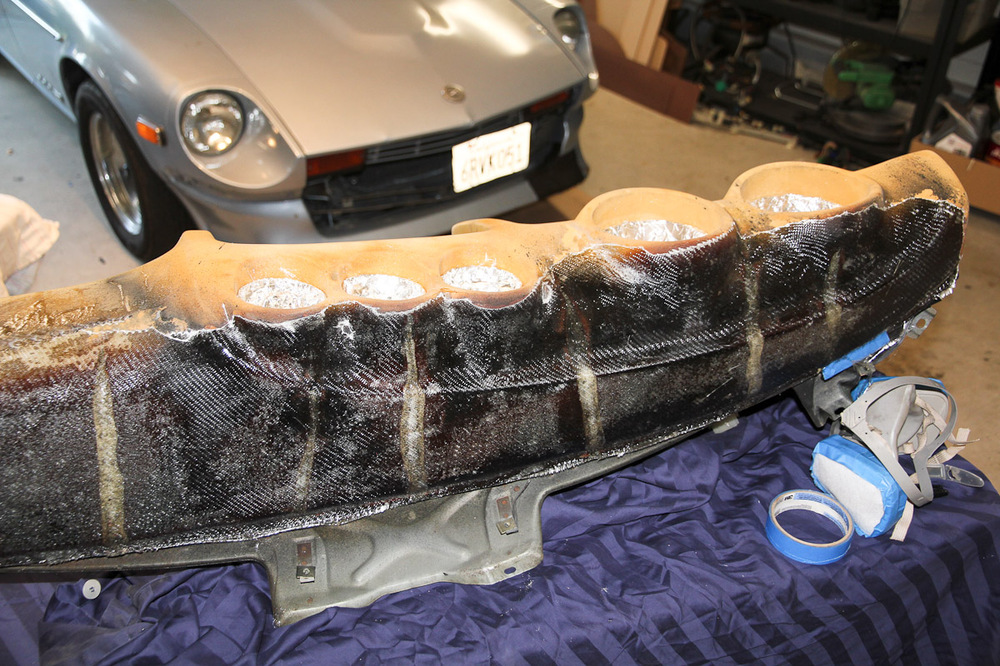
I did a bit of final shaping on the top of the dash and tried, with maybe a little success to get the gauge pods into just a little better shape. The curved section behind the small gauges had collapsed a bit over the years so I stuffed some crumpled aluminum foil under it to push it back into shape. Everything looks good, so here goes nothing! I exchanged some emails with the US Composites people and they didn't recommend epoxy resin for this project and suggested this stuff instead, which is usually used for surfboards. Polyester resin eats polystyrene foam but is safe for urethane, and I did a test on a small part of the dash to confirm beforehand anyway. Started on the top for the first layer of glass, and things went sideways pretty early on. Composites experts, feel free to snicker under your breath now This resin's thicker than the stuff I've used before and the fiberglass cloth wets out much differently than chopped mat. It also doesn't conform to complex curves as well as I thought it would, AND the resin didn't impregnate the foam anywhere near as much as I expected (basically it didn't). Because of all that, I had a fair amount of glass that I had to cut or sand away, but lesson learned: smaller sections moving forward. Well, lesson partly learned. The curves on the gauges are a pain, the resin kicked early, and I didn't even get half of it covered. More cutting and sanding. And now, a new plan! I figure what I really want the glass and resin for (aside from structure on the top) is to provide a suitable substrate for whatever covering I ultimately decide to go with. With that in mind, I brushed a coat of resin over the uncovered parts of the dash. I'm going to go back over that with some small strips of cloth instead of large pieces and hope that works a little better. So the whole thing isn't exactly going to plan yet. On a scale of 1 to Fiasco, this is a currently rating at Minor Annoyance. Nothing's irrevocably borked by any means, but it is a bit more work than I expected.


-
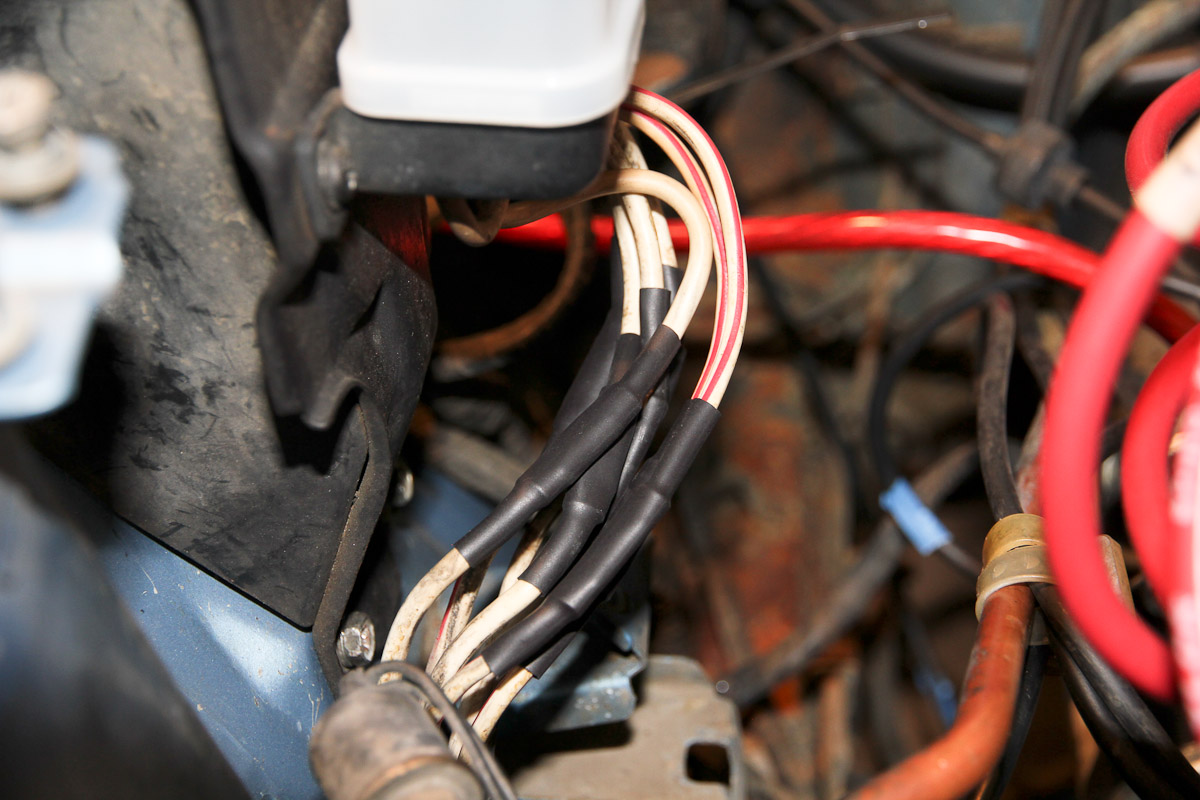
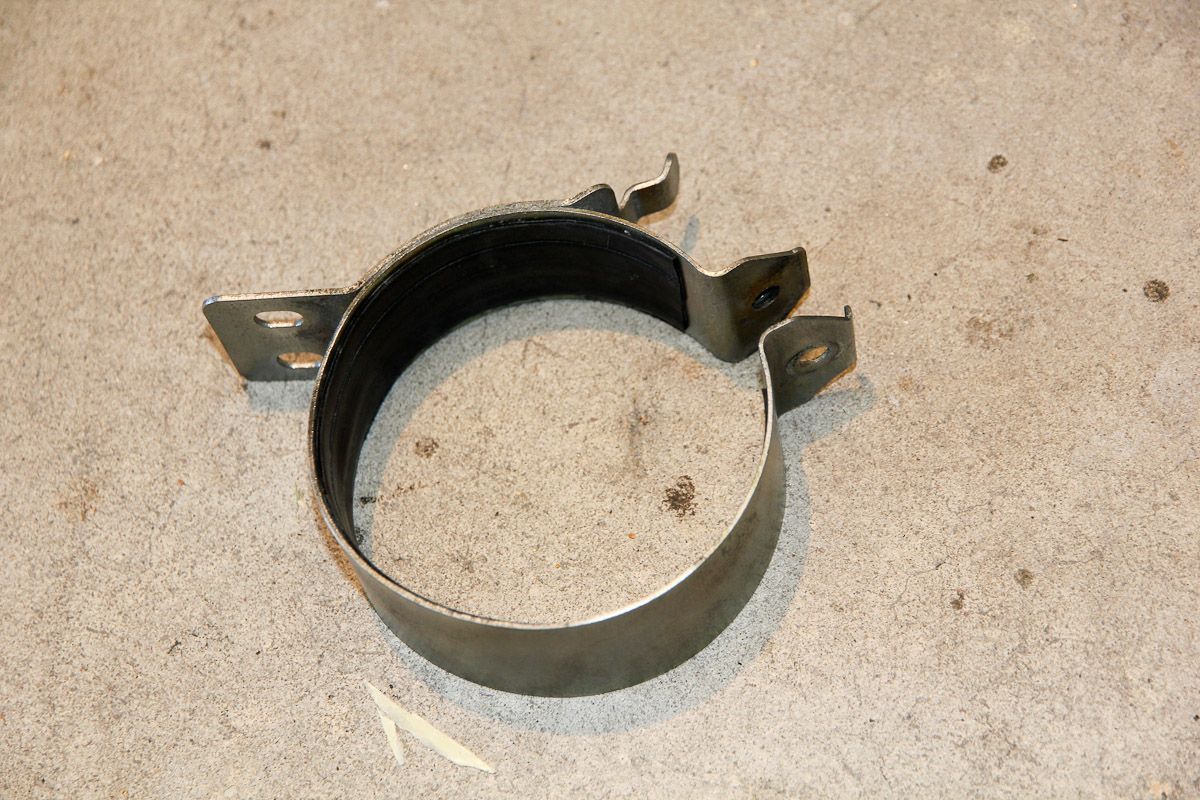
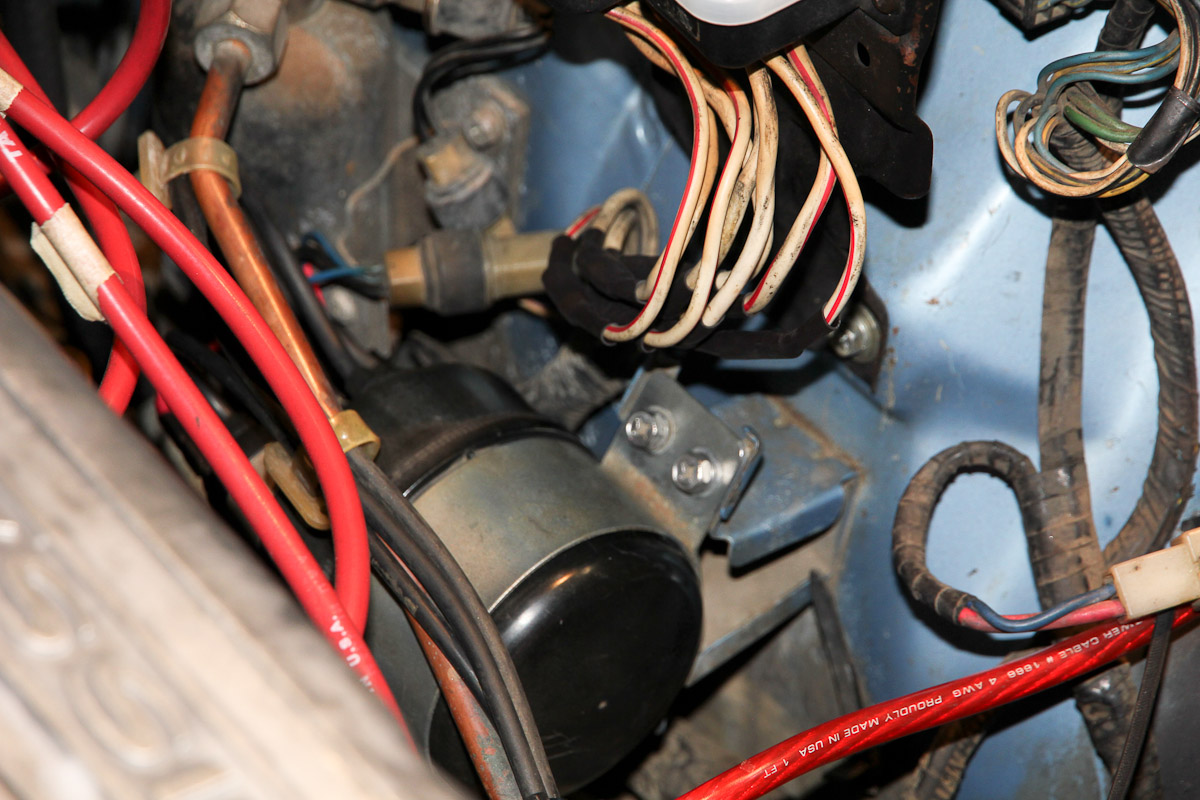
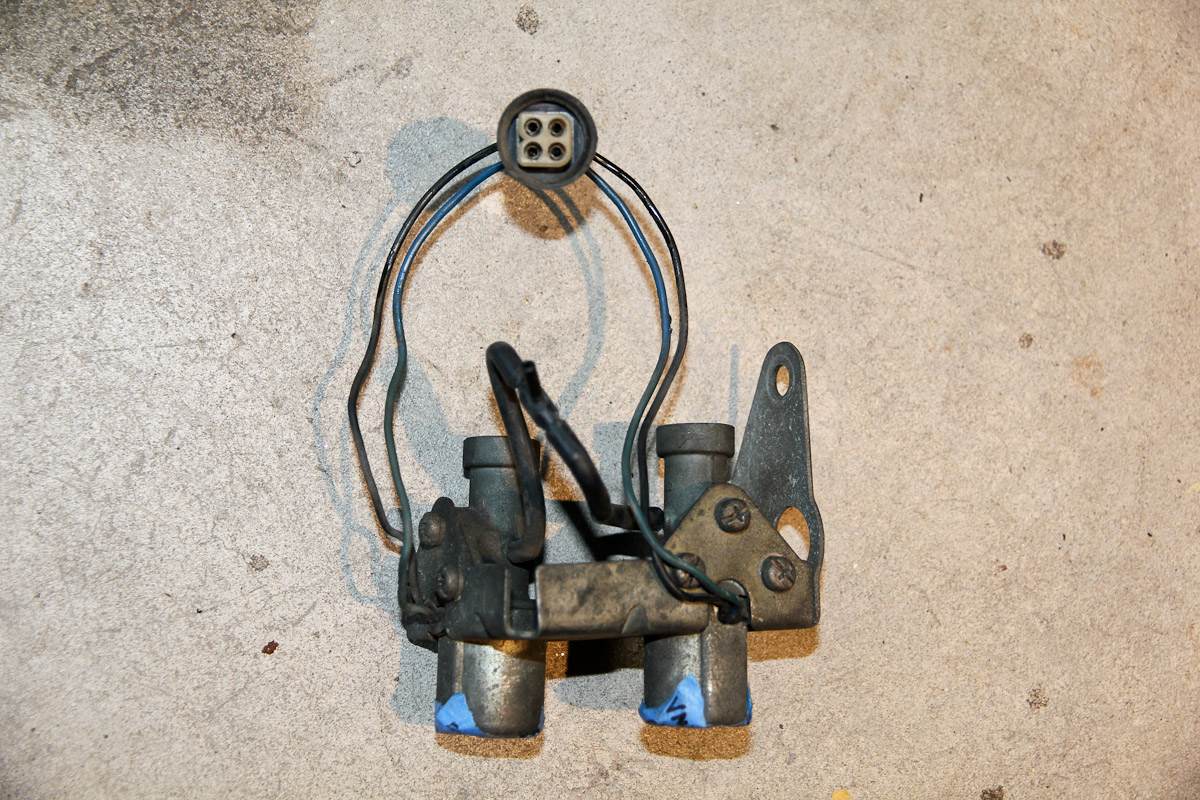
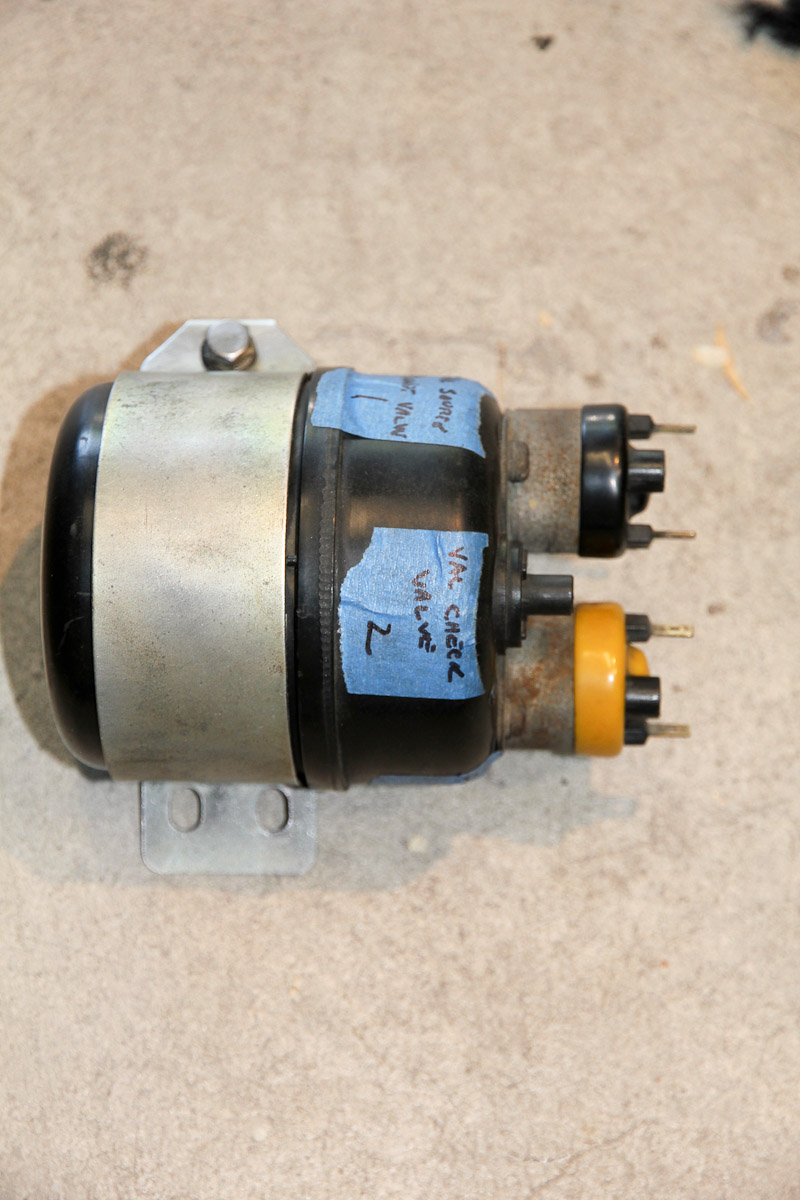
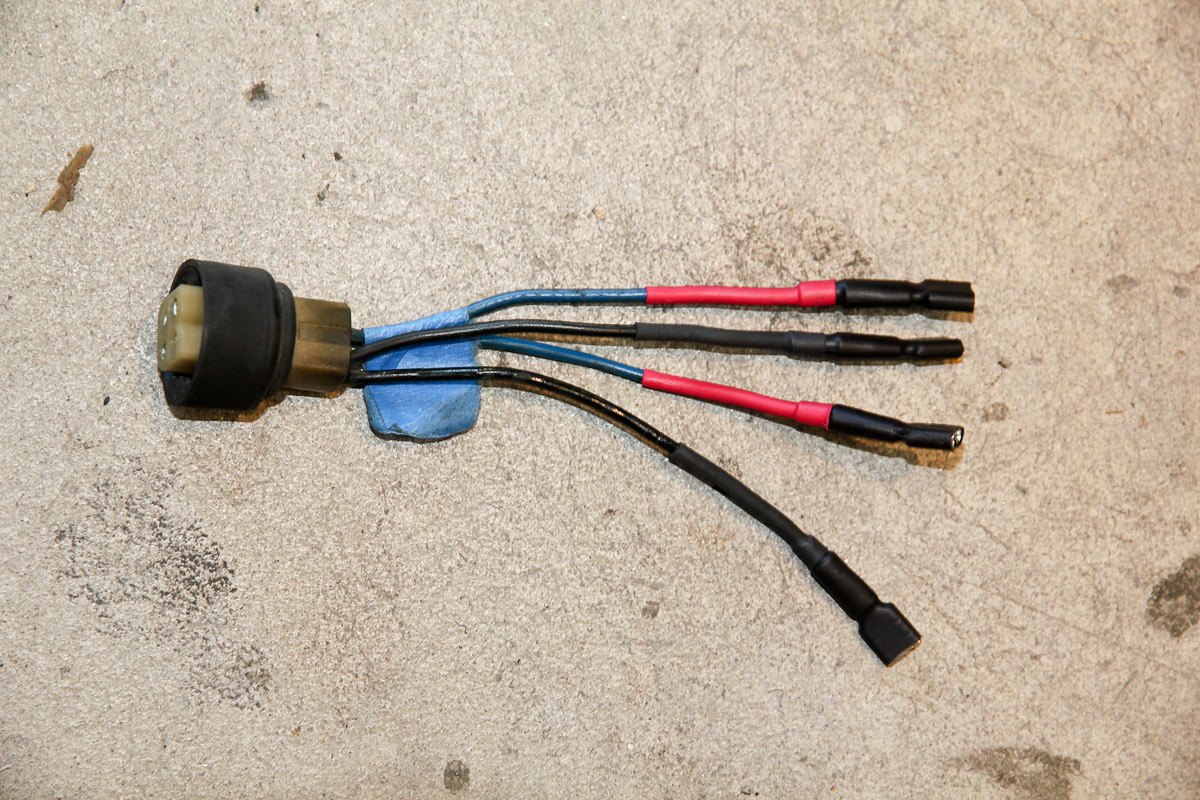
Fiberglass materials haven't arrived yet, and this weekend was shot with my kidlet's birthday party and the start of football season, so I only had time to deal with a minor diversion that I've had in the back of my mind for some time now: I finally swapped in the 280ZX vacuum tank. Well, first I dealt with the nasty fusible link wiring that I inherited. General laziness -- as usual -- got the better of me and while futzing around with the vacuum tank, one of the hot wires arced across one of the poor butt splices, so I took them all out, spliced and heat shrunk them properly. I may still replace all this one day, but at least one fire/electrocution hazard is reduced, and I got my helpful semi-annual reminder to just take the extra 10 seconds and disconnect the battery before futzing around with anything electrical. Anyway, the tank swap. I picked up a vacuum tank from a junkyard for about $7 several months ago and always though it would be worth swapping in since the stock one is big and ugly and the hoses are rather convoluted (and those solenoids up there on the shock tower...eww). It was a surprisingly simple affair: I reused the stock bracket (just lined with some rubber from an old bicycle inner tube) and the harness didn't even need to be extended (just crimped on some disconnect terminals). Everything works as it should, though it did lead me to discover that the FICD has a stopper nut that mine -- surprise! -- is missing, so I'm on the hunt for an M10x.75 nut. If there's any interest, I can do a proper write-up on the process...I feel like I owe this community something


-
@Matthew Abate You're probably thinking of Just Dashes. They're actually about 30 minutes away from me. They seem to do nice work, but the price (~$1800) is, well, a non-starter, to put it mildly. @Captain Obvious I'm no expert on composites, but my limited understanding is that polyester resin might eat foam. It's also stronger and can withstand higher heat, but shrinks by about 10% when cured. Epoxy resin shouldn't eat any urethane foams and only shrinks ~2% when cured, but won't be as strong or able to take high heats (150F+). I'm using epoxy resin since those tradeoffs aren't a real concern, but yes, anyone who might be trying the same thing: test the resin first to make sure it doesn't dissolve the foam! The spacebag approach might actually work! Most of my prior fiberglass experience was on subwoofer enclosures and other audio parts and I didn't have a problem with bubbles. The dash has a substrate that's staying in place, so vacuum forming shouldn't be necessary there. I think vacuums are more useful if you're forming a part from a mold, like a center console. And Harbor Freight's not that bad...I wouldn't be able to do some of the stuff I can without them!
-
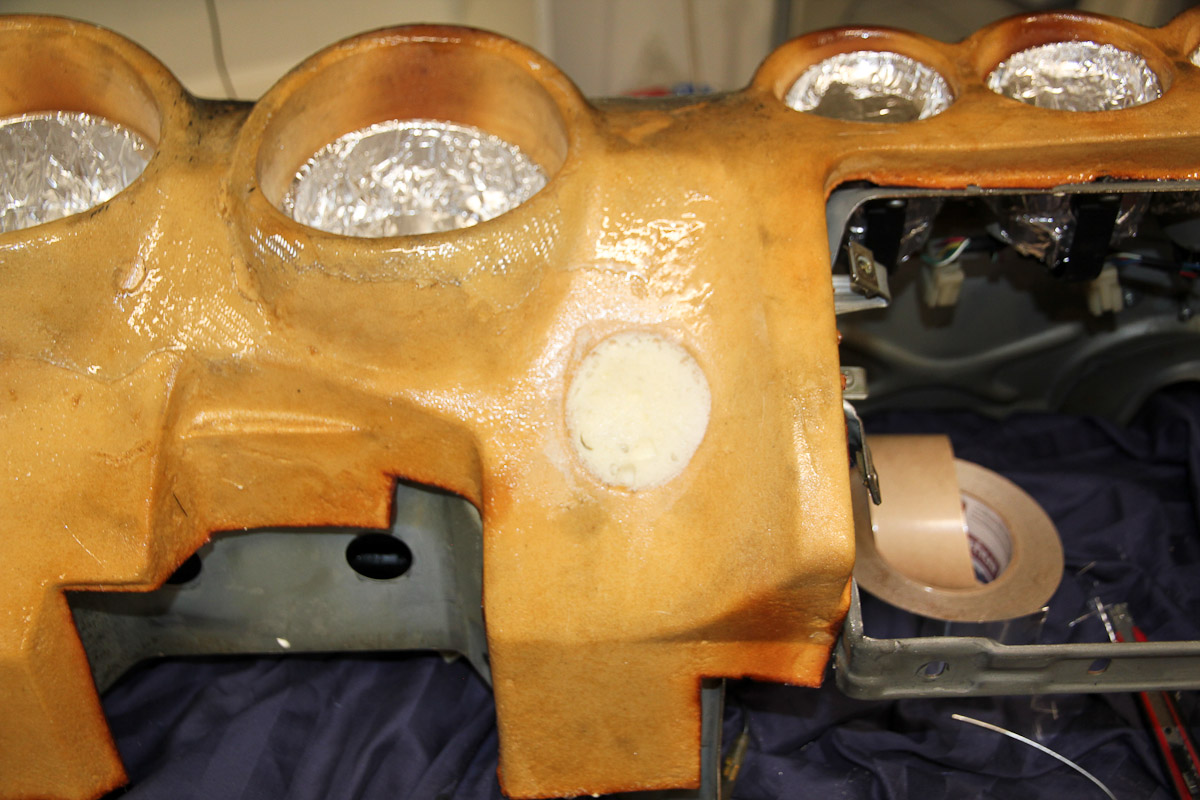
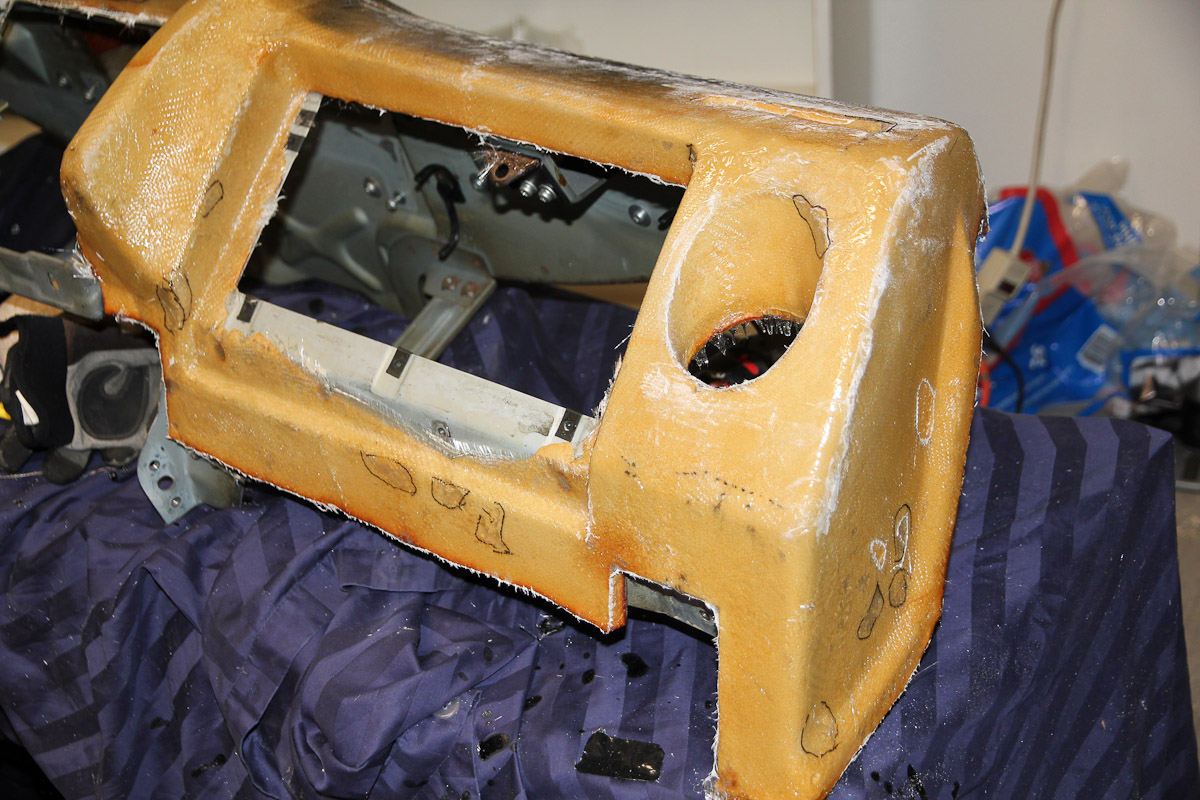
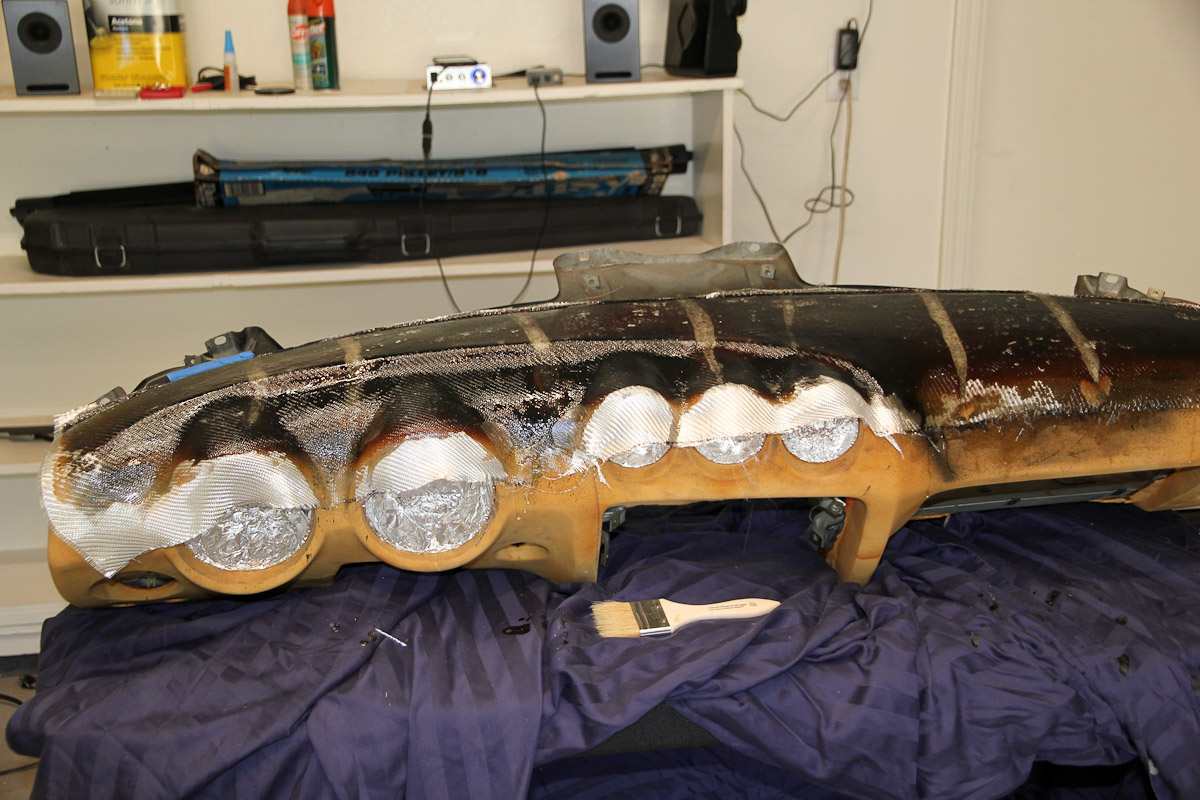
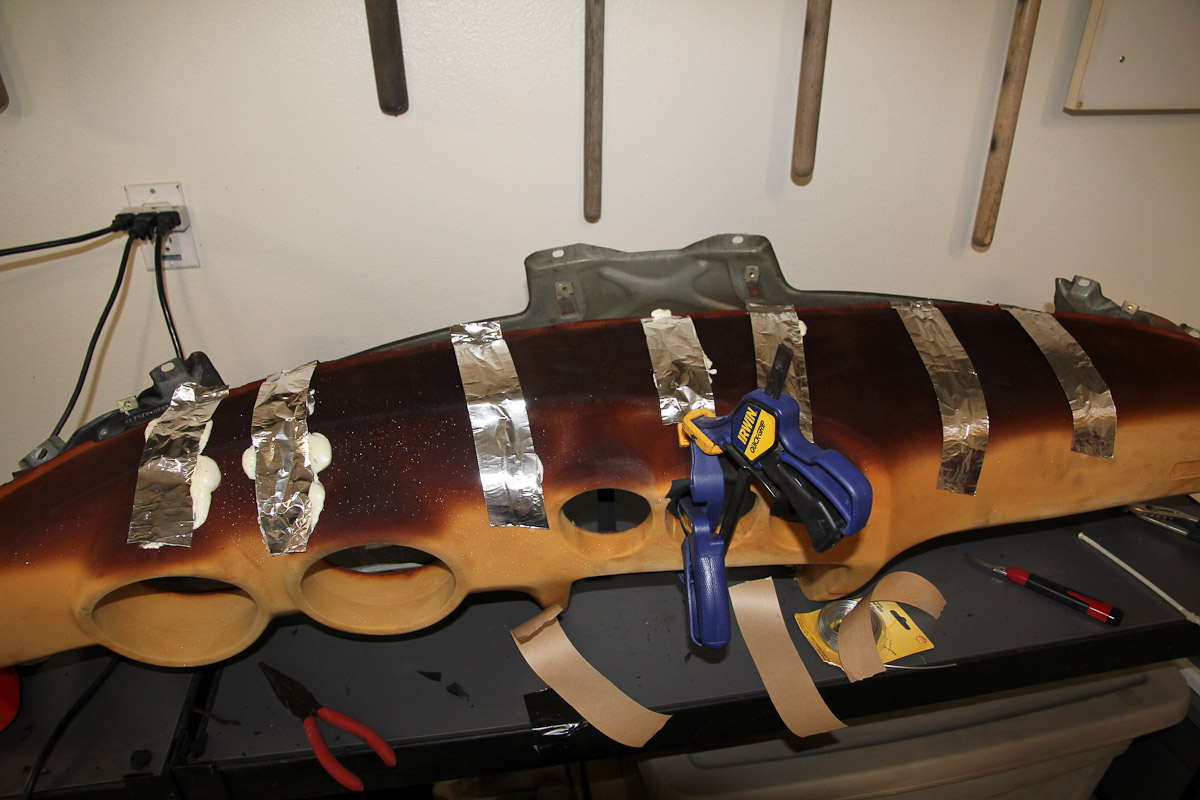
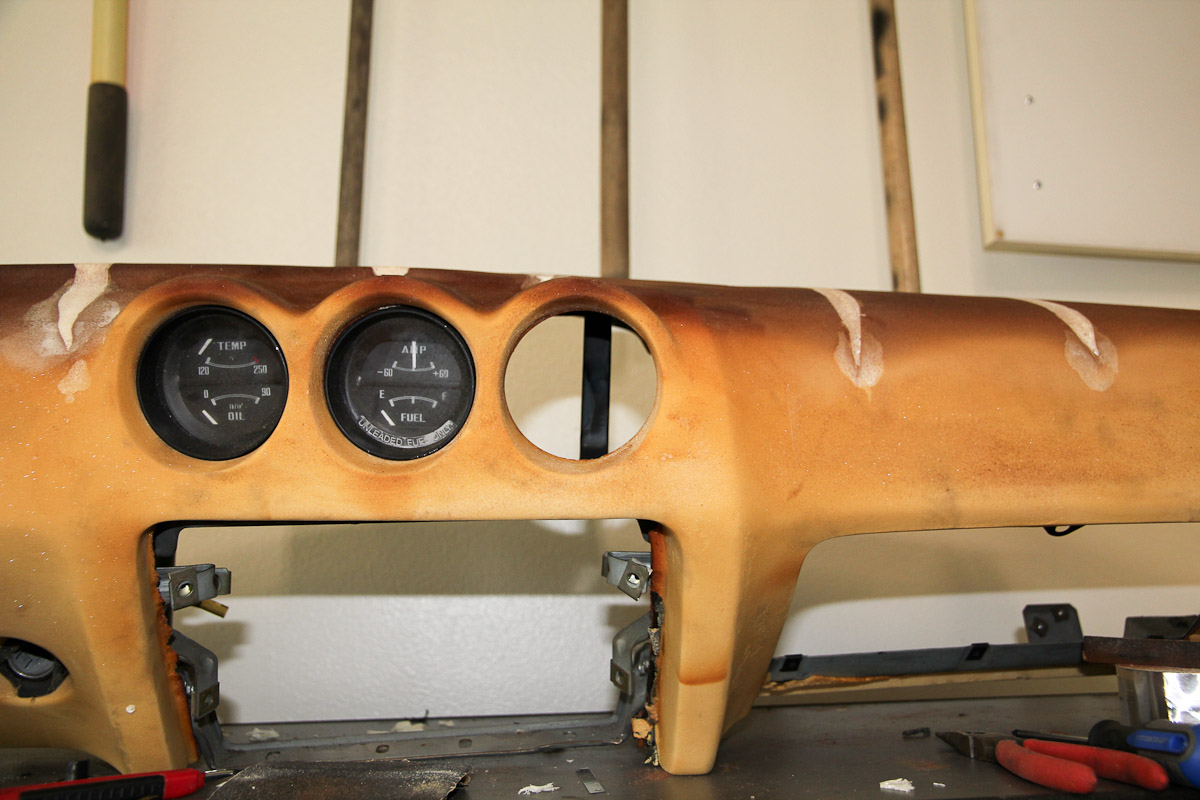
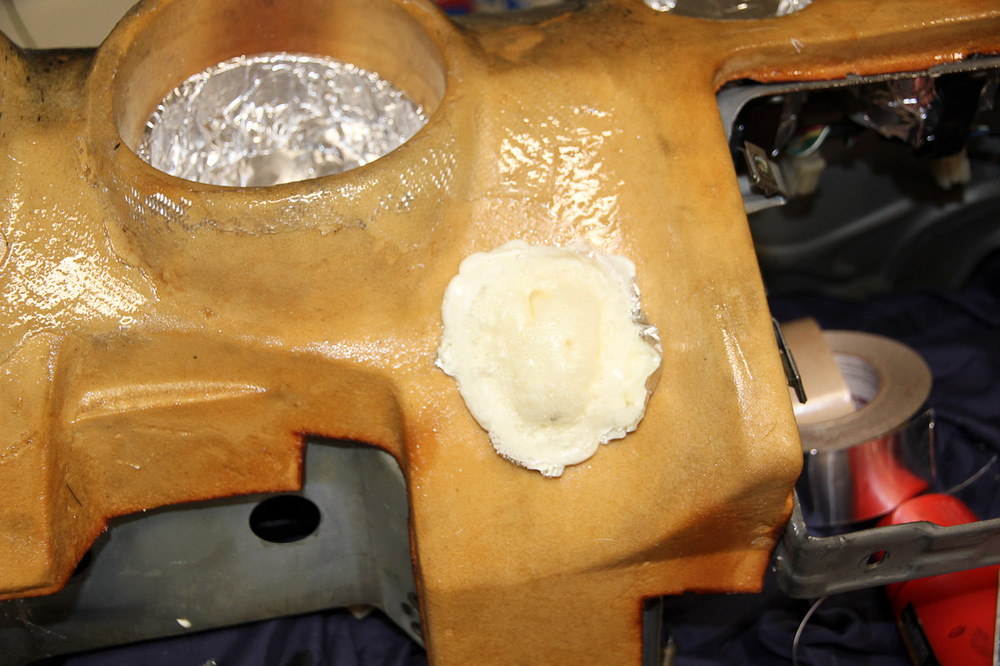
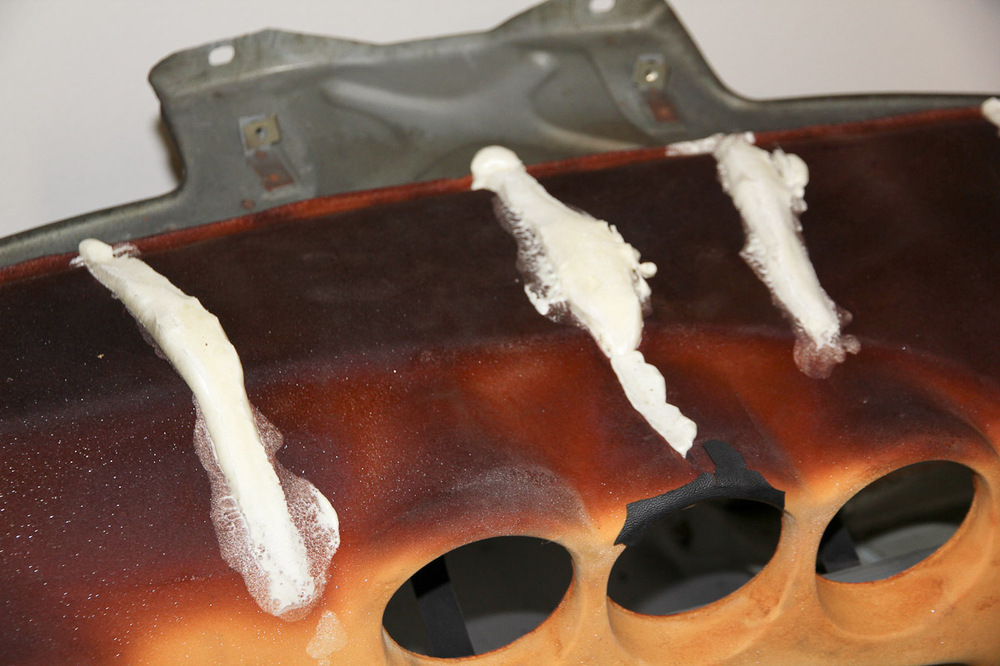
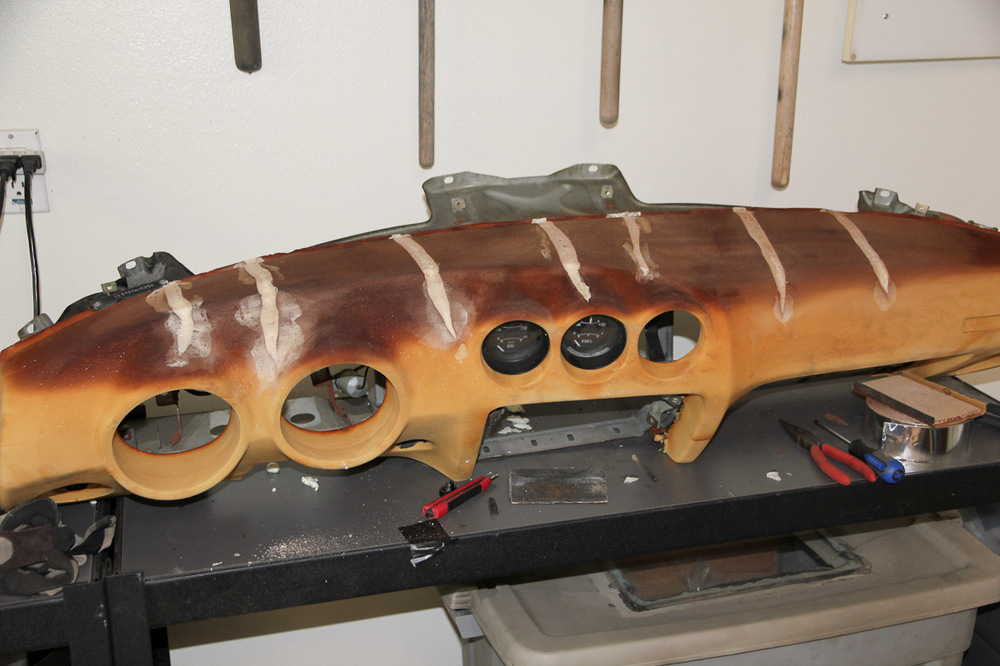
So far, so good. Working first to fill the cracks and get the dash back into shape. Like others, I've used the Great Stuff foam to fill the cracks. I stuck some galvanized wire into the largest crack over the center gauge since it's thin and has nothing else behind it. I put tape over the cracks thinking it might reduce the expansion and make it denser, but I don't think it made a difference or was worth the effort. Side note: I'm a little surprised people have had good and/or long lasting results with the Great Stuff foam, given how much more compliant it is than the rest of the dash. Trimmed off the excess and started with rough shaping, then continued sanding to try and level everything out. Shot a light coat of black paint to try and highlight trouble spots. It's looking pretty good: still some bumps to smooth out and I need to clean up the curve around the gauges. I'd like to get the small gauge housings a bit closer to round as well, especially the clock. Might be able to lay the first layer of glass by next weekend...if UPS can move fast.


-
Interesting that the 70 and 73 sold or are bidding significantly higher than cars on BaT have; most there seem to top out in the high teens.
-
The full dash cover isn't my preferred choice for primarily aesthetic reasons. I've always thought the stock dash (along with the interior as a whole, really) was one of the things that betrayed the car's budget roots, so I want to try and dress it up a bit. If you go with the full cover, then glassing the whole dash doesn't seem like it would be necessary but finding a way to reinforce the foam sections that have split would still probably be prudent. I've heard some people have trouble getting the full cover to fit and removing the original skin might help with that. The cover also doesn't extend all the way to the bottom of the dash, so you'd have to do some kind of blending for those parts
-
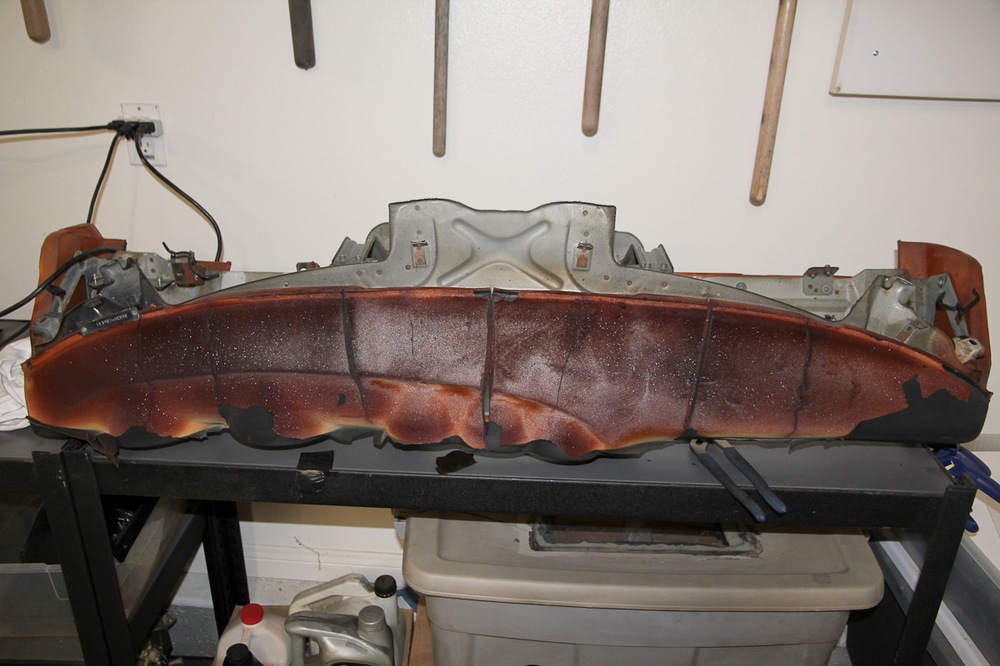
The foam is a problem too, Cap. The darkened foam isn't soft or flexible like the yellow foam is. Totally speculative on my part, but I'm guessing the foam isn't heat stable at the temperatures that it sees from direct sunlight in summer. The plastic is probably breaking down from a combination of age and UV exposure, and when the foam loses it's elasticity, it's game over. As long as the new dash skin is strong enough on its own, I imagine a dash could be permanently fixed without addressing the foam. That's why I'm using fiberglass.
-
Current options I'm considering: Cover the whole thing in Hexis vinyl Flock the whole thing Cover part in vinyl and flock the rest Texture and paint Full dash cover At the moment, I think I like the first three options best, but I'll see what I think when I get more work done and reality hits me in the face. I know a lot of people who have repaired their dashes leave the old plastic there, but it's old and very brittle and I don't think I could even get it back in the car without cracking again, let alone have it last for years in the future, so the plan was always to fiberglass it. Considering that resin won't stick to plastic, the plastic is shot anyway, and that fiberglass will add some extra thickness in areas like the gauge pods it made sense to try to strip it off. Even though the plastic on the lower sides was in good shape, I don't want to worry about any visual or texture mismatches, so it's easier for it all to come off.
-
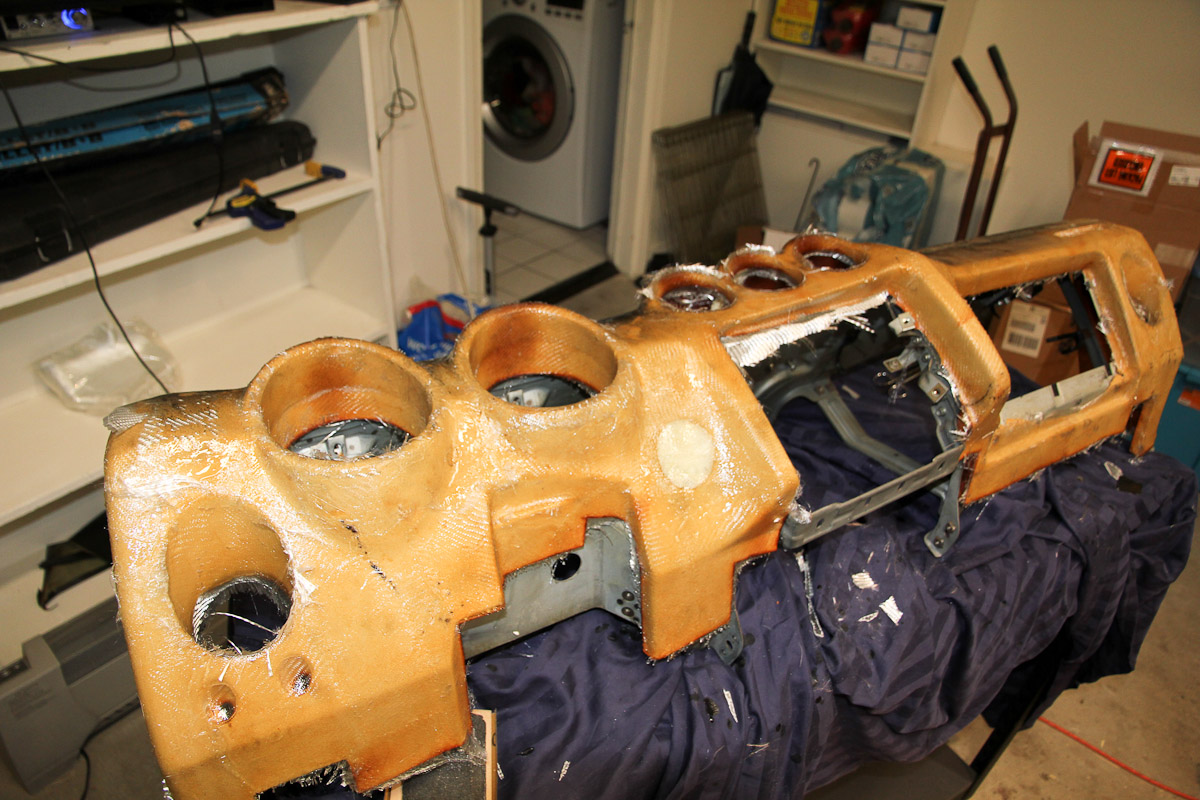
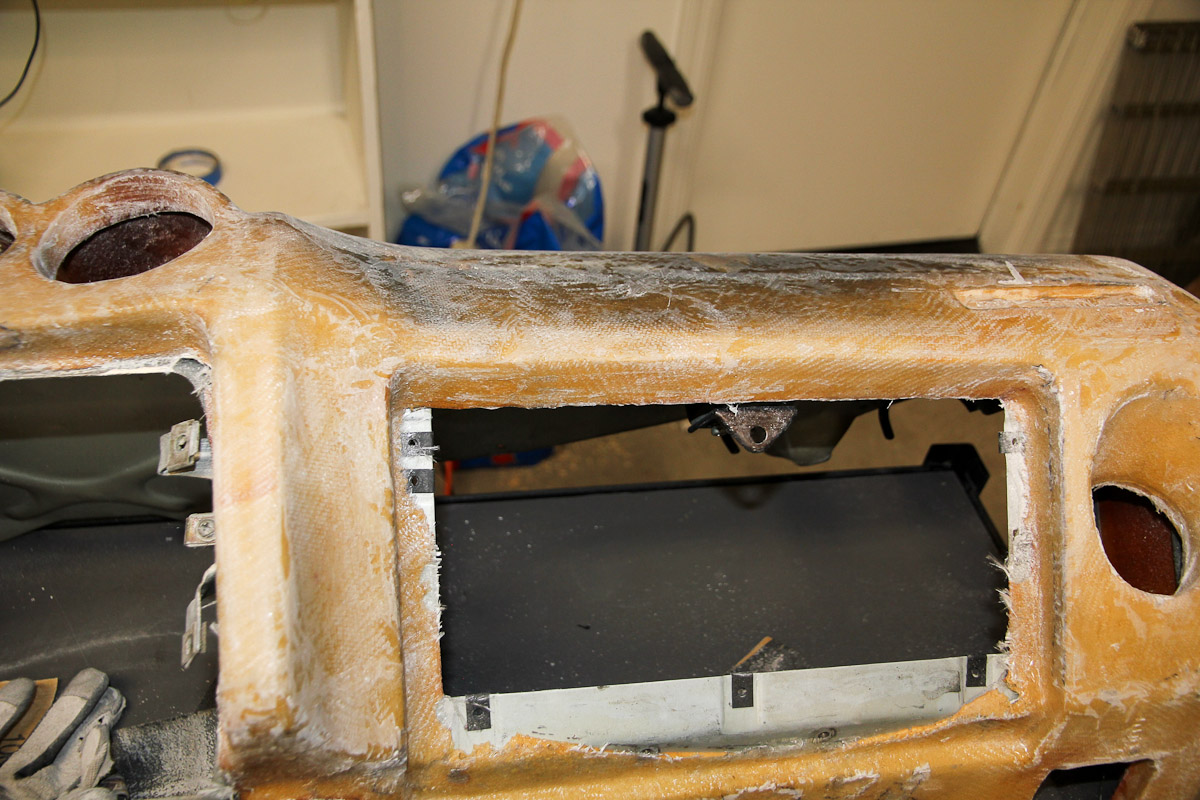
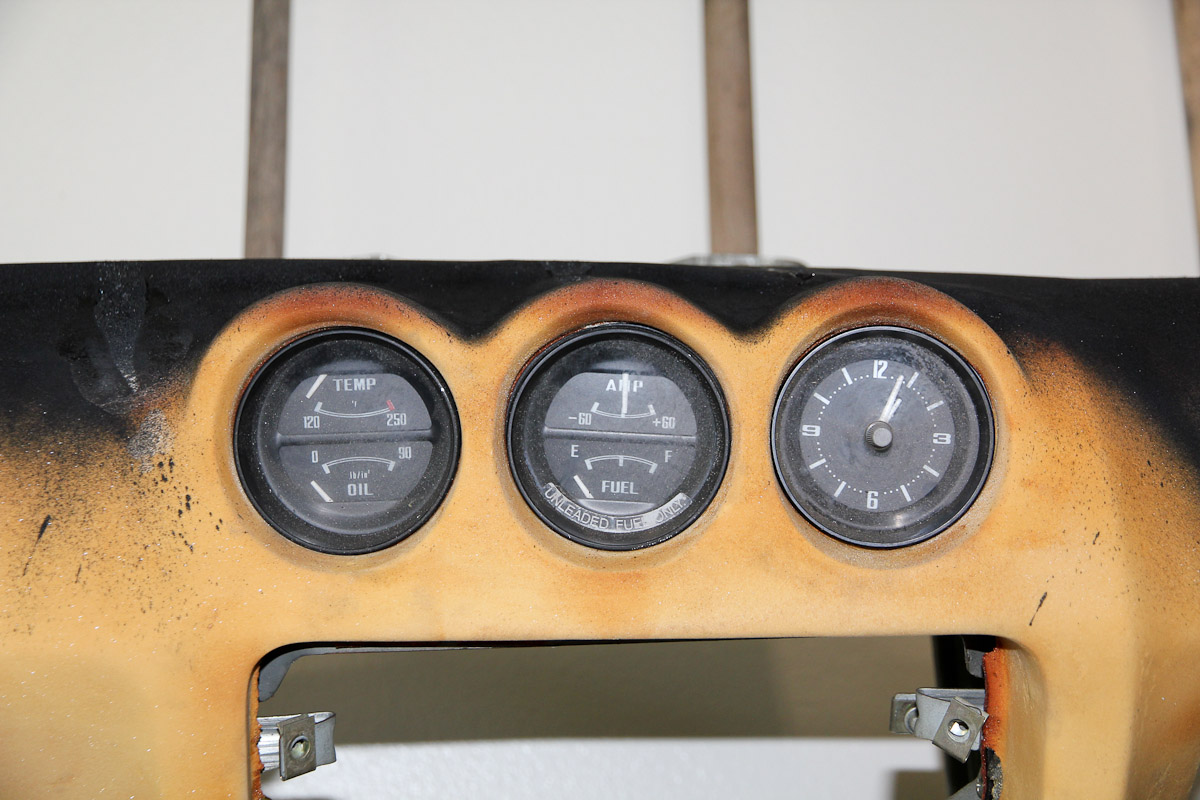
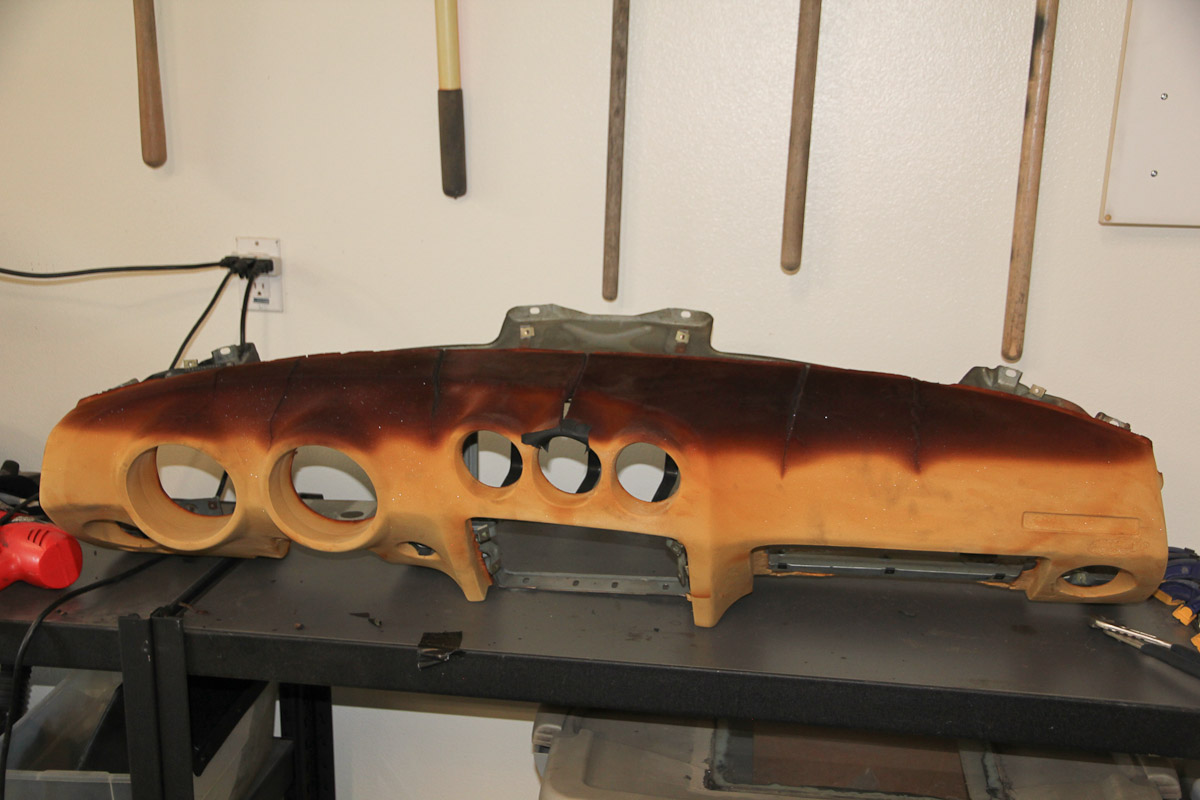
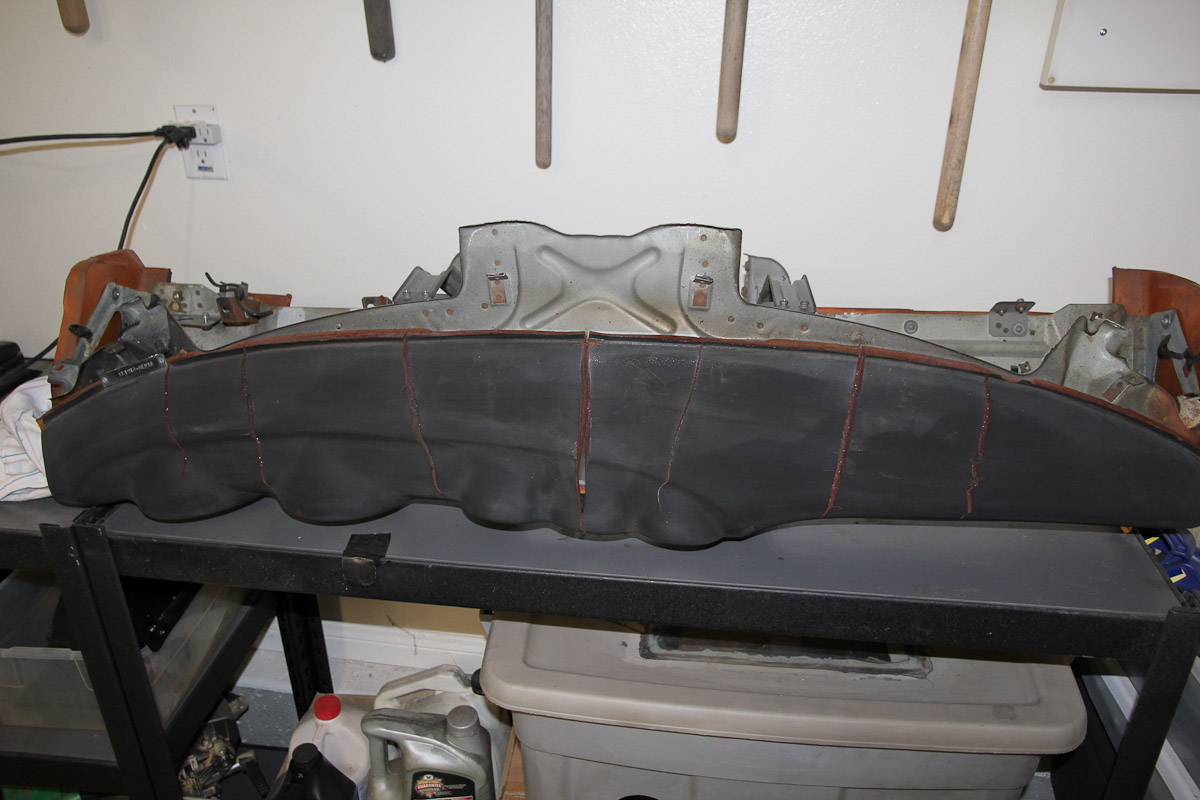
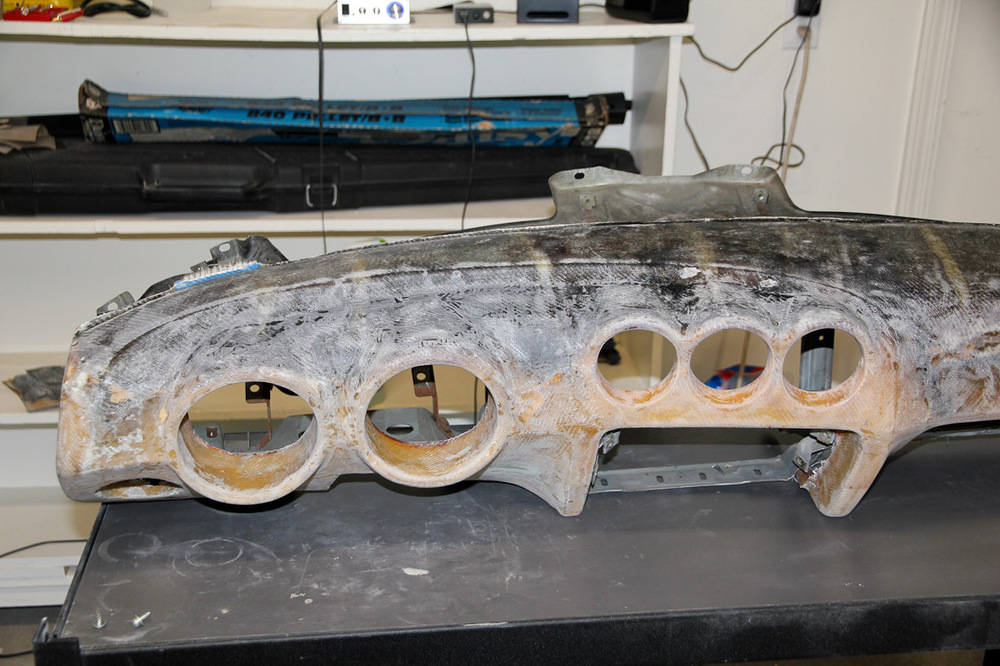
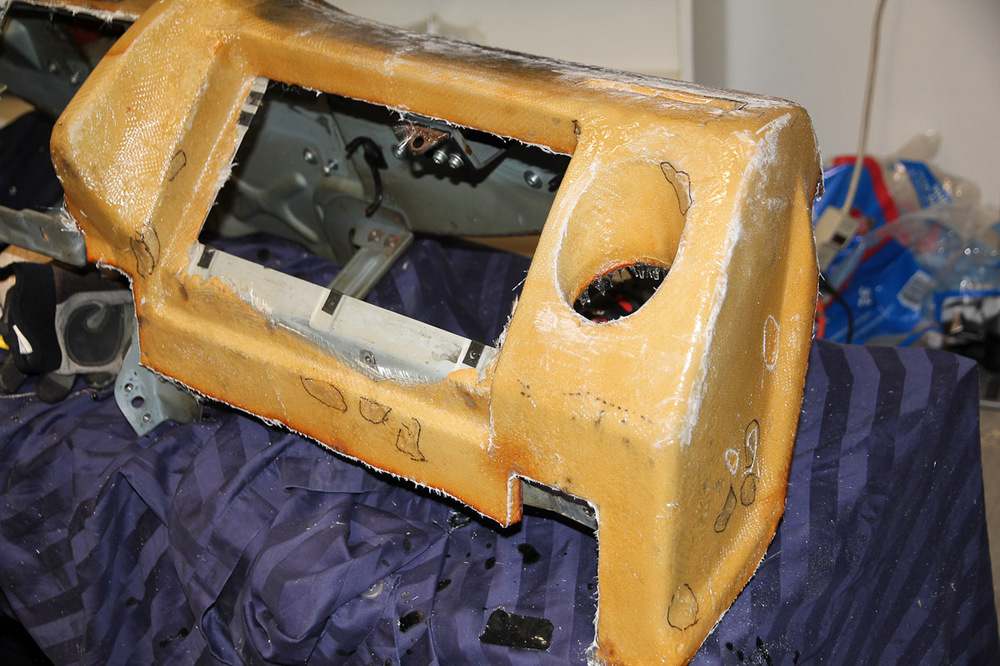
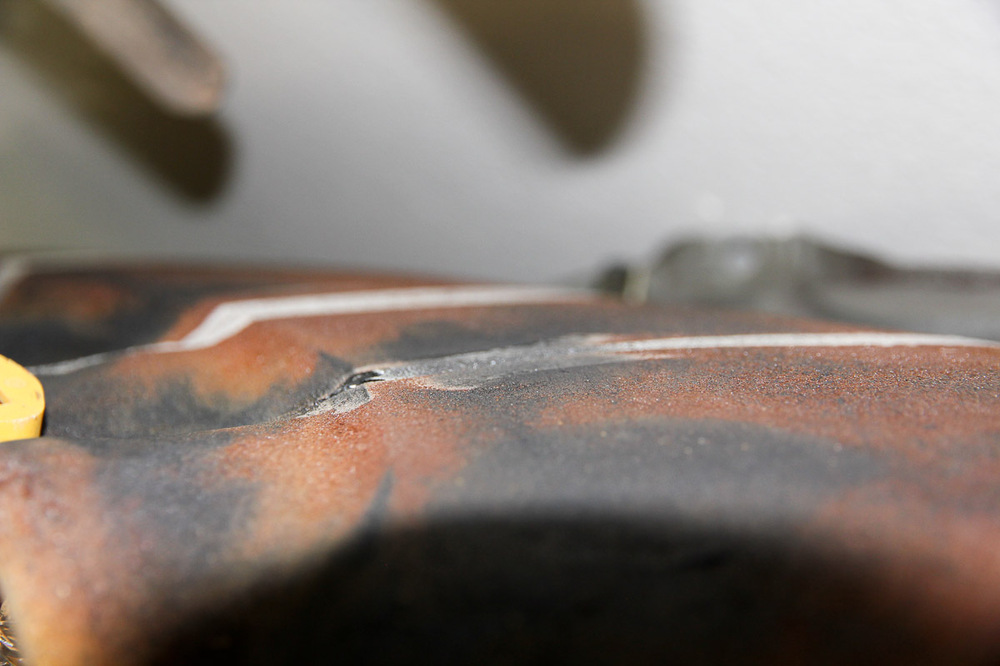
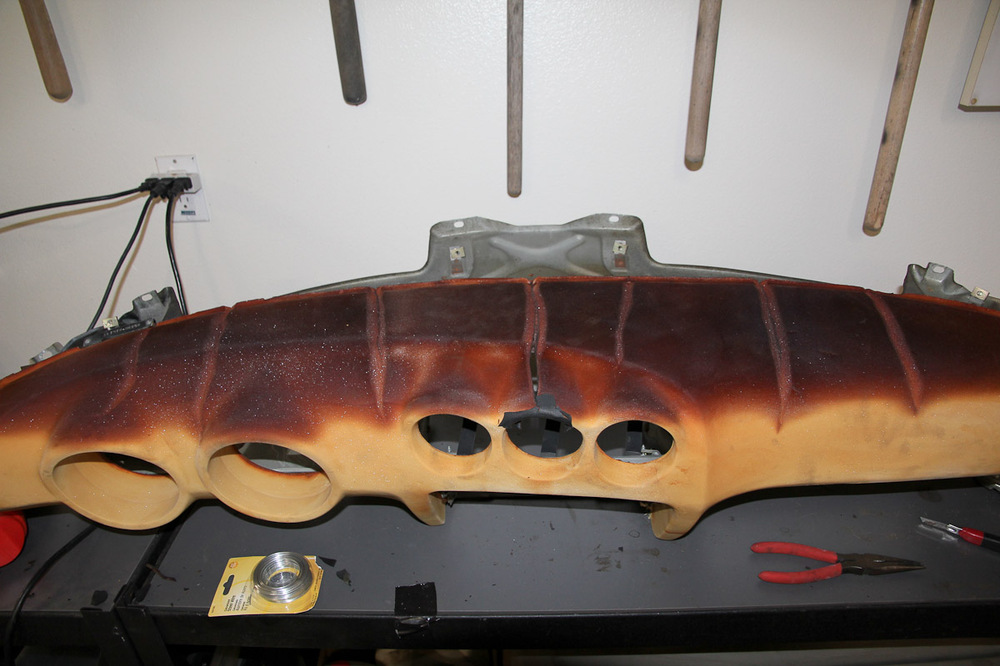
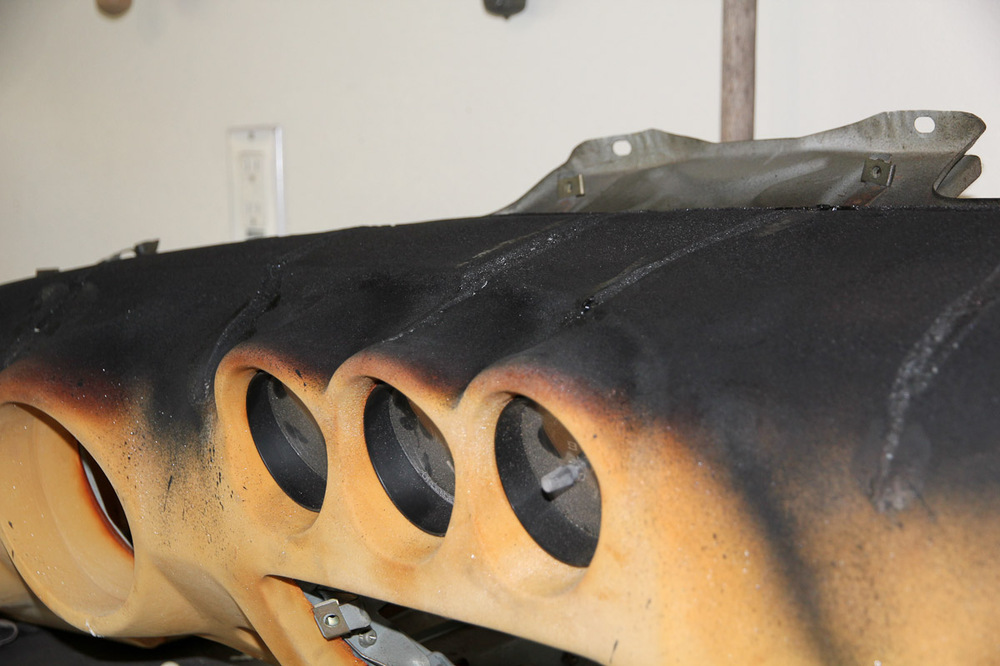
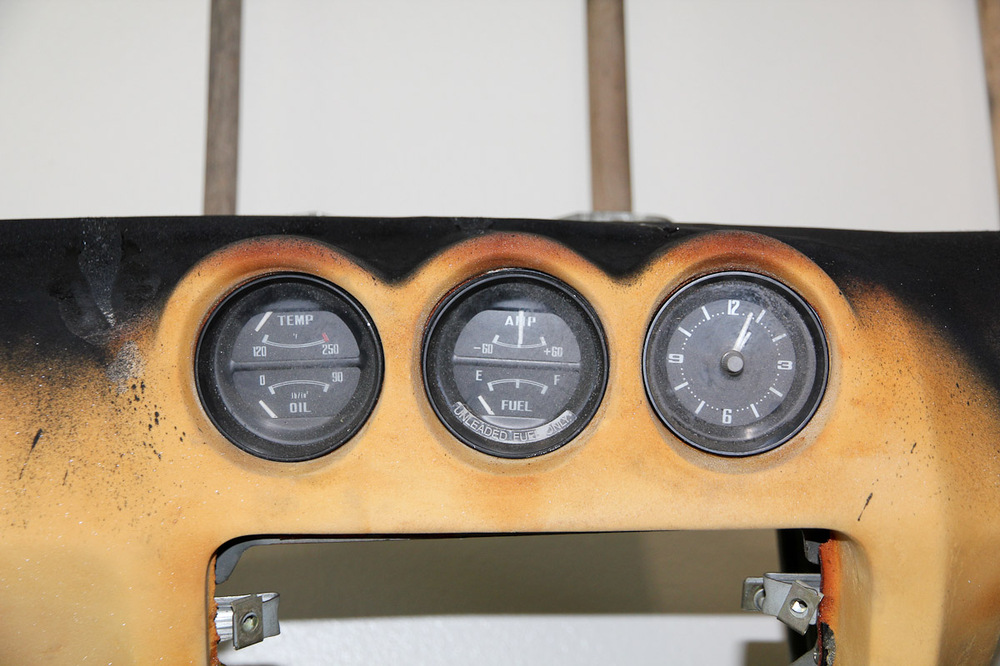
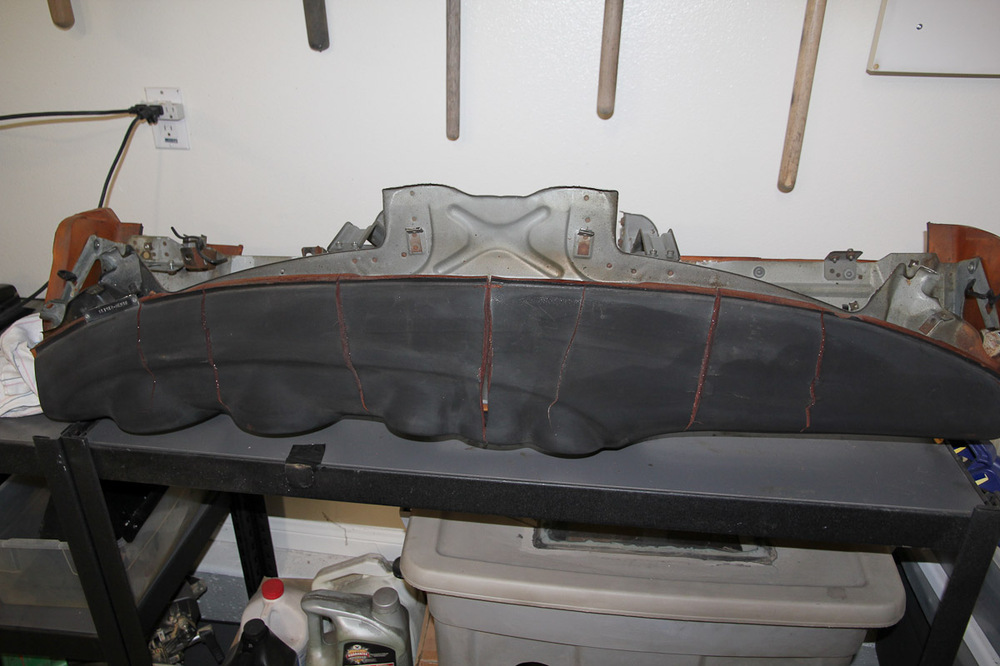
Well, here goes nothing! Pulled everything out of the dash the other night and got ready for what I thought would be the incomprehensibly miserable job of removing the original plastic from the foam shell. Turns out that a heat gun and putty knife make it fairly quick and easy (and clean) to remove. I got the top half done last night while waiting for the shower, and took off the rest this afternoon. Fairly obvious what 38 years of sun, heat and other abuse does to the dash! I'm planning to fill the cracks this weekend. Once the cloth and epoxy resin gets here I can lay that on. Everything's in better shape than I expected, so -- fingers crossed! -- fiberglassing looks like it may go well too. Still debating on finish options.

-
Duplicolor wheel paint and clear on the inside (leftovers from the tail light panels). Rustoleum on the sliding cover.
-
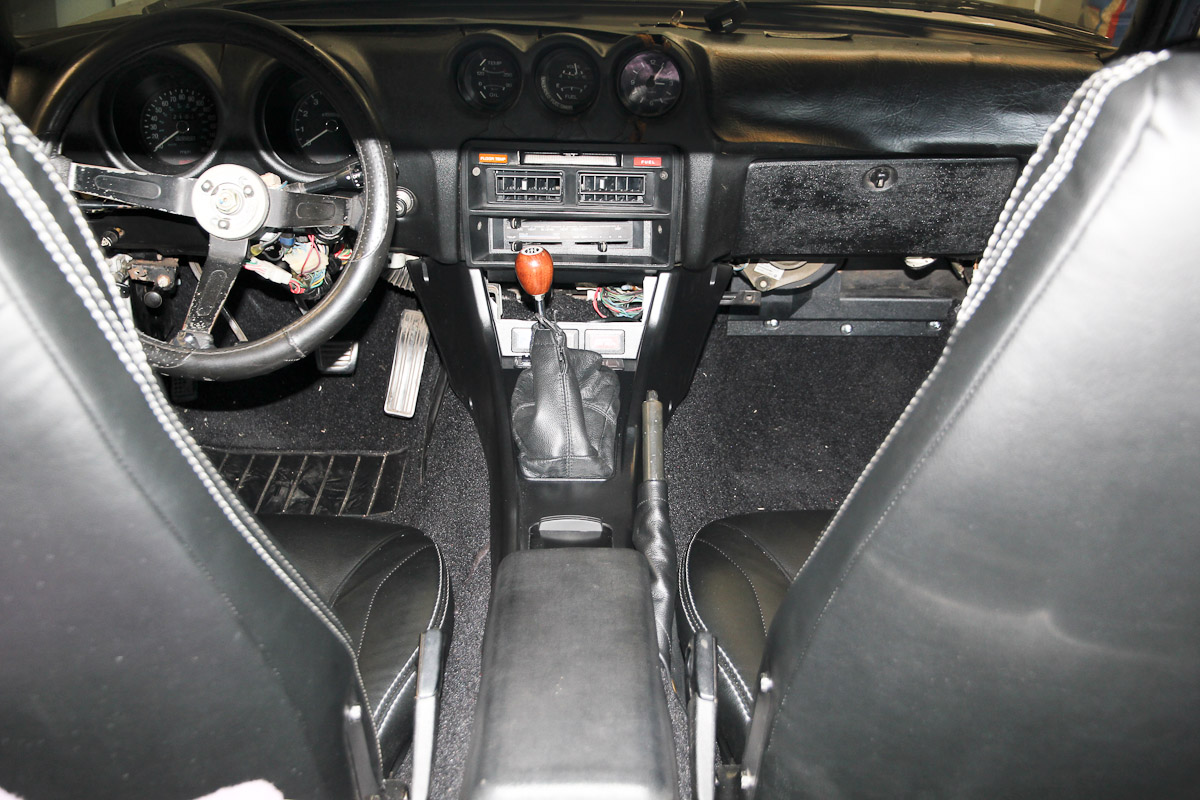
The flash made the console lid look worse in photos than in person, but it's still not great. Based on what the bottom of the cover looked like, I'm assuming one of the POs recovered it some time ago. I don't know what the material is, but it seems like it's halfway between plastic and neoprene. I've used the heat gun trick before too, it might work on this stuff but I'm not optimistic. Worst case, the whole thing gets replaced soon enough anyway. I actually rather liked the no-console look when I was driving around without it. If the dash wouldn't look funny with the HVAC just hanging out there, I'd consider that a good option.
-
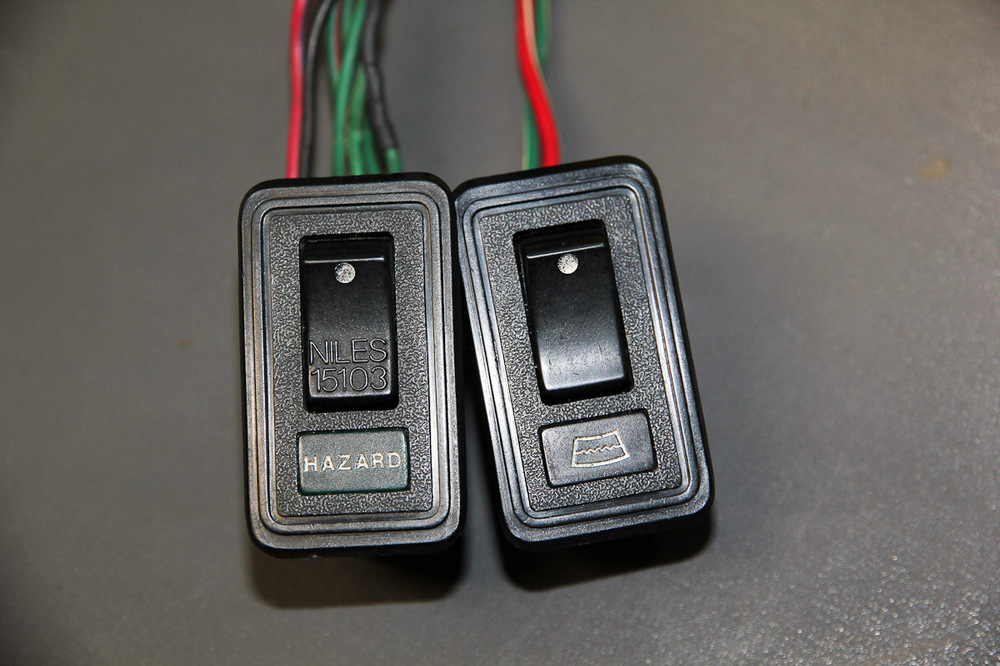
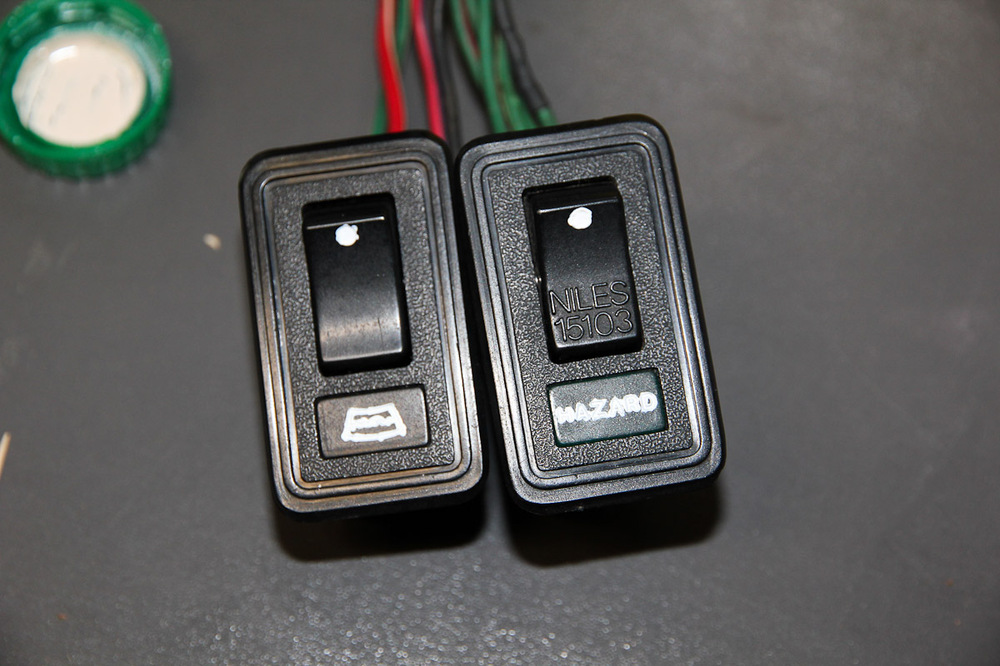
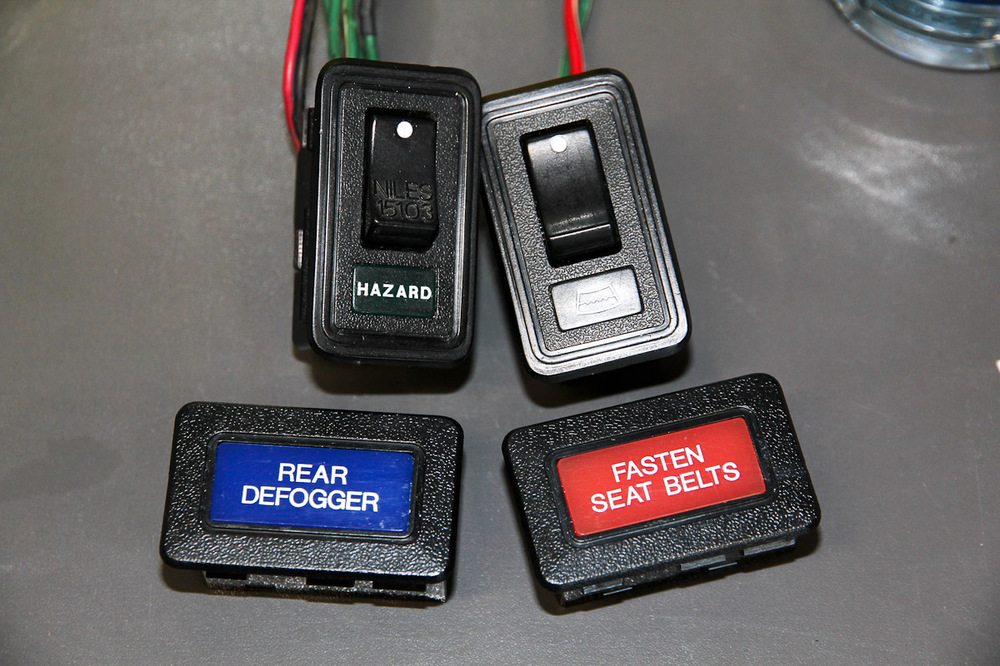
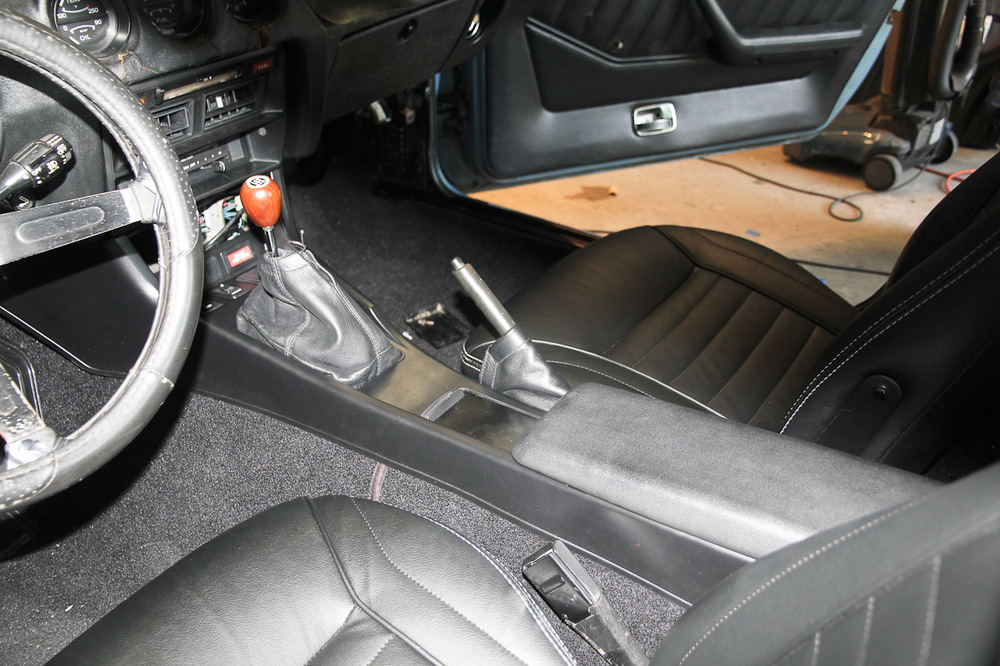
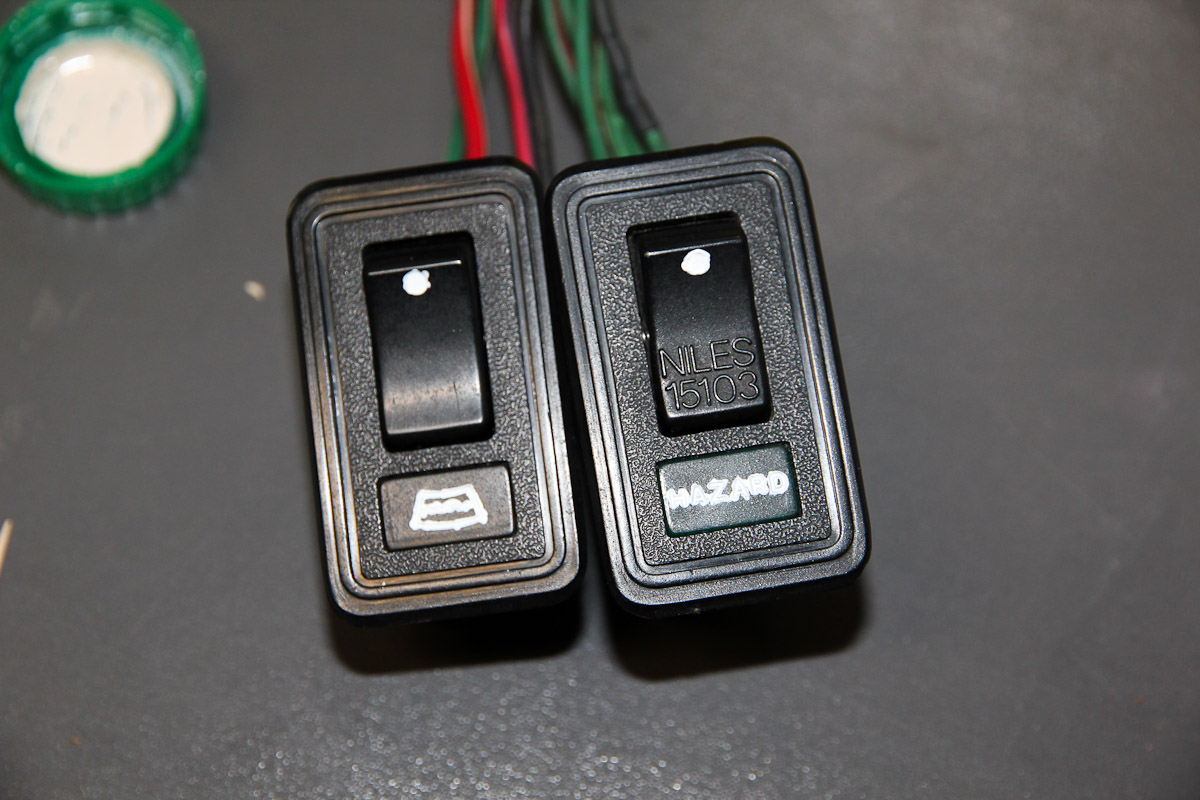
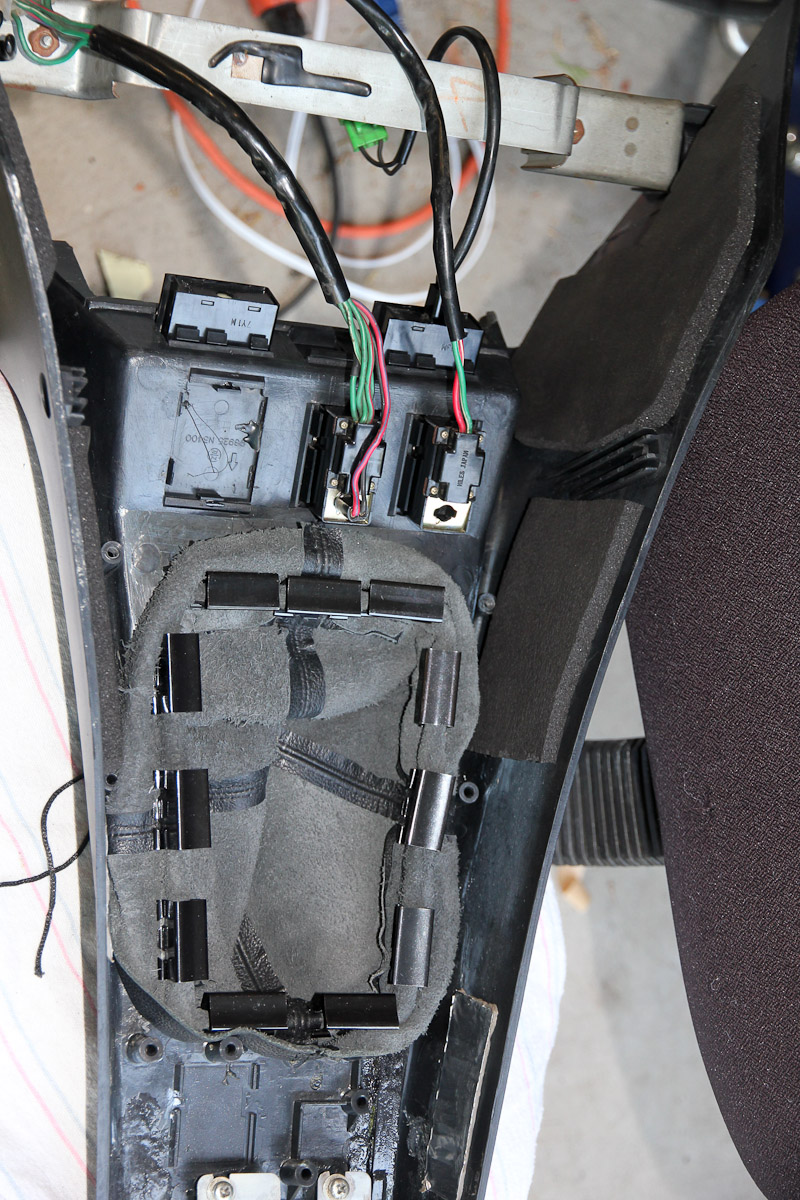
Back from vacation, and finished up the console. Thoroughly cleaned and touched up the lettering on the switches and indicators (too bad most of them are missing the bulbs and wiring -- more to add to the list). Raided the office supply closet to get some clips to hold on the shift boot and stuck Raammat and foam in there to beef up the plastic a bit. Sprayed a couple coats of clear on the console. It actually came out looking better than I expected it to. Now I wish I spent more time cleaning up that choke slot. No more putting it off: that dash isn't going to fix itself.