charliekwin
Free Member
-
Joined
-
Last visited
Everything posted by charliekwin
-
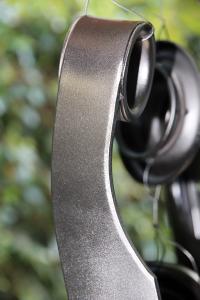
I have a 78 with a 5 speed and a mystery shifter. It has Maxima shifter bushings, a 300zx boot and knob, and seems to be cut and/or bent out of its natural shape. I'm looking to replace it with something that'll work like the stock one. Finding a shifter (any shifter!) is surprisingly difficult, so I want to make sure I'm casting the widest net possible. I know the early 240 had a different transmission, and that one won't work. I *think* the 280's 4 speed shifter will also work with the 5 speed. Is that correct?
-
That's great; much better than throwing stuff away. Do you have a link? I looked and searched but didn't find anything.
-
Curious what some of you guys do with the parts you pull off your car. I've got things like sway bars, bumpers, springs, etc. that I've removed from the car and don't imagine I'll be putting them back on. I could store them somewhere, but we're moving in a month or two, so I'm in a purging kind of mood. Tossing it all in the dumpster feels kinda...wrong, though. Based on the posts I've seen languish on Craigslist, I don't imagine that stuff has much value, so trying to sell them (or even give them away) may be more trouble than it's worth.
-
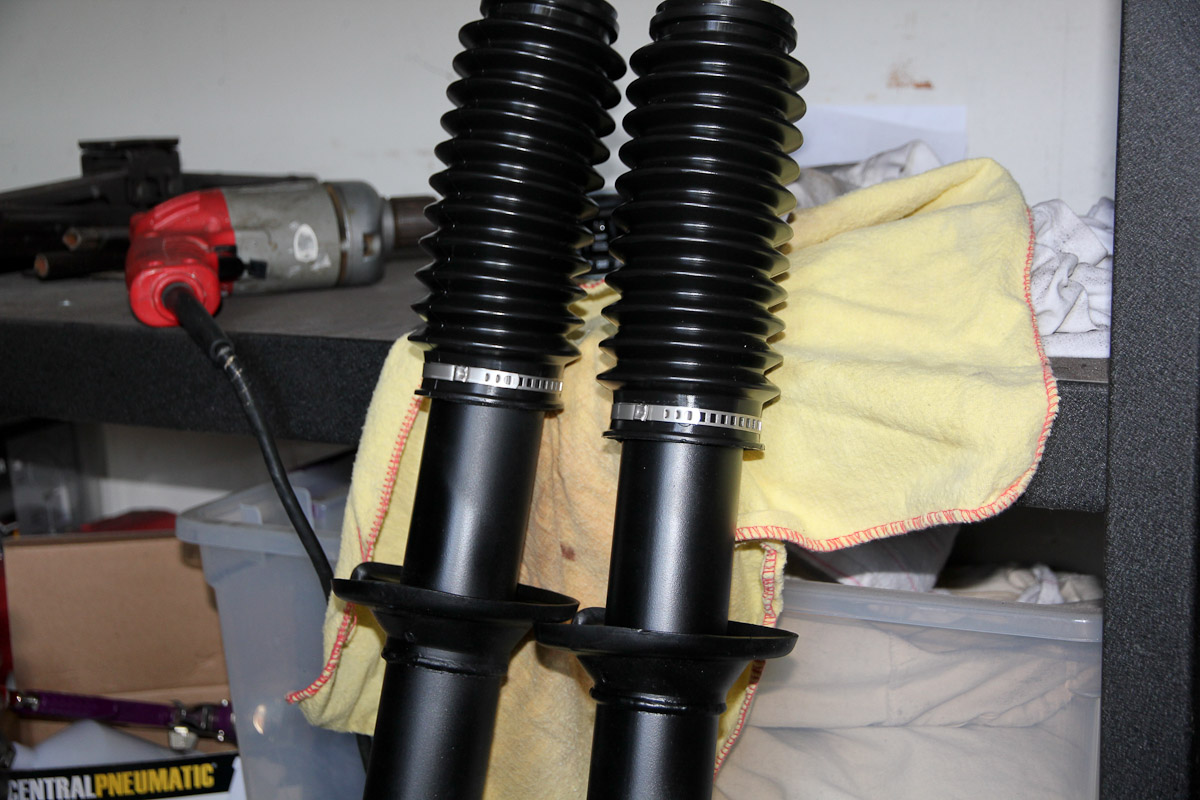
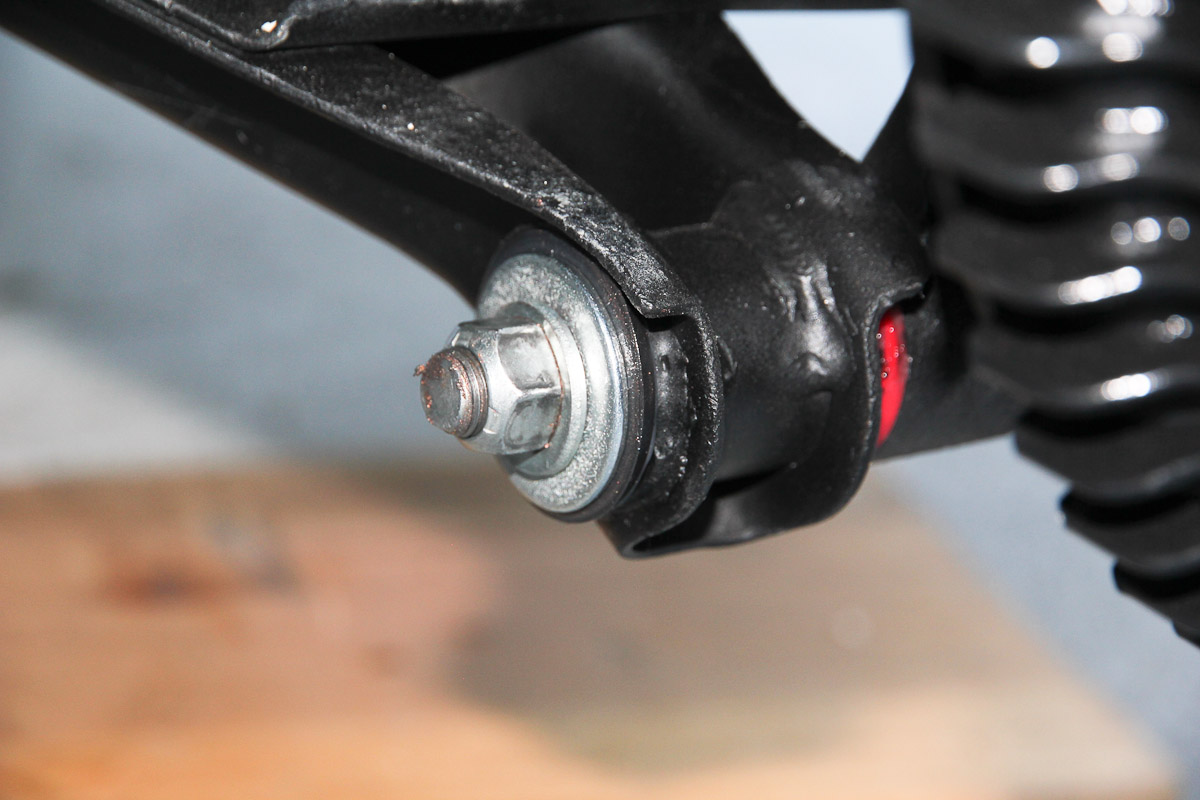
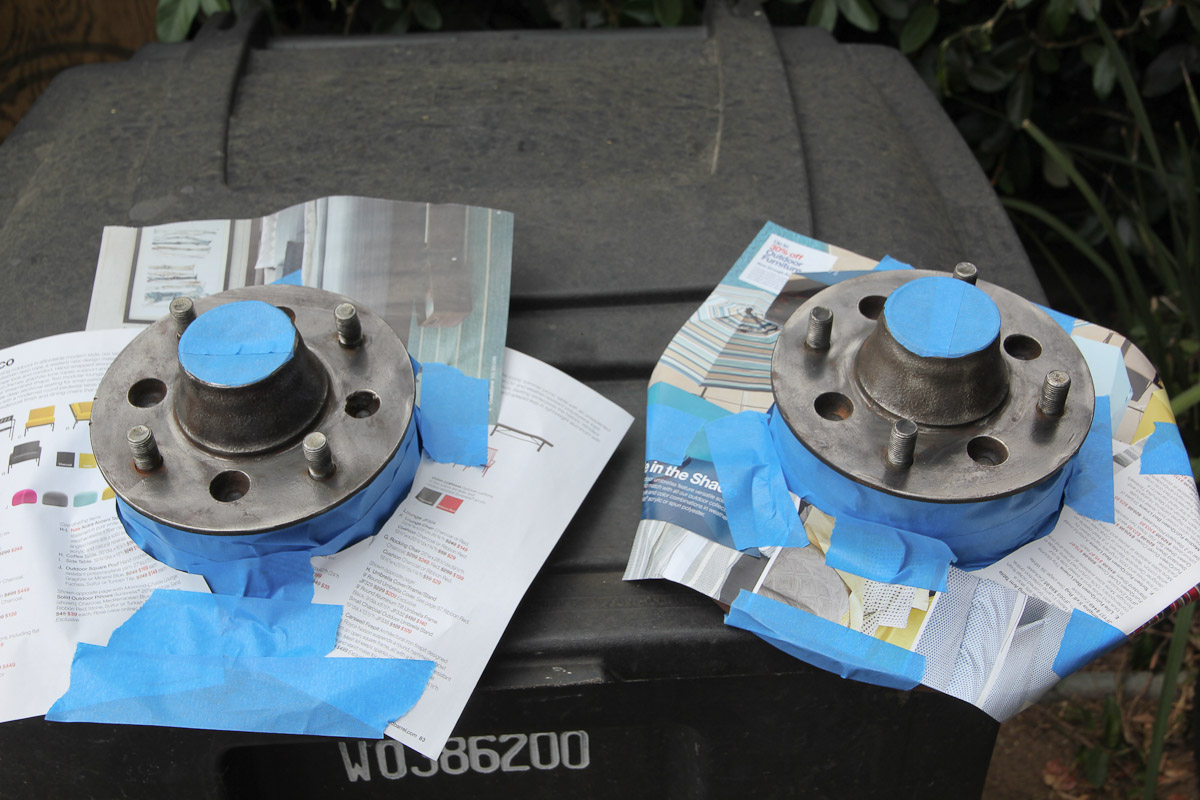
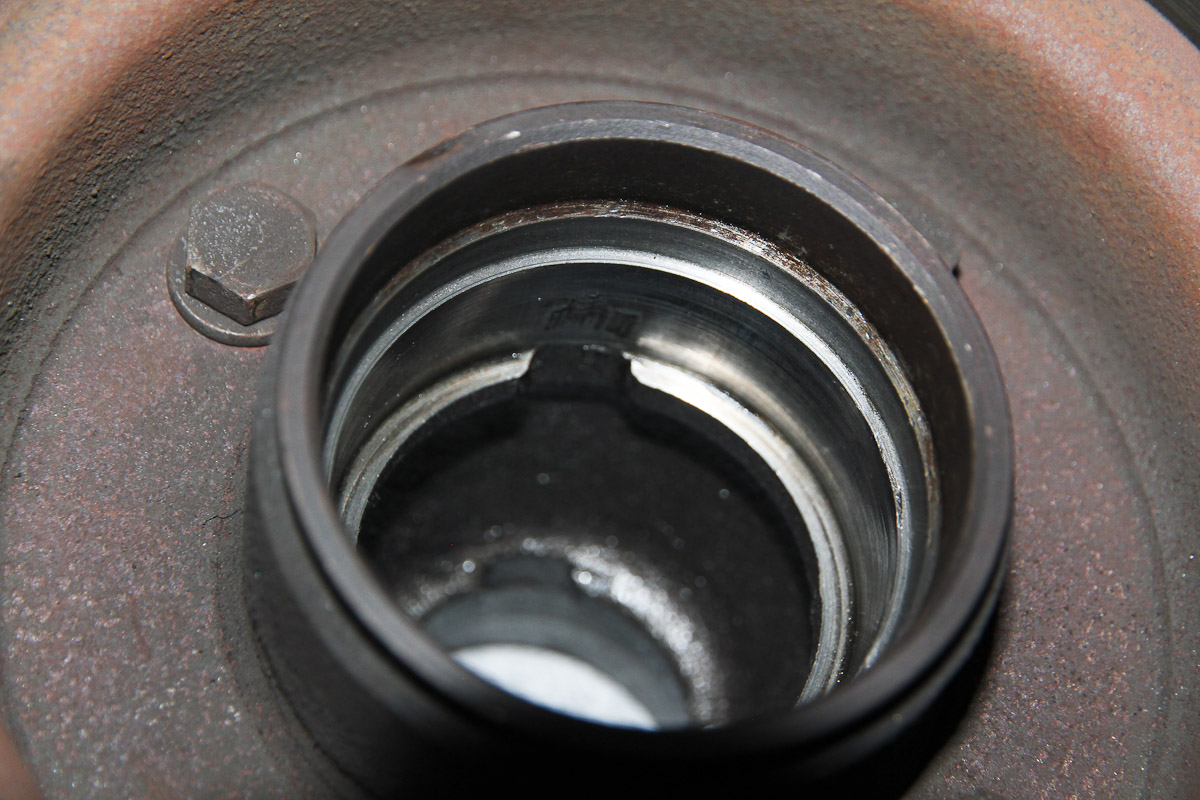
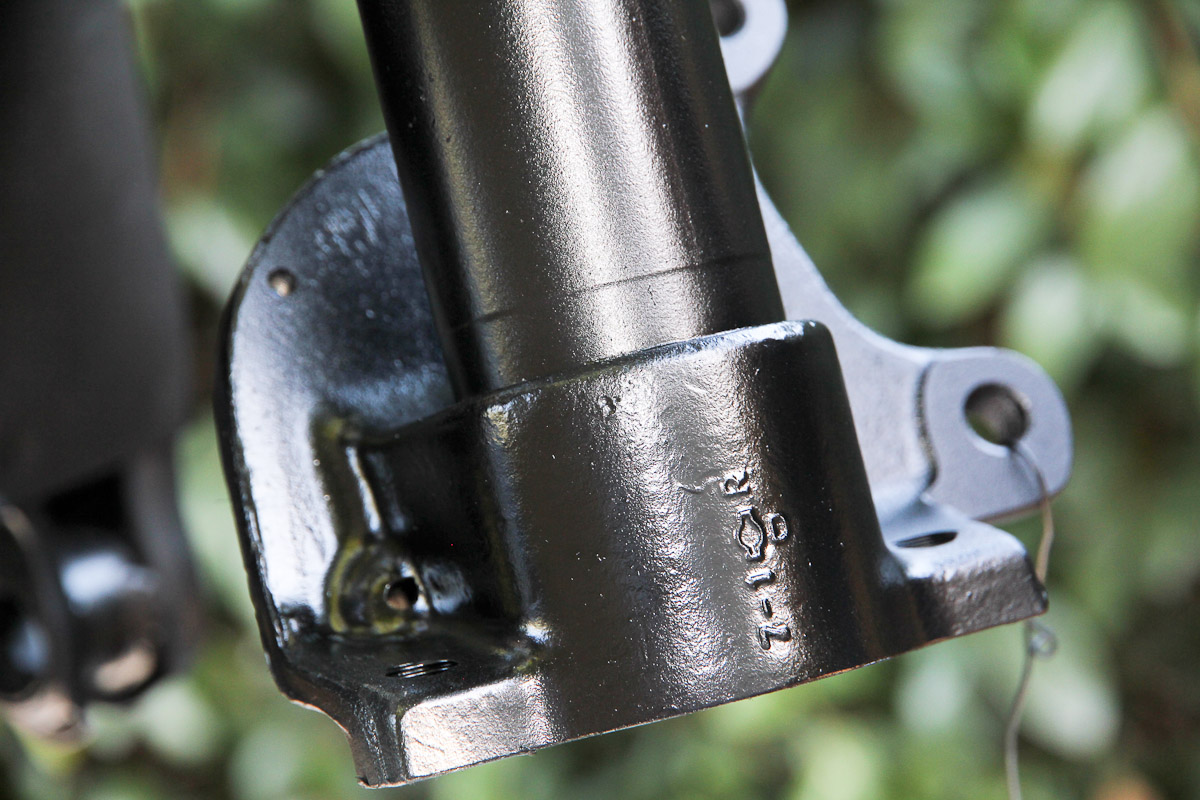
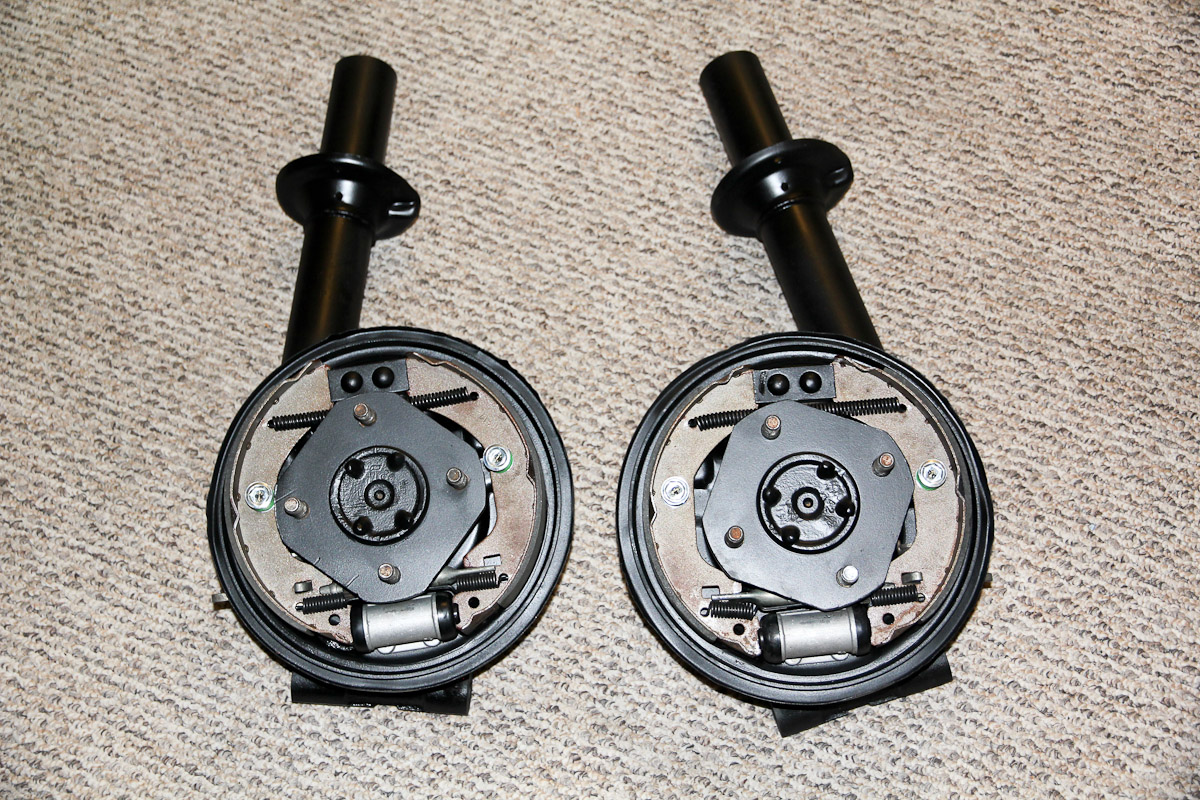
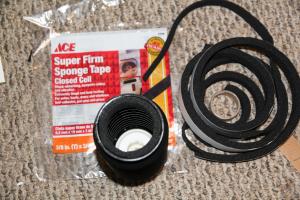
Been kind of slow-going the last few weeks with life and all that getting in the way, but I've managed to squeeze in some progress here and there. So that strut boot problem...first attempt was to cut notches out of the collar. That was enough to get the clips around, but it still moved too much, so I went to my local hardware store for inspiration and found this stuff, which I trimmed down and lined the inside with. Then tied with CV boot clamps. Fits great. The bump stops I'm still not sure about...the instructions have the tapered end pointing down, but that leaves the piston exposed when it expands, which seemed wrong. I left them turned around so the taper fits into the top of the perch. The outer rubber layer on the insulators was long gone, so I got some 1/16" rubber sheet and cut some "washers" to stick on the top. The fronts, ready to be installed, and in the car. Suspension Techniques sway bars went in too. Progress! The troubles with the rear end I don't need to revisit, but it's back together as well. The driver's side, complete with 2 black bushings, just to be matchy. This weekend I moved on to the hubs. They were kinda rough looking and a bit rusty, so I hit them with a wire wheel and some high-temp paint I had left. The bearings looked decent-enough when I pulled them out, but one of the POs did -- big surprise -- a lousy job greasing the hubs, and a complete set of Timkens was something like $30, so I figured replacing them now is cheap insurance. Not too many pictures here...cleaning and packing a hub with grease is messy business, but here's what someone before me managed to do when knocking out a race. Both sides are finished and my parts piles are getting smaller! Then nature intervenes. Despite being in the middle of an historic drought, it still manages to rain whenever I want to work on a car. There's always next weekend.


-
After successfully mangling that bushing, I put one of the good ones on the inside and tried using that one on the outside, but It spreads apart too much and won't work there. I don't dare tempt the fates by disassembling everything to try it on inside again, so I bit the bullet and just ordered a new set from Amazon. It's been that kind of a weekend...on Sunday I went for a nice dip in the pool for a full 5 minutes before realizing that I forgot to take my phone out of my pocket. I'm getting kinda tired of doing this much self-inflicted damage to my wallet!
-
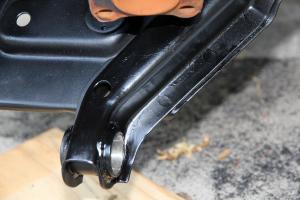
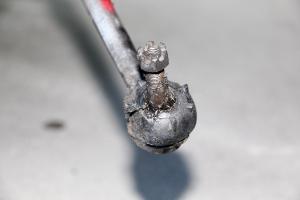
Well congratulations to me for managing to tear one of the spindle pin bushings while trying to force the strut in there. This one is basically useless and it seems like the only way to get another one is to buy the whole tear control arm kit. That's about $50 worth of screwup I really could have done without.
-
I've heard there's a brass screen on the fuel pickup; if that's clogged, it may be part of your problem. If you have a problem with rust, and I assume that you probably do, then acetone isn't going to do any good. Muriatic acid will take care of that, but will flash rust afterwards. Phosphoric acid is another option. Last I checked, a restored tank runs about $400. I did a full restoration on mine, and given the cost of buying all the materials (acids, acetone, tank liner, paint, etc.) and the effort and amount of time it took to do the job, I'd be hard-pressed not to buy a new tank if I had to do it again.
-
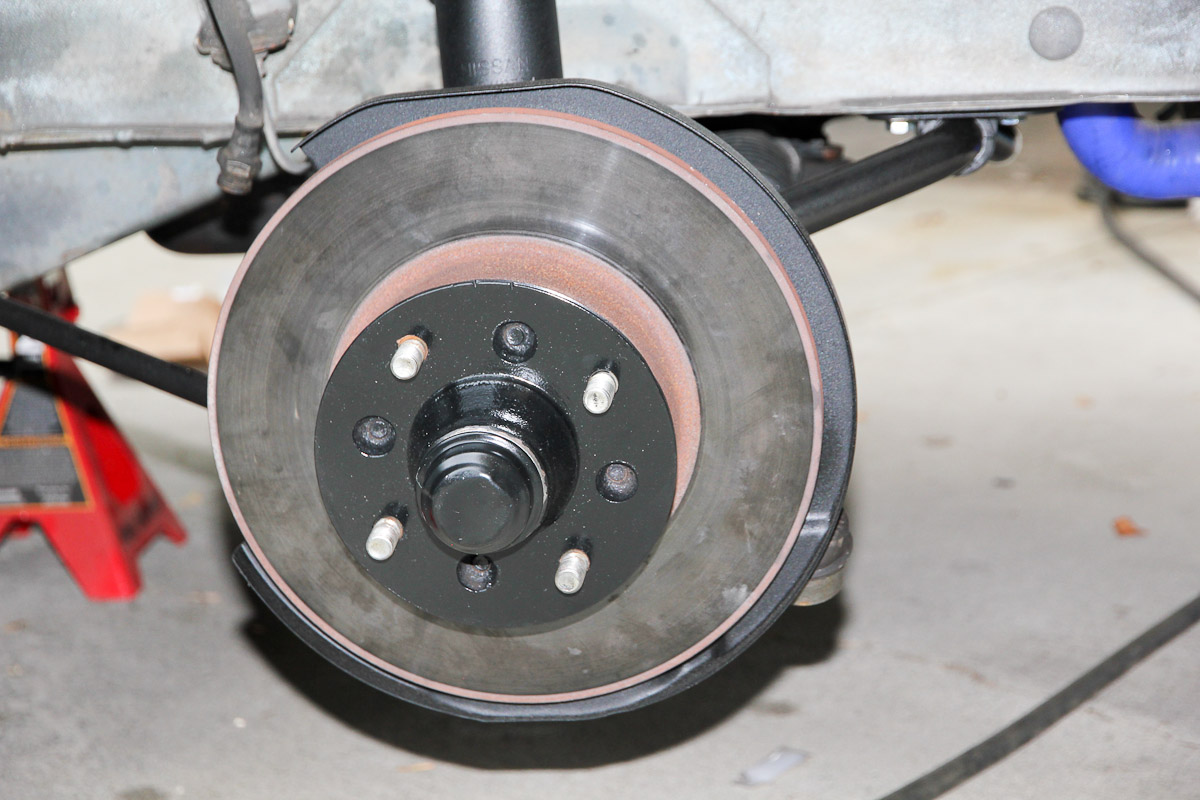
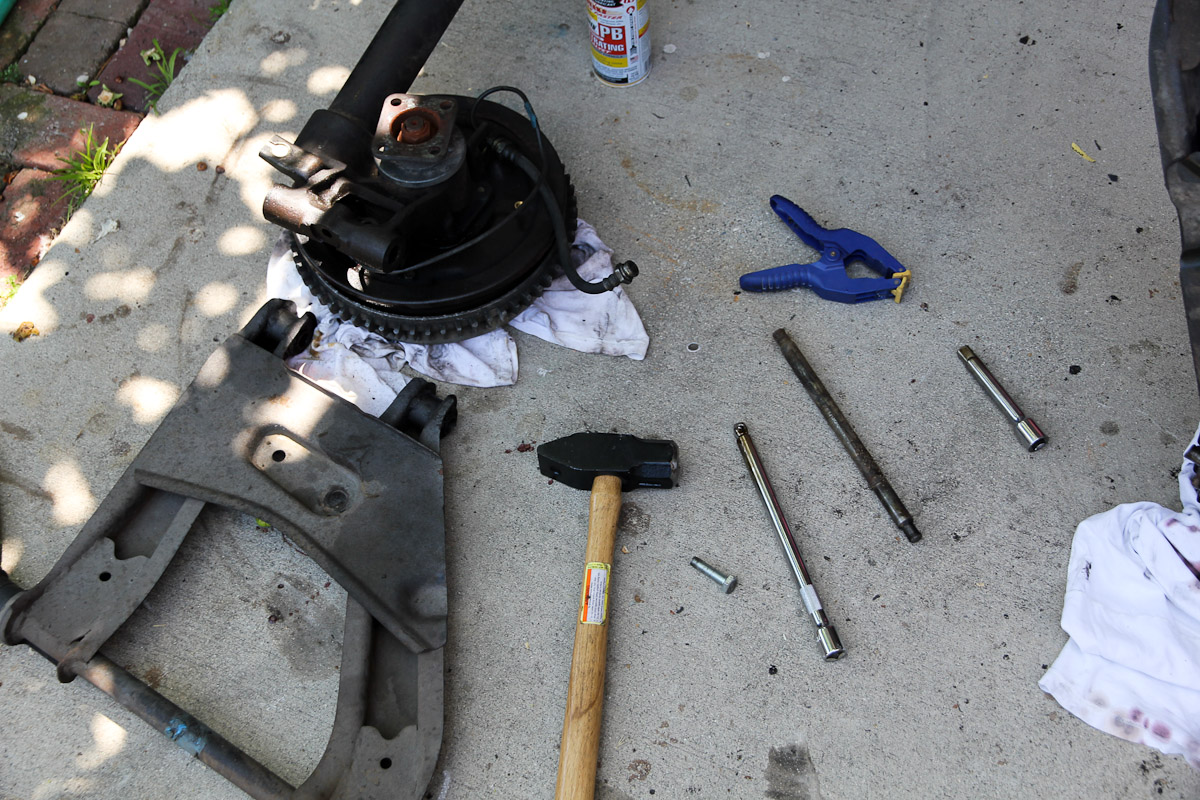
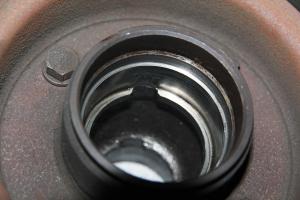
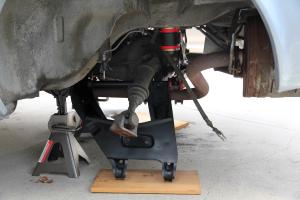
Used one. Did that too. 2+ hours yesterday, and then another 2+ hours today and finally got it in. Only took the hammer, rubber mallet, a scissor jack, my regular jack, a bunch of screwdrivers, putty knife and a bunch of other stuff from the garage to get it done. And the whole process turned into a comedy of errors: the spindle pin bolt wouldn't go in and the treads on it were crushed, I put a tear into one of the bushings, the spindle pin didn't want to go in all the way, and I ended up bleeding twice (that I know of). But it's done. Then, for some reason, I decided to do the driver side. 20 minutes. It practically put itself together. Go figure.
-
Today... mainly just unleashing profanities while trying to get the strut to fit between the spindle pin bushings.
-
Sweet! Now all the money I'm putting into mine I can call an "investment"!
-
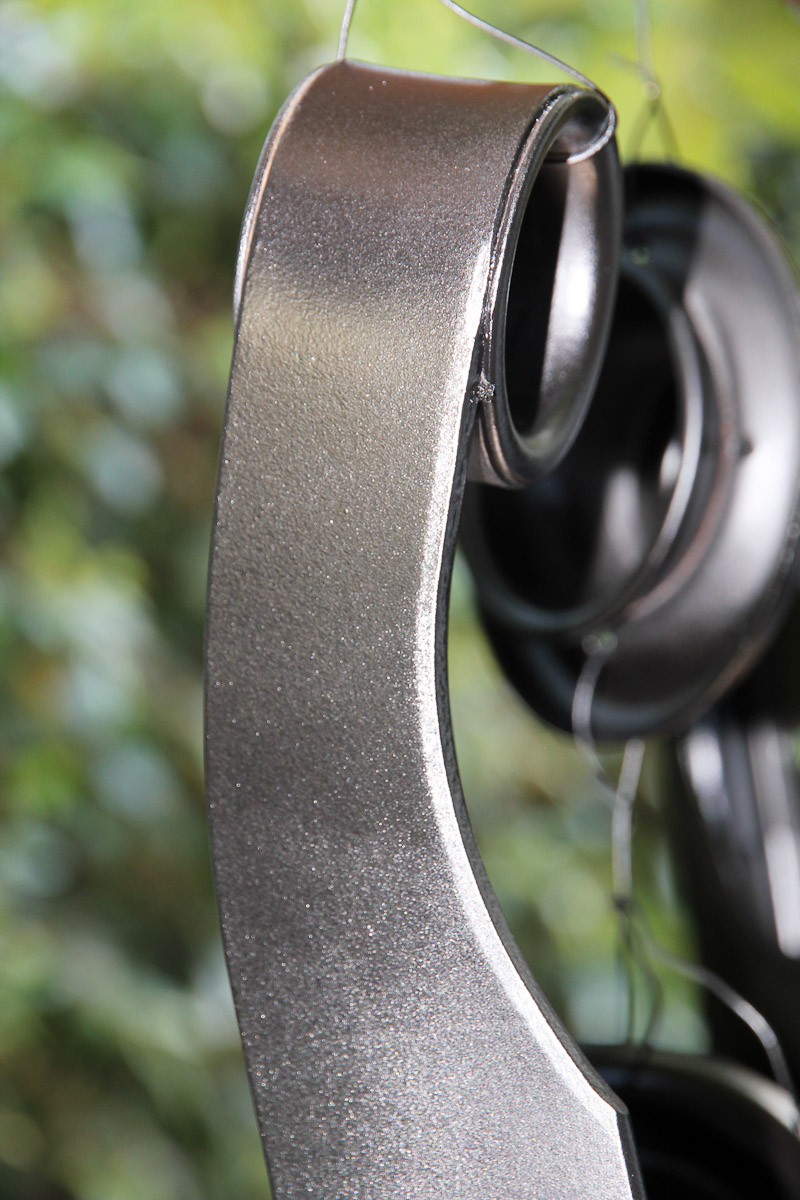
Oy, yeah... that spring put up a surprising amount of resistance. I ended up bending it a little to get it in place. Those new springs are a lot springier than the old ones! It doesn't seem to be interfering with the adjuster and I figure it'll probably get pulled back into shape during normal use, but you're right -- it's probably a good idea to tweak it anyway. Happily though, I think I solved my strut boot problem with a $5 roll of weatherstripping.
-
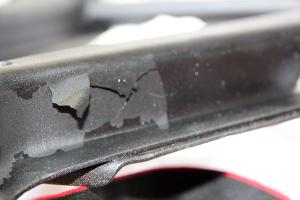
I made every effort to follow Eastwood's instructions as closely as I could, but between my space/equipment (i.e. outdoors next to the garage) and almost complete lack of experience spraying paint, I'm well aware of my limitations. I've read about other people having the same problem, so I suppose it's possible that that paint just has a smaller margin of error than my (meager, I'm sure) abilities allow for. Hopefully the rest of the job holds up alright -- it looks good, at least! -- and for future jobs I can go back to the rattle can...not sexy, but I've had good results with it.
-
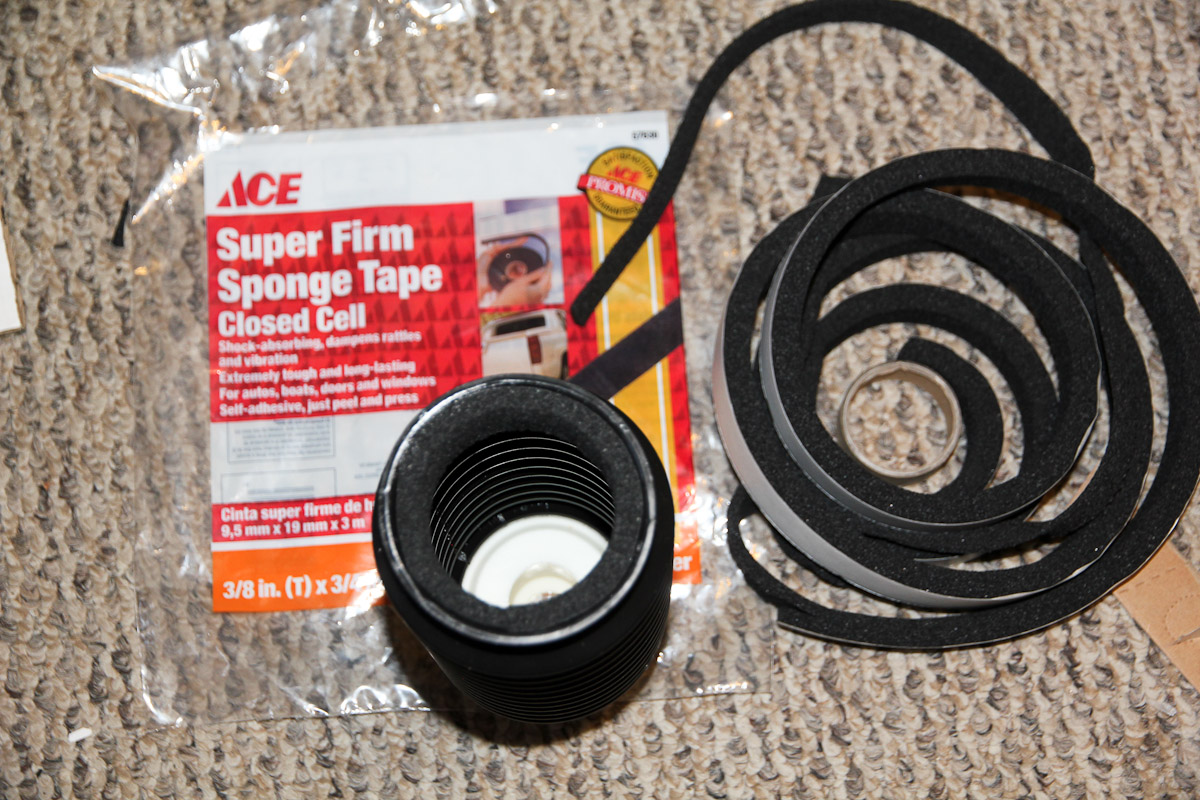
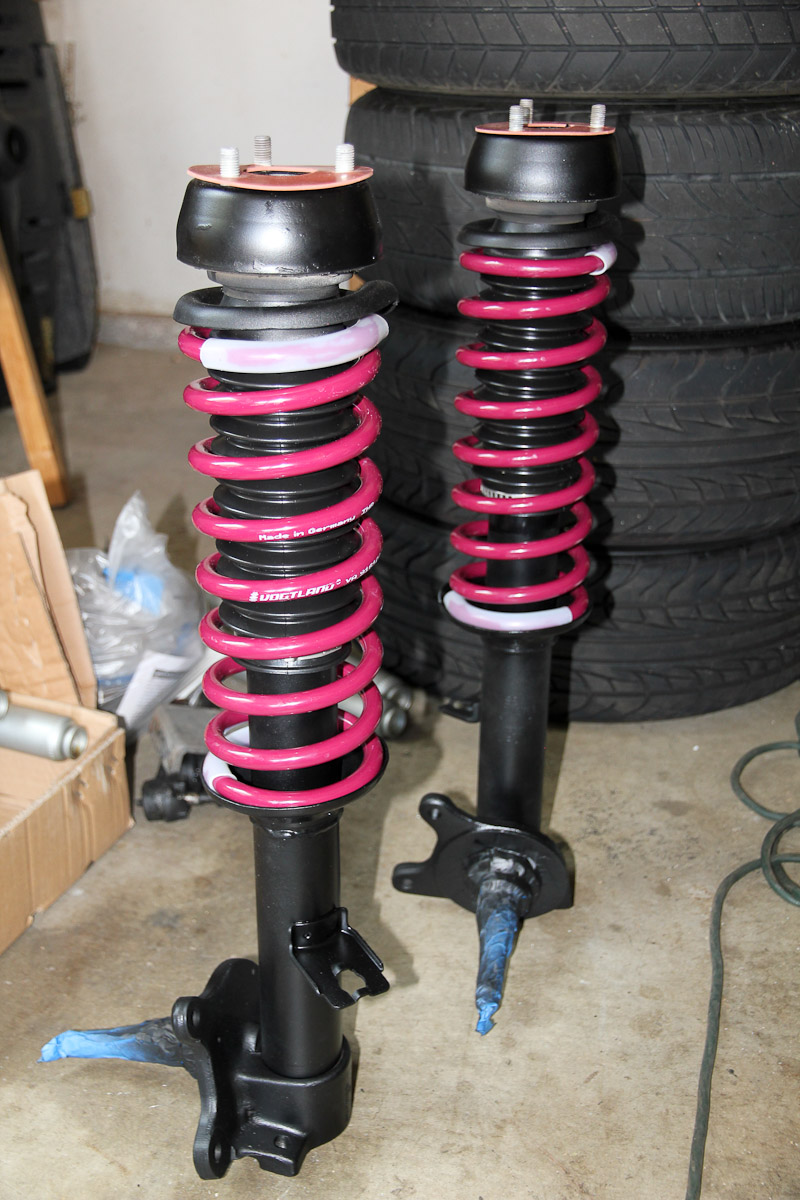
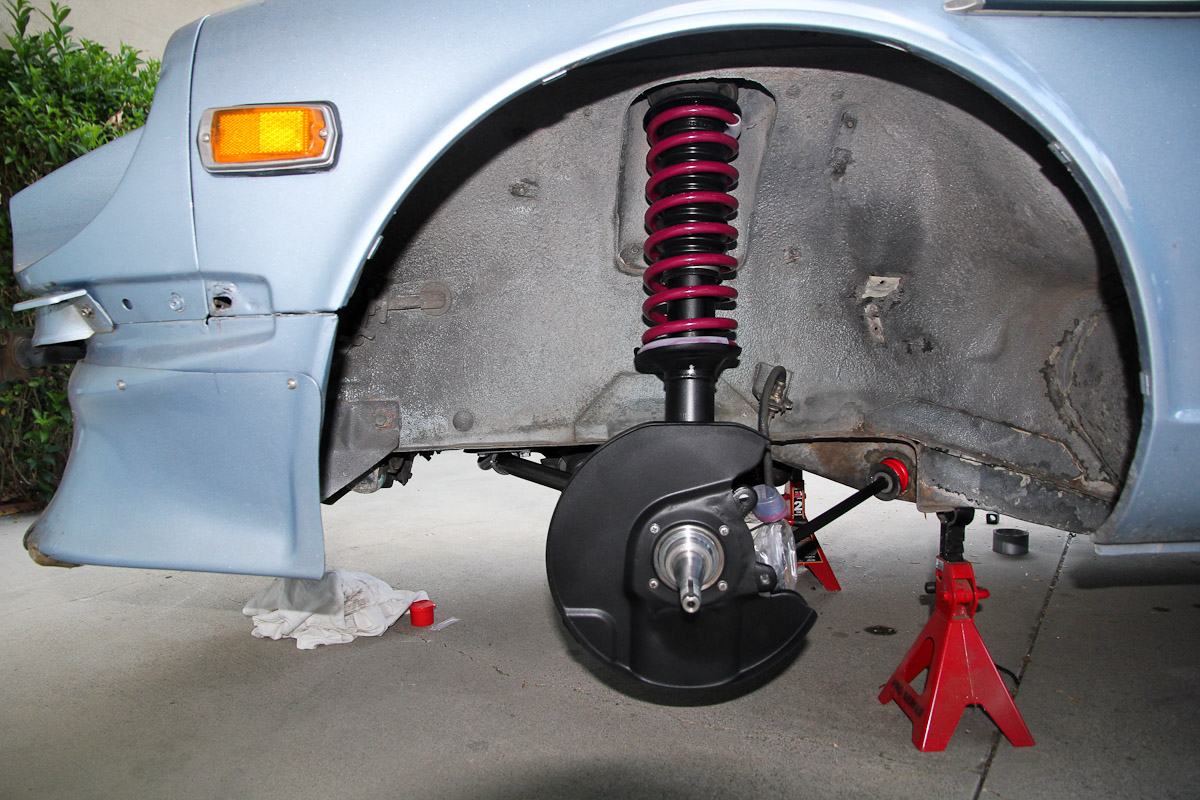
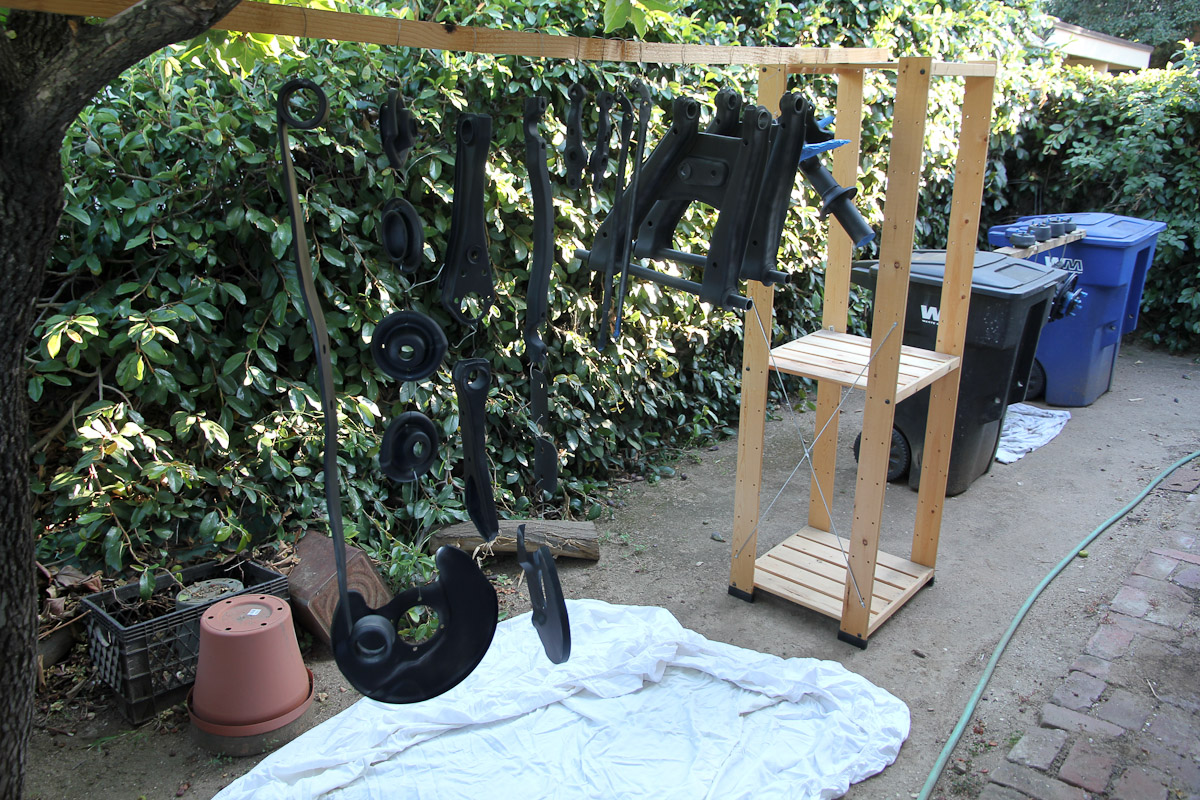
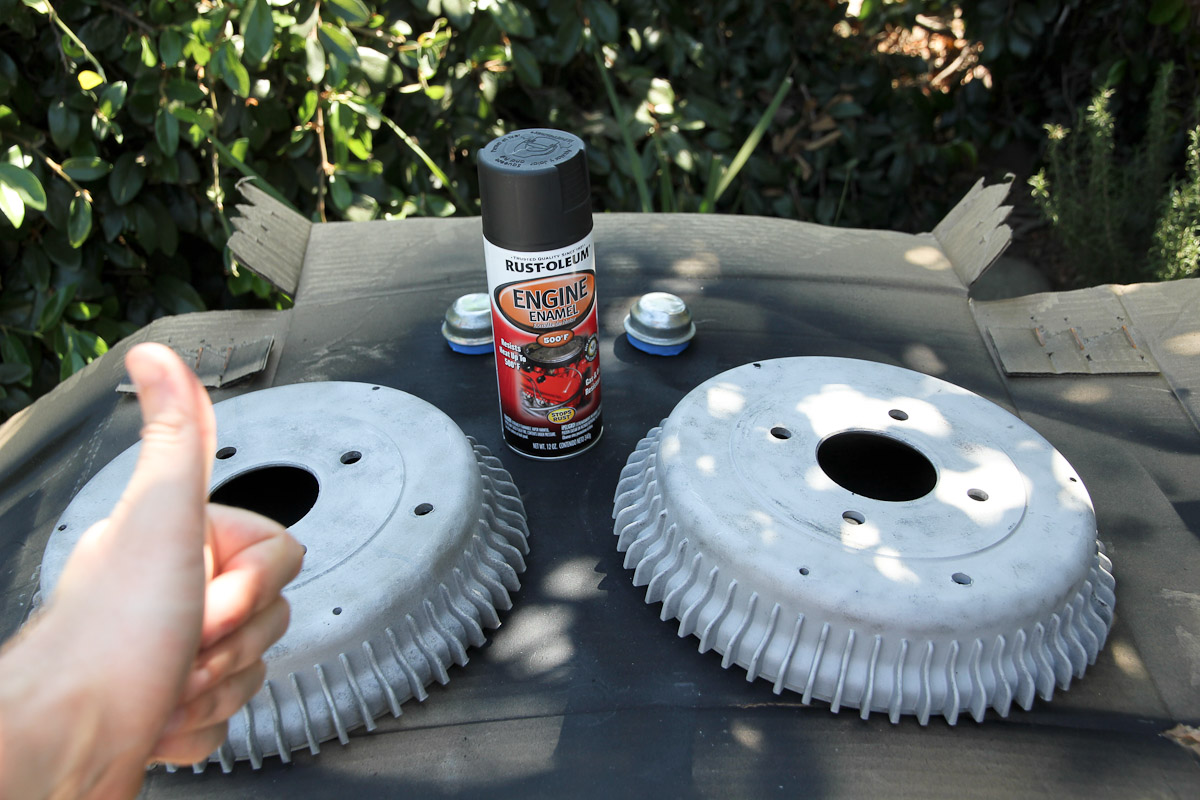
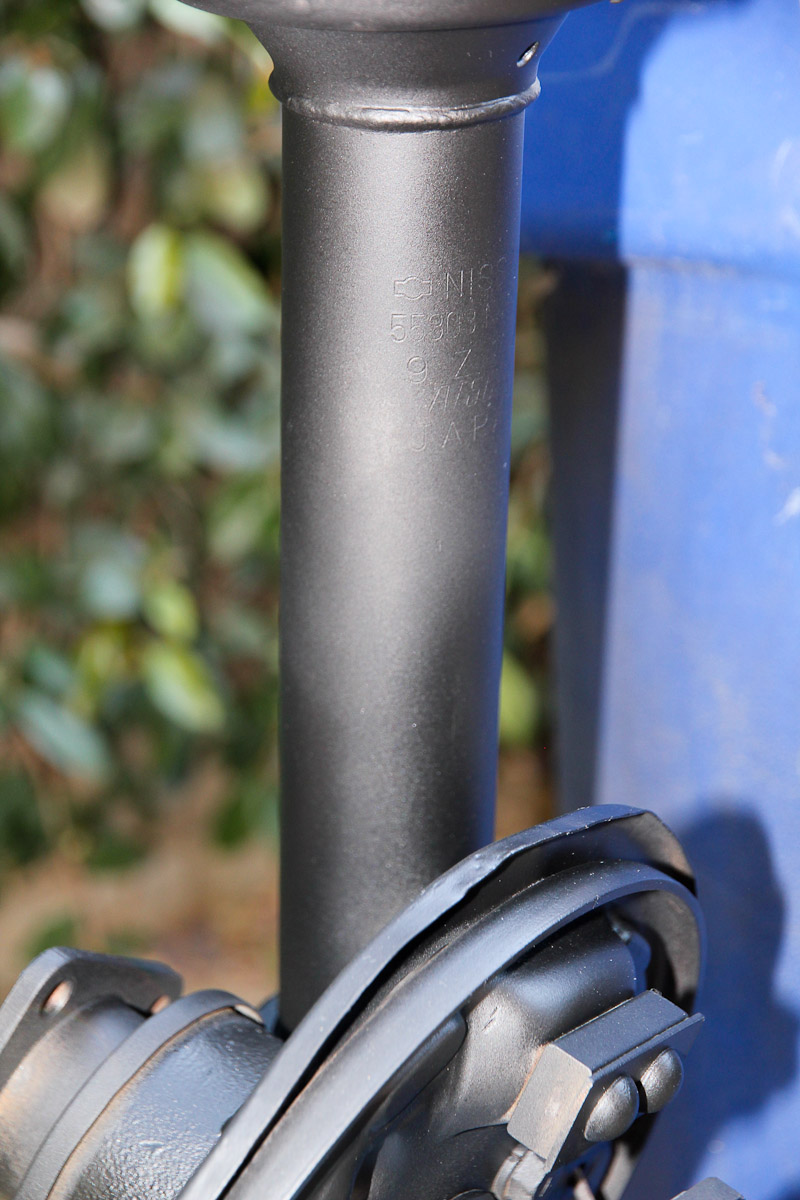
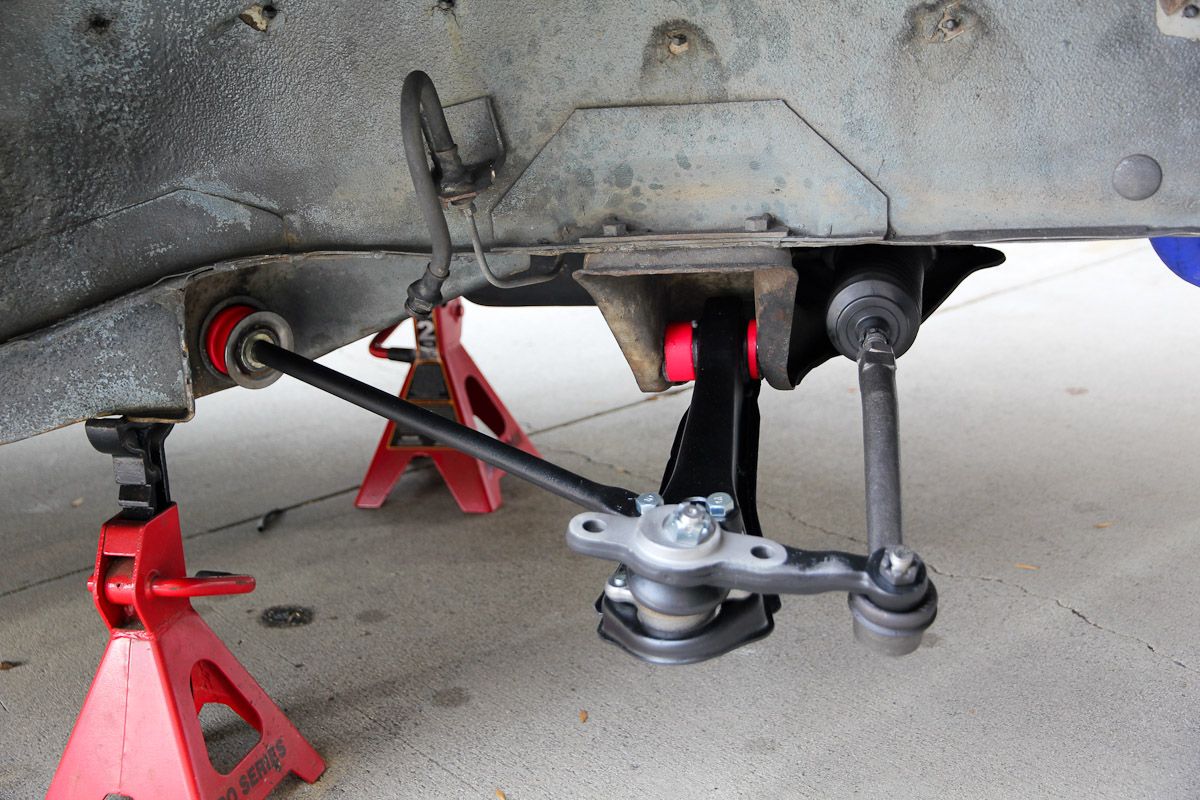
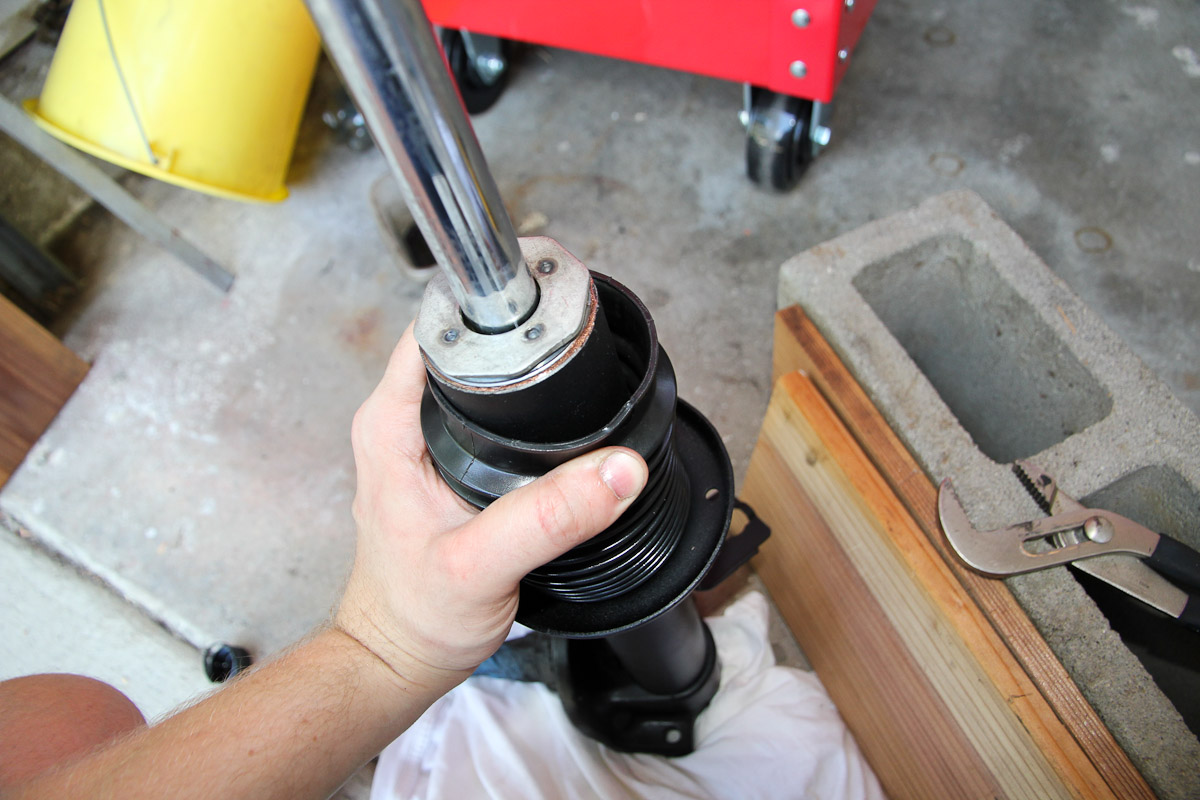
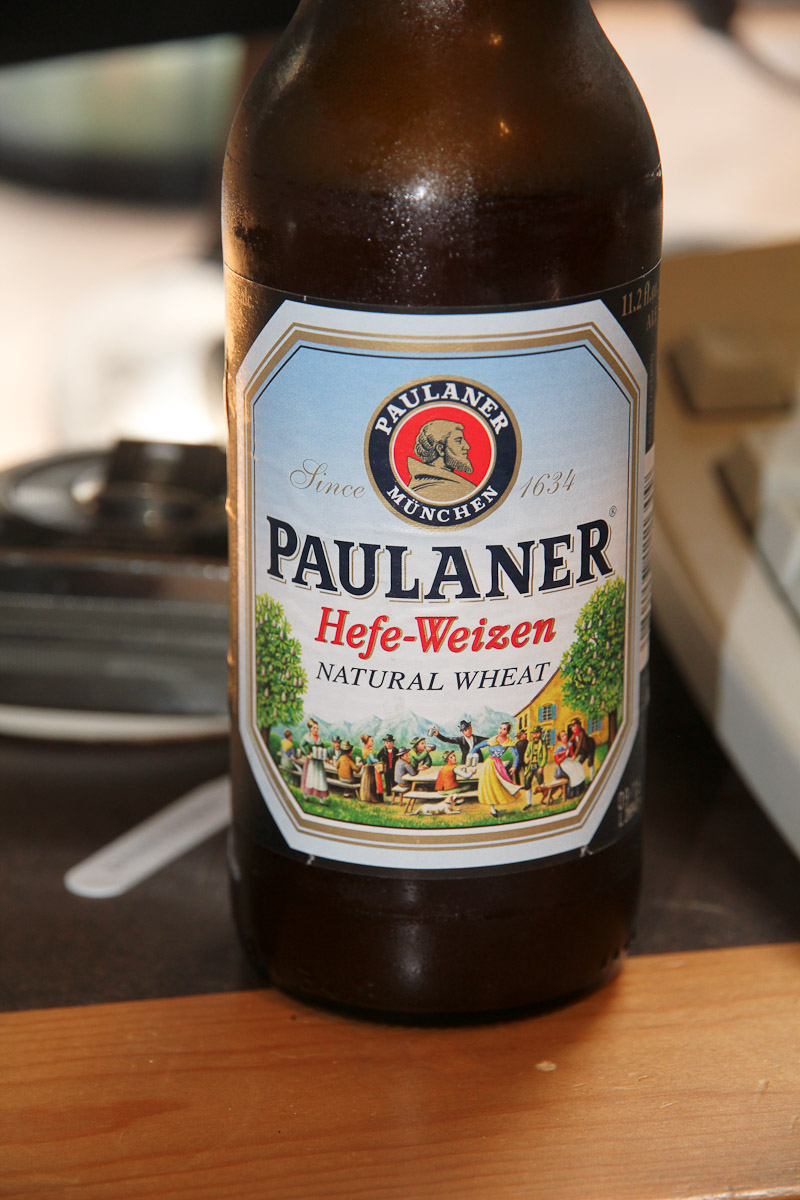
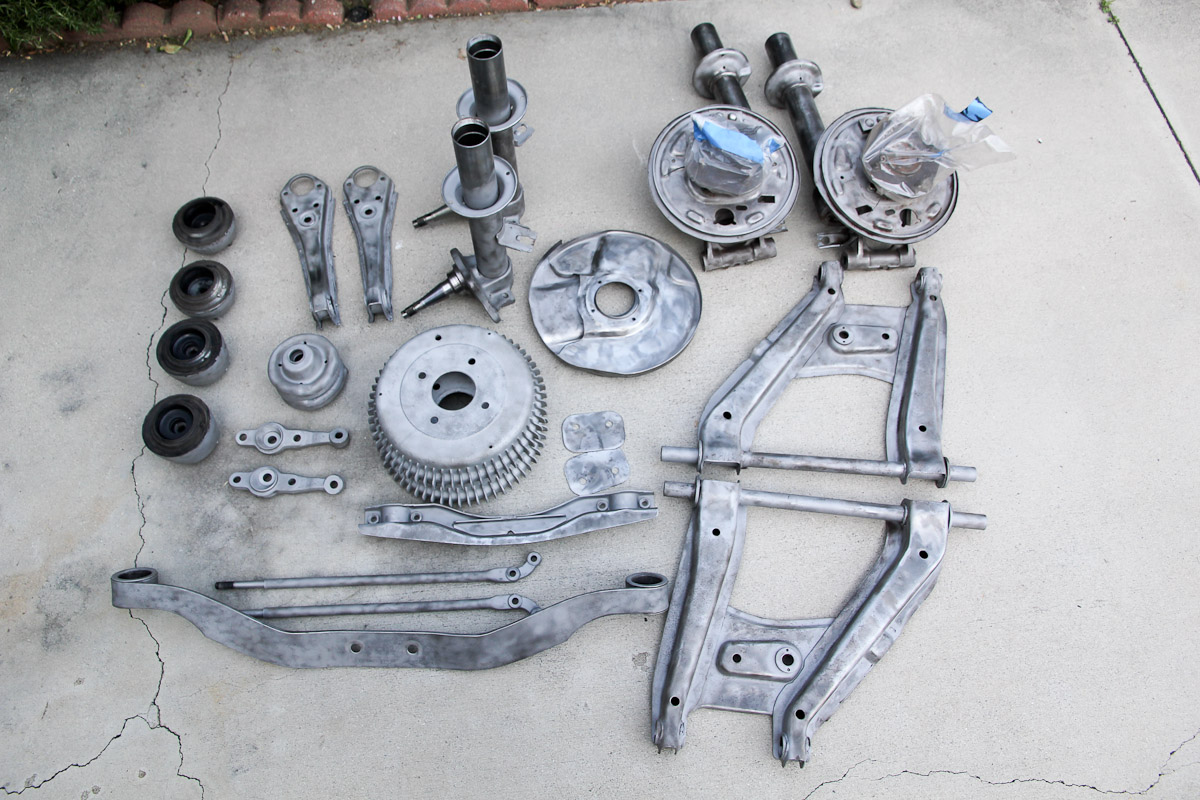
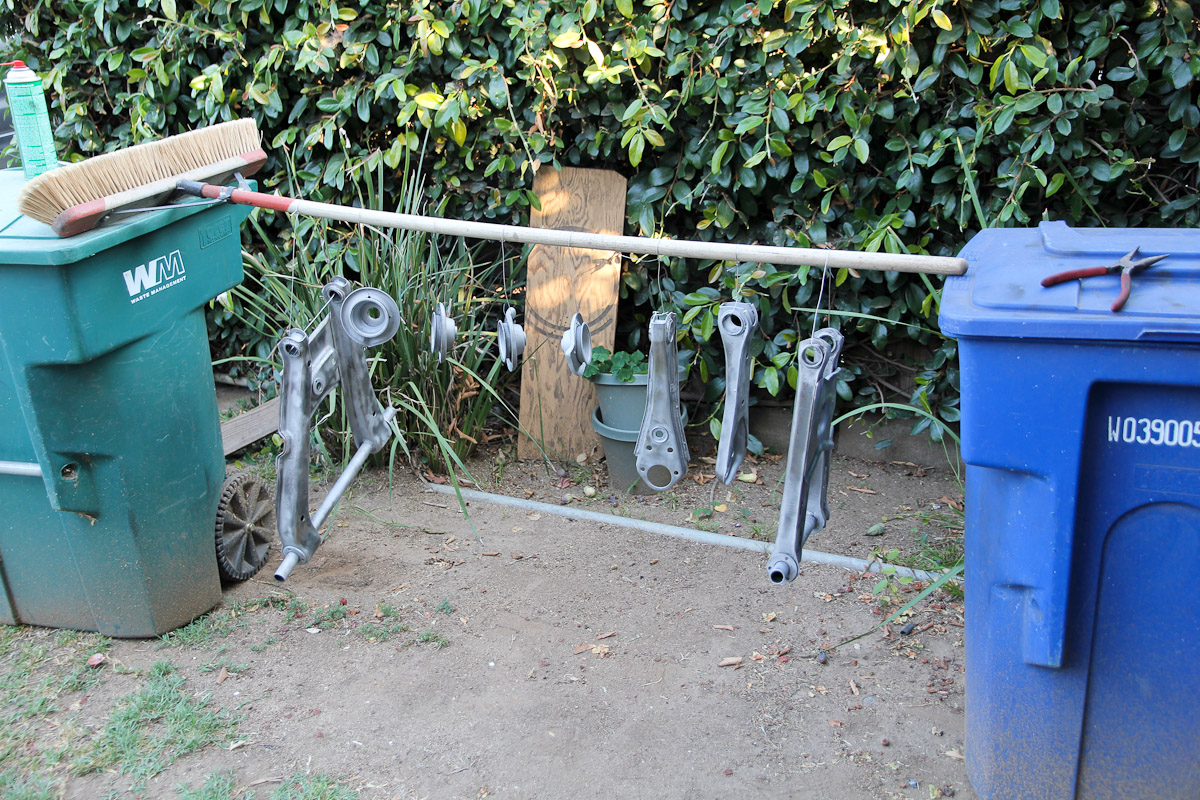
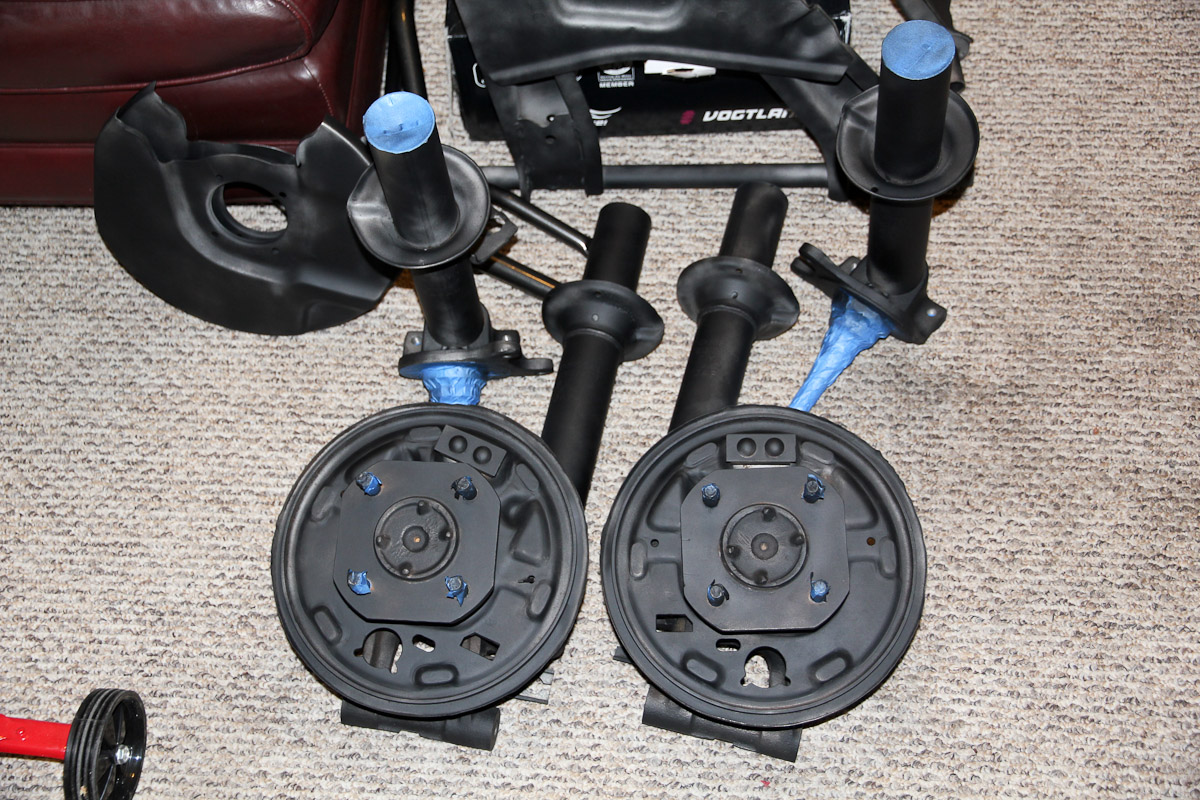
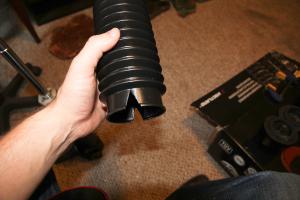
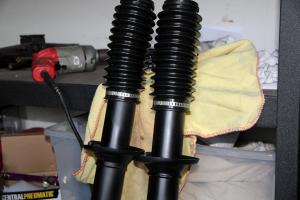
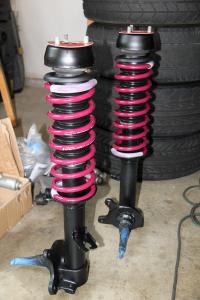
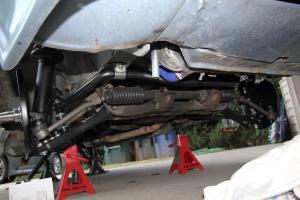
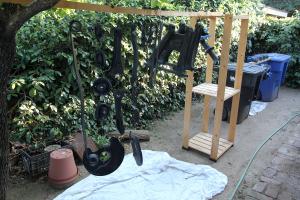
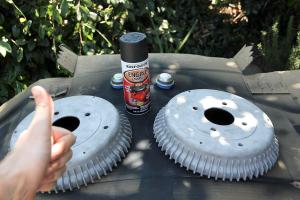
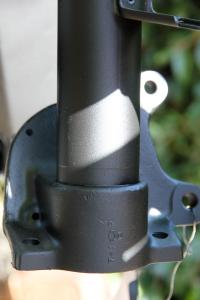
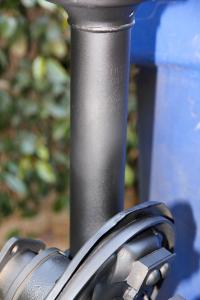
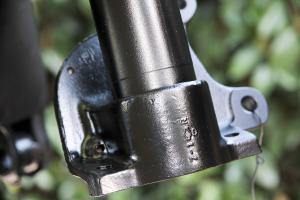
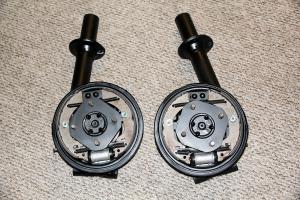
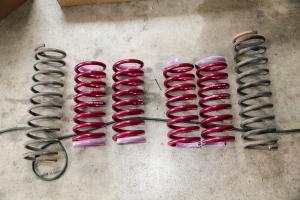
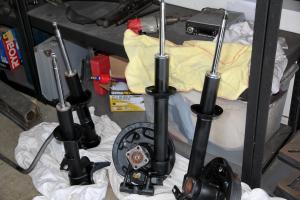
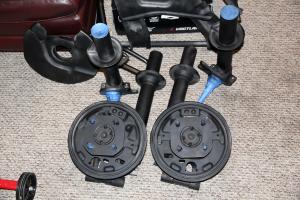
Time for an update. Last weekend was all about painting, which meant I had to set up my spray booth again. This time, with upgrades! I had some 1x1s in the garage that worked better than tree branches for hanging parts. Shot two coats of primer: Then two finish coats, the last of which went on last Sunday. Parts came out looking good. Looks can be deceiving, but we'll get to that. Also shot the brake drums with some rattle can high temp paint. Double checked I had the right one this time. I was hoping to get everything reinstalled this weekend, but hit a couple speed bumps along the way. The biggest came on Saturday trying to remove the old bushing sleeves from the rear control arms. I tried a ball joint press after my hacksaw wasn't getting the job done; didn't work. Accepted that I was just going to have to sweat and be sore, and went back to the hacksaw. 3 hours later, they were all out. By the end of Saturday, I had the mustache bar and control arms back in place. But Eastwood's paint disappointed yet again. One shot with an air compressor did this to one of the control arms. Not what I want to see. I blew off anything else that came loose and brushed on another coat. I don't know what you need to do to make this paint stick, but I'm almost out of it and not buying it again. Hopefully the rest of it stays on. On to Sunday! Ordered new wheel cylinders and brake hardware, which I installed with only a mild amount of cursing. First time ever doing drum brakes, so that's off the list. Moving on to the shocks and springs. Here's the stock springs next to the Vogtlands. I put some silicone tubing on the ends of the springs thinking it might help quiet things down and protect the paint on the struts. And one of the Stagg struts. We'll see about longevity on these things. The included gland nut for the fronts looked oxidized; the rears were shiny. All four installed and the tubes filled with ATF. Speedbump number two: the KYB strut boots are too big by about 1/4" all around, so there's no way to tie the bottom of these things. I'm debating between trying to exchange them at Rockauto or just going down to the hardware store to find something I can wrap around the struts to fill the gap. Anyone have suggestions? That's where I called it a day. Now it's time for that beer!


-
My initial choice was to stick with the black. But, having looked at the pictures a few more times, I think I've changed my mind. There's something about the black bumpers that feels just a little not quite right to me. I think it might be the contrast, which makes them too strong of a focal point compared to the rest of the (beautiful!) car. I'd probably go chrome, or might even consider body color (I'm usually not a big fan of that, but could see it working on yours). Before spending several hundred on chrome bumpers, you could pick up a bit of 3M Scotchprint for about $20 and put that on there just to get an idea of what it would look like.
-
I shot it straight from the can. To date, this paint is the only stuff I've ever sprayed, so I have no basis of comparison, but it seems to go on fine without thinning. I'm using the Harbor Freight HVLP gun and the tip it comes with (1.4mm, I think). I'm being patient and letting everything bake in the sun until late in the week before I try reassembling everything, but so far -- fingers crossed! -- I think I had better results with it than I did on the fuel tank. Just guessing here, but I think letting the primer cure for 4 days might have helped.
-
Finally got the last coat of paint on all the suspension parts this evening. On schedule to reassemble everything next weekend.
-
Some years ago I was lurking in some of the Porsche forums and I remember there was one guy who bought a 944. It was, by all accounts, the right car: one owner, low-ish miles, meticulously maintained with all the maintenance records and ran great. Guy flew out, picked it up, and almost made it home. Threw a rod. Now, I'm pretty sure that's not a common problem, but the rest of the thread that went in to the details on the engine work...that scared me off right good I'm sticking with my Nissans for now.
-
Emissions are required for any car after 1975. The real value of the blue plates is in keeping the car period correct. Plates here stay with the car, and replacement plates will be the standard white ones. Only way to get the blue ones is to buy a car that has them.
-
I would love a Porsche of just about any sort. I've always liked the 944, and considered one for a while, but I read enough horror stories to scare me off. Maybe one day when I can afford to pay someone to keep it out of the shop, I'll be able to get one.
-
Ha, I can't even blame it on beer! I used the same Eastwood paint on the fuel tank and the vent tank cover. Limited experience, but a few things I learned about it: - It's brushable, but won't come out very well. MUCH better results when sprayed. - Recoating with a brush will cause lifting. - Keep any solvents away for a while. I could lift the finish coat off in a sheet after using some 3M90 on it a couple days after I sprayed the finish. - The fuel tank DID come out looking really nice and hasn't chipped or flaked off yet. I'm not inclined to test the finish, but it seems pretty durable now. I think Eastwood gives a 48-72 hour cure time, but I'm not sure if that's enough. I'm going to let the suspension parts cure for a week.
-
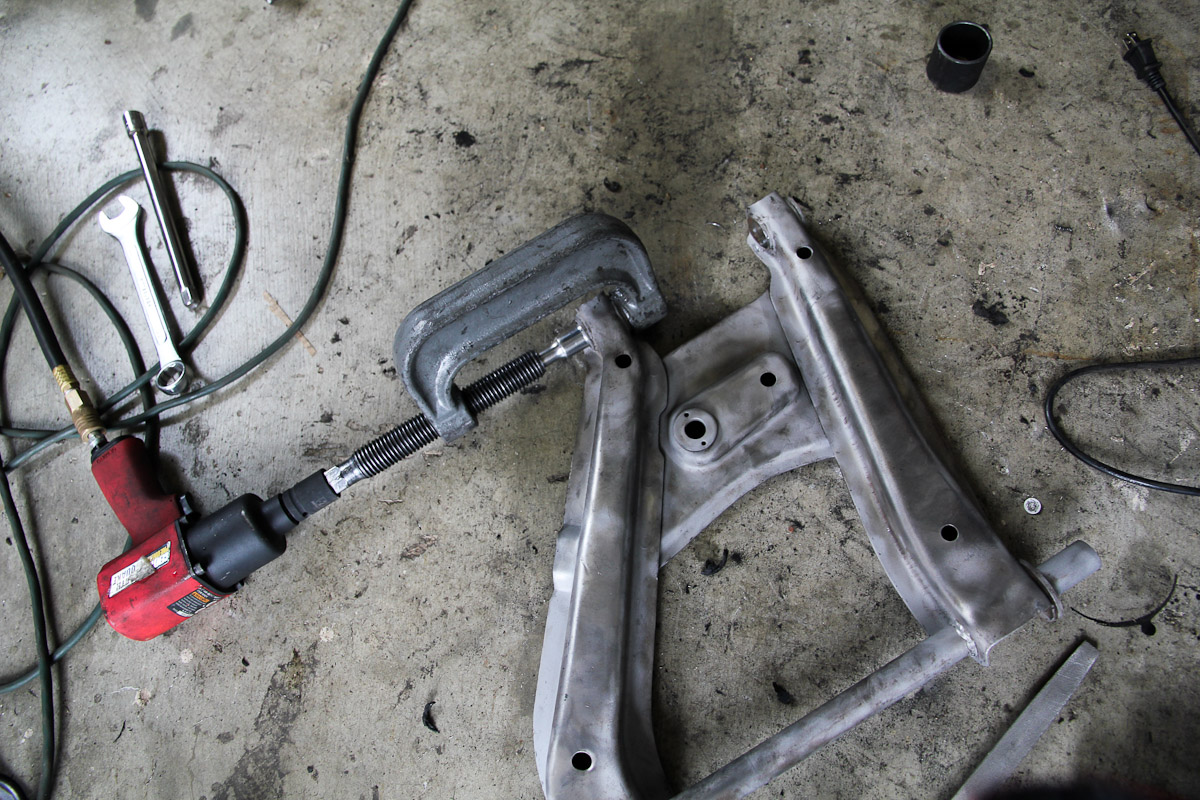
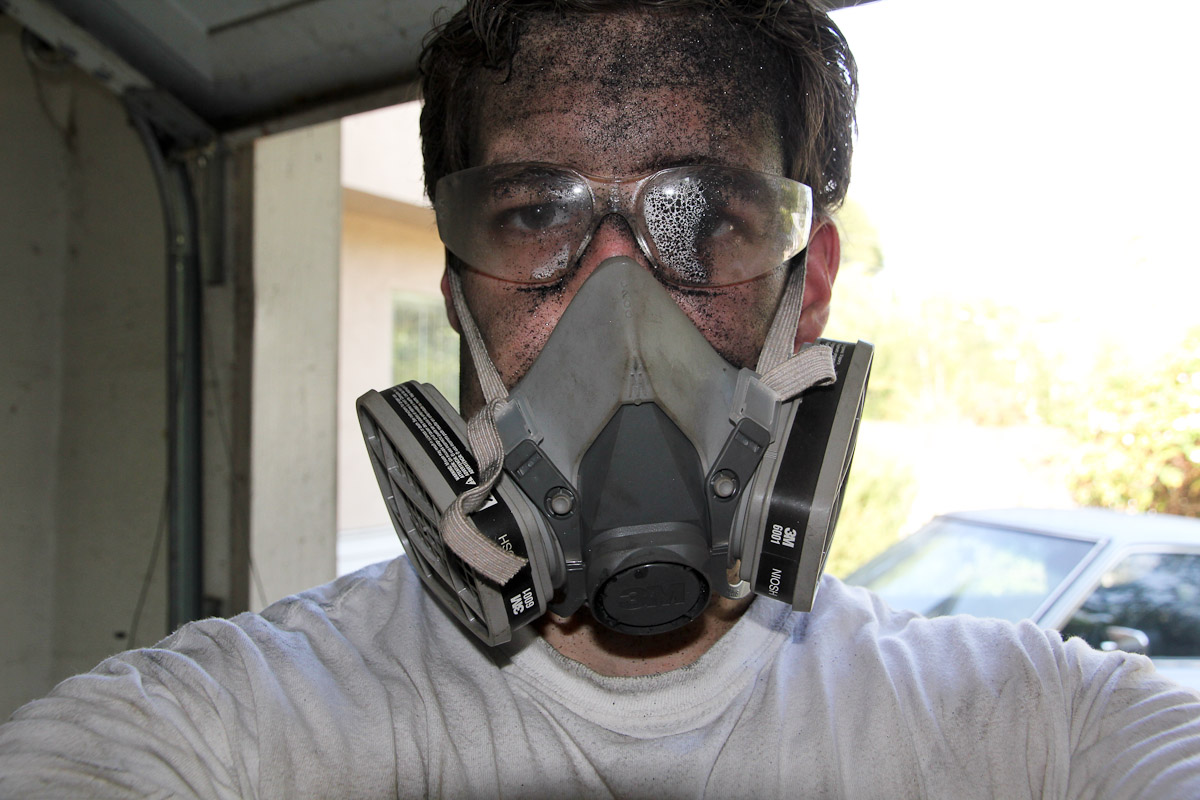
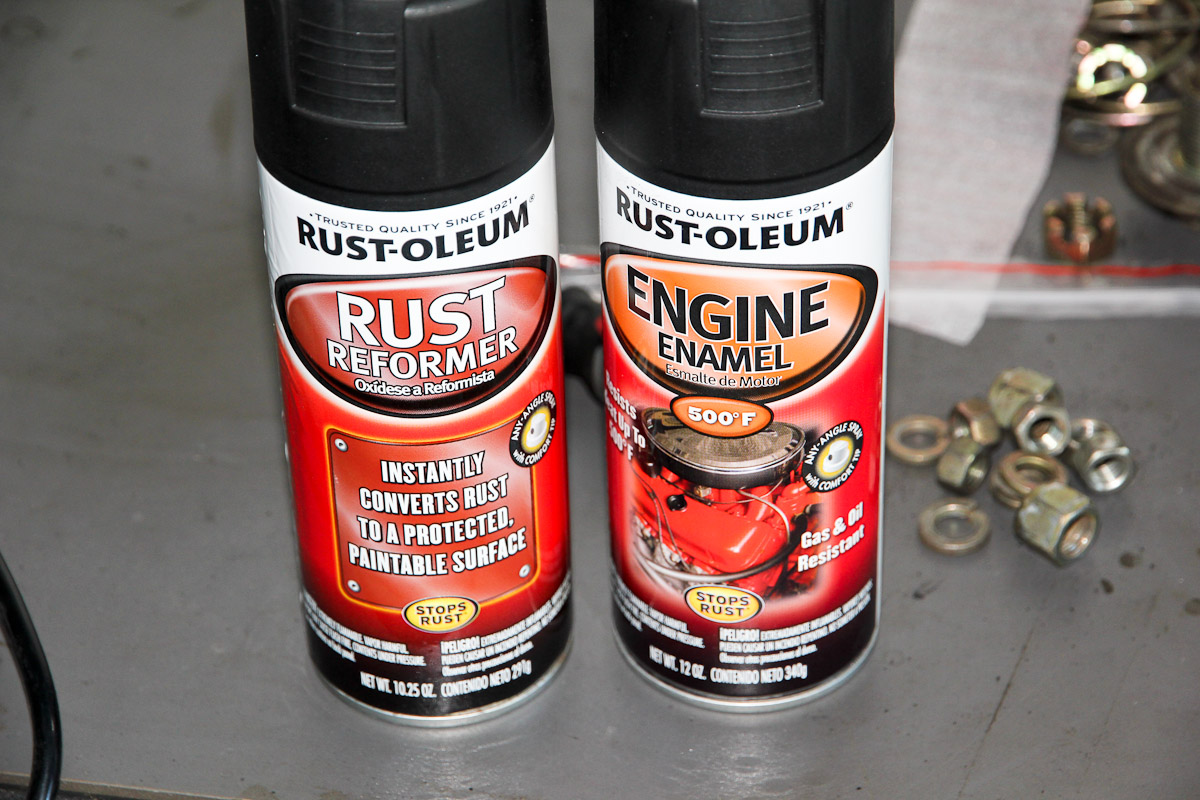
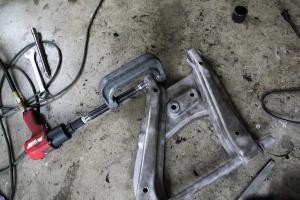
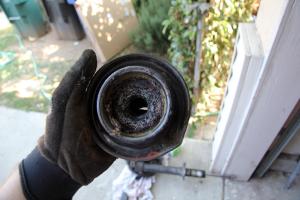
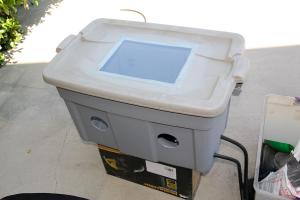
Long weekend of prep work is finally over. Got around to knocking out the bushings from the rear control arm, which a ball joint press made decently-quick (though not easy: I broke a ratchet when the impact wrench was going too slow) work of. I'm considering myself fortunate that these were the only original bushings I needed to remove. After being inspired by Hardway, I took the wire wheel to the rear strut assembly, which cleaned up pretty well. Then bagged the front and stuffed some foam in the back of the rear hub and masked it off so I could media blast it without -- hopefully! -- getting any of that crud in the inner works. A few hours later, I looked like this, but I was finally done with blasting and wouldn't have to go through this again for a while. Parts were cleaned with acetone and hung up so I could spray with a bit of rust-converting paint, which is where things went sideways. I have a non-glorious history of finding ways to make a stupid mistake on my projects. Previous highlights include cutting holes on the wrong side of a subwoofer box and tapping the wrong sides of hard-to-reach wires under a dashboard. Anyway, it was getting late in the day and I was tired, but determined to get the paint on, so I grabbed the can. Rustoleum, by the way, has some similar art on some of their cans. So you can guess where this is going. Yup, I shot everything except for the struts with engine paint. So, Sunday, I did it all again. My pile of parts, ready for blasting. But at least I'm really, really done with that now. I've got the right paint on there now (better believe I checked that can multiple times) and will be shooting a couple coats each of Eastwood extreme chassis black primer and satin over the next few days.


-
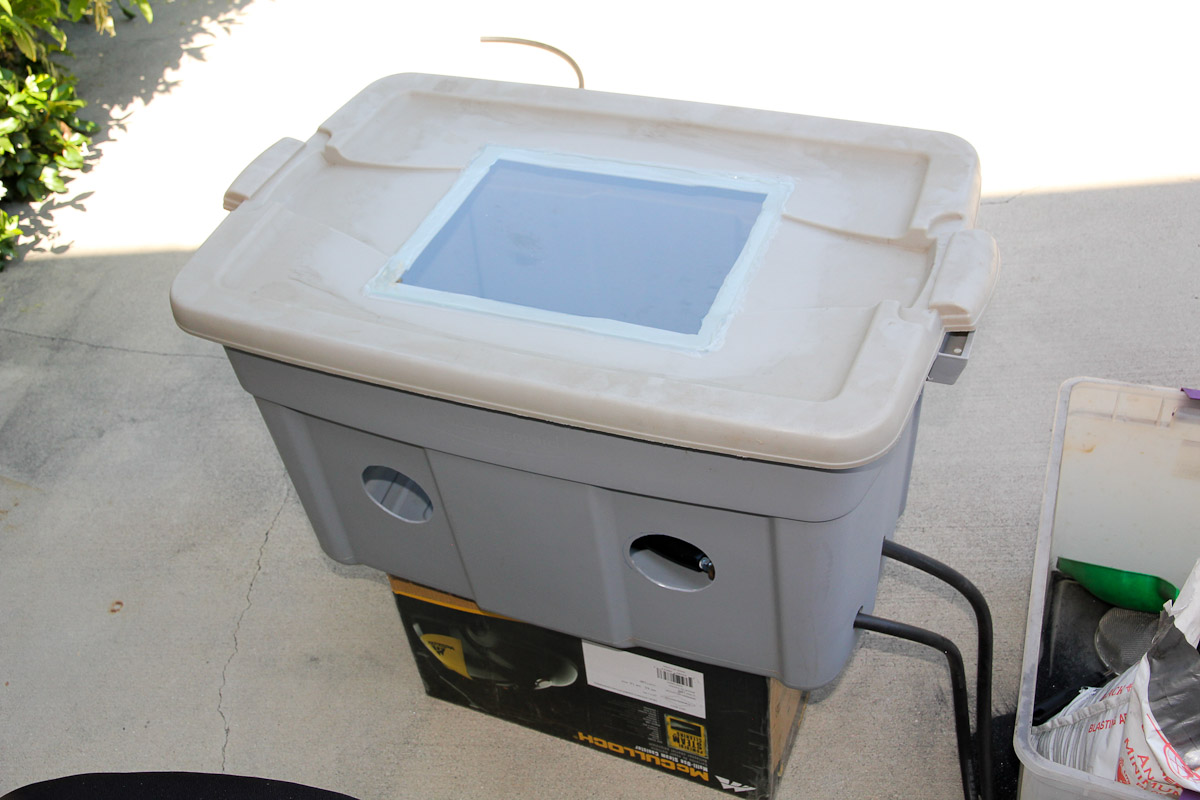
Thanks for the comments! For a grand total of $0 + a disapproving look from the wife when I pilfered the glass from a picture frame, the Rubbermaid rig more than paid for itself. The bearings and seals in the rear hub all seem fine, so I'm pretty reluctant to try and break in there, but I might take the same route you did and hit everything I can with the wire wheel. I remember going through your thread a few months back and yours came out looking quite nice. Anything would be an improvement over the mess it is now, and I know it'll bug me if I leave them alone after going through the effort to clean up everything else.
-
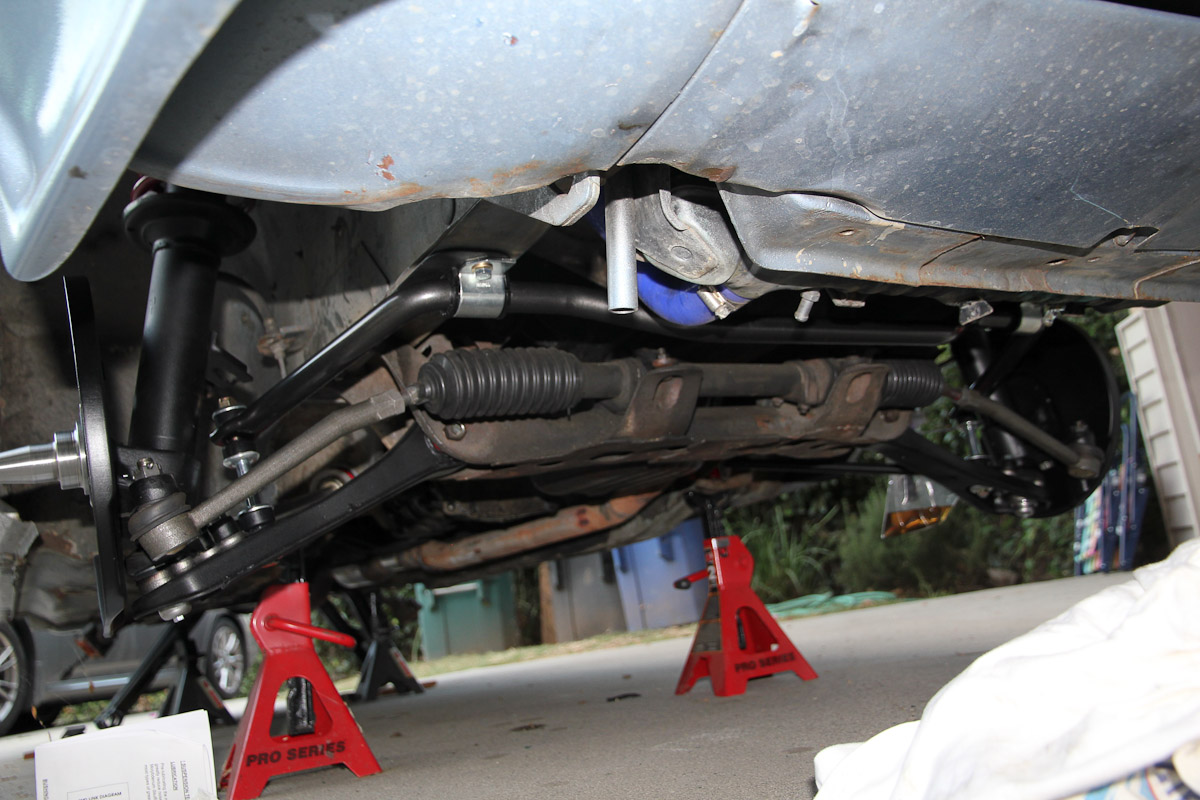
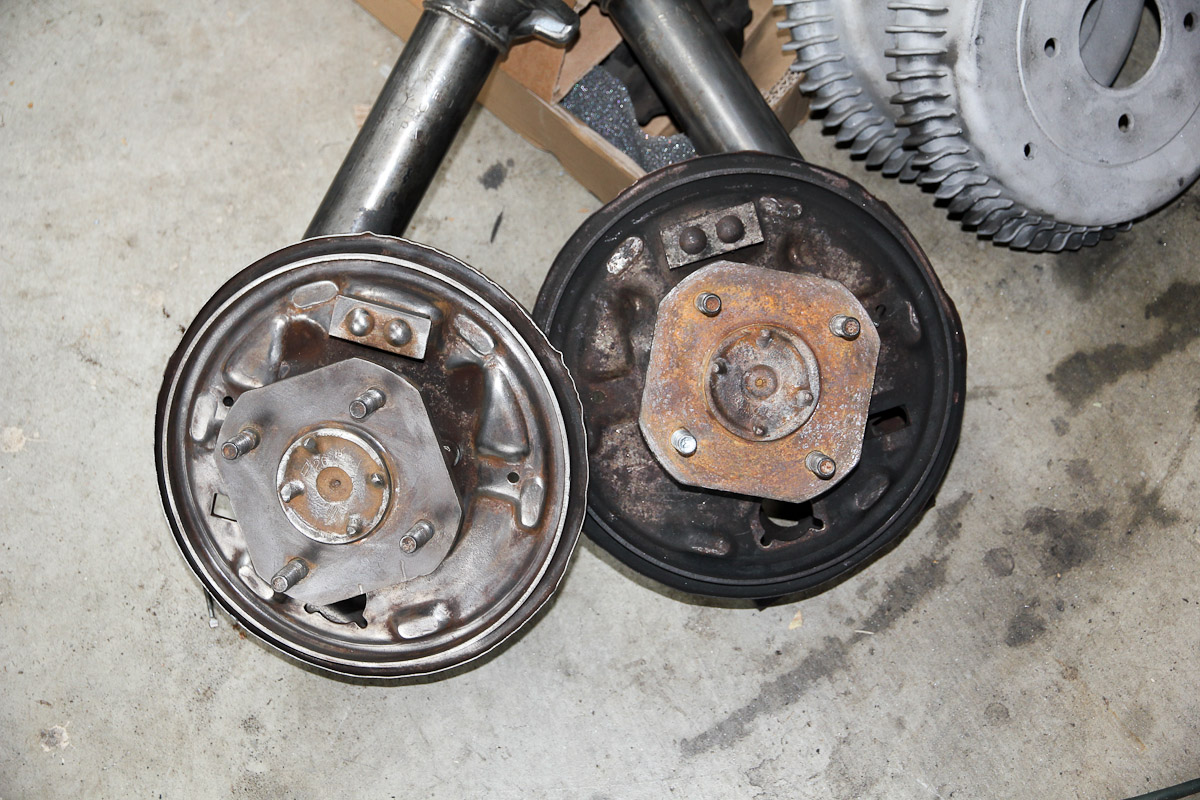
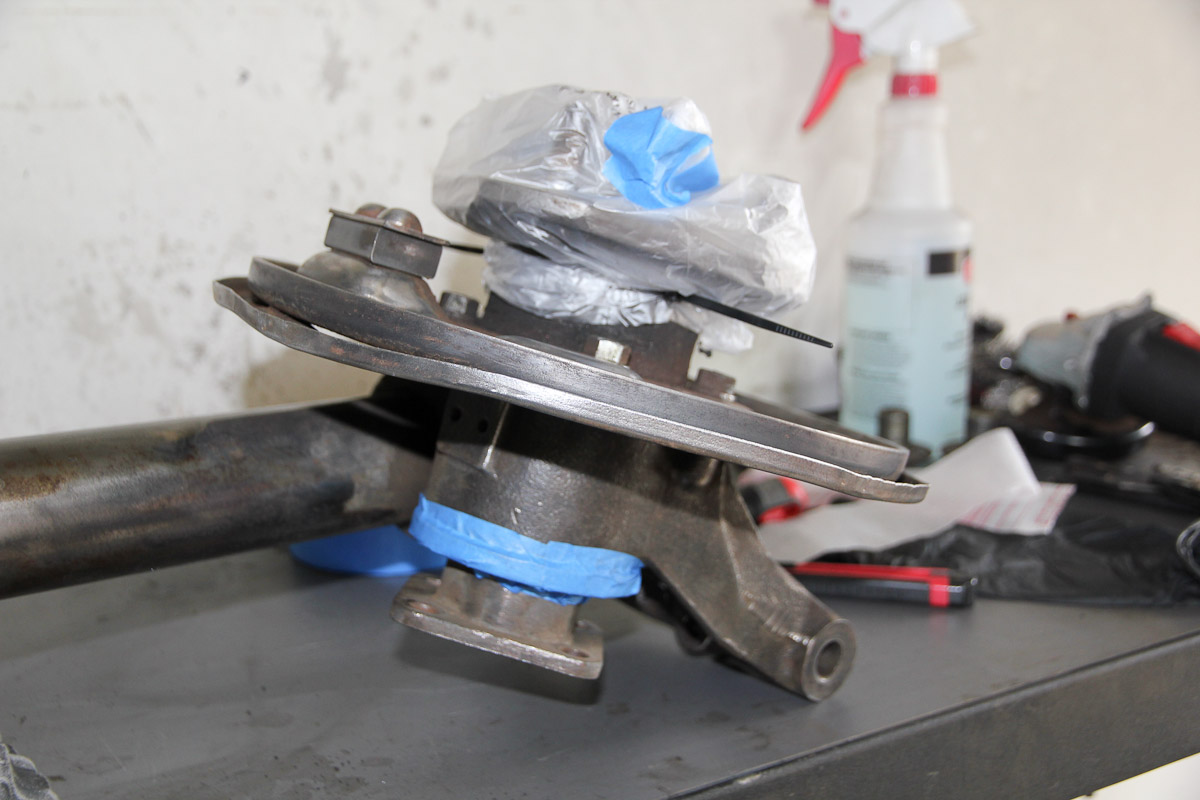
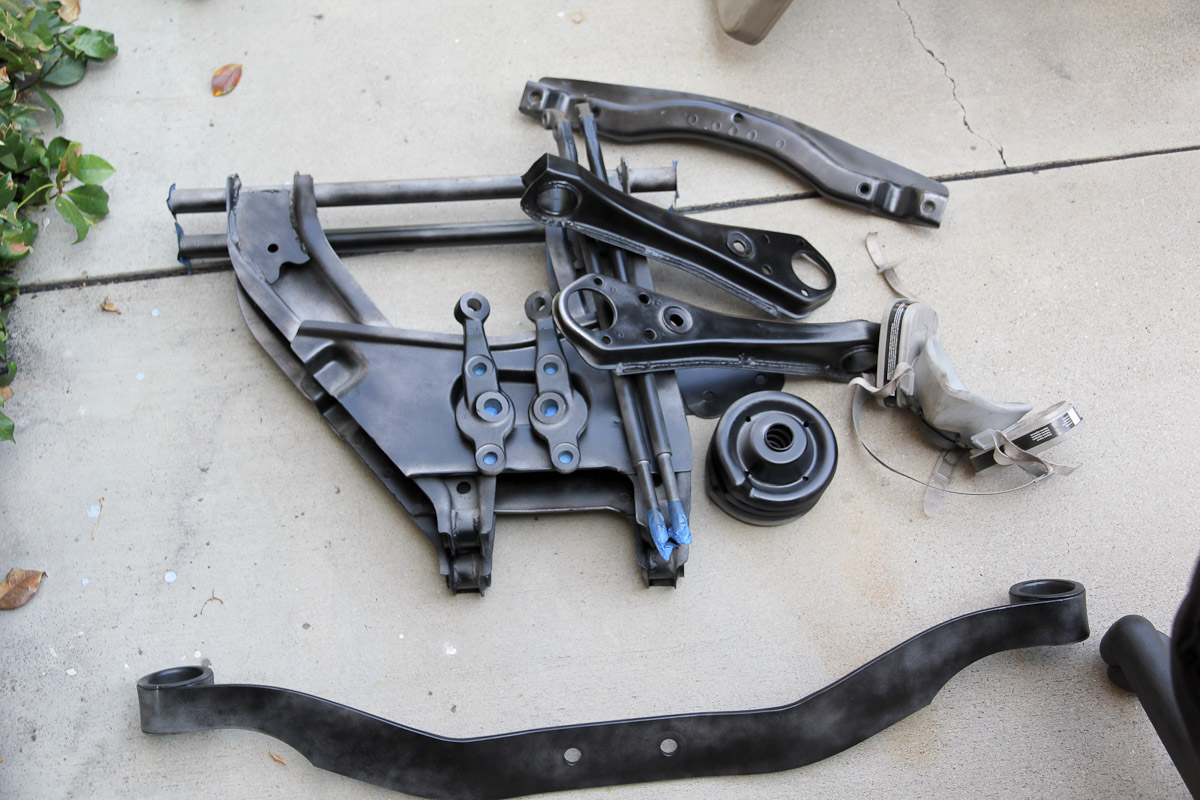
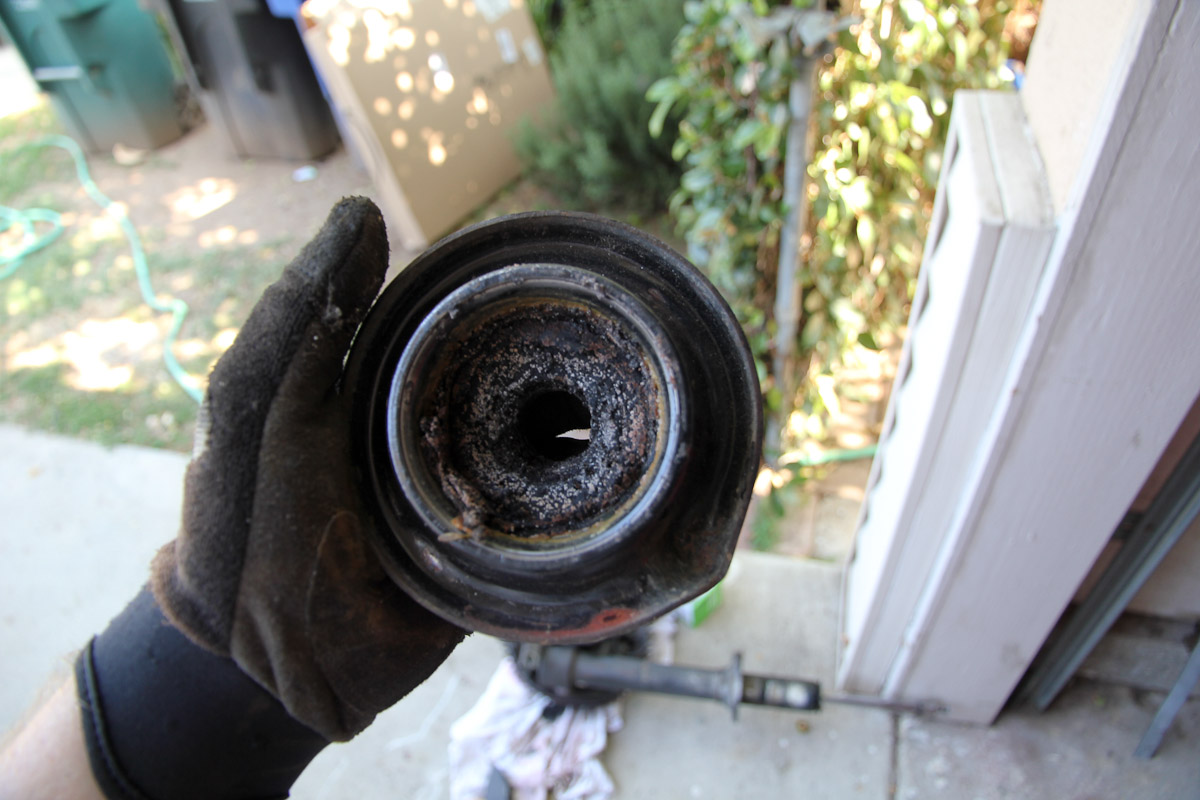
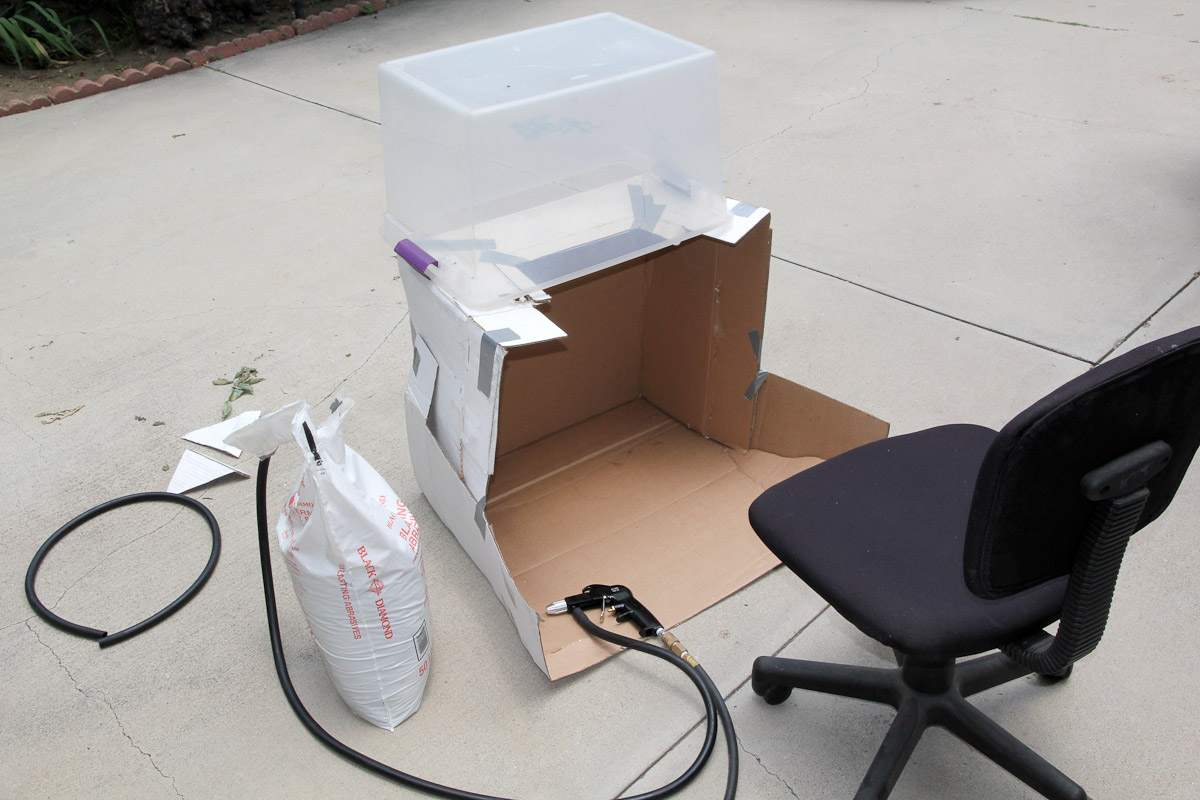
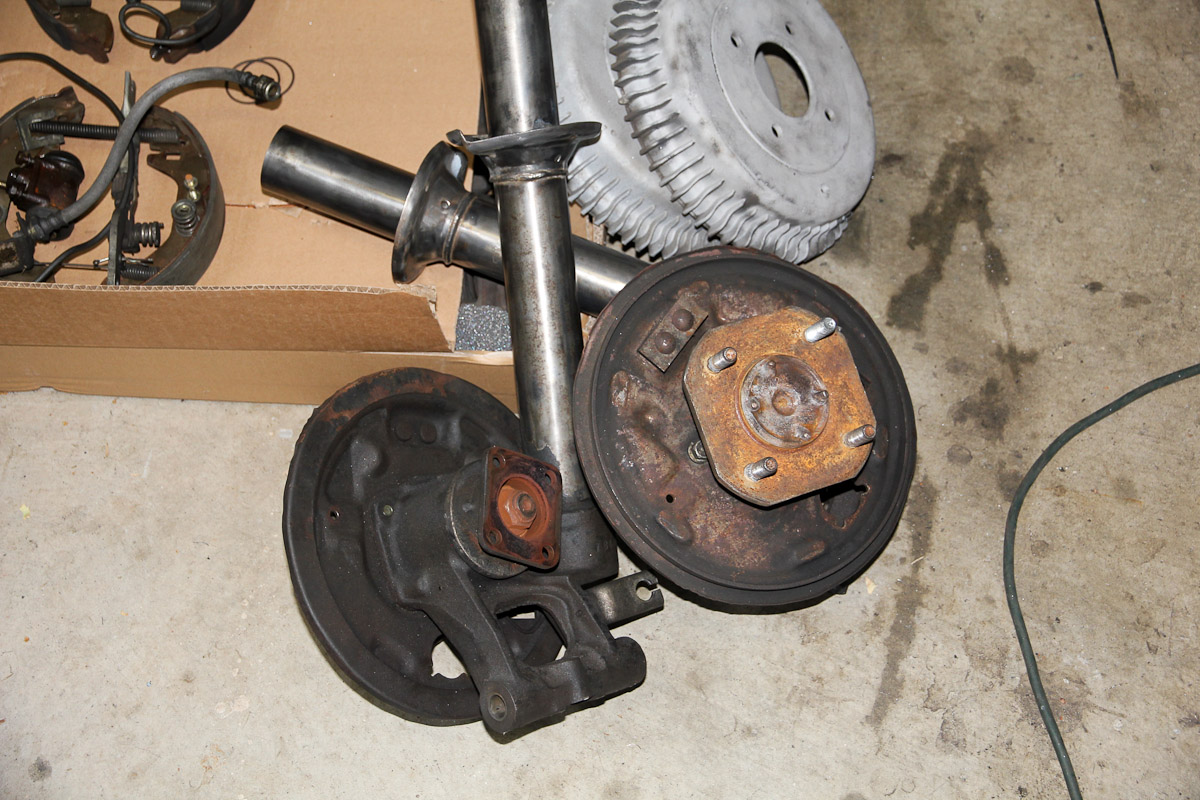
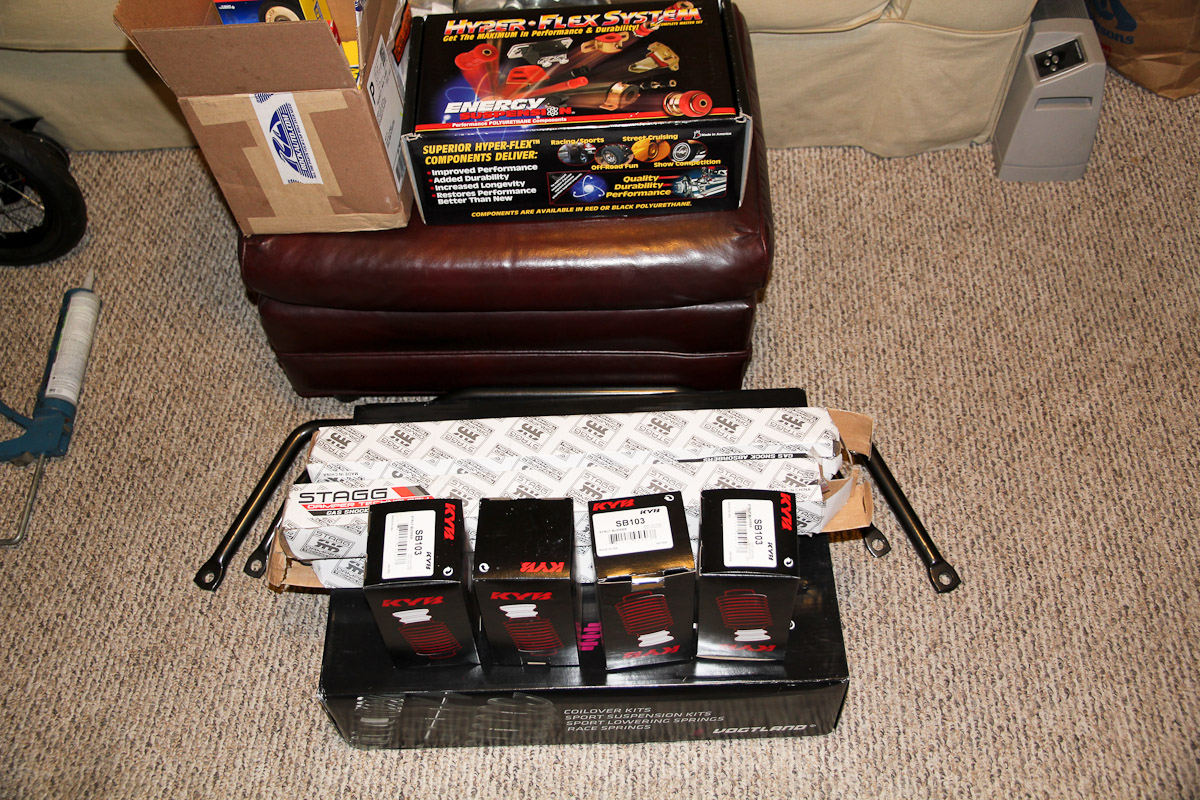
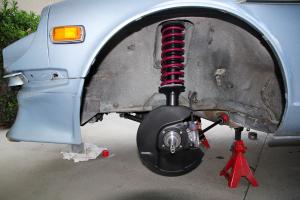
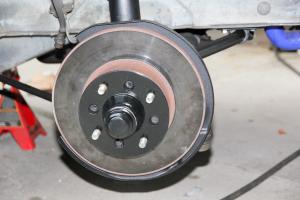
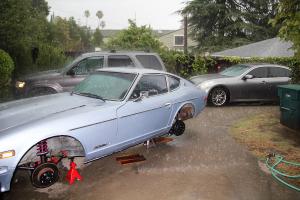
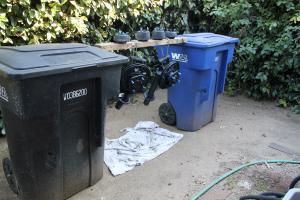
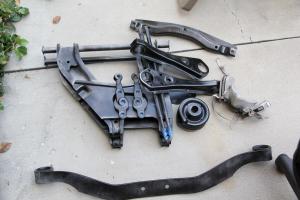
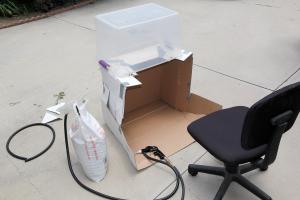
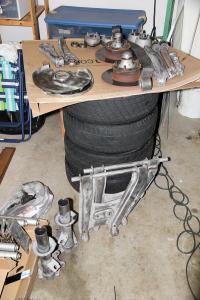
Small update, here in the middle of re-doing the whole suspension. Took both front and rear off the car two weekends ago and found some good and bad. Bad: one each of the tie rod ends and ball joints had torn boots, so they're all getting replaced. All four shocks were completely blown; no rebound at all. The strut mount insulator bearings were covered in some kind of severe nastiness. Spindle pins were in bad shape, but at least that made it easy to beat the heck out of them. Good: seems like all the bearings are in good shape. A previous owner had already replaced most of the bushings fairly recently, so getting those off proved easy. Aside from consumable parts like the ball joints, everything else was actually in pretty good shape and I didn't have to facepalm once when taking things apart. After getting everything apart, it's been a lot of cleaning and paint prep. Started with a wire wheel, then made my first go at media blasting with a $20 siphon-feed gun. Not really knowing what I was getting into, I made this -- uhh...crude -- little "setup" thinking it might keep the mess down. It didn't. So I did a little scrounging around the house to come up with something a little more sophisticated. Still made a mess, and wasn't without some difficulties, but it got the job done well enough. Still have a little cleaning up to do, but hoping to get prep finished by this weekend so I can move on to paint and then get everything put back in two weeks. My stack of parts going in: Vogtland springs and Stagg shocks, Suspension Techniques sway bars, poly bushings, tie rod ends, ball joints, and a bunch of miscellaneous hardware. Only thing I'm not sure about is how to deal with the rear struts. Blasting and then painting the whole assembly seems like it would be a bad idea: too likely for abrasives and other stuff to get where it shouldn't be and muck up the works. I supposed I could remove the rear hub, but everything I've read makes me think I never want to do that. So for now, I'm planning on just cleaning and painting the strut tube and leaving the rest -- rough thought it may be -- as is. Is there a better option?


-
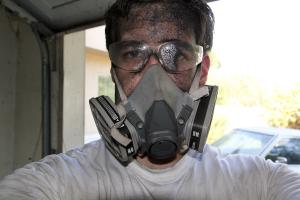
Your weekend looks kinda like my weekend! I've been blasting all my suspension parts with a $20 Amazon blaster and some Black Beauty blast media I picked up at Harbor Freight for $10 (man, hooray for HF). The completely bodgy cardboard-box setup I had did almost exactly nothing to keep the mess down; my jerry-rigged Rubbermaid container "blast cabinet" was better, but I still spent all weekend looking like a 19th century coal miner. Yeah, wear a mask!
-
It's beer time. [emoji29]