charliekwin
Free Member
-
Joined
-
Last visited
Everything posted by charliekwin
-
Ads and tracking are only a (small) part of the story. Fact is, the modern web is just tremendously complicated. If you want a peek at what's going on under the hood when you visit a site, just right-click on a page and select "Inspect" to open the dev tools, then click on the "Network" tab. ETA: and Zed is right. Every bigger site out there is doing extensive testing. You and I may hate the autoplayed videos that dock to the corner, but they increase some important metric on aggregate, so they'll stay until they don't.
-
Mechanical Stig! That's cool!
-
Yup.
-
I didn't really mind filling and blocking at all. The creative aspect of it and seeing things come into shape appealed to me. Rewarding. Wet sanding is repetitive drudgery that comes with a sore back at the end ?
-
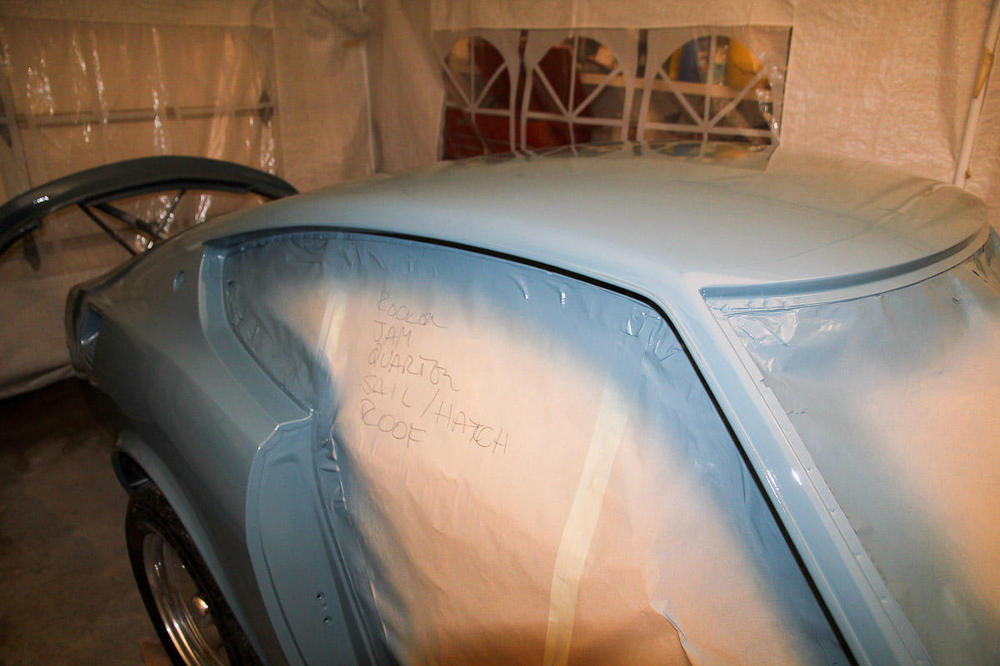
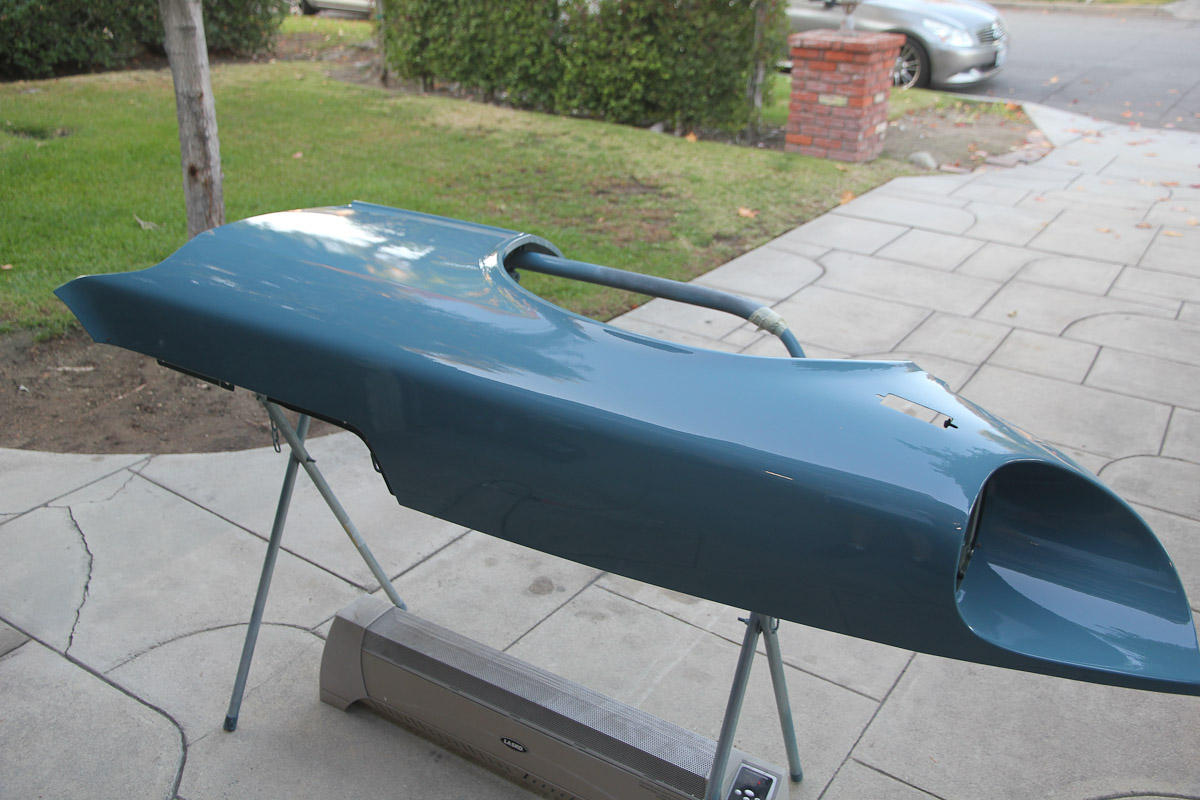
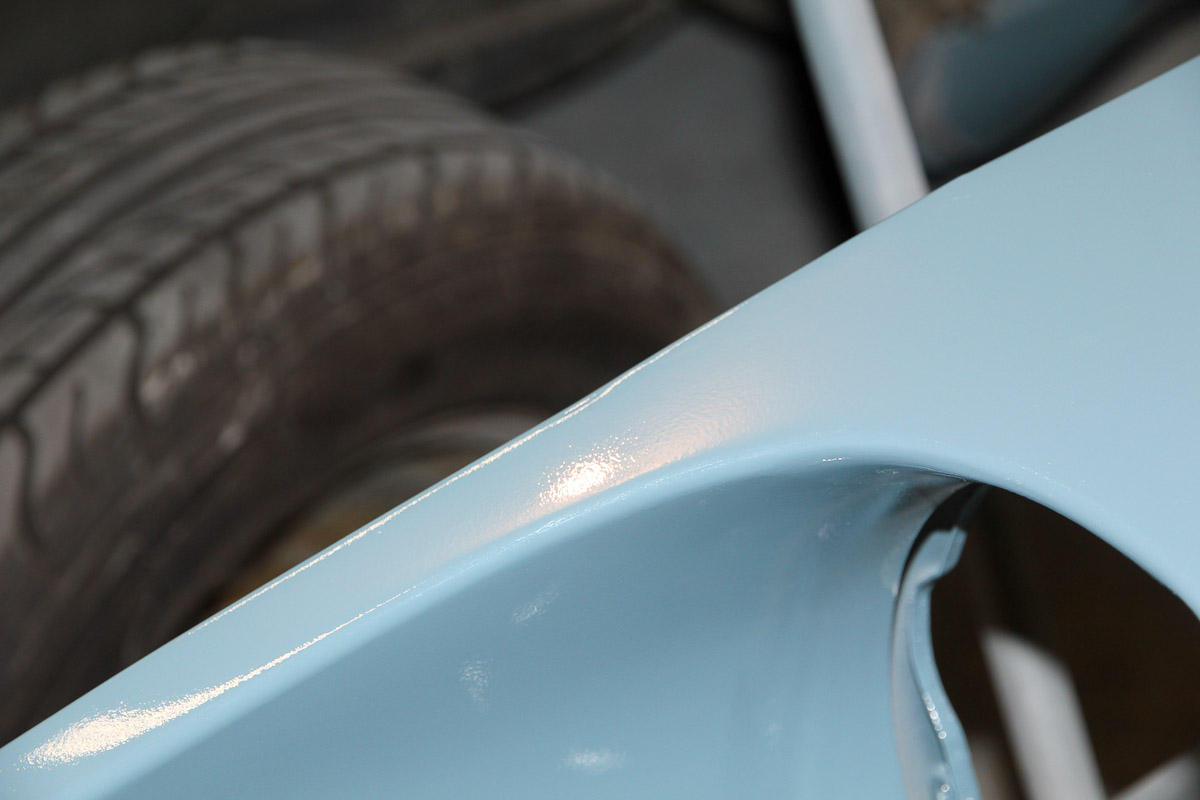
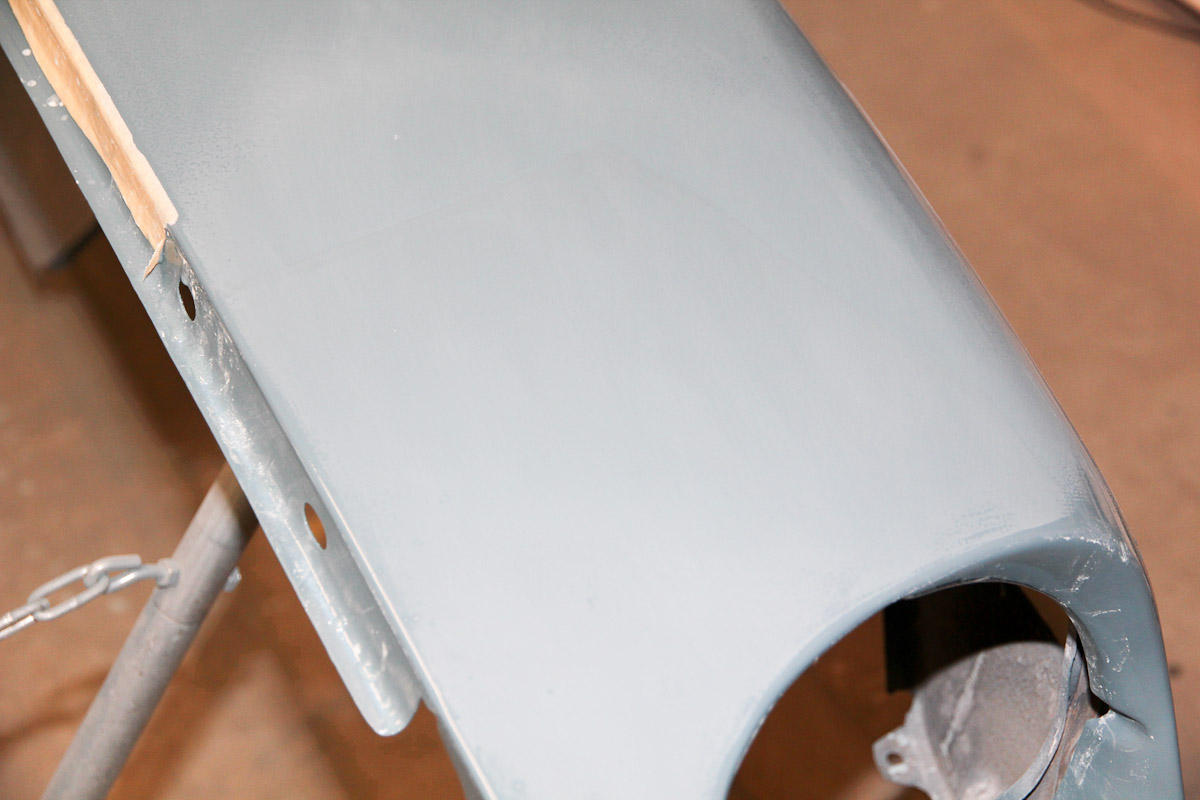
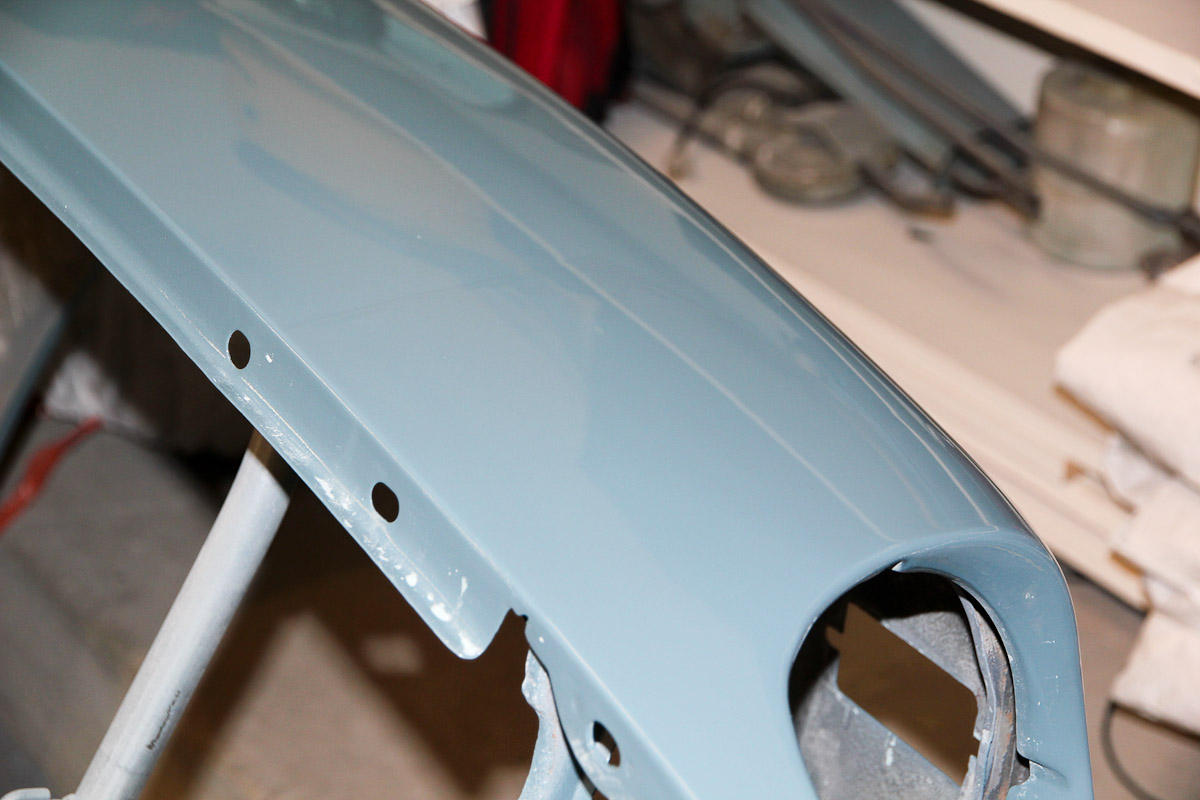
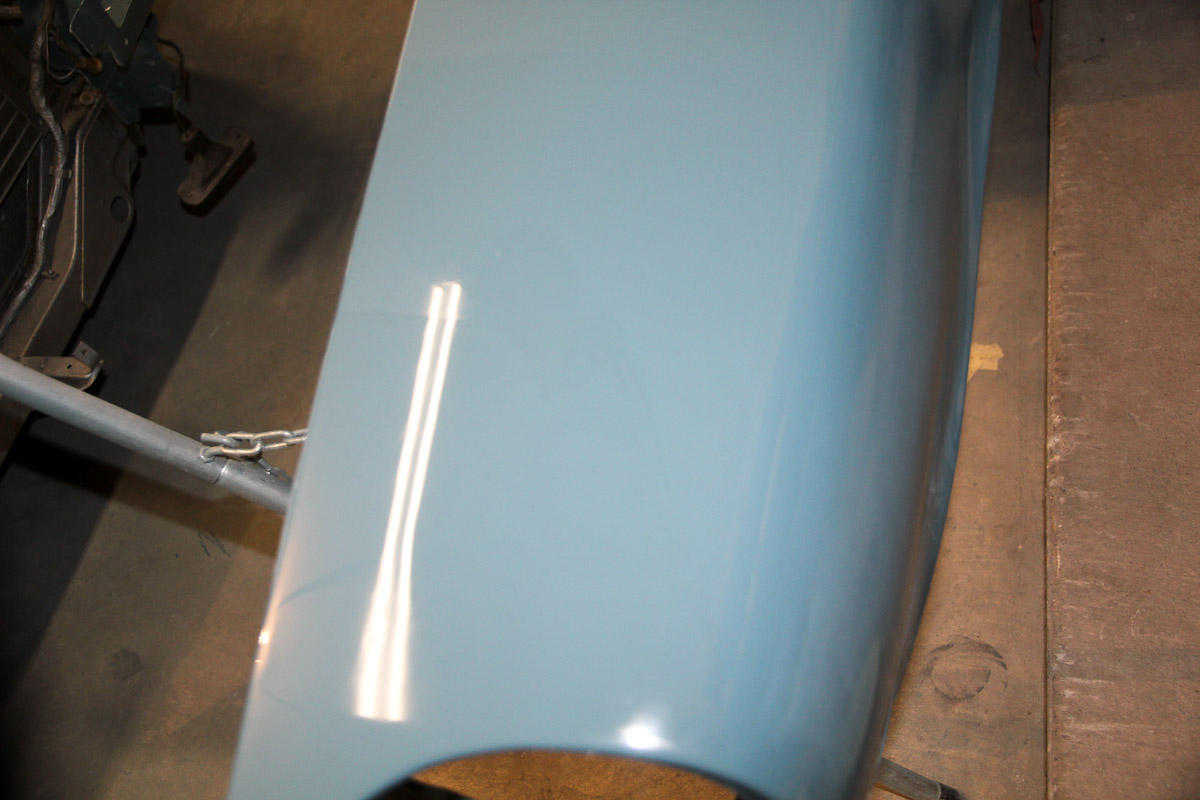
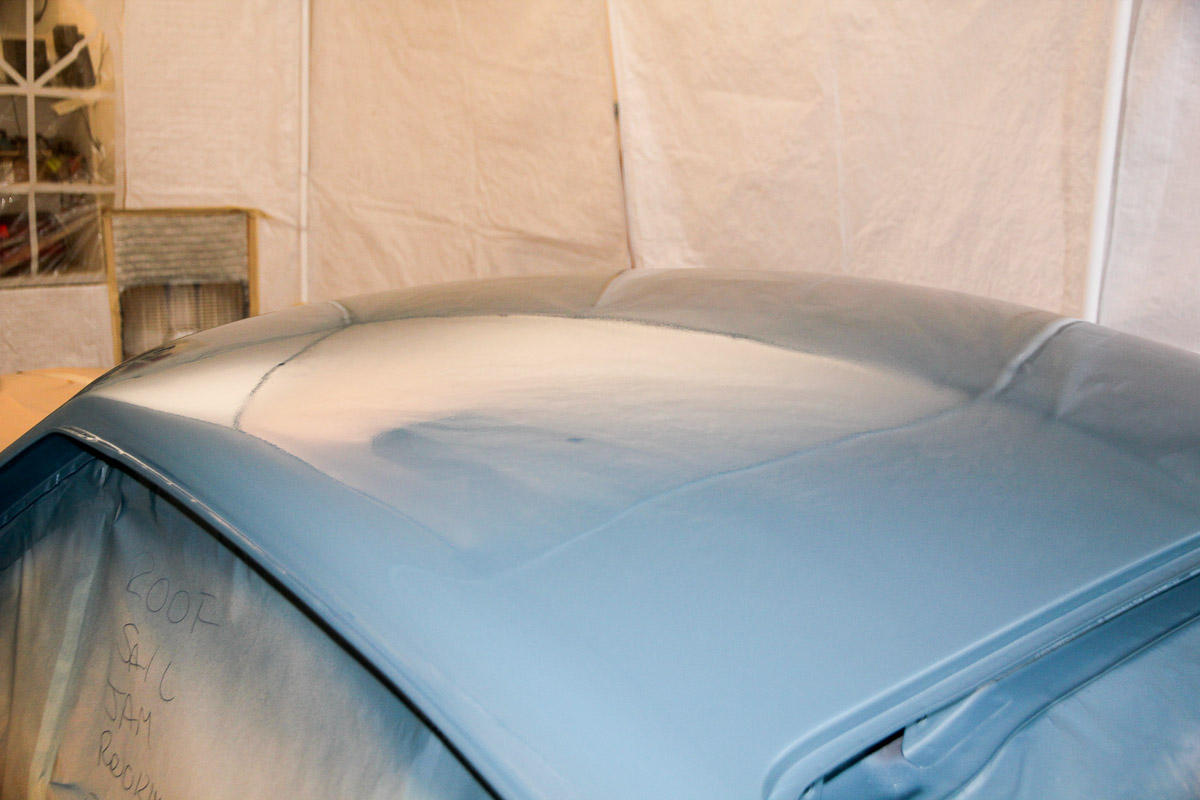
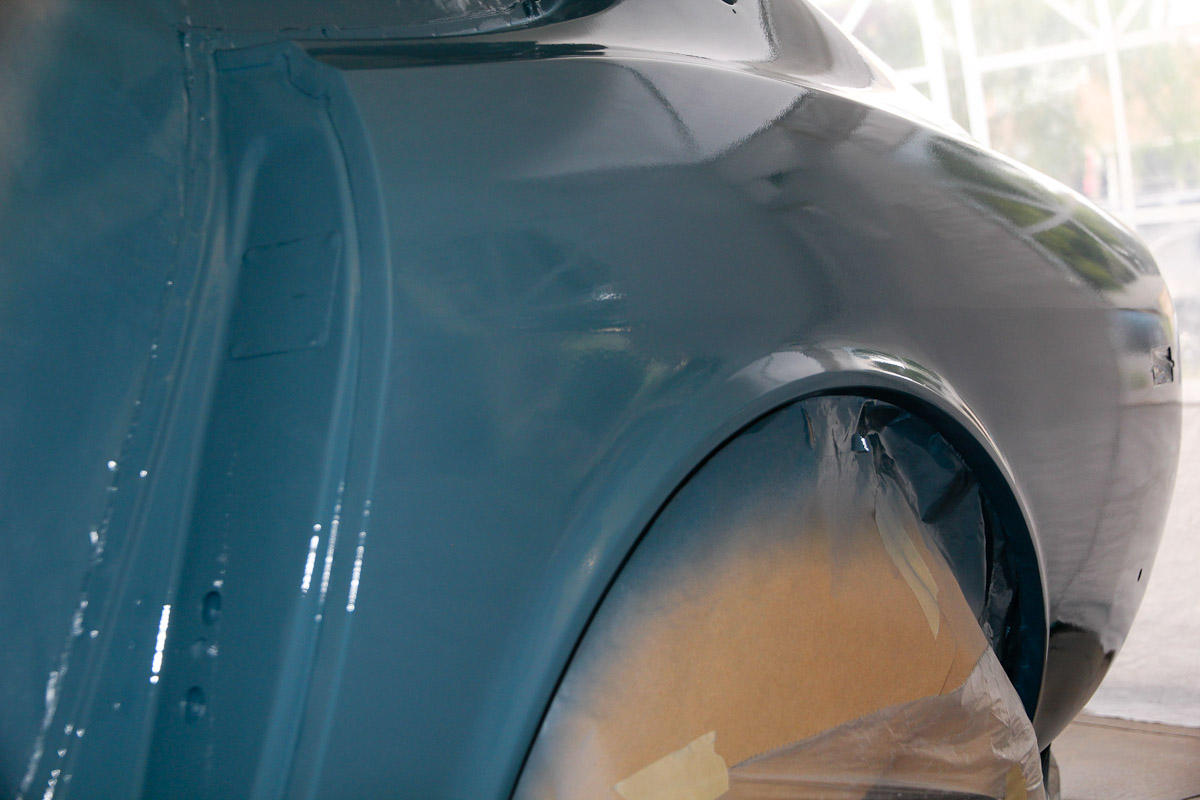
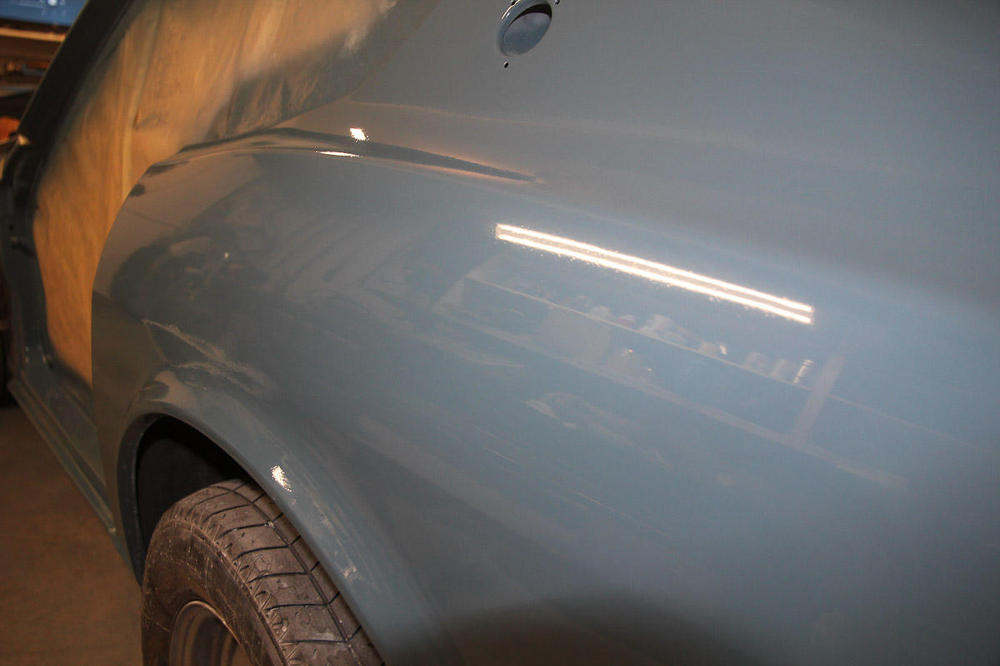
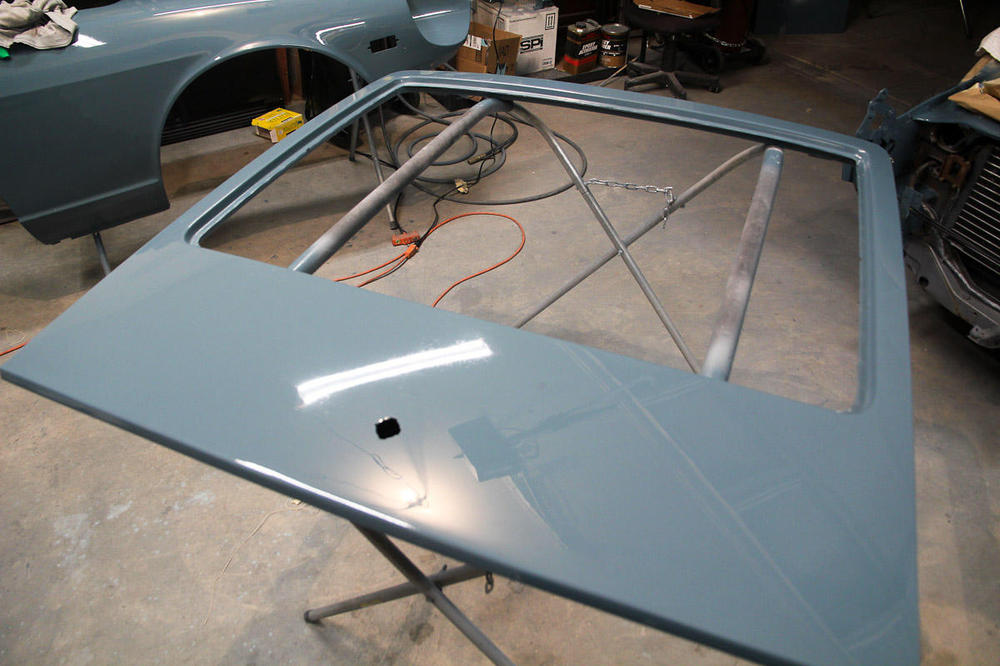
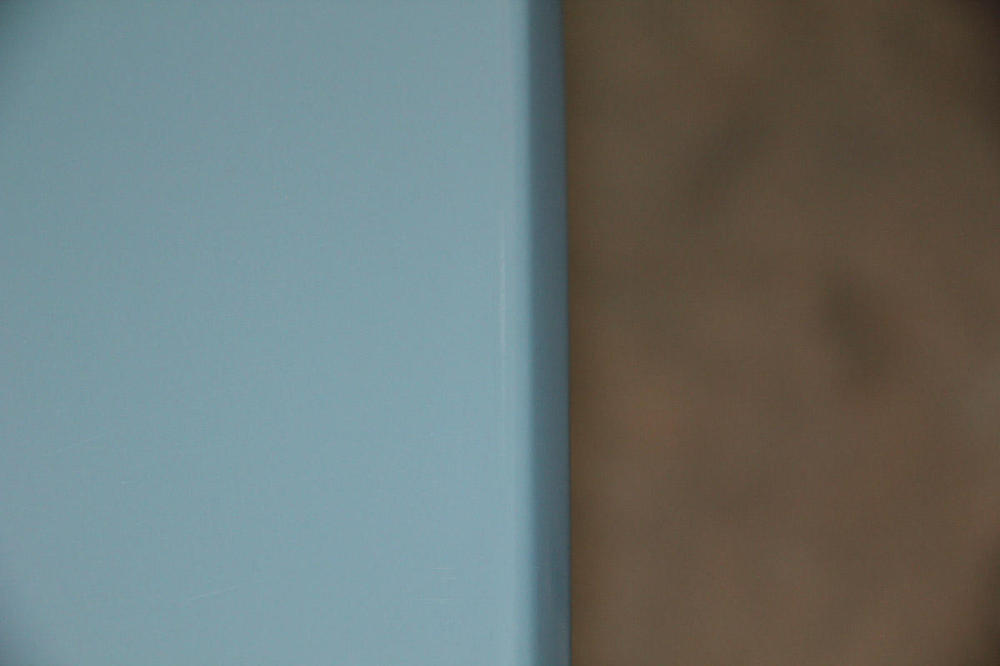
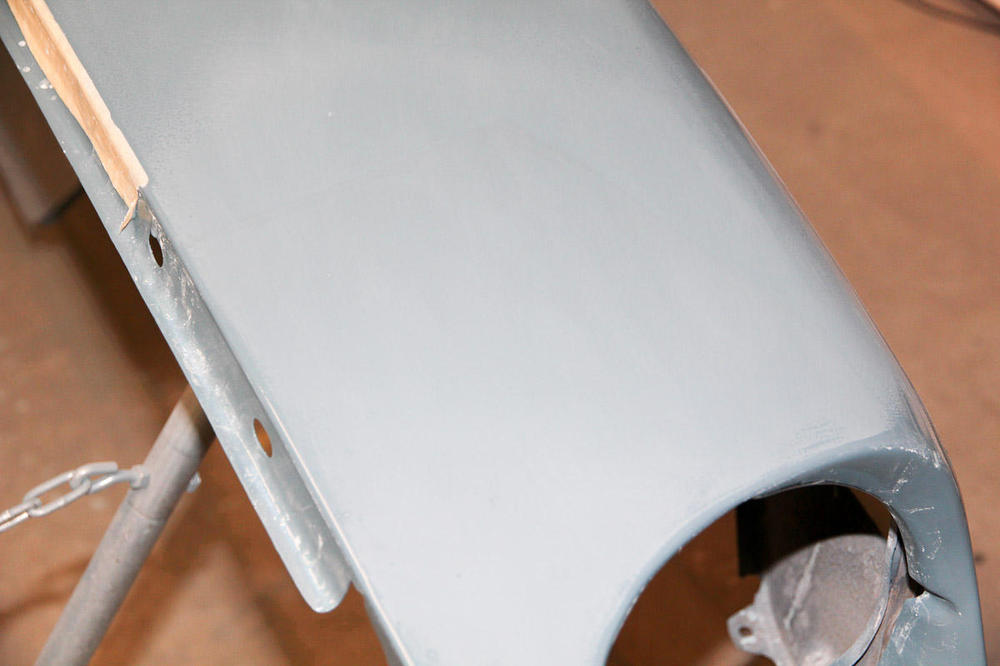
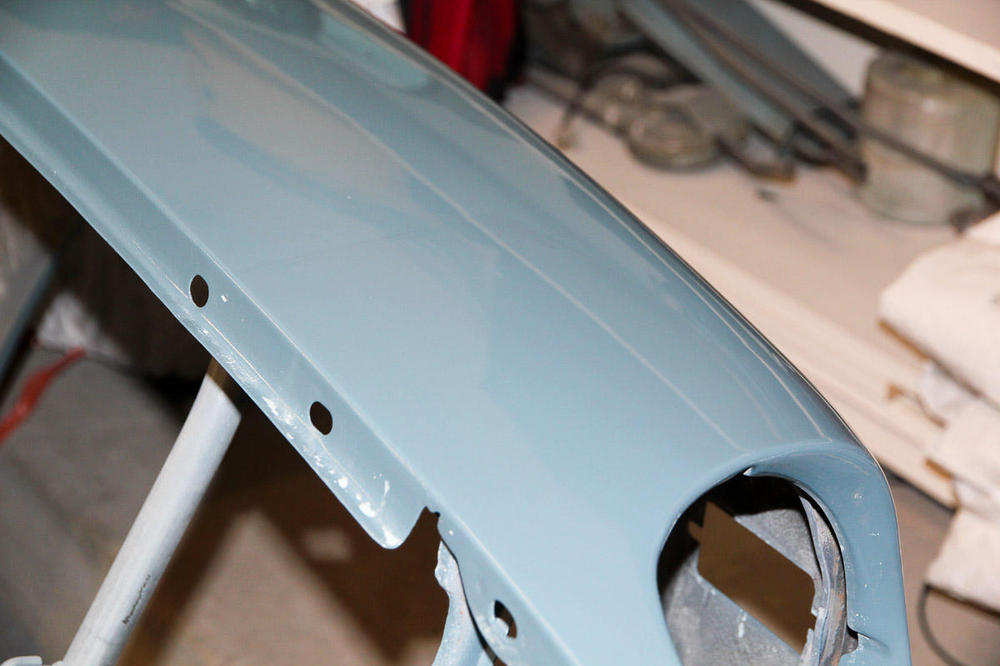
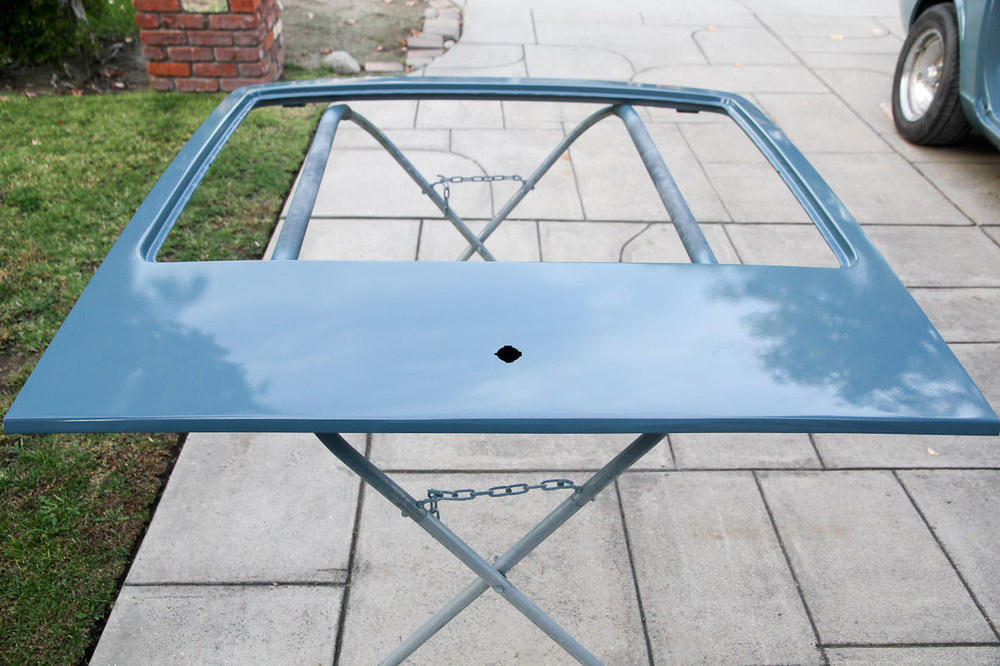
Last weekend I repainted the fender. It's not perfect, but of course, it ended up getting probably the best paint job of all the panels. Before re-prepping it, I spent probably 10-15 minutes trying to sand through the original paint with 1500 and didn't. Even after hitting it with 320 there was still blue, so I figured the likelihood of sanding through on the other panels was minimal and I may as well go for it. I got the hood and doors to 3000. Also, I learned that I hate wet sanding. Still, I'm going to re-do the rear quarters and pillars, and may put some more time into the roof. Today was satisfying: for the first time in a year, parts are going back on. The masking is gone and the doors aren't in the living room any more. They need to be compounded and polished, but I'll do that at the end.

-
It looks like there's just one facility in Vietnam that's making the bumpers and selling them under a couple different business names and also supplying Harrington...is that correct? Same prices for all of them (except Harrington)? At $450 plus shipping, that's a nice present come Christmas.
-
Jeff, if I may offer a bit of constructive criticism: the part of the video I was most interested in seeing -- the actual stitching -- just blew by in a time lapse! I went and just bought my skins from Interior Innovations, so I was curious to see some of the production work you put in. Now that you have the fancy sewing machine, here's a link I found a long time ago that I've had my eye on doing one day: https://www.zdriver.com/forums/showpost.php?p=342586&postcount=182 This guy upholstered all of his interior panels. He (unfortunately) doesn't include many pictures, but it looks quite nice where you can see it.
-
That's what I was hoping to do! Was mainly thinking about possible adhesion problems with just laying a couple more coats of paint, but if it shouldn't be an issue I will gladly skip the epoxy. Sent from my SM-G950U1 using Tapatalk
-
I need to repaint one of my fenders. I've sanded the whole panel with 320 and 400, but didn't take it back down to bare metal. I'm well outside the recoat window now (it's been about a month). Should I re-seal with epoxy? Or just do a couple coats of paint on top?
-
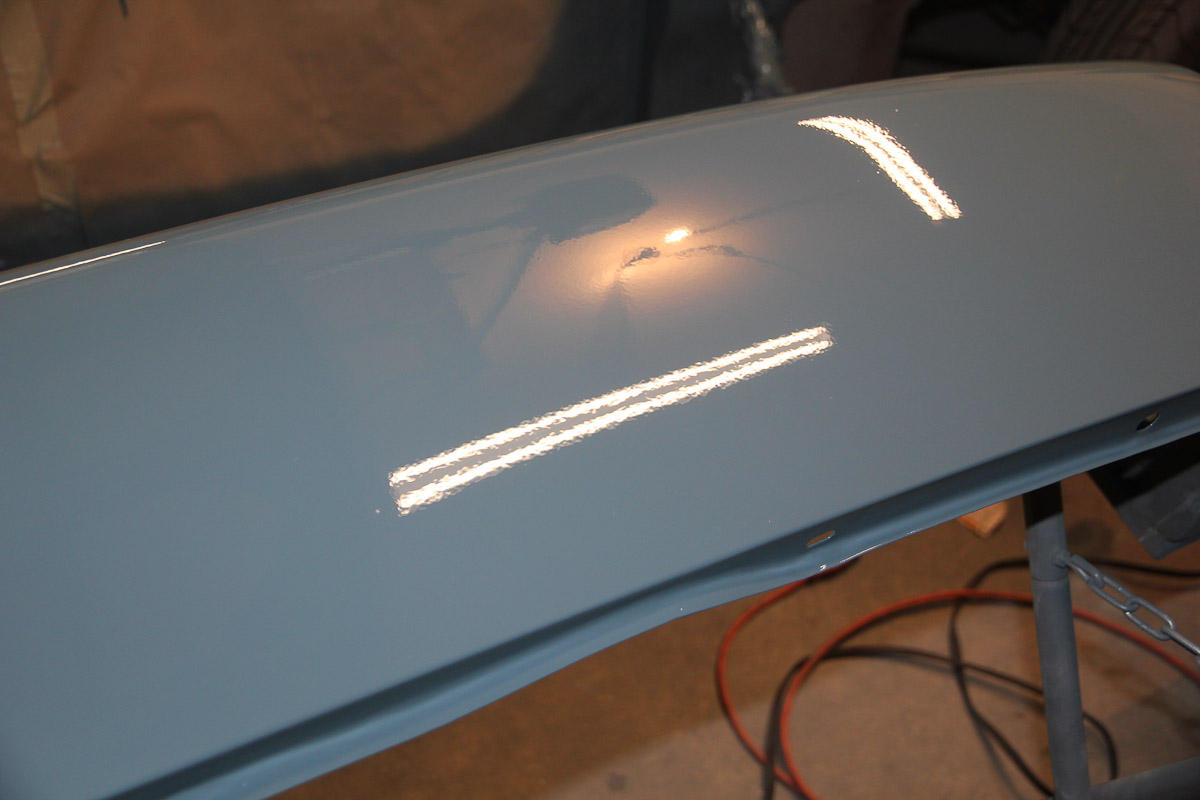
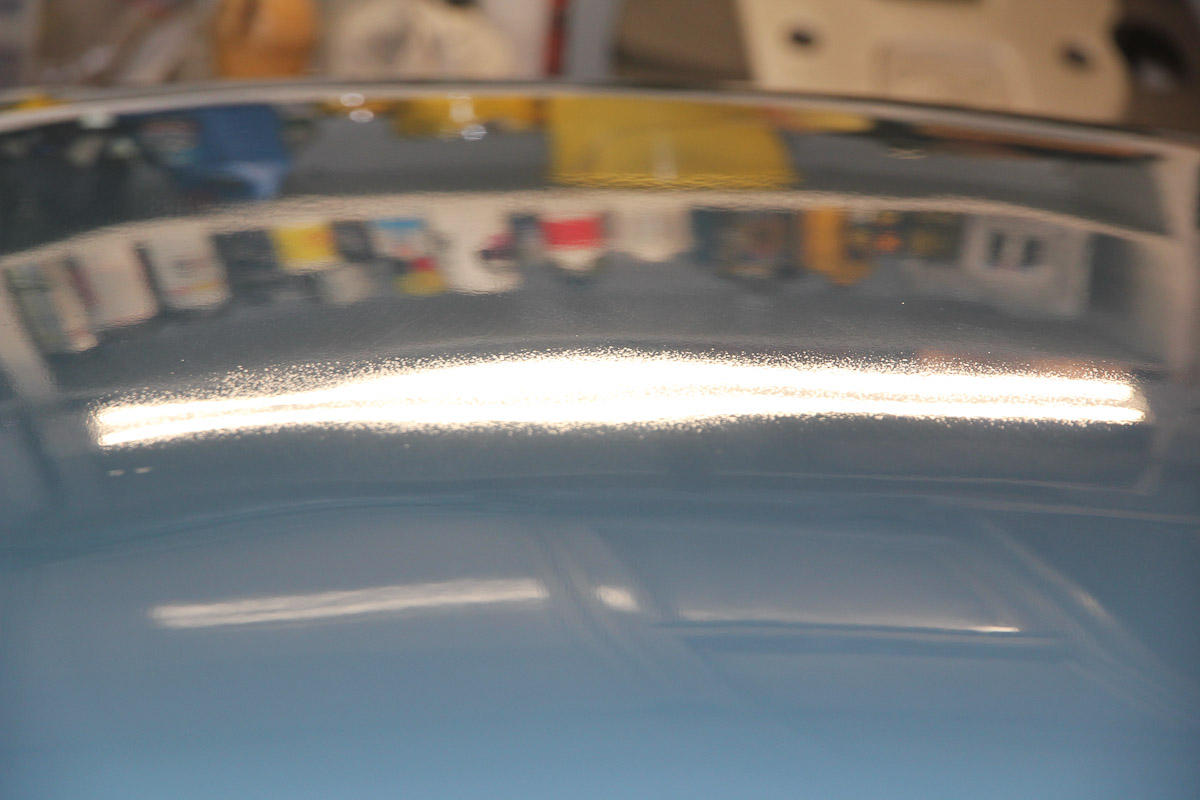
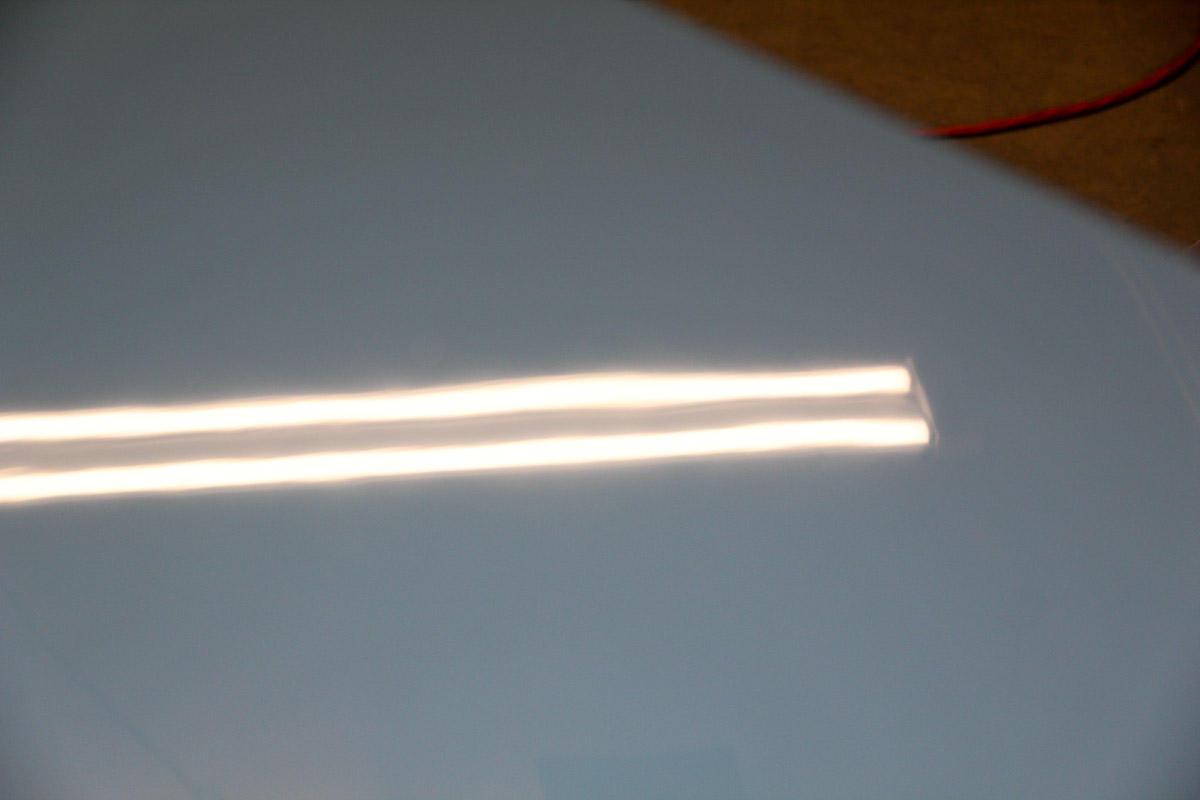
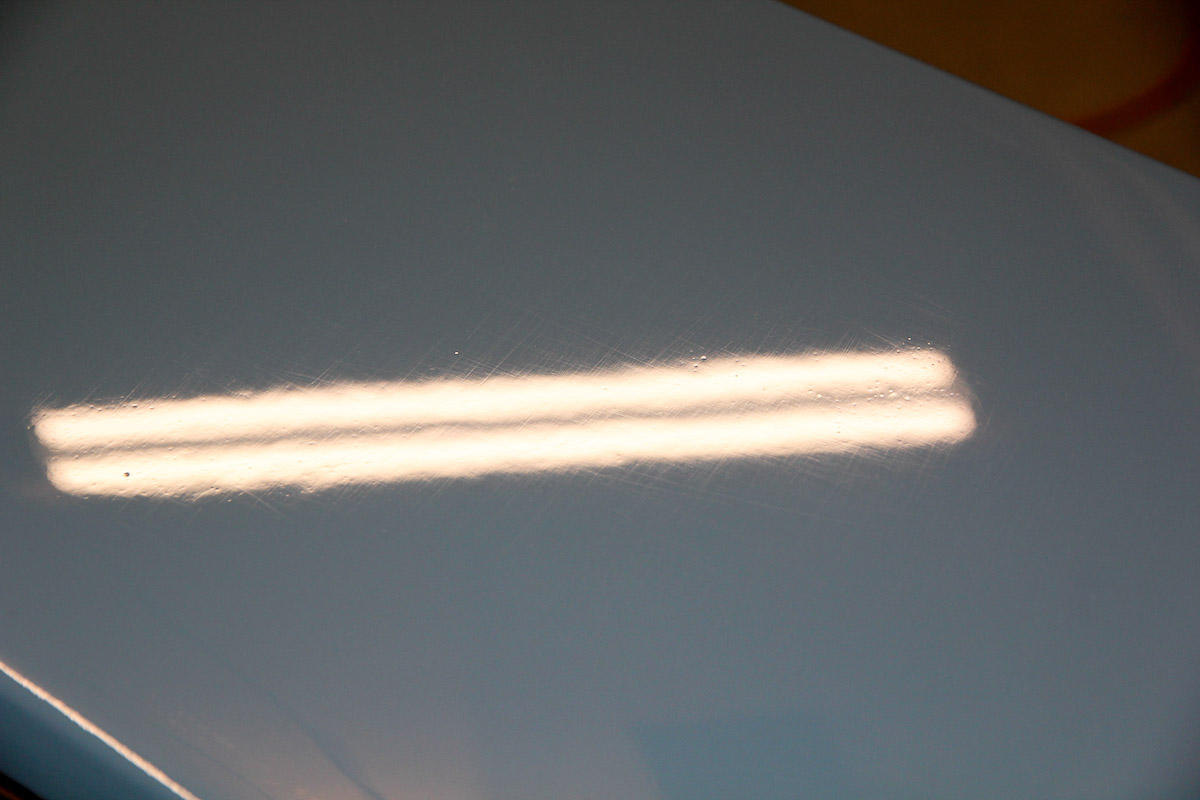
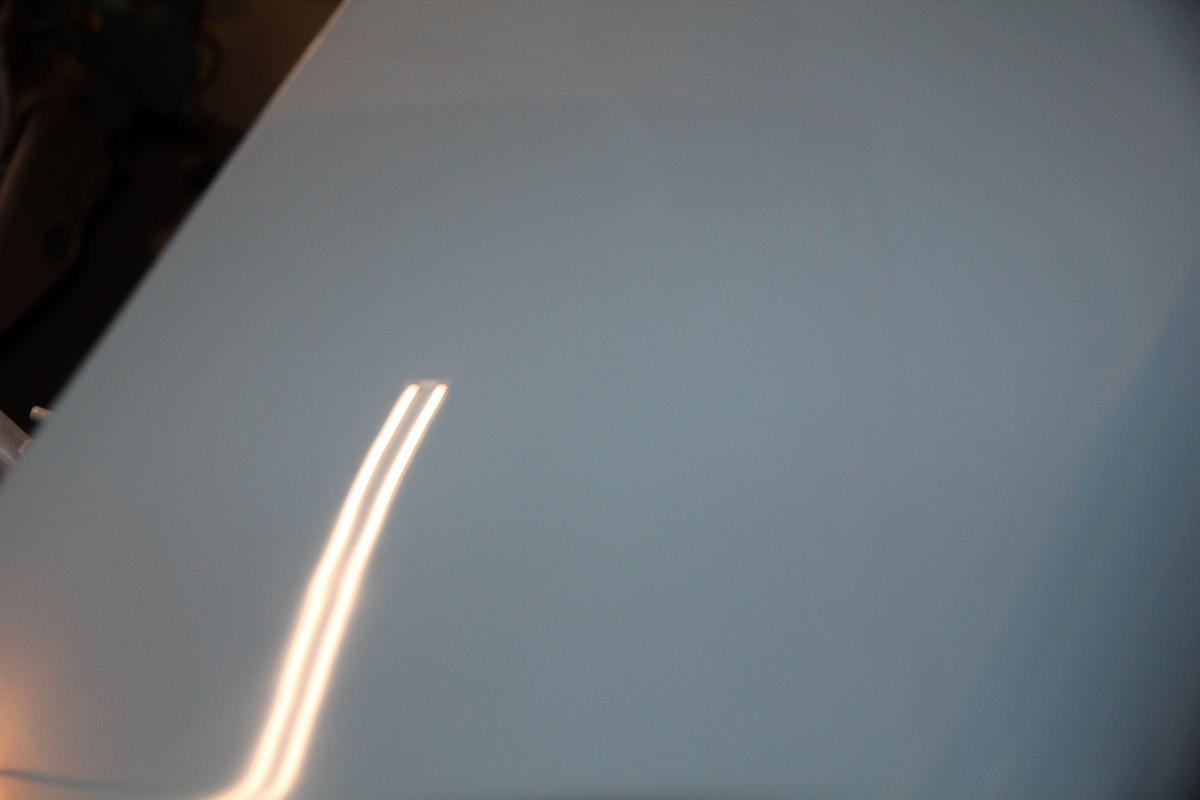
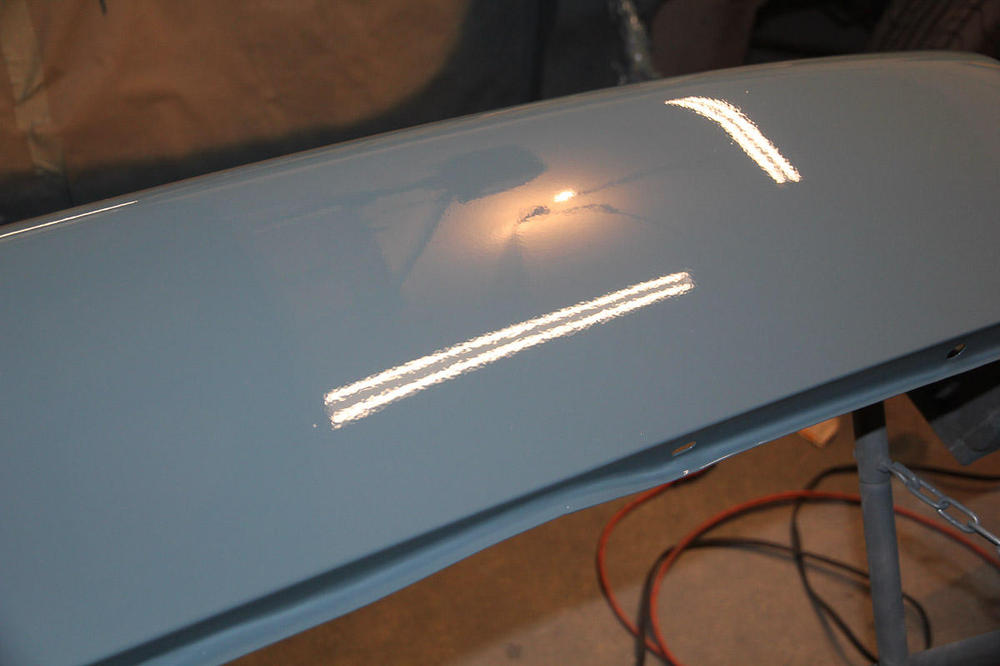
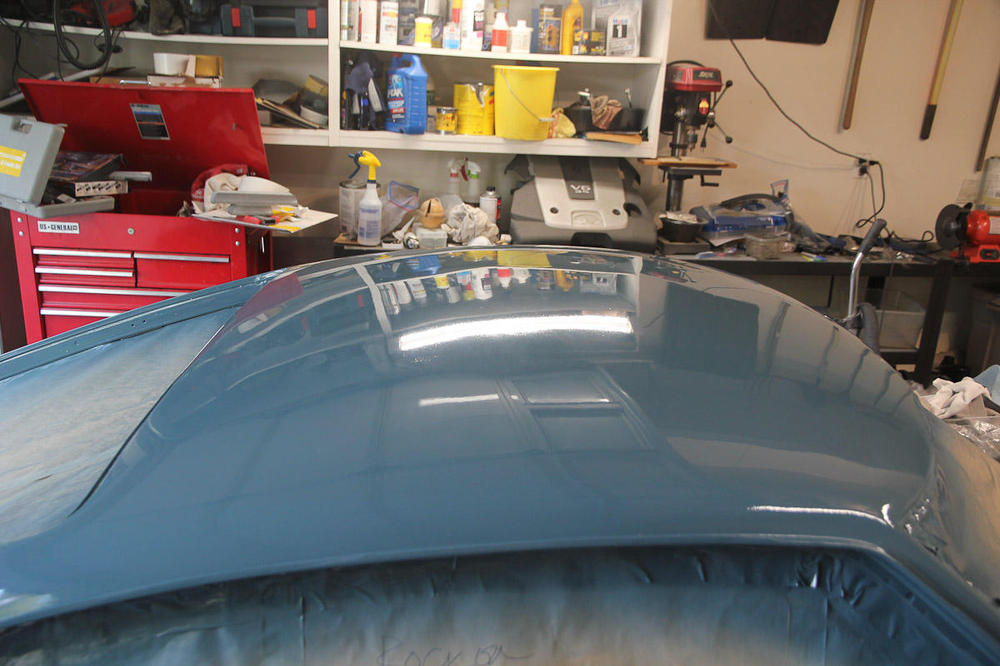
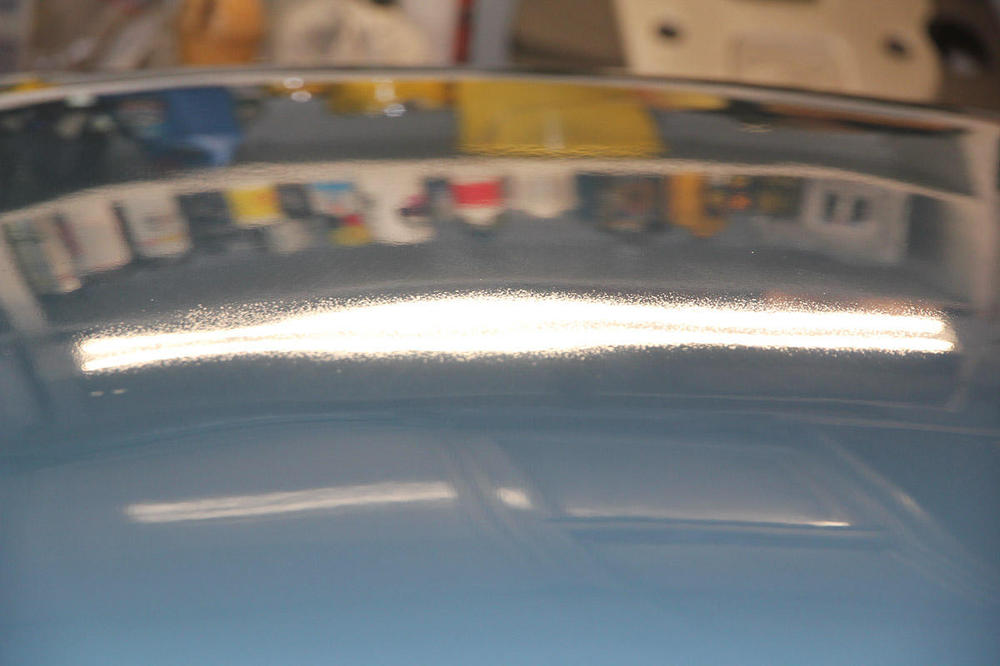
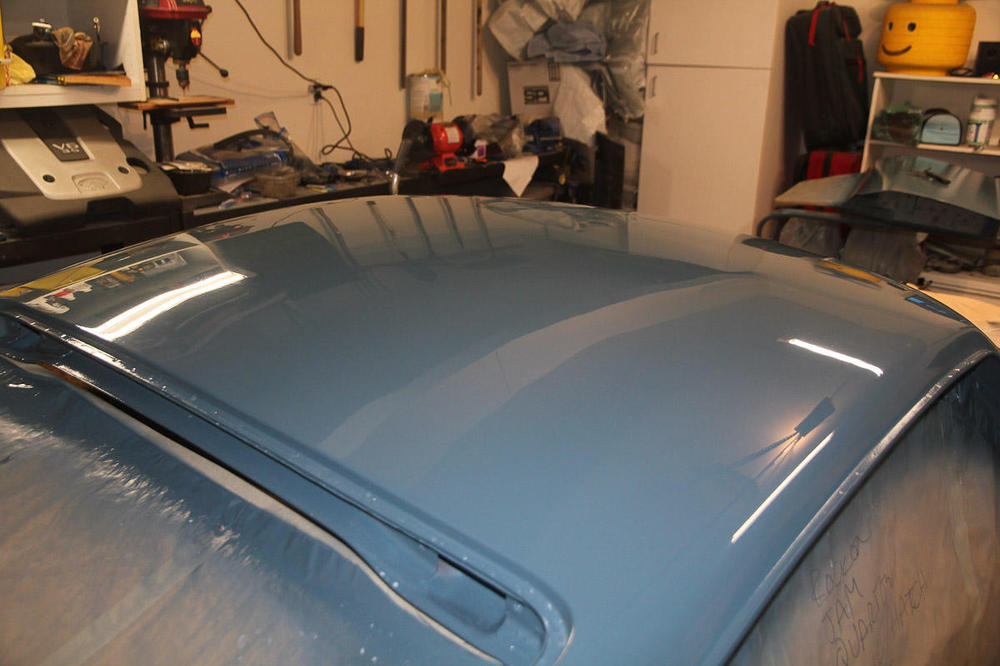
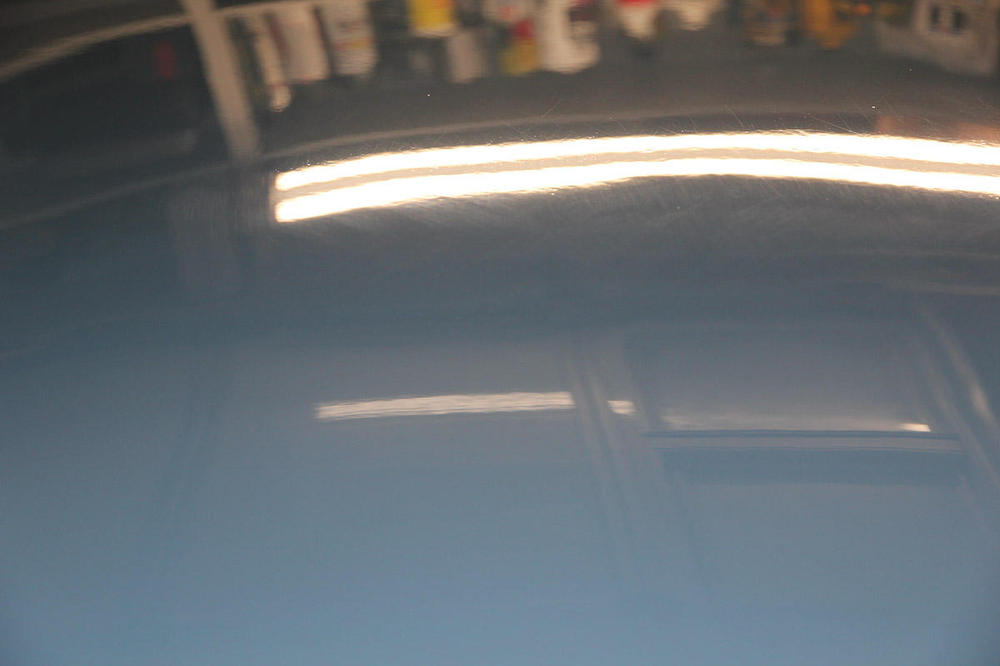
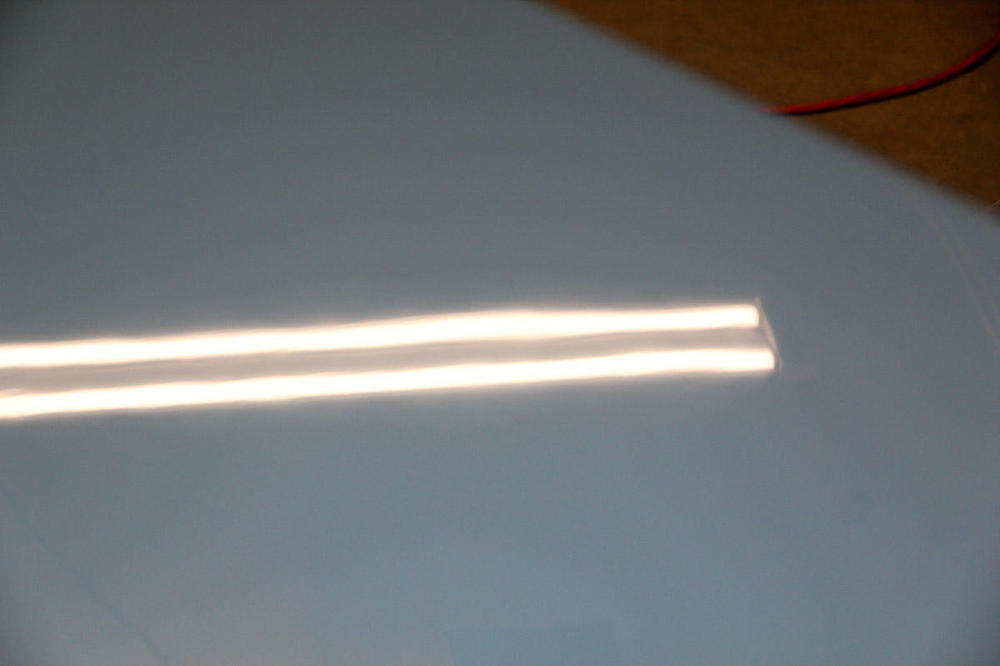
What you see on the roof and body on mine is done with Meguiar's M105 with a red foam pad after sanding to 3000. I'll follow it up with M205 with a yellow pad. I needed to do two or three passes with the DA to get the shine back, with more pressure than I thought it would take (that was key). The compound and foam just don't take much off at all. It's fairly idiot proof in that sense, but tougher to get out scratches. The ones I have left, I think, are from 2000. The thing I have the most trouble with is how far I can sand. It's easy to tell when the paint is flat, but I'm worried about sanding through. Sent from my SM-G950U1 using Tapatalk
-
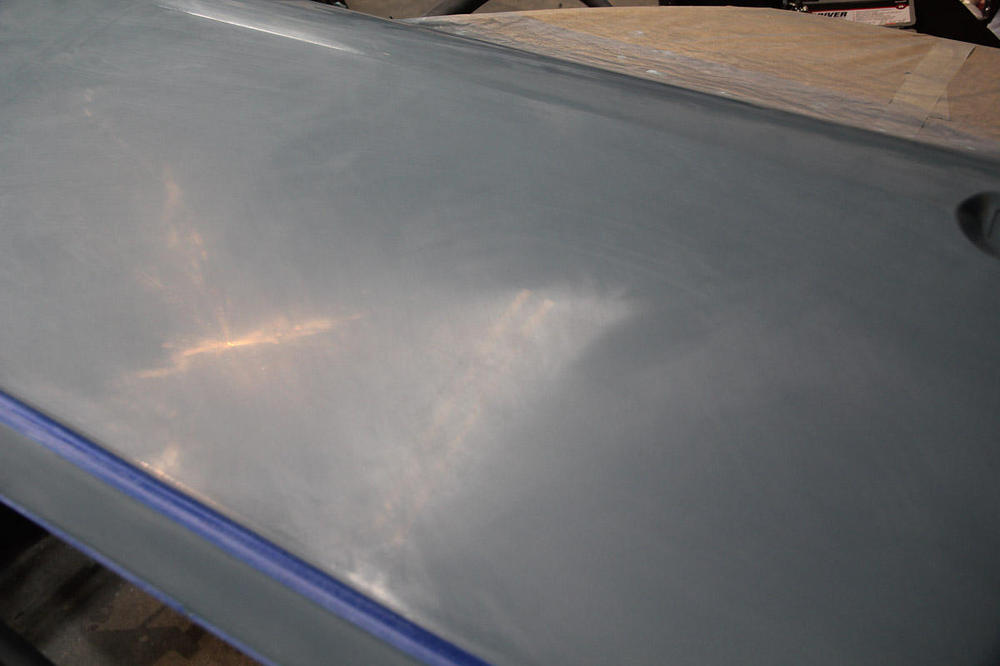
Did the body today, and the roof twice. Worried about sanding through the paint again, and over-corrected instead by not sanding enough. After polishing, I put it outside and decided that it just wasn't good enough. Second time around isn't perfect, but it looks loads better, even without the polish yet. Now I'll probably want to go back and clean up the B pillars and maybe the shoulder part of the rear quarters. Finally getting the hang of the DA polisher, too.
-
Thanks for the kind words! The experience has been instructive: a lot of lessons learned that I can carry to the next project (whatever it is and whenever I can convince my wife that I need a new one). And I have even more appreciation now for the work and skill that goes into the flawless, top-quality paint jobs out there.
-
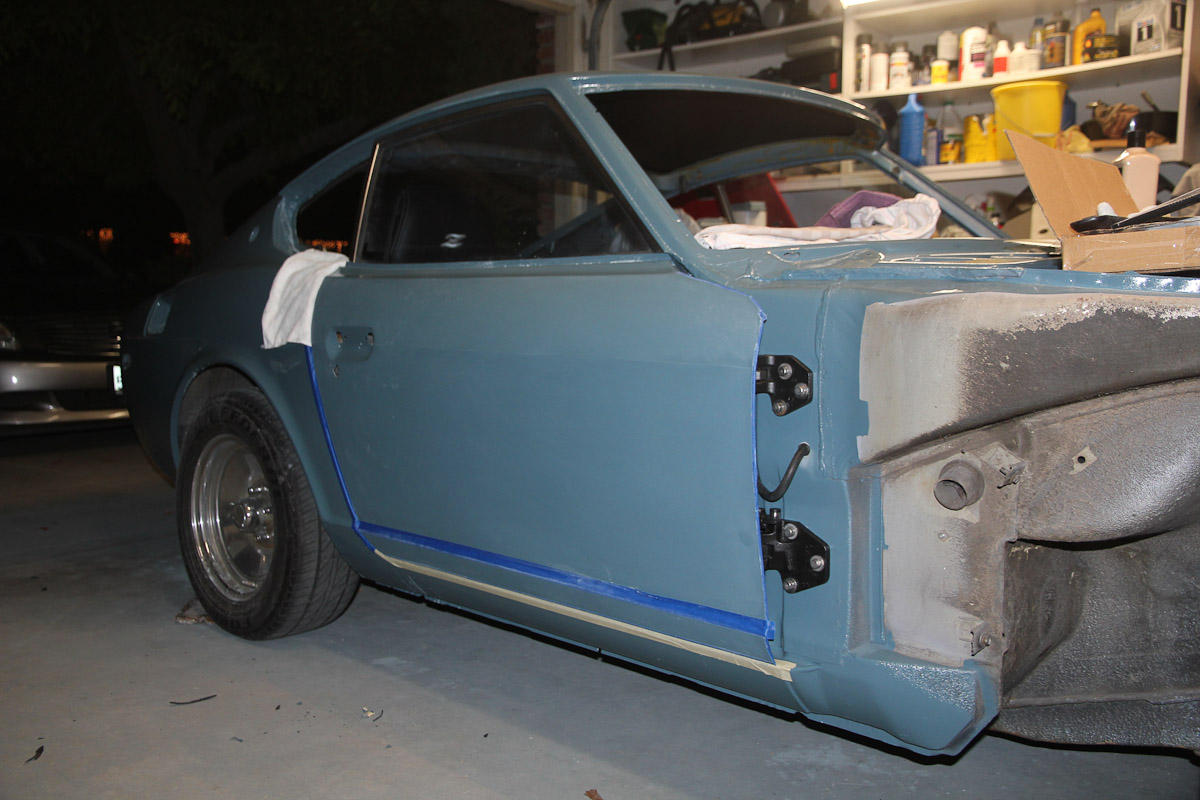
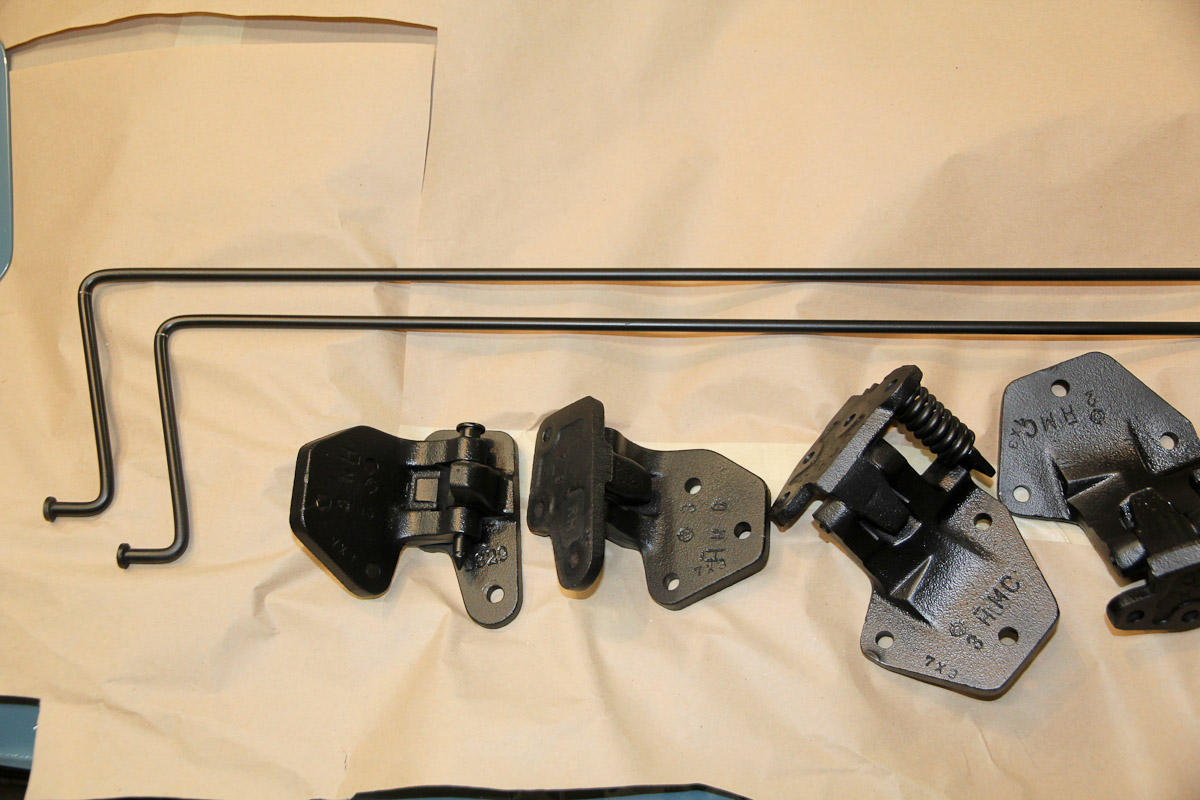
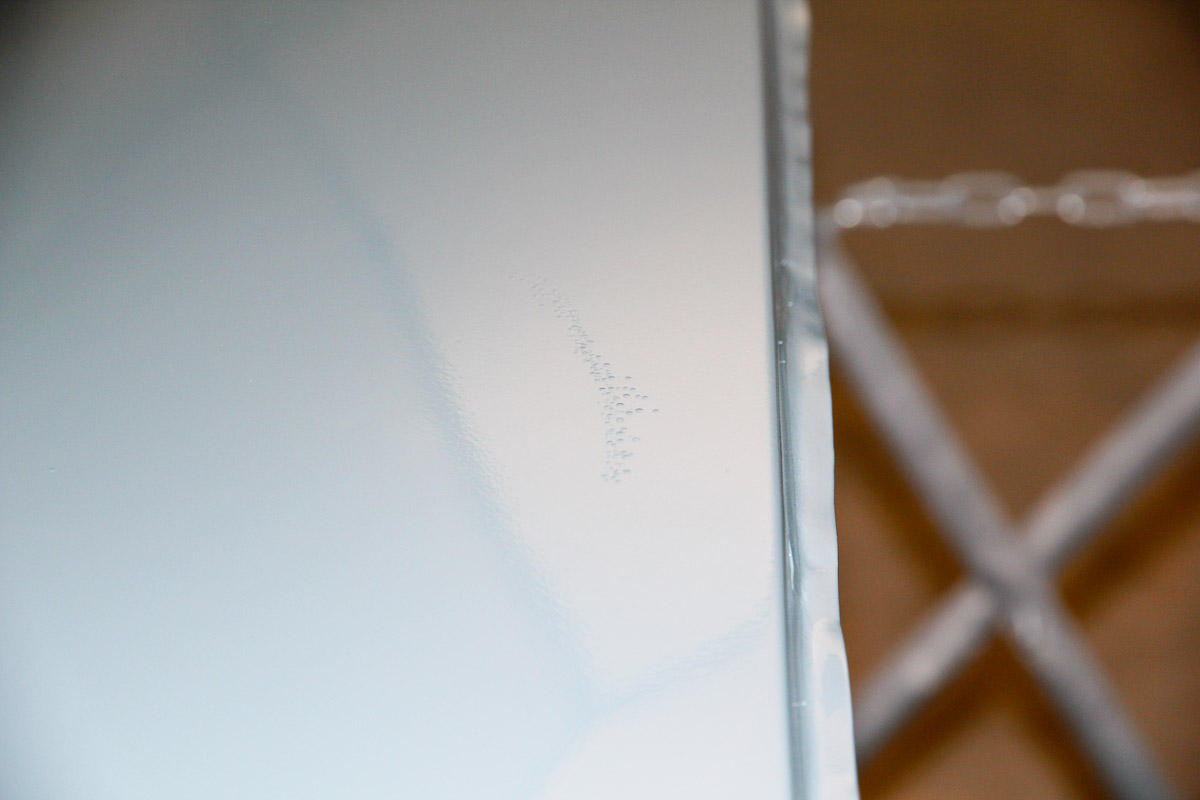
Yeah, I shot single stage. I tried wet sanding but it didn't seem to help a whole lot and I was worried about going through too much of the paint. Oh well. I did the hatch this afternoon. Before -> 1500 -> 2000 -> 3000 -> M105 -> M205 I have to share the hangups, too. Turns out the hatch edges had less paint on them than my fender I practiced on. I should have been more careful with wet sanding and I have a couple areas where the sealer is peeking through. Those will be my reminders to tape up the edges everywhere else. And the paint's definitely not perfect. I can get a pretty nice shot if I let the camera focus on the reflection, but the flaws are there with manual. So it doesn't hold up to intense scrutiny, but does look plenty nice sitting here in my office, and I think I'm as likely to make things worse as I am better if I mess with it much more. I'll look at it in the sun tomorrow before moving on for good. Meanwhile, the amount of all the other stuff still left to do is coming into focus. Over the weekend, I fixed one of the door hinges, cleaned them all up a bit, along with the hood torsion rods, and painted everything with a bit of Rustoleum so they look nicer. (Side note: I love my little Harbor Freight detail gun that came in the two pack!) I got the rods and hood hinges installed. That's also something I hope not to have to do again. Boy, the unpainted bits really stand out now. Happy Thanksgiving everyone!


-
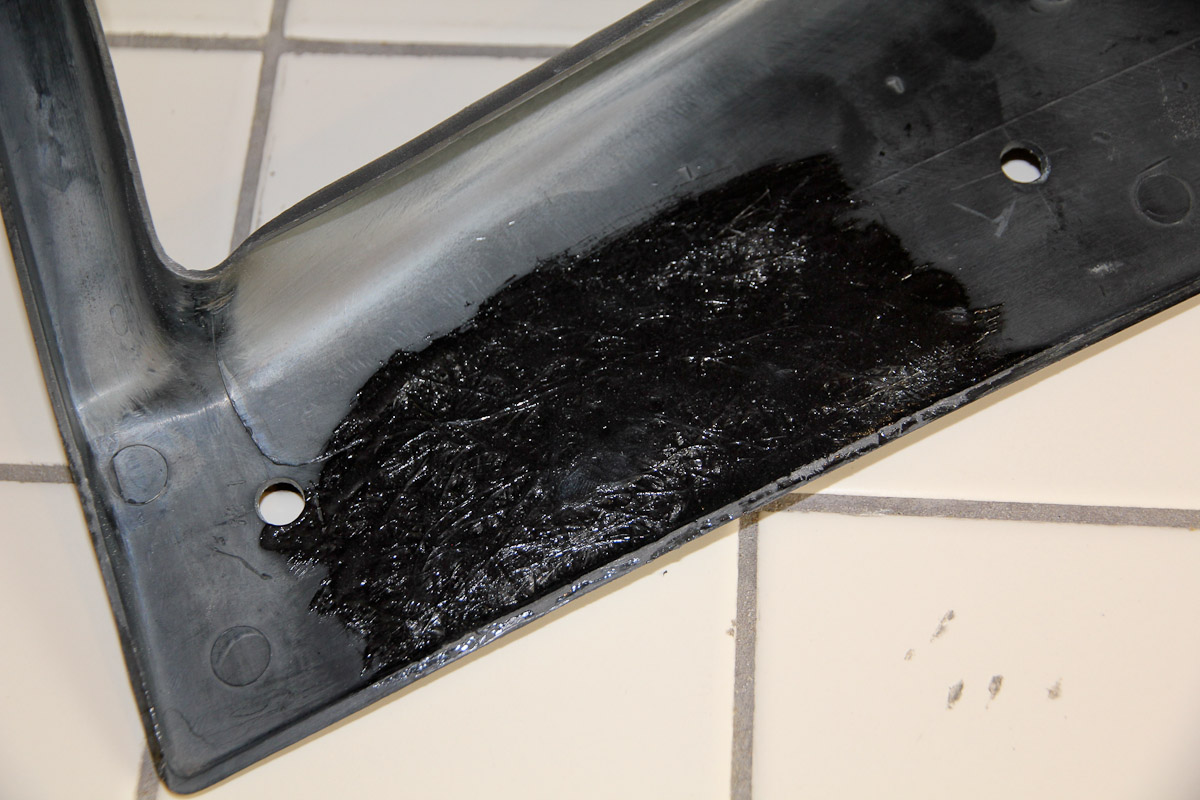
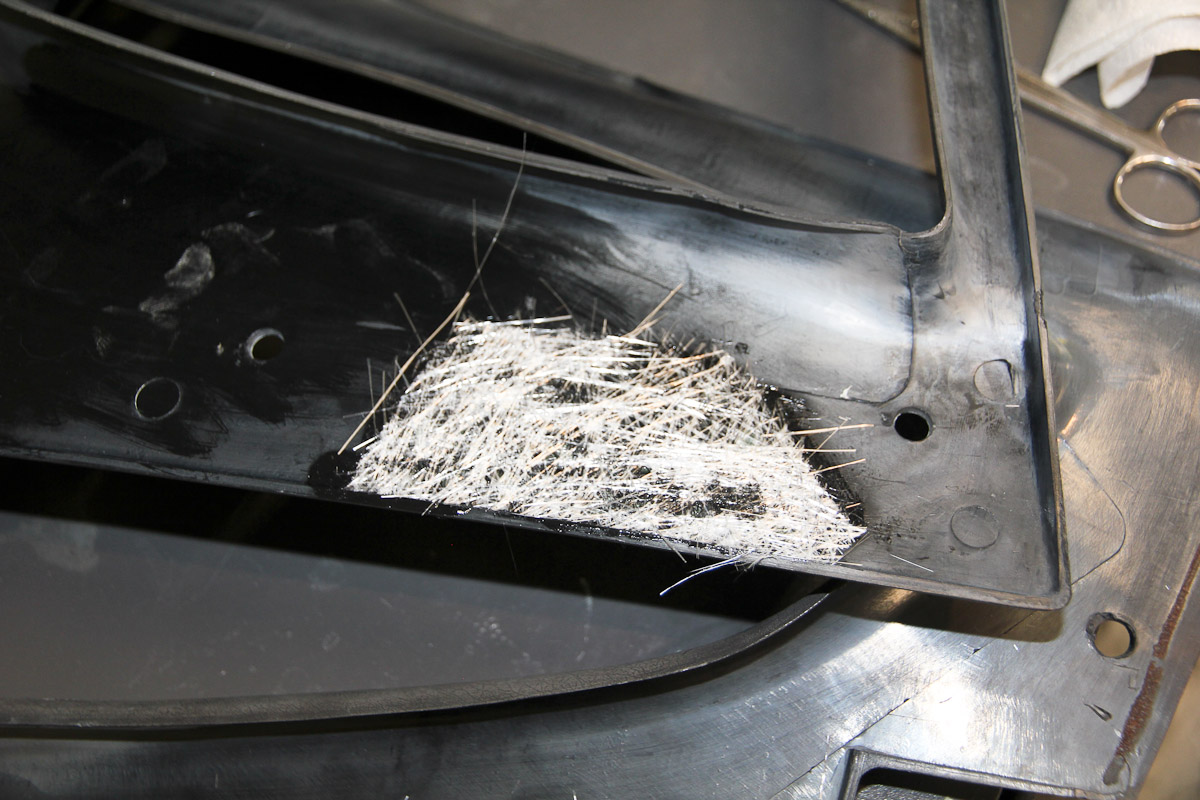
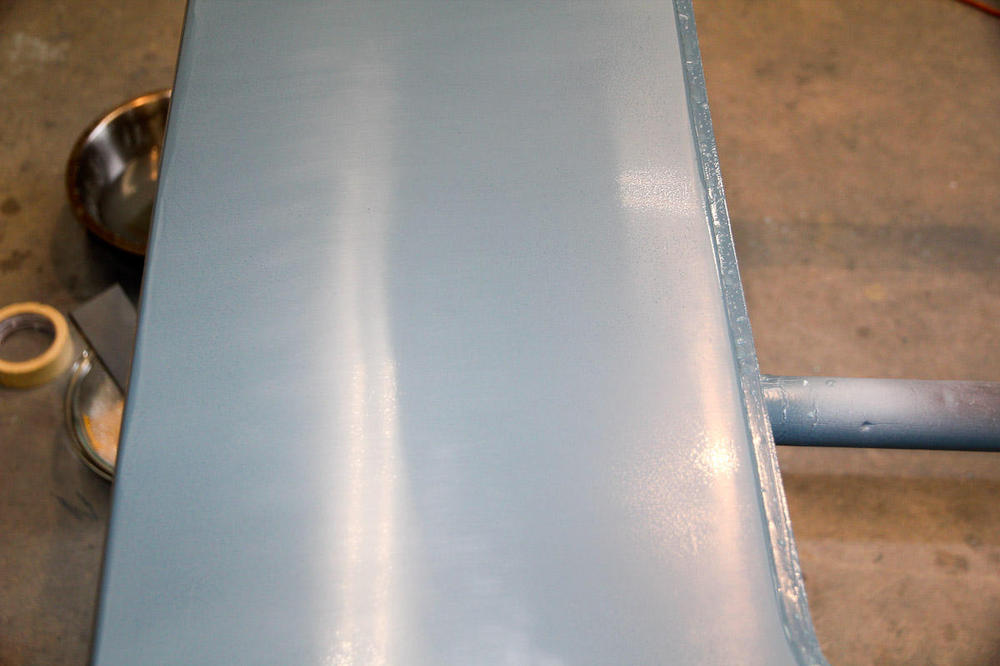
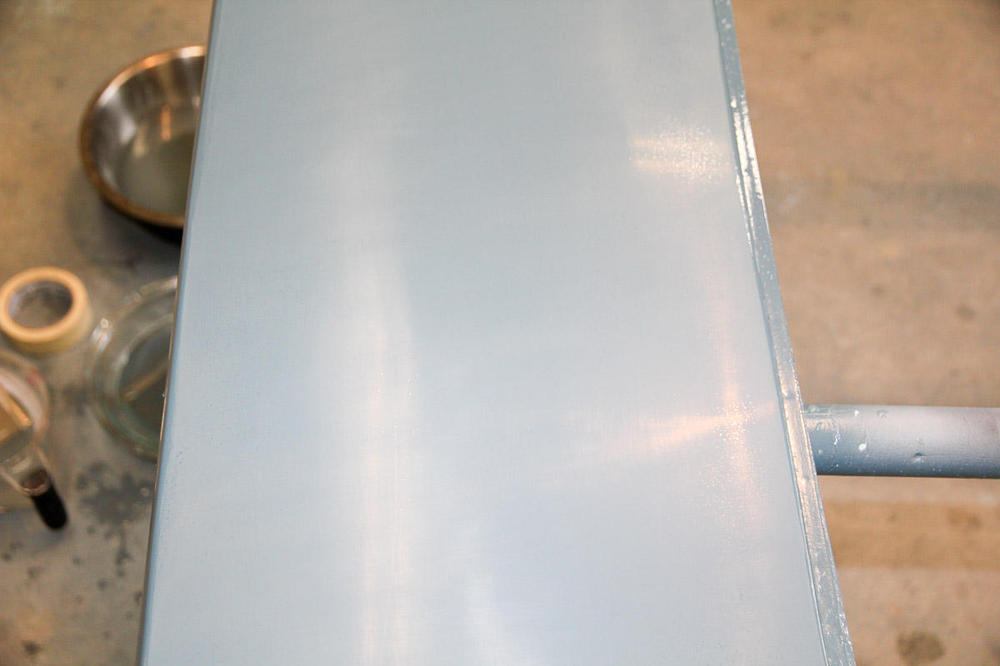
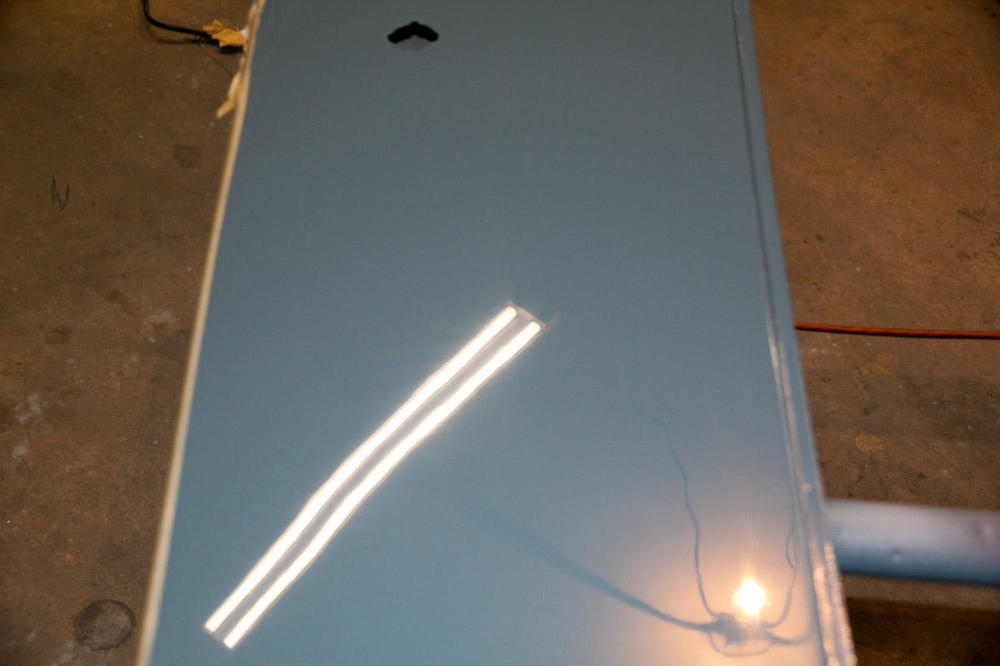
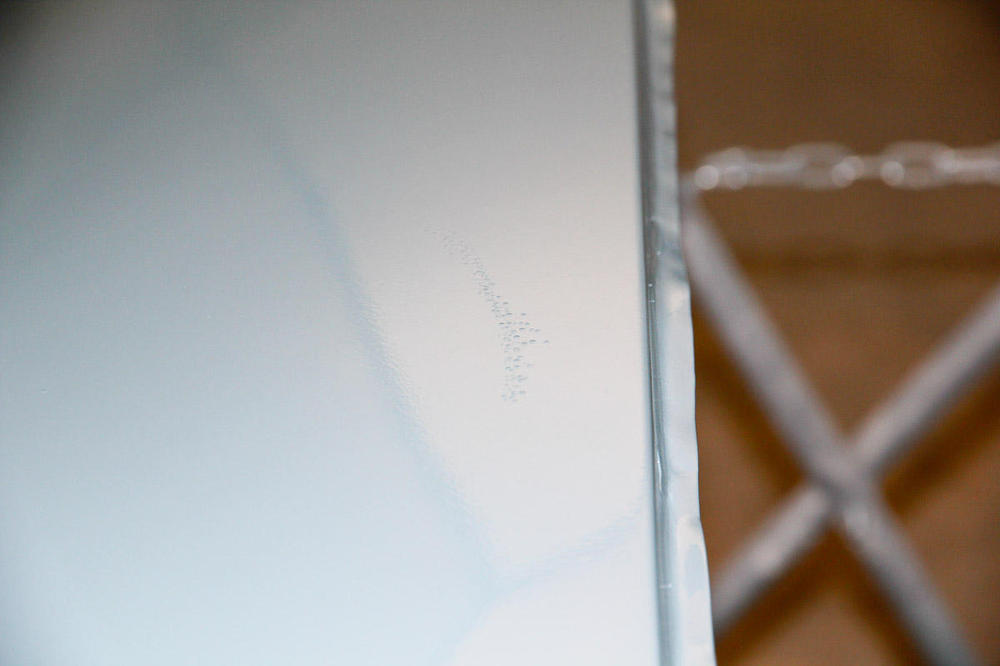
A little bit of a step backwards since the last update. I moved the fenders inside to make room in the garage and when one of them caught the light I saw a flat spot/dent on a headlight bucket that I (somehow!) managed to overlook all this time. Uugghhh. Thought (okay, hoped) I might get lucky and be able to hammer it back into shape. Nope. Thought (with less hope) maybe it wouldn't be too obvious installed on the car with the hood. Also nope. I've put too much into it so far to cut corners now, so I had to fix it. The body work was easy enough, but advice about blending paint seemed to range from "it might work if you have the all the right materials and really know what you're doing, but probably not even then" to "bet on the Browns to win the Super Bowl first." But I gave it a shot (two shots, actually) anyway. The first attempt I tried to blend it in and ended up with a halo. Second attempt I just laid it on, which left an obvious edge that wouldn't sand out. So both failed, and I've come to accept that I just need to sand the whole fender and re-shoot it. So that's a bummer --I just want to be done painting-- but I'm making some lemonade: now I have a test panel I can use to practice color sanding and buffing. I've used 1500, 2000, and 3000 and Meguiars M105 and M205. It does seem like I'll need to go all the way up to 3000 to get out the scratches, since the polisher is less aggressive than I thought it would be. I'm more confident that I won't screw things up terribly now, which will definitely won't regret thinking in a couple weeks. I'm making a real effort to keep my expectations reasonable here and not compare my paint job to that of the show cars I saw last week. For even a quick job, it looks pretty good at standing distance; I should be happy with that.


-
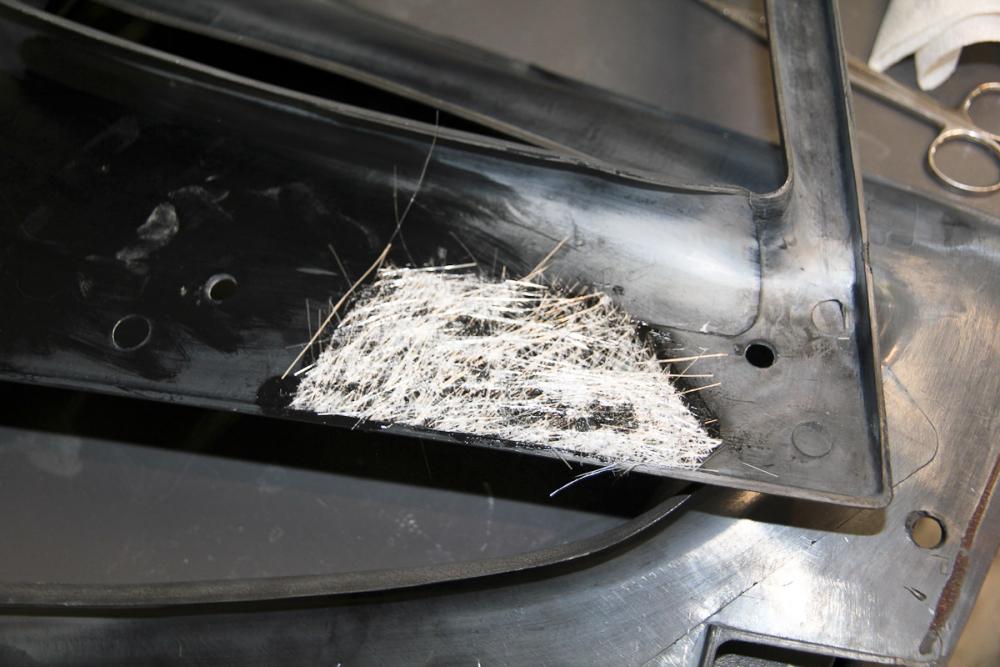
Jeff, you can use ABS cement with fiberglass to repair cracked panels. It will wet out just like resin and sets hard. Good job covering the panels. It's a real pain! I did a vinyl wrap on mine and had flashbacks watching the video. Sent from my SM-G950U1 using Tapatalk ETA: some pictures from a while back

-
YES! I keep going back, thinking it'll make sense, but...nope. At least I've determined that I shouldn't go with their microfiber system (it's designed with harder OEM paints in mind), so that helps narrow things down. Fortunately, I also have a Finishmaster here in town, so I'll check them out. Like painting, YouTube's been a great resource for techniques and tips like buff away from edges, but it's mostly useless for product information. that isn't just companies hawking their wares.
-
Thanks Charles. The sanding part seems relatively straightforward. It's the options for compounding and finishing that are leaving me somewhat befuddled. By my count, Meguiar's alone has like 9 different cutting compounds and 6 polishes. Then there's foam discs and microfiber discs (and apparently Meguiar's has special polishes and compounds for the microfiber discs, too!). With that many options, it makes me think of this gag from the Simpsons: But still, I'd hate to somehow end up with the wrong one!
-
I've finished with painting (single stage urethane), and now ready to undo all my screwups. There's some dust and other floaty bits that got into the paint that I want to get out, and a few areas where the paint didn't flow well where I sprayed a little too fast. There's some orange peel I'd like to try and minimize as well, but I don't expect to get it all out. I'm not aiming for a show car finish, but a 10 or 5-footer -- I hope! -- is within reach. So, what products do you guys like? What grits/papers/blocks for wet sanding? Which pads and compounds for polishing?
-
Walnut Creek! My home town!
-
Mike's Z shop in Whittier seems to be pretty well regarded and I see it mentioned a lot, though it's a bit of a drive. There's Z Expert in Venice. Good reviews there. Miller's Sports and Imports is out in my area in Pasadena. I took my Z to him to check out after I bought it. That's the extent of my experience there, but he always has cars stacked up in the lot.
-
-
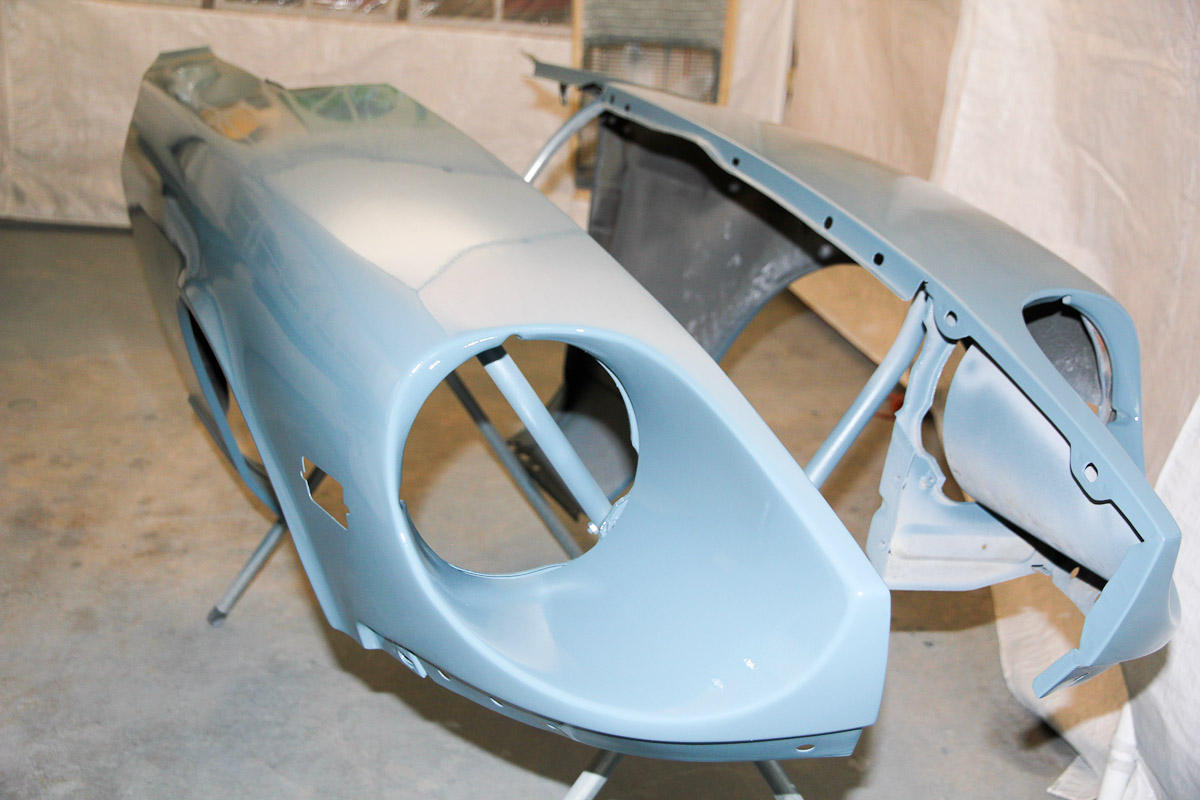
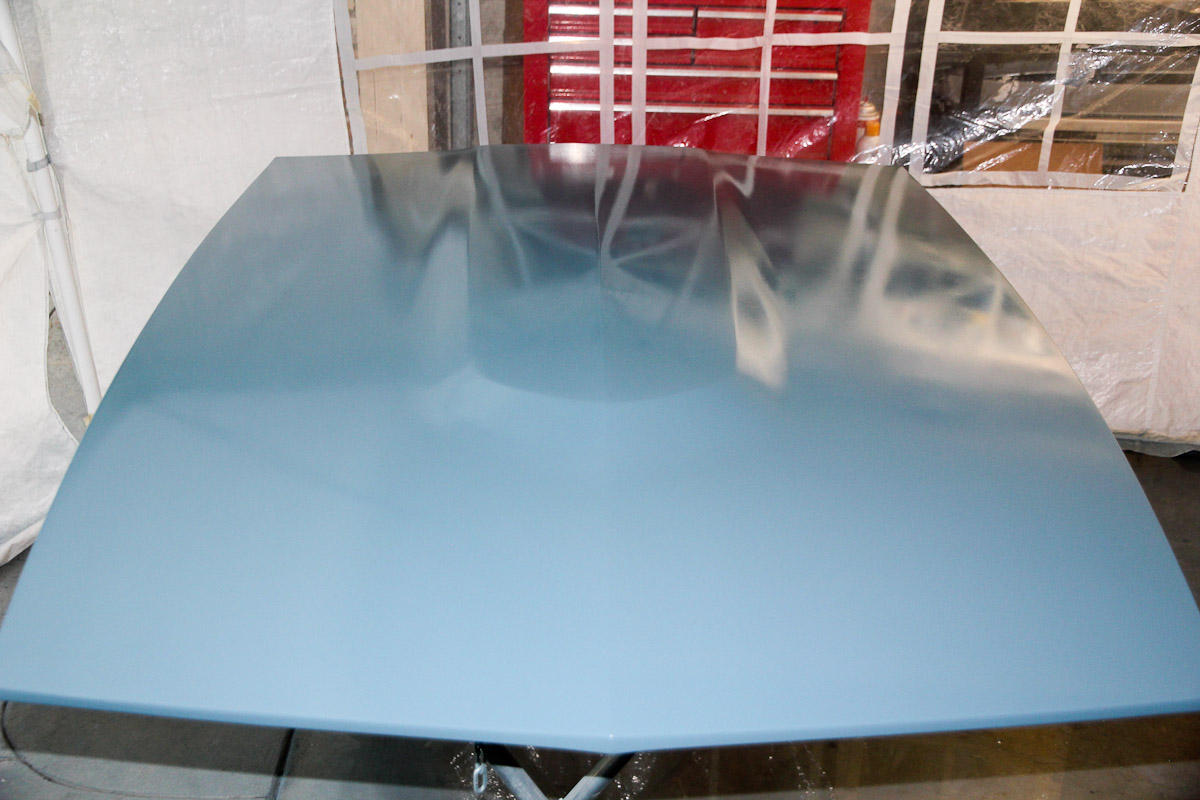
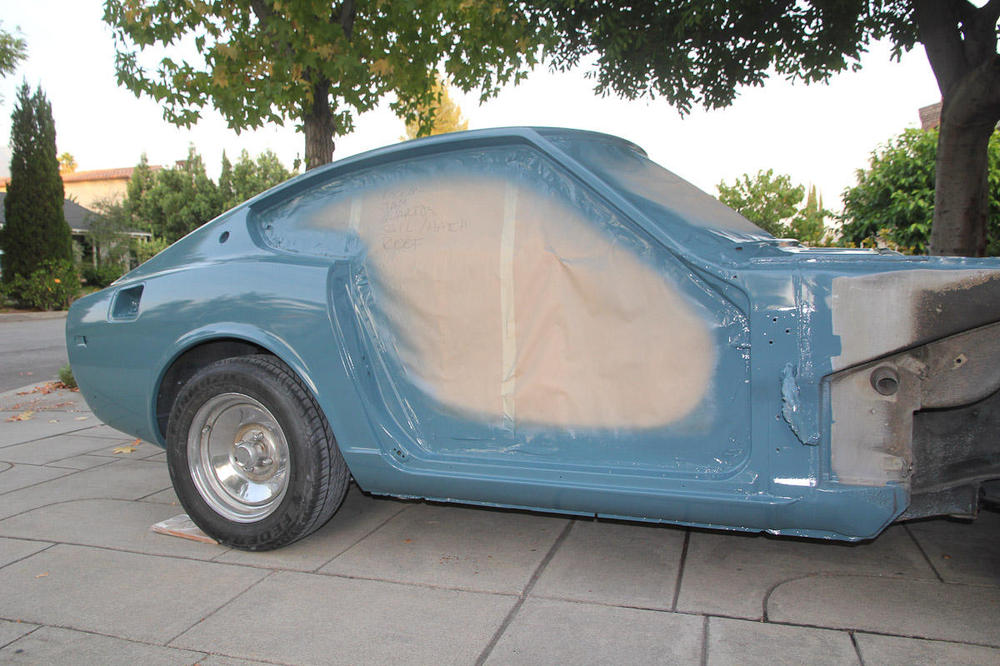
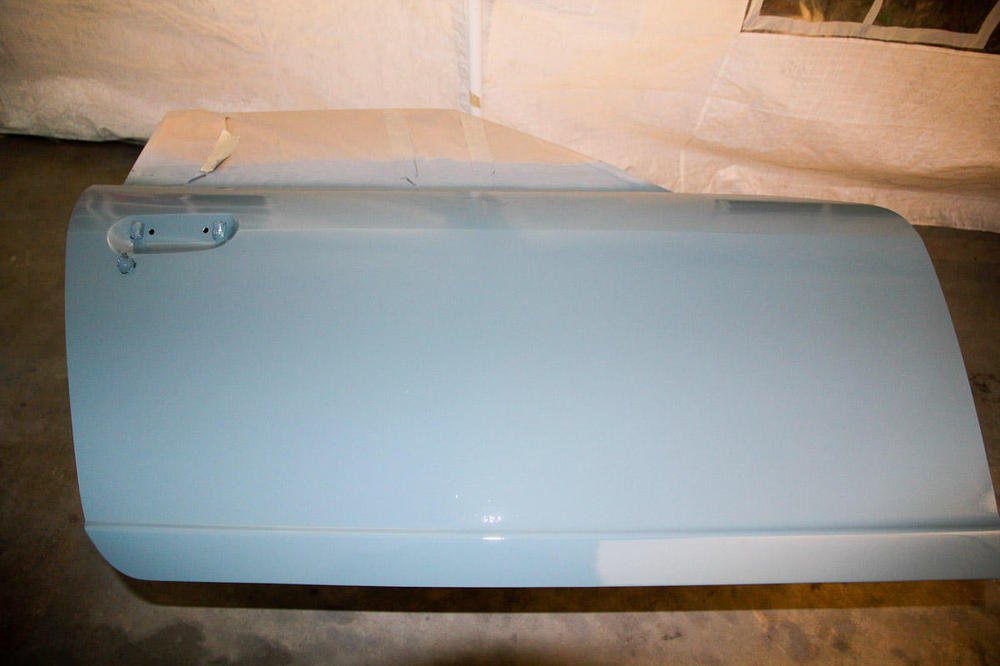
Another productive day of painting; finally in the home stretch. I got the fenders, doors, and the top of the hood and hatch done today. I think I did a better job overall on the shell than I did on these pieces, which I wouldn't have expected. I could never get a nice flat coat on the hood, and something weird happened on one spot on the top of a fender. But I did a respectable job on all my body work (phew!) and I'm planning to do a cut and buff on everything anyway, so I think it'll look good once fixed. All that's left to paint now is the cowl, inspection panels, gas cover, and the bottom of the hood and hatch. And an outside shot of the shell to show the color. This is pretty true to life. I maybe should have gone just a little bit darker and a little less saturated, but I like it.


-
My hatch has a top-to-bottom curve that's roughly the same as the horizontal curve. I think that's how it should be, but my hatch was in fairly rough shape, so I'm probably no authority here. Actually, mine *was* flat when I started... Stud welder and shrinking disk didn't help, but I was very much learning on the fly. Replacing the missing pad behind the panel did the trick for me. That said, if you're happy with how it looks now, unfixing it might not be the best move. Grannyknot's suggestion to embiggen the lock sounds good to me. Sent from my SM-G950U1 using Tapatalk
-
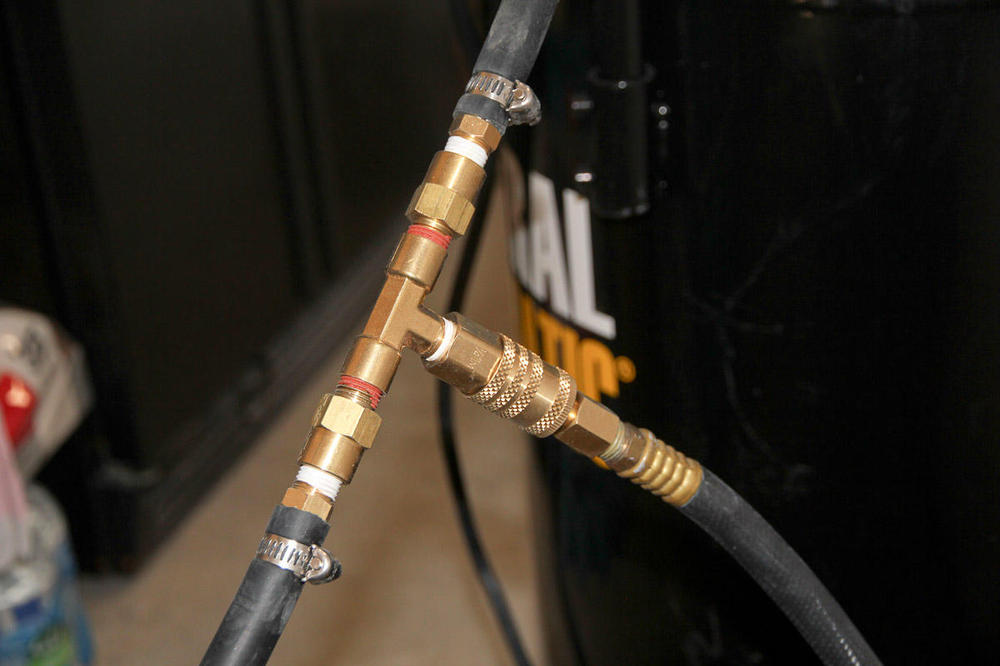
My original compressor is a 10 gallon oiled HF unit. I did the epoxy with that compressor and the purple HF gun. For the high build primer, I used a better HF gun and the same compressor. That was a struggle, but barely passable. That compressor couldn't even do a small test pass with the Devilbiss gun. The second compressor I picked up is the 21 gallon oiled one from HF. Sent from my SM-G950U1 using Tapatalk
-
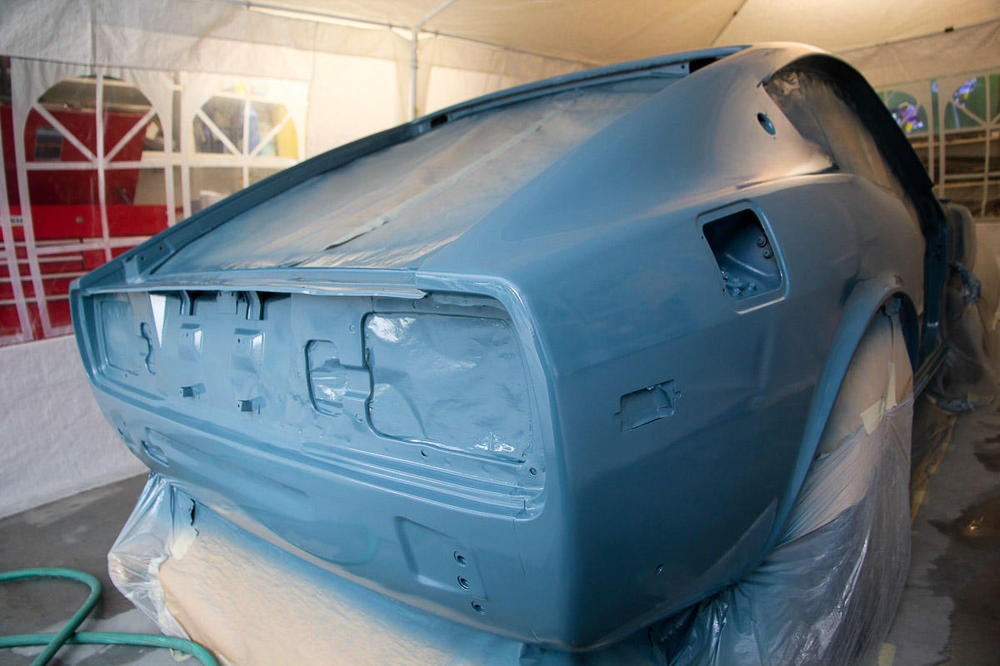
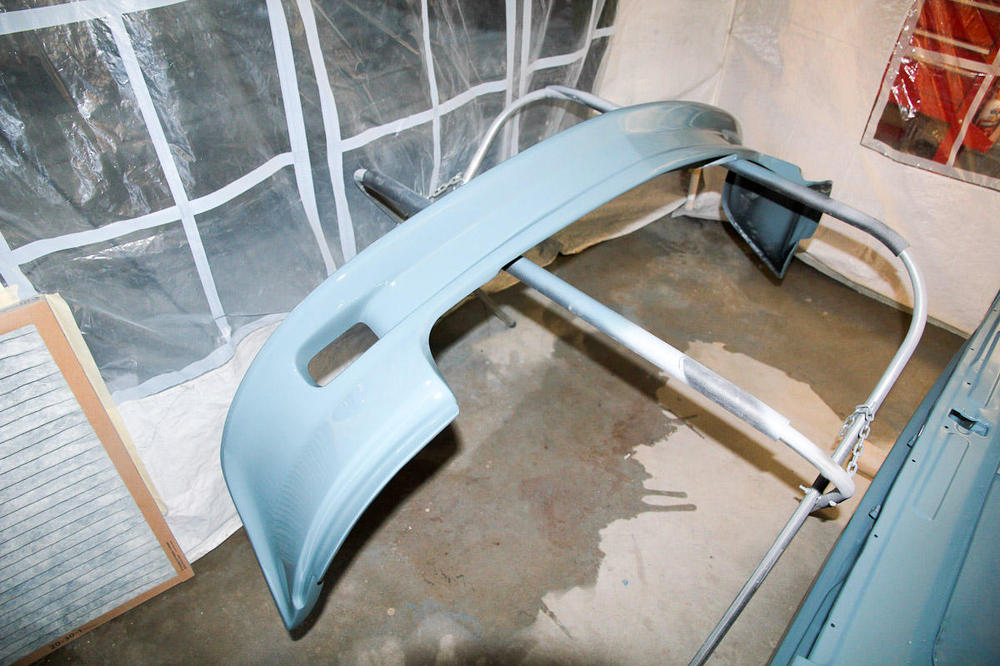
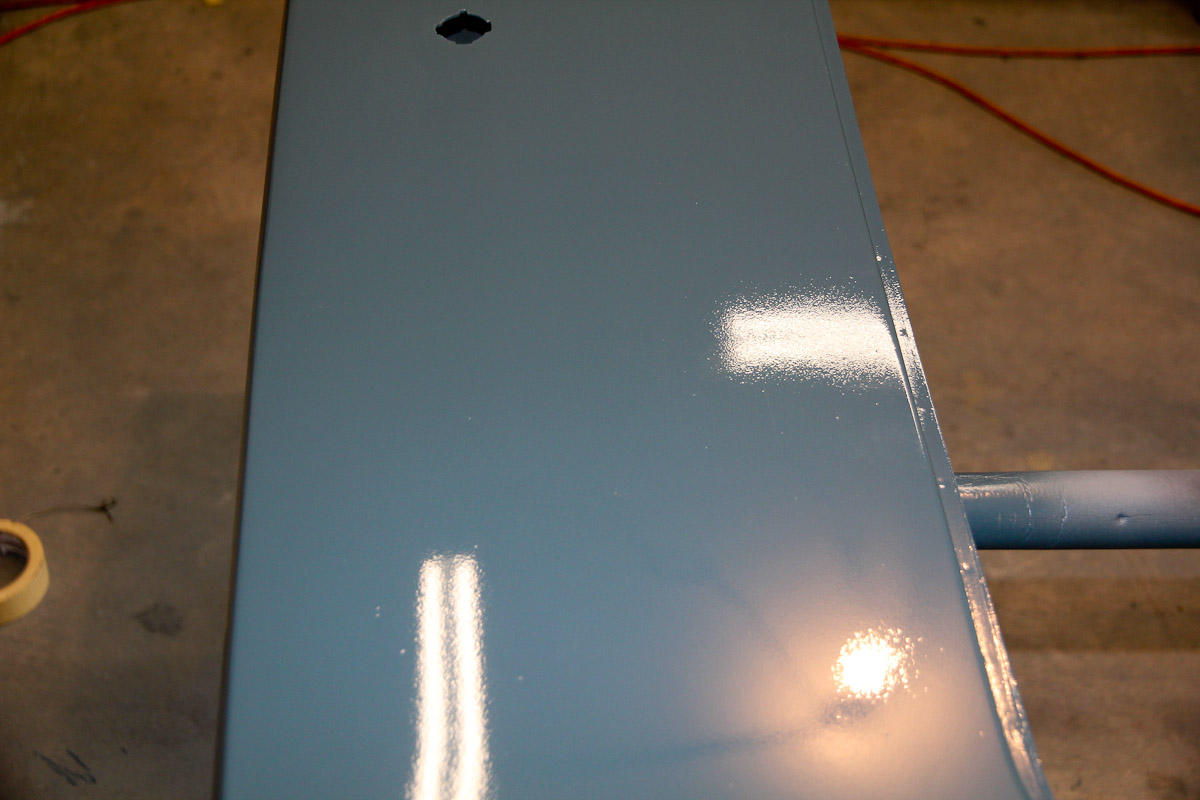
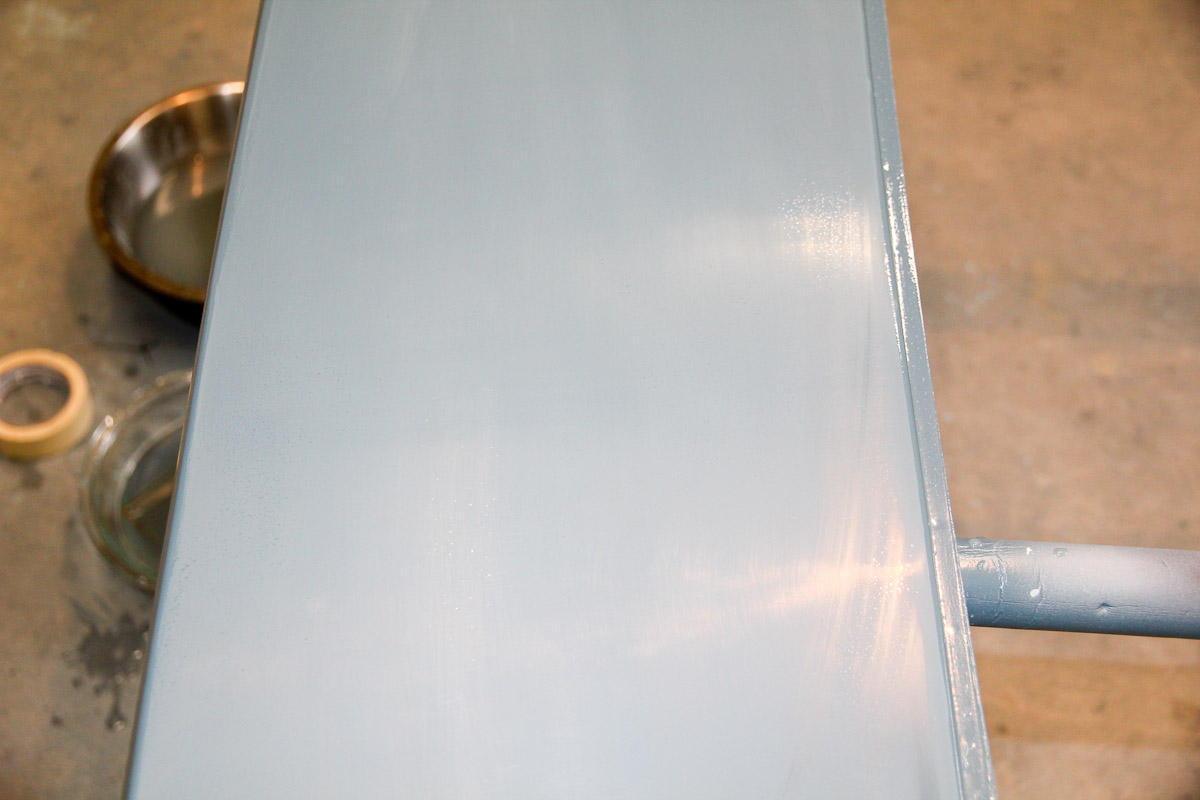
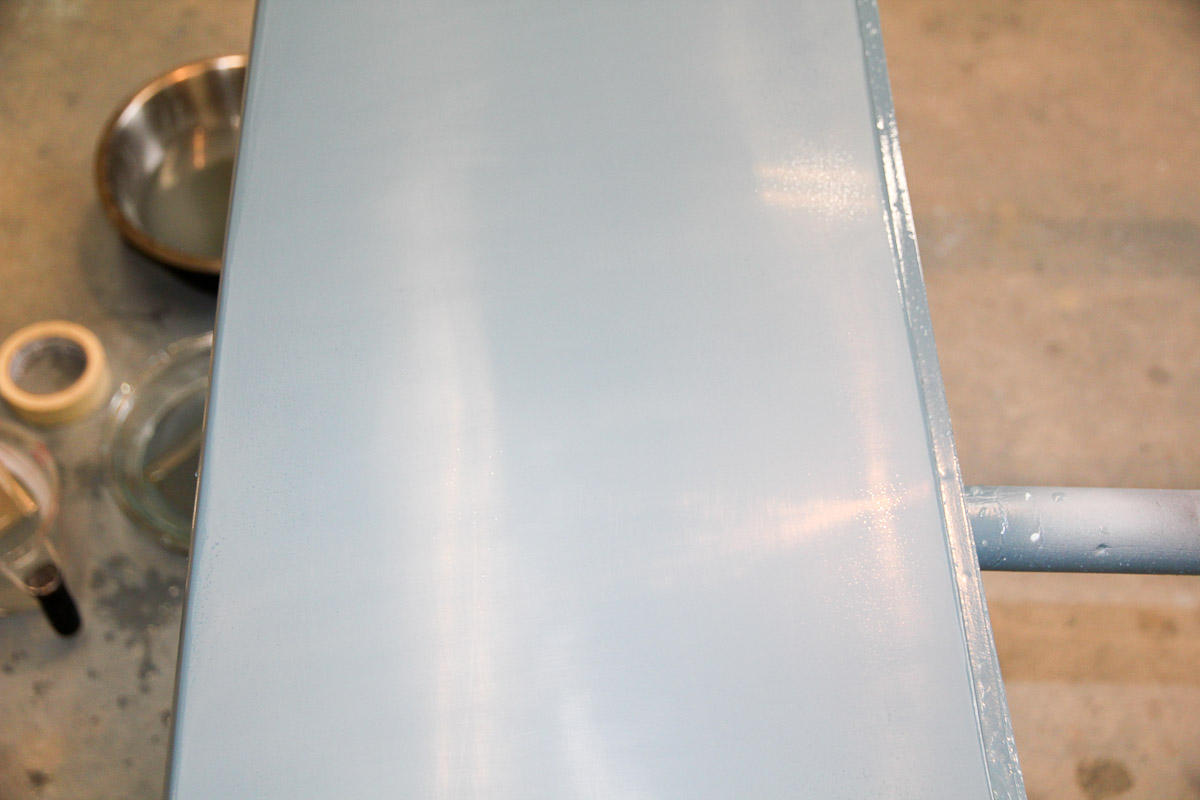
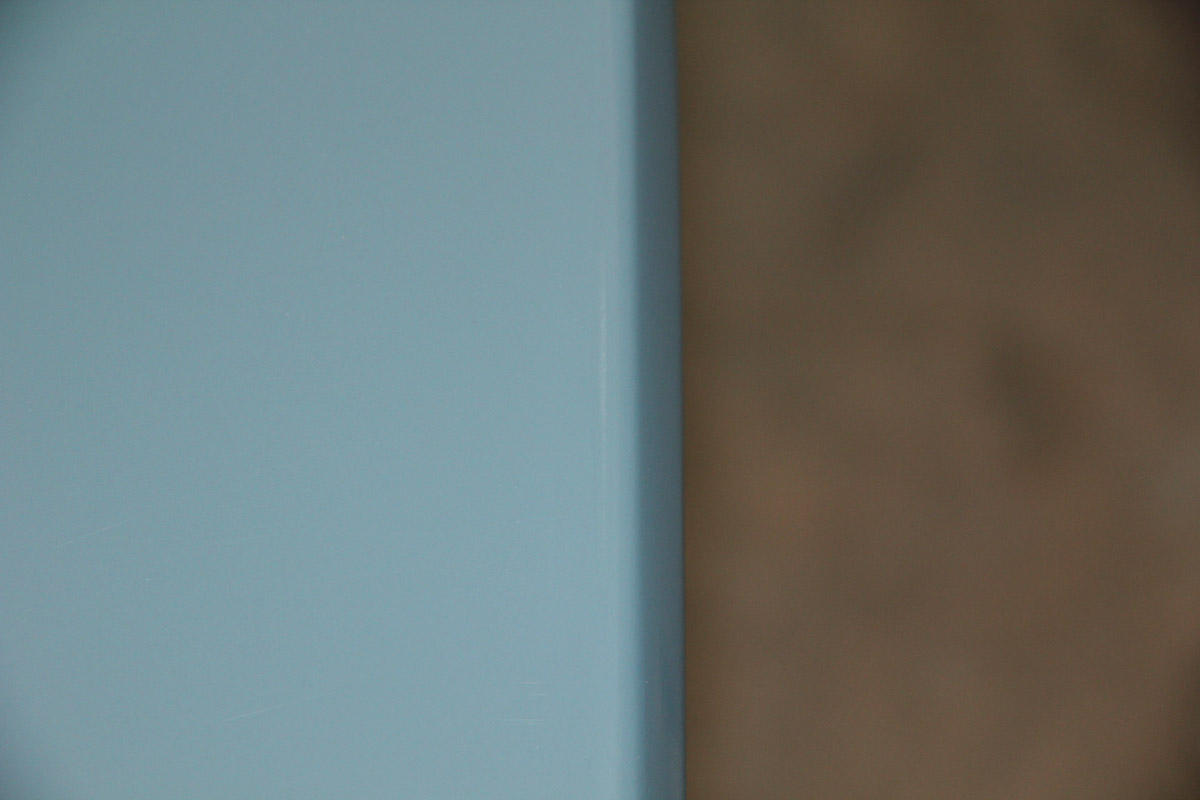
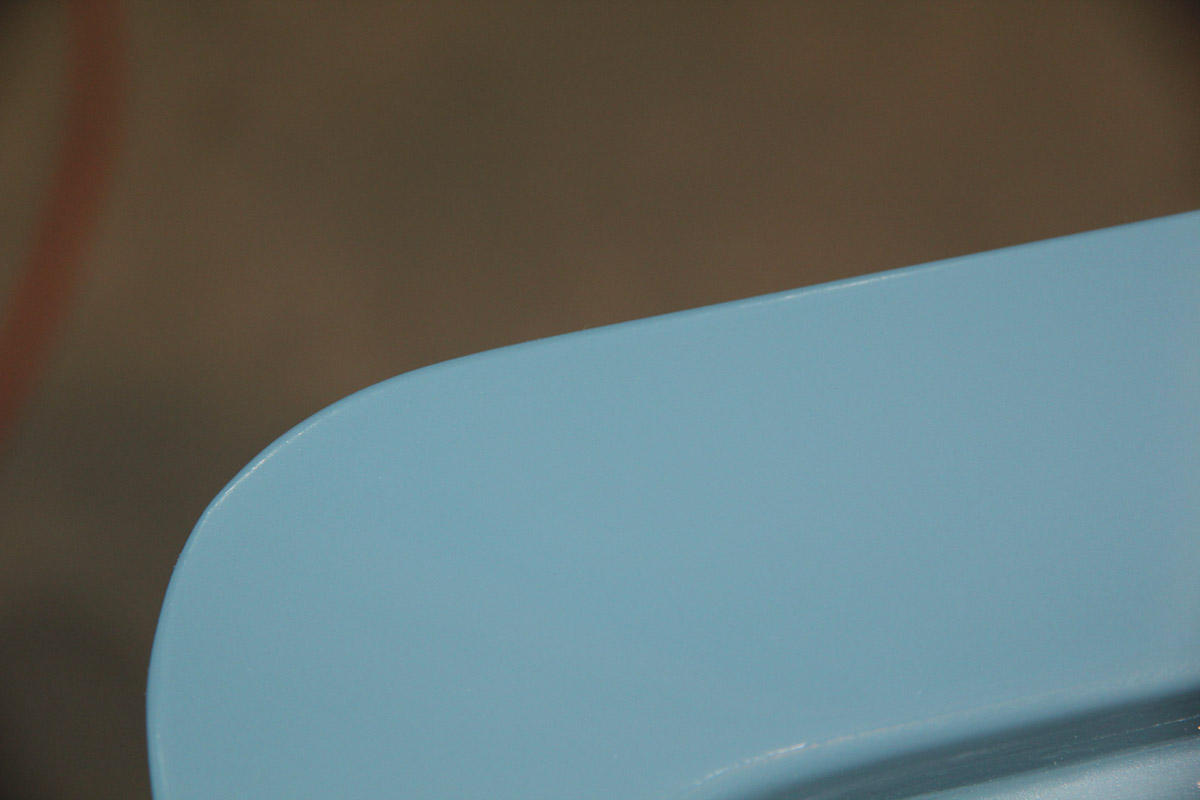
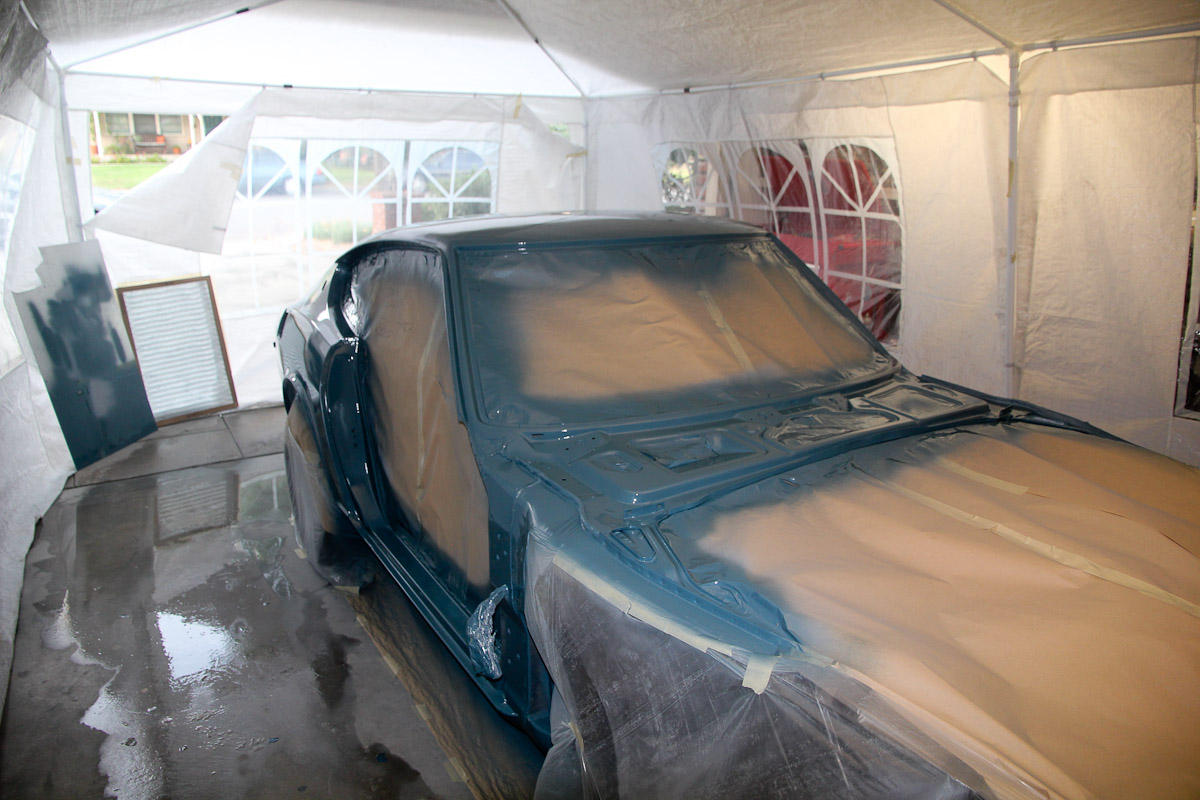
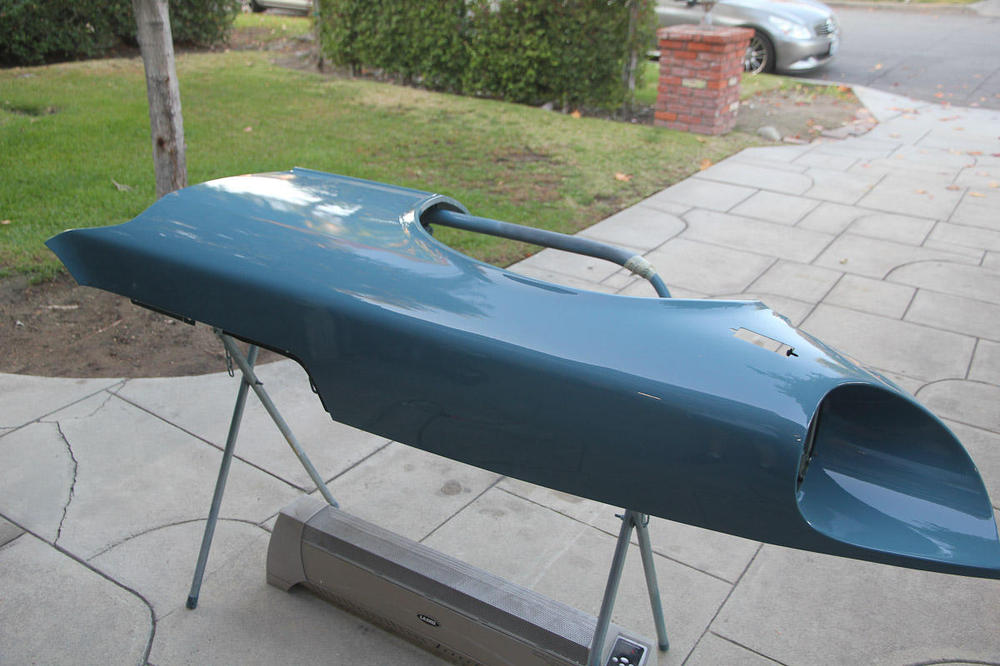
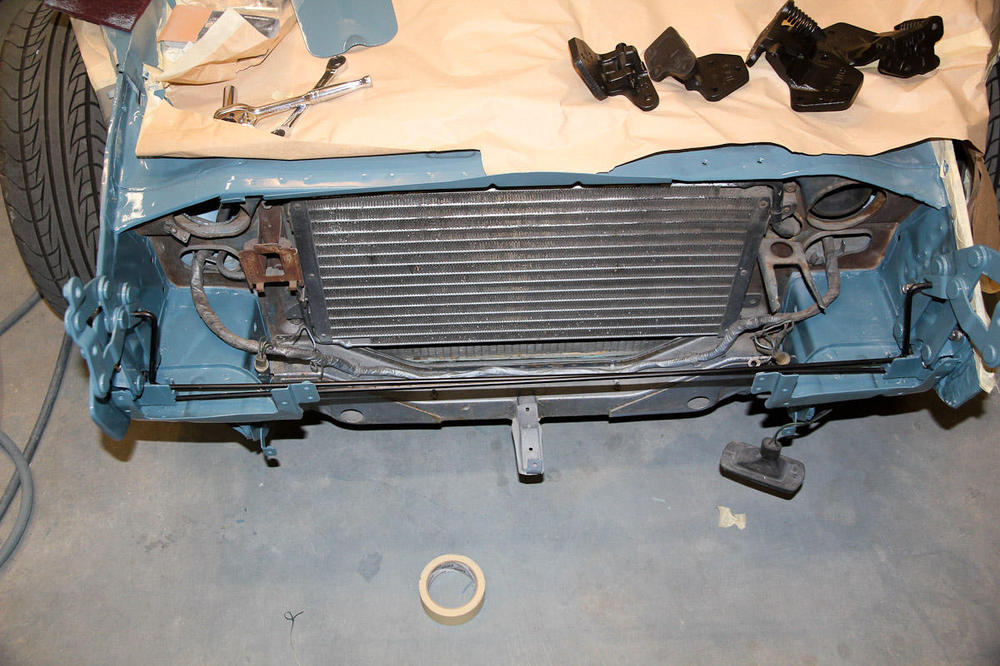
The shell is painted! Also the air dam, but that's less exciting. One coat of epoxy as a sealer, then 3 coats of color. I went with VW's Dove Blue (at least a version of it -- seems like there's some variation out there). Between the color temp in the garage (cloudy + flouro lights), camera flash, and Lightroom processing, I'm not sure any of these pictures are getting the color right, but the rear quarter shots are probably closest. So far, pretty happy with how I did. My test panels had a fair amount of orange peel, but with the exception of the driver rear quarter, I got the paint to lay on pretty flat and without runs. Body work looks pretty good, but I'll know for sure when I can roll it out into the sun. For now, I've got it in the garage with a space heater keeping everything warm. Also, I gotta give a shout-out to some guy on one of the auto body forums I read who had advice on compressors. I don't have a 240 volt outlet at my house, and can't add it as a renter, so all those threads that say "just buy a bigger compressor" aren't that helpful. But connecting two cheap-ish Harbor Freight units with some check valves did the job pretty admirably! The Devilbiss gun wants 13 CFM, but it felt like it was getting enough air the whole time. Business trip to Vegas at the end of this week, but hopefully I can do all the parts on Sunday. Woo!