charliekwin
Free Member
-
Joined
-
Last visited
Everything posted by charliekwin
-
A restomod 510 just sold the other day on BaT for $45k(!!). Maybe I'm just hearing the echo chamber lately, but I wouldn't be surprised at all to see the final sales price get into the high 20s or better.
-
I'm surprised BaT would require such a low reserve price. Considering that this Series 1 (http://bringatrailer.com/listing/1971-datsun-240z-4/) failed to meet reserve at $10k and is in significantly worse shape than yours. Heck this 77 (http://bringatrailer.com/listing/1977-datsun-280z/) just went for $5300. Good luck!
-
No tighty-whities here!
-
My tank looked a lot like siteunseen's, and I did much the same: sloshed/rinsed with water and 88 large nuts, rinsed with muriatic and then phosphoric acid, more water, then acetone, and finally used Red Kote. Materials were probably ~$100, but it was quite a bit of effort and no small amount of misery sloshing a fuel tank around in 95 degree weather wearing blue jeans, a long-sleeved shirt and a mask. The end results were good, though. I did have pink fuel for a bit, which apparently is common with California's gas formulation, and is also apparently not something to be concerned about.
-
Yeah, curious to know how it came out (not curious enough to register on the Celica site, though). I did a lot of Googling and that's the only DIY attempt at vacuum forming a dash that I could find. Just Dashes has a good video that shows their entire process as well: One of the primary reasons I've backed off the vacuum forming idea is that I don't know what to cover it with. It looks like Just Dashes uses a thermoformed plastic, and I have neither a source nor capability of working with something like that. I was thinking about 4-way stretch vinyl that's used for upholstery, but I'm not sure how well that works with contact cement and vacuum forming. The Hexis would probably work well with vacuum forming initially, but I'd be concerned with over-stretching and subsequent lifting.
-
-
Honestly Cap, at 1:30 this afternoon I was beginning to curse myself for not buying a few cans of SEM paint and was *this close* to coming online and telling everyone that the vinyl was a stupid idea that no one else should try. That may still be true -- there's a lot left to do! -- but in this case at least, persistence paid off. A whole case full of fancy gin might not be enough to get me to do it again, though. Once dash time comes around, I'll do a more thorough job of documenting the whole process in case others want to try it themselves. I'd shoot a video of one of the smaller pieces, but even those are taking about 2 hours!. Funny you mention a vacuum table, because that's exactly what I was originally planning on doing. Someone else had the same thought a couple years ago:
-
Sweet baby Jesus, when you said "under" you weren't kidding! I mean...how...why...who...? I'm kinda pissed off about that and I don't even own one! The Escape starter is a comparative piece of cake, even including the stuff I had to cut off to get the replacement one to fit (thanks to you too, TYC).

-
Slow progress this weekend. As soon as I started working on the quarter window trim bits, I get a call from my wife: "my car won't start." So a good chunk of Saturday afternoon was spent waiting for a tow, then removing the starter from a Ford Escape, and Sunday morning spent putting it back in. Ford engineers, BTW, really found a difficult place to mount those things. I don't know what I did to deserve all these starter problems So, window trim. First step was eliminating the speaker holes, since I'm not going to put speakers there and it won't look good with the vinyl. Some masking tape on the back side and a bit of body filler. To give it a little extra support, I tried something new on the back: put a light coat of ABS cement down, then a piece of fiberglass mat. Wetted that out with more ABS cement. Worked great. On to wrapping, which was beastly. I've done a similar inset like this before, so I knew it was gonna be tough. The hard part is having enough material in the middle to get into the recesses and not have it bunch up on the flat surfaces. I tried valiantly, but couldn't get it to sit right, and eventually cut a seam in one of the corners. Everything got repositioned a bit; the excess material is on the bottom left. By this point, it was not going well -- the vinyl wasn't laying well, had a lot of wrinkles, and was lifting in the corners -- and I could feel myself getting frustrated with it and was getting ready to throw in the towel. So, gym break. Back at it after a couple hours, and things started going a little better. As expected, the corners lifted, so I shot some superglue in there which should keep it in place (that trick's worked for me before, so here's hoping). The seamed corner isn't great and there are a couple wrinkles here and there, but the end result is acceptable. And the other one...I'll wait for tomorrow.


-
-
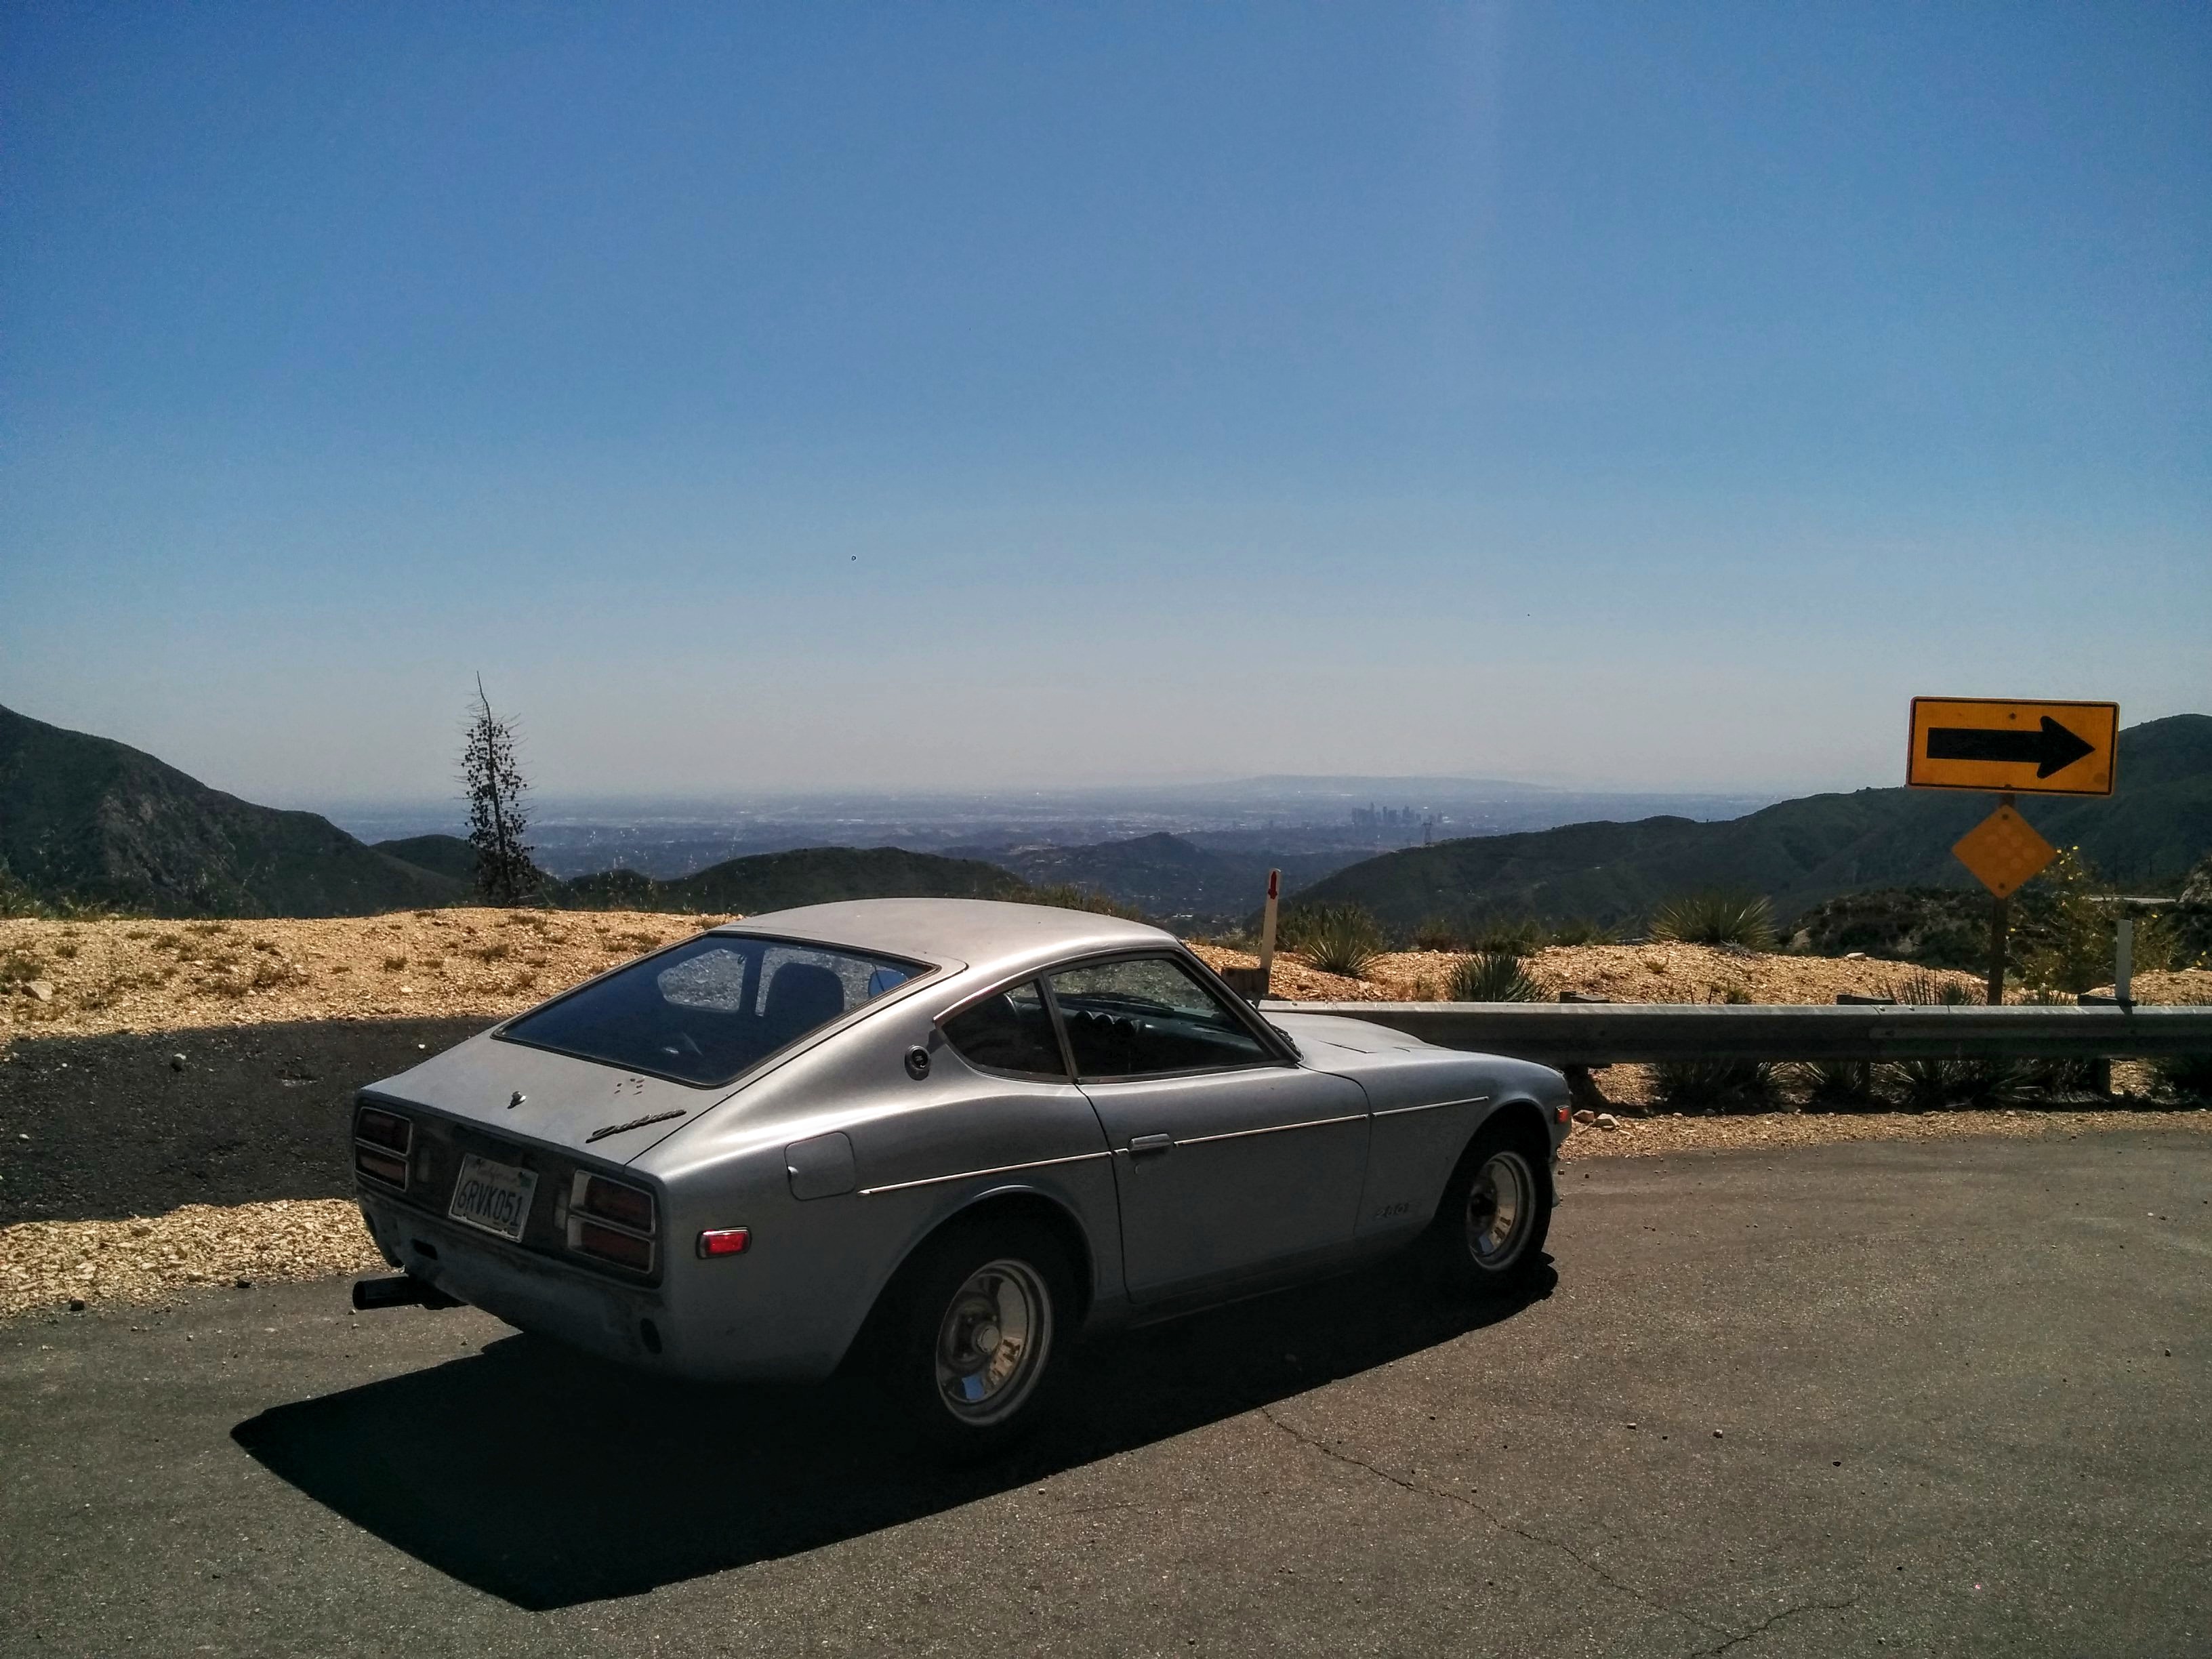
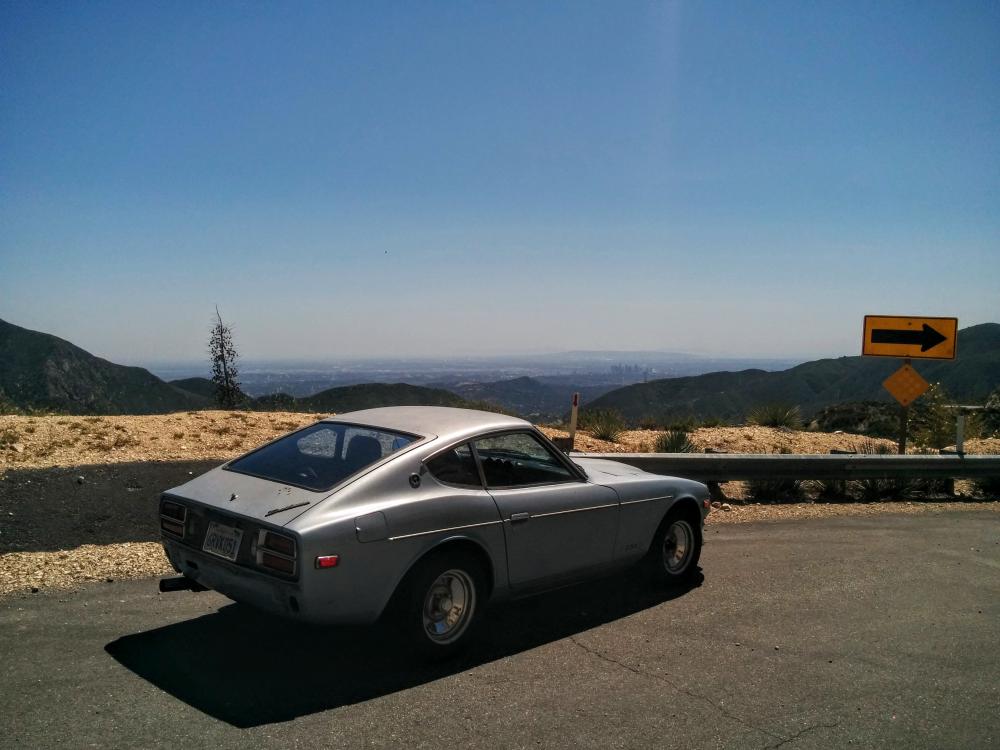
I'll never know what happened to them, but I'm 99% sure they weren't there when the starter went on the car. It's all been degreased, tidied up, regreased, and put back together now (with screws this time!), so that's over and done with. And since I took the day off work, it seemed like as good a time as any to finally take the car out. First time it's gone farther than just around town. Has some rough spots, but it's kind of fun to drive!
-
It's a remanned unit, but I would hope it would've been noticed and addressed. Mistakes happen, and maybe I just have bad luck with shops, but darn if that kind of stuff doesn't seem to happen more often than I'd like. At least it's an easy fix. Bless those 1970's engine compartments that let you see all the way to the ground.
-
Those weren't in the kit I got for the 78, either. Someone in packing got mixed up, I think.
-
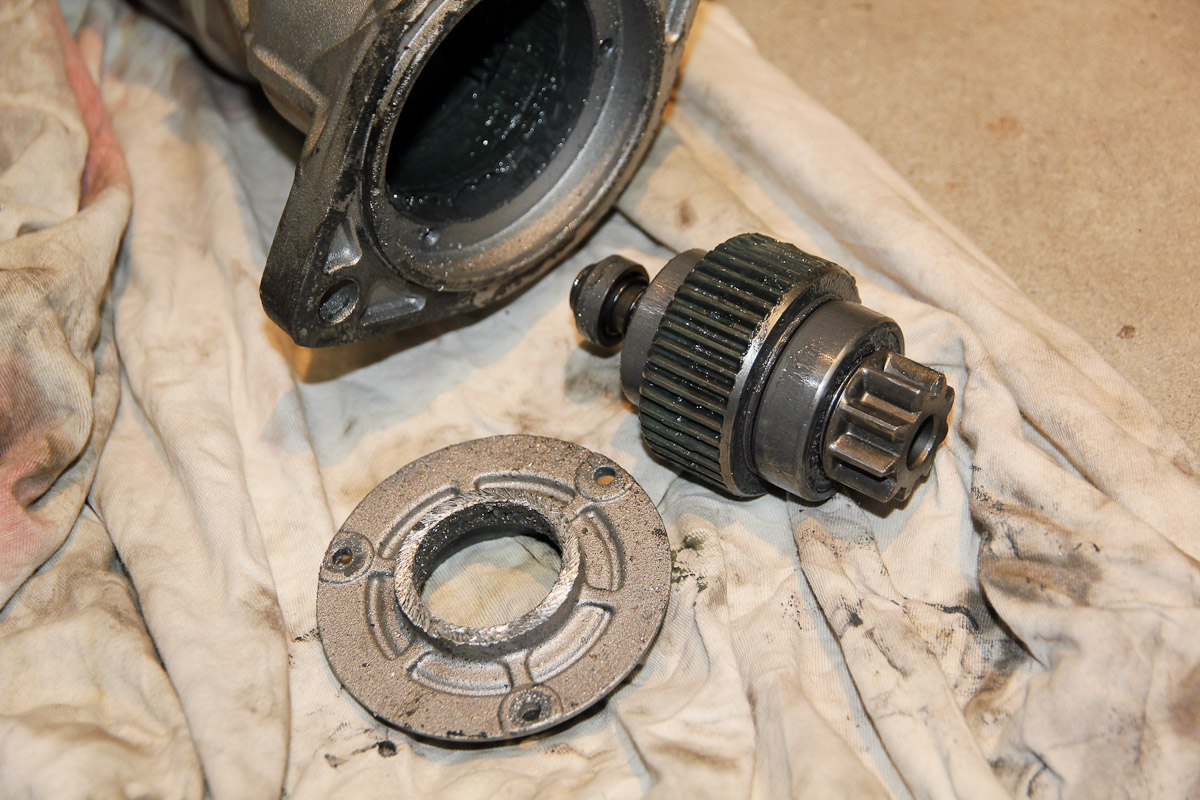
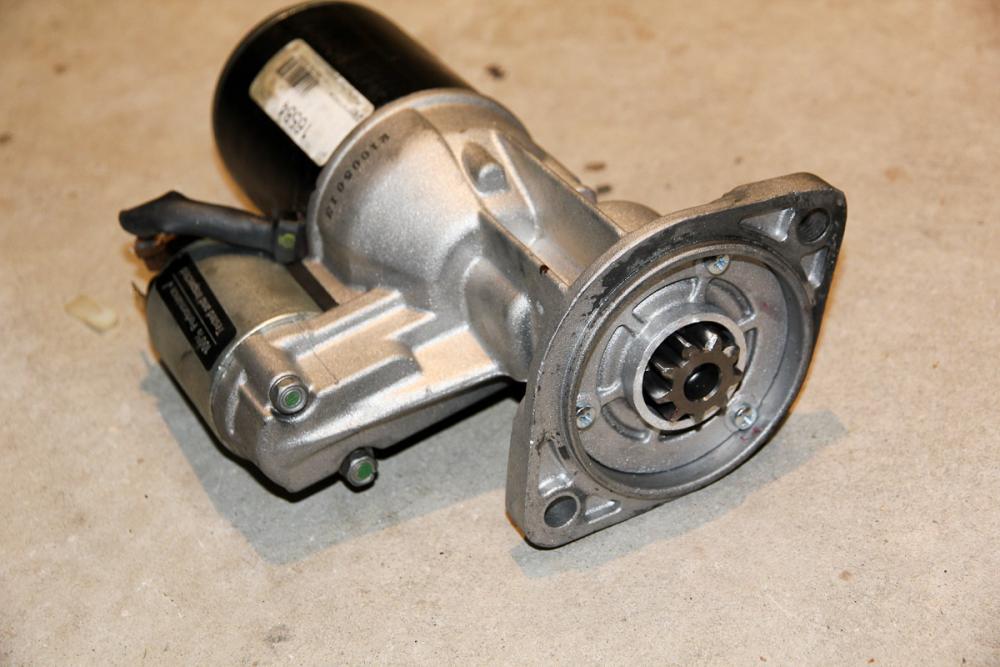
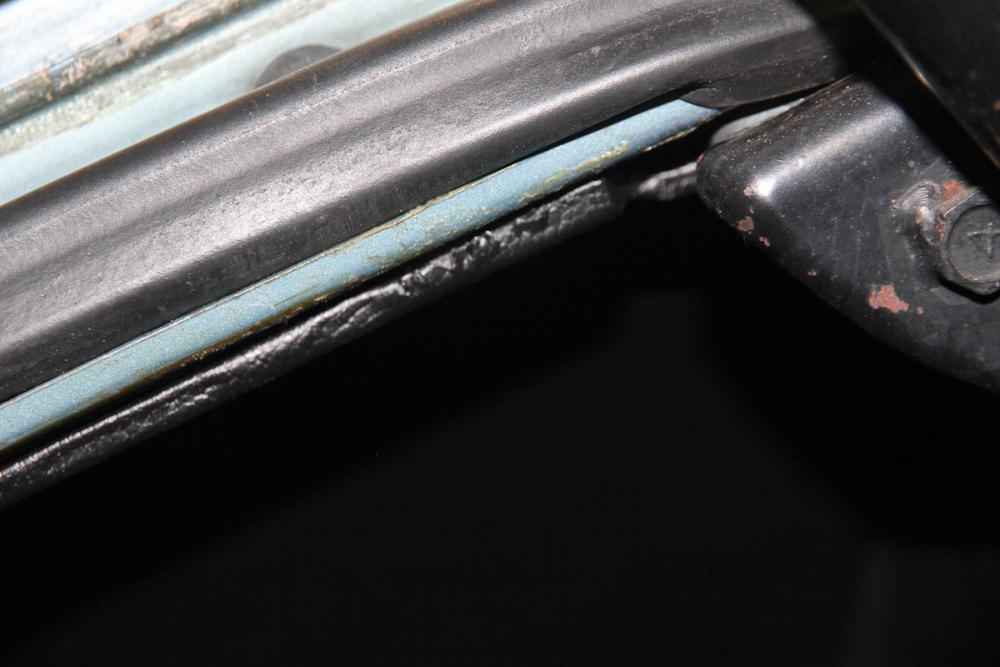
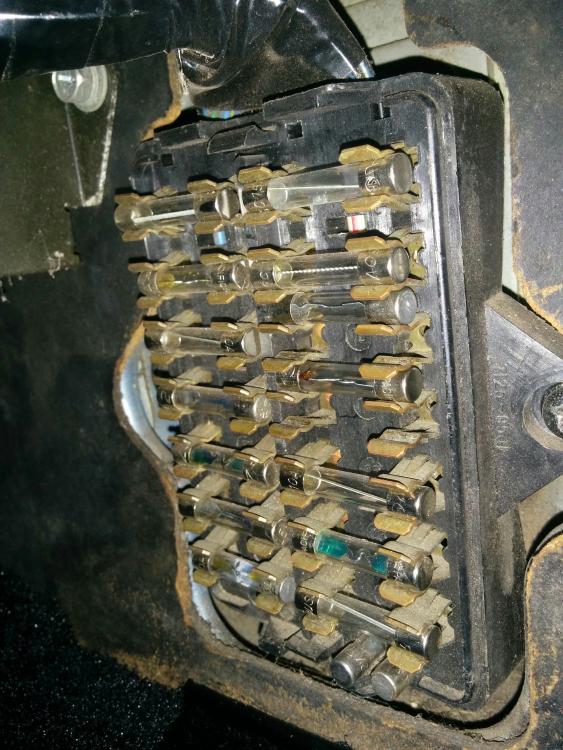
Out of nowhere, there's been a nasty grinding noise whenever I start the car. Sounds like the pinion gear on the starter isn't retracting. The starter's pretty new: the old one died at the shop when the mechanic (a local Datsun guy with a good rep) was giving the car a once-over after I purchased it, so I had him replace it then. I pulled it off tonight to inspect it and promptly had the pinion gear/clutch assembly fall right out onto the ground and saw this: The three screws that are supposed to hold that housing in place were nowhere to be found and the housing is a bit torn up as well. I'm assuming the housing got caught on the pinion gear and shoved into the flywheel ring gear. Should be an easy fix once I can get some screws, but I'm none too thrilled with the mechanic's work right now. Brake lights aren't working either. The fun never stops!

-
I installed the molded ACC carpet in mine and am pretty happy with the results. It's certainly not a drop-in replacement, but I don't recall coming across any that were when I was doing my research. I took a bunch of photos during the installation with the intent of writing up a how-to post and never got around to it. If there's any interest, I'm sure I could bang it out in the next day or so.
-
This car sold twice: http://bringatrailer.com/listing/1972-datsun-240z-9-2/ First time for $12K and the winning buyer didn't pay, and a couple months later for $13,100: As a UCLA alum and person with what I consider to be at least decent taste, it's doubly offensive :D
-
Have you considered Bring a Trailer? Aside from being a nice diversion at the office, they seem to have the hots for Datsuns over there: a number of listings have generated higher bids than I personally thought the cars would be worth.
-
That's a pretty solid plan, Cap. Only flaw I see is sending the panels to me! None of the panels left look like they'll be especially easy. The one that covers the vent tank has a lot of complex curves, the seat belt covers are convex and the window trim has tight inside corners to deal with. I'm with you on the dash...this stuff would look great as a dashboard cover. I want to take that project on as soon as I can.
-
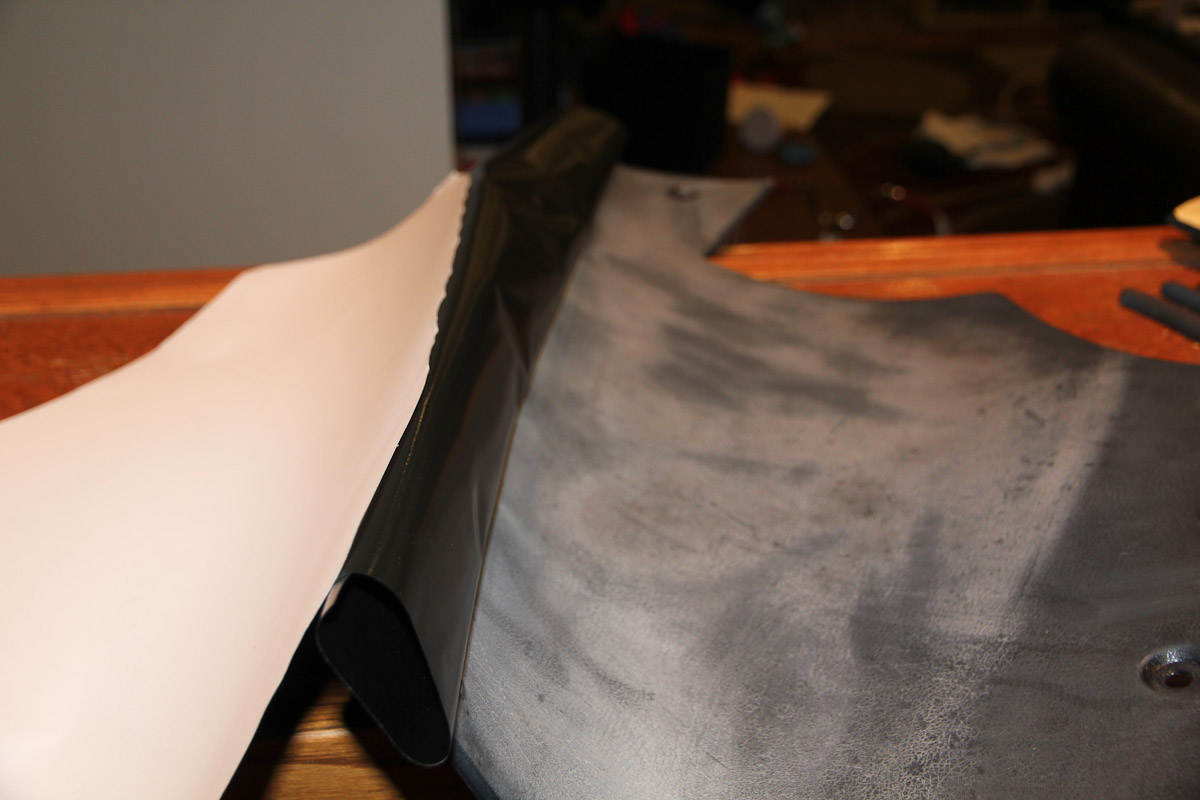
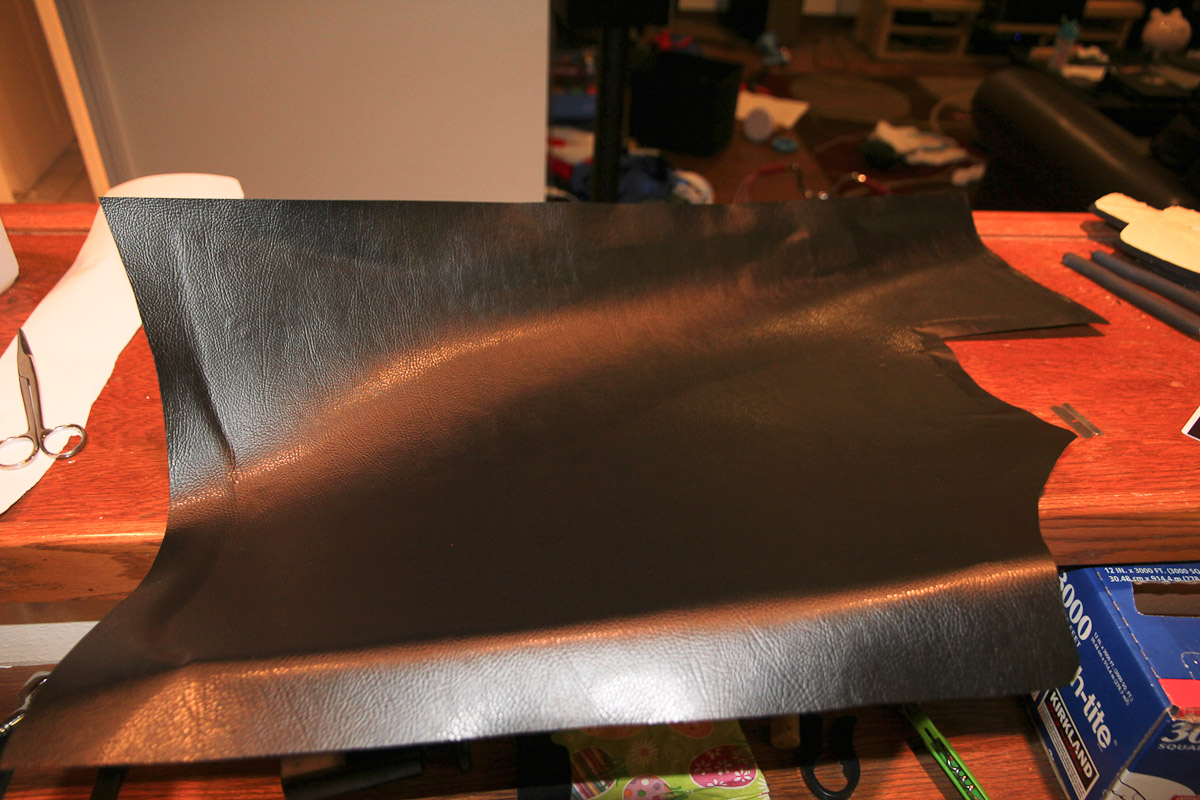
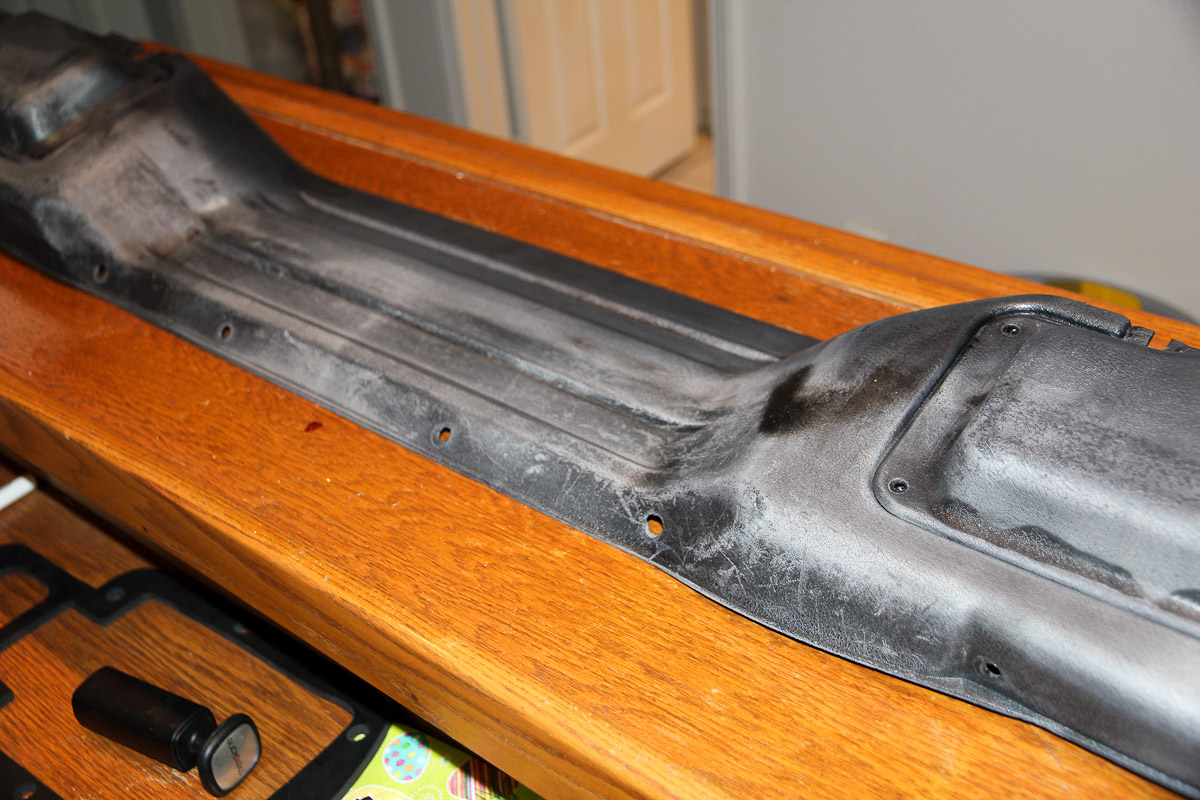
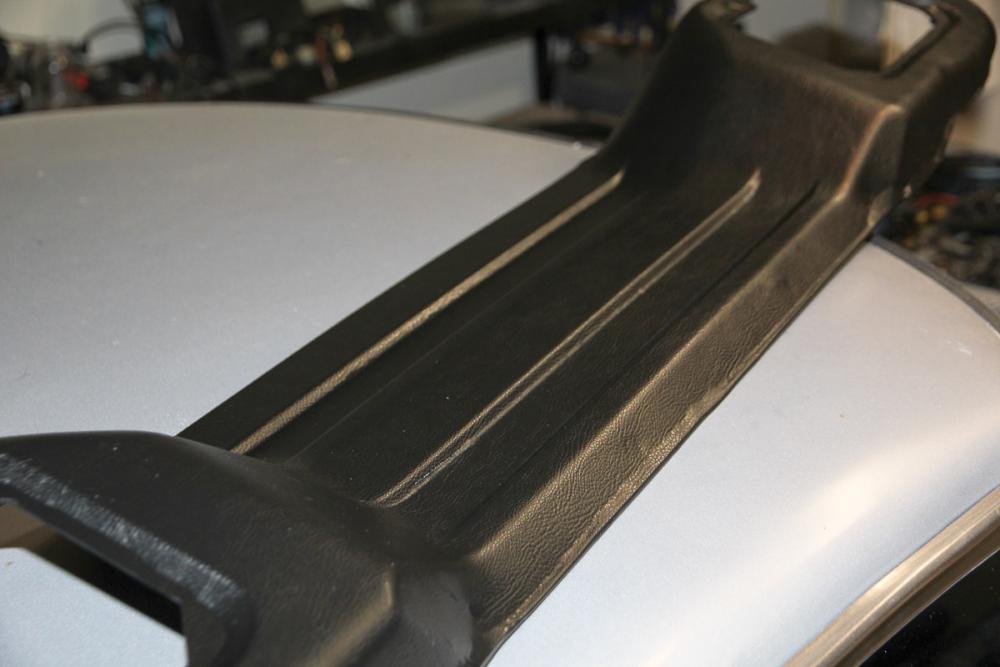
Better results today doing the panel I should have started with yesterday. The rear panel on the driver's side is curved, but only in one direction, so it's basically a flat piece. 30 minutes for this one, and it came out quite nice. The toughest part is getting the sheet down flat so it doesn't wrinkle, but it's workable if you go slowly. Did a little practice with some scraps on the tougher shapes, because I'm out of easy bits to wrap now! Panel looks good installed, except for the part that got nicked up on the hatch support. Another entry in the What Did You Think Was Gonna Happen!? file.


-
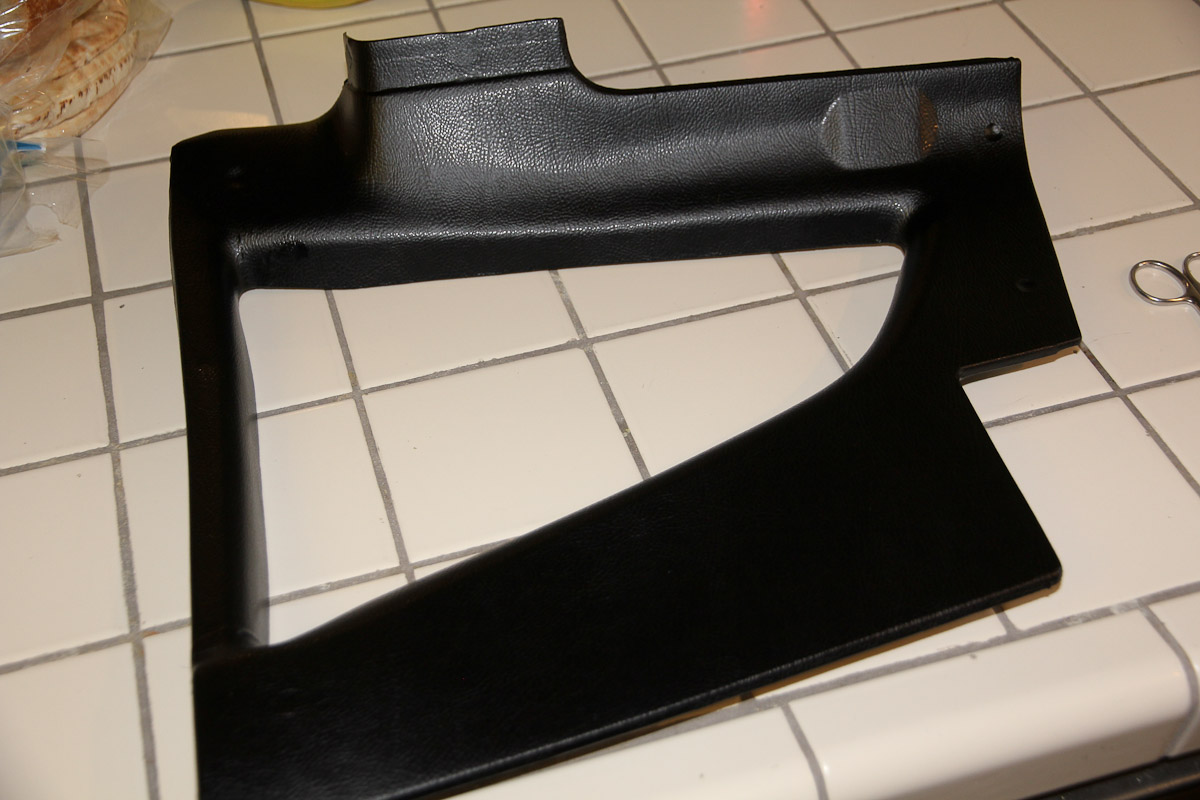
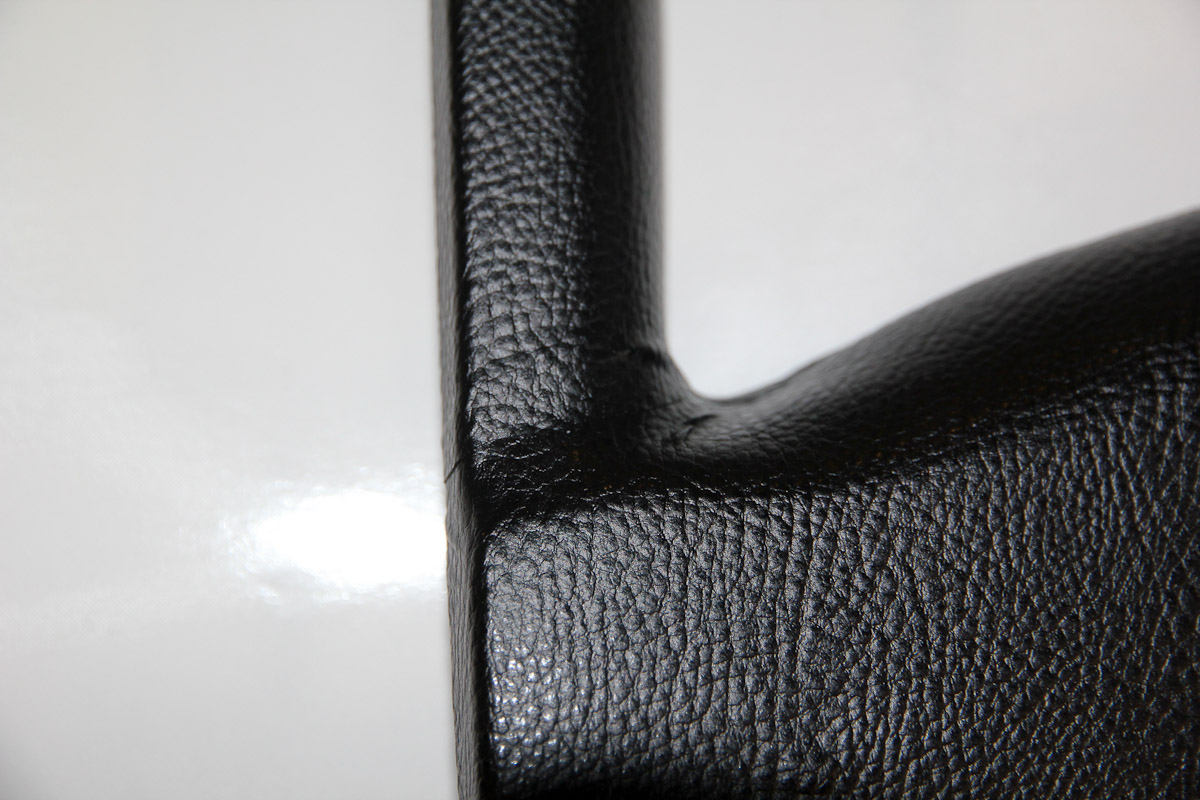
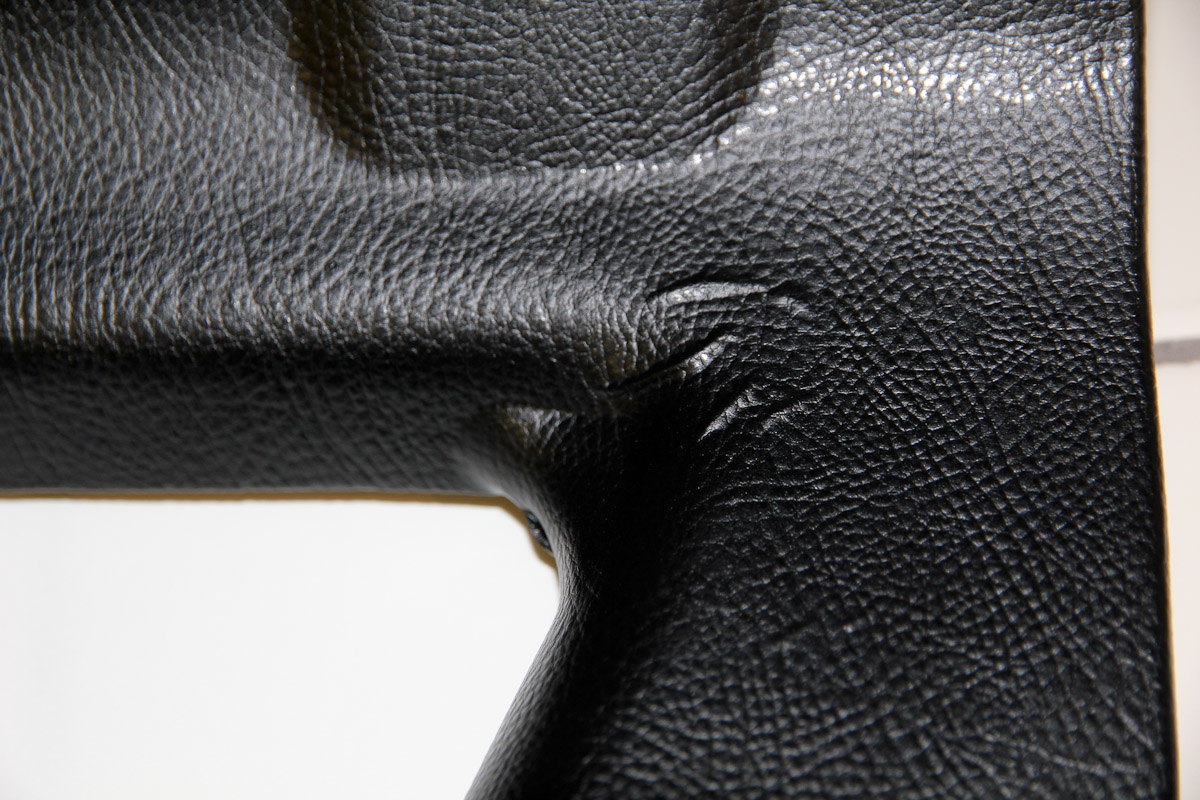
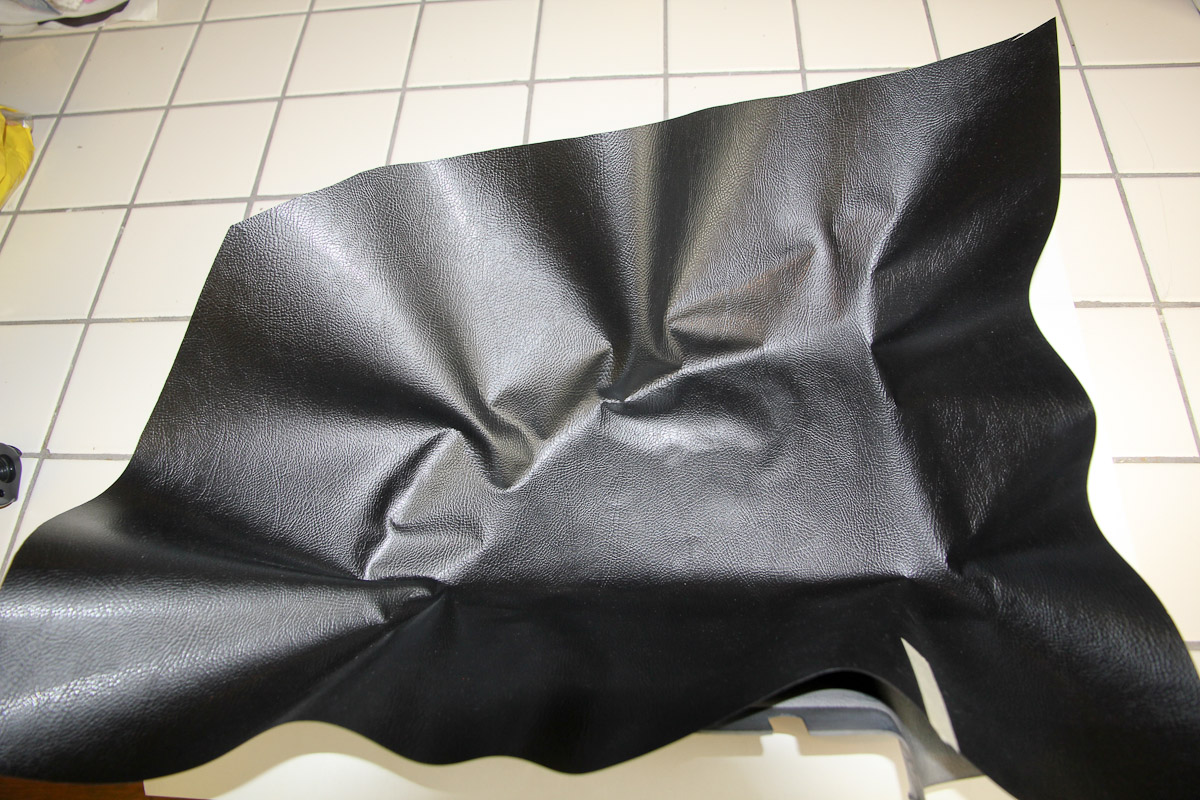
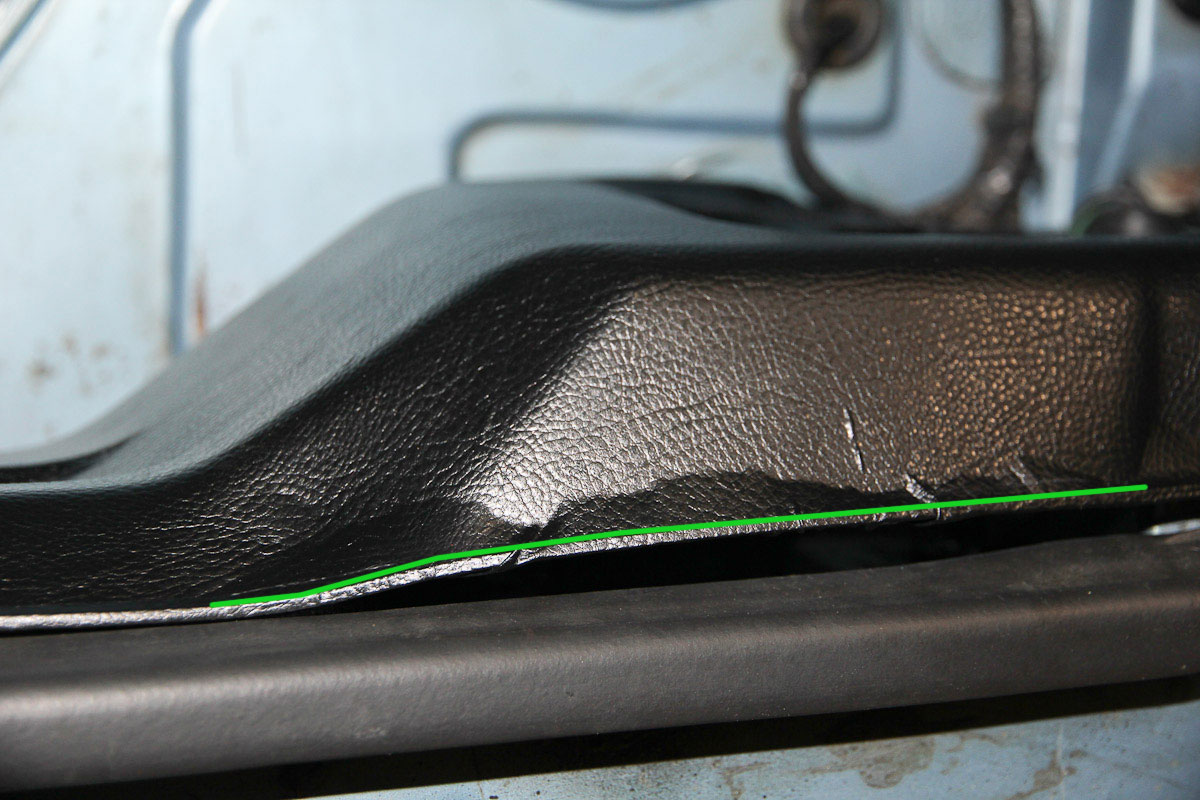
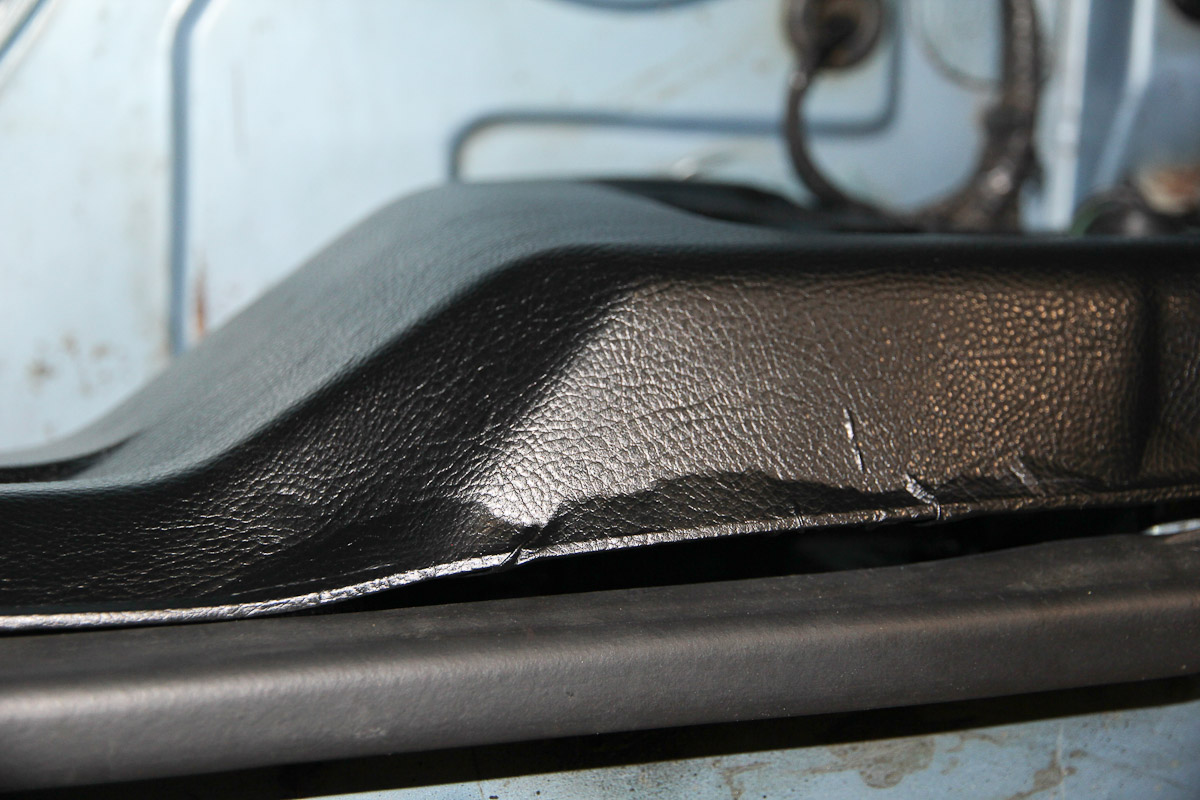
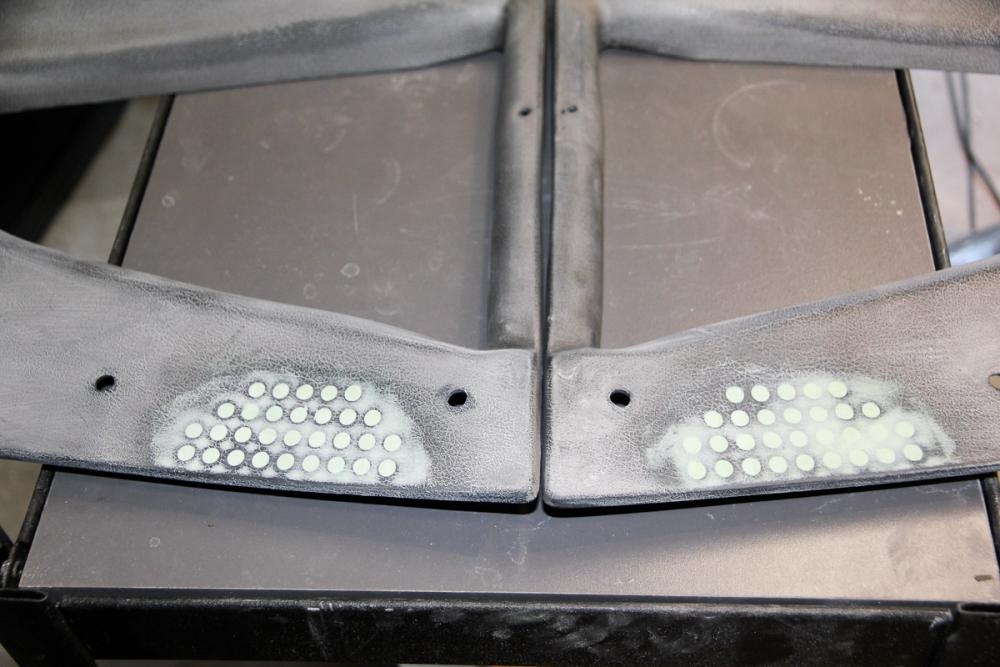
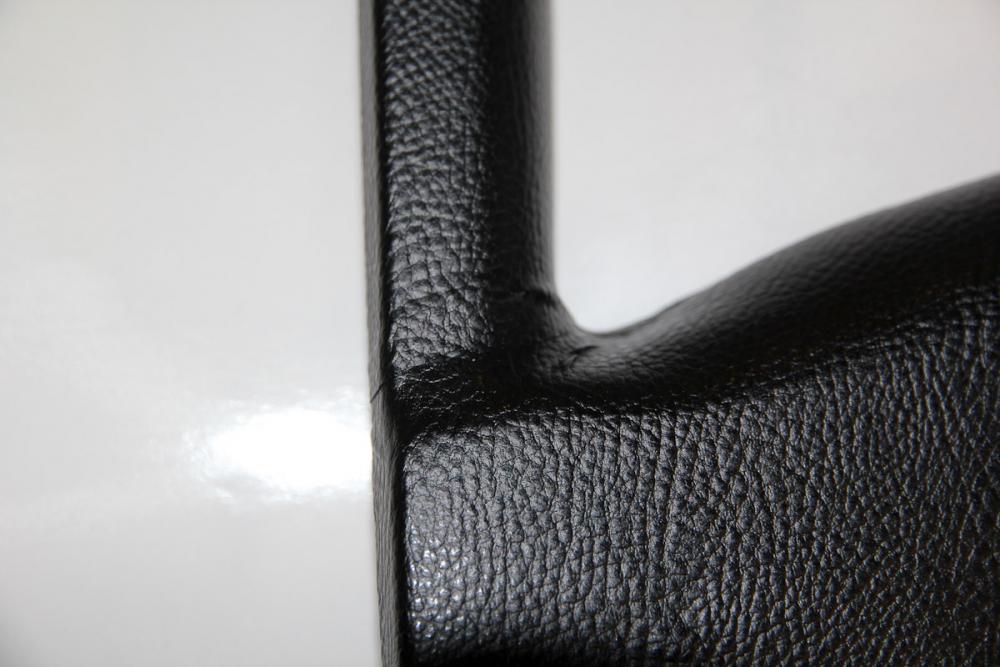
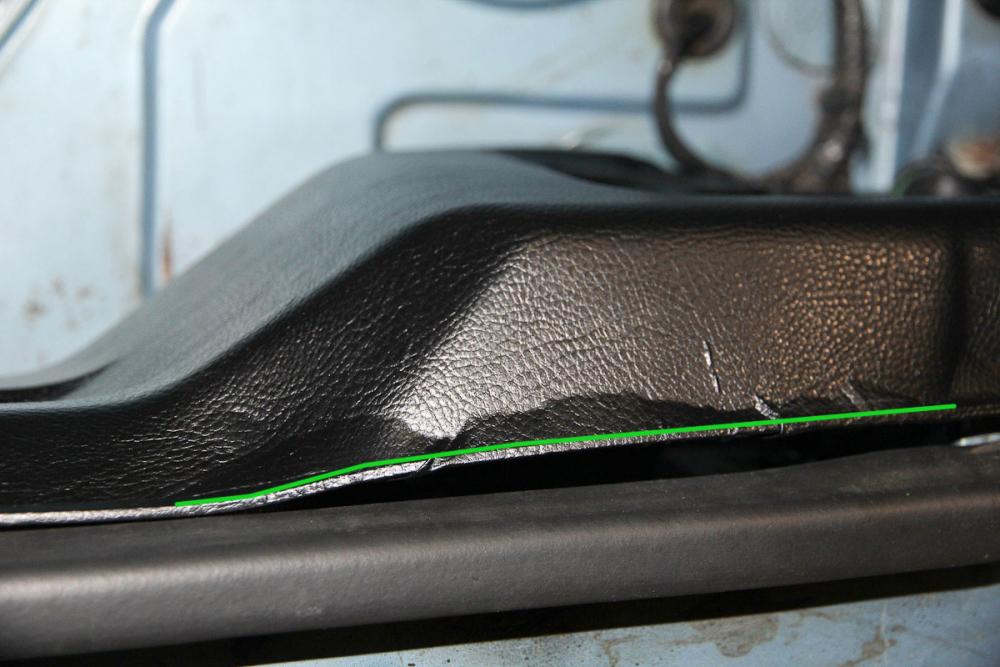
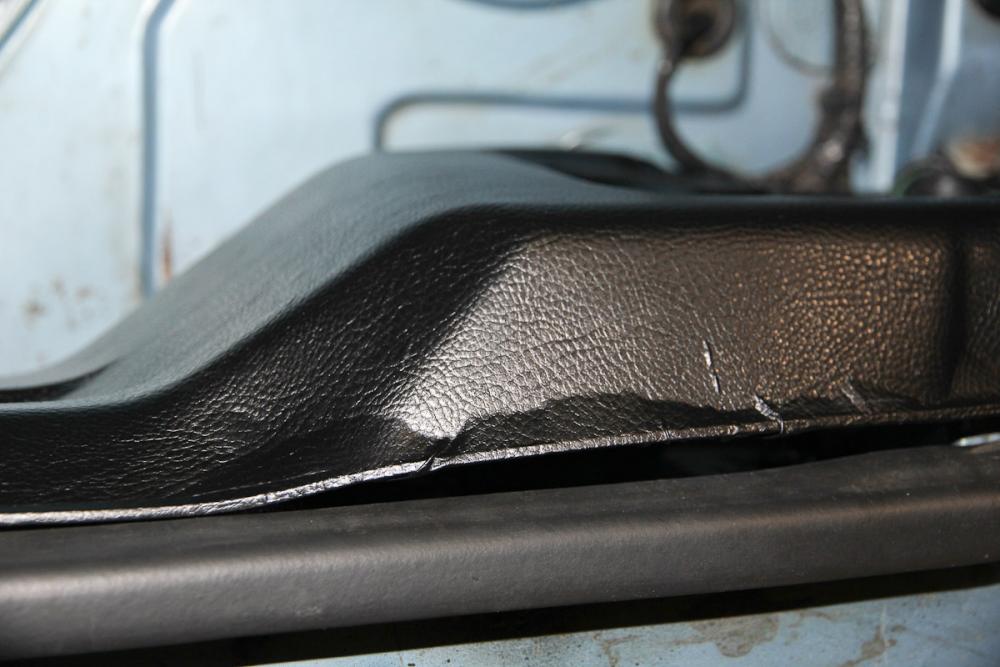
Summed up, I'd say the results are a 10 of 10. The look and feel is exactly what I was hoping for. I'd describe it as a slightly cheaper version of the G37 interior. The vinyl didn't distort the panel at all, and actually give it more structure so it isn't so flimsy anymore. My application was more like a 4 out of 10, though. This part here: I probably lifted, stretched and repositioned it 20+ times, which is tough on the adhesive. Most of that was just to clean up the far outside curves, which can't even be seen. The way to wrap complex curves is (somewhat counter-intuitively) to stretch the vinyl around them. The Hexis material can stretch about 30% before it will lift, so even if I had hit this on the first shot, it probably wouldn't stick. I should have trimmed along that green line instead. Depending on how the rest of the panels go and how much I'm bothered by it, I may re-do this panel later. If you could find an upholstery or wrapping company that would be willing to do the application for you, that might be ideal. I'm considering that myself for the dashboard. In any case, it cost $85 shipped for two yards of vinyl and it's totally reversible if you screw it up
-
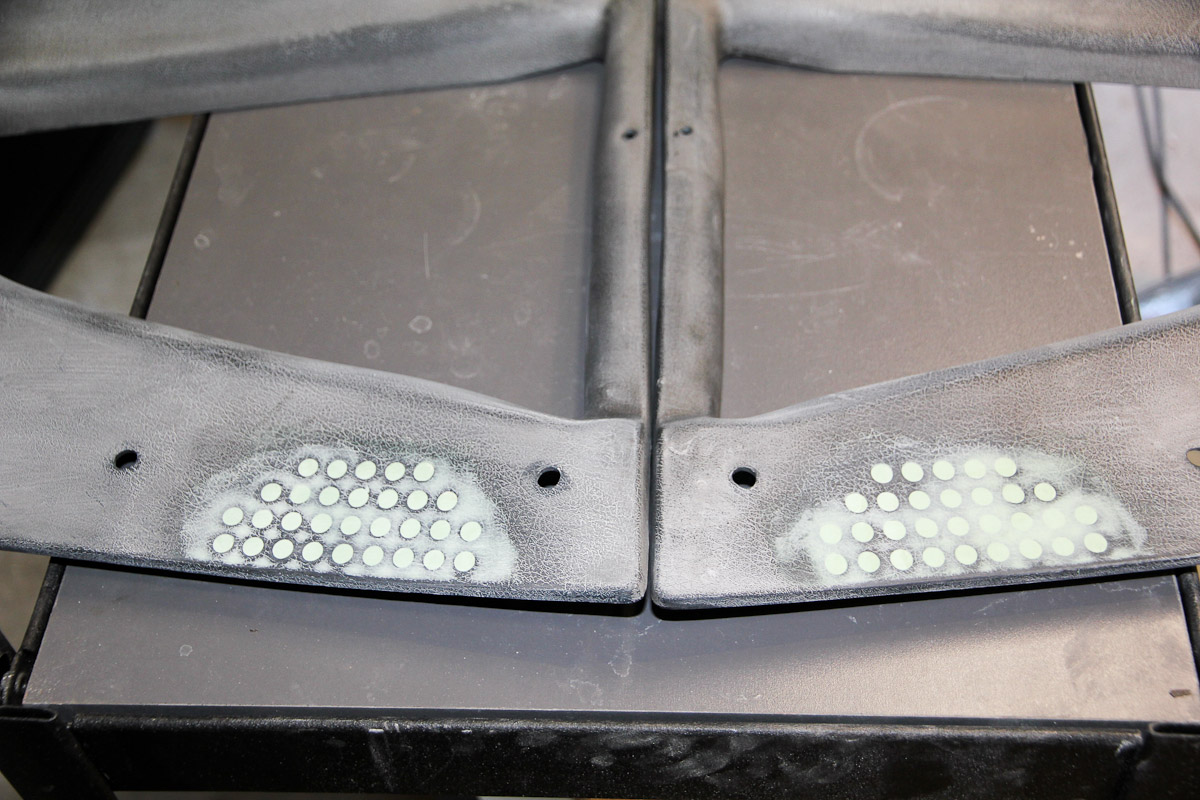
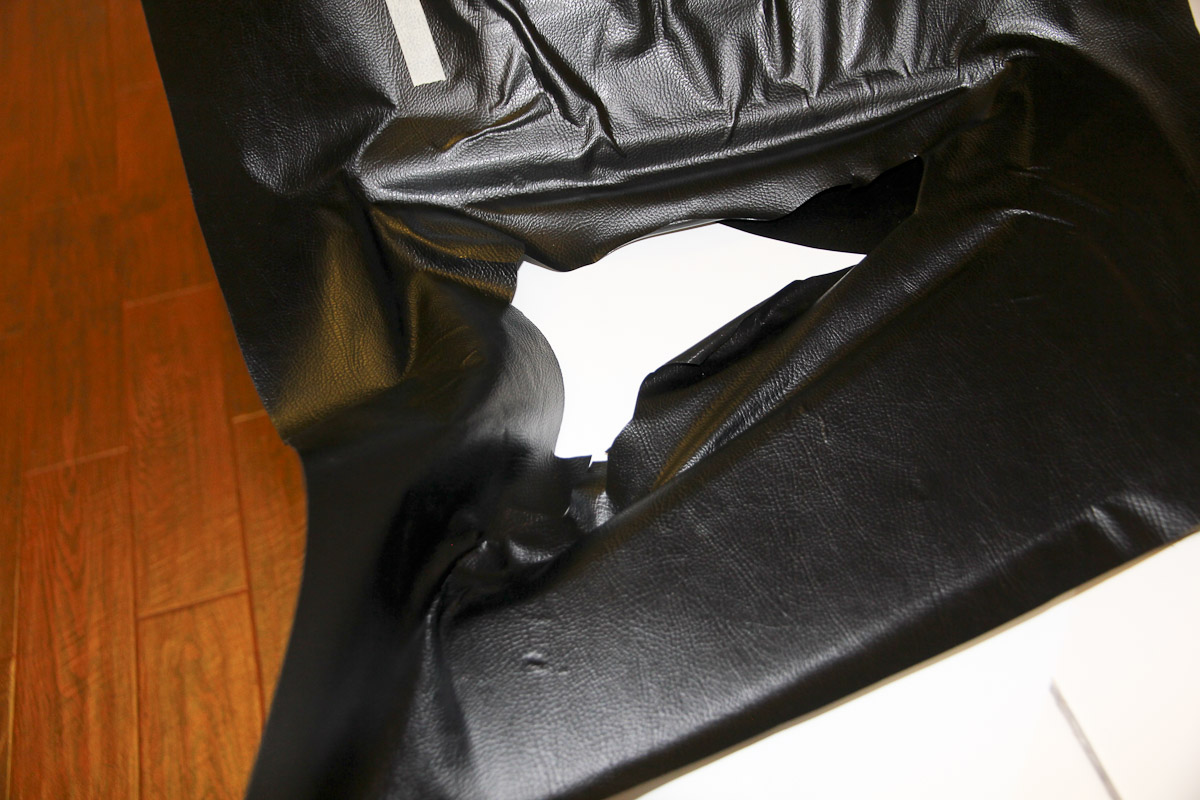
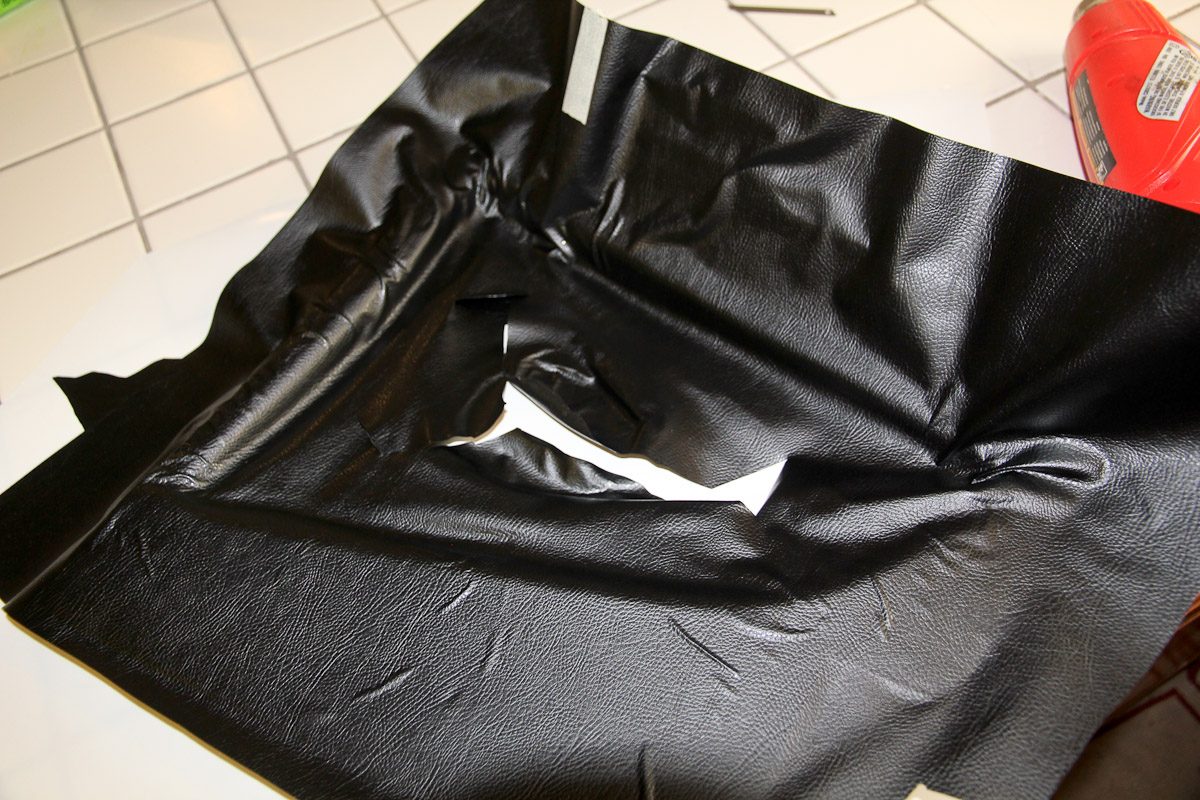
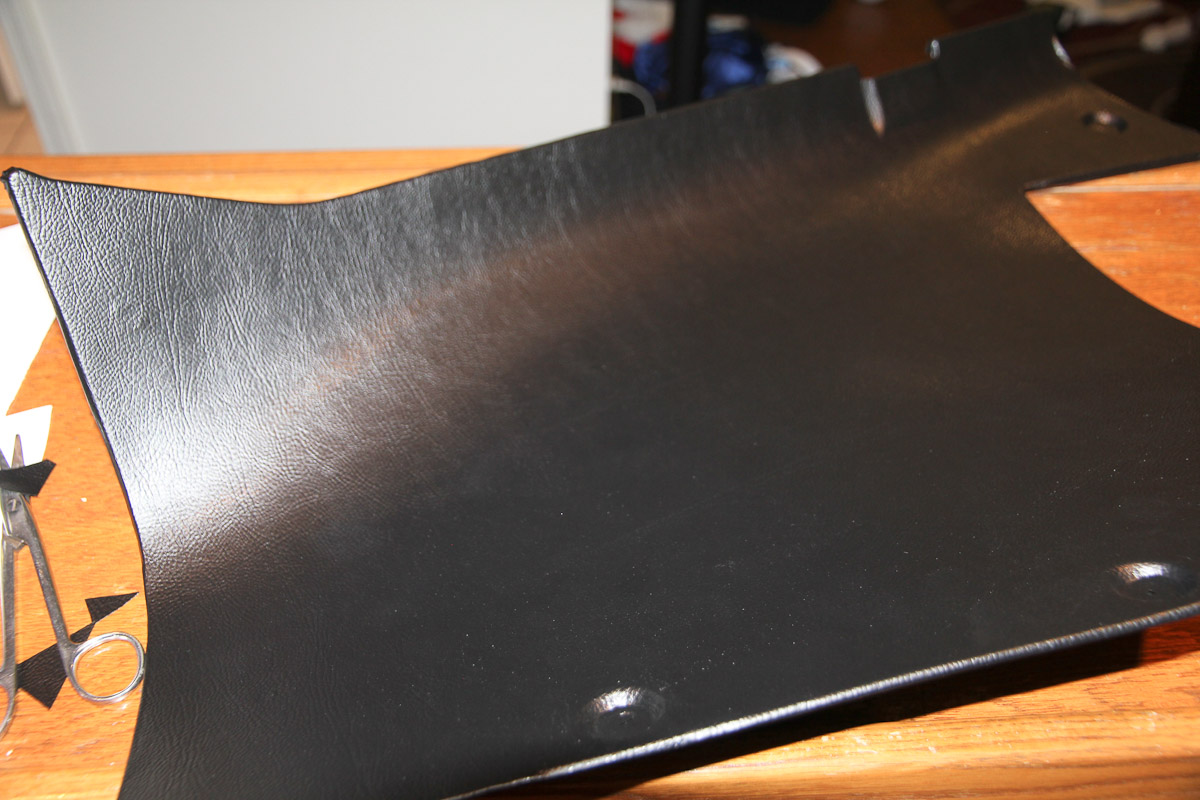
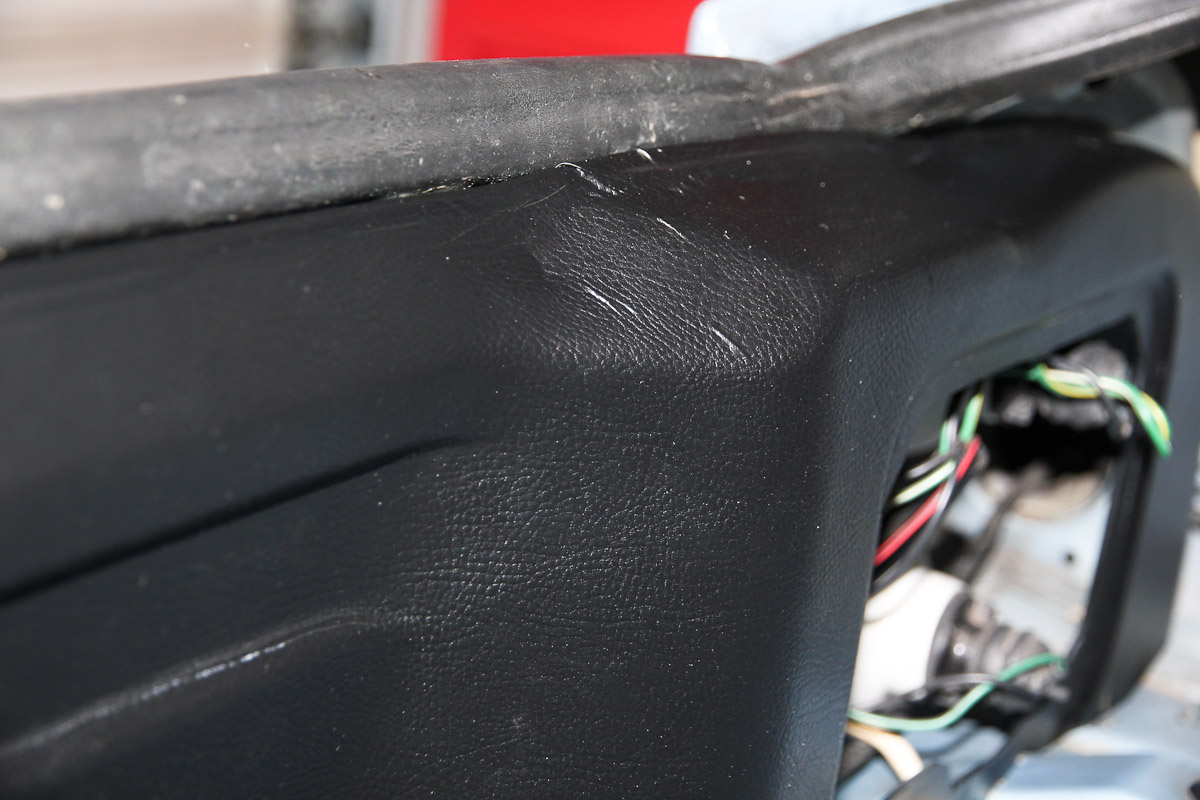
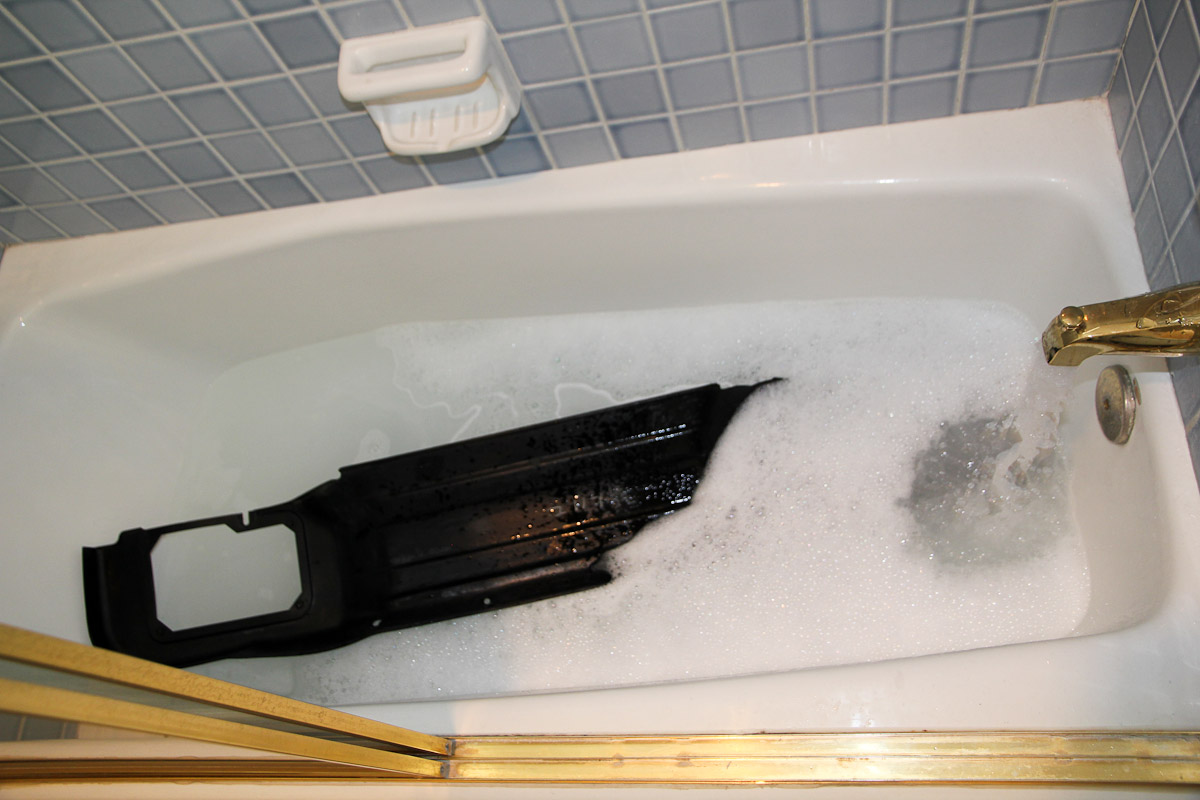
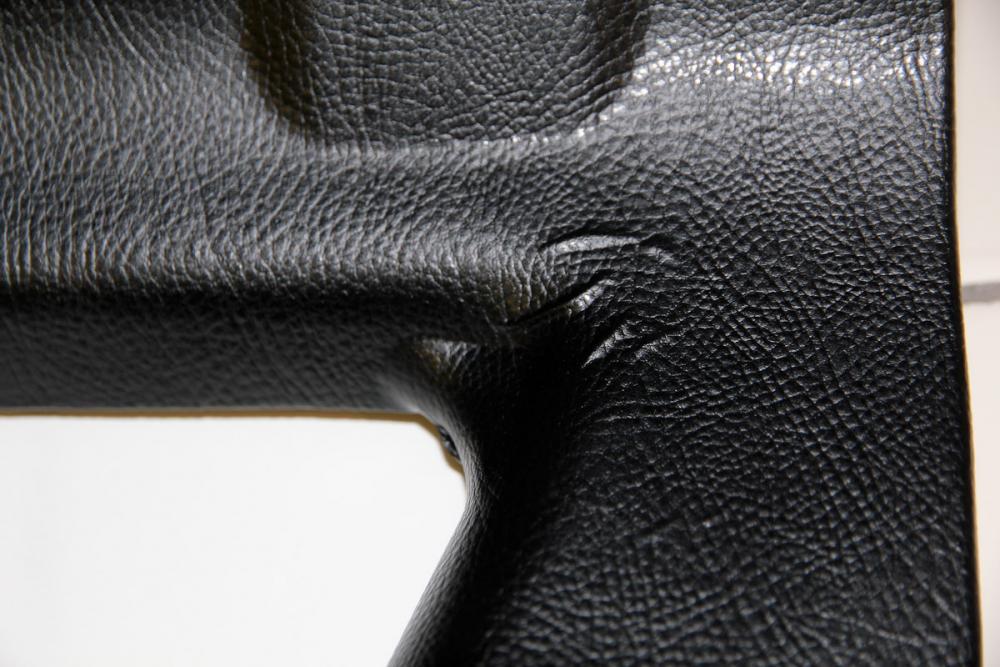
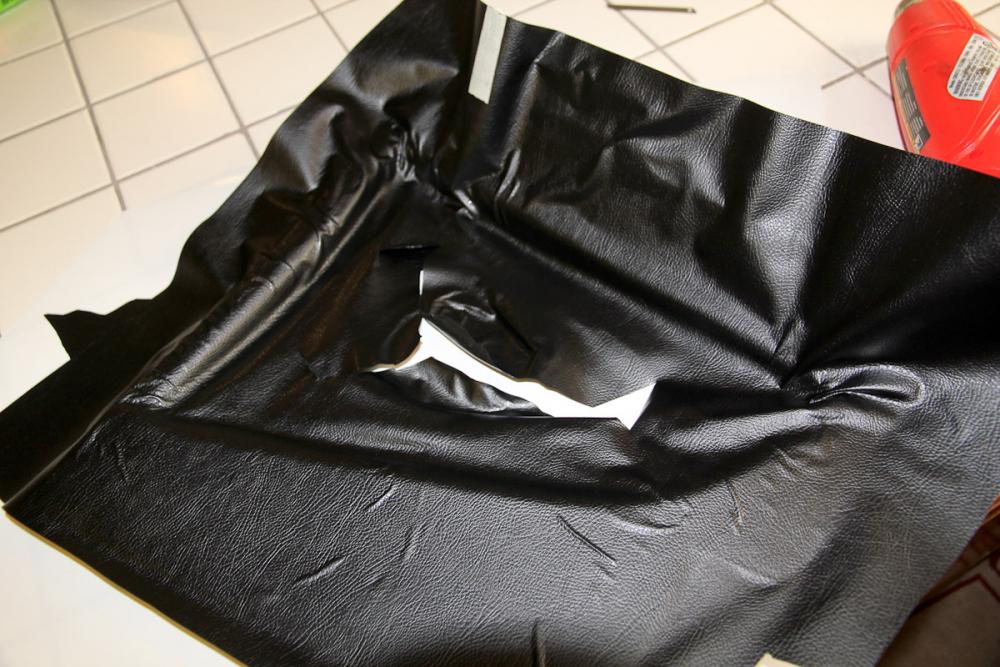
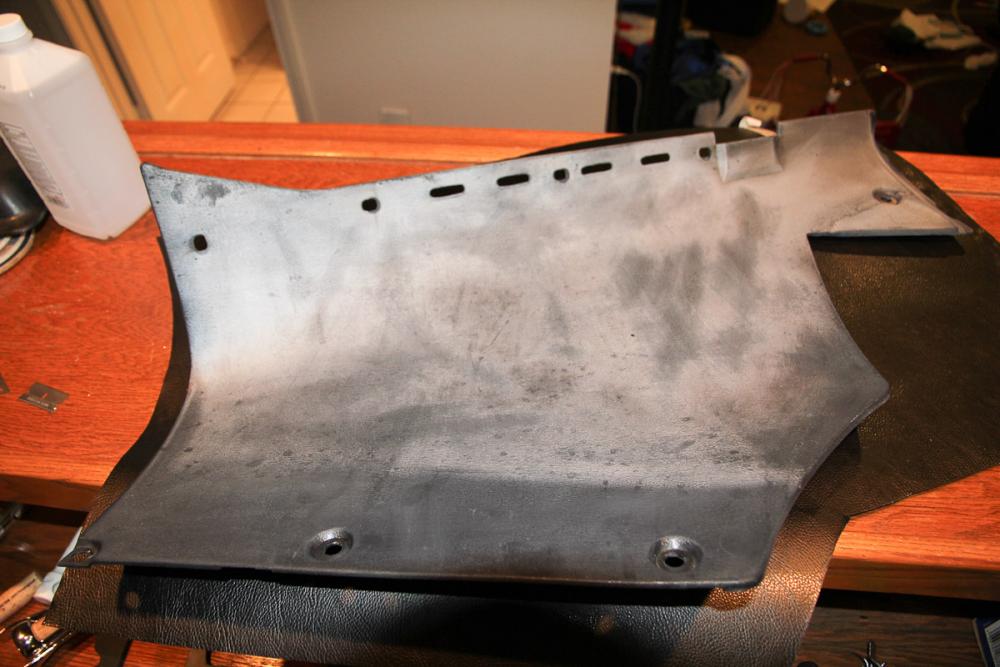
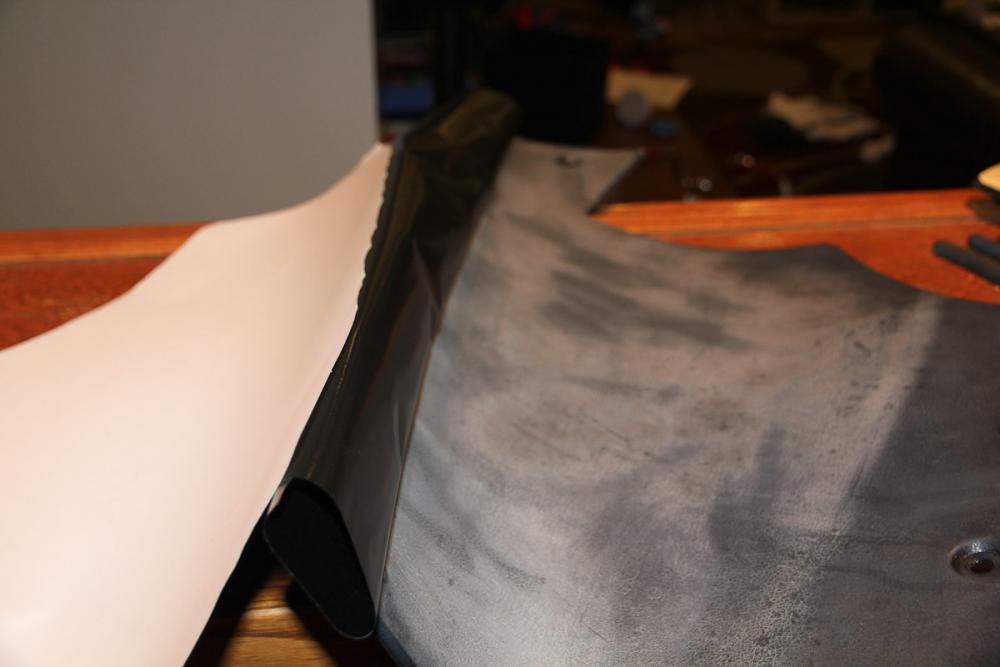
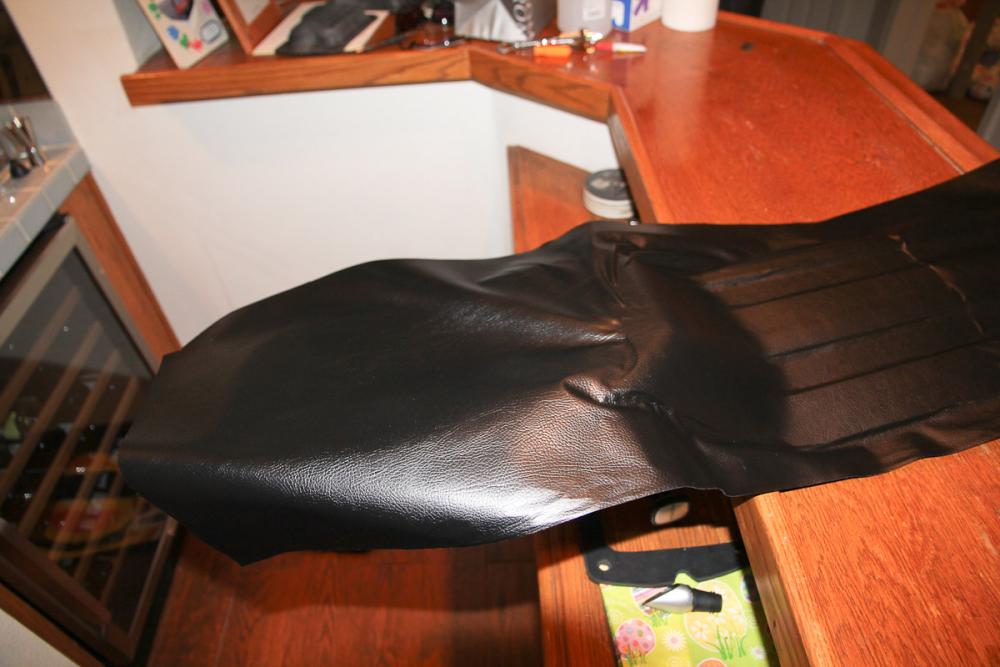
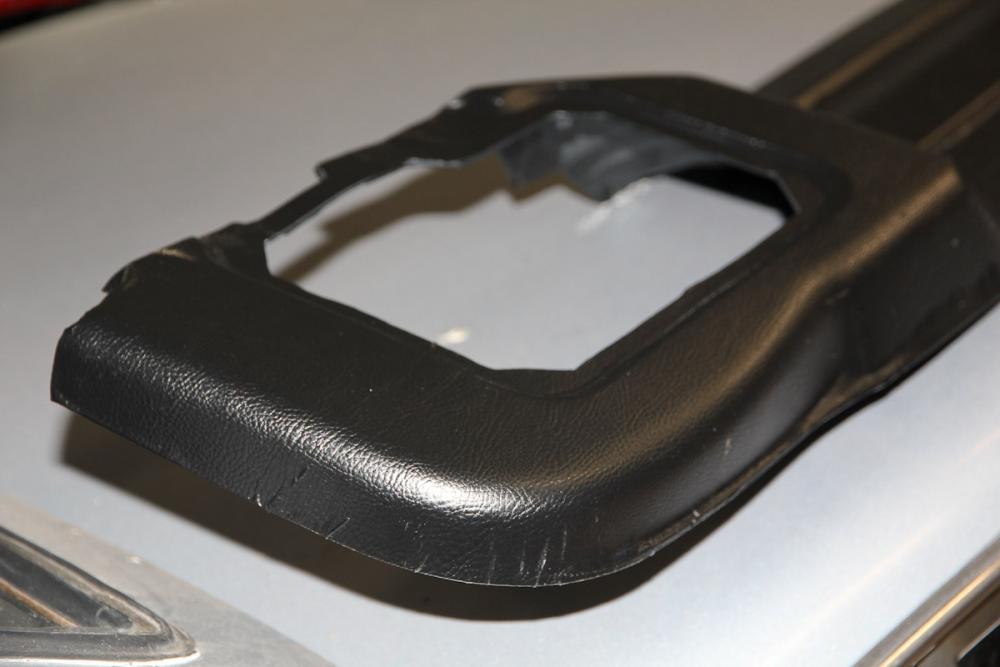
No more putting it off...finally dealing with the interior panels. I found a leather-textured vinyl made by Hexis that looked promising and ordered two yards of it, which should be enough to do all the interior panels in the rear hatch. Thinking it would be an easy one (oops...) I started by doing the tail light piece this afternoon. Step 1: clean. I gave it a bath with Oxy-Clean and scrubbed with a green scuff pad; followed that with D101 all purpose cleaner, rinsed with water and then wiped with isopropyl alcohol. Step 2: rewatch the Hexis training videos on YouTube for the third time and convince yourself this'll be a piece of cake. Step 3: start trying to apply the vinyl and remember that applying this stuff is totally not a piece of cake. I spent more than 3 hours doing just the tail light panel. That's all I got done. Step 4: admire your ...umm...handiwork? A few pictures before getting in to some details. Some takeaways from today's efforts: Curves are tougher than they look and it does take some time to get a feel for working with the vinyl, but you do get more comfortable with it as you go. I've wrapped some small interior bits before, but a long time ago and not enough to consider myself experienced. I picked the tail light panel thinking it would be easy but inadvertently ended up picking probably one of the worst panels to start with. The curves are deceptively tricky to deal with, and it's also large and awkward. The convex curves on the outside edges gave me a ton of trouble and I never got them looking especially great. Unfortunately, the repeated lifting/stretching/heating that I did to get those to look the way they do now seems to also have reduced the effectiveness of the adhesive on sections that were overly-futzed with. So visible section like this are lifting, because I spent too much time trying to make sections that I now realize can't be seen look good. Whoops! That said, the areas where I managed to apply it well came out really well! I wasn't sure how much I'd like the look or feel, but both are very good and, IMO, appropriate for the car. Will definitely continue on with the rest of the panels, which hopefully should be a bit easier to deal with.


-
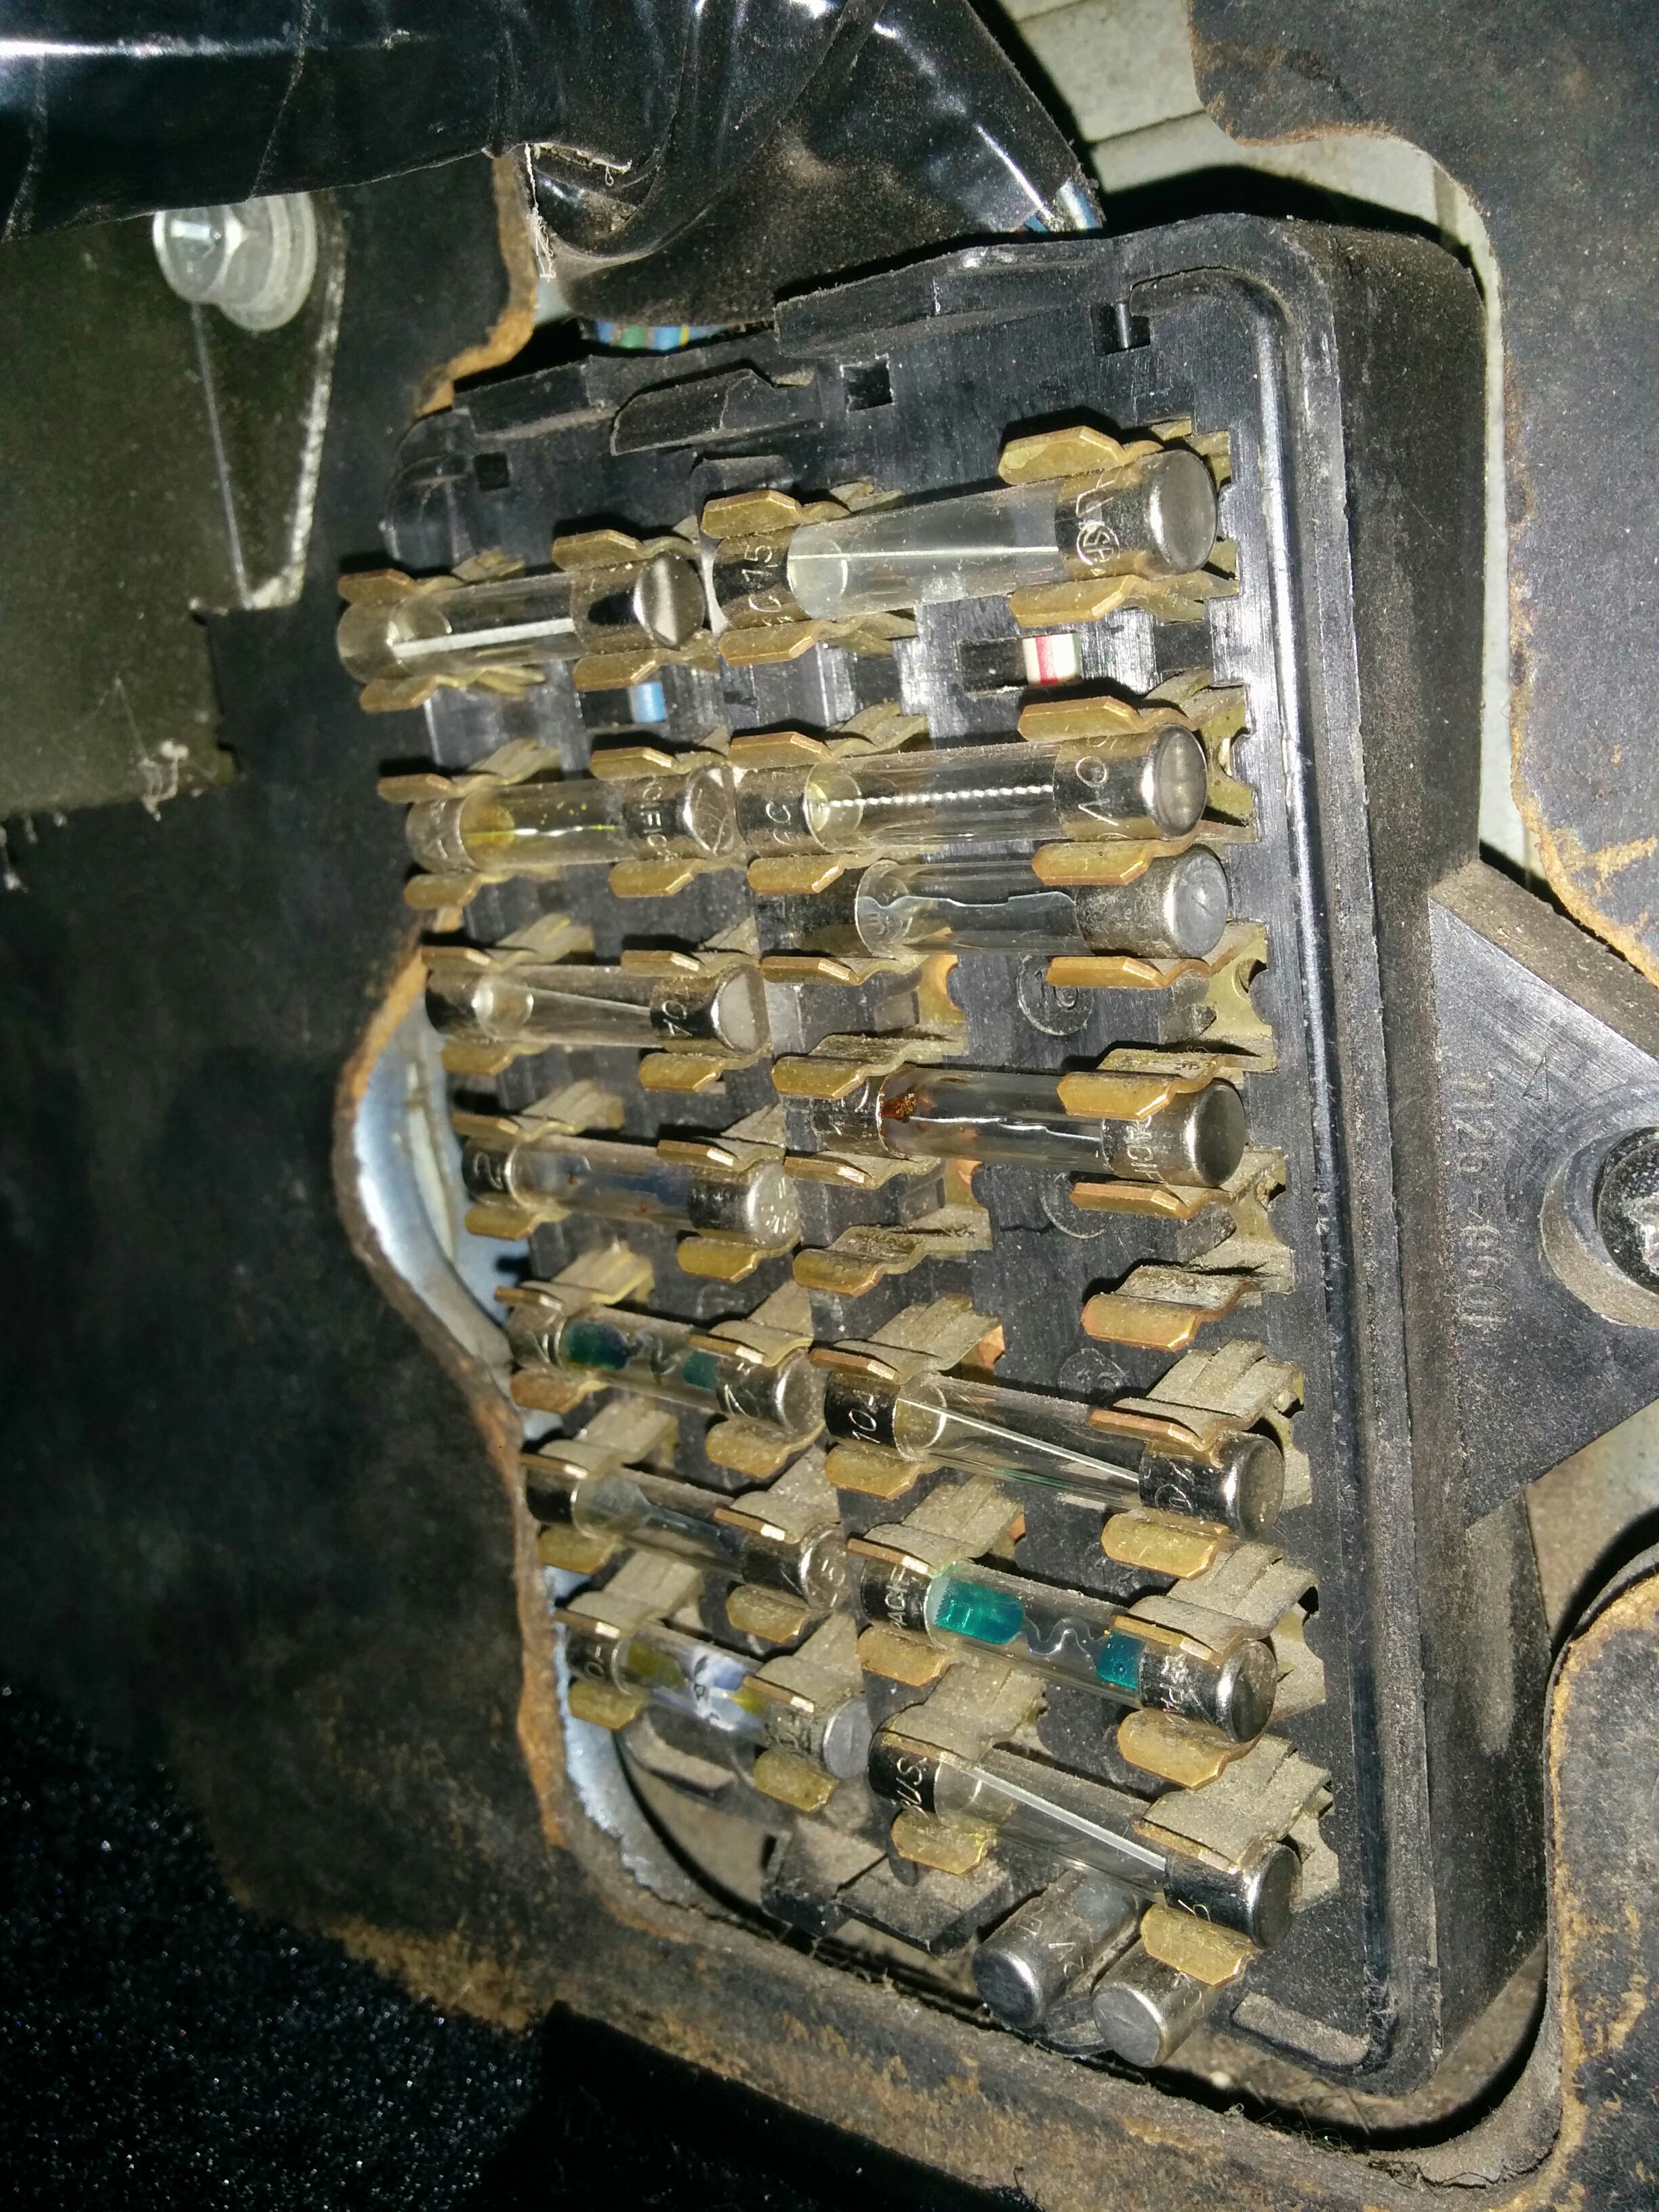
My brake lights are back! The PO had hacked up the hazard switch and jumped two of the wires to make the turn signals work, which I thought might've been the problem. The one I picked one up on eBay got the hazards working again but still no brake lights, so I started again at the pedal and worked my way through everything... My son likes to "work" on the car with me, which is cute and I love that he wants to do that. Usually he'll just grab a wrench or a screwdriver and finds something he can poke at, but lately he's been finding things that interest him and he'll just bury his head into it for 10 or 15 minutes. The other day it was the kick panels, and I didn't think anything of it. I pulled the fuse cover and saw the little booger's handiwork: A couple weeks ago, he forgot that he stored a bunch of tools in the glove compartment, which resulted in a 45 minute hunt for my tape measure. If he weren't 4 1/2 years old, I'd swear the kid was gaslighting me!
-
Good that your run-in with the Washington state troopers didn't lighten your wallet! I think Z cars are the automotive equivalent of the birthday paradox. Even in my little town of 10,000 just outside of LA there are at least 3 other Z's that I see rolling around!
-
It might. I didn't find much definitive about making a fuel-safe patch and since the hose was there on eBay, I ended up buying it. Having been through the leak problem twice now, it's worth the peace of mind knowing I won't have to do it again.
-
Those bumper supports are the perfect height and shape to inflict an impressive amount of pain. Only thing worse than running into them was doing it 3 more times! Cap, I look forward to the day when I can do (or pay for) proper paint and bodywork. Those tail light panels are now the best-looking thing on the car