charliekwin
Free Member
-
Joined
-
Last visited
Everything posted by charliekwin
-
I had to get splined lug nuts for my wheels. Picked up on eBay. I think these are the same ones, though I got chrome: https://www.ebay.com/itm/20-Black-12x1-25-Spline-Lug-Nuts-Key-for-Subaru-Nissan-BRZ-FR-S-STI-BAJA/253111950908
-
-
Ha, funny Charles, I had the exact same thoughts: a little bit of body work, remove some trim, scuff, mask, shoot. Why, that sounds EASY! When or whether I reshoot this car or take on another project in the future, the experience has been tremendously valuable. YouTube videos, internet comments, and the like help make it accessible, but as you say, there's simply no substitute for doing it.
-
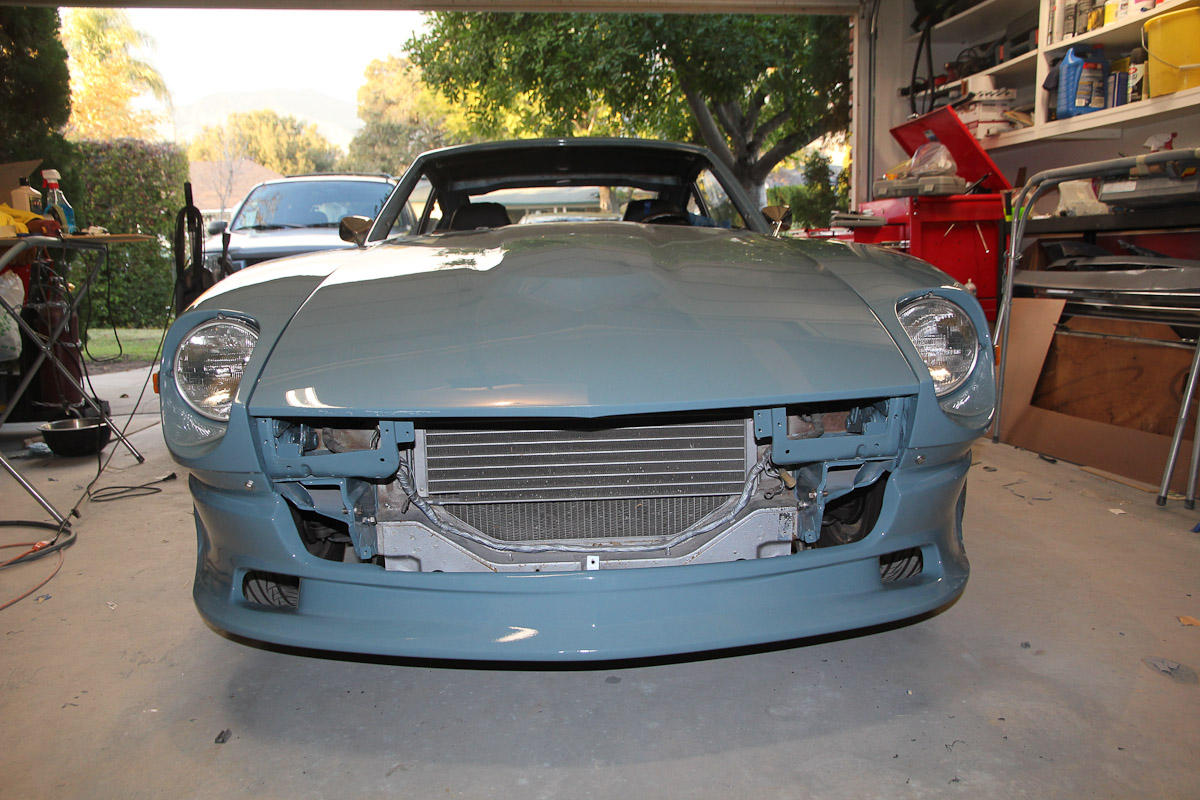
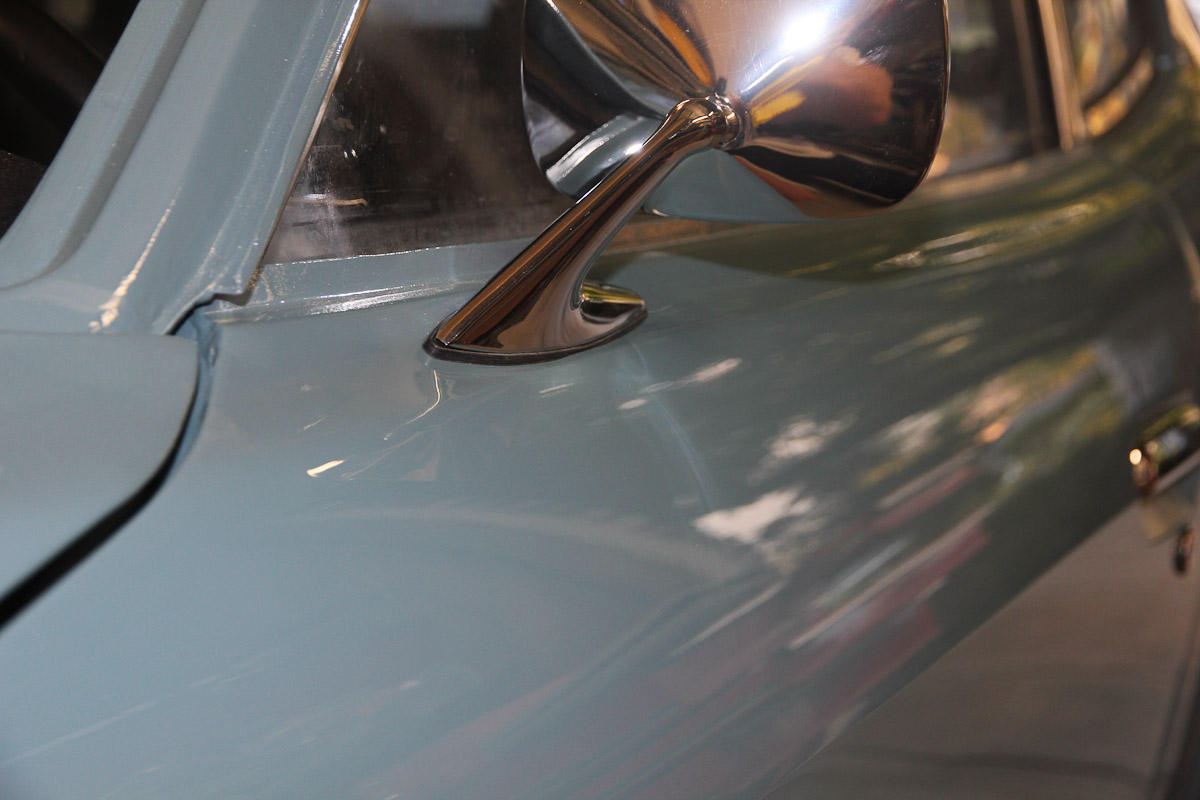
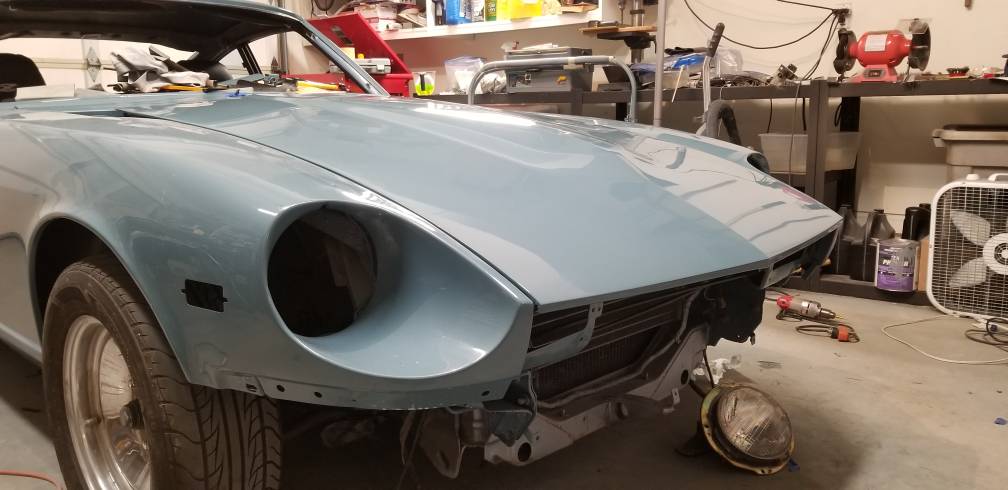
Thanks :) I think the welded headlight buckets look a bit disproportionate when the fenders are off the car, but on the car with the hood (which is still not quite right), they look pretty sharp. Glad you like it too! I'm going to put 240z bumpers on it...once I can scrounge up $750 for a set.
-
Thanks @grannyknot. I really appreciate it. I'm being particularly critical because 1) it's the only way I'll get better; 2) I've seen many instances online where people choose bury their setbacks and highlight their successes, which doesn't paint a realistic picture of what's involved in a project, and 3) I've been in my garage this whole time in a particularly harsh environment that's made me very aware of all the blemishes in my work. I'll also say that I've been moving the goalposts. My original goal, according to my own post in 2017 was: "I don't want/need a show car. I do want the Z to look like something to have some pride in, or that I could take to a Cars and Coffee without feeling the need to explain it." And by that measure, I'd say I've succeeded. But the more I worked on it, the more I felt like a show car paint job was my measuring stick, and every blemish was a failure to get there. Anyway...yes, both the hood center line and the body lines have filler on them. The sides required a bit of filler after removing the molding and welding the holes shut. I used masking tape to help keep things straight, but mostly just a long block and followed the panels. The hood was basically the same. Masking tape down the middle to set the line, then a long block following the hood contours. I never got it quite straight because the profile of the hood makes it difficult to get the tape straight. I've seen some people use a laser level. I might try that next time.The quarter required the most work. I scribed the profile of the wheel arch on the passenger side in about 8 places and transferred it to some heavy card stock (cereal boxes) to use that as a rough guide to the shape I needed to get. Then used the stud welder to pull things into shape as much as I could, then laid on body filler. I used both masking tape and a pencil line (different times, multiple times) to identify the location of the swage line. The upper portion of the shoulder was in good shape and I followed the contours of that with a long block. The line itself (and the fade at the top of the wheel arch) kind of appeared naturally. To shape the bottom half, I used shorter blocks and a Dura-block cylinder. There's generally a flat plane that extends from the wheel arch and out to the swage line or the end of the body panel, which I followed and makes blocking easier. I also picked up a profile gauge and used that to fine tune the wheel arch shape against the passenger side. And I used a metal straightedge a lot (all over, not just on the quarter panel). Both to check for straightness and on curves to compare one side to another and to make sure they're smooth by rolling the edge on the panel. I probably have photos if the wall of text doesn't make sense.
-
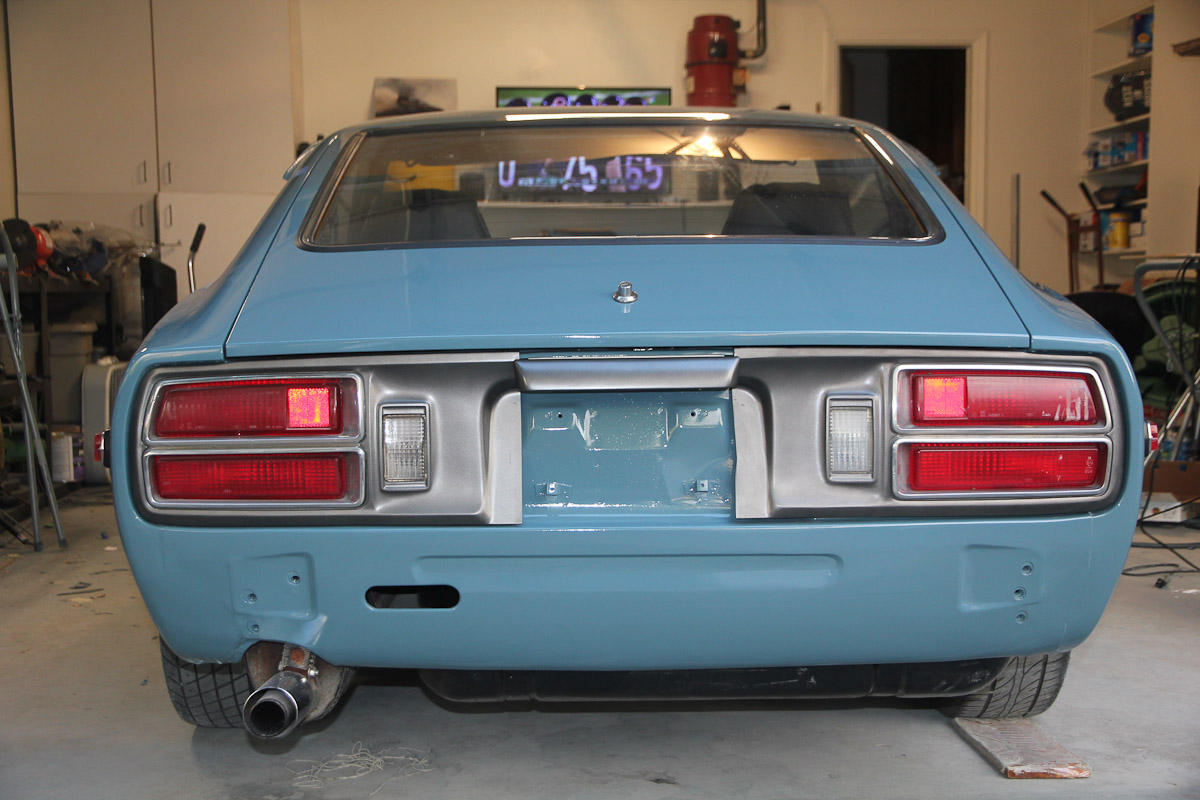
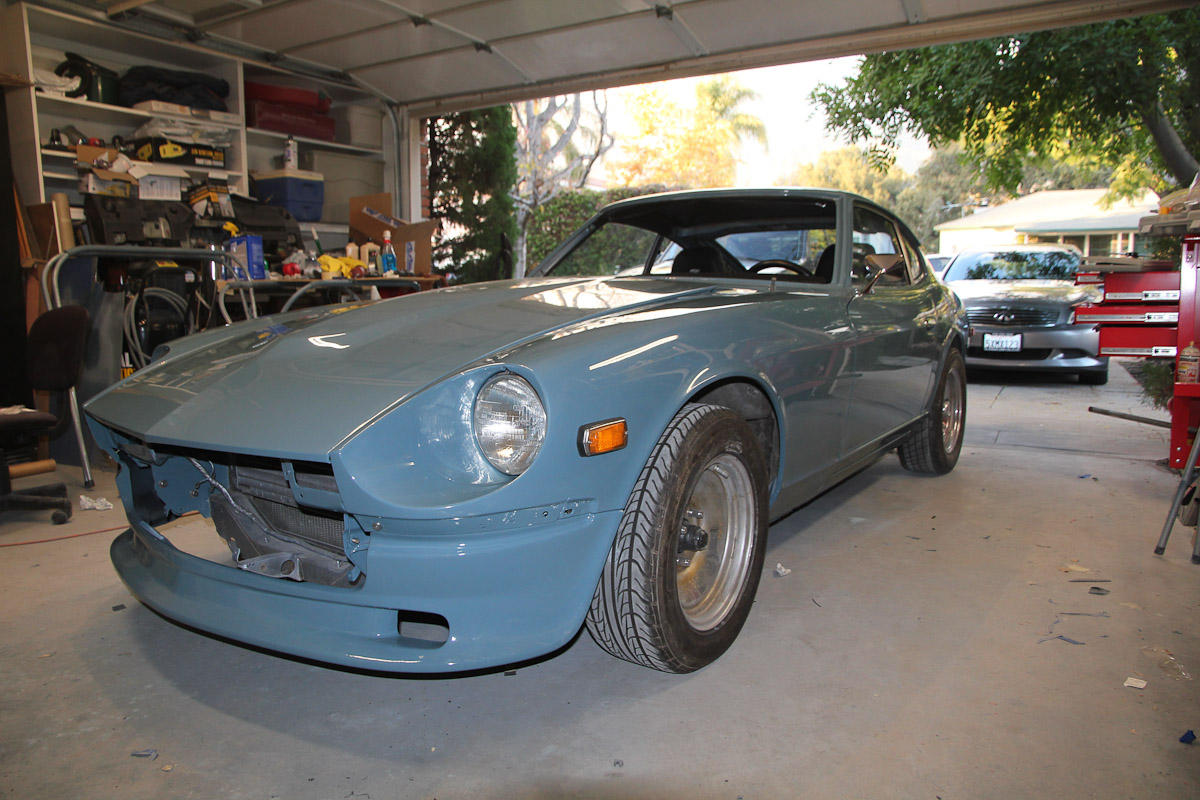
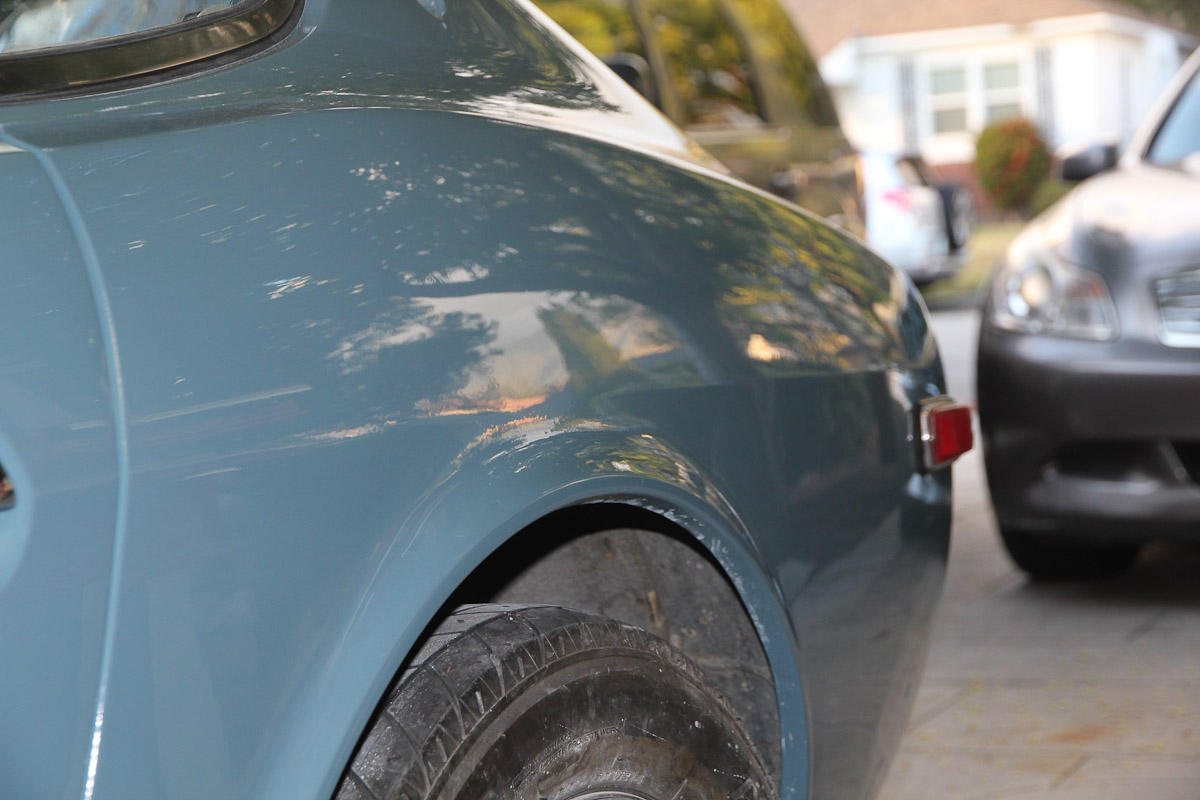
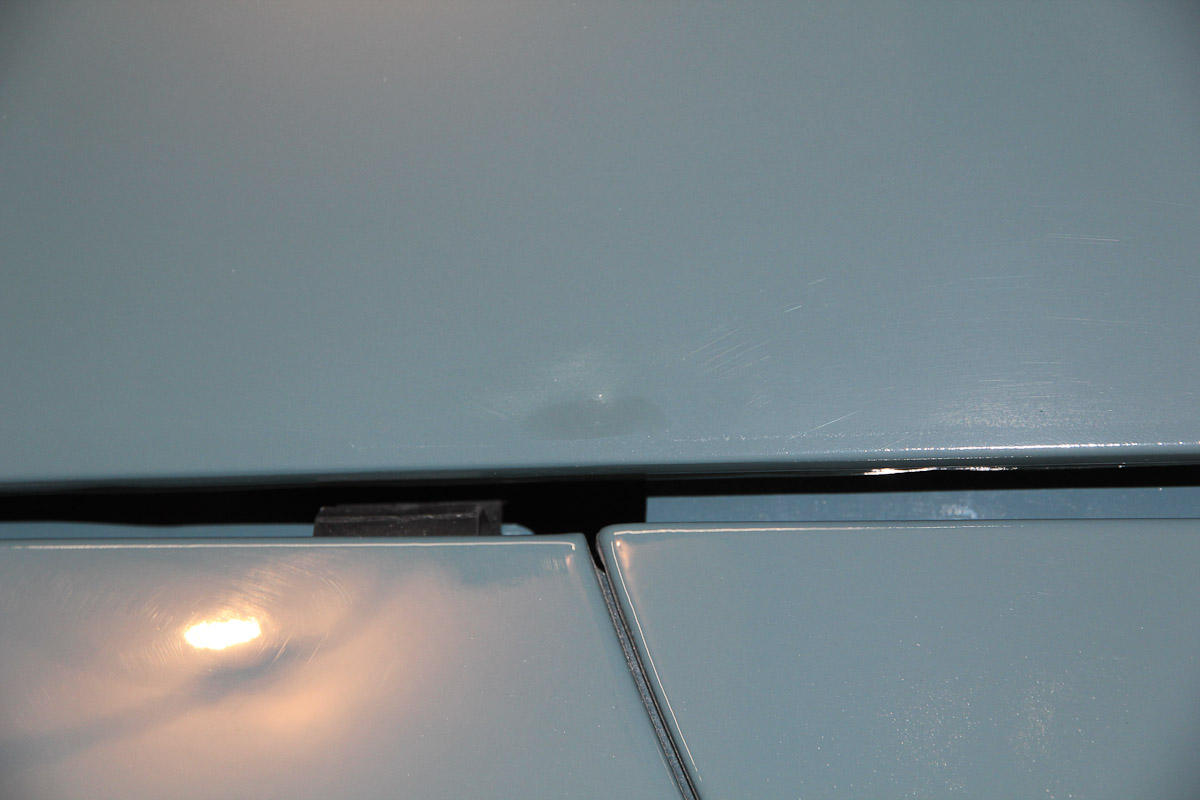
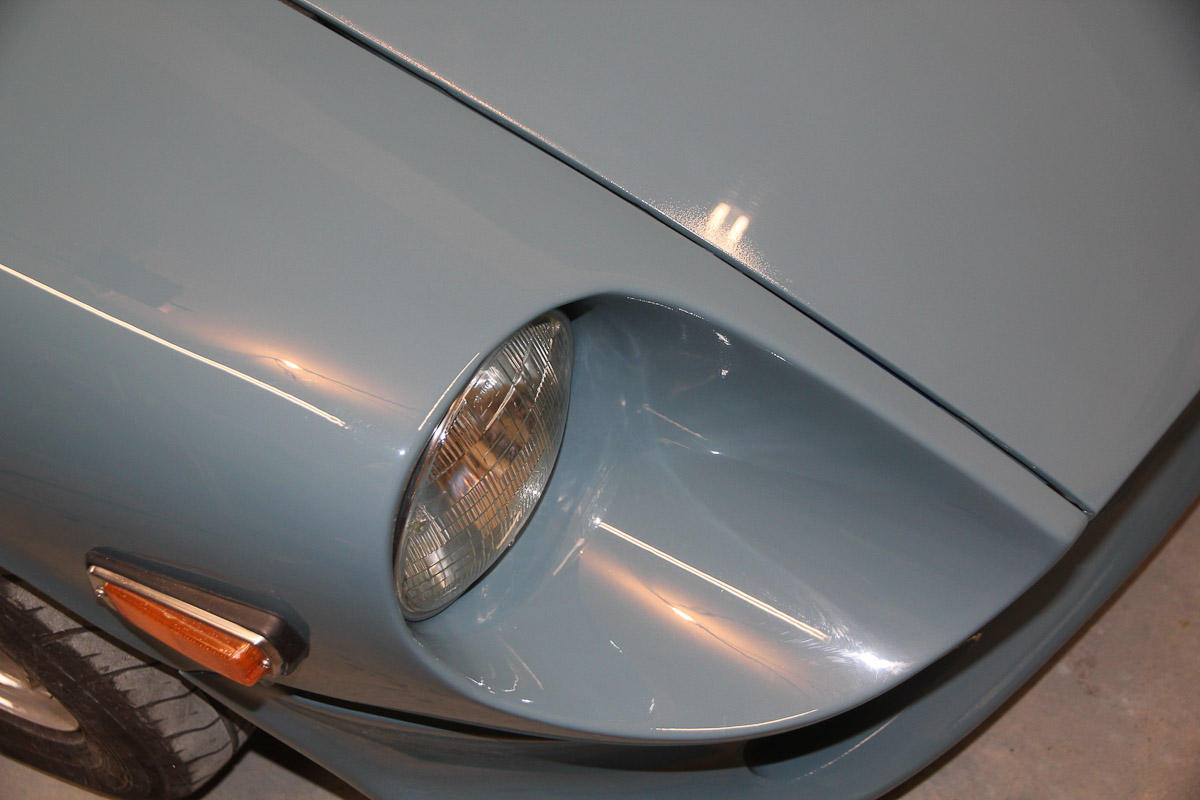
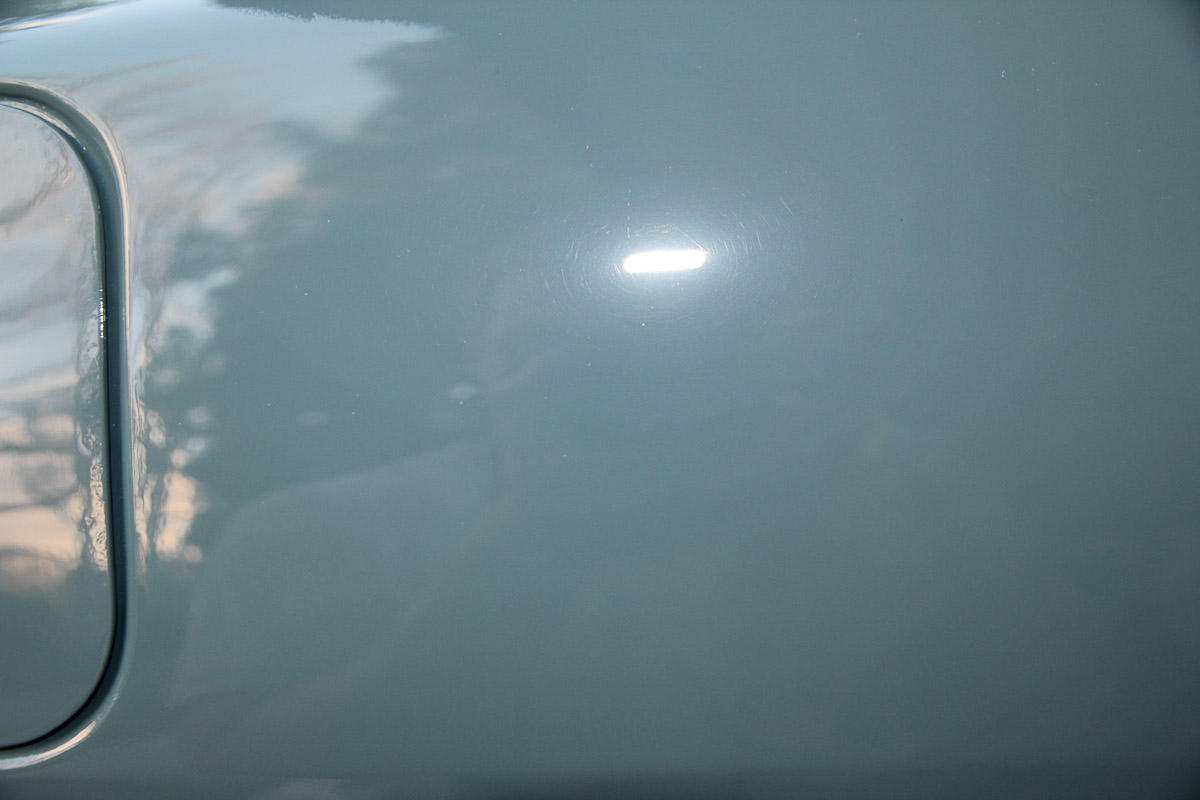
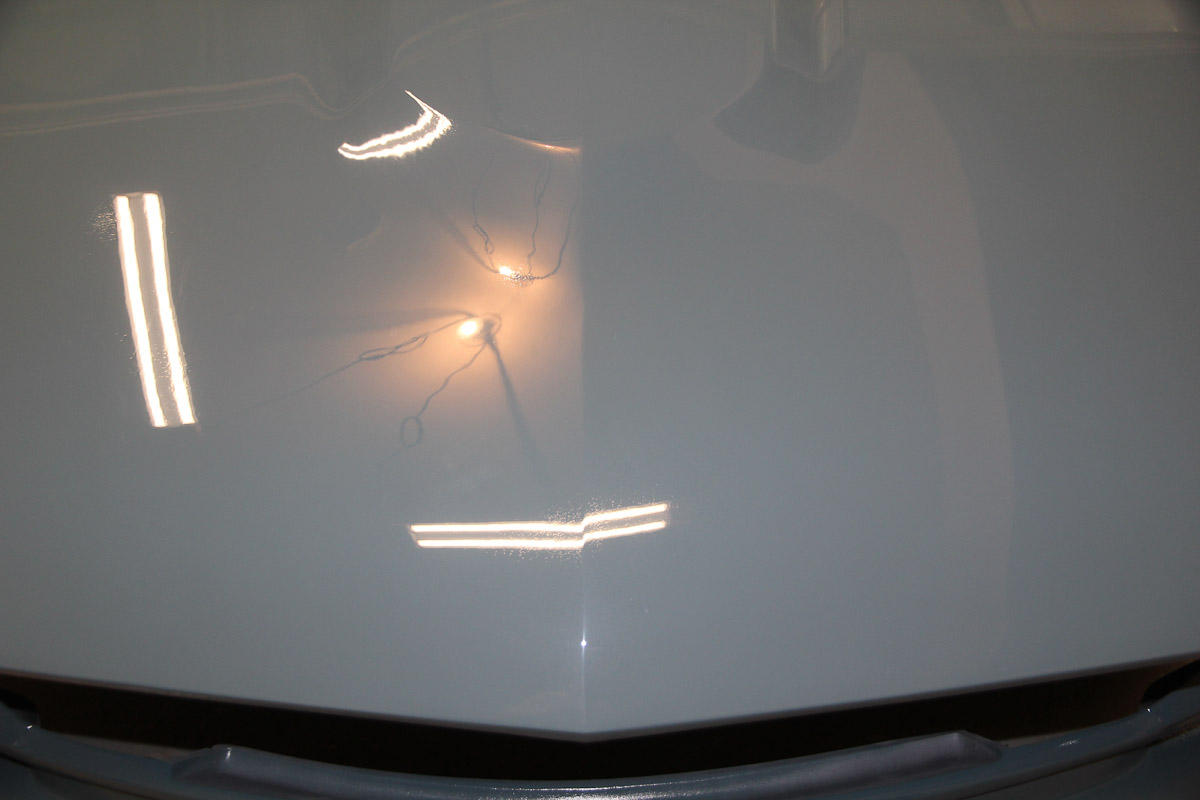
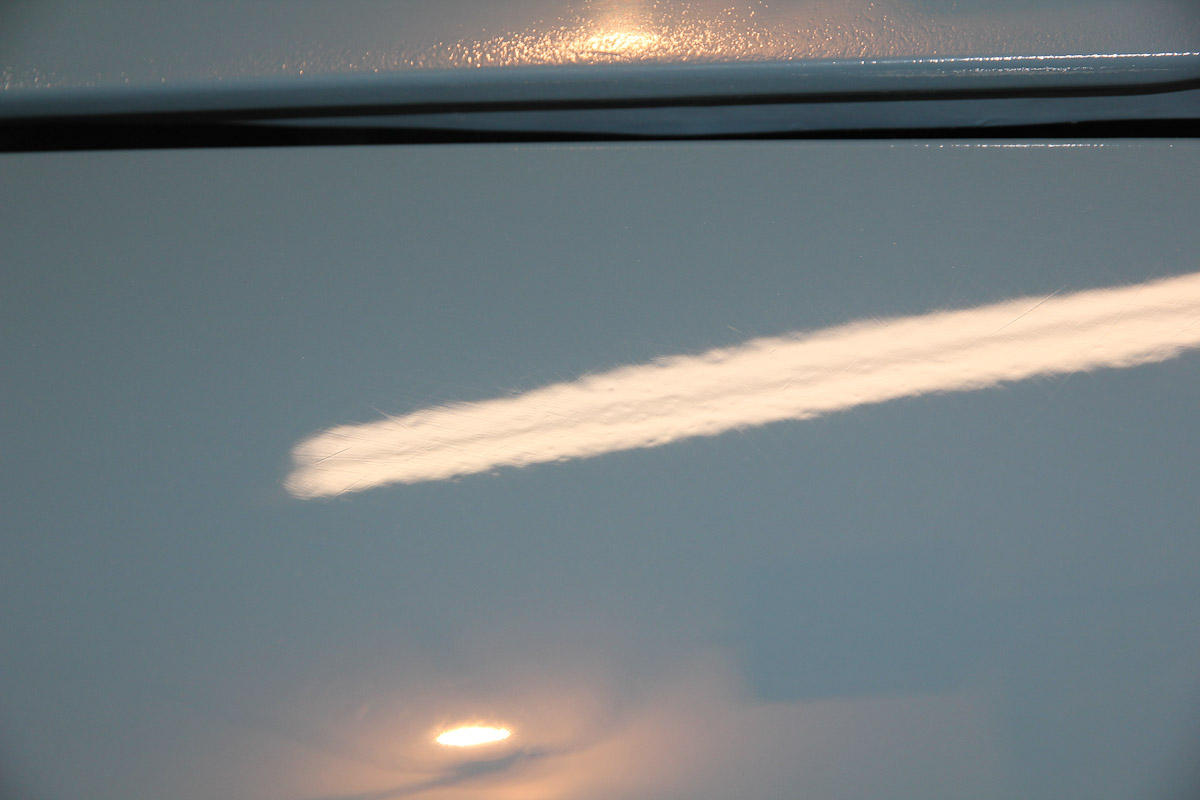
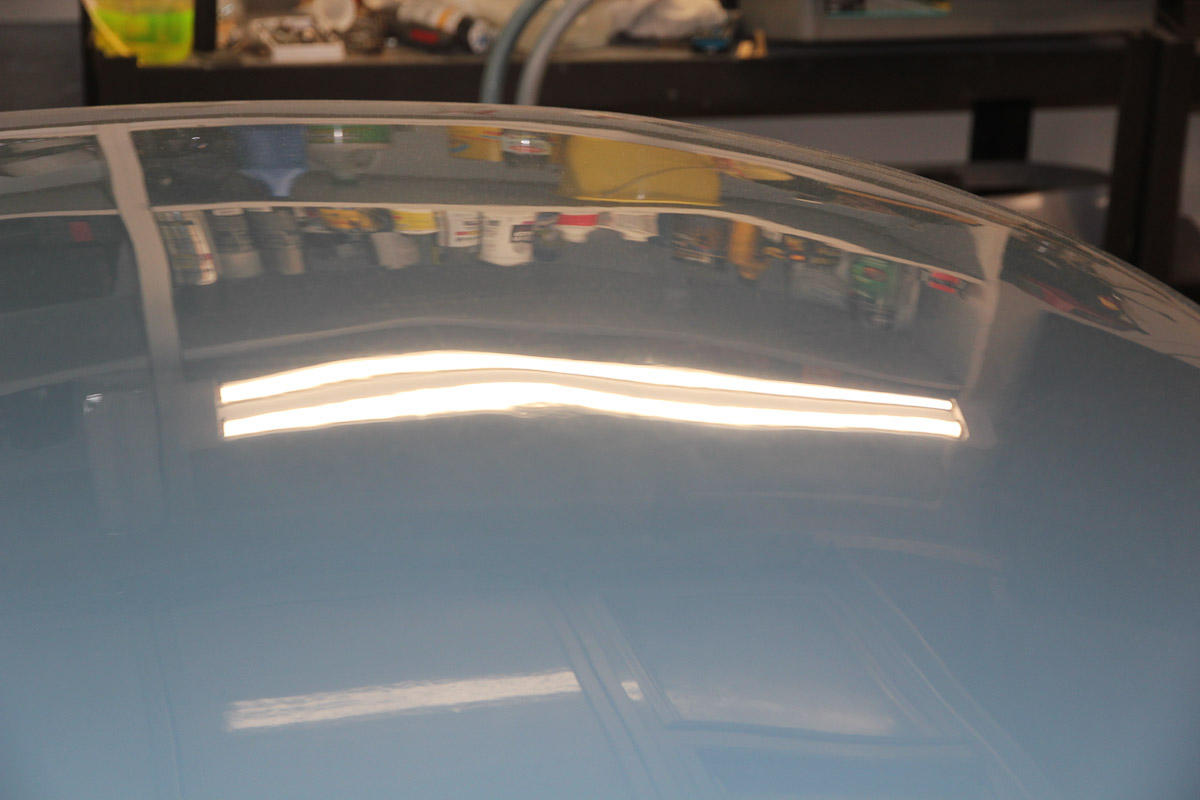
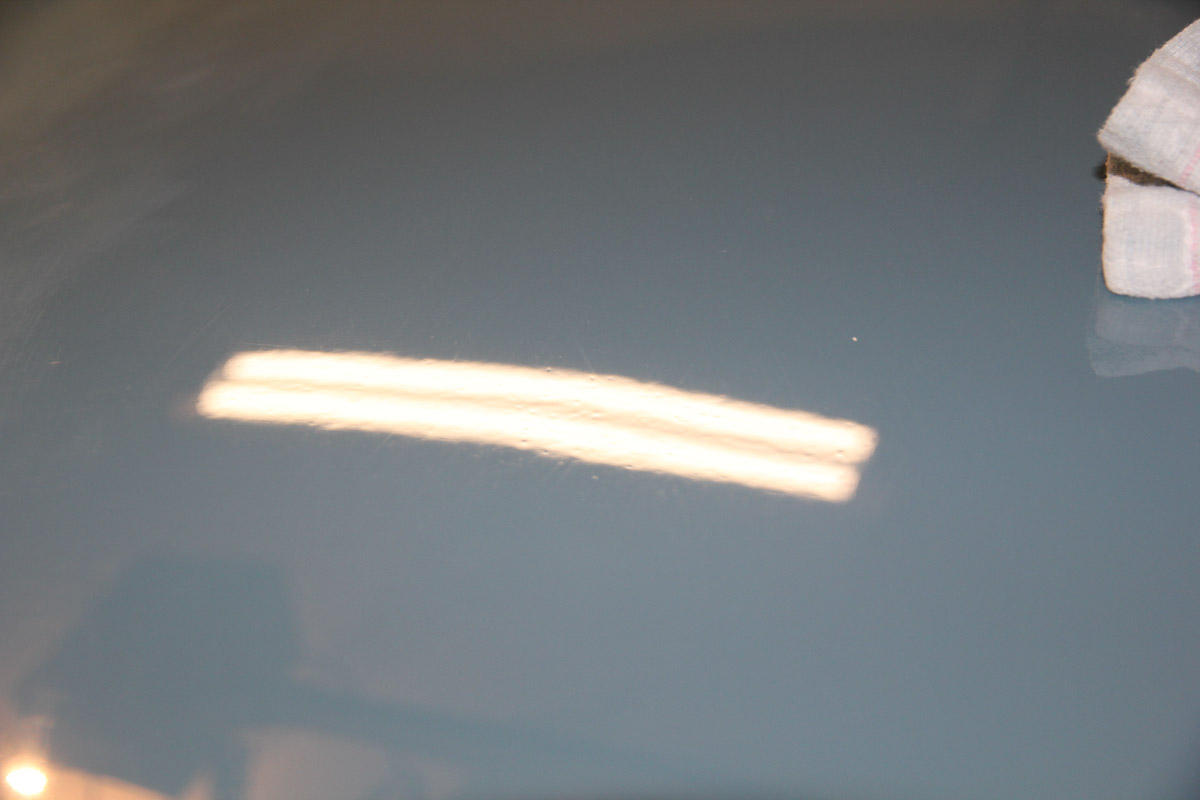
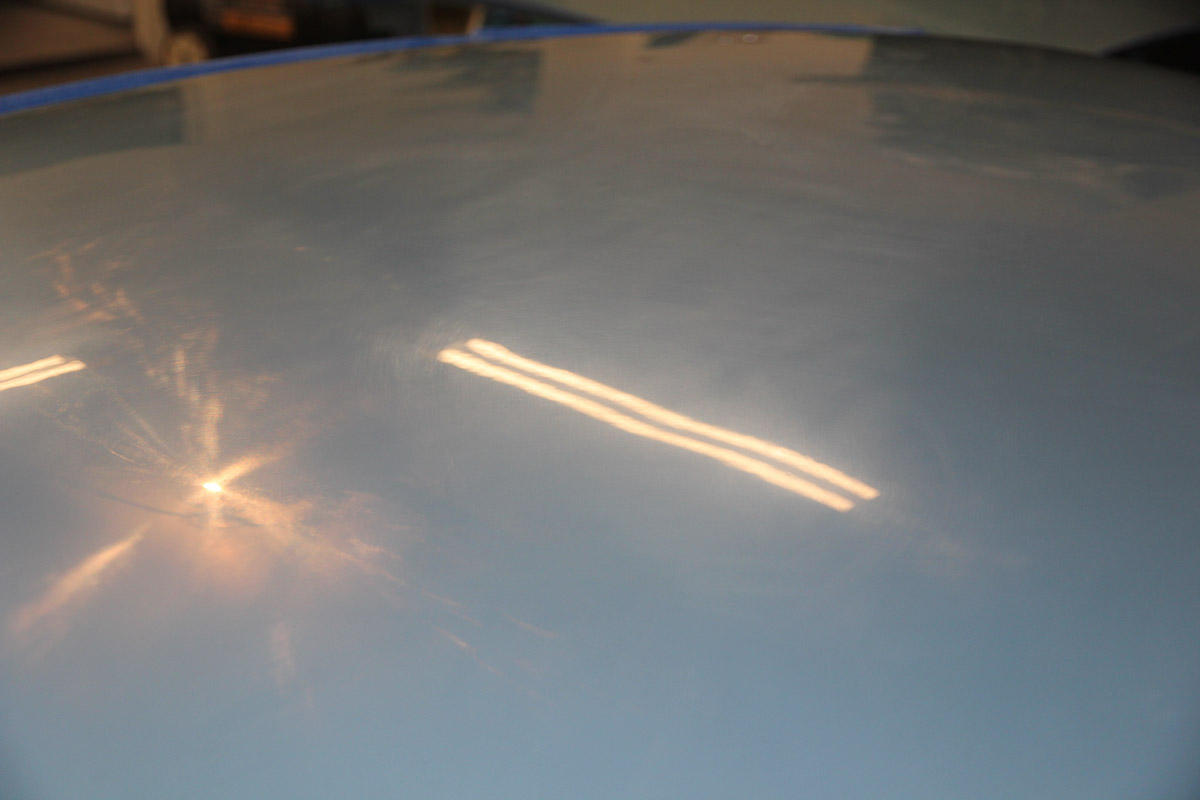
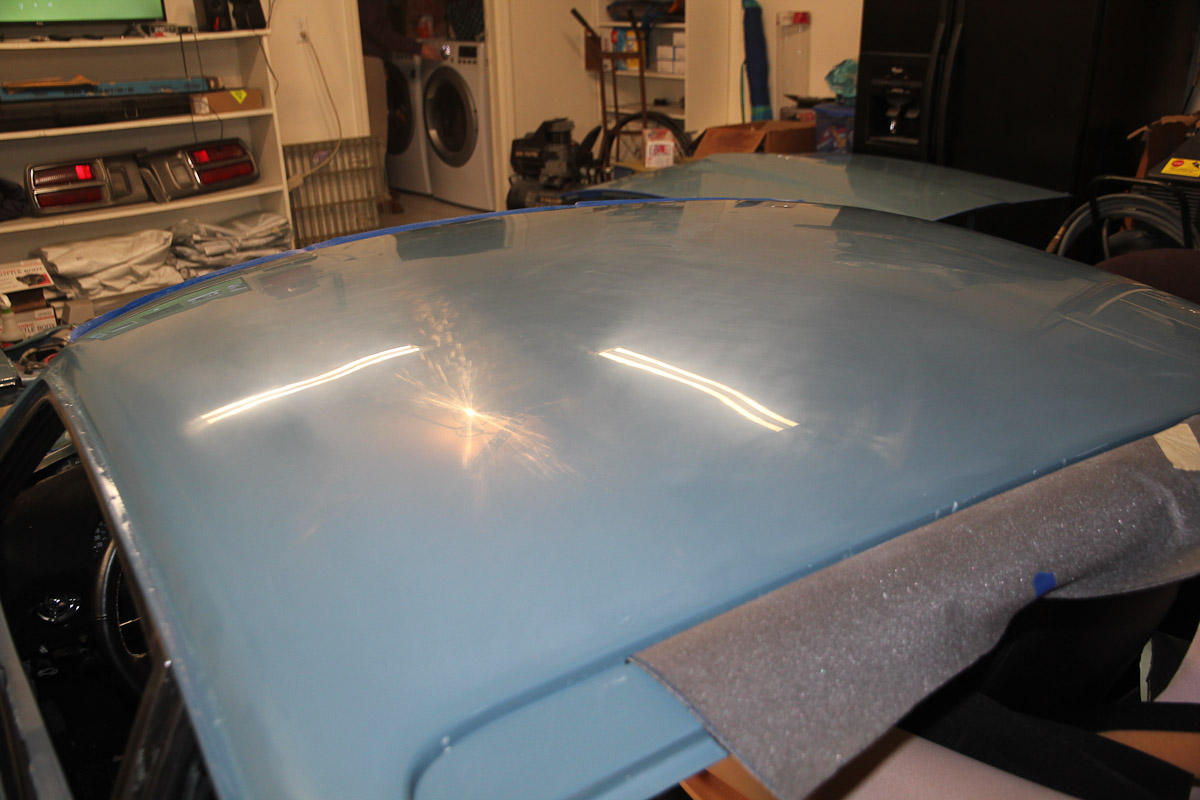
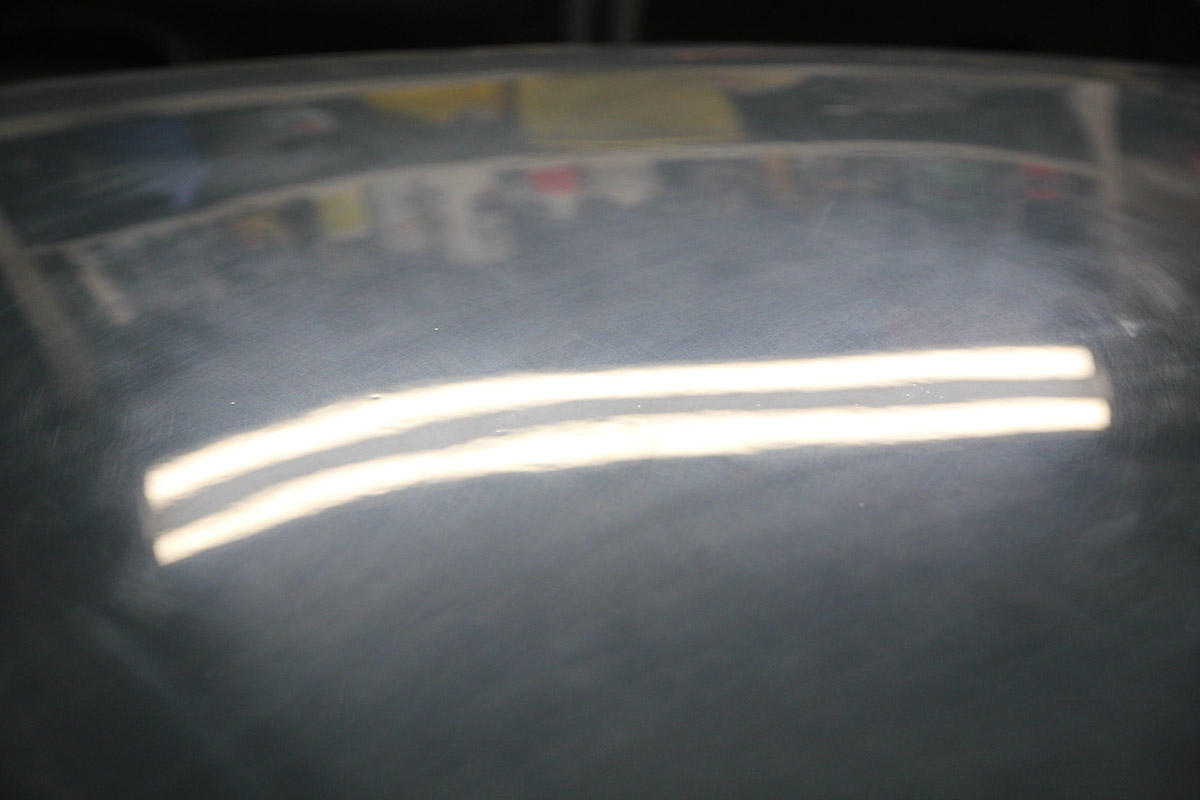
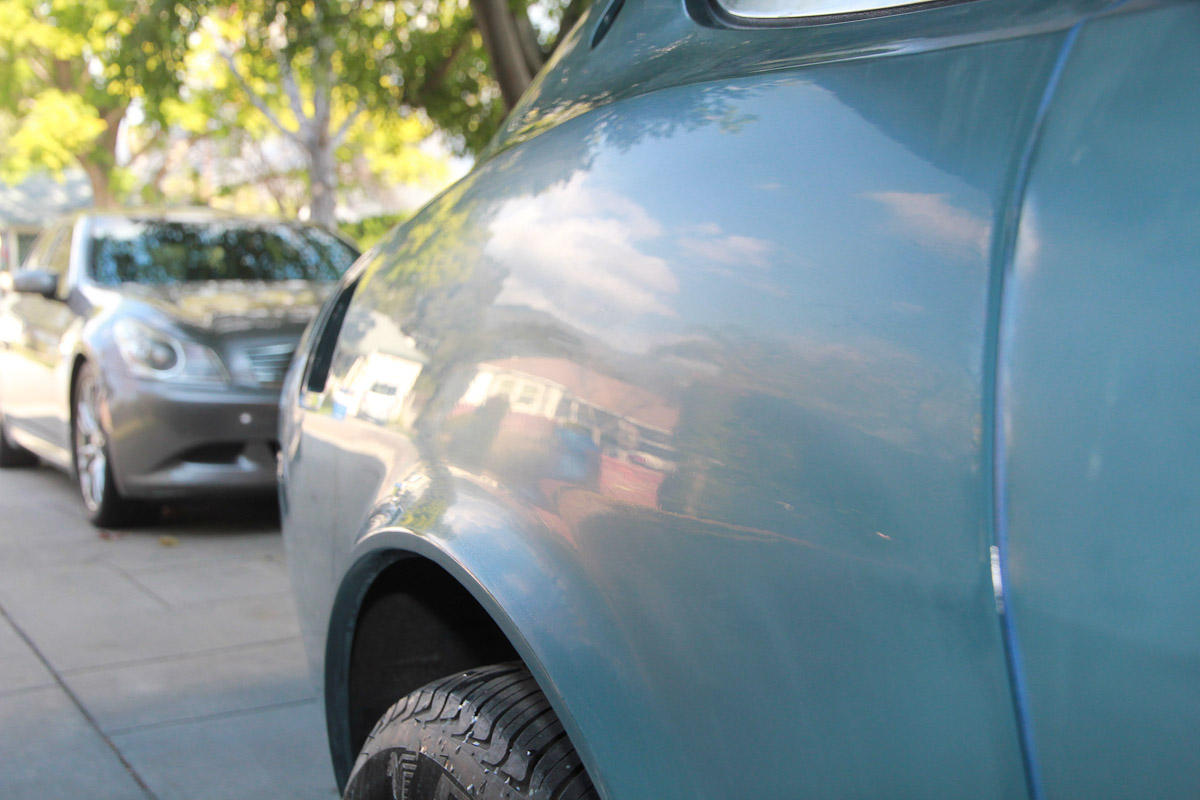
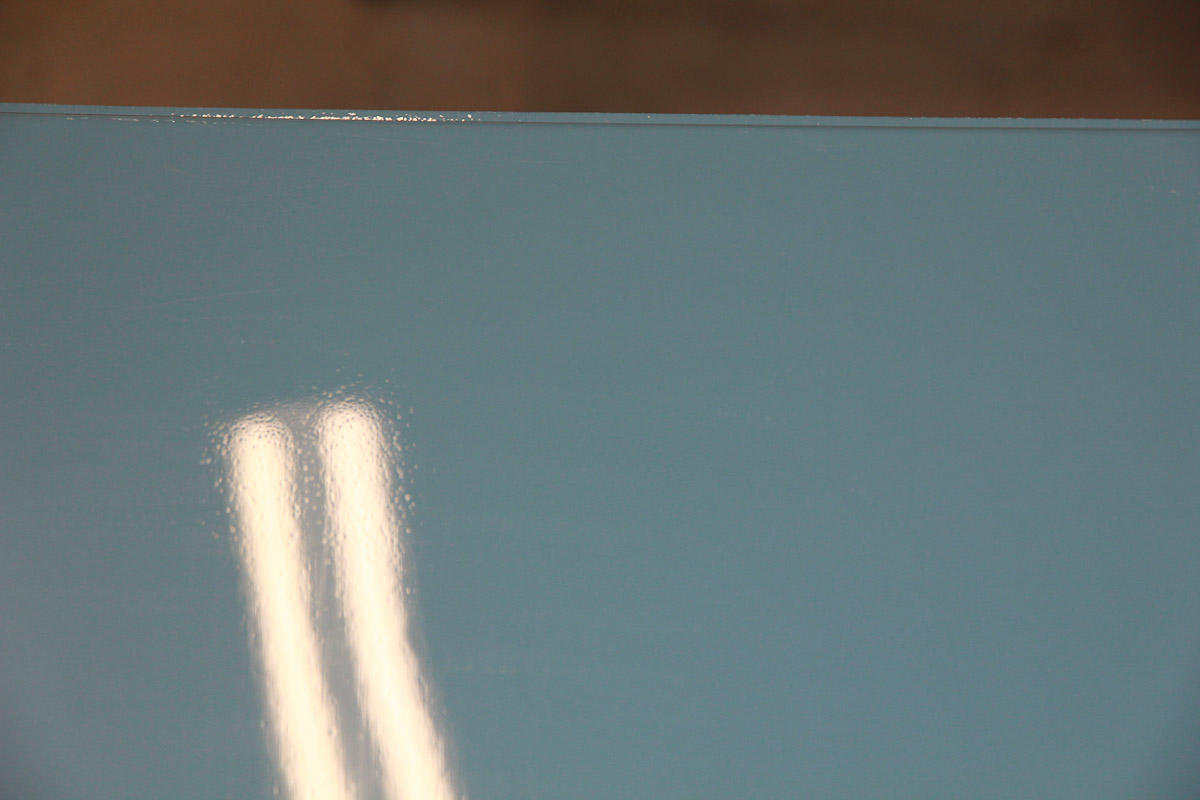
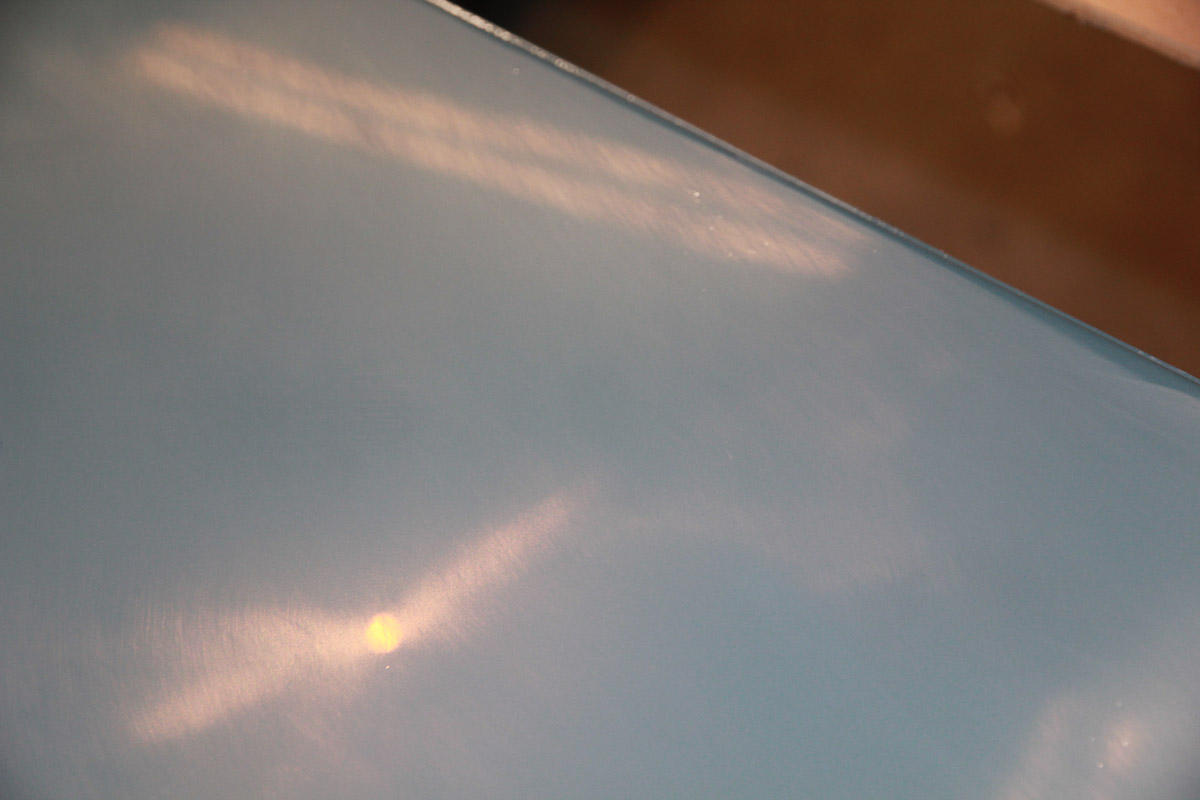
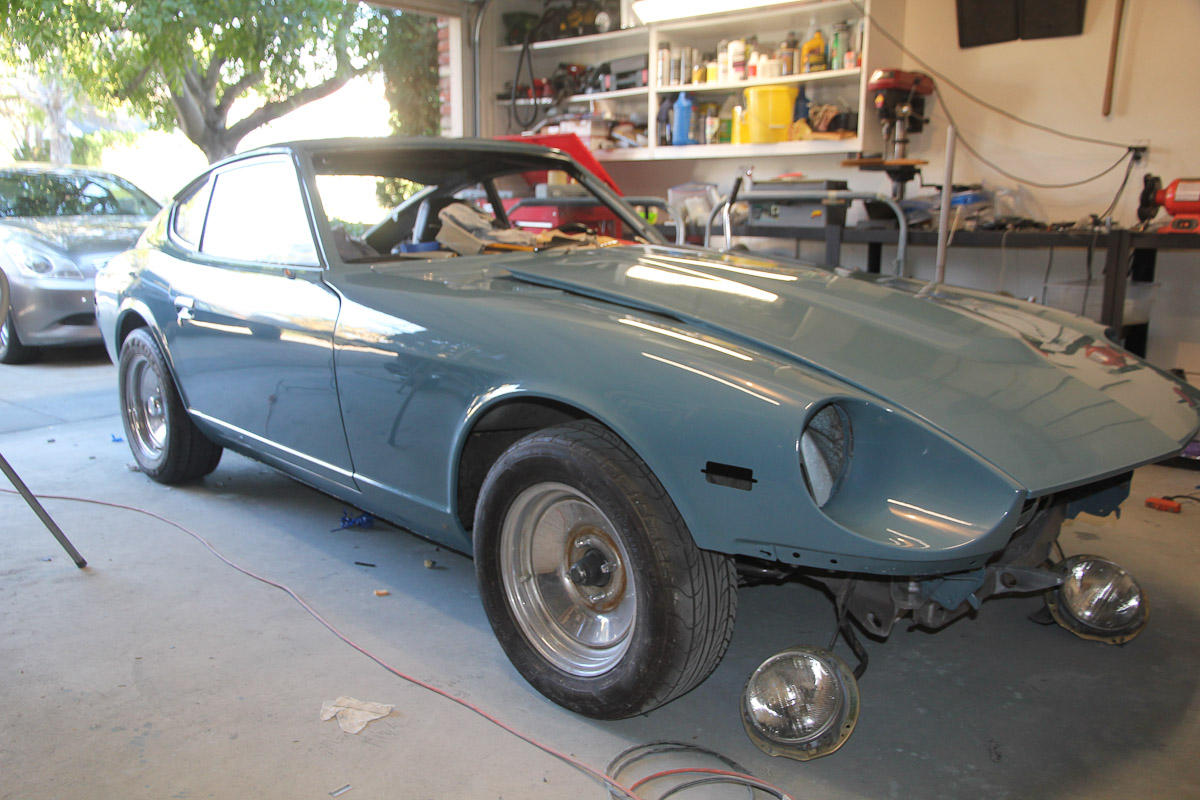
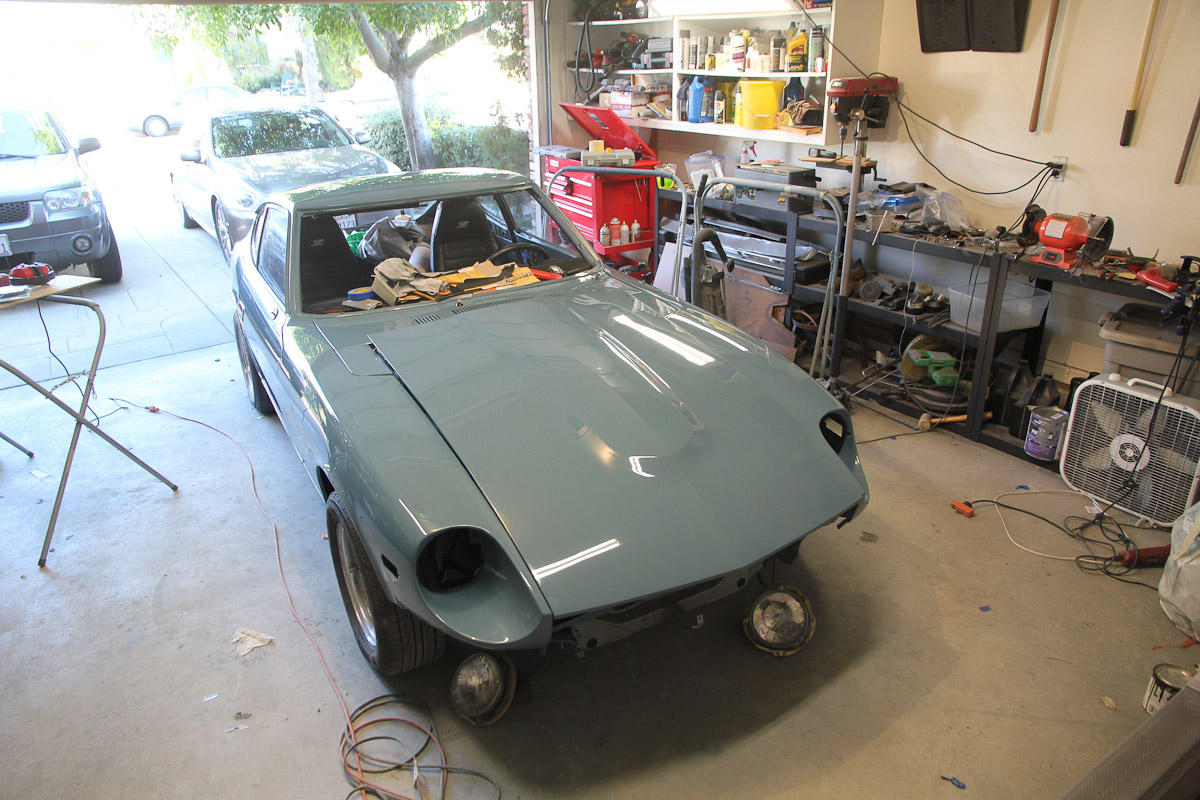
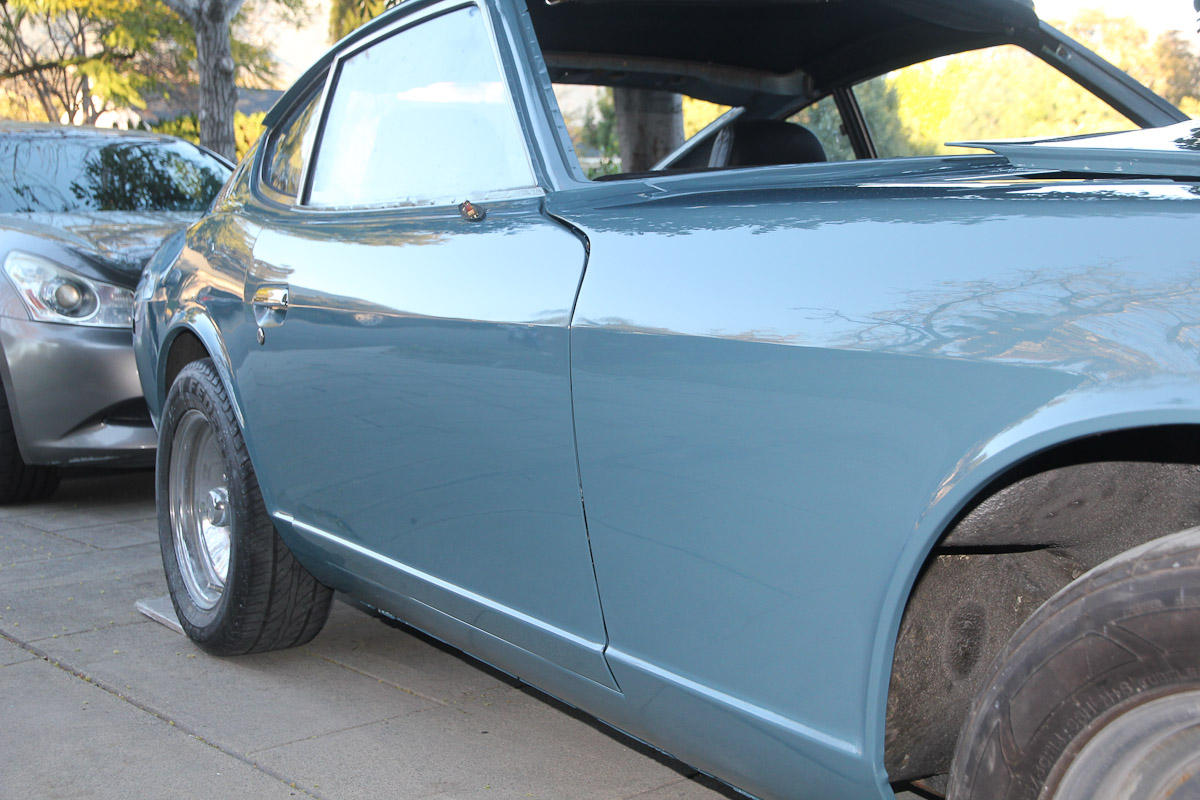
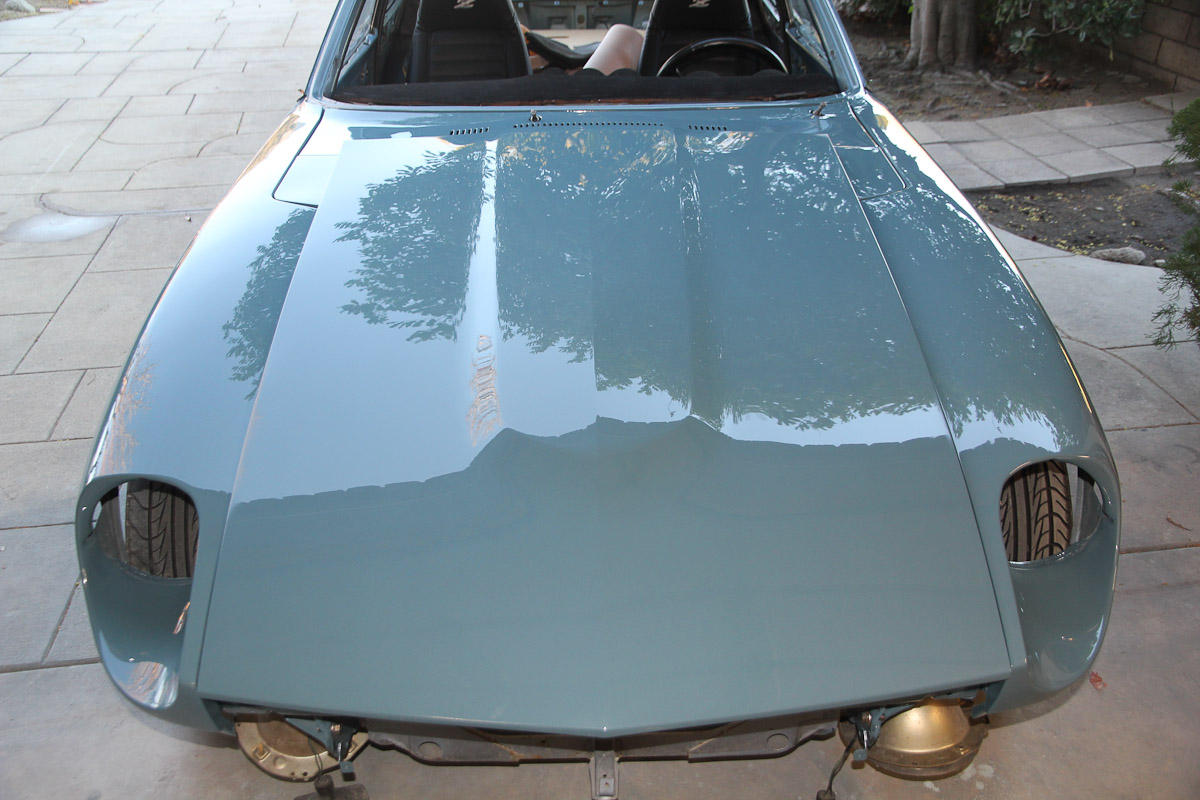
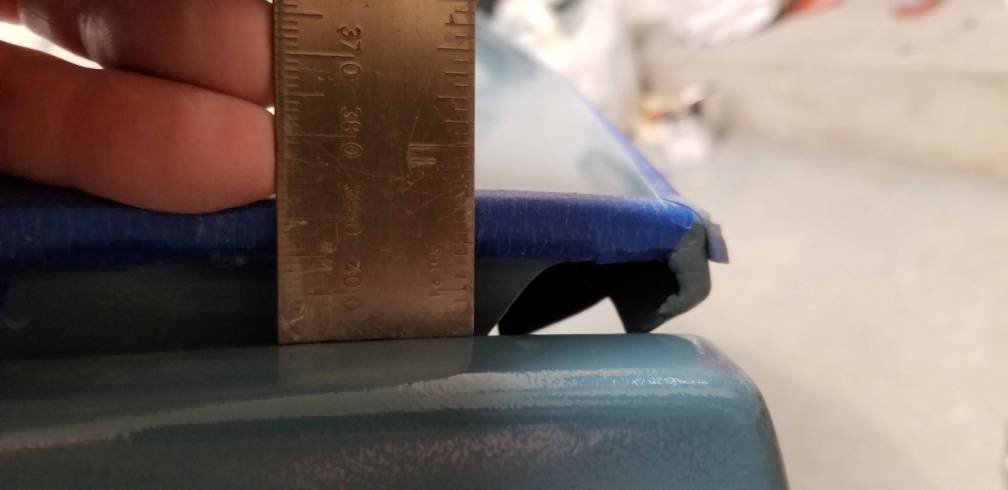
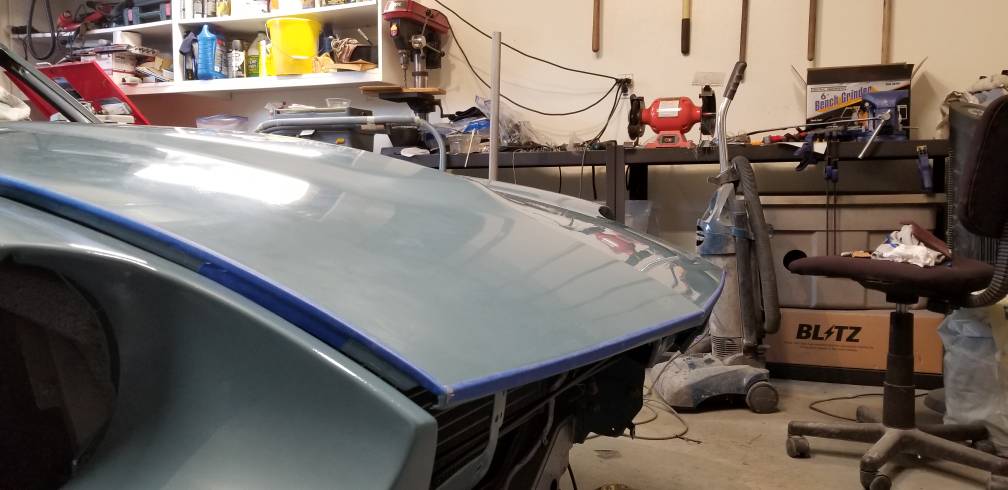
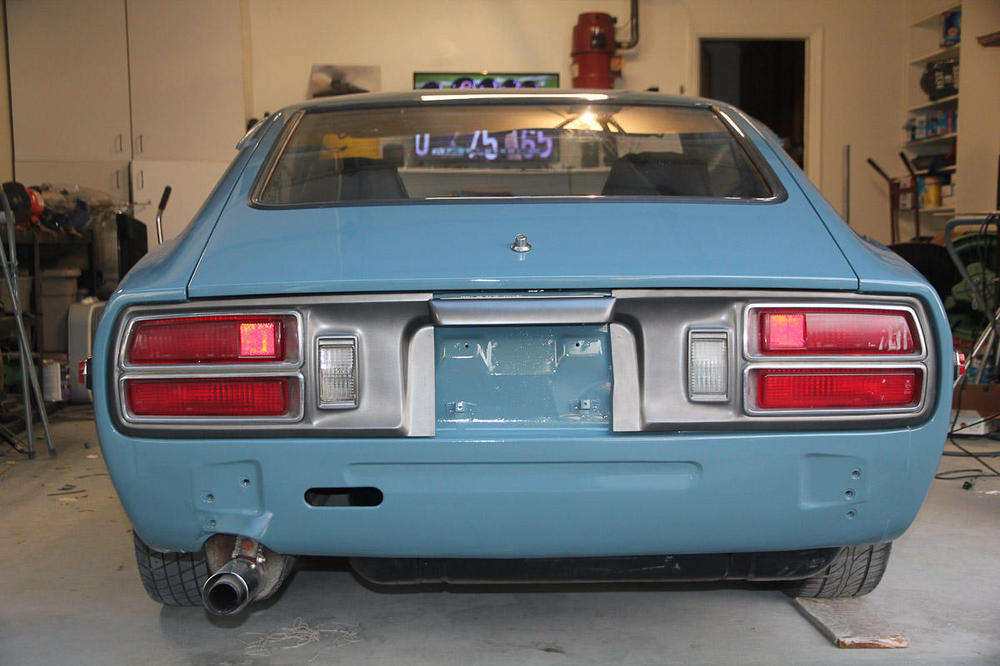
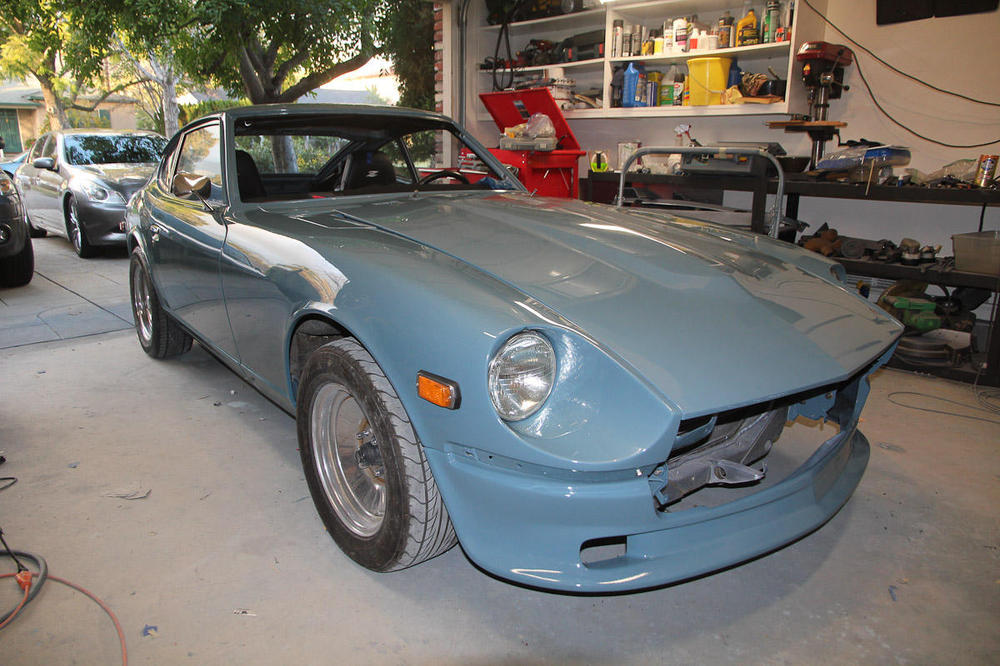
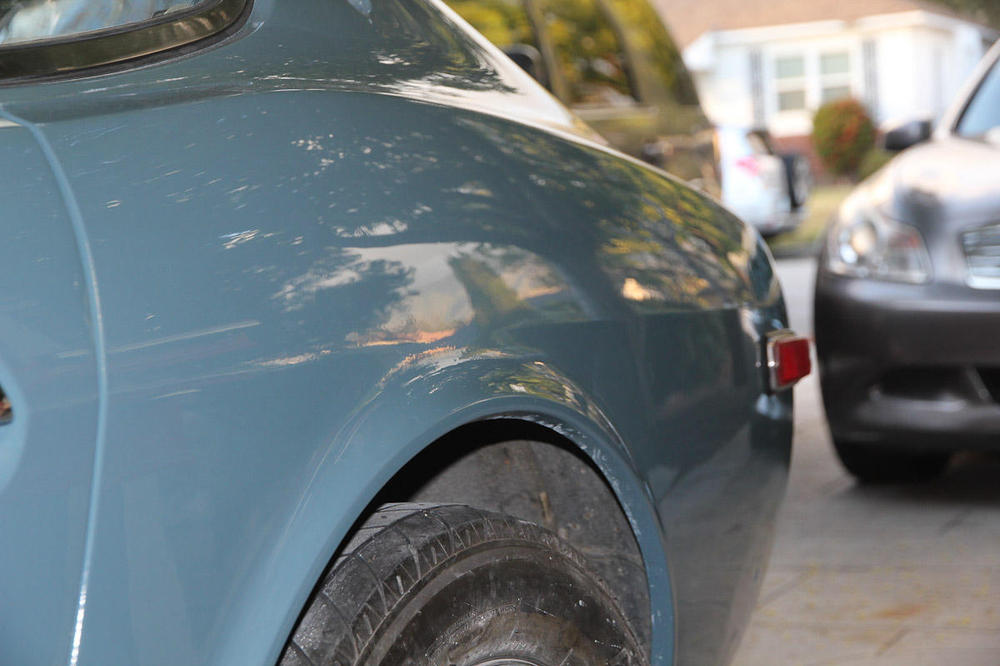
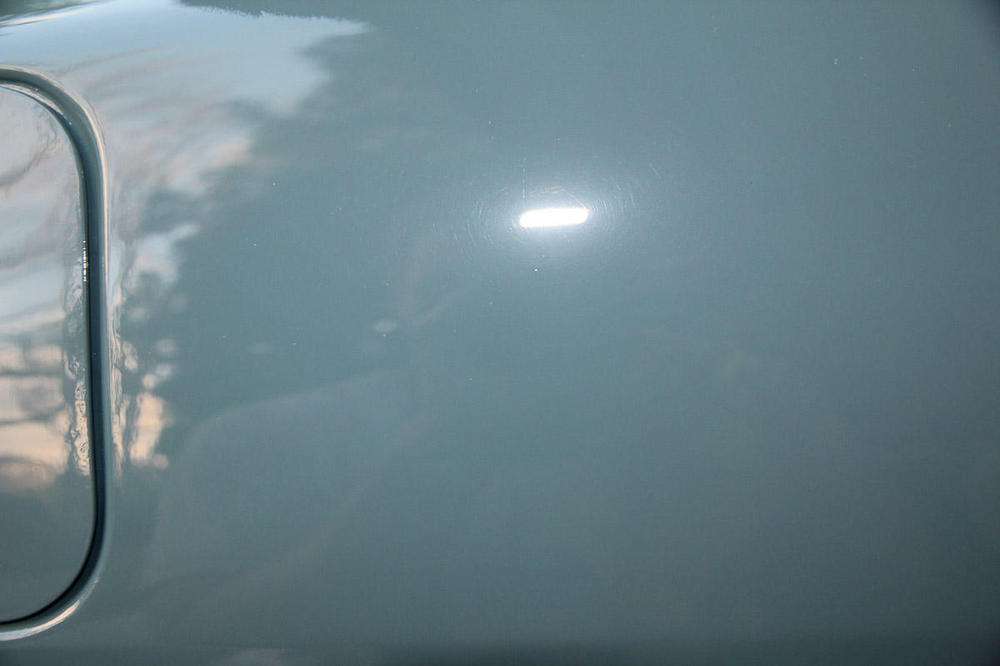
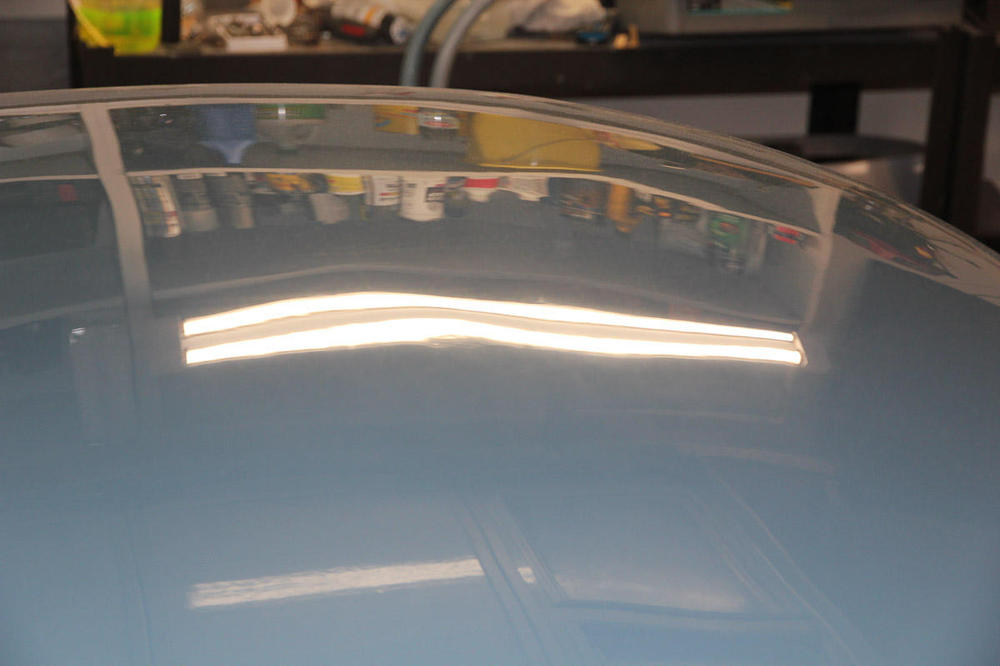
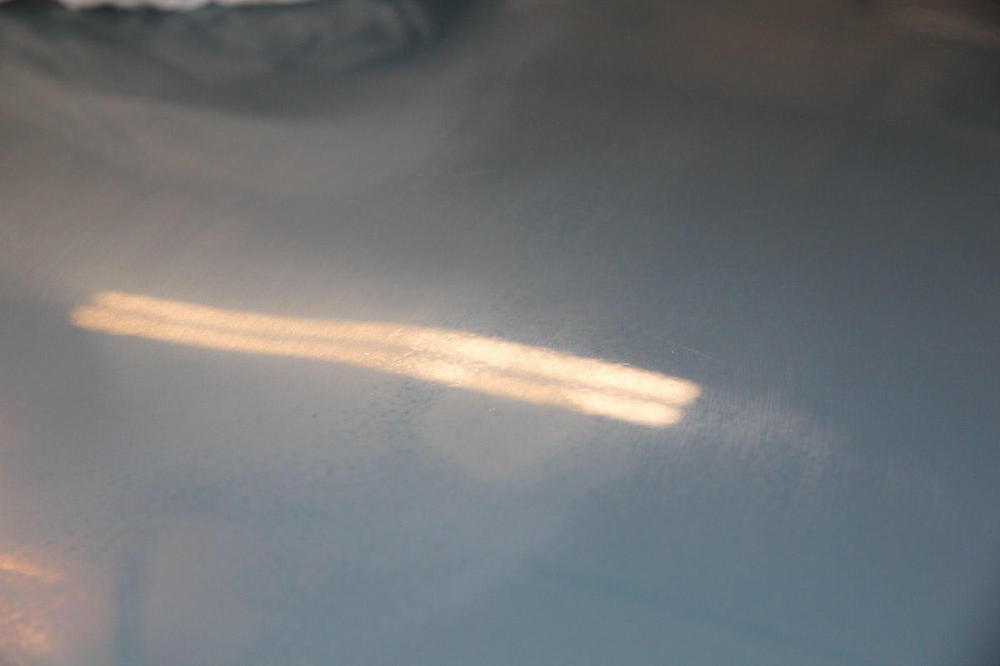
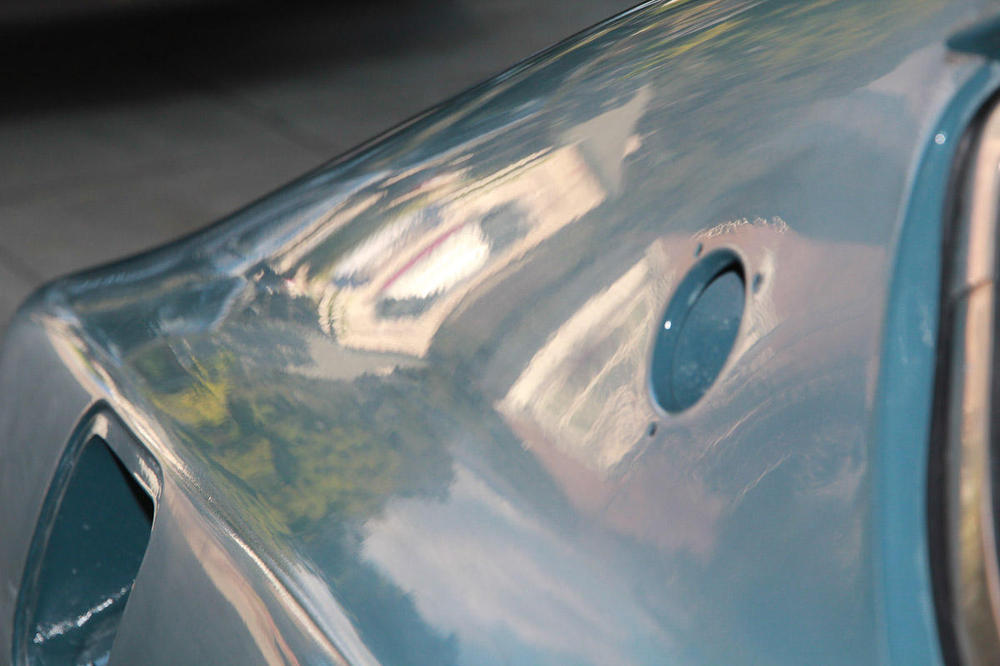
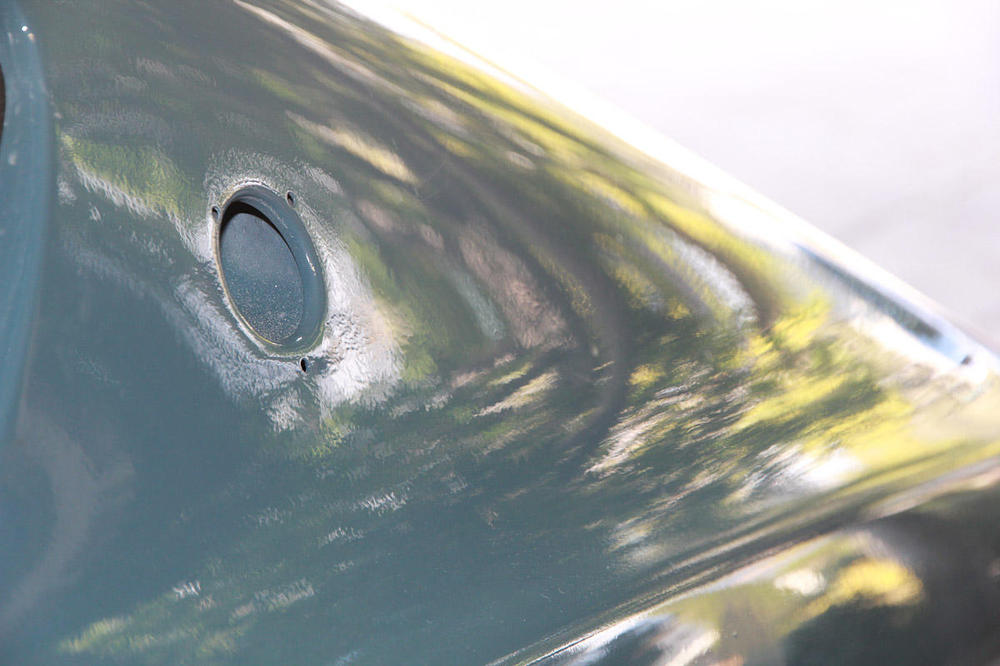
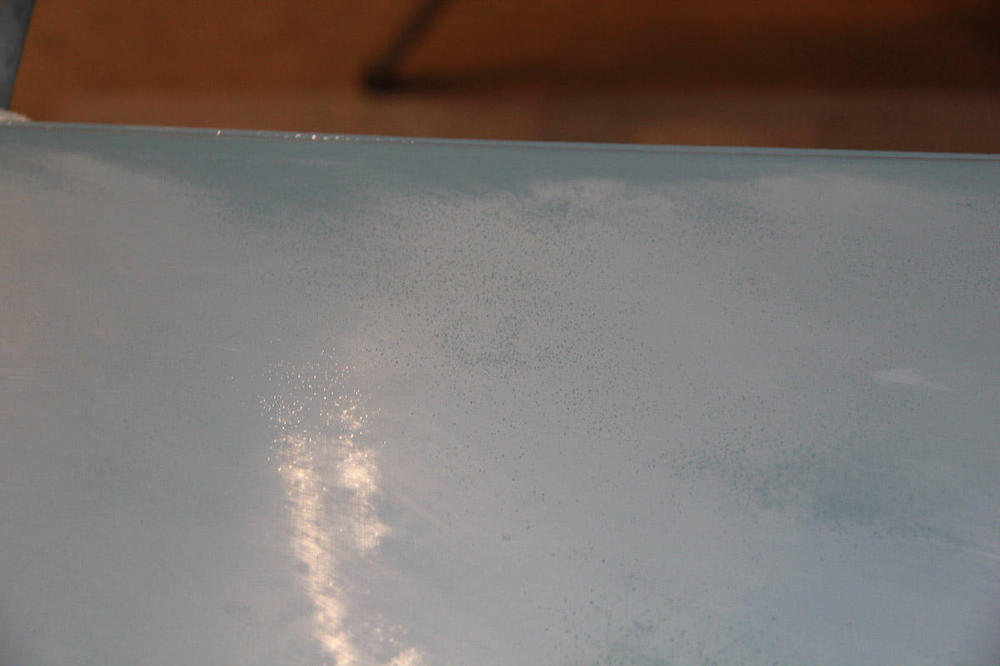
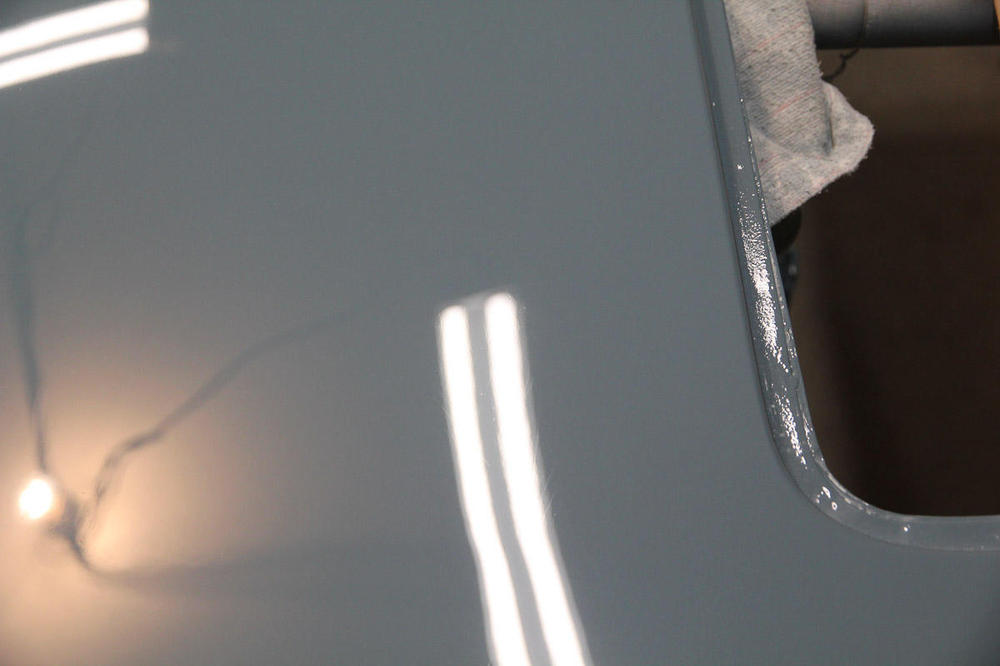
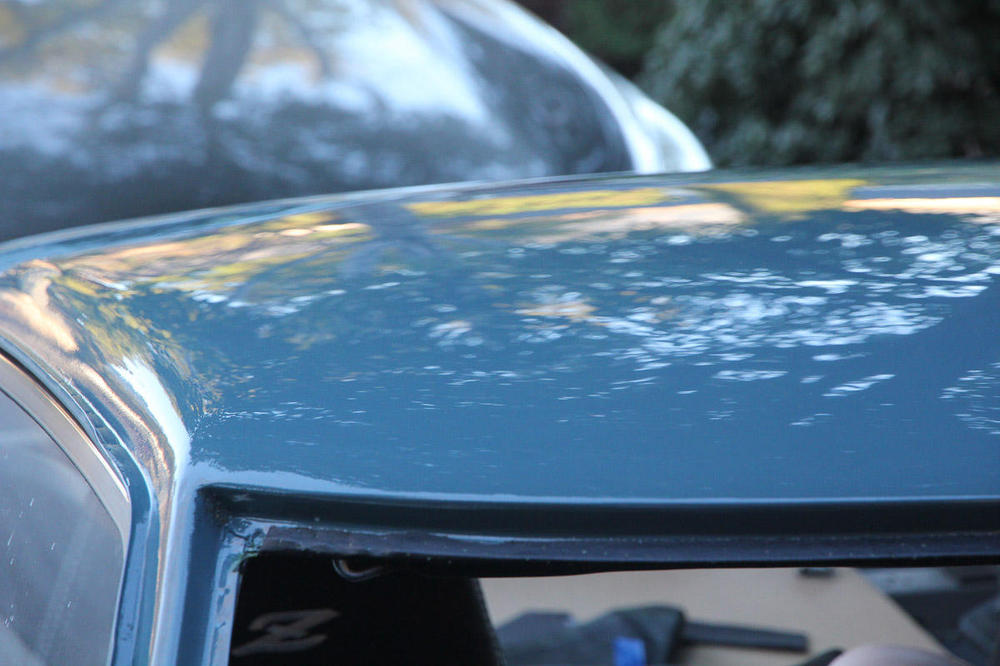
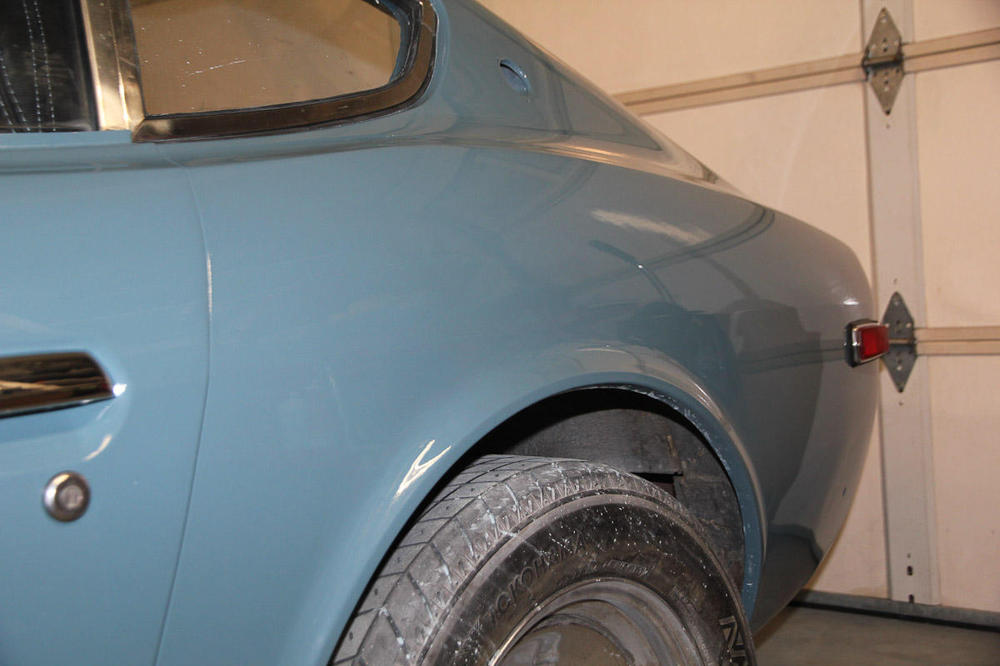
Now that I have all* the panels on, everything polished, and a couple days to look and think at it, I figured I would do kind of a postmortem on the body work and paint, complete with an acknowledgement of all the things I did wrong. *The struggle with the hood continues. Body work first... Hits: Really happy with the way the fender and headlight buckets came out. The hatch, the driver rear quarter, the passenger rocker, and the top of the driver door all needed a lot of work, and all came out well. I was especially concerned about getting the swage line back into the rear, but that looks good. For all the problems that the hood had, that came out pretty nicely too. The only thing I think I should have done better on is a slight jog in the center line at the bottom of the bulge. Rear bumper holes are gone There were numerous dents and dings all over the car, almost all of them fixed. Misses: There's a couple very small dents that I missed. Should have been more conscientious about blocking. I didn't get the body line quite right on the section of the rear valence that I replaced, and you can see the difference in the gap on the tail light panel. The roof was really rough, and while a lot better, it's not perfect. I can't see it in the body when just "looking at it", but the distortion of the lights in the reflection tells the story here. I set myself up badly by not stripping out the headliner and butyl mat before I got started (in retrospect, probably a choice I shouldn't have made), but the roof was probably the hardest section of the whole car, and I didn't really pick up on some of the defects until it was painted an polished. More experience needed here. And paint... Hits: I painted a car in my garage. It looks a lot better than it did when I started. Some of the polished sections look really good. Misses (sadly, more misses than hits here): Dust was a problem. In some areas, especially where I sanded aggressively, there's some spots/flecks of the primer showing through. They're not noticeable from more than a foot or two away, but I know they're there. There are imperfections in the paint, and there are some scratches. I'm not sure if they're left over from blocking or from wet sanding (either from 1500 or from stray dirt/grit), but I sanded off a lot of paint and didn't want to take my chances trying to sand further. There was a high spot on the hood and a promptly sanded through the paint. I may try to touch this up. I know it won't blend well, but badly blended color will probably look better than primer showing through. There's a couple spots where something odd happened with the paint and it looks almost...cloudy/splotchy, maybe, from certain angles. A total guess on my part, but maybe there was some paint that wasn't mixed well? I haven't been able to get a good photo of it, but you can kind of see it here: Bad job spraying on a handful of panels. Most I could sand out, but some places I couldn't and the imperfections can be seen from certain angles. The edges of the hood are the worst; I mostly left them alone after sanding through early on. I might go back and try sanding some more. Even on sections where the paint is sanded smooth and the body work is good, the paint still seems like it has some texture and sometimes seems a bit flat and lacking some depth. There's two major things I will definitely do differently in the future: Better dust control. More paint with each coat. The fender I had to repaint was easily the best panel I did, and even that little experience helped. Looking ahead: I still need to paint the engine bay, which won't happen until I work on the motor, probably a couple years from now. When that time comes, I might consider fixing the roof and any other outstanding body issues and doing a respray if I think it's needed.


-
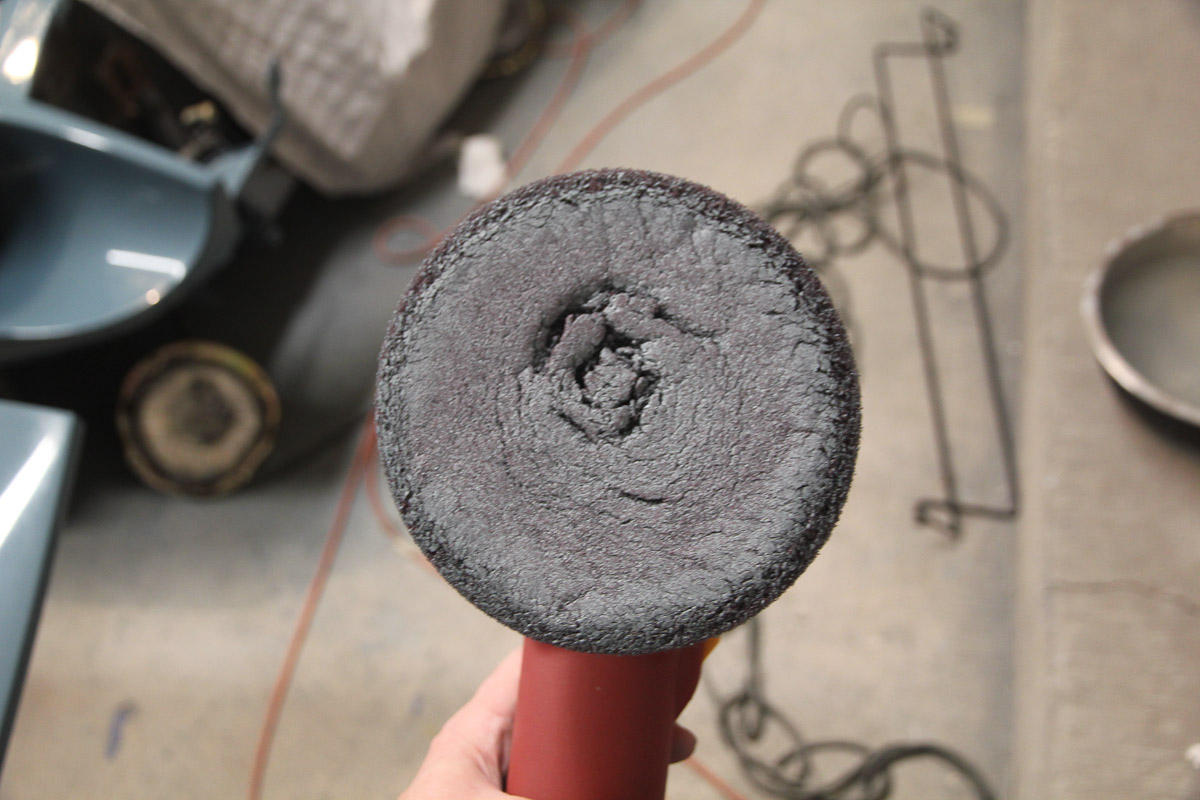
Lots of little projects over the last few weeks, and a lot of progress made, but this one's all about paint, because I finished sanding and polishing today. Some time around Christmas, it was starting to bother me that the fenders and doors were looking quite a bit better than the roof, rear quarters, and hatch. So I re-sanded and re-polished all of them. They're still not perfect, but they're better than they were and the effort was worth it: The roof; before, during and after: Sail/quarter; before and after sanding: And the hatch: With those done, back to polishing. I found it took at least 3 passes with the red pad and M105 to polish out the haze and most scratches. Red pad gave its all. That was followed up with one pass of the yellow pad and M205. Like I said, I finally got it all done today, and it's nice to be over that hump. Even with the screw-ups. Those screw-ups and some thoughts tomorrow...now I just want a cocktail!


-
Nothing adjusted, just got it on before heading out. Good way to end the year: Sent from my SM-G950U1 using Tapatalk

-
I've been taking it on and off myself the same way Patcon describes without issue, but my luck would likely run out when it matters most. Fortunately, I've gotten better about avoiding situations that will lead to immediate regret. Mostly from experience.
-
Thanks Mark. Still have that tired engine to deal with at some point, though! Homes t aren't on yet, just stripped for paint. Wife is laid up with the flu, and I figure the chance of me not dropping my newly painted hood on my newly painted fenders if I try to do it myself if basically zero. Sent from my SM-G950U1 using Tapatalk
-
New hinges came today, and they have *no* slop or looseness at all. Big difference, and explains all the things that never seemed right with the hood since I got the car. Sent from my SM-G950U1 using Tapatalk
-
Just picked up a set on eBay for <$50 shipped that was described as "smooth movement, tight, not twisted" which are all the things mine are not. Worst case, I'll have a set I can disassemble and see what would be involved in a rebuild.
-
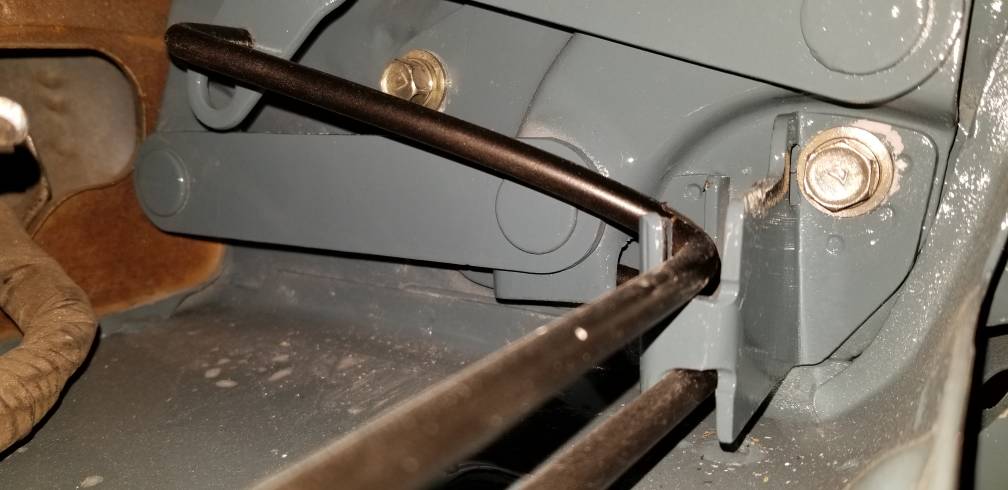
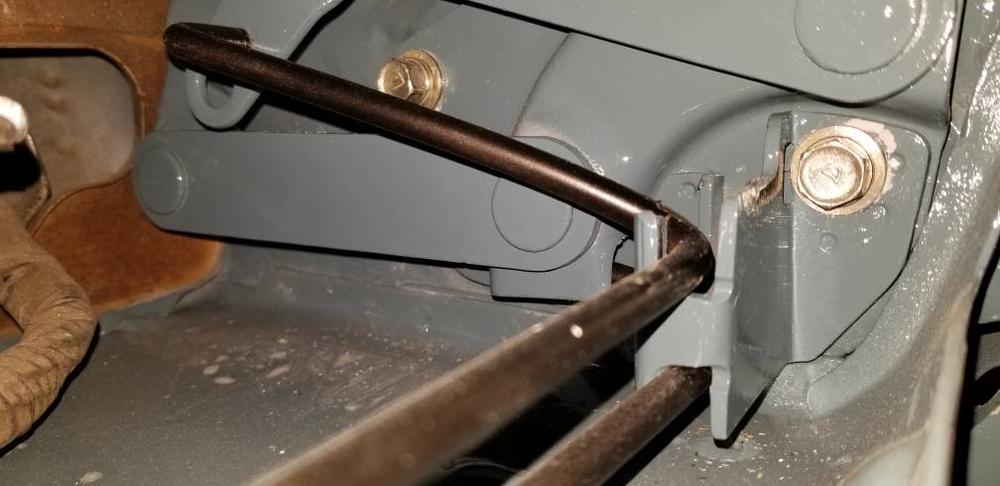
I considered struts when I thought my rods were long gone. Maybe one day, but I don't think they'll help with this problem: A little tough to film with one hand and move with the other, but there's a fair amount of play that translates to vertical movement of the hood, and side-to-side slop. I only filmed one, but both hinges are basically the same. I thought they had a little more play than they should, and the rods would tighten it up (true enough, I suppose, even if the result isn't quite what I want), but I gather from the comments that these hinges are properly shot. I can't recall seeing any documentation on rebuilding the hinges (which I suppose would require drilling out and re-riveting everything), so replacement is likely the only reasonable option here?
-
Ha, I tried putting the rods in with the hinges off the car, but the whole thing kept falling apart on me, so I just went the muscle route instead. Granted, it wasn't easy. Since there's clearly something amiss that's not explained by me forcing parts together in the wrong way, I'll pull out the rods and hinges today. There may be nothing I can do to fix the hinges (they seem very unserviceable), so I might just do as the PO did and leave the rods out until I can replace the hinges.
-
Not my greatest cinematic achievement, but here's an attempt at a video. I can push the hood down flush, but the rods will twist it back up.
-
Bars meaning the hinge bars, not the springs. Mine are anything but precise, so this is starting to look like the issue. Sent from my SM-G950U1 using Tapatalk
-
It's been well over a year now, so going by memory, but I think a lot. Probably the same 3/4" that it sticks up now. Definitely not an 1/8 or so. Sent from my SM-G950U1 using Tapatalk
-
Something that just came to mind: before I tore the car down, and without the torsion rods, the front of the hood was flush with the fenders, but, I could lift it up and move it vertically. Without any other cars to compare to, I figured it was normal...but is it? My hinges have a fair amount of slop in them. Again, figured this was just normal, and the torsion rods would pick it up. If they shouldn't, I'm thinking maybe the pins have worn grooves into all the bars, and that slack is causing my problems? Sent from my SM-G950U1 using Tapatalk
-
I thought so too. At this point, I'm not assuming anything, so this is right, right? Sent from my SM-G950U1 using Tapatalk
-
Fenders are bolted in and everything there is sitting nicely, so that's probably not it. I'm starting to think the PO wasn't too lazy to put the torsion bars back in, that was just his "fix" to the problem. Anything on the hinges I might look at? Sent from my SM-G950U1 using Tapatalk
-
Oh god. I put them in the only way they're able to go...but is it possible to have them flipped around? Please tell me no, because getting those suckers in was high on my list of things I don't want to do again.
-
Hmm...I tried loosening the hinges to see if that would help, and I only get a bit of adjustment. The hood sits about 3/4" high, which is way more than the slots allow. With the hood closed, the hinges do not sit all the way down (they move if I push down on the front of the hood). Should they? Sent from my SM-G950U1 using Tapatalk

-
So I put the hood back on today and the front looks like this. Seems like the torsion bars are pushing up too much. I can lean on the hood to bring it down, but I'm probably putting 100lbs on it to do so. FWIW, the bars had been removed from the car before I got it. (I didn't even realize they were missing and just sitting in front of the radiator until I took everything apart for paint.) I'm guessing that's the reason why, but I'd much rather have them on there then not. Any suggestions? Sent from my SM-G950U1 using Tapatalk

-
Summit does indeed list the Pilkington windshield (https://www.summitracing.com/parts/pkc-400046793), though it has the blue strip and has been out of stock with a consistently pushed back availability date. I have an outstanding order that is supposed to be shipped on Dec 28, but it's already been moved back three times since September.
-
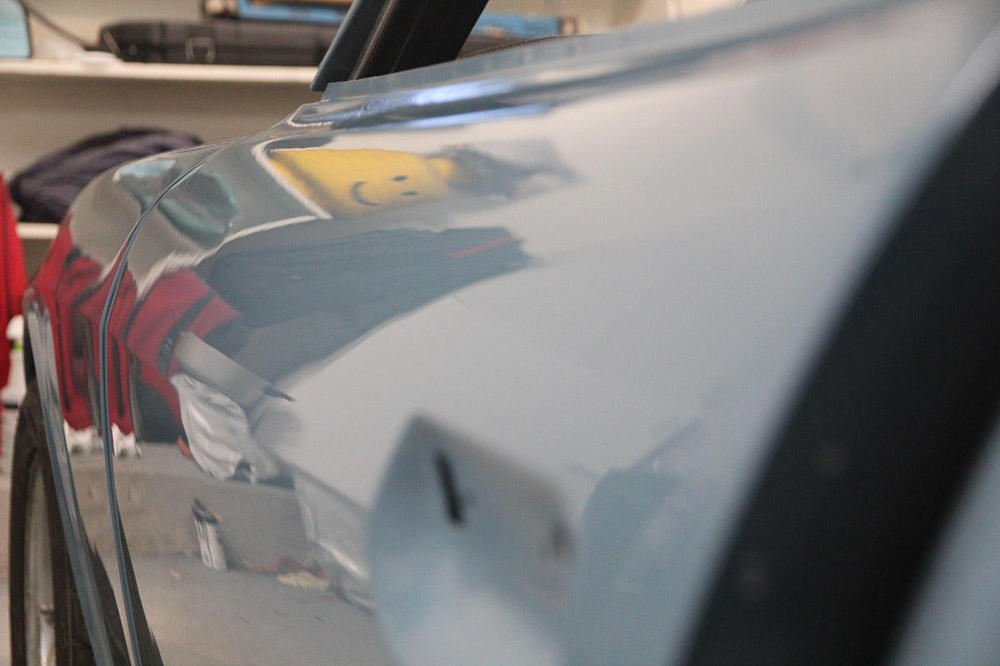
This picture is amazing! "Okay Charles, just try to look natural." "Got it."