Matthew Abate
Free Member
-
Joined
-
Last visited
Everything posted by Matthew Abate
-
 Z Car Depot has stepped yoke washers, so I’m going to check those to see what kind of leeway they would provide. I could also grind a small amount off the tab on the bottom of the manifold to compensate. Another question I have is could these spacers be thinner at the top to angle the manifold up slightly and create more clearance. I’m thinking 3 to five degrees.
 -
I think my options at this point are either abandoning the SU system in favor of a DCOE setup (Mikunis or ITBs), which is $$$, or making an aluminum spacer to fit between the intake manifold and the head that brings the manifold out away from the header, which would have an impact on performance.
-
@Patcon Do you think it’s deep enough to shave it? I emailed Steve at @Ztheraphy and he said it’s very thin there. He also thinks my headers is for a 280, which may or may not be possible. Spirit garage doesn’t distinguish between the two (just LHD or RHD), so it is probable that this header is just not meant to work with the original intake manifold.
-
Yeah, the bottom of the N36 is hitting the tops of the header pipes. I wanted to stick with SUs for a stock look, but I am guessing this header is really meant to go with a set of triple Mikunis. It’s not a huge interference. If there is enough material there I can probably make it clear, but I am worried about the heat and getting a heat shield to fit.
-
Ah right! Yoke washers. I completely forgot about those. Thanks for the reminder. Okay, I’ll look at adjusting the placement of the manifold and header first. Maybe that will be enough to mean I don’t need to shave the intake manifold. People had warned me that all exhausts need tweaking, but I don’t want to mess with the headers any more than necessary. It’s nice to hear that that rectangular protrusion is thick and could handle shaving. I was starting to go down the ITB FI mental rabbit hole.
-
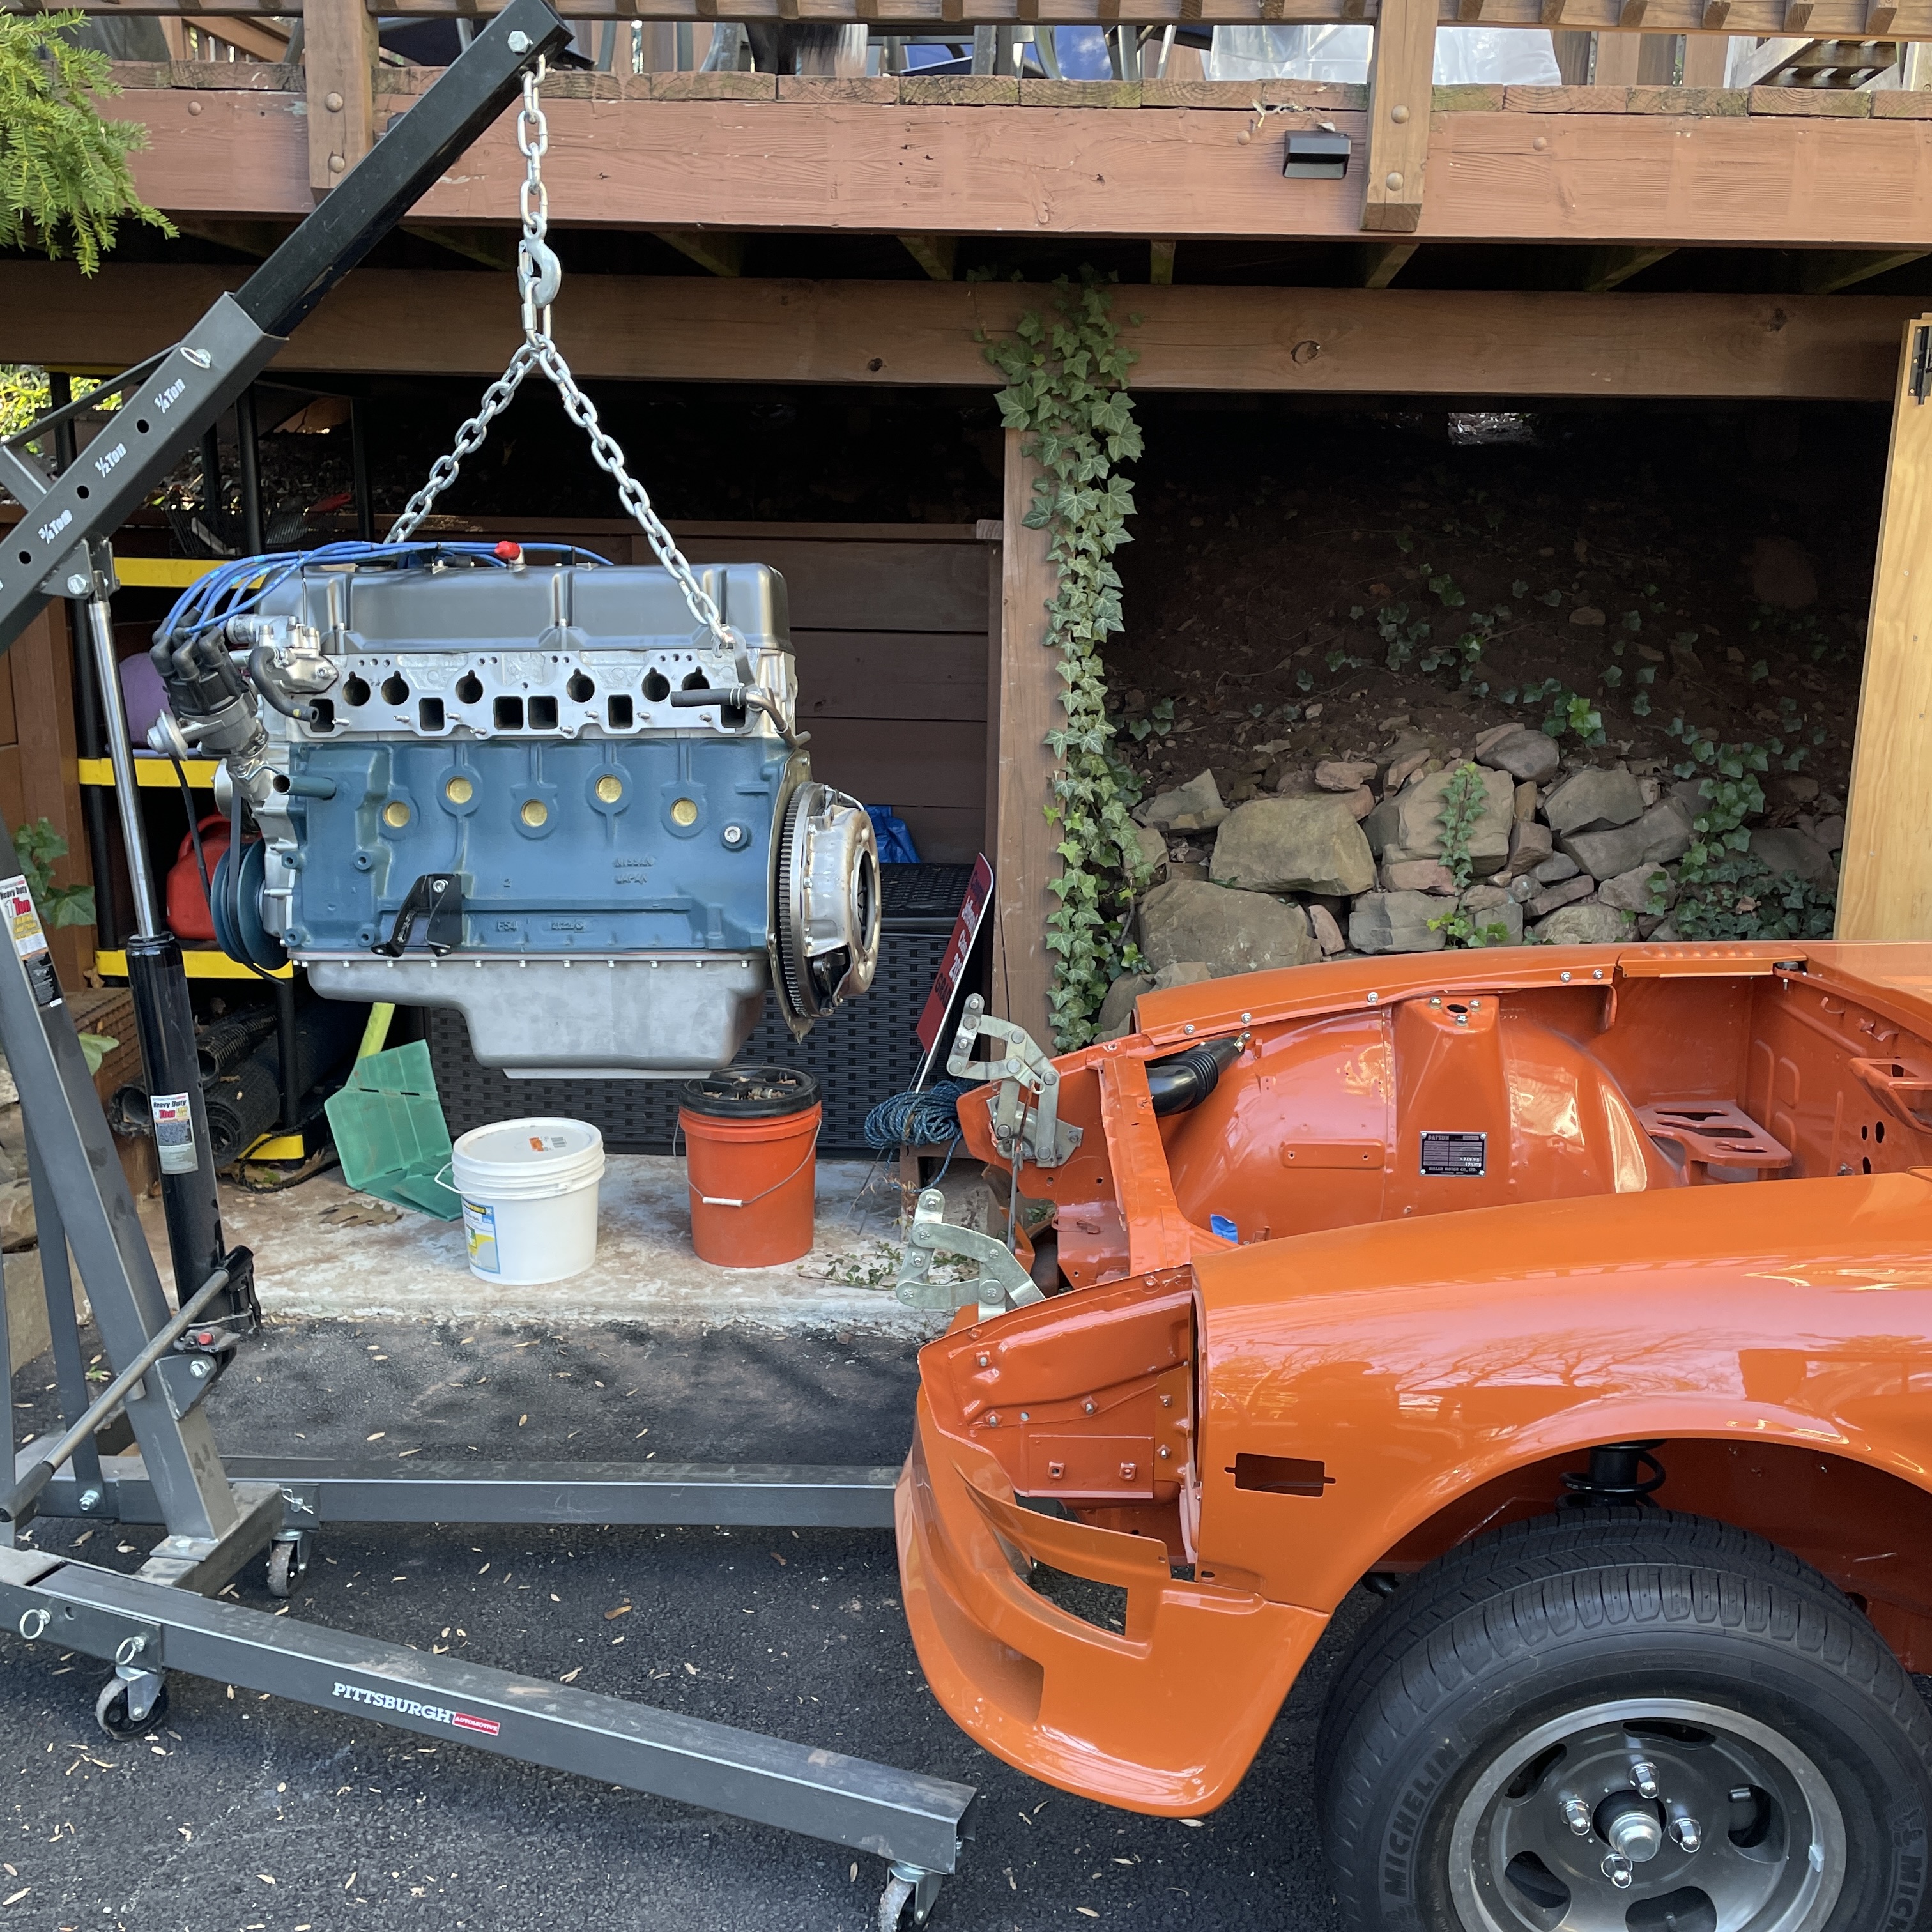
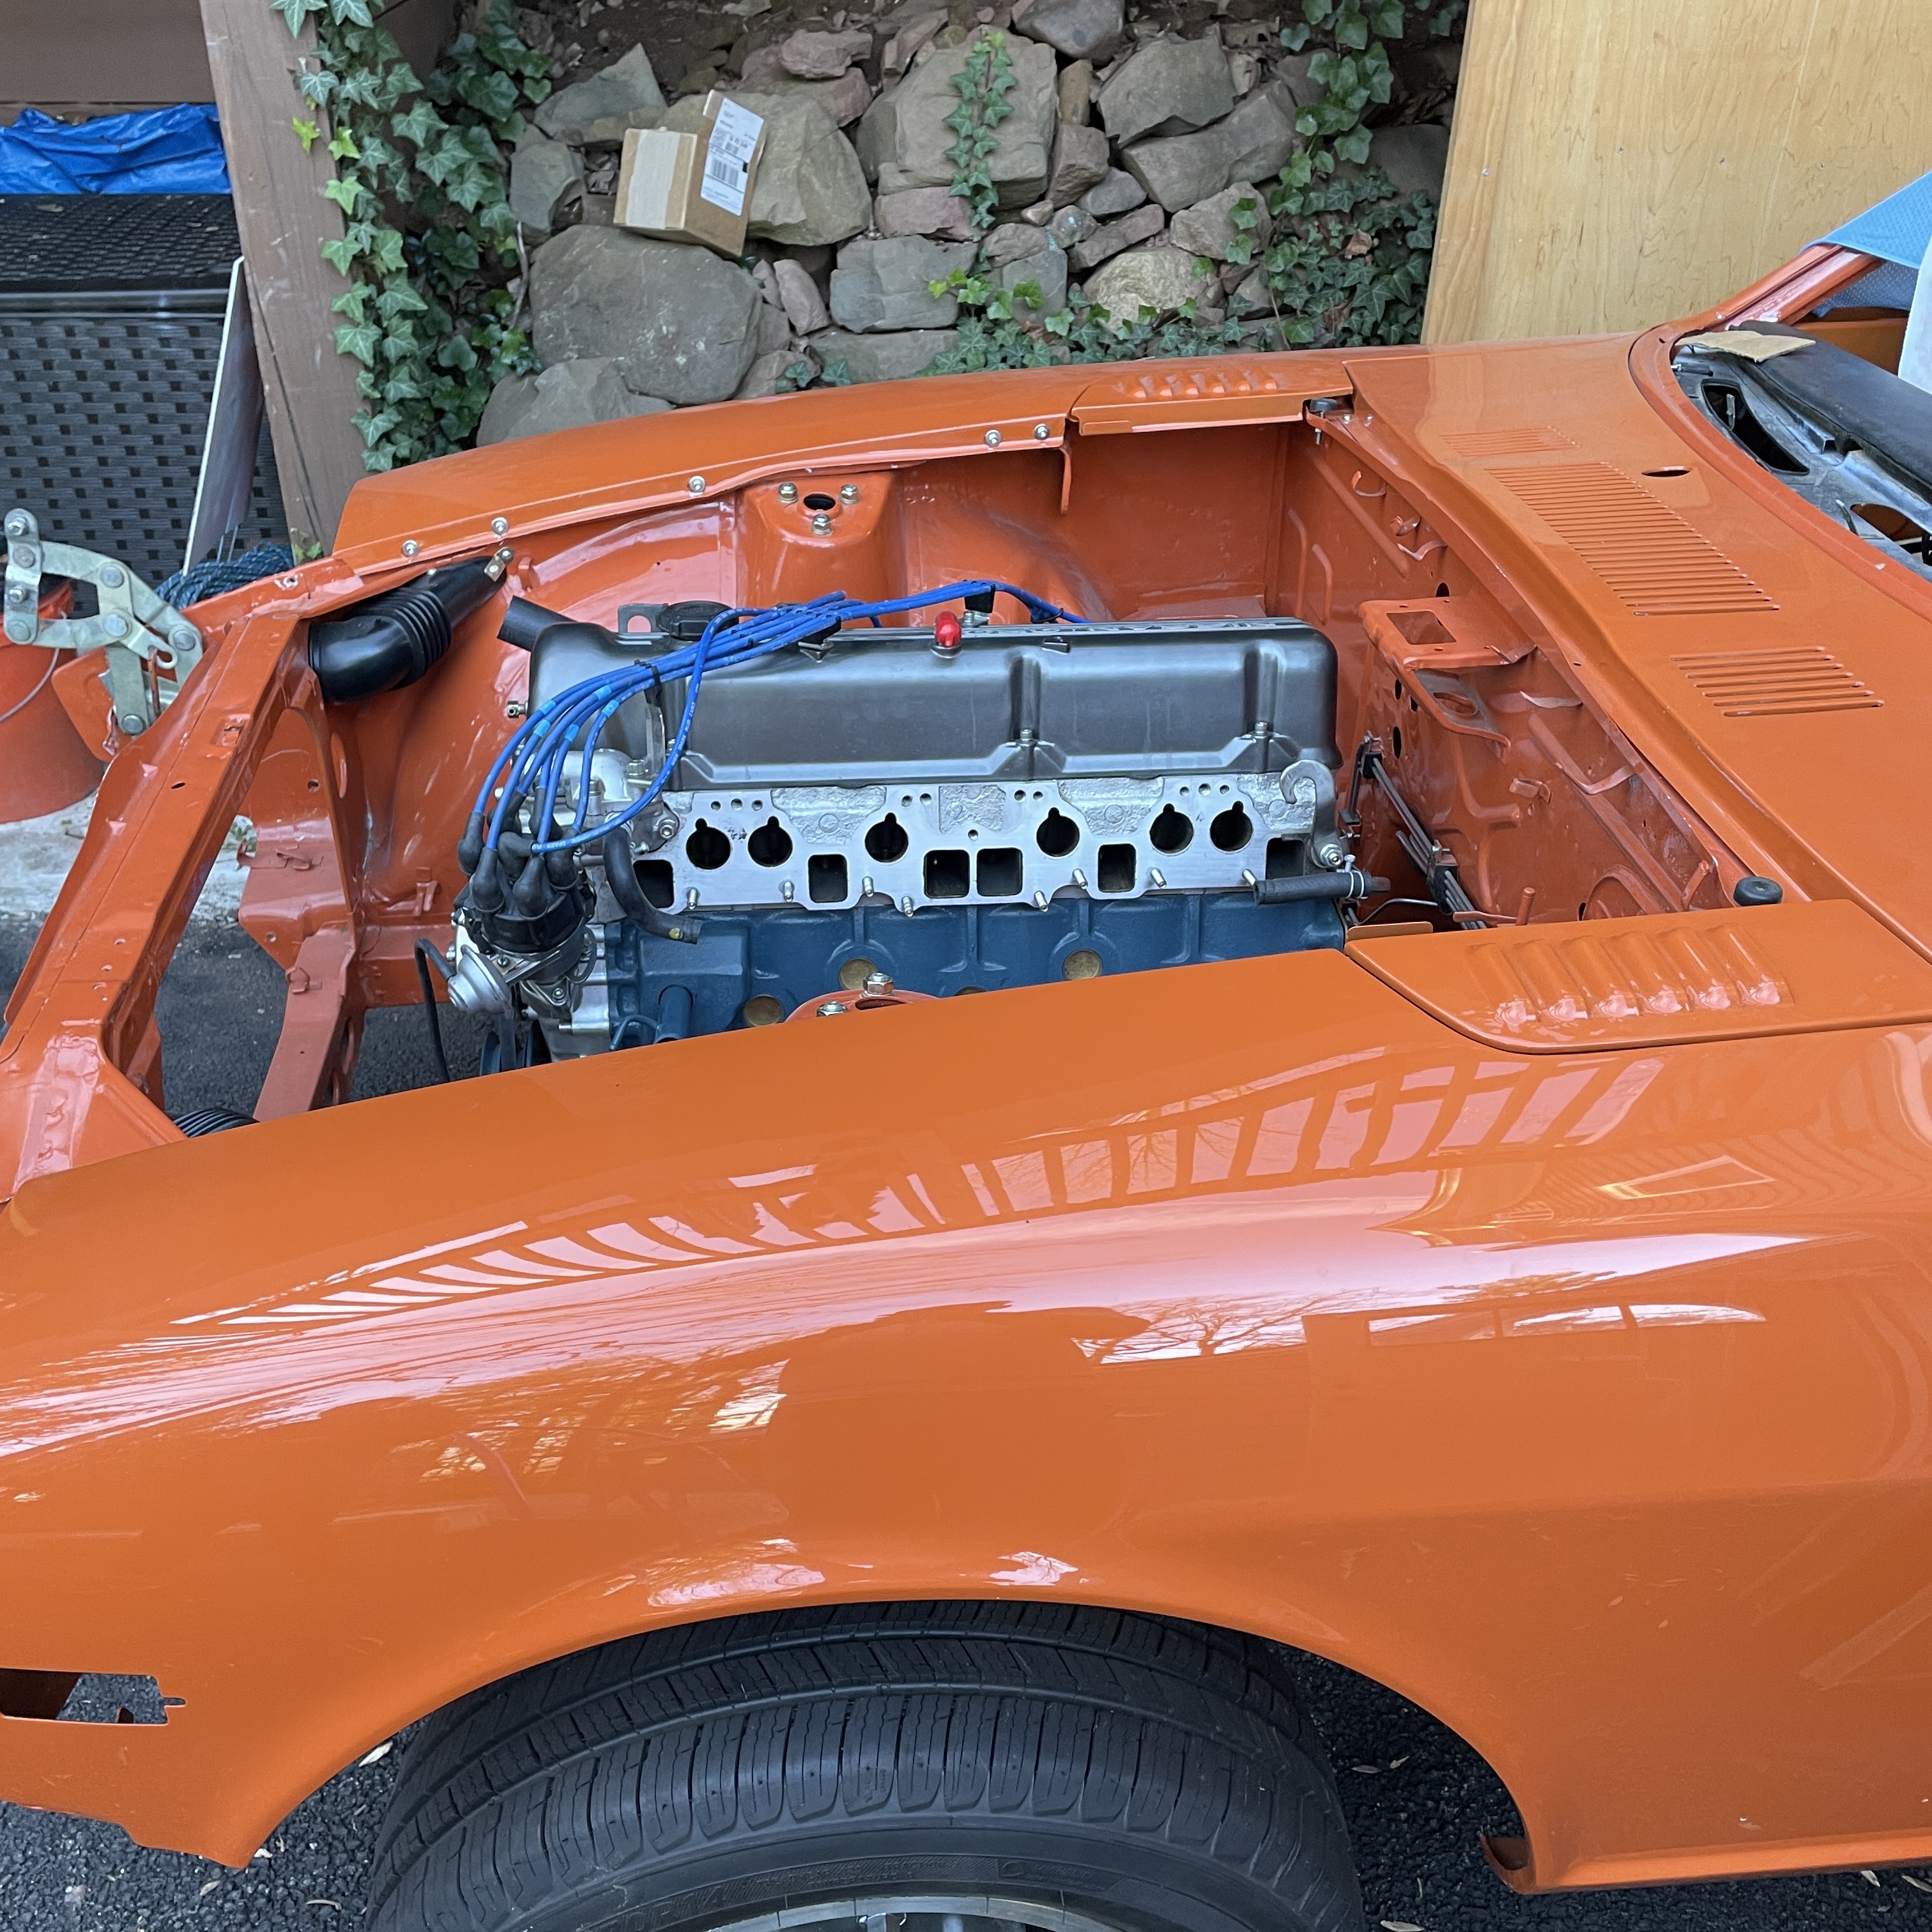
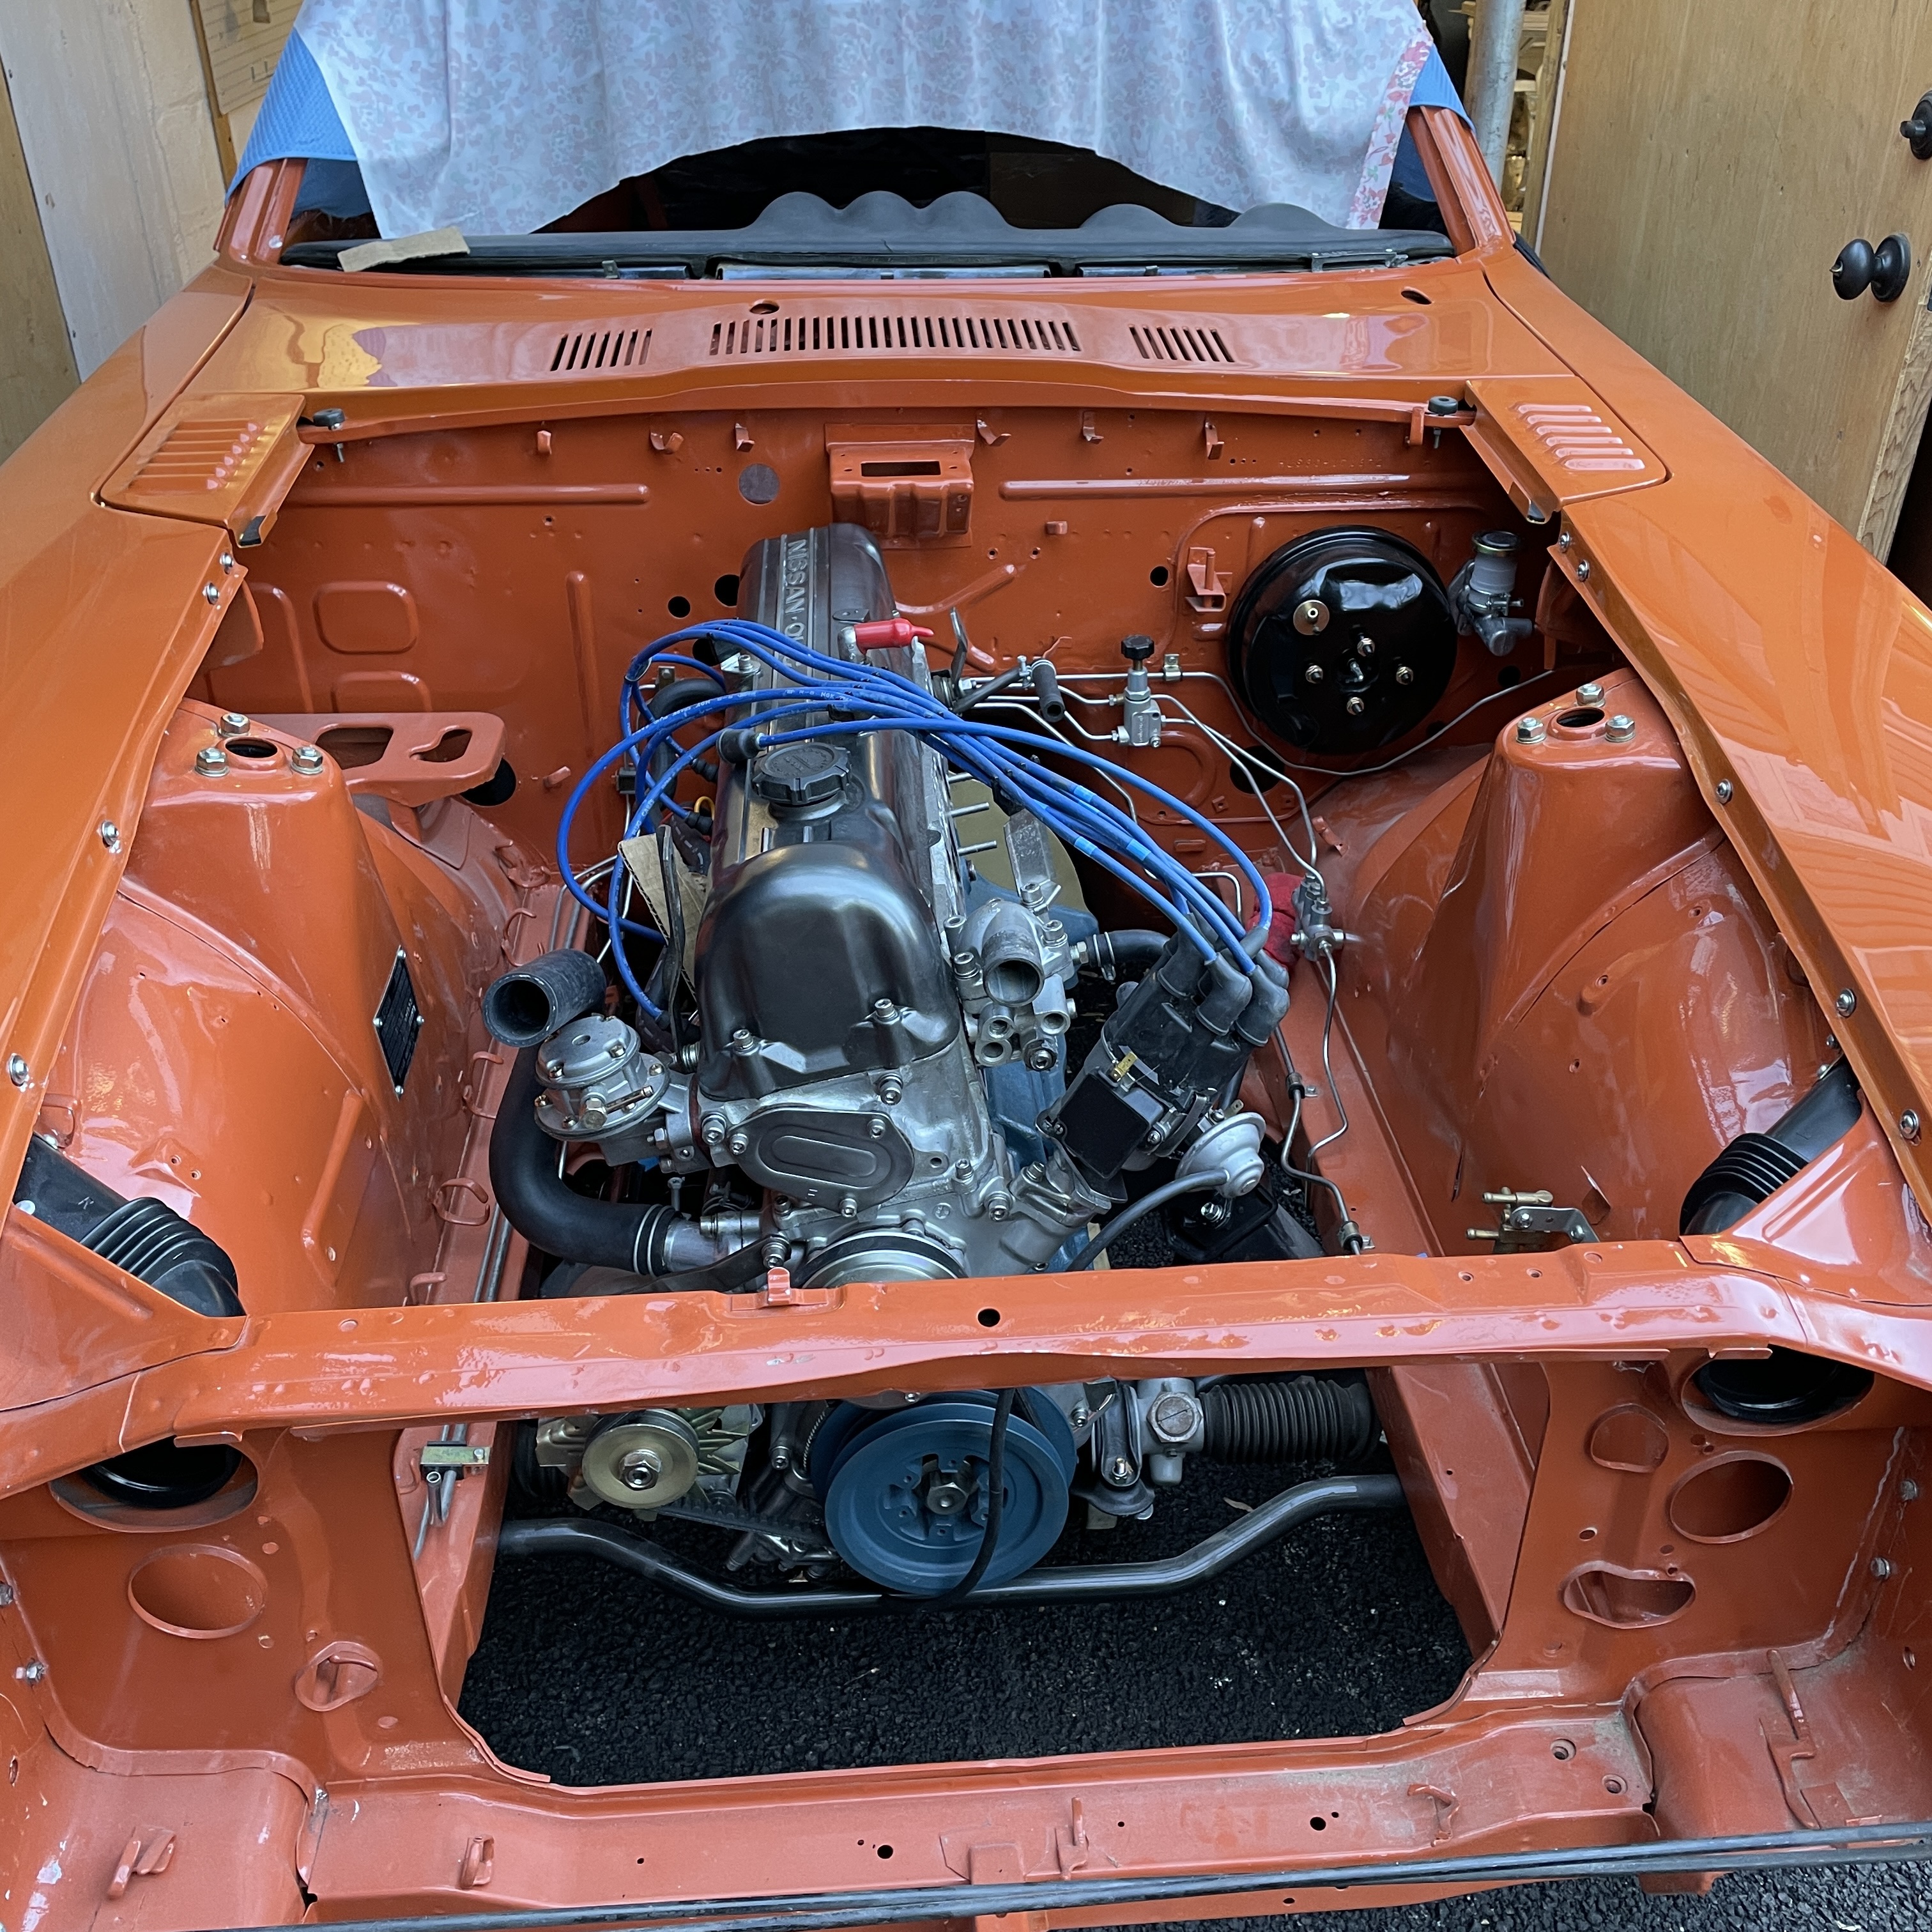
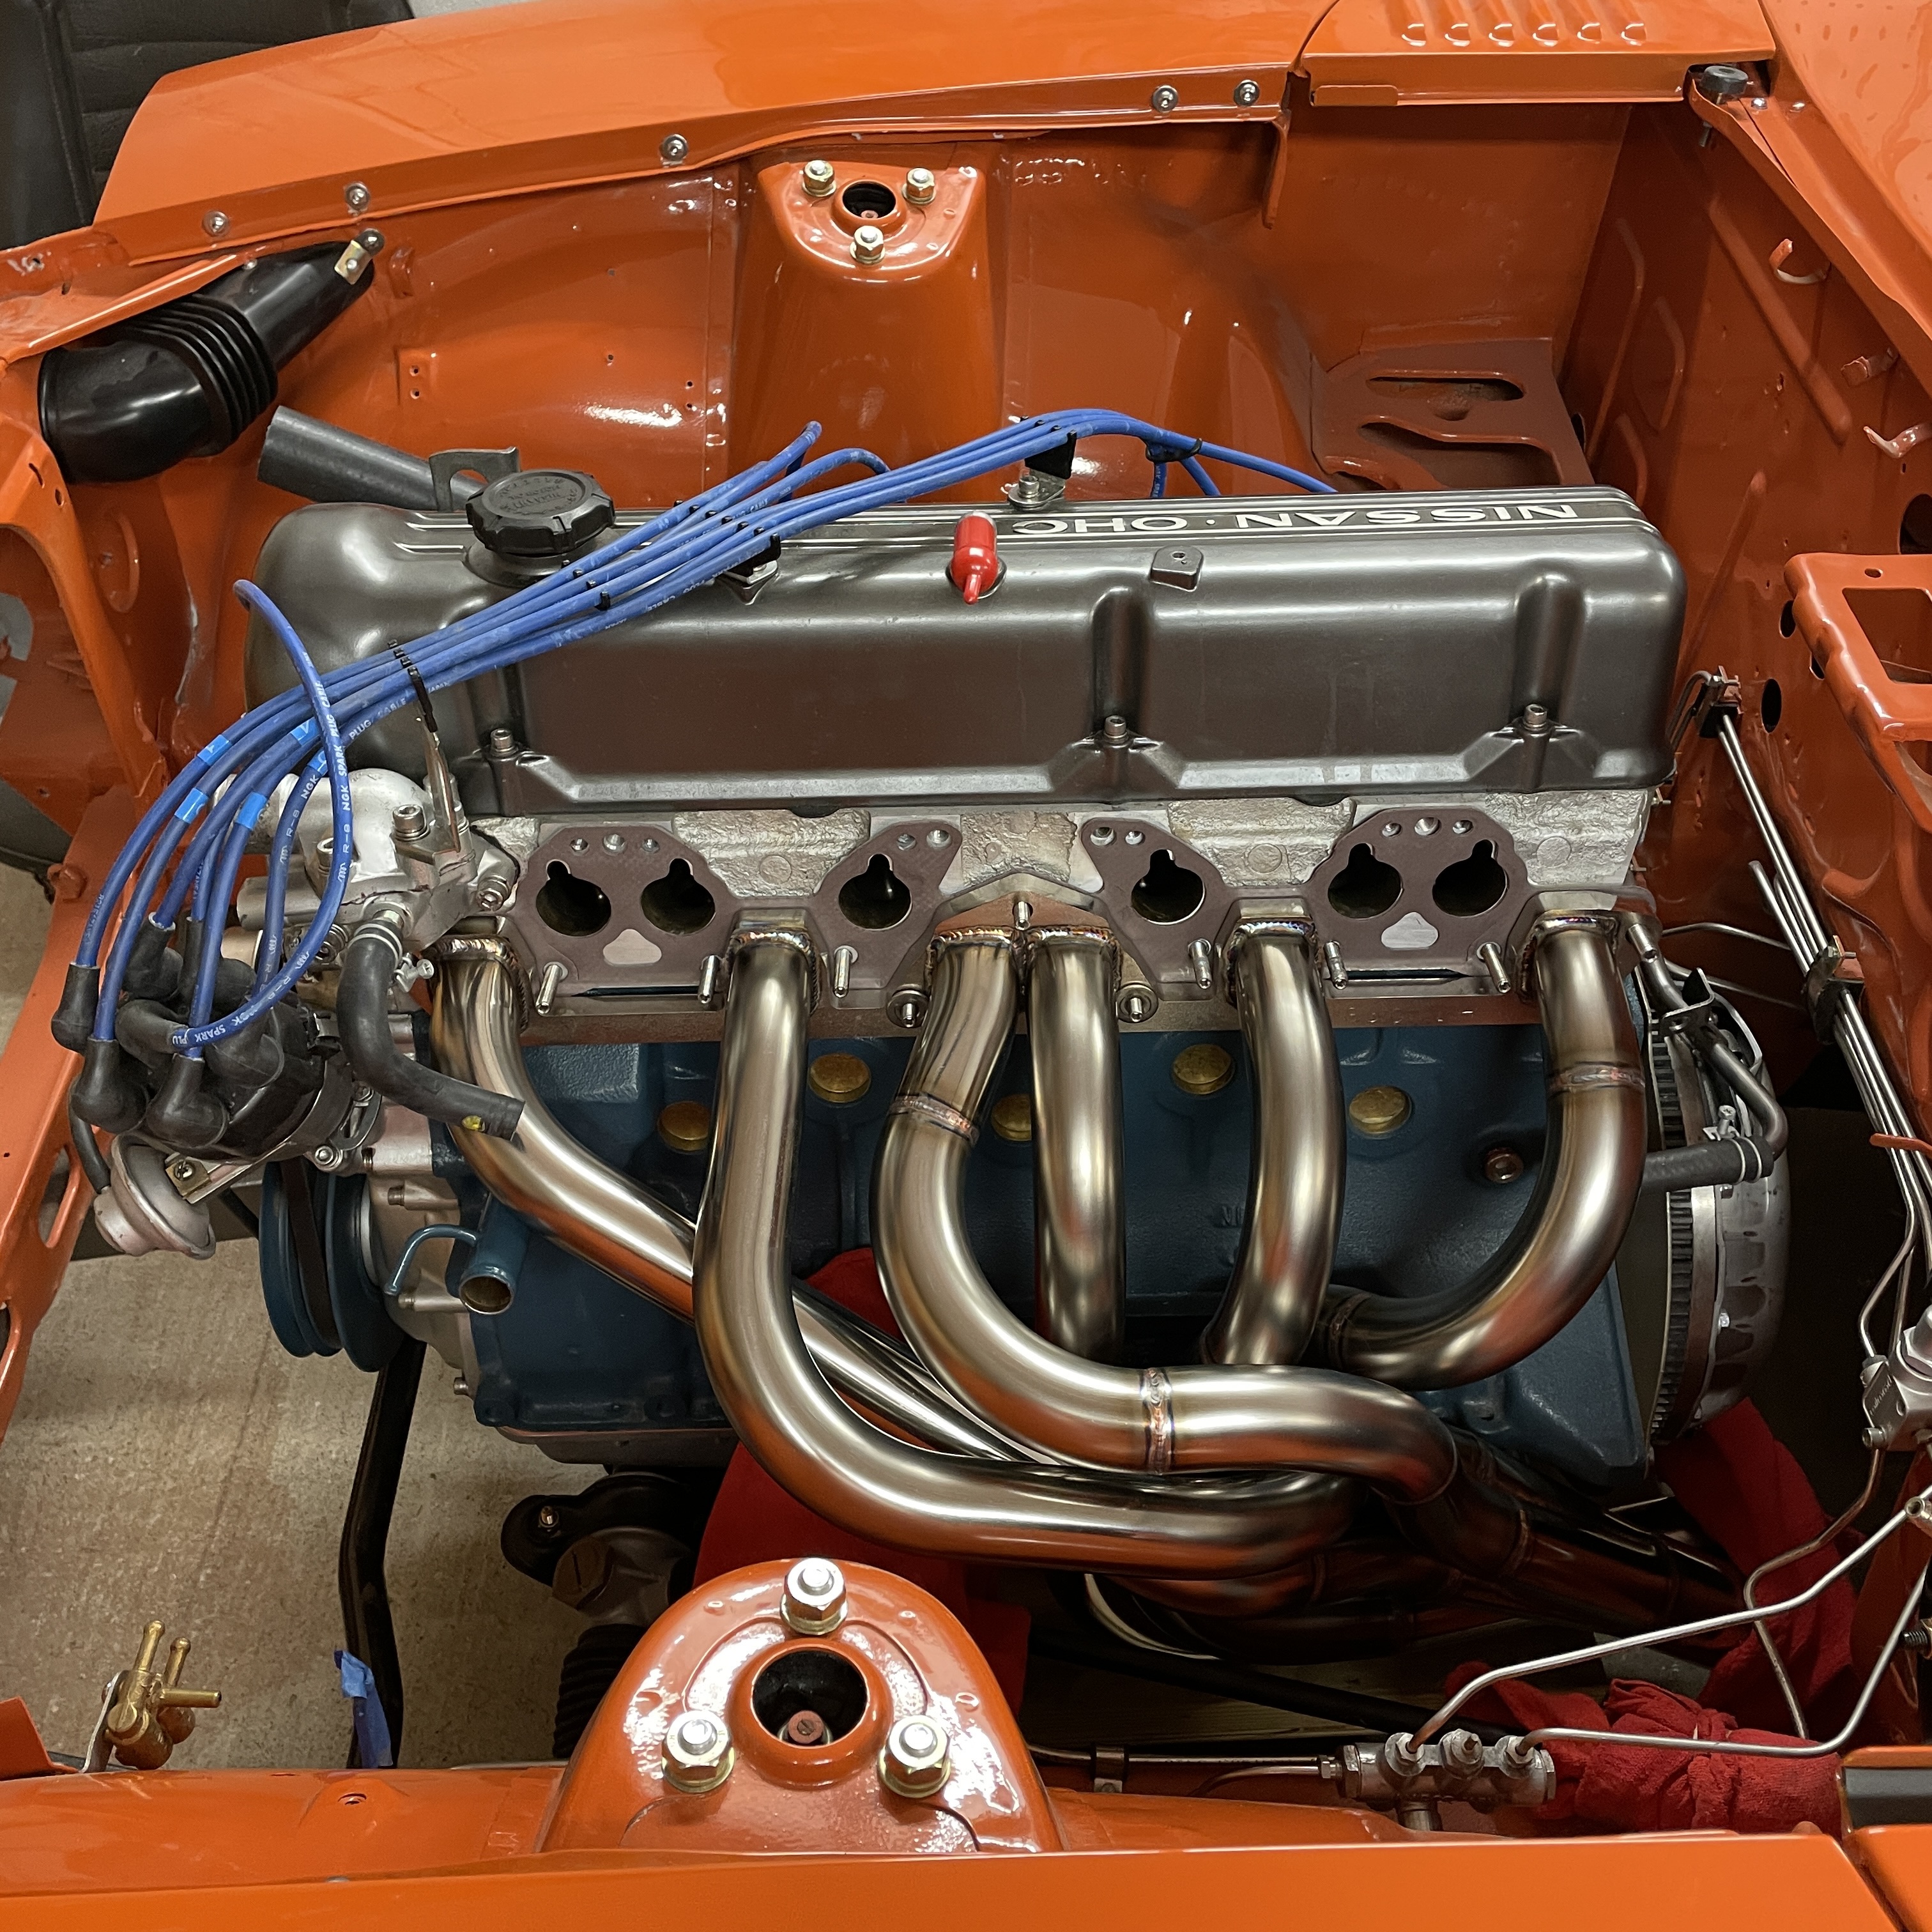
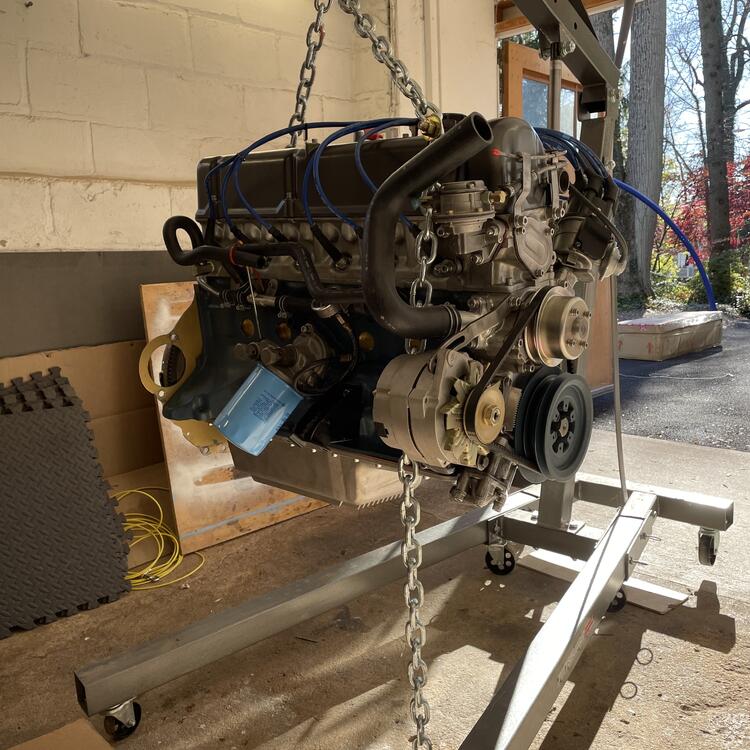
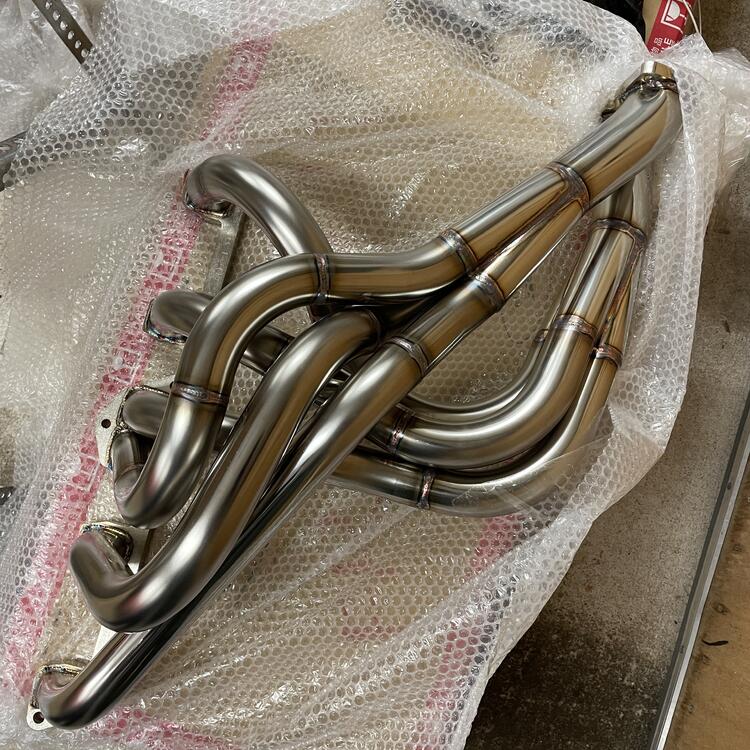
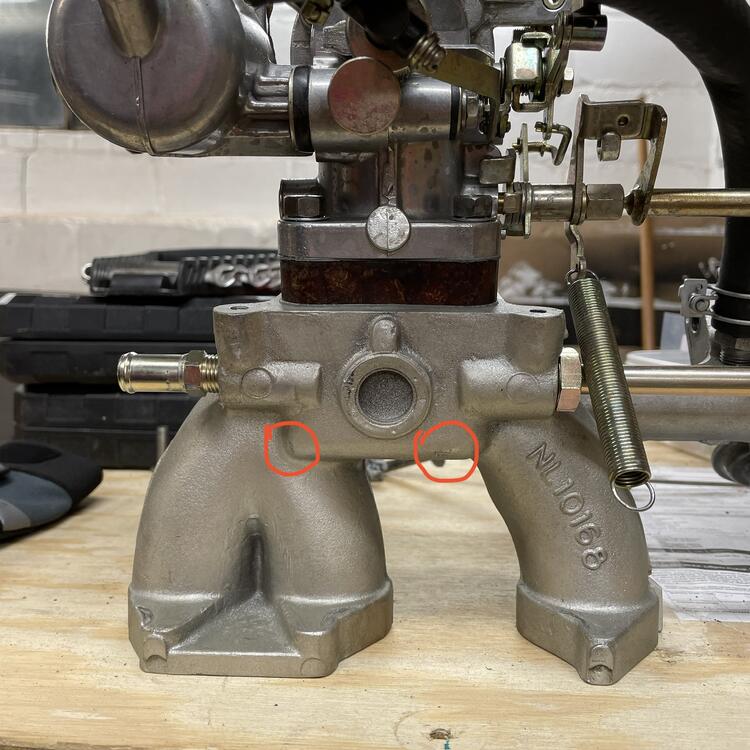
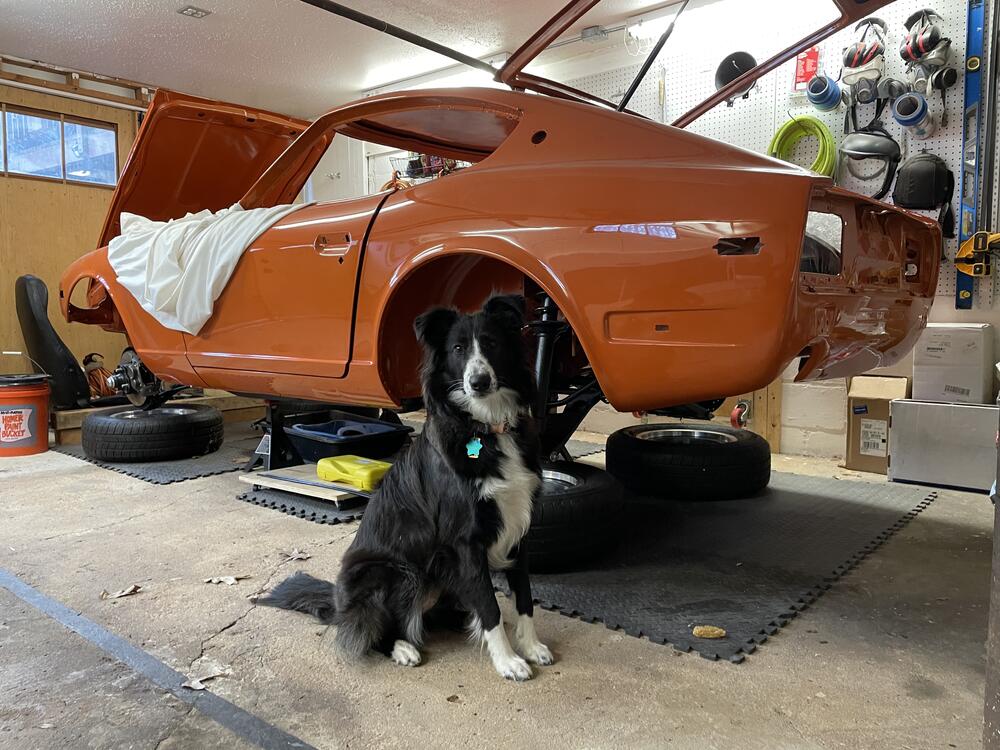
Progress! with a few snags… Here’s the engine on the hoist, ready to go. This is my engine builder, A.K.A. my dad, former sprint car crew, retired Air Force jet mechanic and crew chief, current fox-body mustang hot rodder, and now L-Series engine tuner. The engine went in like butter… after we realized we had two left side mounts on it and swapped the right side for the correct mount. That only wasted two hours. 👆🏻 This is my BEAUTIFUL, GORGEOUS, MESMERIZING left-hand drive header from Spirit Garage, courtesy of Jesse Streeter of Streeter Corporation. …and here it is in place. No steering clearance issues so far. The back of the engine is sitting high because the transmission isn’t ready and I have it in a support. —- Okay, so the snags… 1. There are many more studs than there are holes in the header. Eight to be exact. I’m not sure what I am supposed to do with those. Is there a part that I am forgetting that these studs would clamp down onto? I looked at the L24 exhaust manifold and it just has eight more bosses to use those studs. I looked at the headers made by others and they don’t have them. I don’t understand how you get a good seal without something using those. I’ve dug around online but haven’t seen this mentioned anywhere. Am I spacing something obvious? 2. I forgot to buy a clutch release sleeve for the transmission and the one in my 4-speed is too long. I’m not worried about figuring out which one fits and getting one (I think it’s one of the 225mm ones), but it does mean the transmission is either not going in this week or I’ll have to put it in temporarily until I have the sleeve. 3. The bottoms of my N36 intake manifolds are hitting the headers. The red circles in the photograph below show where I have contact. I am considering filing them until they have enough clearance, but I’m not sure what is in that spot and how thick that material is. I don’t want to puncture the water channel in there, or the air channel for that matter. I also have a set of E42 manifolds that I could use if these won’t work, but I don’t think they will have any better clearance from what I can tell so far.


-
Okay, quick update foreshadowing my thanksgiving week plans: That would be a crate containing one complete and test run 2.9 liter L-series Nissan engine, which arrived from AZ on Thursday morning.

-
Exactly. Mine is 98% Velcro.
-
Har har har. 🙄 She’s a Scotch Collie

-
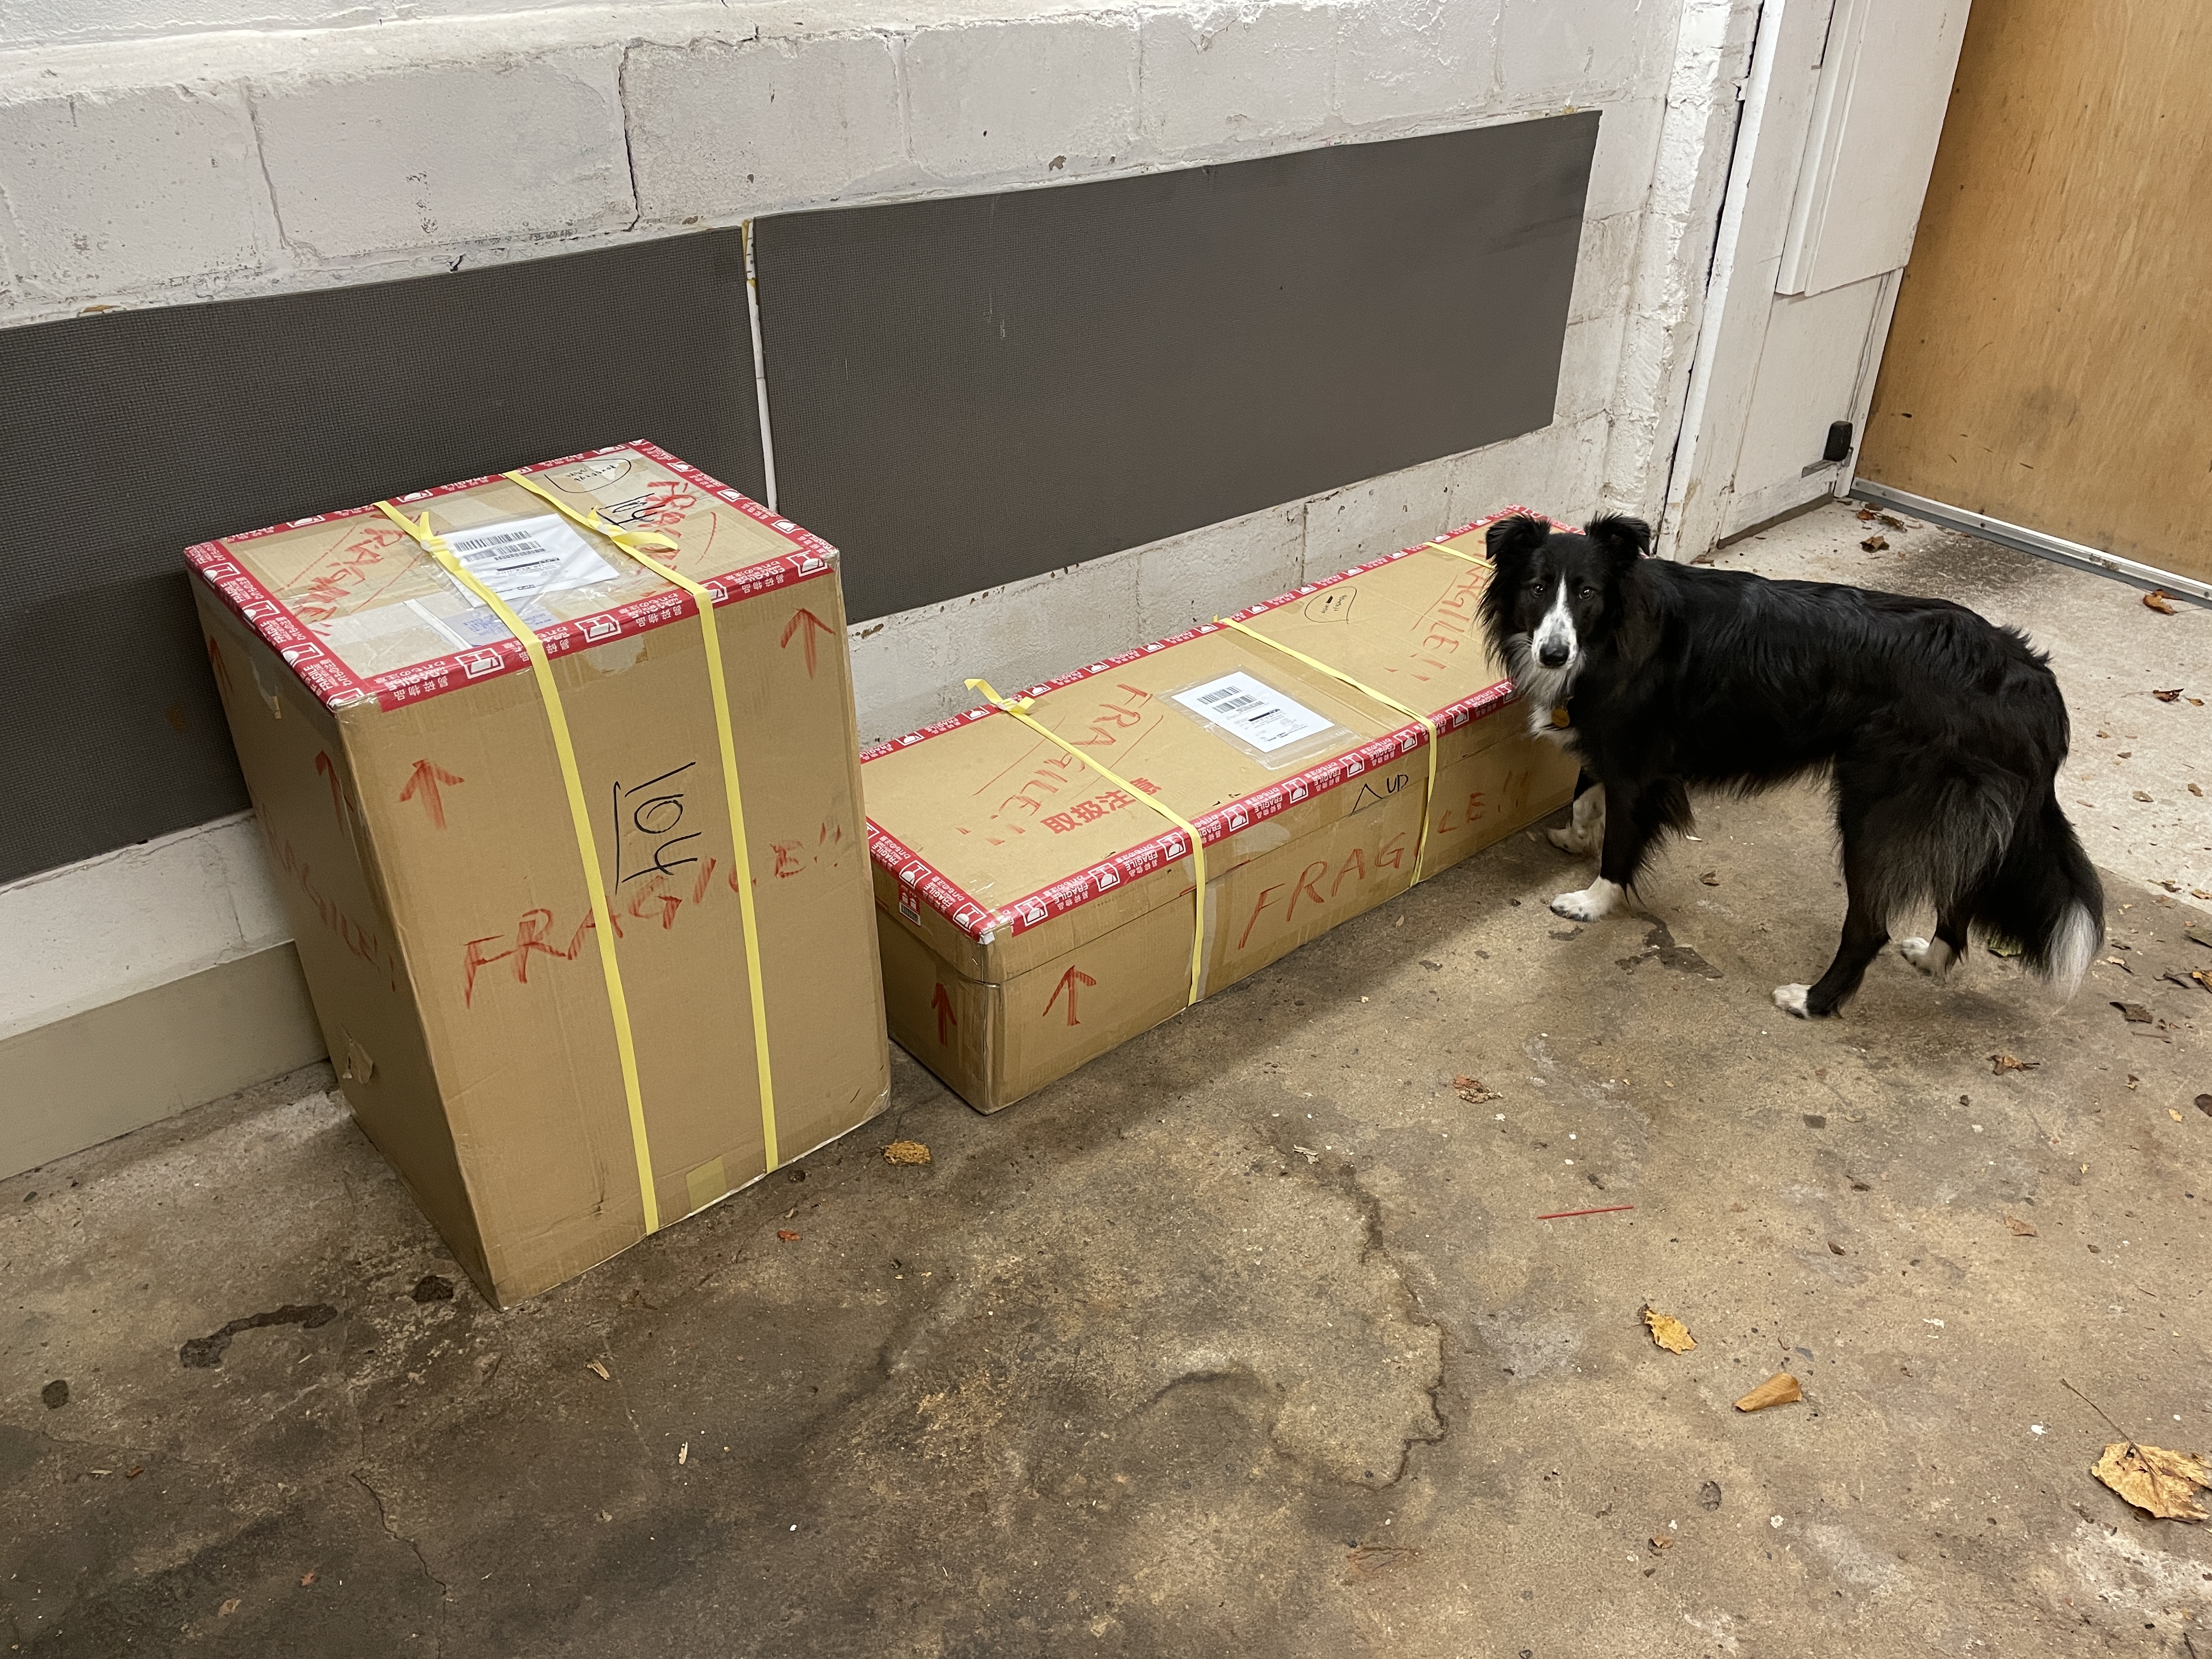
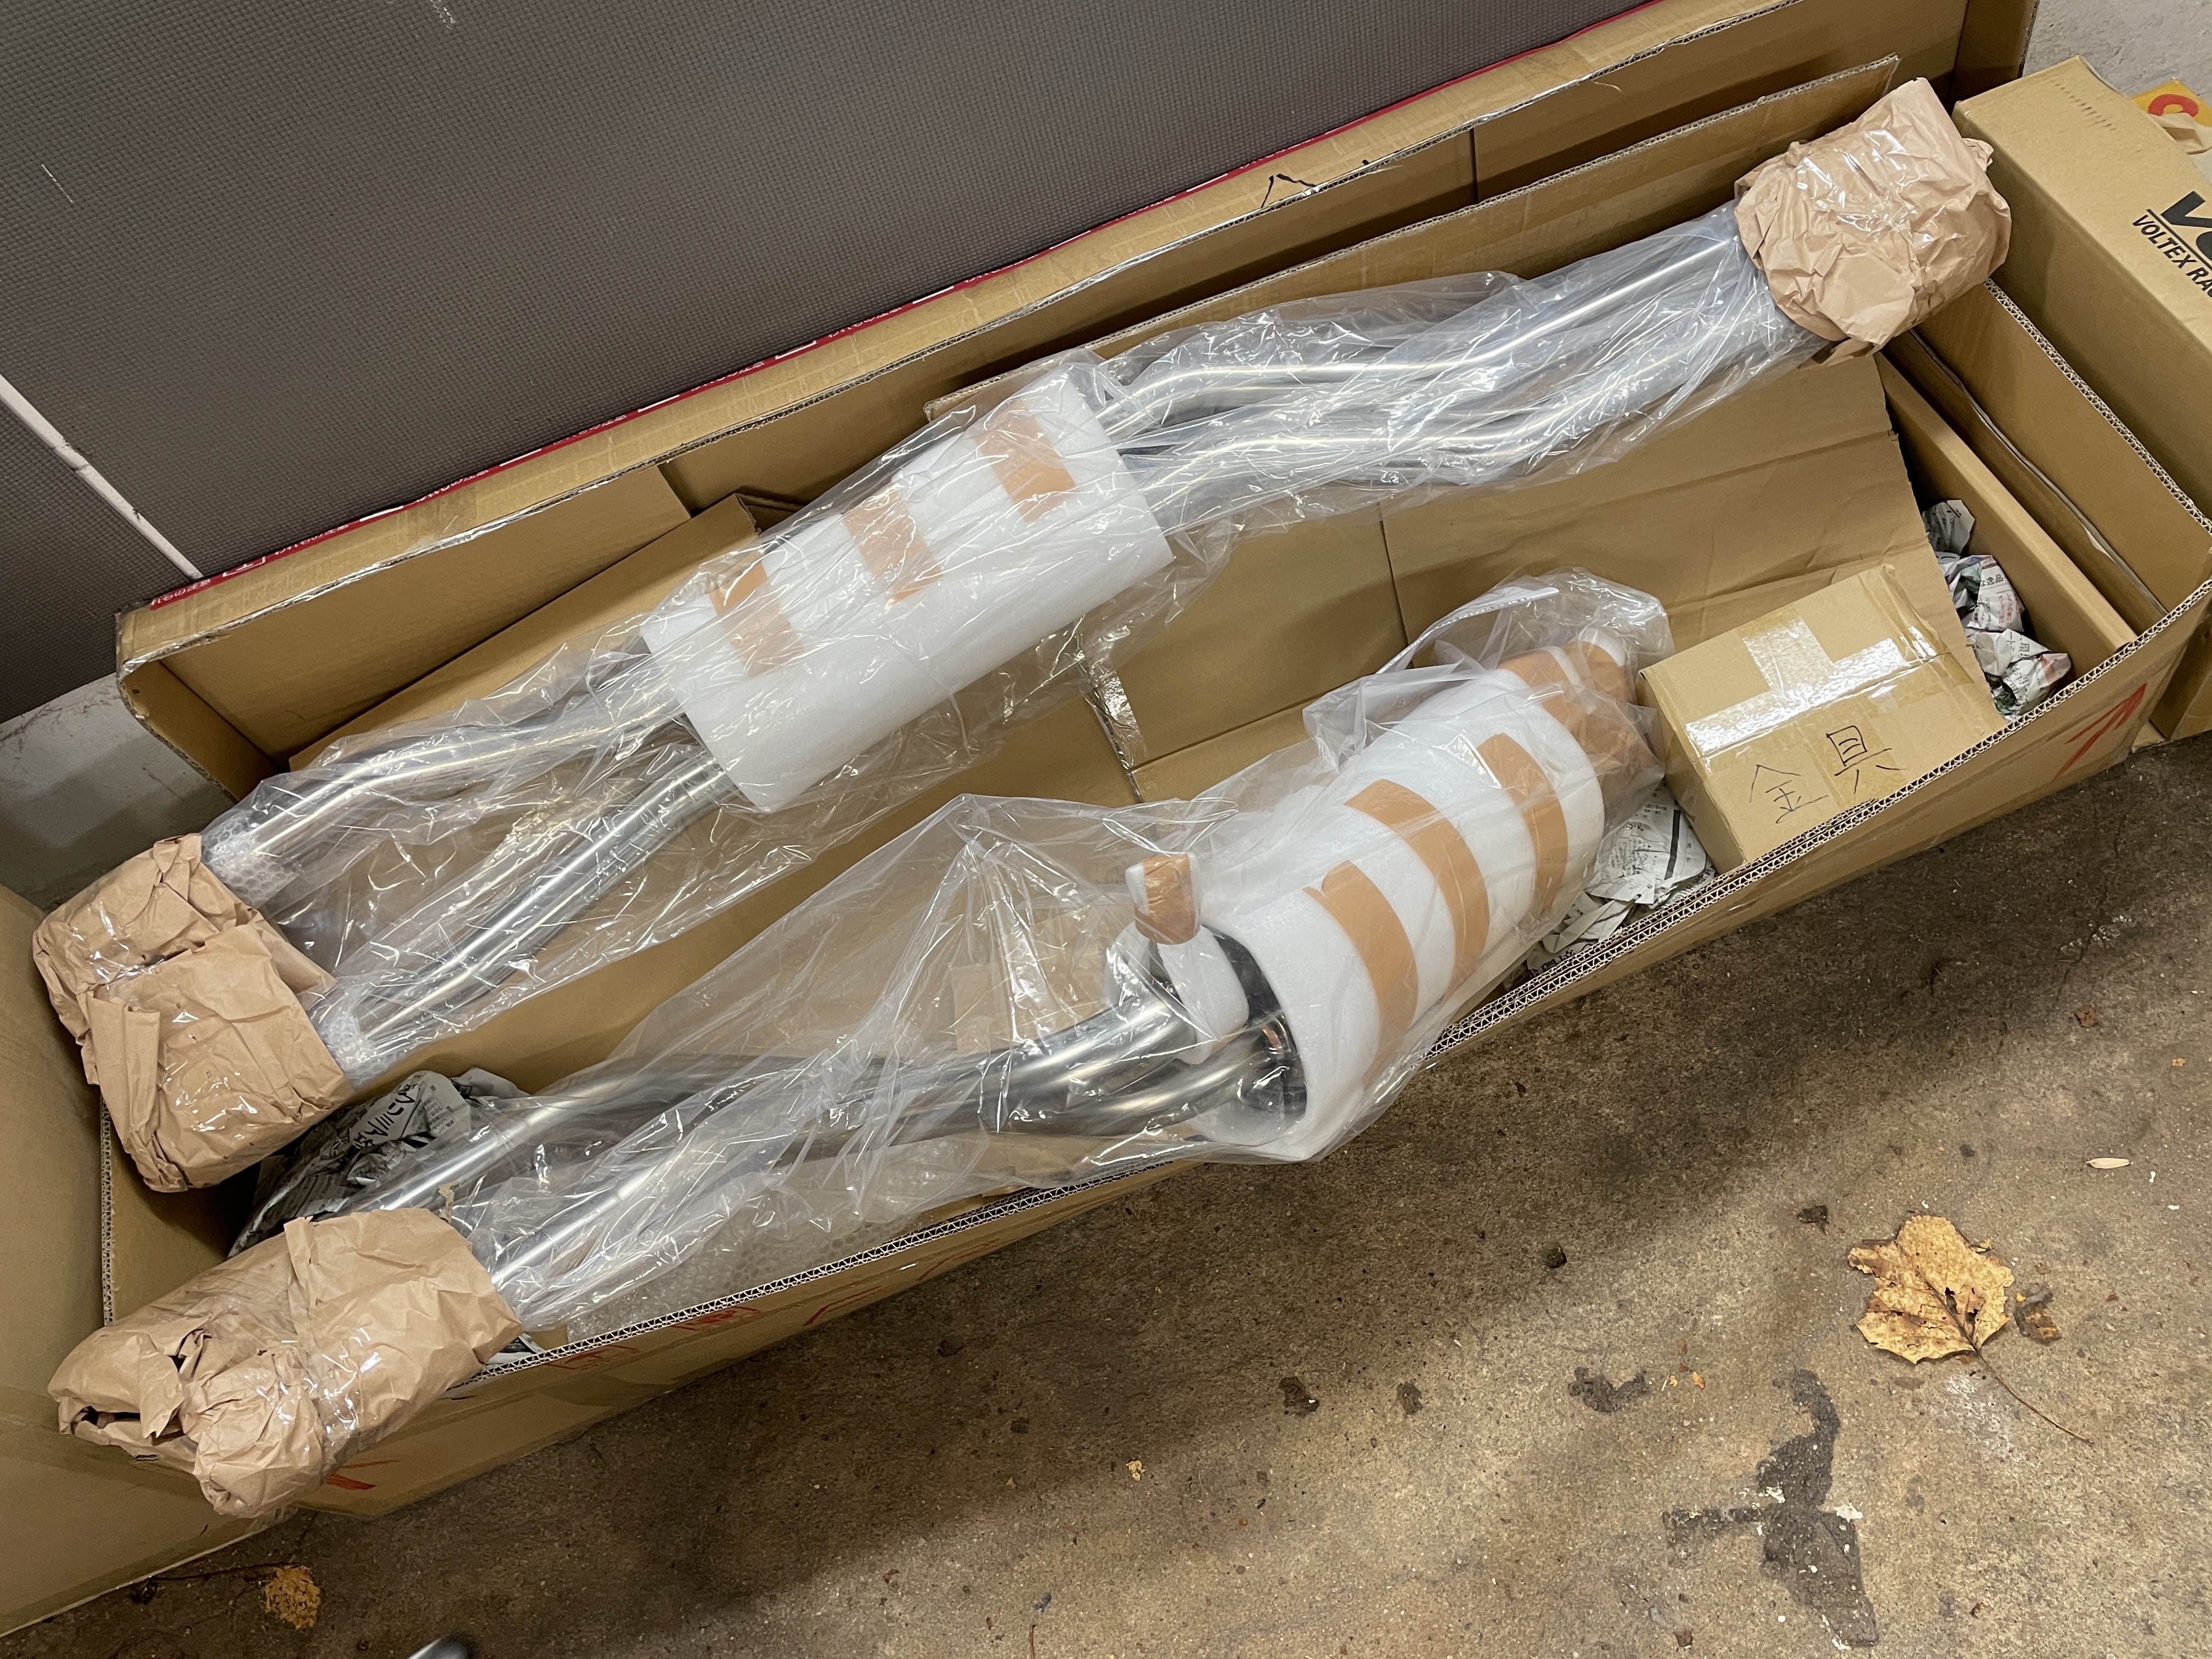
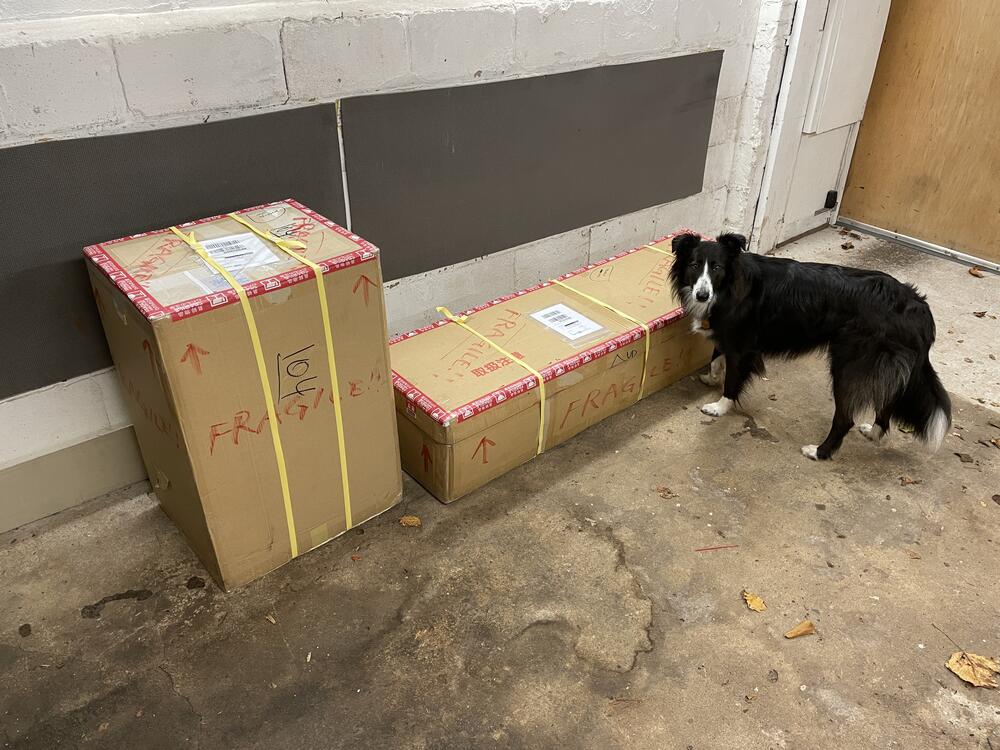
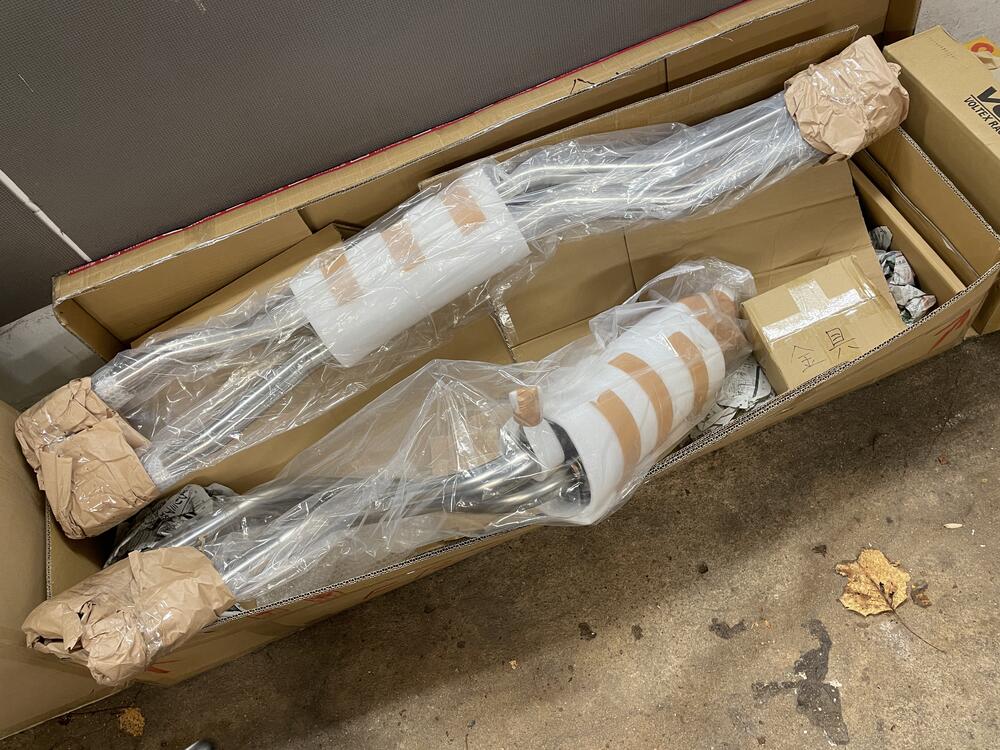
Winter solstice presents came early! 👆🏻 Full stainless twin-pipe exhaust and LHD header by Spirit Garage (dog for scale).

-
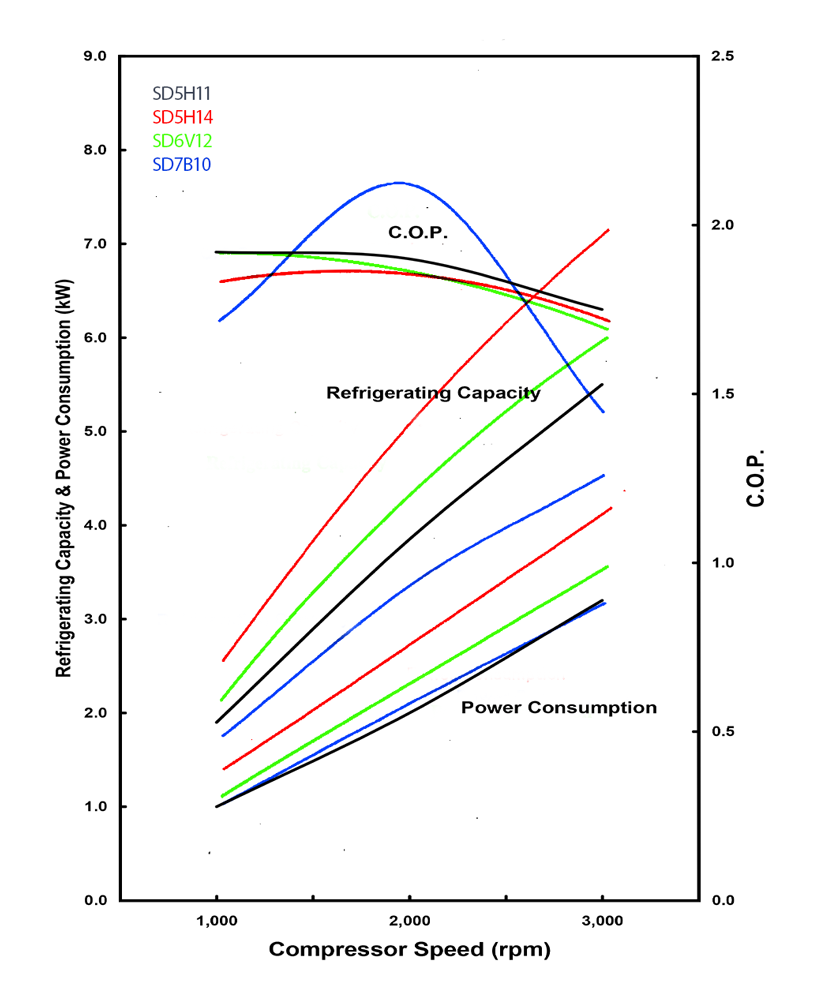
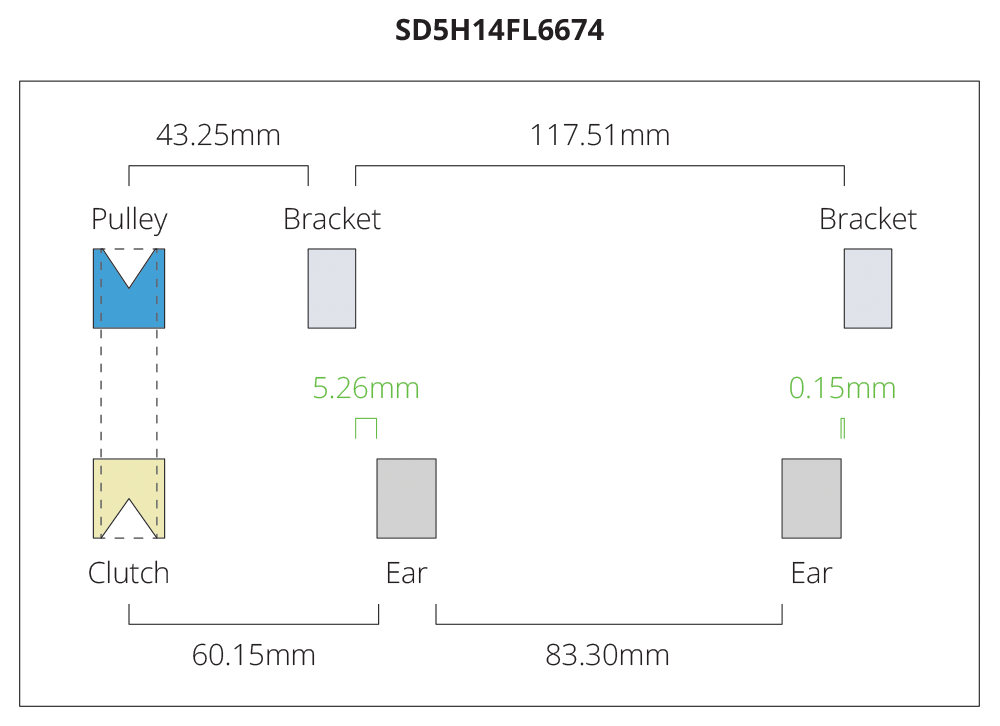
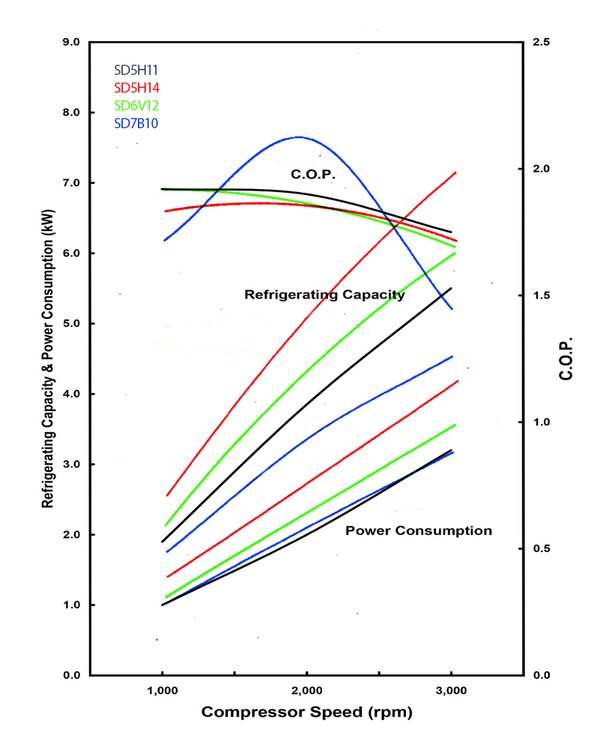
The other day I downloaded the schematics for 104 of compressors from the SD range that Sanden makes with a v-belt clutch pulley. After looking at all of the gauge line measurements have determined that the one that best fits the 280zx AC compressor bracket is the SD5H14FL6674. The pulley on this model puts the ears of the compressor between the ears sticking out of the bracket while staying aligned with the idler pulley, thus aligning the whole thing with the crank pulley. This is a happy coincidence because I was leaning in the direction of a 5h14 anyway (see my previous post with the performance diagram, red lines). I have not yet looked into the clutch pulley diameter and how close that is to the crank pulley or original Hitachi compressor pulley diameters. This Sanden has an outside pulley diameter of 122mm and a maximum RPM of 7,000 (6,000 sustained). I am not certain (because I don't yet have my engine in my hands and haven't found definitive photographic evidence) if the bracket lines up with the back or front groove in the pulley. If it is the back one, I am going to have to figure out if there is a belt out there that can wrap around the water pump, alternator, crank, idler pulley, and compressor, but if not I can always look into moving the alternator forward and remove it from the equation.
-
So @EuroDat, the place in Austria came through. It arrived on Monday, which was surprisingly fast shipping. I paid out the nose, but the shop only had to wait a week. Thanks for that!
-
Looks like it’s my only option. Amayama is going to take 5 months. Nissanparts.at is 20 days.
-
Made a quick graphic comparing the charts for the various Sanden AC compressors I am considering:
-
@EuroDat is that first one a legit resource? Looks suspect given the other Nissan parts websites all say NLA. @jerz I saw that, but was hoping to get my hands on one faster than Part Souq can get it to me. The things I’ve purchase there all took months to arrive. I might try Amayama if I can’t get it faster than they can, which is the 26th.
-
I am in the middle of having my 5 speed rebuilt and ran into a major issue. The shop tells me I can't move forward without replacing the 1st gear bushing (PN: 32253-14600), which turns out to be NLA. Not only is the original NLA, the supersessions seem to be as well. If anyone (who isn't a scammer) wants to sell me one, please send me a direct message. If anyone knows of an alternate part that isn't in the supersession list, please let me know! Supersession Part Number: 32253-14611 Replaces: 32253-14600, 32253-14601
-
I’ve seen a ton of people switch to LEDs for their instruments, and I’ve seen a bunch of people say not to because it can be too bright. I’m also saw someone worked out a way to make a dimmer that works for LEDs. Well, that may not be necessary. In trying to locate that how-to thread I stumbled upon three dimmers for LED instrument lights: Autometer https://www.autometer.com/led-lighting-dimmer.html Classic Instruments https://shop.classicinstruments.com/leddim New Vintage USA https://newvintageusallc.mybigcommerce.com/led-lighting-dimmer/ I’m going to dig into reviews on these and see if any of them stands out. I’m guessing there are others as well.
-
After taking a second look at the illustration from Fujitsubo of the r200 compatible EPU and comparing that to the photo xs10shl posted of his installed SG pipes, I think one of my open questions is indirectly answered. I was trying to figure out if the r200 version works with the factory crossmember that supports the r180, because it has the indentations for the twin system. The space between the pipes immediately to either side of the differential doesn’t look that far apart, but I’m guessing there’s no way it tucks into those indentations, because they have two versions of the EPU exhaust and not just one that works with both differentials. All this is inference, obviously, but I will bet that’s the situation.
-
@xs10shl That looks great! I wanted the mild steel version as well as the ceramic header, but they weren’t going to ship for at least four months so I went with all stainless, but all the factors you listed were a big part of it.
-
Not sure why you’re taking this conversation personally and starting a second flame war in the same thread. There’s no need for personal attacks. No one came at you. And, by the way, the manufacturers were unresponsive, as previously stated.
-
Asking questions and expecting clear answers to be able to compare two components that are ostensibly the same is reasonable. The retailers who sell the Fujitsubo kit are inconsistent in the information the provide. The O2 boss is a great example. All of the Super Ex + Legalis kits are advertised as working on a 280z, which would require one. Only one retailer I found mentions it. Fitting on a left hand drive car is another great example. One retailer says one model fits, another says the same model doesn’t fit. Maybe it’s not Fujitsubo’s fault the information isn’t out in the world in a way that makes the choice easy, but I was pretty set on their system being right for me until I started really looking at it. They’ve also changed it twice in that time. It’s better than it was when I started looking at it, but you can still get the old ones and making sure you’re getting what you think you’re getting is key on a $3,000 part. I also know more now, and while it may be great, I understand what I should be looking for and am moving in another direction for my setup. But the reason I’m continuing to post on the topic is I’m trying to do the group a favor and get these questions answered so someone coming up behind me can be informed. I still don’t feel like the information someone can access is clear. They should fix that if they want people to buy it. And yeah, I’ve been posting since 2017 and the information is only more convoluted. I will take as long as I please to make my choice in a way that fits with the circumstances of my life, which you don’t have insight into and can’t comment on.
-
Question to the group concerning valve lash pads. My lash pad wipe pattern is off center, away from the cam, approximately 3/32 inch. Given that the installed lash pads are 0.118-inch (3.00mm) thick and lash pads are available in increments of .25mm, what thickness lash pad will center the wipe pattern? If thinner lash pads move the wipe patter inboard toward the cam, I’m thinking 0.099-inch (2.5mm) should do it. Edit: In the end the advice I got from everyone seems to be "Trial and Error" is the best way to figure it out, but confirmed that thinner moves the wipe pattern away from the valve and thicker toward the valve. We ended up filing down 7 of the pads to get the right thicknesses and it looks like I am going to have to get them from Precision Shims in Australia. Bummer that I will have to wait so long to get them, but at least they are the right thing. It was that or go with the Kameari ones at $15 a pop and wait 4 weeks for them to arrive.
-
Jeeez. It’s like they don’t want us to buy the damn thing. I’m just going to go with Spirit Garage.
-
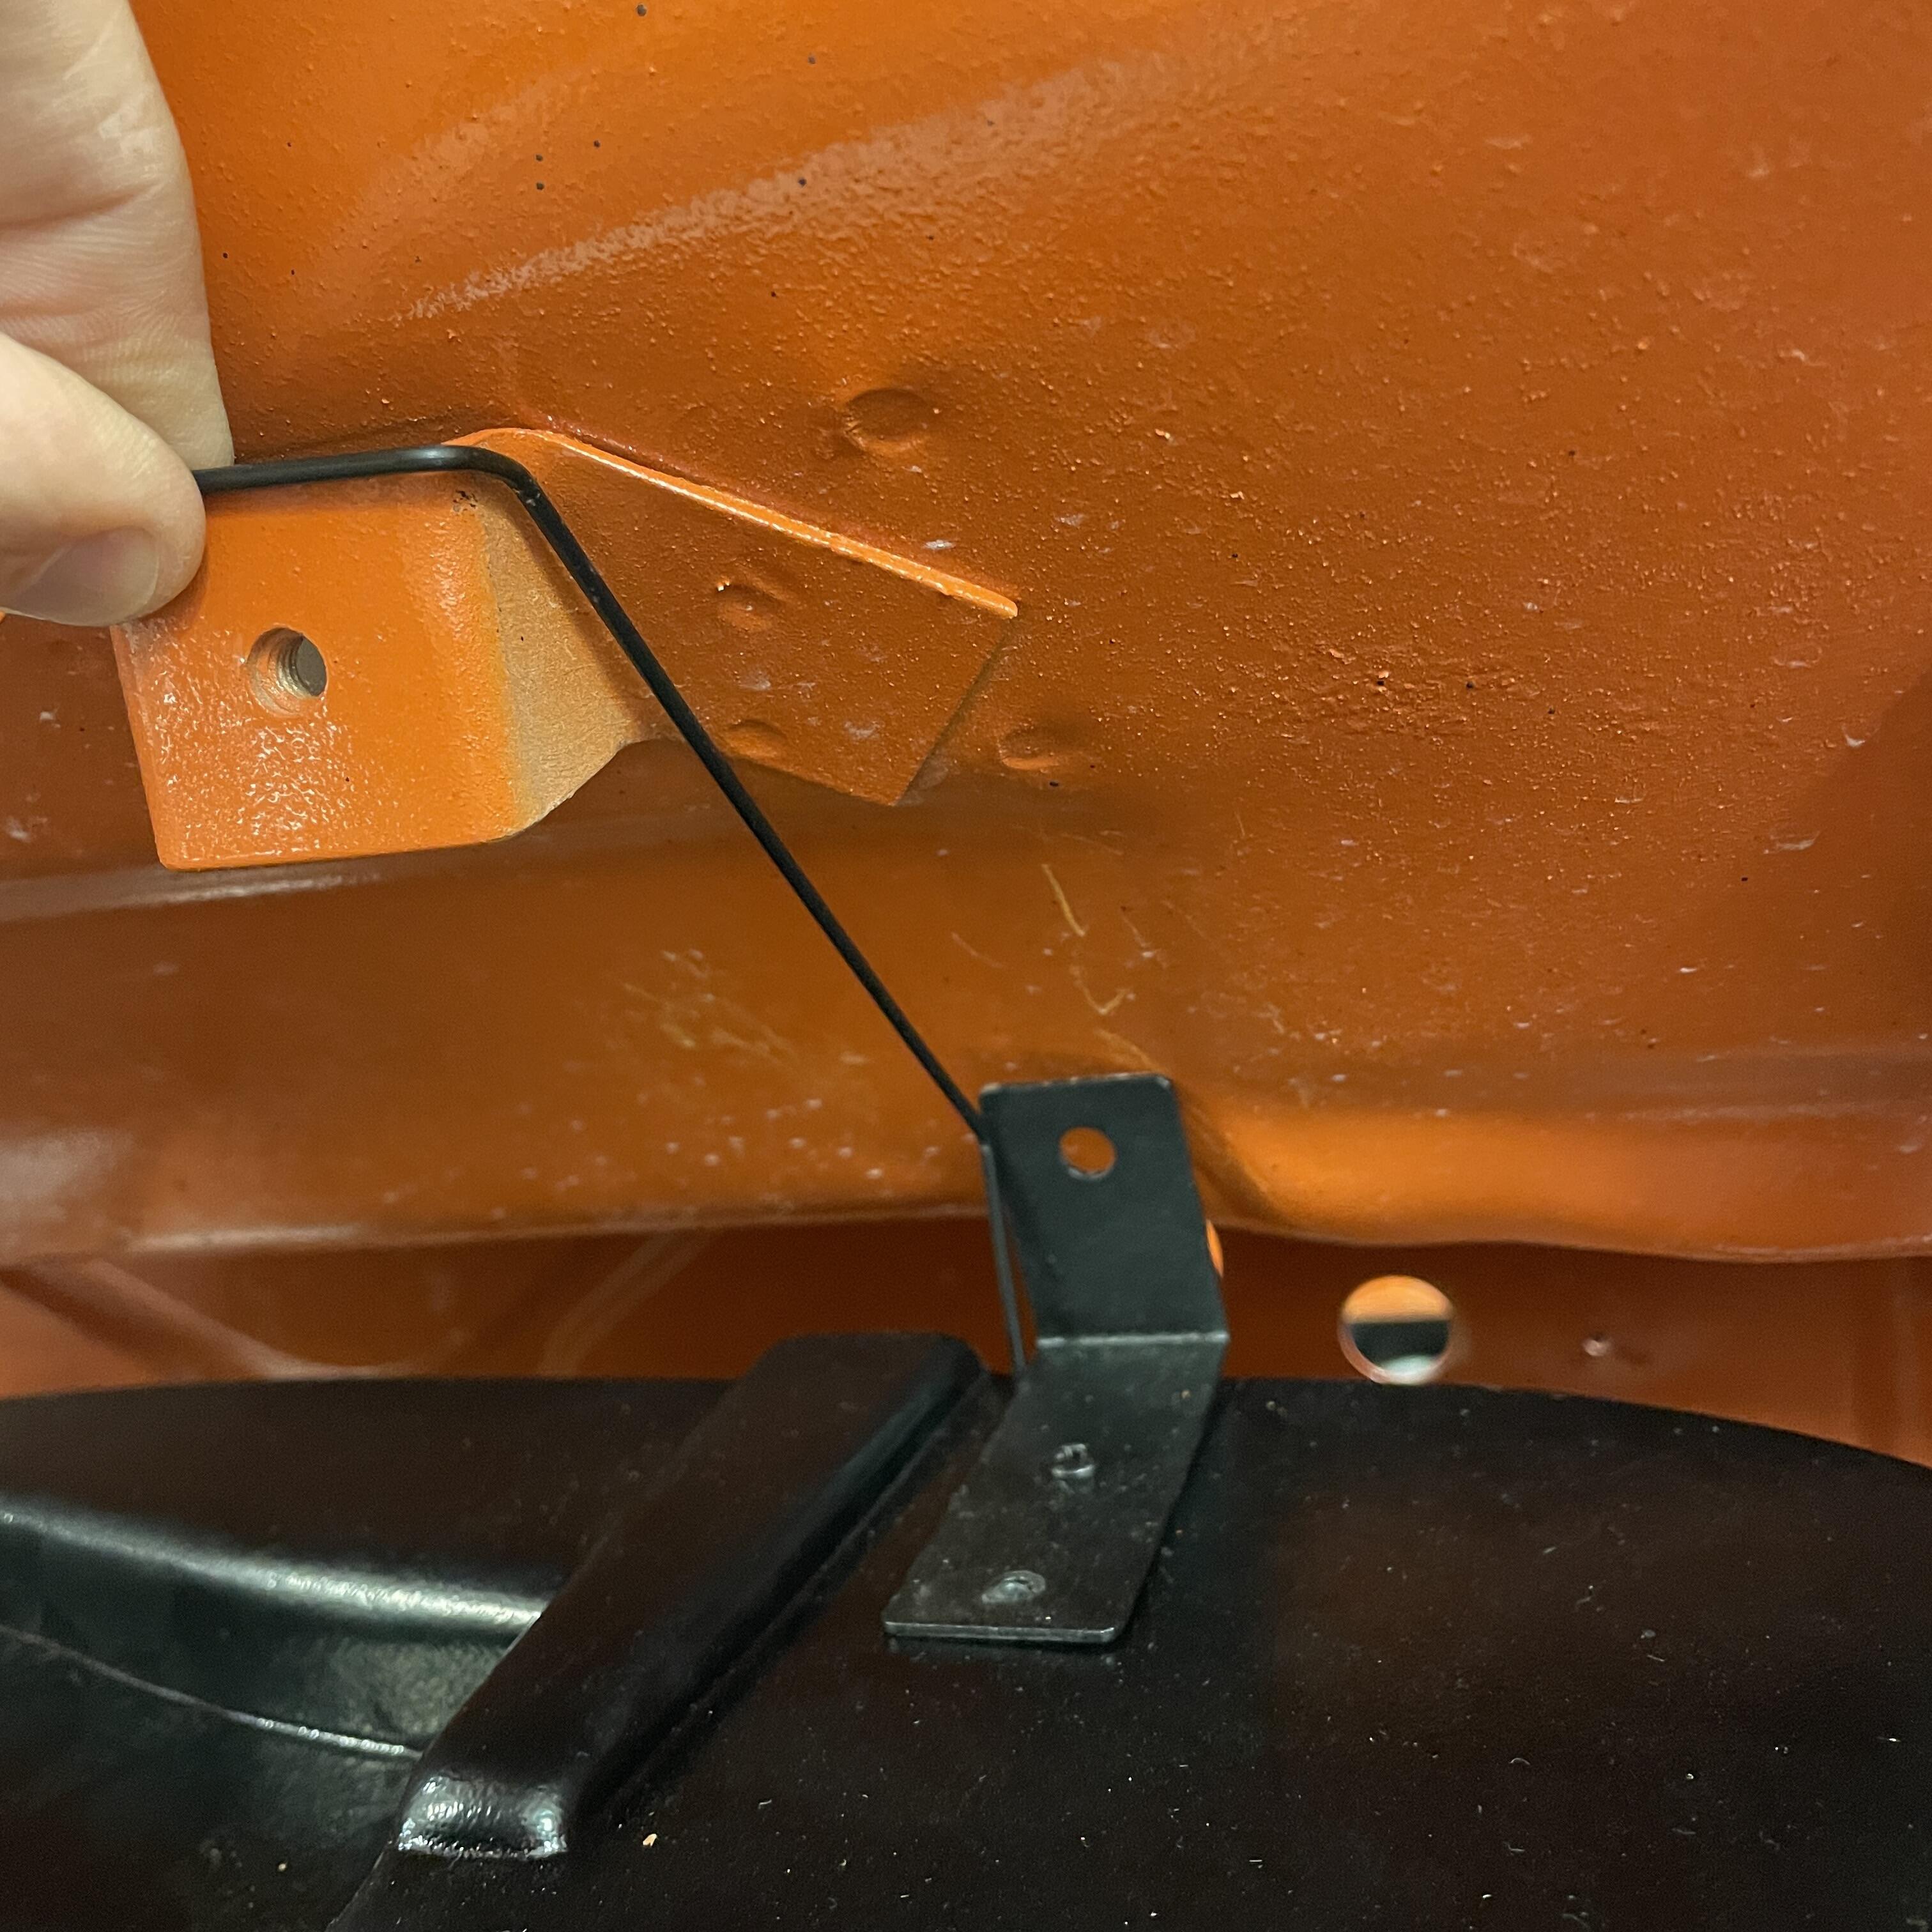
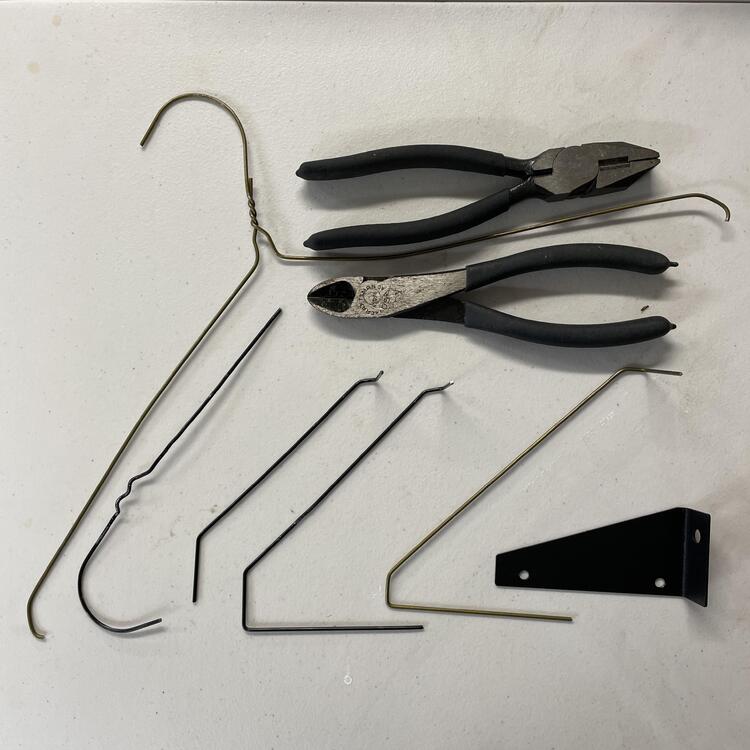
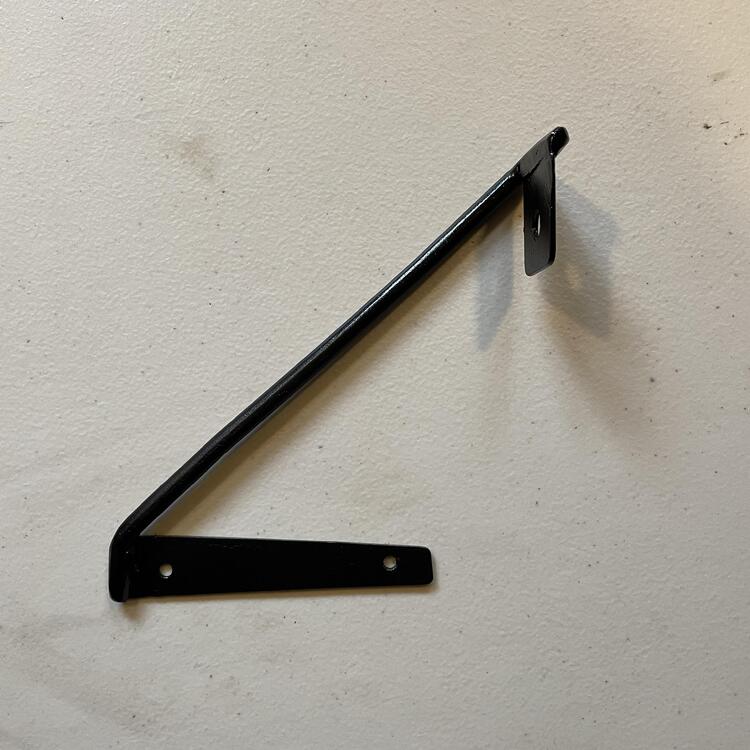
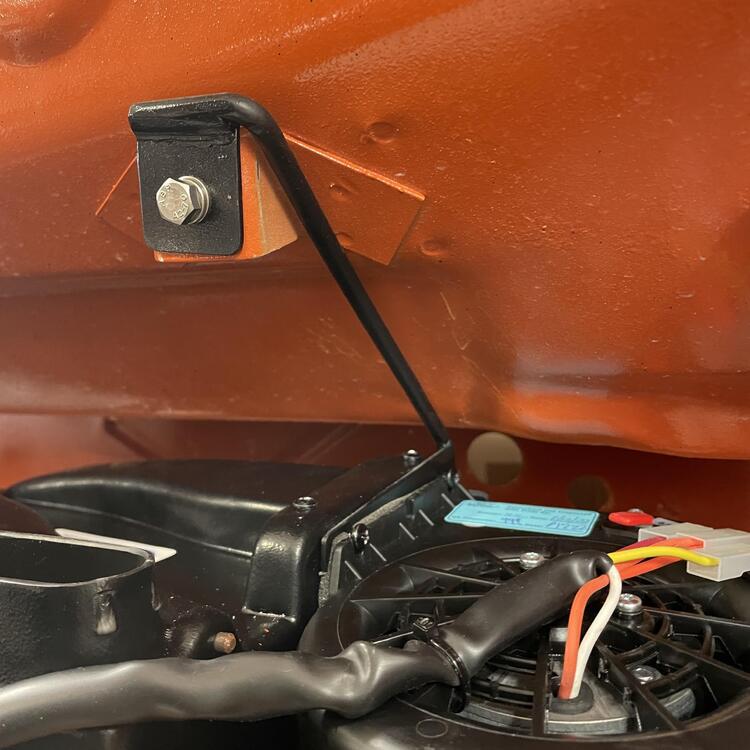
Evaporator Bracket no. 3: This one was a MF to get done, and I’m still not 100% happy with it. I would change a couple of things about it if I were to do it again, but I already have too much time invested and it’s doing the job well enough. Overall, I think this series of brackets is the right approach vs using the flat bits they provide, but the geometry is ever so slightly off on all three of them due to minor differences between the real evaporator and the mock-up. don’t get me wrong, the mock-up made it way easier, but I wish I had a CNC machine so I could take the next step and make these in aluminum and tweak the angles to fix the errors. The evaporator is a few degrees off from square on the yaw axis, which is why it was hitting the glovebox. It could also stand to move forward about 1cm and down the same amount. Not bad for hand made and rough measurements, though. You can see where the original bracket they provided with the mock-up evaporator was scratching the paint. The one of the actual evaporator is just as in the way, so I deleted that entirely. It is unnecessarily tall.


-
Silicone Rubber Sheet,Heat Resistant, Heavy Duty,High Grade 60A,12 x 12 Inch, 1/16 Inch Thickness for DIY Gaskets, Pads, Seals, Crafts, Flooring,Cushioning of Anti-Vibration, Anti-Slip https://www.amazon.com/dp/B08LN8MJZB?ref=ppx_pop_mob_ap_share