Matthew Abate
Free Member
-
Joined
-
Last visited
Everything posted by Matthew Abate
-
 I feel like maybe there's an in-between way to use one's car, no? Sent from my iPhone using Classic Zcar Club mobile
 -
To add some clarity to the discussion and perhaps help some other people with this, here are the options for a street application I have identified so far: OEM by price '82-83 280ZX Turbo Factory Crankshaft Pulley ($259.87 @ Motorsport!) '75-83 280Z/ZX Factory Crankshaft Pulley (Double Pulley, $219.00 @ Z Car Depot) '73-74 240Z Factory Harmonic Balancer, US-Spec ($274.95 @ Motorsport!) 240Z Factory Harmonic Balancer, Rest-of-World (NLA) Nismo L-Series Harmonic Damper (NLA) Street Aftermarket by price Professional Products PowerForce Harmonic Dampers, 70-83 Z/ZX (Single Pulley, $105.95 @ Motorsport!) PowerBond Premium OEM Replacement Harmonic Balancers (Double Pulley, $183.97 @ Summit Racing) Powerforce SFI-Spec Racing Damper, 70-83 Z/ZX (Single Pulley, $199.95 @ Motorsport!) - Note that I have read threads about these being too small and not fitting, but this is 10-12 year old information and may have been rectified by now. Pioneer Balancers DA-41(Double Pulley, $249.97 @ Summit Racing) ATI Super Damper Sport Compact Harmonic Balancers ($359.97 @ Summit Racing) BHJ Dynamics Street Performance Special L-Series Datsun Harmonic Damper ($497.00 @ BHJ) Racing Aftermarket by price (for posterity) Kameari L-Type Super Racing Damper Pulley ($382.40 @ RHD) BHJ Dynamics Race Special L-Series Datsun Harmonic Damper ($497.00 @ BHJ) Kameari L-Type Super Racing Damper Pulley Full Kit ($637... @ RHD) I have also read that the Nissan Quest, Maxima, Laurel, and Cendric pulleys/ballancers will work, but I don't know if they require modification, nor if the timing marks are the same. Another wrinkle is the 280ZXs that came with factory installed AC had the timing indicator on the passenger side (light) rather than the driver side (left). I'm not sure if that means the balancer is different, or if it means timing was maintained by aligning gear teeth differently.
-
Hey guys, You may know that I am building a ZX motor for my 240z with a euro SU carburetor configuration, but I am stumbling over the harmonic balancer I should use here. I've read about thirty threads on this topic, from the 5 or 6 forums that I follow, and none of them is actually comparing the options against each other. I only need one pulley, so I had initially intended to go with a standard 240z balancer, and if I could find one from Europe with just one pulley, even better. However, I've read in a lot of places that the factory balancers are prone to failure. I don't plan to hang out in the high revs all day long, but I'll definitely be getting into them periodically and I don't want my balancer flying apart. I also read somewhere that the timing marks from my '83 ZXT engine aren't in the same location as 240z timing marks, so I have to use something meant to go on a ZX. So now to my actual question: has anyone done a comparison of the various option for balancers? Snooping around the internet yields three basic options: a factory balancer, the Powerforce balancer on MSA, or the $350-$500 options like ATI, BHJ, and Kameari. I can't imagine that a street car should be running a $500 balancer, so I guess what I want to know first is are the two Powerforce balancers high quality (like Motorsport claims they are) or do they fly apart all the time like people on Hybridz are claiming? Right now I'm leaning toward one of these, but if they are crap, or if there's a brand out there with something sub-$150, I'd love to know before I buy something.
-
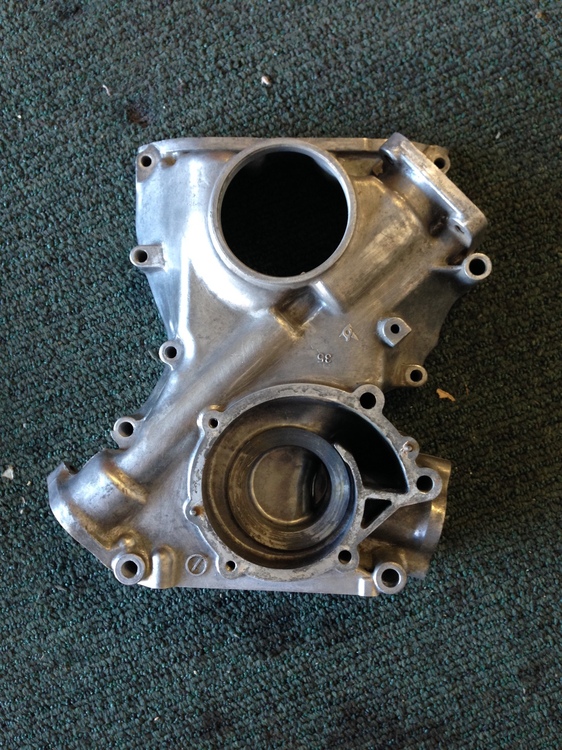
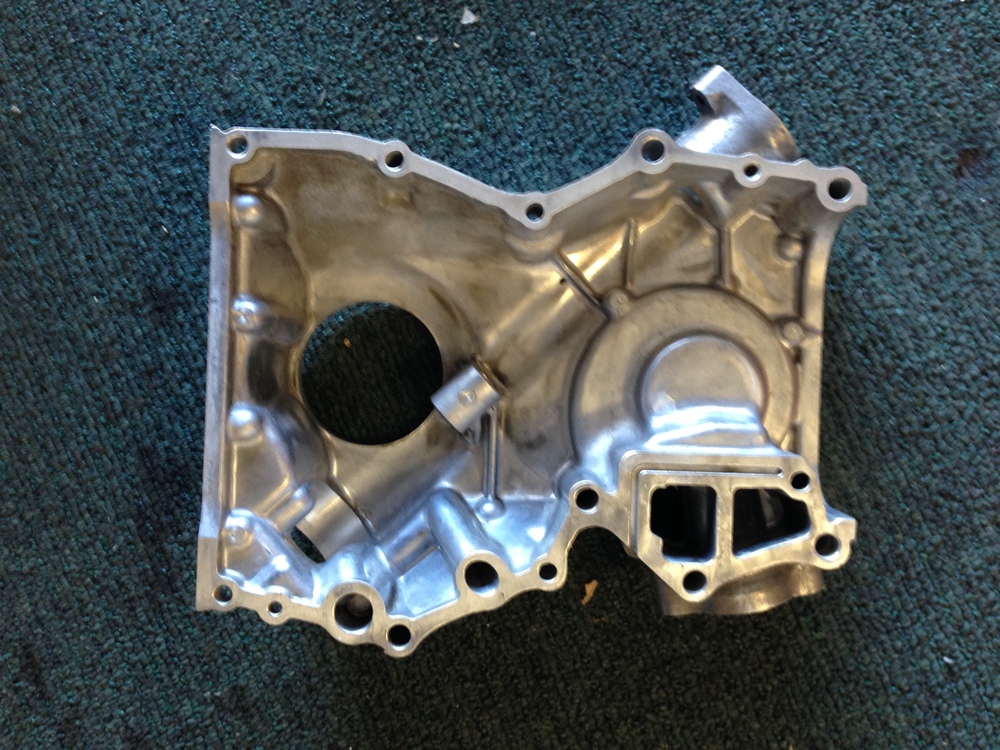
It turns out that the stains from forty years of grease and road grit on the various aluminum parts aren't coming out. I'm looking into different solutions like oven cleaner, Never Dull, Aluma-Brite, and such, but if nothing works we are going to be forced to go with paint because I don't want to polish it.
-
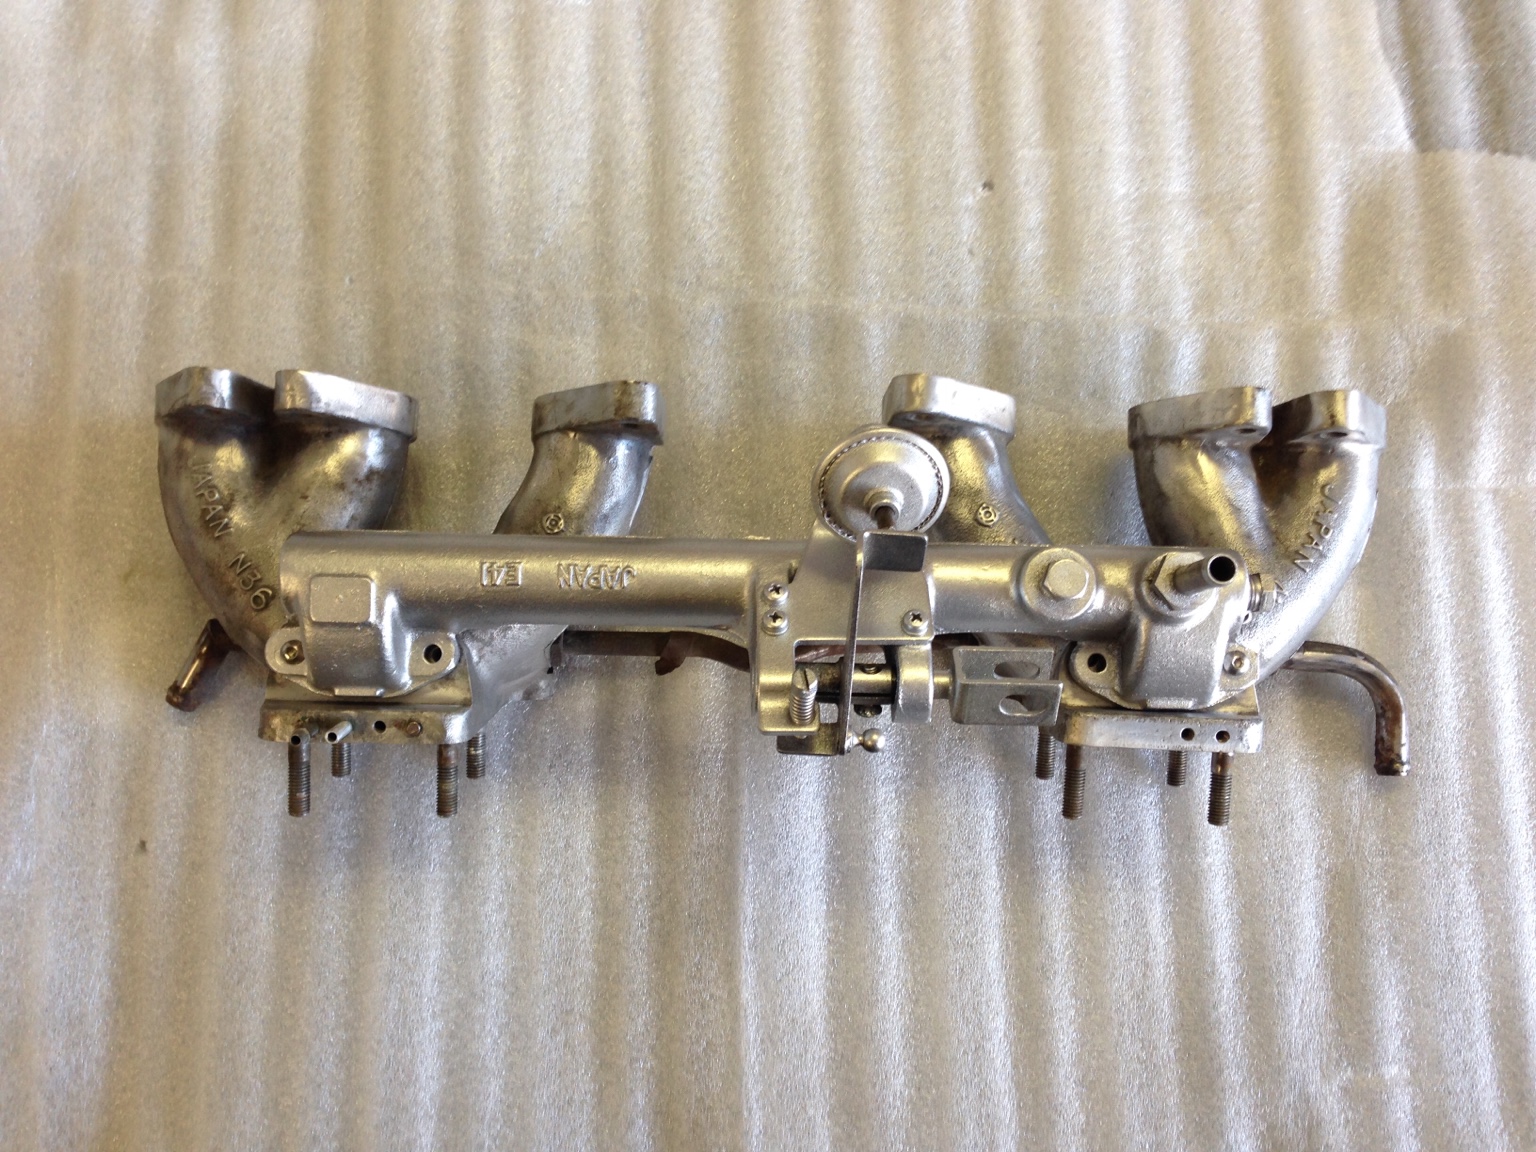
Yes, it does. Primarily because now I know there is no way to plug the rail into the balance tube, which is what I originally thought before I got confused. Thanks. One last question: is it possible to disassemble these in a way that I can save or replace the plastic bushings or are they pretty much fused together? Sent from my iPhone using Classic Zcar Club mobile
-
So here's are two questions that spin out of that: 1. If one end goes to the charcoal canister, what does the other end of that third tube plug into? 2. If the charcoal canister helps with vapor lock and the gas smell, can this work with what I'm trying to do, or did I negate that by choosing the euro balance tube? I am assuming that it all plugs into the balance tube with this question because I can't find diagrams that I can decipher and I understand this mod less than I thought I did. Edit: the charcoal system needs a '74 gas tank for the vapor line, doesn't it?
-
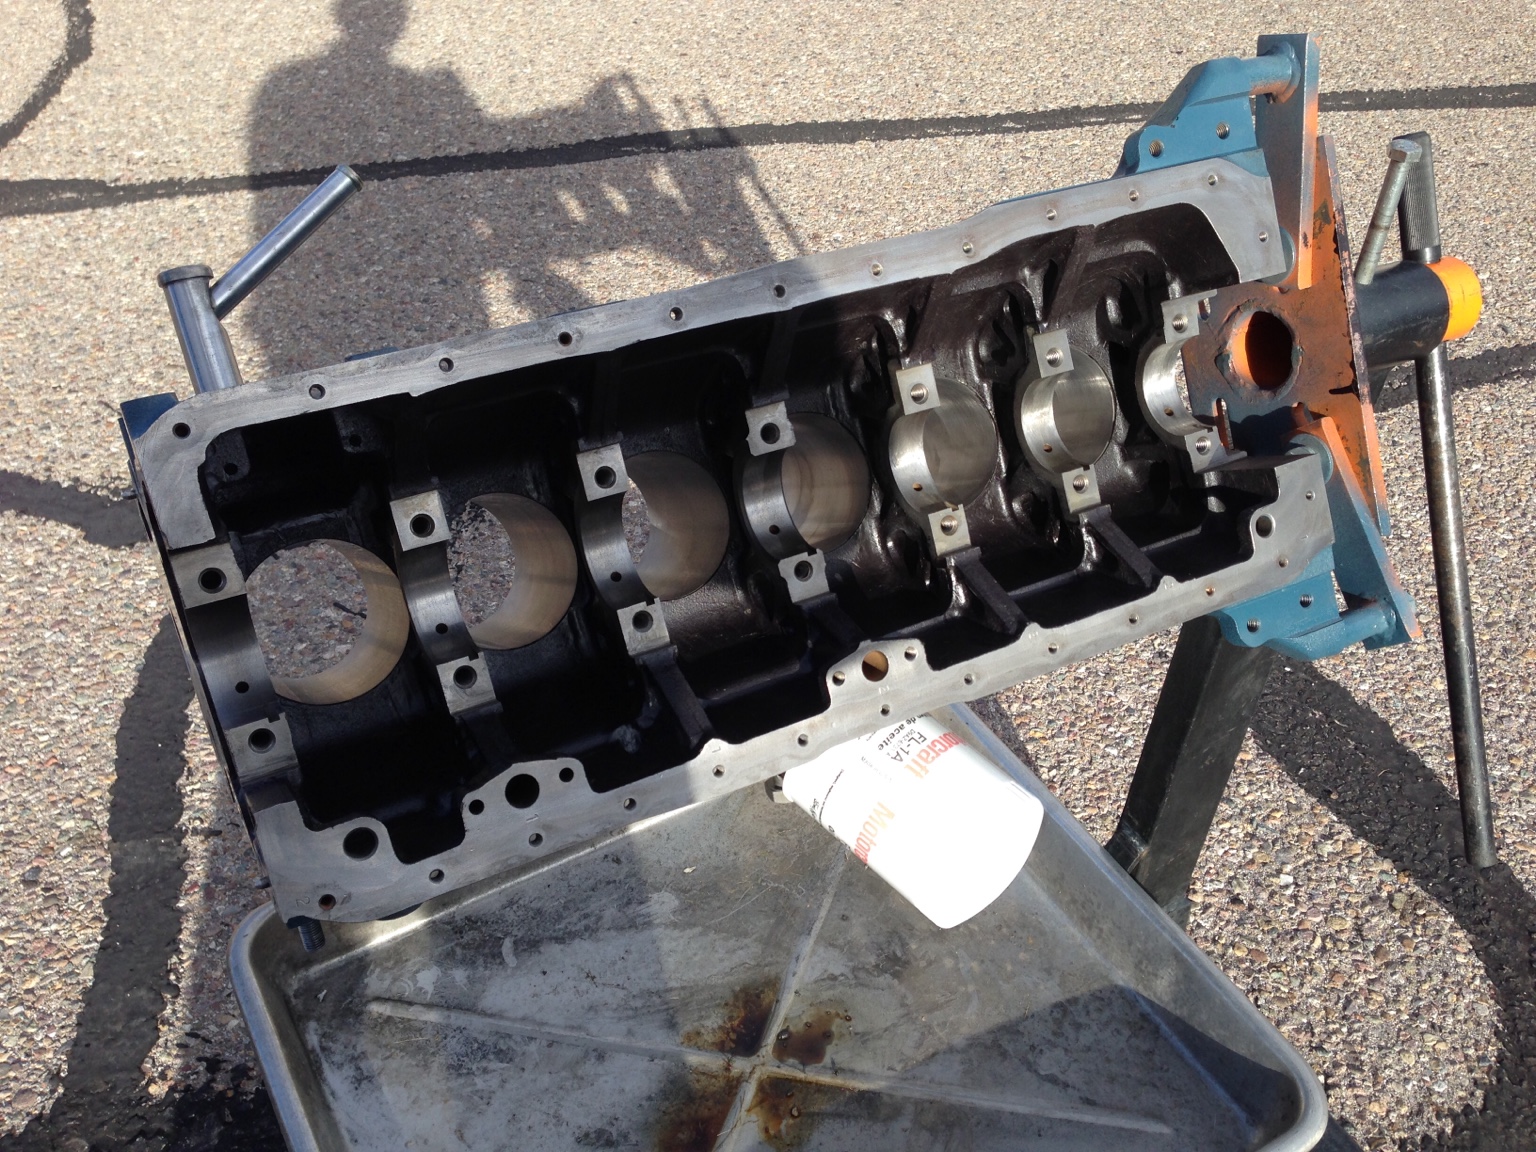
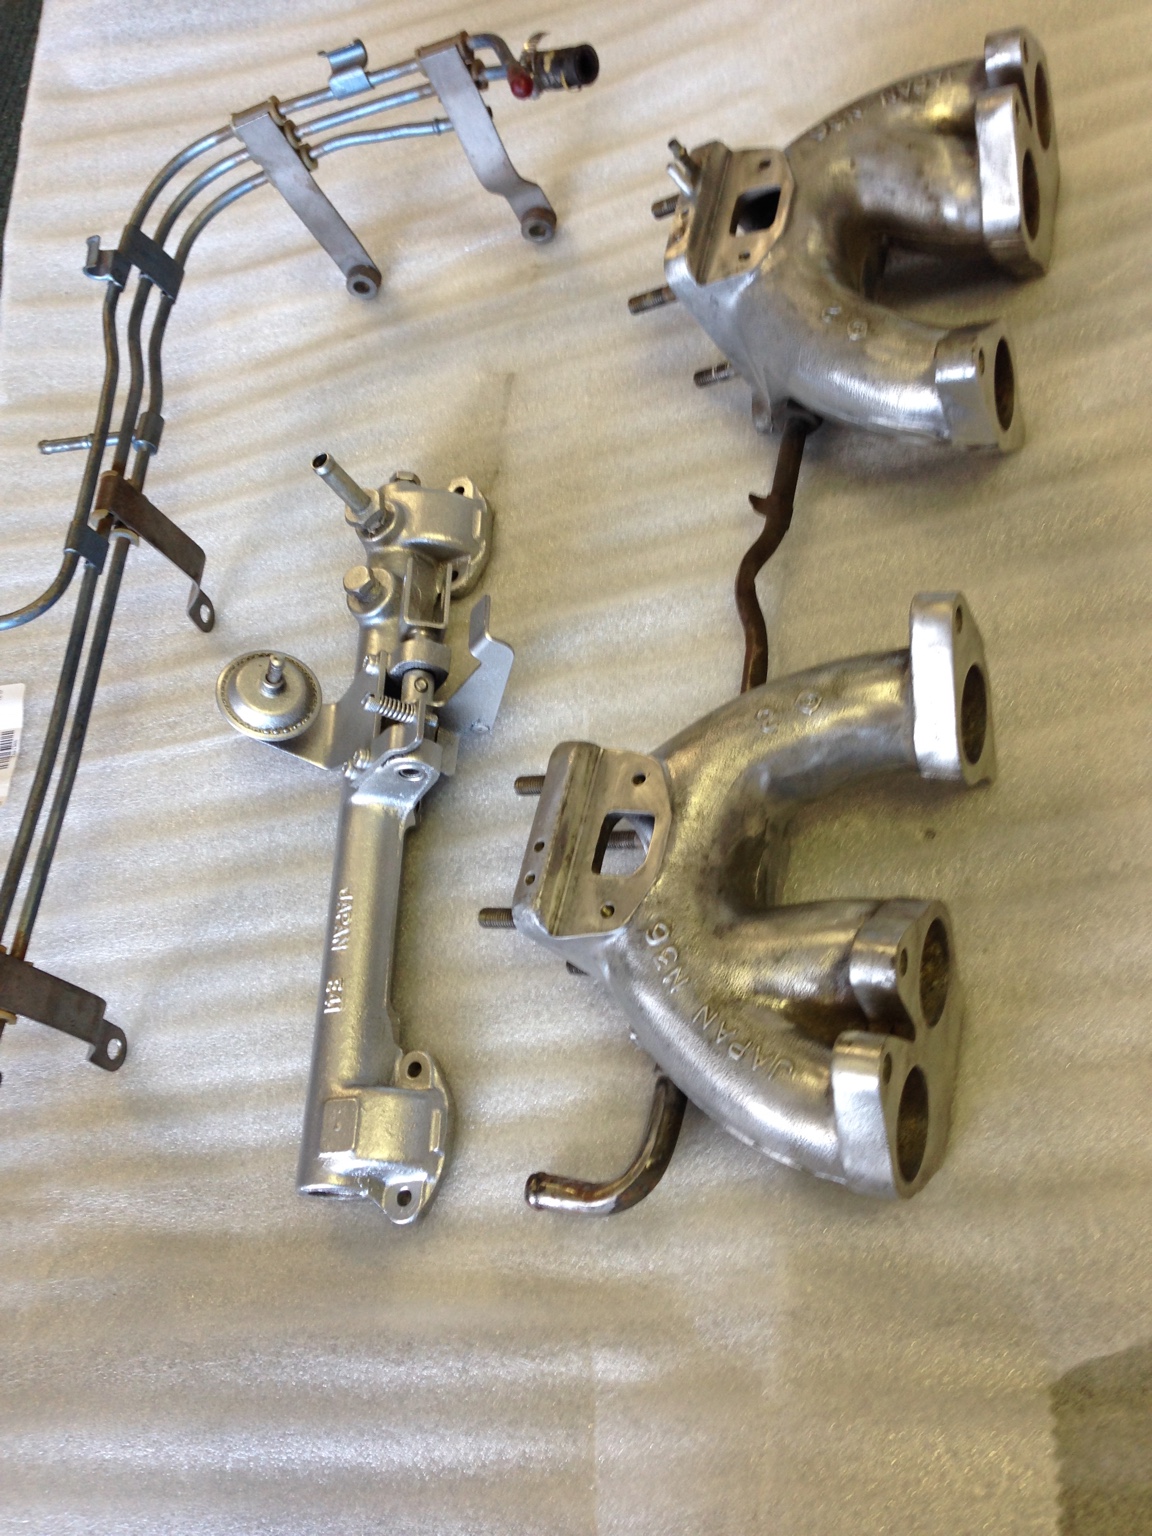
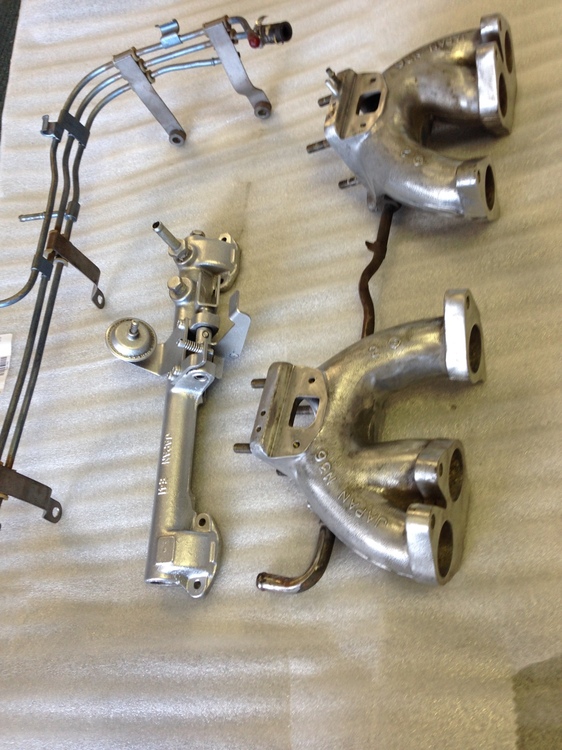
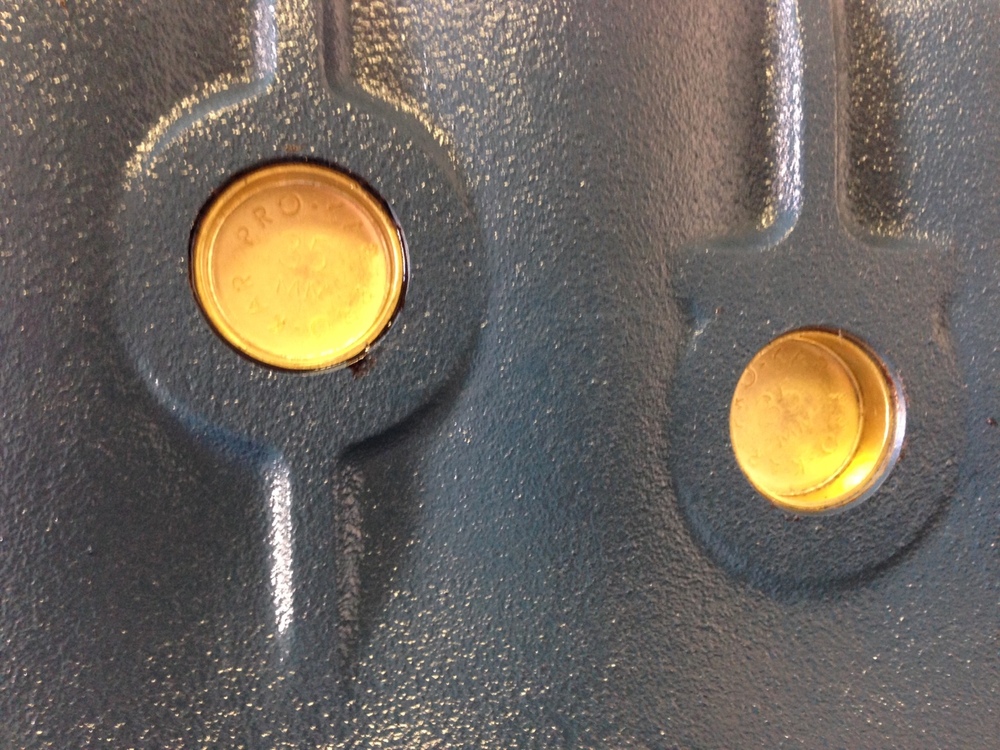
Progress: We went with Rustoleum Ceramic Enamel on the interior. This did very well in a '63 'Vette, so we're confident. Cleaned it out: Finished with the plugs: Painted the inside: And took a look at the parts for the intake setup: Not sure what to do about accidentally buying a three-tube fuel pipe / rail...


-
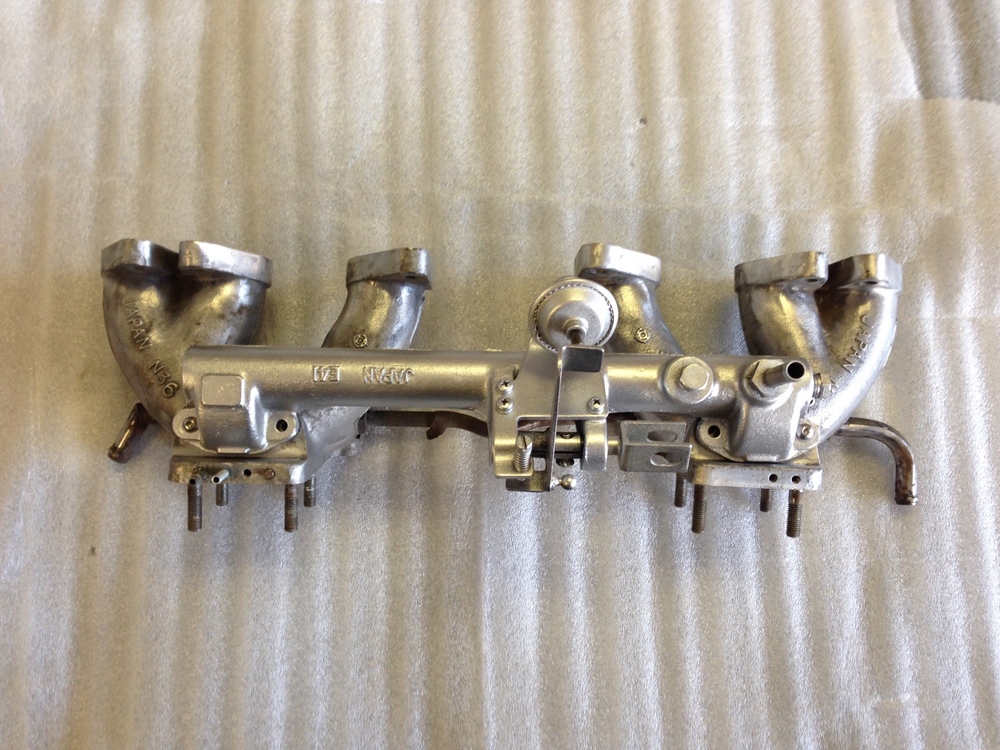
Okay, I have searched a ton of places and can't find the answer to this nor a diagram to help me from the FSM, Chilton, or Haynes manuals: 1. If I want to go with a euro balance tube on my SU setup, which rails can I make work? 2. What is the third tube for on the 73 and 74 fuel rails / pipes? Where does it go? I had assumed I would need a 70-72 fuel rail / pipe to work on the euro balance tube, but I'm not certain. I have a three tube one that is either from a 73 or a 74 (not sure) and had assumed that third tube was part of the emissions system. I've seen people talk about cutting it off, but nothing clearing up what it is for. I'd love some help (and directions to some comprehensive diagrams and illustrations).
-
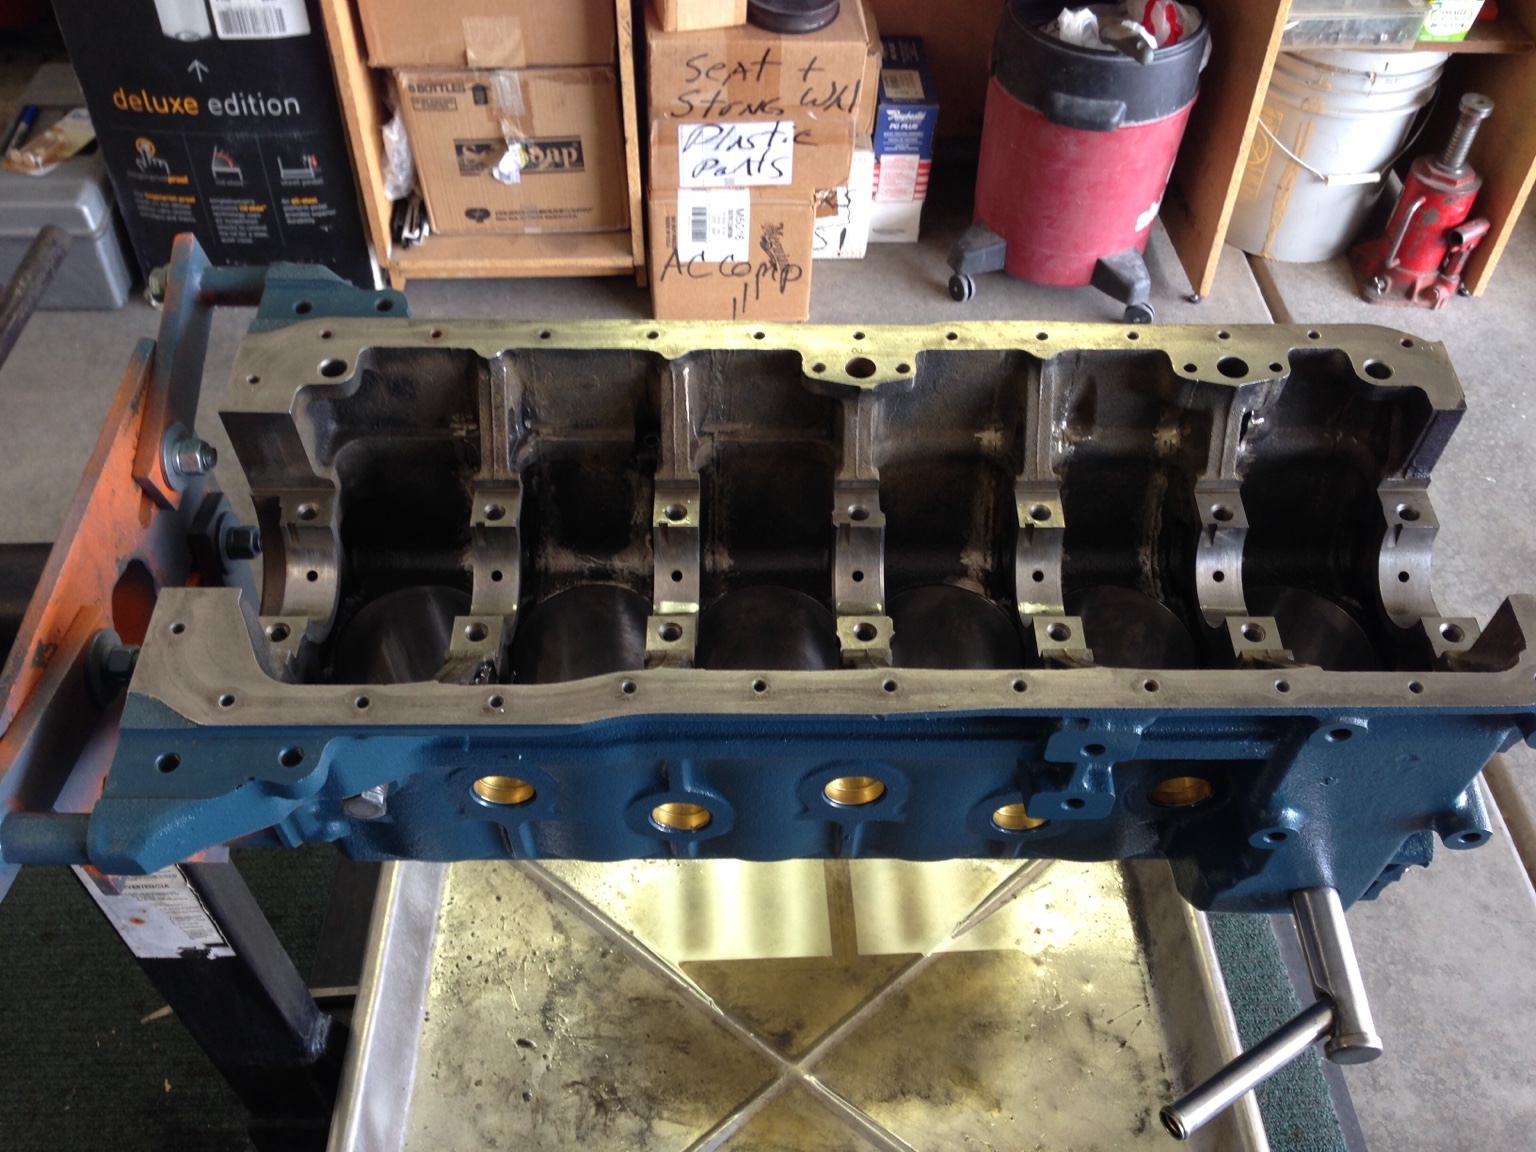
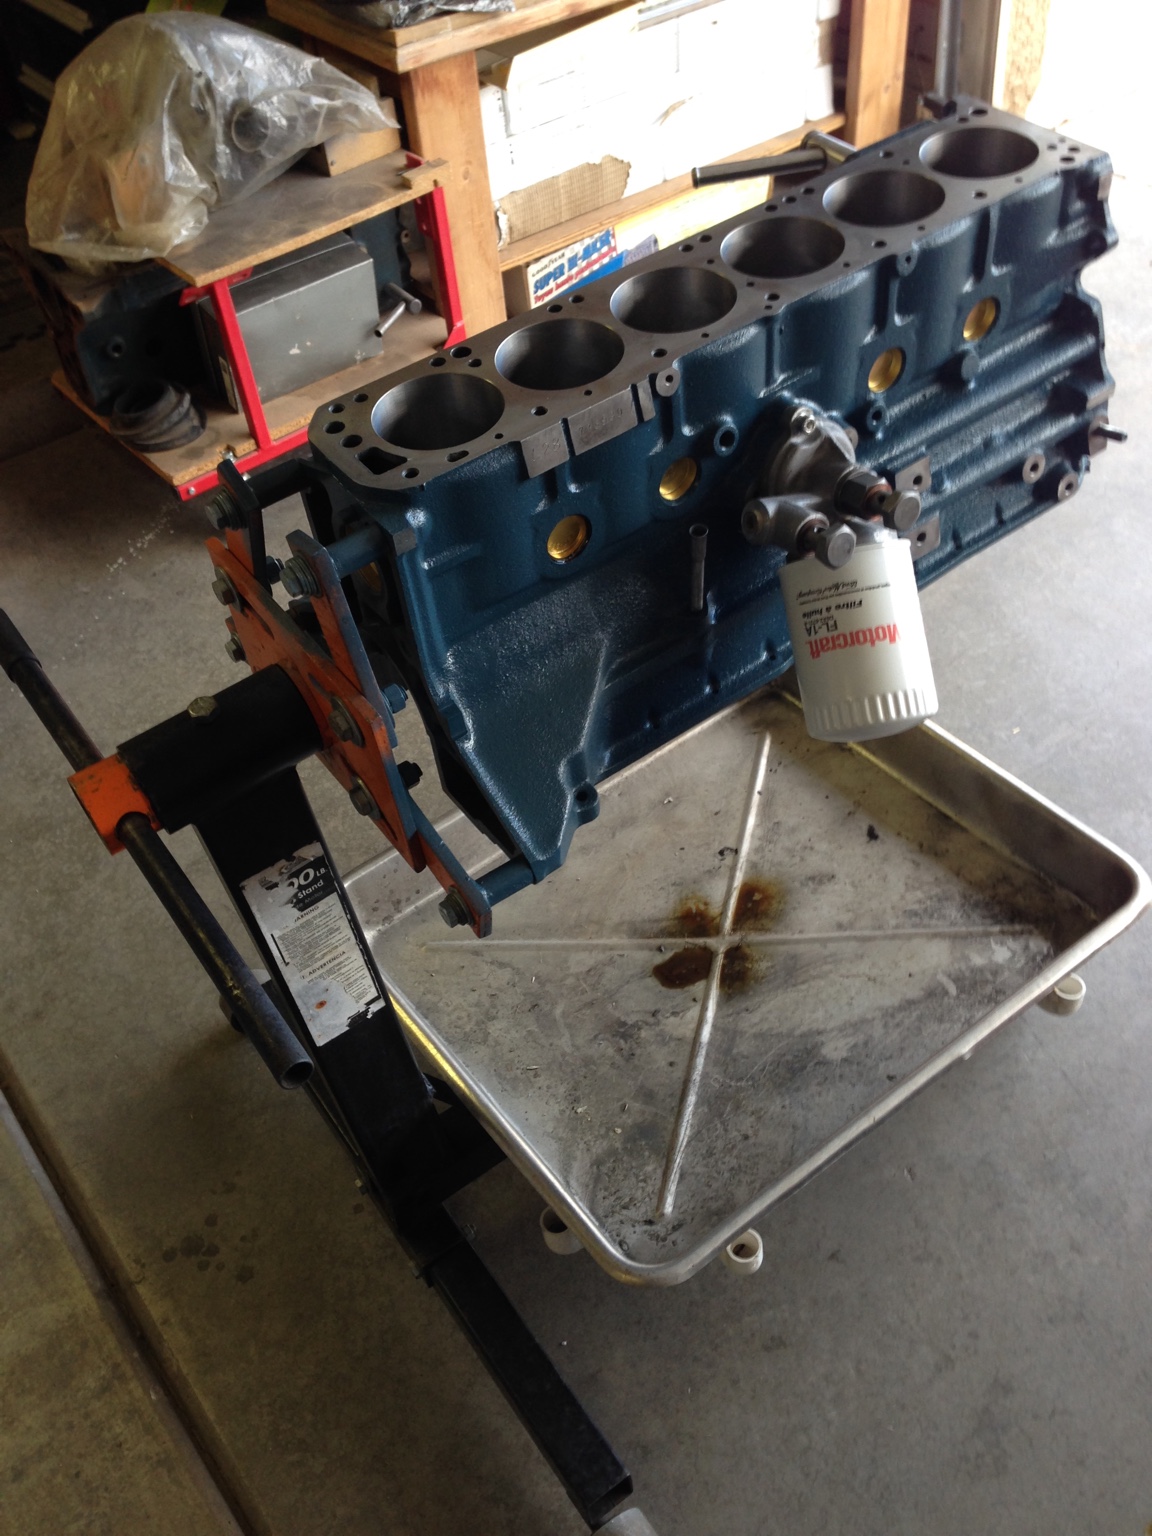
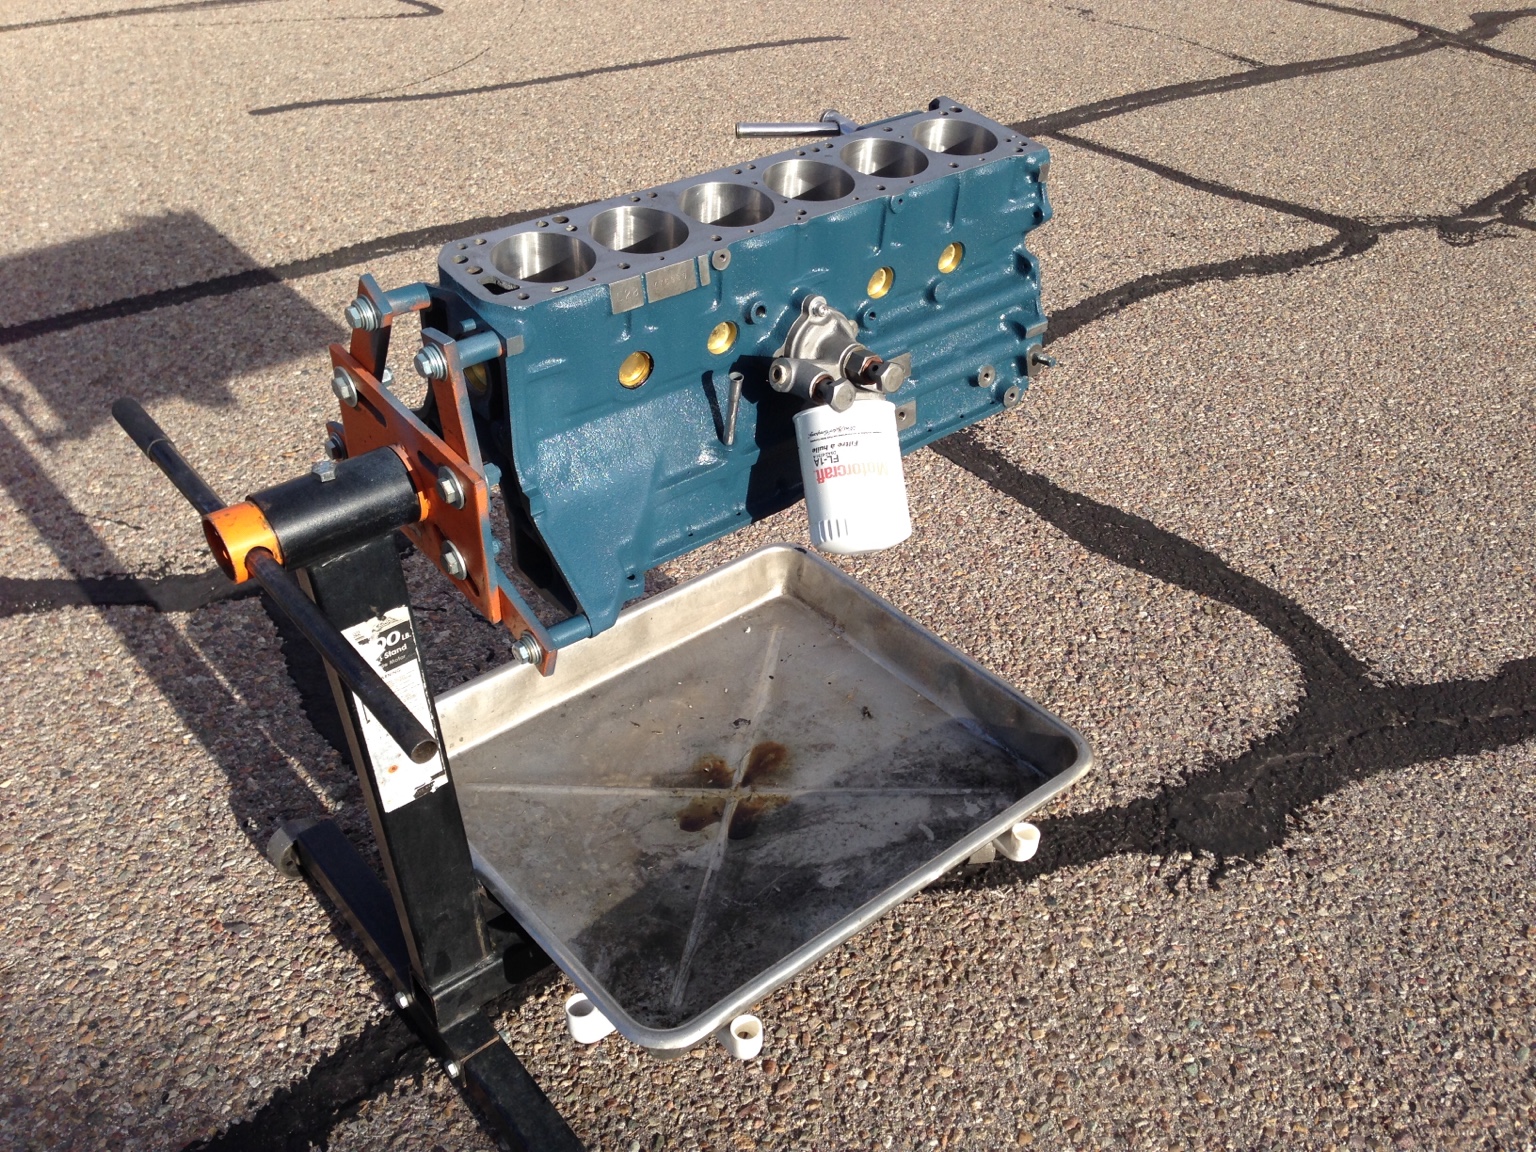
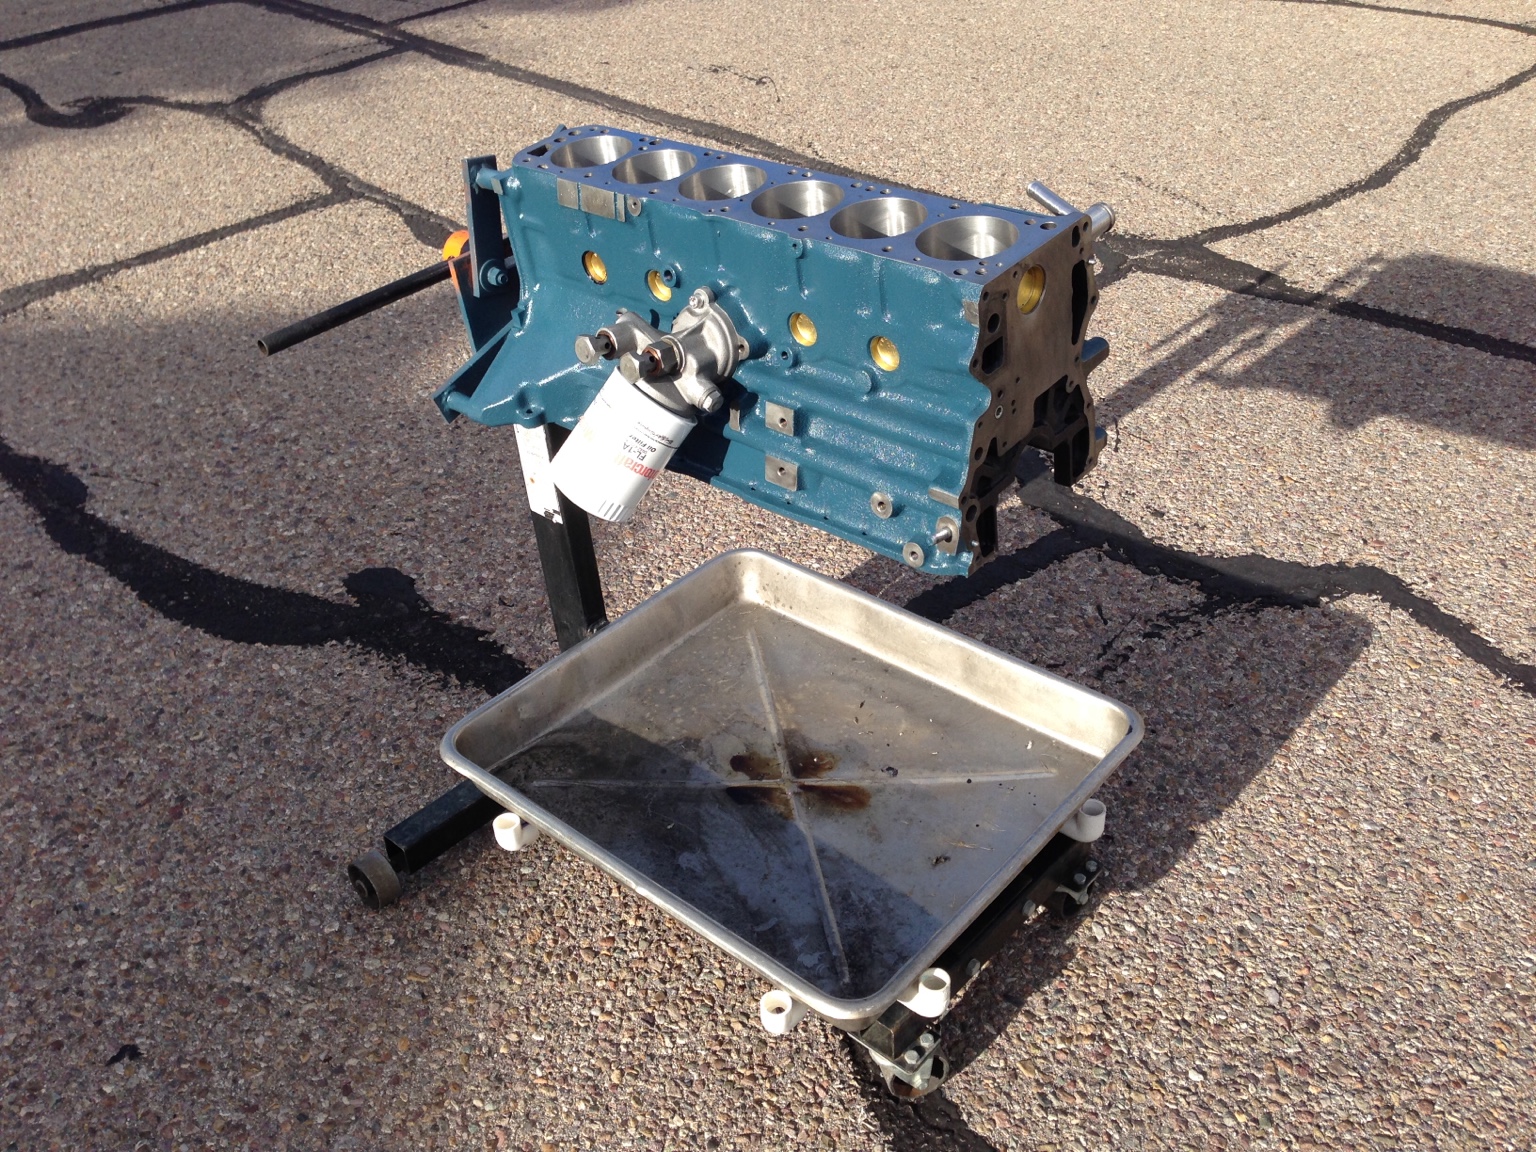
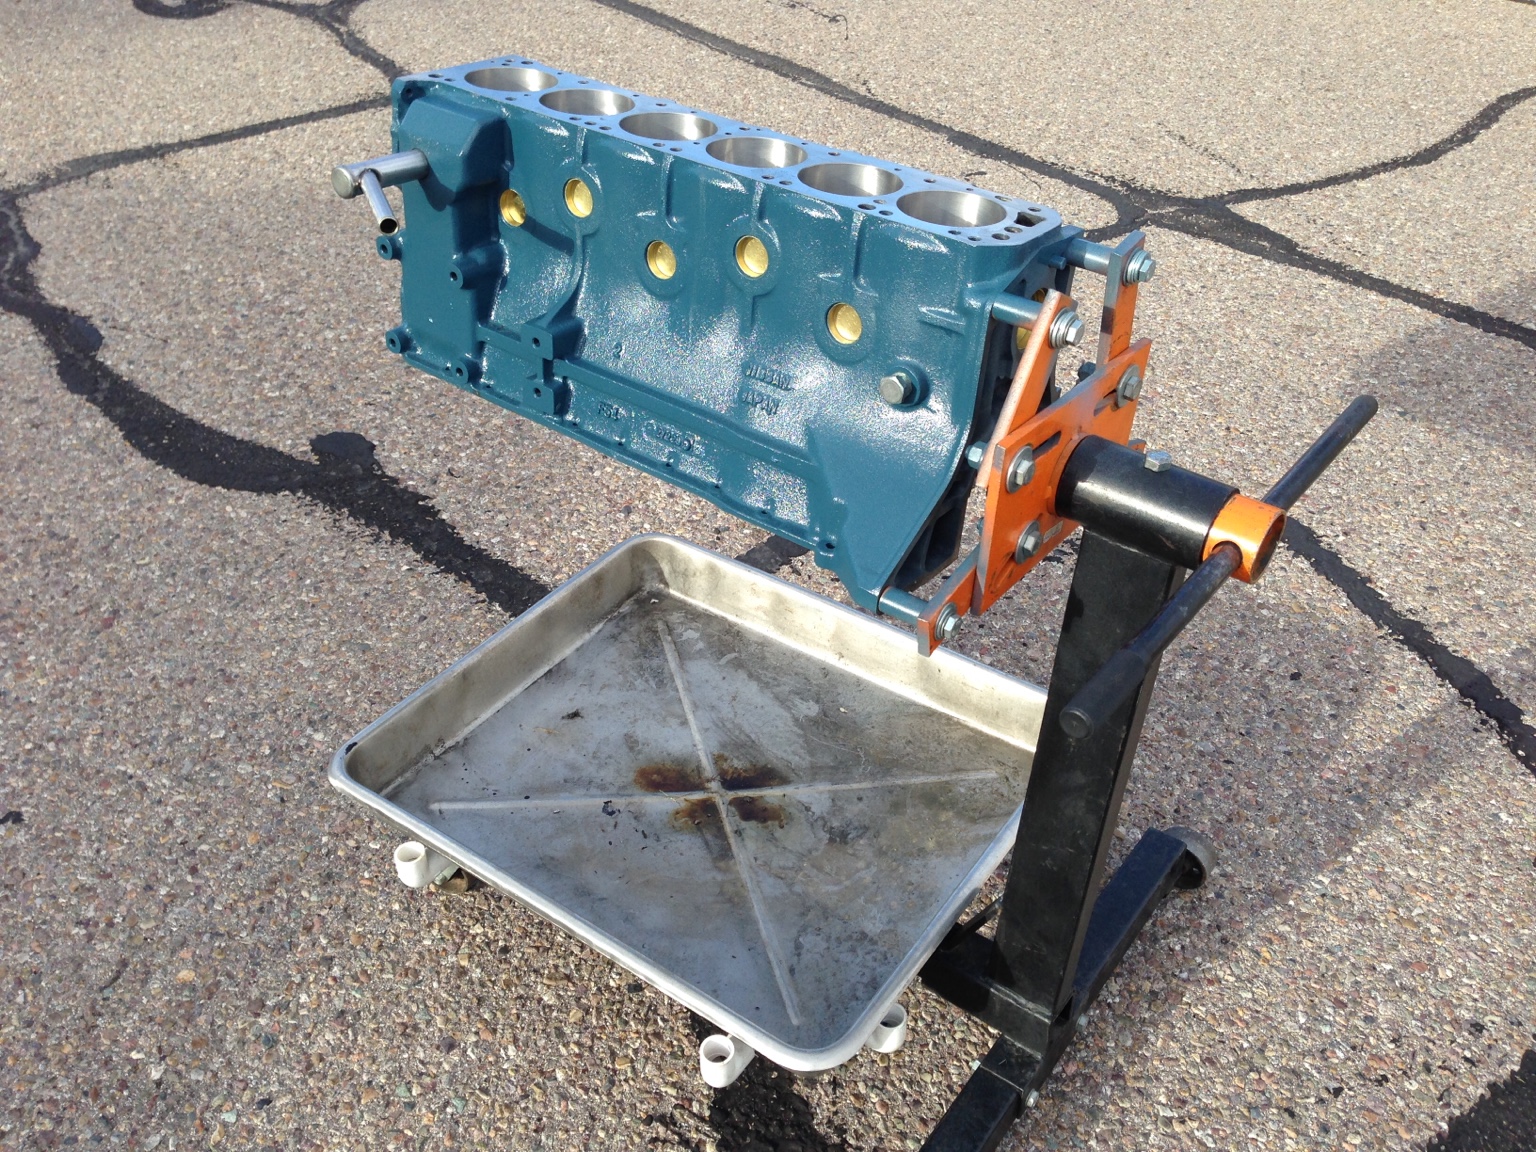
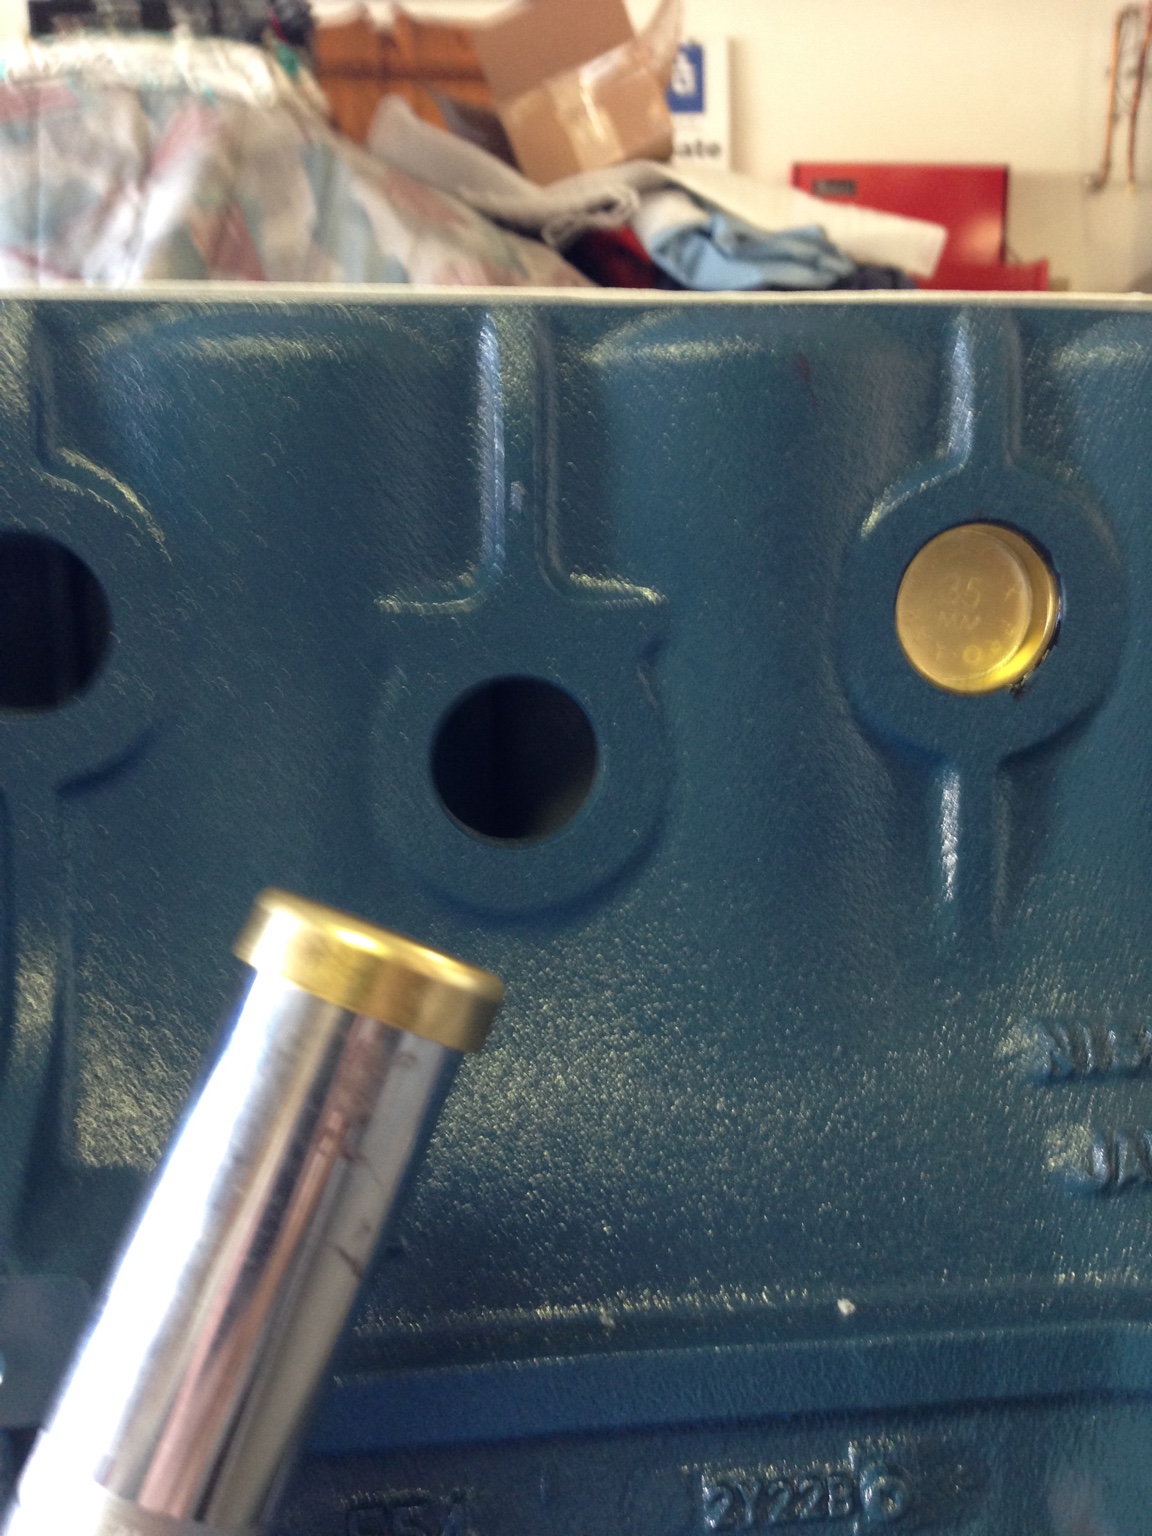
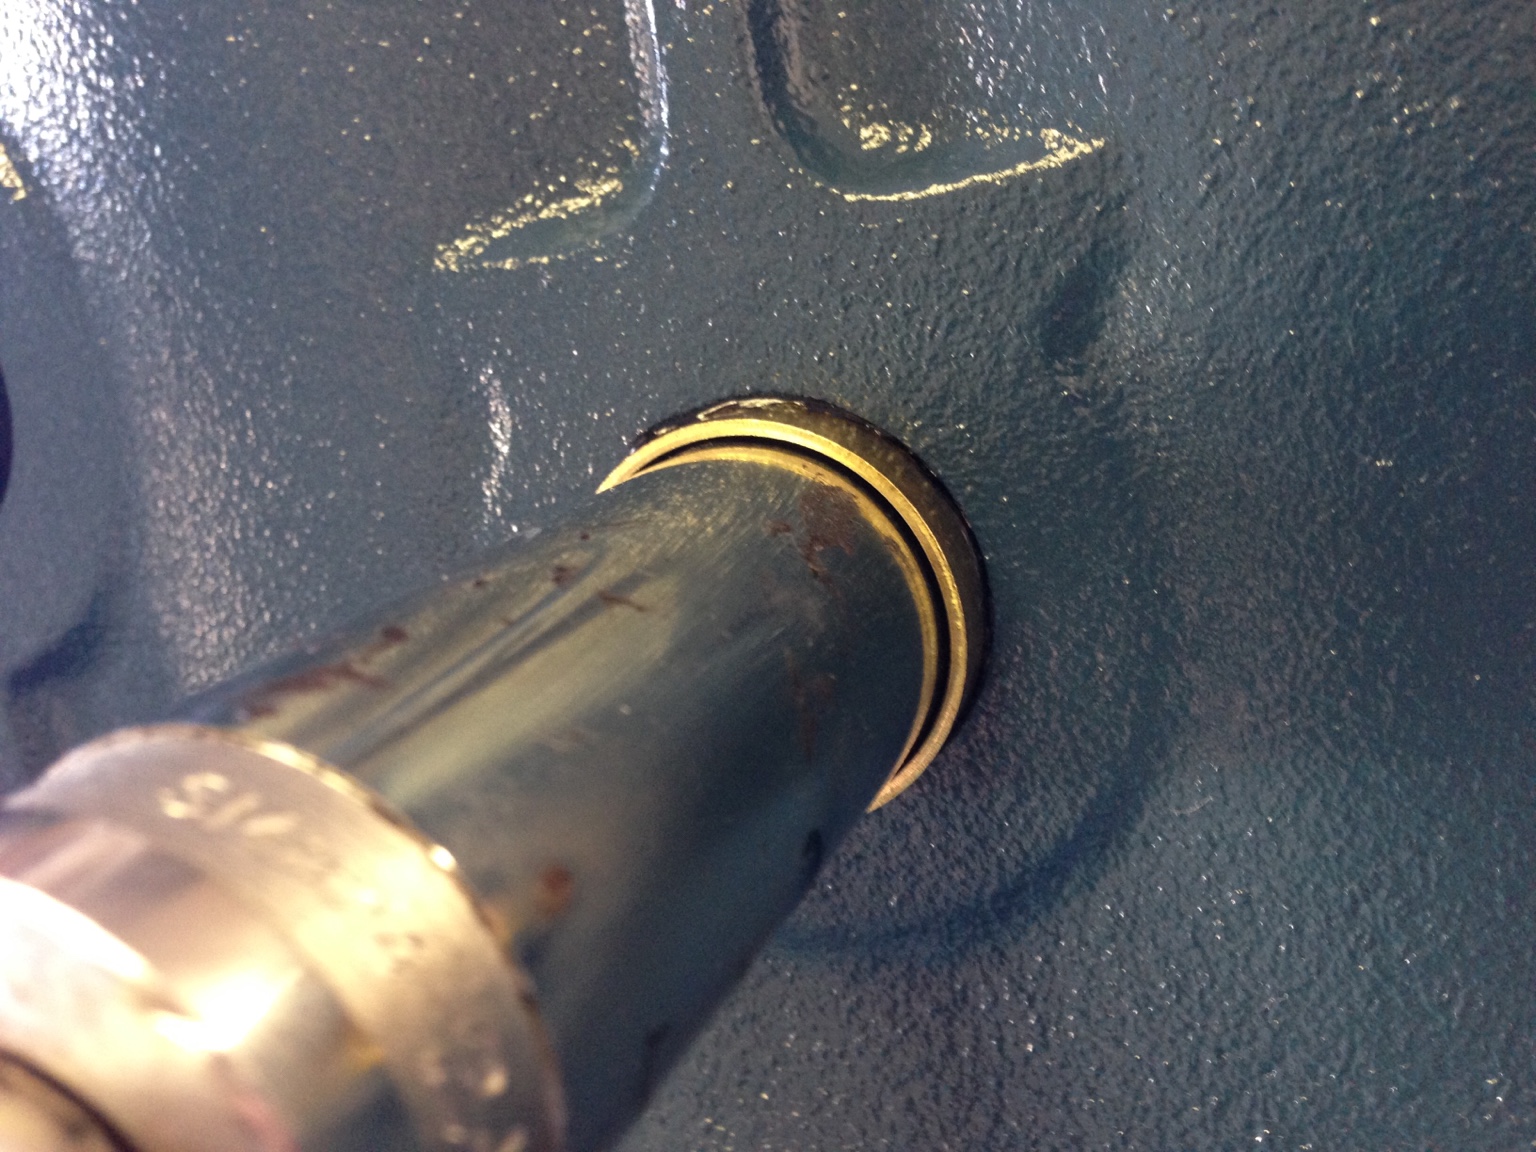
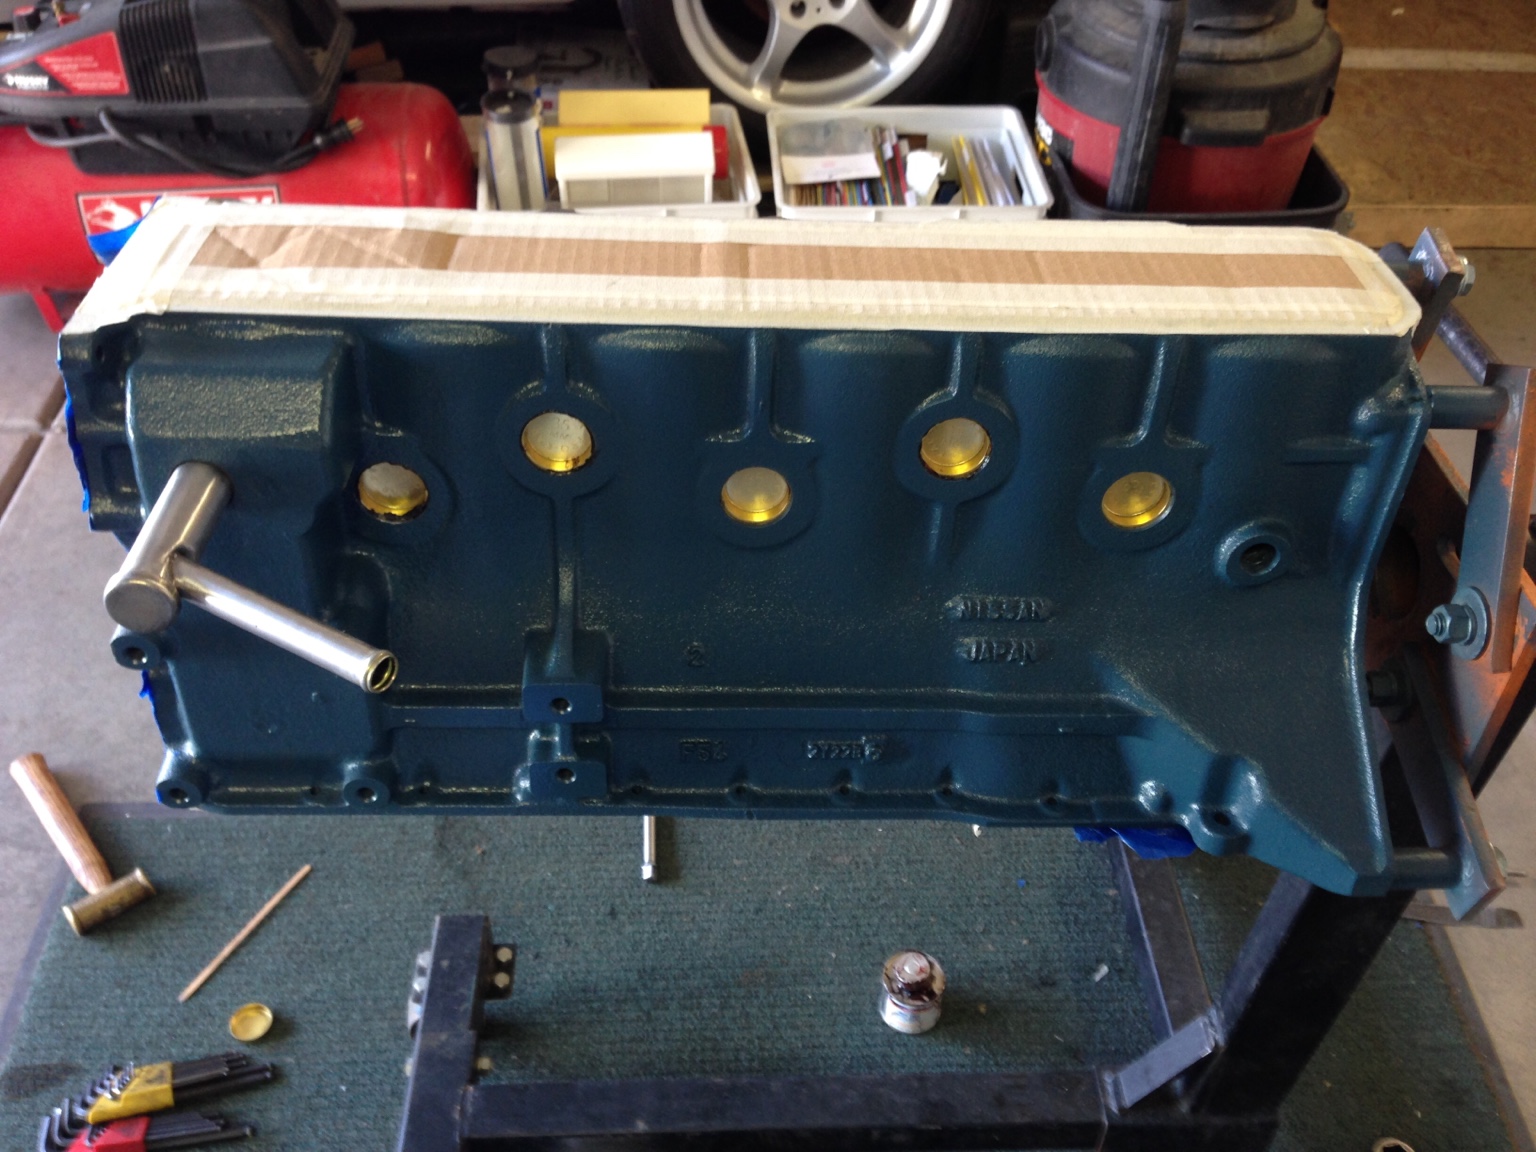
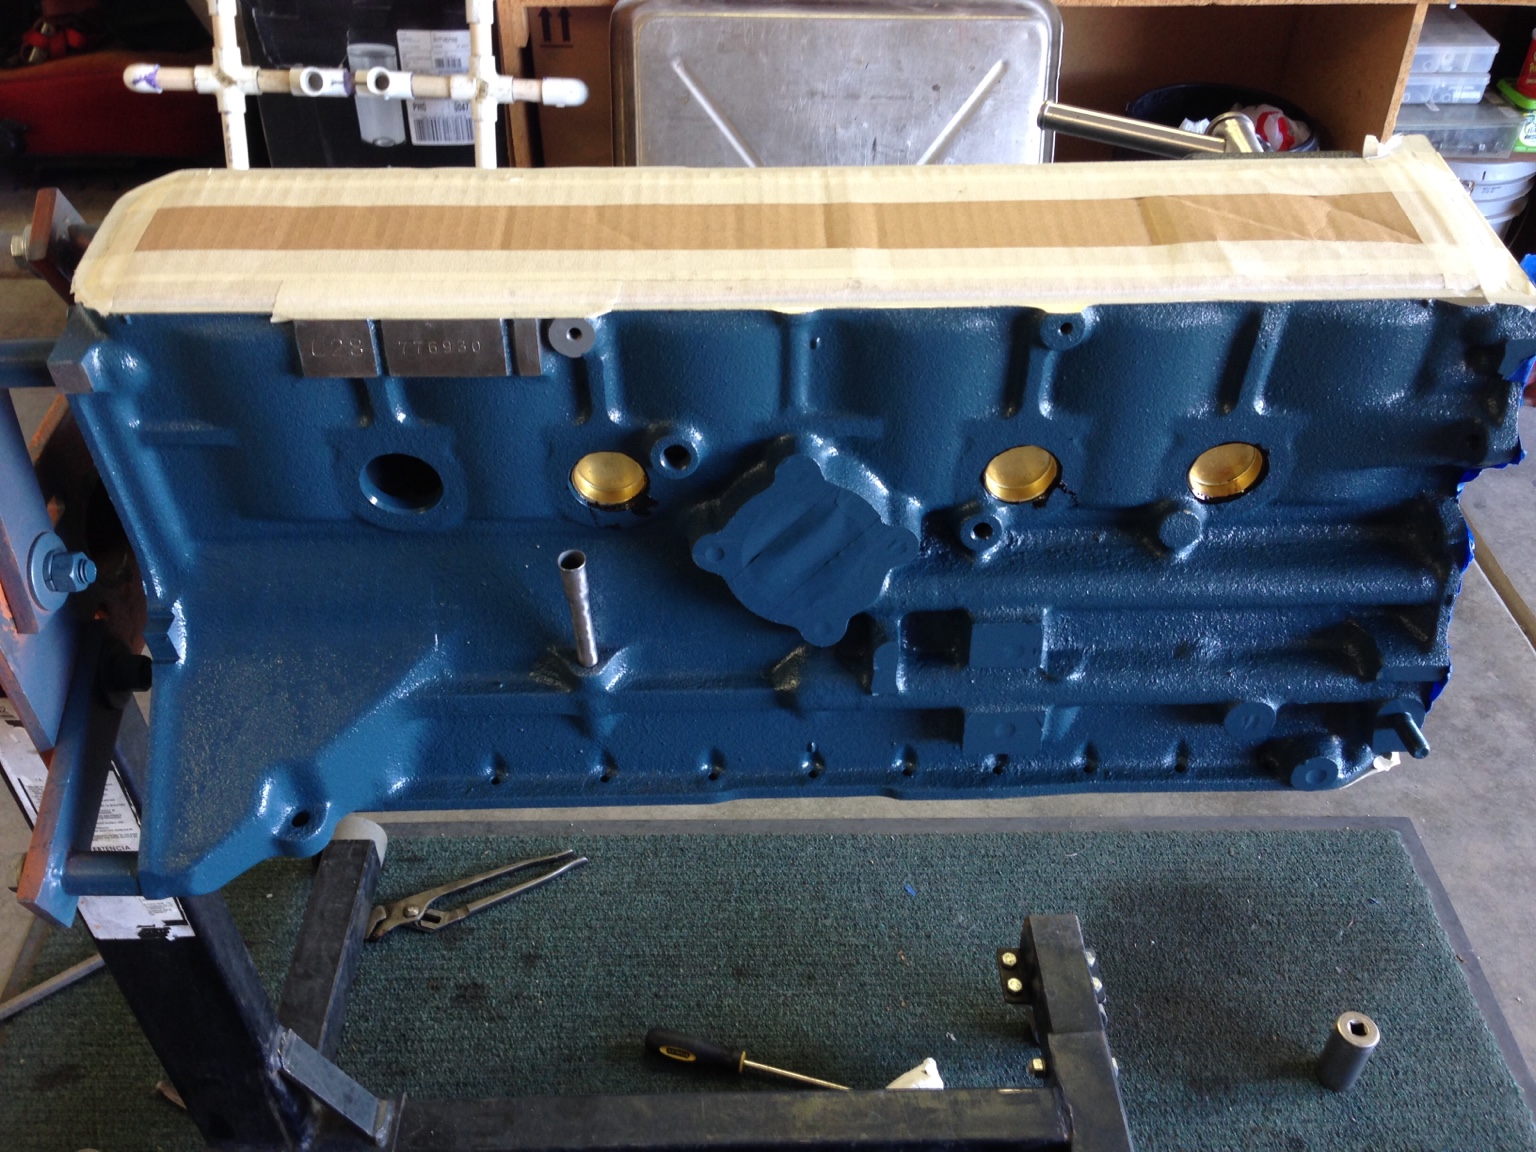
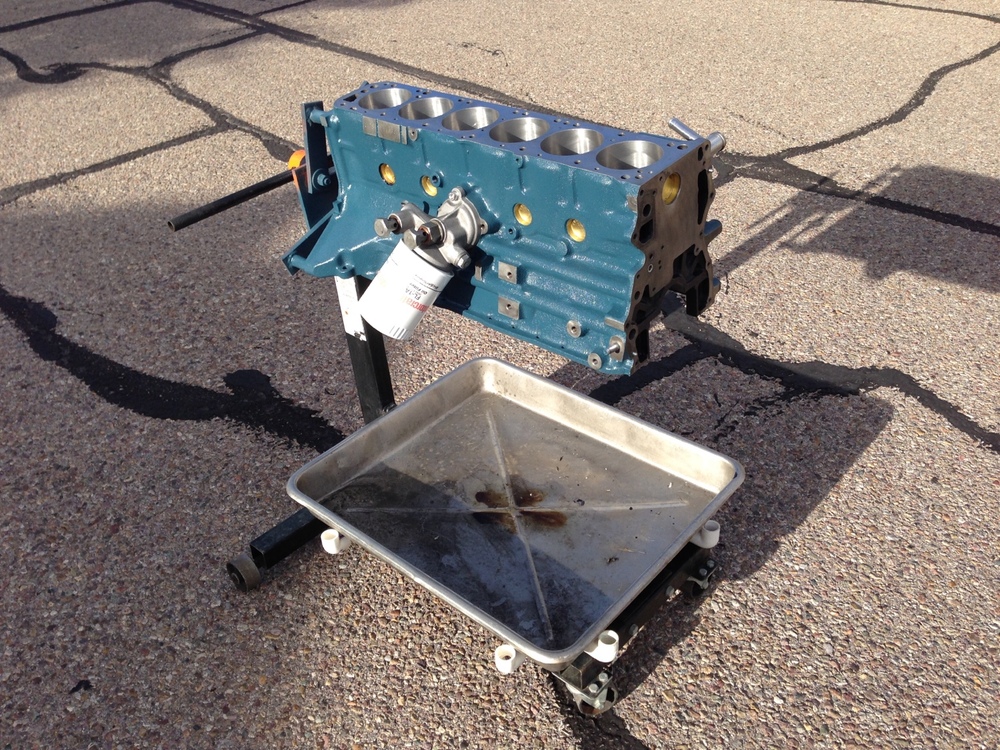
We are still researching the right direction for the interior, but have had good results with other solutions, such as Rustoleum Ceramic Enamel, which doesn't need to be baked on. --- In other news... Freeze plugs: And luscious Nissan blue paint on the block: More angles:


-
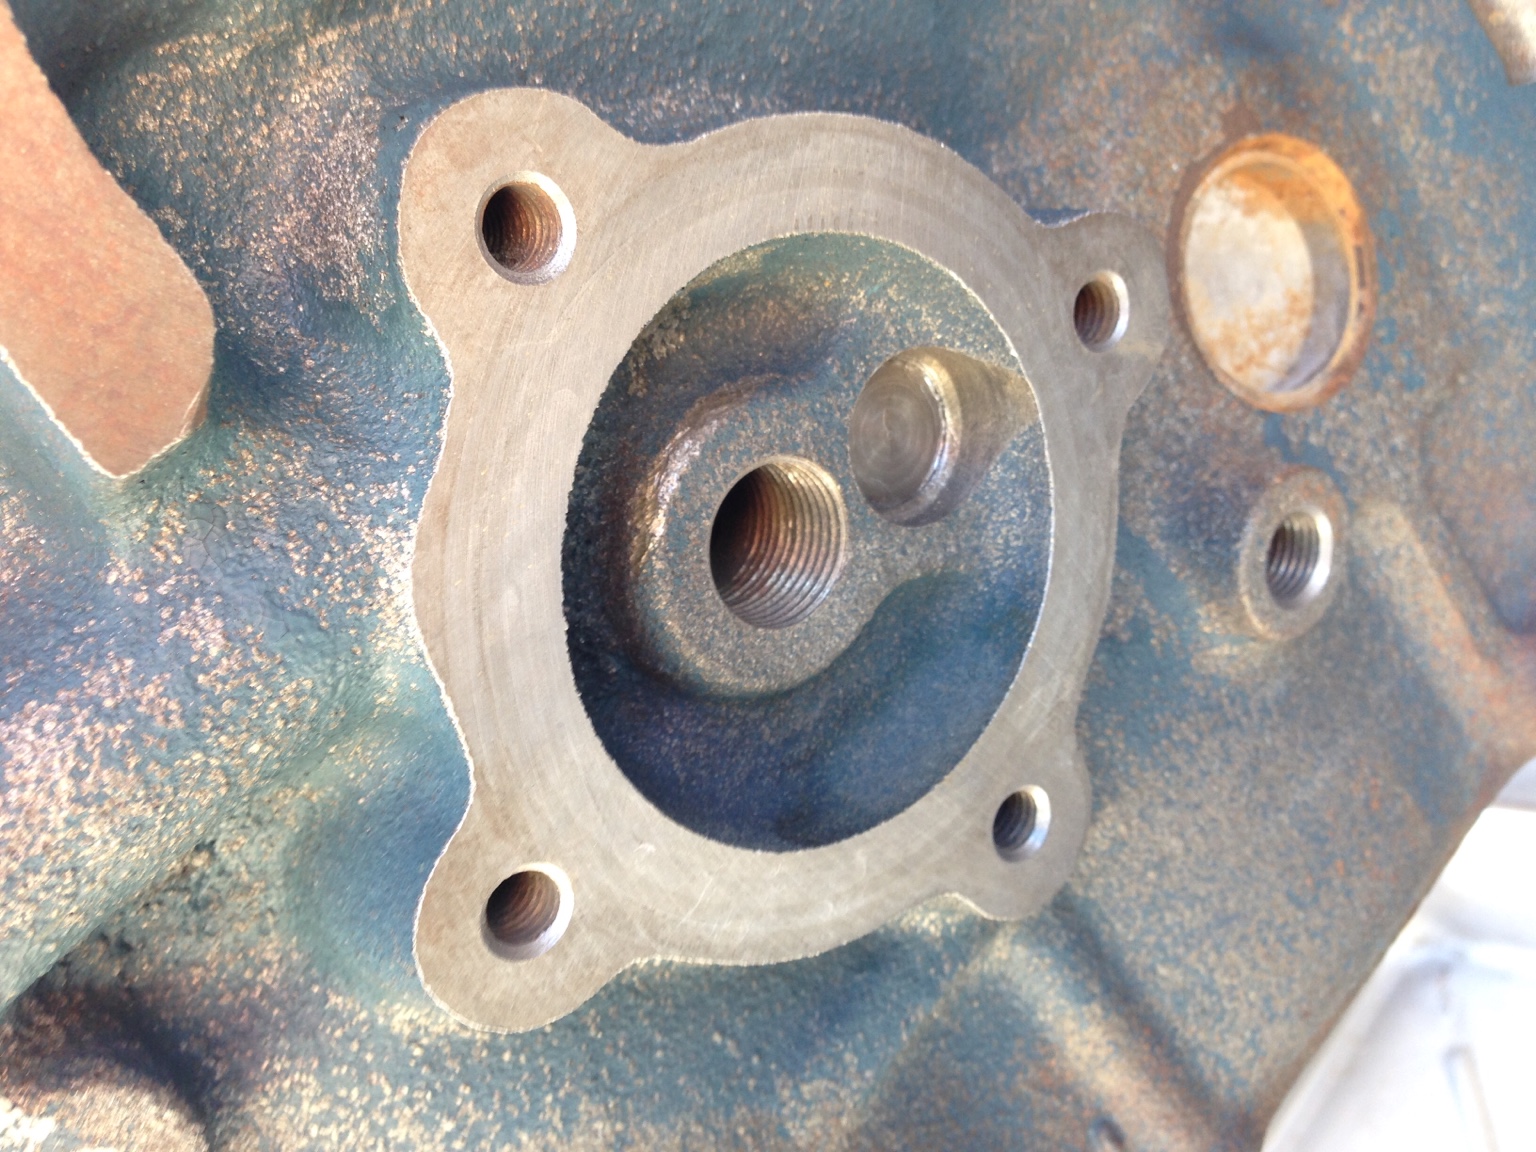
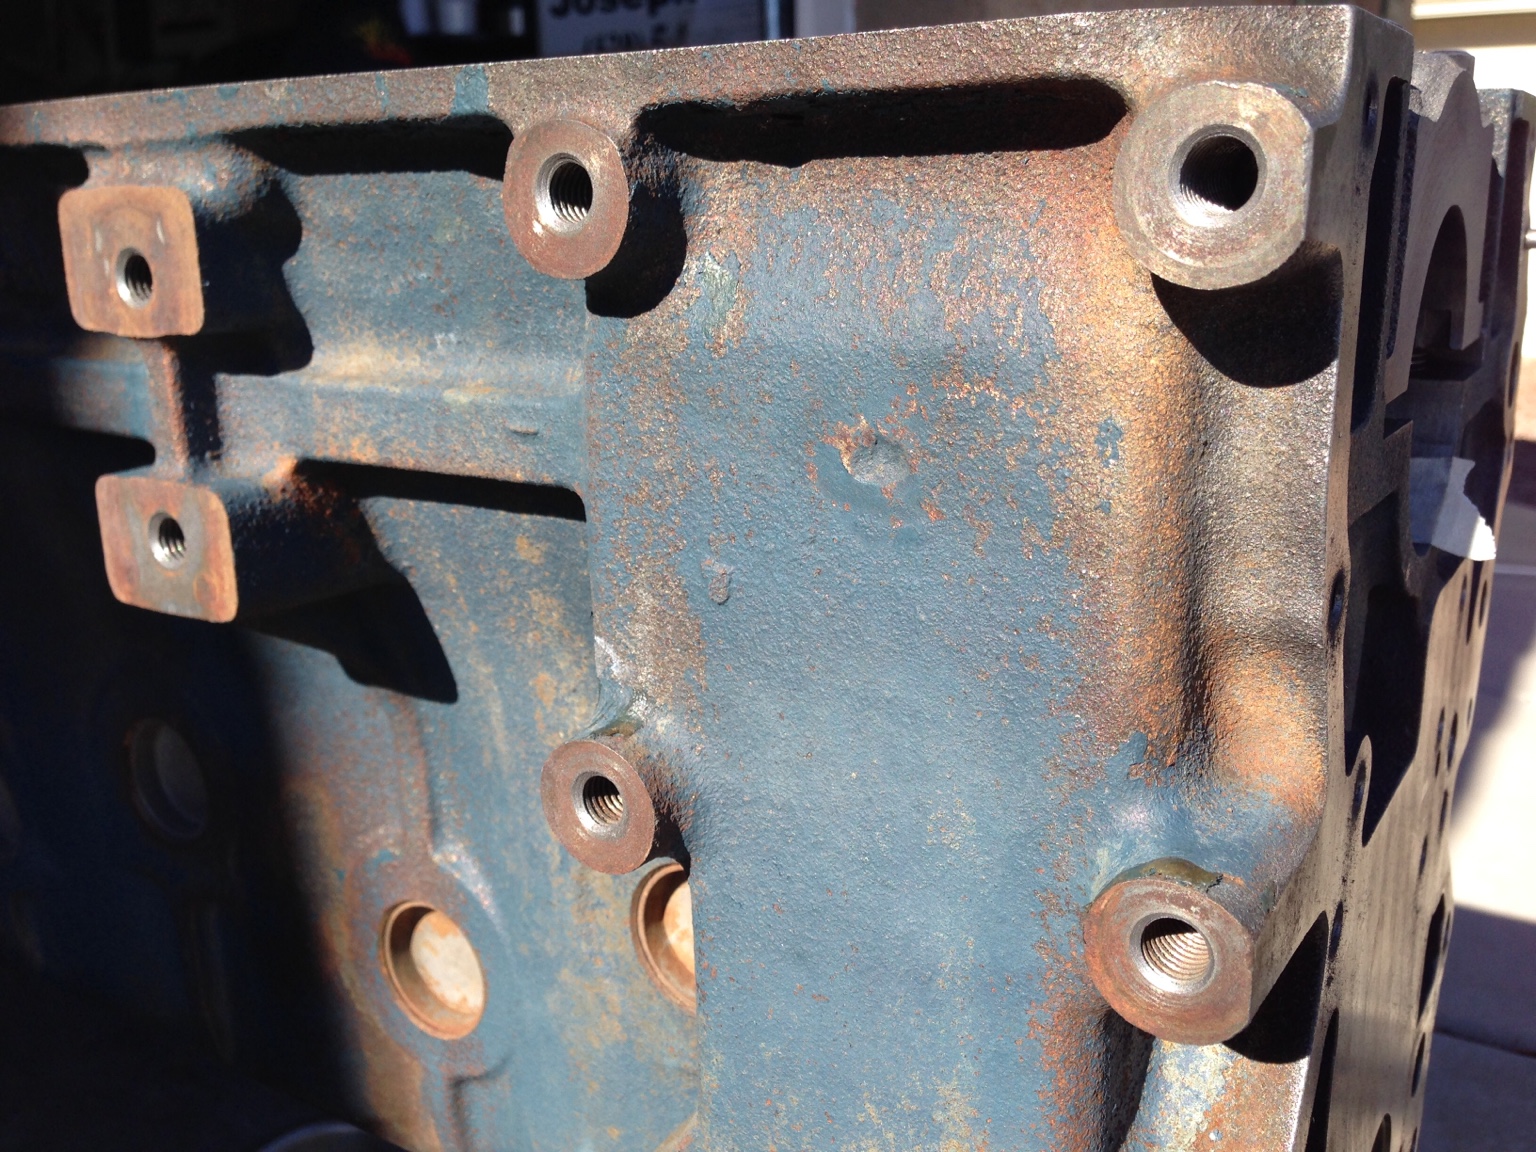
Update on the engine: Finished the crankcase grinding, cleaning, and painting Got the front oil gallery plug out and tapped the hole The paint looks very nice. Sprayed the cleaned block with prep-sol to remove oil residue, blew it dry with compressed air, then did the same with 99.9% alcohol Gave it two very light coats and one medium coat of light-grey ceramic engine primer paint Waited 20 minutes and used same method with the blue. Used less than 2/3 of the can.
-
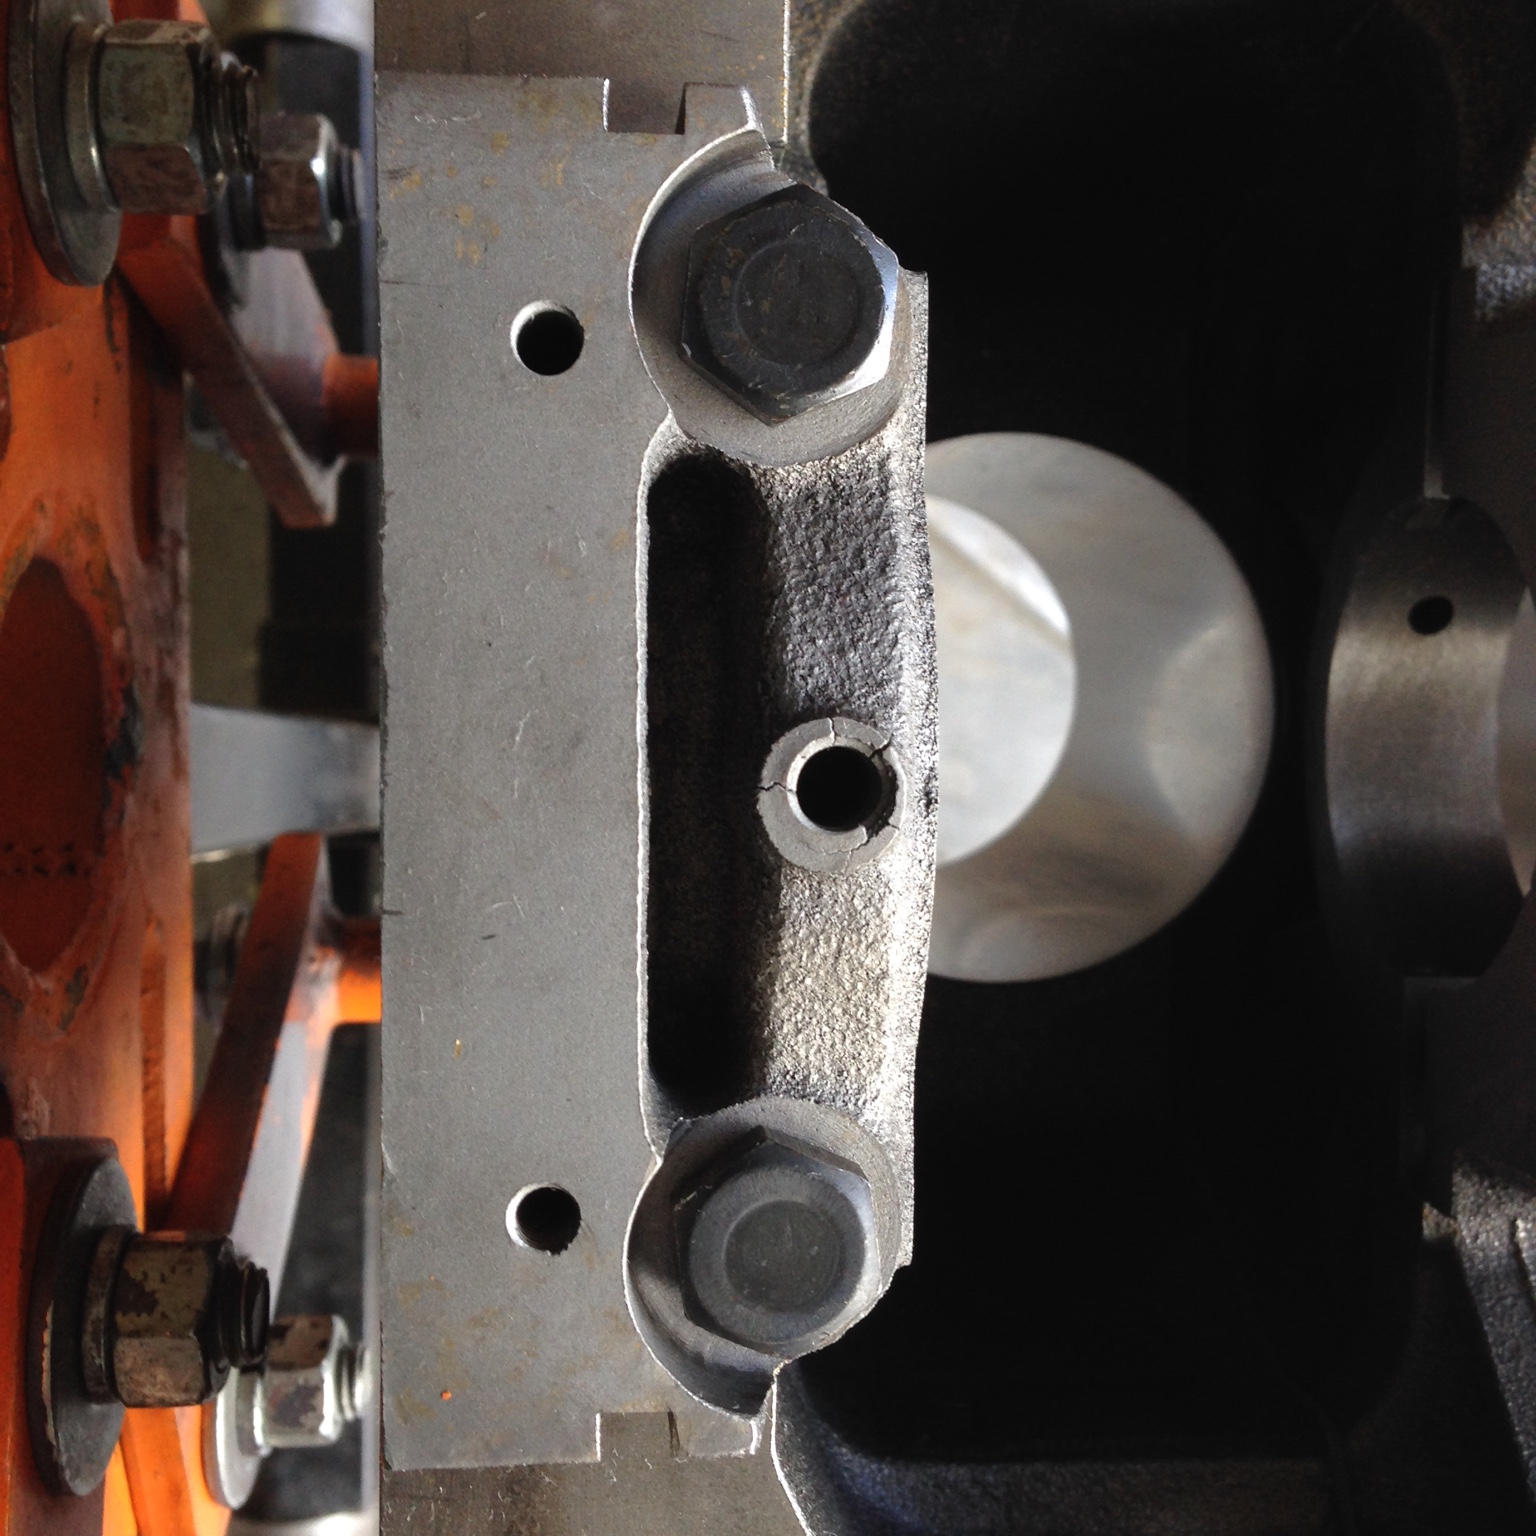
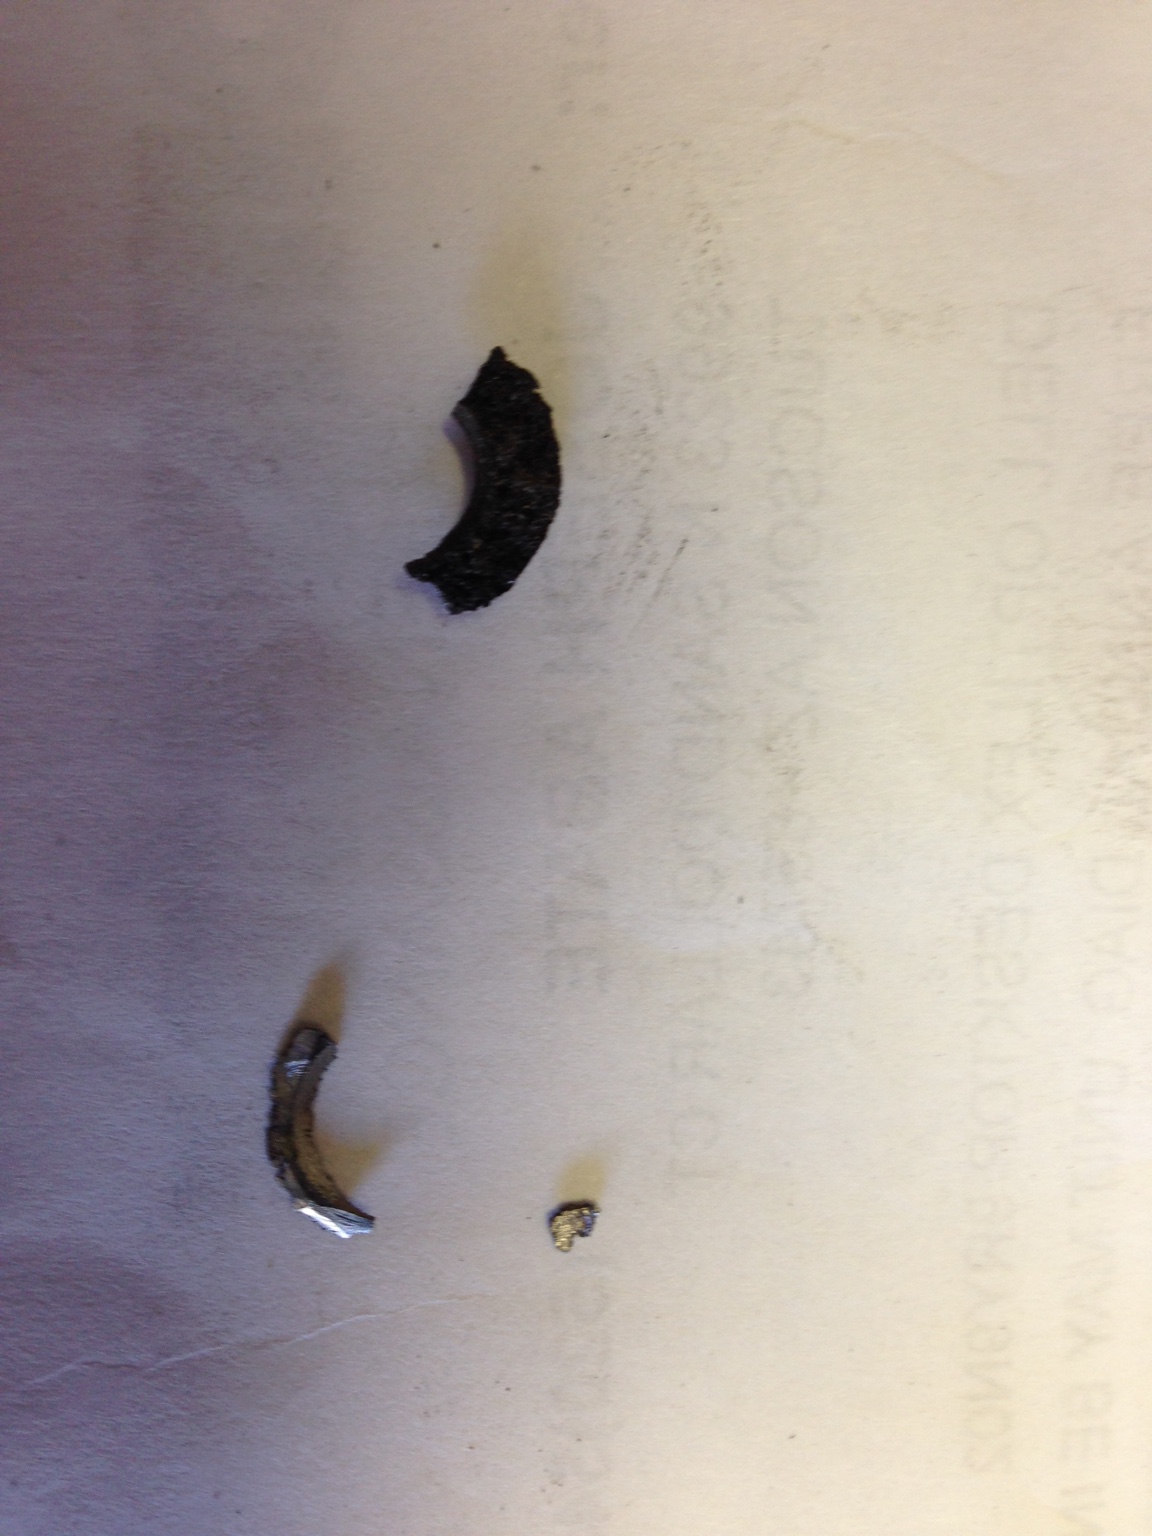
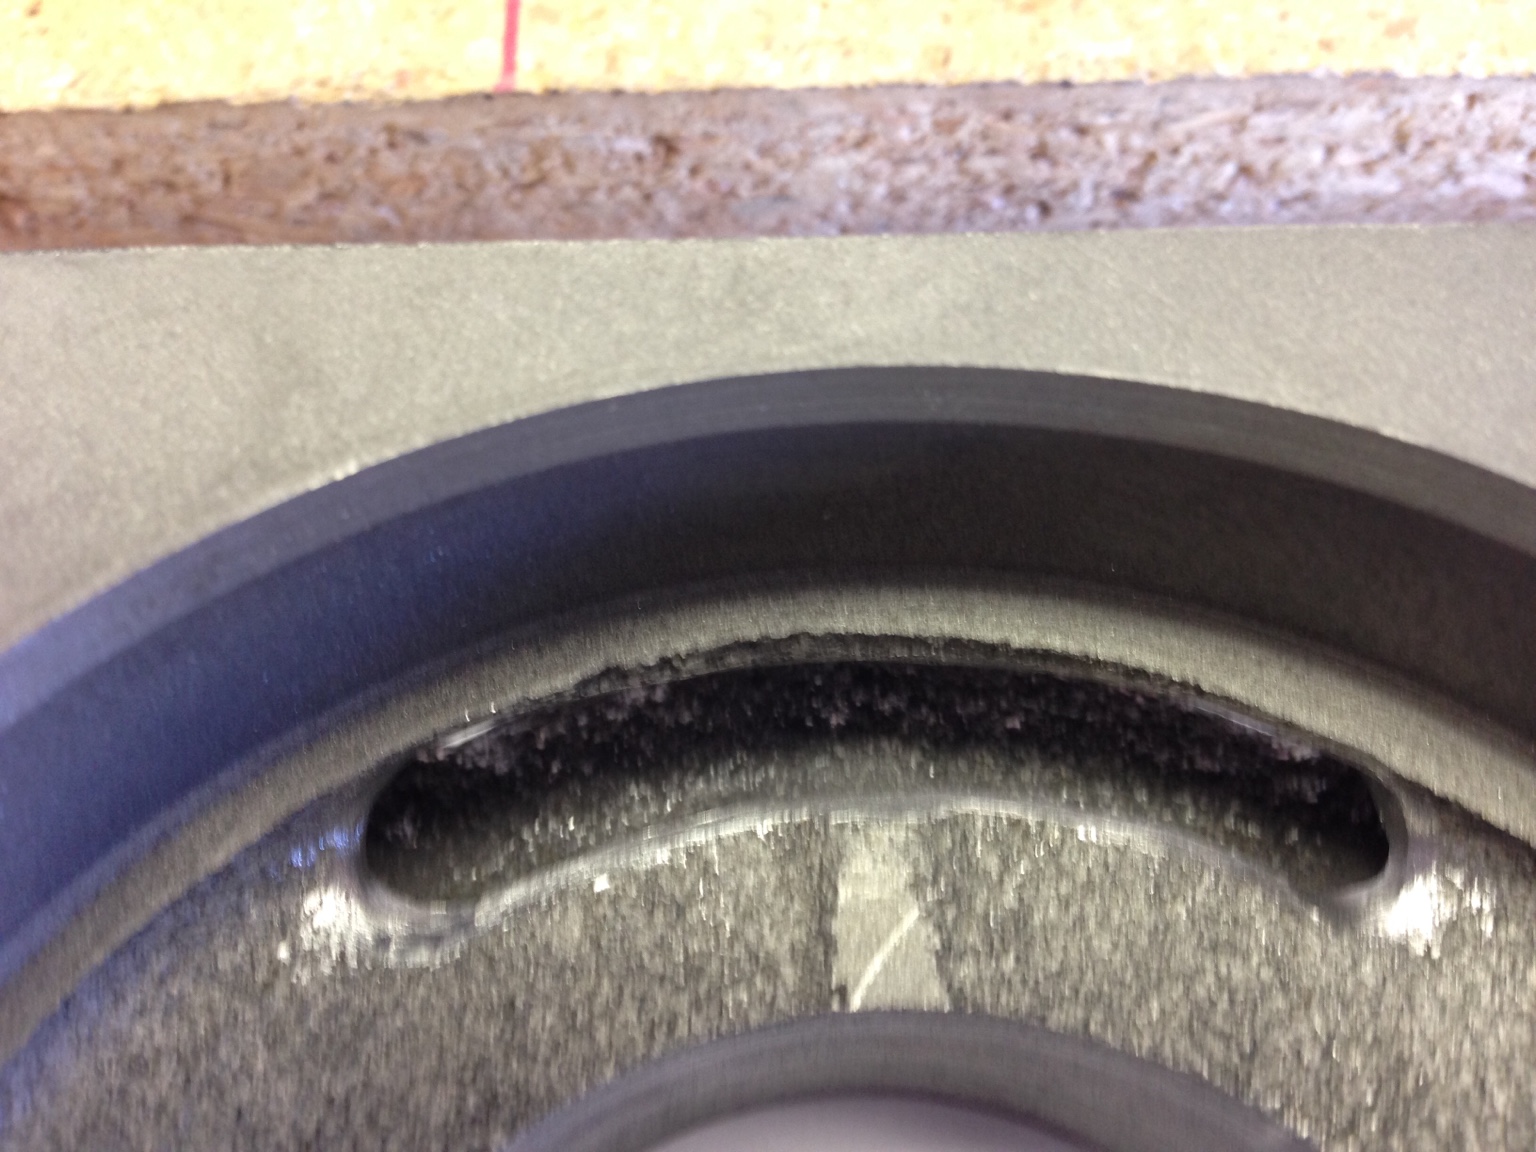
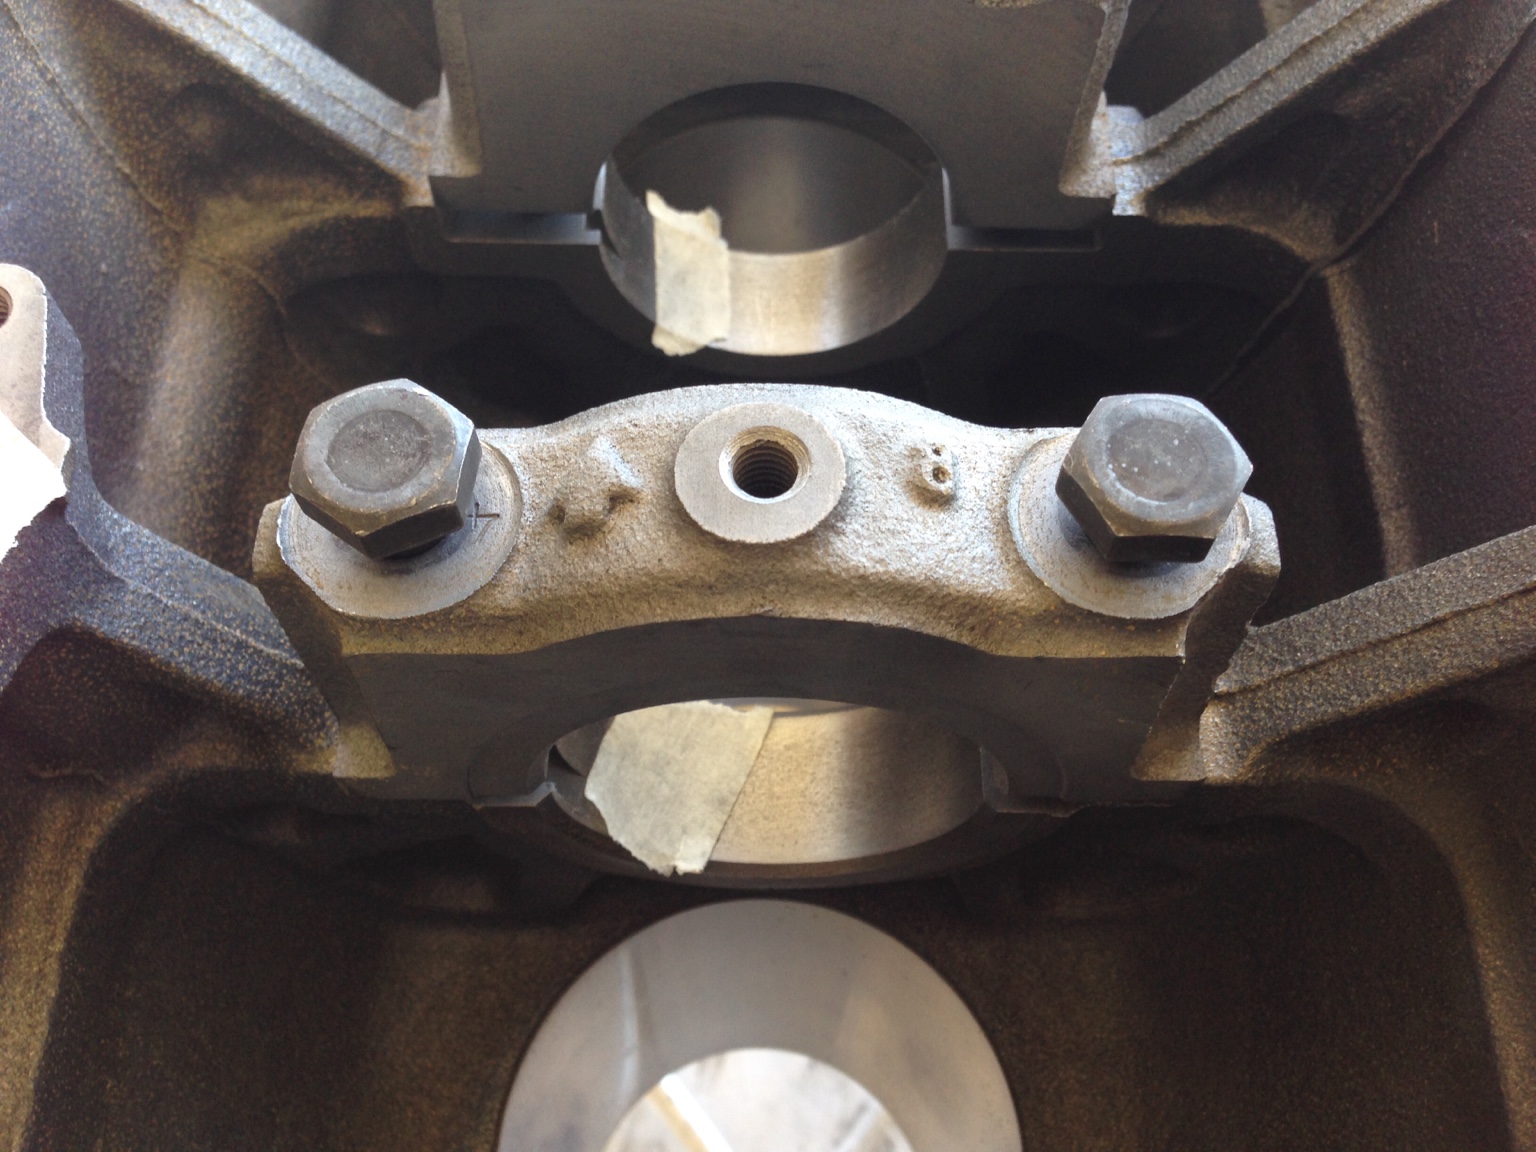
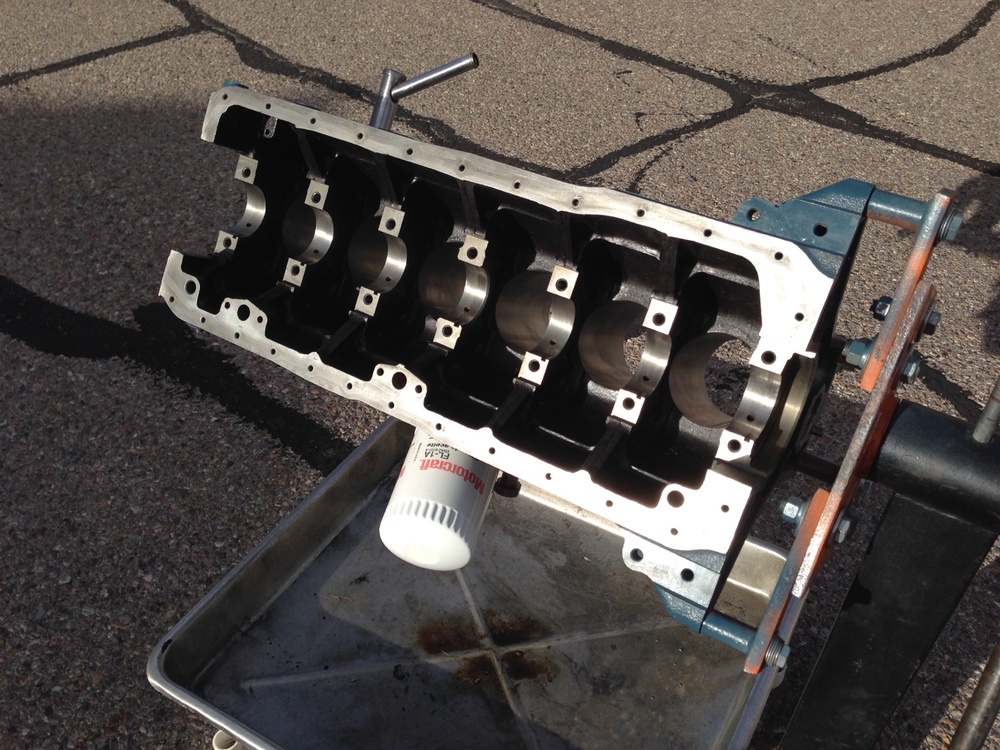
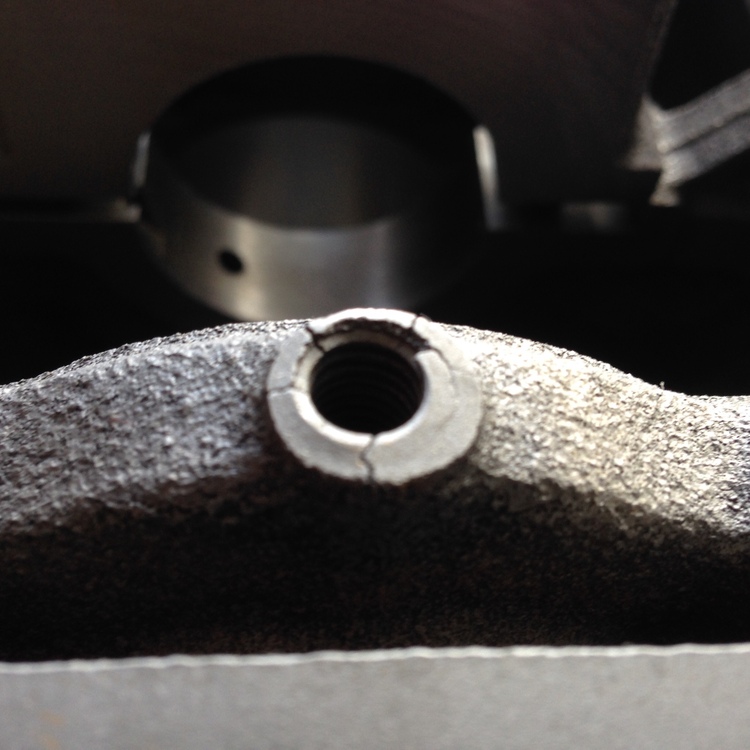
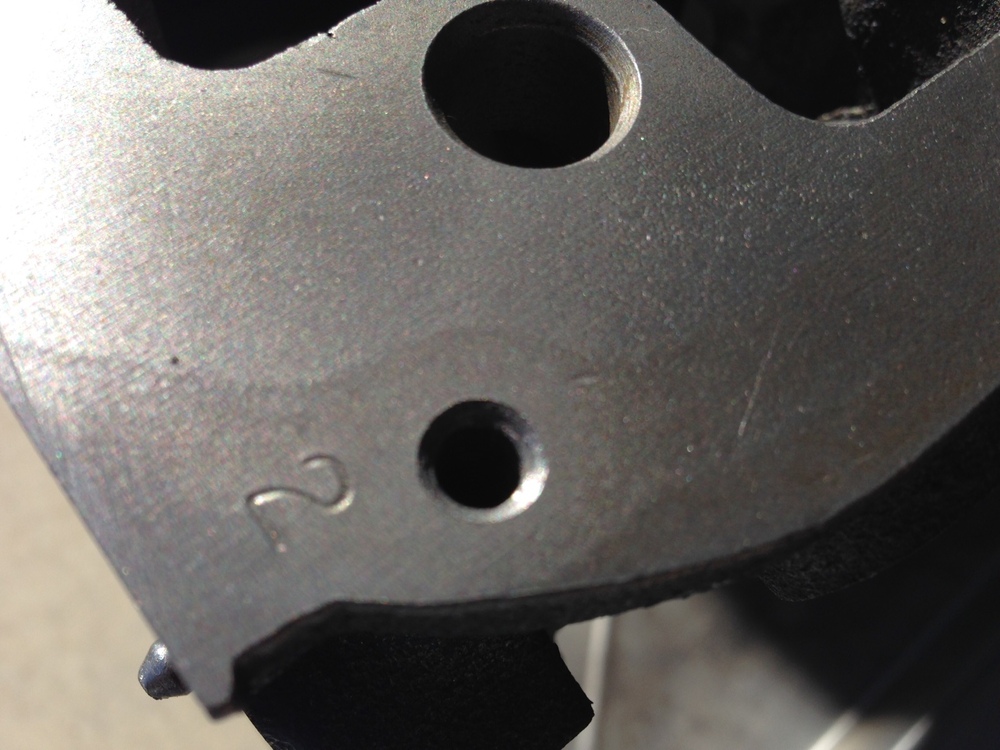
This is my rear main cap and the pieces that fell off while cleaning it up: Cleaning all these parts up by chamfering the threaded holes on the block and head - so that torquing the parts dosen't "pull" the threads: And some other shots of the various threaded holes (note the cleaned block): Casting flash on the crank case will be ground away: Tape being applied to all of the journal surfaces before any work is done:


-
Well, I screwed up. I bought a three-tube fuel rail instead of a two-tube one because I didn't stop and think about the fact that I might need to match it to the setup I am putting together. I'm not sure if it's for a '73 or a '74. Gotta investigate. Either way, I need to decide if I want to modify this one or buy another one with two tubes. Bummer. Sent from my iPhone using Classic Zcar Club mobile
-
eBay win! NOS Nikki MFP for $50 shipped. Huzza. Yeah, I know it's not original to a '73, but neither is my engine. The guy who has the Denki one I was watching wouldn't come down under $90 and I couldn't find an Ampco. I figured that since both of them have the same chance of being shot and needing a rebuild, and the replacement parts for both will be at least $50, why not get the one everyone covets for about half the price? 🤣 Sent from my iPhone using Classic Zcar Club mobile
-
Right, I just meant that I haven't put any effort into figuring out how to set them up yet. I fully expect that they will need an overhaul. Besides, they're filthy.
-
Update: I made a decision on my fuel system today, at least for the medium term. I got a very sweet deal on an N36 intake manifold, but it didn't have the gargantuan 260Z balance tube, so I scrounged around, located, and pulled the trigger on a Euro-spec E41 balance tube for about the same money I've seen the US-spec E46/E88 ones of for. Not a bad bit of internet shopping, if I do say so myself. I also have a set of 1972 SUs laying around that I grabbed at the imports show in Pennsylvania last year. I had intended to use them to familiarize myself with the SU carbs in case I want to rebuild the set on the L24 that I pulled out of my car, but now the plan is to rebuild the extra set and mate them to this intake setup described above. The implications are as follows: This system requires me to go smog-system free, which is okay by NJ-emissions standards, but makes me feel a little guilty. I probably won't be going with the triple-Mikuni system I was considering. That's okay because I'm saving at least $1,800 and haven't seen definitive data on any gains that system supposedly provides. The engine bay will be cleaner The character of the car will be closer to original The expense was small enough that I can still change my mind and resell these parts without it hurting This makes my exhaust-header options much more straight forward --- I feel really good about this direction. The parts are in the mail, so I'll let you know how they look when they arrive. --- A few things left to figure out later: Do I go with a mechanical fuel pump (the consensus for L24s and L26s is yes, but this is an L28)? How will I set up these carbs? Do I install the larger fuel lines I would have needed for the Mikuni system anyway?
-
I know this thread is a little old, but I have a clarifying question: Were the Atsugi and Ampco pumps designed with the donut/disk diaphragm rod that was used in the Nikki pumps, or did they use the t-shaped diaphragm rod from the Kyosan Denki pumps? I read in this thread that the Kyosan Denki pumps are replacement pumps that never came installed from the factory (unless I read that wrong), so I assume that all of them use the same rod shape as the Nikki and only the Denkis use the t-shaped rod. Edit: I also just found out that there are two different diaphragm-rod diameters, which makes it even harder. Ultimately the only rebuild kits available are for Kyosan Denki pumps, so I think that might be the way to go. I also noticed that none of the Kyosan Denki pumps I'm seeing on the internet have the staple in the diaphragm tab.
-
I think I have 16 hours of mandatory metalwork, max. I really just need to get the floor welding finished. The rotisserie is more for stripping the underside of the car than welding, but since I still have some I'm thinking get it hung before I finish it. Technically, I could do everything without one, but I'm thinking of going around all the seems and stiffening up the car and it would just be easier to do it standing up.
-
Are you talking about a shop, a restorer, or just someone with a lot of experience? I haven't found one myself. I've found that this and other forums, plus Google, are enough to allow me to do it myself.
-
Okay, so here's the plan on moving this forward, since I just got our property tax bill: Strip what parts I can reach without lifting the car Buy a rotisserie in late February Drop the suspension Weld everything that's is just tacked or stitched up solid Strip all of the paint off the car Send it of to get the remaining paint media blasted off if necessary Body Sealer Have the body shop evaluate the metal Epoxy primer Put it on ice for a few months Work on the suspension while I save money
-
I've been digging around the internet for the best deal on a rotisserie and this is what I have found (I am not really considering lifts without jacks but might go there if I have to. I am not considering making a rotisserie for a variety of reasons, even though I am certain I could make a fairly nice one on my own, so save your breath). In every case I will need to buy or fabricate the brackets that attach the rotisserie to the car, so I did not factor in those costs. After comparing a ton of them I have four finalists listed in descending order by price: AutoTwirler Elite — $1,837.77 ($1,285.00 + $552.77 Shipping to NJ) via JMC Automotive Equipment This has some really nice features, notably a screw to adjust the T-arm for correct center of gravity and 3" tubing, but it's not worth the price after shipping so it is off the table. Redline ROT3K — $1,406.49 ($1,199.50 + $82 shipping + $124 for lift gate service) This is pretty much what I want. It's really similar to the auto twirler, but a bit less expensive, powder coated, and made out of 3" tubing. Summit Racing Rotisserie — $1,308.97 ($1,159.97 + $149.00) Pretty much the same as the Redline one above. Weaver W-Rotisserie — $1,195.00 (free shipping) Comes with lots of extra goodies, including door bars, but none of the brackets will work on our cars so they are kind of a waste. I'm not sure I need the door bars, either. I DO like the crank they have for rotating the car, but I think if the center go gravity is dialed in that becomes unnecessary. It's also the only one in this list that doesn't have the balancing screw. Eagle Equipment Adjustable Height Rotisserie Lift — $1084 ($895 - 5% military discount + $128 Shipping to NJ + $140 for lift gate service) from manufacturer Might be okay. It has a screw for adjusting the center of gravity for the T-arm, but this one is 2.5" tubing. Tuxedo CR-3000 — $995.00 (free shipping) via Best Buy Auto Equipment Looks kind of rickety, but everyone who sells them says they never get complaints, and I don't see any bad reviews. I expect that this will come with hardware that needs to be replaced. It's also 2.5" tubing.
-
Yeah, totally agree. Funny because I think the complete wide body kit looks alright, for a wide body kit anyway. Sent from my iPhone using Classic Zcar Club mobile
-
I had some down time at work today, so I did a quick photoshop mockup of what the Rocket Bunny Pandem Fairlady front valance could look if they made a narrow body version. I had been considering having a 3D designer make me a CAD file of this… (Original photo) ... but now I'm thinking that I don't love it as much as I thought I would.
-
-
Title says it all. I'm looking for a complete variable height rotisserie with jacks to get my car ready for paint and am trying to save money by not buying a brand new one. Please PM me with the make, model, and your shipped price to 07040.
-
I wish they were louvres. I was thinking they looked pretty rad when I looked at that picture on my phone, but that is the mat I bought to stand on when I am welding. Maybe someone should use that as inspiration to make some!