Matthew Abate
Free Member
-
Joined
-
Last visited
Everything posted by Matthew Abate
-
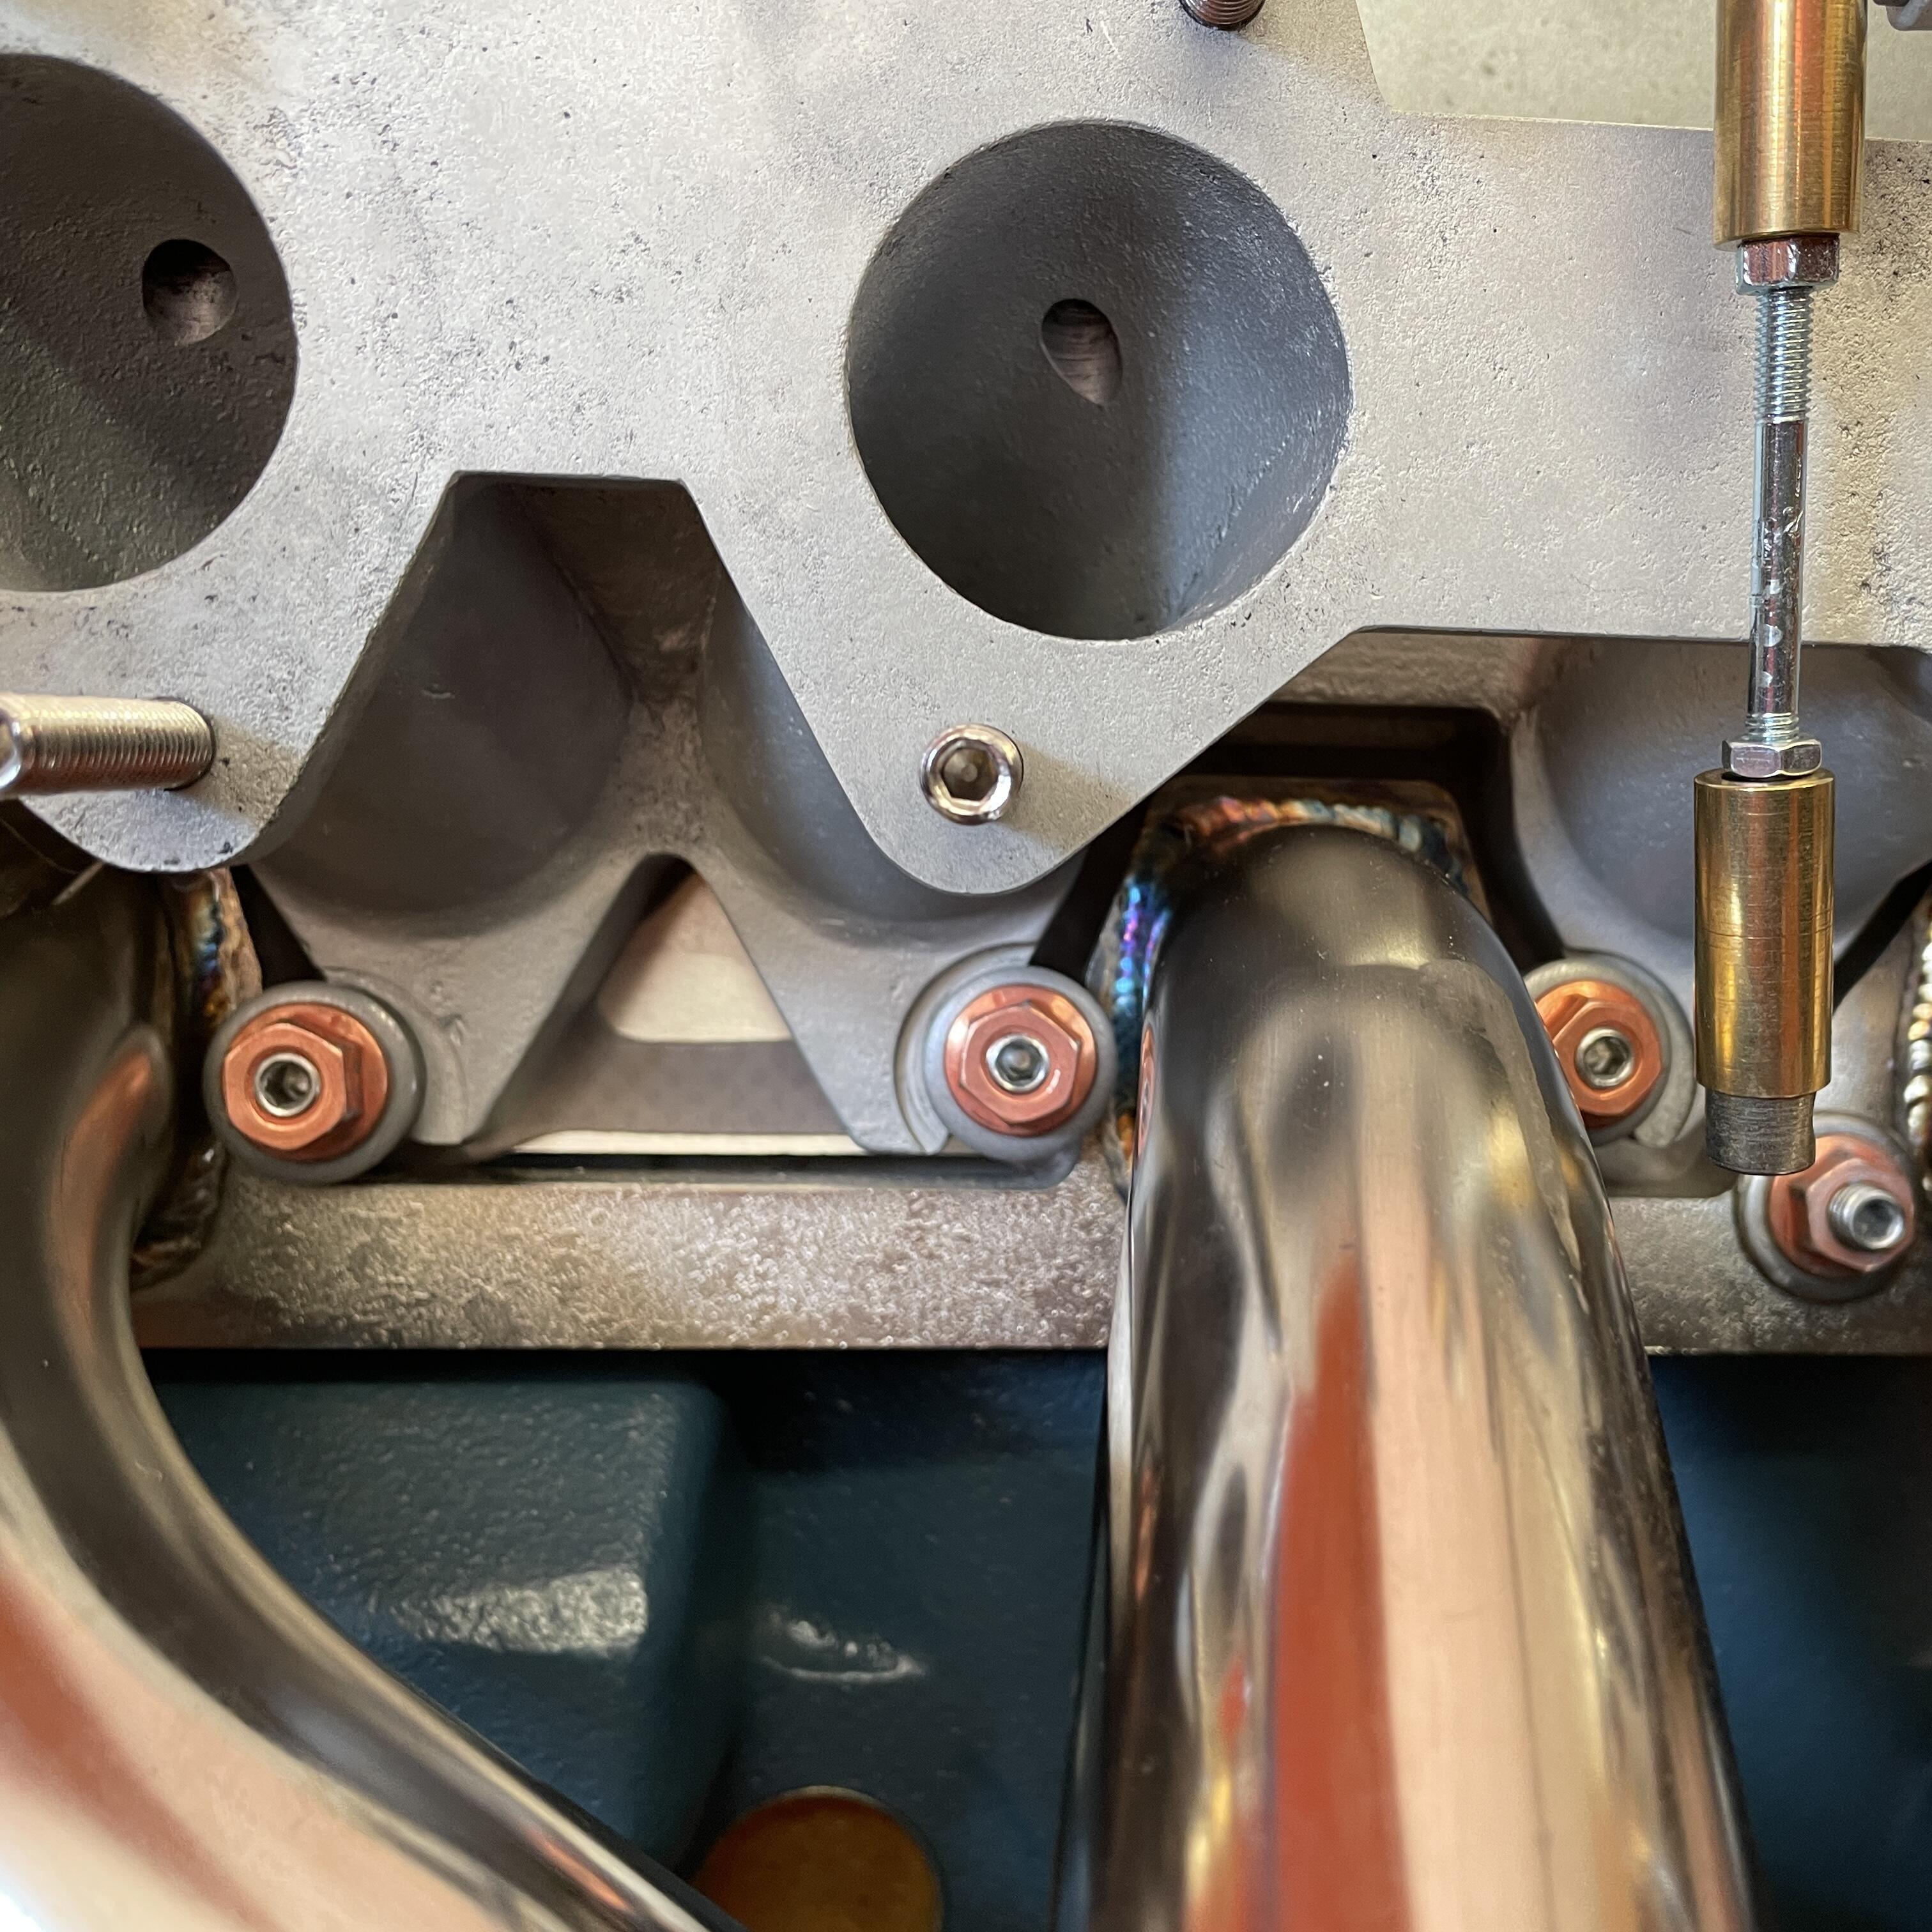
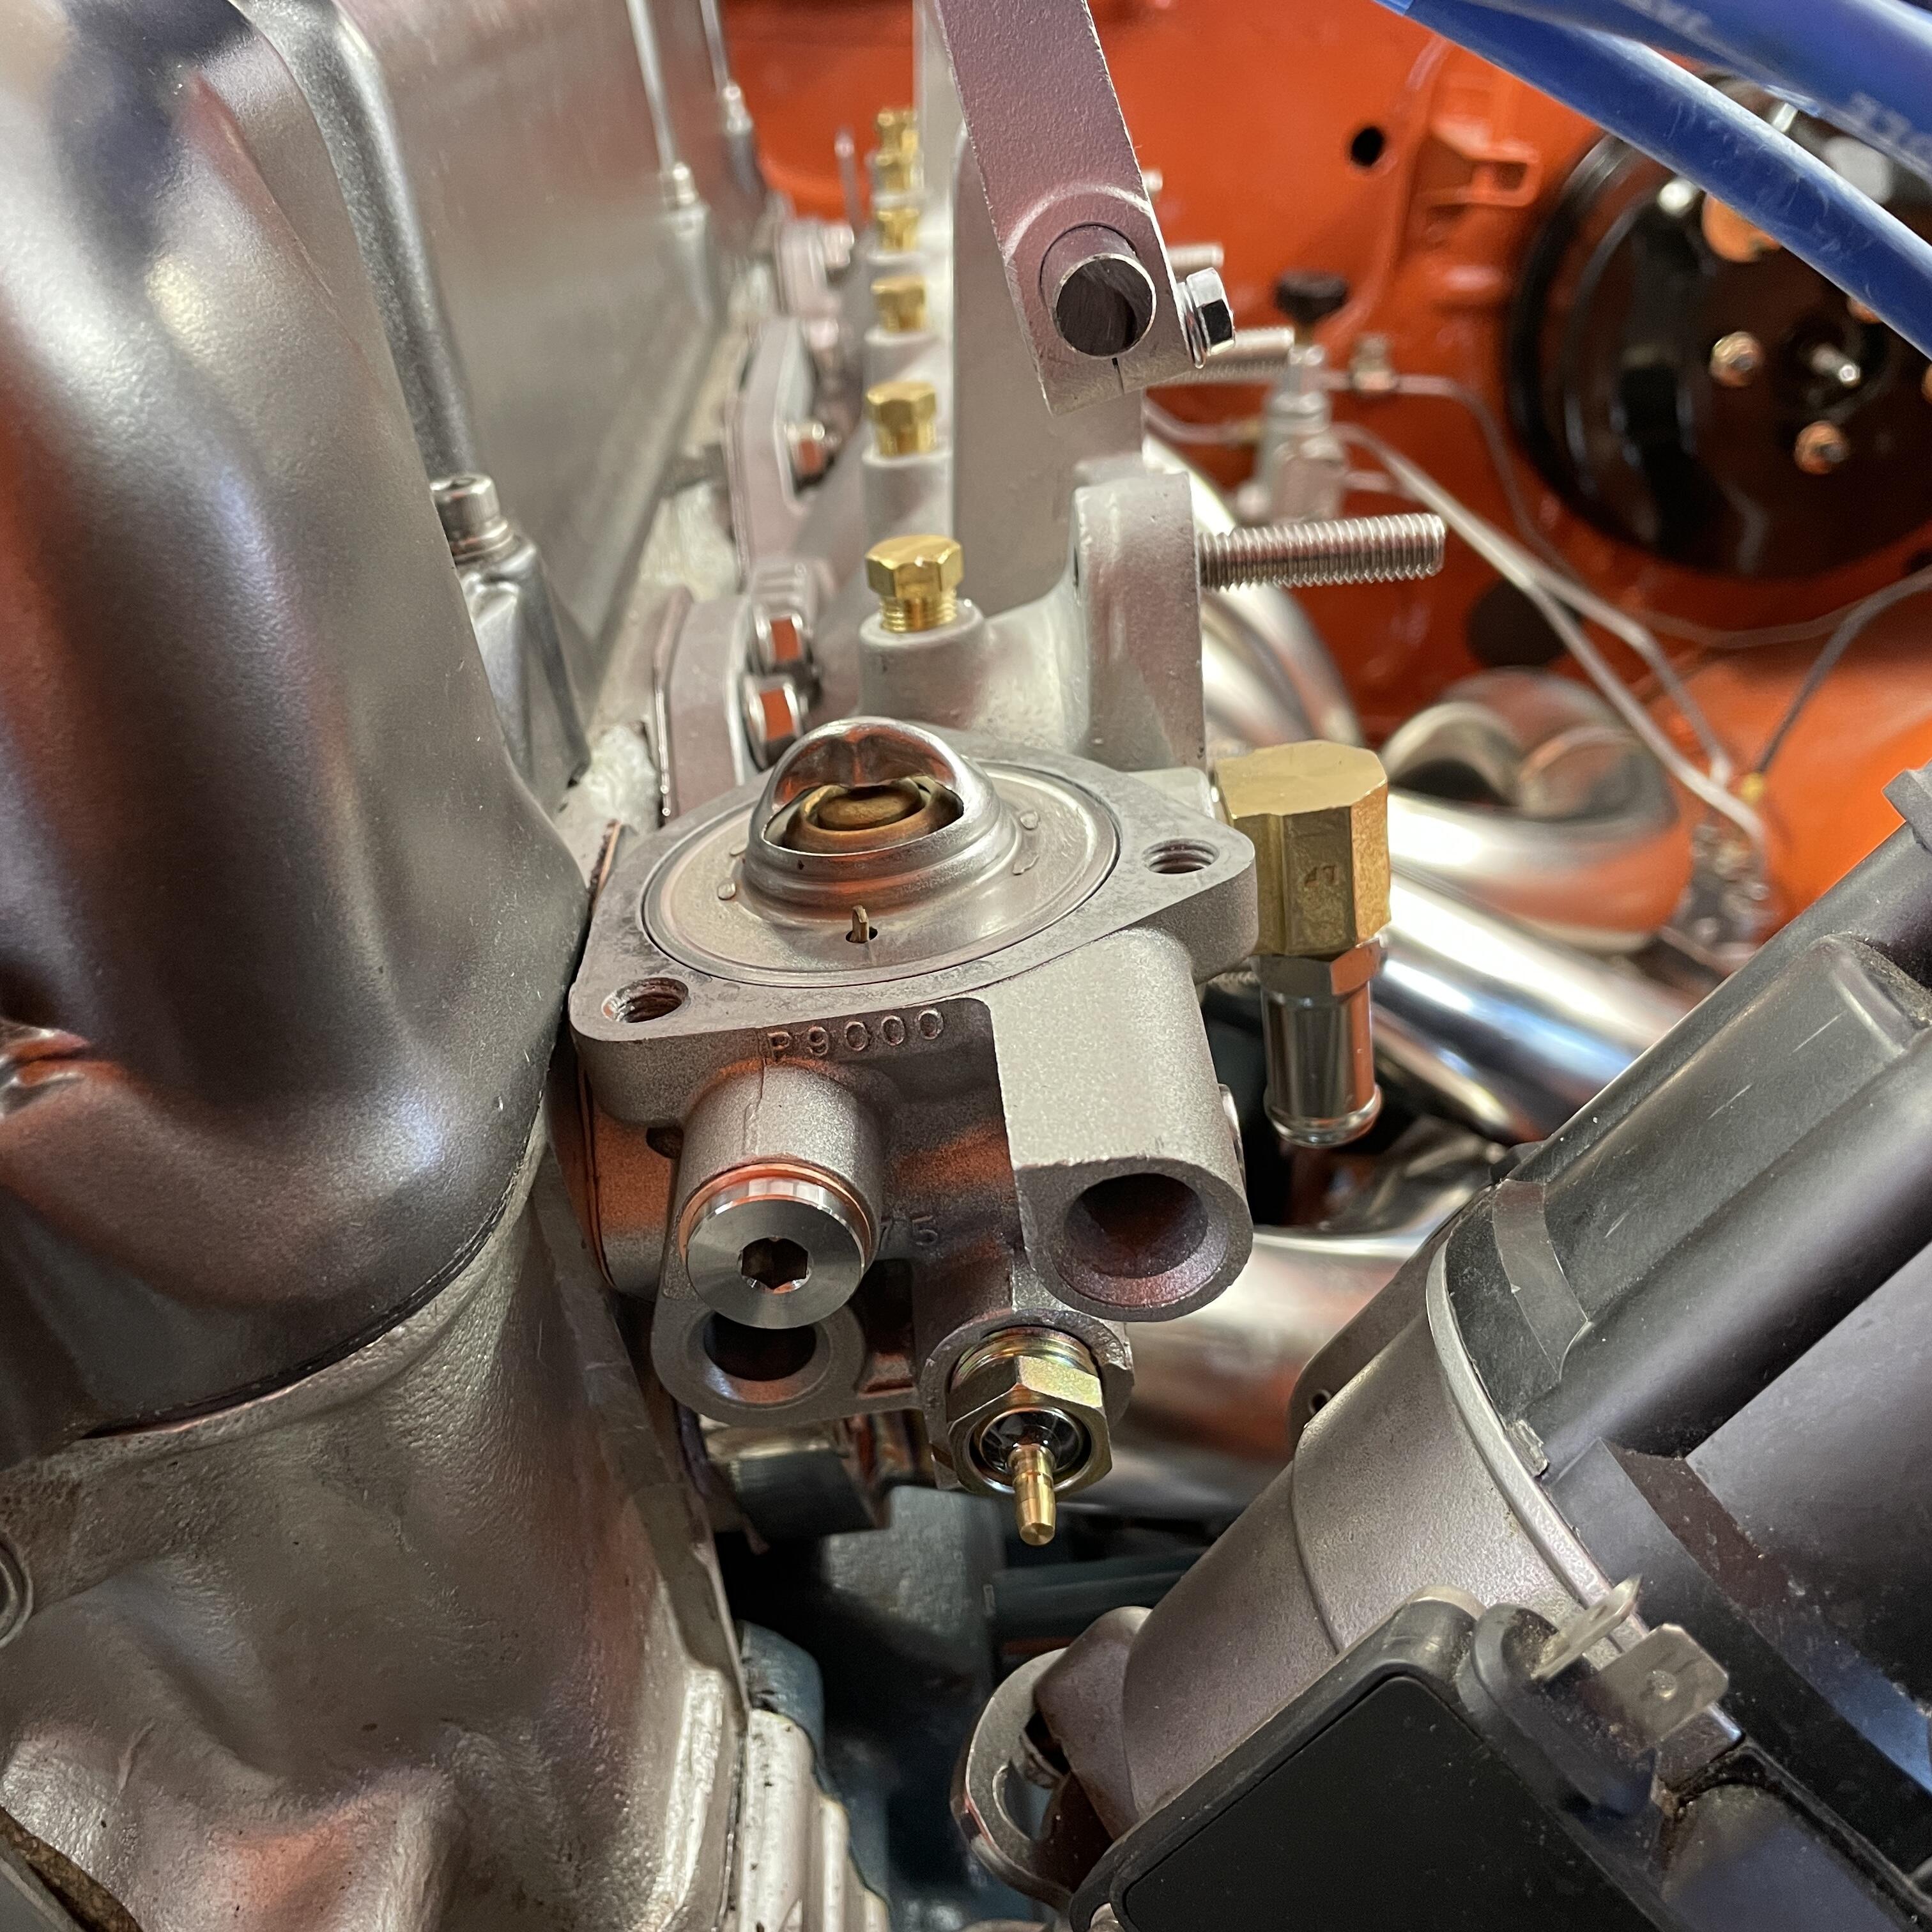
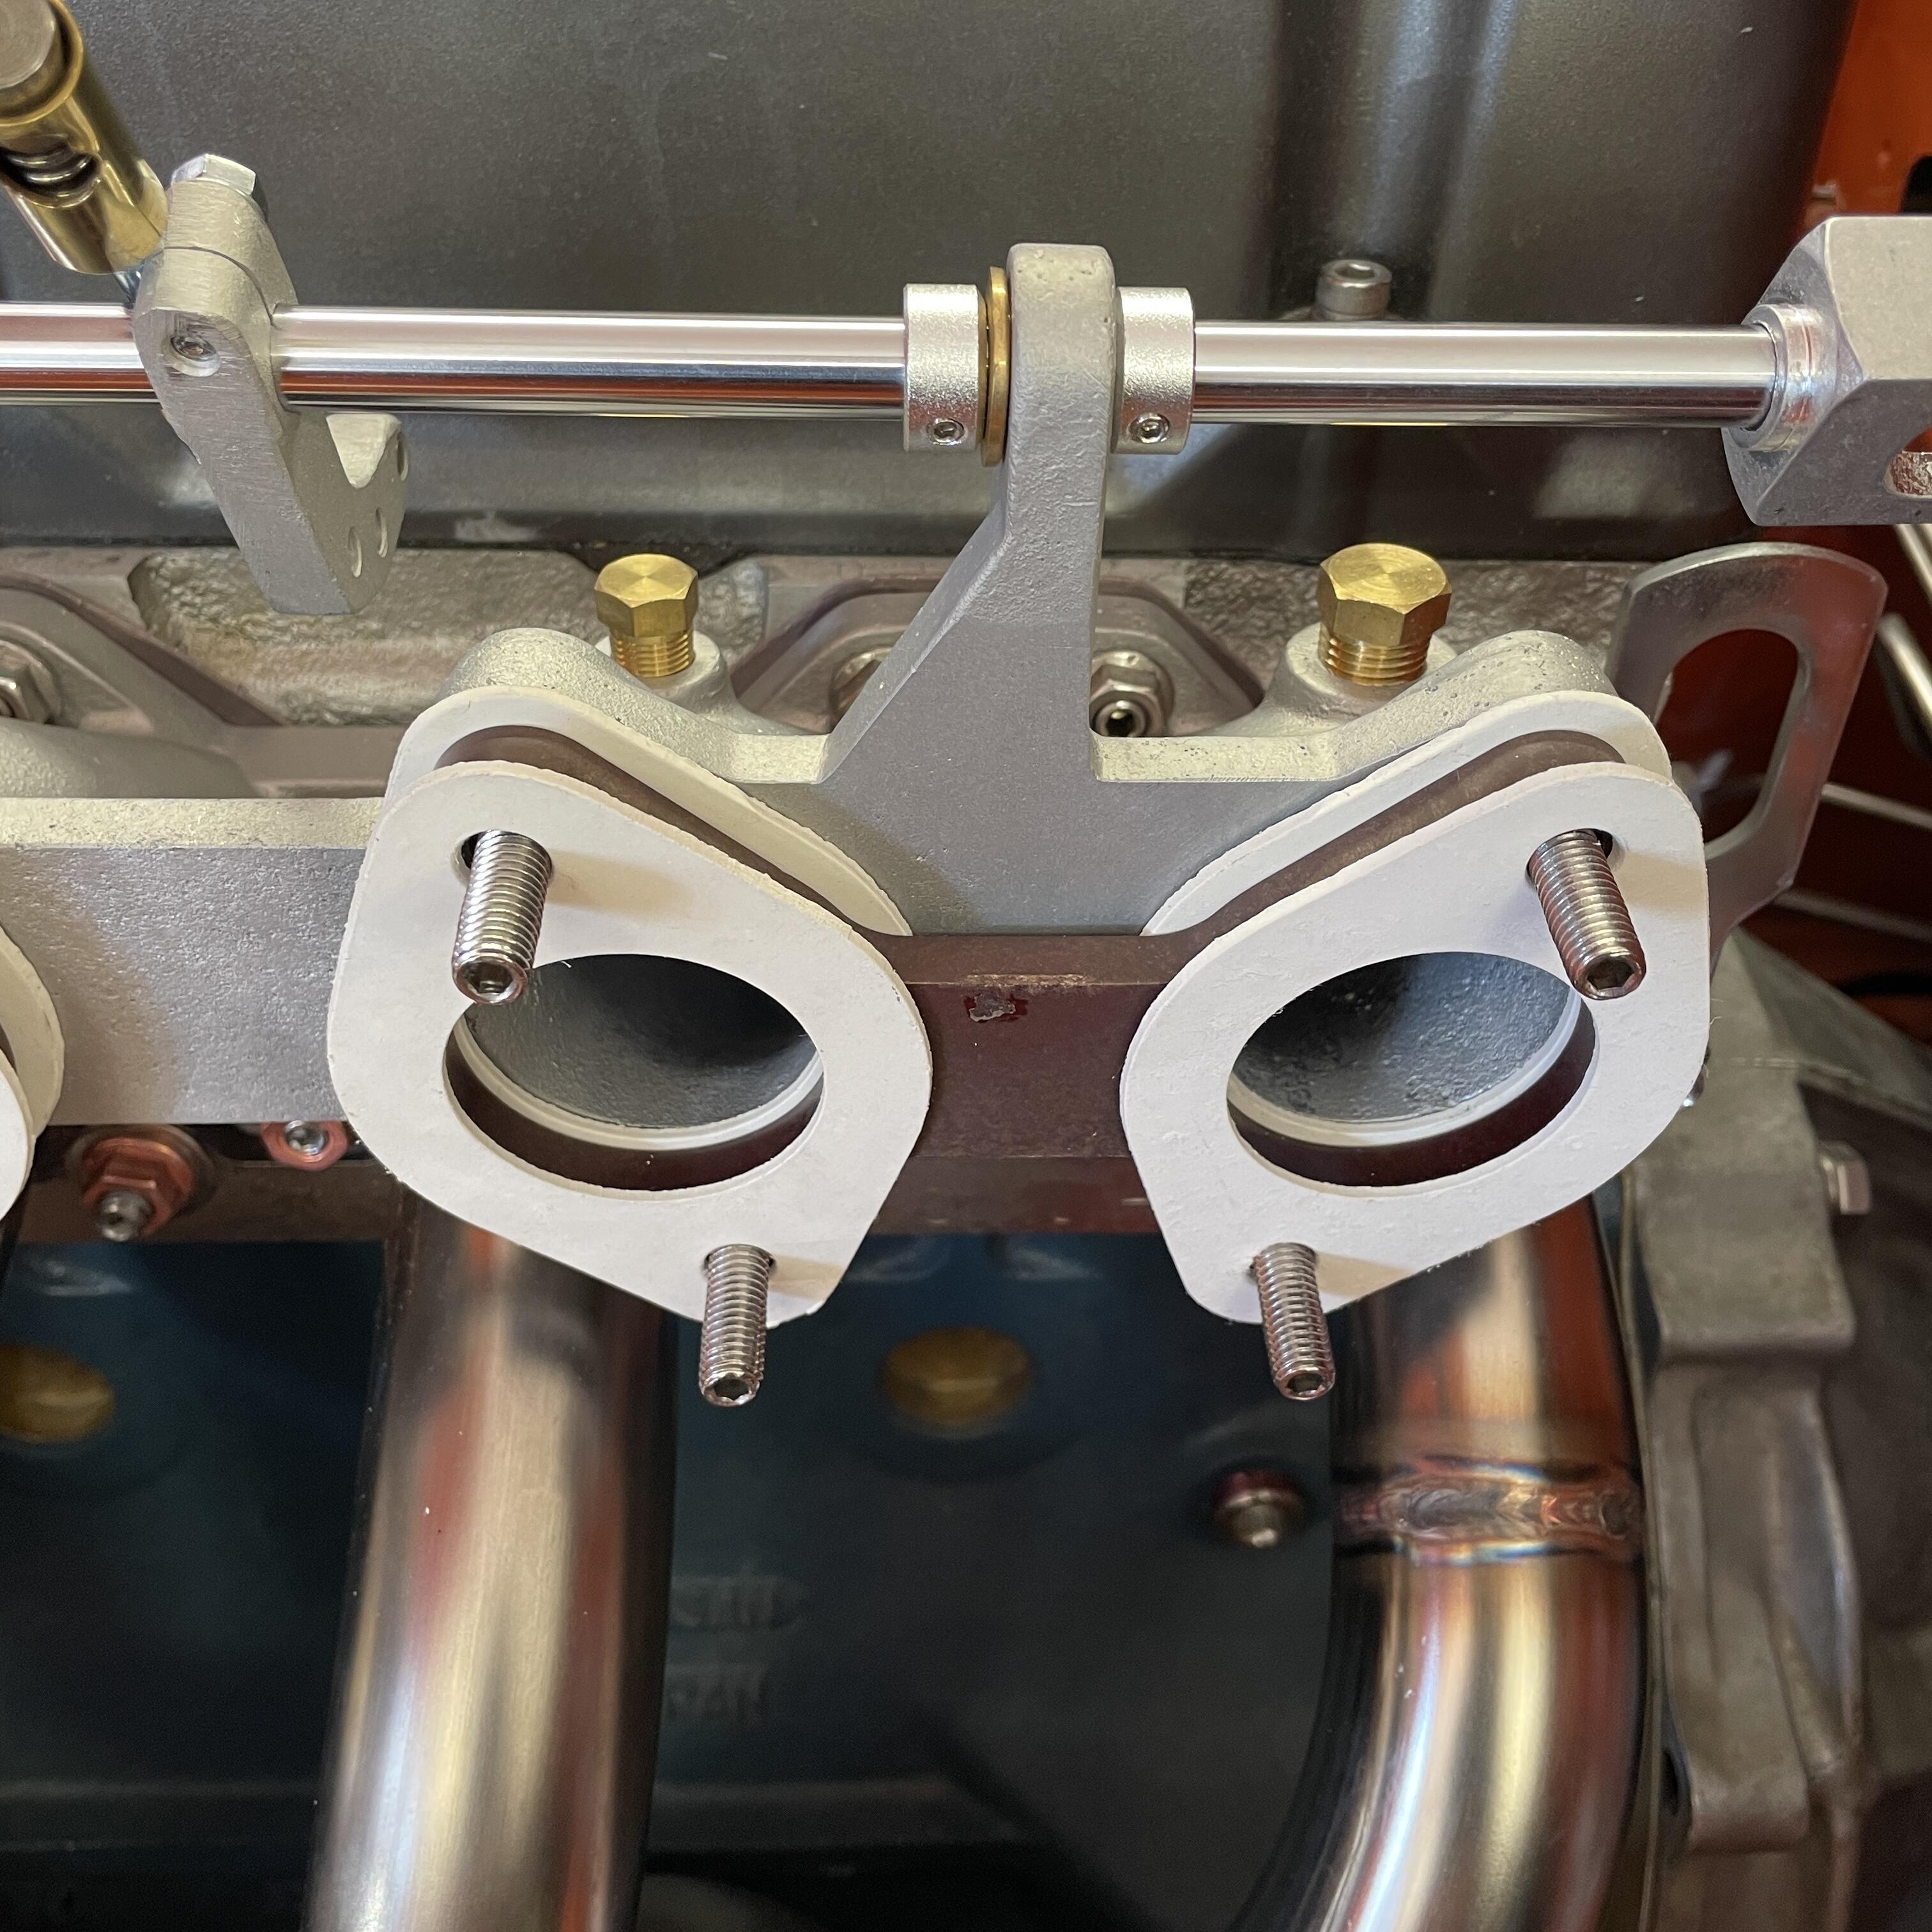
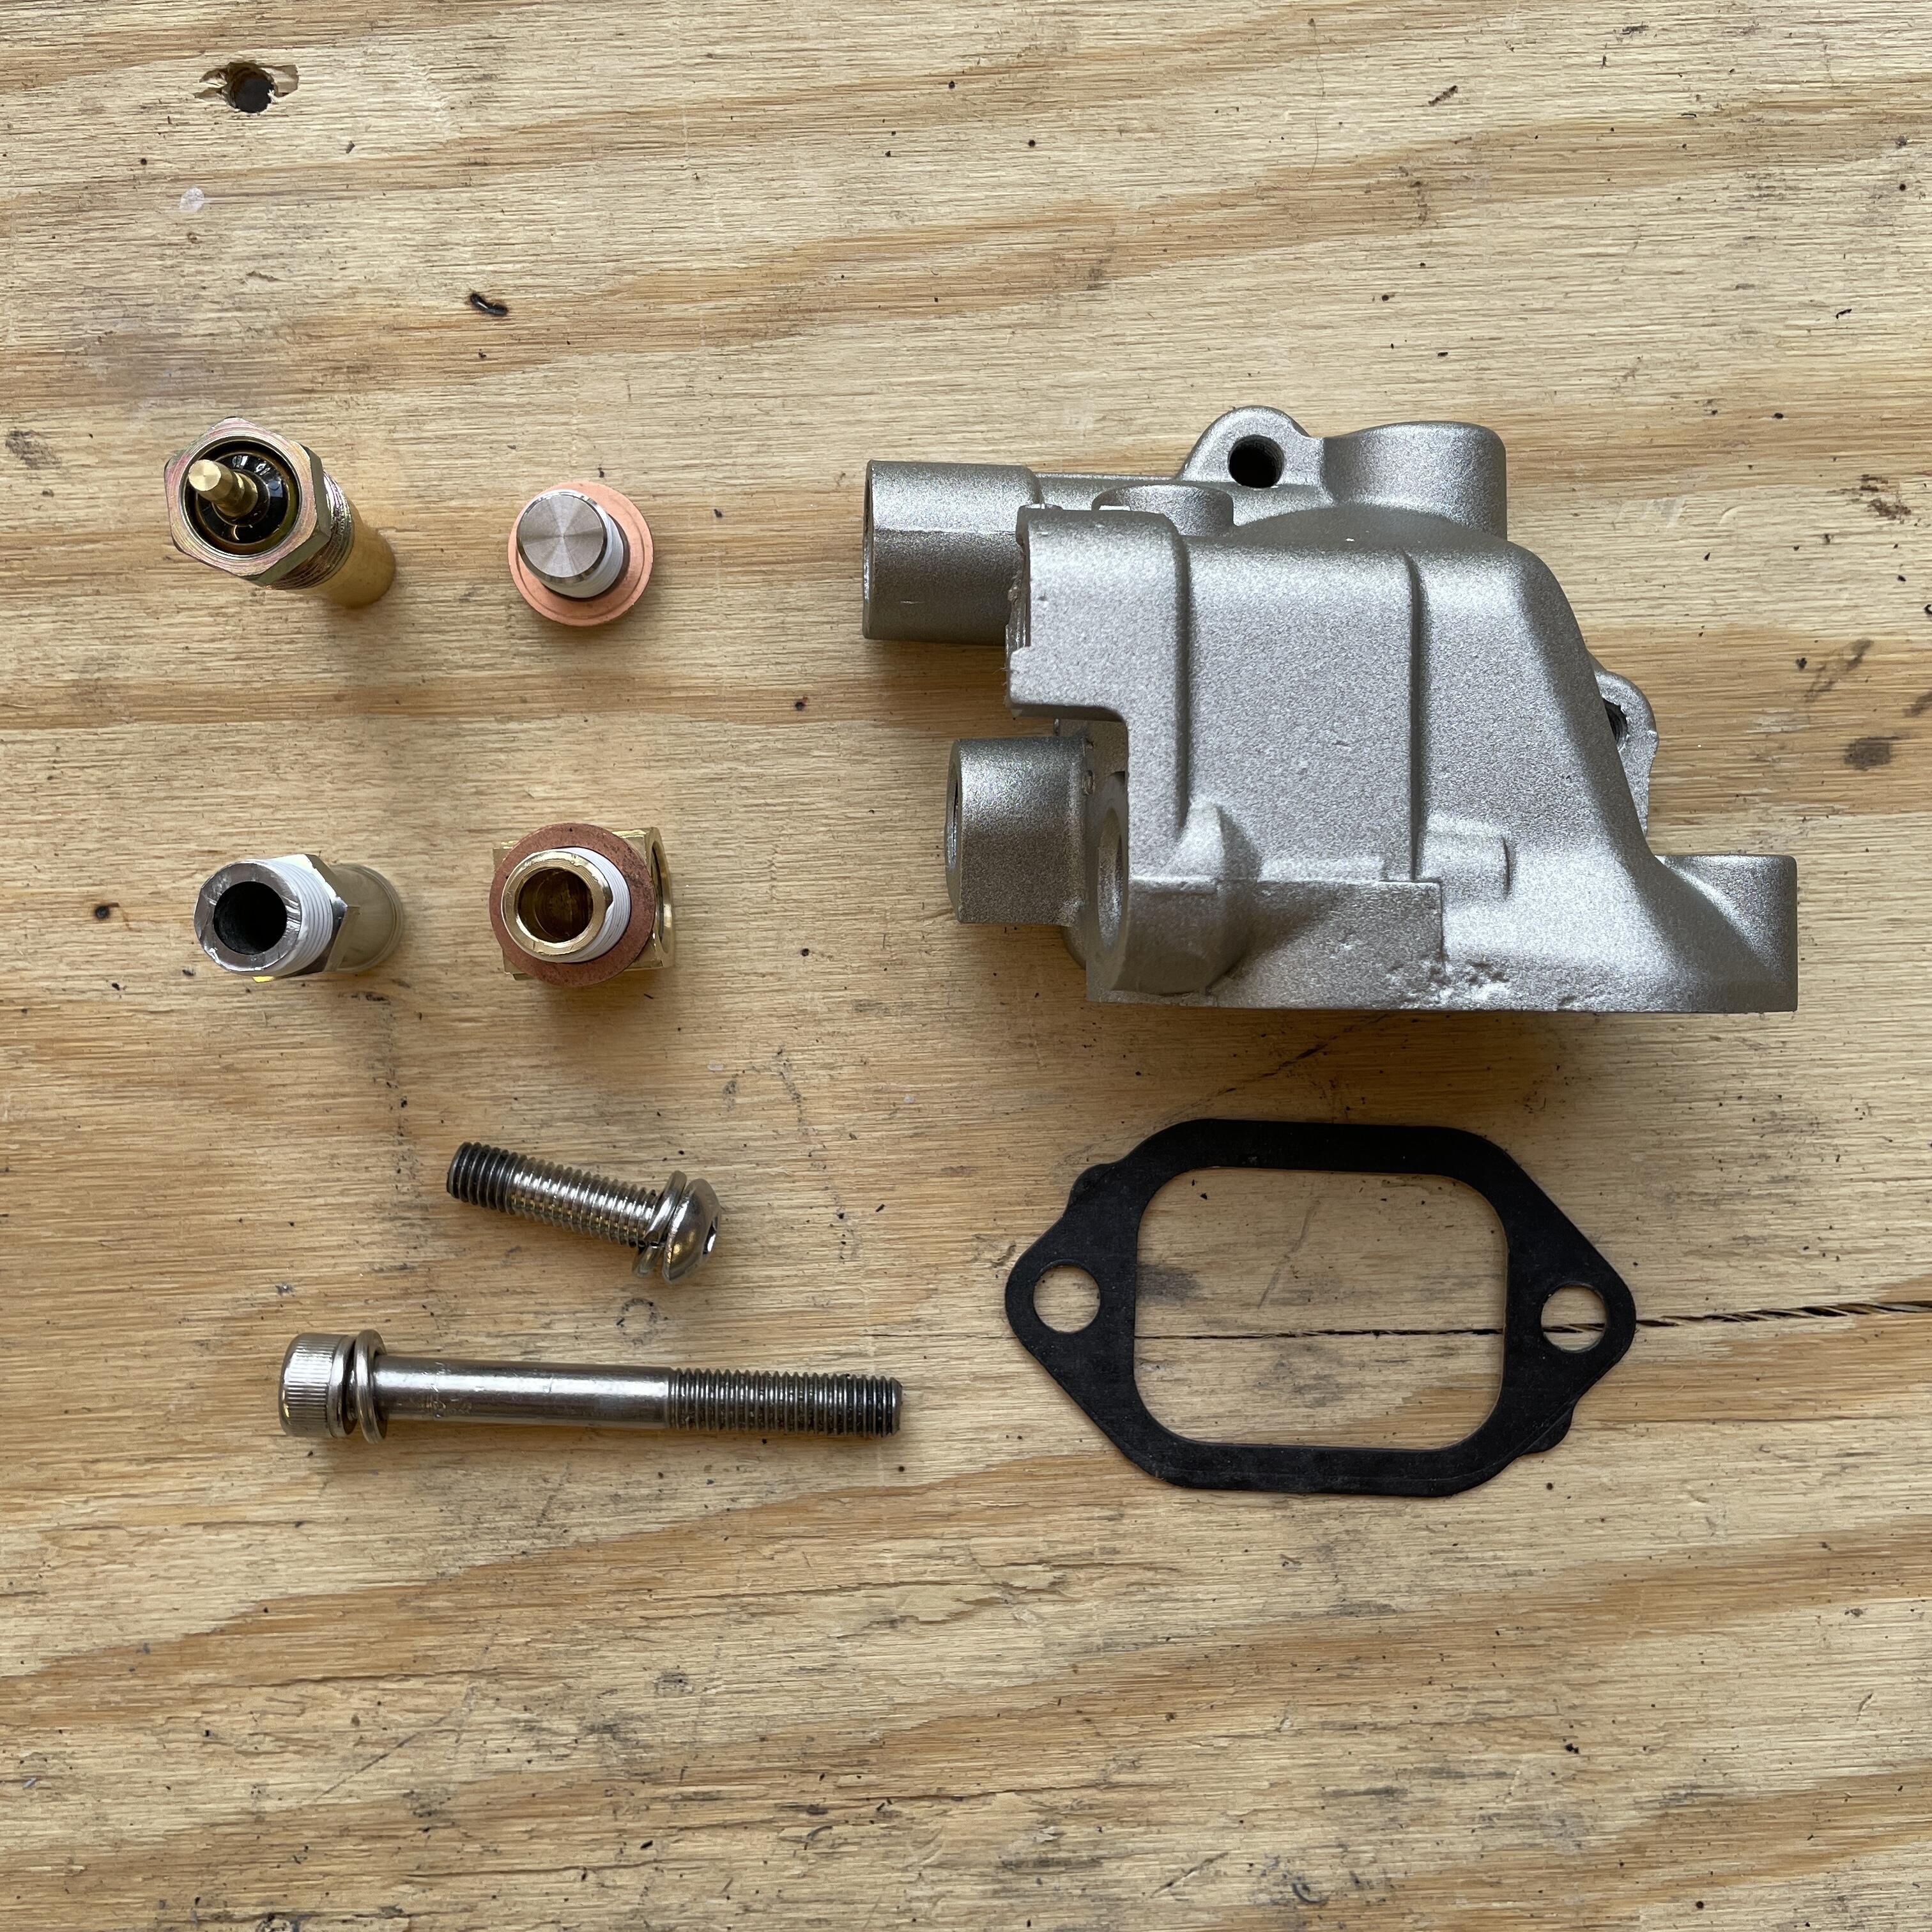
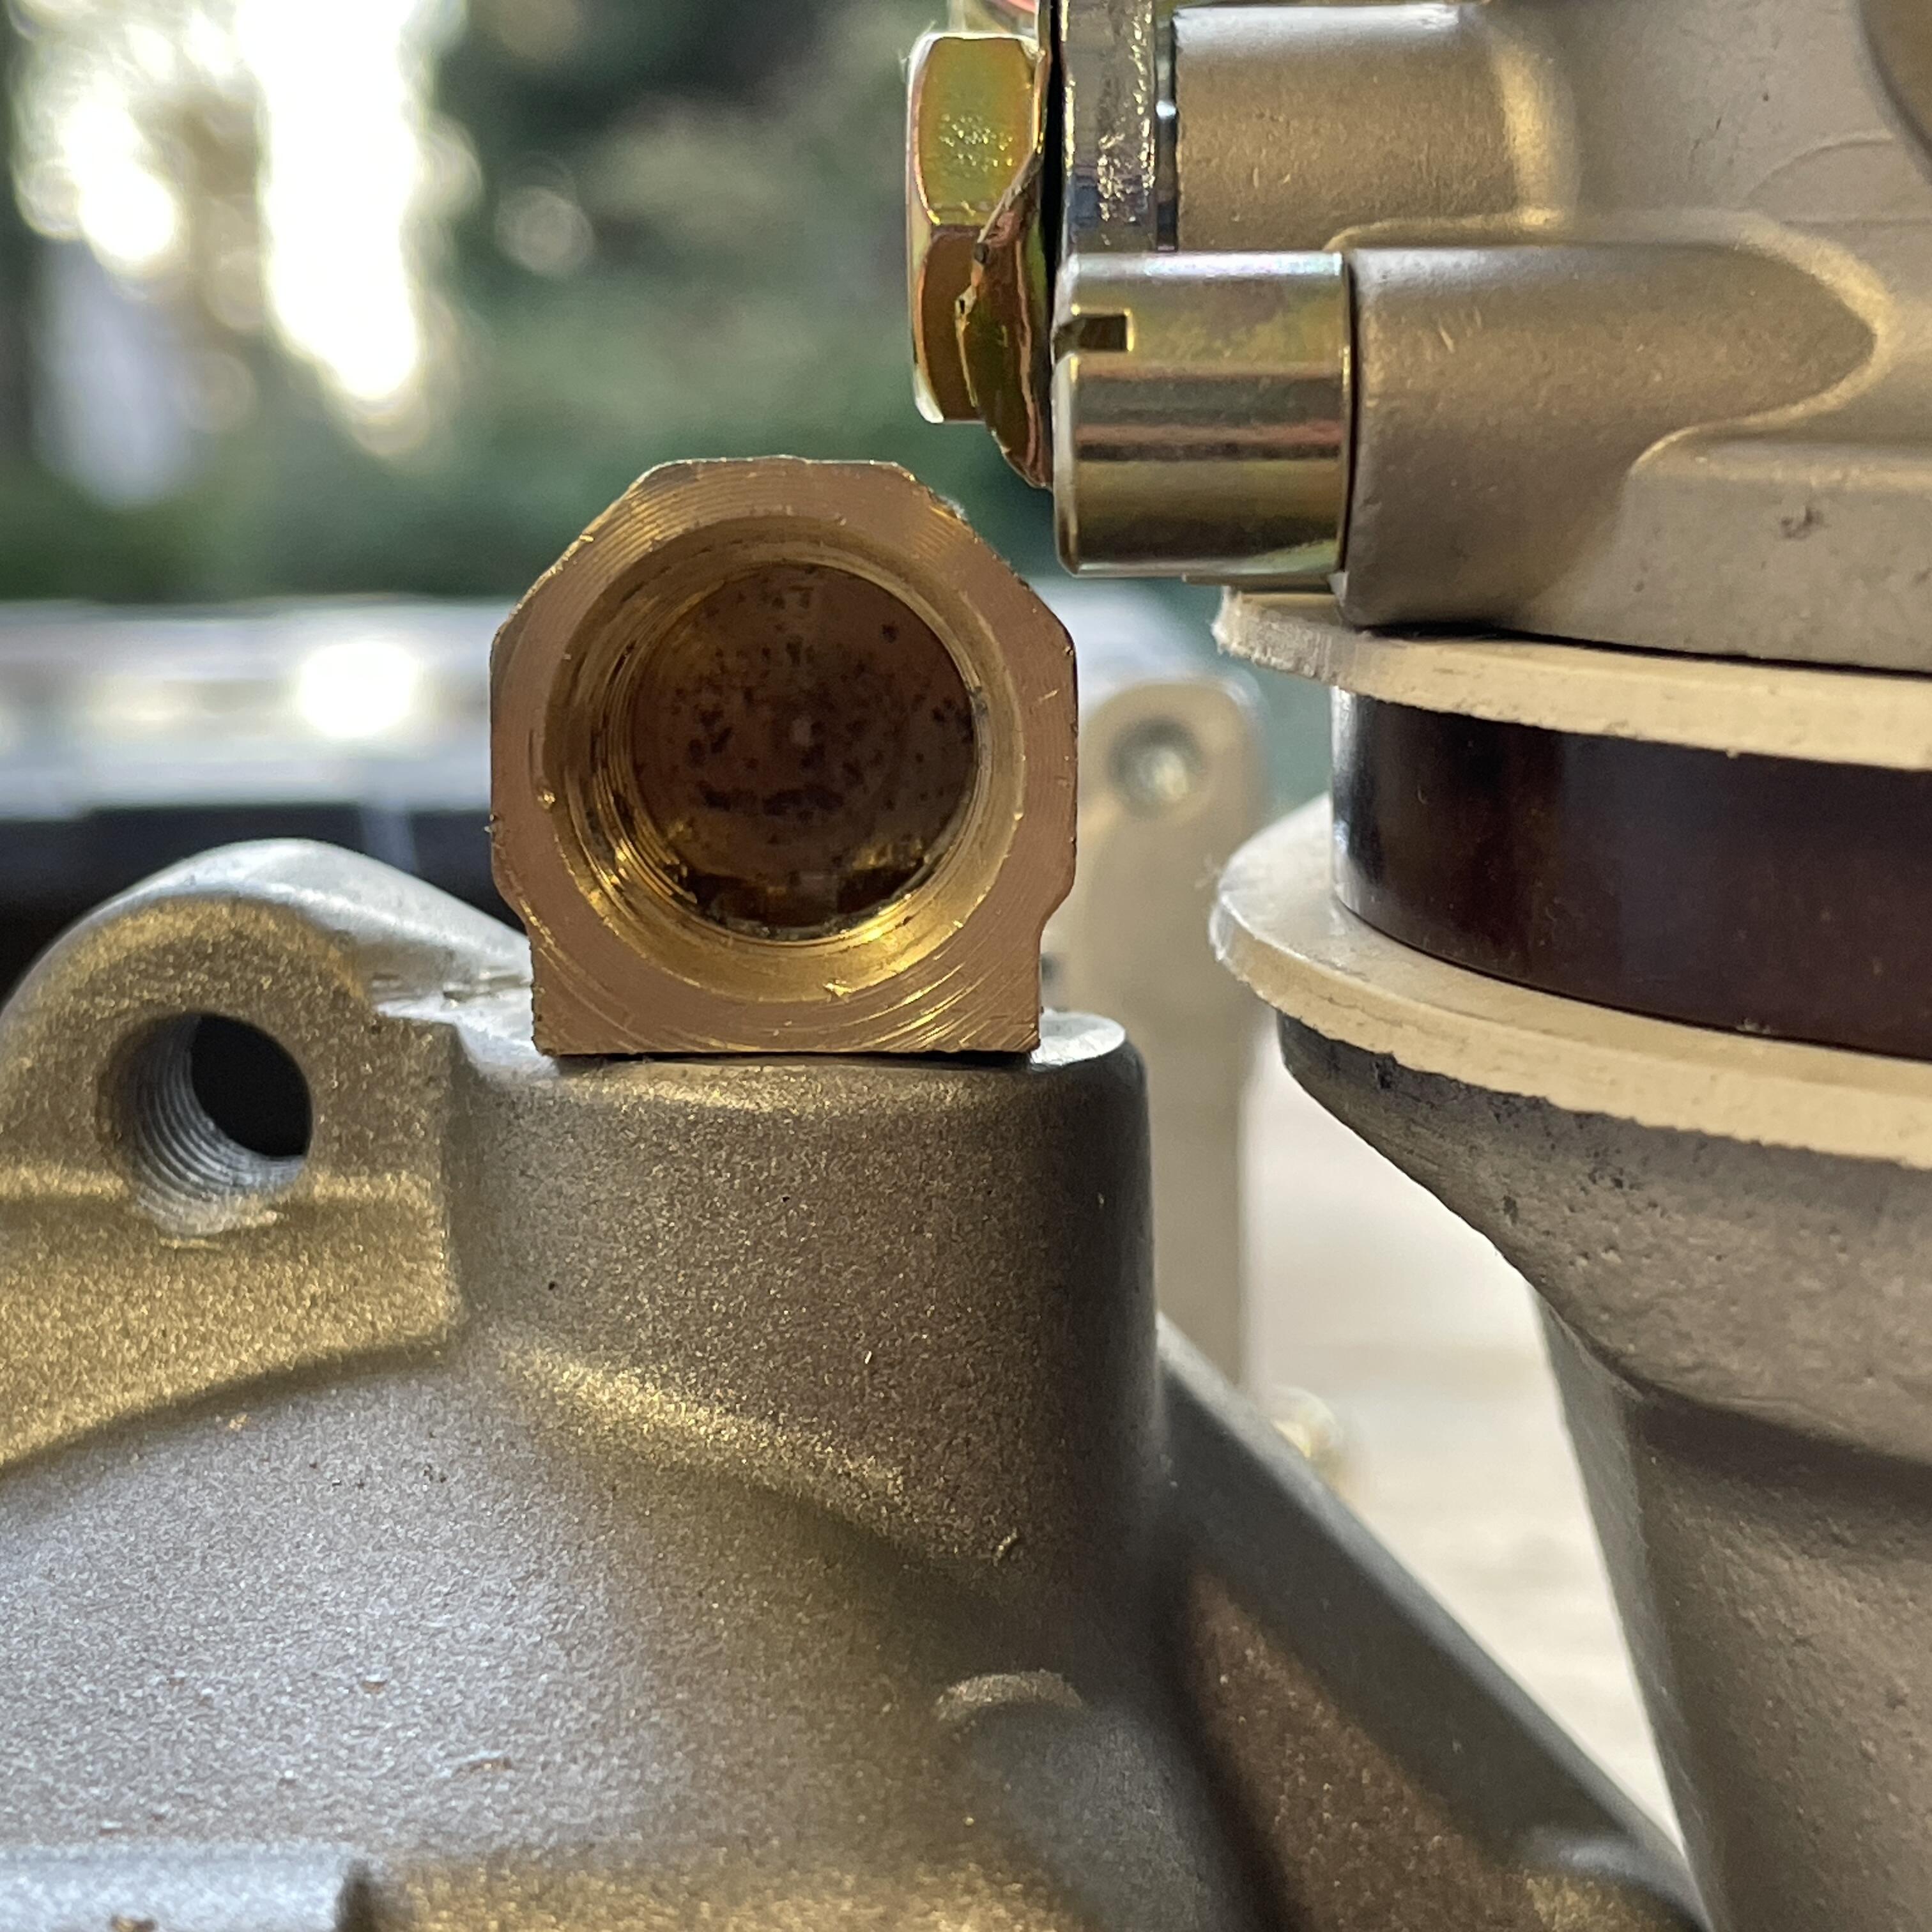
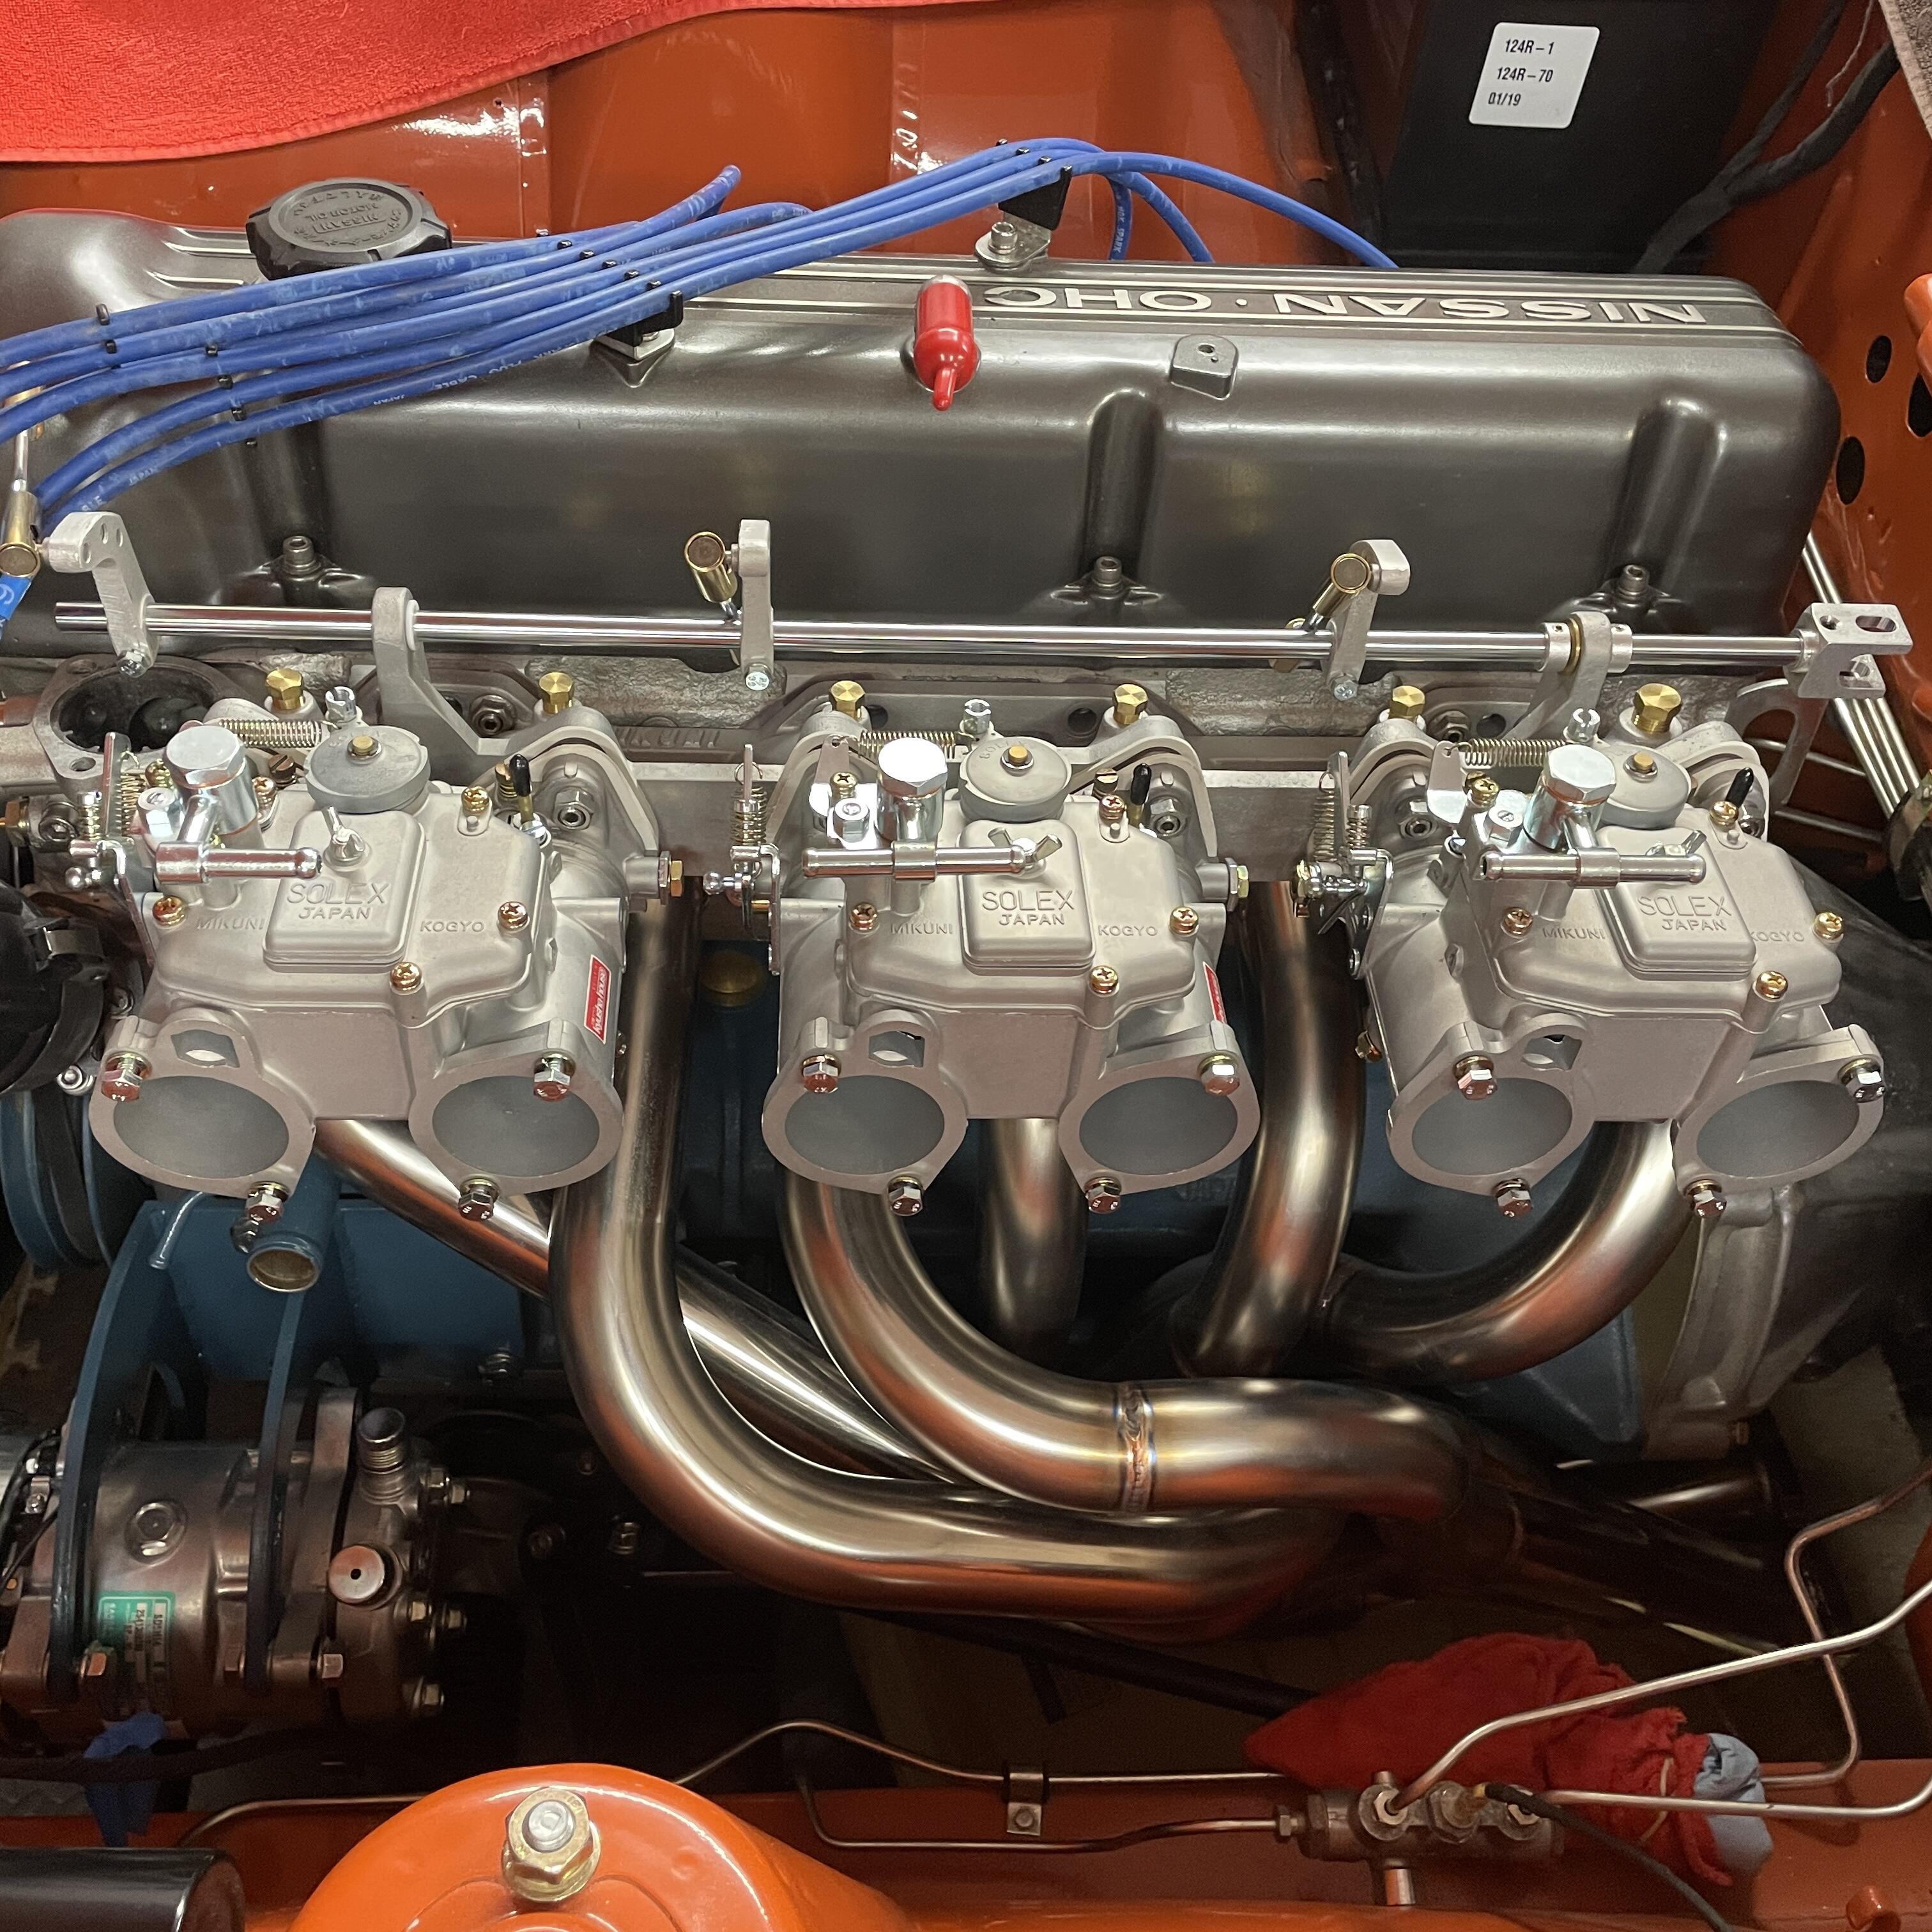
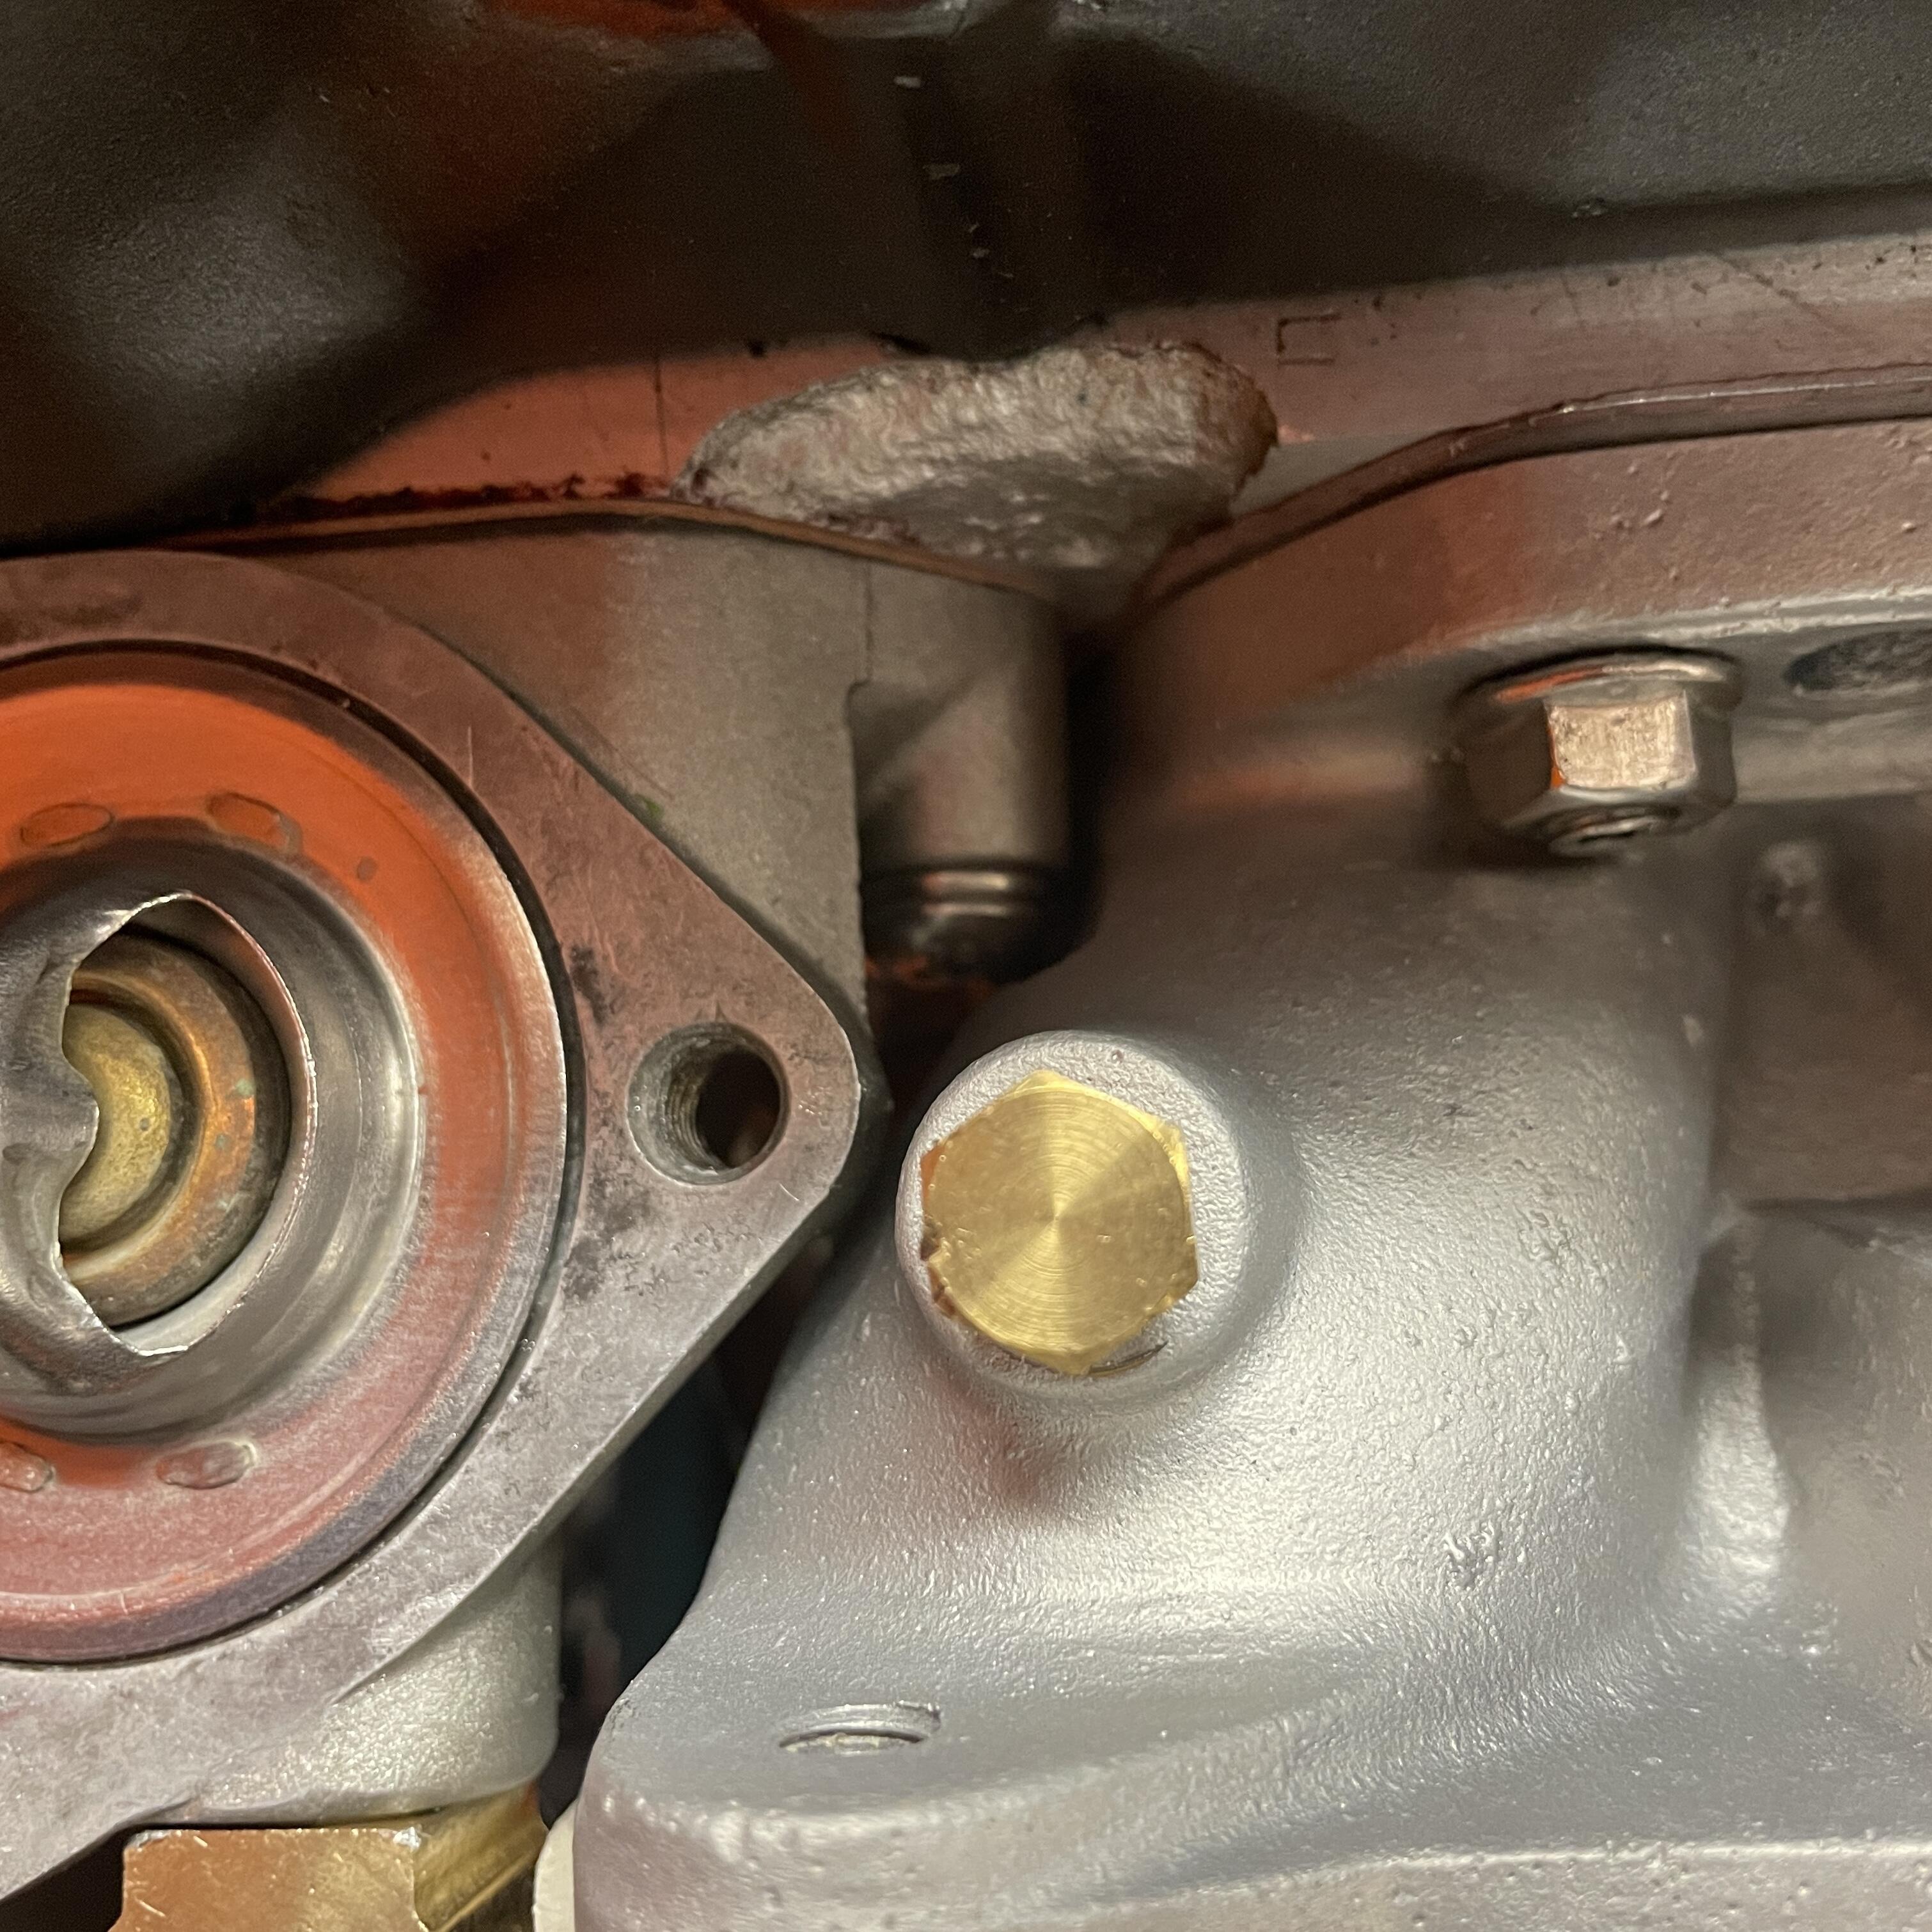
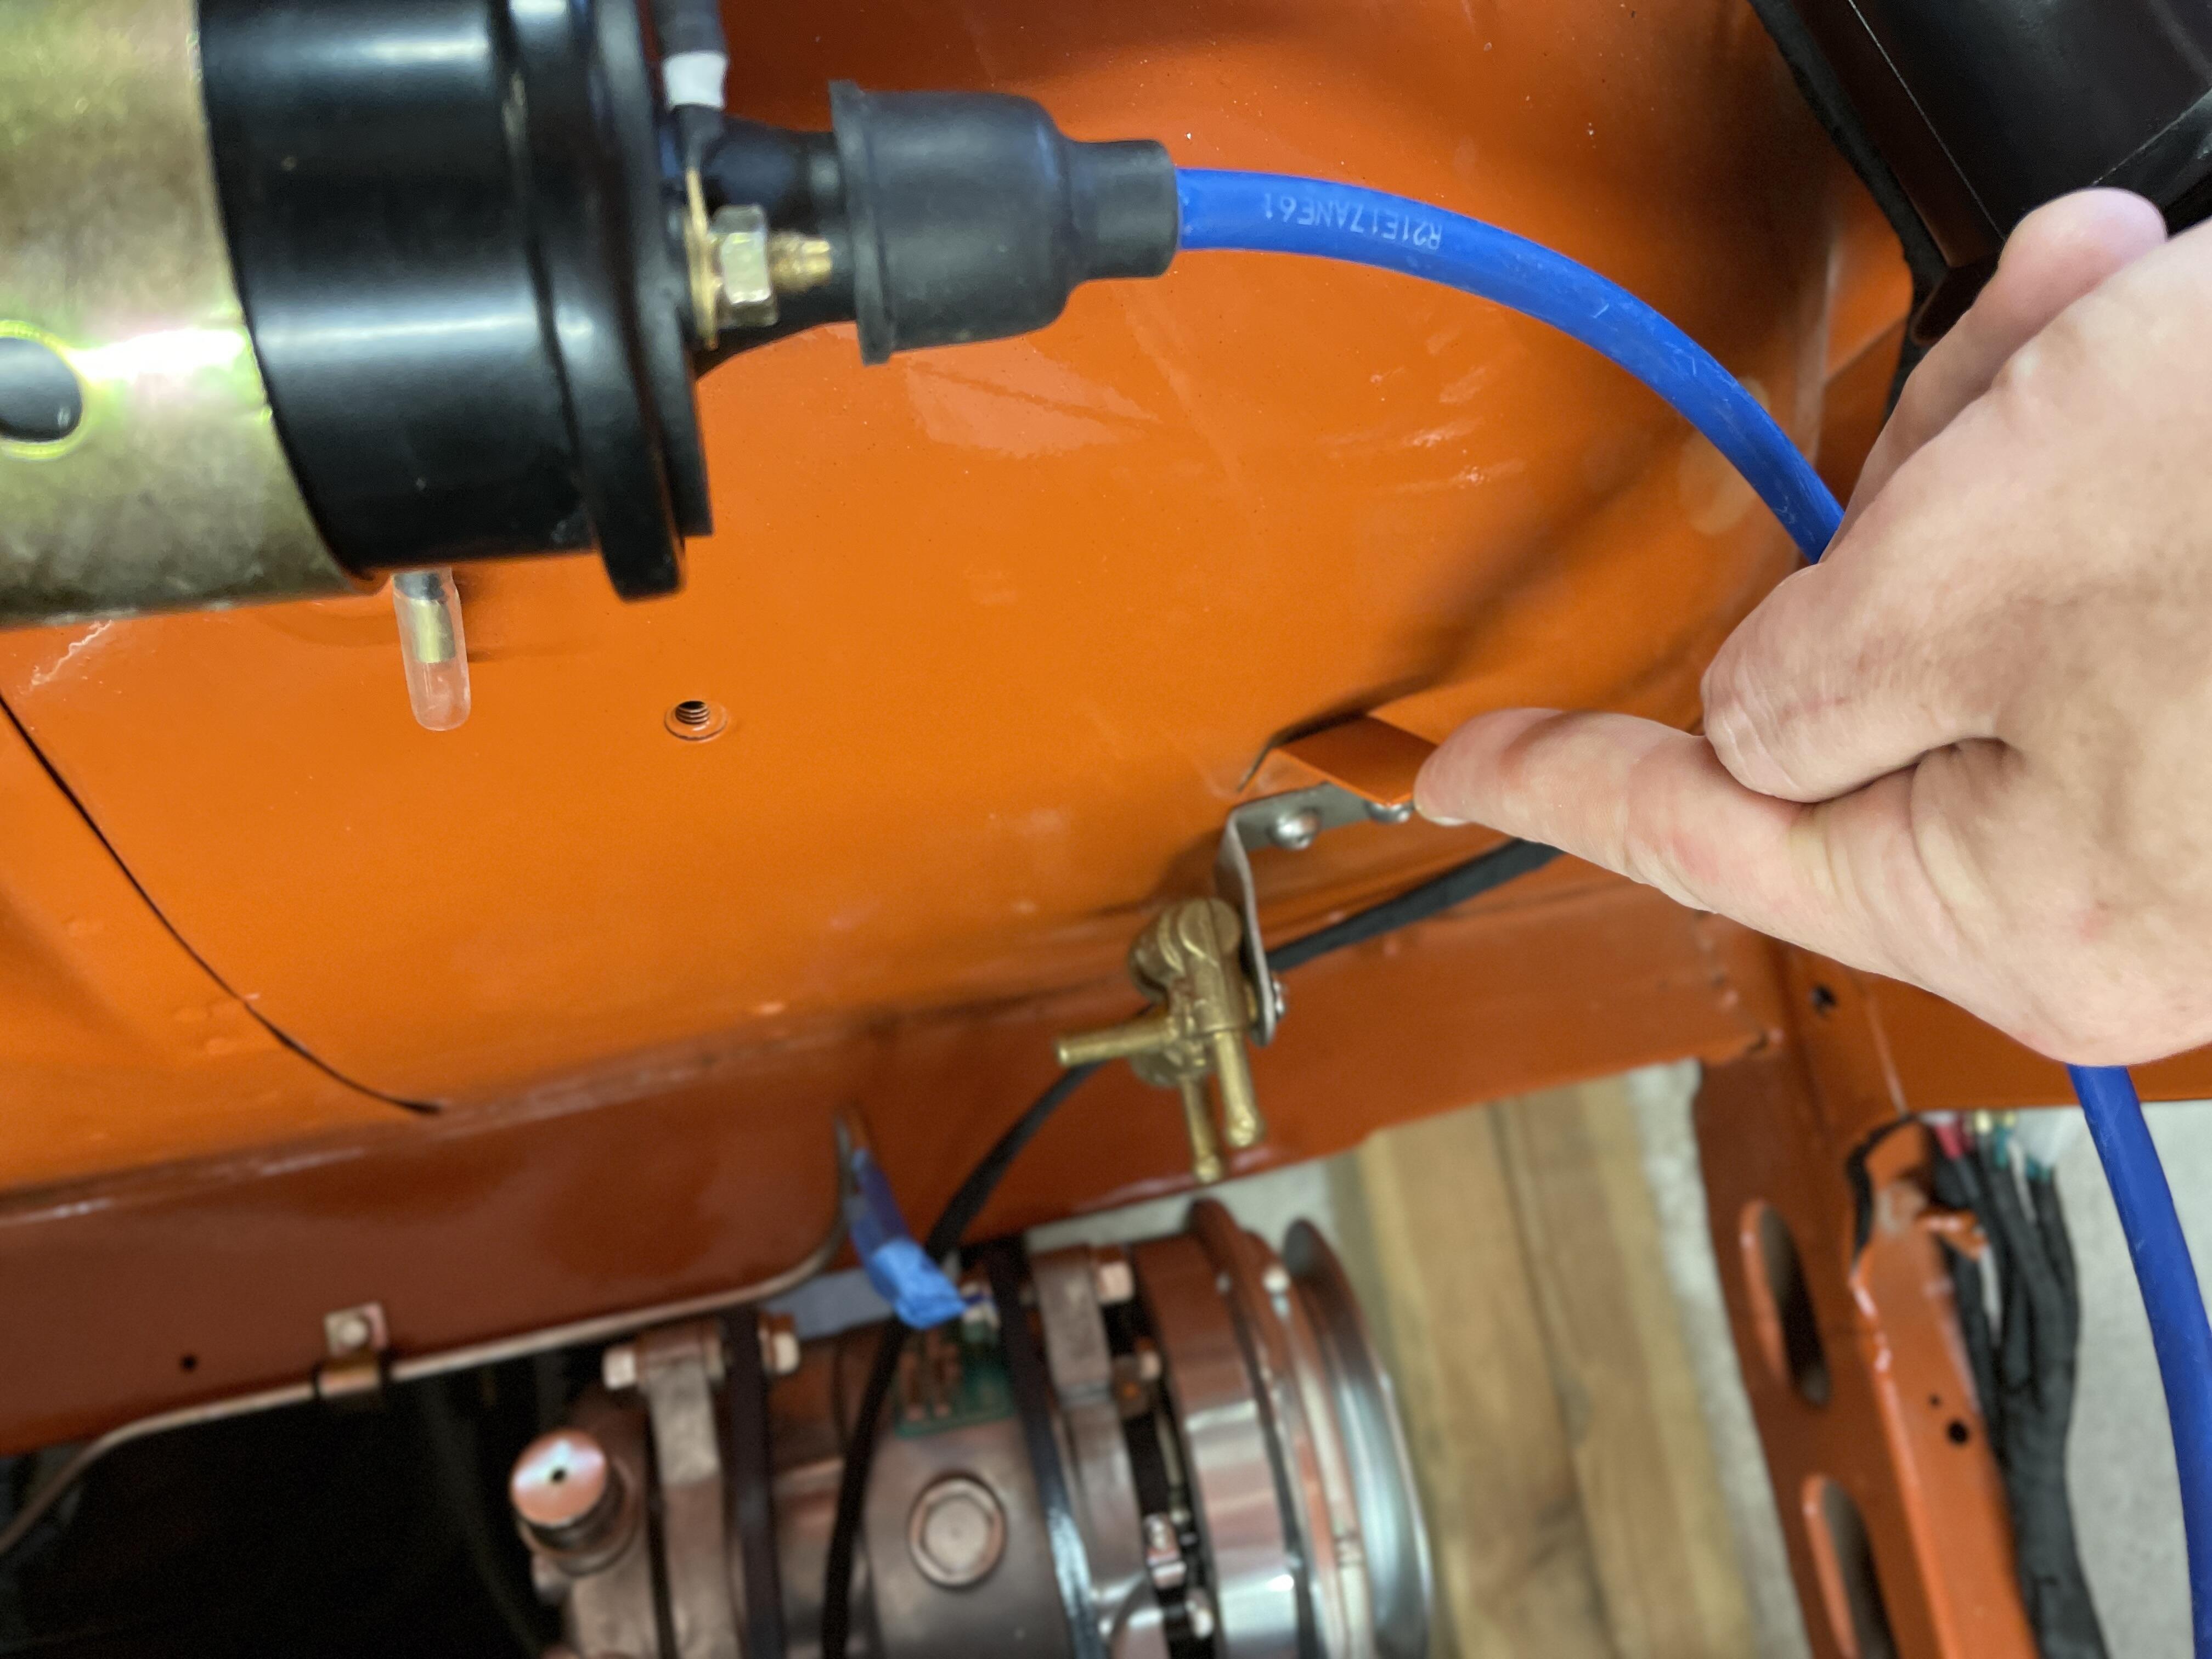
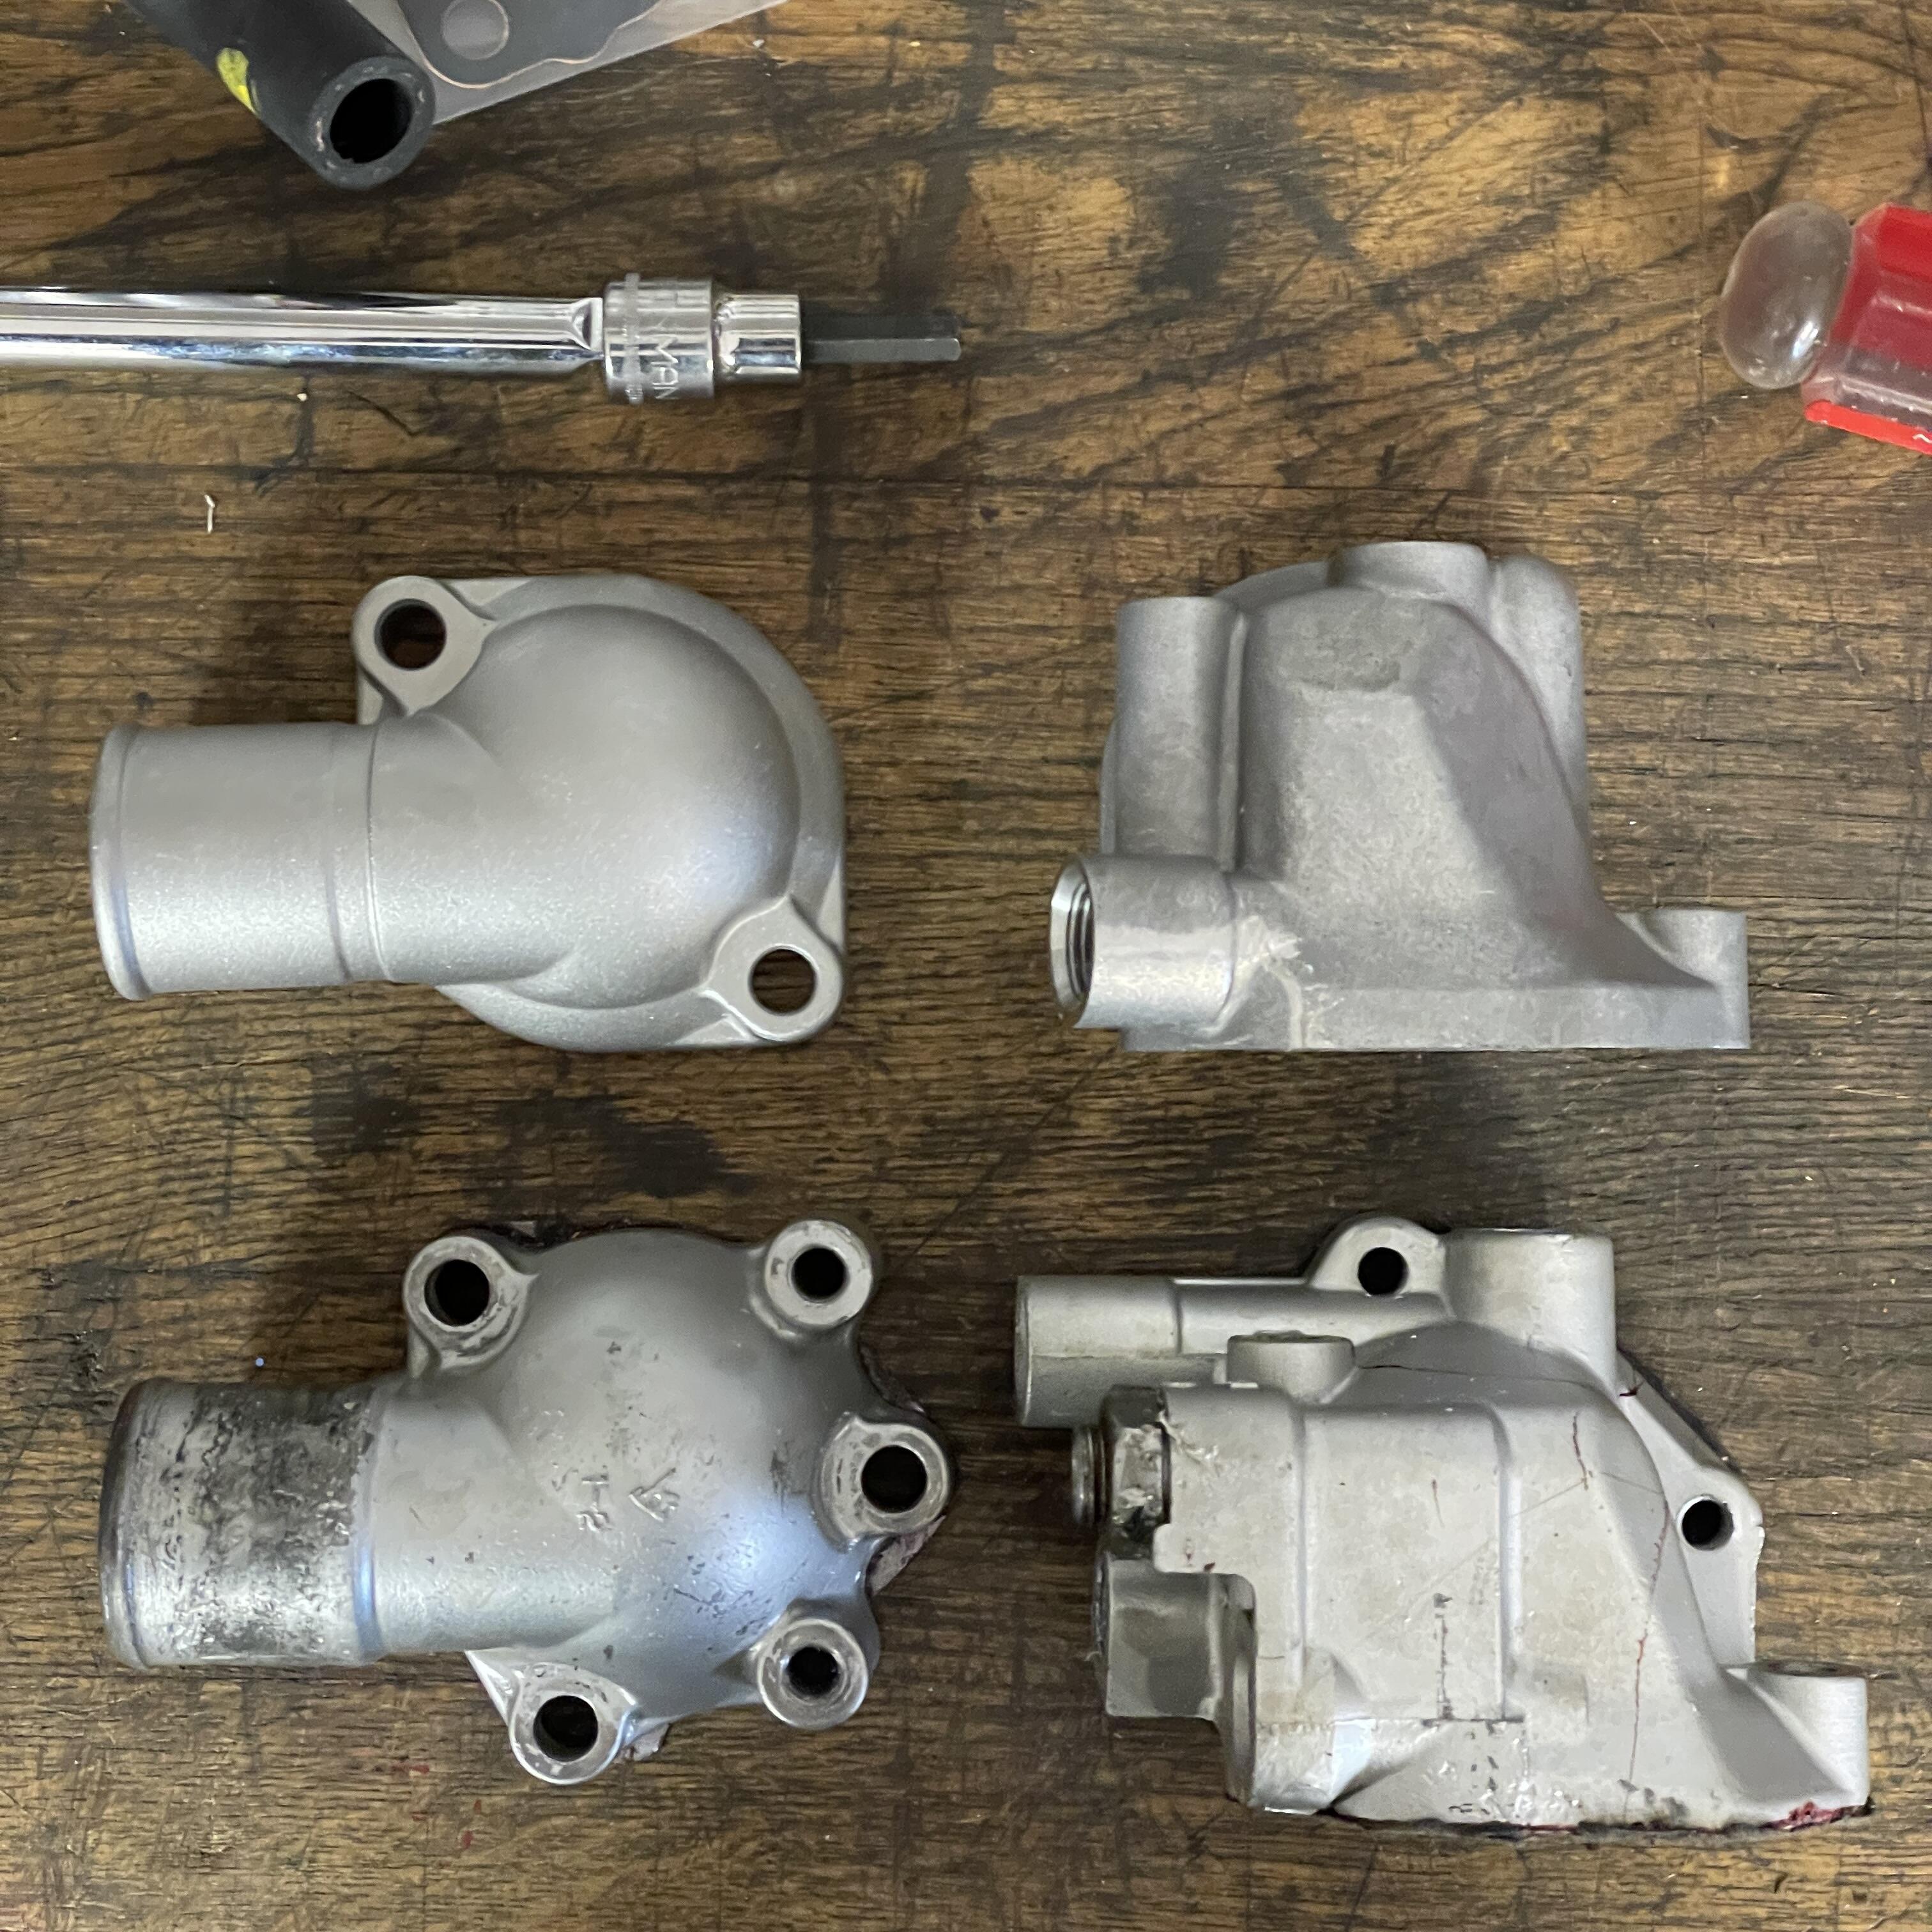
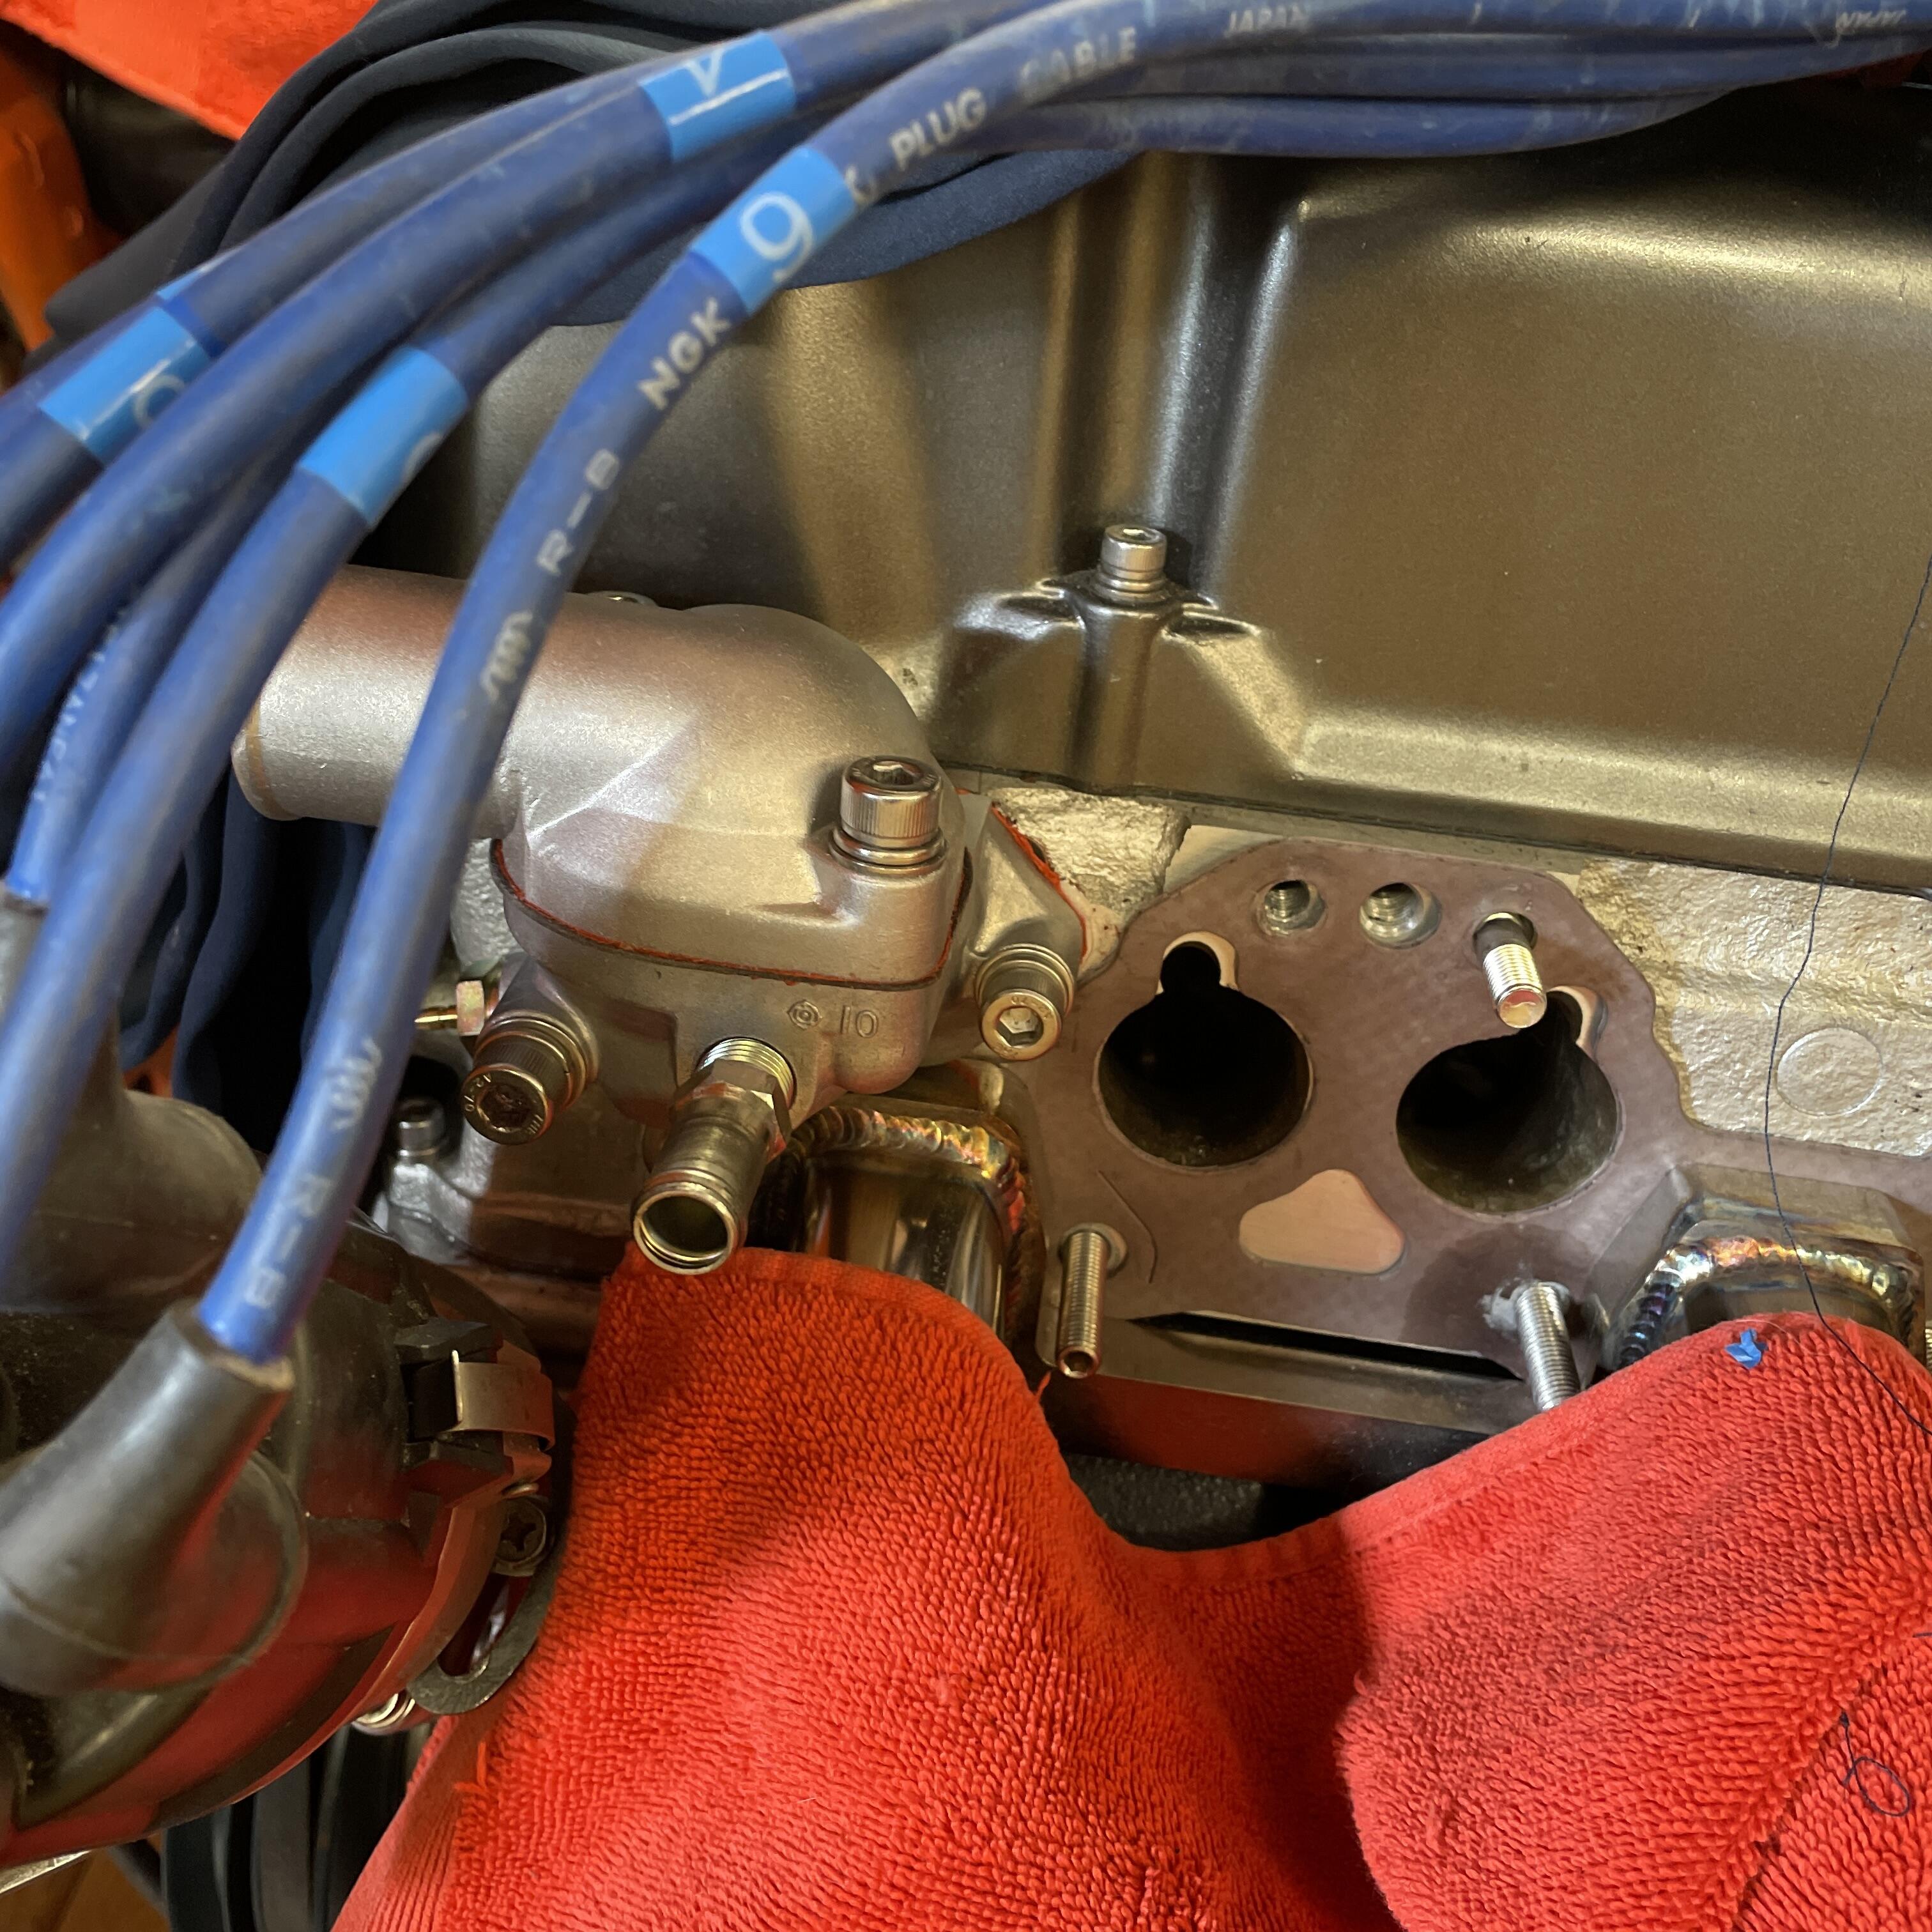
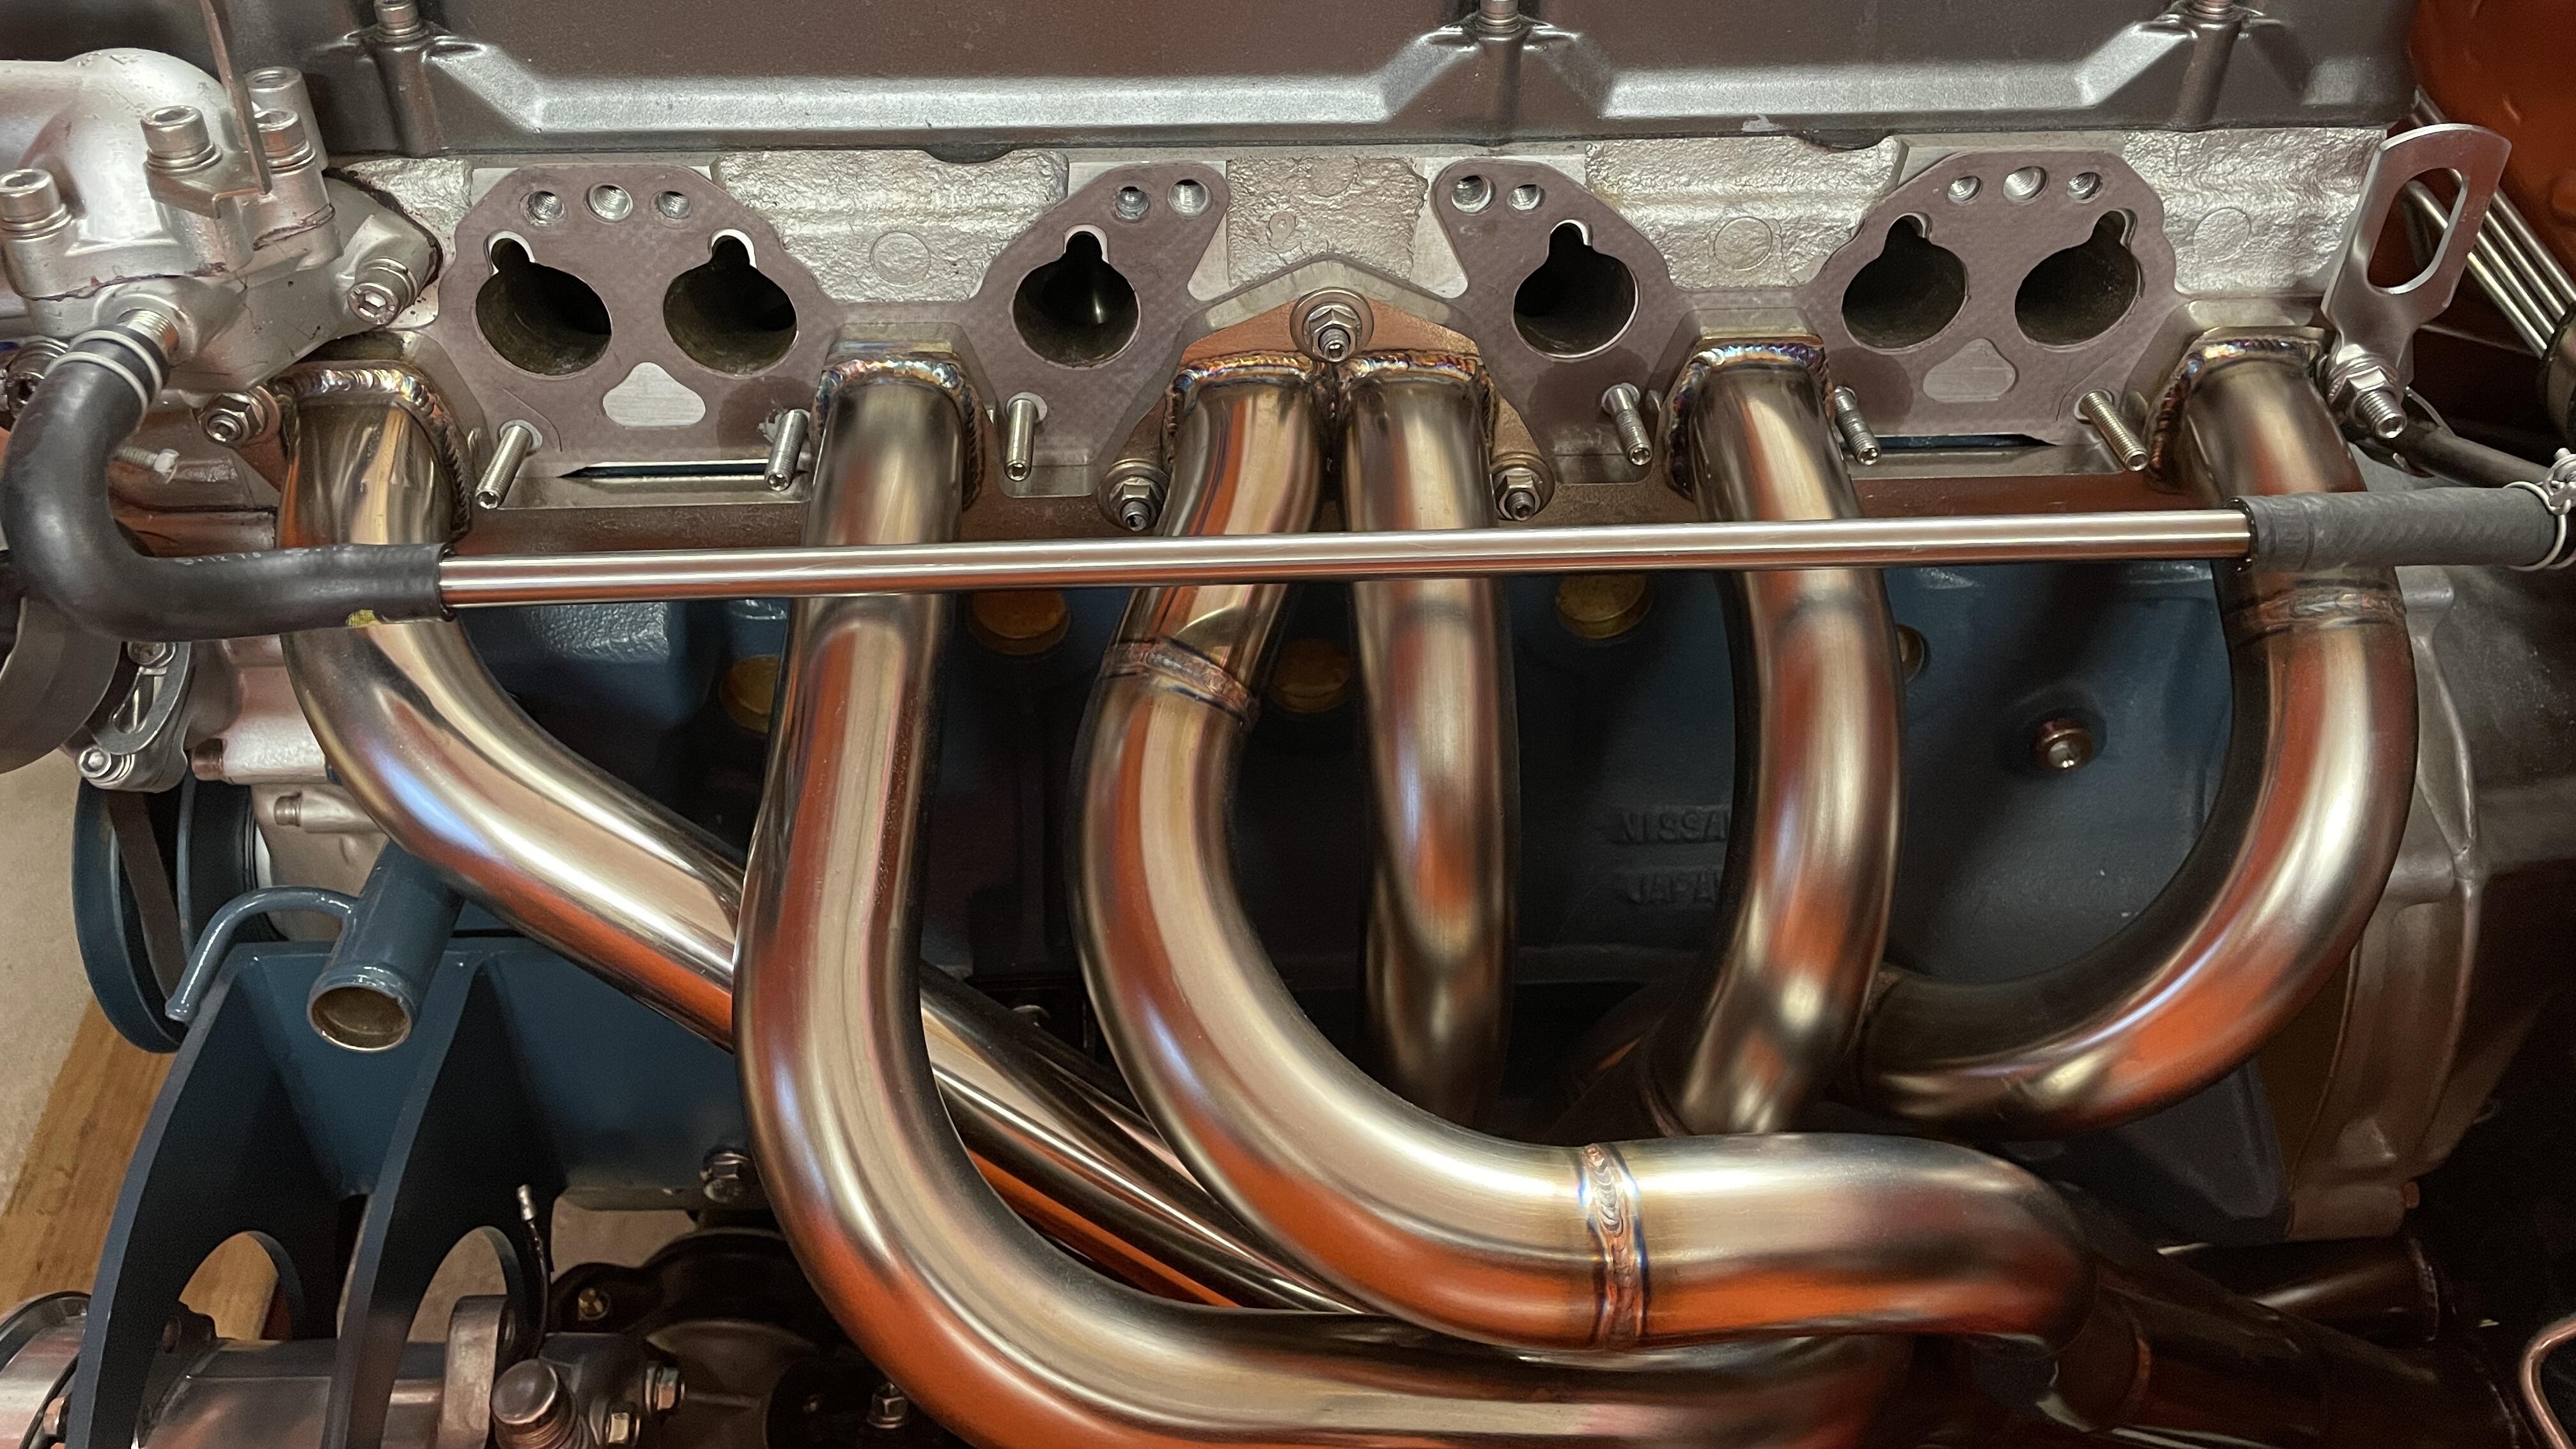
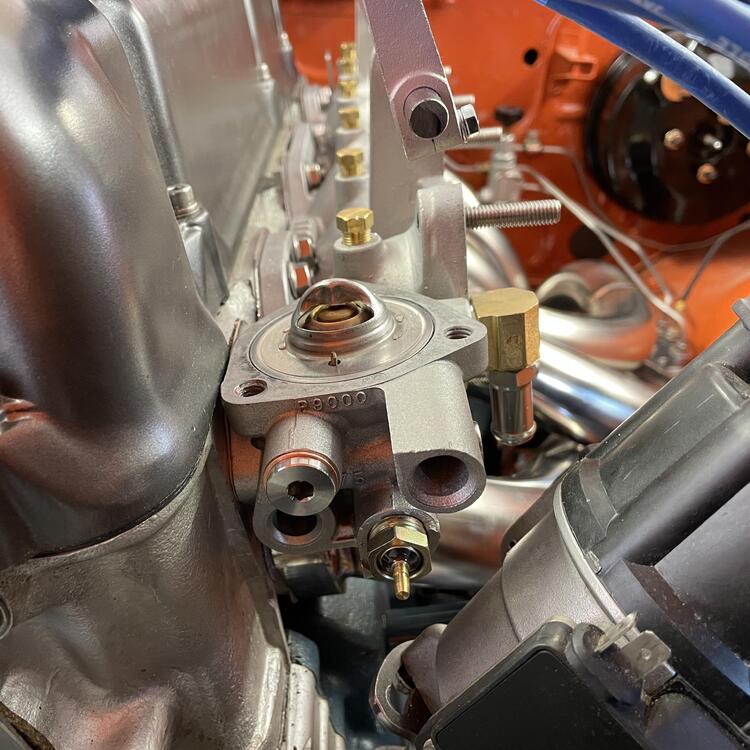
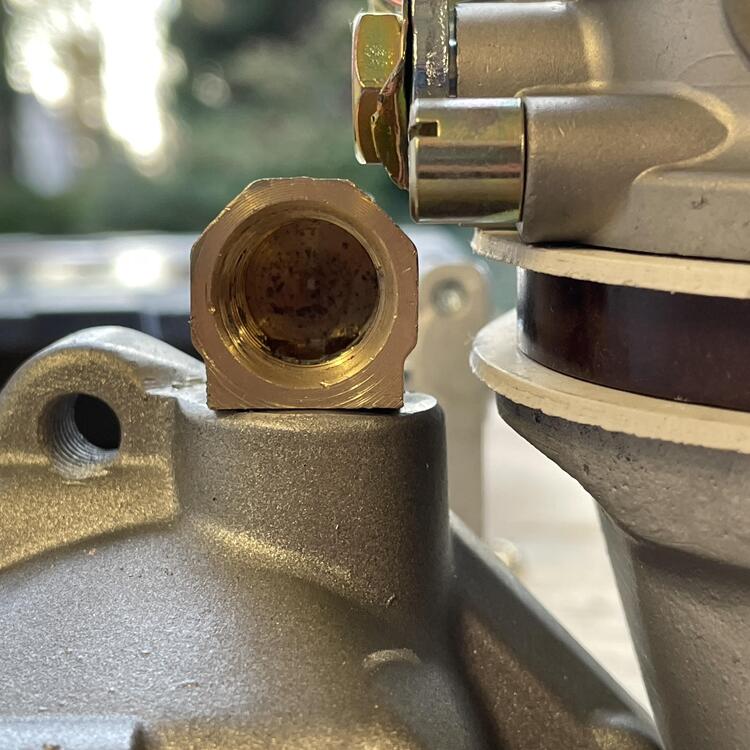
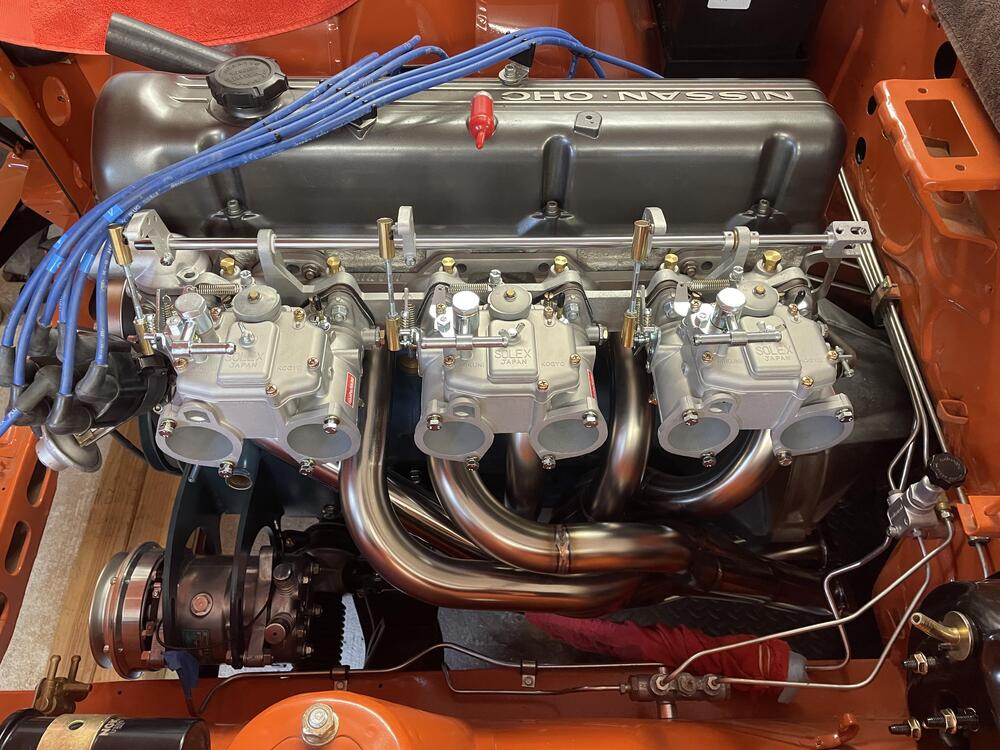
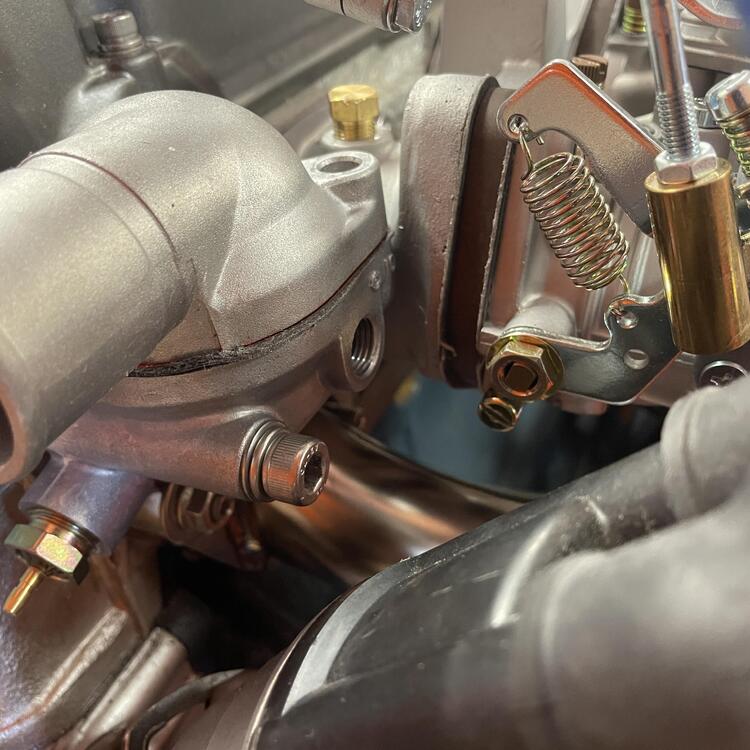
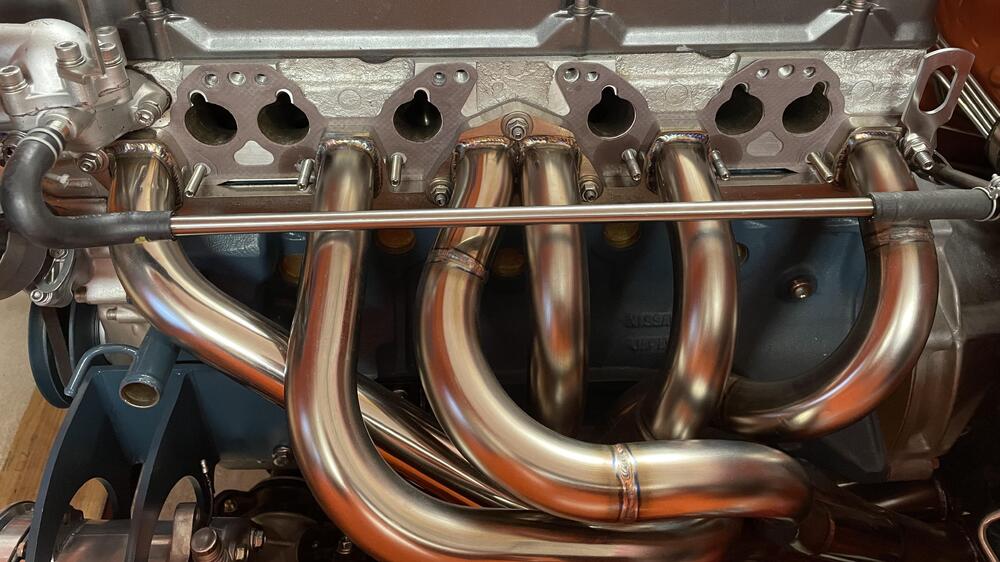
 My Mikuni 44PHH carburetors are in. This. Took. Some. Work. They are fitted to a Mikuni short-runner intake manifold, which sounds all well and good until you try to fit it along side a 240z thermostat housing, which fouls the manifold. I had to switch back to the ZX housing. It doesn’t interfere with the manifold installation, but it’s cover sure does. Also, the water inlet for the coolant fouls the front carb and the throttle linkage. I want to retain a functioning heater, so I need that water pipe to work. I tried a bunch of stainless adapters, which were all much too big, but was saved by this little brass guy from Home Depot (a 90° 1/4 npt M to 1/4 npt F street / adapter). I still had to drill it out to increase the flow, as well as tap both the adapter and the thermostat housing and cut down the water inlet pipe to ensure a high rate of flow through the whole junction. I also replaced the thin black carburetor gaskets that came on them with VW carburetor base gaskets by EMPI from JBugs California Pacific. I was a little bummed to find out that they are white and not the grey in the photos, but I am pleased with how thick they are. That extra few millimeters helped push the carburetors away from the thermostat housing and gave me some much needed clearance. The gaskets are the perfect thickness for want I needed when it came to making clearance, but they aren’t an exact fit for the PHH carbs. They’re meant for VW solexes (so downdraft) and the bases are different, which meant I needed to trim them to no be sticking out a mile. They also needed to be opened up from 40mm to 44mm to not interfere with the airflow. On the left is one with the outline of the gaskets that came with the carburetors drawn in pencil. On the right is a trimmed gasket before final cleanup. In the next photo you can see that the holes are now the same size as the phenolic. They are slightly bigger than the carburetors and manifold, which I think is fine. If I have trouble I’ll make something from scratch that is custom to each port. The last photo just shows that they don’t stick out a mile anymore, even though I could probably trim them further. For the thermostat cover, I took a gamble on a NOS one for L20Bs and JDM C210 Skylines for $20 on Amayama. It looks like it uses the same gasket as the ZX, so hopefully it will fit. It looks just like the three-bolt ZX cover, except it doesn’t have the two extra bosses on the rear end, which hopefully means it won’t hit anything. We will find out when it arrives. Now on to the goodies: the carburetors are 44mm Mikuni PHH side drafts (I explained in an earlier post how I got them). They are on the previously mentioned Mikuni short intake manifold, held on with OEM manifold washers and copper flange nuts on the bottom and SS flange bits on top, and wearing 50mm Kameari velocity stacks. Next I plan to fit the heat shield and solve the water pipe routing problem. I have air filters but don’t expect to mount them until the brake and clutch master cylinders are in and the fuel routing is worked out.
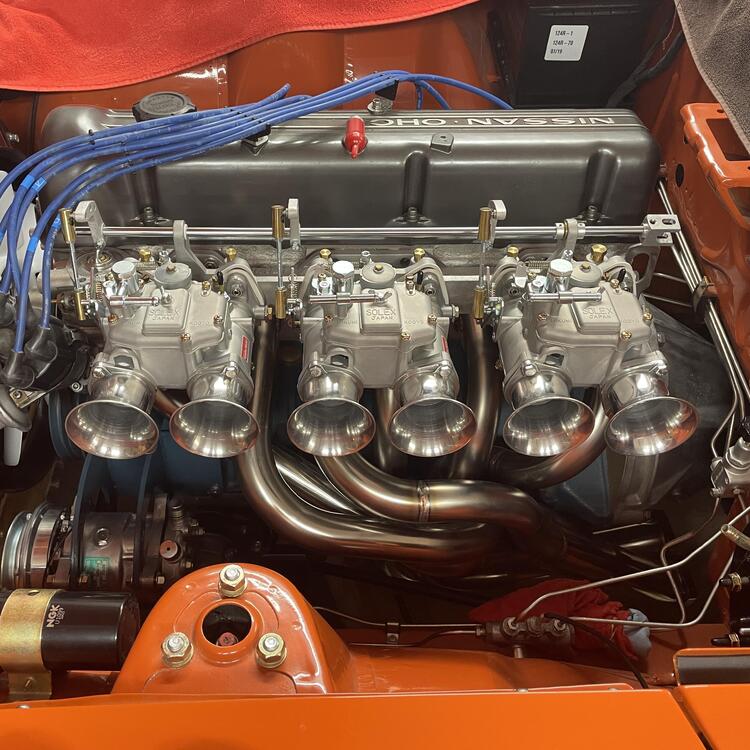


-
These windows are scratched so I will probably end up replacing them. The ones I’ve seen for sale done have the black pieces in them. The circles are probably solvable but the rectangle curves away from the glass like it does something so I want to make sure that gets done correctly.
-
Does anyone know where to find the five rubber parts that are adhered to each door window? I just did a search on Google, MSA, and ZCD and found nothing.

-
Is he the Ralph Nader of LED lights?
-
I did not know this. I guess those brand new flashers I bought were a waste. @SteveJ do you recommend a particular one? Are they different for hazard and turn signal, or can you get two of the same kind?
-
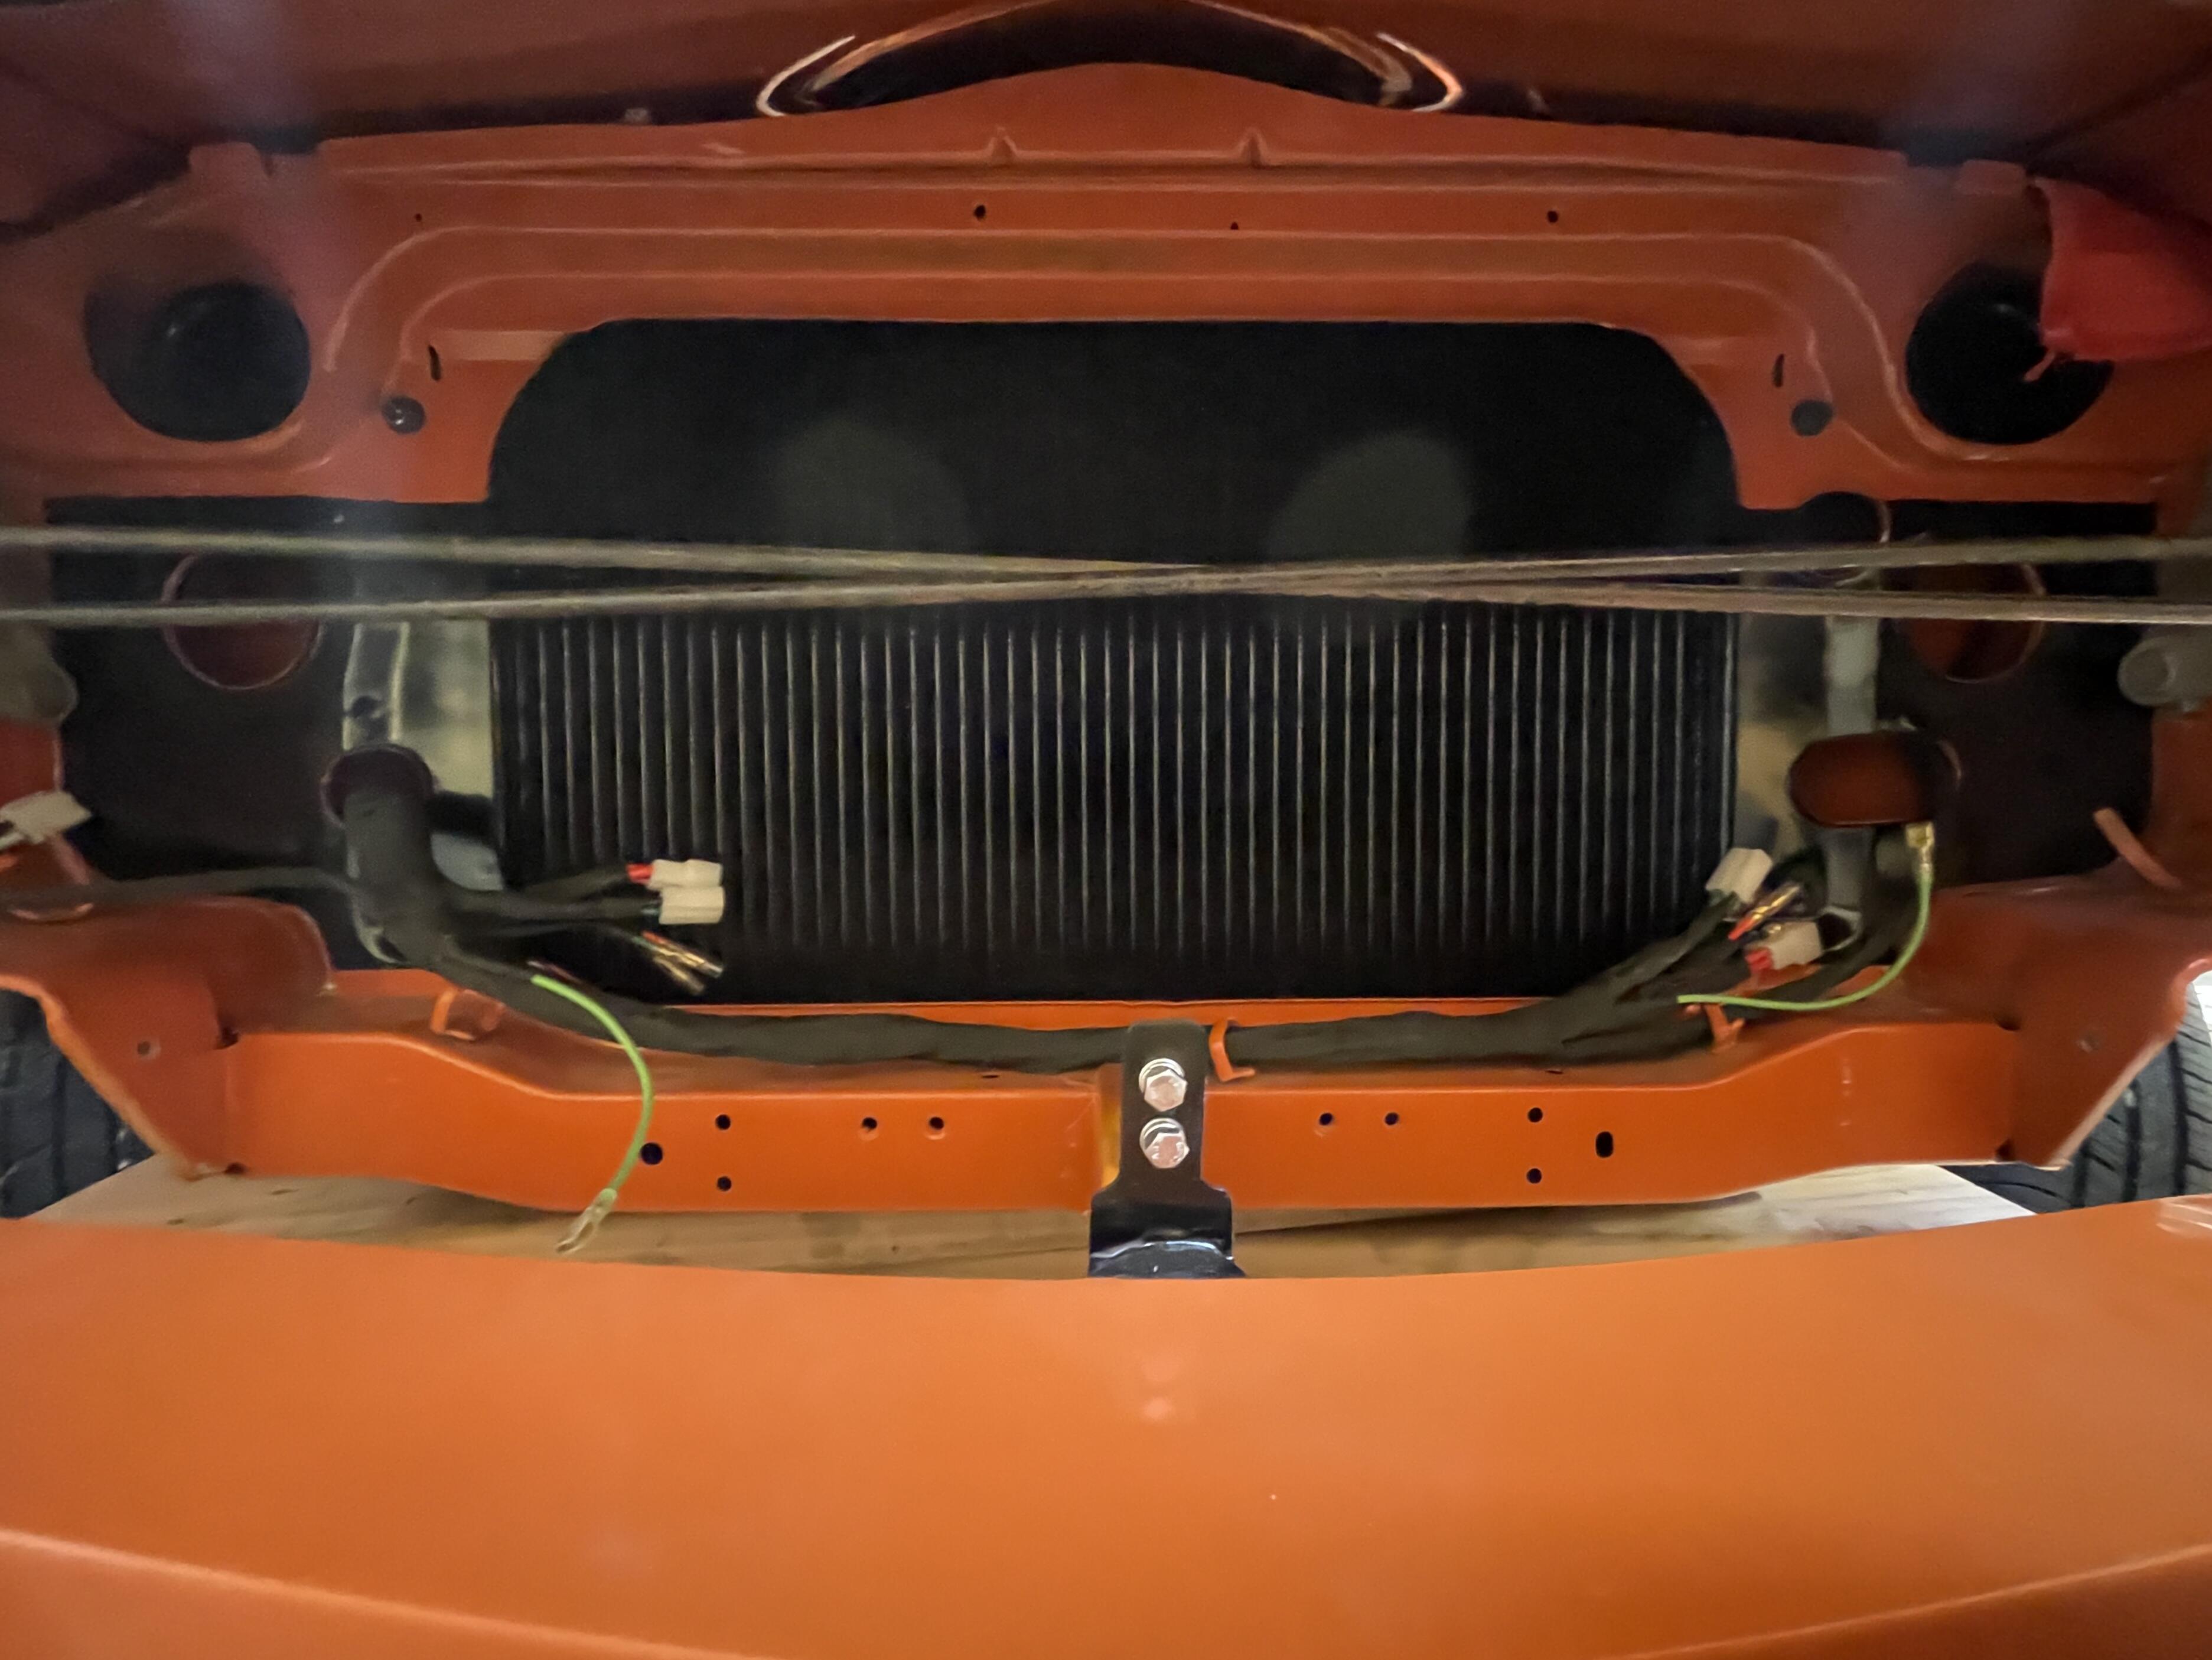
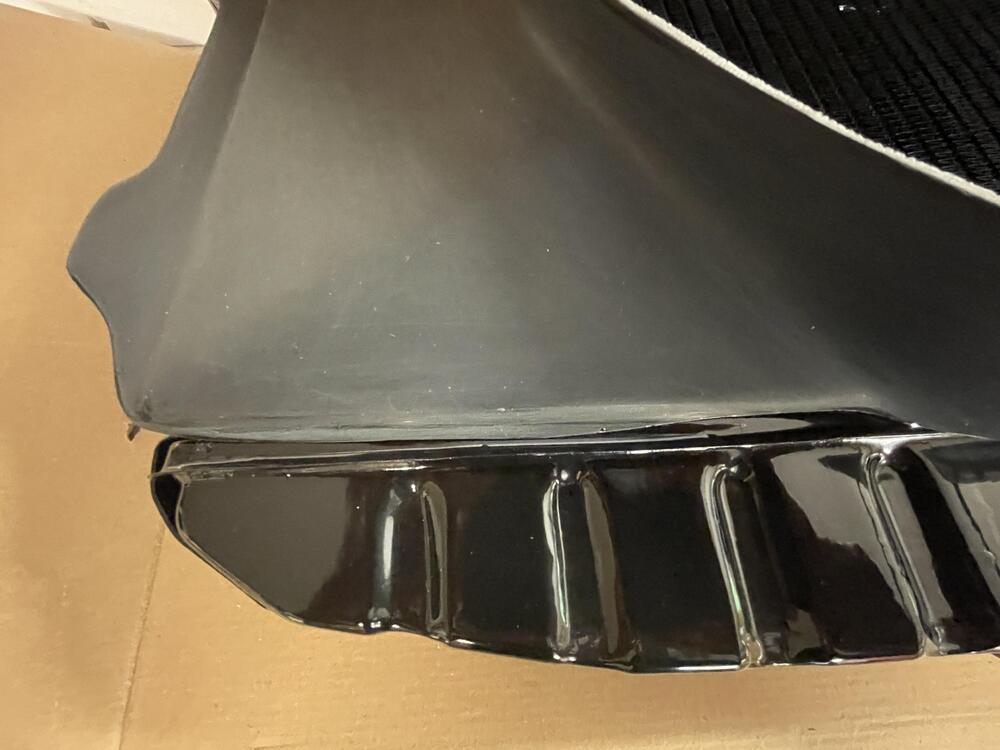
McMaster-Carr has high-temp closed cell adhesive foam in a variety of sizes, so I’m sure I can find something. I will run a strip across the top and bottom because it’s clapping against the radiator toward the center where it’s most flexible. Right now the plan is to adhere it to the shroud and not the radiator. Should be an easy fix.
-
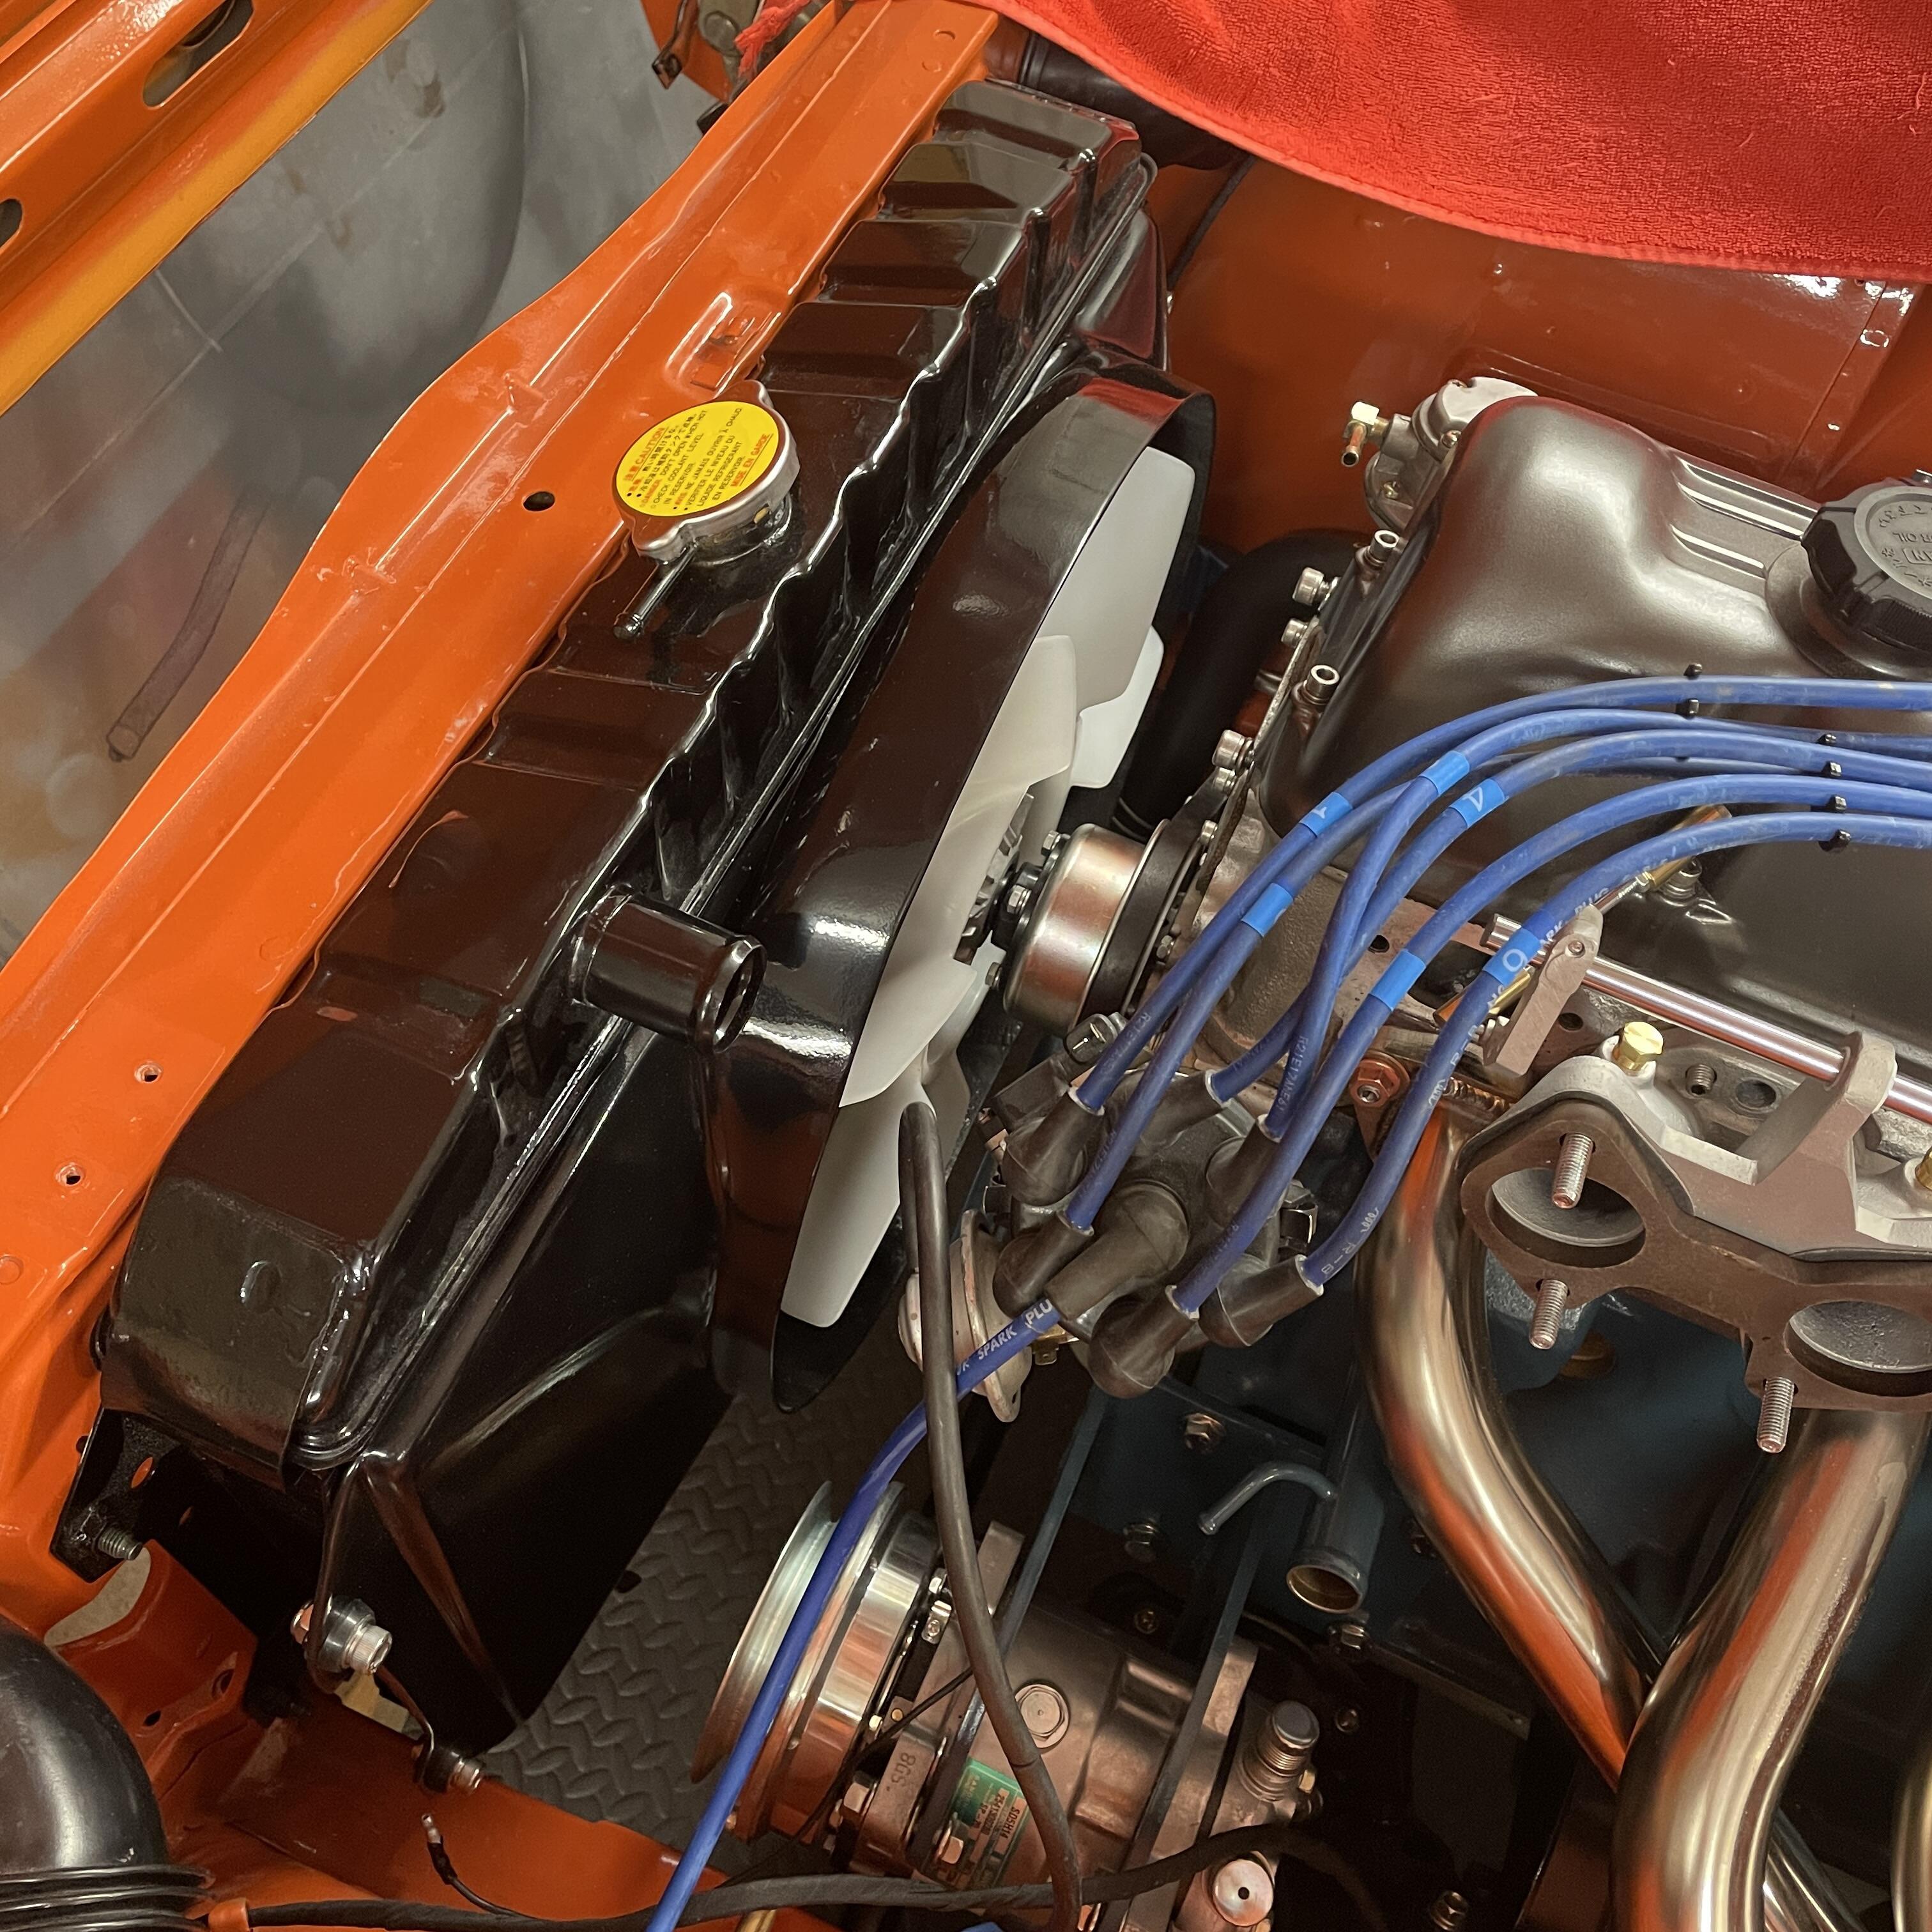
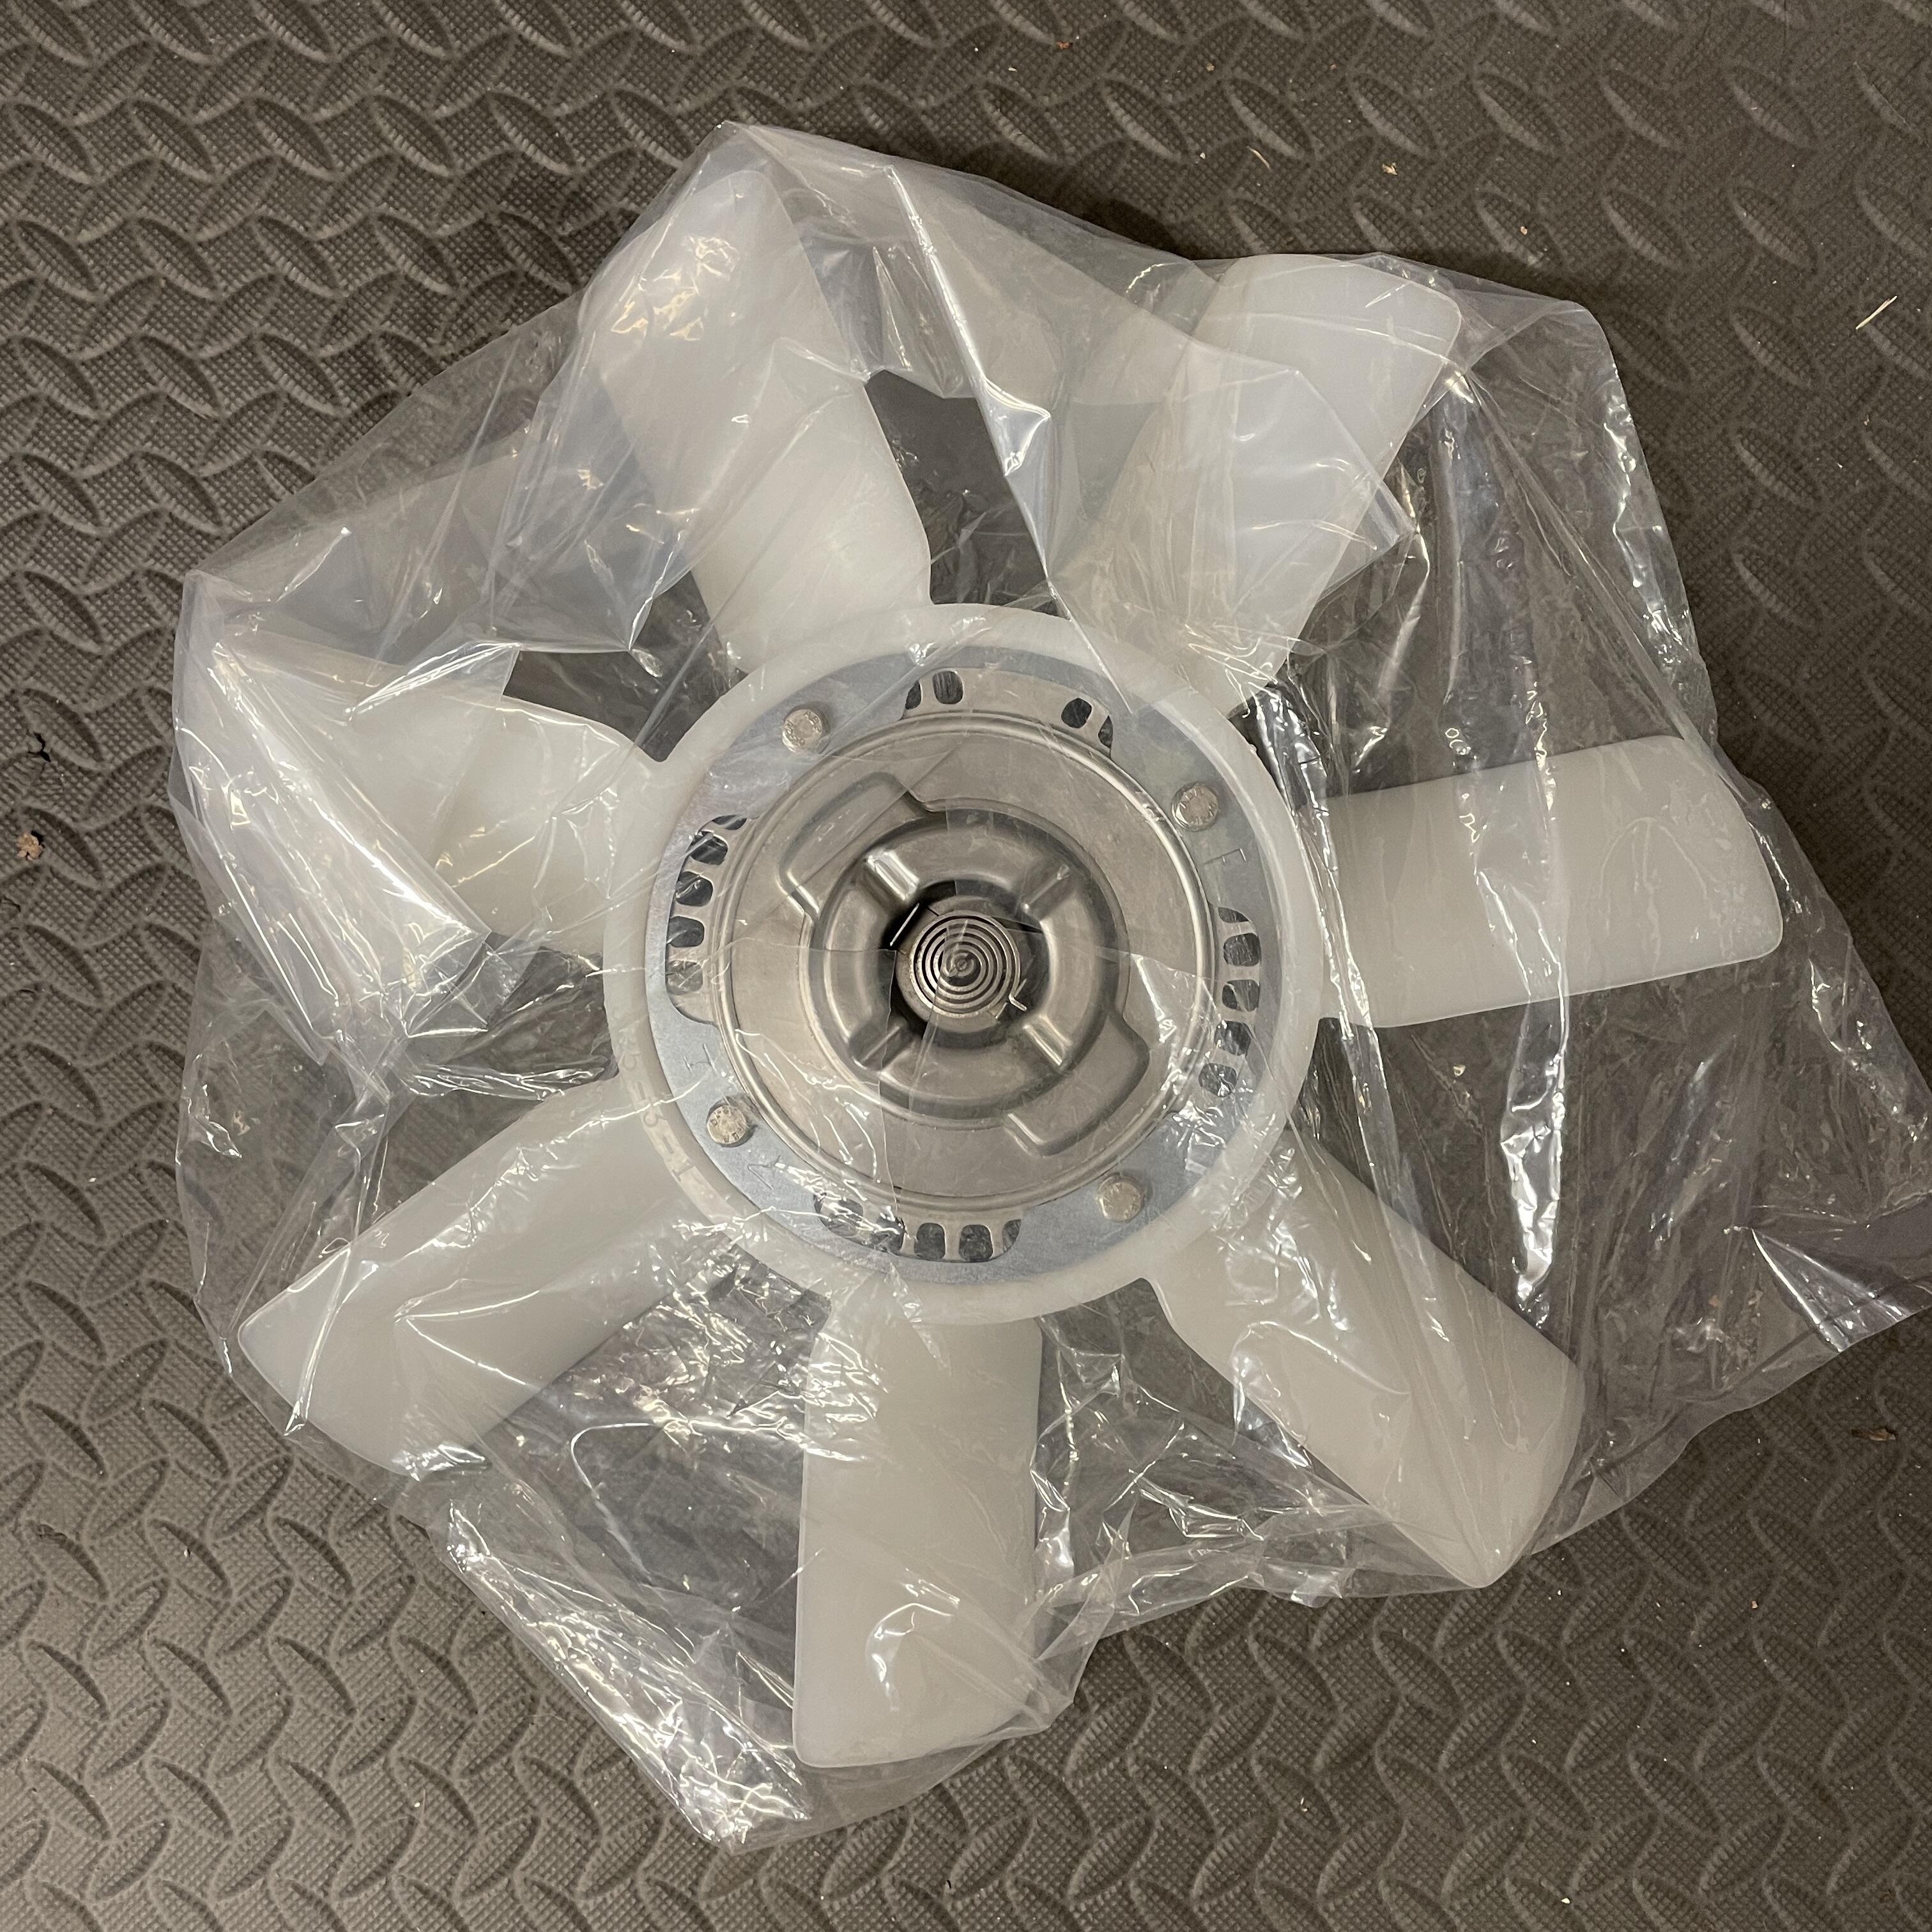
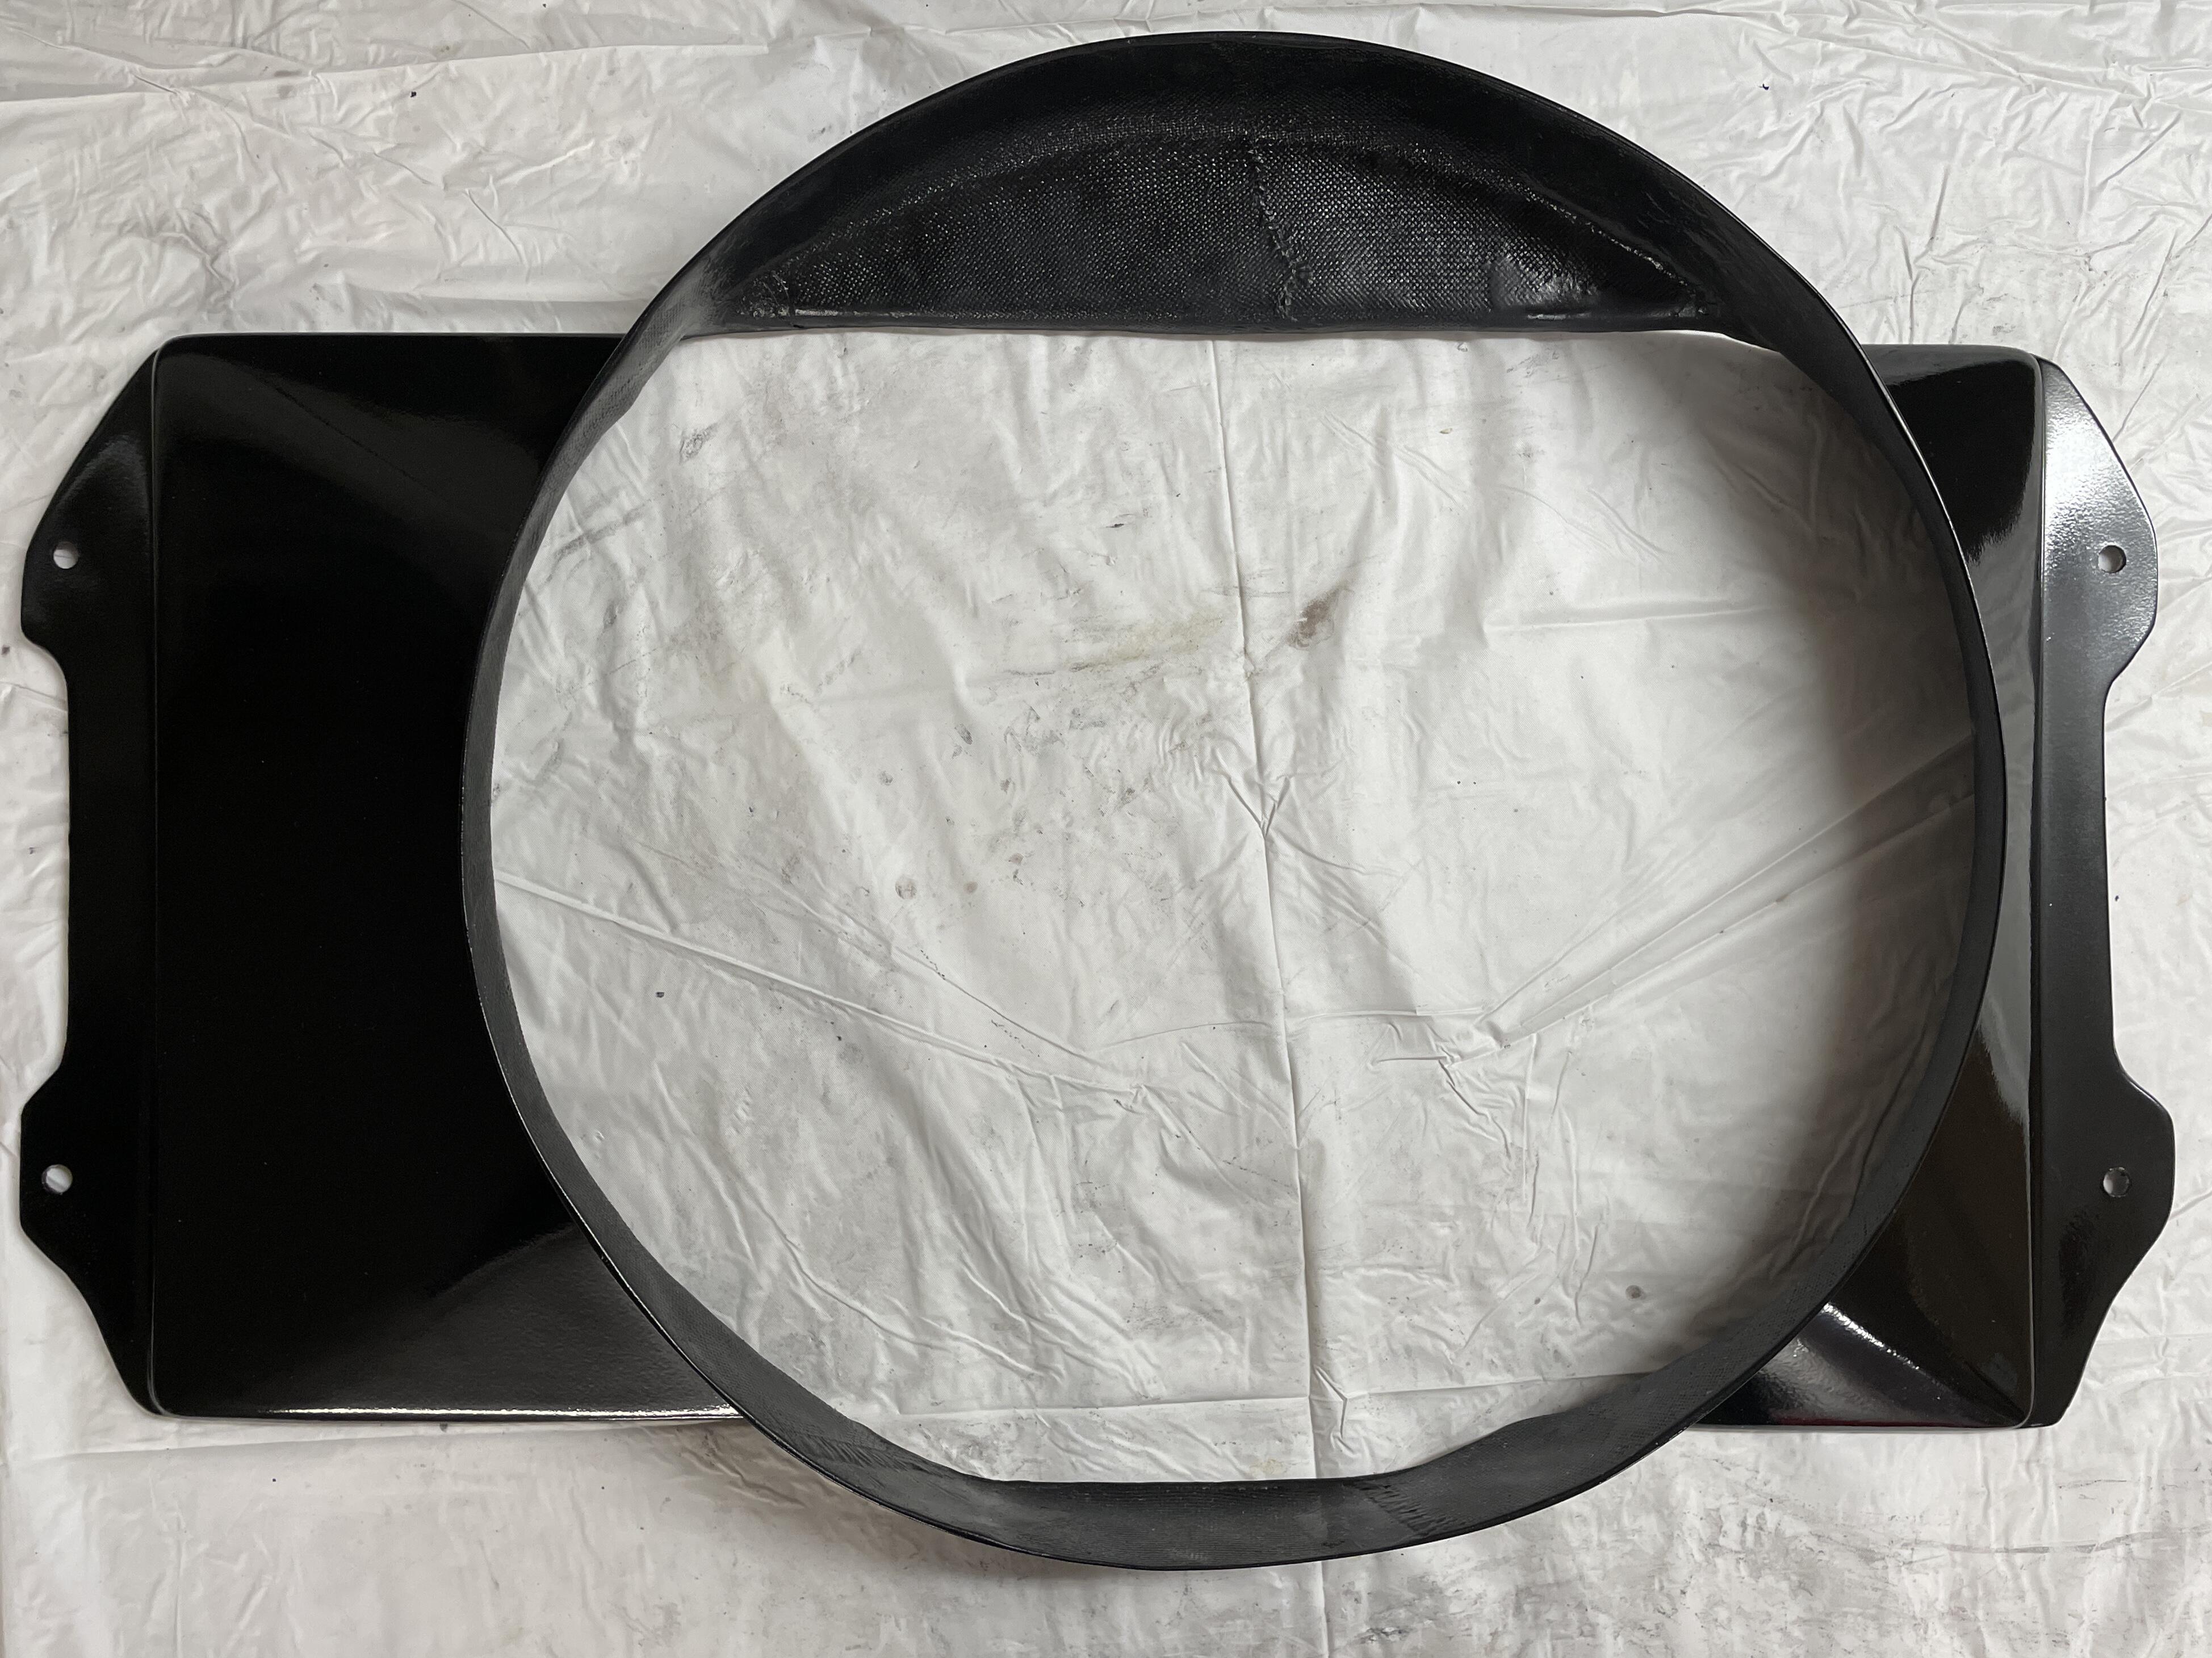
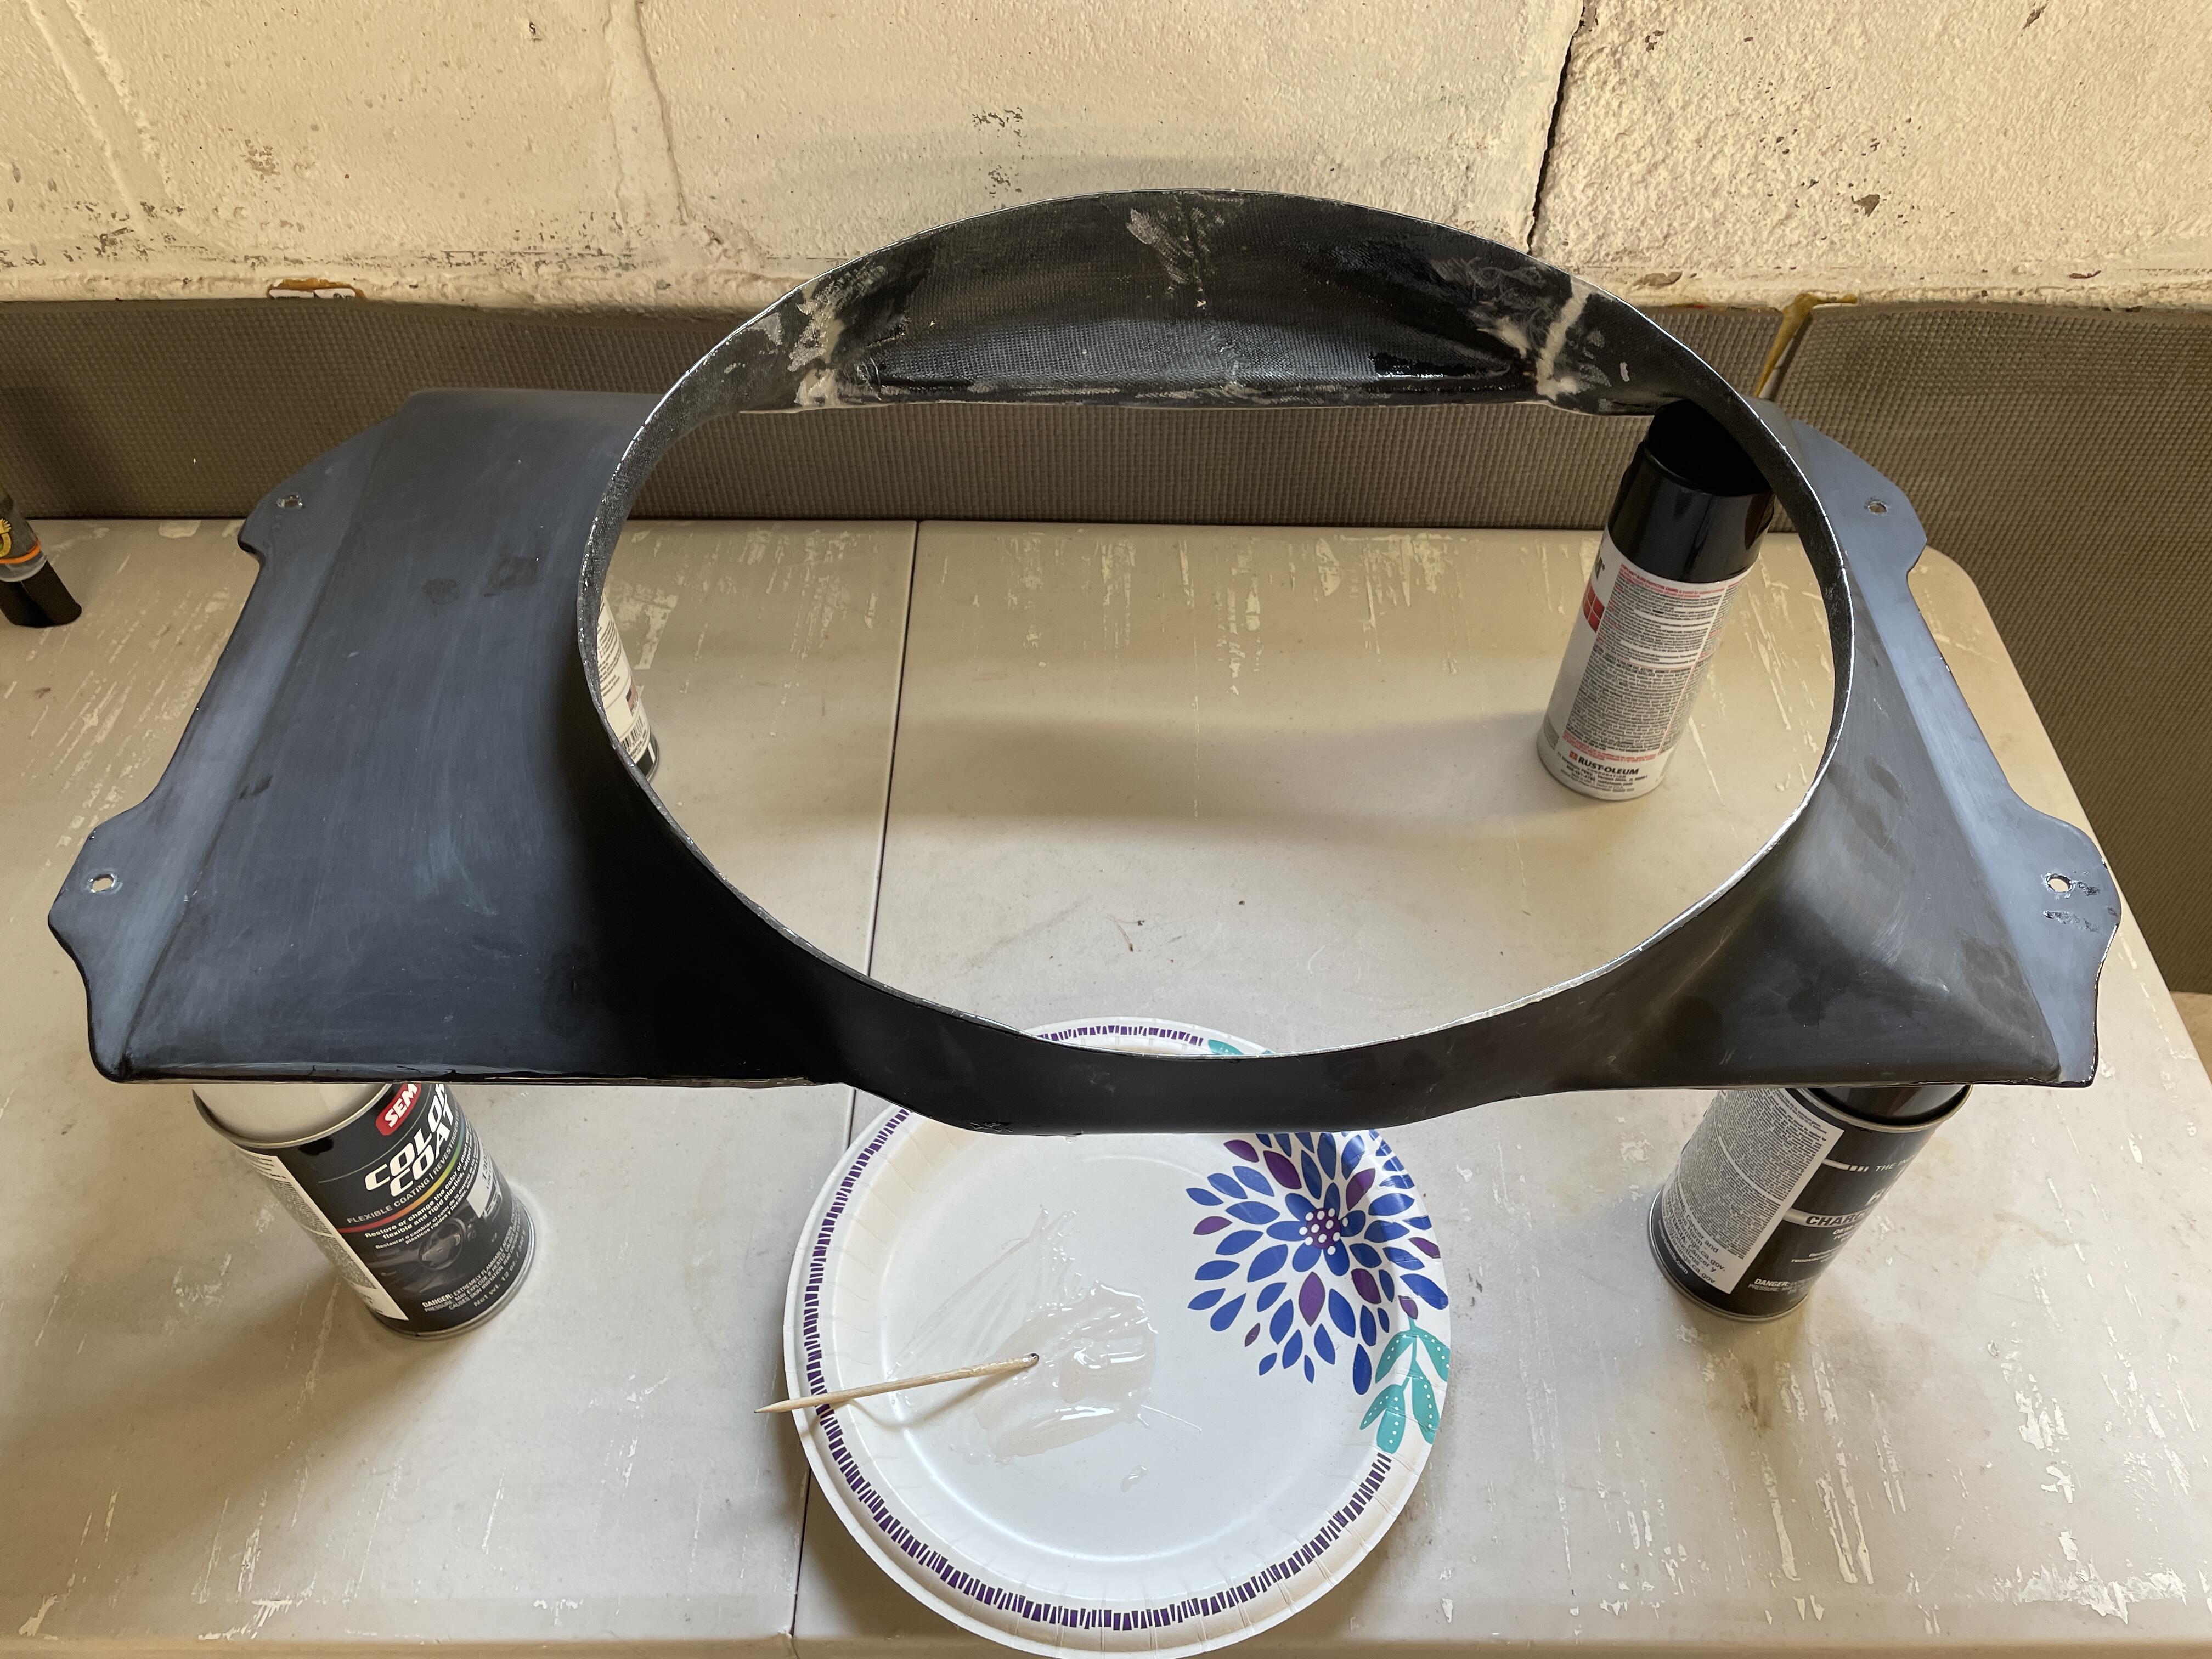
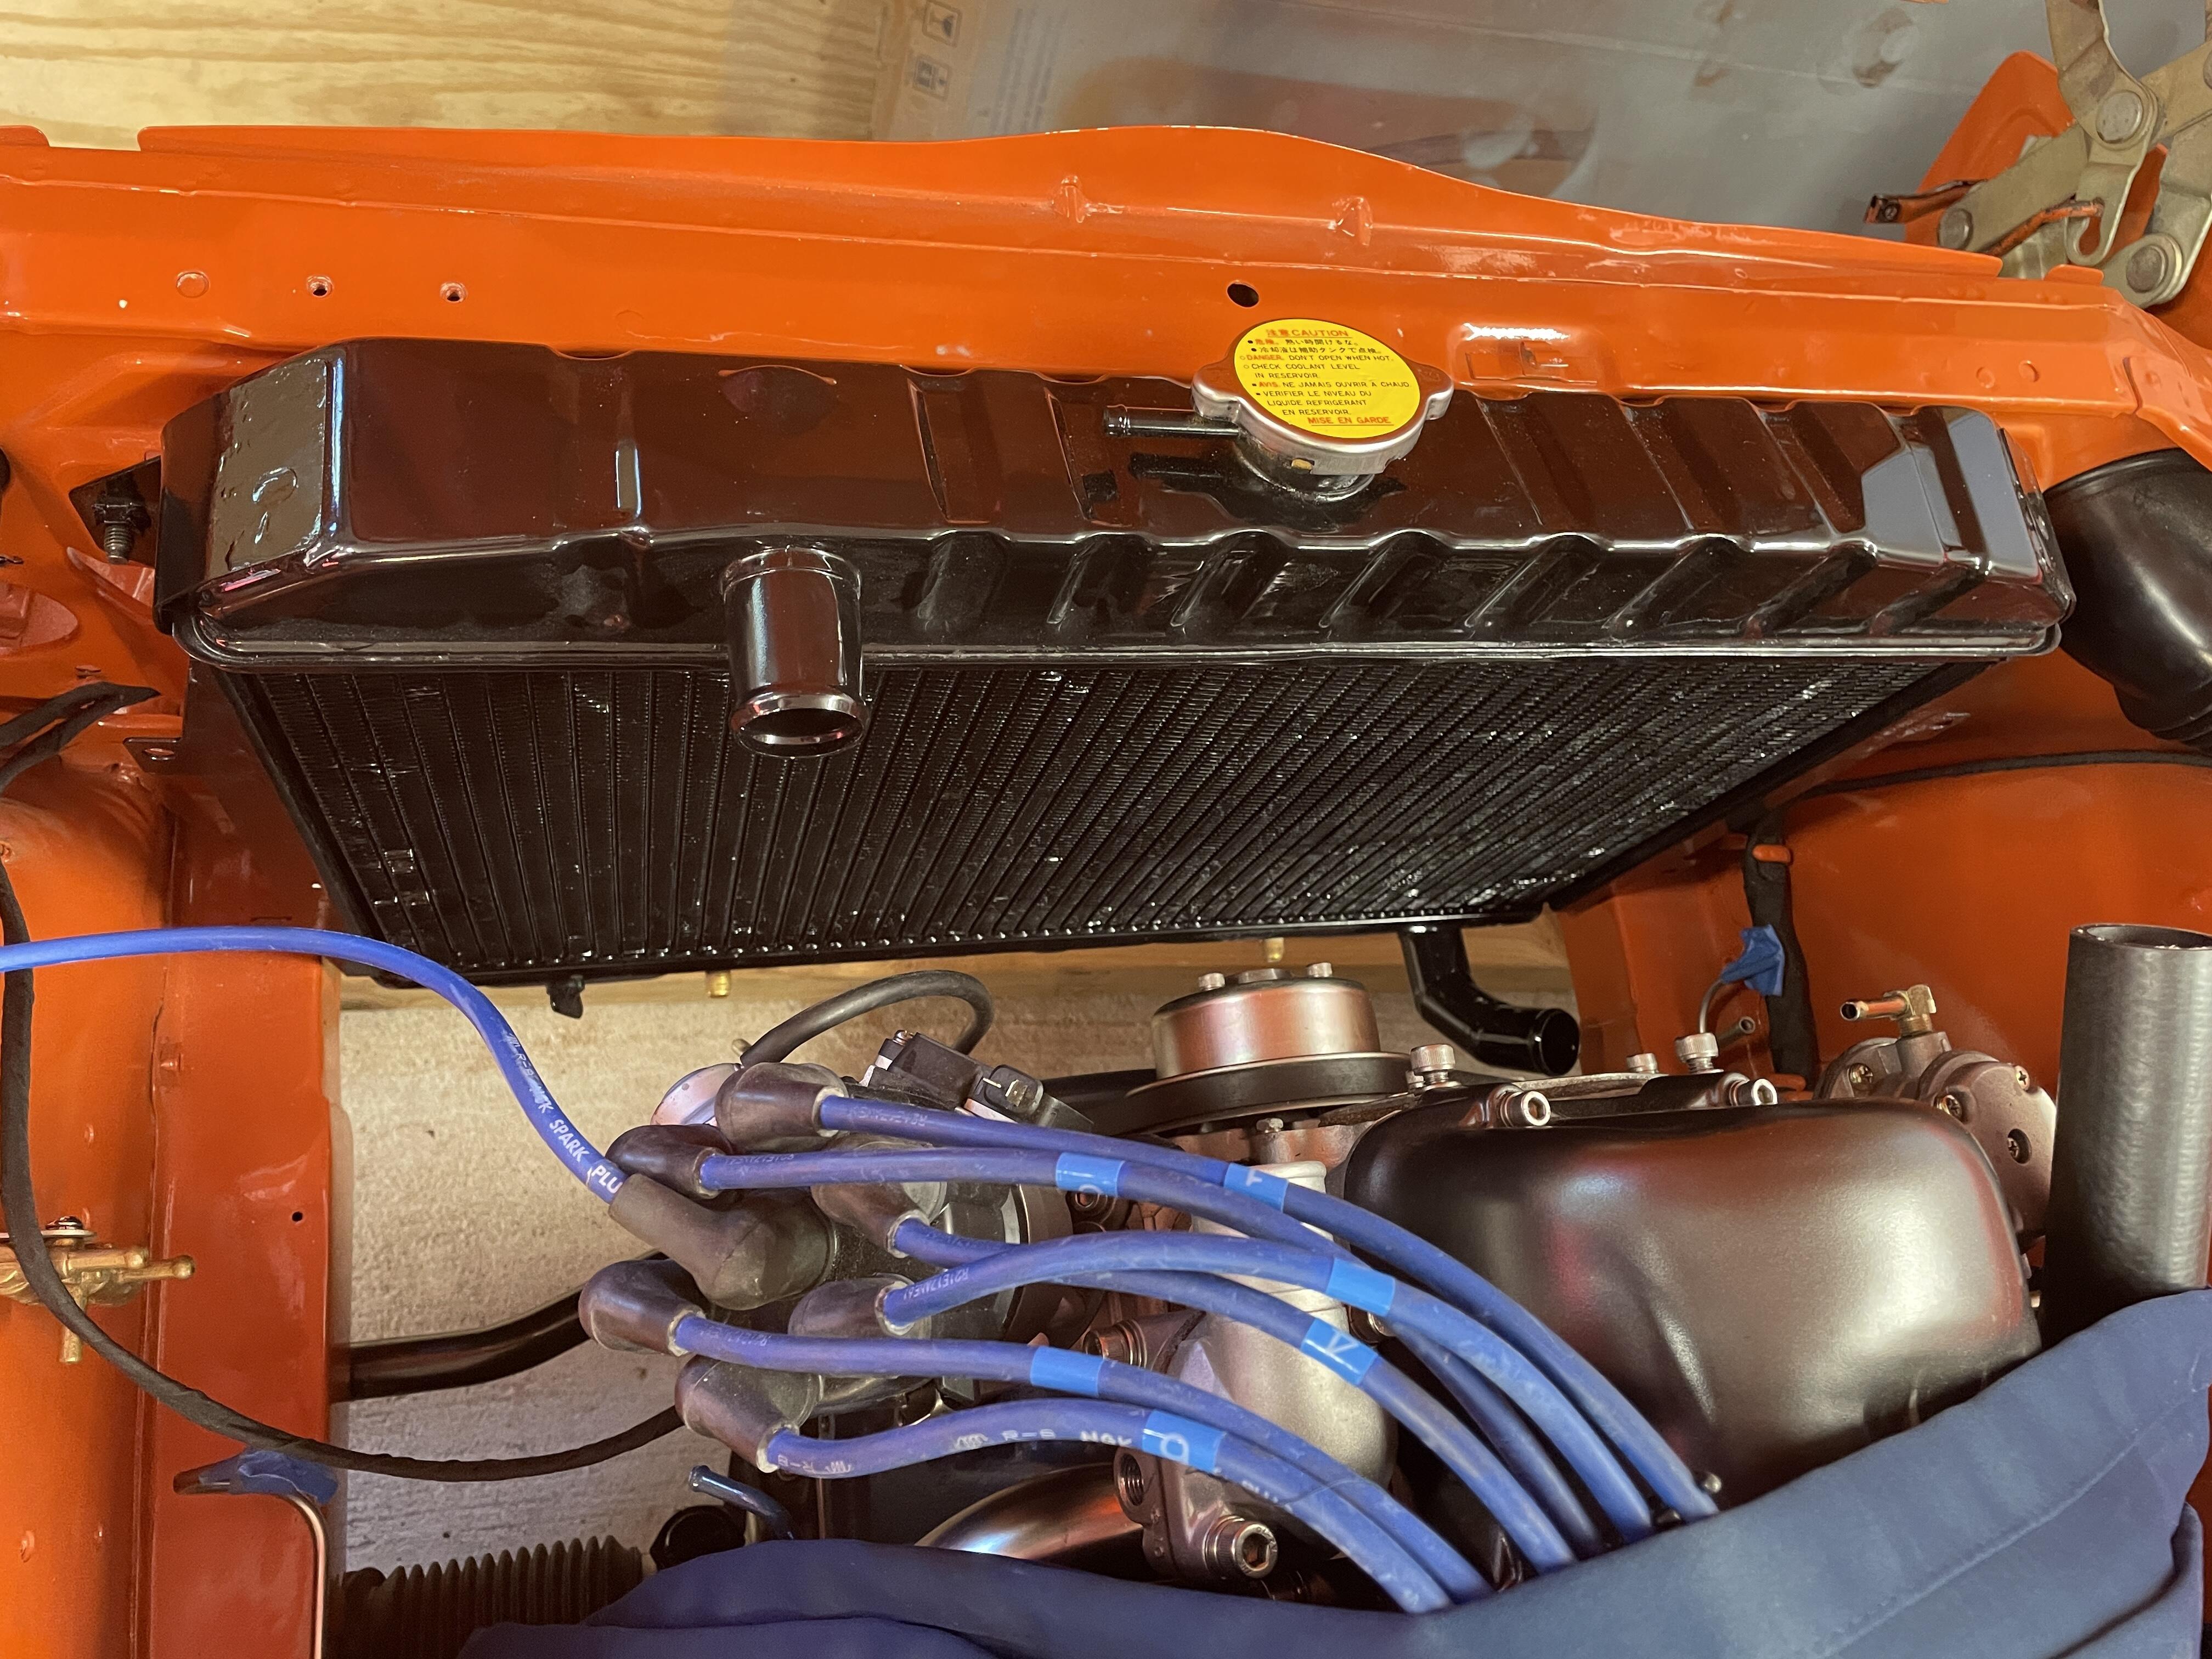
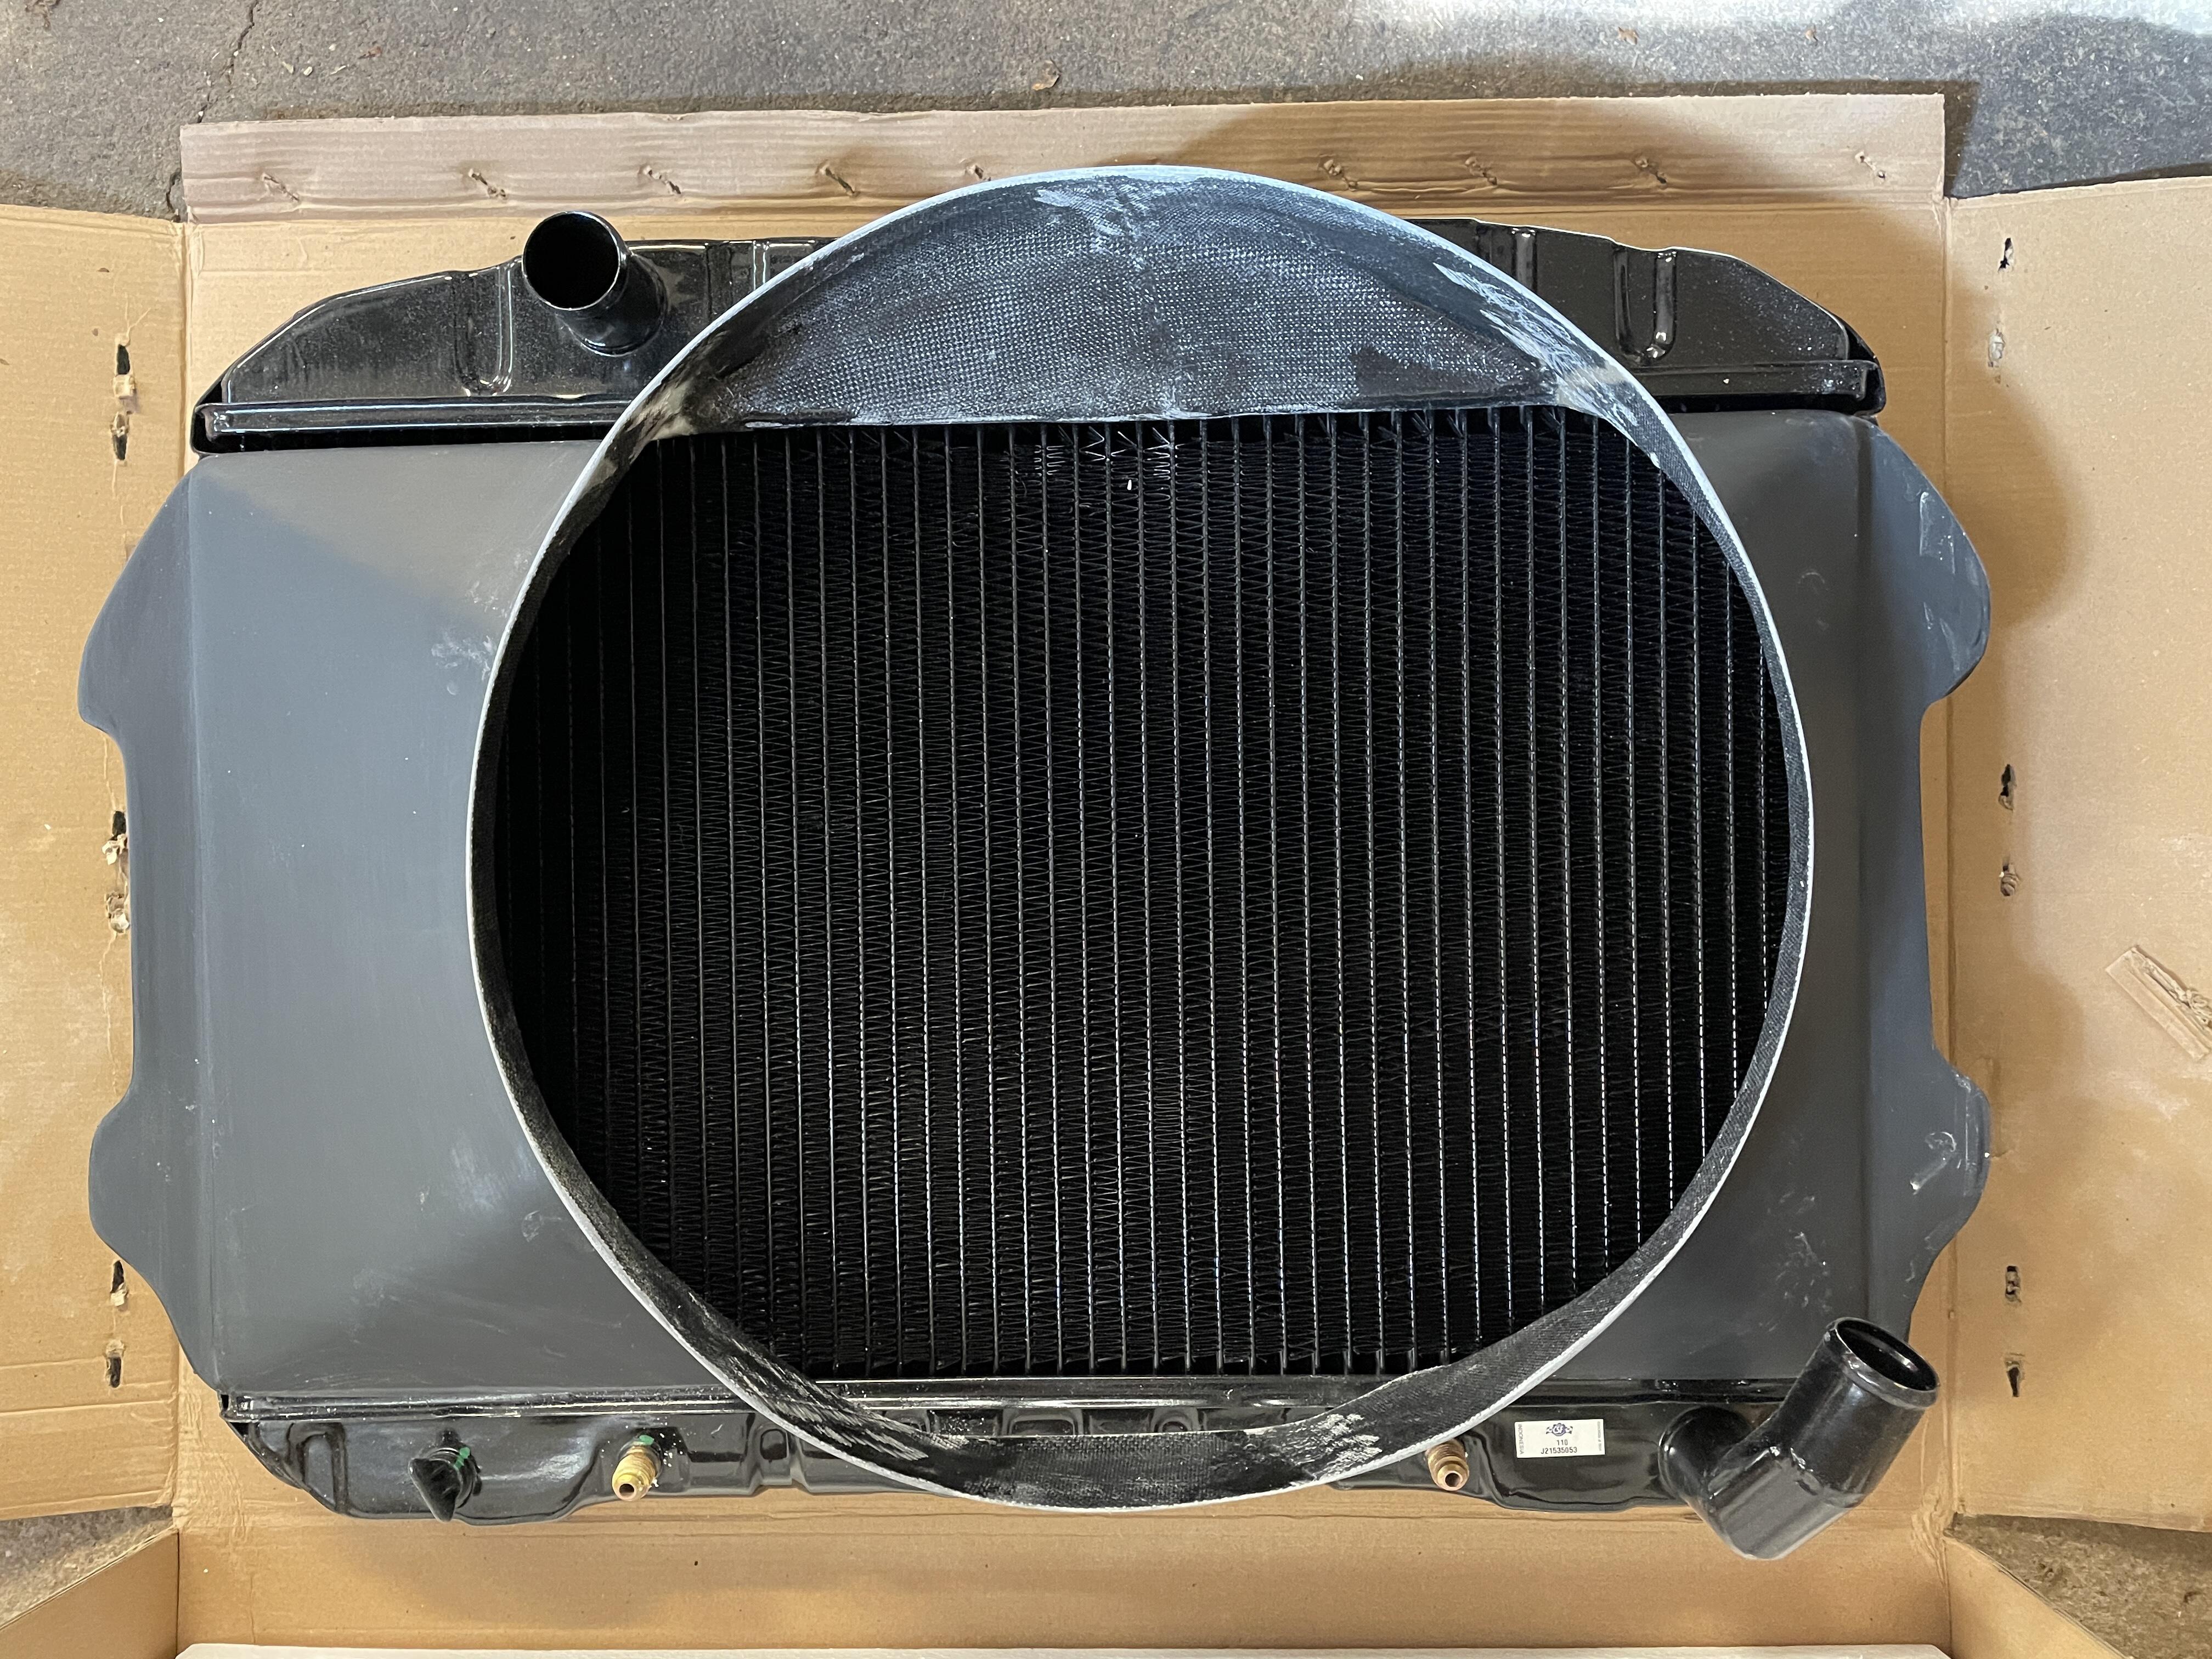
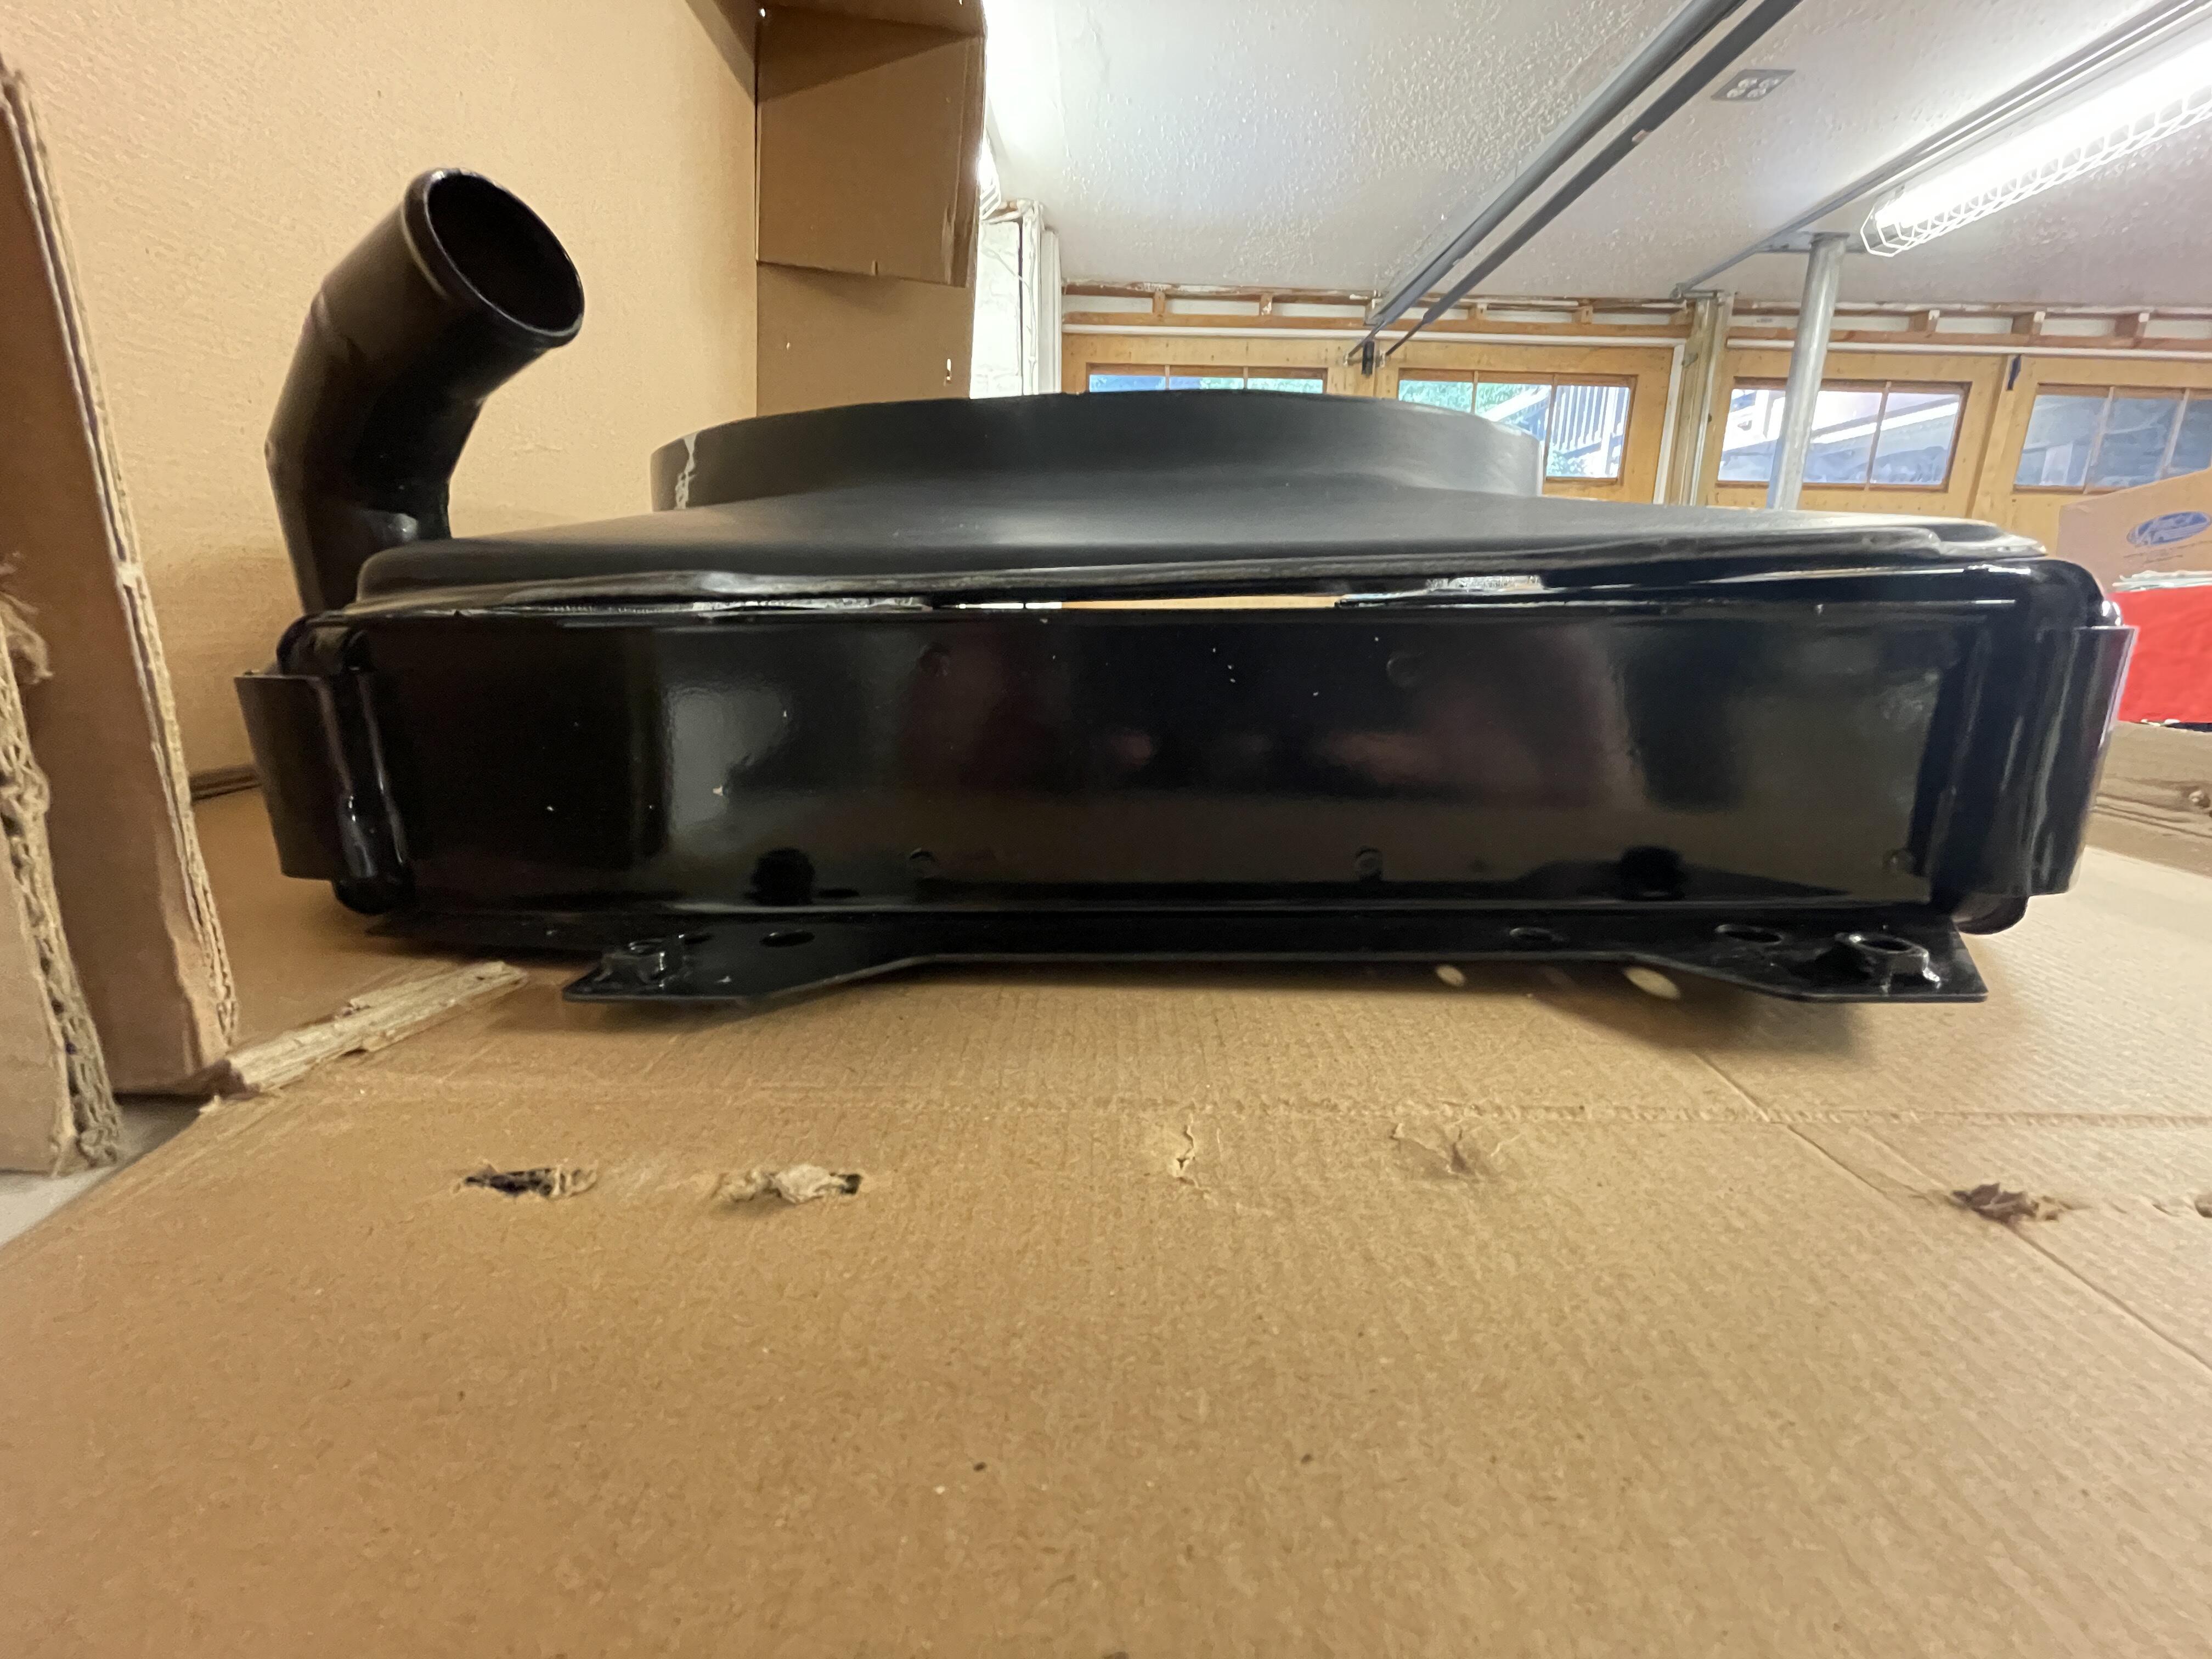
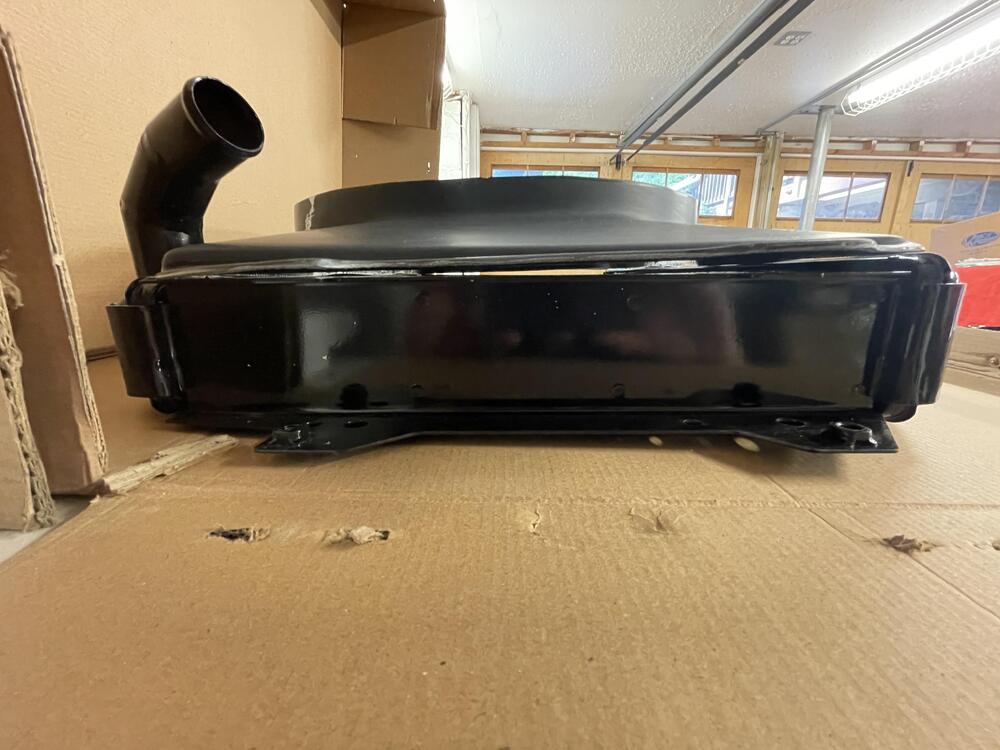
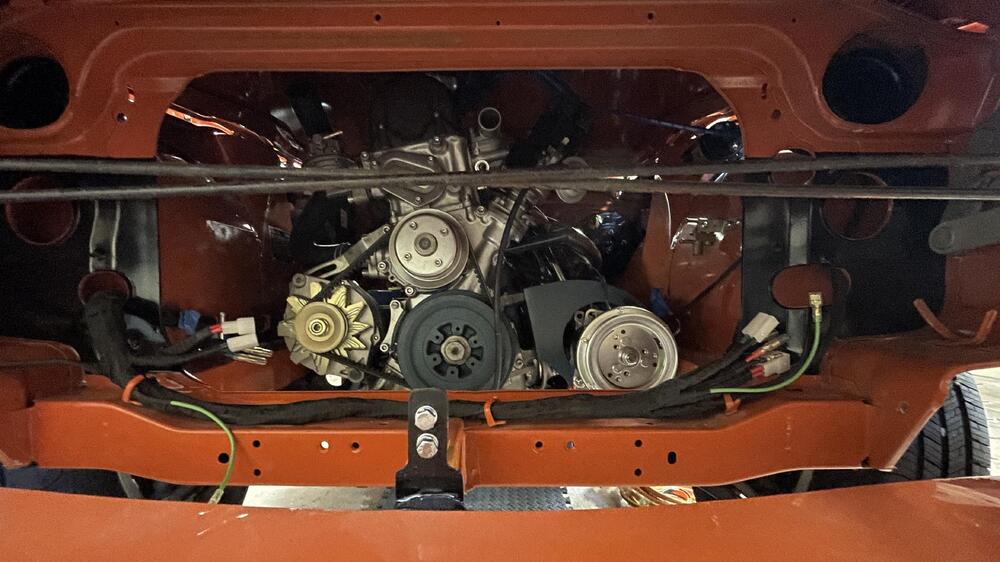
“…he never drives it. He just rubs it with a diaper.” After several days of painting, sanding, and polishing, the radiator and fan are in. The fan shroud is the fiberglass one from MSA, the fan is a seven-blade OEM, and the clutch is the original that came with the car (after much polishing and some matte high-temp clear coat). The fan shroud comes untrimmed, so there were a few days of cleaning up the fit. The paint is rattle can engine paint, just with several sanded coats and some heavy layers of clear sanded to 5000 then polished out. It’s held on with SS cap heads, but I’ve insulated it with rubber spacers on both sides of the fiberglass to prevent delaminating or cracking. The radiator is the 3-core 110 copper/brass radiator from @csf_radiators. Zero adjustments were needed. It just dropped right in. I think this really went a long way toward making this ZX engine look like it’s supposed to be in this car. I’m pretty happy with this arrangement. The only thing I’m concerned about is that the fan shroud flexes and will probably rattle against the radiator. I’m considering putting some weatherstripping foam around the perimeter of the shroud if I can find some with a high enough temperature rating.


-
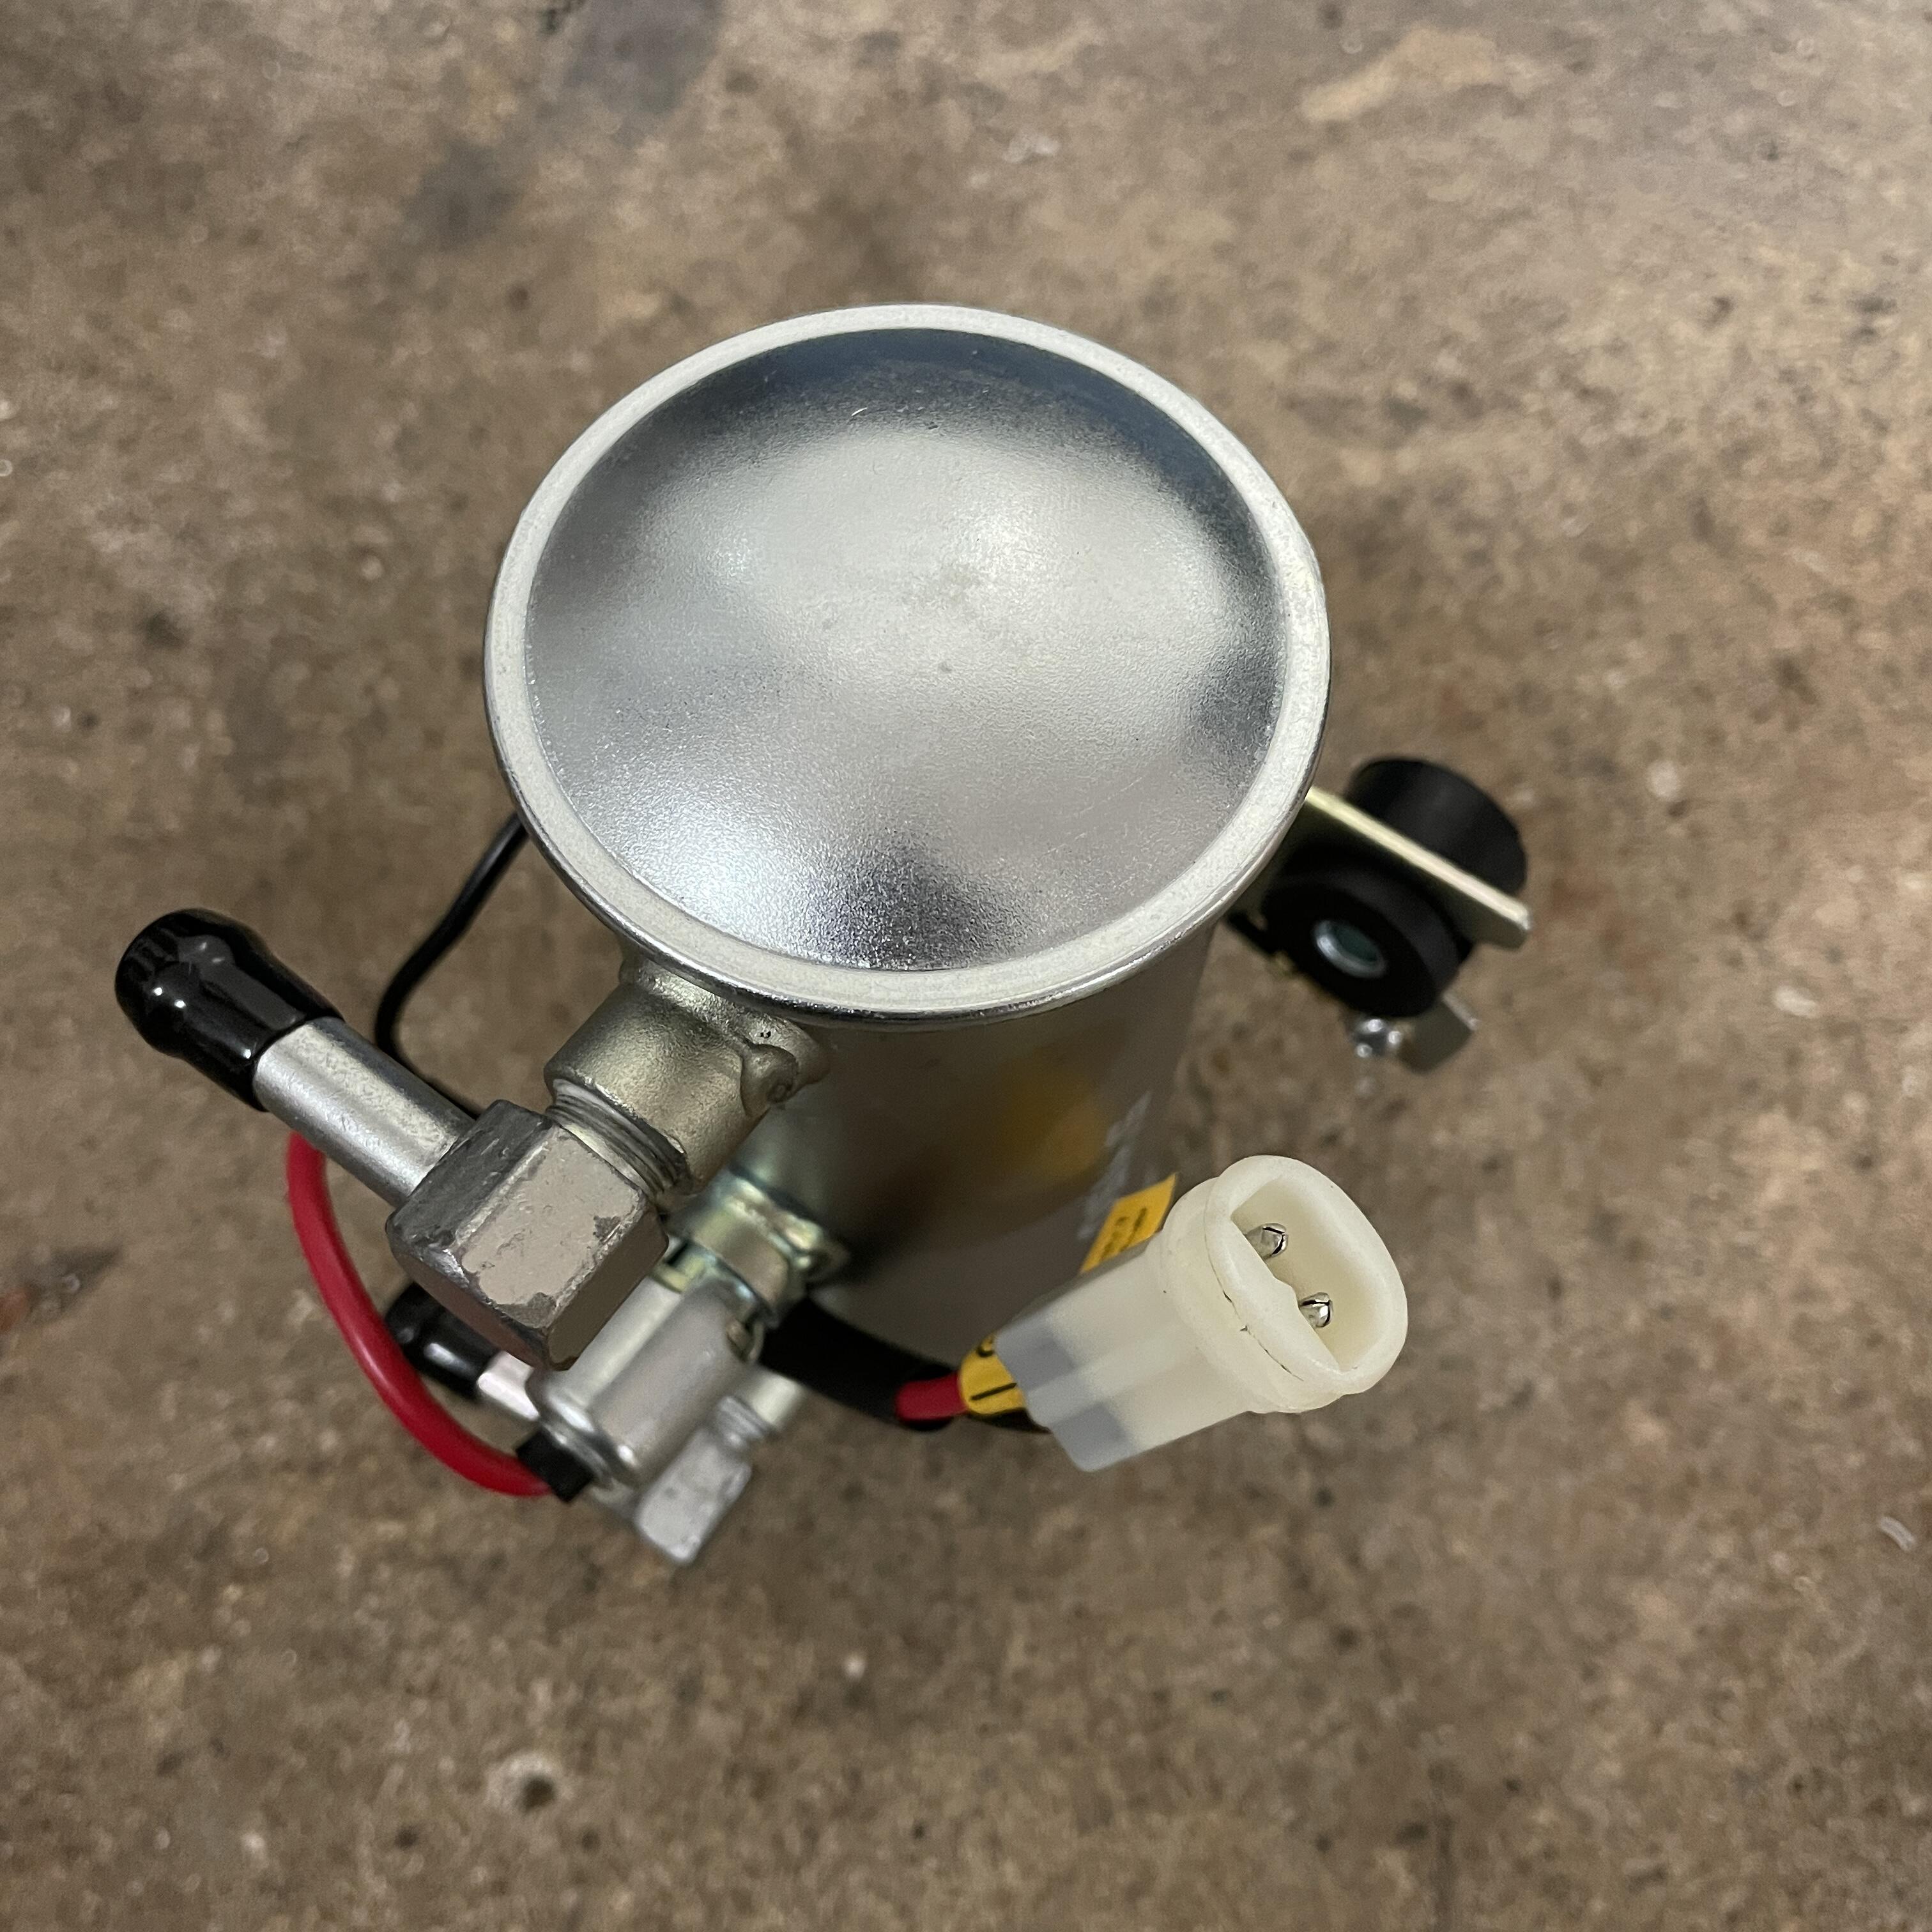
Can anyone point me to a place where I can buy the female partner to this male plug on the fuel pump?

-
Thank you! I just wish I hadn’t forgotten to paint the starter plate.
-
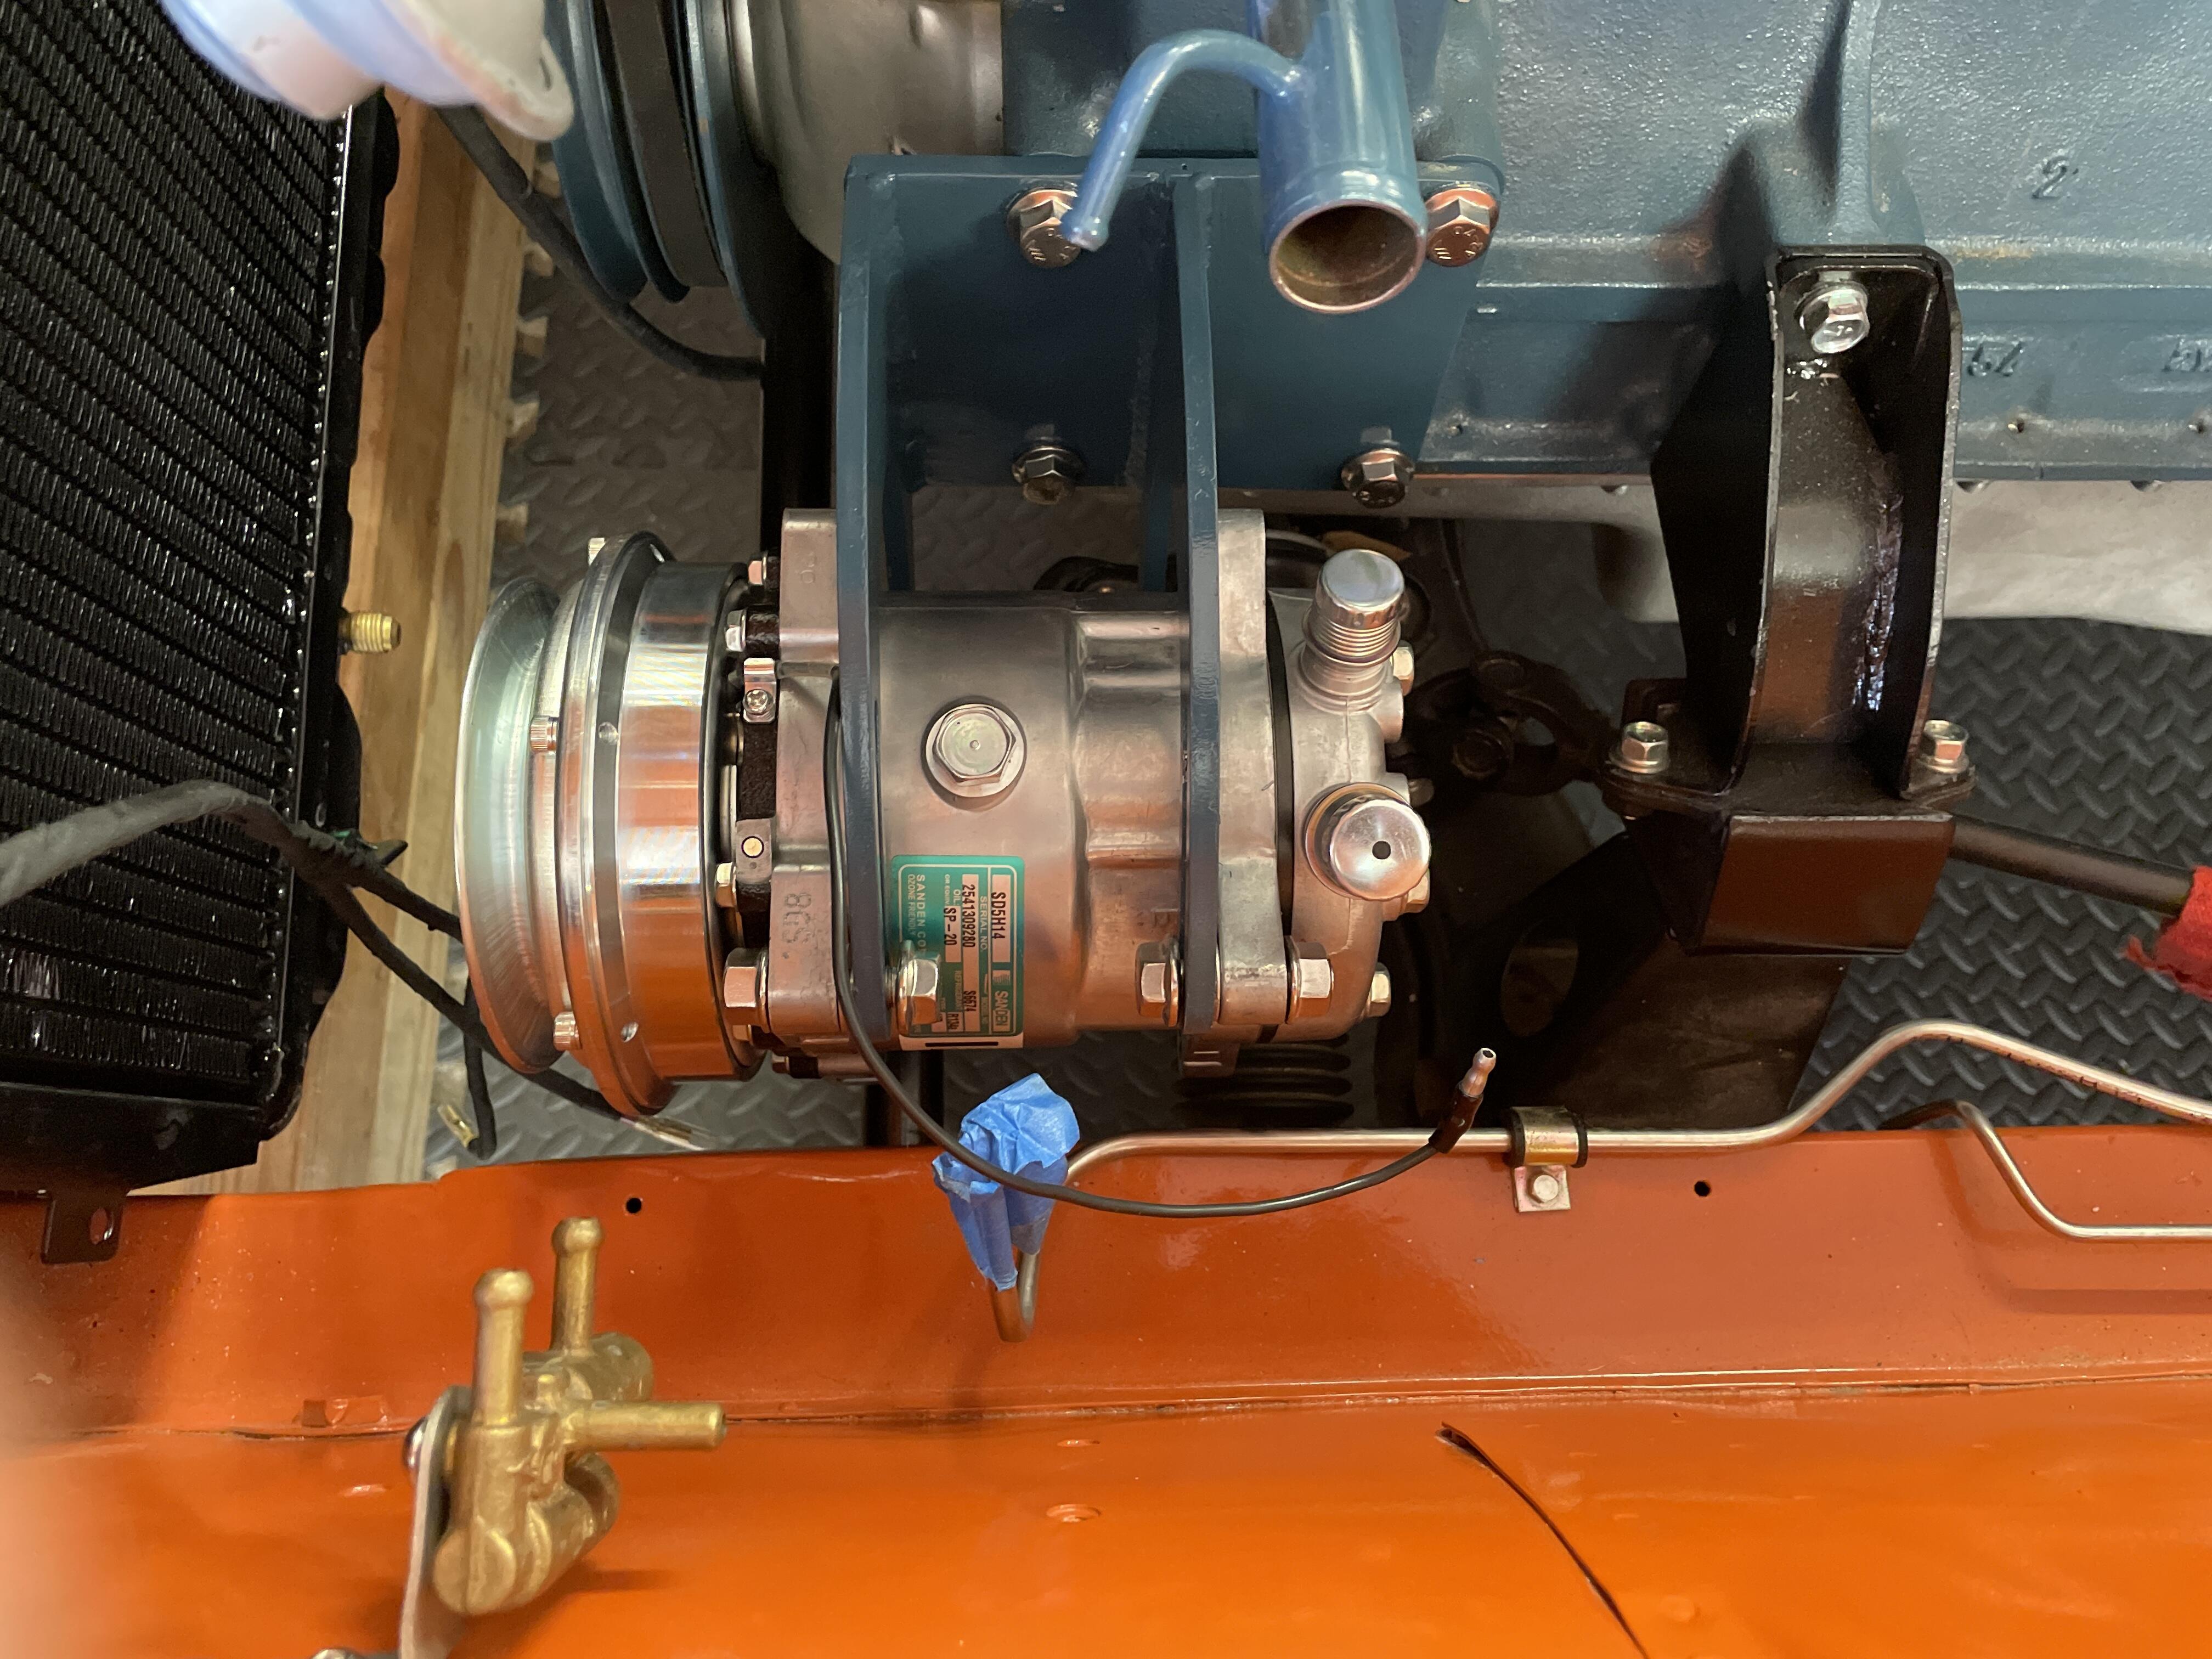
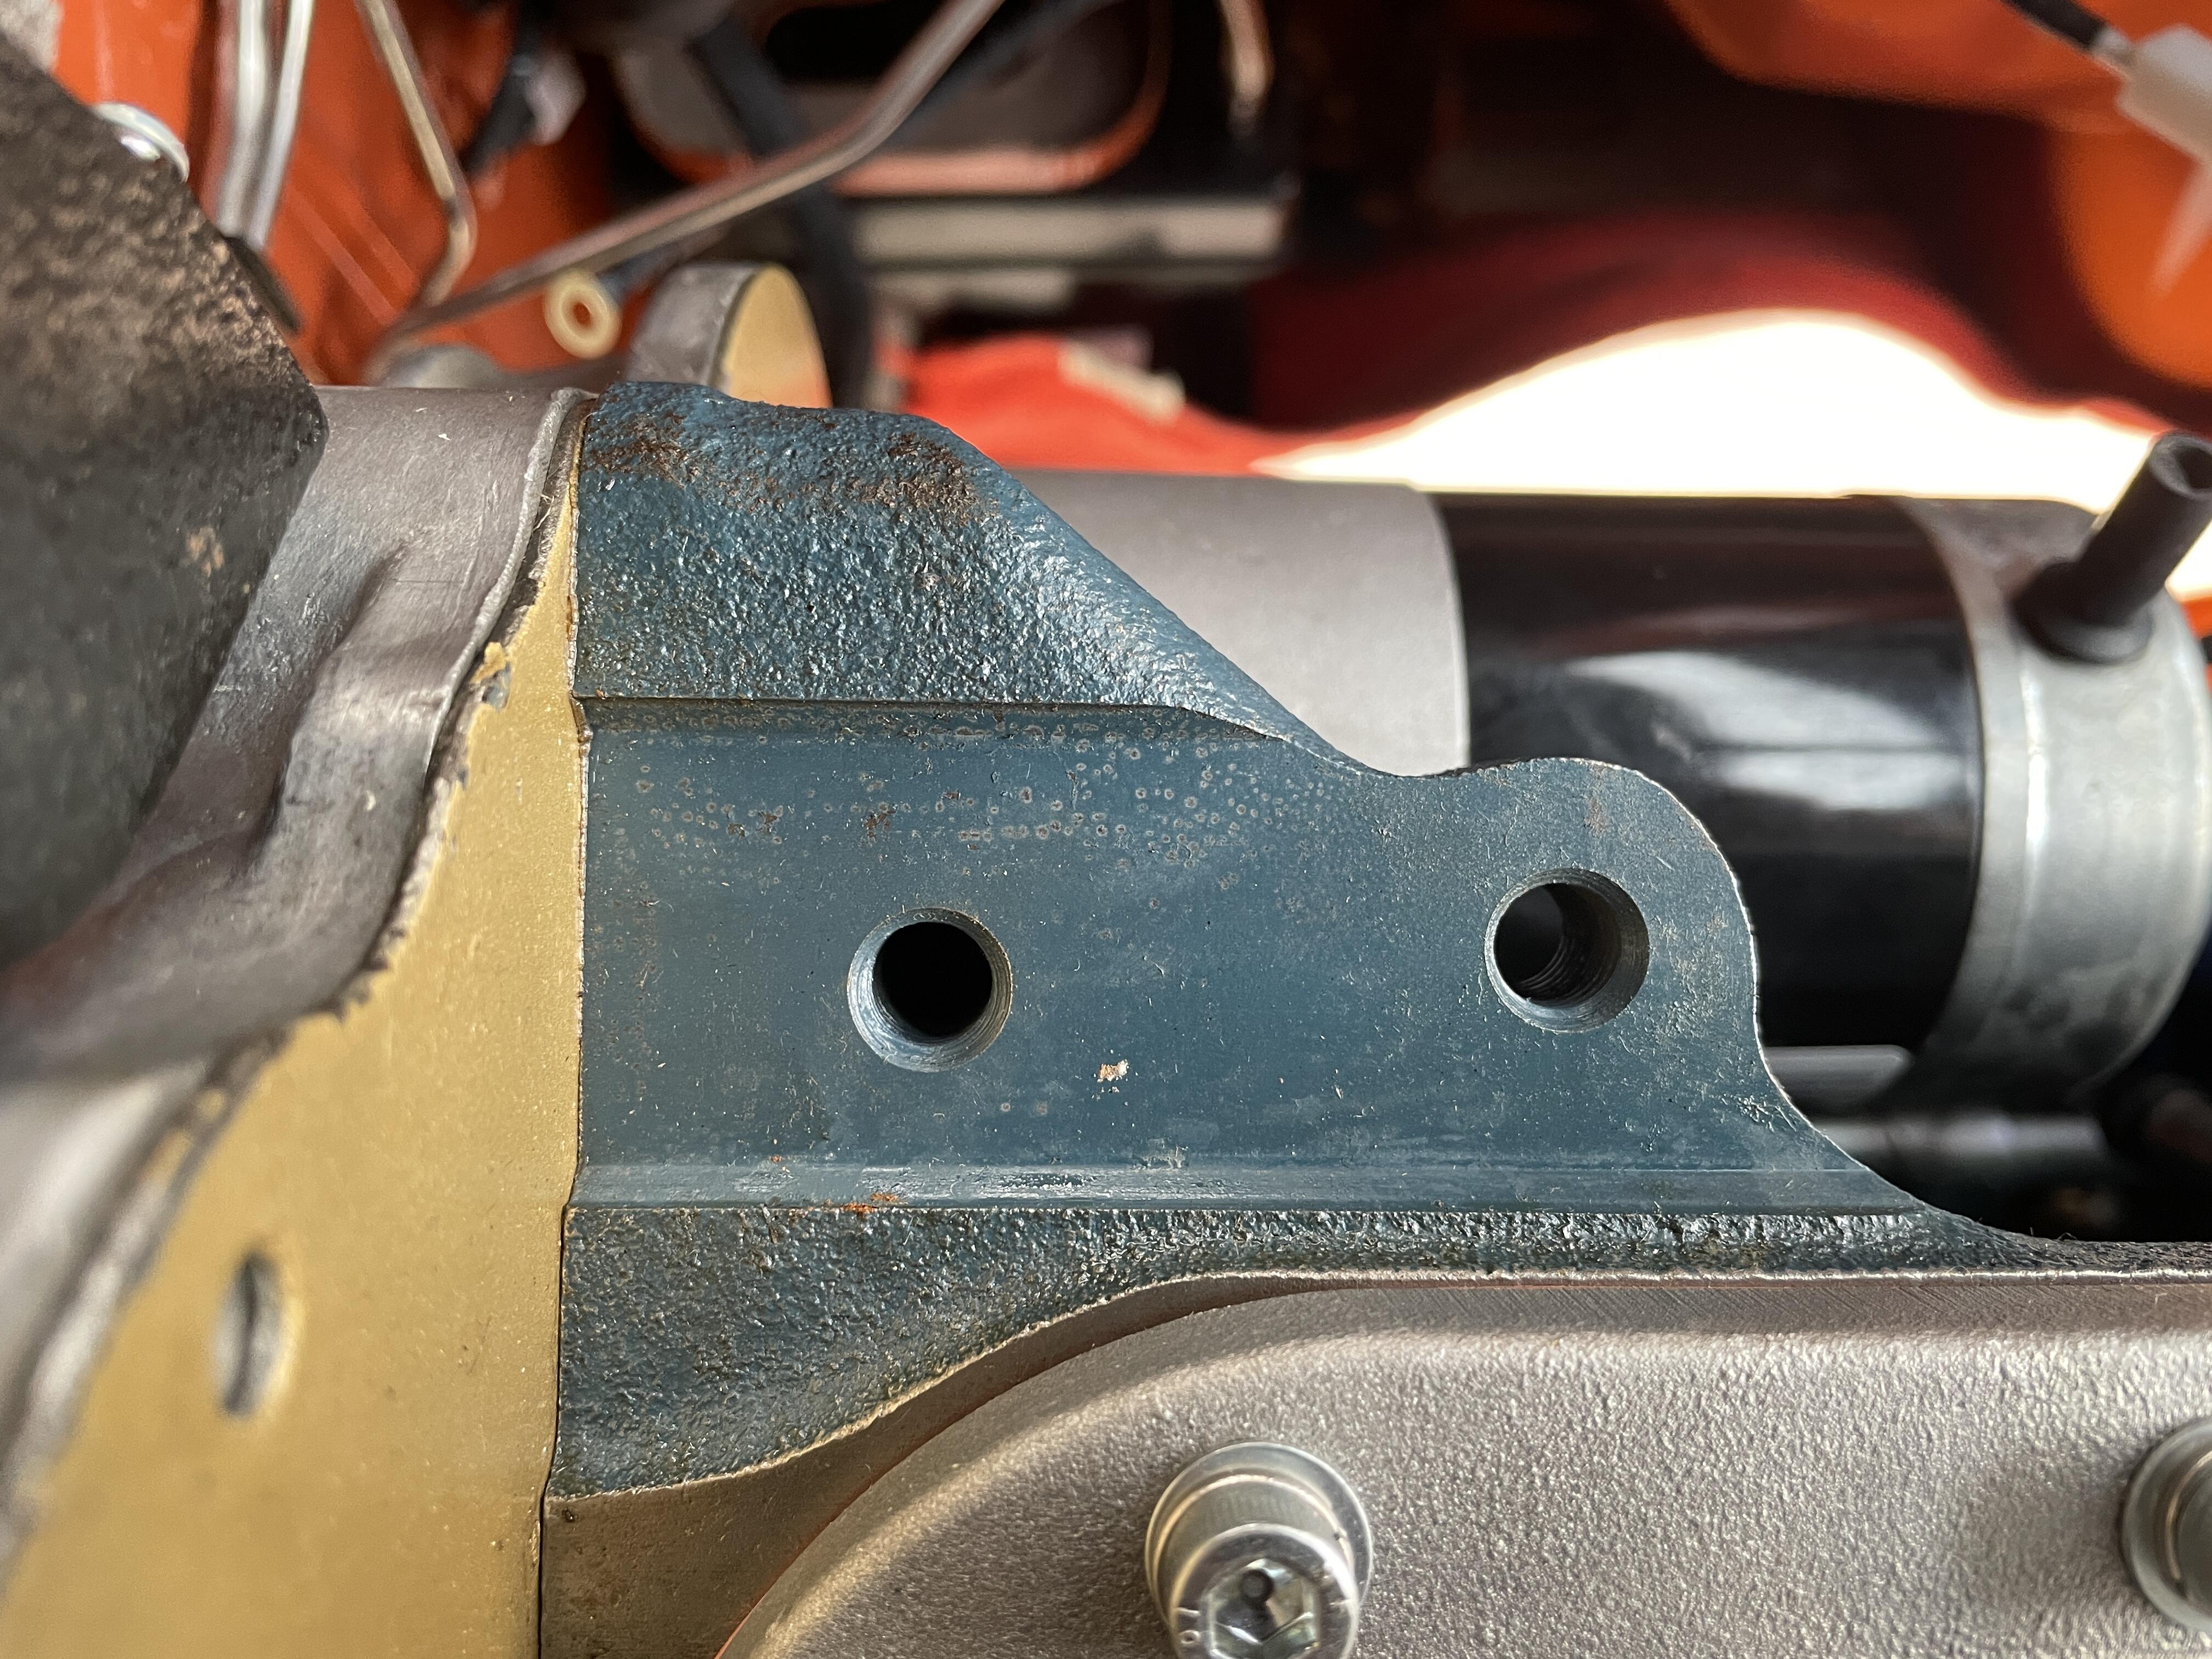
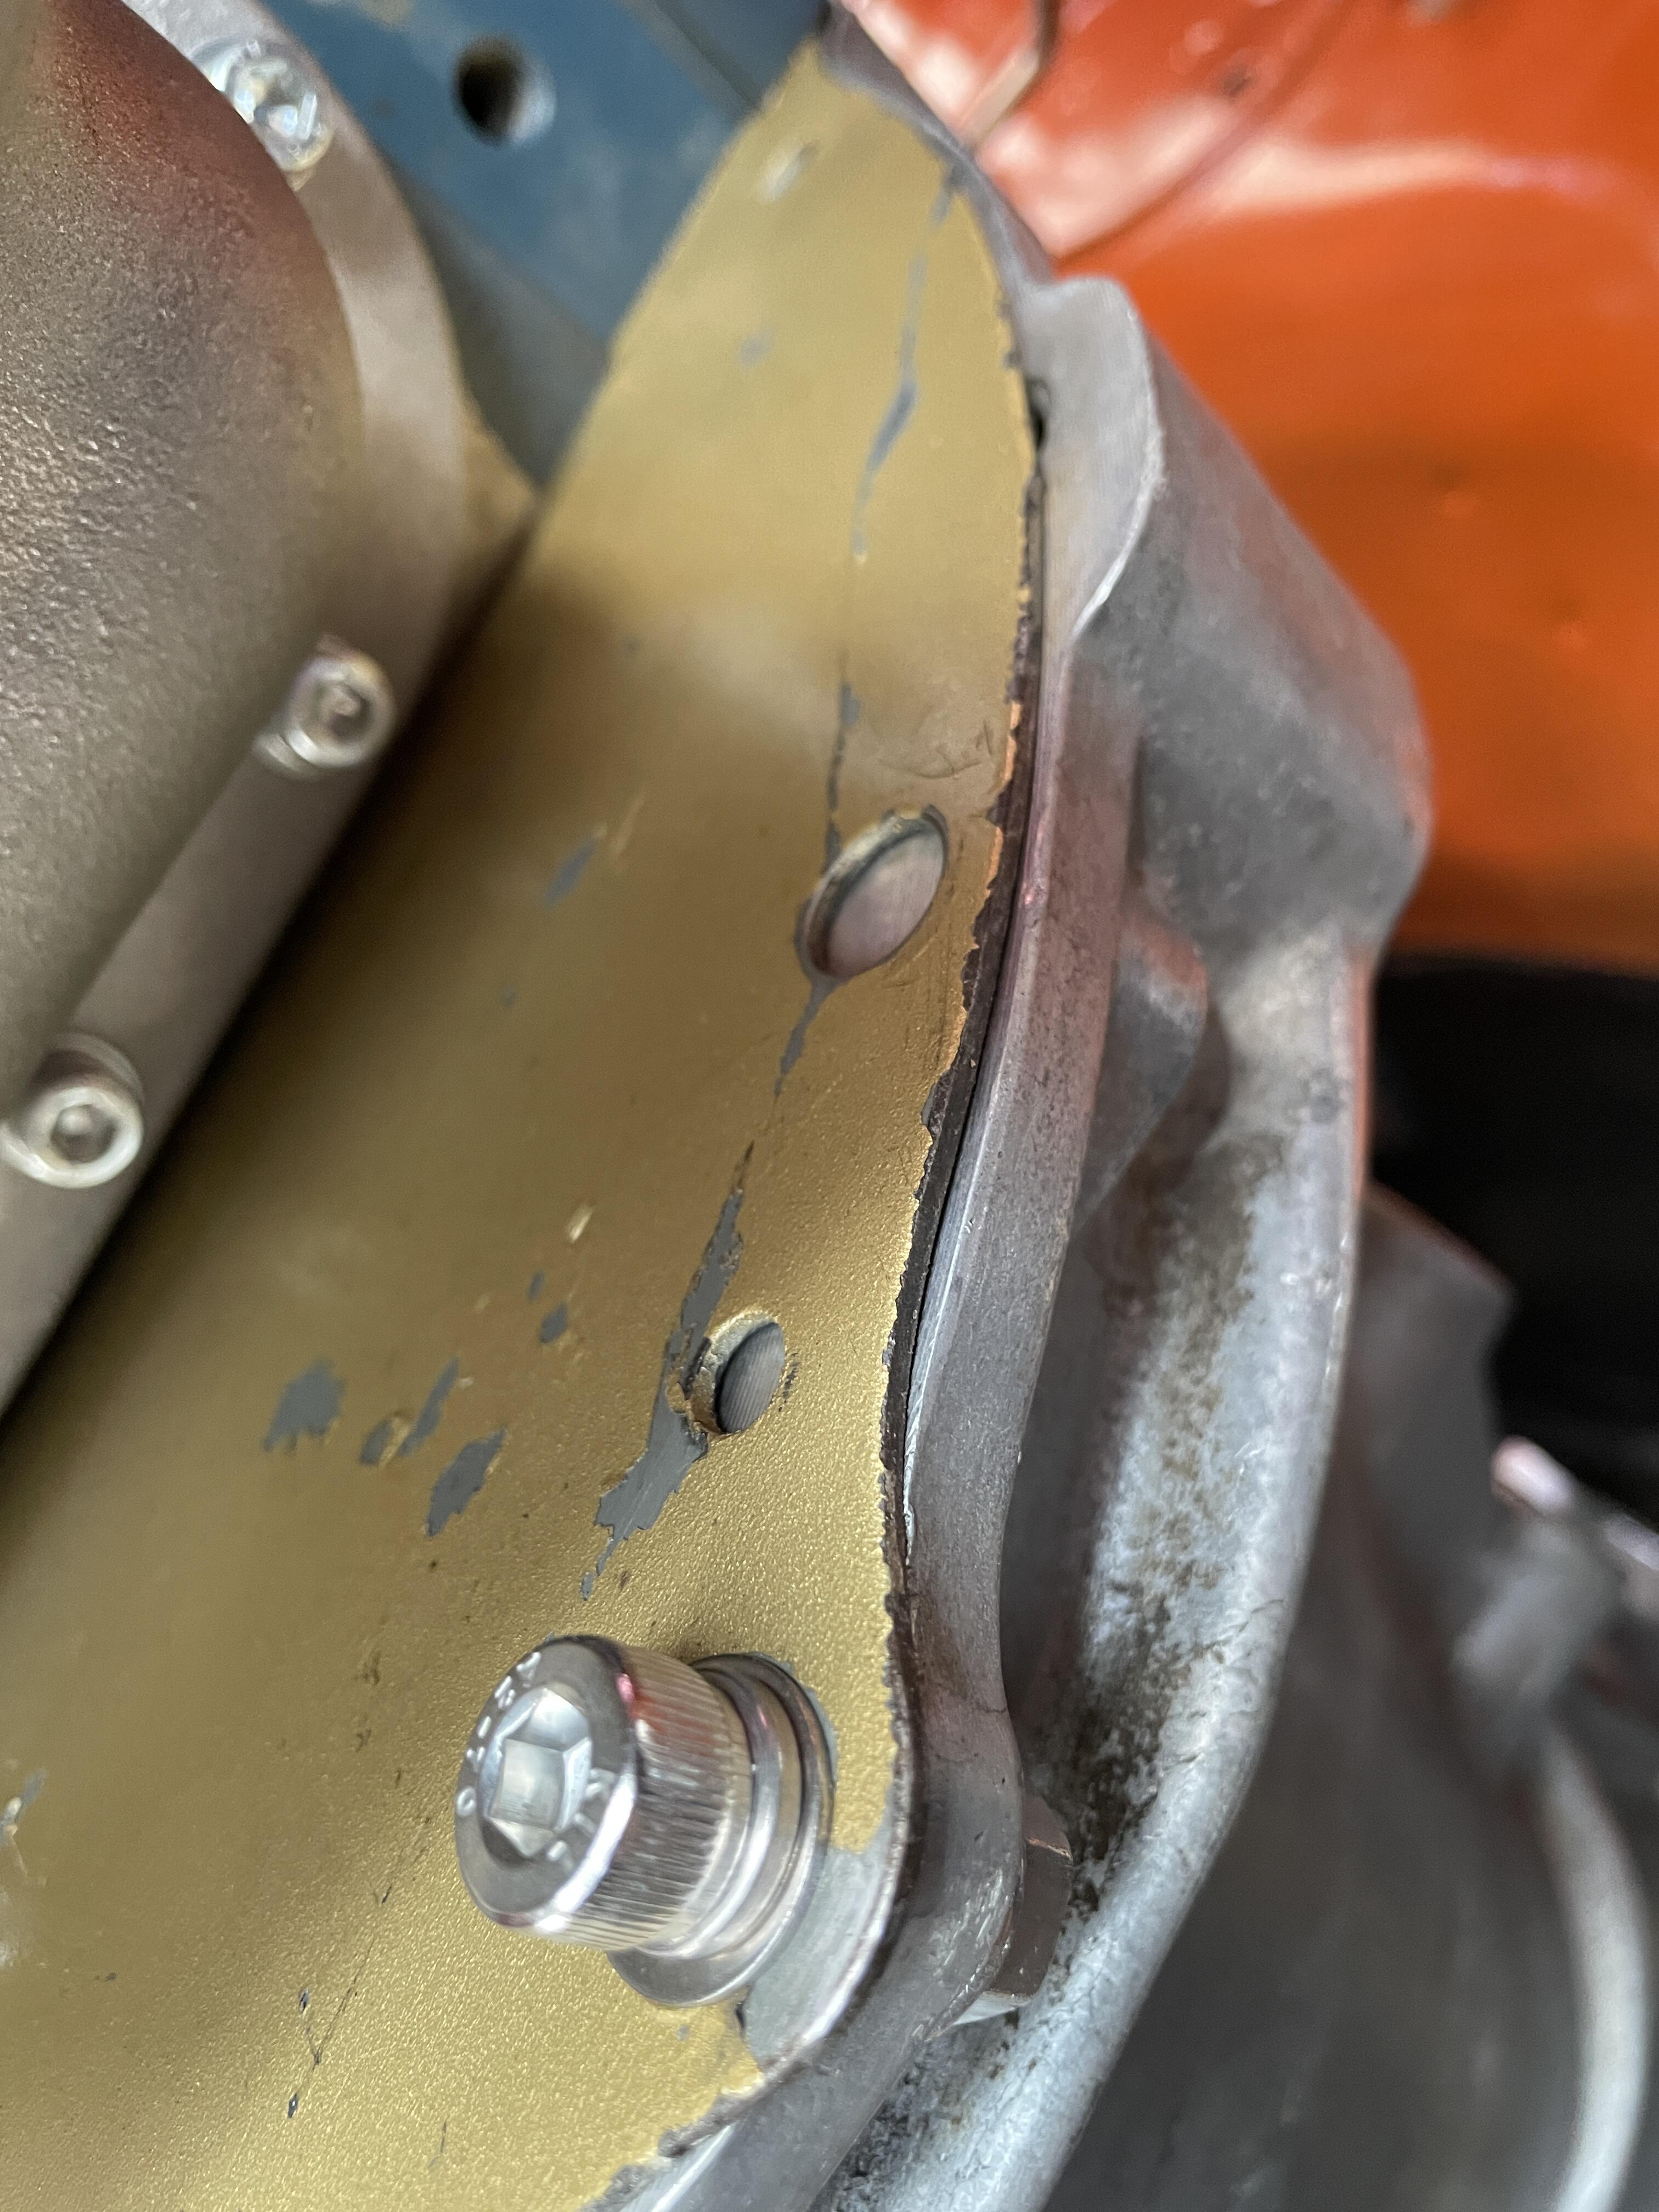
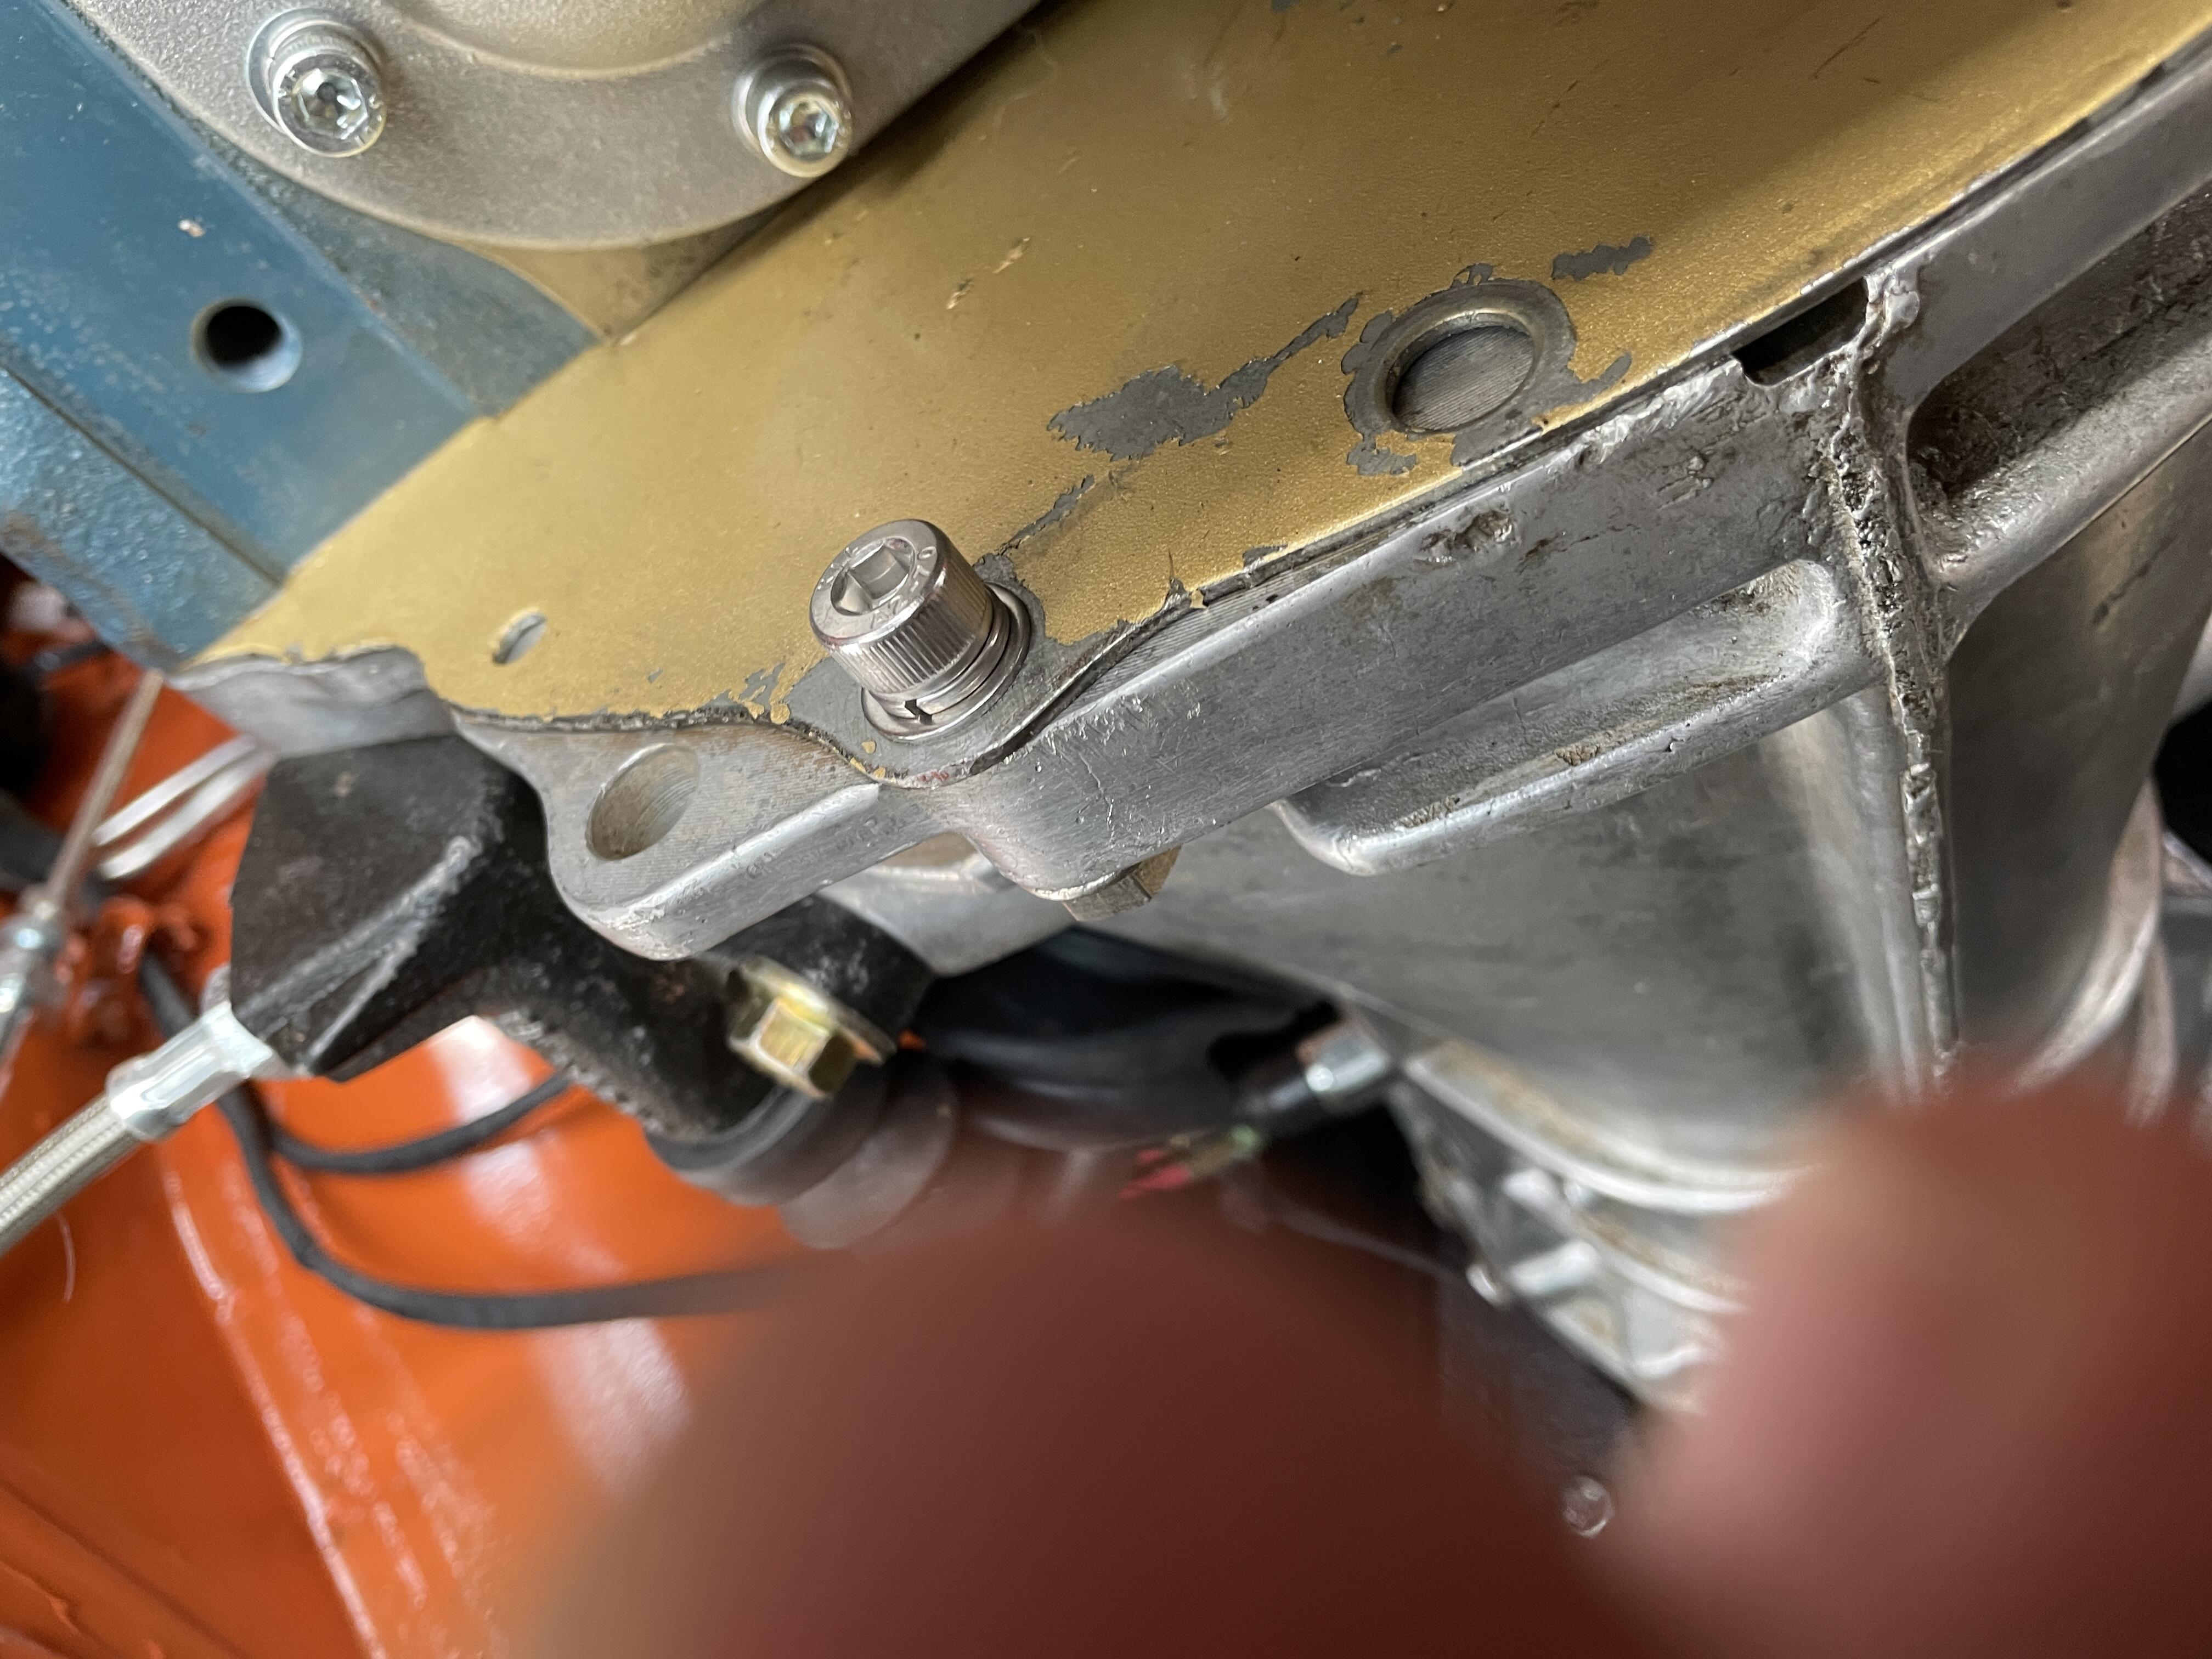
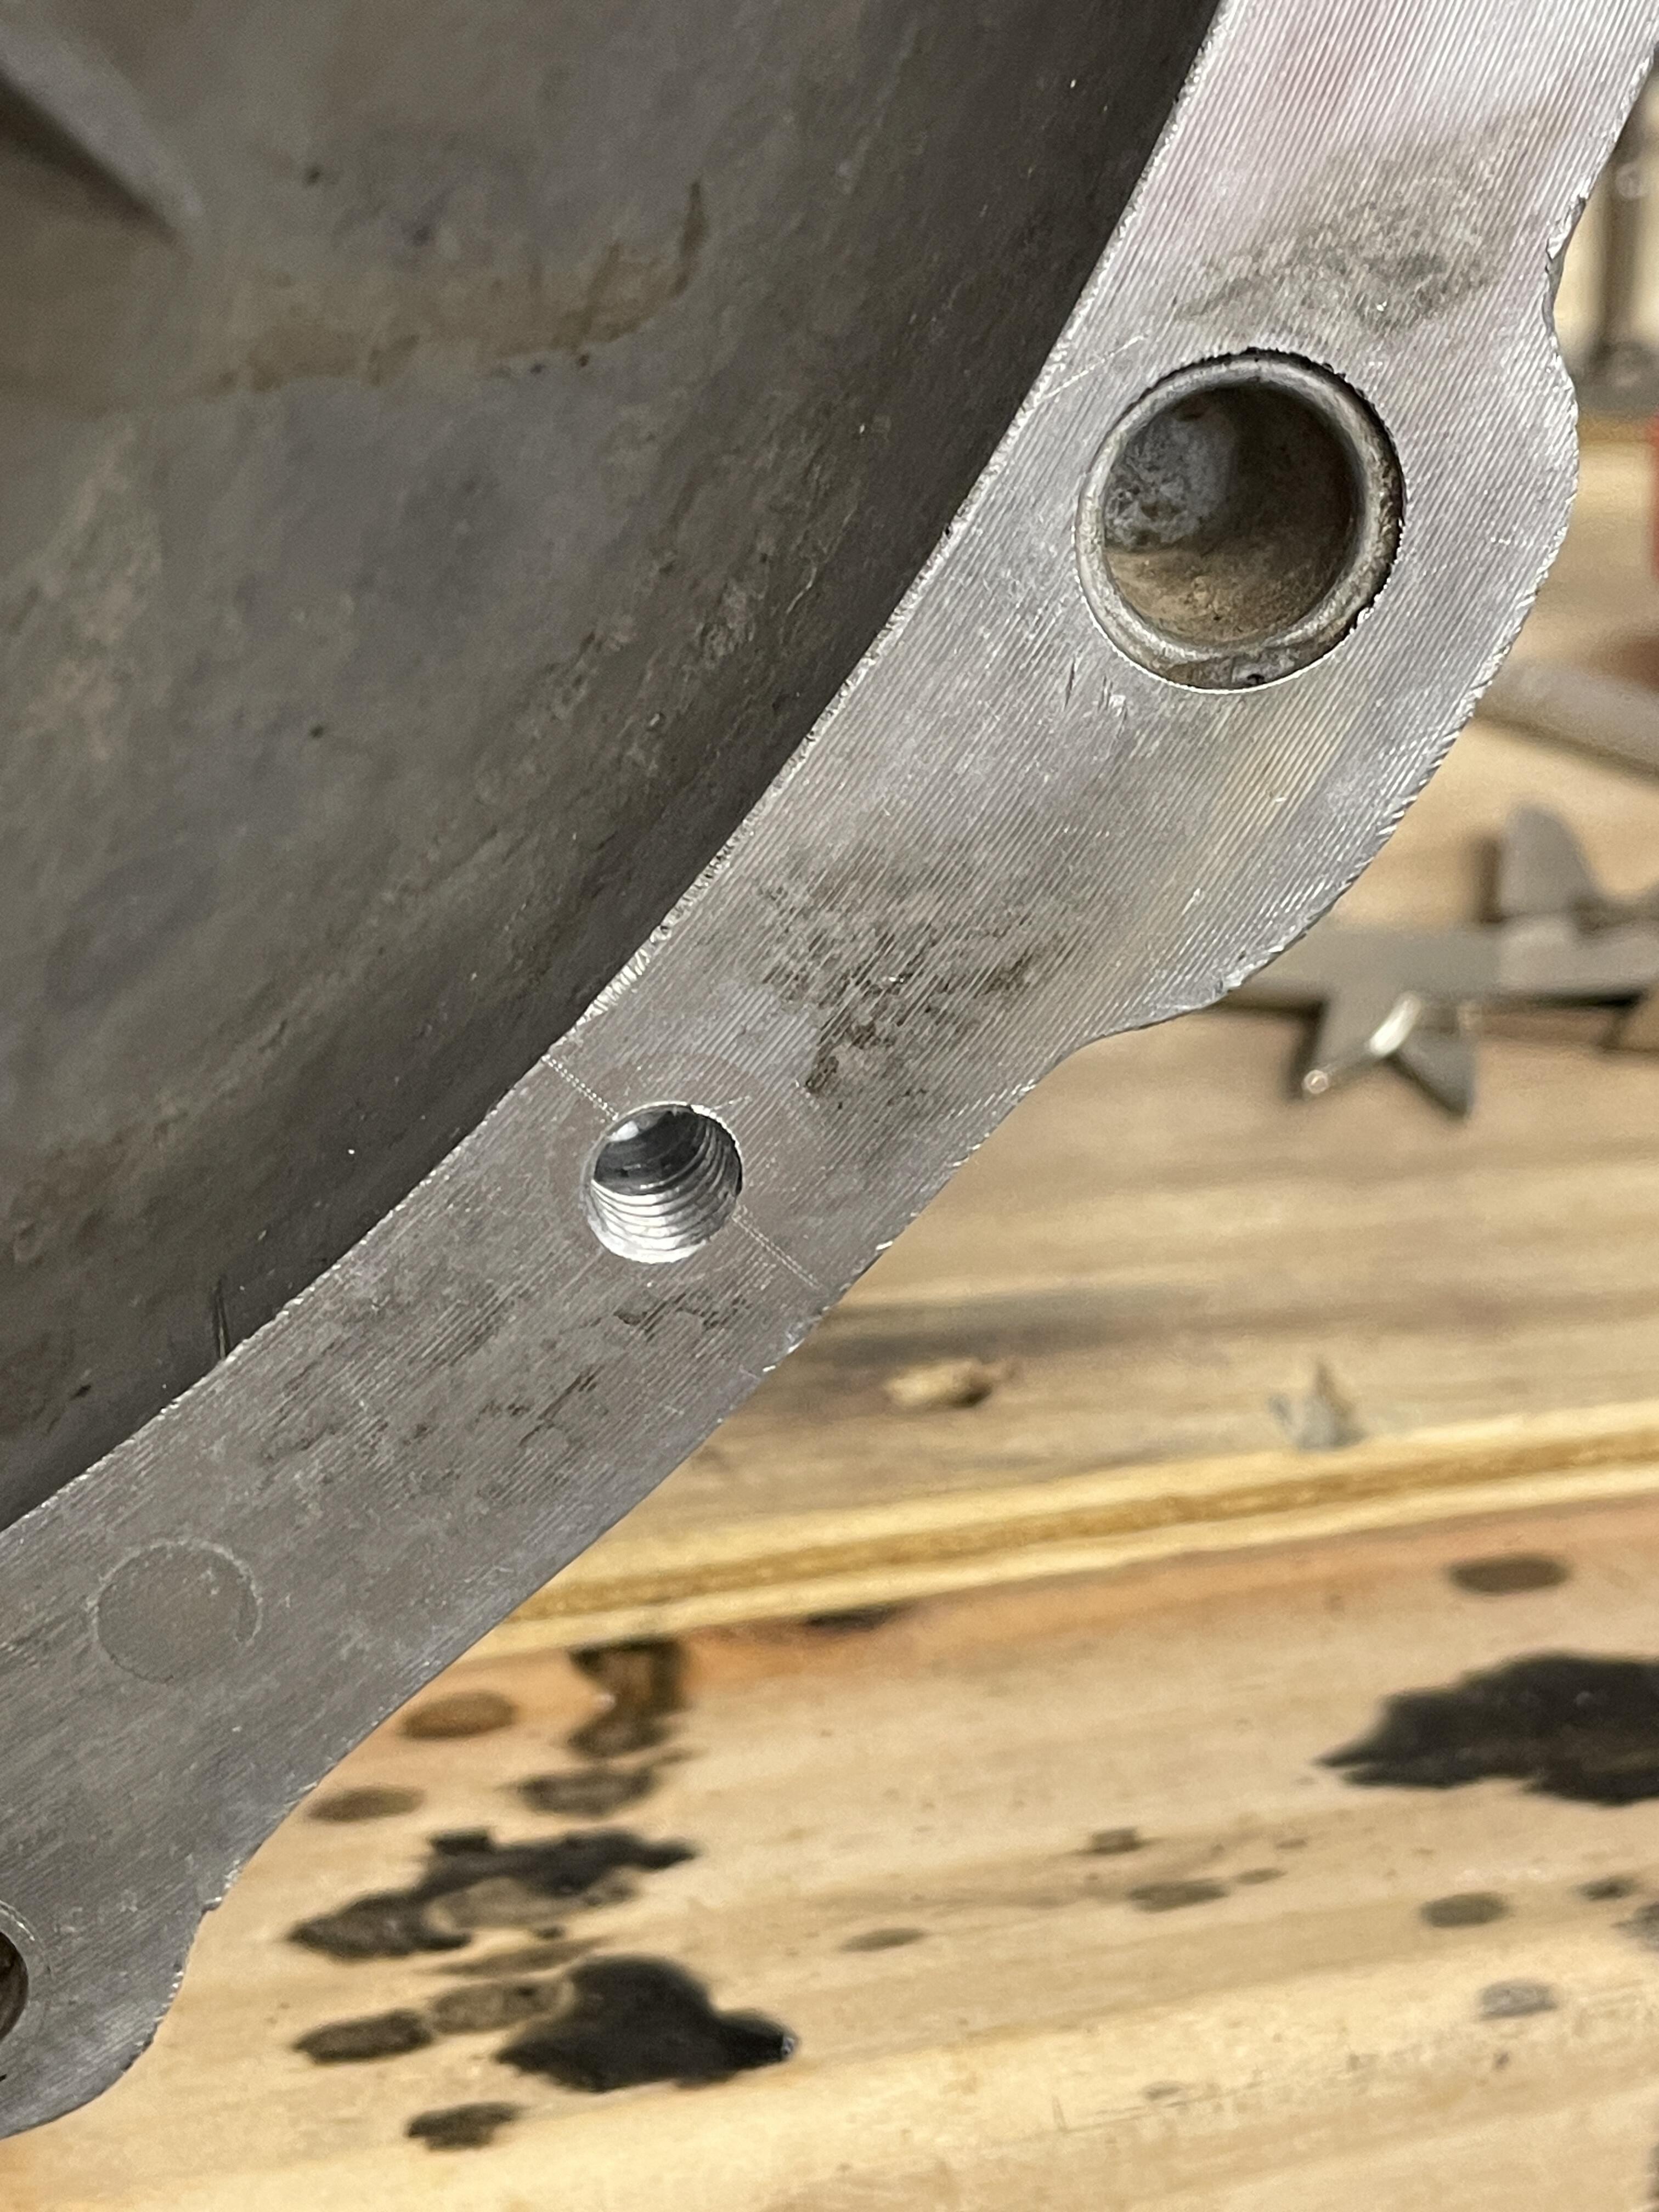
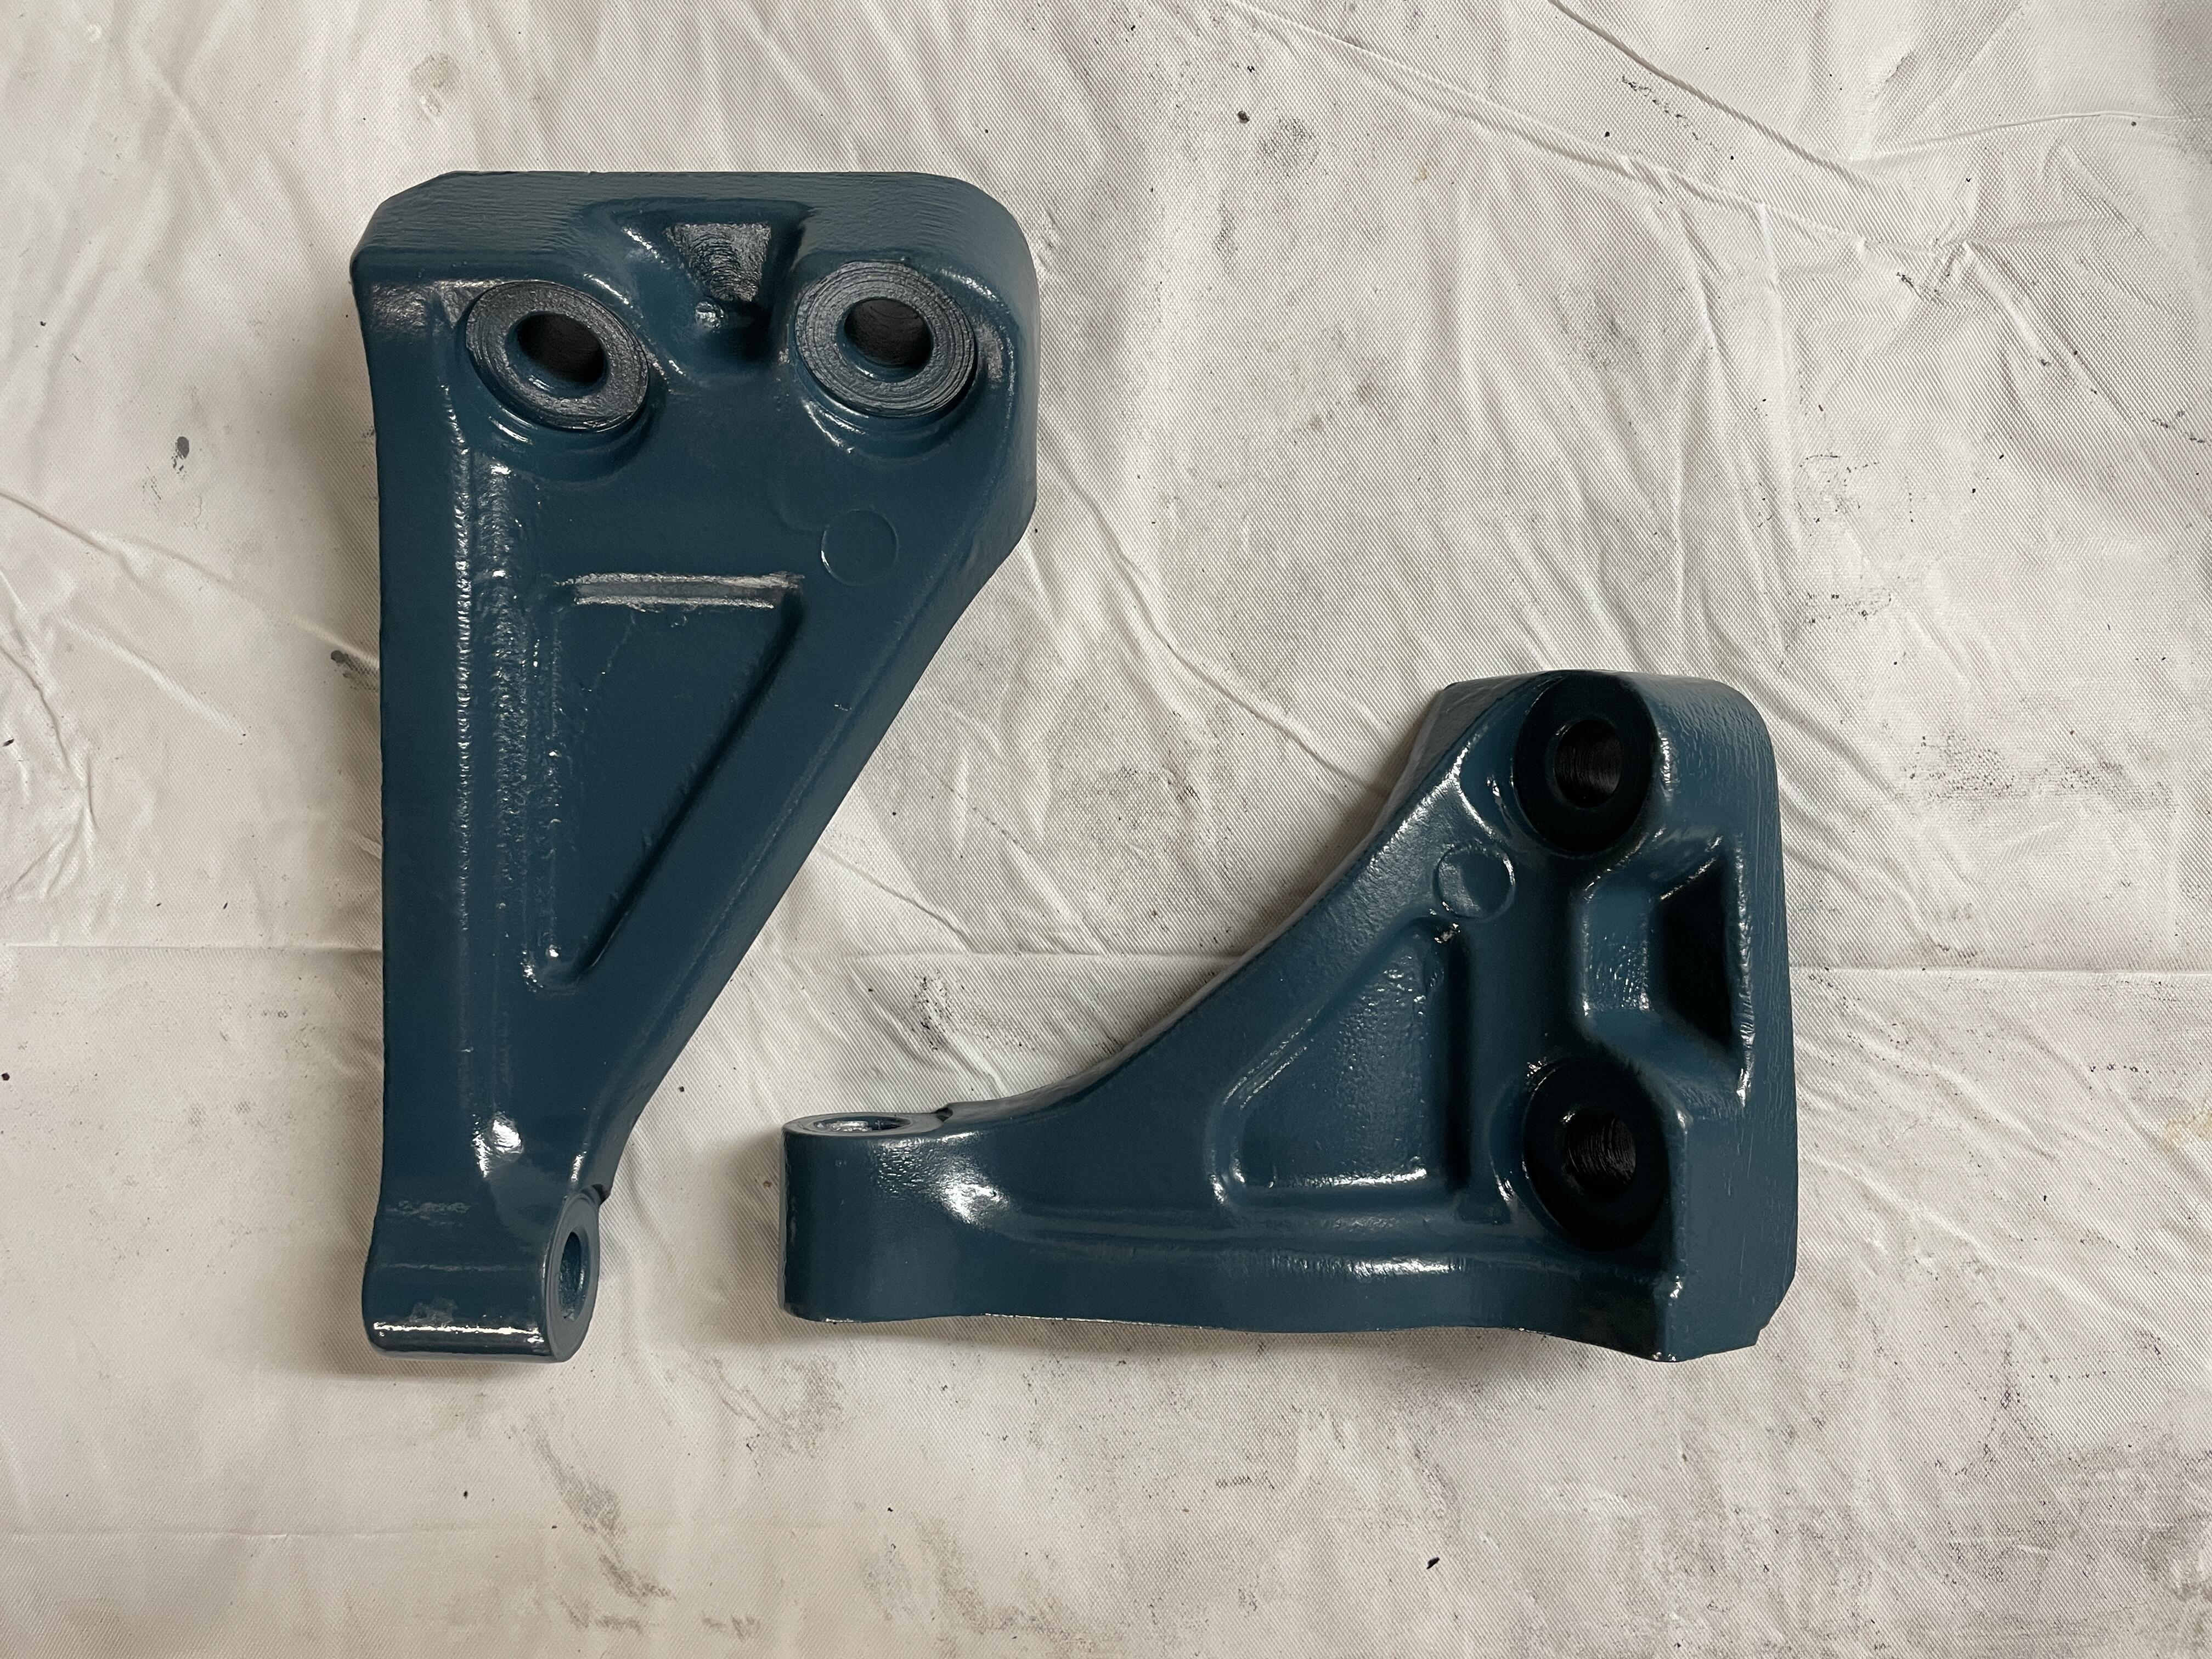
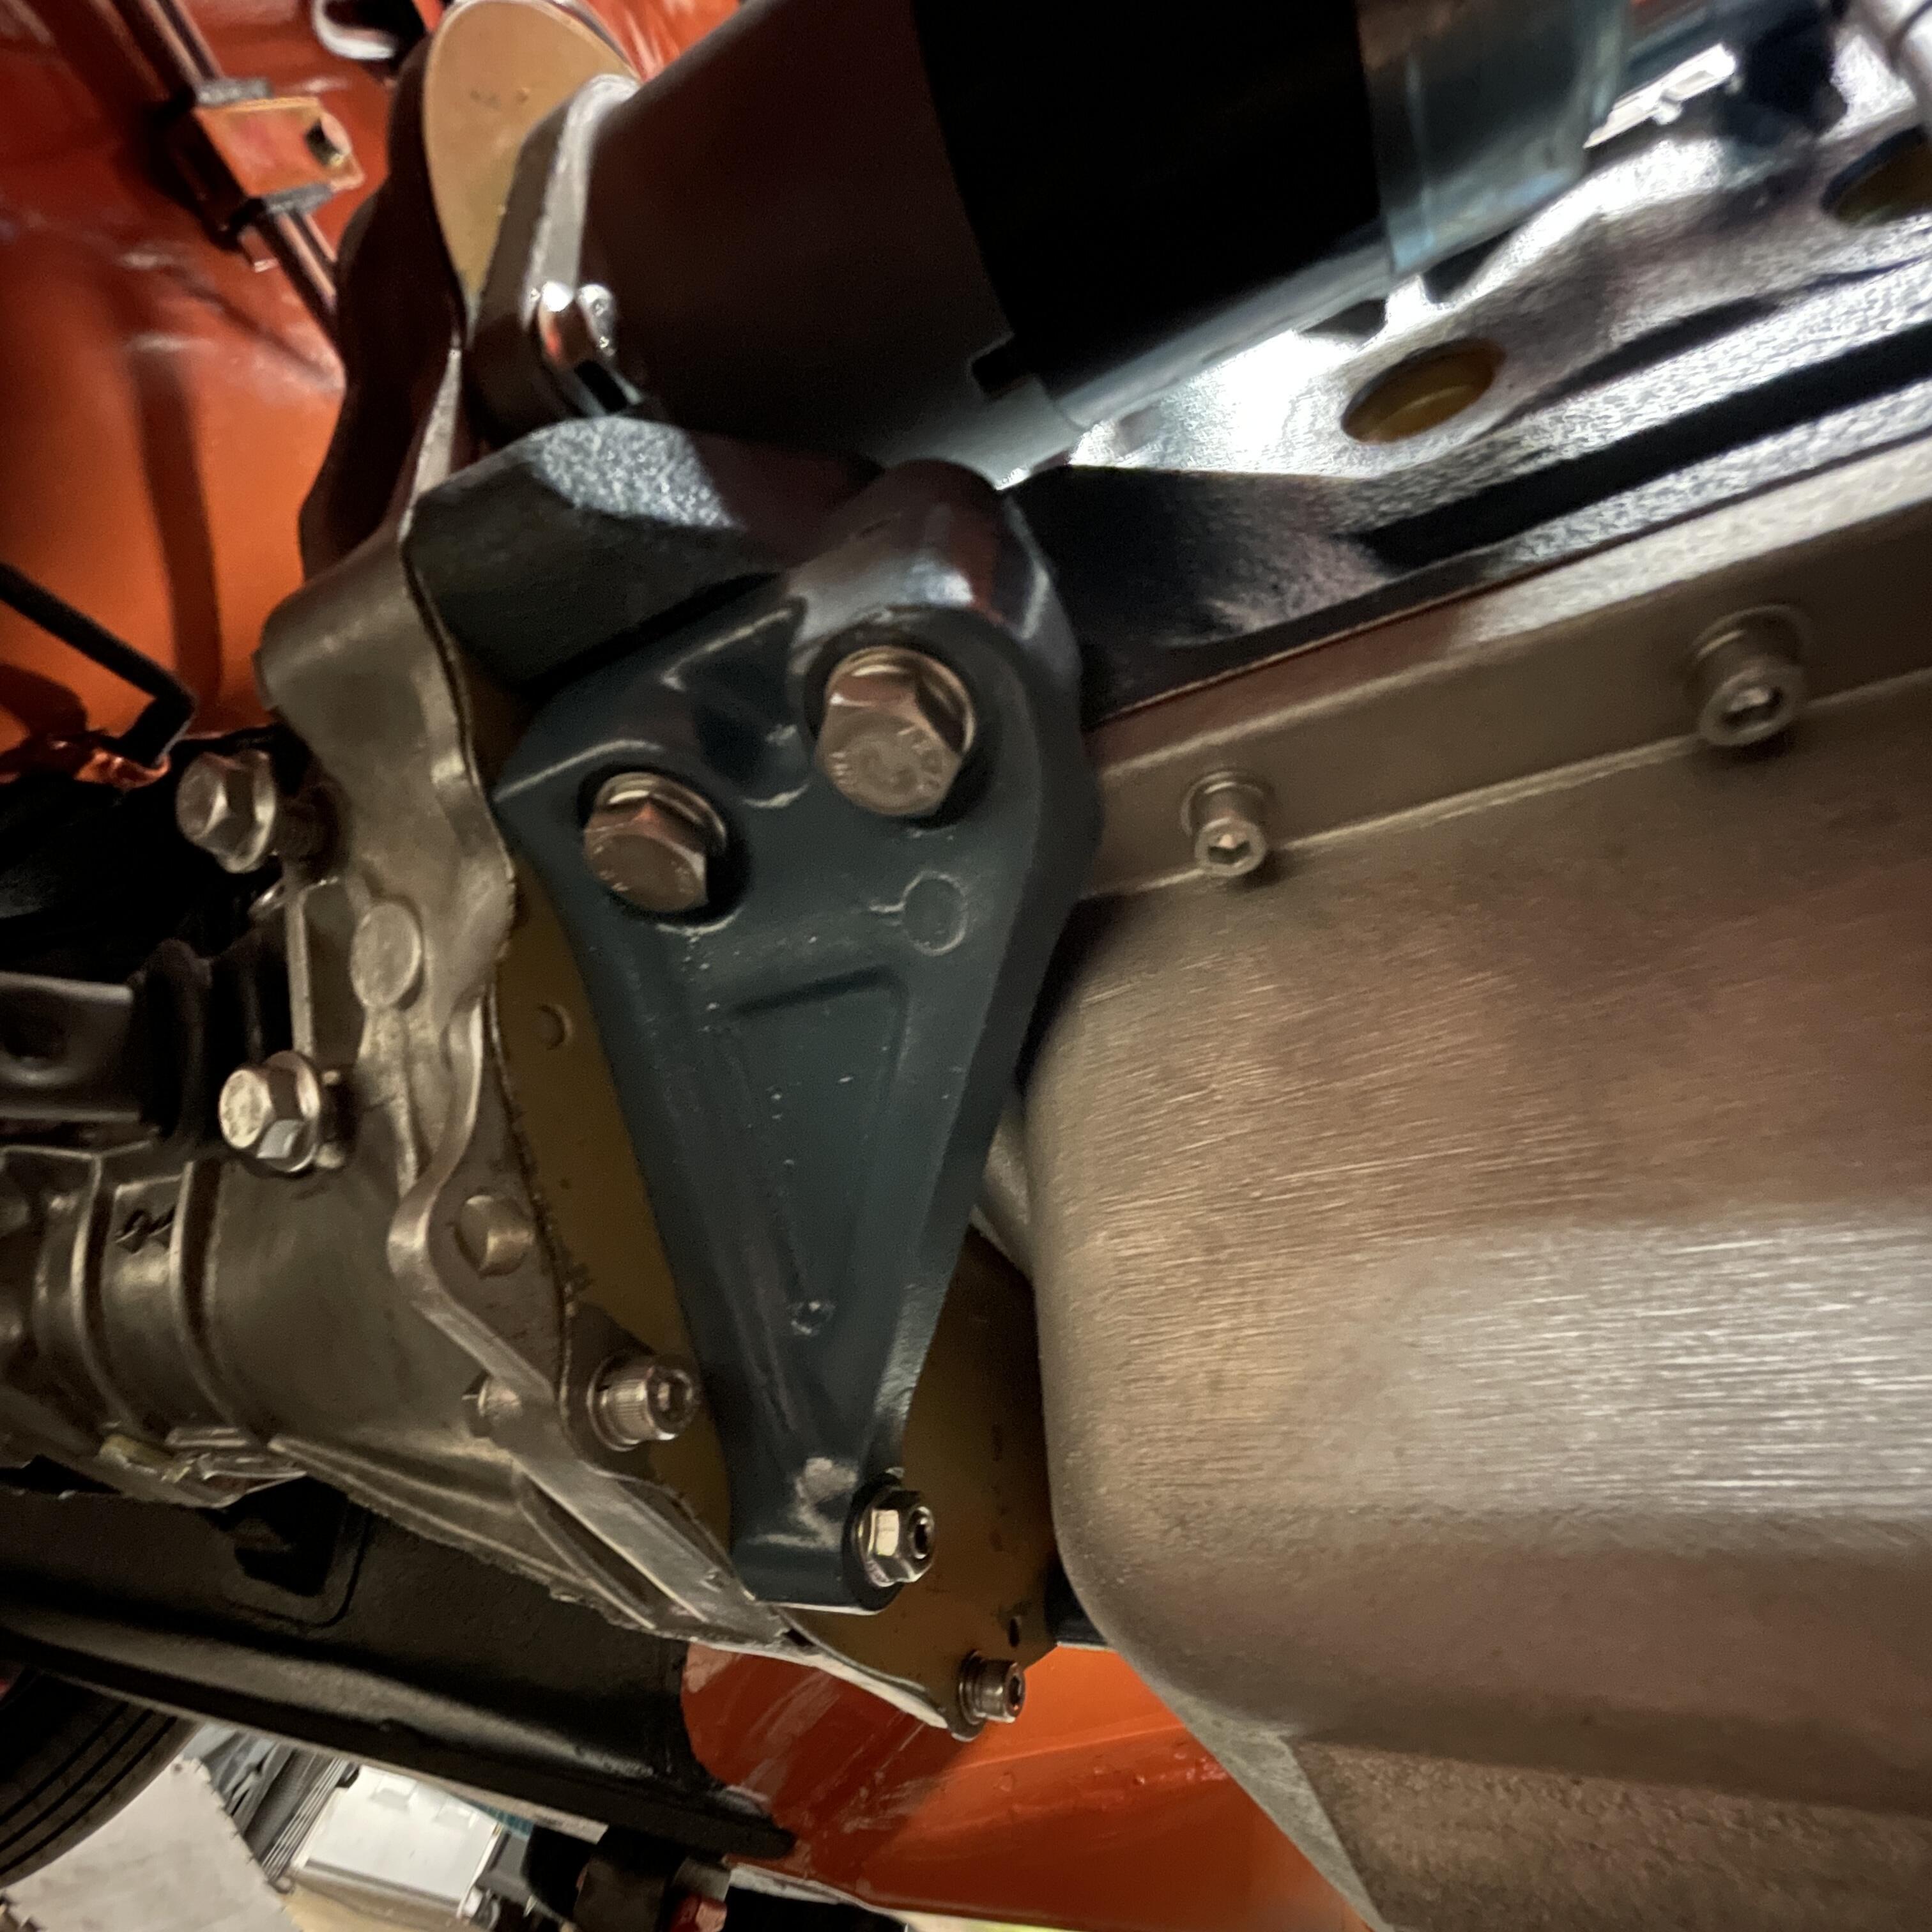
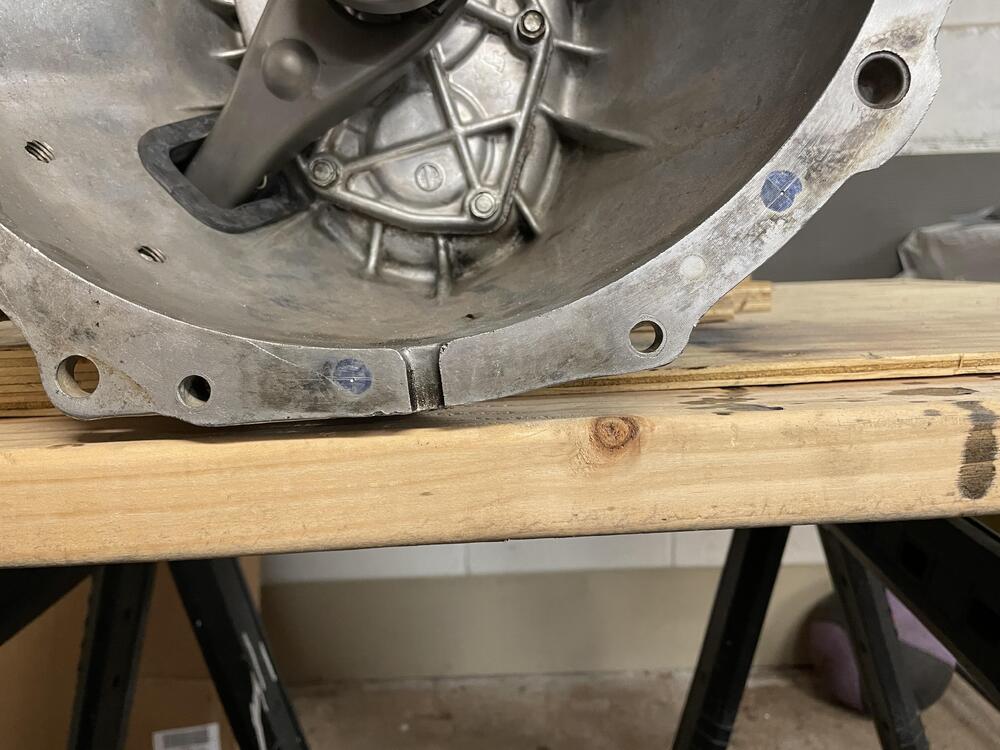
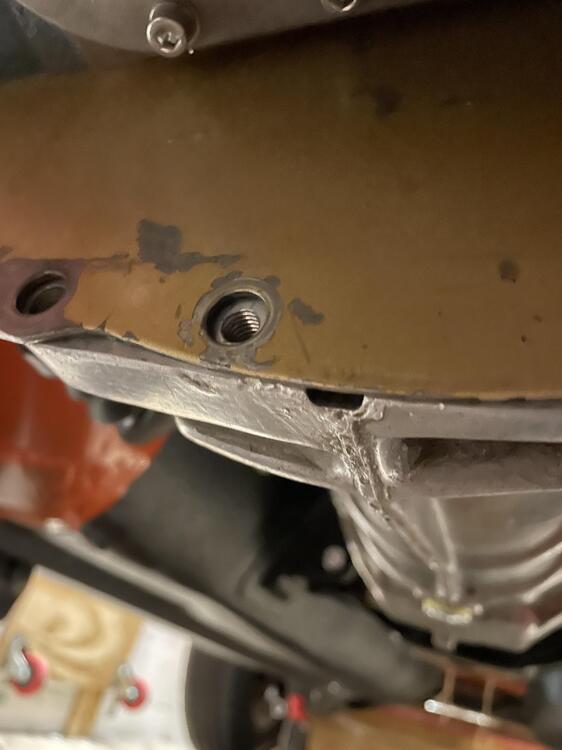
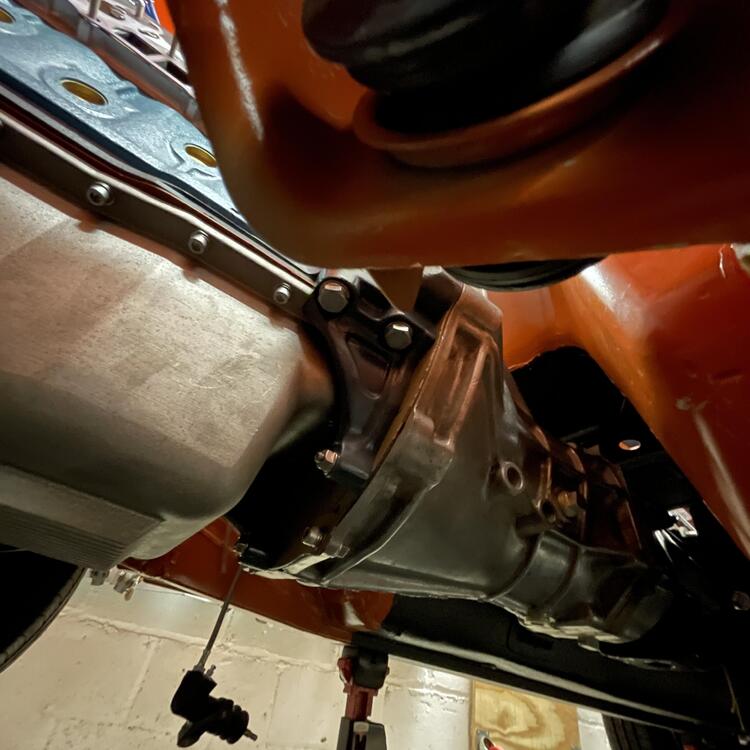
Did some stuff… Chopped up and rebuilt my compressor bracket to move it up and toward the block… I rehabilitated my transmission gussets and made them work on this 720 transmission. The gussets needed relief to accommodate the rear left corner of aluminum oil pan and the bolts. You can see where I carved that out in the process shot below where they are hanging on wires. I tapped the bell housing for m8-1.25 manifold studs and finished it off with flange nuts.


-
I see that N3300 was used on the manual. Any idea how it was different from N3301?
-
Am I misreading that? I’m not finding anything when I search 22472-n3301.
-
Yeah, that’s what I was afraid of.
-
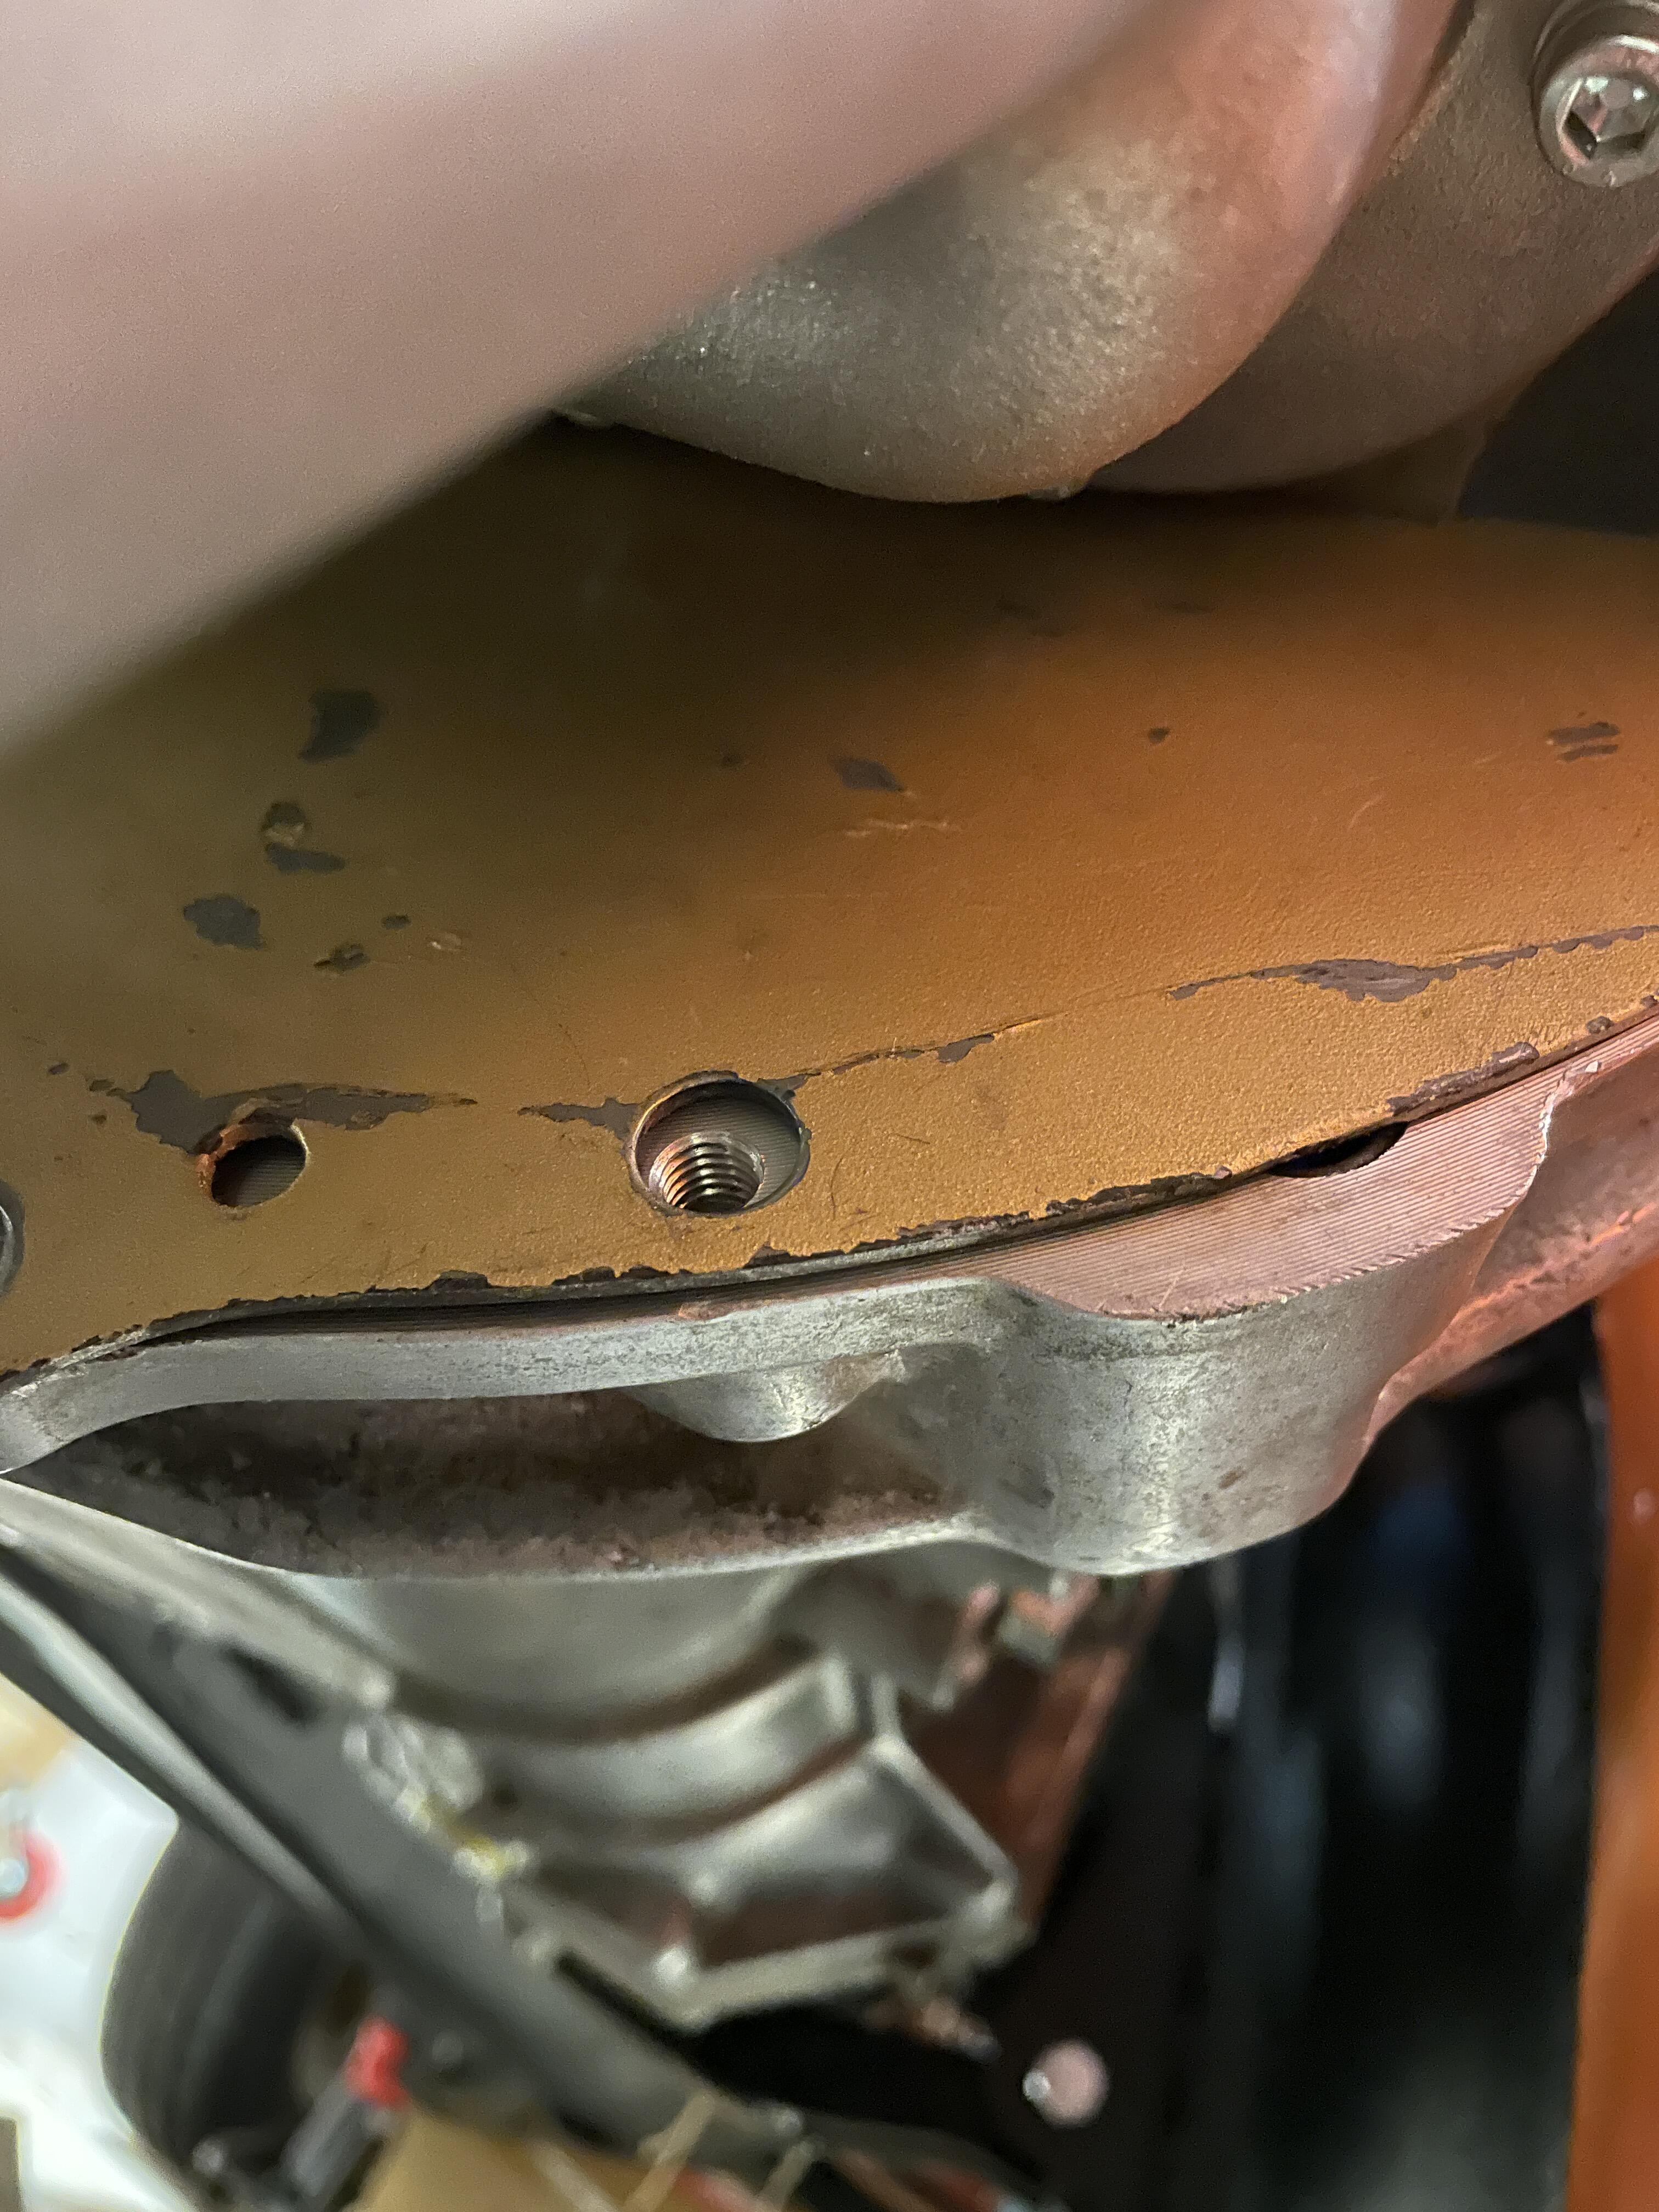
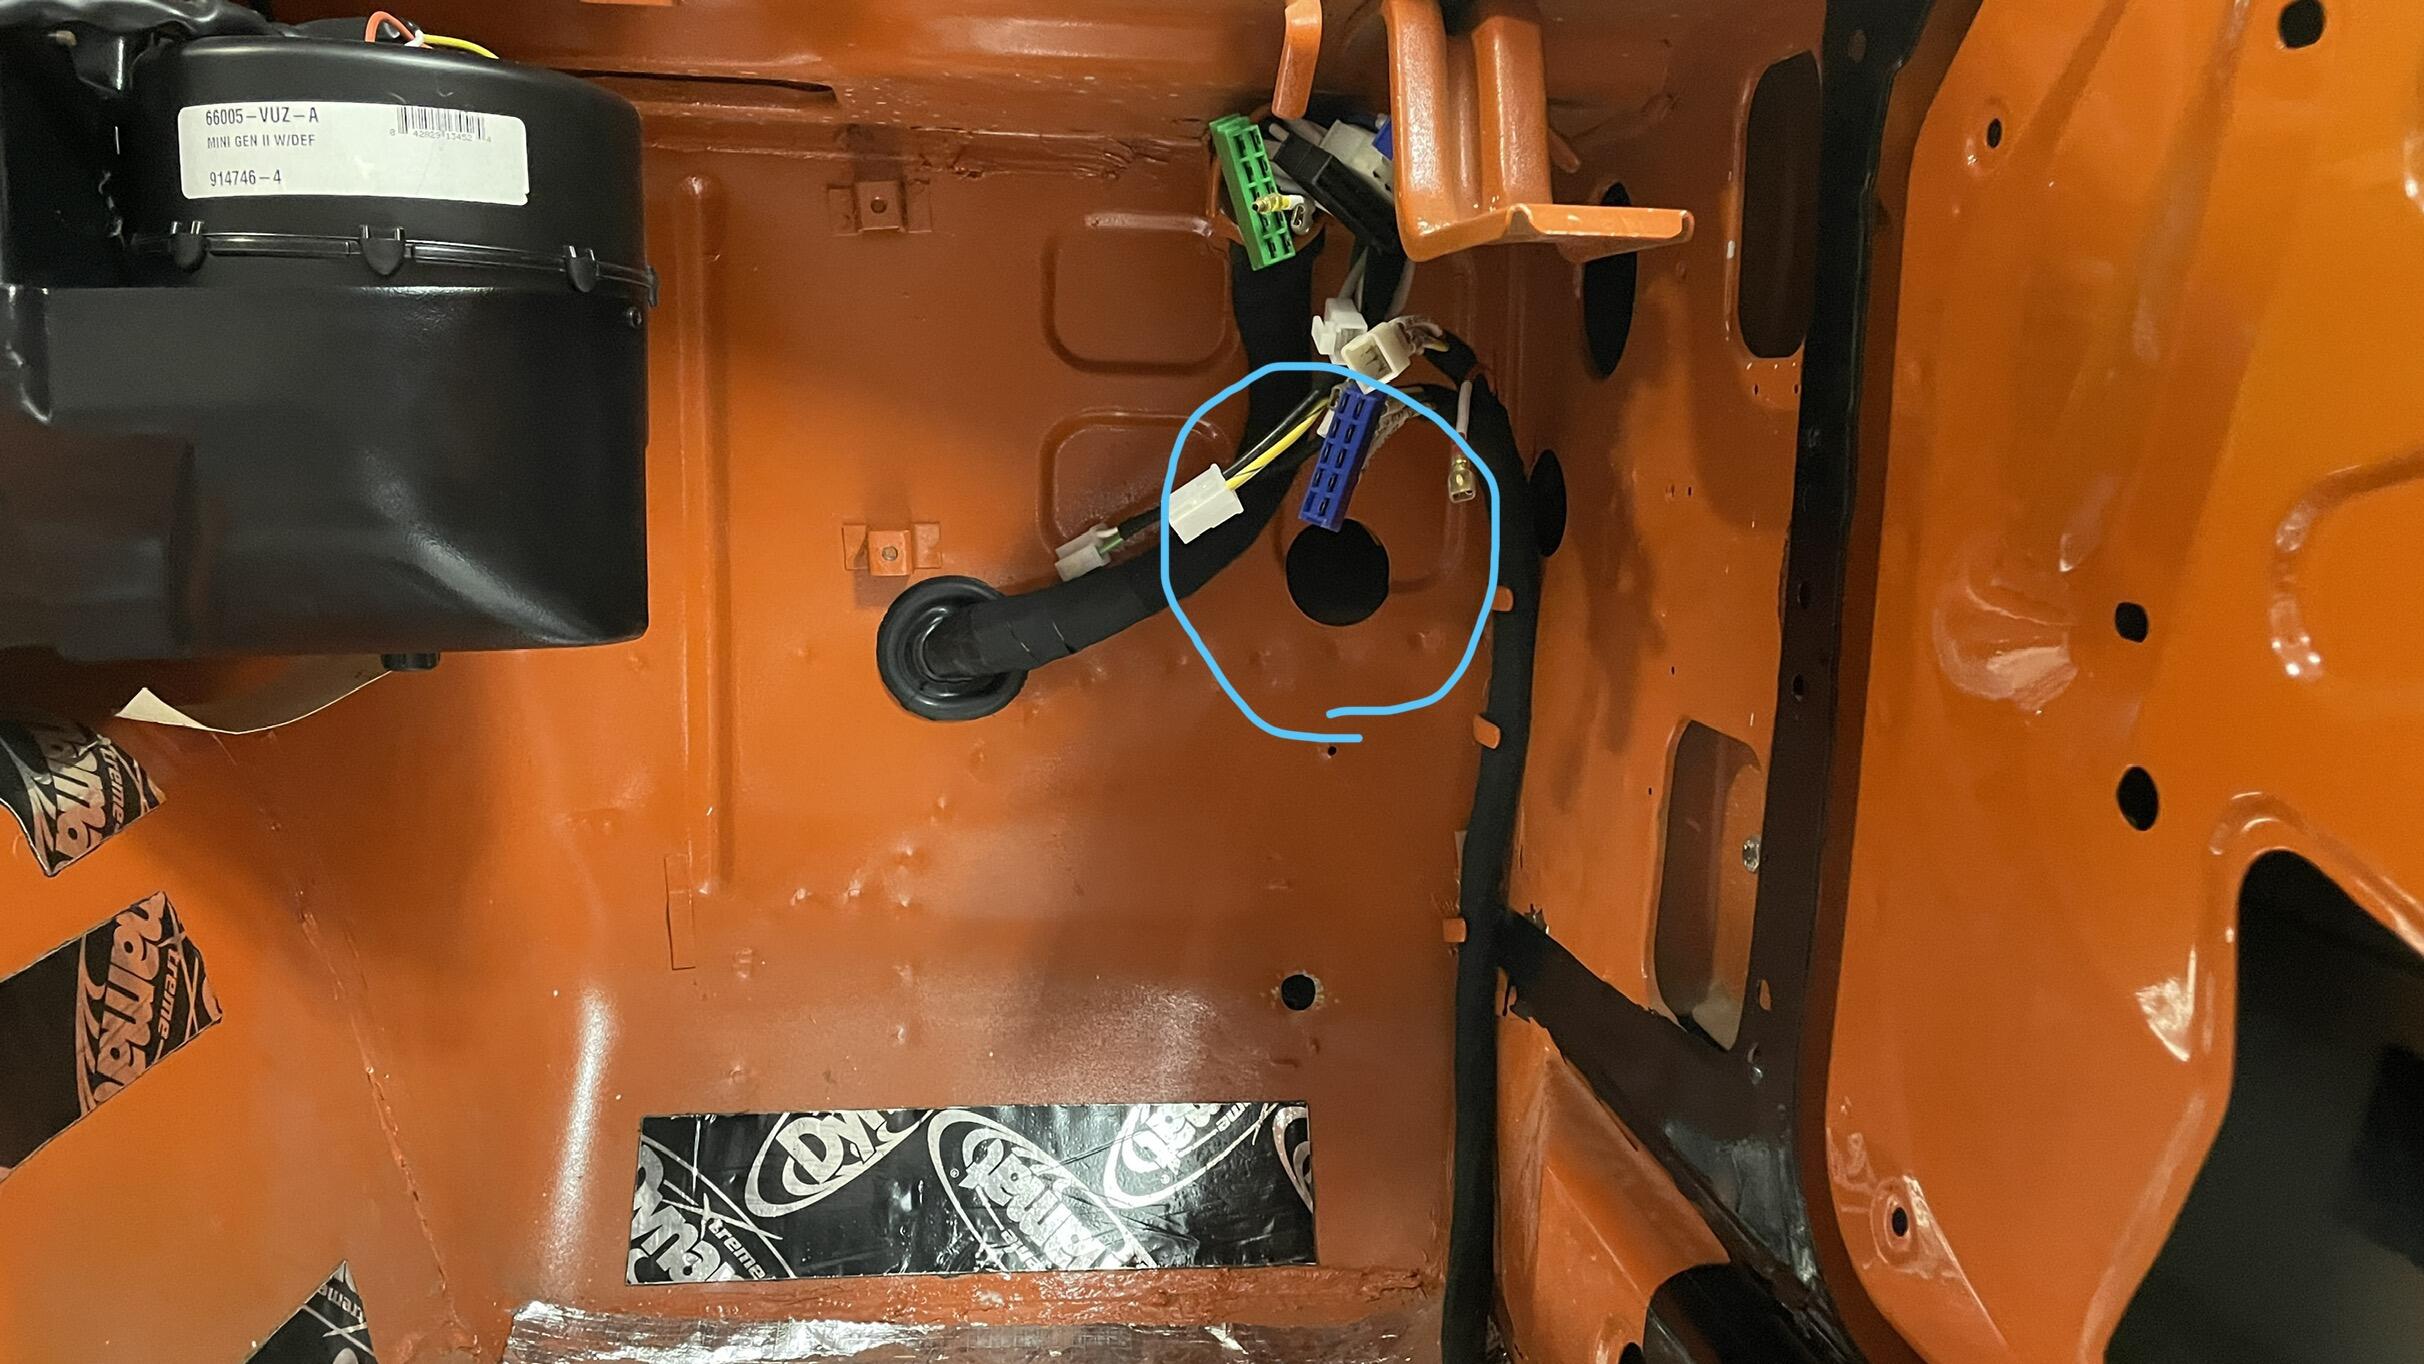
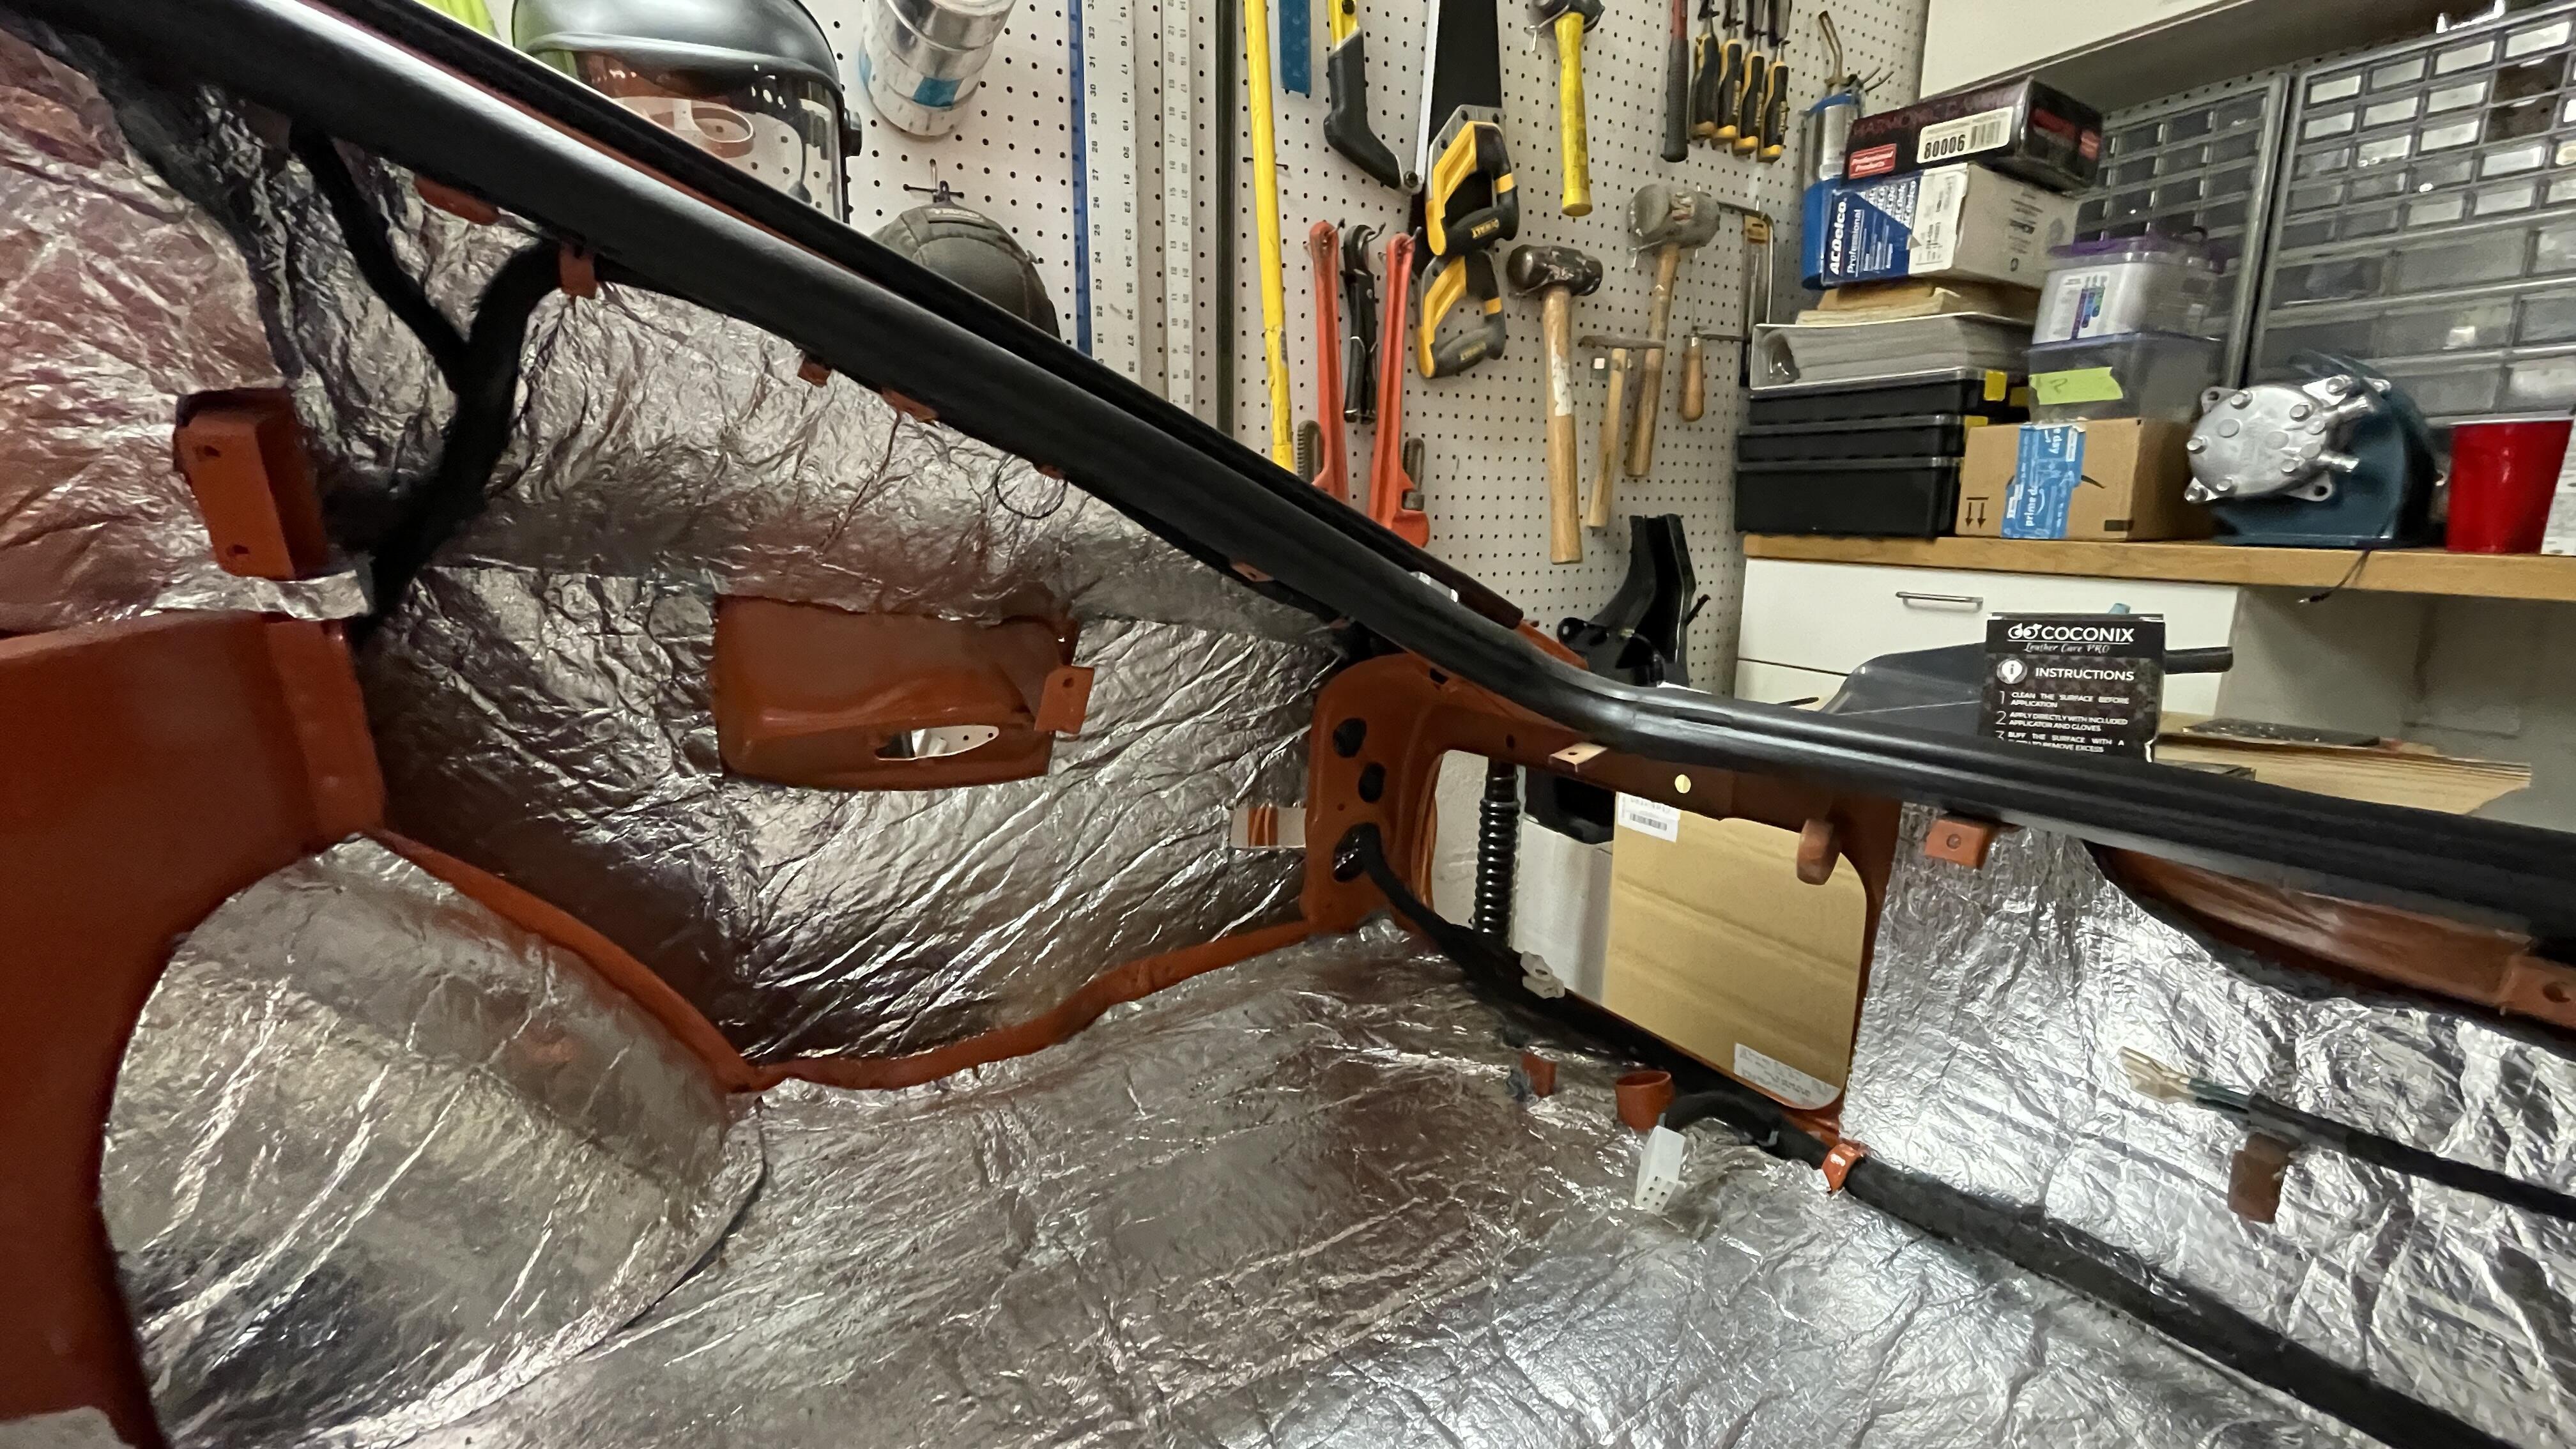
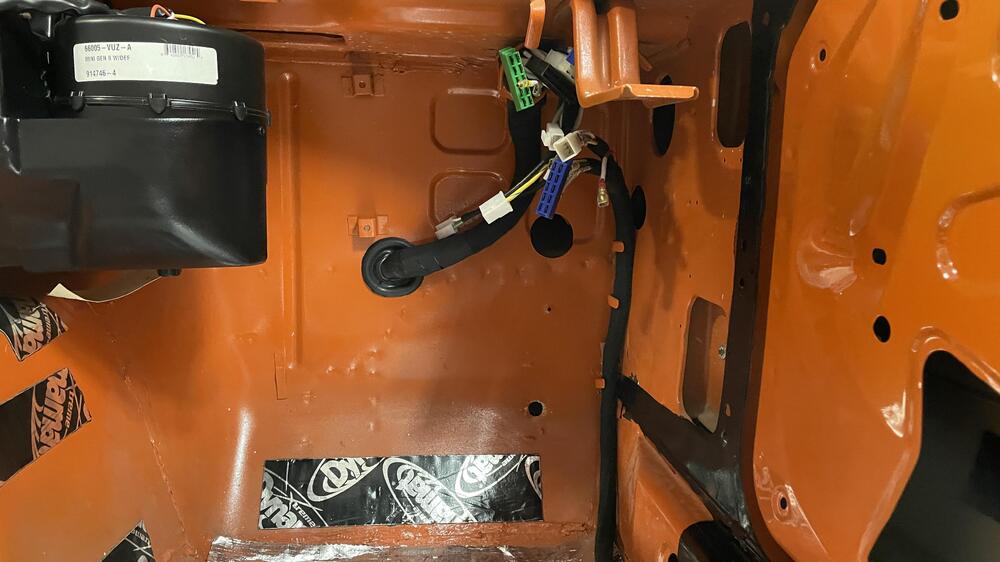
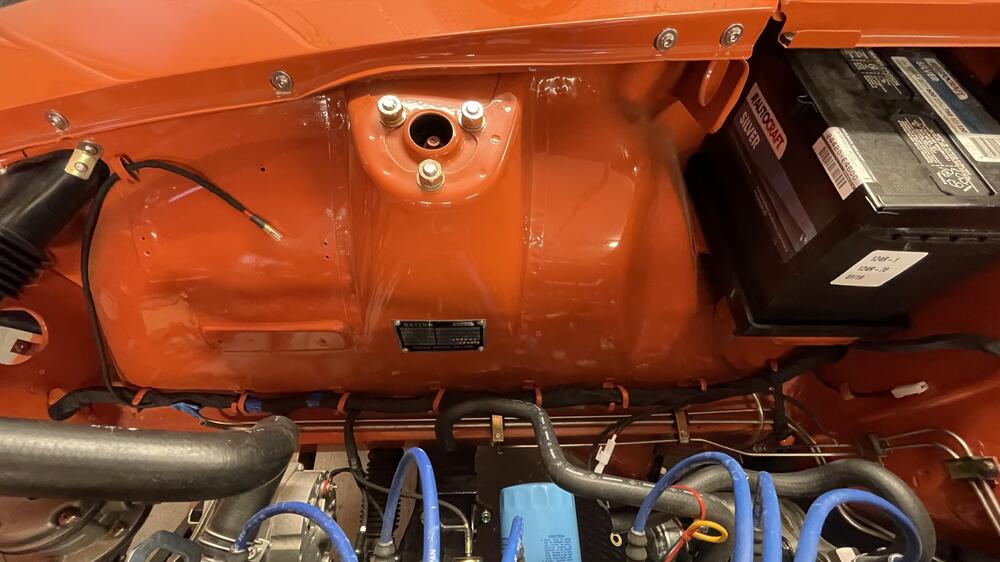
Question: what is this 52mm hole in the firewall under the battery tray for?

-
If it is they have a surplus. It was three days from ordering to parts in hand.
-
Yeah, that’s why I DMed you about it. Using the Toyota description to decipher what you get with that part number is confusing. I got that number when trying to get just the housing, and I think the price is supposed to be for just that, but then I got the whole kit, so ¯\_(ツ)_/¯. What else is interesting is how much other places want. JDM Car Parts has single housings for $189, plus they’re probably RHD and would blind oncoming traffic if they’re actually JDM.
-
81110-60P70 Route 22 Toyota in NJ.
-
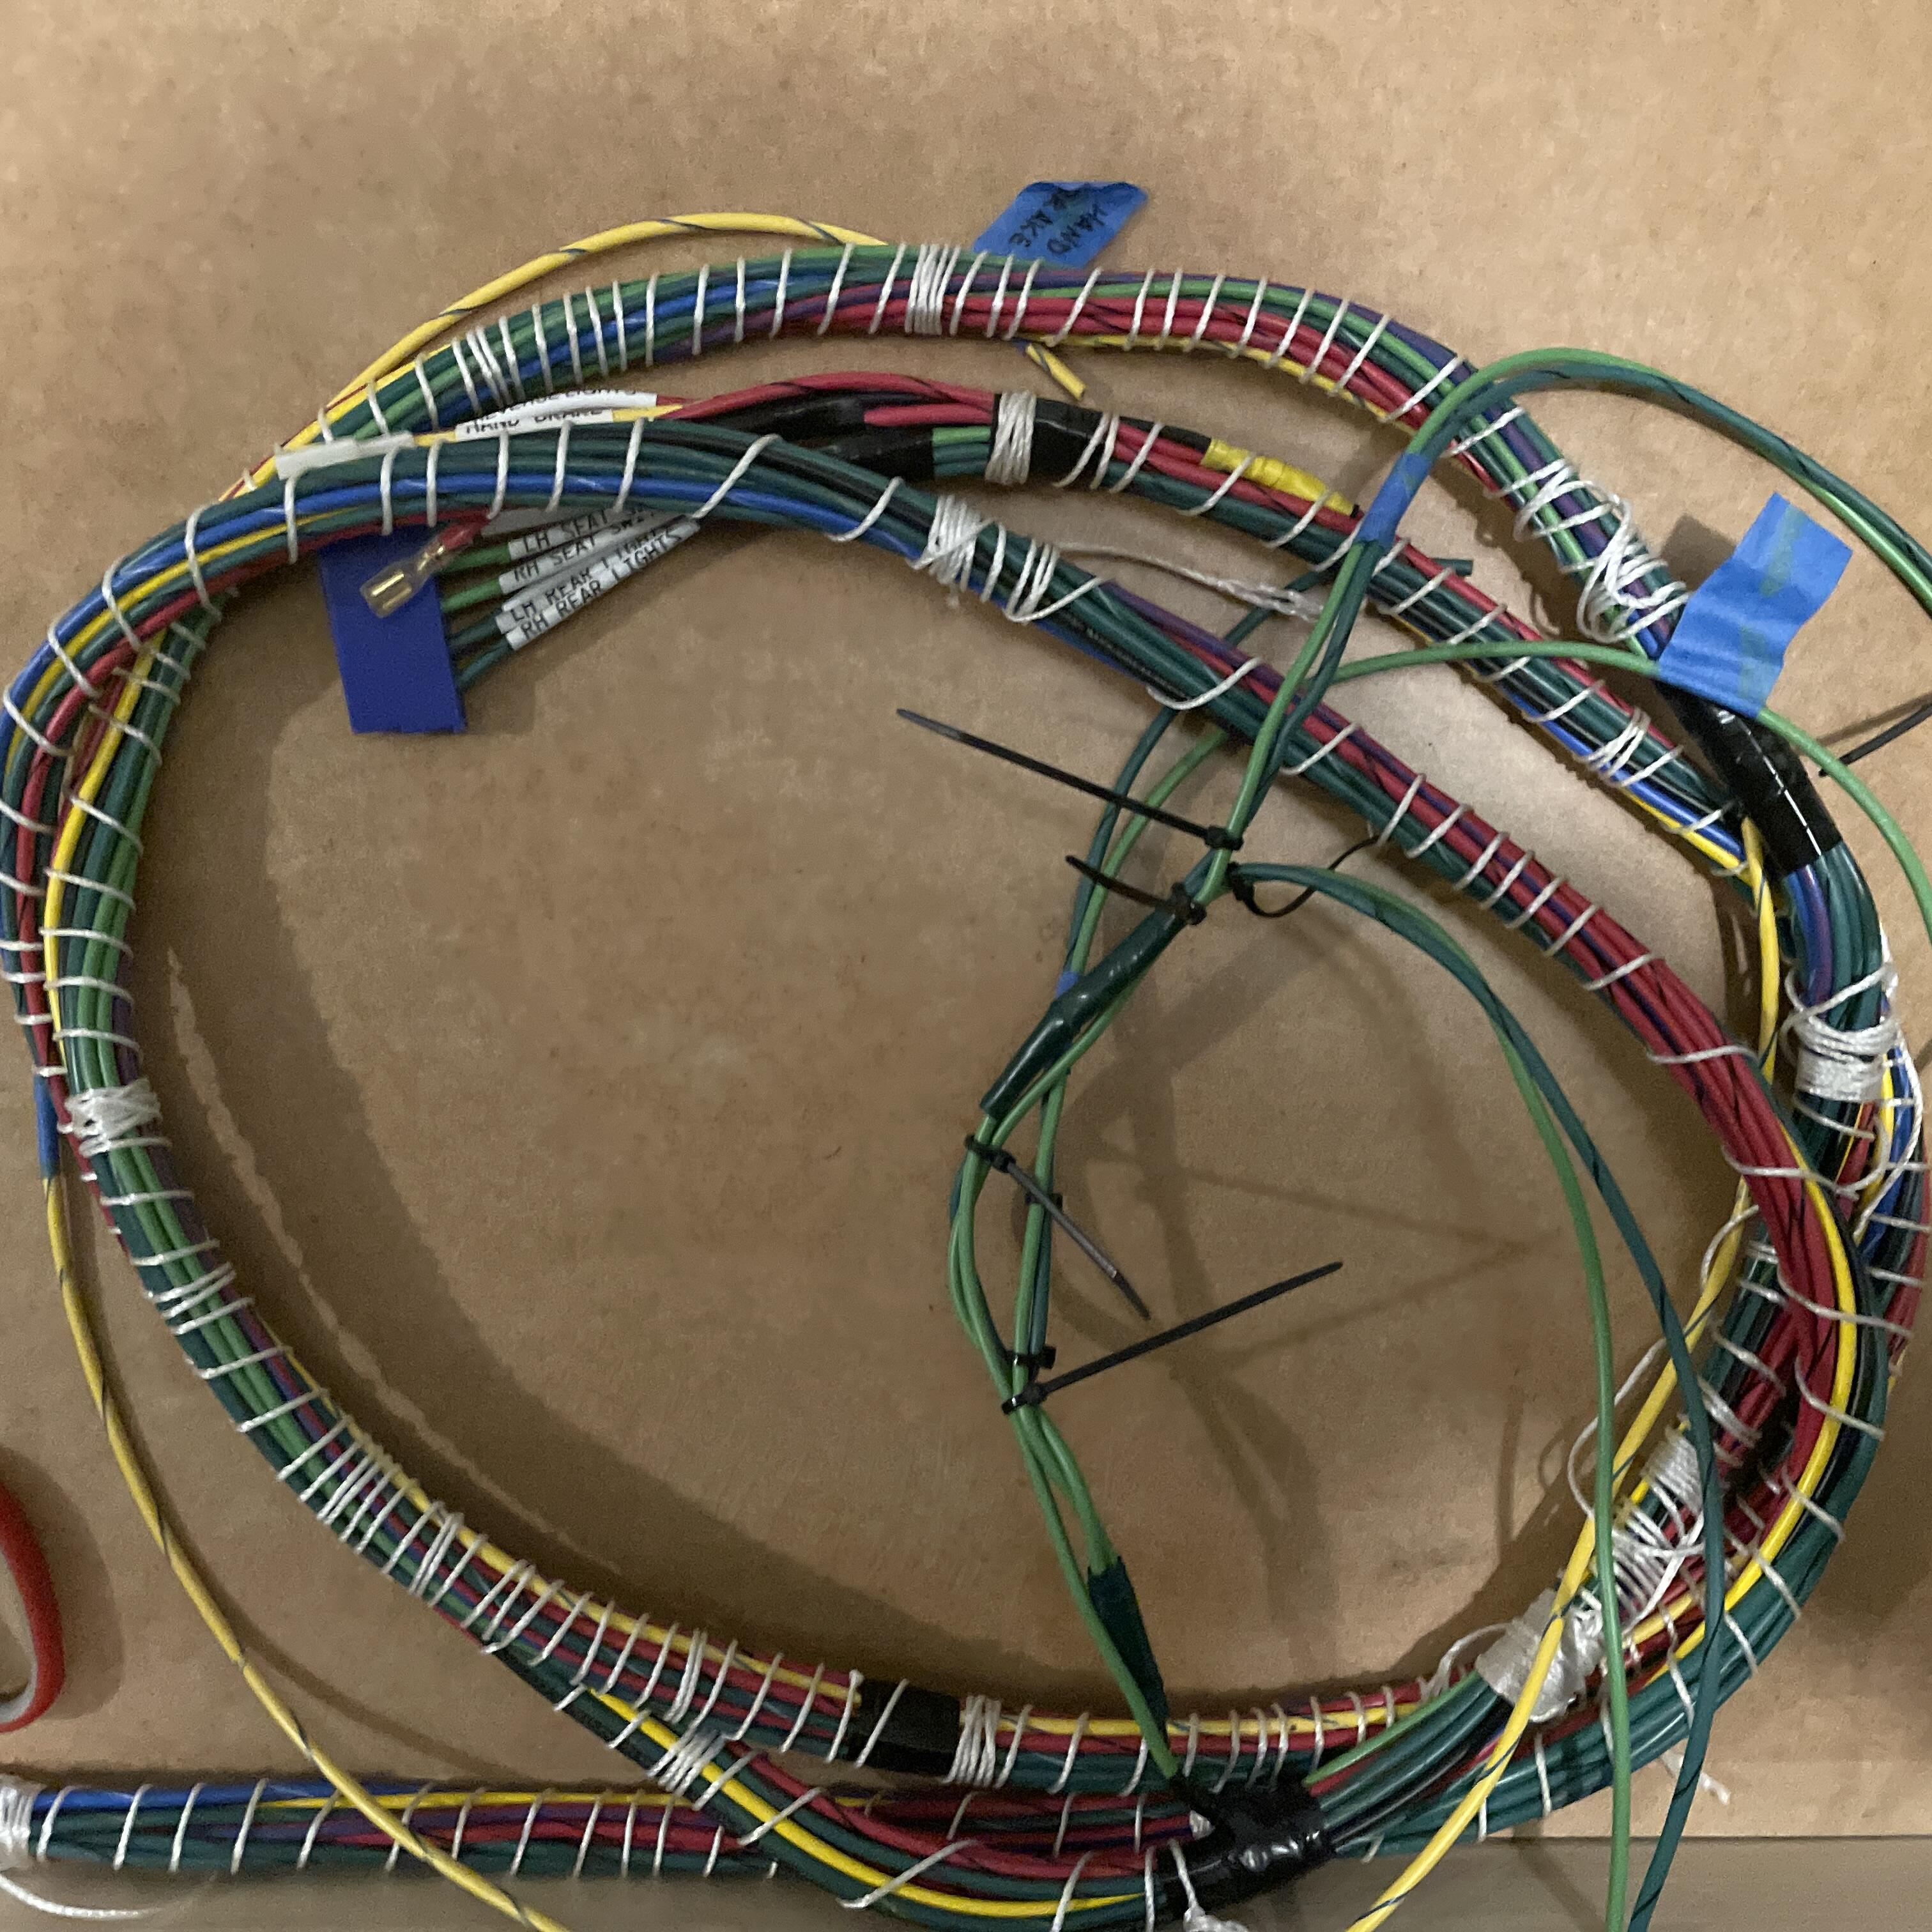
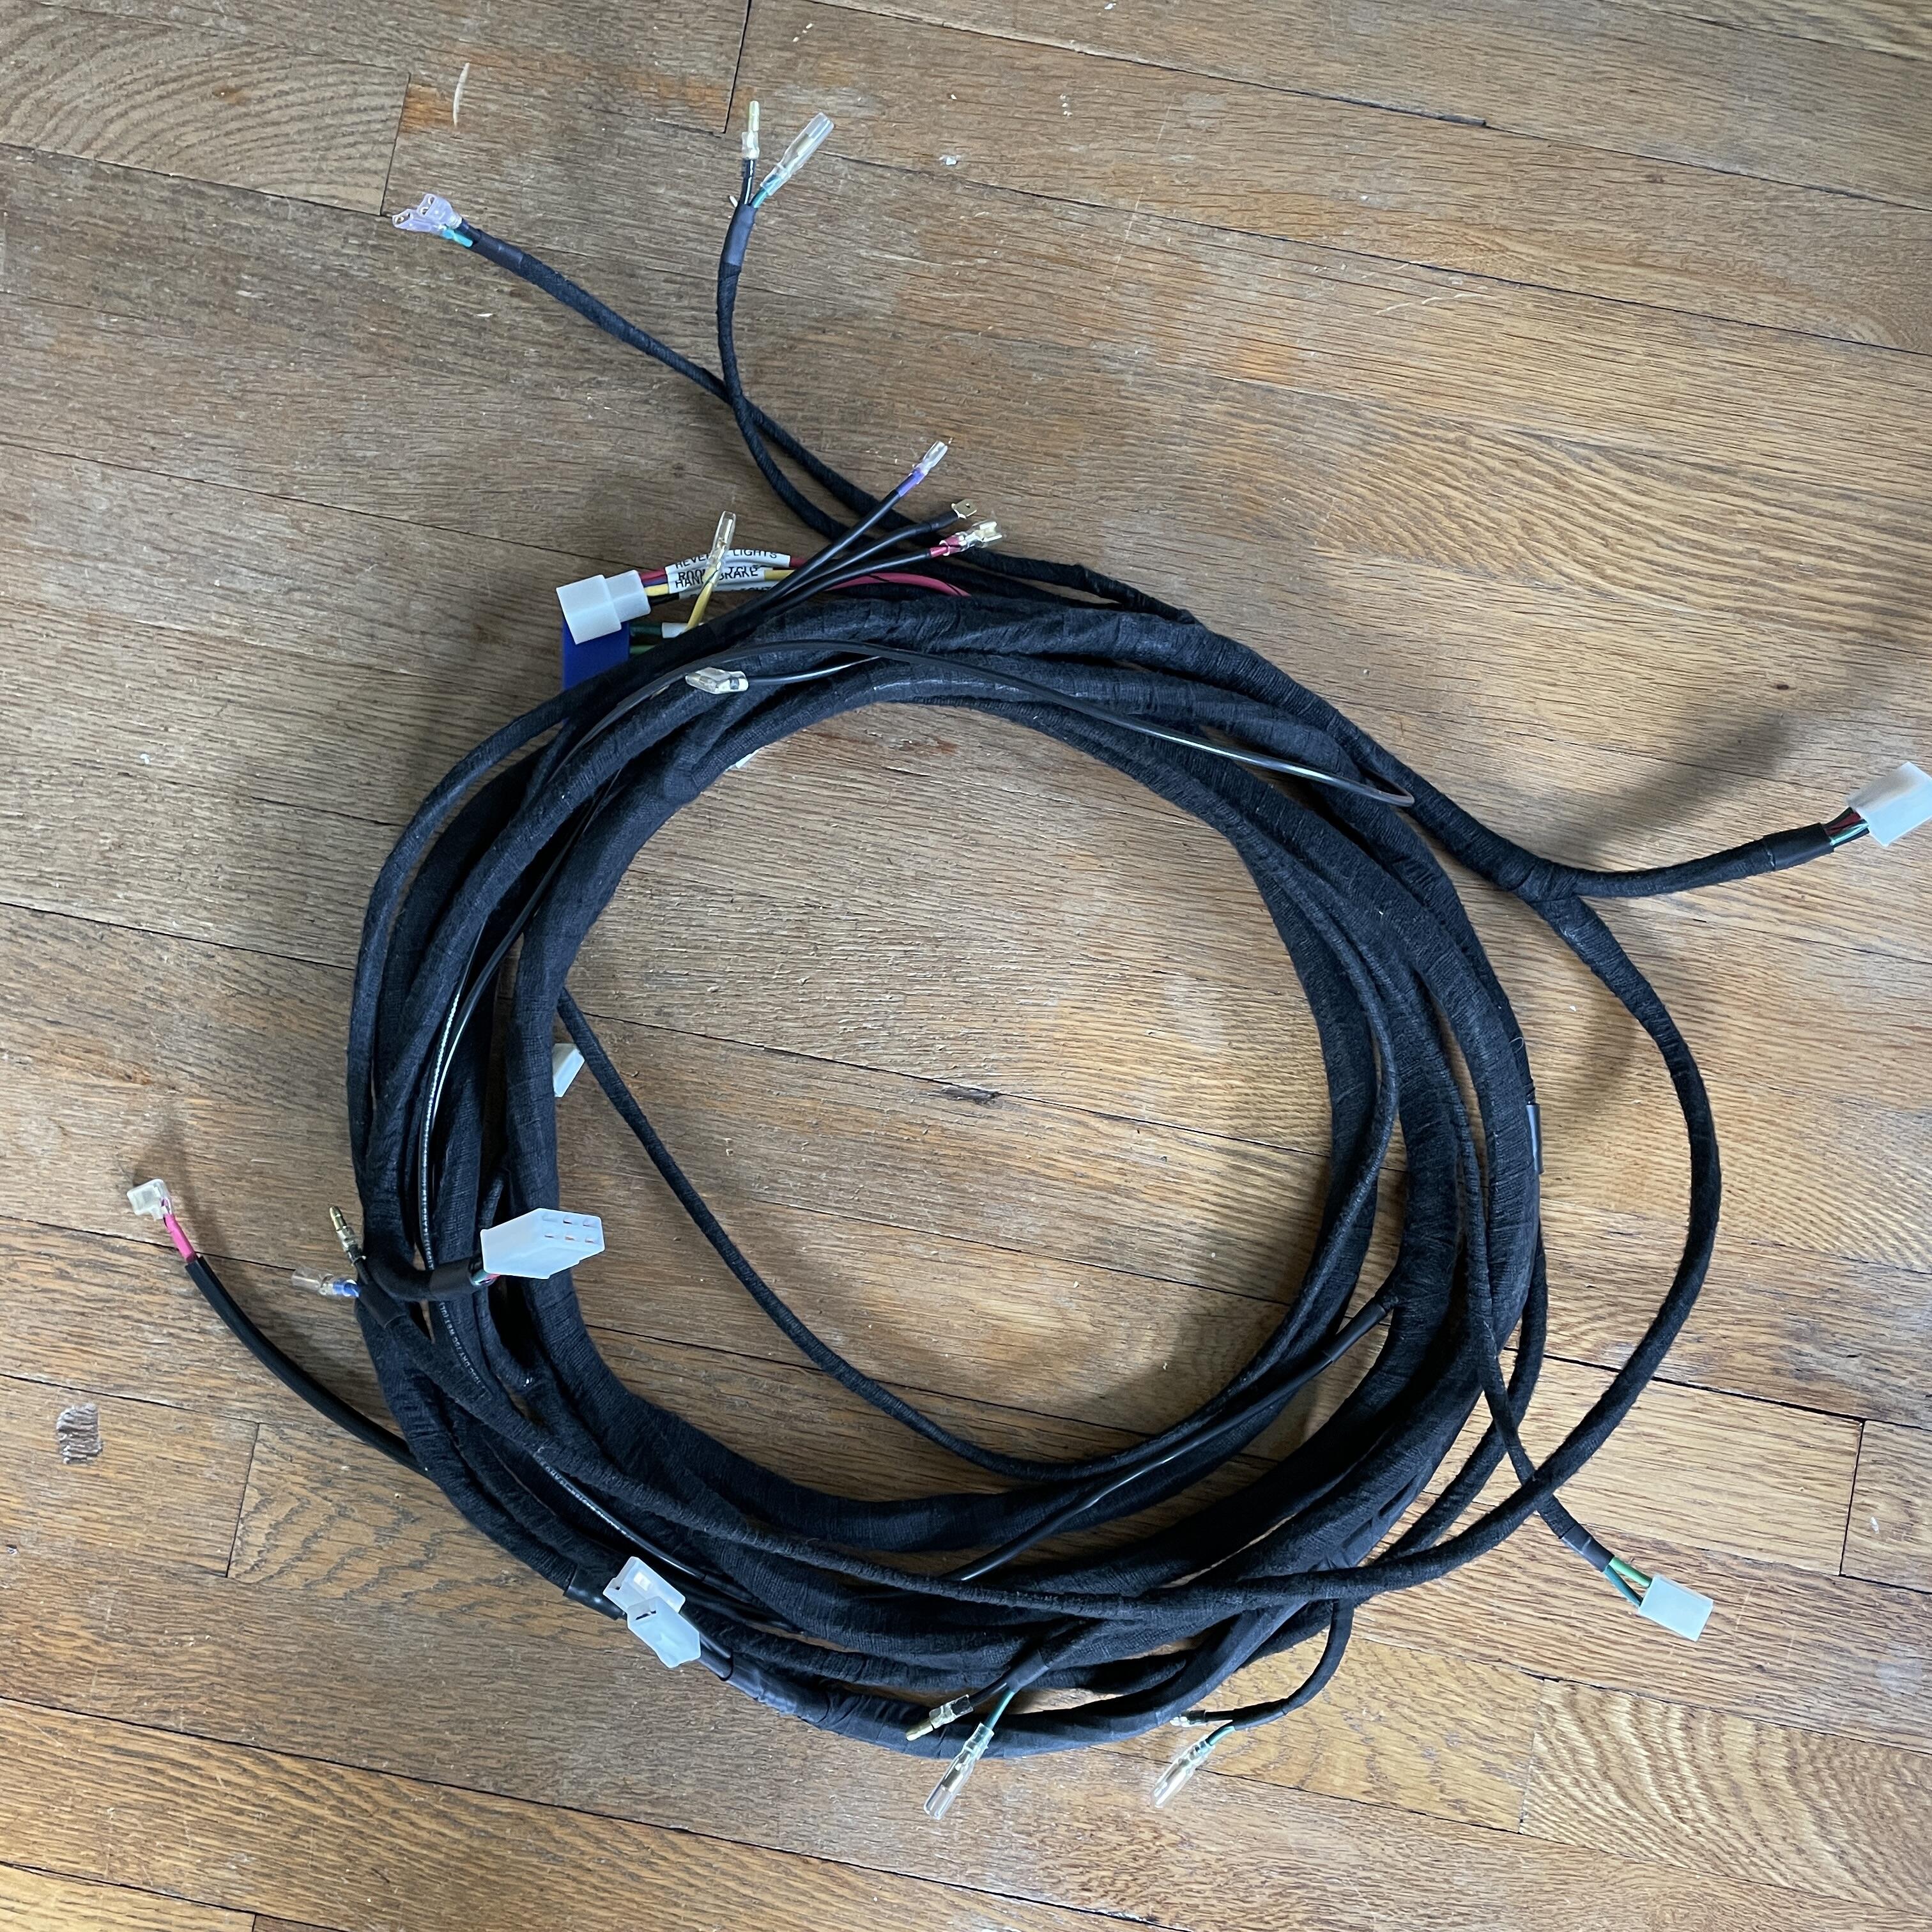
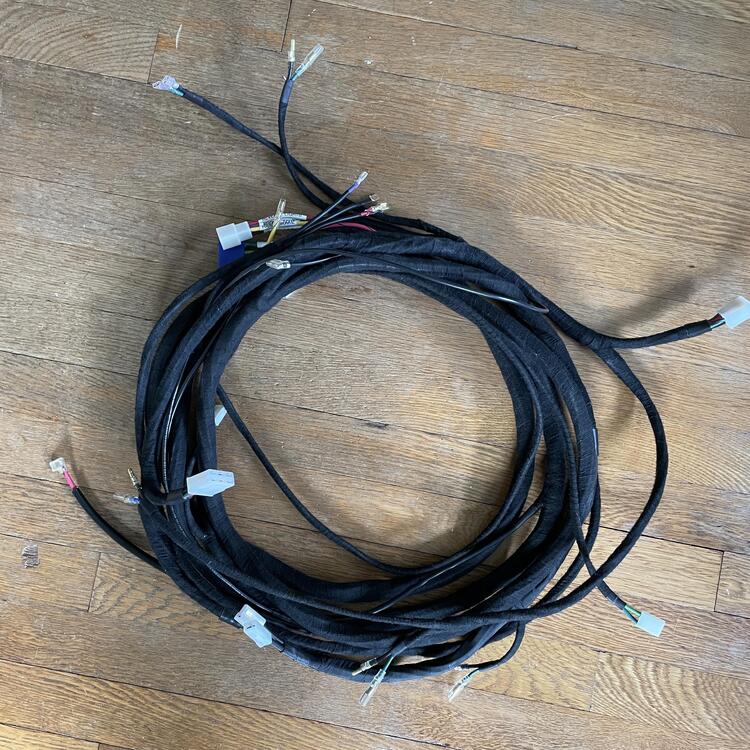
Been a minute, so here’s a progress report: I didn’t take any in progress shots of the body harness as I wrapped it, but here’s the final product, coiled up. One thing I found was that if I wrap the whole thing tightly with string it’s a lot easier to get everything taped off and wrapped in the Tesa tape. I just did the string in the opposite direction so I could unwrap it a bit at a time as I went around it with the tape. I used a harbor freight fish tape to get it in, so it wasn’t a very tough job. $15. I messed up my measurements for the light and defroster wires somehow, but thankfully they’re about 18” too long, rather than too short, so I can cut them down and redo the terminals. Just need to get another set of 90° 6.3mm terminals for the defroster. Oh! And a 52mm blanking grommet for that hole under the battery.


-
Price update: I just picked up a set from my local Toyota dealer for $17.34. $35.44 after shipping and tax.
-
Finally done with the body harness. In addition to deleting the wires for the speaker and antenna, added a provision for some kind of third/auxiliary brake light next to the license plate light wires, switched to a euro/JDM wiring configuration for the rear combination lights, and added wires for a 12V power supply. Also, I used fuzzy Tesa tape for most of it to reduce potential rattling and their chemical-proof tape near the fuel system, just in case.

-
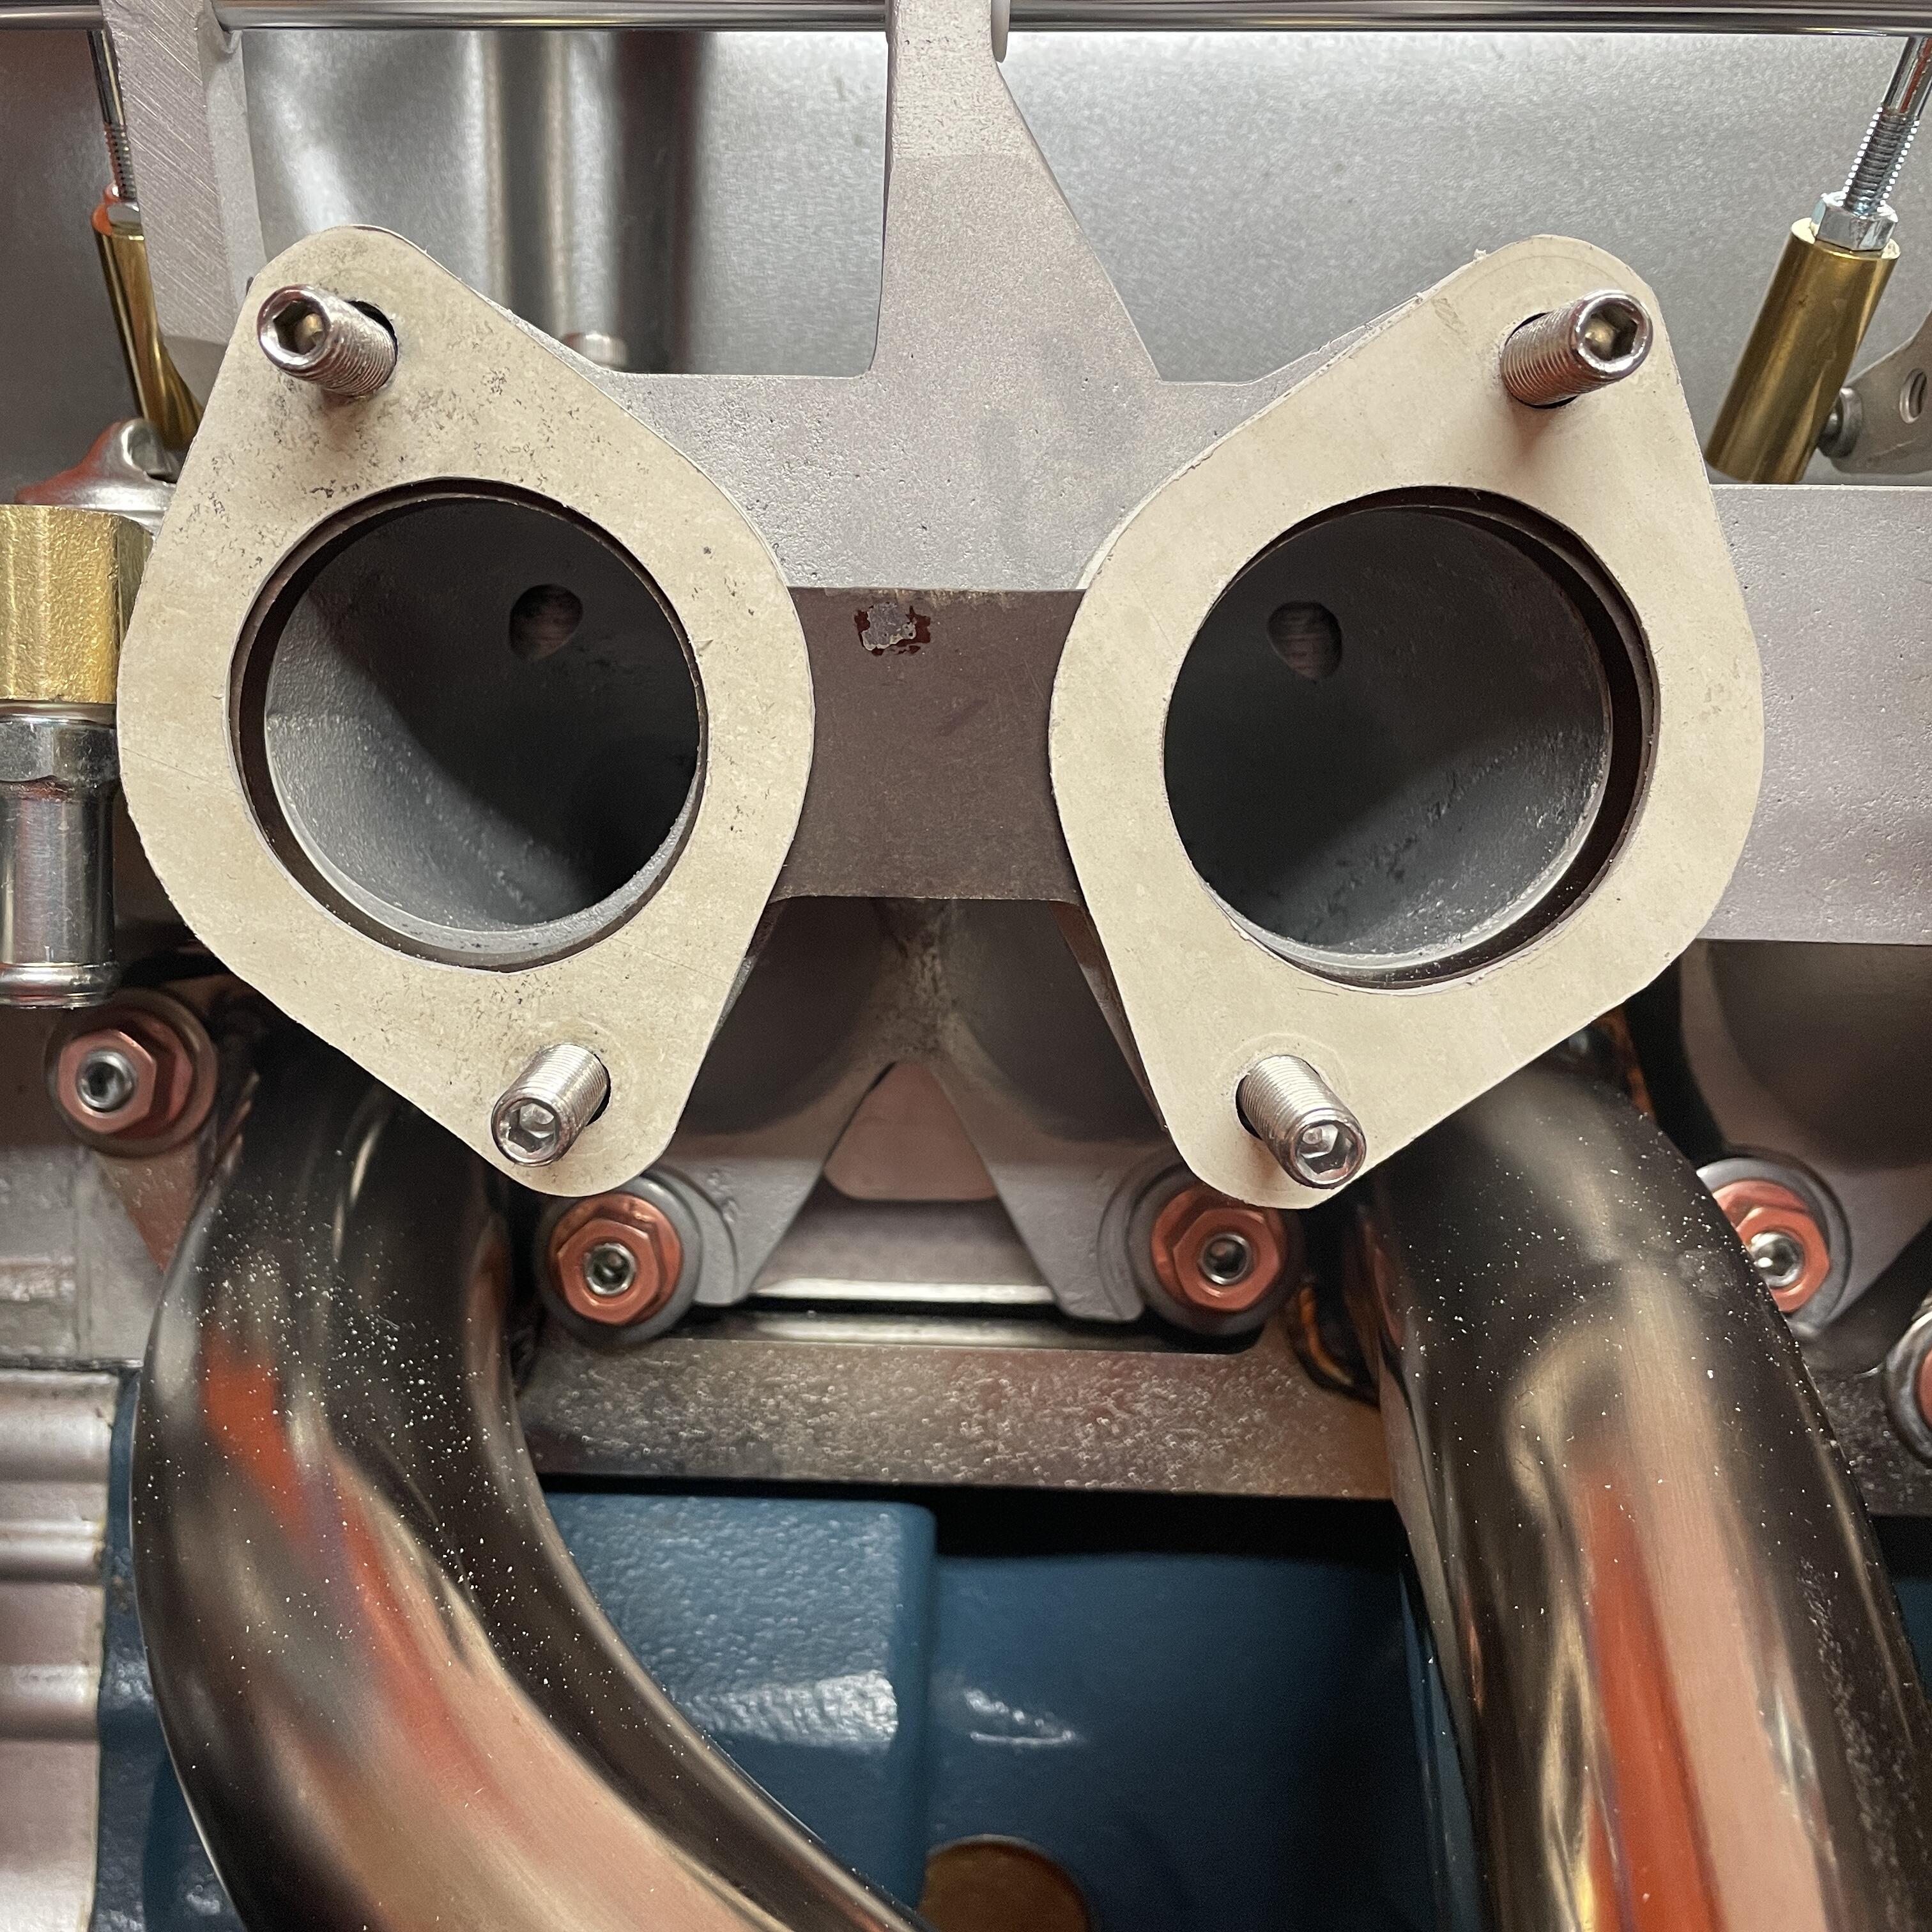
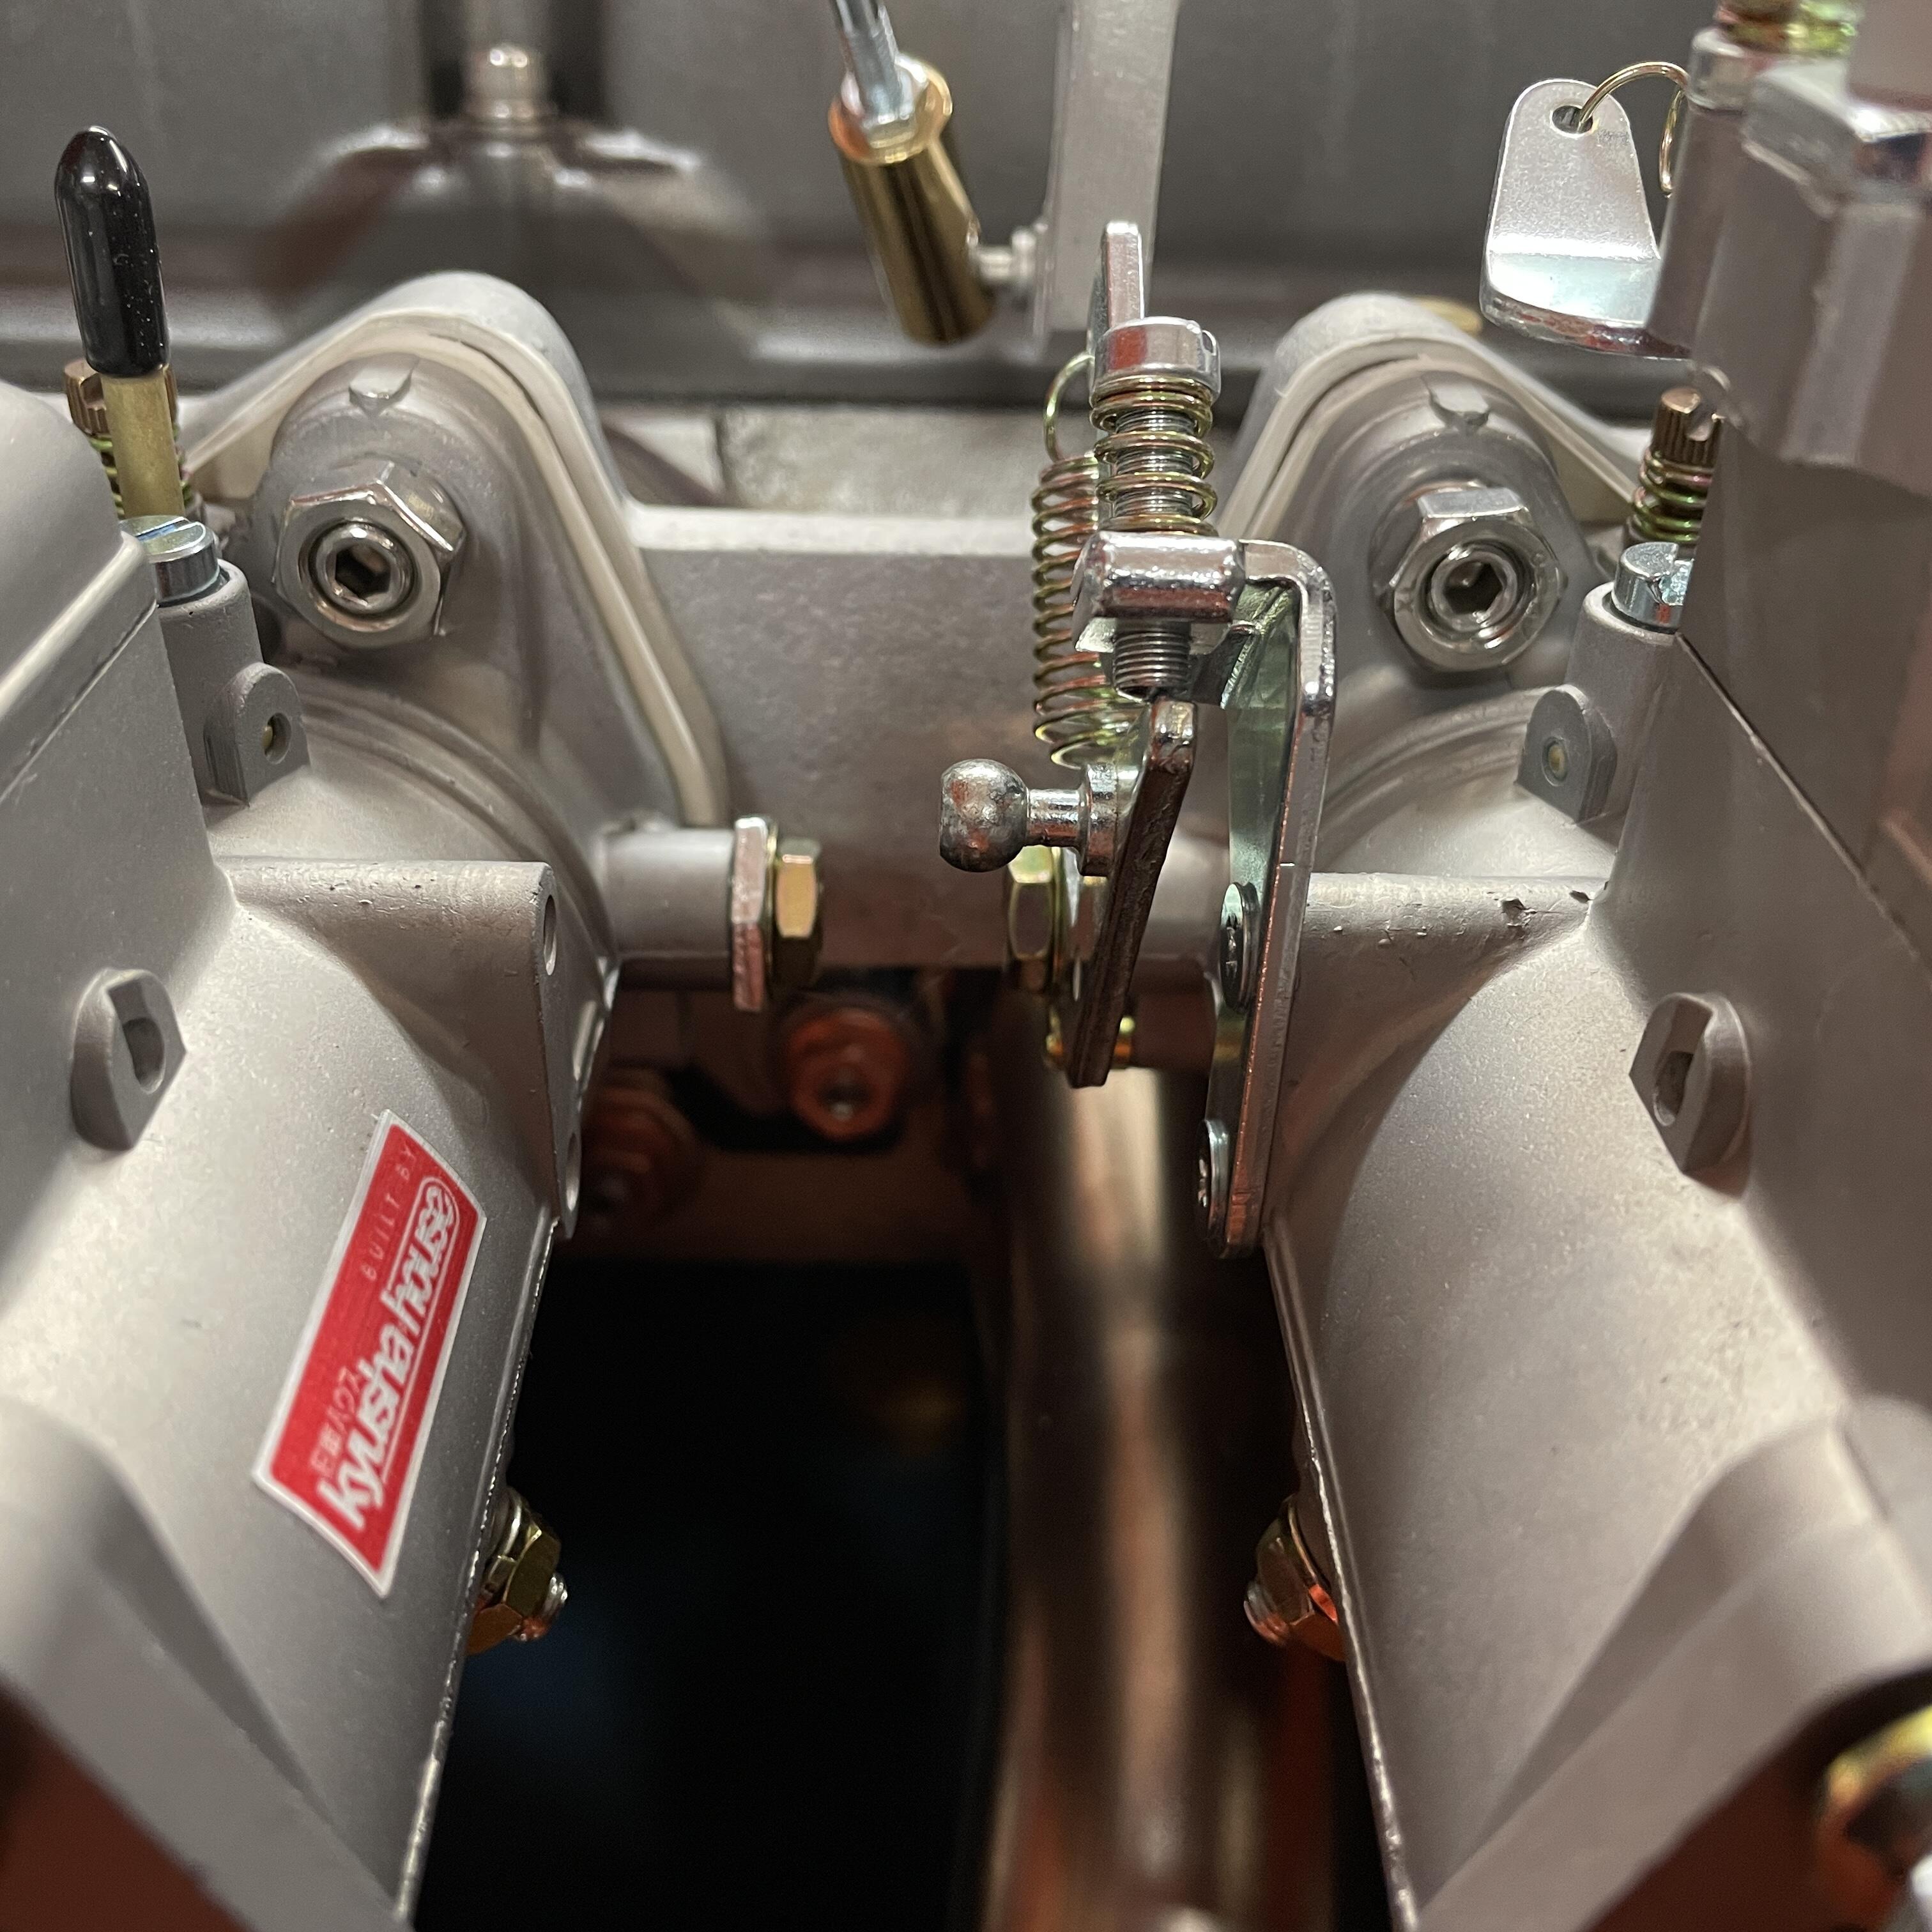
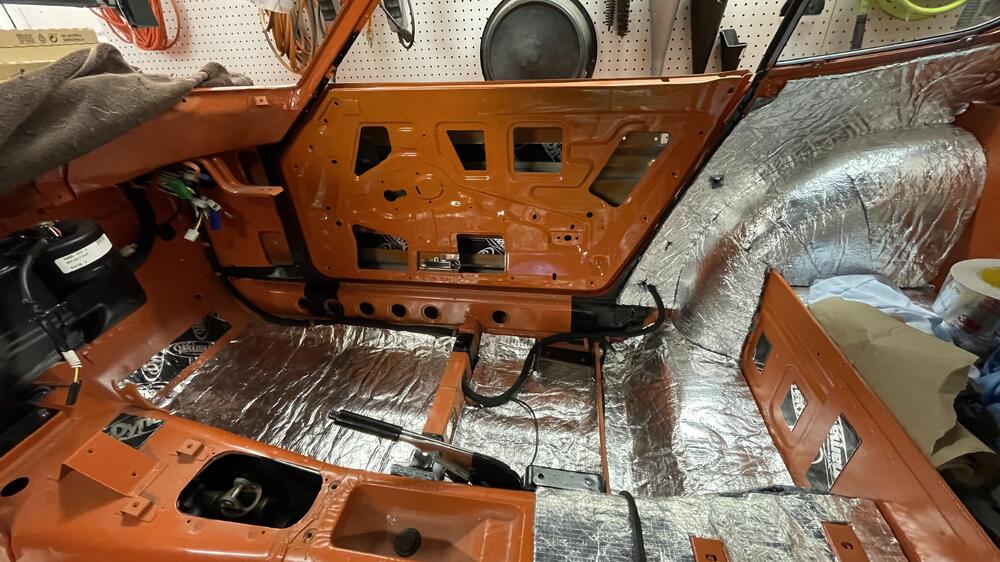
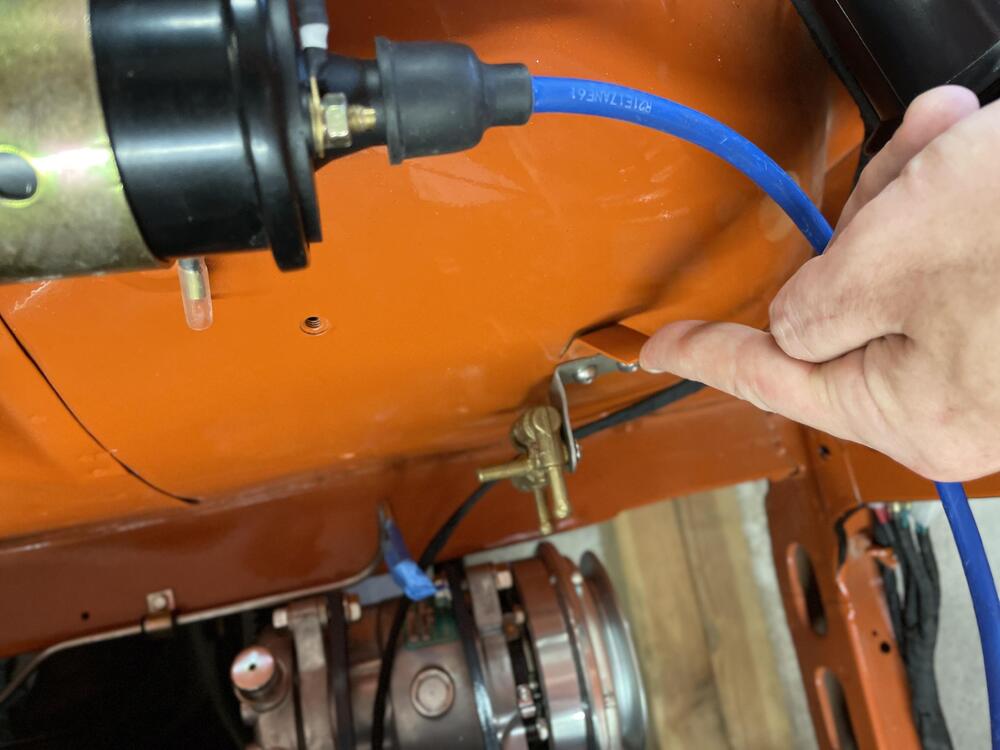
The engine harness is in. Everything is pretty much right. There are a few places where it got twisted as I was wrapping it, and the headlight plugs aren’t exactly in the right place, but I can mitigate that when I require the front lights. The harness is quite a bit thicker than OEM because I used marine wire, so I had to trim the firewall boot all the way to the widest hole size. As a result it’s not quite tight, so I need to fix that, but otherwise it’s done. ☝By the way, does anyone know what this tab is for? I assumed it’s for a clip to hold the coil wire because it’s similar to the tabs for the plug wire clips. *** I also test fit my Mikuni setup: Okay, so… It wouldn’t be my car without some substantial but not insurmountable problems. They are almost entirely because I went with the Mikuni manifold, which has the shortest runners of all of the options. The Harada I traded for this one probably wouldn’t have had any of them. There is interference between the manifold/carbs and a few of the factory configurations: 1. The water pipe that goes into the thermostat hits the throttle linkage. Yes, the one I just made that stainless steel pipe for. I’m going to see what a 45° or 90° elbow adapter does to fix it. 2. The OEM manifold studs are too long by around 3mm and the stainless ones by about 11mm. Luckily I was able to figure out that the stainless “manifold studs” that you see all over are actually set screws, and you can get them in any length (in 5mm increments) at McMaster Carr. I have 40 and 45mm studs/set screws on the way (watch, I’ll end up needing 35mm). 3. The metal riser for the plug wire clip hits the manifold. It definitely has to come off to get the manifold on, but I think this one is for a ZX. The 240z one at Z Car Depot is different and may work. 4. The plug wires bind up in the throttle linkage. I think I can partially fix this by adjusting the linkage so it isn’t sticking straight up, but I may end up rerouting them. *** Lastly, I replaced my corroded and beat up 280ZX thermostat housing with a new one for a 240z. It didn’t fix any of the interference issues but it looks nice and I don’t have a bunch of plugged sensor holes.


-
No, I haven’t. This is straight out of the box.
-
Nope. Spirit Garage https://www.spiritgarage.com/
-
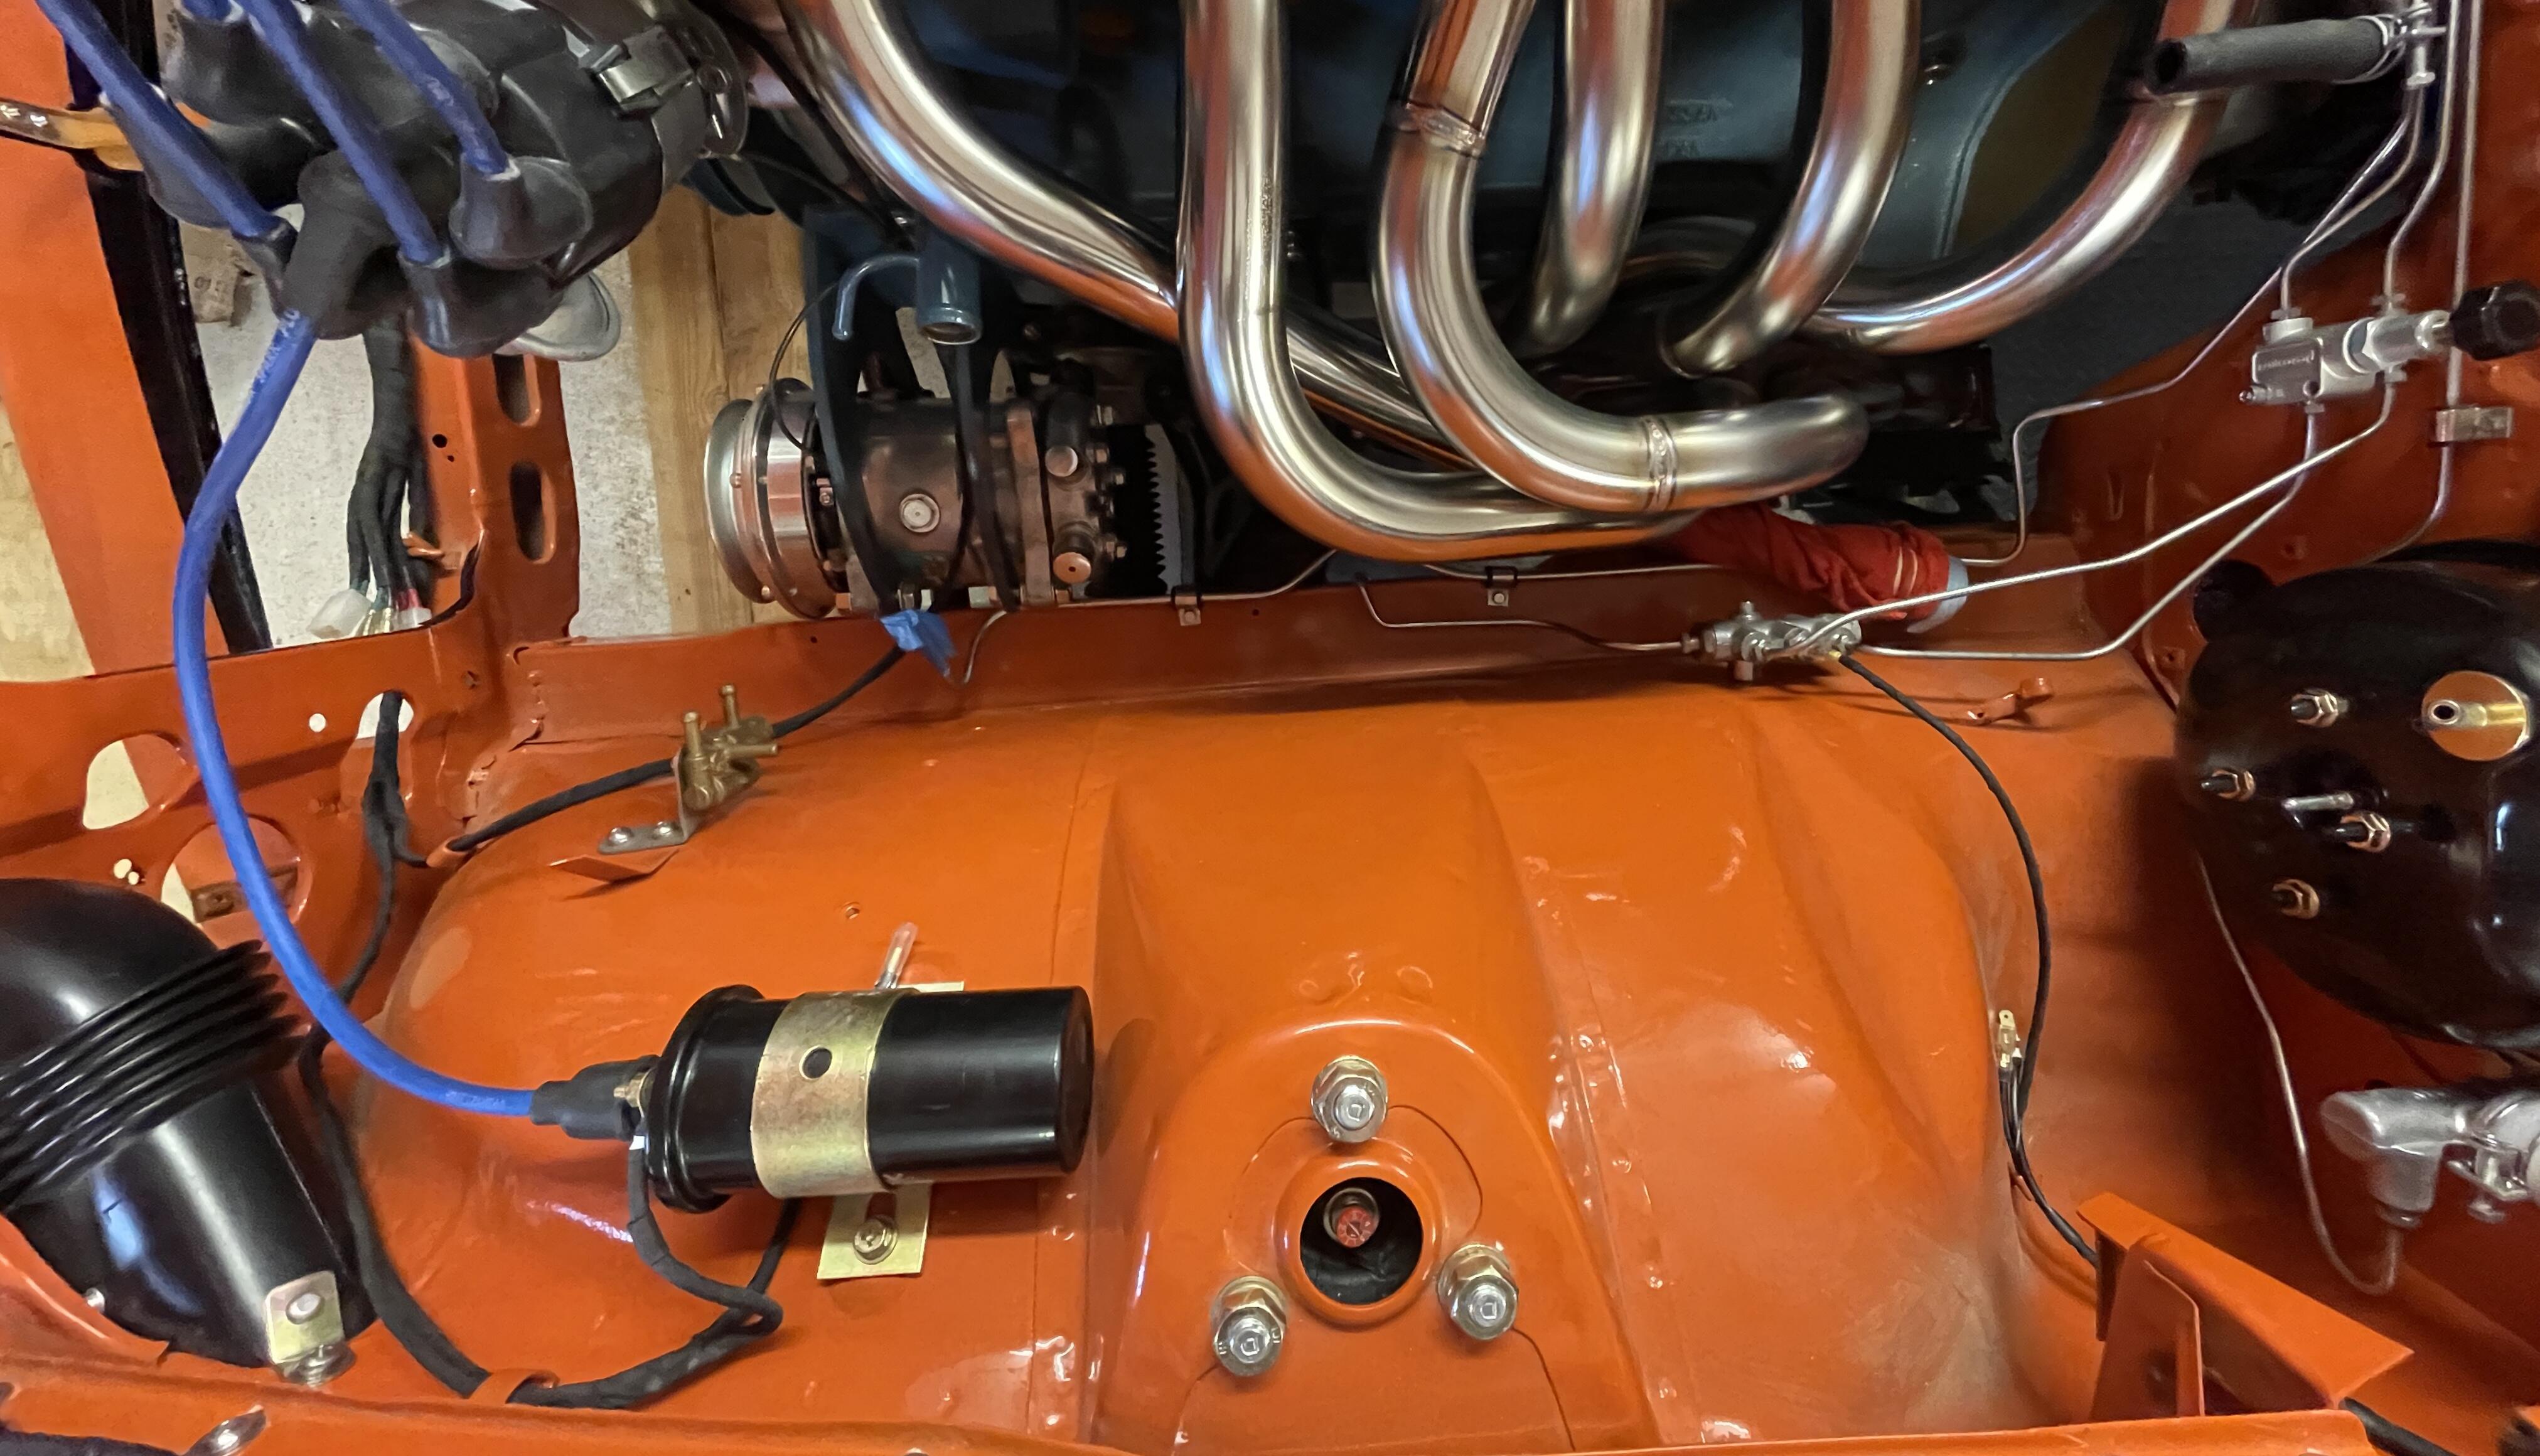
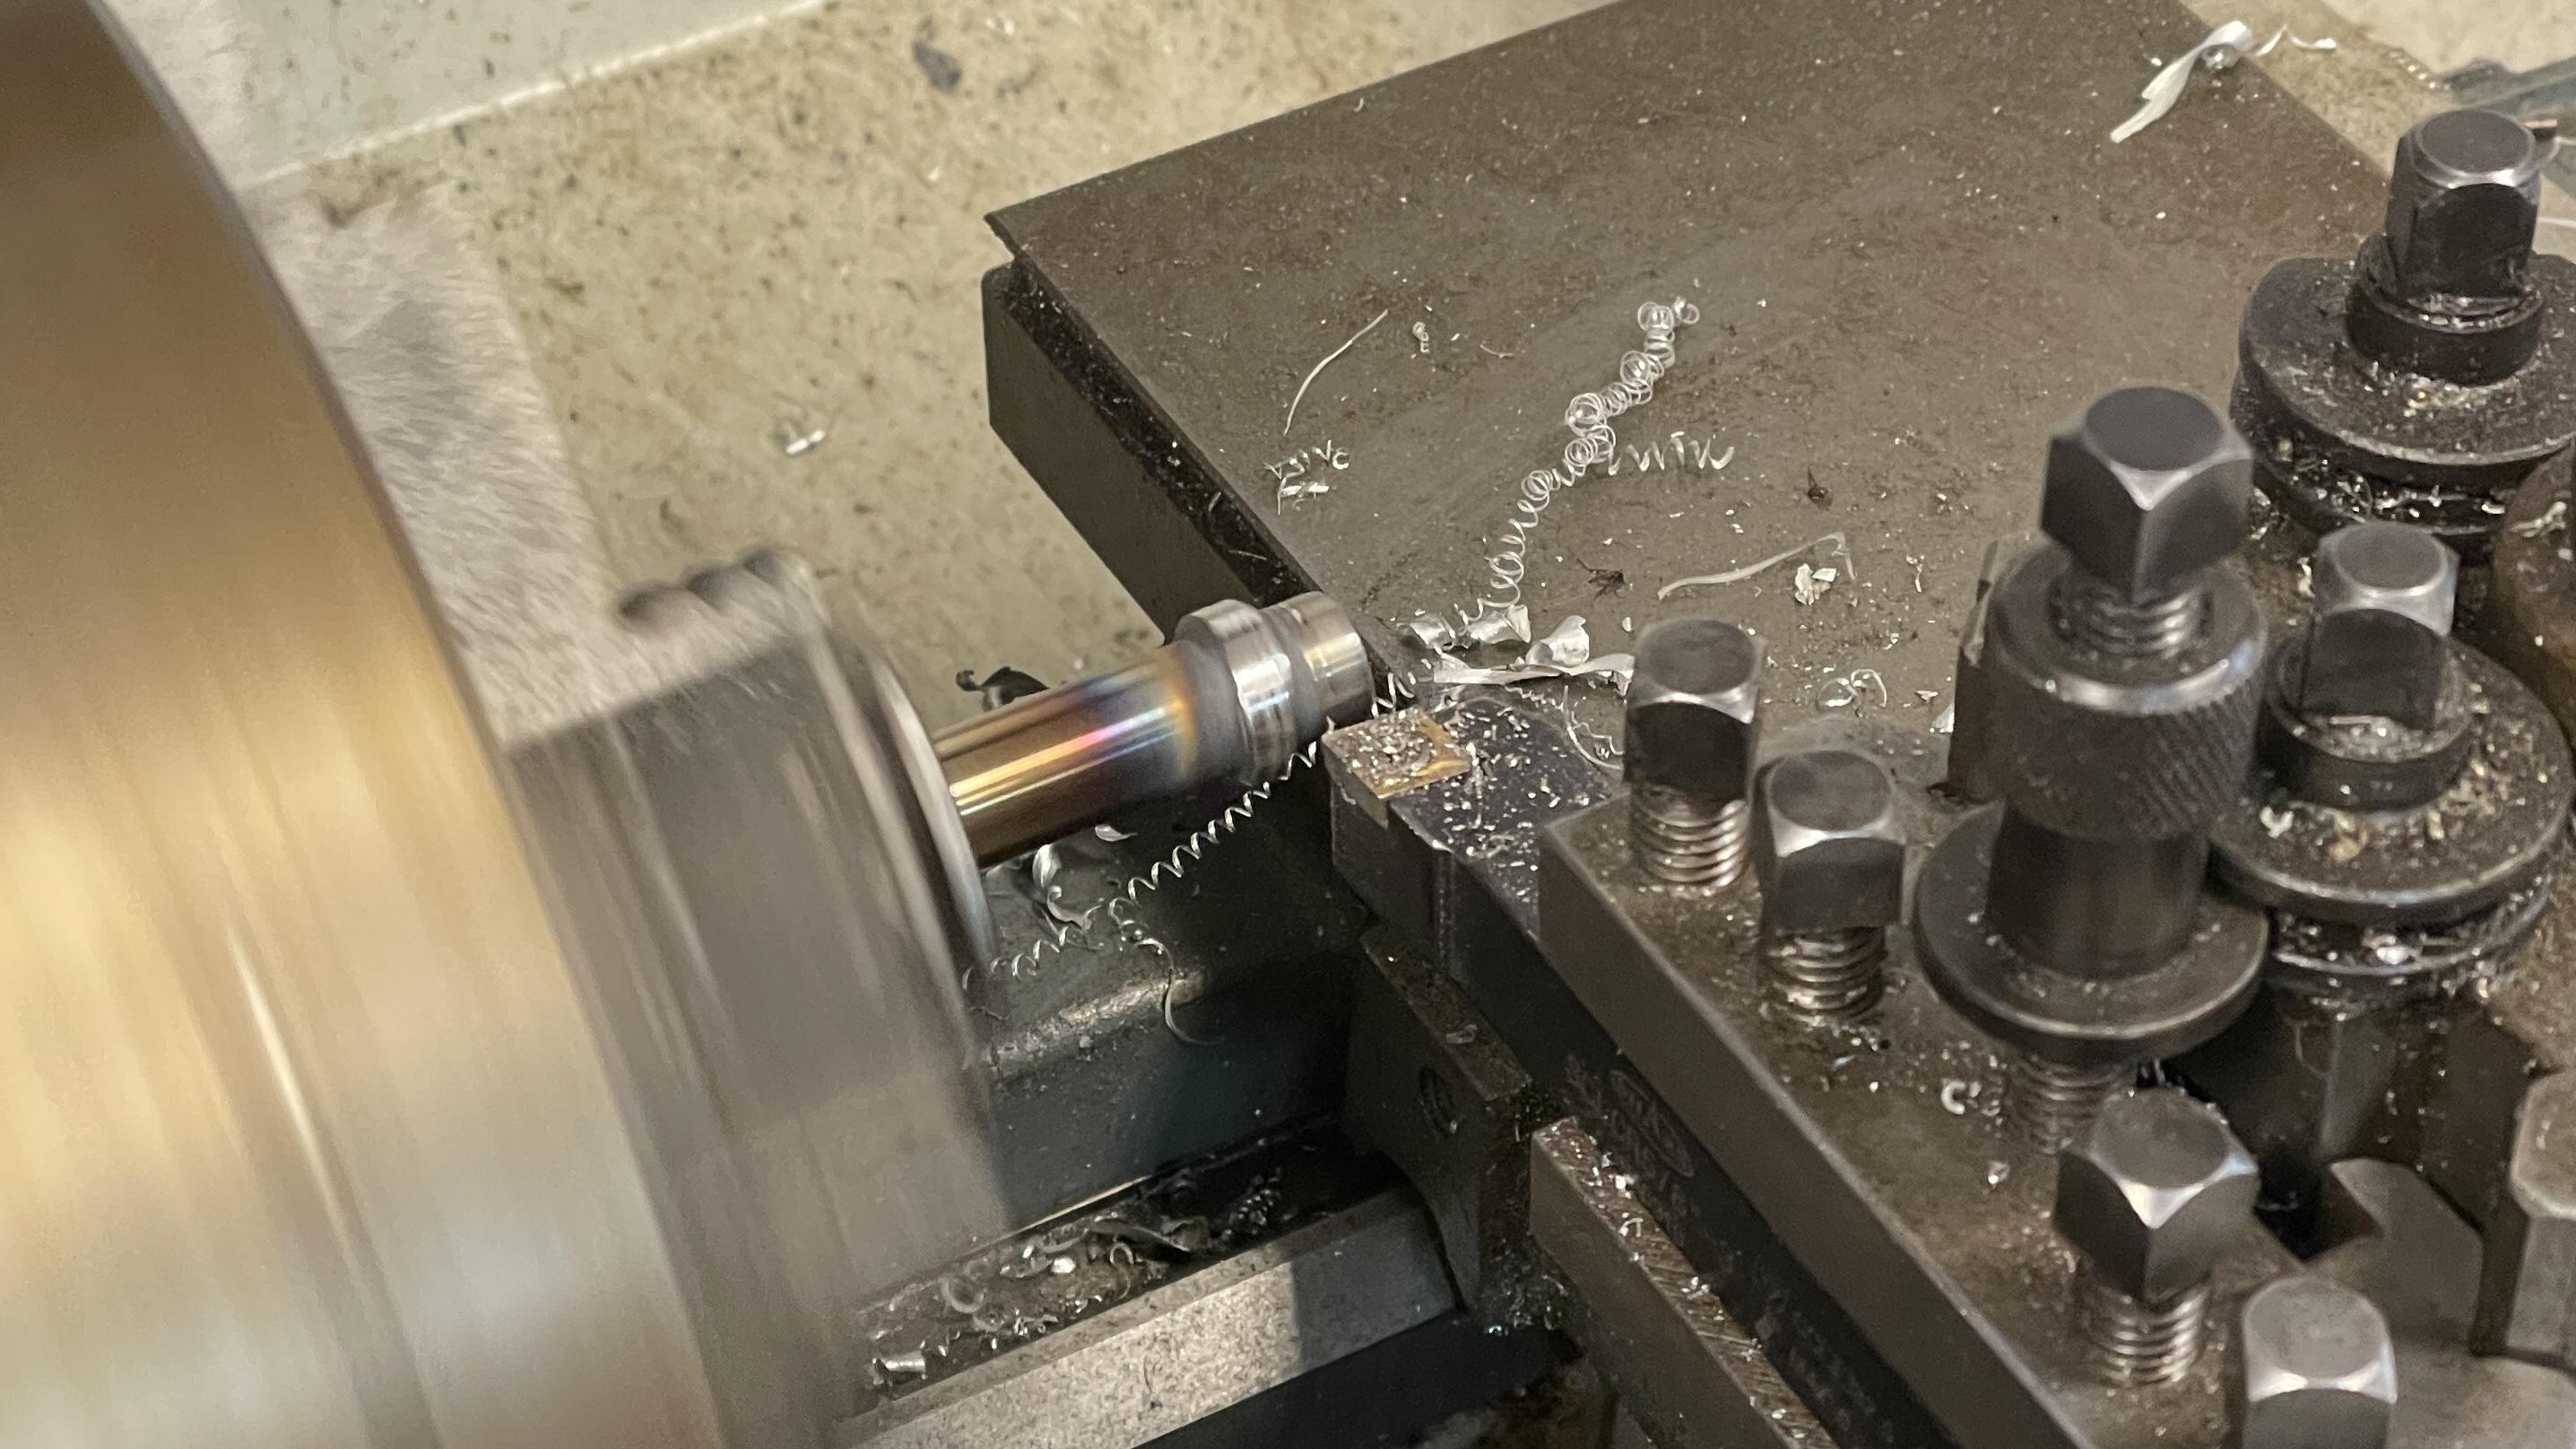
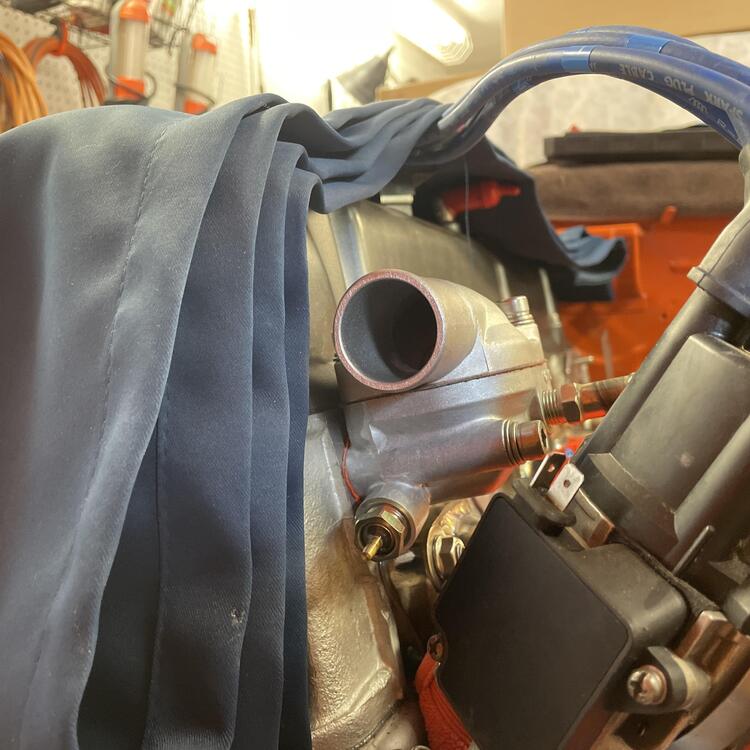
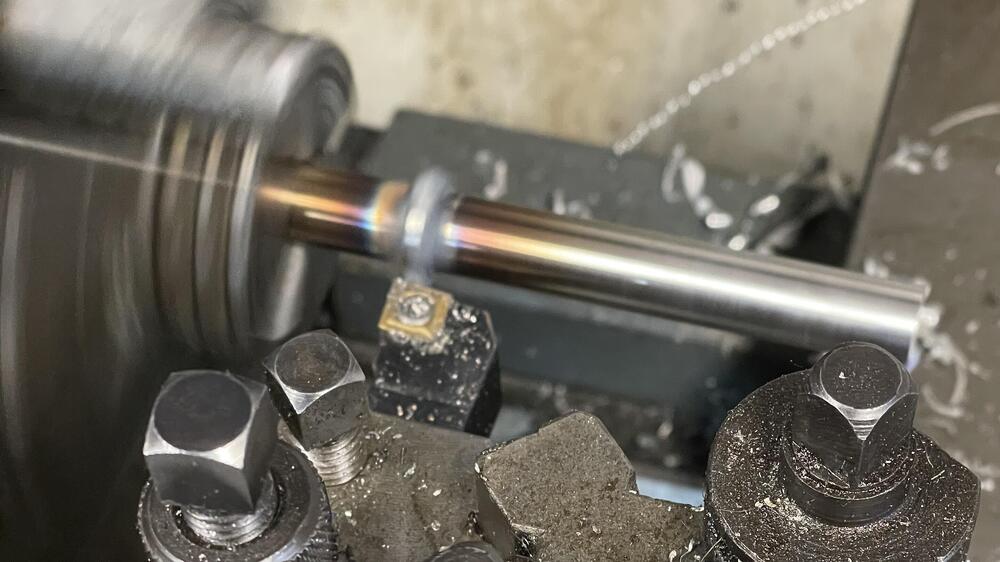
I made a manifold bypass tube out of stainless today so I could reconnect the coolant bypass tube in the rear of the engine to the thermostat housing. I received a great deal of snark on the FB Mikuni group when I asked how others were completing this part of the coolant circuit (short story is most of them don’t and sacrifice their heater) but I want everything working as designed and to be able to drive in the winter. Those that had done it just used “a rubber tube”, which is a wildly insufficient explanation, IMO. I opted for stainless because I am not confident a coolant tube poached from another car would survive the header heat. There’s a chance I will need to wrap this to keep the heat out and not boil the coolant, and I possibly need to get different set of tubes to get this pipe up further away from the headers, but I’ll see if this configuration will get it above the heat shield when I test fit that in a few days. We will see. It’s 316 stainless, 1/2” OD, .6 wall thickness, and 19.5” long. Here are some shots of how I cleaned up the tig-welded hose clamp beads with a lathe, and then the final piece.


-
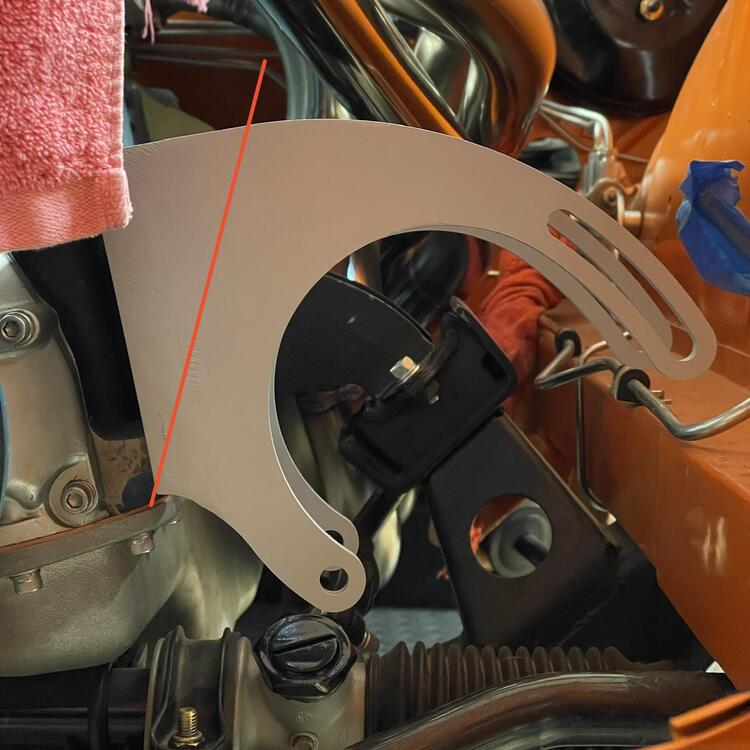
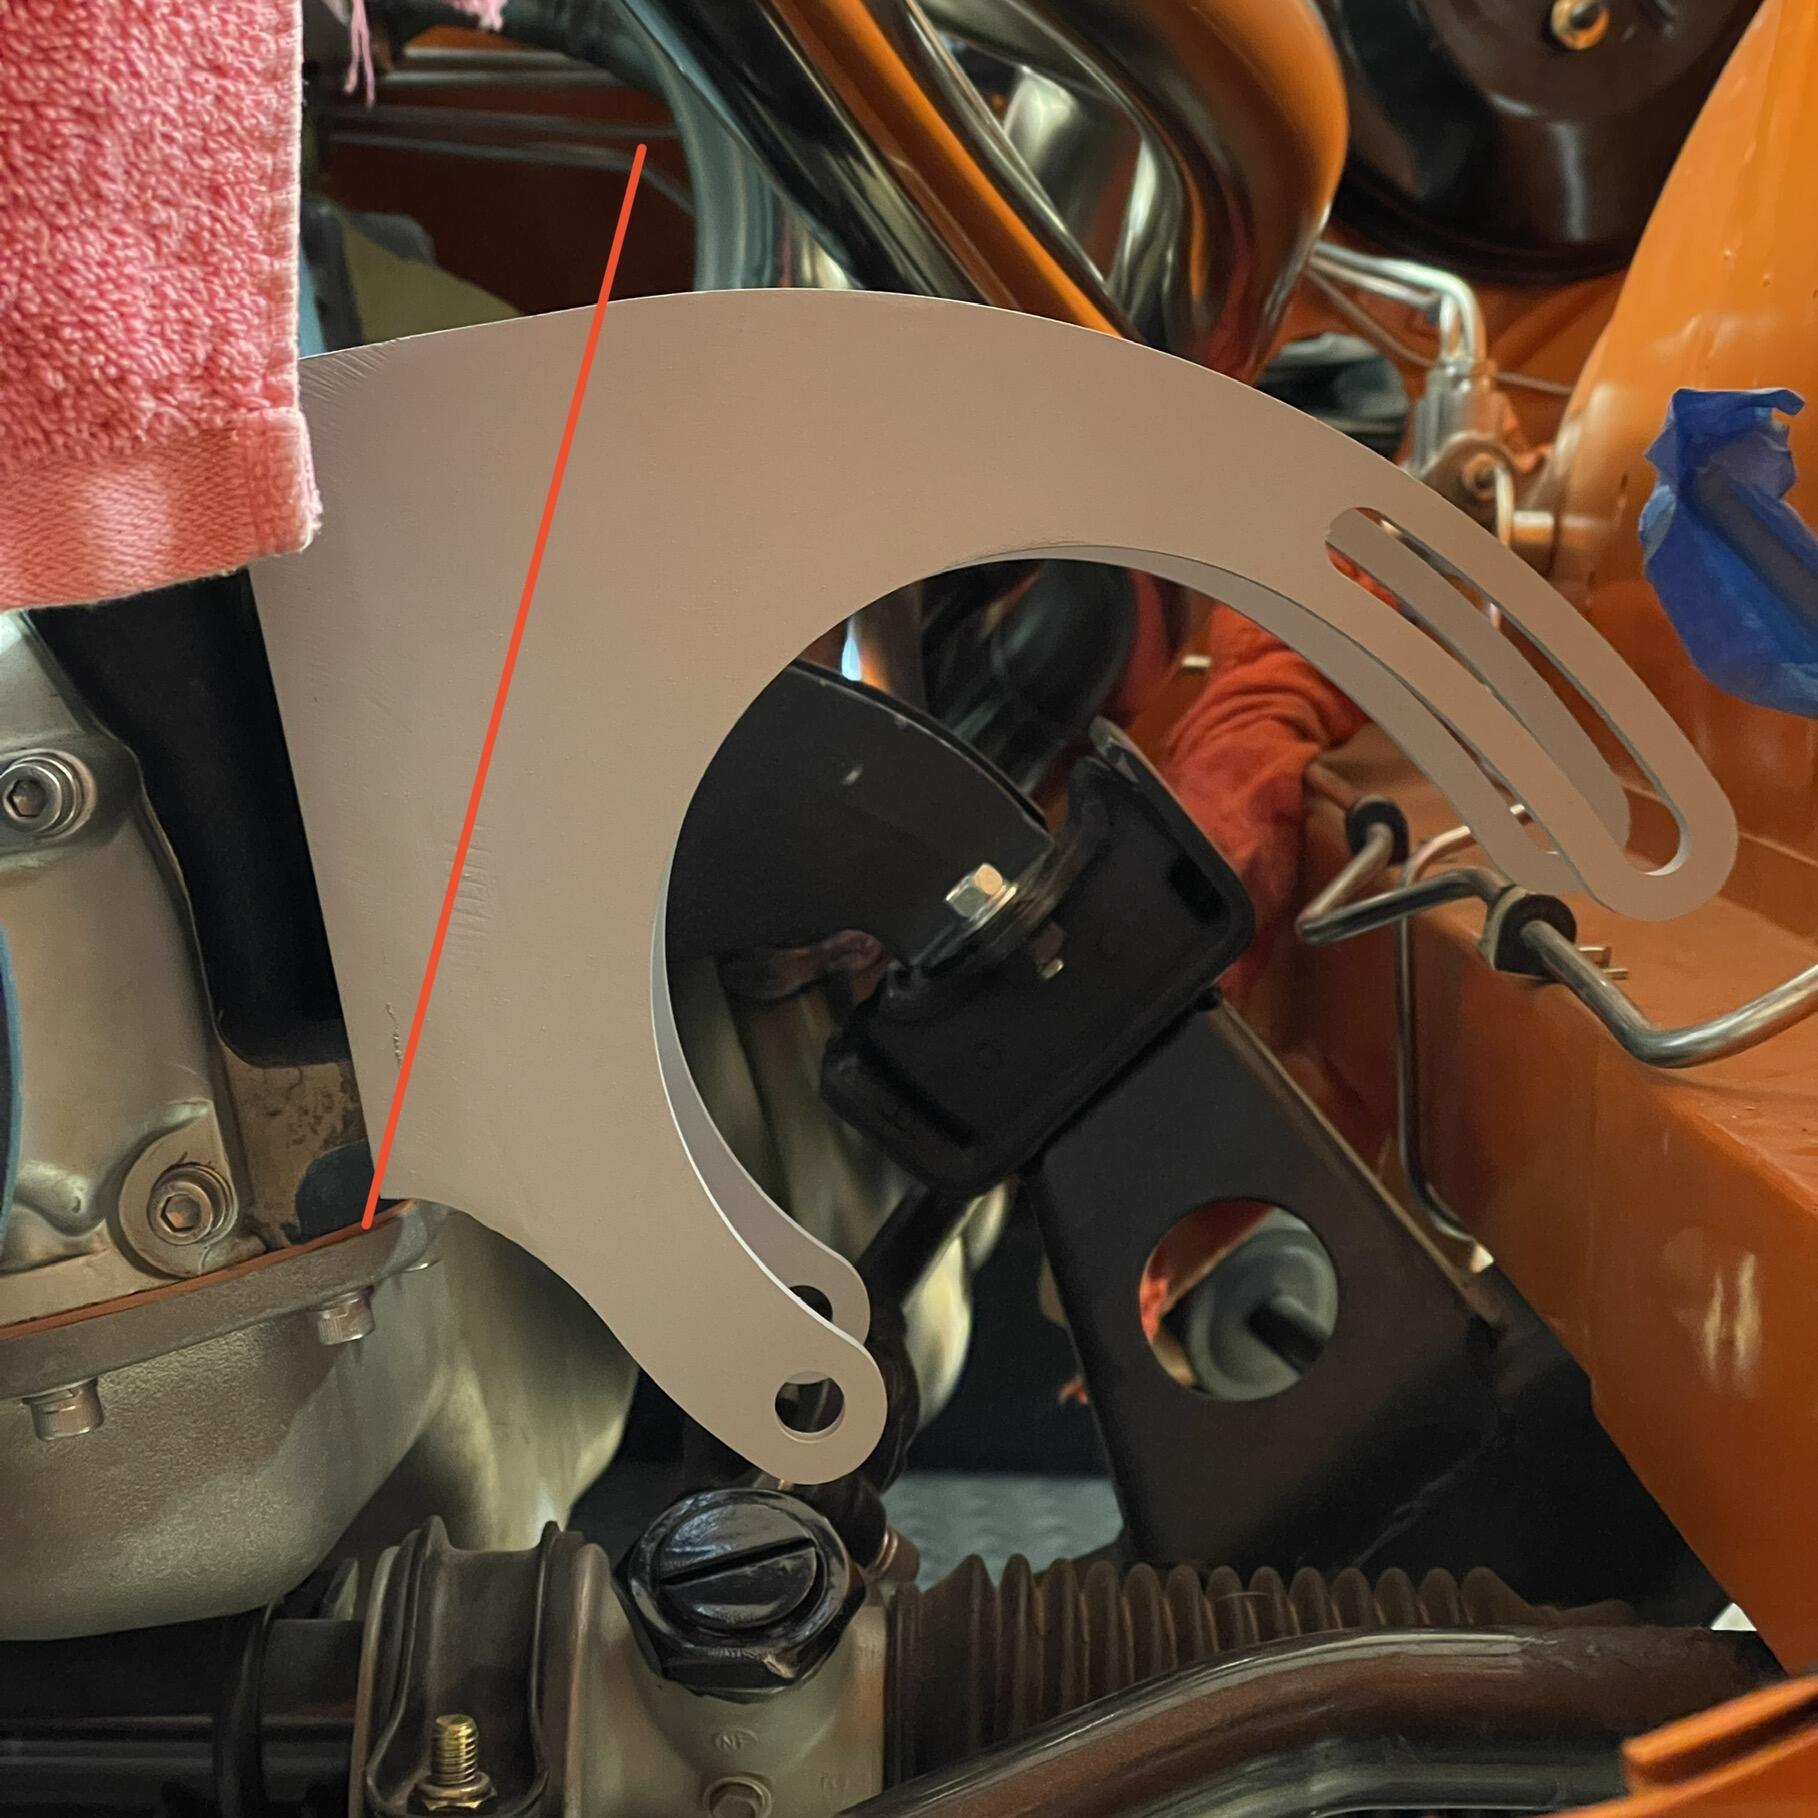
Yep. I would cut the brackets somewhere between where I cut it and where the red line is in the photo above. I considered doing this at the beginning and second guessed myself, thinking I needed the clearance for the air box. I may take the bracket off and cut them like this at some point down the road, but only after I’m done with the car.