Matthew Abate
-
Posts
1,187 -
Joined
-
Last visited
-
Days Won
16
Content Type
Profiles
Knowledge Base
Zcar Wiki
Forums
Gallery
Events
Downloads
Store
Blogs
Collections
Classifieds
Everything posted by Matthew Abate
-

1973 240z Custom Wiring From Scratch
Matthew Abate replied to Matthew Abate's topic in Build Threads
It's labeled "Brake ind." in the diagram and the wire shown is yellow with blue. It's also Yellow w/ Blue on pages BE-5 and BE-6 in the FSM diagram, conflicting with page BE-2.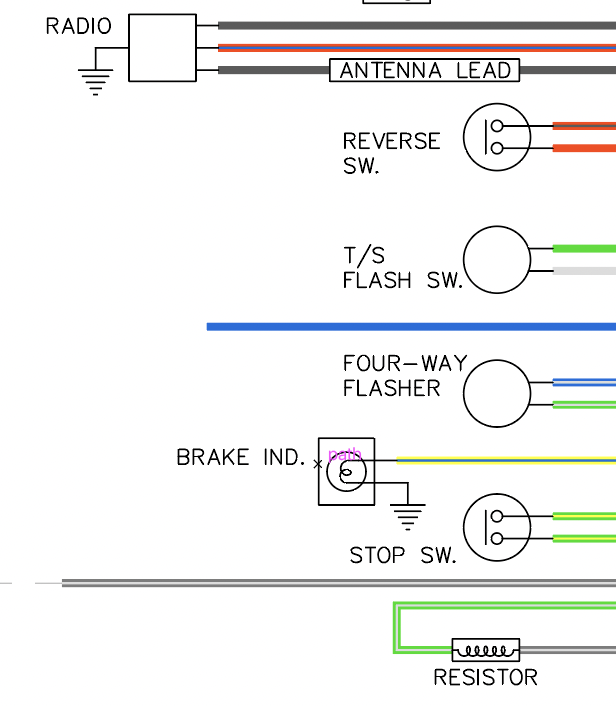
-
1973 240z Custom Wiring From Scratch
Matthew Abate replied to Matthew Abate's topic in Build Threads
I think I found the answer to the yellow w/ green wire question: apparently it's from a low brake fluid/pressure sensor to the e-brake light on the dash. -
1973 240z Custom Wiring From Scratch
Matthew Abate replied to Matthew Abate's topic in Build Threads
Thank you for getting in there and checking! I’ll take this back and start chasing the wires to see where things connect on the other end. Maybe that will clear it up. -
1973 240z Custom Wiring From Scratch
Matthew Abate replied to Matthew Abate's topic in Build Threads
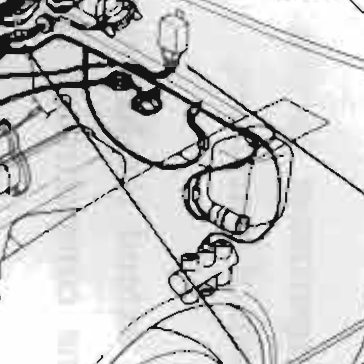
Thanks @stevej! Some of this is definitely right, but I have some questions about a few things. Is the washer motor not up on the washer tank by the firewall? If it is, I think we both has some stuff swapped around. I thought maybe these wires went to the Thermo Switch and other things that connected to the distributor on the Automatic cars. Here's a close crop of the illustration in the FSM where this stuff is. It would be between the lights and the ballast resistor, but I don't see a branch in the harness in the illustration. I'm pretty sure I have the green wires for the horns accounted for in the bundles coming out of the loom near the headlights. This one is further down the harness toward the coil. I chased it back to a splice where it joins a green wire that goes back to the other end. There are two black w/ white wires in that splice as well. These are the ones that go to the coil and stuff you mentioned. There is a black wire running to a ground next to the battery in the wiring diagram. Do you think it's this one? (Why the hell would someone cut that!?!) I am wondering if this whole mess actually goes to the washer tank and what I have labeled as the washer tank wire goes somewhere else. Here's where this is in the FSM illustration: It would make sense that this thin branch would be this part given how long it is. However, if it is some of these other things are not what I have them labeled now.
-
1973 240z Custom Wiring From Scratch
Matthew Abate replied to Matthew Abate's topic in Build Threads
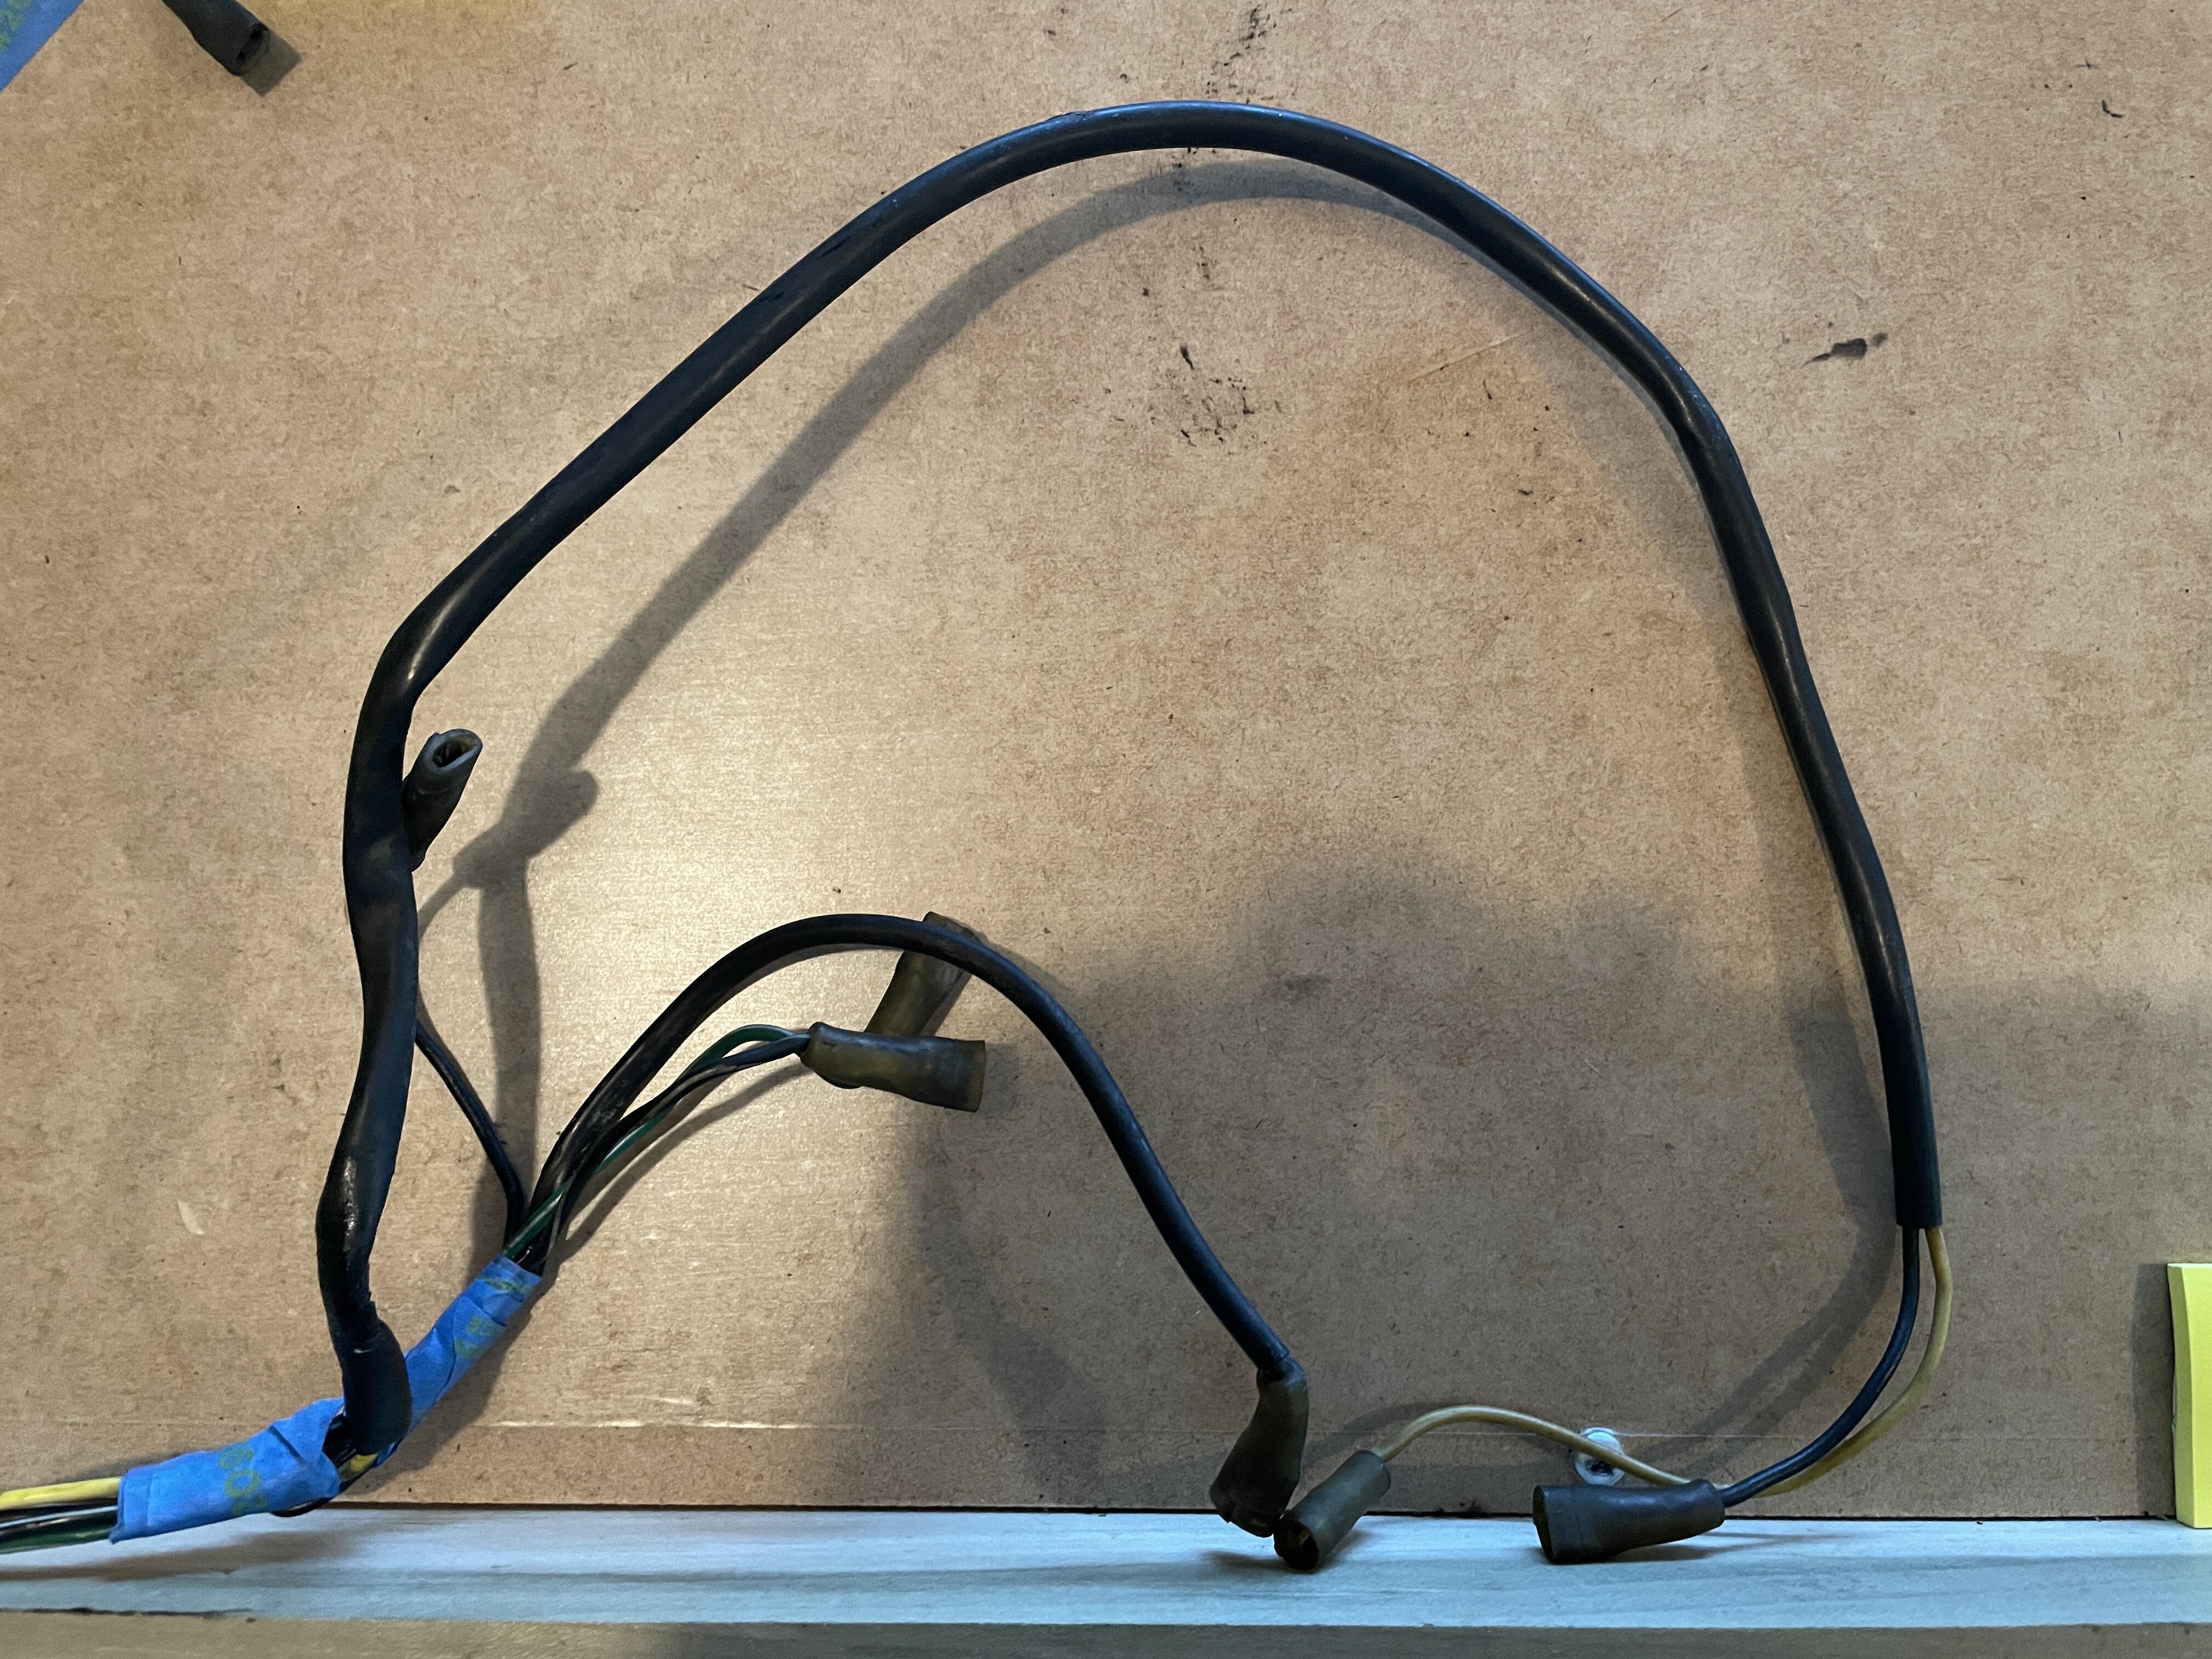
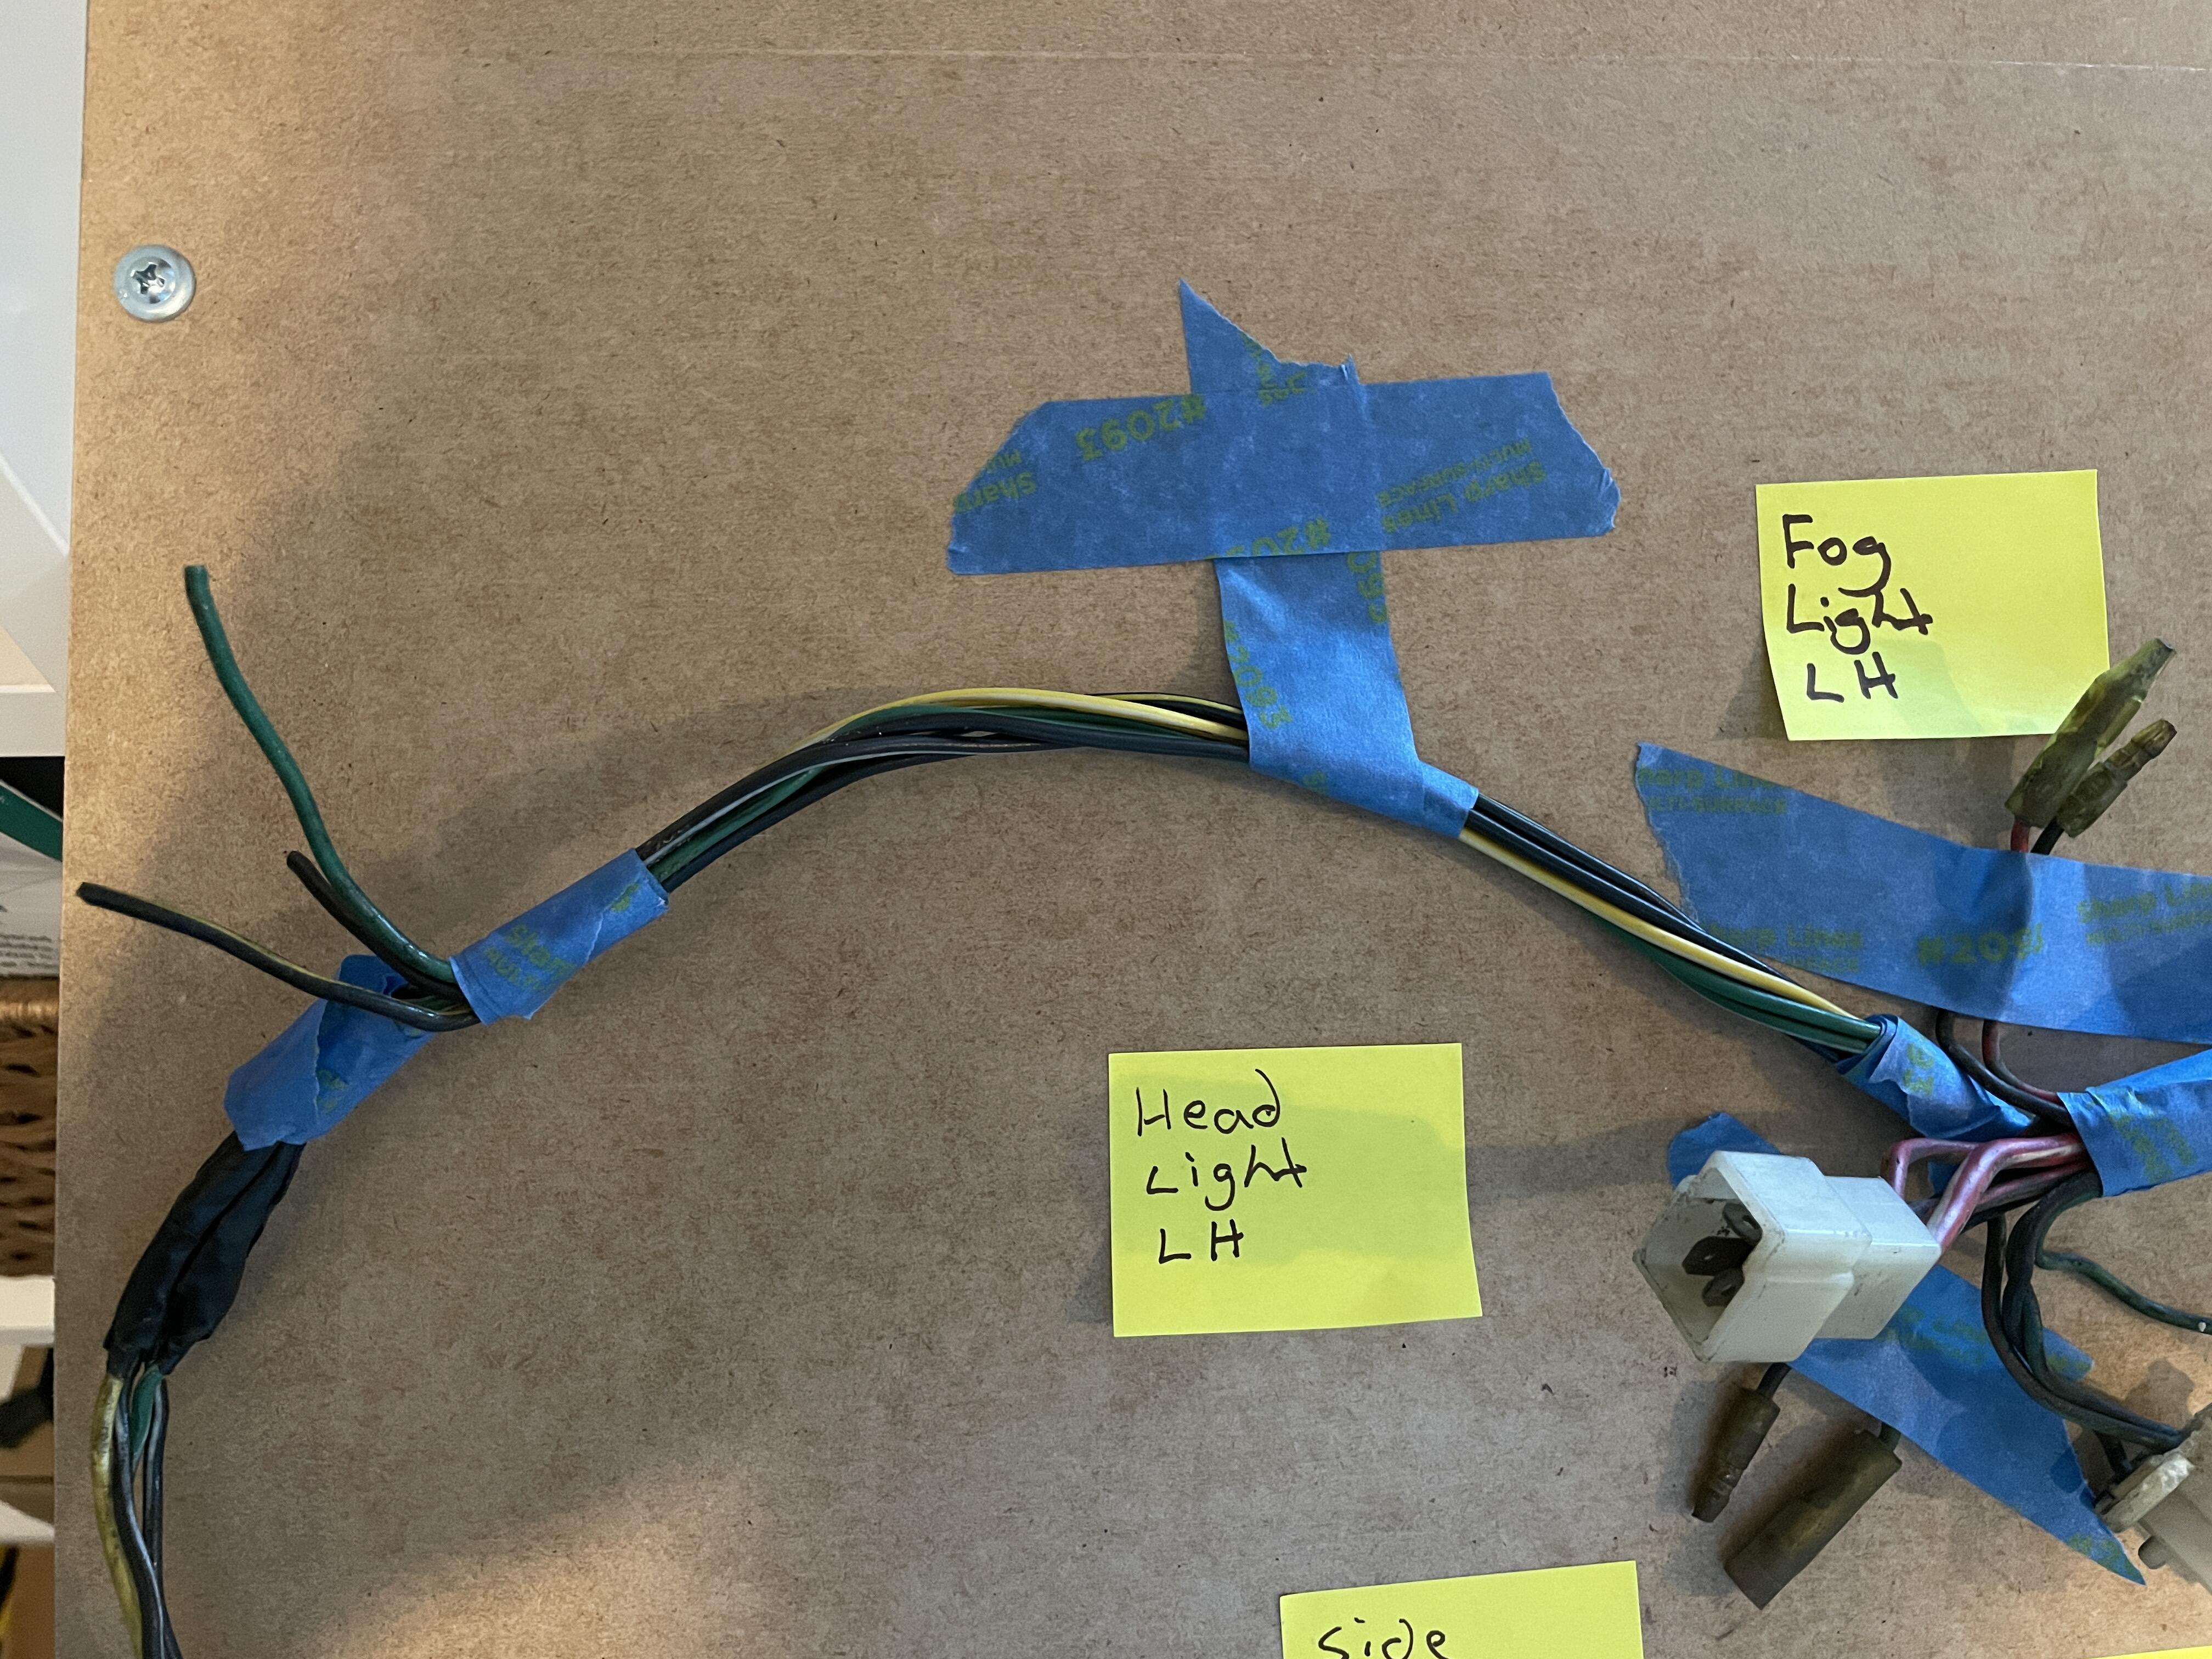
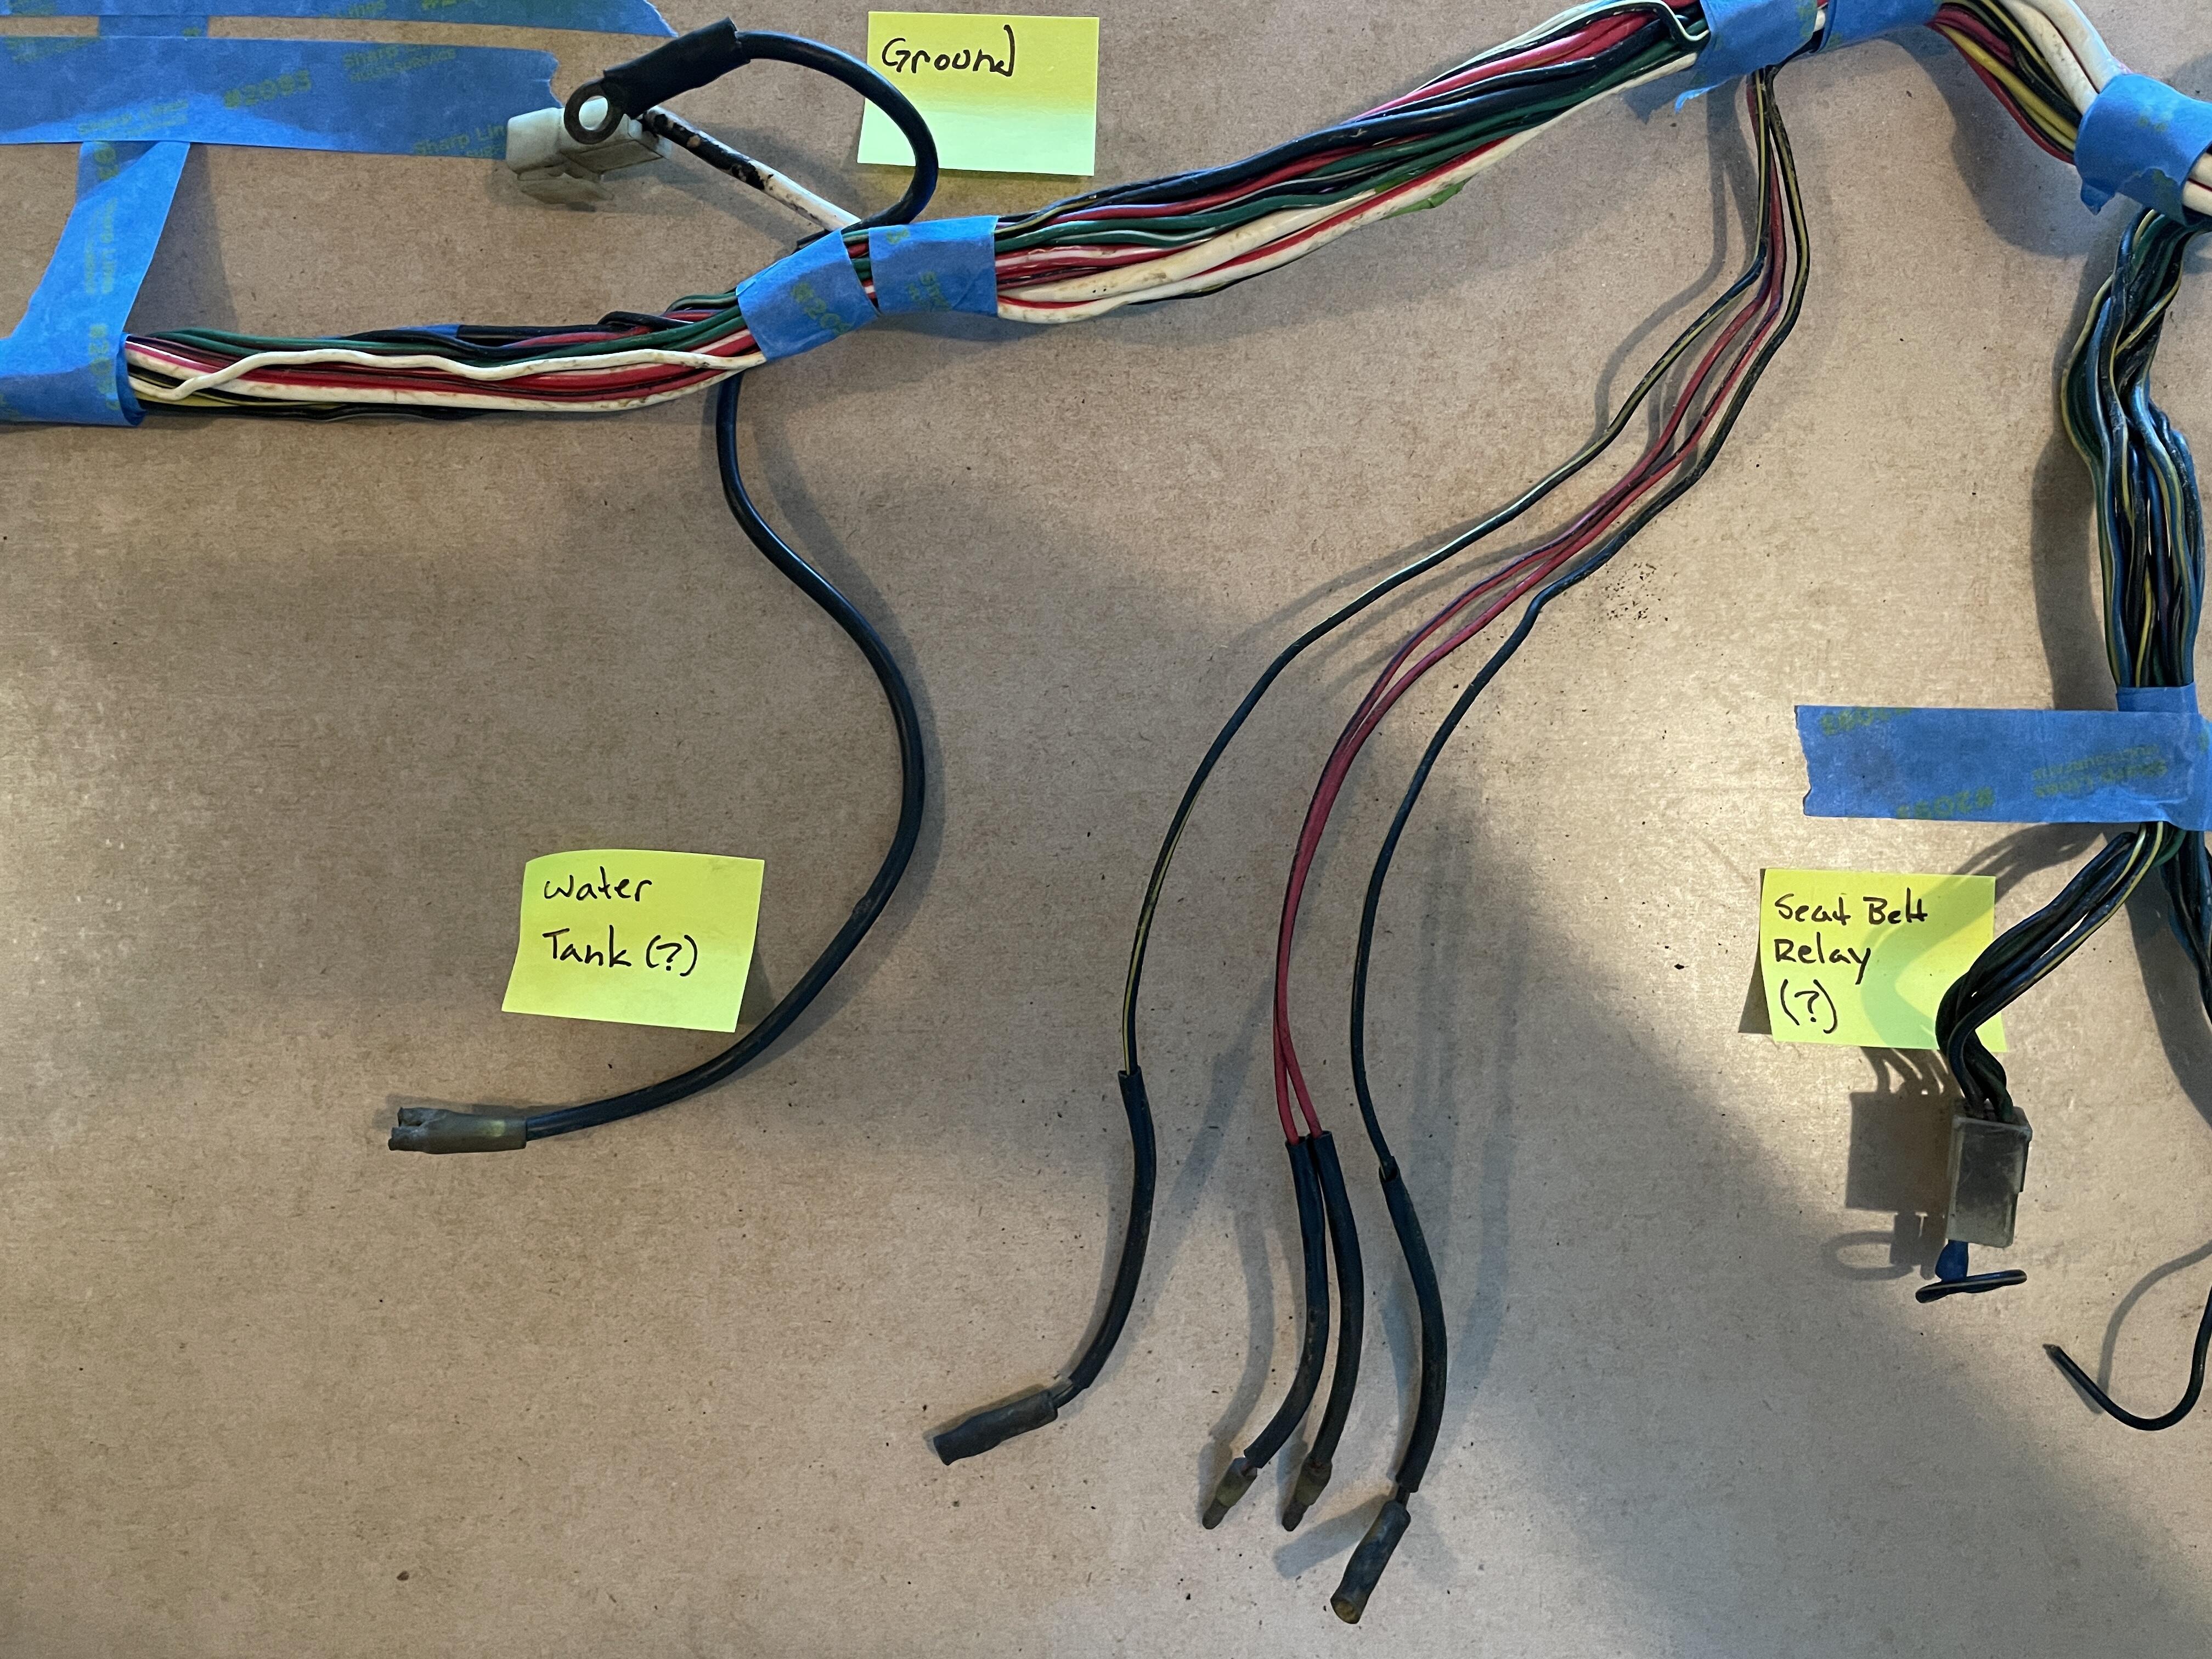
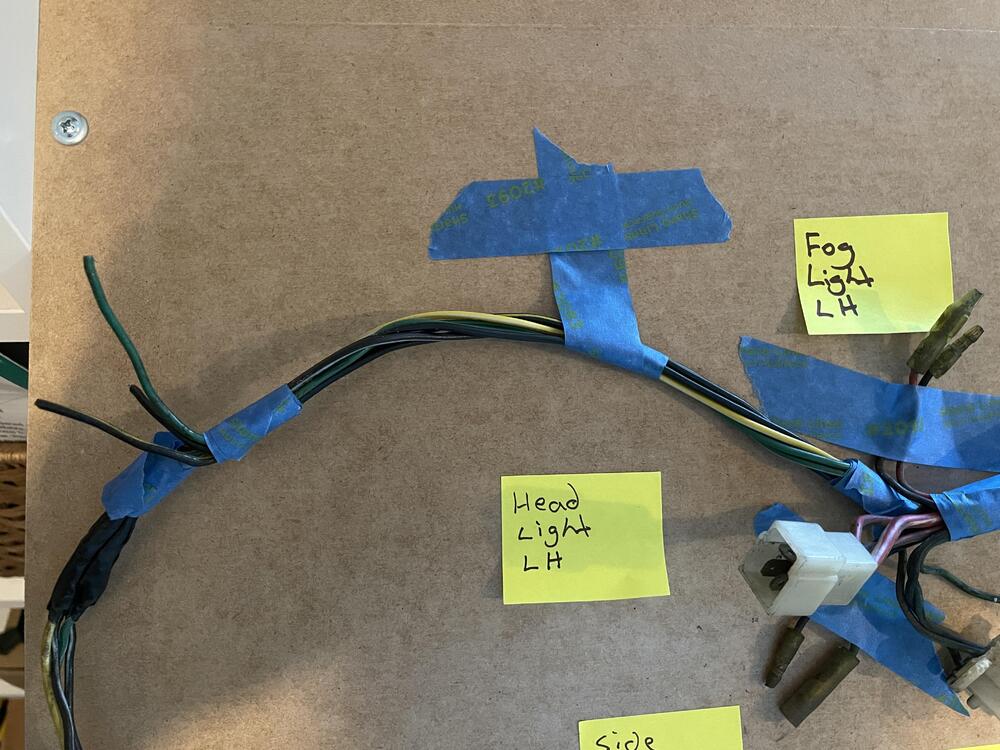
Okay, I officially need help. I have 14 wires in this harness I cannot identify at all, and 5 that I think I have right but am not 100% sure about. Starting at where this harness connects to the dashboard harness, here is a list of what I have identified already: Instrument Harness A through D, To Dash Harness A from Alternator, To Dash Instrument Harness B from Starter Motor, Horn Relay, Intermittent Relay, and Hazard Wiper Motor Starter Motor, and Starter Ground Oil Pressure Switch, Alternator, and Alternator Ground Voltage Regulator and Condenser Inspection Light Side Marker Lamp RH, Parking & T/S & Side Front RH, Head Light RH, Fog Light RH, and Horn RH Horn LH, Fog Light LH, Parking & T/S & Side Front LH, Head Light LH, and Side Marker Lamp LH --- So, working from the end furthest from the firewall toward the dashboard connectors, this is what I am looking at: I have a yellow wire ending in a female bullet connector sharing a sleeve with a black wire ending in a female spade connector That black wire extends to where the yellow wire merges into the harness and has another female spade connector At that same point I have a green w/ white wire and a black w/ white wire, both ending in female spade connectors There is also a longer black w/ white wire ending in a female spade connector and shrouded in a black sleeve Further up the harness, about 10 inches from the bundle of wires for the lights on the left side of the car, I have 3 wires that have been cut: black w/ yellow, green, and black. See the far left side of the following image. The next mystery is a bundle of 4 wires that emerges between the bundle for the starter and the thick branch of wires that holds the wiper motor connector, among others. There are 2 red w/ black ending in male bullet connectors and 2 black w/ yellow ending in female bullet connectors. See the middle of the image below. (Also, can someone confirm that that is the water tank wire?) Lastly, I have two 4 wires emerging from that thick branch that holds the wiper motor connector and what I think is the seatbelt relay (automatic only). There is a black wire that is on its own and has been cut. There is also a bundle of 3 wires: black ending in a male spade connector, black w/ yellow ending in a female spade connector, and yellow with green ending in a female bullet connector. This bundle of wires is about 6 1/2 feet long, and the diagram does not show any yellow w/ green wires. (Can someone confirm that that is the seat belt relay connector?) --- So yeah. That's the hangup on finishing this step of the project. If anyone has any idea what these wires are for, please let me know. It is entirely possible that these were modifications the previous owner made, but I am hopeful that we can solve this collectively.


-
1973 240z Custom Wiring From Scratch
Matthew Abate replied to Matthew Abate's topic in Build Threads
Well, I am pretty sure that my engine harness is for an automatic, not the manual harness I need. It has a 6-prong plug (G, B, B, BY, BY, BY) and a long branch with a yellow/blue wire. In the diagram that wire goes to the inhibitor. Both of these are automatic only. Not a crisis, because it was damaged and messed with in a number of places, but it does make using this as a guide to build my new one significantly harder. -
1973 240z Custom Wiring From Scratch
Matthew Abate replied to Matthew Abate's topic in Build Threads
You may have noticed a few things I marked in Red in the last post. These were wires that differed from what I have in the Factory loom I disassembled in the wiring diagram. Well, I have a few more for the engine bay. I still have a lot of wire chasing and investigation to do, but I can point out two things: 1. The Throttle Opener Relay is missing from the wiring diagram I downloaded, but it is in the FSM wiring diagram for 1973 cars with manual transmissions (bottom left hand corner near the coil). 2. The 10-pin clips are differing pretty substantially this time. I am not surprised by a couple of wires being different colors, but also, the White and Black connectors are swapped from what is in the FSM and I am missing a wire in each of the other two. I need to find out somehow if these were removed or just never there in the first place. Maybe this will become apparent after I finish chasing the wires. Component Connector Color Connector Style Direction # of Pins # of Wires Diagram Wire Color Sample Wire Color Instrument Harness A Blue 10-Prong F 10 9 Red w/ Black Red w/ Black Red w/ White Red w/ White (Heavy) Green w/ Black Green w/ Black Green w/ Red Green w/ Red – – Yellow w/ Green Yellow w/ Green Red w/ Black Red w/ Black Black w/ Yellow – Red Red Blue w/ Yellow Blue w/ White Instrument Harness B Green 10-Prong F 10 8 Black Black Black Black (Heavy) Green w/ Black – – – – – Green w/ Black Green w/ Black Green w/ Red Green w/ Red Blue Black w/ Yellow Green Green Green Green Instrument Harness C White Black 10-Prong F 10 8 Yellow w/ Green Yellow w/ Green Blue Blue Black Black – – – – Red w/ Yellow Red w/ Yellow Red w/ Blue Red w/ Blue Green w/ Blue Green w/ Blue Red Red Blue w/ Yellow Blue w/ Yellow Instrument Harness D Black White 10-Prong F 10 9 Green w/ White Green w/ White Black w/ White Black White White Green Green – – Yellow w/ White Yellow w/ White Black w/ White Black w/ White Black w/ White Black w/ White Yellow w/ Blue Yellow w/ Black Yellow w/ Red Blue w/ Red -
1973 240z Custom Wiring From Scratch
Matthew Abate replied to Matthew Abate's topic in Build Threads
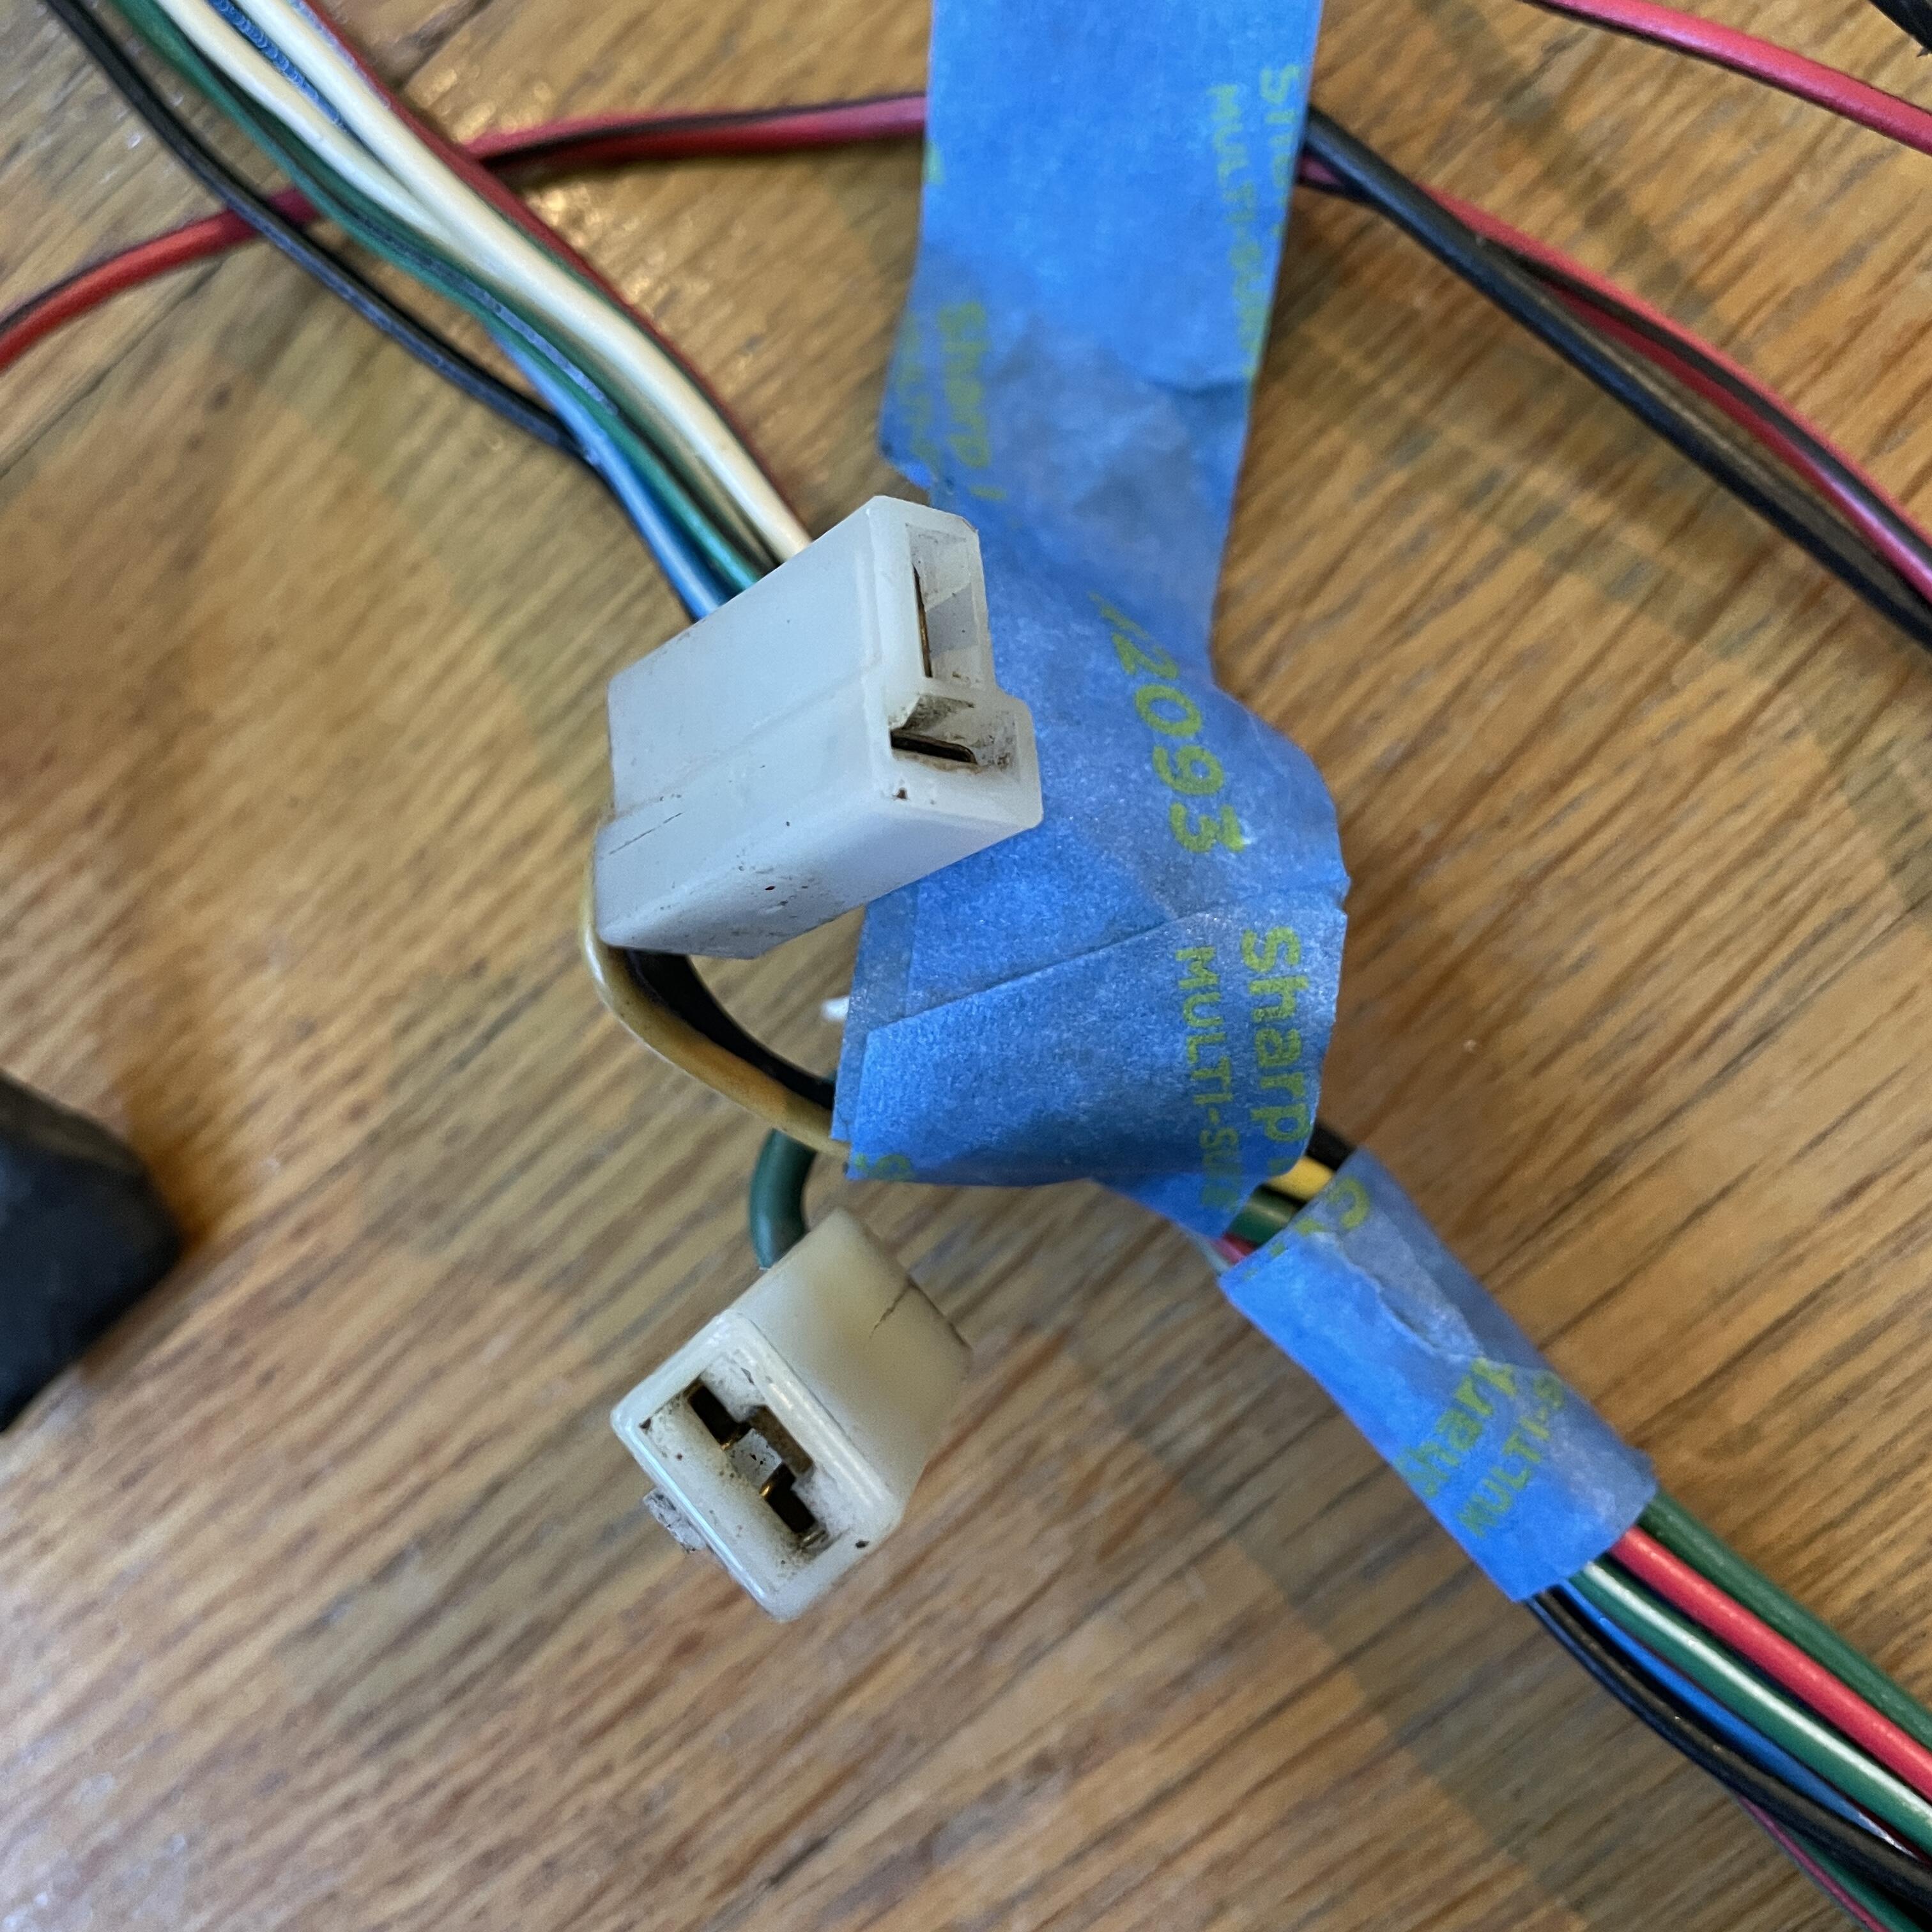
Finished the inventory of the body harness… Tagged all the connectors and checked them against the diagram. Measured the lengths and identified all of the splice points. Here’s everything I’ll need to replicate it (except the optimal wire gauge), with the splice color indicating the color tape covering the splice: 1973 240z Body Harness Inventory Position Component Conector Color Connector Style Connector Image Direction # of Pins # of Wires Diagram Wire Color Harness Wire Color Min. Feet of Wire Needed 1 Instrument Harness A Blue 10-Prong F 10 10 White w/ Black White w/ Black [See Speaker] Blue w/ Red Blue w/ Red [See Antenna] White White [See Speaker] Blue w/ White Blue w/ White [See Antenna] Yellow Yellow [See Fuel Pump] Green w/ Black Green w/ Black [R. Comb. Lamp RH] Green w/ Red Green w/ Red [R. Comb. Lamp LH] Green Green [See Belt Switches] Green Green [See Seat Switch] Green Green (Heavy) [See Fuel Pump] 2 Instrument Harness B White 6-Prong M 6 6 Red w/ Black Red w/ Black (Thick) [See Rear Glass Defroster] Red w/ Blue Red w/ Blue [See Room Light] Yellow w/ Green Yellow w/ Green [See Hand Brake Switch] Green w/ White Green w/ White 18 (to Green Splice C) Red w/ Black Red w/ Black [R. Comb. Lamp LH] Black Black 1 (to Yellow Splice) 3 Door Switch Clear Spade F 2 2 Black Black [See Step Light Harness] Black Red w/ Black [See Room Light] 4 Step Light Harness Clear Bullet M 1 1 Black Black 2 Clear Bullet F 1 1 Red w/ Blue Red w/ Blue 1 4 Yellow Splice N/A N/A N/A N/A 2 2 Red w/ Blue Red w/ Blue N/A Black Black 5 Hand Brake Clear Spade F 1 1 Yellow w/ Green Yellow w/ Green 8 6 Green Splice A N/A N/A N/A N/A 3 3 Green Green N/A Green Green Green Green 7 Belt Switch RH White 3-Prong Mini F 3 2 Green w/ Black Green w/ Black [See Seat Switch] Green Green 7 7 Green Splice B N/A N/A N/A N/A 3 3 Green Green N/A Green w/ Black Green w/ Black 8 Seat Switch White 3-Prong Mini F 3 2 Green w/ Black Green w/ Black 1 Red Green 1 (from Green Splice A) 9 Belt Switch LH White 3-Prong Mini F 3 2 Green w/ Black Green w/ Black 1 (from Green Splice B) Green Green 12 9 White Splice A N/A N/A N/A N/A 2 2 Black Black N/A Black Black 10 Room Light Clear Spade F 1 1 Black Black 3 (from White Splice A) Clear Spade F 1 1 Red w/ Blue Red w/ Black 17 Black Spade M 1 1 – Red w/ Blue 17 11 Rear Glass Defroster Black Spade F 1 1 Black Black 19 Black Spade F 1 1 Red w/ Black Red w/ Black 15 12 Green Splice C N/A N/A N/A N/A 3 3 Green w/ White Green w/ White N/A Green w/ White Green w/ White 12 Rear Side Marker Light RH Clear Bullet M 1 1 Black Black 1 (from White Splice B ) Clear Bullet F 1 1 Green w/ White Green w/ White 1 (from Green Splice D) 13 Tank Sending Unit White 2-Prong w/ Clip F 2 2 Black Black 6 (from White Splice A) Yellow Yellow 14 Fuel Pump White 1-Prong F 1 1 Black Green 14 Yellow – – 14 Rear Combo Lamp RH White 4-prong Small F 4 4 Black Black 3 (to White Splice A) White w/ Black Green w/ Black 16 Green w/ White Green w/ White 2 (to Green Splice E) Red w/ Black Red w/ Black 1 (to Green Splice D) 14 Green Splice D N/A N/A N/A N/A 2 2 Red w/ Black Red w/ Black N/A Red w/ Black Red w/ Black 15 Green Splice E N/A N/A N/A N/A 3 3 Green w/ White Green w/ White N/A Green w/ White Green w/ White Green w/ White Green w/ White Green w/ White Green w/ White 15 License Plate Light Clear Bullet M 1 1 Black Black 2 (to White Splice B ) Clear Bullet F 1 1 Black Green w/ White 1 (from Green Splice E) 16 Rear Combo Lamp LH White 4-prong Small F 4 4 Black Black 1 (to White Splice B ) White w/ Black Green w/ Red 18 Green w/ White Green w/ White 1 (from Green Splice E) Red w/ Black Red w/ Black 18 16 White Splice B N/A N/A N/A N/A 2 2 Black Black N/A Black Black Black Black Black Black 17 Side Marker Light LH Clear Bullet M 1 1 Black Black 2 (from White Splice B ) Clear Bullet F 1 1 Green w/ White Green w/ Black 3 (from Green Splice E) 18 Speaker Clear Bullet M 1 1 – White w/ Black 19 Clear Bullet F 1 1 – White 19 19 Antenna Clear Bullet F 1 1 Blue w/ Red Blue w/ Red 20 Clear Bullet F 1 1 Blue w/ White Blue w/ White 20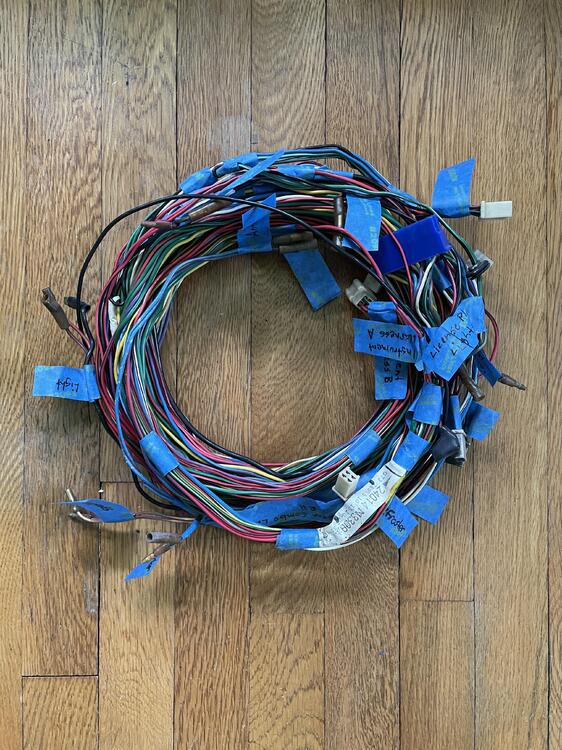


-
1973 240z Custom Wiring From Scratch
Matthew Abate replied to Matthew Abate's topic in Build Threads
Awesome! Thank you. I just realized I may have filed this thread in the wrong place. I don’t see an electrical section but maybe one of the moderators can move it to the right place. -
1973 240z Custom Wiring From Scratch
Matthew Abate replied to Matthew Abate's topic in Build Threads
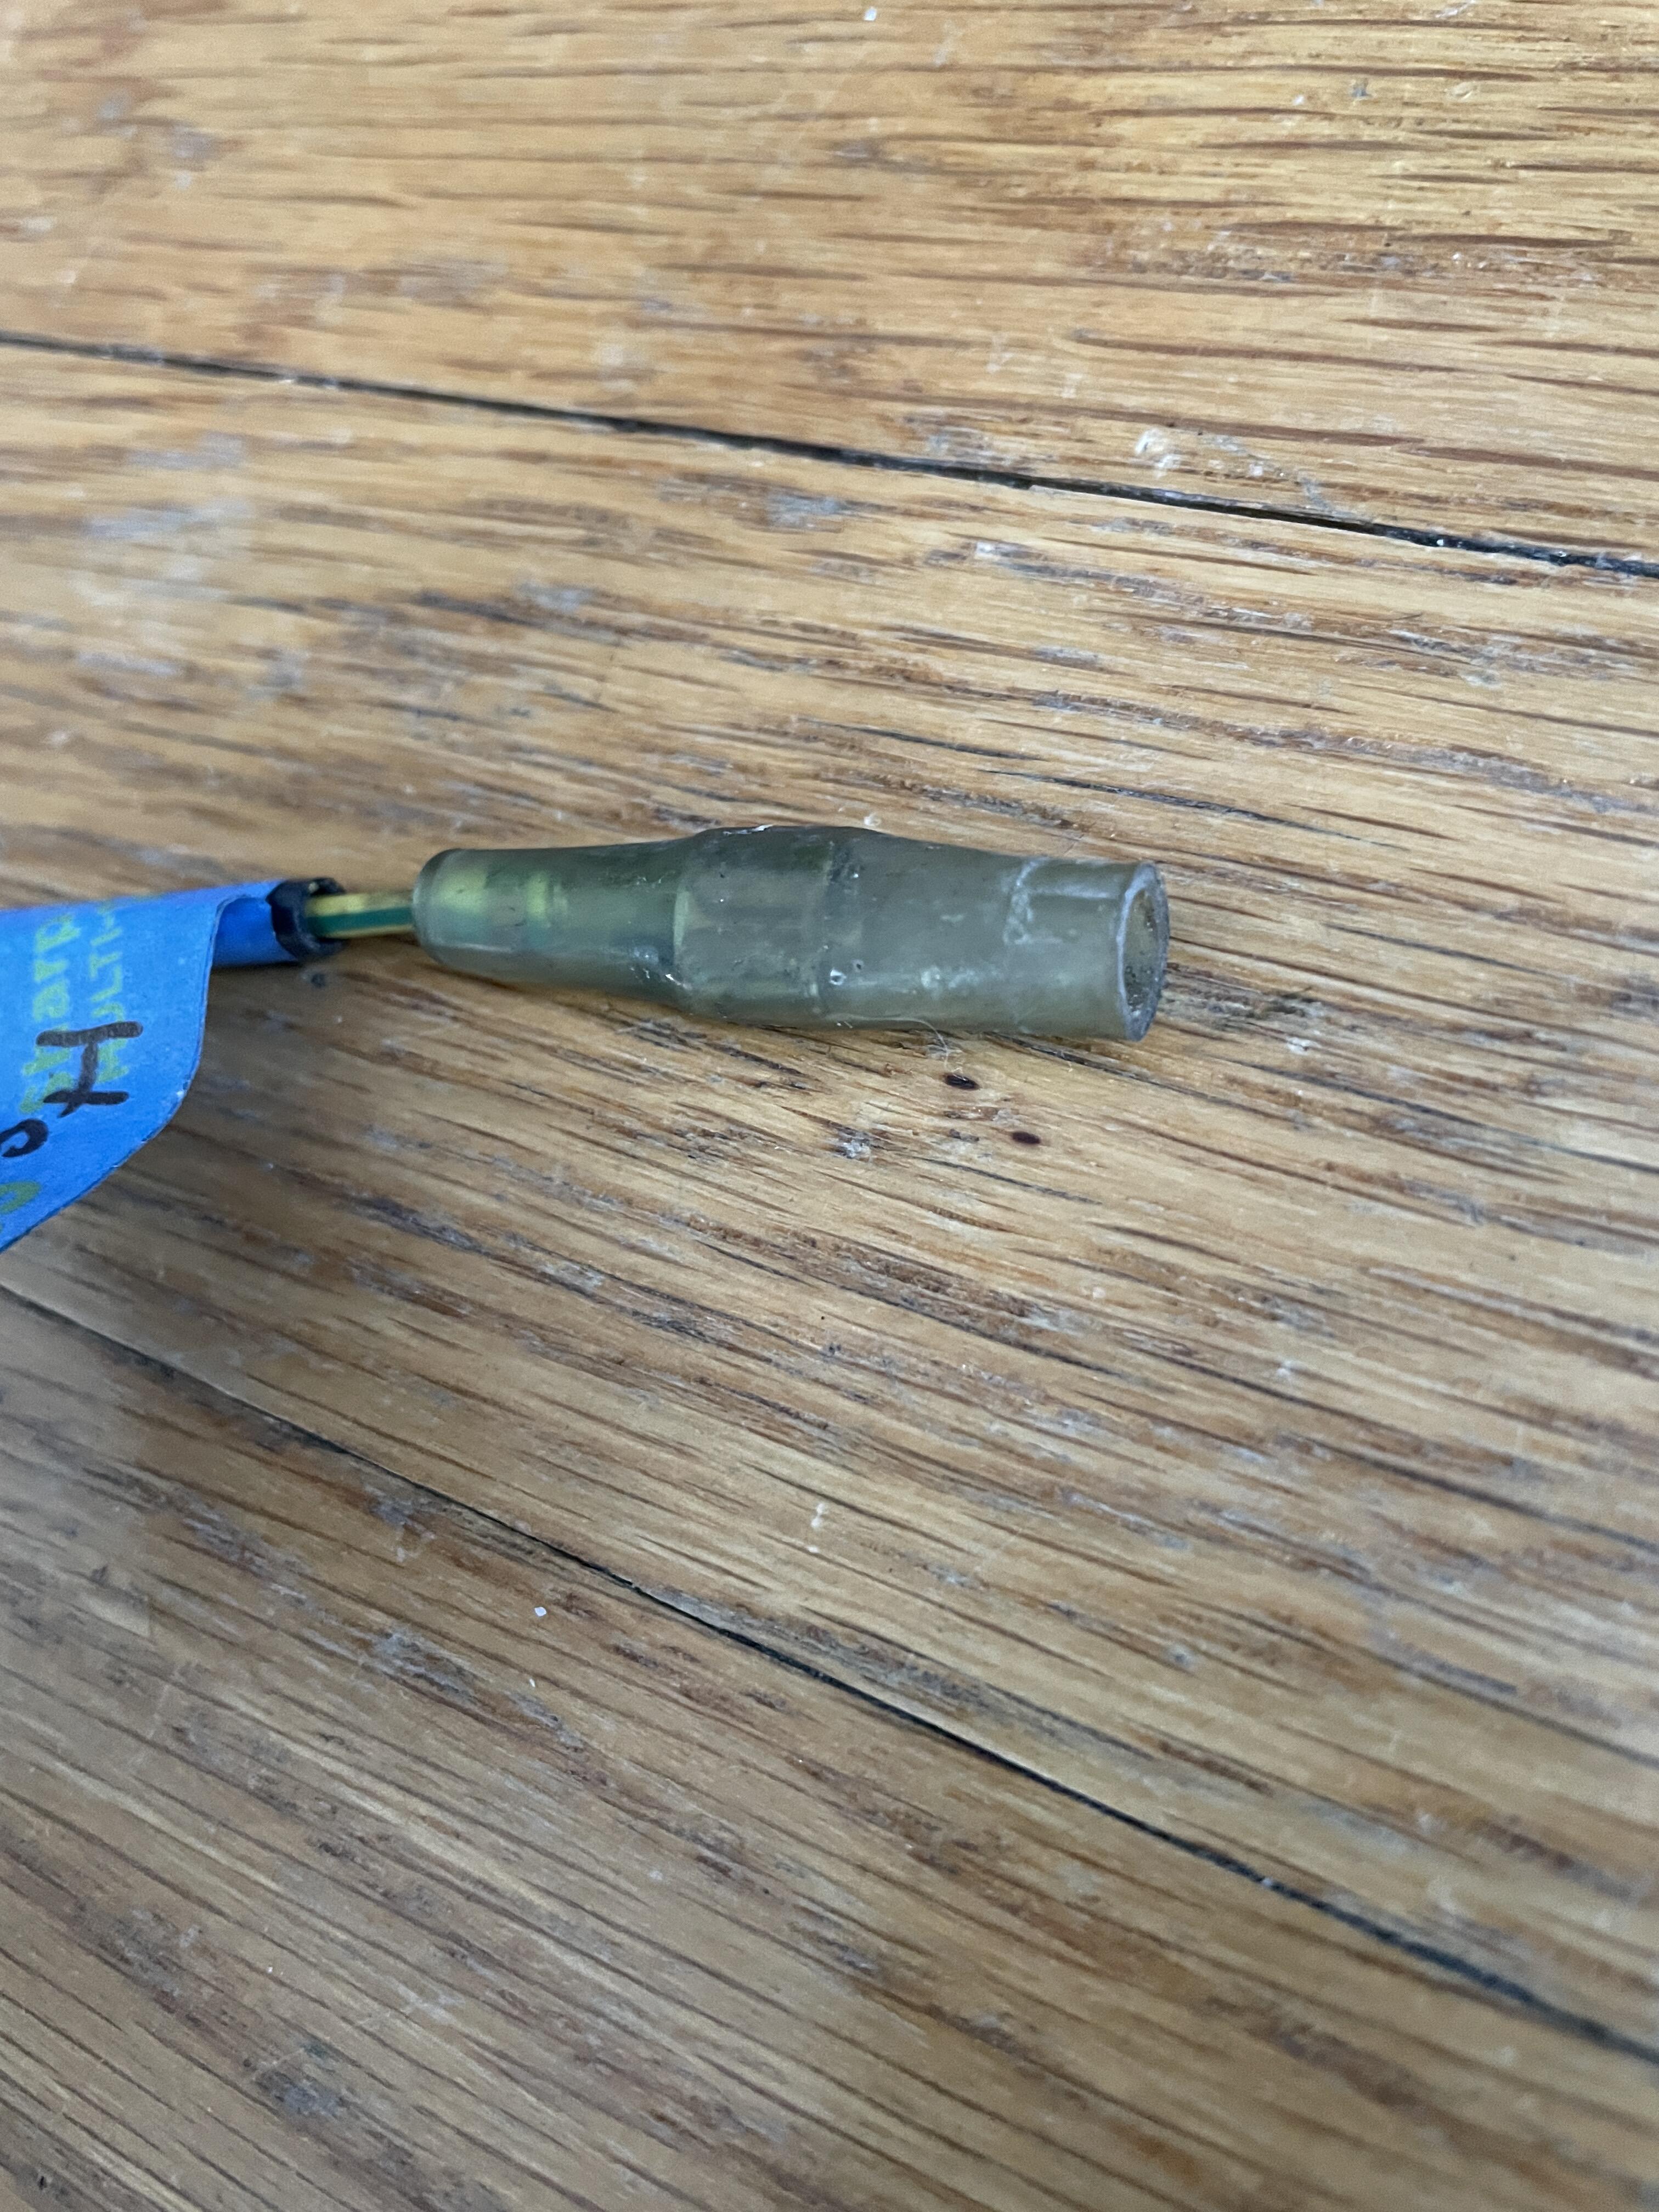
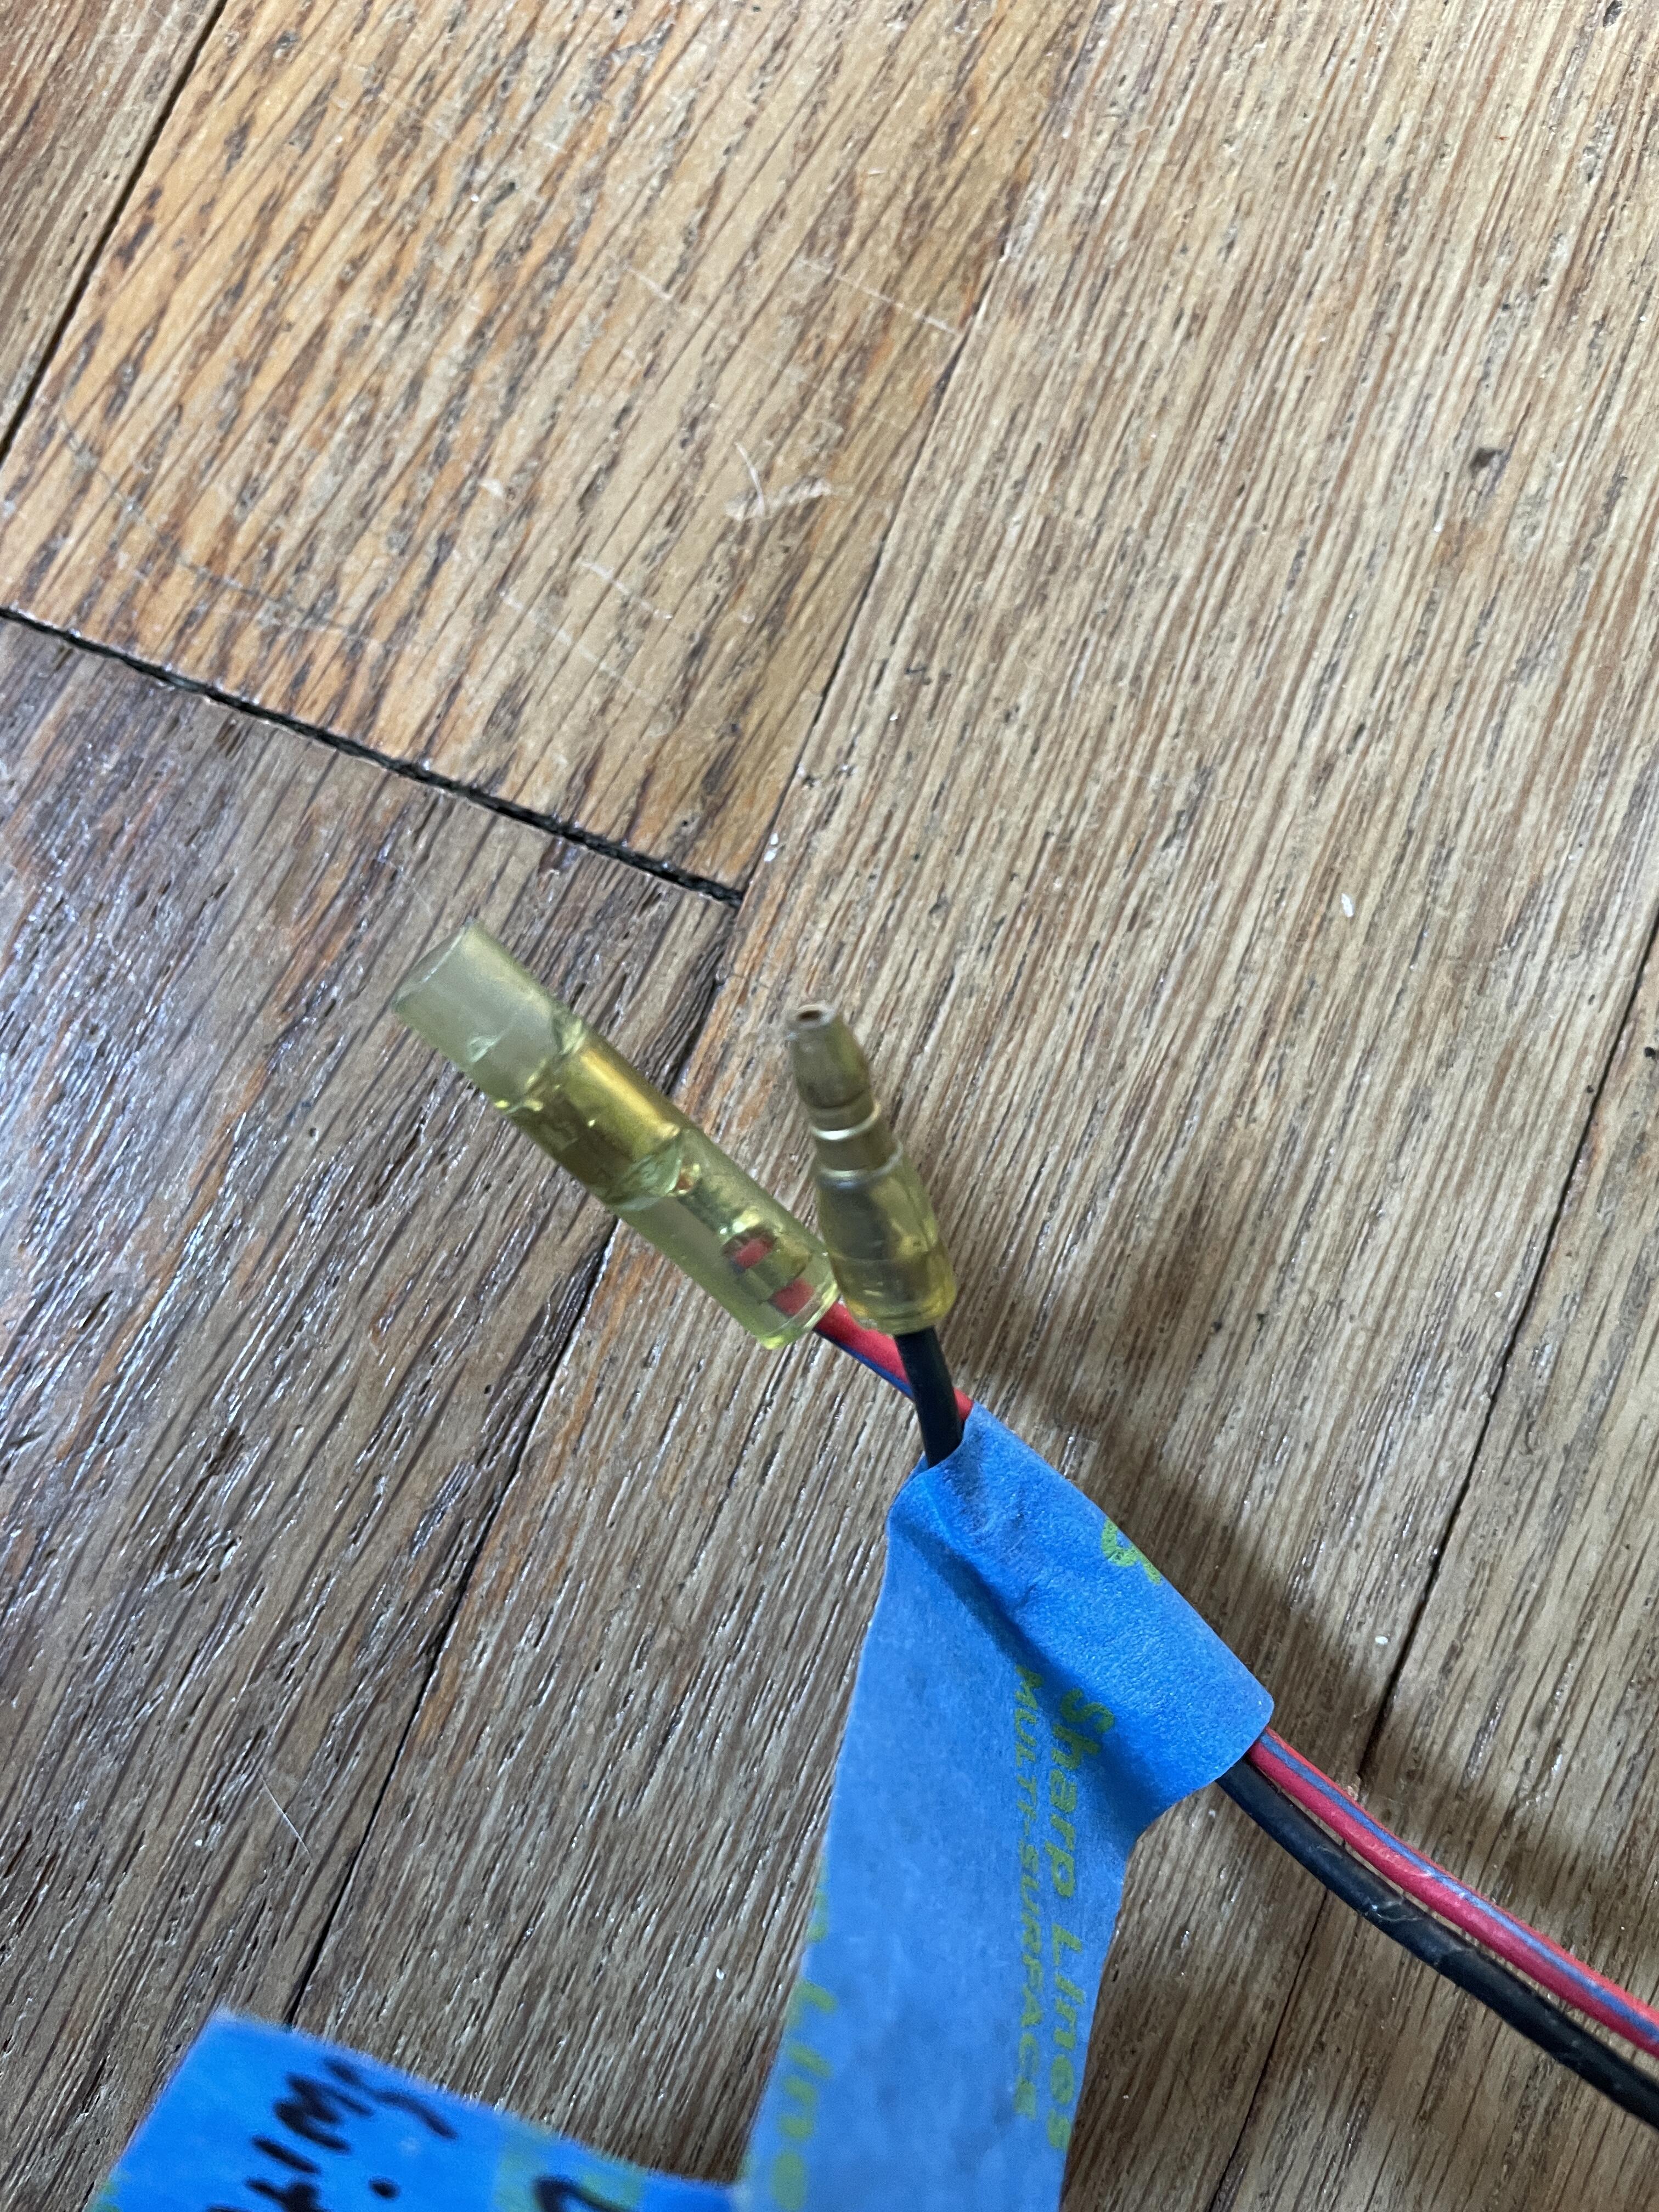
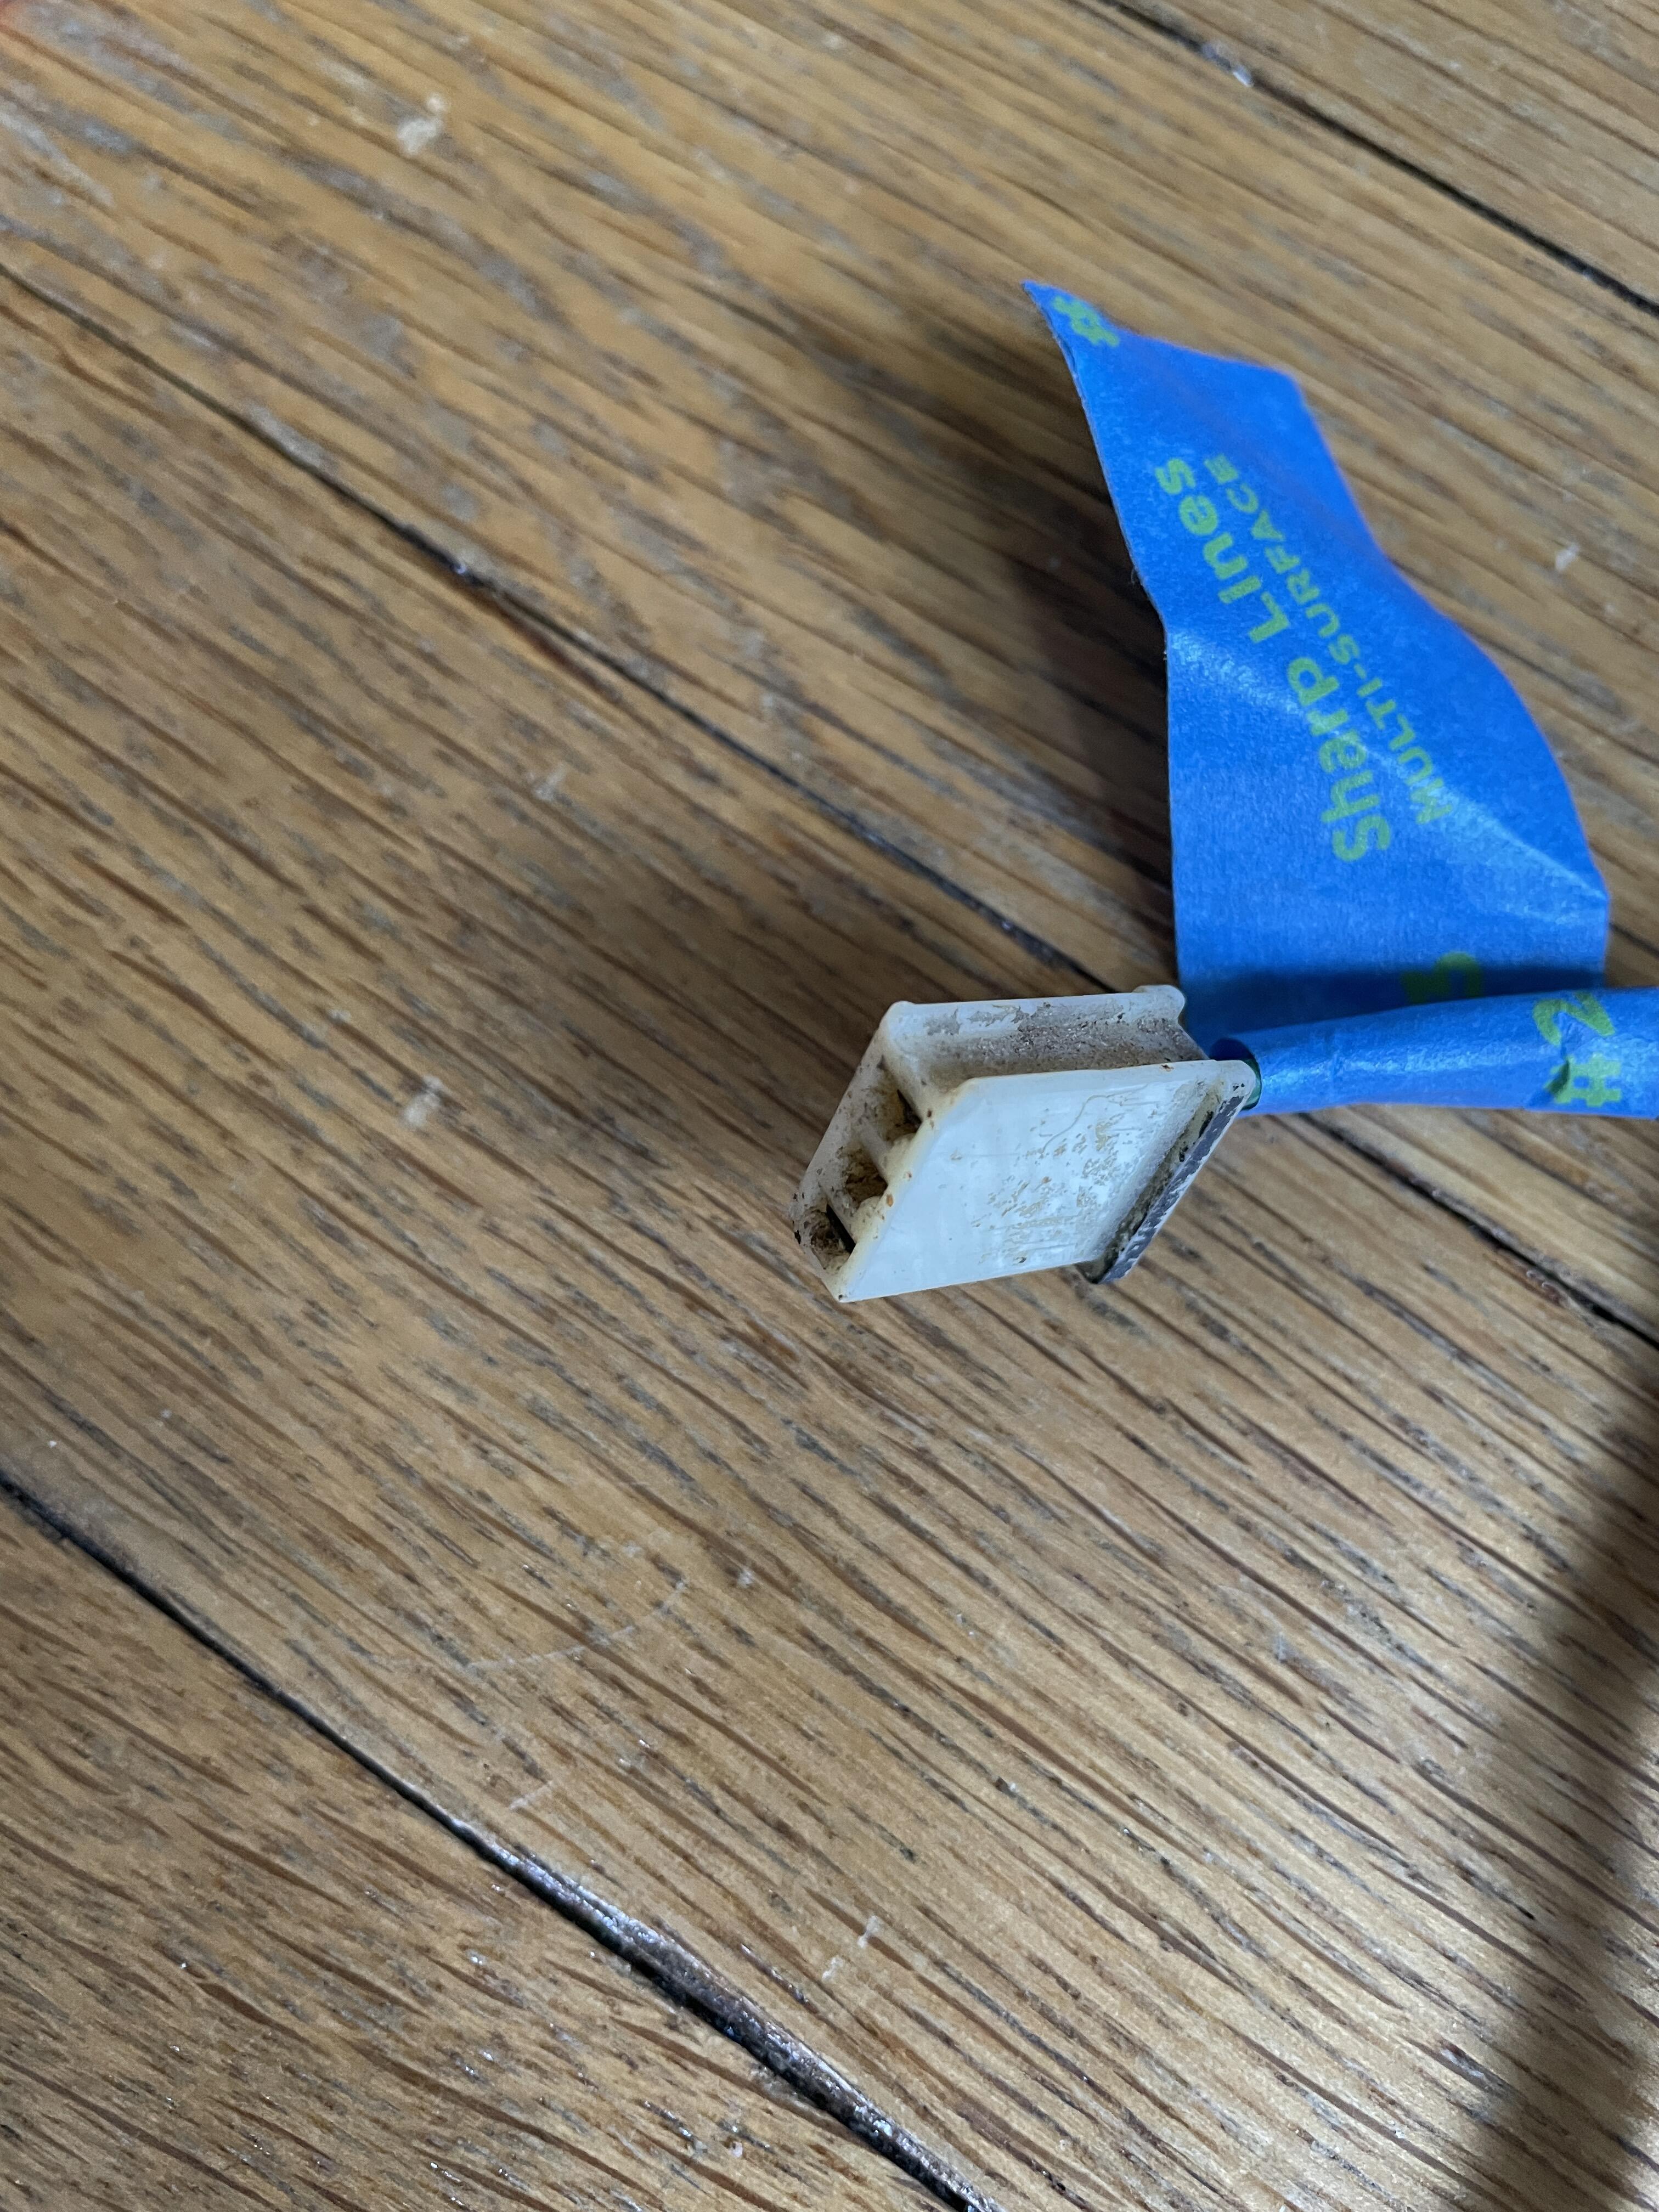
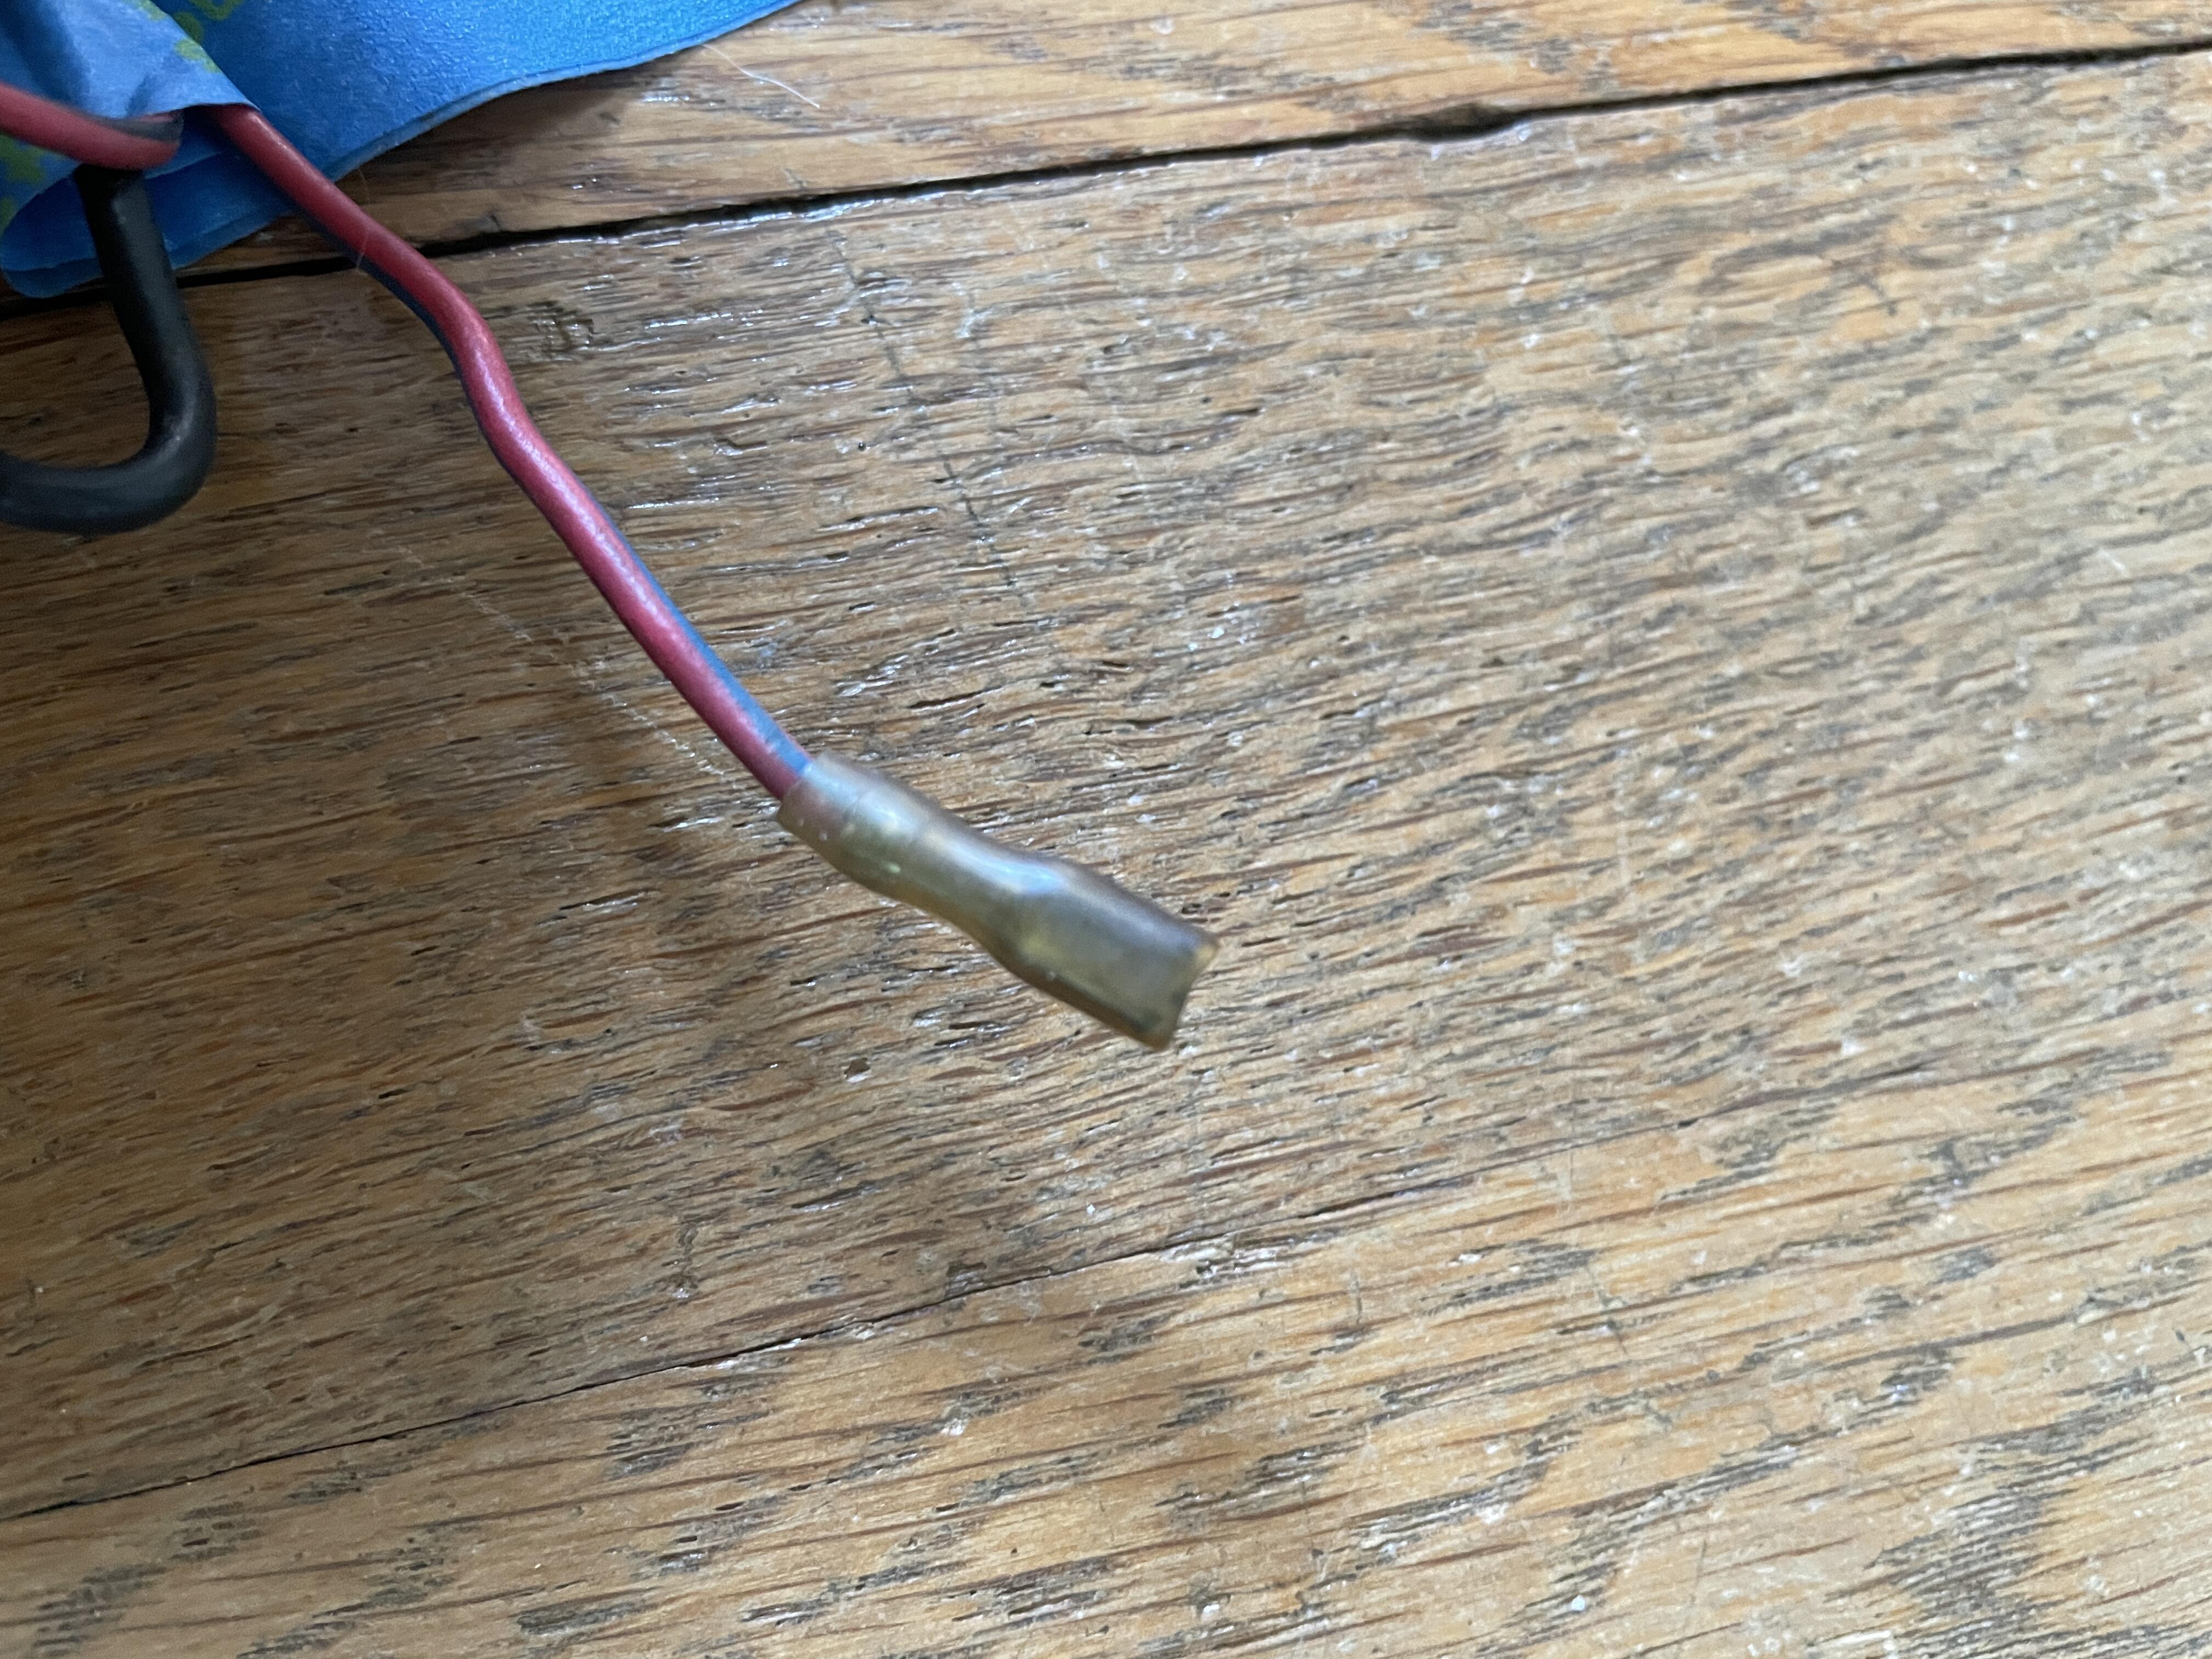
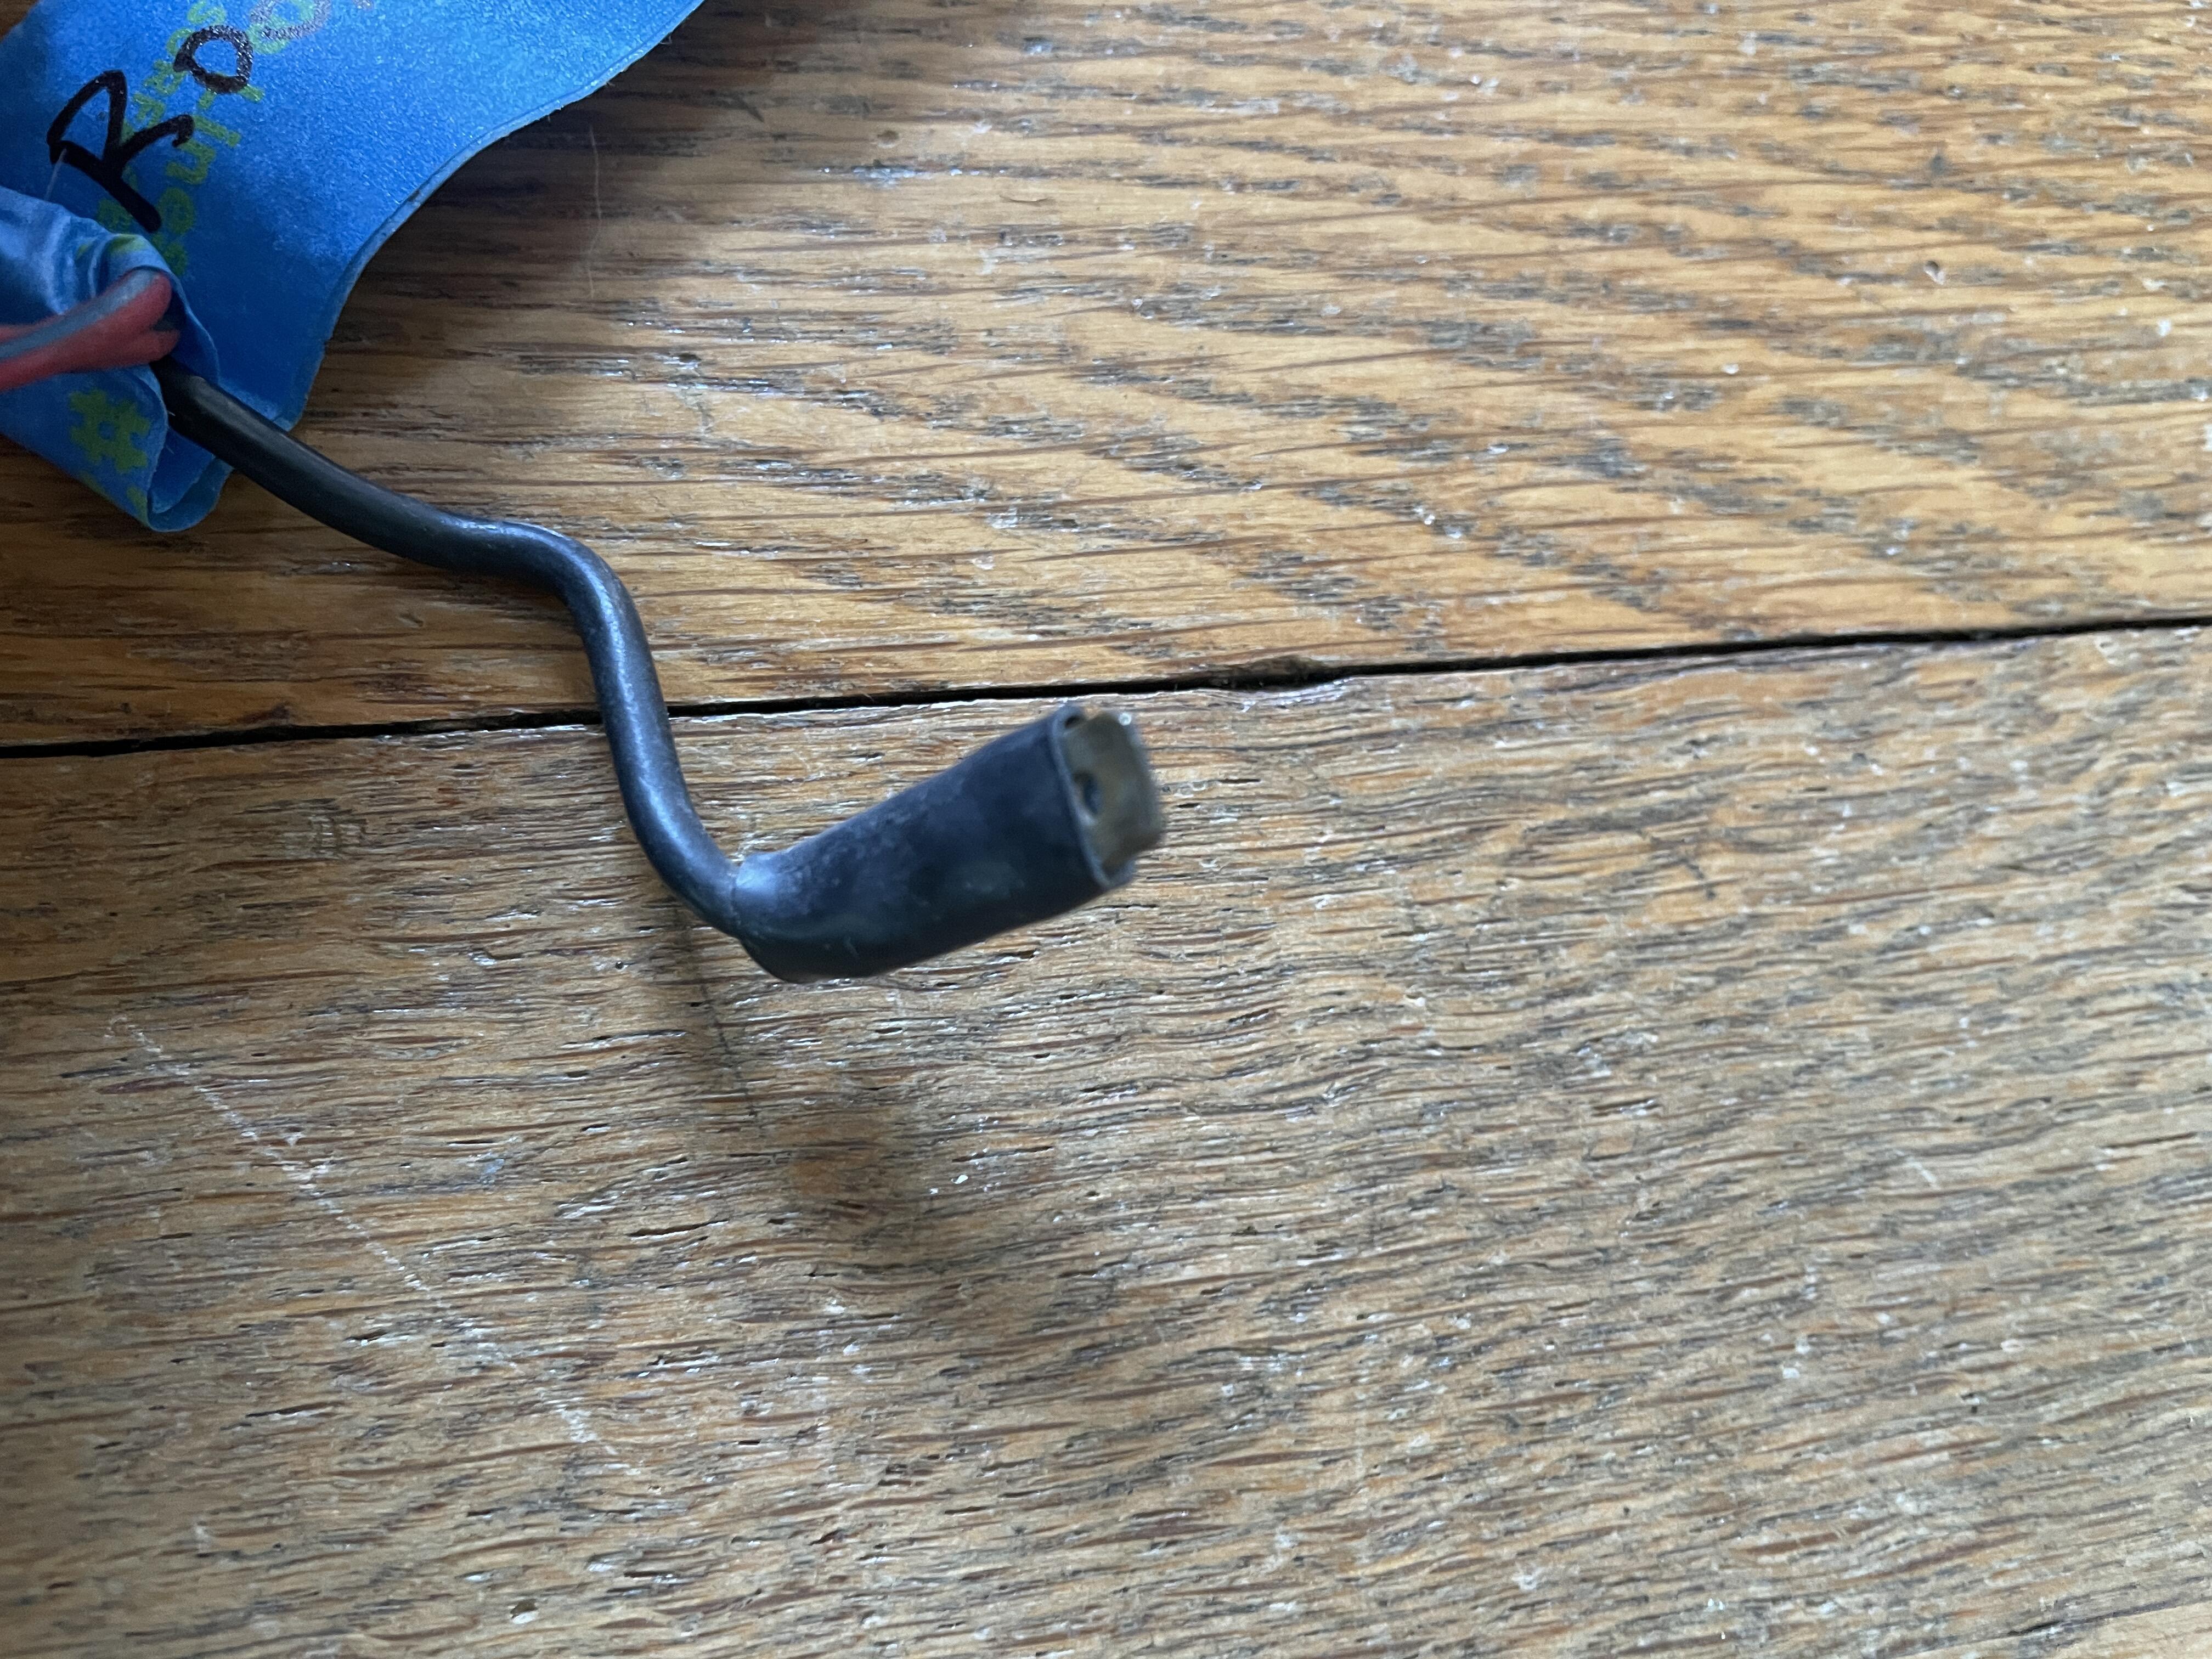
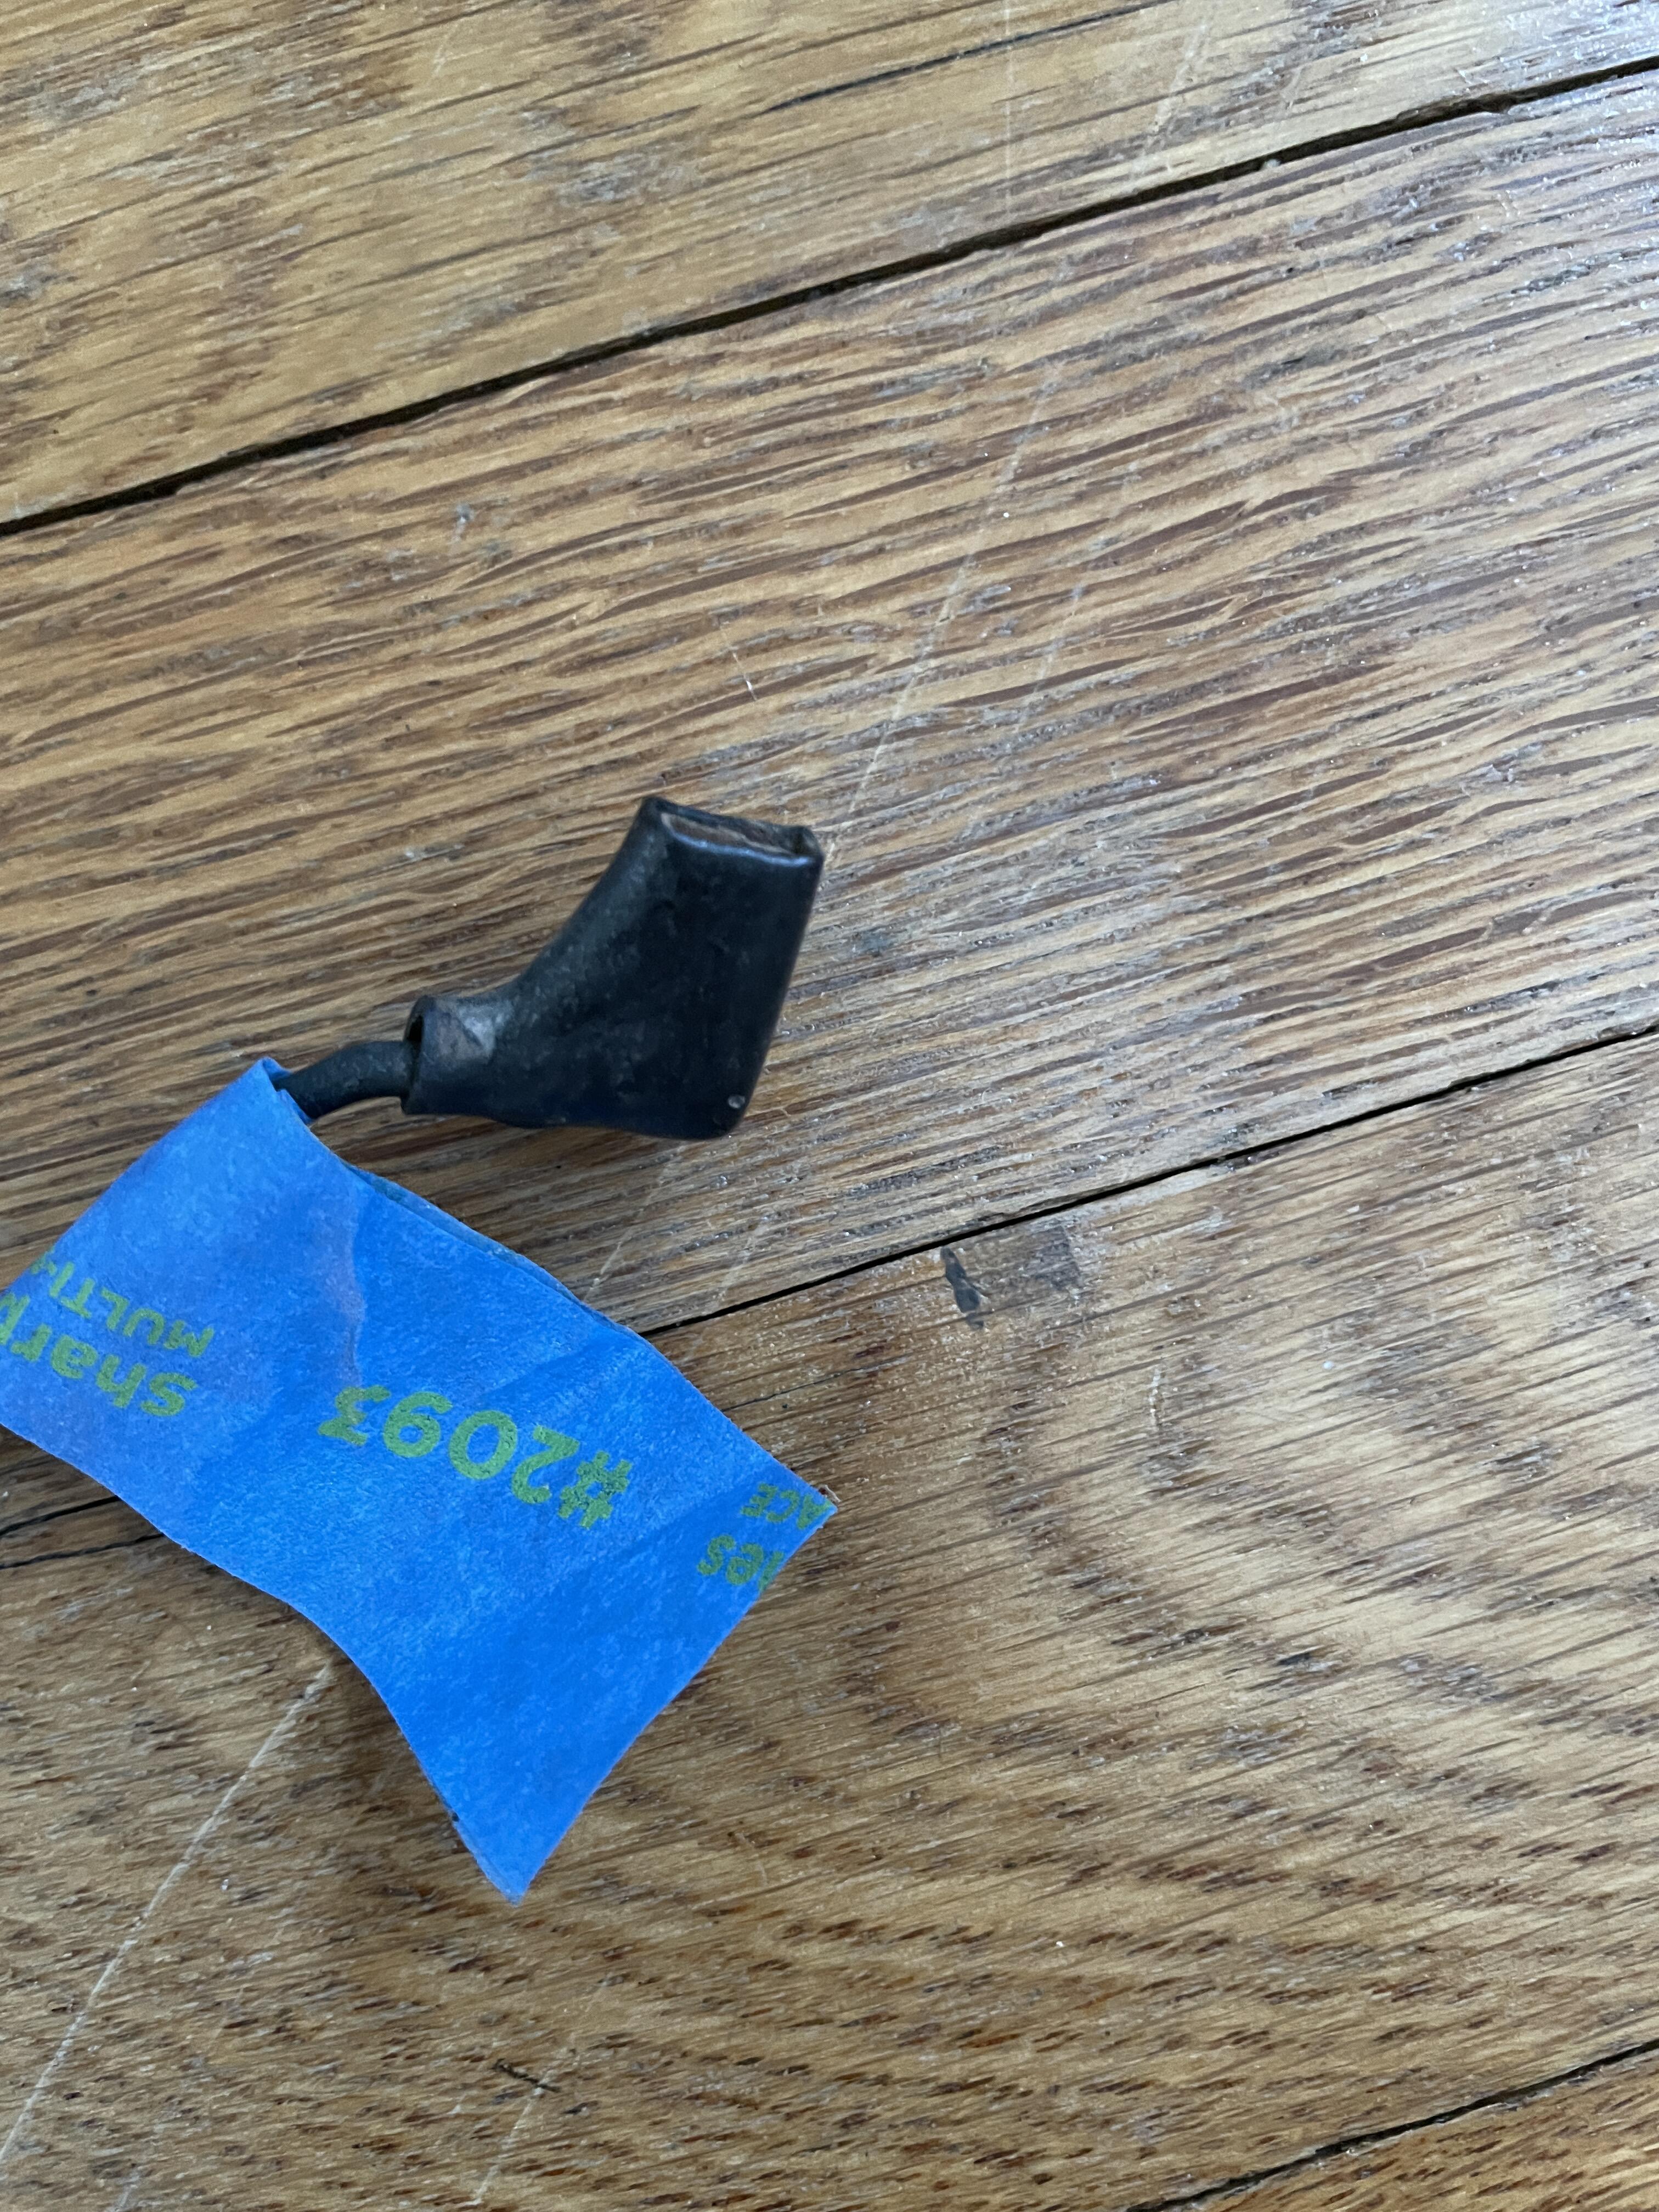
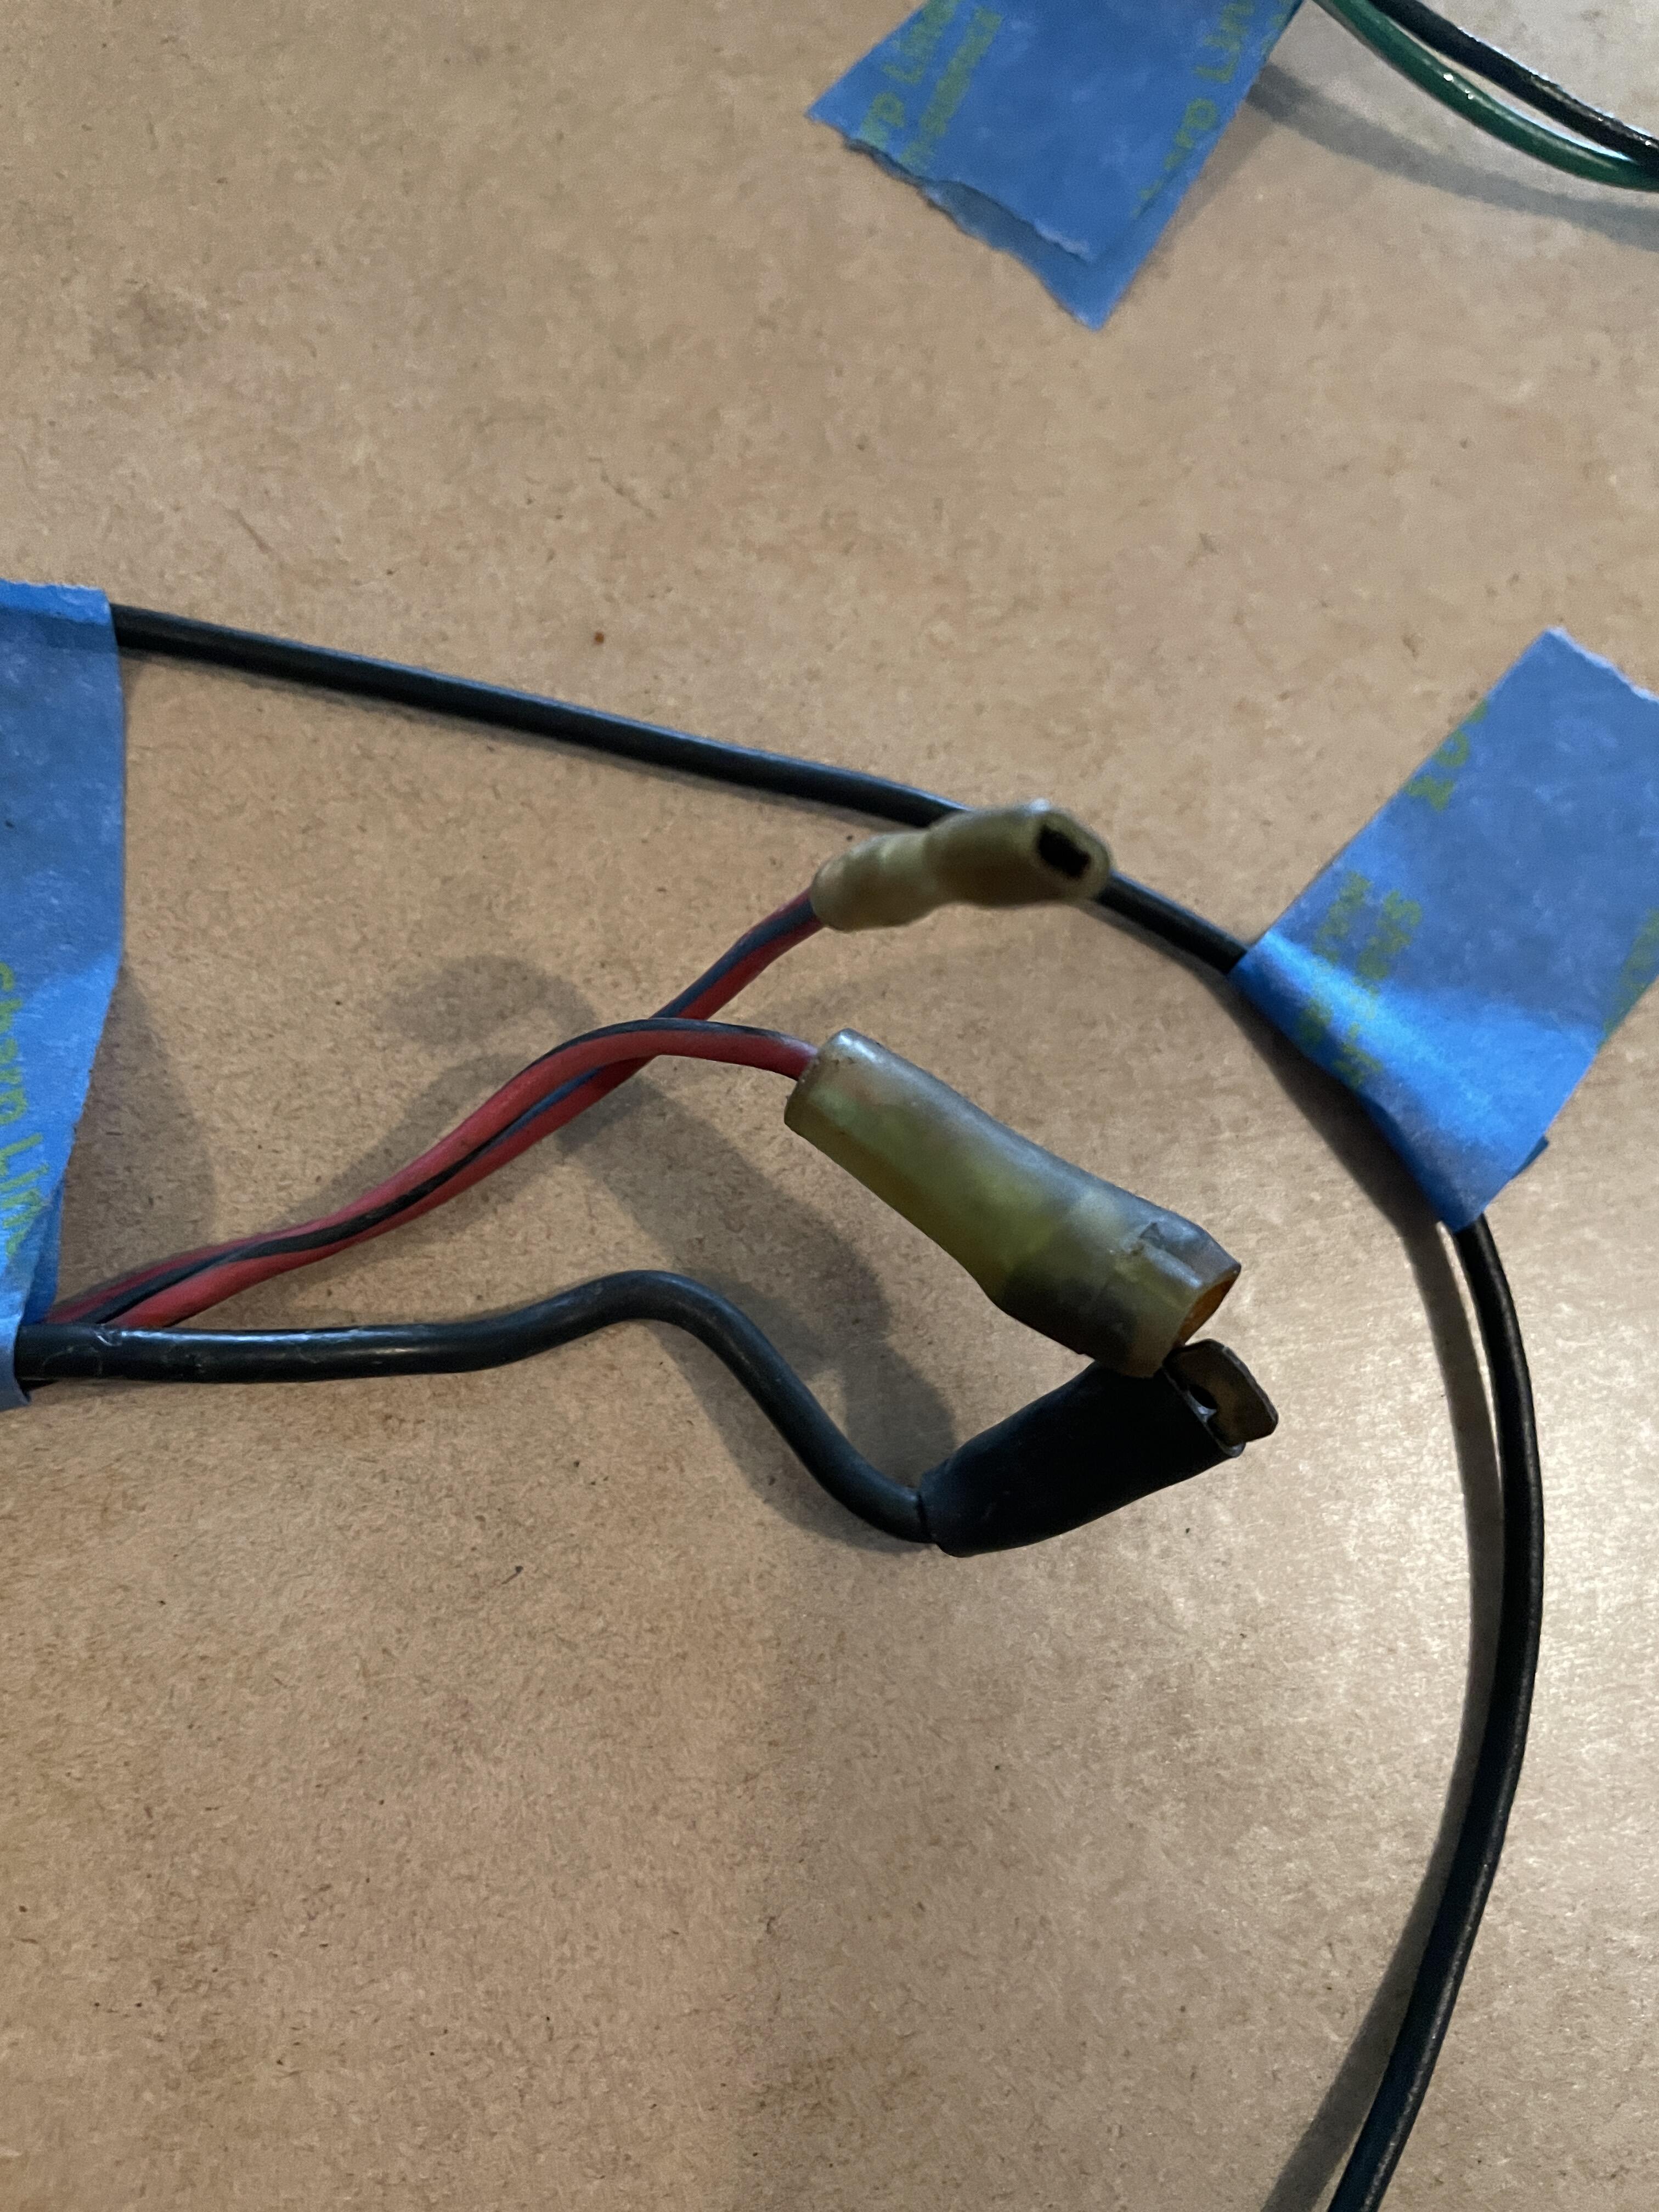
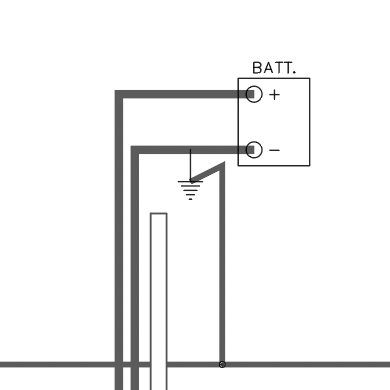
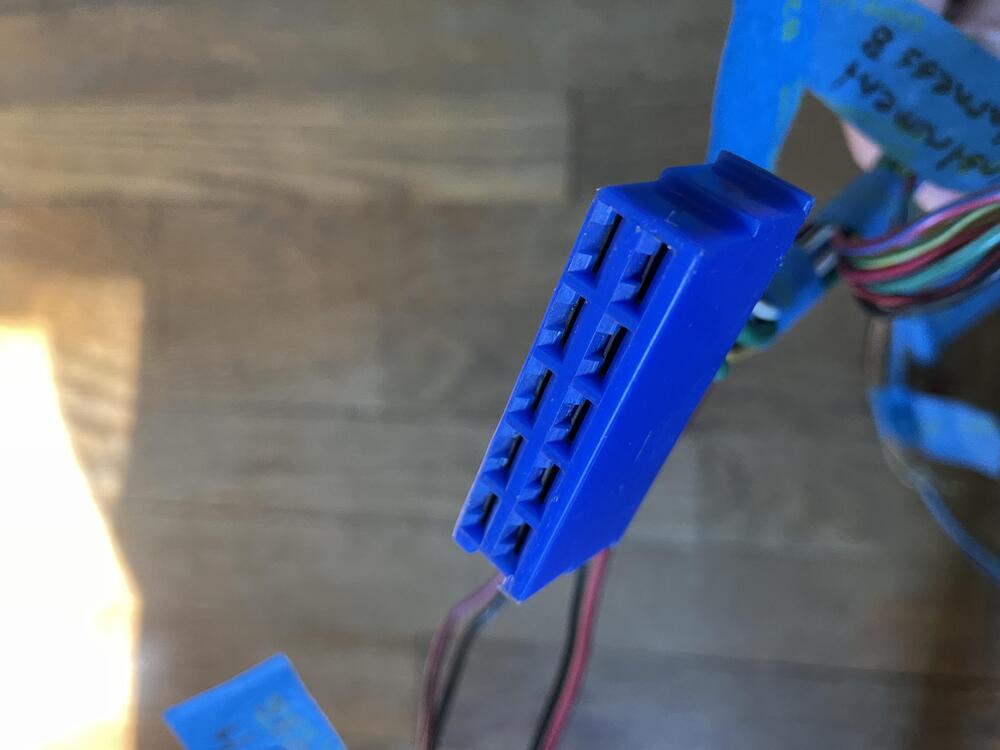
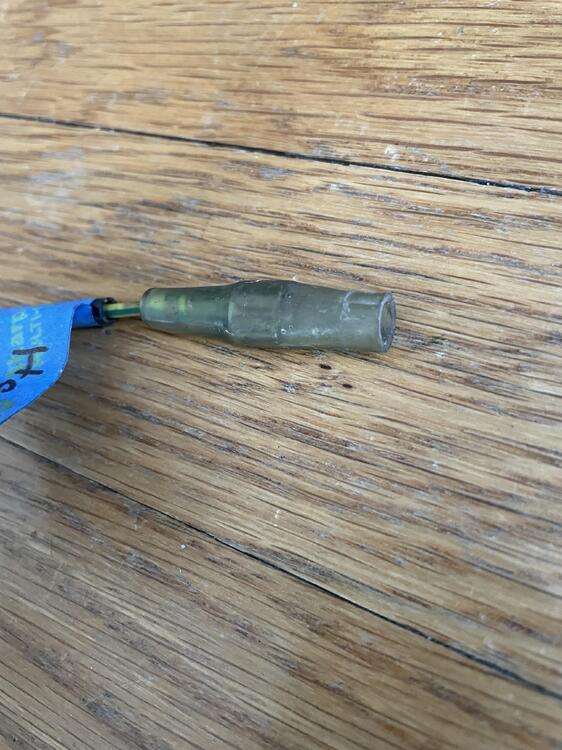
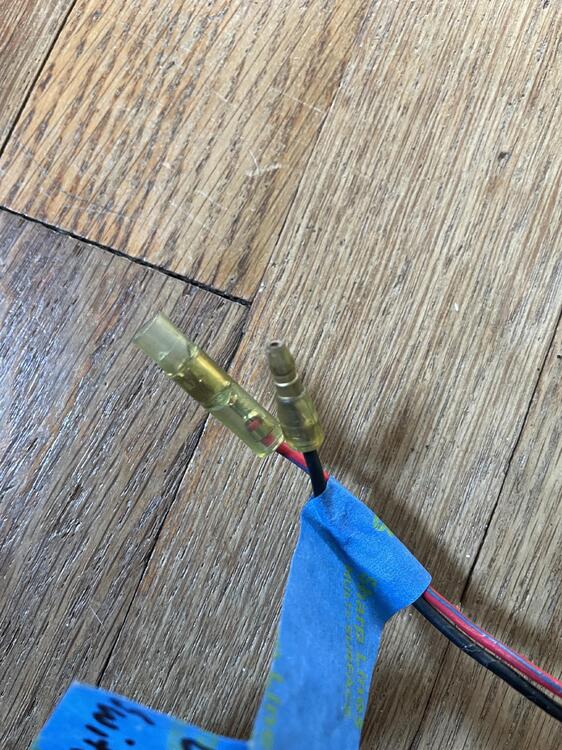
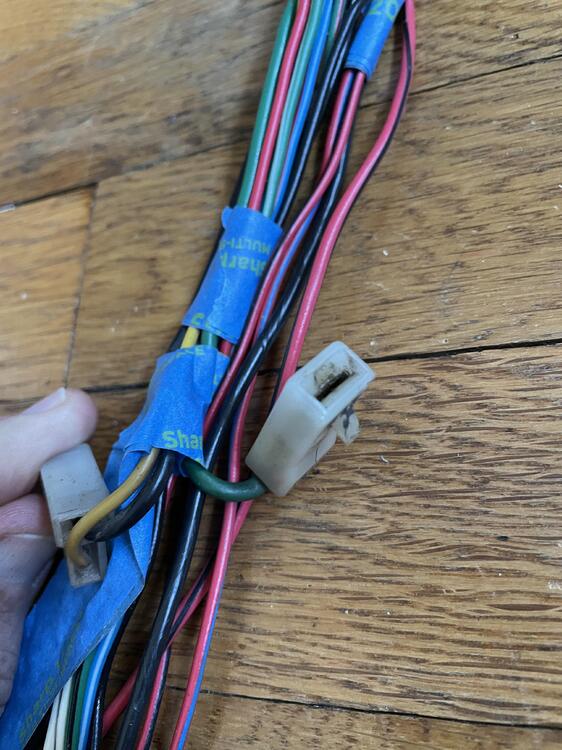
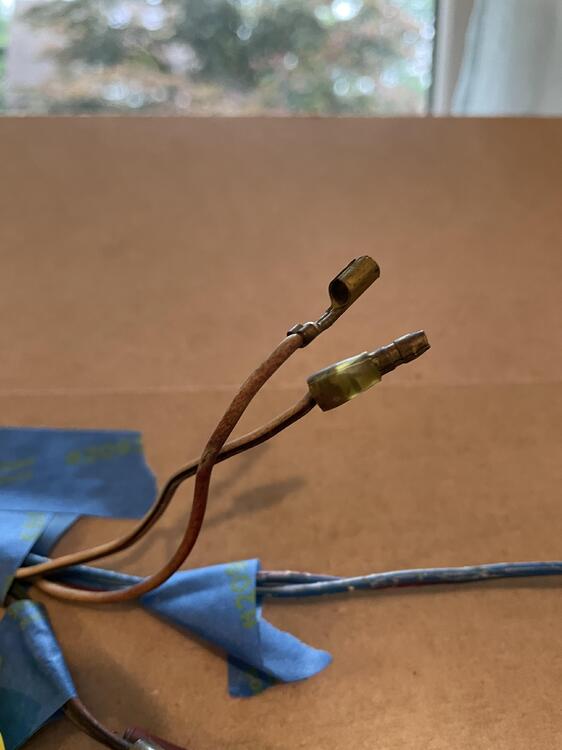
I have a question about these plugs on the body harness: The one at the top of the photo is to the fuel pump and is labeled in the wiring diagram and the FSM. It has two wires (black, yellow) and two plugs in a T arrangement. The other on is the one I can’t identify. It has one plug and one wire (green) that is a heavier gauge than all of the other wires in the harness. The connector has a tooth for a clip and the wire goes all the way back to the blue 10-pin connector that joins the dashboard harness. I checked the FSM and don’t see a label for this wire where it describes that blue connector, but it is directly across from the yellow wire in that connector, which goes to the fuel pump. Is this just a third wire for that fuel pump harness? If so I wonder why they didn’t just use a 3-plug connector. Is it for the fuel tank sending unit? That is showing as two wires (black, yellow) in the diagram.
-
1973 240z Custom Wiring From Scratch
Matthew Abate replied to Matthew Abate's topic in Build Threads
I have verified that is is the right harness for my car by the part number printed on the white shrink near the blue clip (24014-n3300). It isn't the one that came with the car, which I can tell because it has metallic green overspray on it and I am pretty sure my car never had. I think it is for a 7/72 to 7/73 car, which mine is (7/73), but it has the black connector sleeves for the defroster, which came on the 75-83 harnesses according to Banzai Motorworks. I still have two things I have not been able to figure out about this harness, though: 1. This one is minor. The room light wires should be Red w/ Blue, Black, and Black. I have 3 long wires that I know are for the room light based on the connectors on the ends, but they are Red w/ Blue, Black, and Red w/ Black. Is this maybe just a foible of my harness? I know these aren't mixed up with the defroster wires because I have accounted for those and verified them by the connectors on those wires, even though they are the same colors. This would not be the only place where the wire colors deviate from the diagram. The rear combination light connectors don't match the diagram either, but they do match the FSM. 2. This one is perplexing. I have two wires (White & White w/ Black stripe) coming out of the harness at the same point as the two wires that go to the left rear marker light. I haven't been able to find these in any of the wiring diagrams for any year. As far as I can tell, these do not go to the tail lights, license plate lights, fuel pump or sensor, antenna, or marker lights. Is this maybe a European, Canadian, Californian, or Right-Hand-Drive harness? Some of the diagrams specify market-specific options and others are USA only. They do have the same connectors as the Step Light wires on the other end of the harness, but that runs into the door from the front on the right side. The left door switch is on the dash harness, plus the connectors don't match, so it isn't that. Maybe rear fog lights (not in the diagram)? I'm pretty sure that these supply signal and power to the speaker that was in the left rear quarter panel. Any help figuring this out would be much appreciated!
-
1973 240z Custom Wiring From Scratch
Matthew Abate replied to Matthew Abate's topic in Build Threads
Okay, my plans suffered their first casualty: I will not be going with an electric compressor on my AC system. It’s possible, but I would need to have a 200 amp alternator to handle the draw. The one I have is 100 and can’t cover it. I would also have to figure out some kind of controller to make sure it was operating and cycling correctly, and I’m trying to avoid computers. The thing that really tipped it over the edge, though, is having to move it out of the engine bay to keep it cool. These things are too big and need pipes to the condenser, even if you move the condenser somewhere too, so there isn’t an obvious place to put it. So that simplifies my project a little. I can probably pull the trigger on my AC parts now. —- I think I want to have my additional interior components on a new / additional harness. I haven’t decided if it would attach to the body harness or the dash harness yet, but it is for my additional power supplies to charge phones and a Bluetooth speaker. At least two of them will be USB-C plugs, and the last either a 12-volt plug or another USB-C. -
1973 240z Custom Wiring From Scratch
Matthew Abate replied to Matthew Abate's topic in Build Threads
I just learned something that is not immediately obvious to someone who has never done this kind of thing before: The positions and lengths of the lines in the wiring diagram DO NOT correspond to my harness very closely at all. Yes, the wires connecting one component to another are captured in the diagram, but there is no relationship between either the length or the proximity of one wire to another in that diagram to what is in the car. What I mean by this is the just because two wires are next to each other in the diagram does not mean they are in a same harness. The best example of this are the blue/white and blue/red wires that go from the antenna switch to the antenna. In the diagram these are very short and not near anything else. These two wires are the longest wires in my body harness, where they are twisted up with 18 other wires. There is also a random blue wire in the 1973 diagram coming from the Accessory Relay and going to nothing. It goes between the two flashers in the dash and just stops in the empty space. Just a word of caution to anyone else jumping into their first wiring project with both feet. They’re great for checking wire colors but you need a physical representation to refer to in order to make a new harness. -
1973 240z Custom Wiring From Scratch
Matthew Abate replied to Matthew Abate's topic in Build Threads
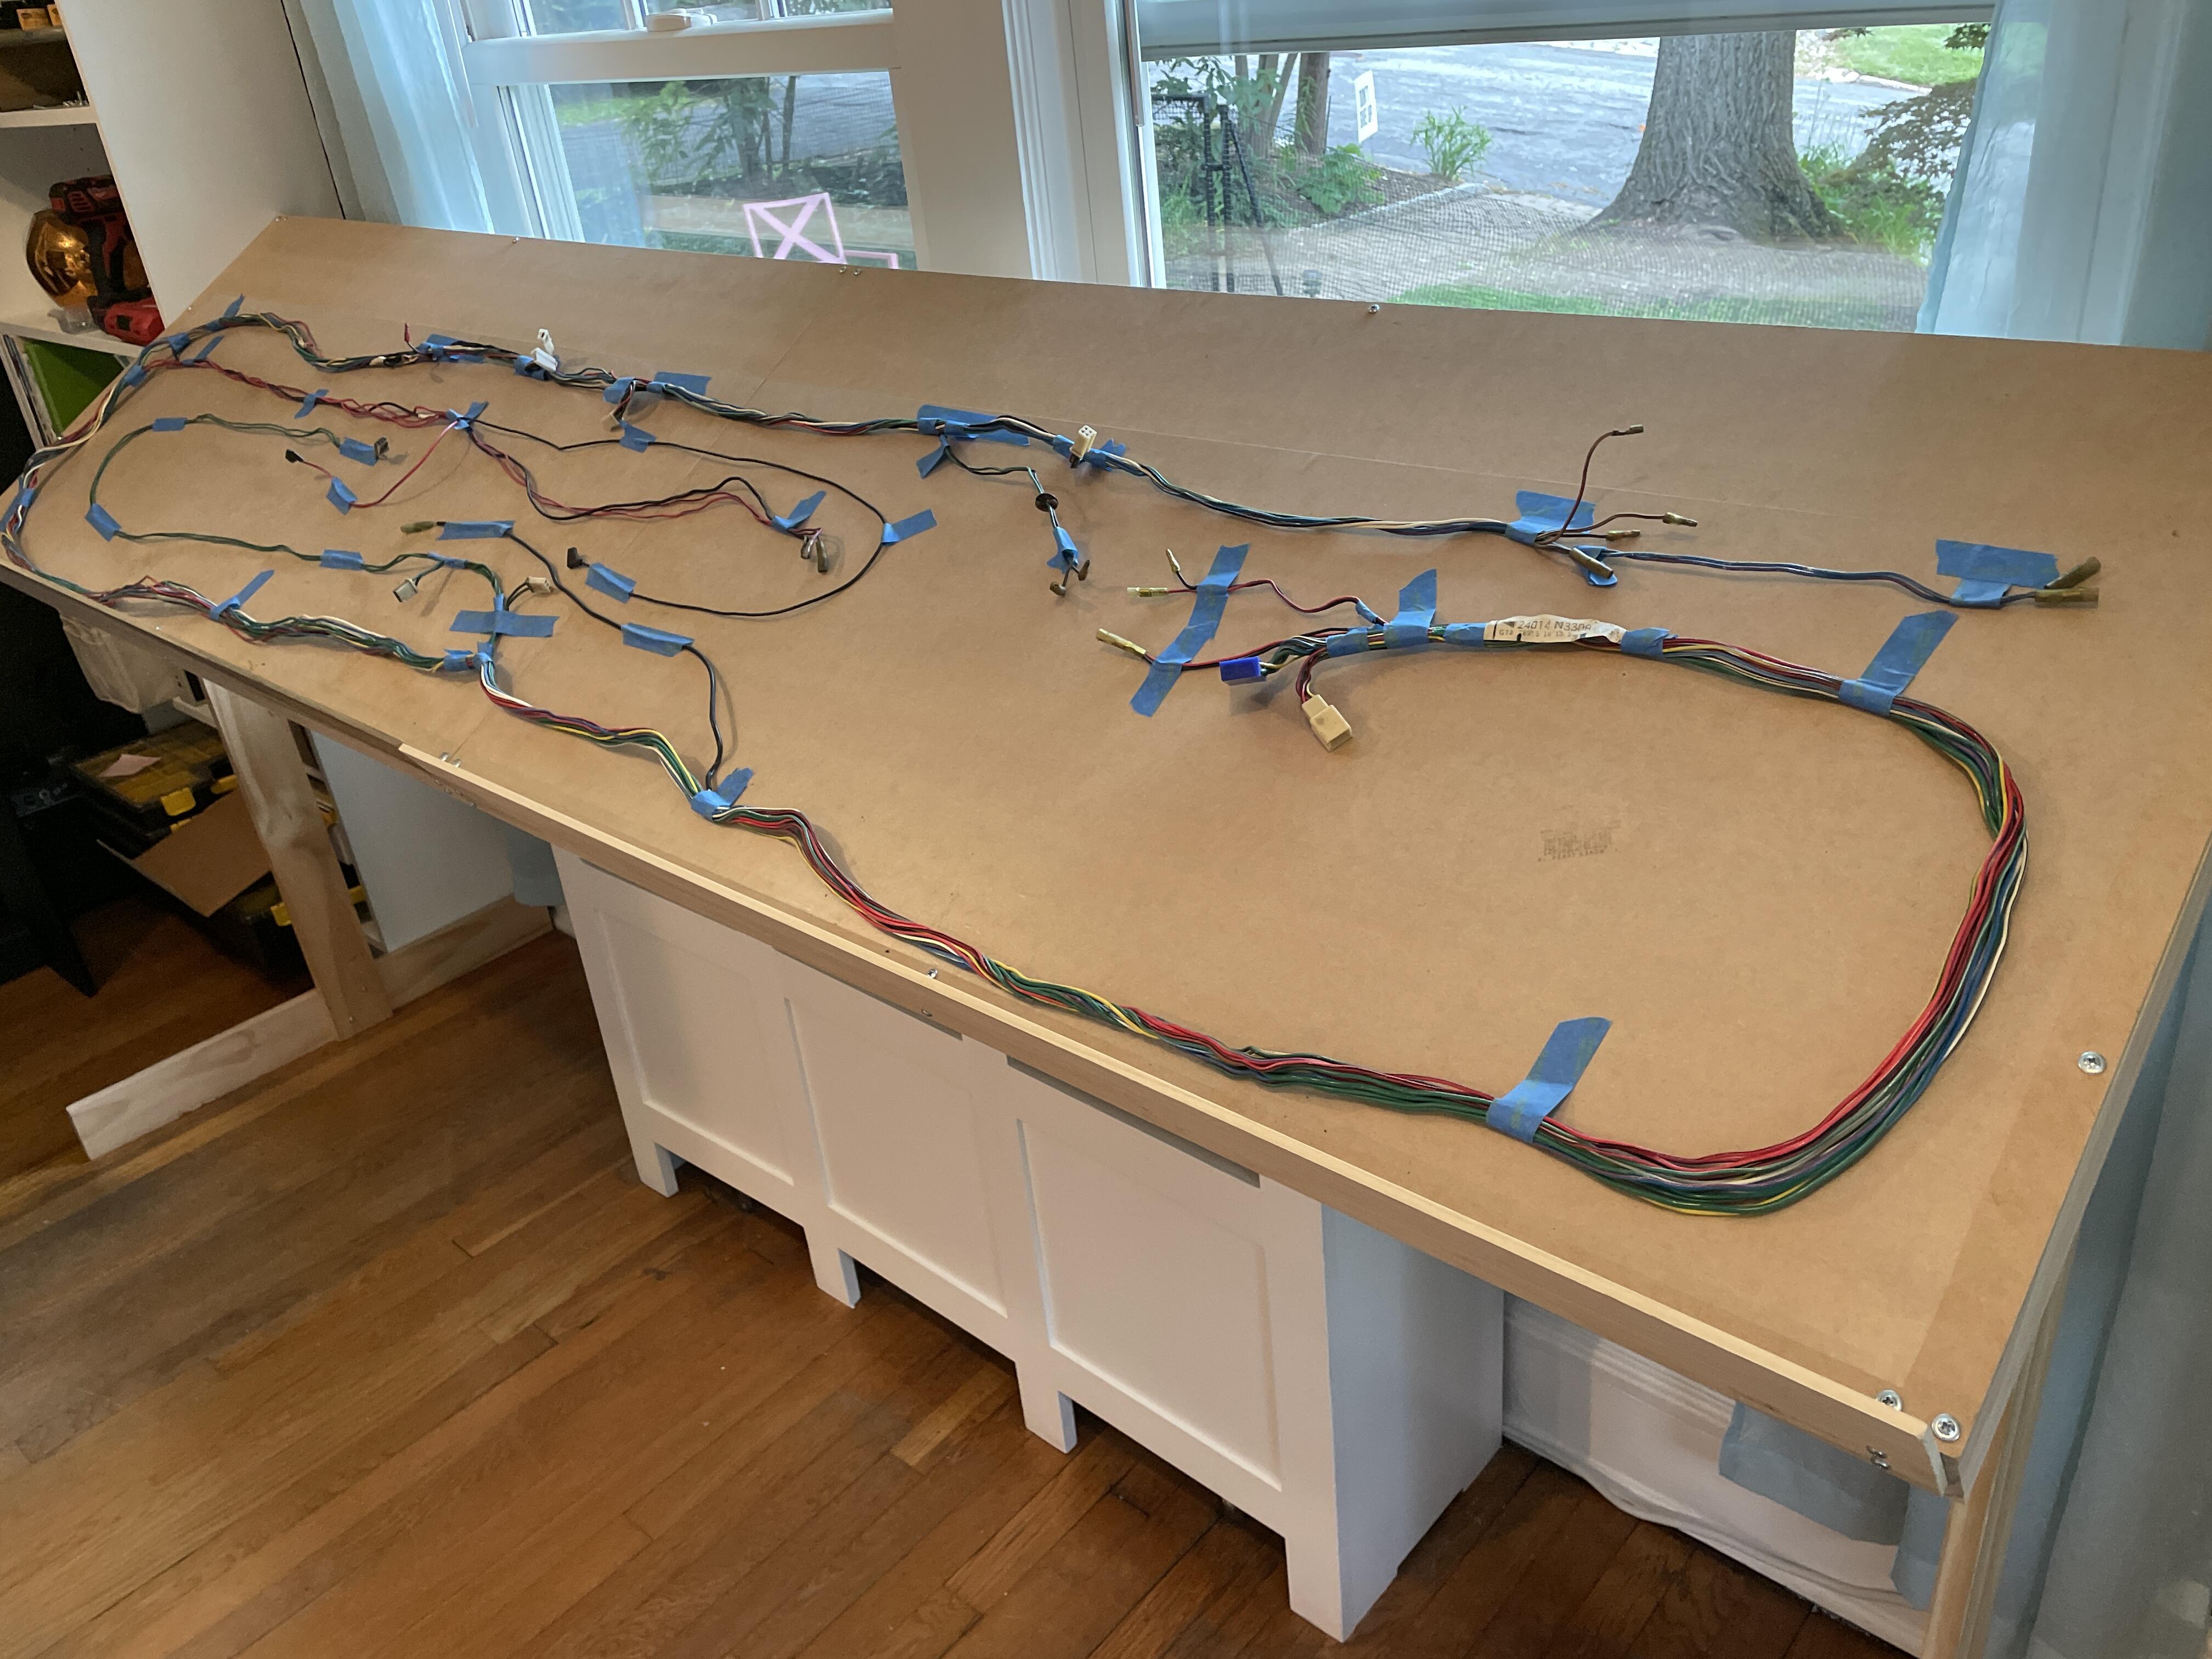
Okay, the body harness has been stripped. I am very glad I didn’t try to use this thing. It’s melted / burnt in two places and has been messed with and rewrapped in three places. The next step is to compare this to the diagram and see what the story is.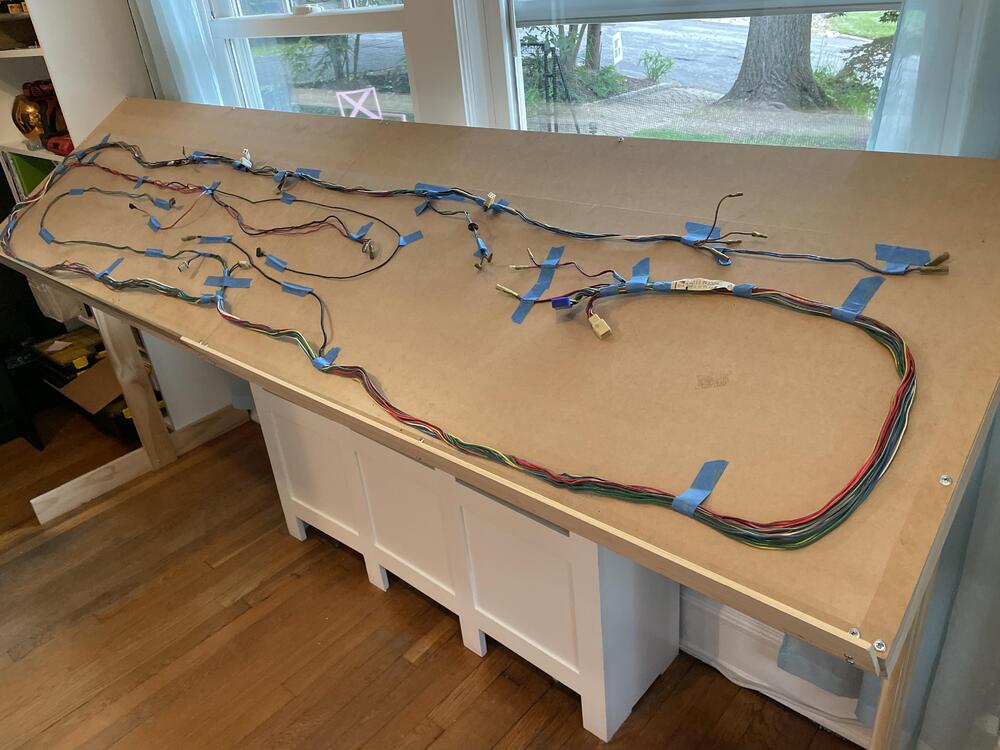
-
1973 240z Custom Wiring From Scratch
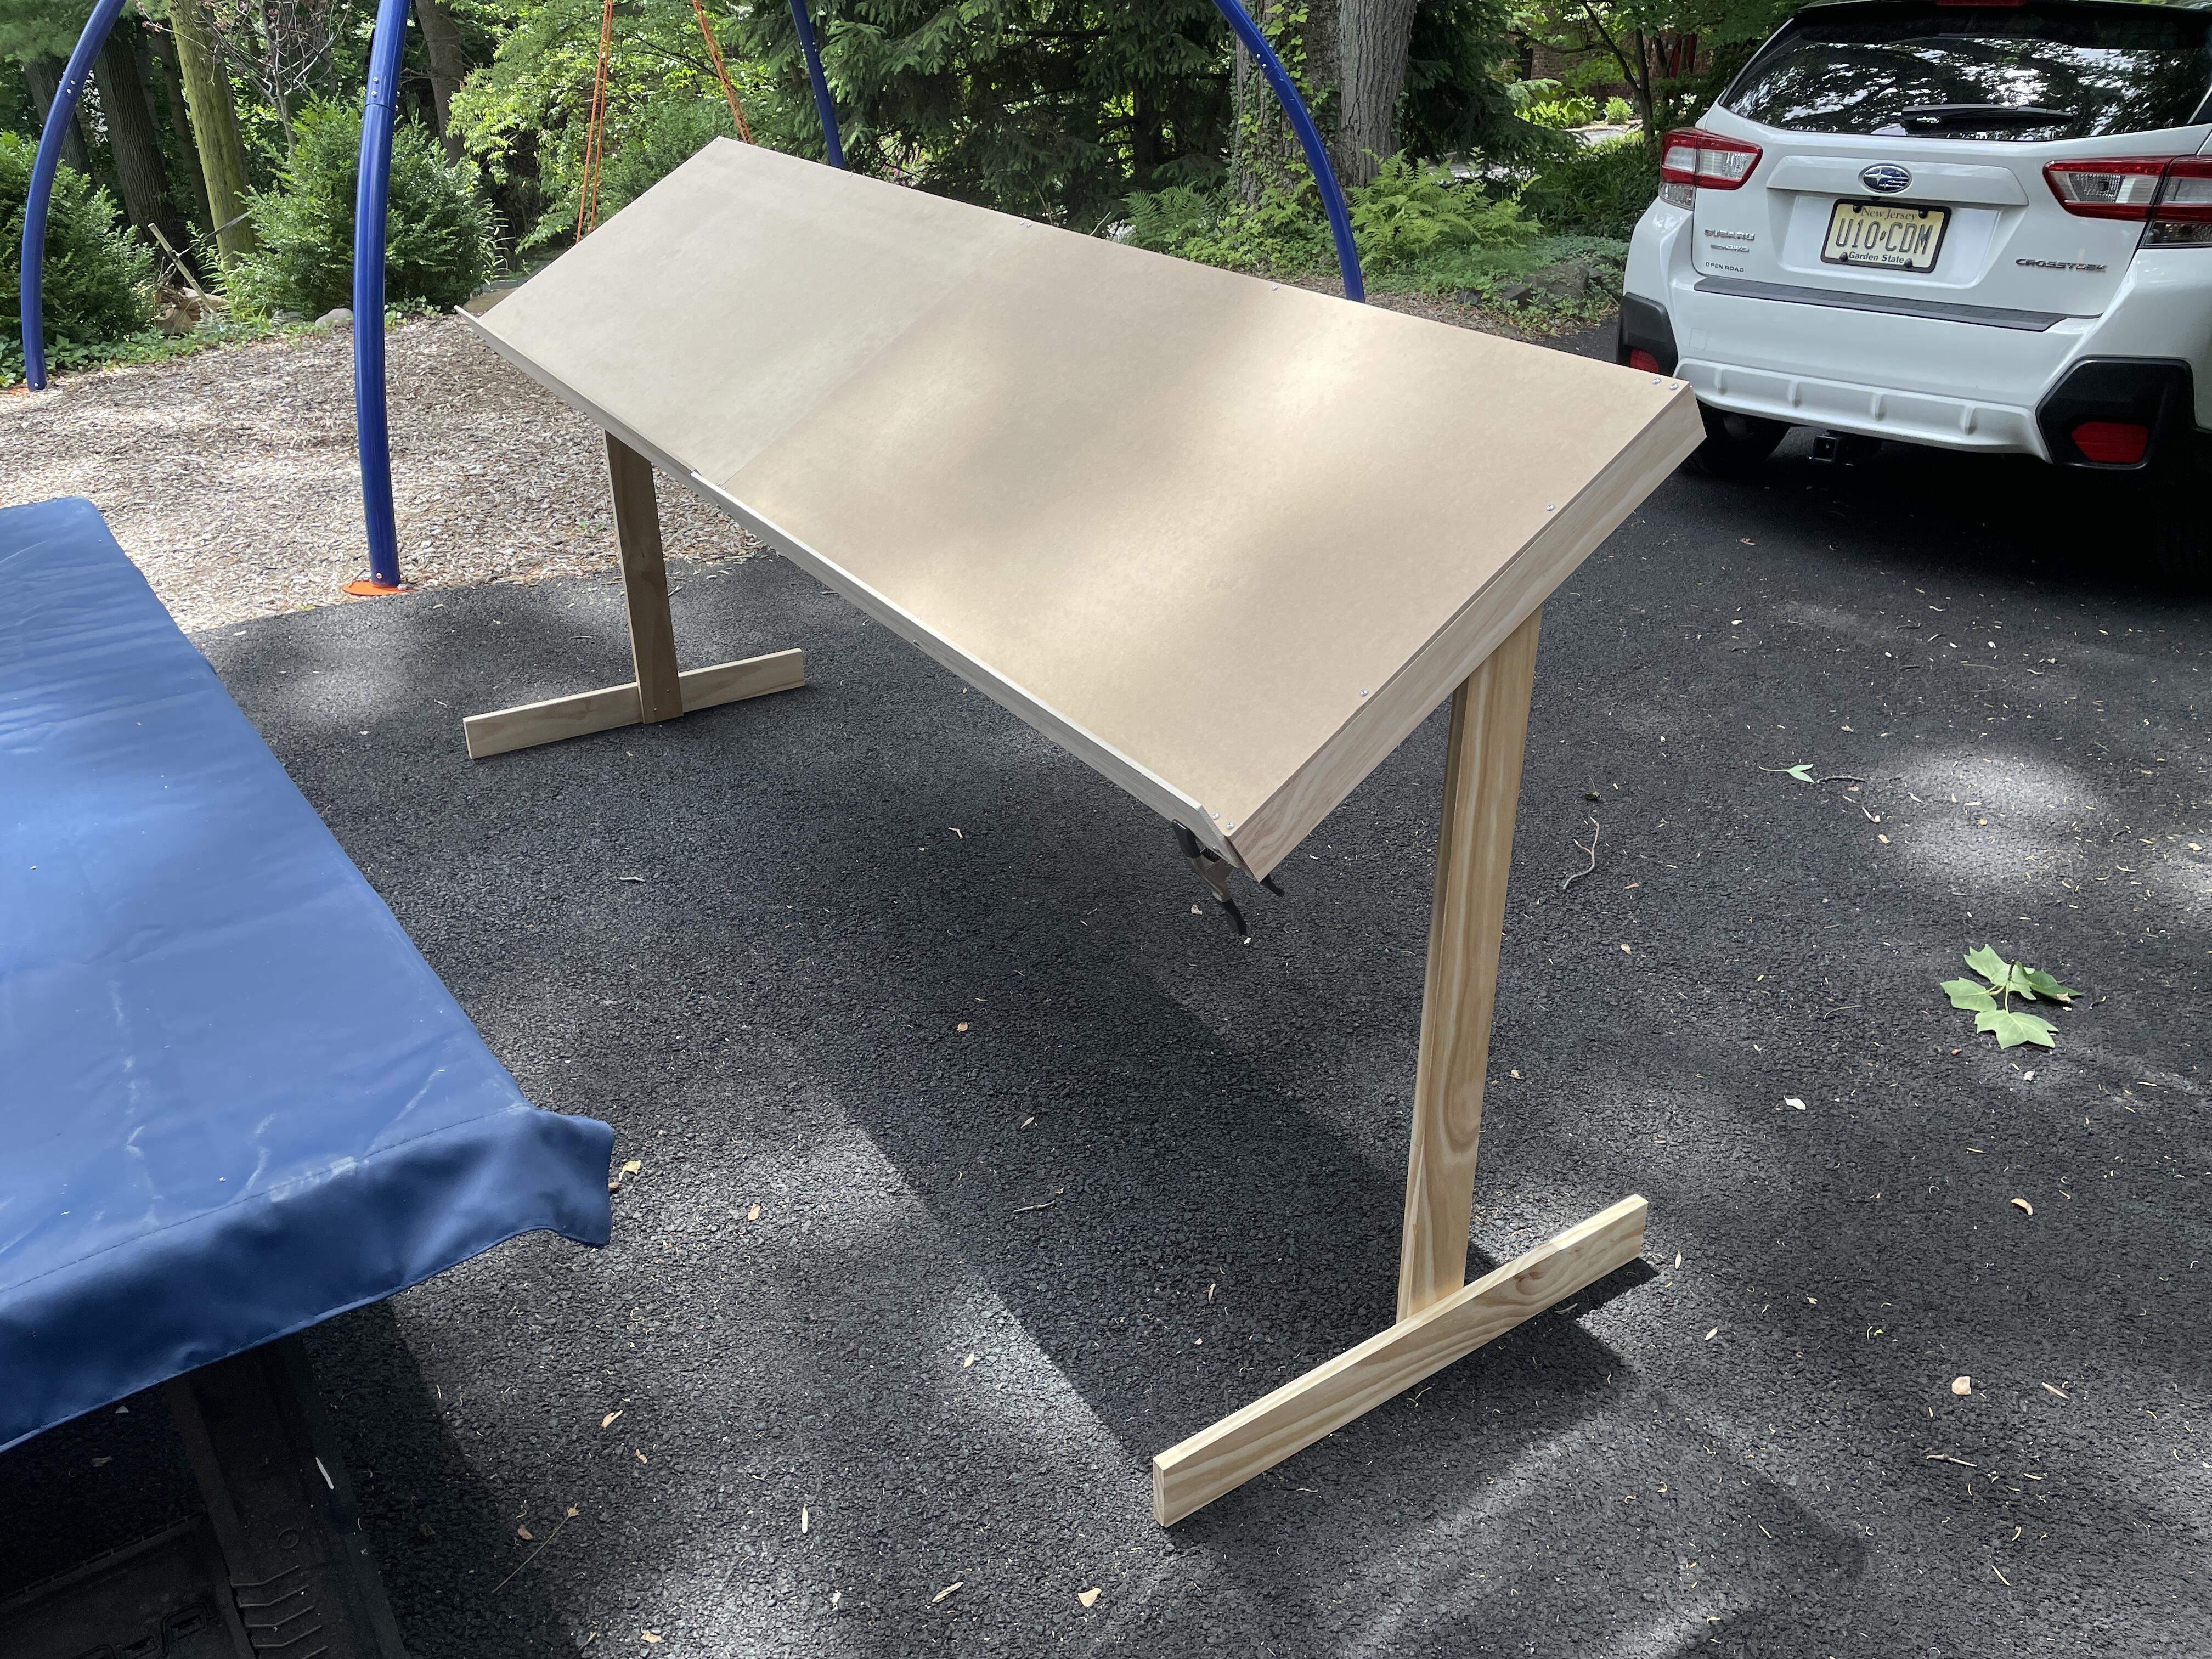
Matthew Abate replied to Matthew Abate's topic in Build Threads
Okay. Made a nail board… It’s flimsy and probably too small, but it fits in my home office so I can theoretically work on this when it’s crazy hot out. I’m hoping that makes the project more likely to move forward.
-
1973 240z Custom Wiring From Scratch
Matthew Abate replied to Matthew Abate's topic in Build Threads
This is super cool! It also sort of negates the reason I got a 240z, which is to have a car with no computer that I can fix myself. It also costs 2/3rds what the car cost me. I am looking at going with a more modern ignition system though… -
1973 240z Custom Wiring From Scratch
Matthew Abate replied to Matthew Abate's topic in Build Threads
I have some noob questions maybe some of you can help me out with: Is it better to build the wiring for mods into the main body harness or make a separate one that attaches to the main one, given I am starting from scratch? Can I somehow repurpose the Thermo Switch / Thermo Relay for an automatic transmission to control my electric radiator fan? Could I repurpose the wires for the automatic antenna and antenna switch for anything, like power for a Bluetooth speaker, for example? Could I repurpose the wires for the Inhibitor switch for an automatic transmission for anything? Could I repurpose the wires for the indicator lamp for an automatic transmission for anything? -
1973 240z Custom Wiring From Scratch
Matthew Abate replied to Matthew Abate's topic in Build Threads
Also, I found this helpful in understanding what we are dealing with here: -
1973 240z Custom Wiring From Scratch
Matthew Abate replied to Matthew Abate's topic in Build Threads
I went through the wiring diagram I have, which I downloaded from this site, and captured the wire colors running to each component in the stock system. I am planning to use this list to figure out what color wire to change to when I am unable to source wiring in the stock colors, but I thought I would post it here for anyone who wants it. Item OEM Wire Color Water tank • Black • Black w/ Yellow Side Marker Lamp RH • Black • Green w/ Blue Inspection Light • Ground • Red w/ Blue Horn Relay • Green • Green w/ Black • Green w/ Red Battery • Black • Black • Ground Accessory Relay • Blue • Black • White w/ Red • Blue Choke Switch • Black • Red w/ Blue Map Light • Black • Red w/ Blue Rheostat • Green w/ White • Red w/ Blue Fuel Pump • Yellow • Black Defrost Relay • Blue w/ Red • Black • White w/ Red • Red w/ Black Glove Box Light • Ground • Red w/ Blue Room Light • Black • Red w/ Blue Tank Unit • Yellow • Black Step Light RH • Black • Red w/ Blue Side Marker RH • Black • Green w/ White Ground • Black Rear Combination Light RH • White w/ Black • Green w/ White • Black • Red w/ Black Rear Combination Light RH Rear Combination Light RH License Light RH • Black • Black License Light LH • Black • Black Heat - Glass • Red w/ Black • Black Rear Combination Light LH • White w/ Black • Green w/ White • Black • Red w/ Black Rear Combination Light LH Rear Combination Light LH Auto Antenna • Blue w/ Red • Blue w/ White • Black • Antenna Lead Antenna switch • Blue w/ Red • Blue w/ White • Blue Side Marker LH • Black • Green w/ White Step Light LH • Black • Red w/ Blue Comb. Switch • Green w/ Blue (1) • Green w/ White (2) • White w/ Red (19) • Black (3) • Blue w/ Yellow (4) • Blue w/ White (5) • Red (20) • Blue (6) • Red w/ Blue (7) • Blue w/ Red (8) --- • Green w/ Yellow (9) • White w/ Red (10) • White w/ Black (11) • Green w/ Red (12) • Green w/ Black (13) • White (14) • Red w/ White (15) • Red w/ Black (16) • _____ (17) • Green w/ Black (18) Hand Break Switch • Ground • Yellow w/ Blue Speedometer • Red w/ Blue • Red w/ Blue • Red • Red w/ White • Yellow w/ Blue • Red w/ Blue Tachometer • Green • Red w/ Blue • Green w/ Black • Green w/ White • Black w/ White • Green w/ Red • Red w/ Blue • Black Oil Pressure / Water Temp • Black • Yellow w/ White • Green to Yellow w/ Red • Red w/ Blue • Green to Yellow w/ Red • Yellow w/ White Fuel Gauge / Ammeter • White w/ Red • White • Red w/ Blue • Yellow • Green to Yellow w/ Red • Black Clock • Black • Red w/ Blue • Blue Choke Warning Light • Red w/ Blue • Red Defrost Switch • [MISSING] • Blue w/ Red • Blue Seatbelt Warning Light • Black • Green Fog Light Switch • Red • Red w/ Green Door Switch RH • Black • Black • Ground Cigarette Lighter • Blue w/ White • Black Seat Switch • Red • Green w/ Black Seatbelt Switch LH • Green w/ Black • Green Seatbelt Switch RH • Green • Green w/ Black Neutral Switch • Green • Green Buzzer • Green • Black Door Switch LH • Black • Black • Black • Black • Ground Indicator Lamp (Auto T/M) • Black • Red w/ Blue Hazard Switch • Green w/ White (1) • Green w/ Red (2) • Green w/ Black (3) • Green (4) • Green (5) • Green w/ Yellow (6) • Green w/ Yellow (7) • White w/ Black (8) • White w/ Red (9) Ignition Switch • Black w/ Yellow (1) • Black w/ White (2) • White w/ Red (3) • Blue w/ Red (4) • Green w/ Blue (5) Steering Lock Switch • Red • Black Wiper Motor • Black (E) • Blue w/ Red (B) • Blue (L) • Blue w/ White (M) • Blue w/ Yellow (H) Buzzer • Yellow • Red Inhibitor Switch (Auto T/M) • Black w/ Yellow • Black w/ Yellow • Red w/ Black • Red Air Con Power • Red to Blue Blower Switch • Red • Black • Black Heater / Blower • Red • Black • Black • Ground Side Marker Lamp LH • Black • Green w/ Blue Parking & T/S & Side Front LH • Black • Green w/ Red • Green w/ Blue Head Light LH • Red w/ Black • Red w/ White • Red w/ Yellow Horn L • Green • Ground Fog Light LH • Black • Red Fog Light RH • Black • Red Horn R • Green • Ground Head Light RH • Red w/ Black • Red w/ White • Red w/ Yellow Parking & T/S & Side Front RH • Black • Green w/ Blue • Green w/ Black Voltage Regulator • Black (E) • White (A) • White w/ Black (F) • Yellow (N) • _____ (L) • _____ (–) • Black w/ White (IG) Thermal T/M • Yellow w/ White • Ground Oil Pressure • Yellow w/ White • Ground Fuse Box • Green w/ Red (H) • Green w/ Yellow (S) • Red w/ Blue (PT) • Red w/ Blue (PL) • Red (HR) • Red w/ Yellow (HL) • Blue w/ White (C) • Blue (A) • Blue w/ Red (W) • _____ (F) • Black w/ White (IG) • Blue w/ Red (C) • _____ (–) • _____ (–) • _____ (–) • Red (–) • White w/ Red (A) • White w/ Red (A) • _____ (–) • White (B) Starter Motor • Black • Black • Black w/ Yellow • Ground Fusable Link • Black Radio • Ground • Black • Red w/ Blue • Antenna Lead Reverse Switch • Red w/ Black • Red Turn Signal Flash Switch • Green • White Four Way Flasher • Blue w/ White • Green w/ White Brake Indicator • Yellow w/ Blue • Ground Stop Switch • Green w/ Yellow • Green w/ Yellow Ballast Resistor • Green w/ White • Black w/ White Thermo sw (Auto T/m) • Black w/ White • Green Alternator • Black (E) • _____ (A) • White w/ Black (F) • Yellow (N) • _____ (–) • _____ (–) • _____ (–) • _____ (–) • _____ (–) • _____ (–) • Fusible Link (A) • Black (E) Fusable Link • White w/ Red Thermo Relay (Auto T/M0 • Green • Black • Black • Red w/ Black to Black Coil • Black • (To Distributor) Distributor (Manual T/M) • Black • (From Coil) -
1973 240z Custom Wiring From Scratch
Matthew Abate replied to Matthew Abate's topic in Build Threads
Thanks @zKars! I'll take your comments into account. I was already leaning toward Deutsch or Weatherpack connectors. The gauges I had not considered changing due to the lack of dual options out there, but I'll look around. In addition to suggestions for adding or swapping things, if anyone sees anything on my list that they think I should take off, please let me know. For example, I had someone tell me to ditch the electric fan and keep the original, but I am not sure about that because I am going to add air conditioning. -
1973 240z Custom Wiring From Scratch
Matthew Abate replied to Matthew Abate's topic in Build Threads
Thanks @SteveJ! I think you already noticed this based on your comments, but I'll state it for anyone else who may comment: My overall goal in this is to make the ideal wiring system for the car with consideration to the modifications I am going to make, not to replicate the original. That said, I don't want to deviate wildly from original because I want to be able to go back and fix stuff if necessary. I also want to reduce complexity and weight wherever possible. However, I also think I will go heavier than necessary with the wiring so I never have to worry about that part of the system. The things on the ends of the wires are a lot easier to fix down the road than the wires themselves. ___ Here is my first pass at an inventory of components for this project, sorted according to their position in the wiring diagram: Mod Item Replacement In Diagram? Stock Antenna Lead Delete Yes Stock Antenna Lead Delete Yes Stock Water tank Yes Upgrade Side Marker Lamp RH LED Bulb - Front Turn Signal Yes Upgrade Inspection Light LED Bulb - Inspection Light Yes Stock Horn Relay Yes Stock Battery Yes Stock Accessory Relay Yes Stock Choke Switch Yes Upgrade Map Light LED Bulb - Map Light Yes Stock Rheostat Yes Stock Fuel Pump Yes Stock Defrost Relay Yes Upgrade Glove Box Light LED Bulb - Glove Box Light Yes Upgrade Room Light LED Bulb - Dome Light Yes Upgrade Room Light Yes Stock Tank Unit Yes Stock Step Light RH Yes Upgrade Side Marker RH LED Bulb - Red Marker Light Yes Upgrade Rear Combination Light RH LED Bulb - Brake Light Yes Upgrade Rear Combination Light RH LED Bulb - Rear Turn Signal Yes Upgrade Rear Combination Light RH LED Bulb - Reverse Light Yes Upgrade License Light RH LED Bulb - Plate Light Yes Upgrade License Light LH LED Bulb - Plate Light Yes Stock Heat - Glass Yes Upgrade Rear Combination Light LH LED Bulb - Brake Light Yes Upgrade Rear Combination Light LH LED Bulb - Rear Turn Signal Yes Upgrade Rear Combination Light LH LED Bulb - Reverse Light Yes Stock Auto Antenna Delete Yes Stock Antenna switch Repurpose ??? Yes Stock Side Marker LH Yes Stock Step Light LH Yes Stock Comb. Switch Yes Stock Hand Break Switch Yes Stock Speedometer Yes Stock Tachometer Yes Stock Oil Pressure / Water Temp Yes Stock Fuel Gauge / Ammeter Voltmeter Yes Stock Clock Yes Stock Choke Warning Light Yes Stock Defrost Switch Yes Stock Seatbelt Warning Light Yes Stock Fog Light Switch Yes Stock Door Switch RH Yes Upgrade Cigarette Lighter 12 volt plug Yes Stock Seat Switch Yes Stock Seatbelt Switch LH Yes Stock Seatbelt Switch RH Yes Stock Neutral Switch Yes Stock Buzzer Yes Stock Door Switch LH Yes Stock Indicator Lamp (Auto T/M) Yes Stock Hazard Switch Yes Stock Ignition Switch Yes Stock Steering Lock Switch Yes Stock Wiper Motor 91 Honda Civic Wiper Motor Yes Addition Wiper Motor Wiper Upgrade Relay No Stock Buzzer Yes Stock Inhibitor Switch (Auto T/M) Yes Stock Air Con Power Yes Addition Air Conditioner No Stock Blower Switch Yes Stock Heater / Blower Yes Upgrade Side Marker Lamp LH LED Bulb - Front Turn Signal Yes Addition Side Marker Lamp LH Side Marker LED Conversion Plugs No Stock Parking & T/S & Side Front LH Yes Upgrade Head Light LH Headlight Projection Housings Yes Upgrade Head Light LH Headlight Projection Housings Yes Stock Horn L Yes Stock Fog Light LH Yes Stock Fog Light RH Yes Addition Front Fog / Rally Light Relay No Stock Horn R Yes Upgrade Head Light RH Headlight Projection Housings Yes Upgrade Head Light RH Headlight Projection Housings Yes Addition Head Light RH Headlight Relay Upgrade Harness No Upgrade Parking & T/S & Side Front RH LED Bulb - Front Turn Signal Yes Addition Parking & T/S & Side Front RH Parking Light Upgrade Harness No Addition Parking & T/S & Side Front RH Parking Light Upgrade Harness, 70-73 No Stock Volt Reg Yes Stock Voltage Regulator Yes Stock Thermal T/M Yes Stock Oil Pressure Yes Upgrade Fuse Box 280ZX Fuse Box Yes Upgrade Fuse Box Long Pigtail Blade Style Fuse Box Yes Upgrade Fuse Box Short Pigtail-Blade Style Fuse Box Yes Upgrade Fuse Box Short Pigtail-Blade Style Fuse Box Yes Upgrade Starter Motor Gear Reduced Starter Motor Yes Stock Fusable Link Circuit Breaker / Fuse Yes Upgrade Radio Stereo Delete Box Yes Stock Reverse Switch Yes Stock T/S Flash SW Yes Stock Four Way Flasher Yes Stock Brake Ind. Yes Stock Ballast Resistor Delete ??? Yes Stock Stop Sw Yes Stock Thermo sw (Auto T/m) Yes Upgrade Alternator Alternator - 100 Amp Yes Addition Alternator Alternator Upgrade Plug No Stock Fusable Link Circuit Breaker / Fuse Yes Stock Thermo Relay (Auto T/M0 Yes Stock Coil Yes Stock Distributor (Manual T/M) Yes Stock Distributor Condenser No Addition Anti-Theft Kit / Alarm N/A Addition Auxiliary Fuse Box N/A Addition Bluetooth Speaker Power N/A Addition Electric Radiator Fan N/A Addition Electric Radiator Fan Pigtail N/A Addition Electric Radiator Fan Temp Control Kit N/A Addition GPS Power N/A Addition Third Brake Light N/A Addition Under Dash / Footwell Lights N/A Addition USB Socket / Phone Charger N/A Upgrade LED Bulb - Dashboard Light Set N/A Stock Fuel Sender Electrical Connector No Stock Electric Fuel Pump Wiring Install Kit Harness Relay No @SteveJ, I don't know if I will be going with the ammeter I have or converting to a voltmeter. I need to look at the pros and cons of that change. In fact, I have not decided if I am keeping the factory gauges at all. This is a restomod and I have already made irreversible changes, so I don't know. I might also address the 9-pin switch by backdating that to an earlier version. Any suggestions on other changes anyone has that will make the car better would be much appreciated. I am hoping this thread can turn into a resource for others and not just me tracking my progress. -
Okay, I've decided to start a new build thread dedicated to this wiring project. I think it is going to be complicated enough to necessitate its own space. Here's the link:
-
I have decided that the wiring on my '73 is going to be complicated enough to warrant it's own build thread. I will post the high level stuff in the full-car build thread (https://www.classiczcars.com/forums/topic/51541-1973-rebuild/#comments), but the details and back and forth conversation will be here. This is going to be a huge learning process for me since I have no experience in this area. With that said, this is where I am with this so far… When I got the car, the harnesses were installed, but the car was otherwise stripped. I pulled the harnesses, gave them a cursory dusting off and stuffed them into a box. The dash harness is still on the dashboard, which is on a shelf. I have been tracking an inventory of modifications I want to make to my electrical system over the past few years as I work on the rest of the car. I had a lot of ambition when I first put this list together, but I have backed off from my initial list of additional components over time. This is what I am still thinking about doing: Anti-Theft Kit / Alarm (Mostly because I have one laying around that I never installed on my motorcycle) Auxiliary Fuse Box or an Upgraded Fuse Box Bluetooth Speaker Electric Radiator Fan, plus maybe a thermostat controlled switch that would allow it to run after to car is turned off. GPS Third Brake Light Under Dash / Footwell Lights USB Socket / Phone Charger LED Exterior Lights 100-Amp Alternator Radio Delete LED Headlights Rally / Fog Lights 12-volt Socket (Replaces Cigarette Lighter) Door / Step Lights (These are super rare and way too expensive) Other Considerations… Figure out where I am going to do this work (it's getting hot) Decide which type of wire for each component (TXL, SXL, GXL, etc.) Choose connectors (Original style?, Deutsch style?, AMP style?, Weatherpack style?) Decide which colors to use for each color in the original harnesses Find amperage / voltage / wattage for each component Determine ideal wire size for each component Choose distributor Choose fuse box, distribution block, relay upgrades Identify fuse and relay requirements for each component Draw up new / modified wiring diagram Choose wrapping material Find shrink-wrap labels for label maker Find retailers ___ Right now I have a pretty solid spreadsheet put together with all of the components I need, mapped to the wiring diagram, and tracking the parts I plan to buy. Oh, and I’ve never done automotive wiring before, so this will be an experience.
-
Getting ready to work on installing the firewall insulation and other parts. Can anyone point me to a good thread about the sequence here? I’ve seen several threads about the overall sequence of the interior, but they all sort of gloss over this part. The specific information I’m looking for is the order for these items: Sound deadener / Dynamat Grommets Heat shield/jute or similar Black card pieces / kick panels Wiring Pedal Box Steering Column Heater Blower Dashboard I assume that’s the right order, but if anyone thinks differently let me know. What are the pitfalls I’m overlooking?
-
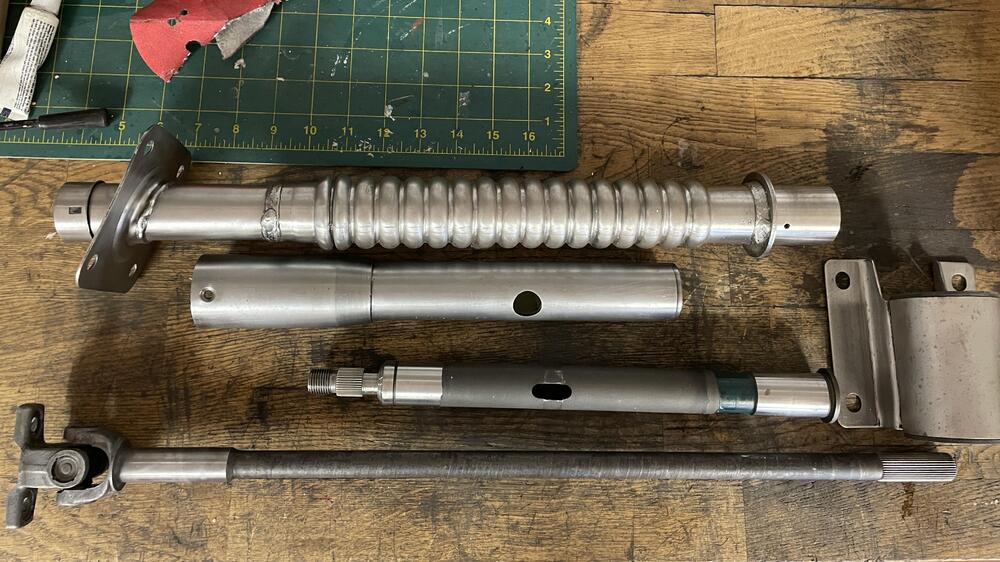
Back together: I found this component to be a pretty simple refresh project… if you don’t try to pull the bearings or the plastic bushing out of the column as I’ve seen done in other threads. I used a variety of degreasing sprays, patience, time, and gravity to clear everything out. I think eight rounds and it was flushing out clean. Then repacked the bearings using more patience and a syringe full of grease. It took way too long but it worked. Primer and paint were harder given the poor weather in the north east over the last several weeks. It took a full week for each coat to completely cure. And that’s in the heated garage with a dehumidifier running 24/7. Hence the drawn out timing of this process.