Matthew Abate
-
Posts
1,187 -
Joined
-
Last visited
-
Days Won
16
Content Type
Profiles
Knowledge Base
Zcar Wiki
Forums
Gallery
Events
Downloads
Store
Blogs
Collections
Classifieds
Everything posted by Matthew Abate
-

280z space saver spare tire replacement?
Matthew Abate replied to chaseincats's topic in Wheels & Brakes
So I know this is a slightly old thread, but I have a slightly different direction from what’s been mentioned that might work with bigger brakes. I have maxima calipers on the back and Toyota calipers on the front. The 14x6” rims I have fit but the wheel weights the tire shop used hit the calipers. This made me realize that a Datsun rim isn’t going to fit, so I am looking at getting a 2007 Nissan Sentra spare tire rim (PN: 40300-ET077) and fitting a Yokohama Y870B - SIZE: T135/80D16 tire to it. This should be similar to what @SoCalJim uses but closer to the stock tire diameter. I haven’t verified that the offset for that rim will work, but a spacer could solve that issue. The other thing I need to check is if that tire will fit into the spare tire well. It should be 24.9” in diameter inflated. The wheel is 4” wide plus however far the center sticks out (it’s a front wheel drive wheel). Maybe this will all work out. -
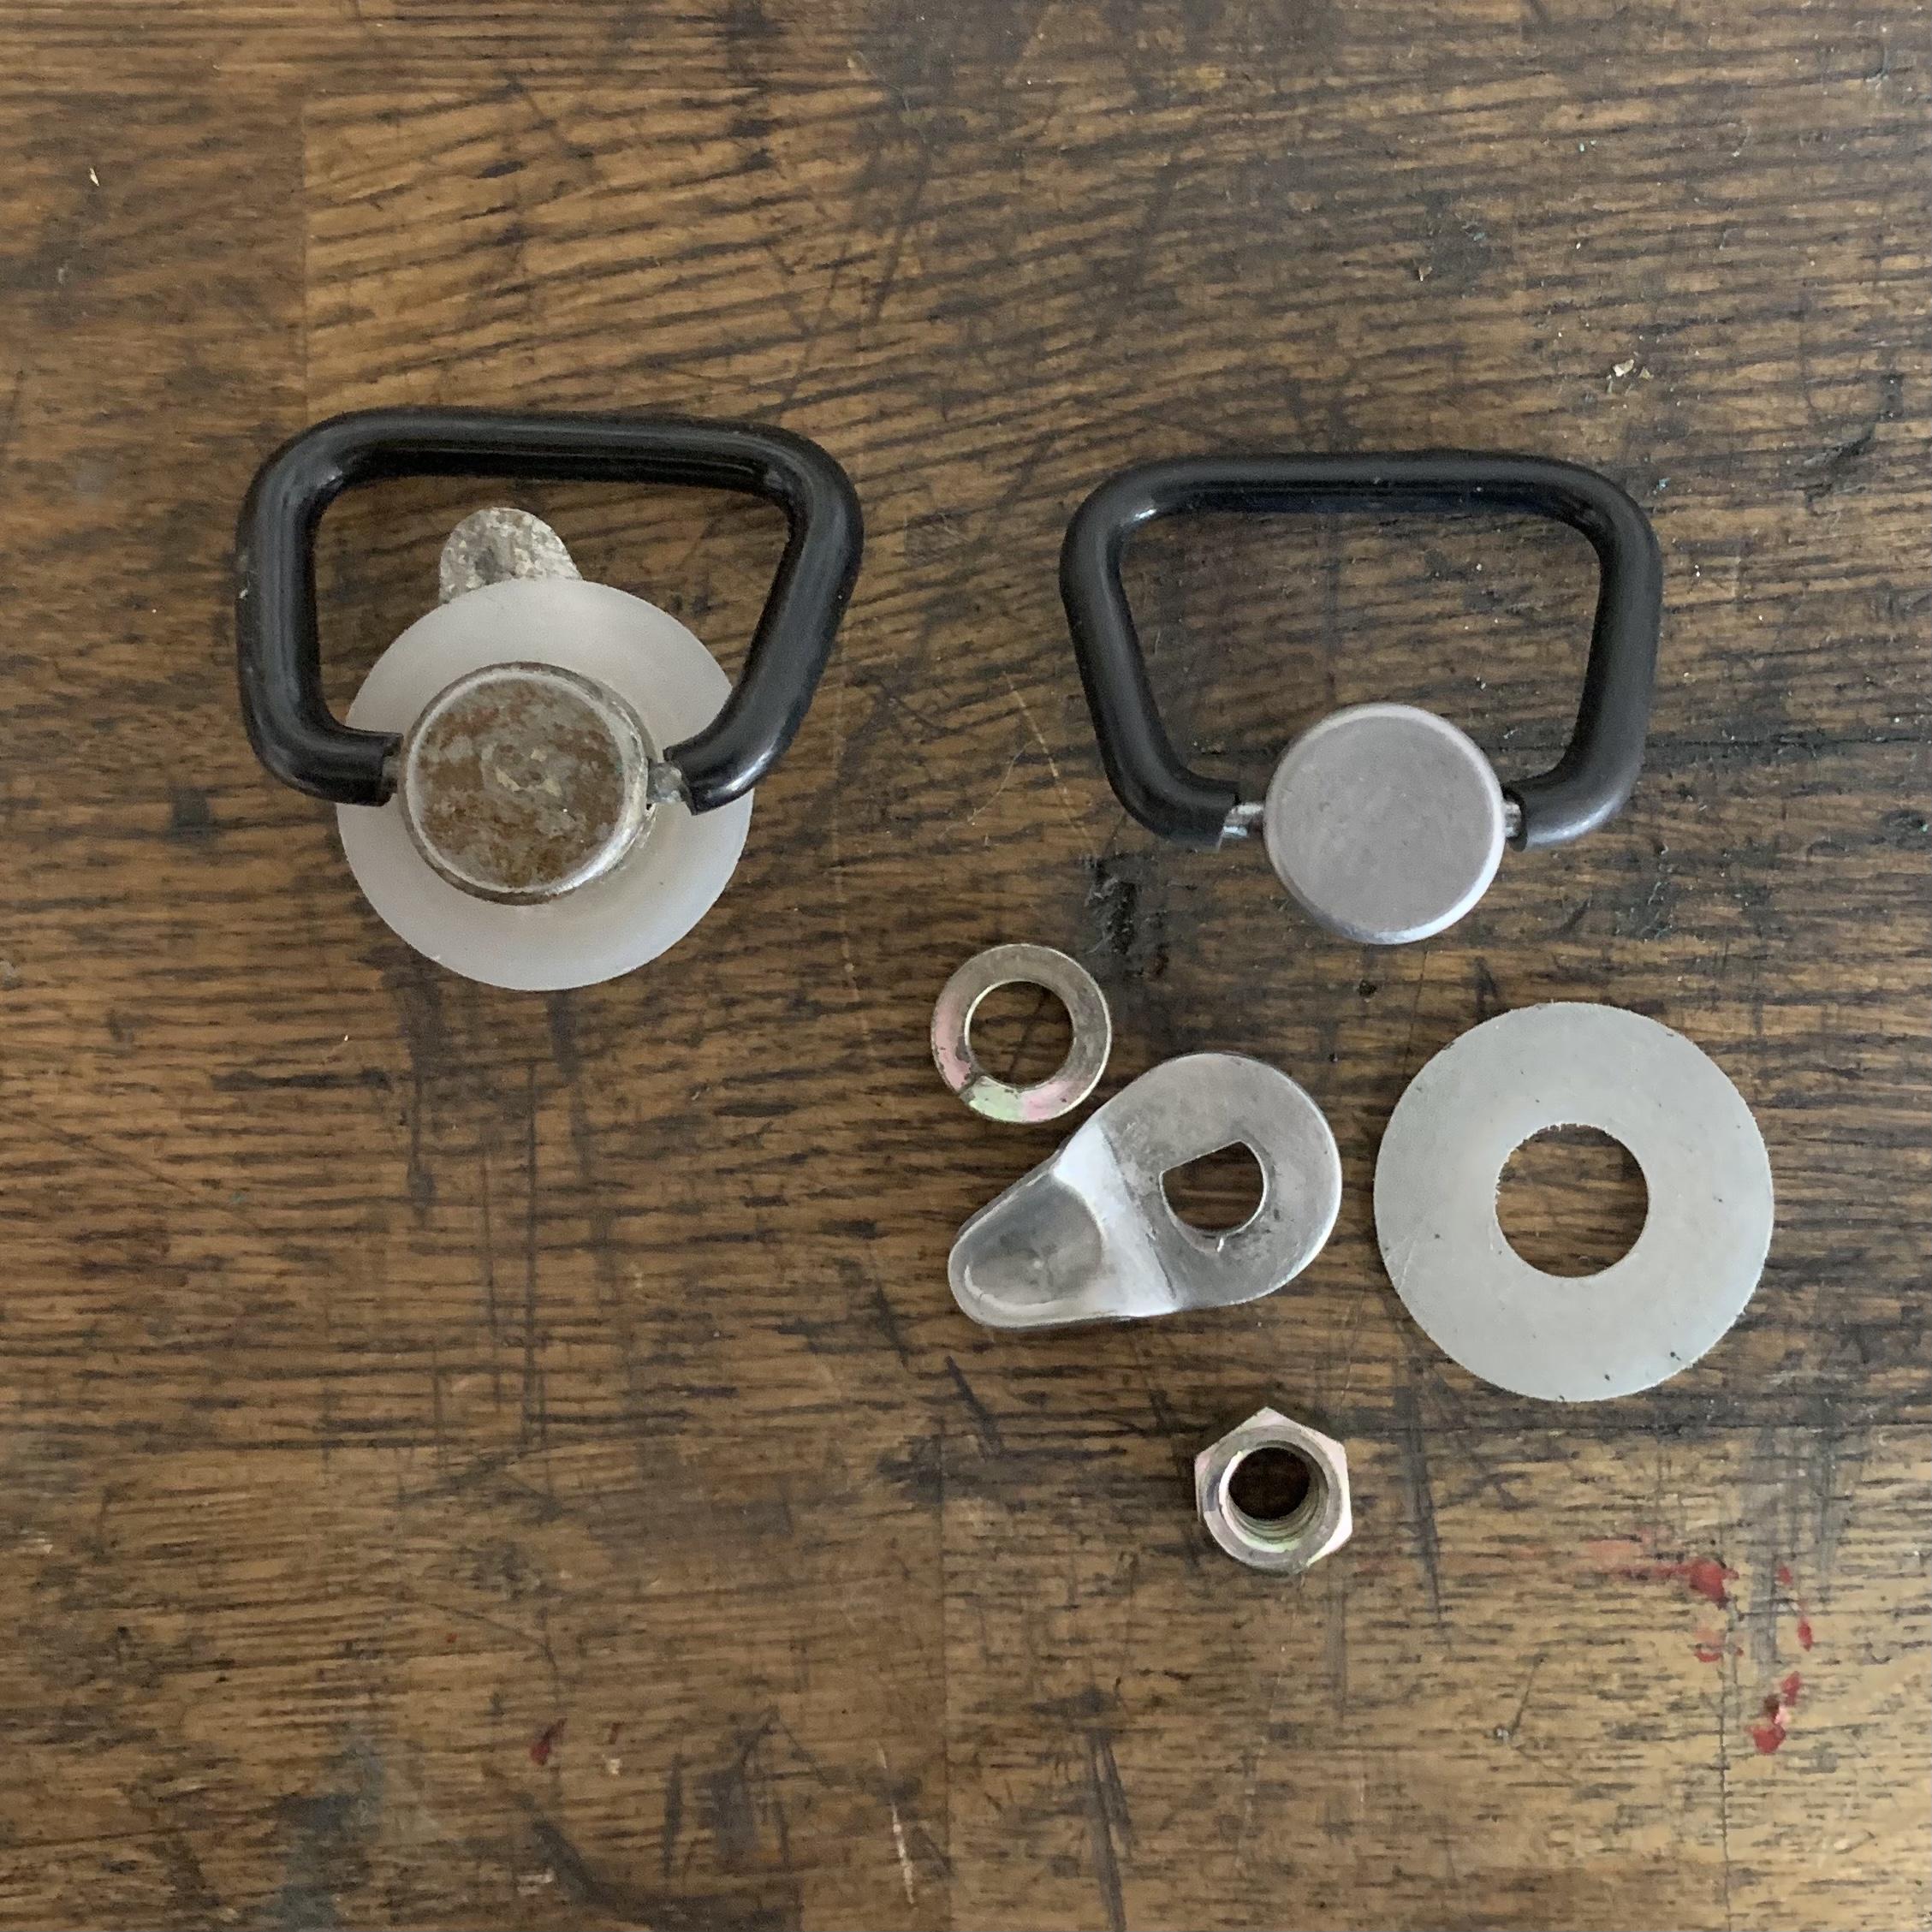
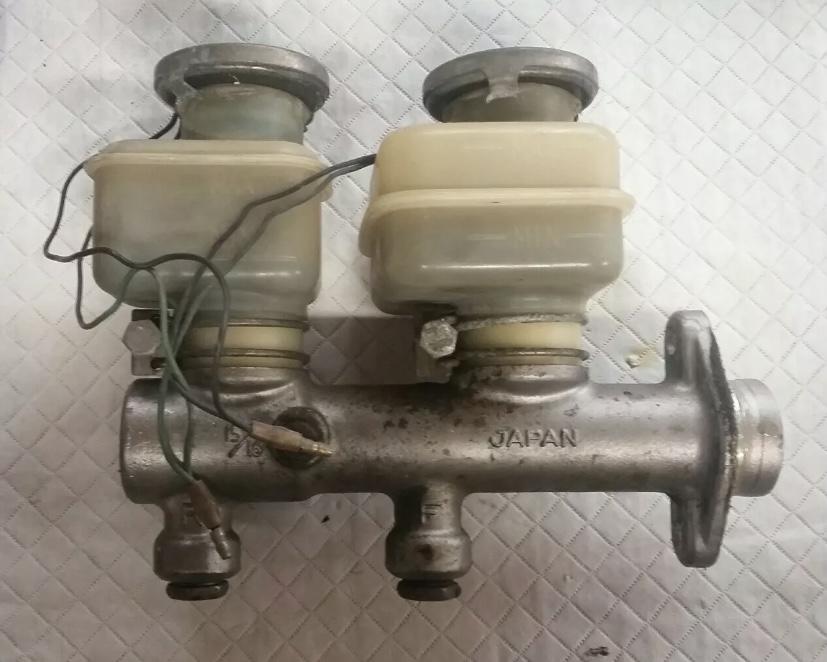
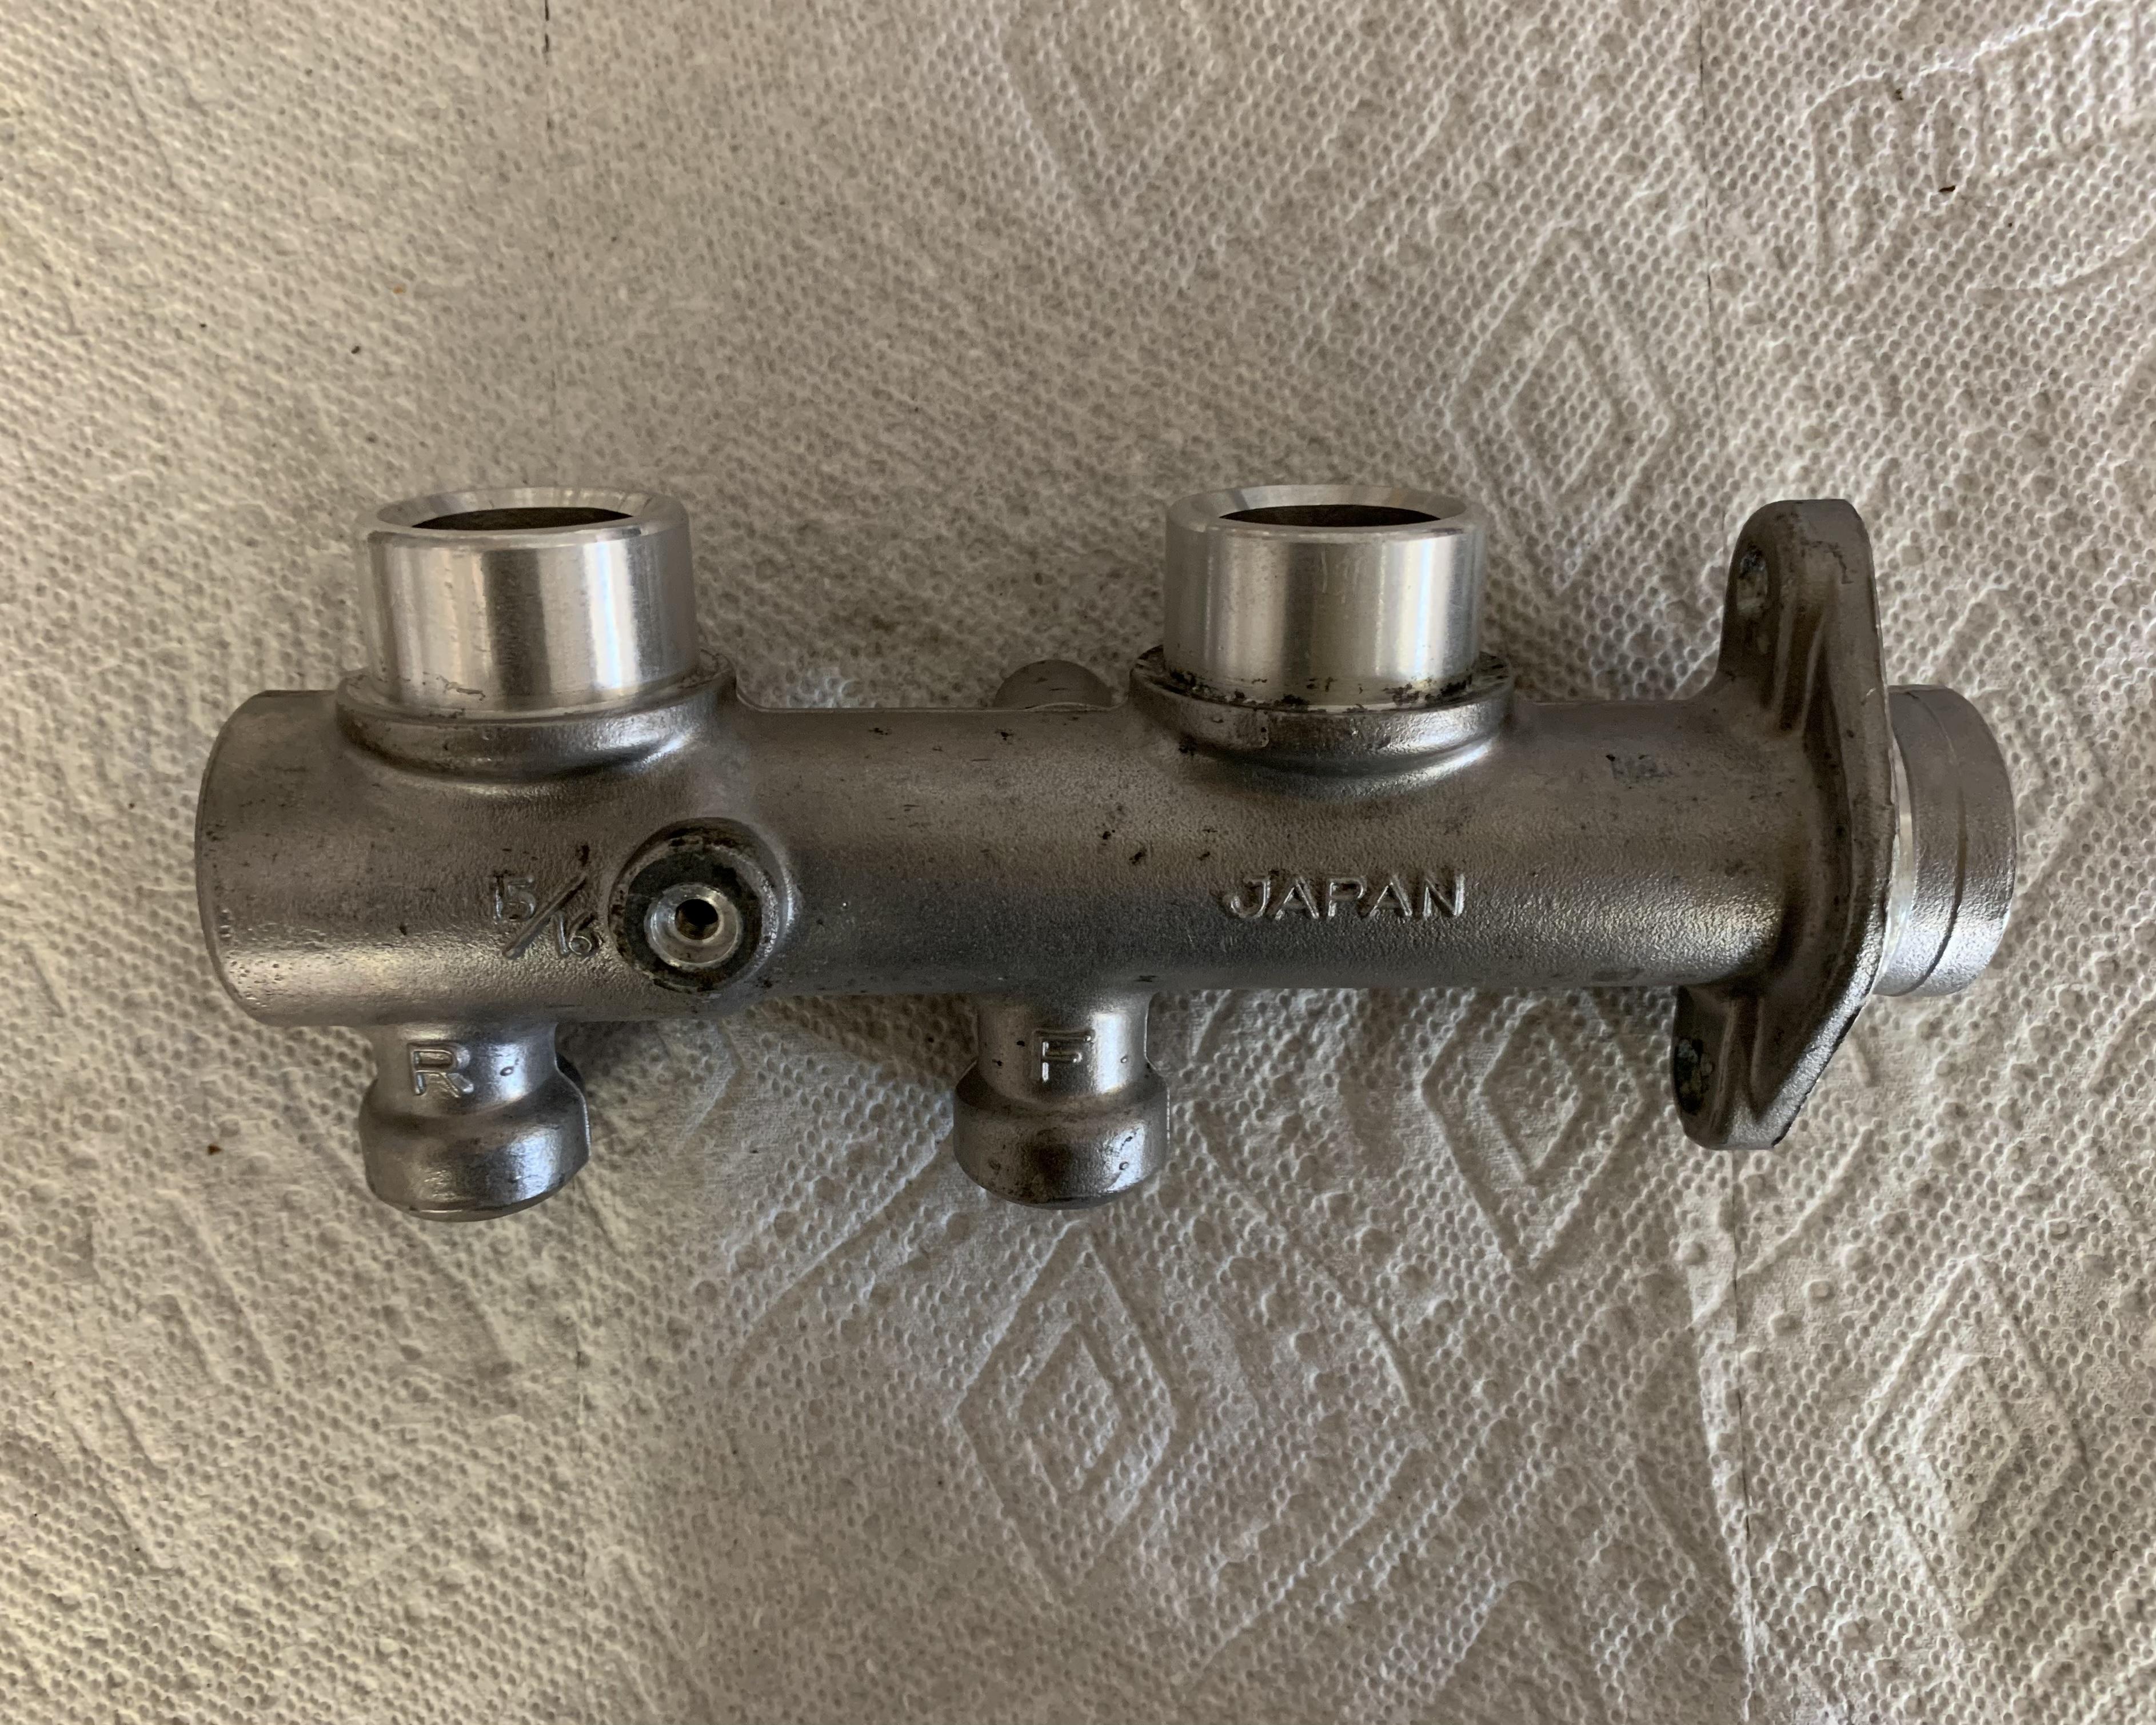
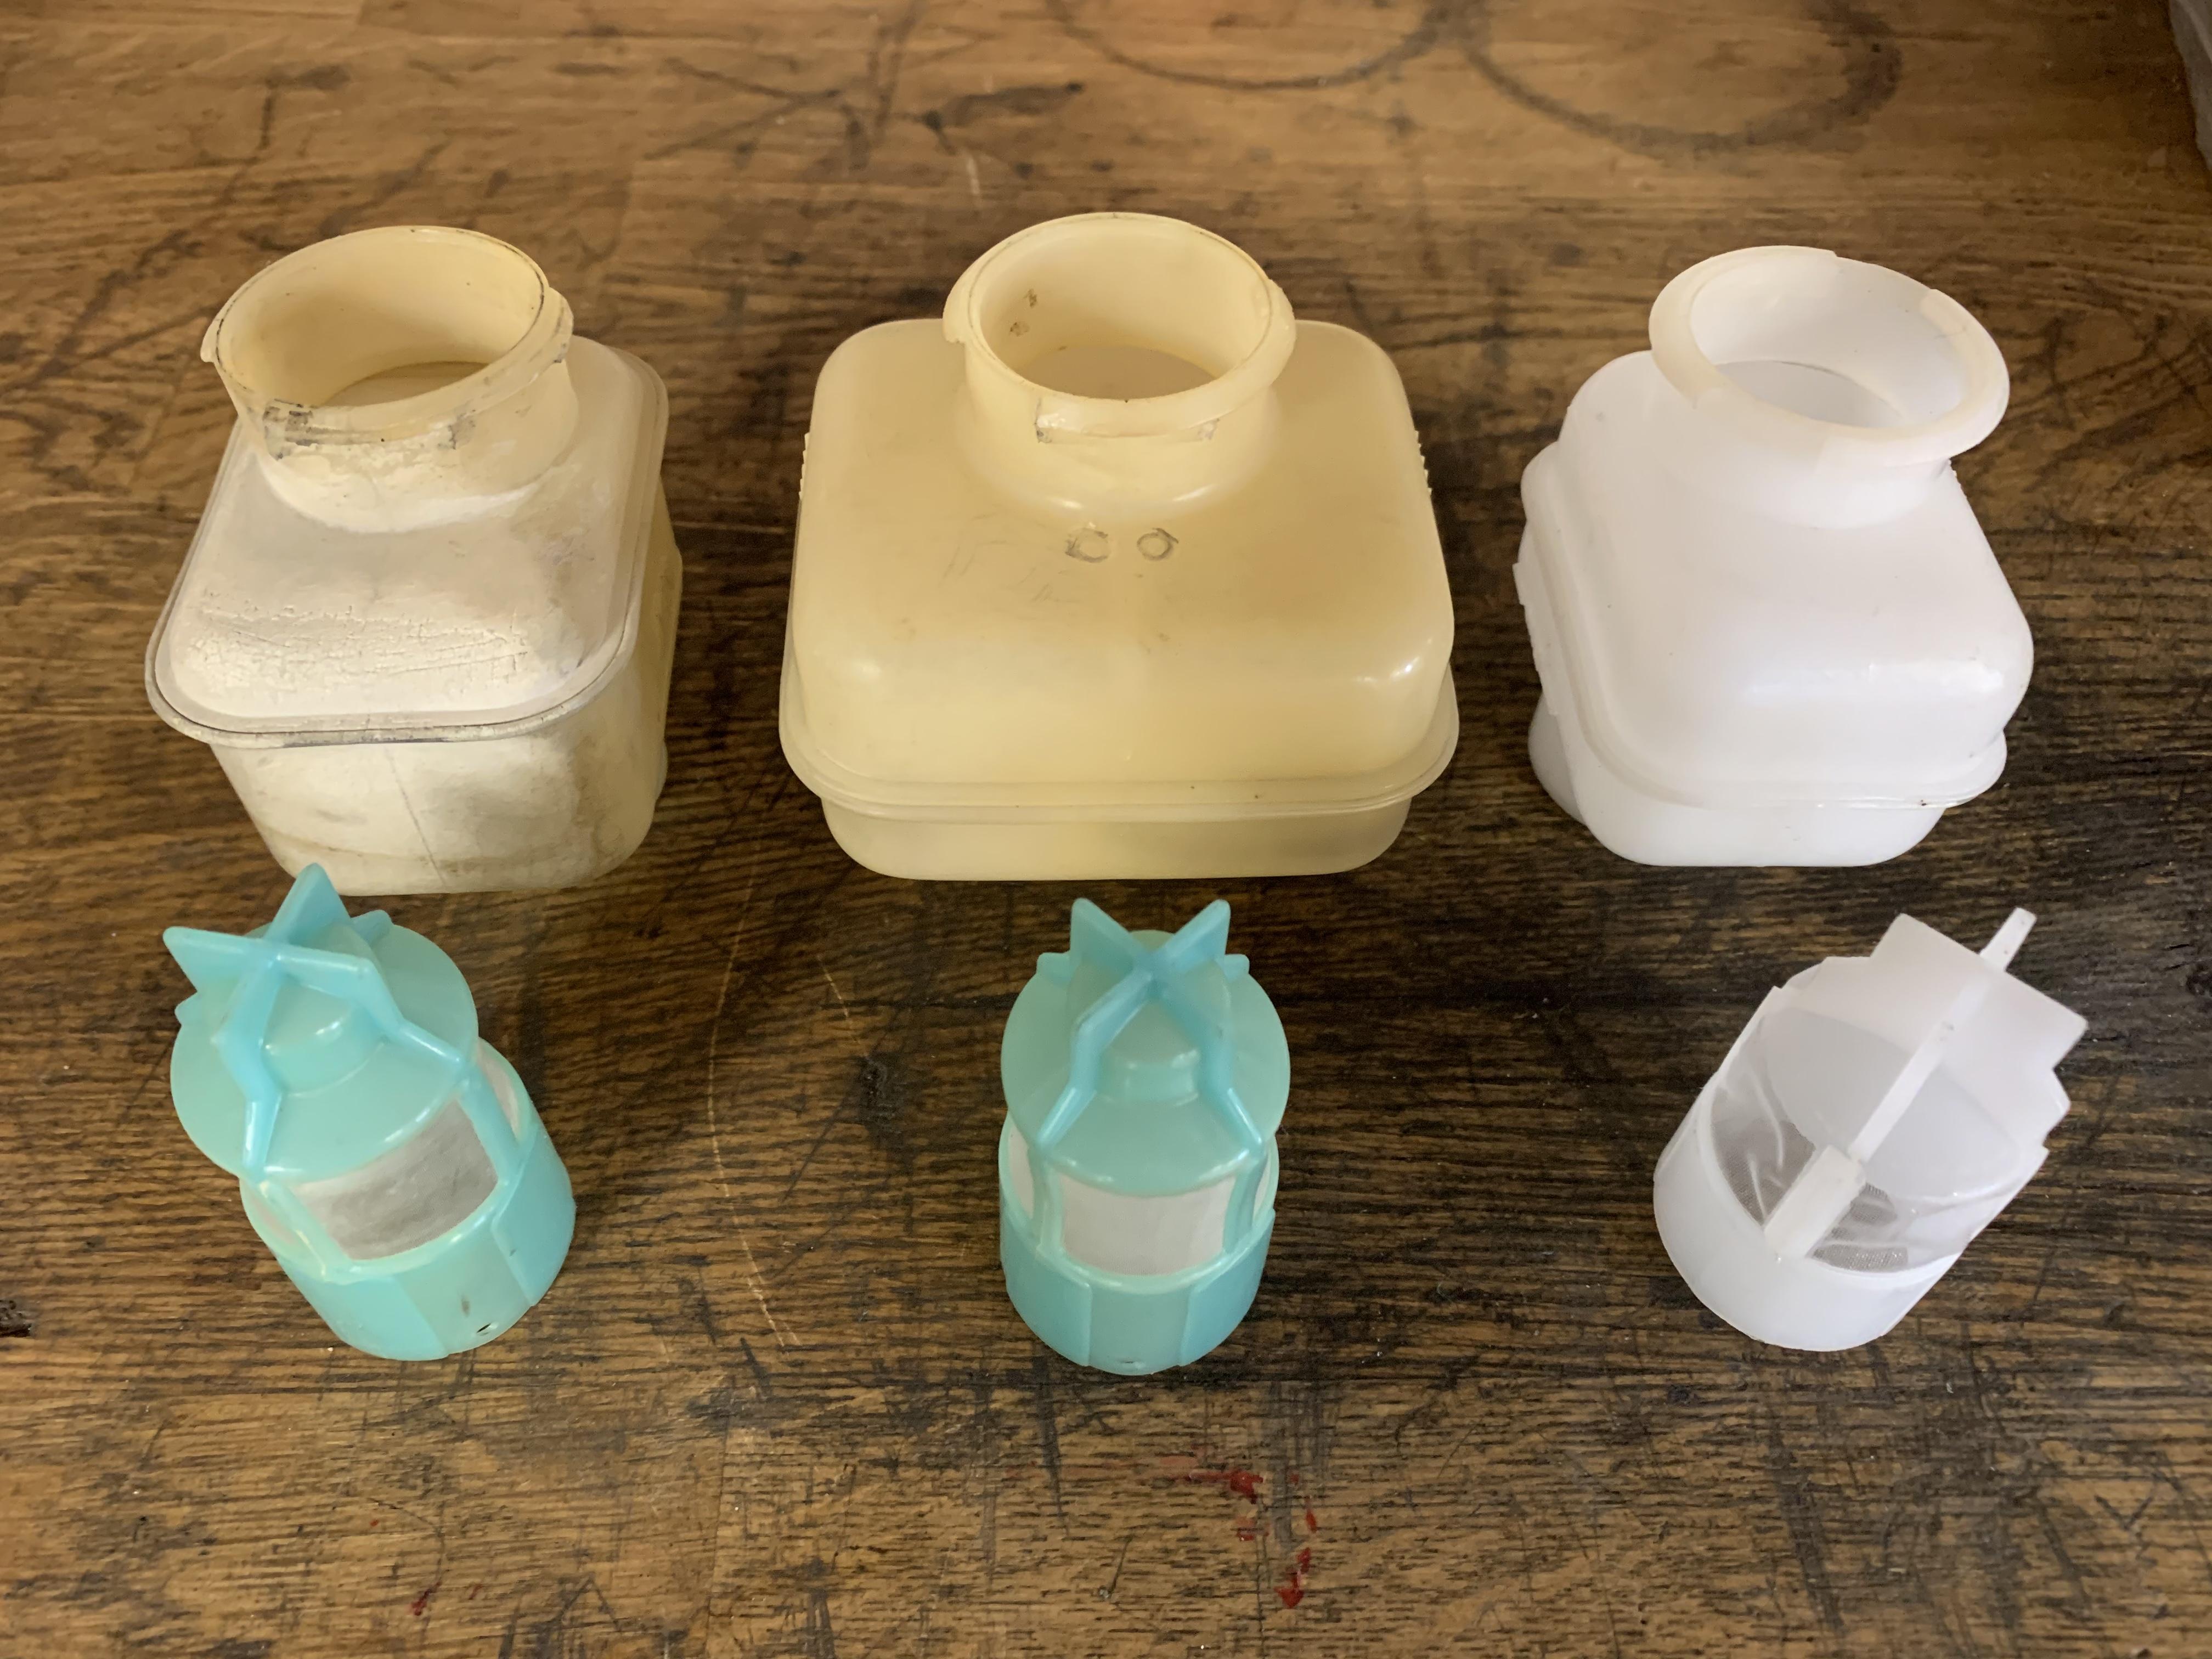
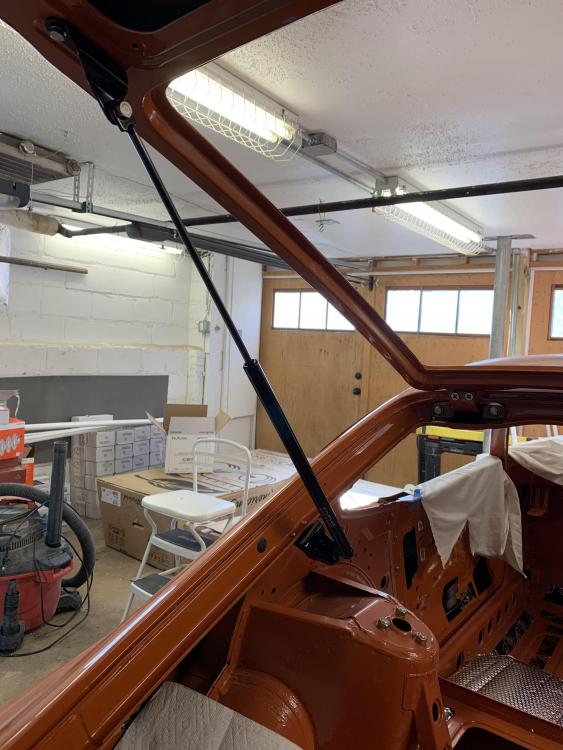
Okay, I was able to accomplish a few things this week: I received and installed the hatch bracket from @zKars and put the strut in. This made it a lot easier to get the final alignment of the hatch done. I polished up the storage box handles I got from @7tooZ (photo taken between for comparison) And I cleaned up the 280ZX master cylinder I got on eBay I have lots of cleaning on the MC parts to do and various rebuild parts coming in the mail, so that will take a while. I should be able to get the brakes totally finished by the end of February.


-
Thanks, but I want to stick with the ZX-sized tanks. I found a set on eBay and picked them up. They were more than I wanted to spend but I will have them Wednesday, so ¯\_(ツ)_/¯.
-
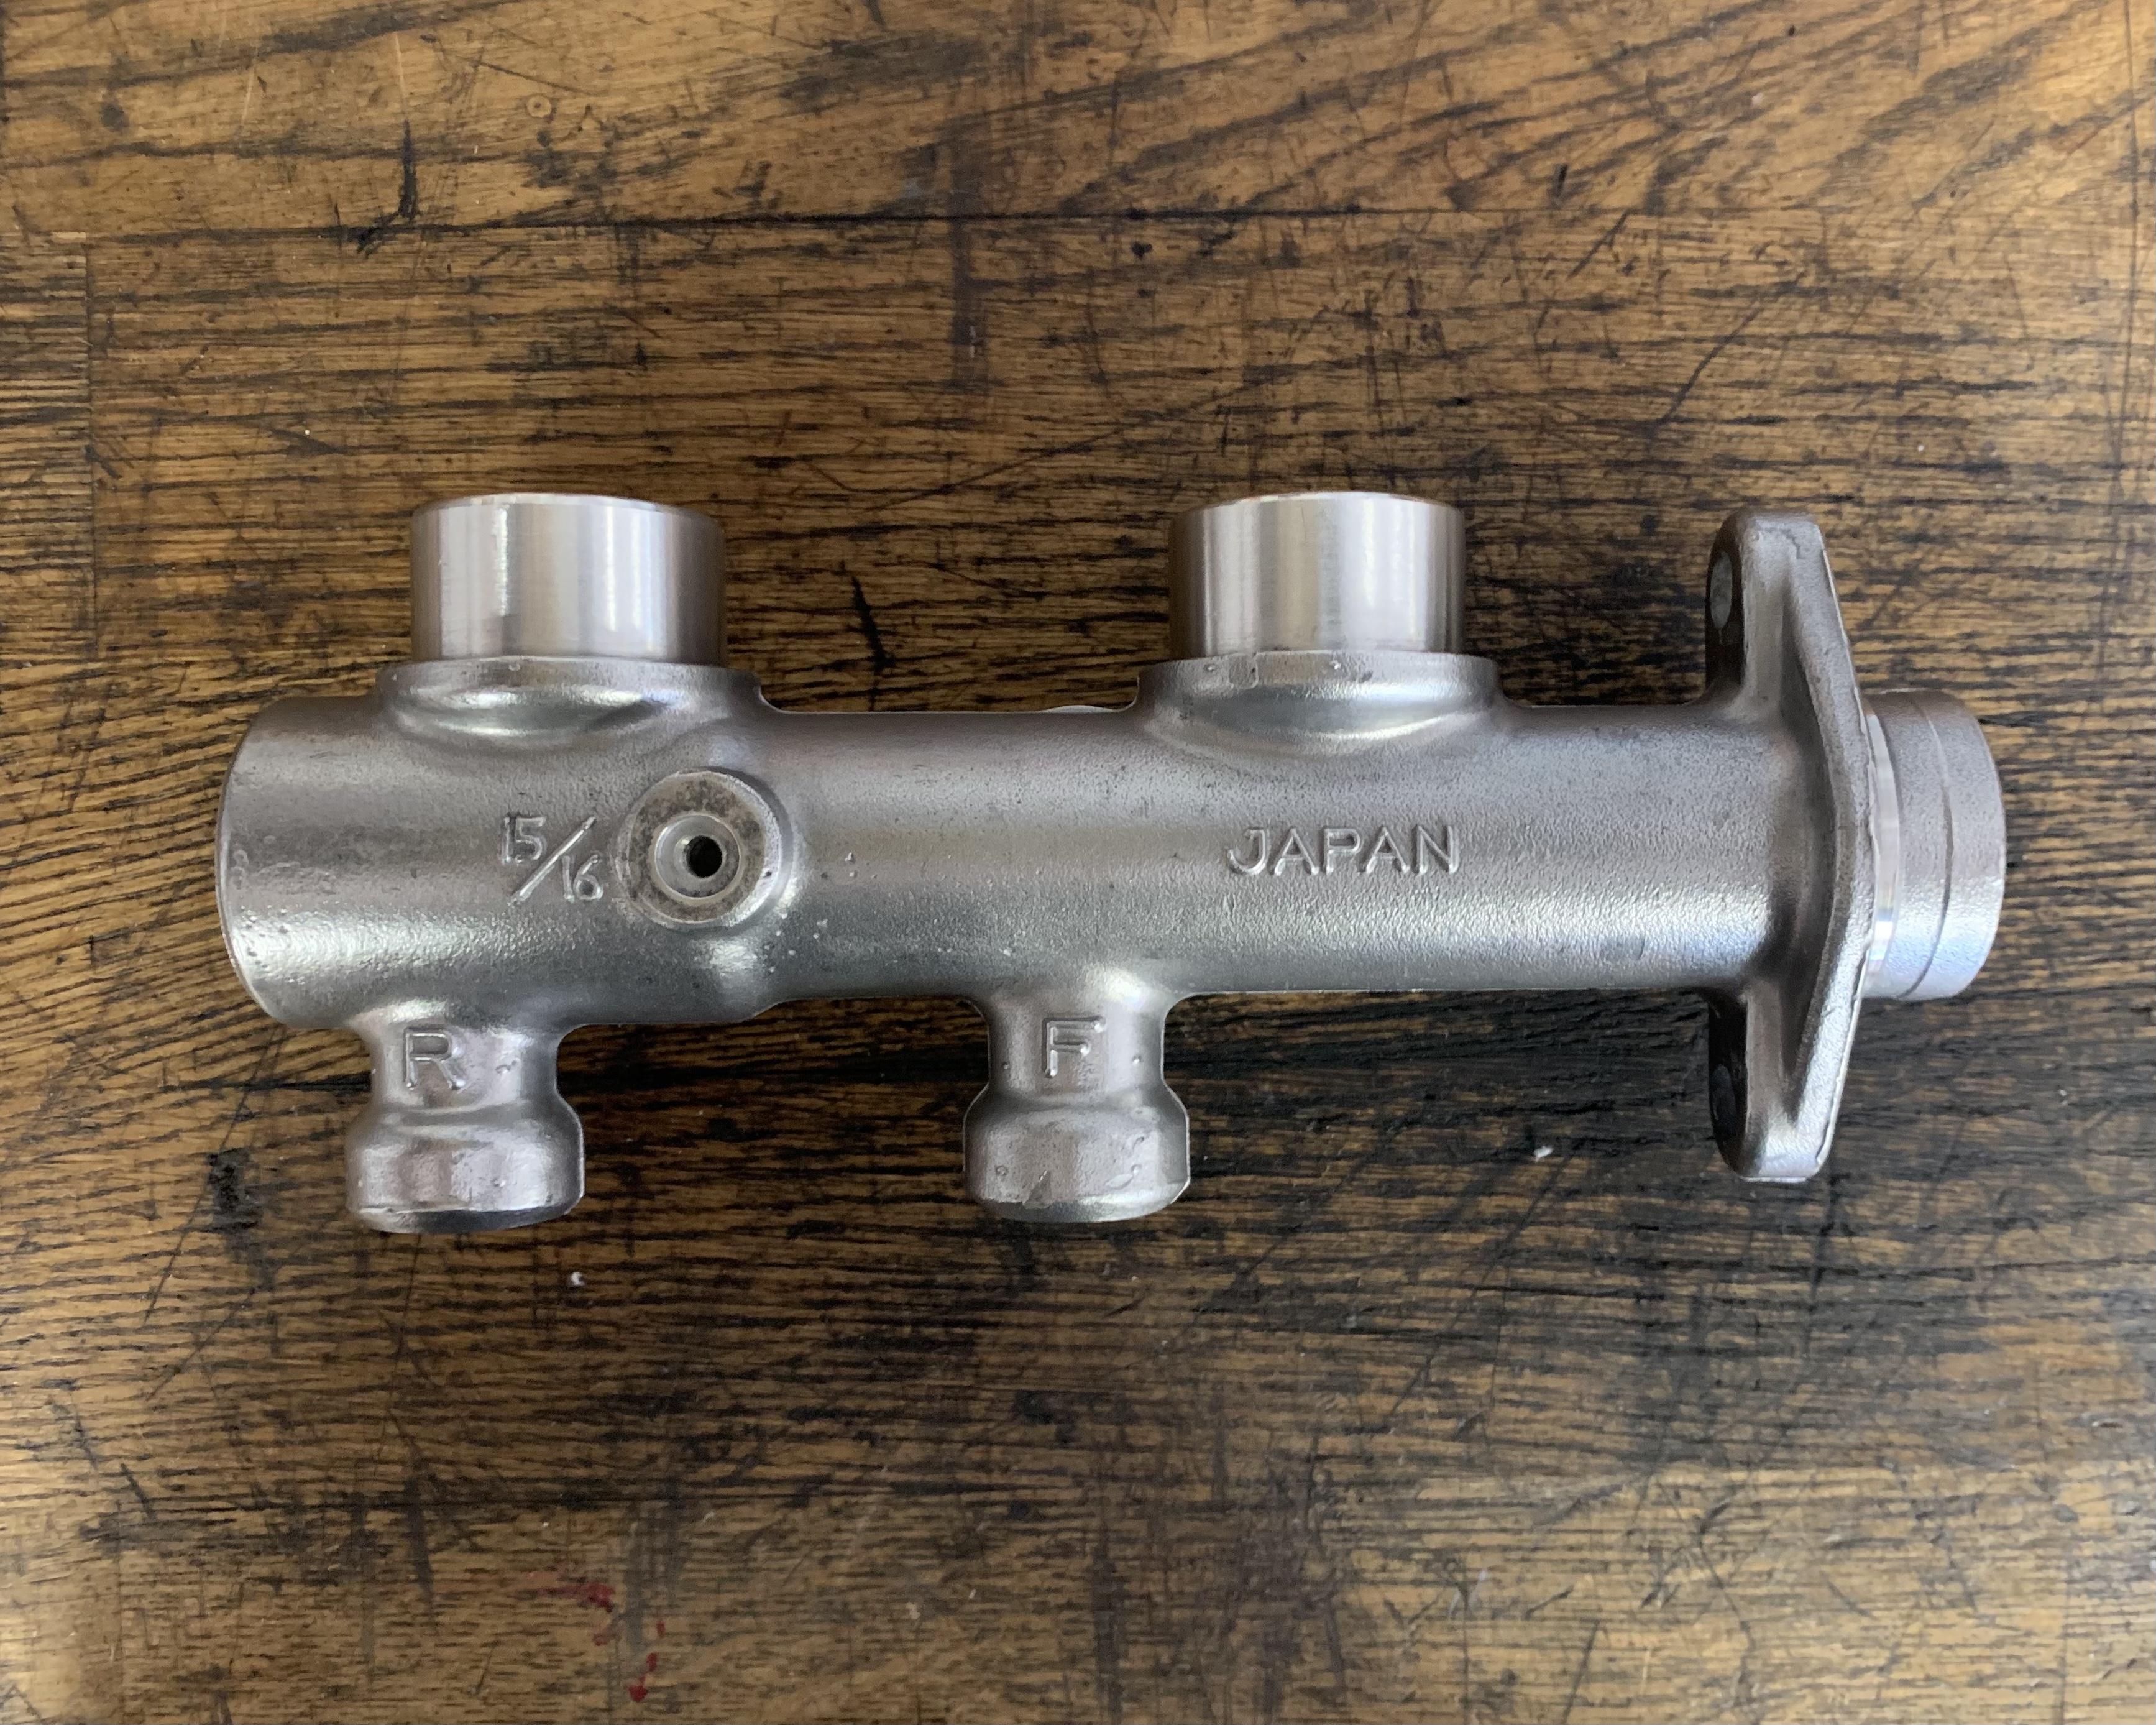
So, I’ve been collecting random brake parts, and one of the things I grabbed was a 79 ZX master cylinder. I am planning to rebuild it, and I have everything, but the reservoirs look... questionable. They still hold fluid and don’t leak, but they aren’t pretty. I know it’s a long shot, but what are the chances I can get a NOS pair from someone who’s been hoarding a set in their basement? I actually only need the big one (46090-P6500) because I have a little one that is close to if not exactly the same as the original (46091-U0502). Its either that or I reuse these or get some tilting tanks or something. PS. This is where I got the part numbers: https://parts.bayridgenissan.com/a/Nissan_1979_280ZX/_51504_8122687/BRAKE-MASTER-CYLINDER/S130_US-201101_460A_1.html

-
This is what I was referring to: https://jdm-car-parts.com/products/datsun-240z-260z-280z-rear-hatch-glass-reproduction-no-international-shipping?variant=13934211694701
-
Has anyone had good luck using a 260 or 280 rear glass in a 240 to solve this problem? A cursory Google search tells me the grid is the same and the only difference is that the glass is 5mm thicker and would need a different rubber seal, but I’m sure it’s more complicated than that. If it works maybe that opens up the available used parts enough to be able to just replace it. at this point I’m thinking I’ll polish the grid off and forgo it. The only other option is the series 1 reproduction, which is $850 before shipping. While I like the look of the vertical grid, I don’t like it that much.
-
4x reproduction Nissan Fairlady Z432 wheels in aluminum
Matthew Abate commented on Sean Dezart's advert in Completed Ads
 Can you tell me the inside diameter of the back of the wheels? I want to see if there is clearance for balancing weights around my rear calipers. I’d like to know this for the 7” wide wheels as well.
 -
Does anyone know if the OEM glass pieces have any films on them? If repairing the grid isn't an option, I may have it polished, but I don't want to burn through any films that may have been put on either side.
-
True, but new cars have this, so it must be possible. Maybe it's up to the place that does the tinting.
-
A couple of thoughts I had while reading through this thread: Can we can an inventory of all of the materials tried so far (stencil tape, various paints, etc.) and a review of their efficacy? I can't look right now, but I think maybe the OEM grid has a slight curve to it that makes the lines look straight on the curved glass. If I am correct, then the Frost Fighter may pose a slight problem in looking correct. Has anyone done a masking test to see which tapes do the best job? I am intrigued by the cellophane tape idea mentioned earlier. One thing I have been considering is recreating the grid in software, having a vinyl sticker mask made from that, and airbrushing the paint on after I apply the vinyl sticker. Then I won't need to remove the grid that is there. I just need to find. the best paint. However making the mask with tape might be faster and cheaper. If I make the vinyl sticker it could be reproduced and distributed. Another thing I am trying to find is a company that does these restorations. I would much rather take it to a pro to have restored. My grid is about 20% missing due to a sticker that pulled it off when I removed it. I am considering tinting my glass after I fix the grid in order to protect it. My car is a resto-mod with a bunch of non-reversible changes, so factory original isn't a concern for me. Those who are worried about the paint coming off from cleaning might consider this. (I am also considering buffing the grid off and adding a third brake light). Last thought, take a look at the electric guitar world. Conductive paint is used to lower interference in the pickups to get a cleaner sound: https://www.stewmac.com/electronics/shielding/conductive-shielding-paint.html
-
I'm reviving this dead thread because I have the same question as the OP, which was never answered. Has anyone installed a kit from Restored Air? I was looking at the Bantam and the Vapir 2 and Vapir 3 S. I am also looking at this one by Auto AC Solutions.
-
I could really use some help understanding the interior fabric for these cars, and the options for my year in particular (1973). I started a separate thread about this: https://www.classiczcars.com/forums/topic/64974-understanding-original-carpet-interior/ If anyone has good photos of how the sills are supposed to be covered, the differences between the various carpet kits, how the spare tire well is trimmed, etc., I would really appreciate it.
-
I am looking into the options for carpet in my 7/1973 240z and have some questions about what was original. My car didn’t have much of the interior when I bought it. It was kind of a husk on the inside. In reading about the carpet options it seems that generally people think the Newark Auto 11-piece kit is the best, followed by their 7-piece kit. Please disabuse me if this assumption if I’m wrong, but it’s what a few days of Google has turned up. I’m also seeing that “some cars” had rubber in place of 4 of the pieces, hence the 7-piece kit. Does this mean not all Zs had the diamond quilted vinyl on the transmission hump? What was happening on the outer edges at the sills? I have the trans hump vinyl in a box, and my firewall had what seems like mat-board behind the dash, but not carpet. I’ve put Dynamat down on the floors and will be putting foil-backed insulation over that. I may put carpet padding between that and that carpet, but either way I will need to go to the sills with something, whether its carpet or the afore mentioned rubber (?). Advice and photos of your setup are appreciated.
-
Thanks!
-
Sending you a direct message.
-
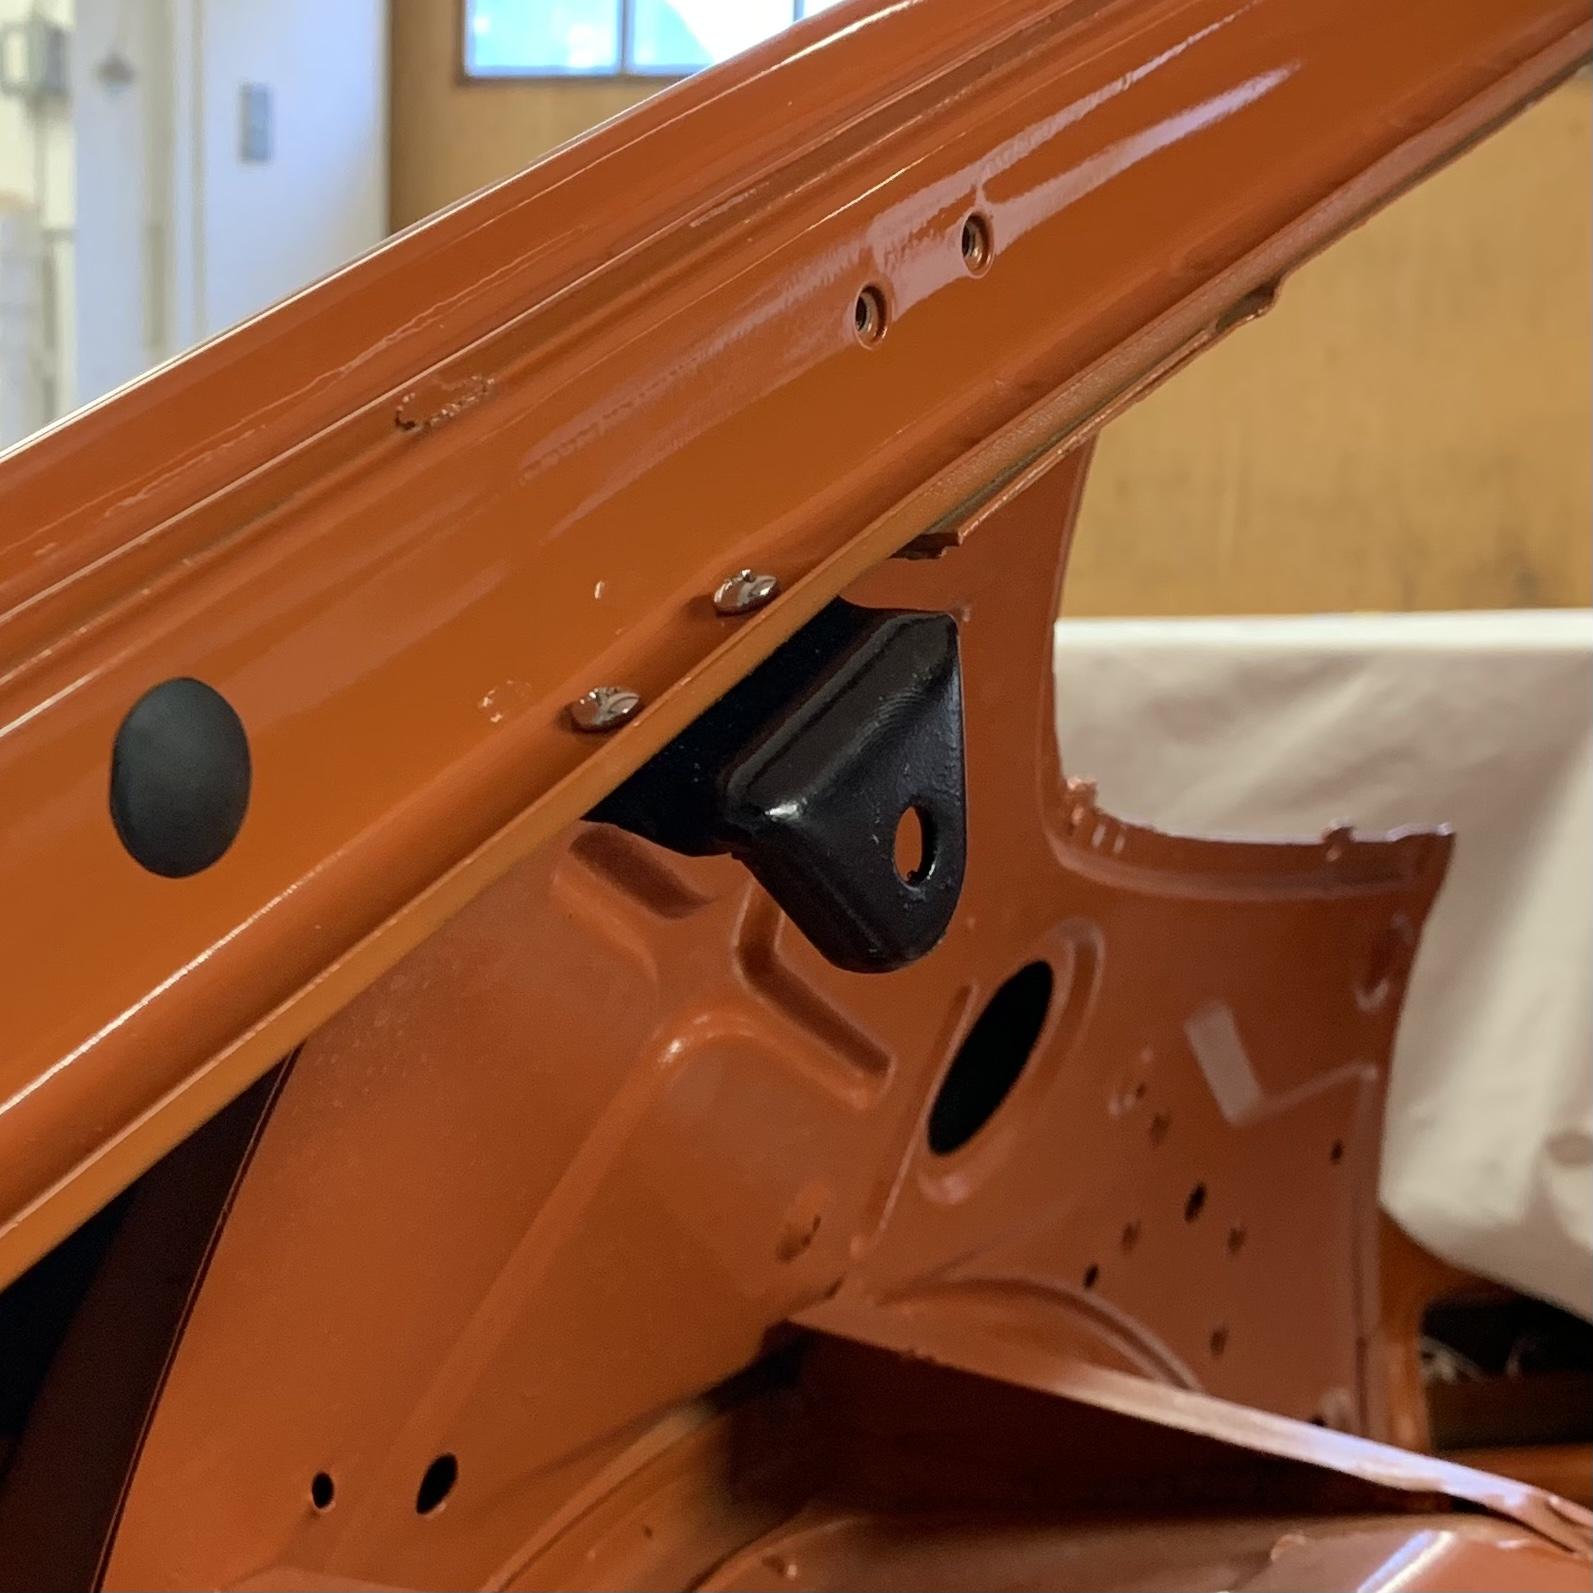
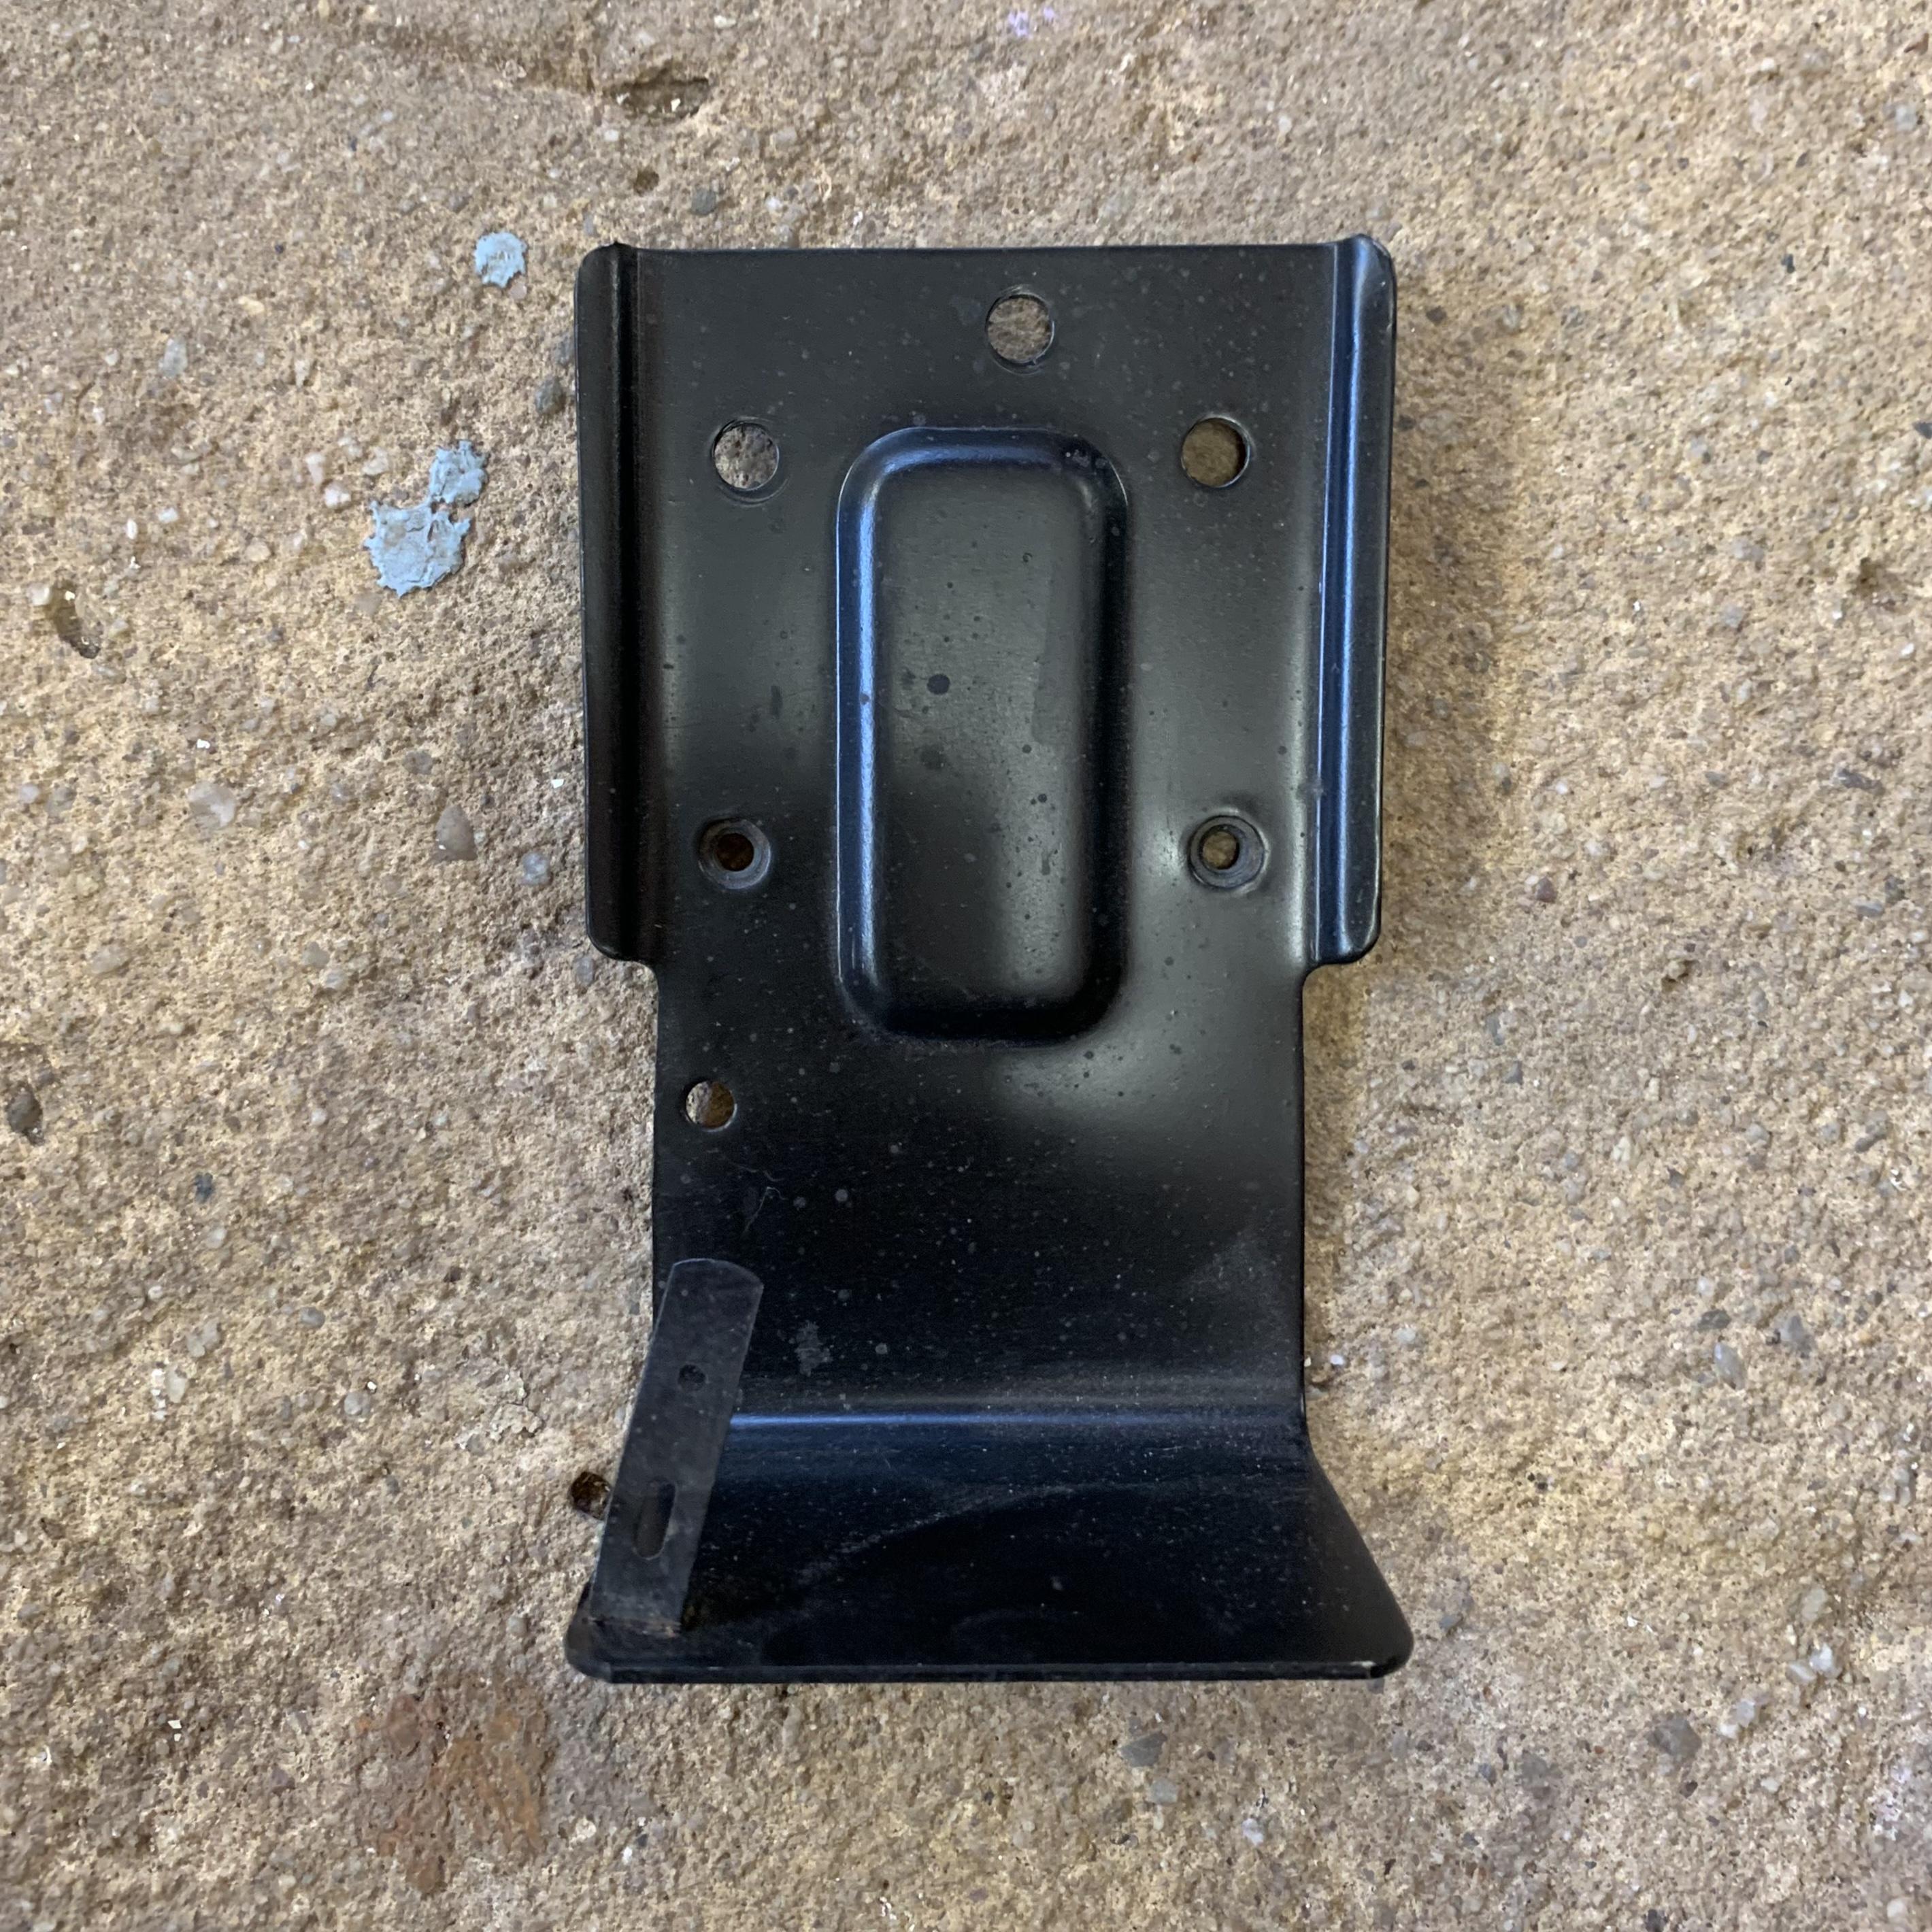
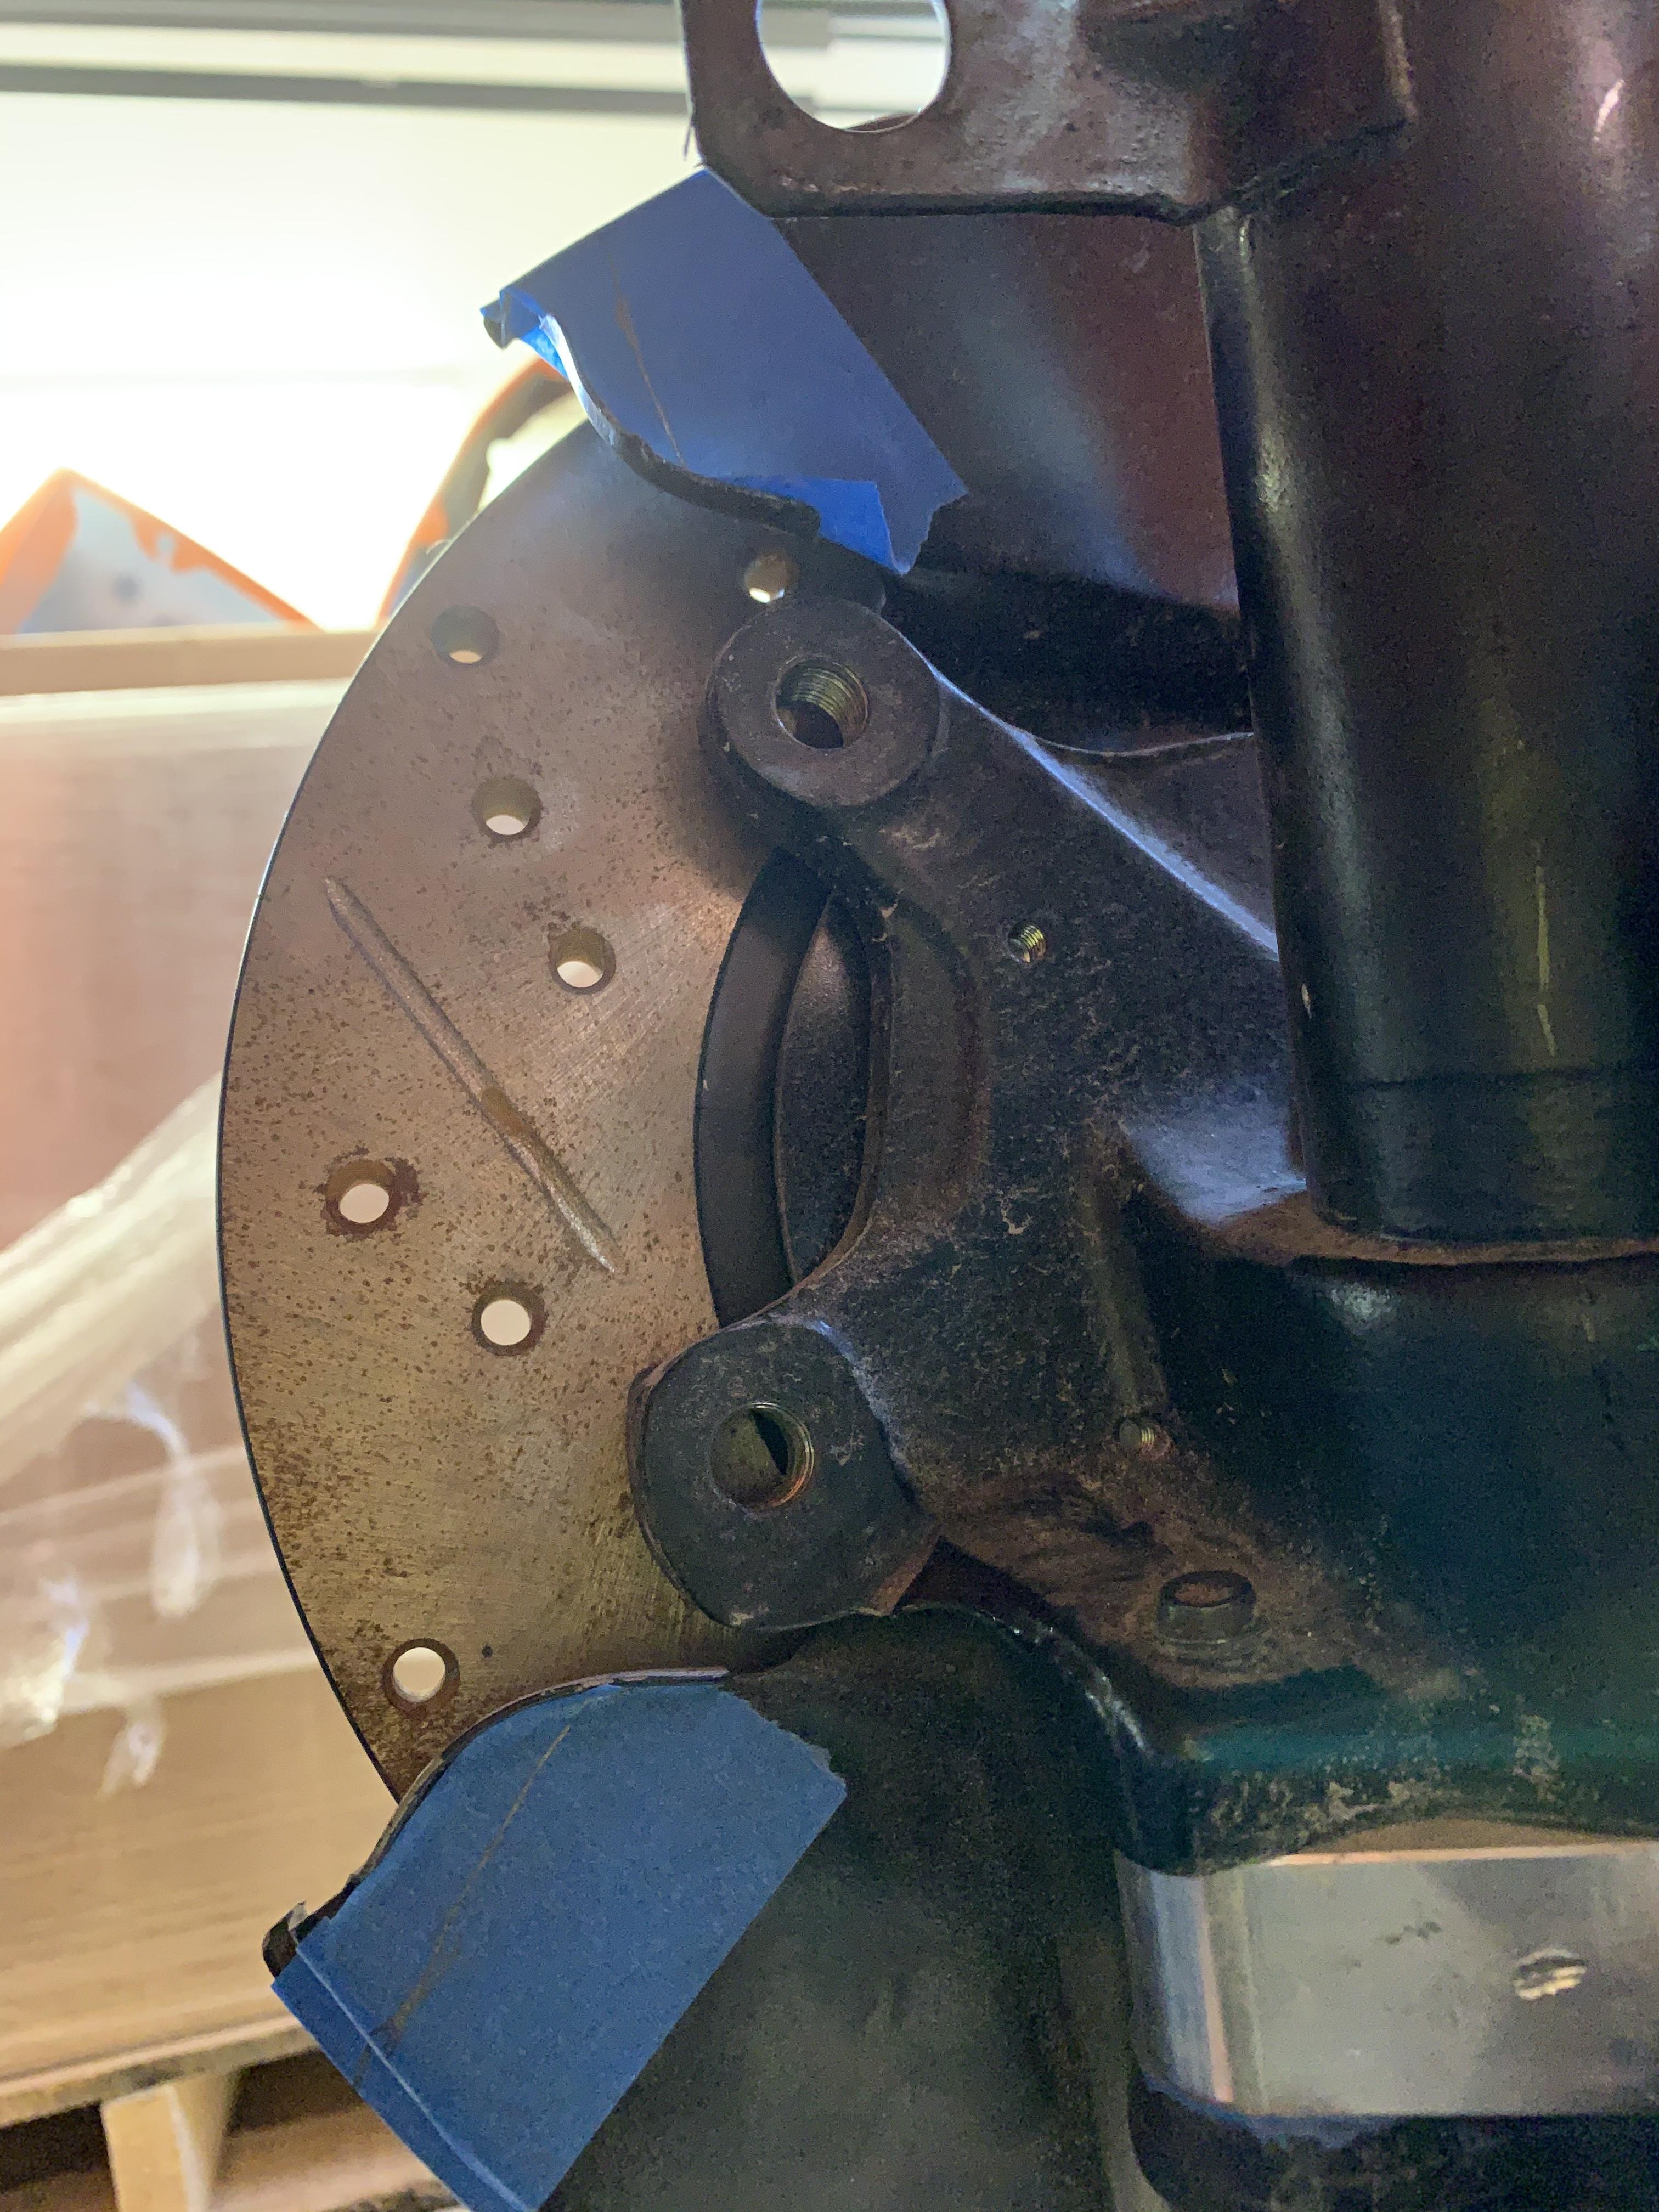
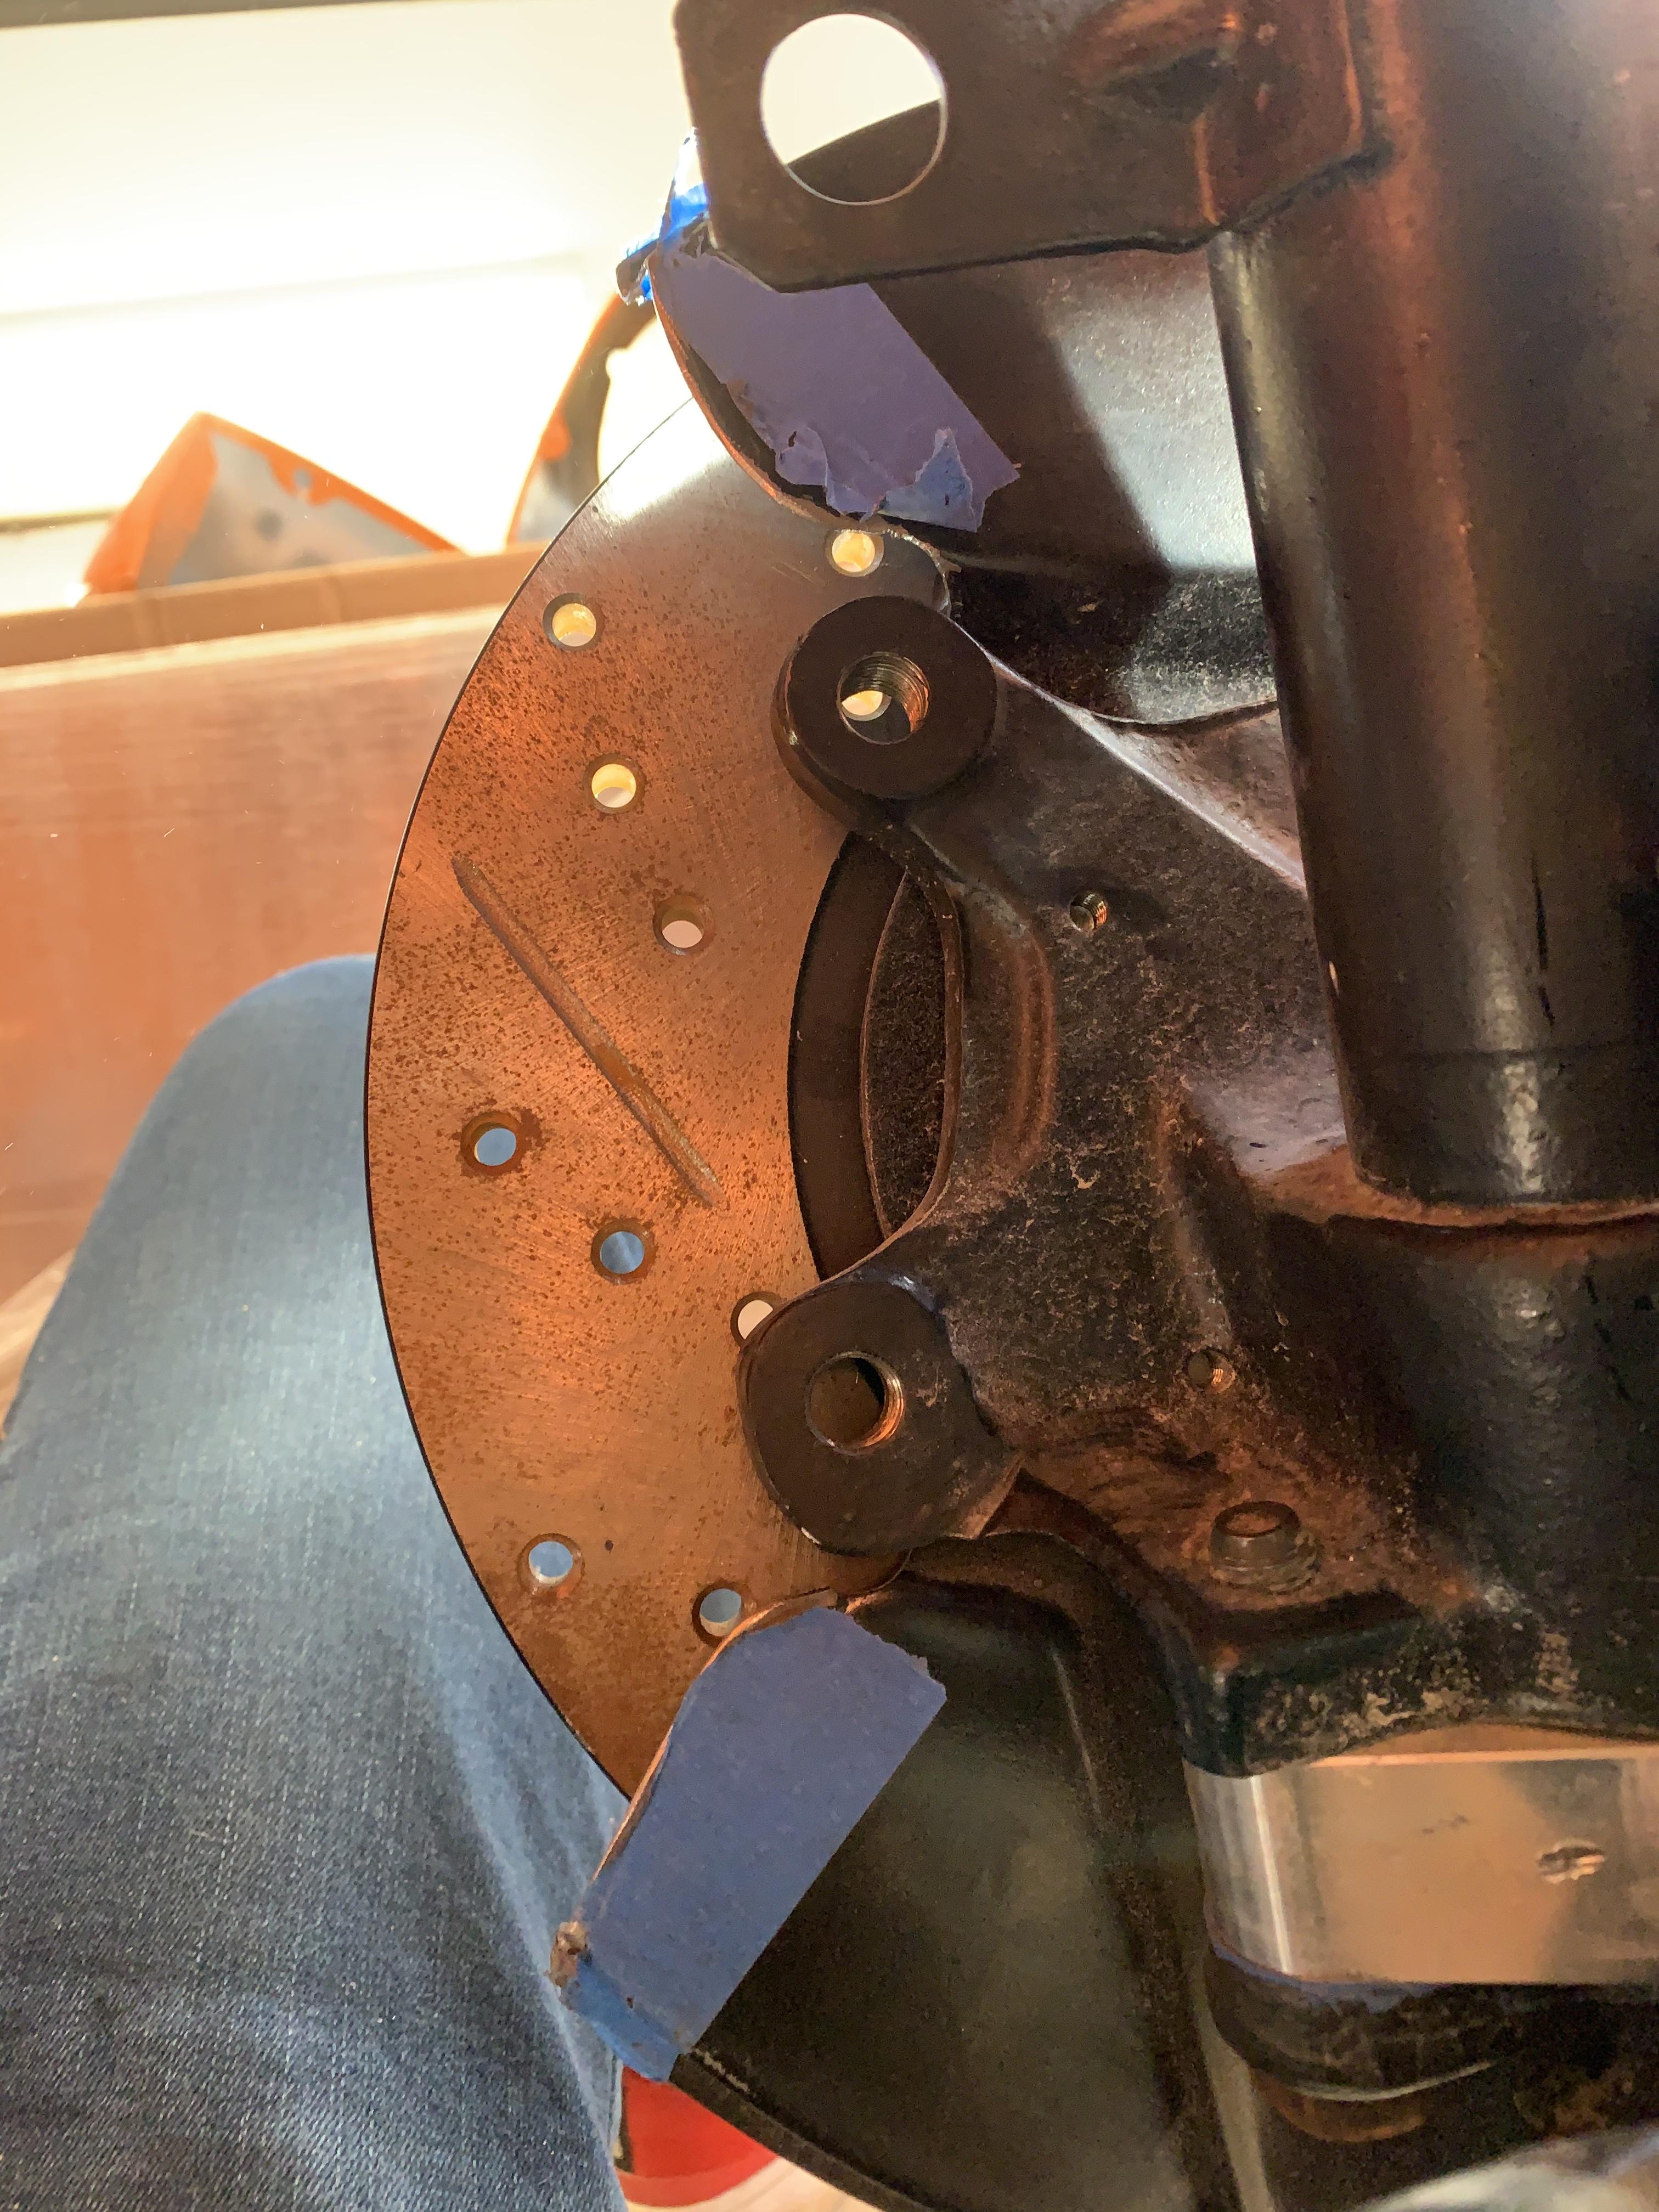
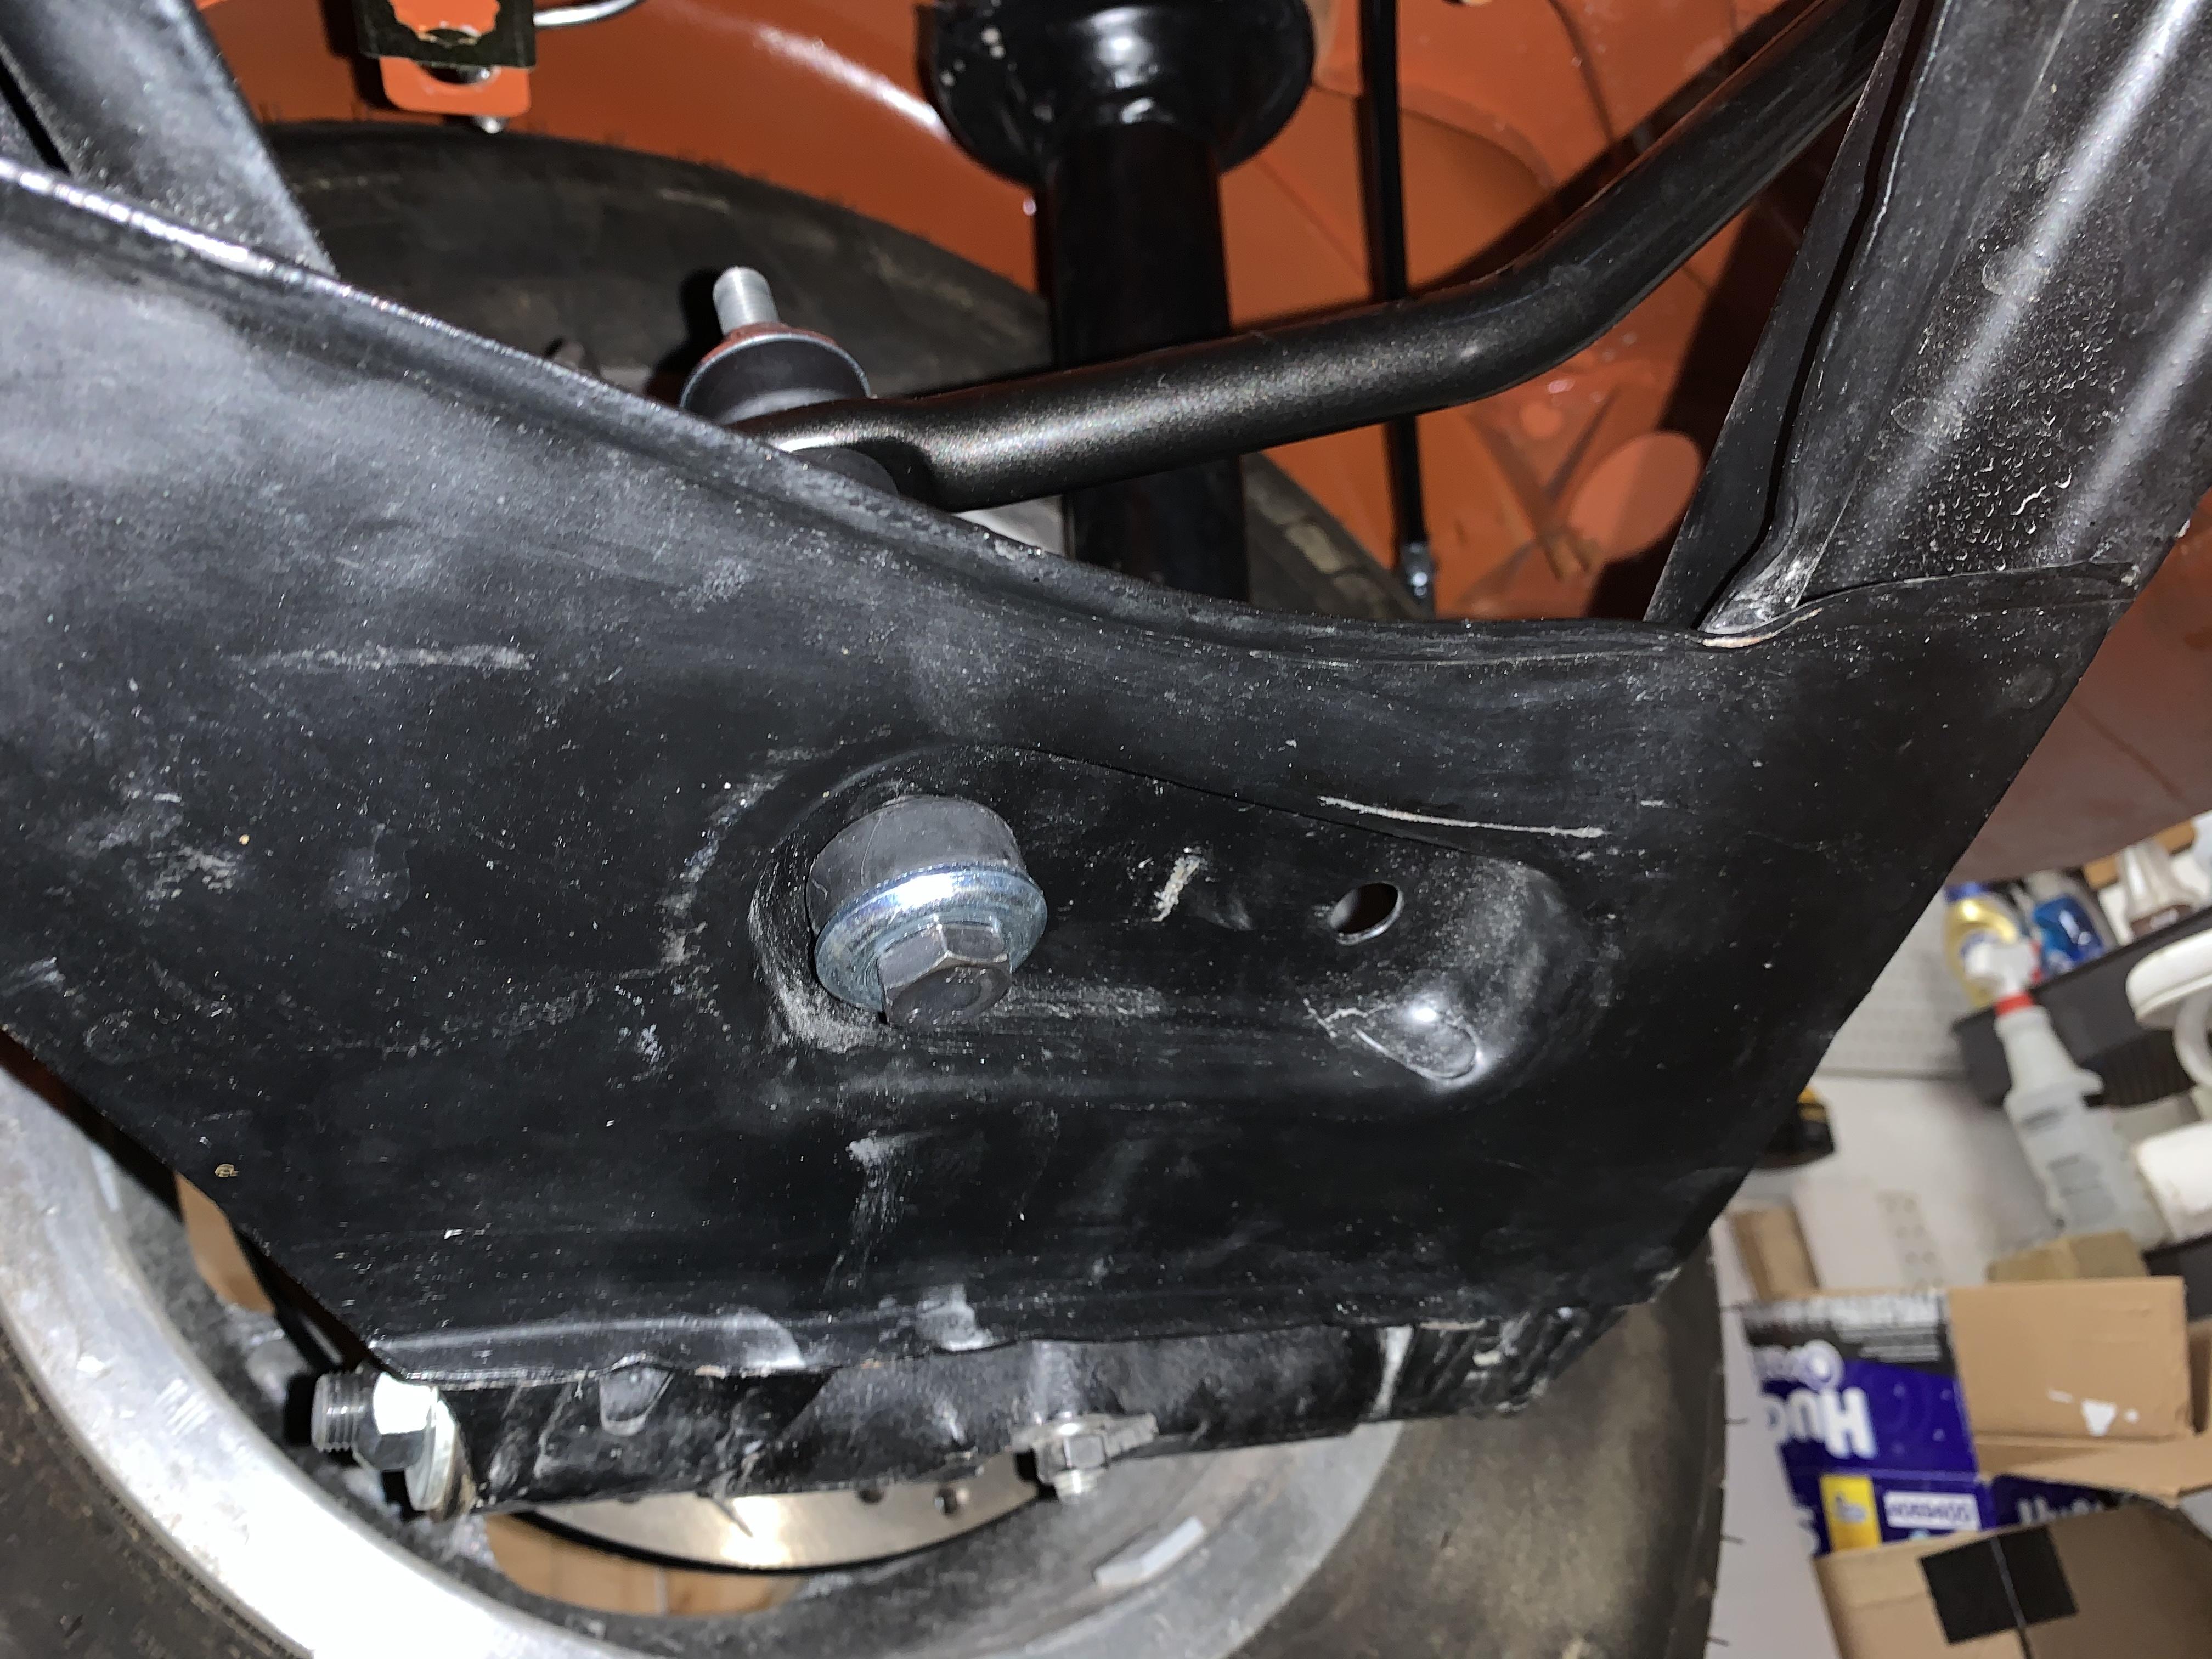
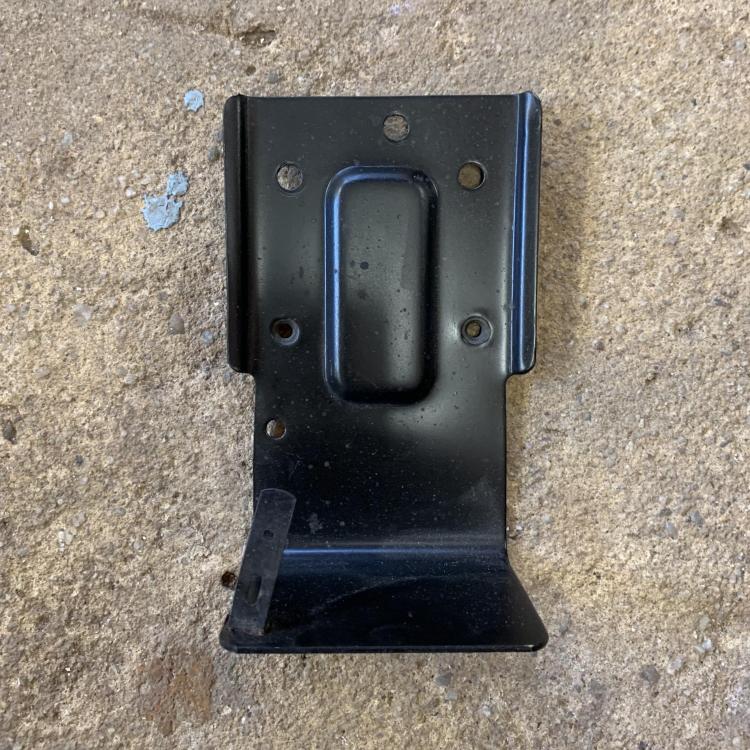
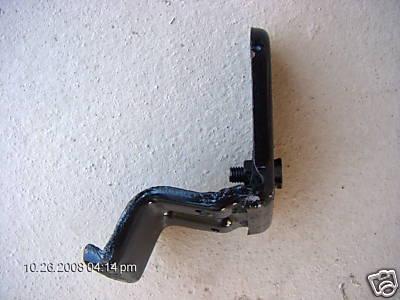
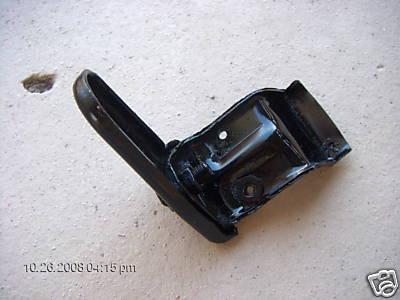
Stumped on two things: First, can someone remind me what this is and where it goes? I can’t find it in my notes: Second, does anyone know where I can get the piece that the rear hatch lowers strut bracket bolts to? I’m talking about the piece that is up under the body discussed in this thread and looks like this: I know I have one somewhere but can’t find it. I have a feeling I am going to have to fabricate one.
-
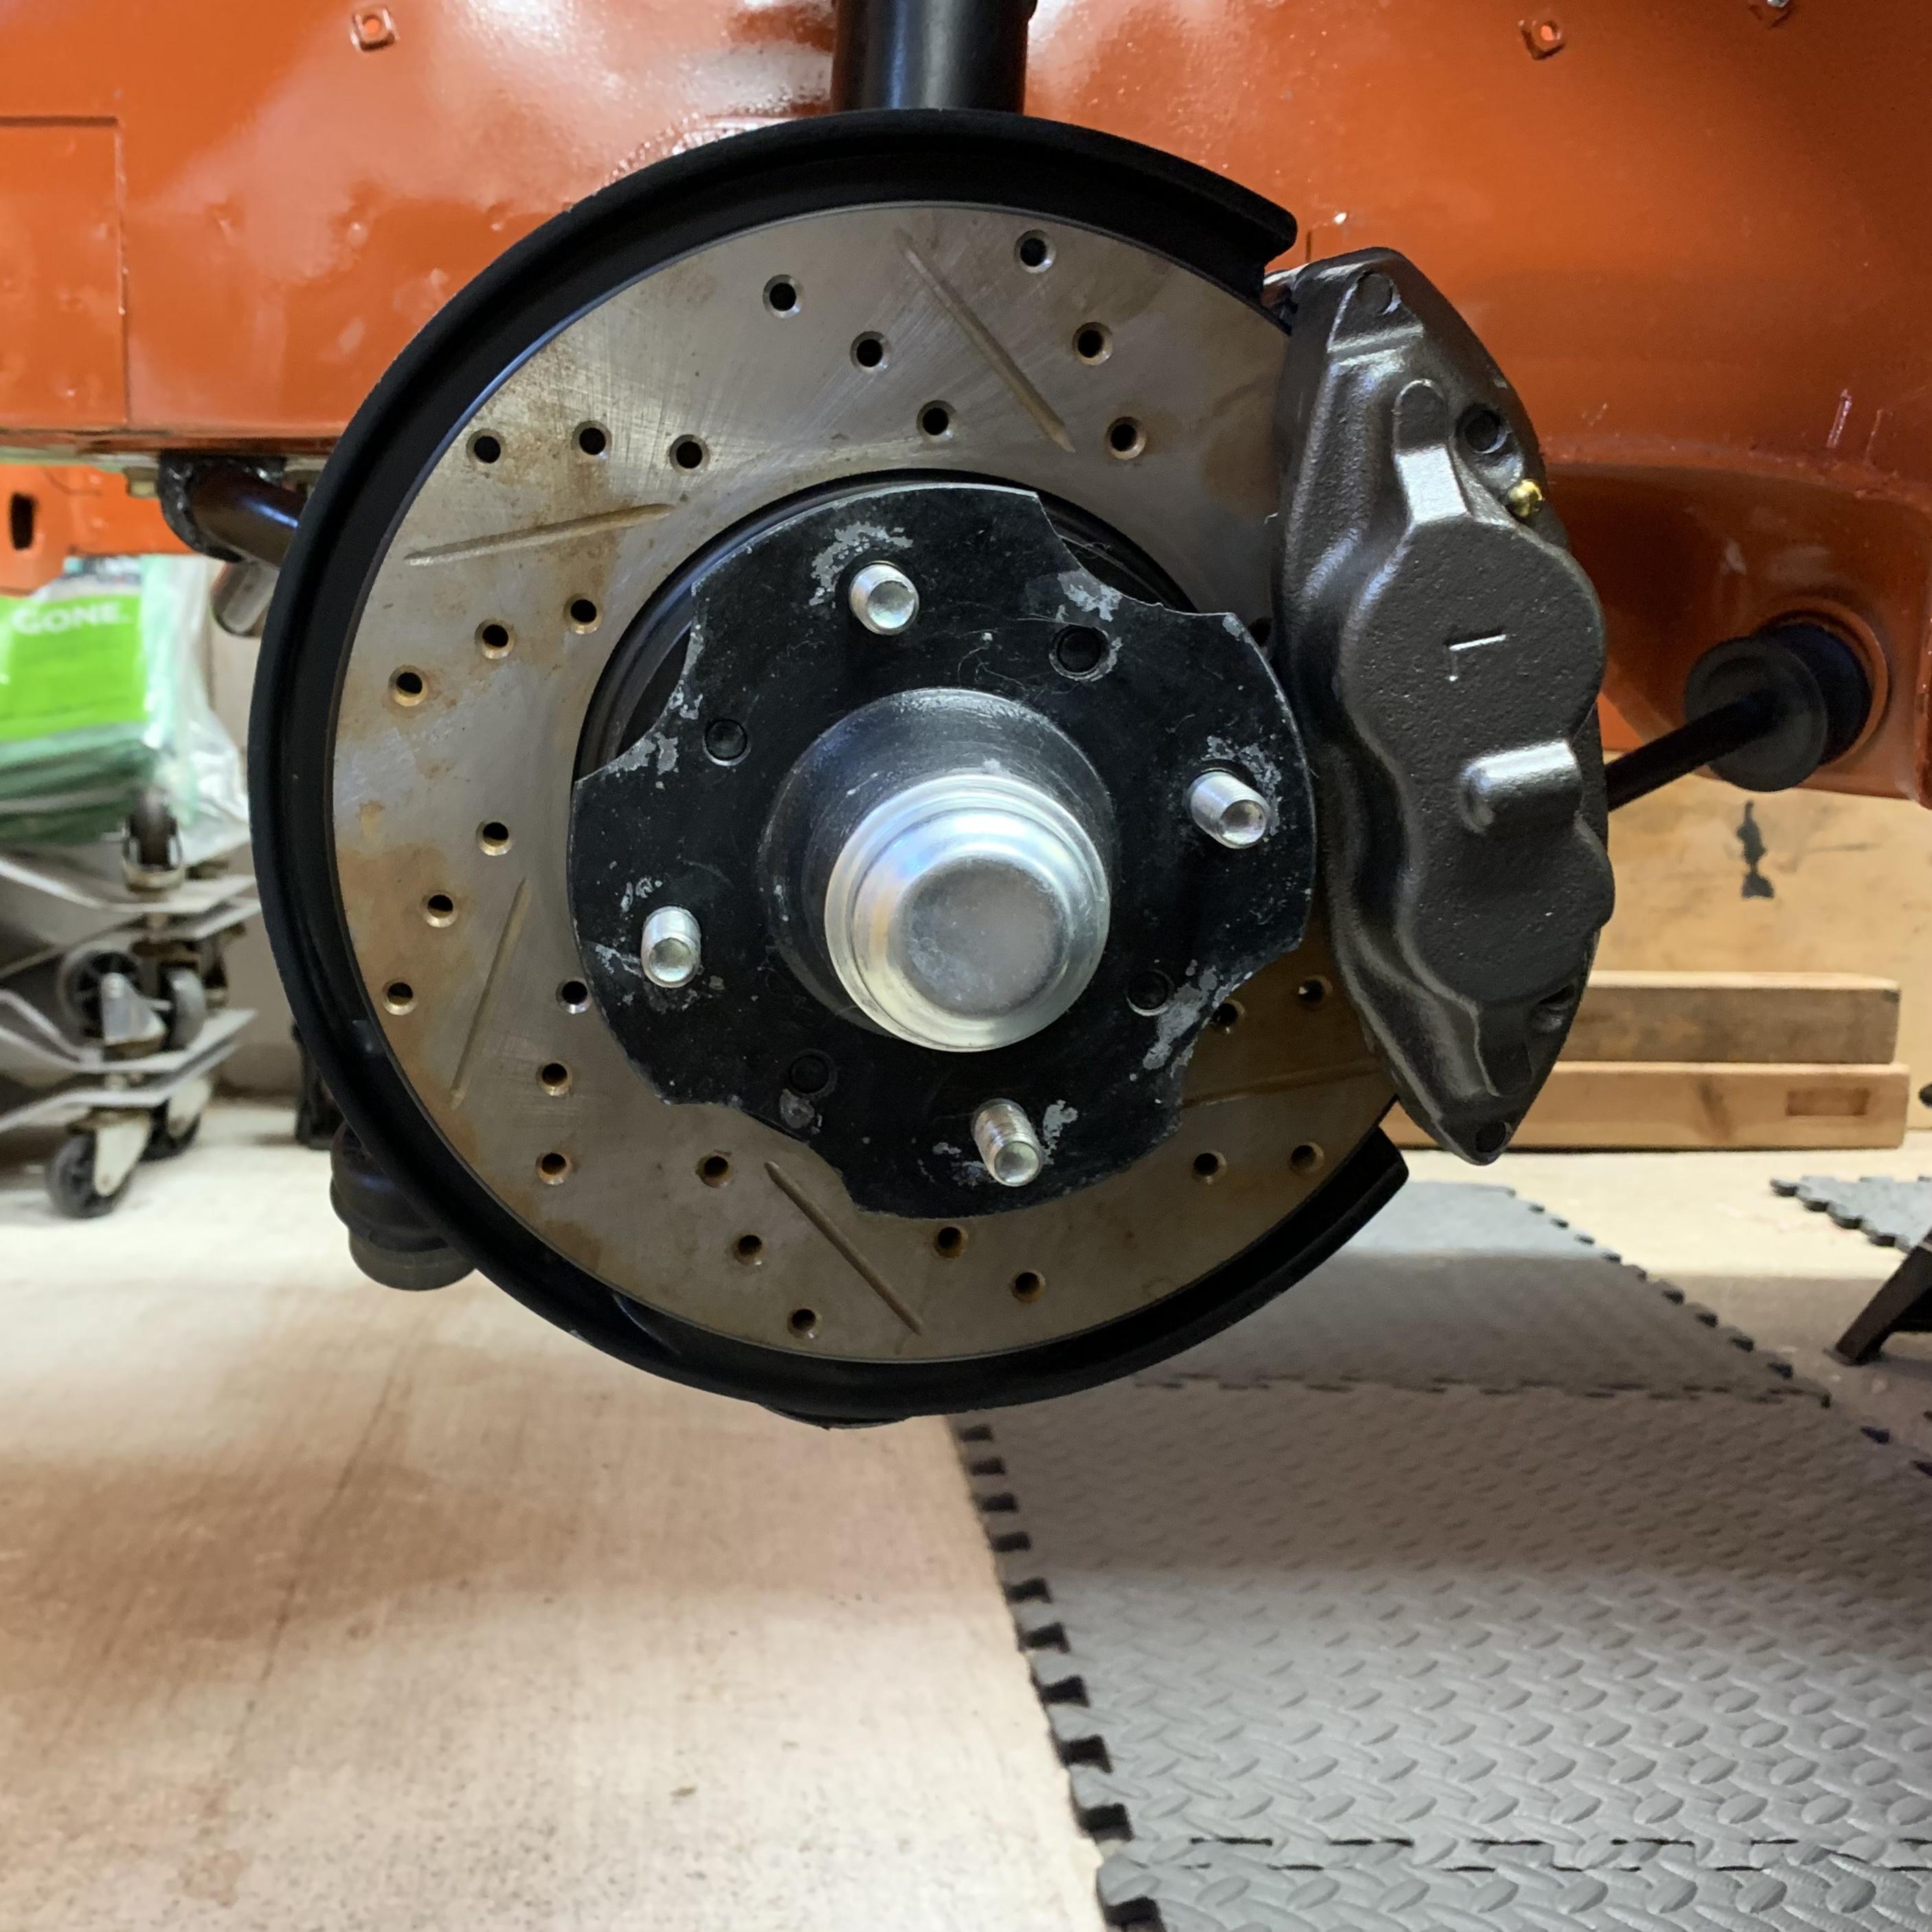
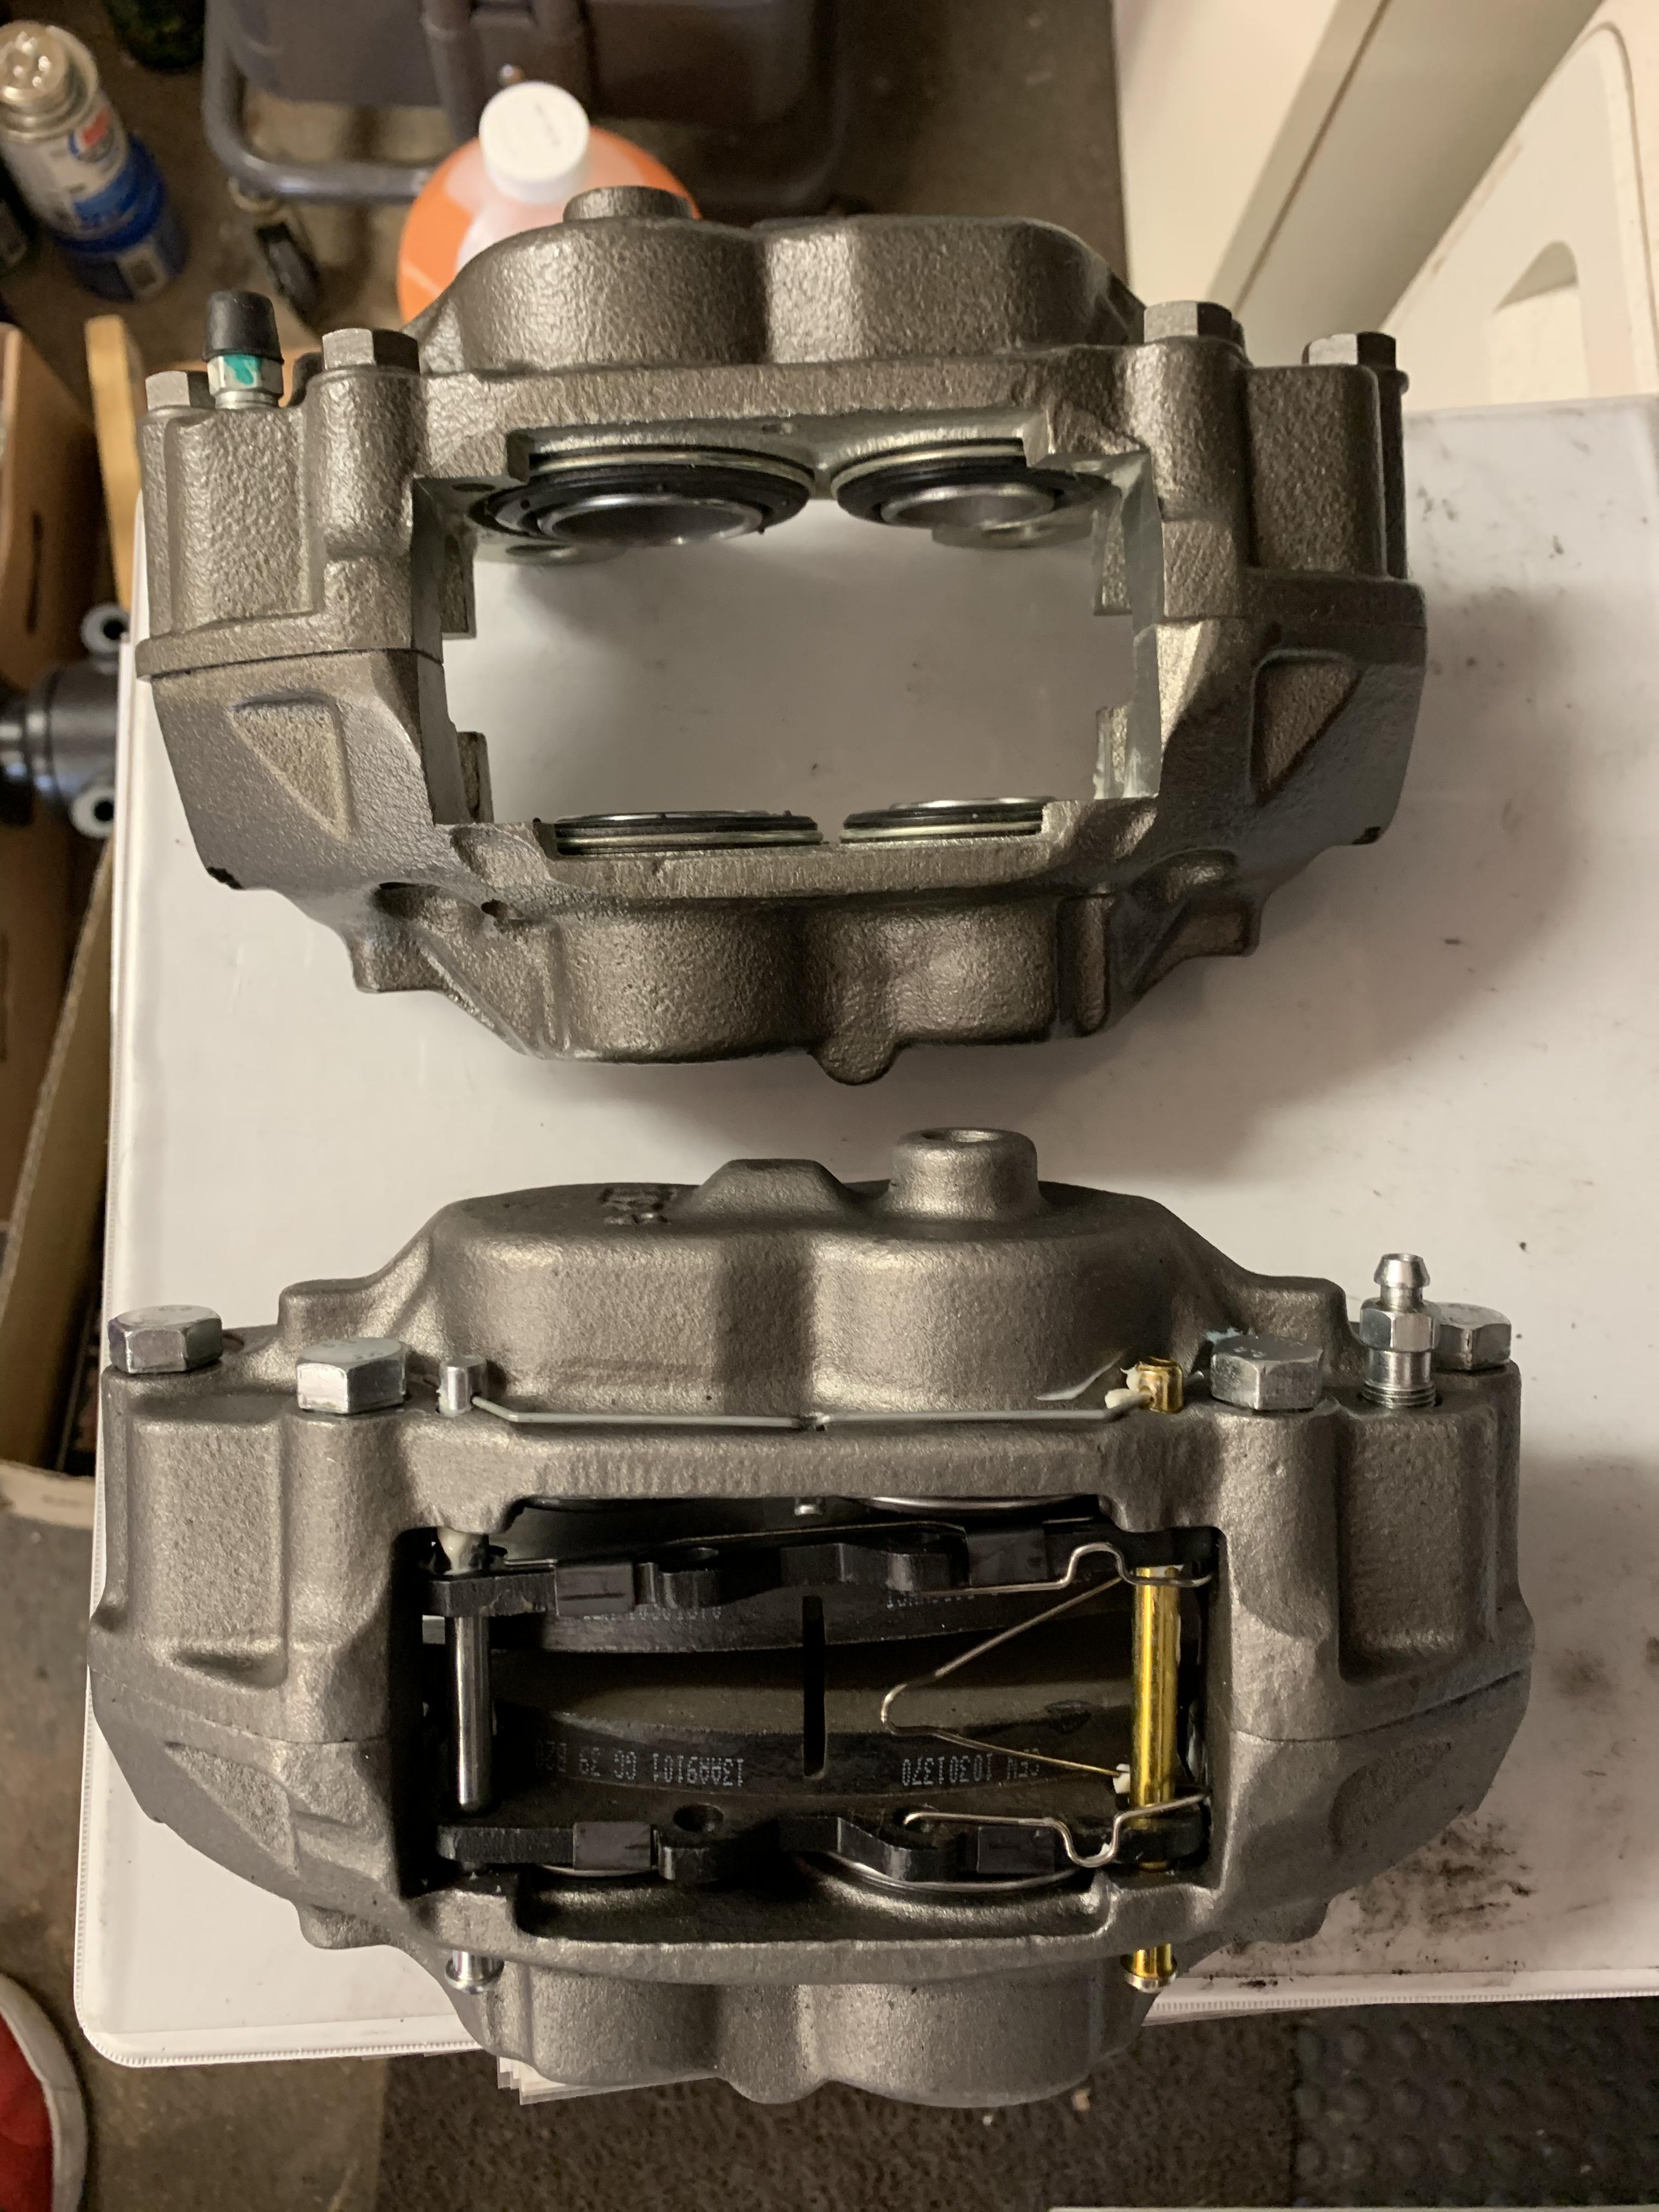
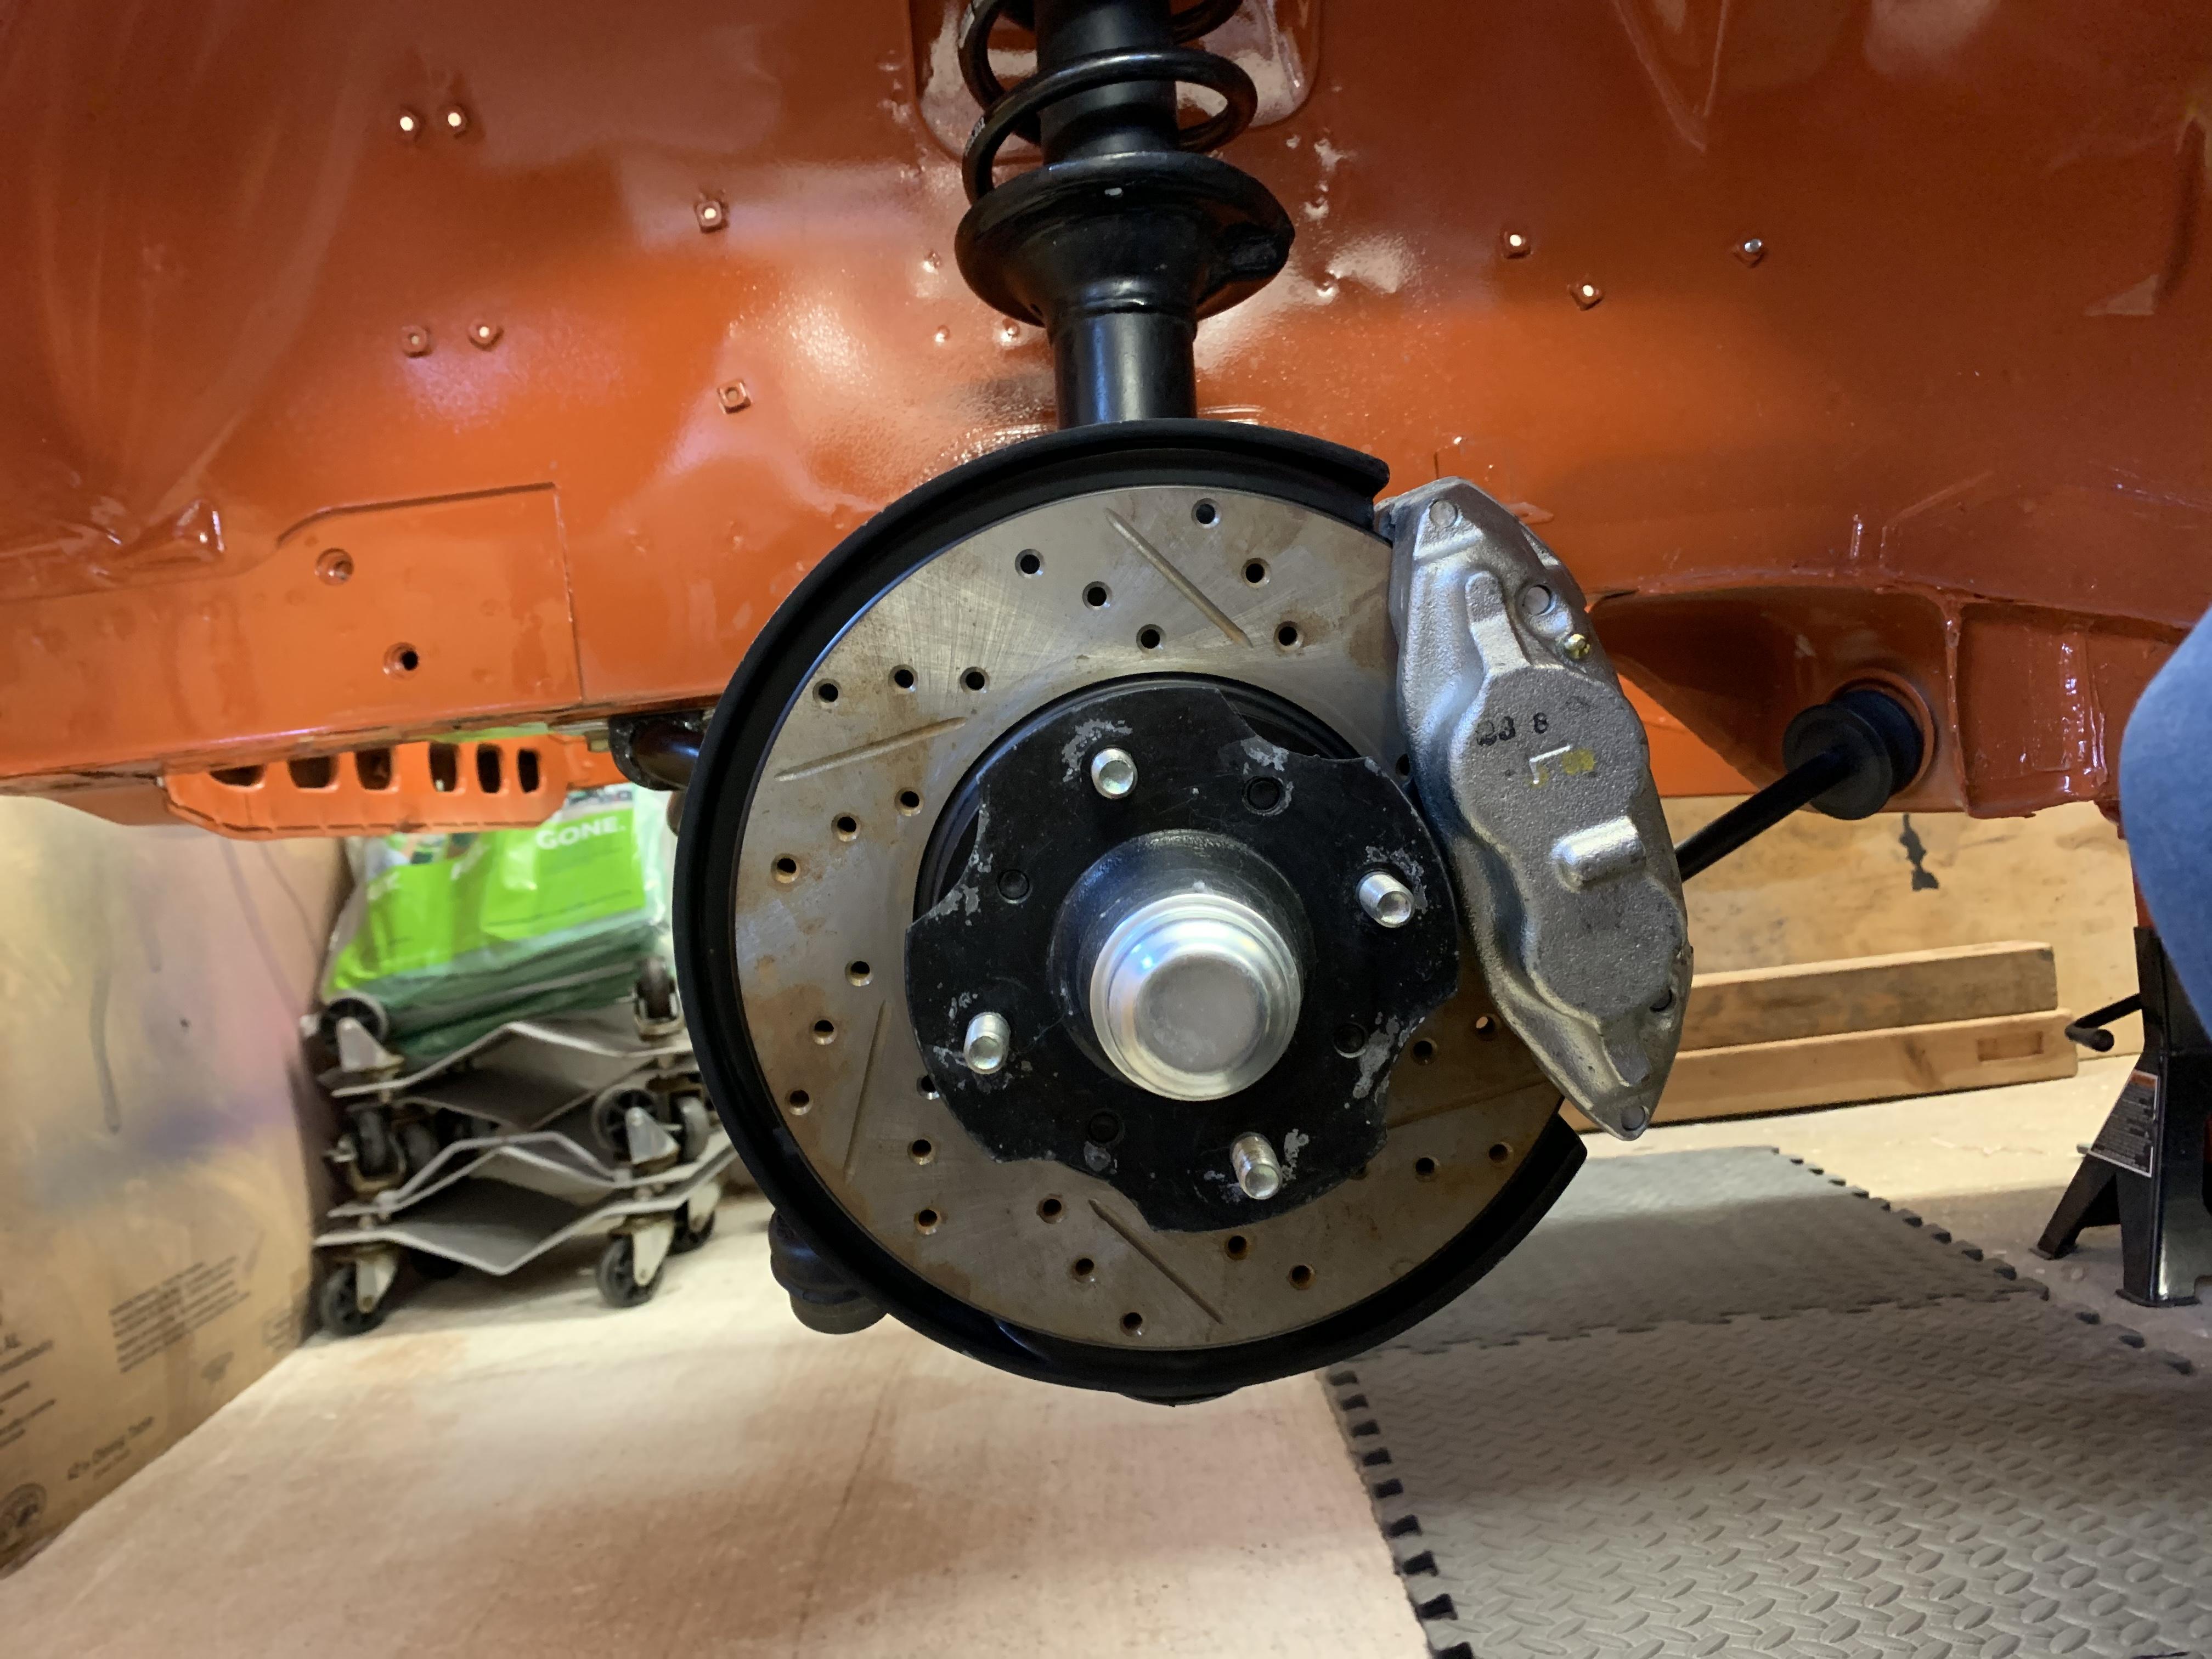
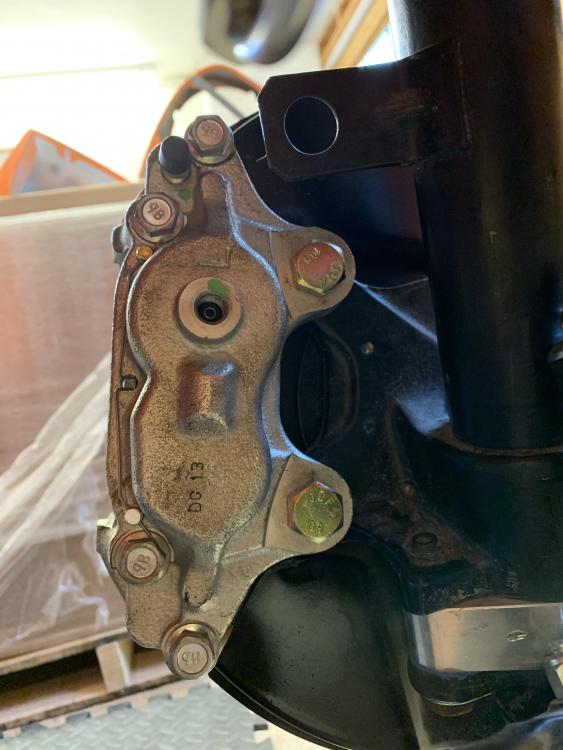
Gave the Toyota calipers a quick spay to make them match the maxima calipers... @Zed Head was right about the rears being on wrong. Got that fixed. Unfortunately I can’t find wheel weights that will work on these little 14” Shelby rims without hitting the calipers. Unless I can find some that are 2mm thick I might have to get new wheels before this car can go on the road.


-
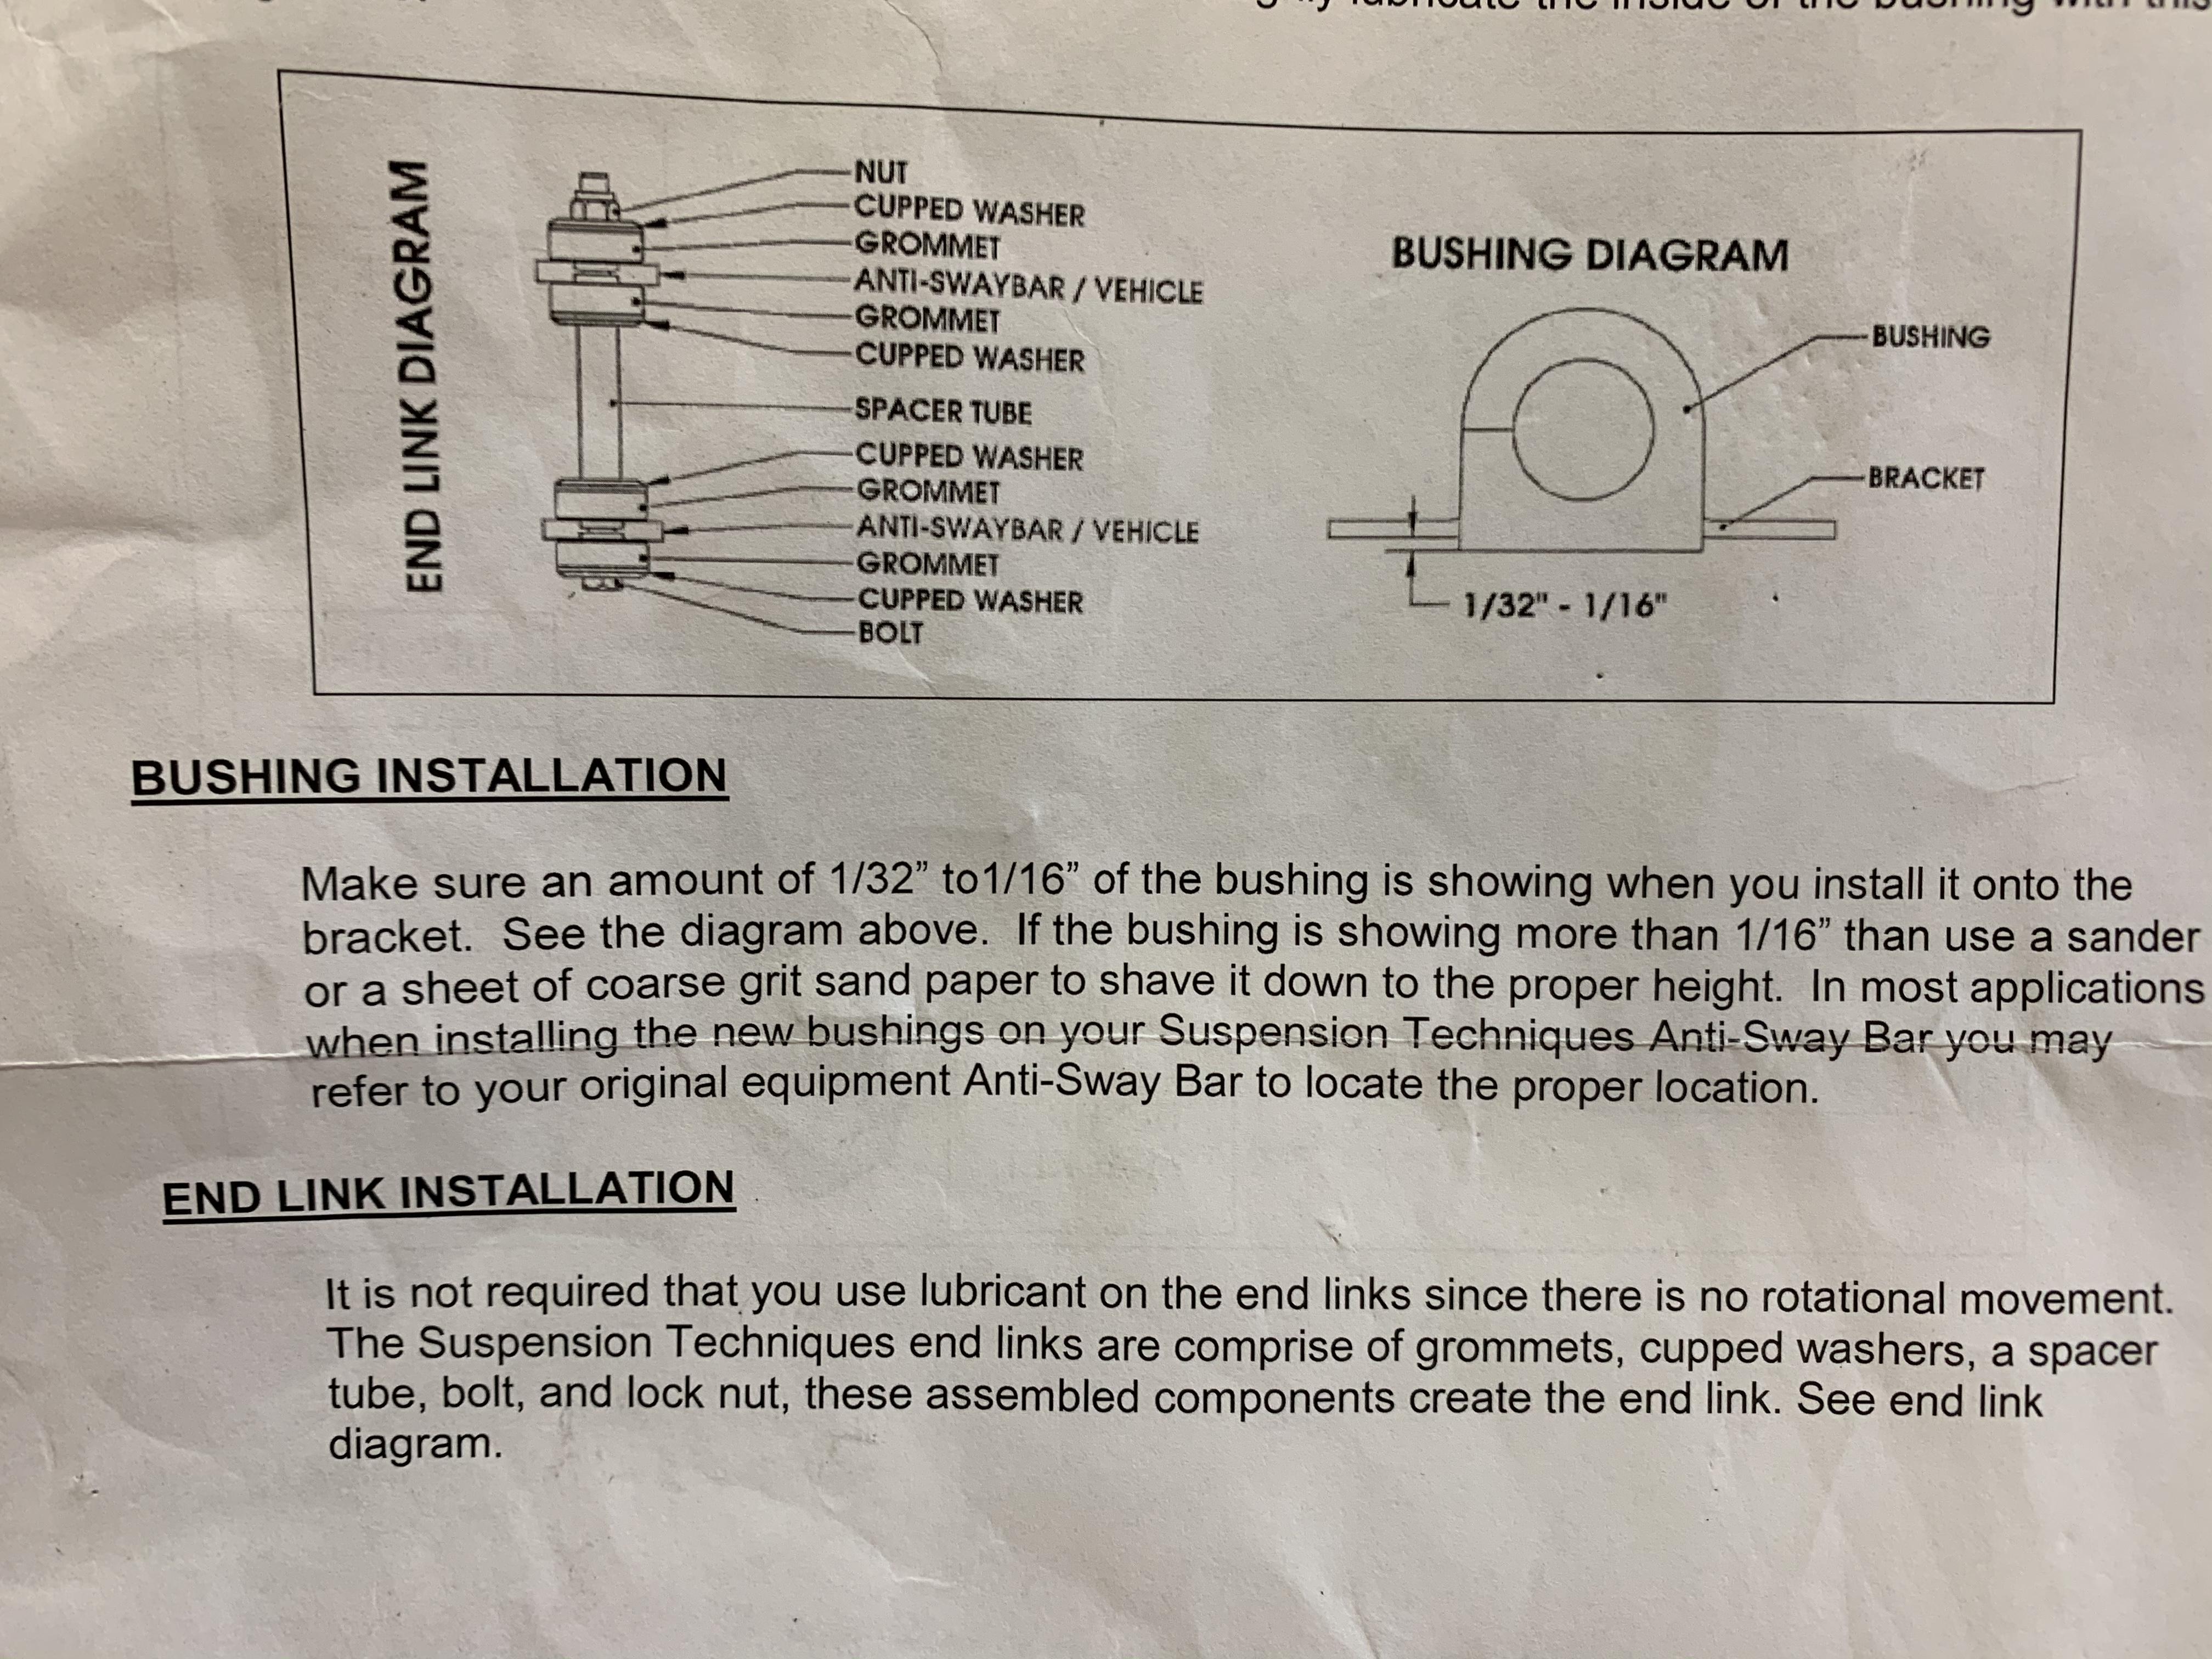
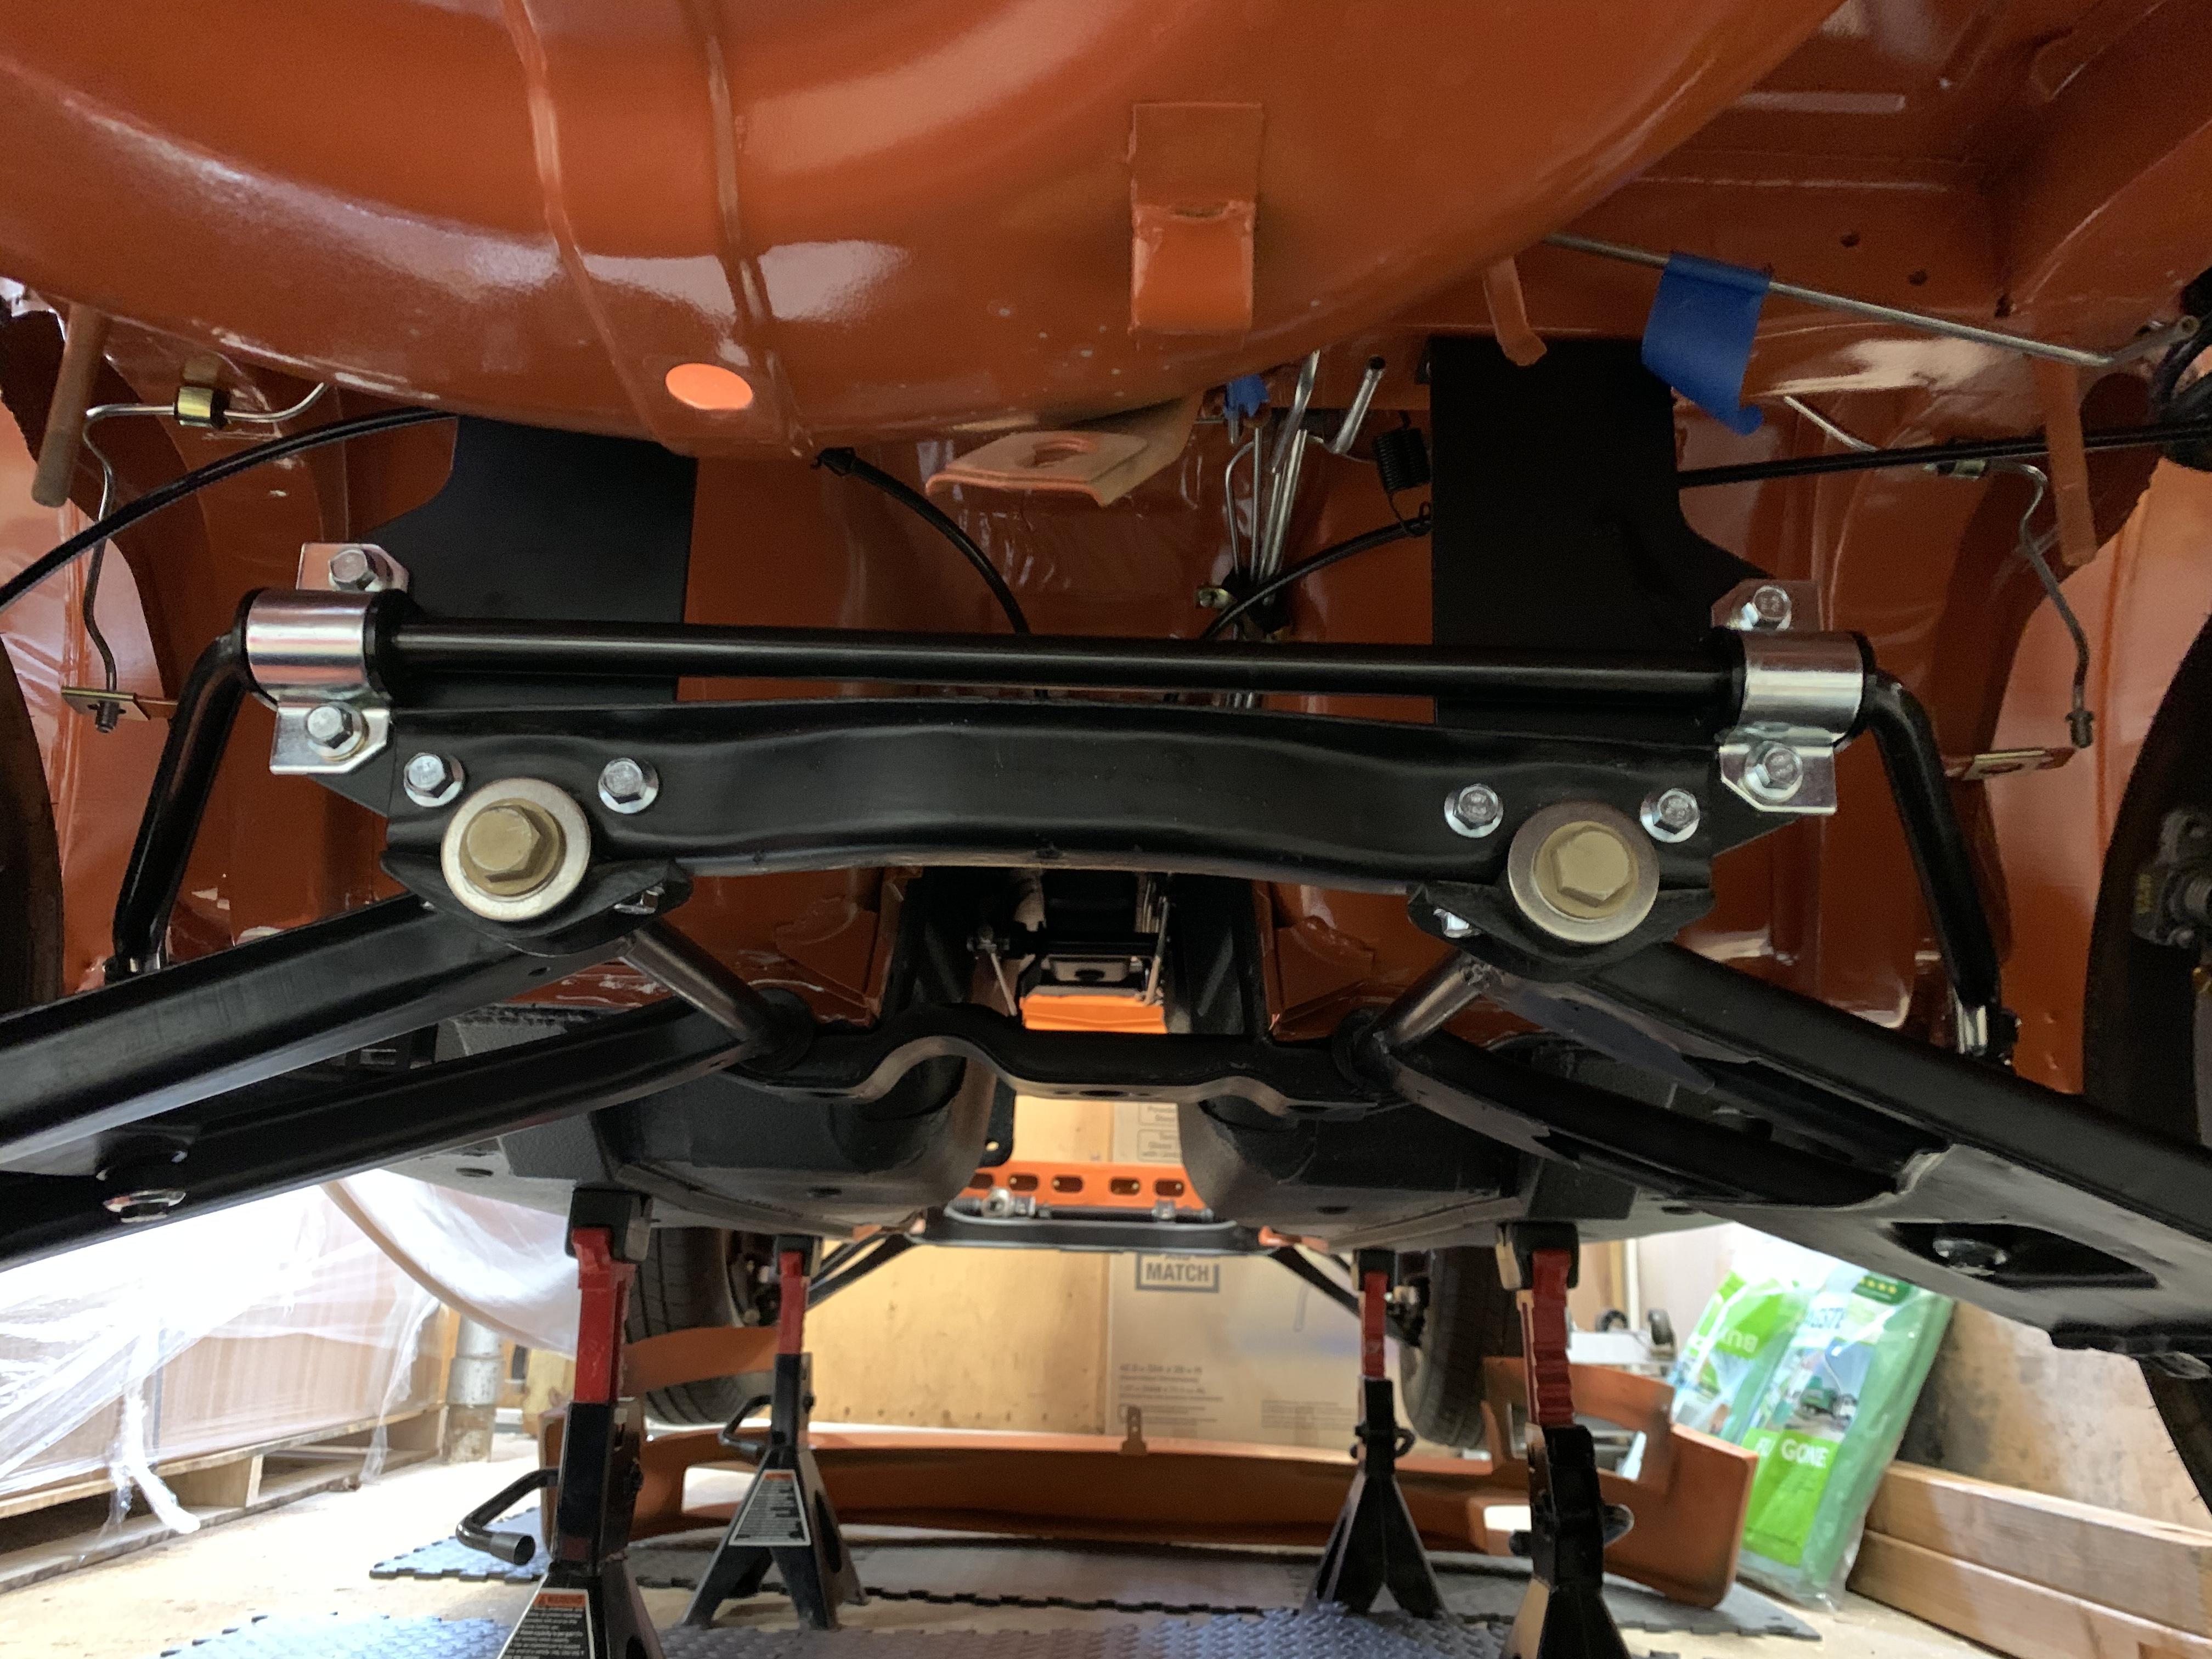
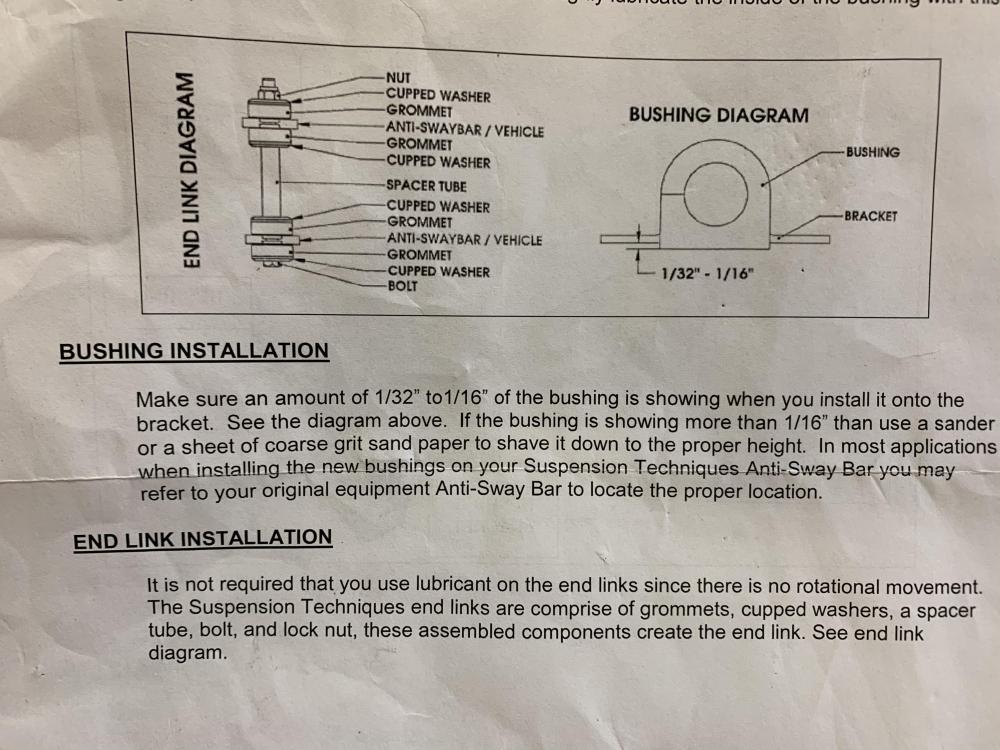
Update to the sway bar bolt question: I got an email back from the manufacturer and they said, “Ok I cross referenced and go ahead and torque down to factory specs on those pivot bushings.”
-
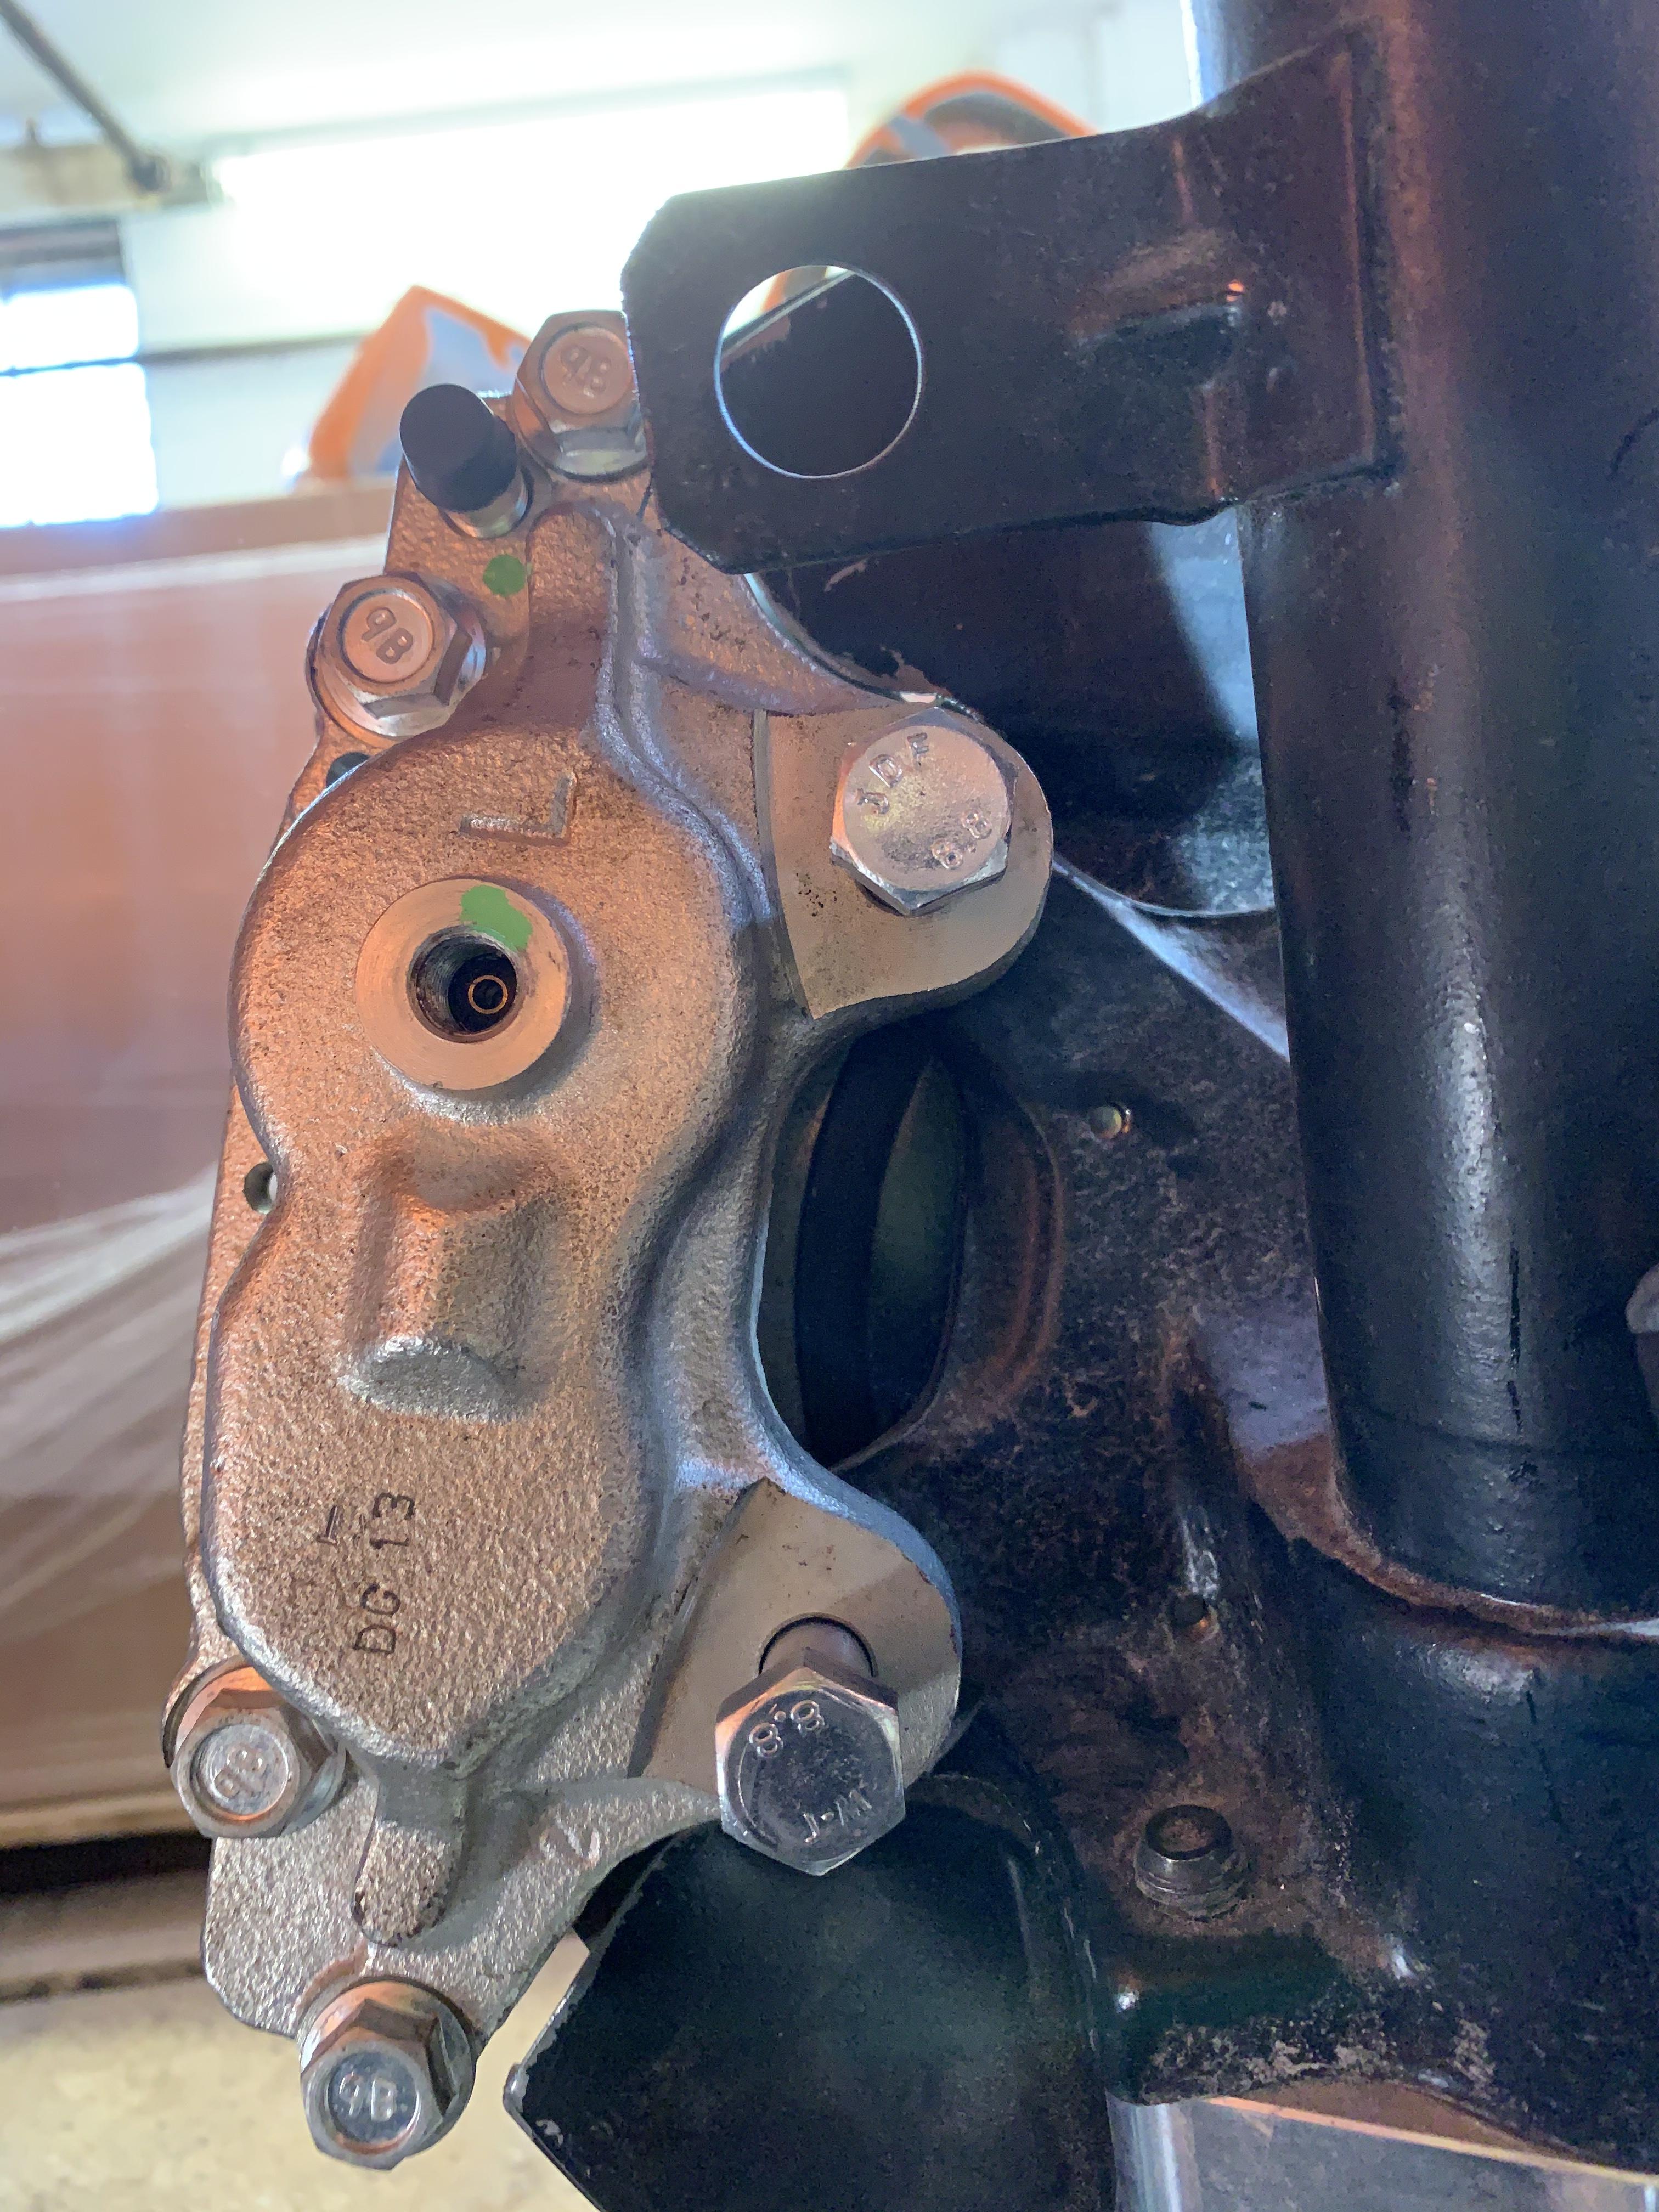
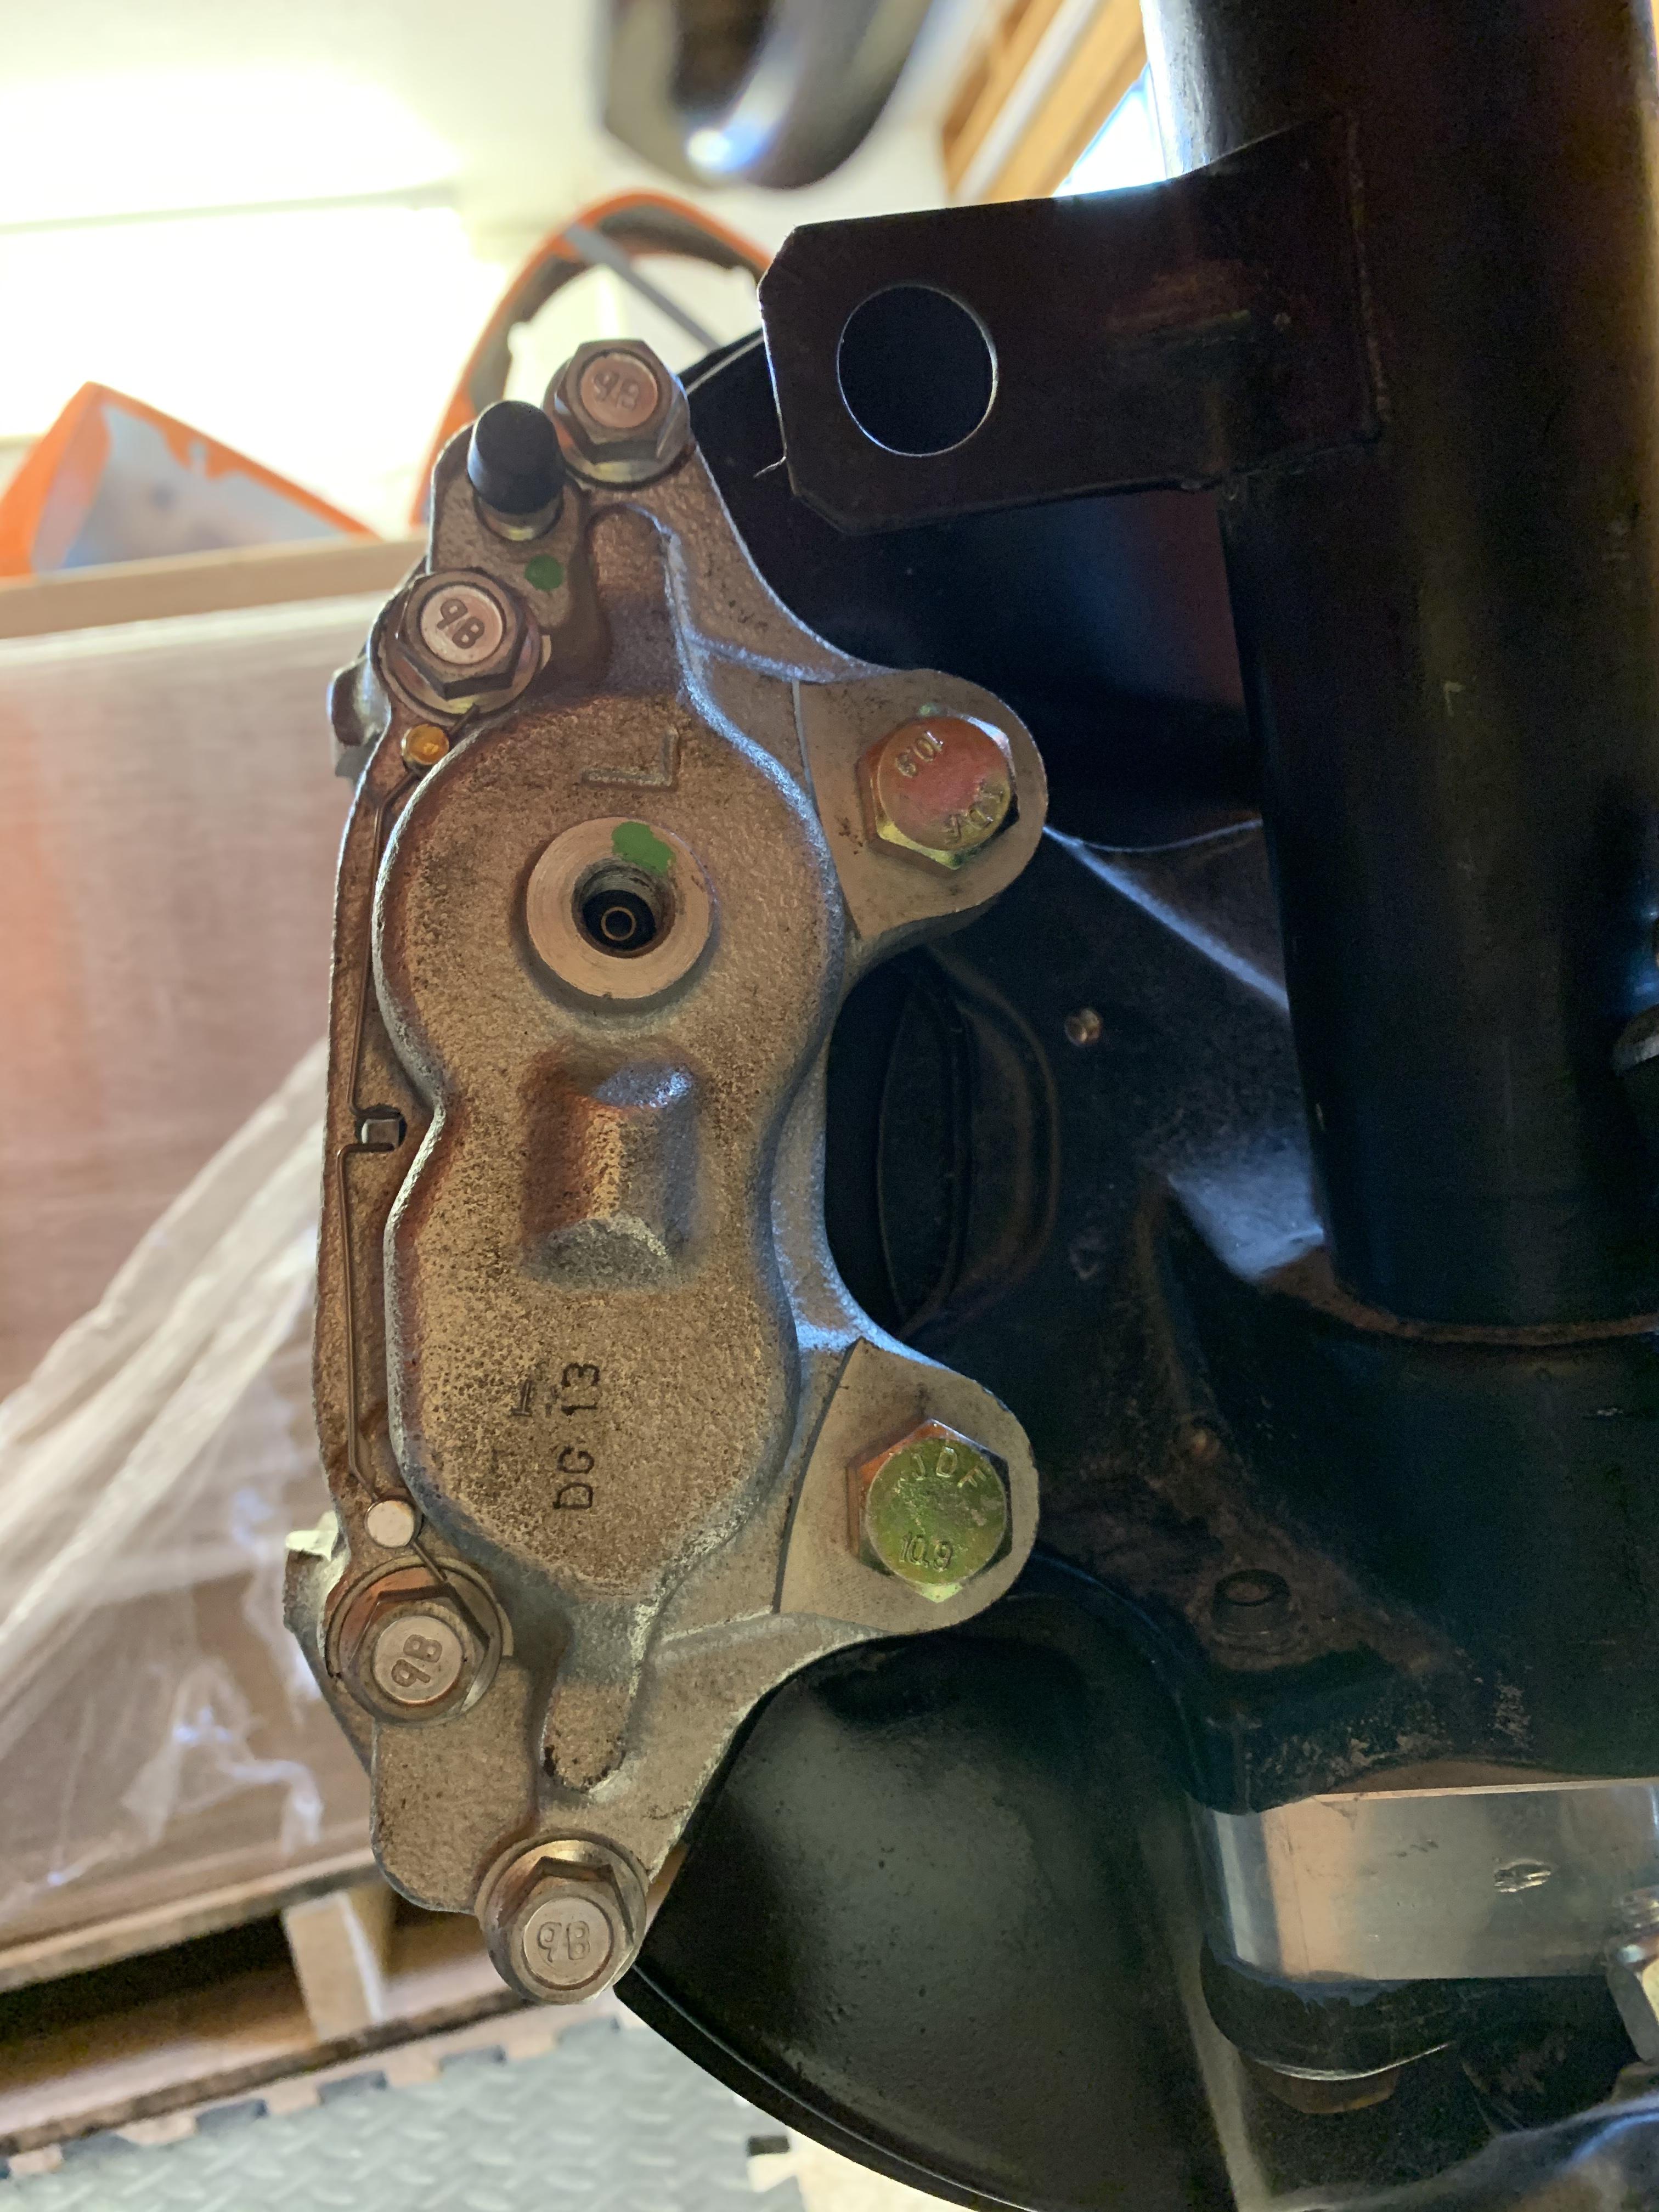
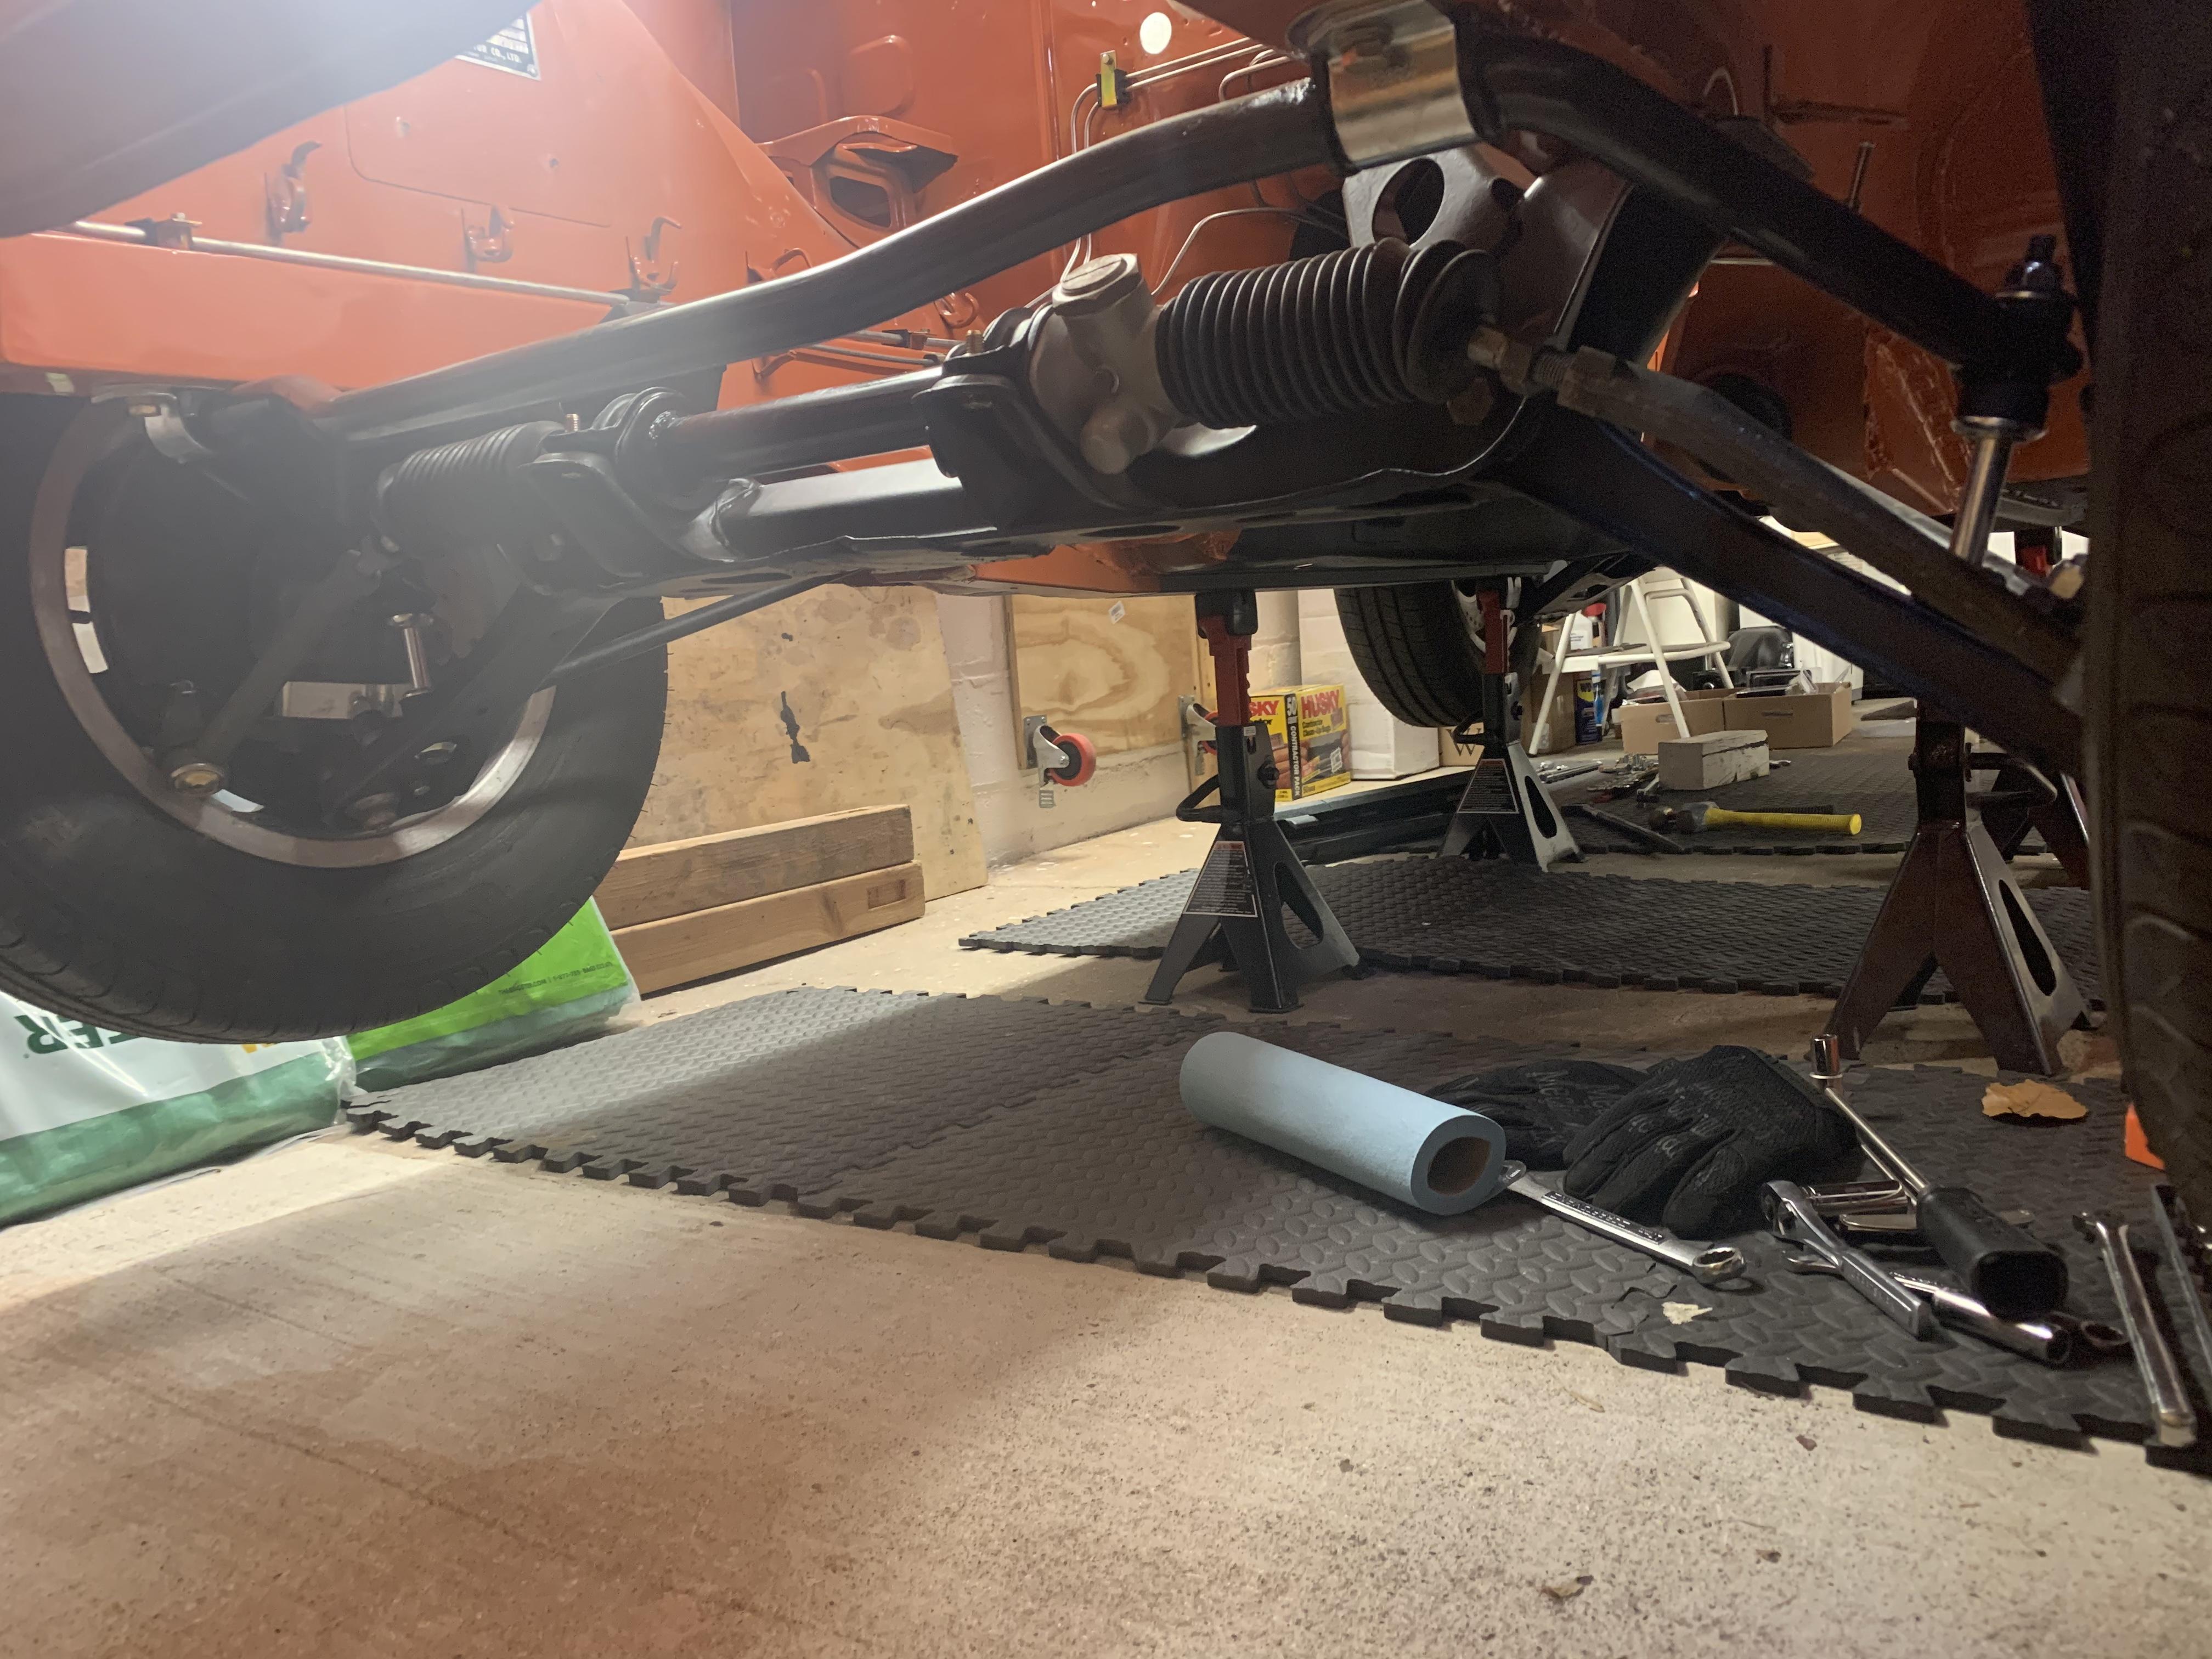
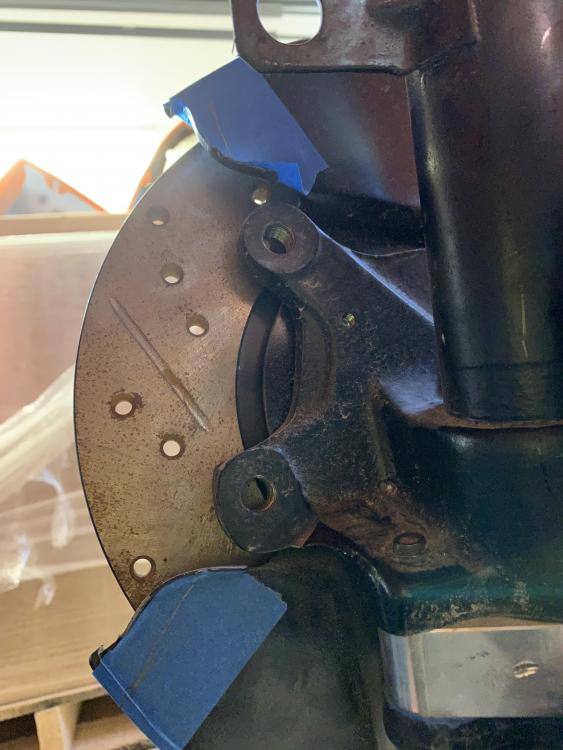
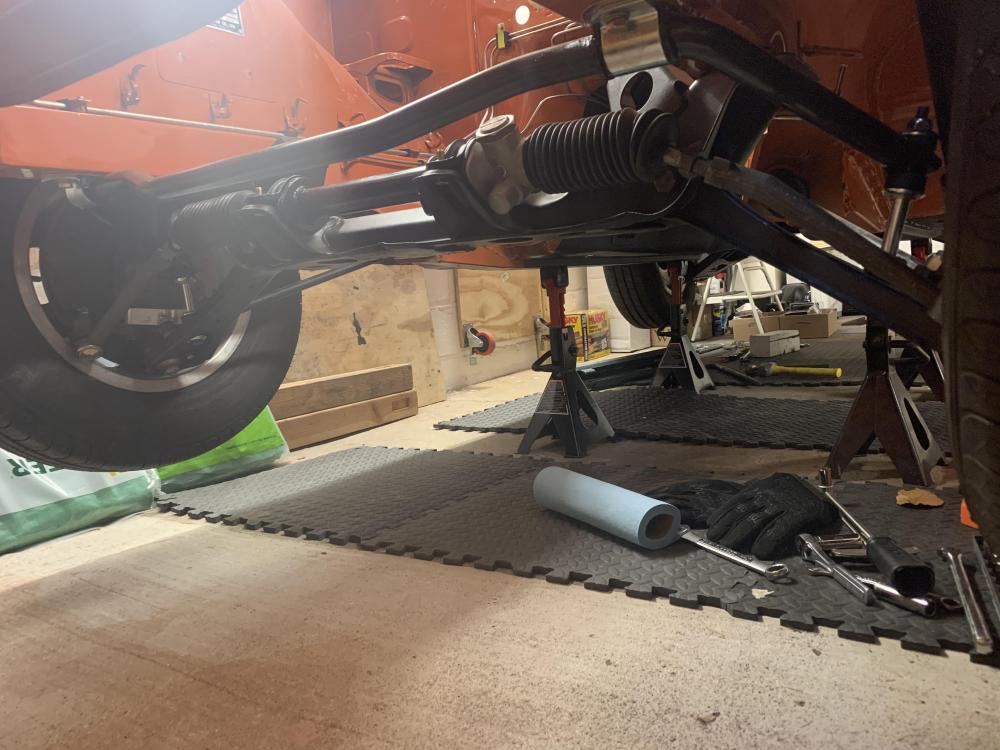
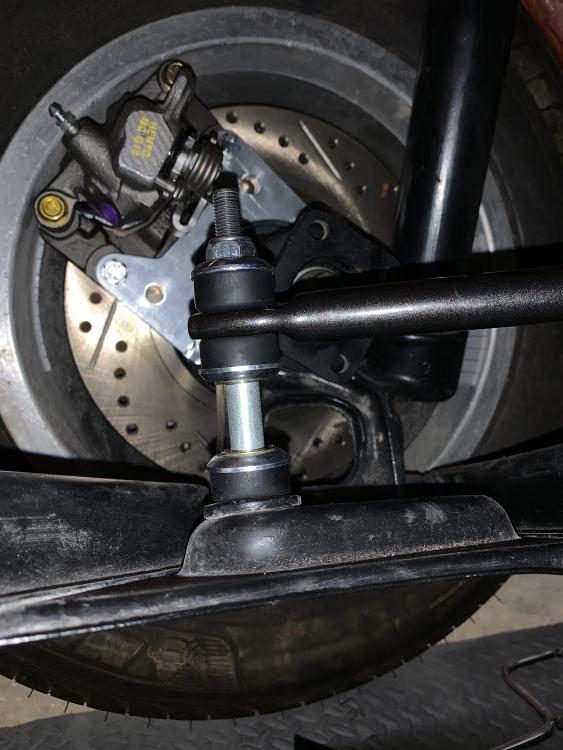
@Zed Head Here is a picture of the instructions for the sway bar brackets. I am thinking of putting a 1/16th inch thick washer between the bracket and the point where it mounts in order to create the gap but also be able to torque all of the bolts to factory specifications. —- In other news, I installed the Toyota front calipers. They’re only finger right right now. I have some 5mm longer JIS bolts coming in the mail tomorrow. Im just bummed that the calipers aren’t the same color. Looks like I have a caliper painting project in my future. 1. Marked the material to remove from the dust shields 2. Removed as little as possible with tin snips 3. Test fit 4. Filed smooth, masked, and sprayed with POR-15 Top Coat 5. Caliper in place (Finger tight) 6. Left front after a quick wipe down


-
I’ll post the instructions when I get home this afternoon. Do you think I should flip the calipers to the opposite sides? Right now I have them on the sides they would be on in a Maxima.
-
I was speaking generally because I was too lazy to type it out on my phone. 🤣 I’m not referring to the oval shaped washer that goes between the front sway bar and the frame. The instructions say to leave a 1/16th “ gap on both the front and the back brackets. Literally, an air gap. This seems like a bad idea. I can see maybe putting washer in there, but then why not just make the bracket the right size?
-
ST Suspension front and rear sway bars are in: One thing I thought was odd... the instructions said to leave a 1/16th gap on one of the bracket bolts where they mount to the body. I wrote the manufacturer and asked for clarification. Right now they are torqued to the specs in the FSM, but they do look a tad over compressed.


-
The 7” is at ZCar Depot and several of the other places listed above. I’m thinking I either don’t need one or should use a liquid gasket.
-
There are a couple of places you listed that I haven’t looked yet, but I have no idea if it is something that I Chili’s be able to find. I can’t find it in the FSM or the exploded diagrams of the booster. I can’t imagine it doesn’t have one. The boosters aren’t that different. I am guessing I’ll need to make one if I can’t find it on one of these sites. Anyone with a 260 or 280 that knows about these boosters?
-
8.5” It’s a July car so it has a few 260z things happening here and there.