Matthew Abate
Free Member
-
Joined
-
Last visited
Everything posted by Matthew Abate
-
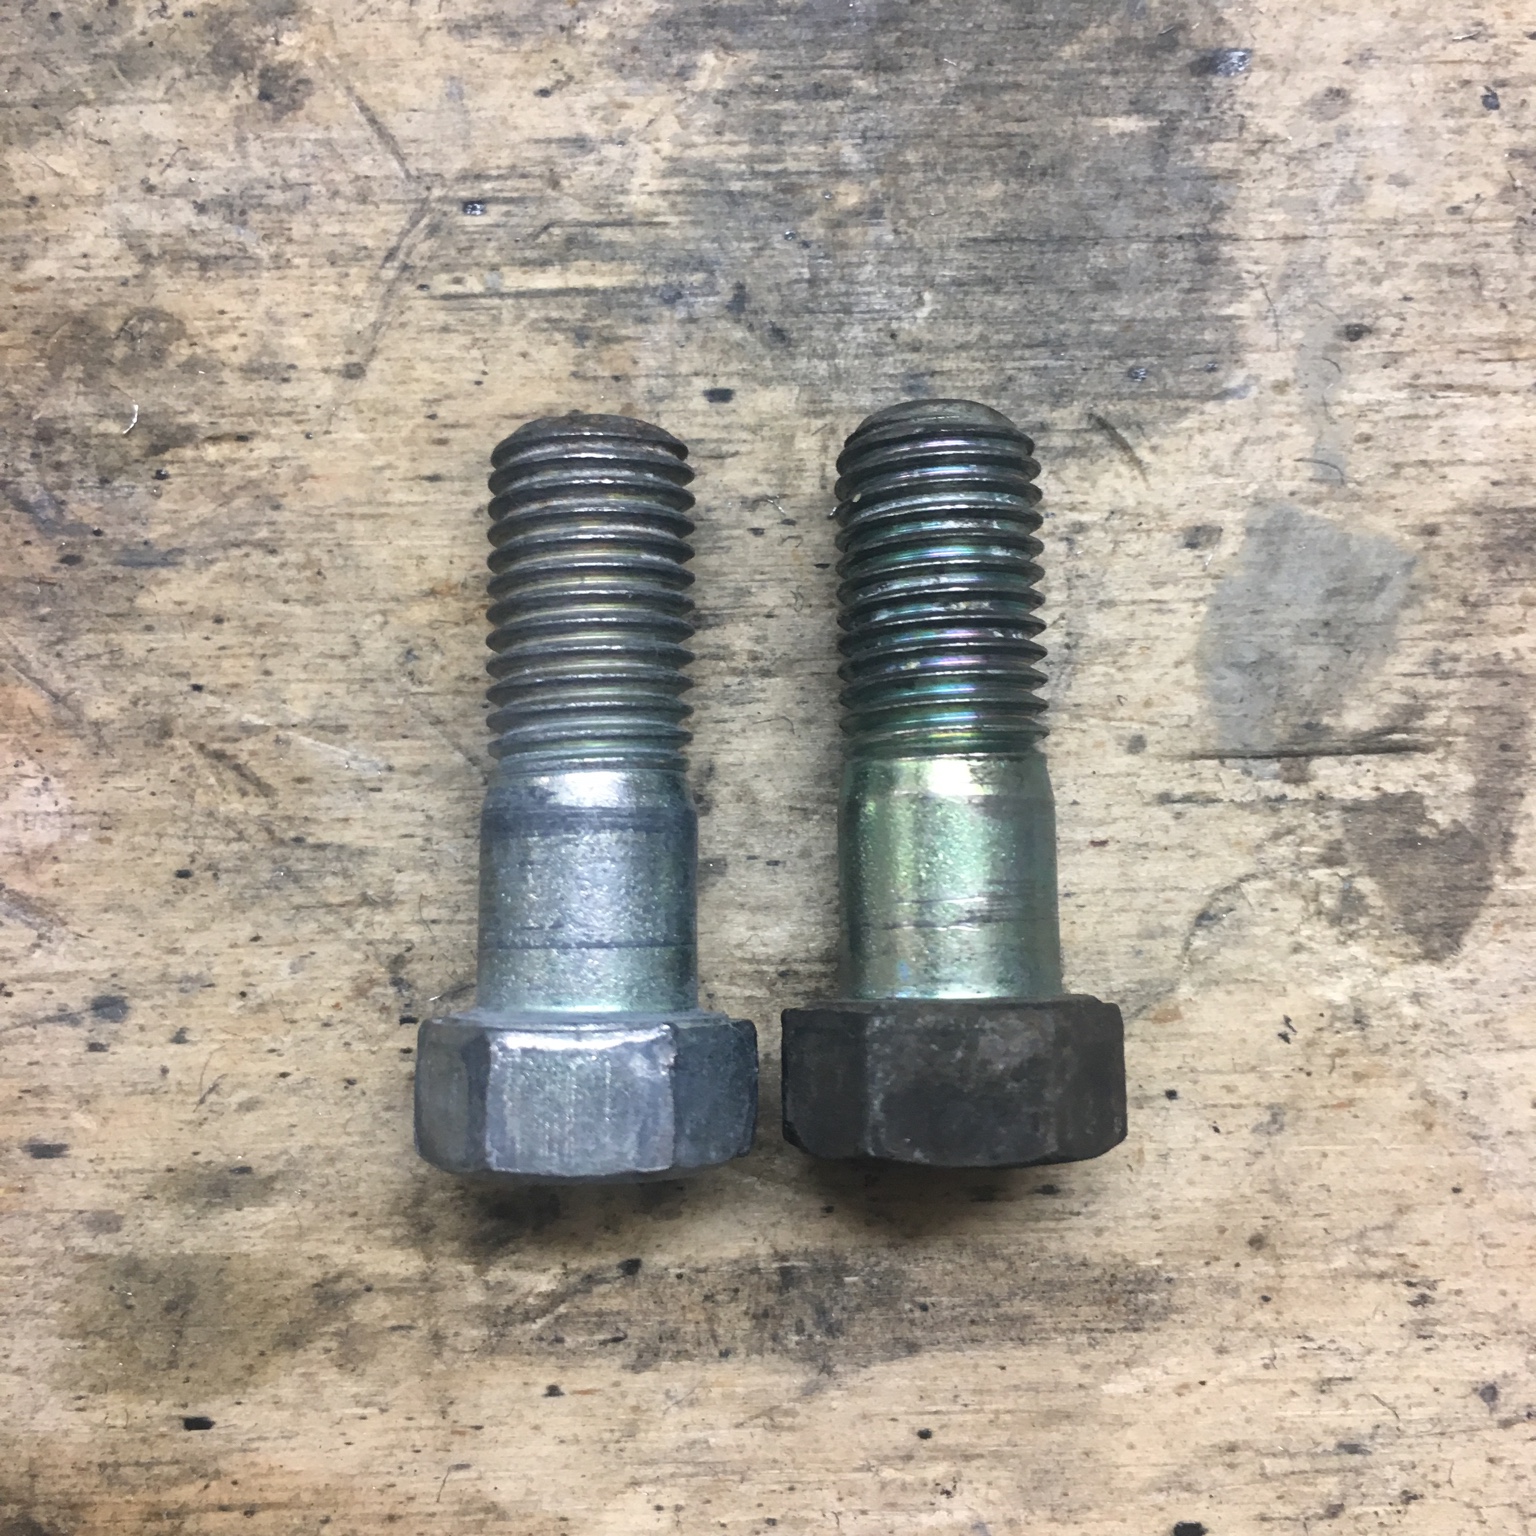
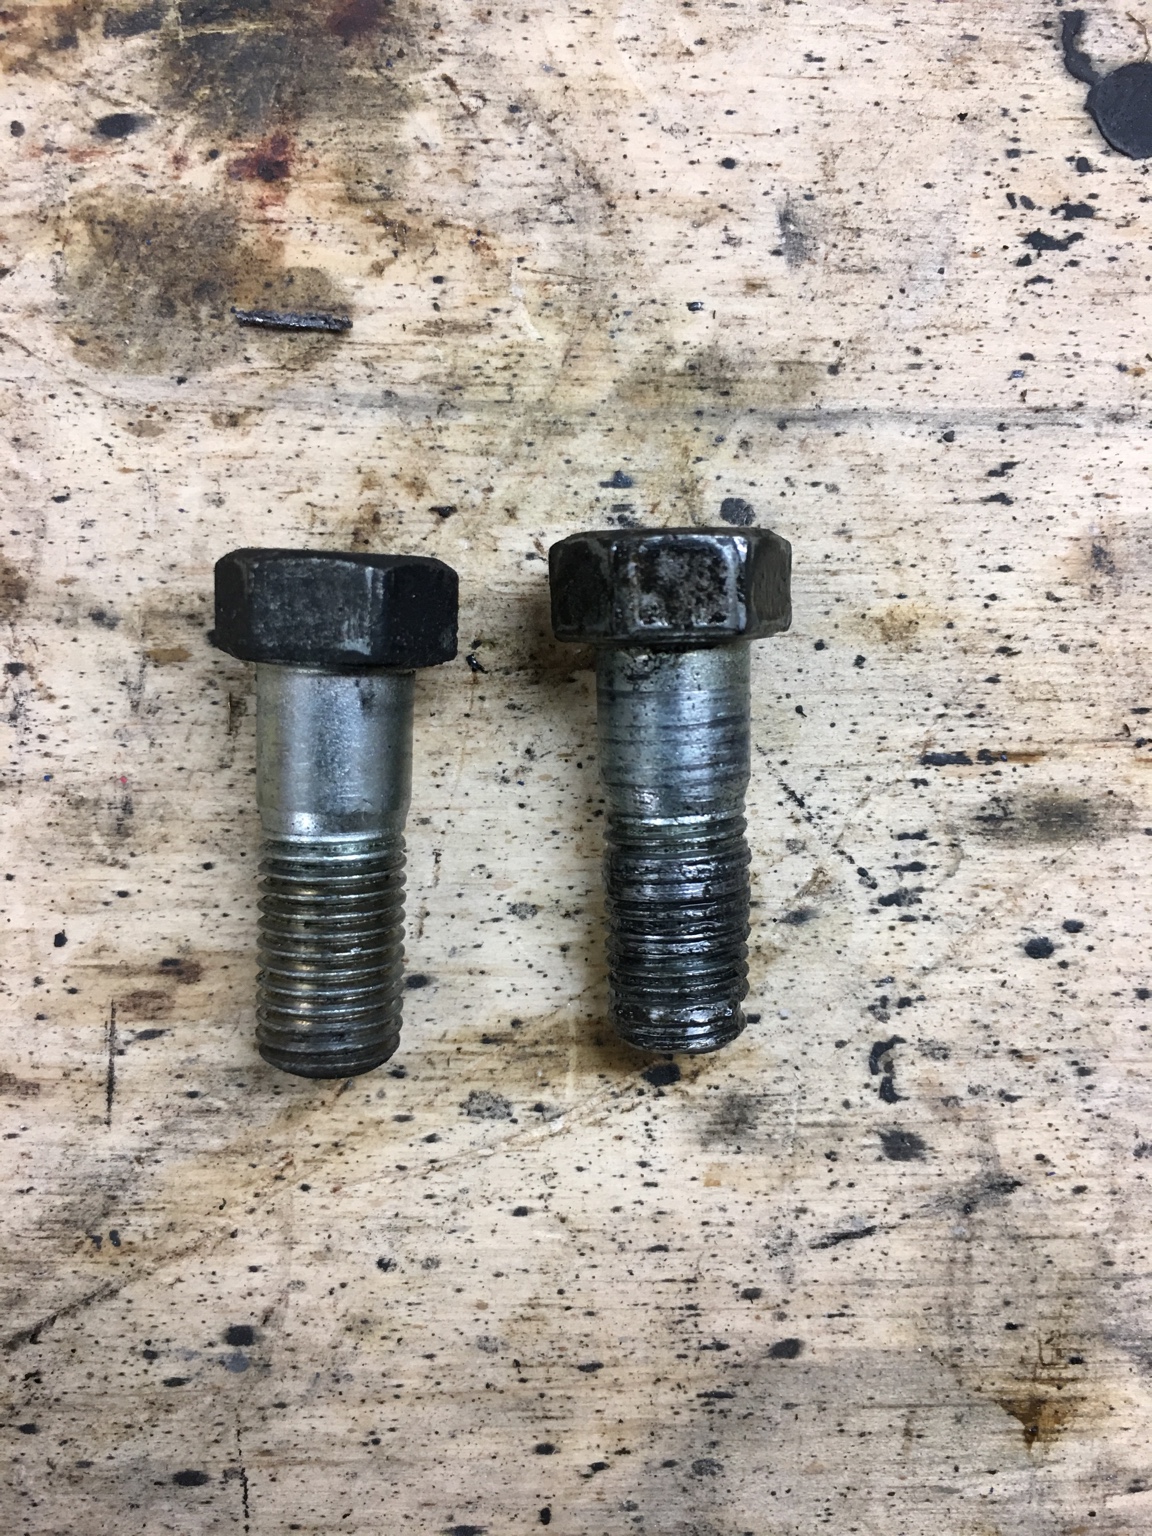
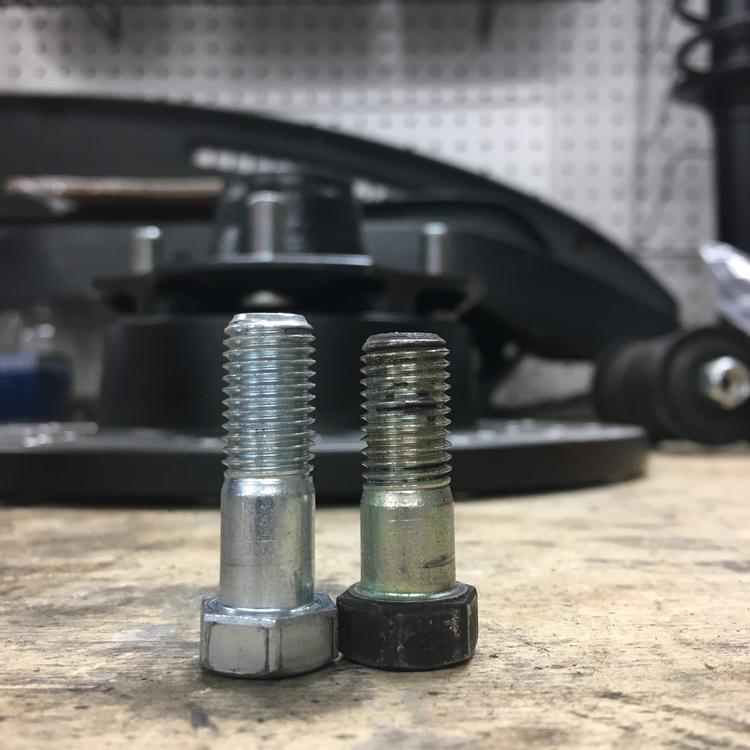
 My old bolt vs the eBay 210/310 bolt. Problem solved.
-
Found some from a 210/310 on eBay. I have a feeling they aren’t the same, but they were $15 for 4 so I too the gamble. We shall see. Sent from my iPhone using Classic Zcar Club mobile
-
Yeah, that’s a problem too. I’ve read and been told not to use a regular washer with a split lock washer, so I’m trying to source some more correct bolts or a m10 split lock washer that is at least 4mm thick. Tall order. These might work: http://www.dli-teknik.se/index.php?section=products&subsection=7&cat=83&s1cat=578&s2cat=1056&showprod=10154&lang=en I called ARP and they said these were probably custom manufactured by them for this distributor. Looking into the details. Sent from my iPhone using Classic Zcar Club mobile
-
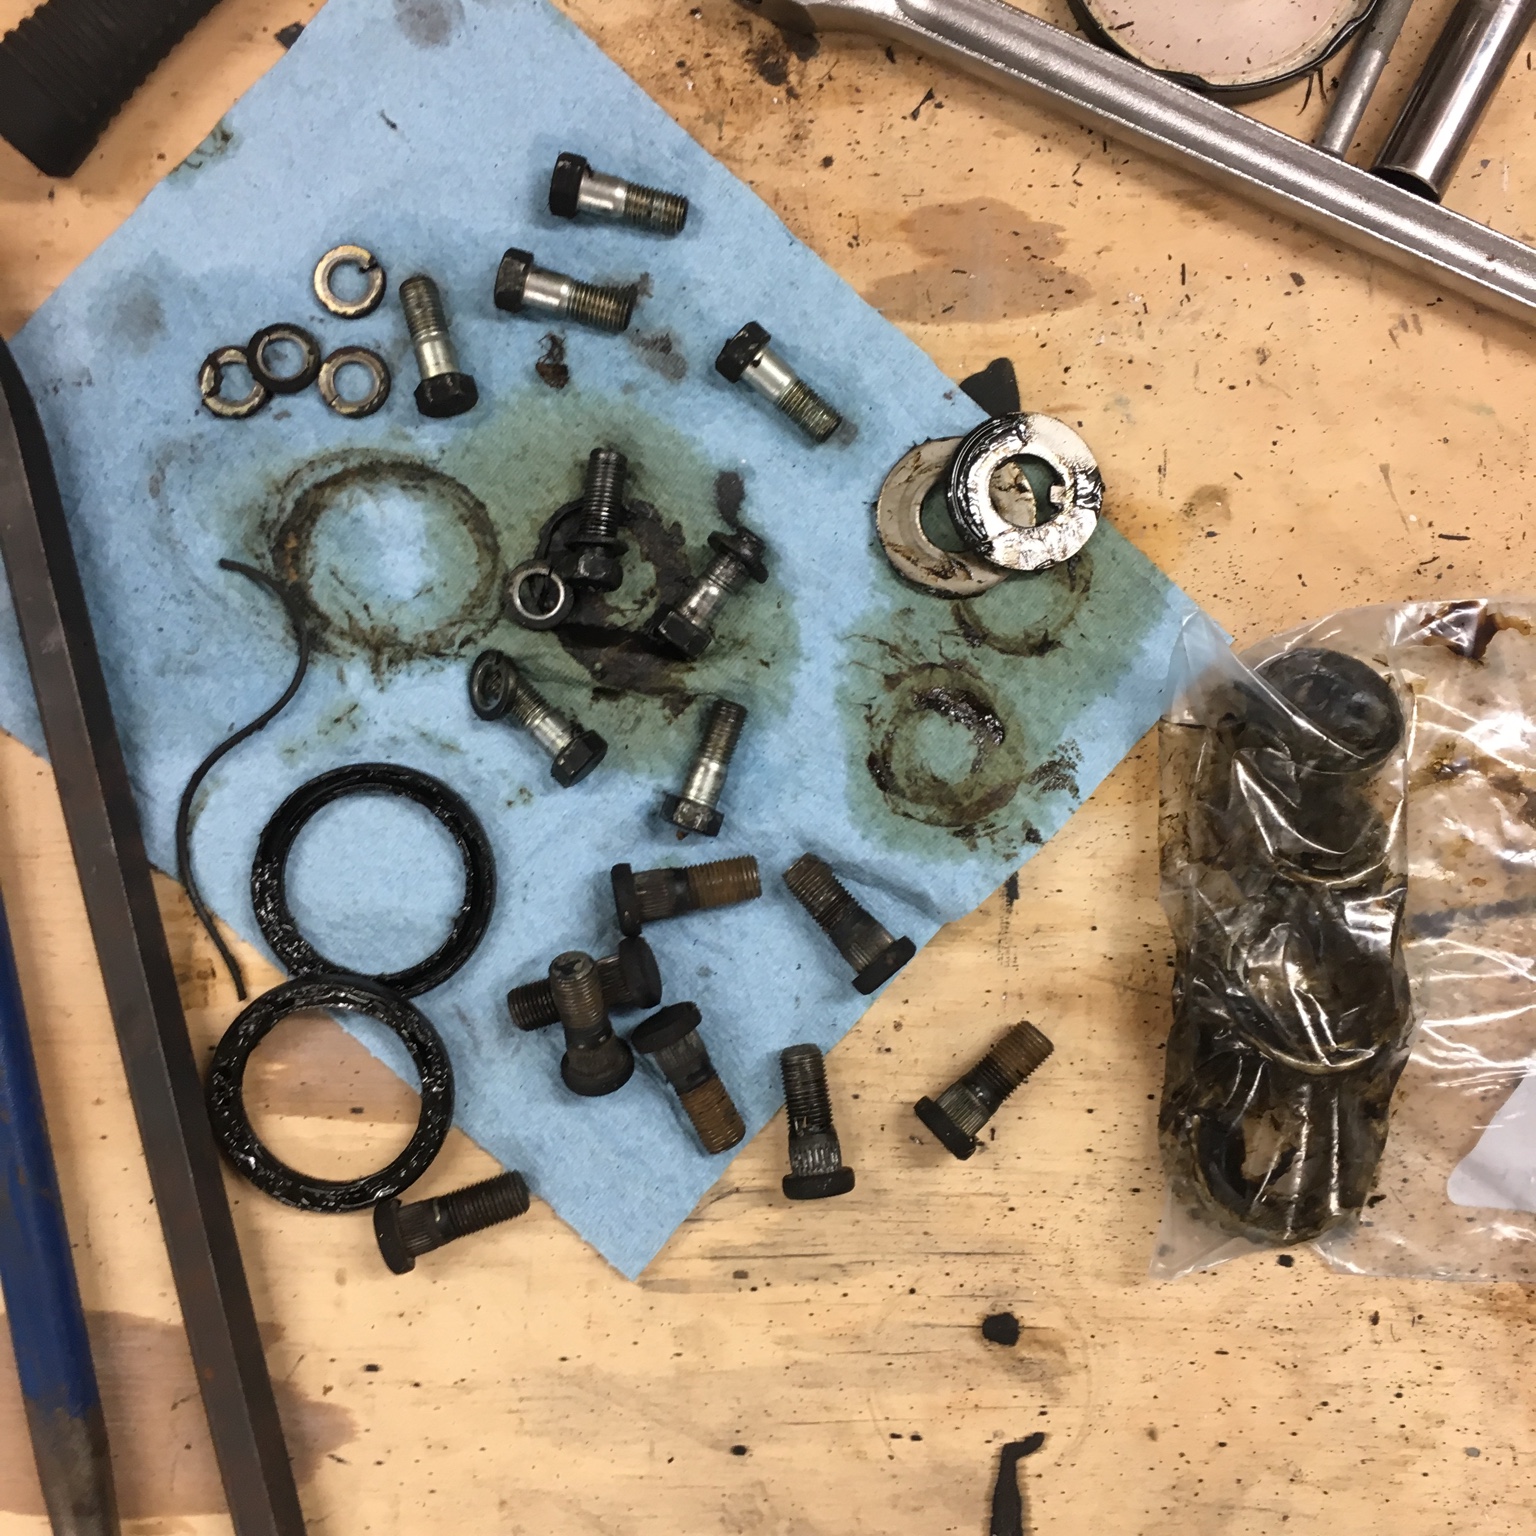
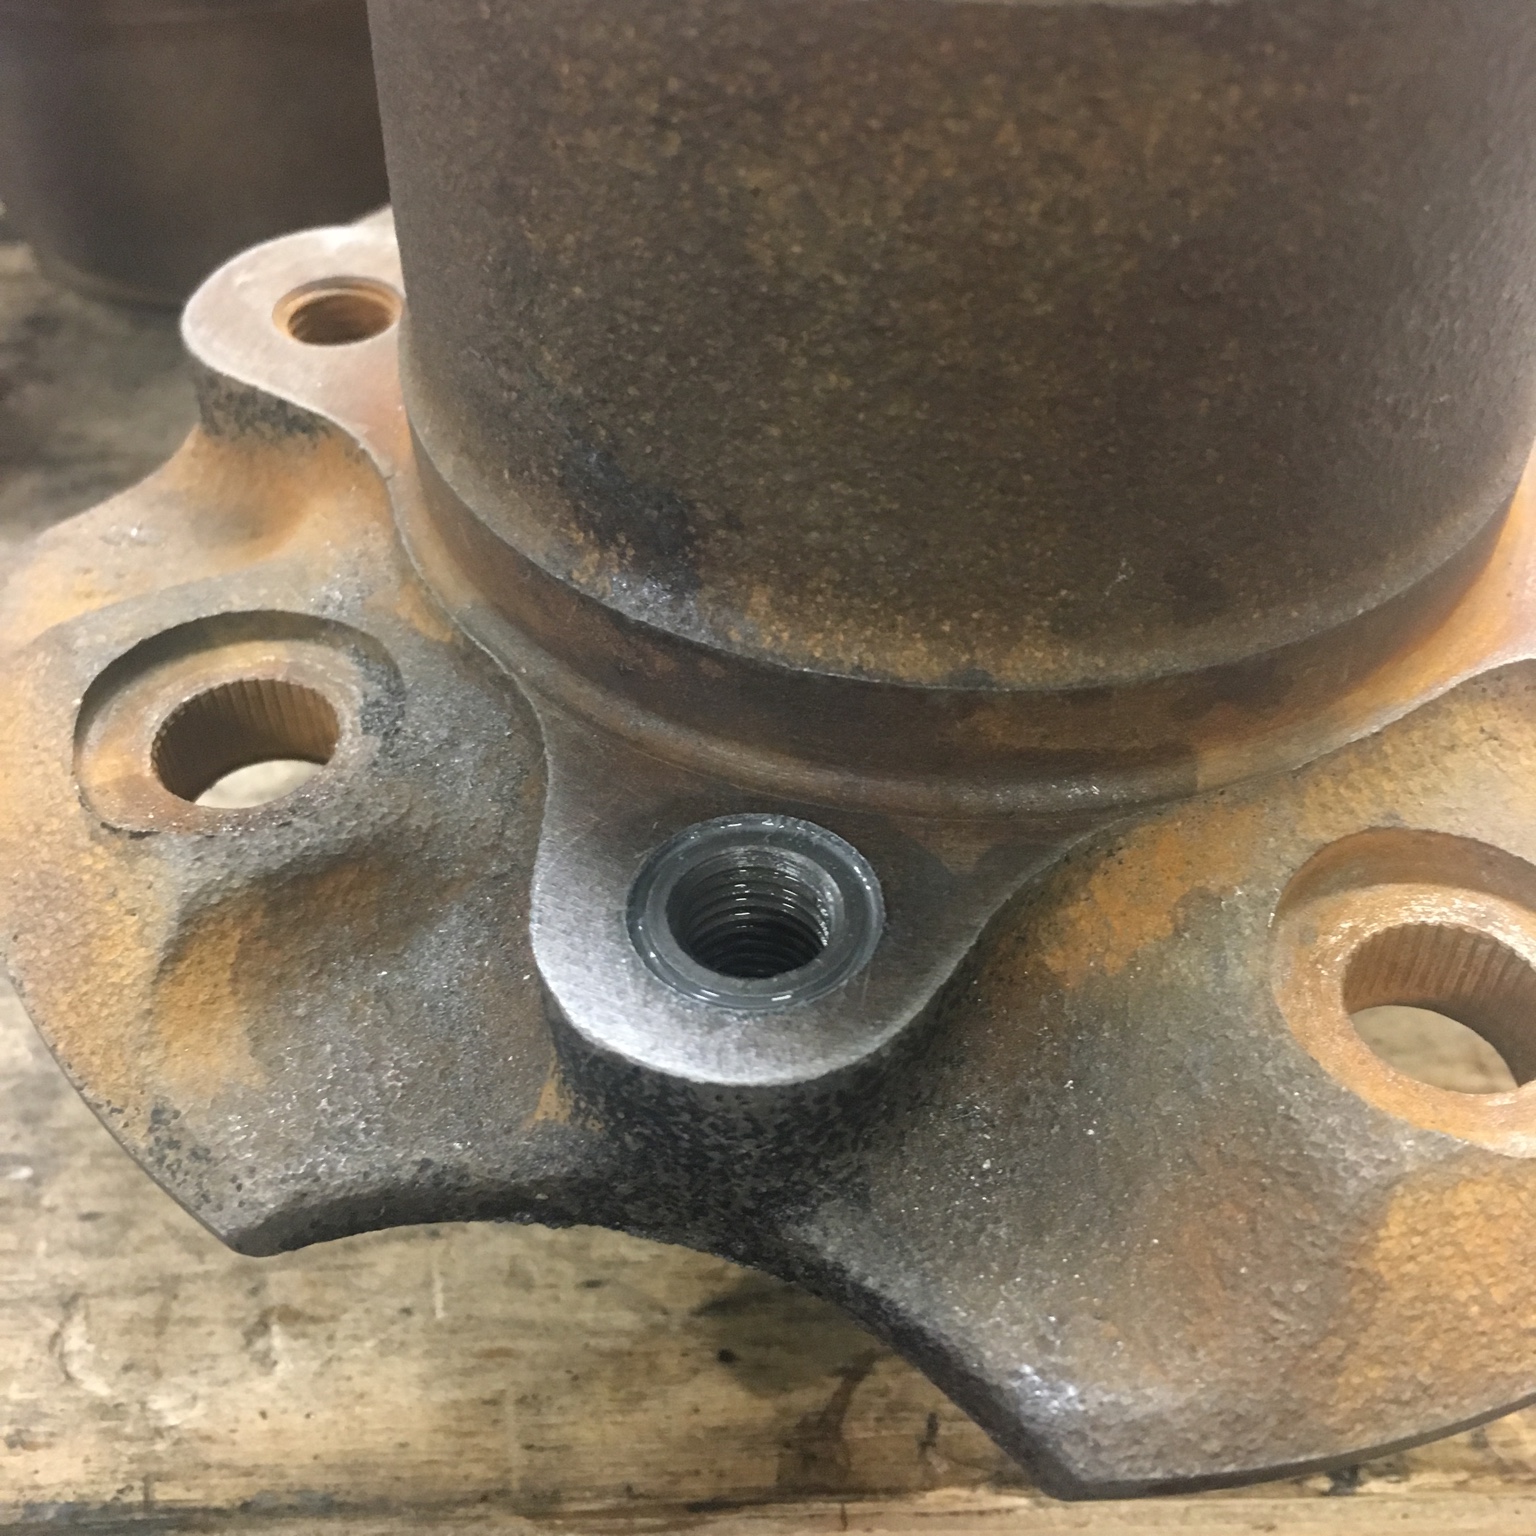
I just got off the phone with them. They had only checked them on 260/280Zs so that’s part of the problem. My options are find some OEM ones (just emailed Jim), find thicker lock washers, or grind these down. I don’t like the grinding option because I would be reducing the thread contact area from the intended design. For reference: Bolt = 40209-22000 (NLA) m10x1.25, 27mm long, 10mm grip length Lock washer = 08915-14010 m10x3mm thick
-
Yep. Z Car Depot said they get these from Nissan, so they are looking into it to see if they can figure out something better. Note that the thread count is fine and it is the unthreaded shank that is way to long by at least 1.5 millimeters.
-
What did you torque yours to? I couldn’t find the torque spec in the FSM so I went with what is in the Chilton, which is 43-54 pounds. I’m thinking that might be part of it. As soon as I can I’ll pull a bolt and check the measurements to verify that.
-
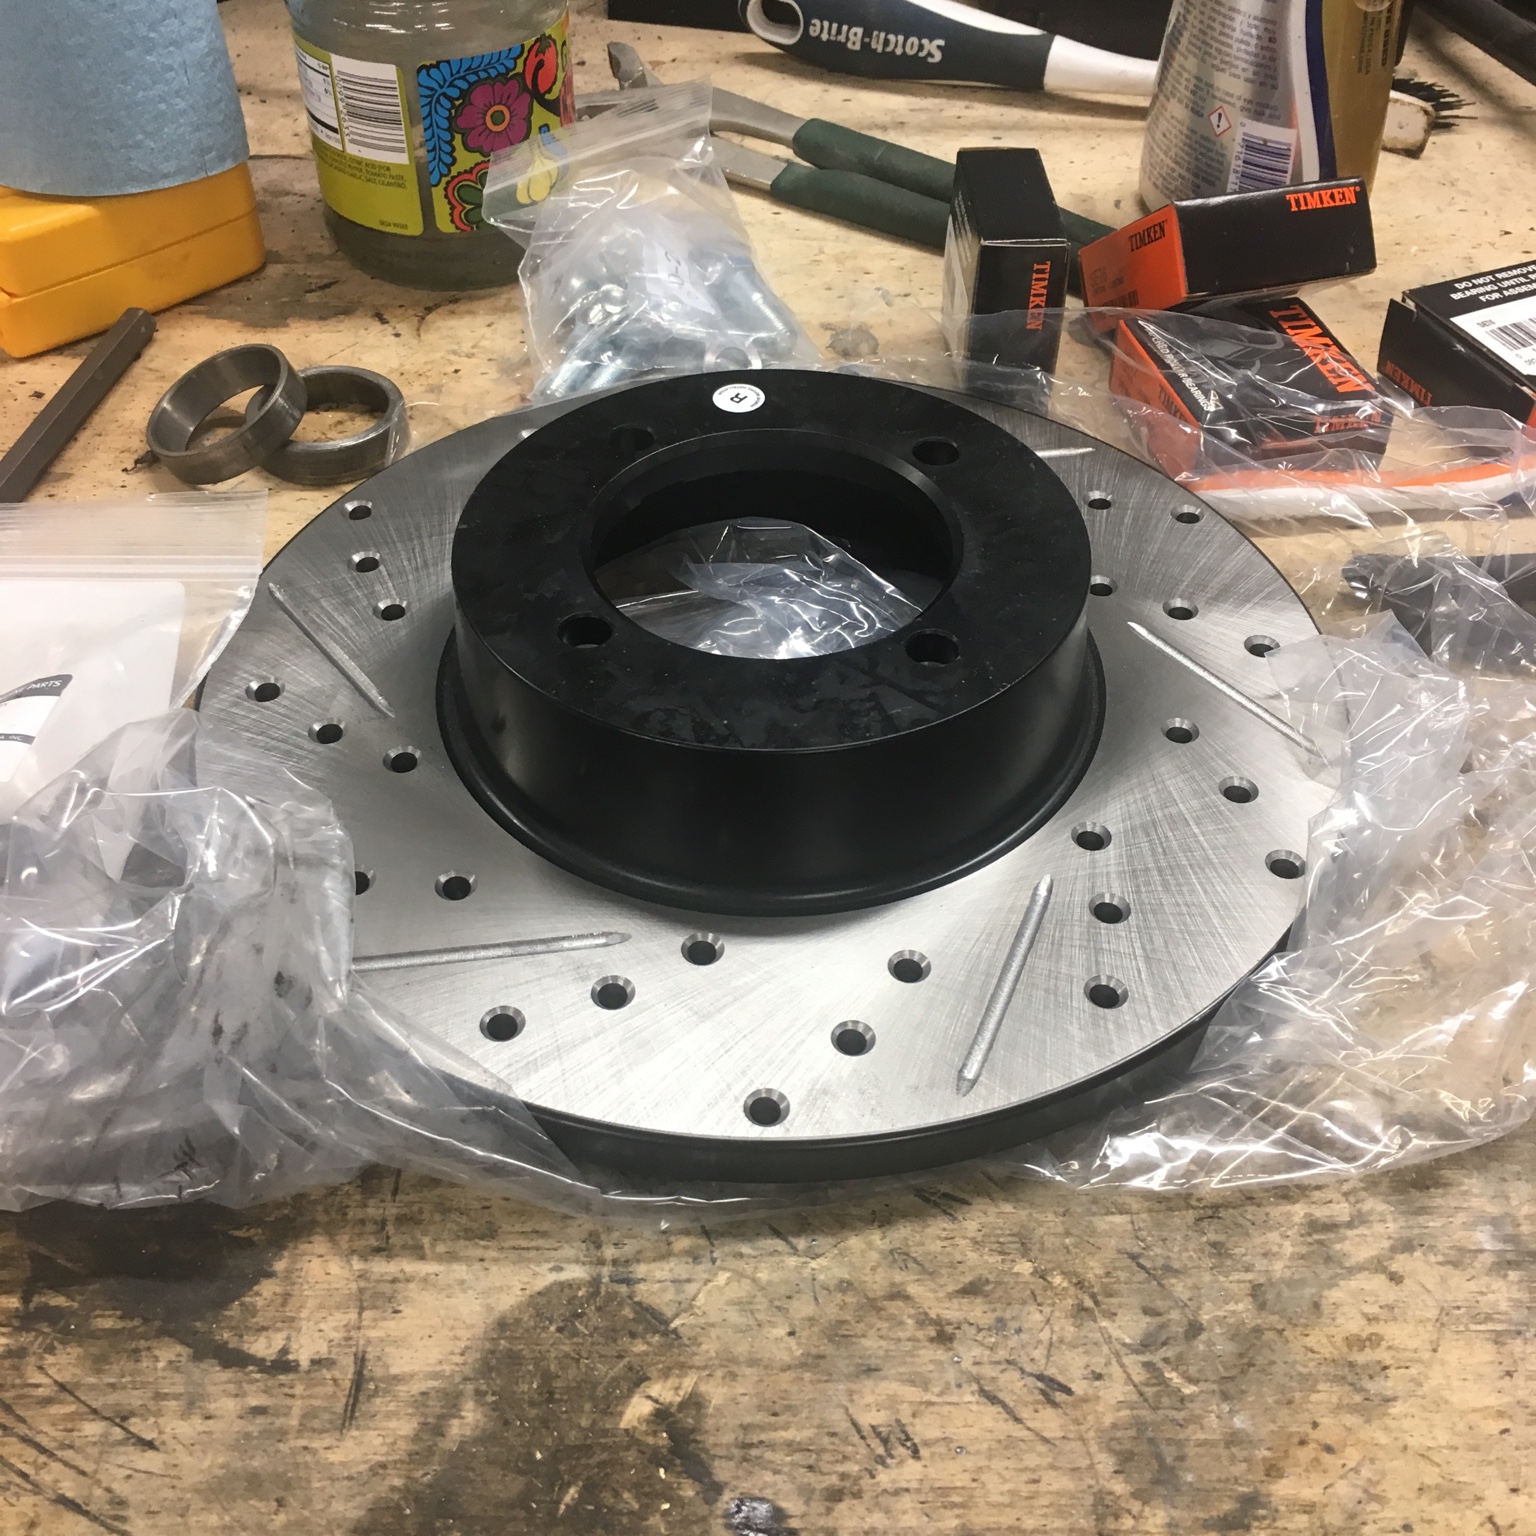
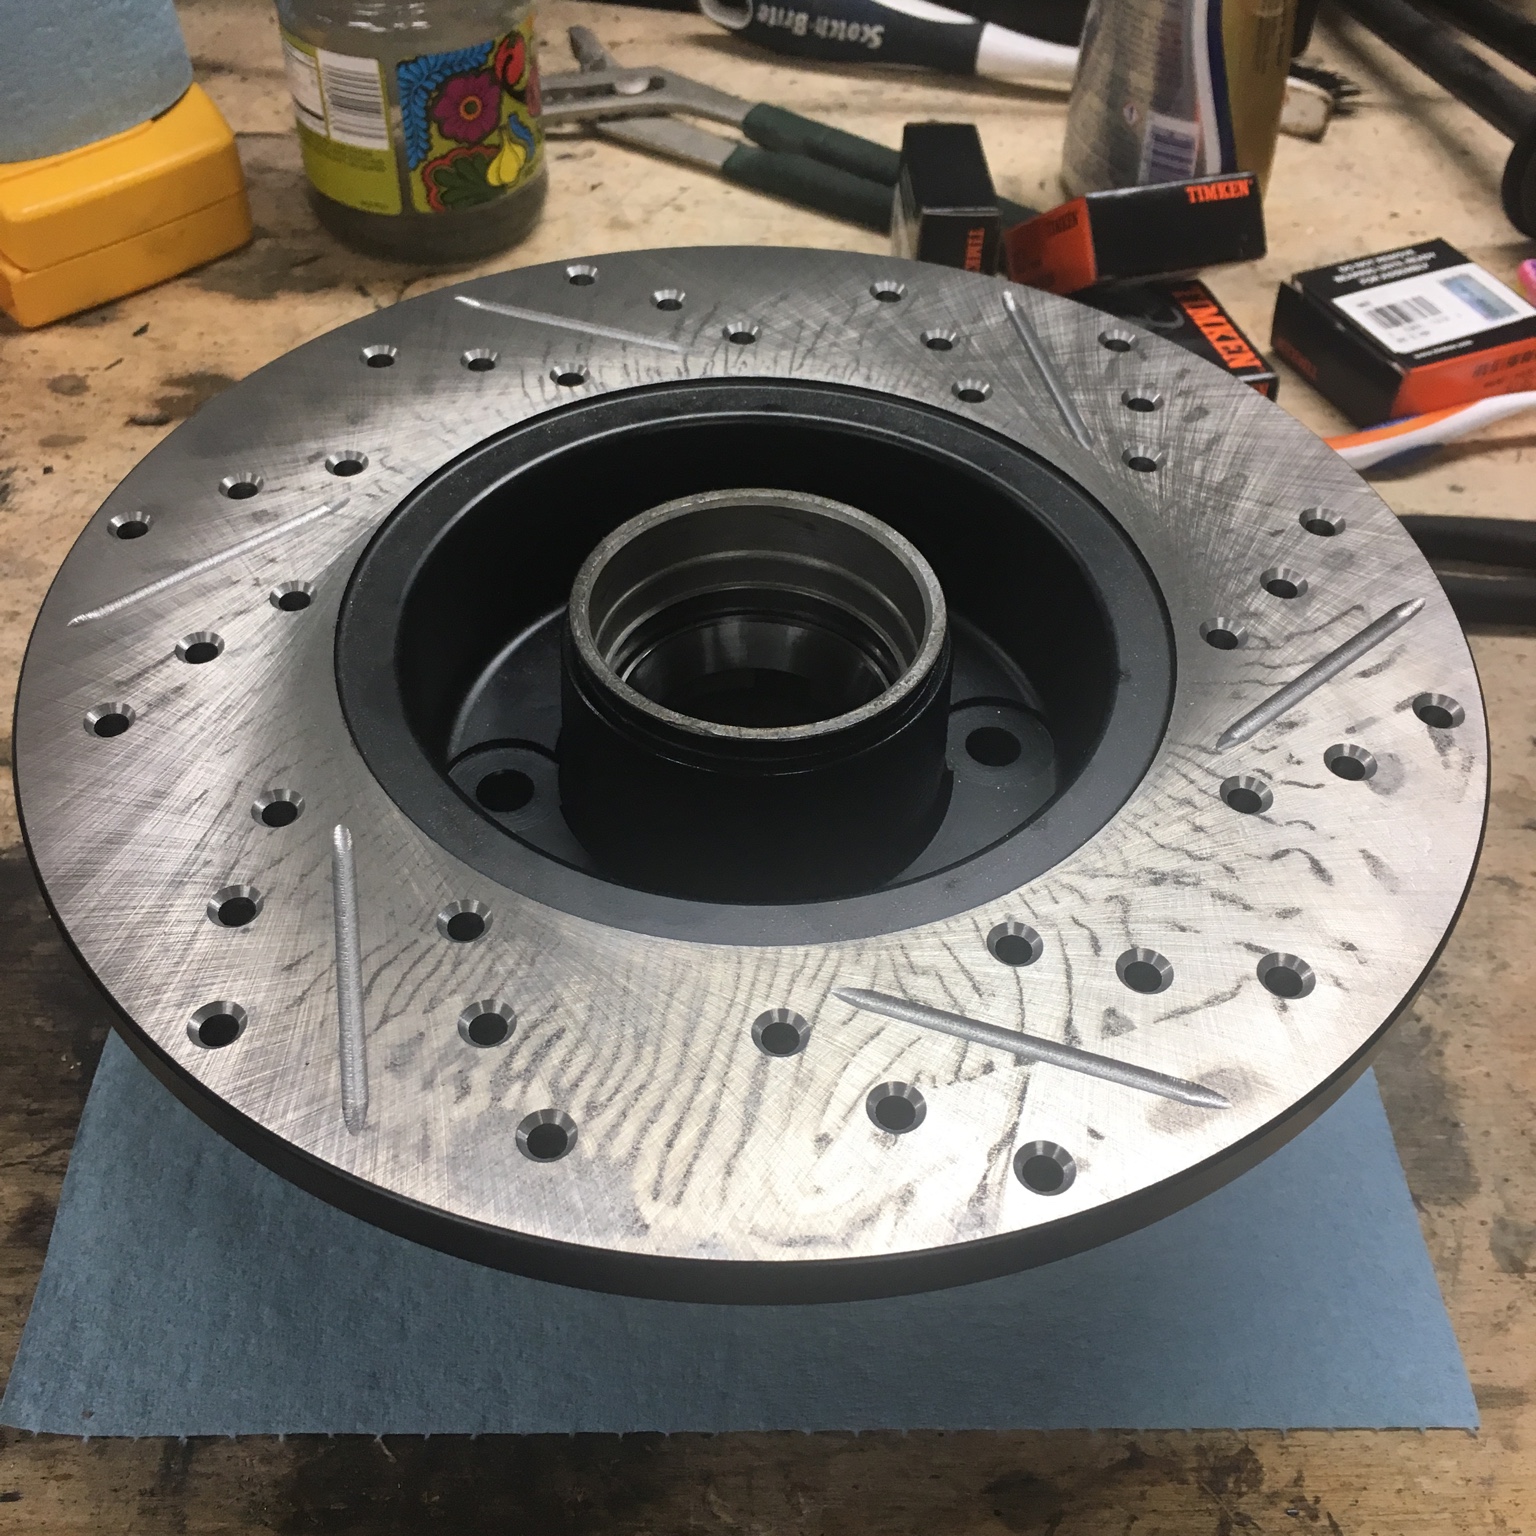
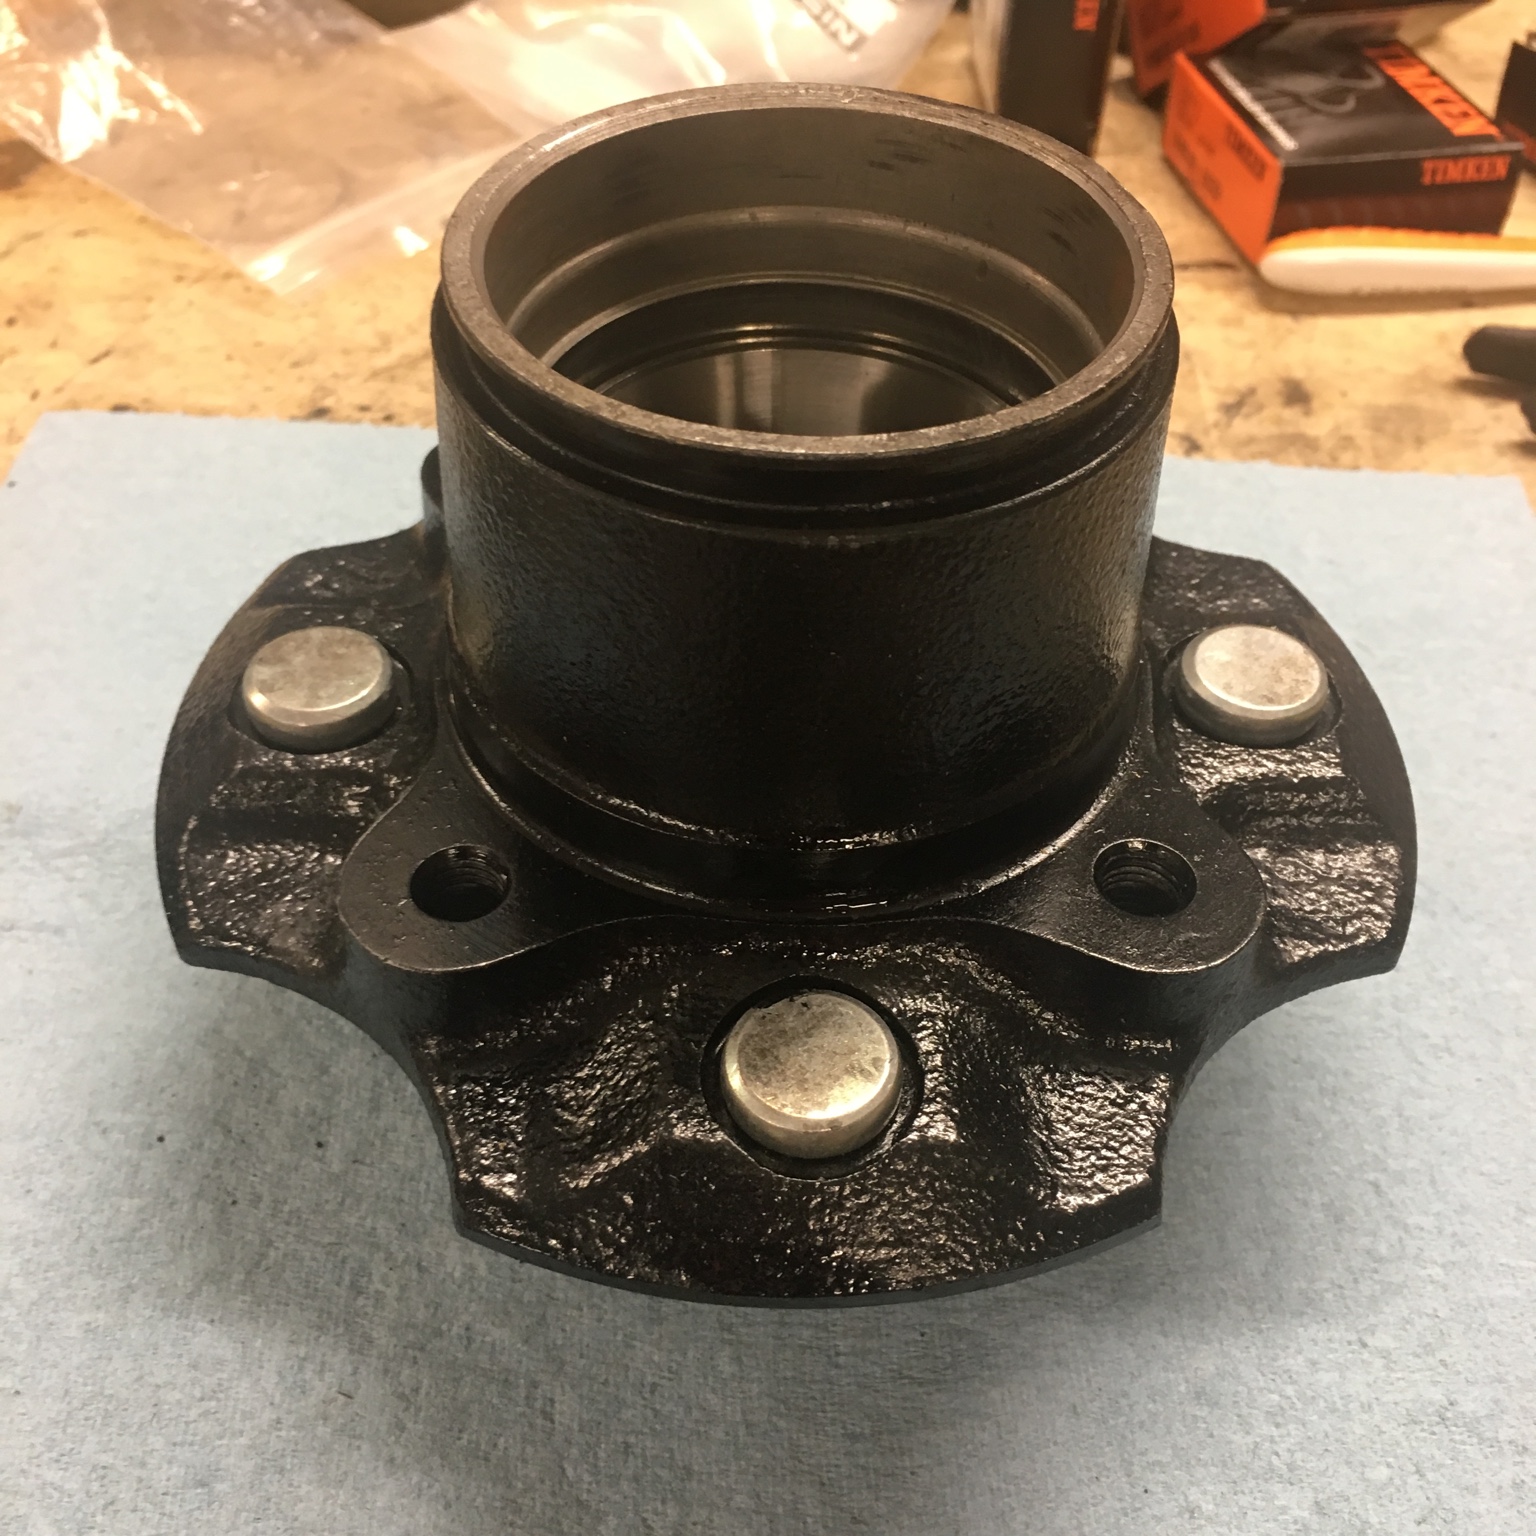
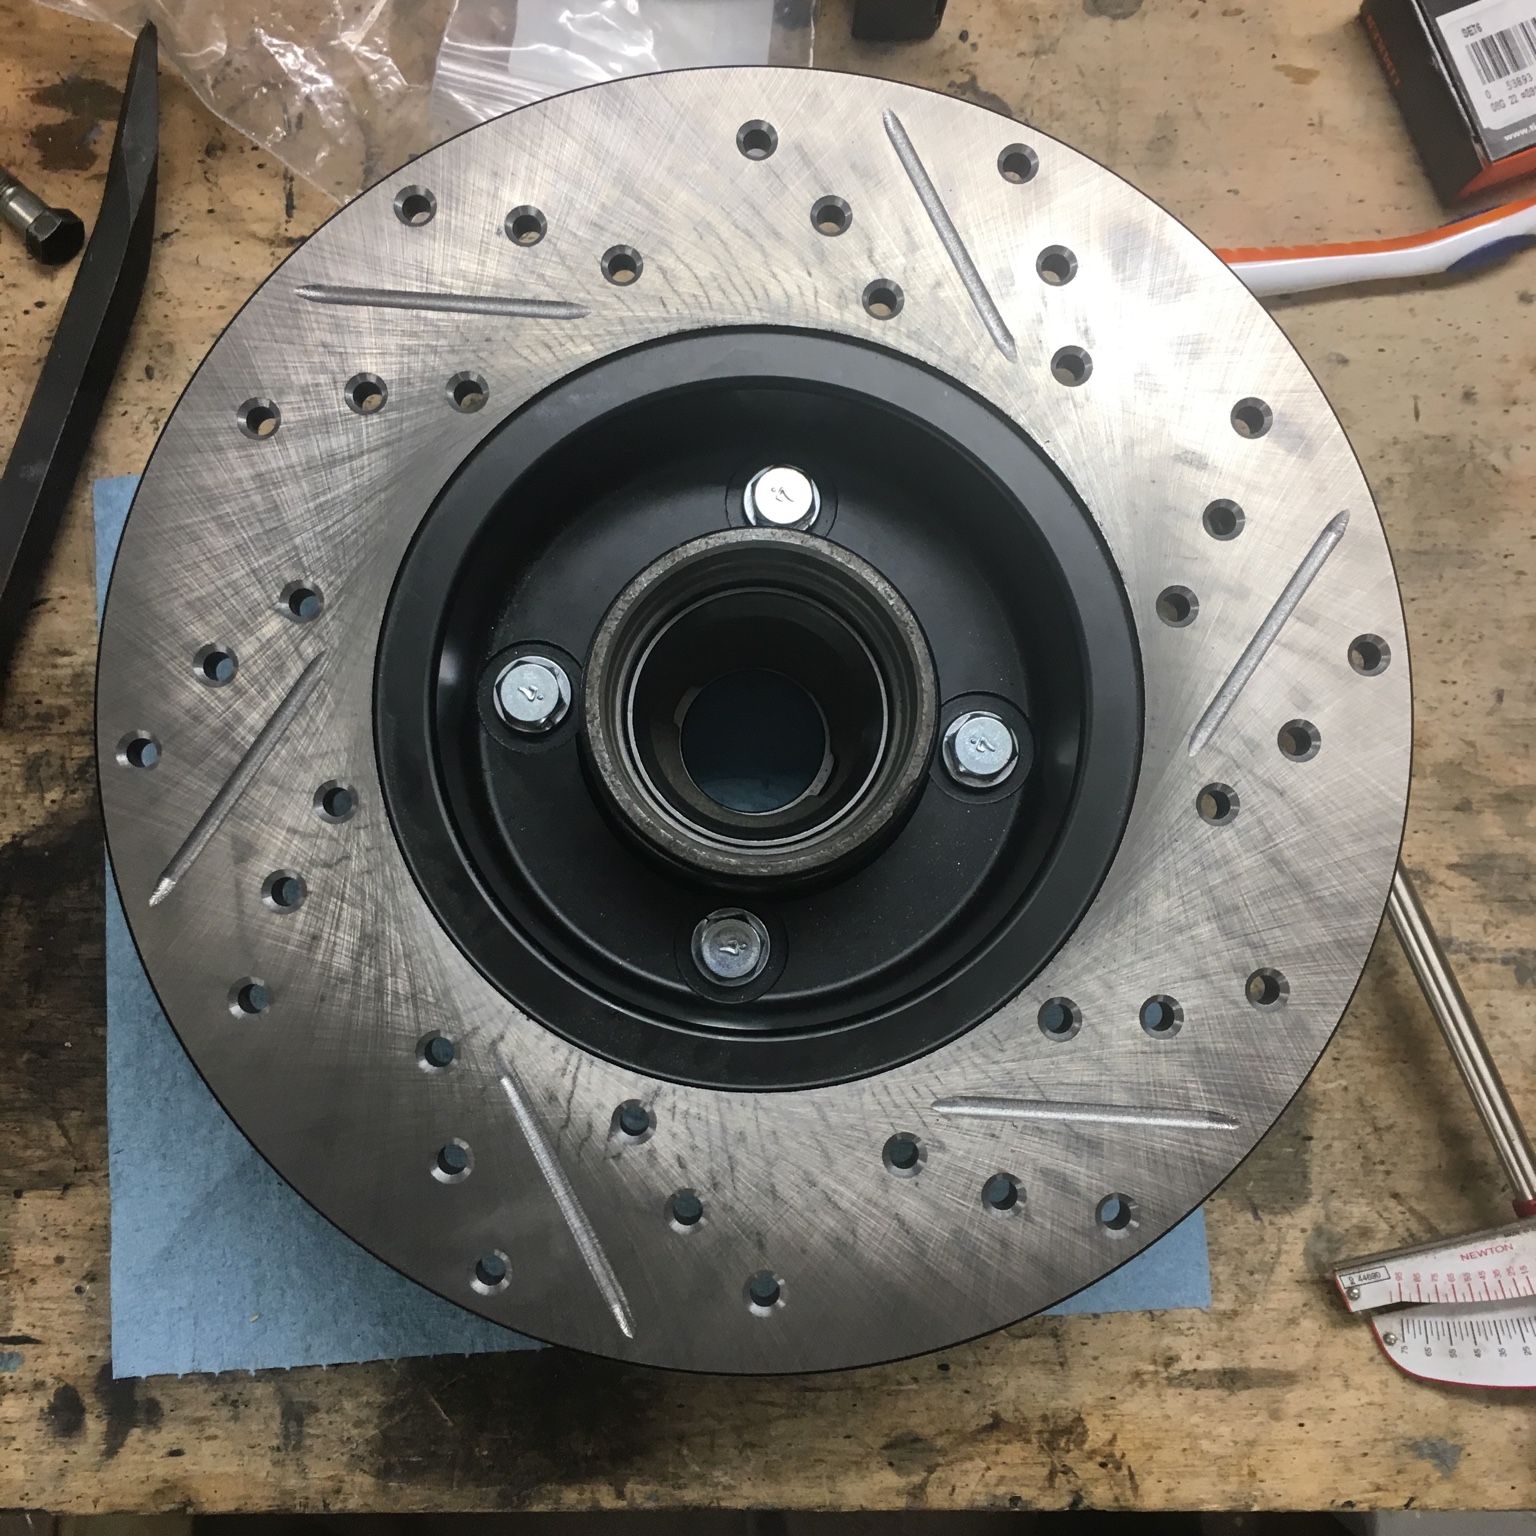
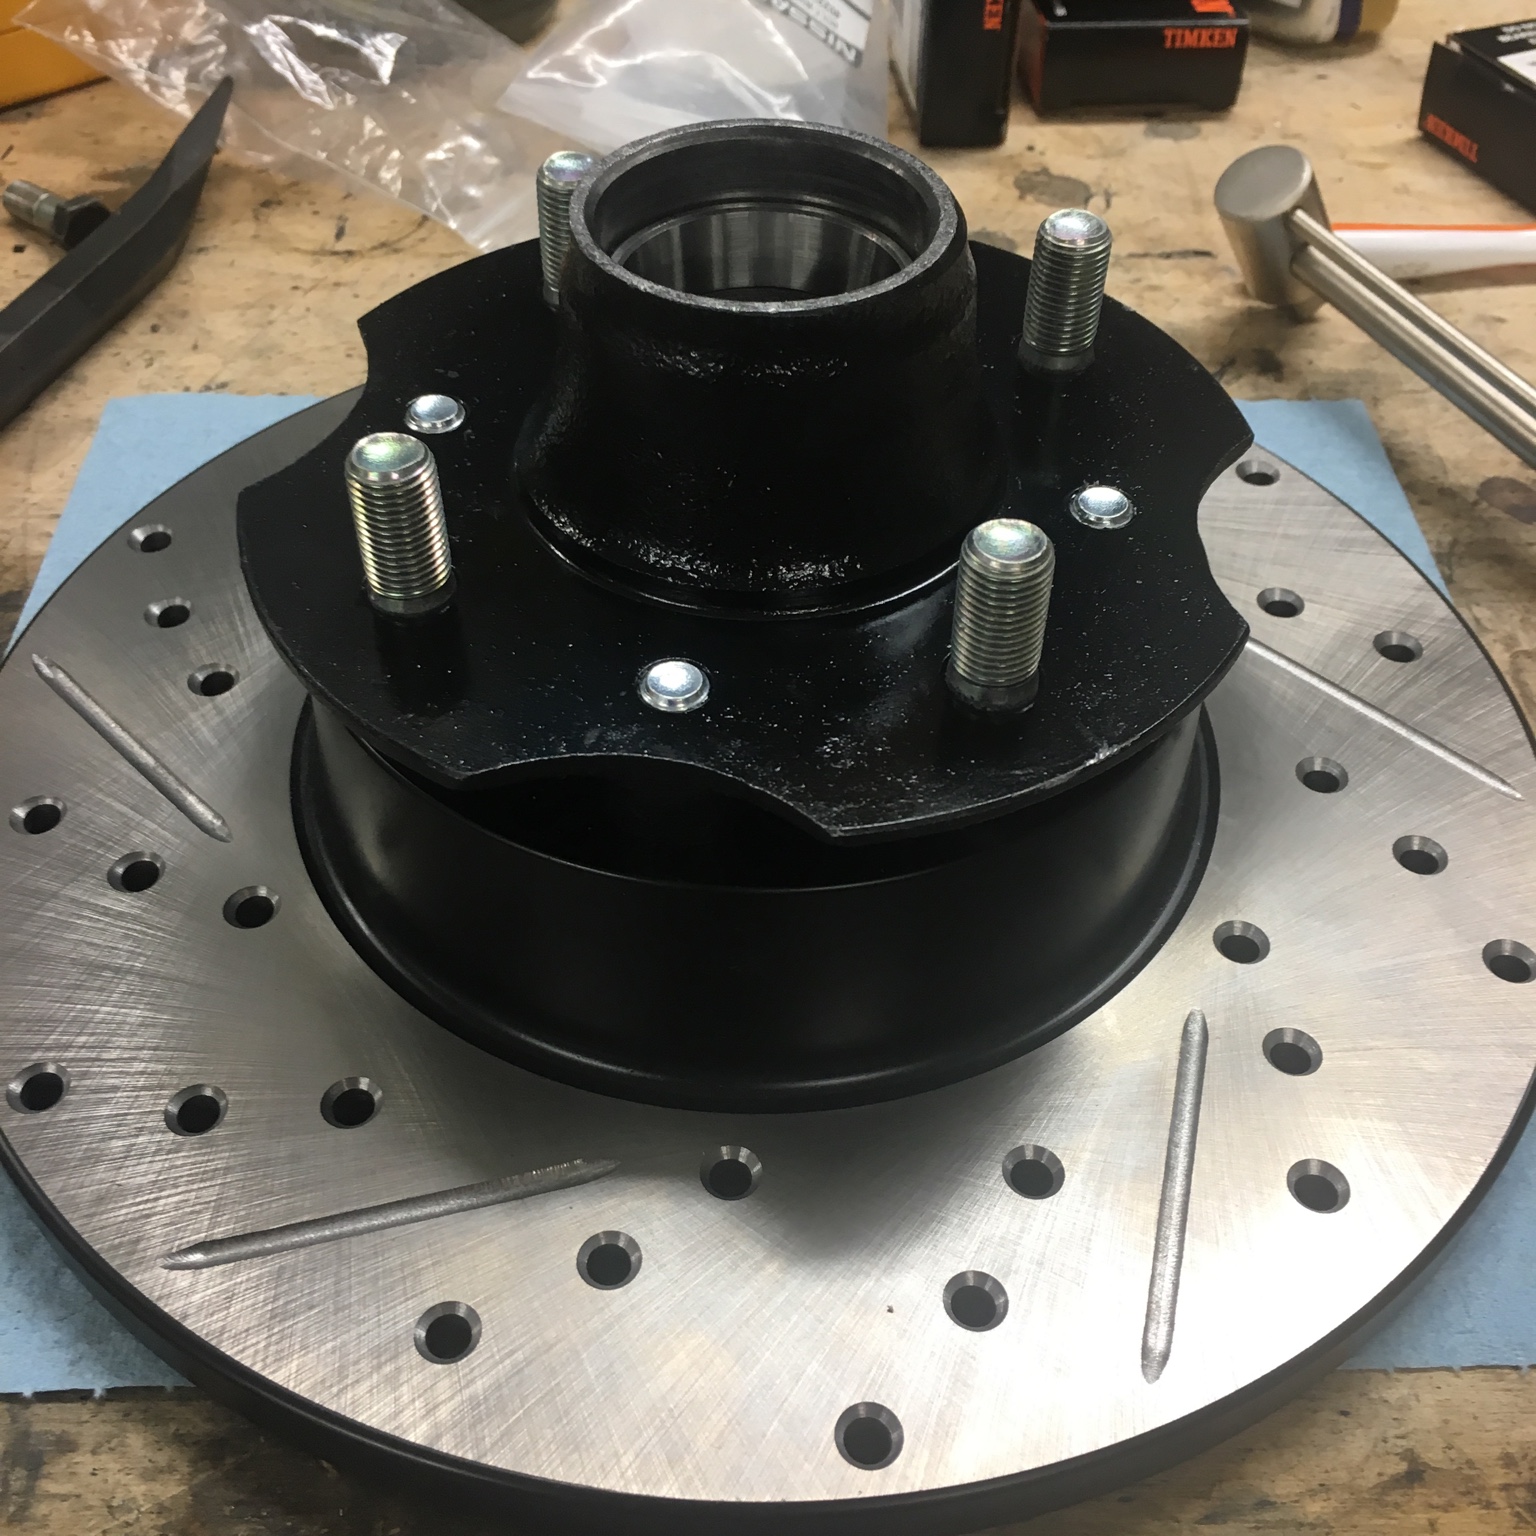
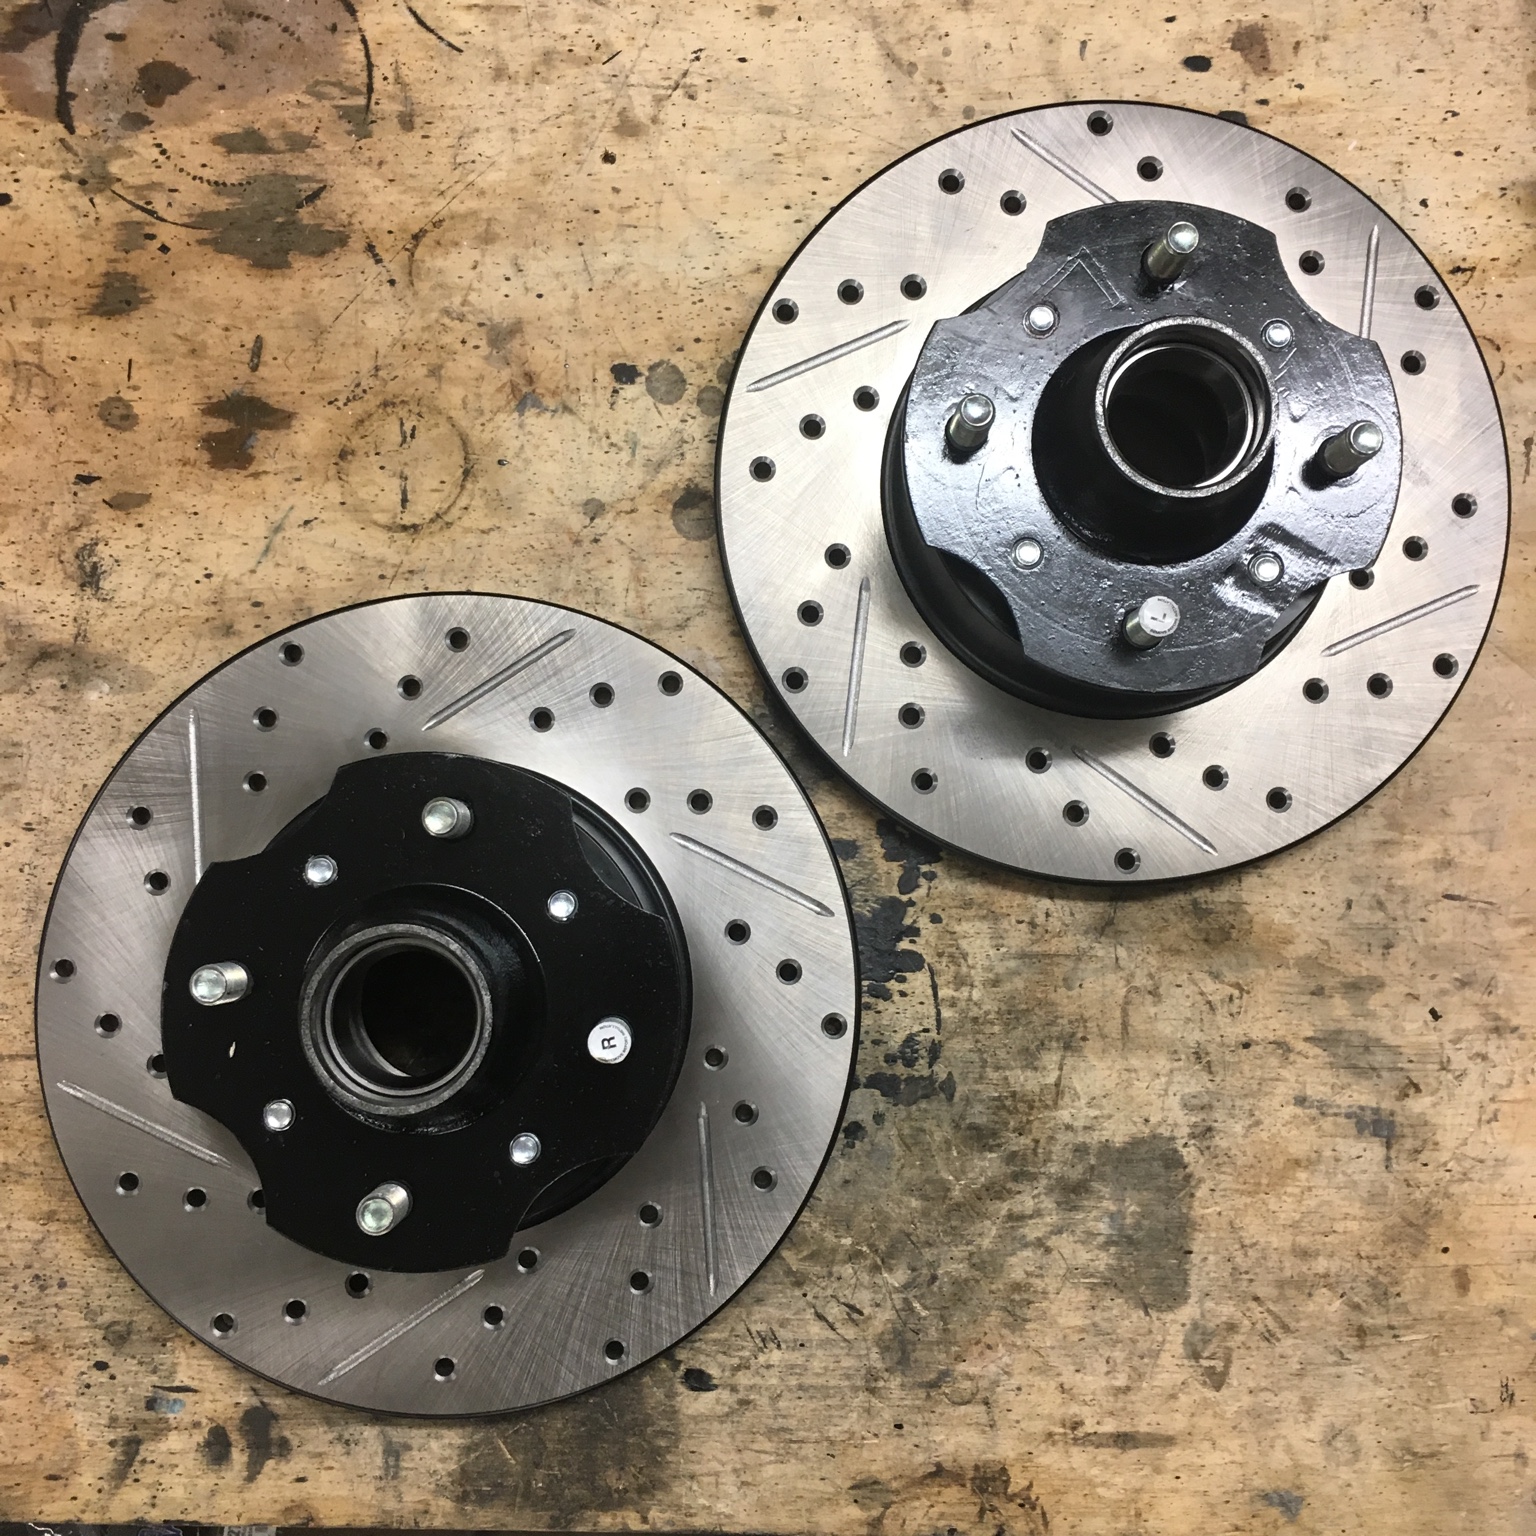
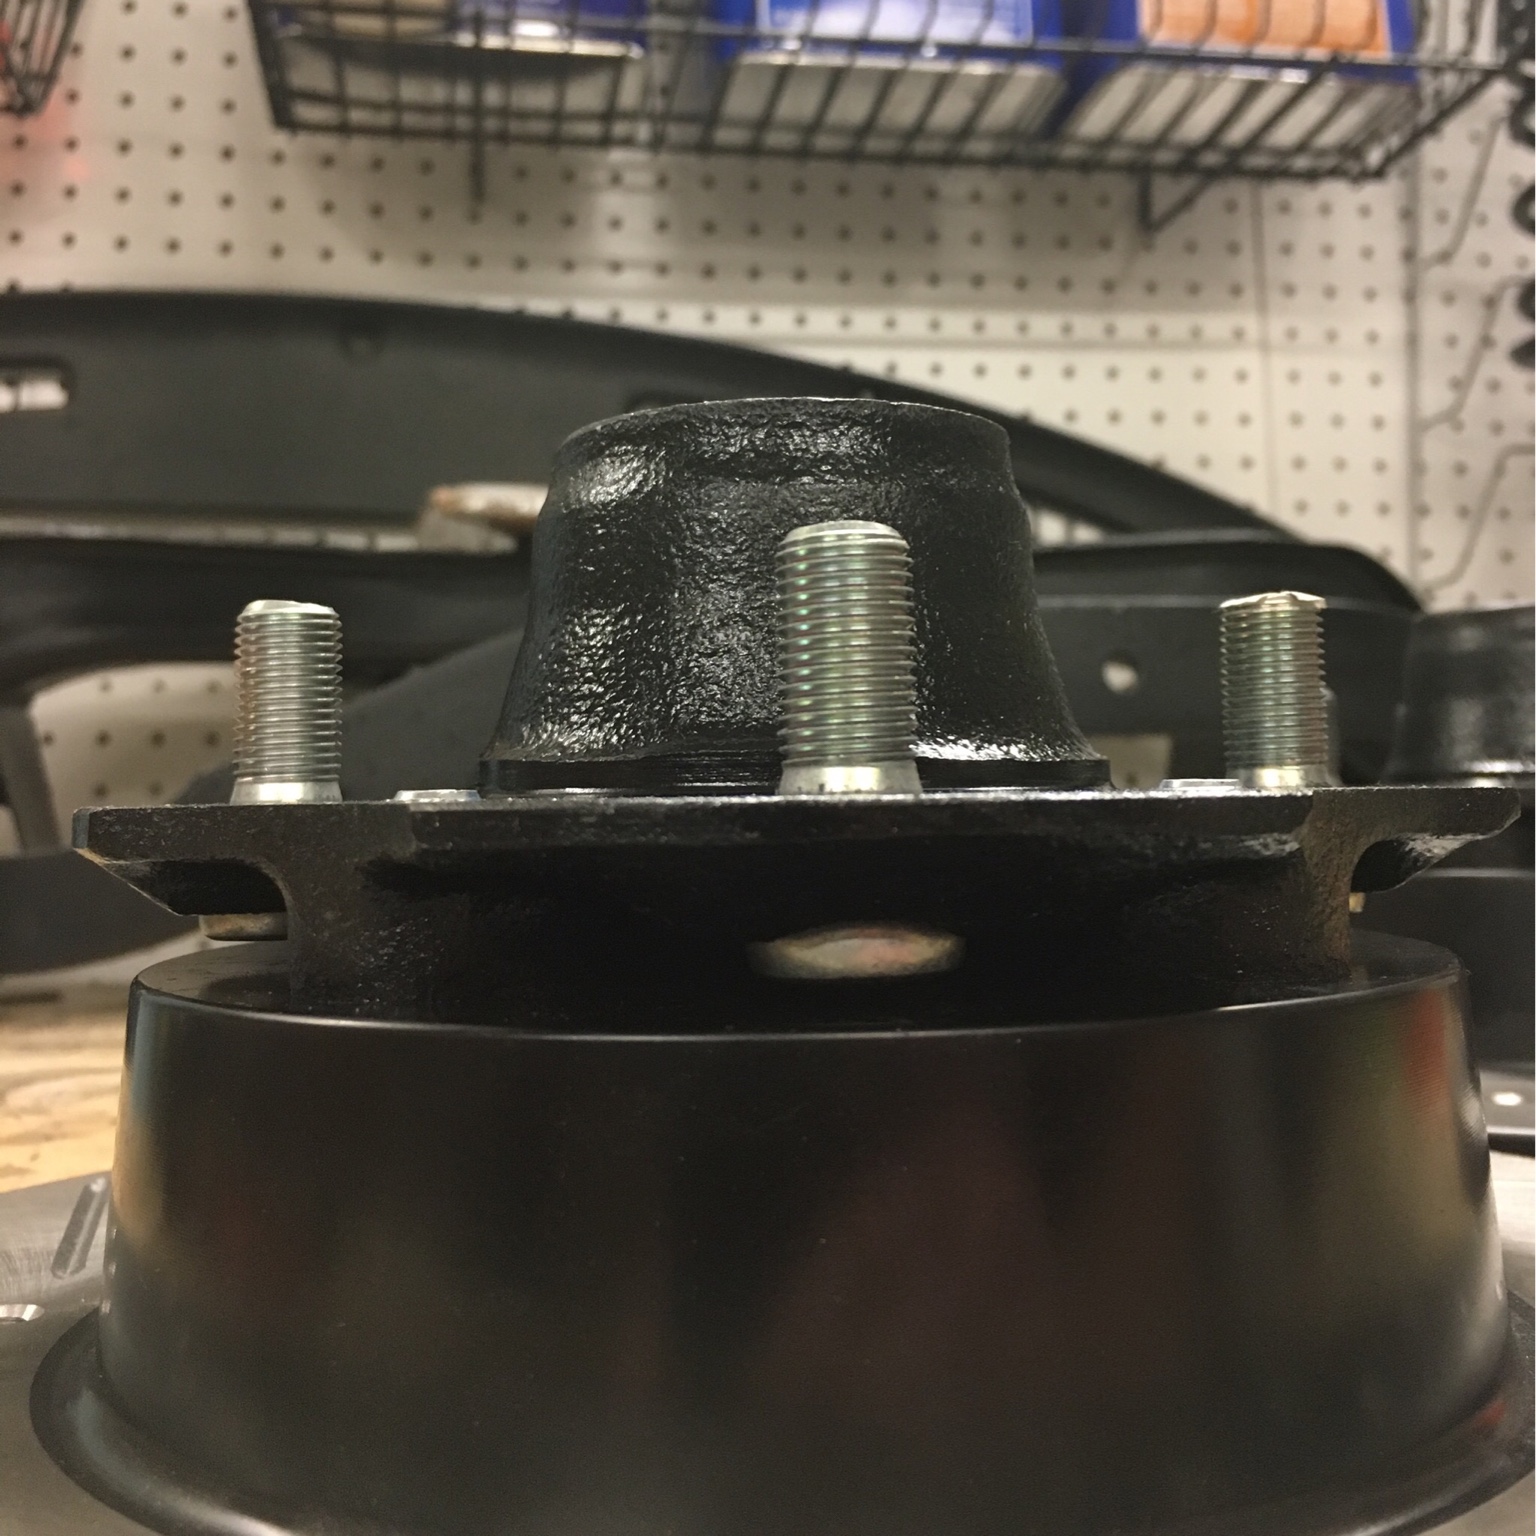
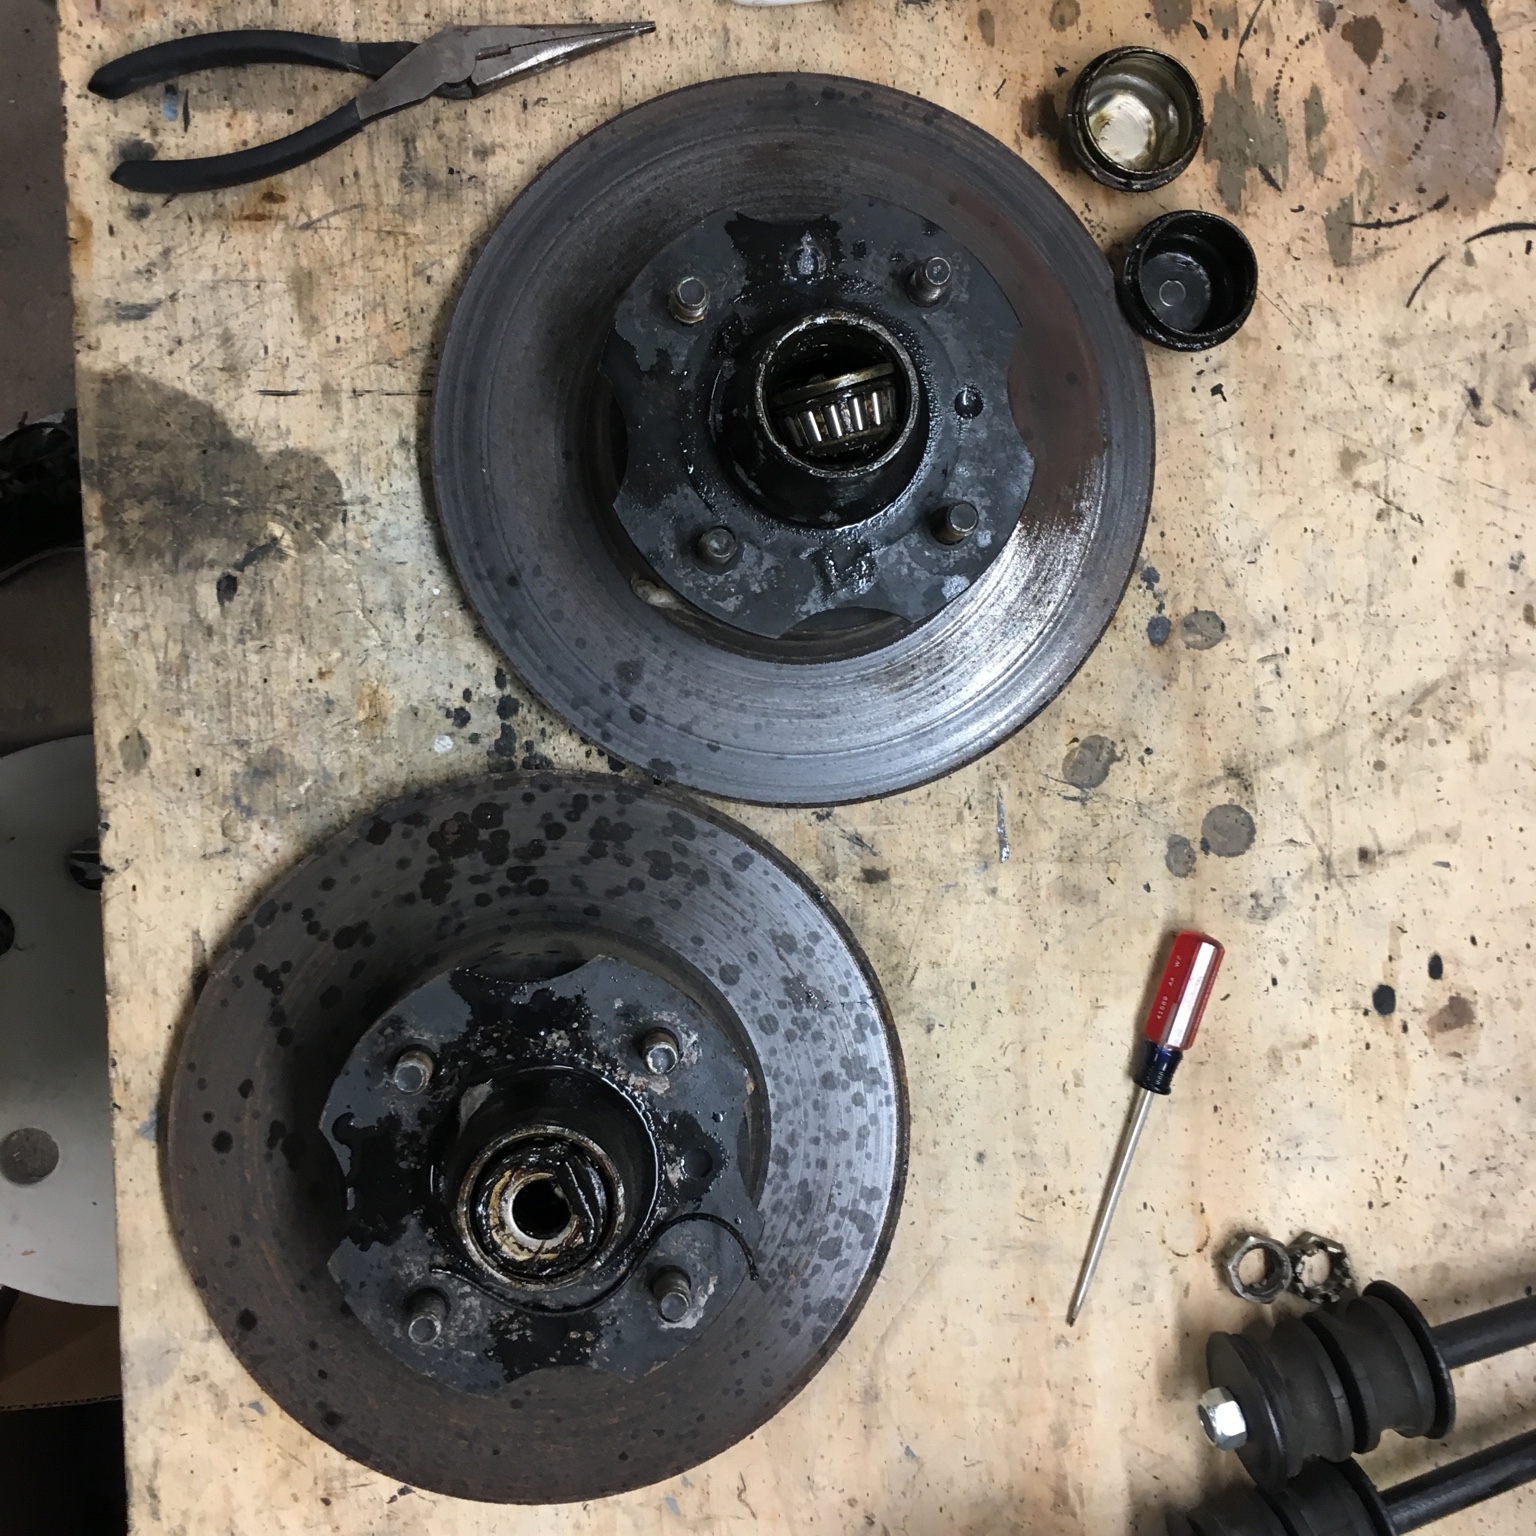
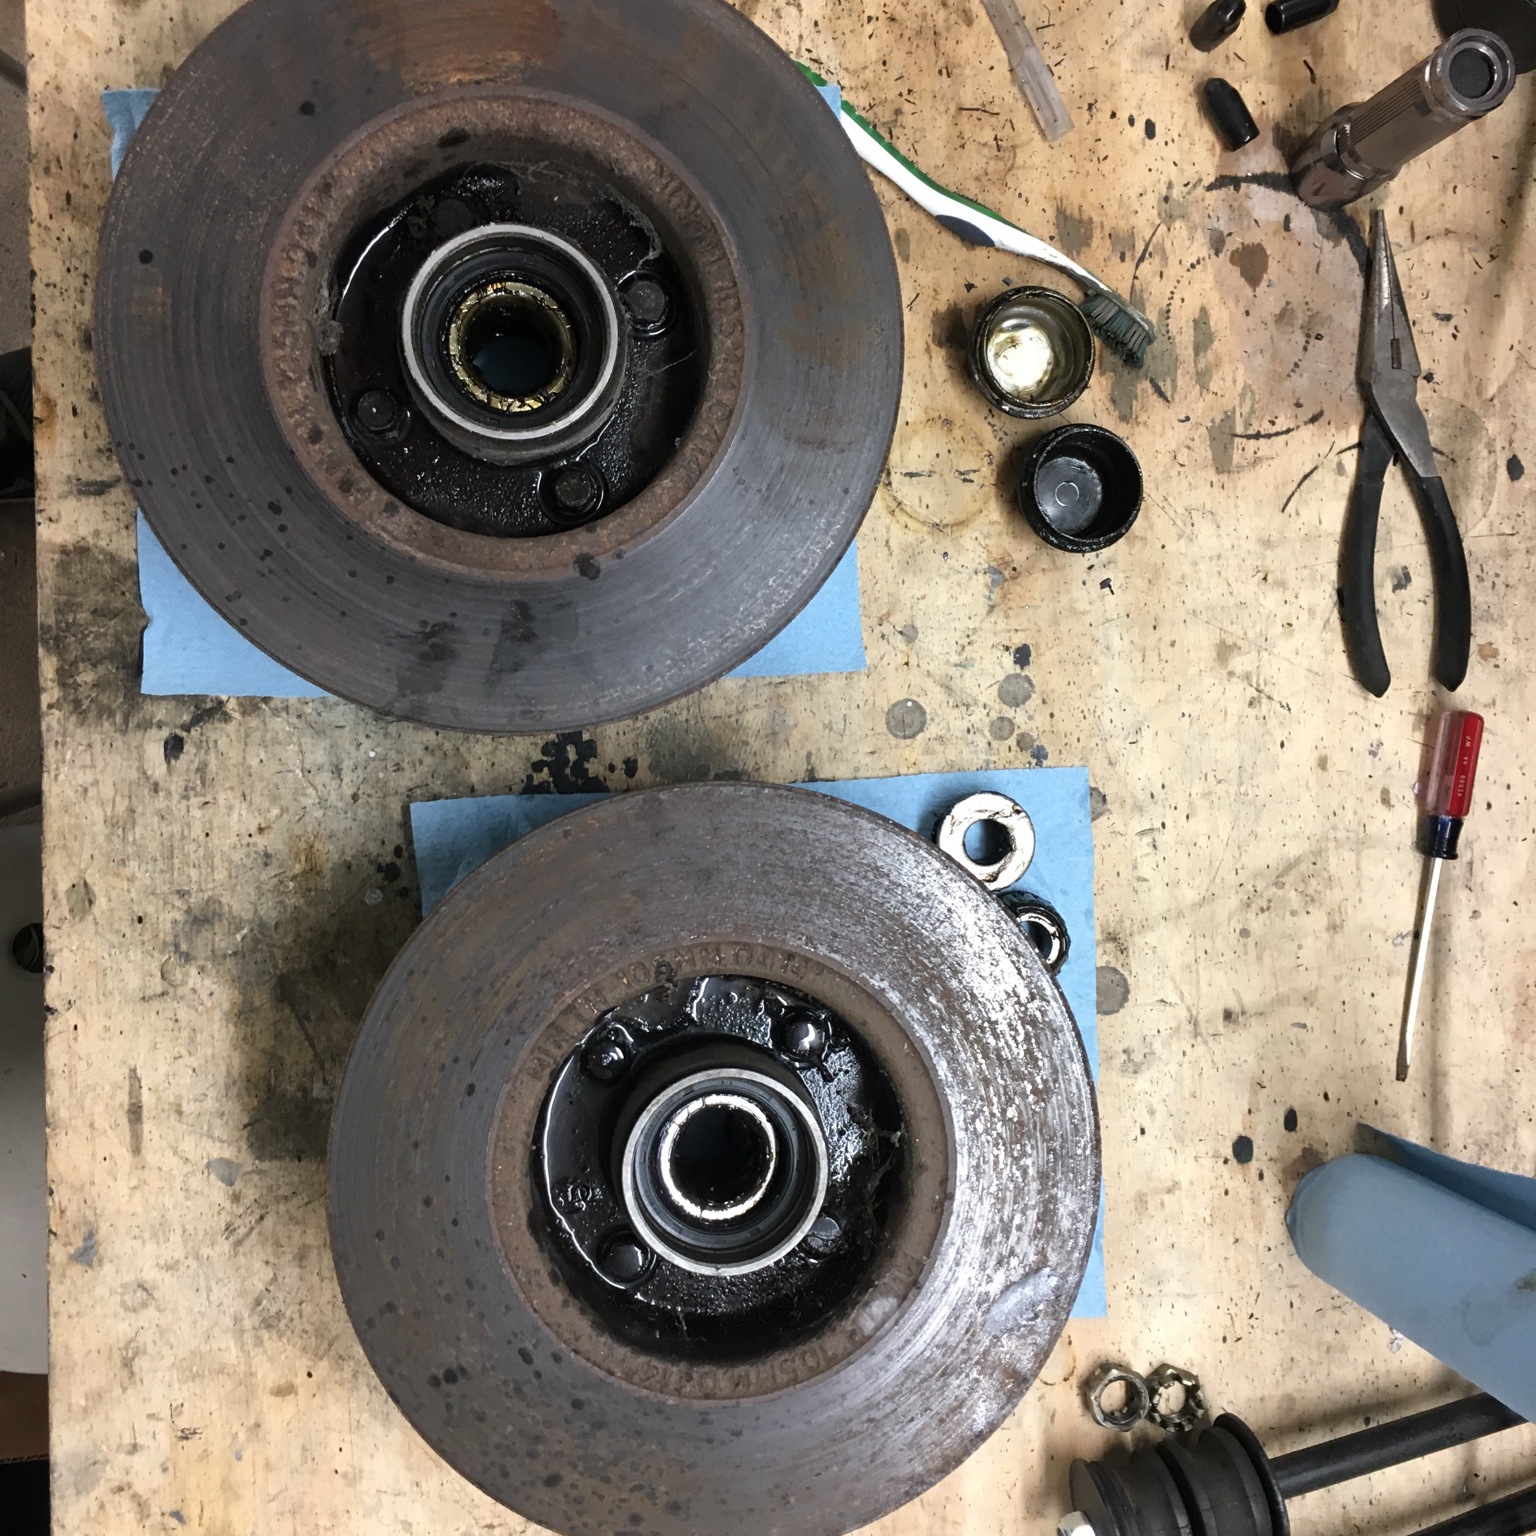
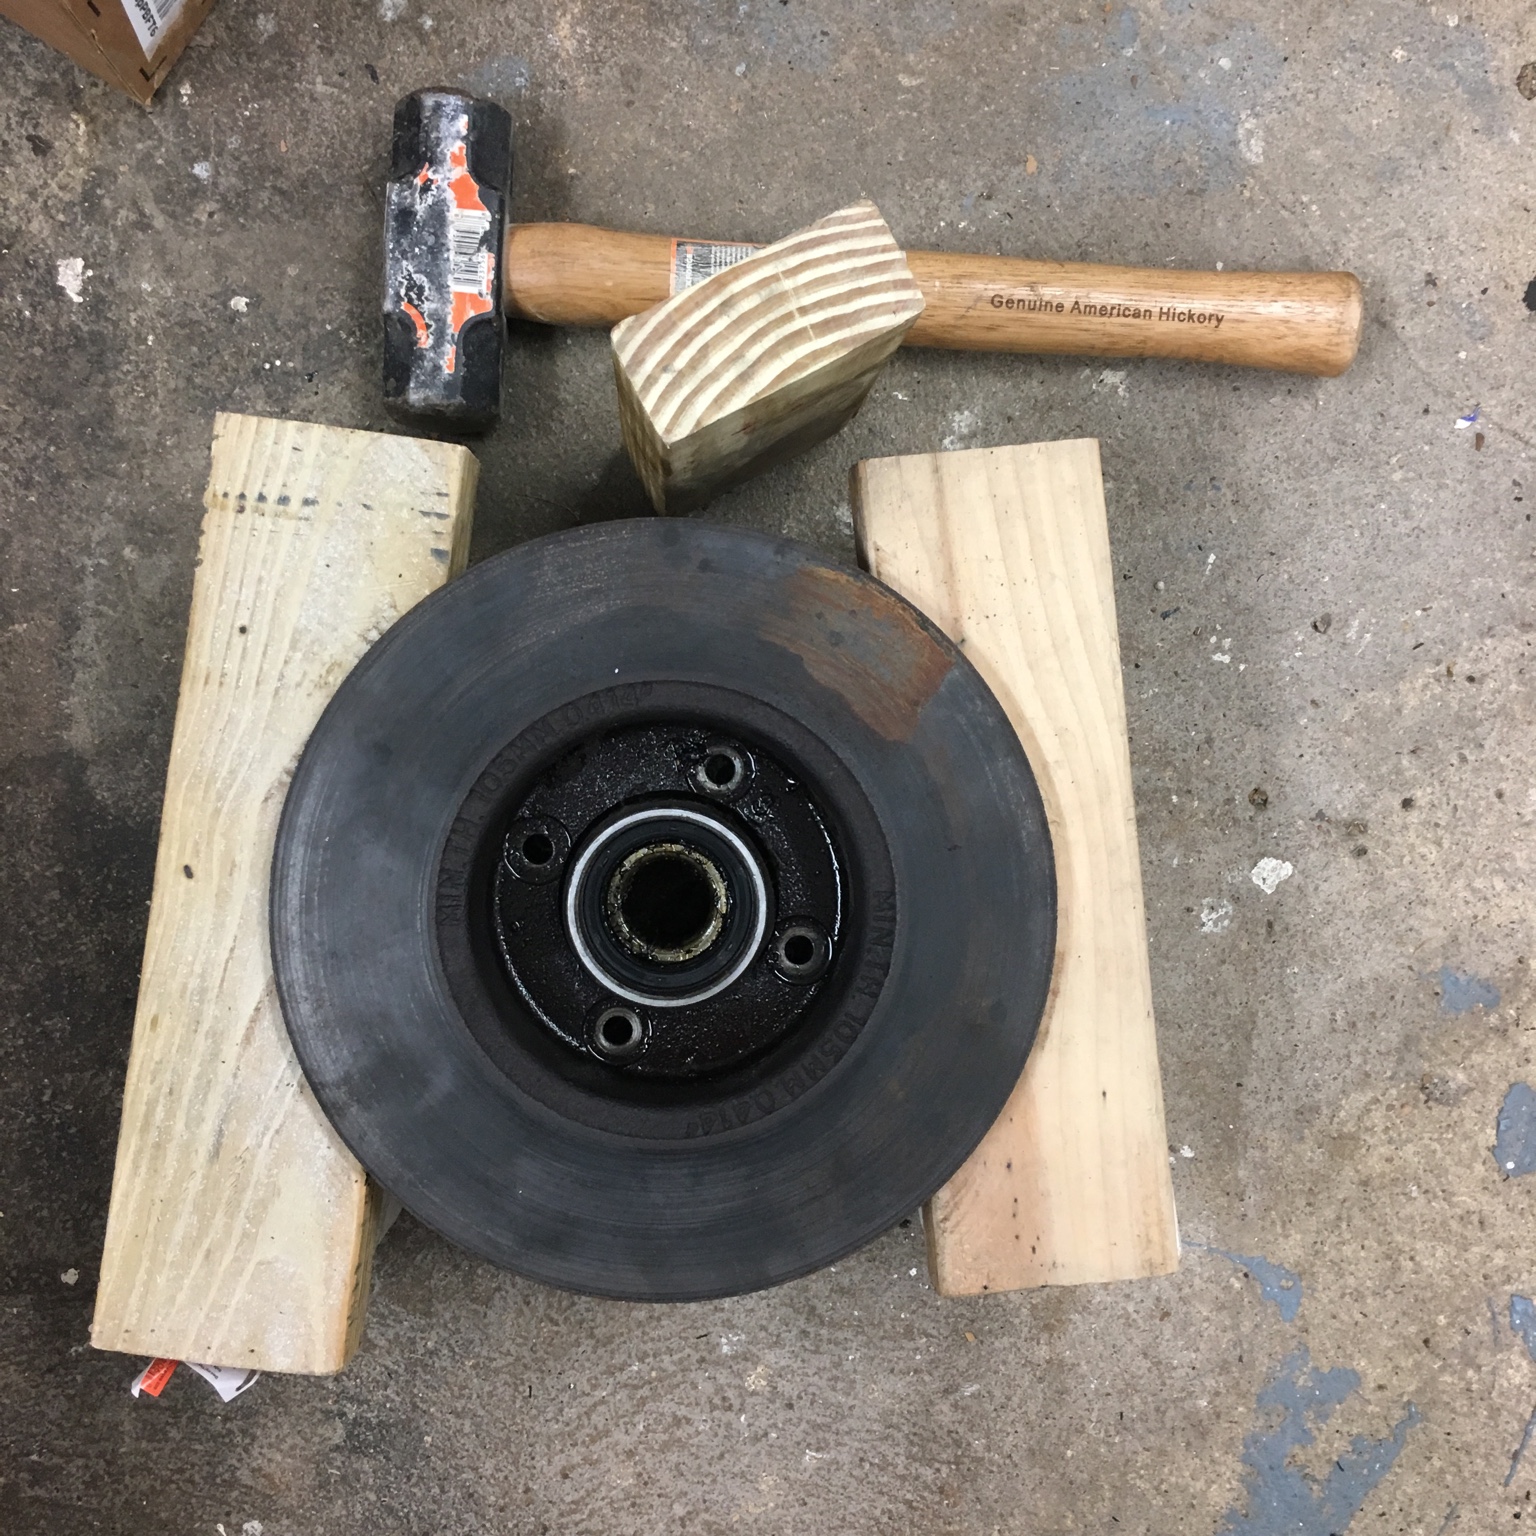
Got the hubs and rotors together... ... but... ... notice anything? The hub bolts are protruding. They will hit the wheel if I leave them like that and prevent a solid mating surface between the hub and wheel. This could mean one of, or a combination of, three things: the new bolts are longer than the OEM bolts, the new lock washers are thinner than the OEM lock washers, or the new rotors are thinner at the mounting point than the OEM rotors. I’m going to pull a bolt and double check the length as soon as I have time, but I suspect that it’s the rotor. They have a recess where the bolt hole is and I think it’s too deep. If the new bolts and washers are the same measurements as the OEM bolts I’ll have two options: grind the bolts shorter or find thicker lock washers.


-
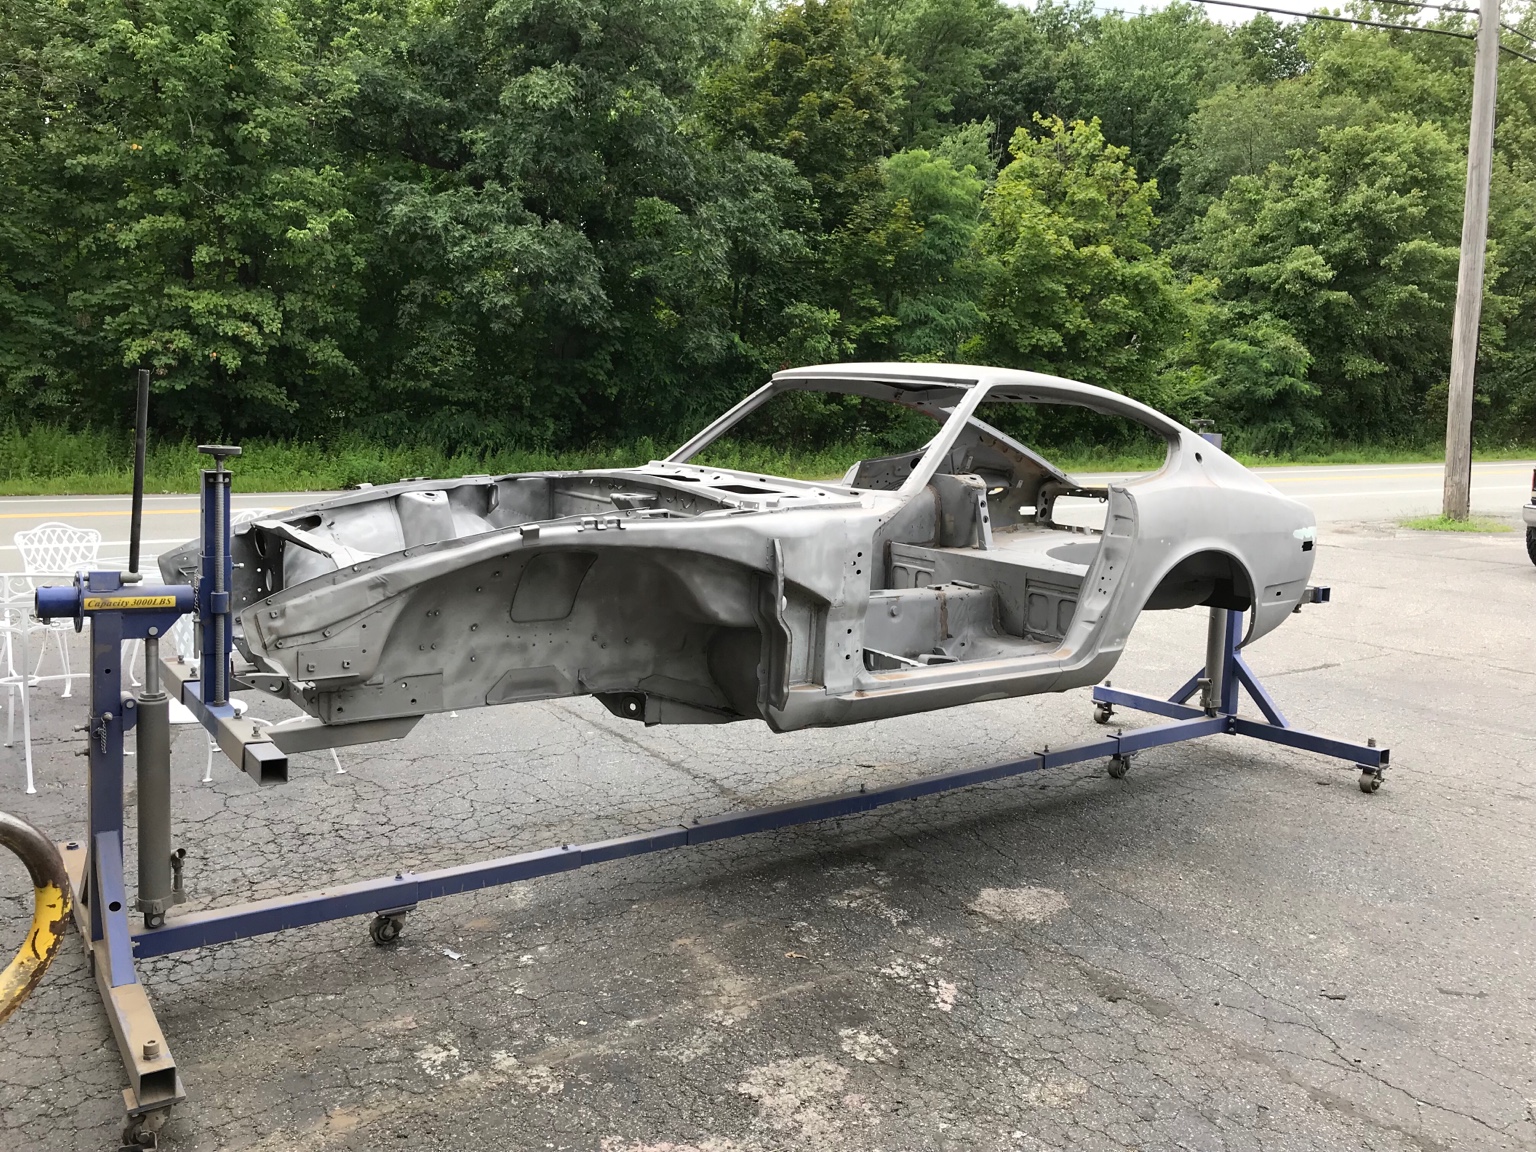
I got about half way and ran out of vacation days and sand, so Blast Lab finished it. Sent from my iPhone using Classic Zcar Club mobile
-
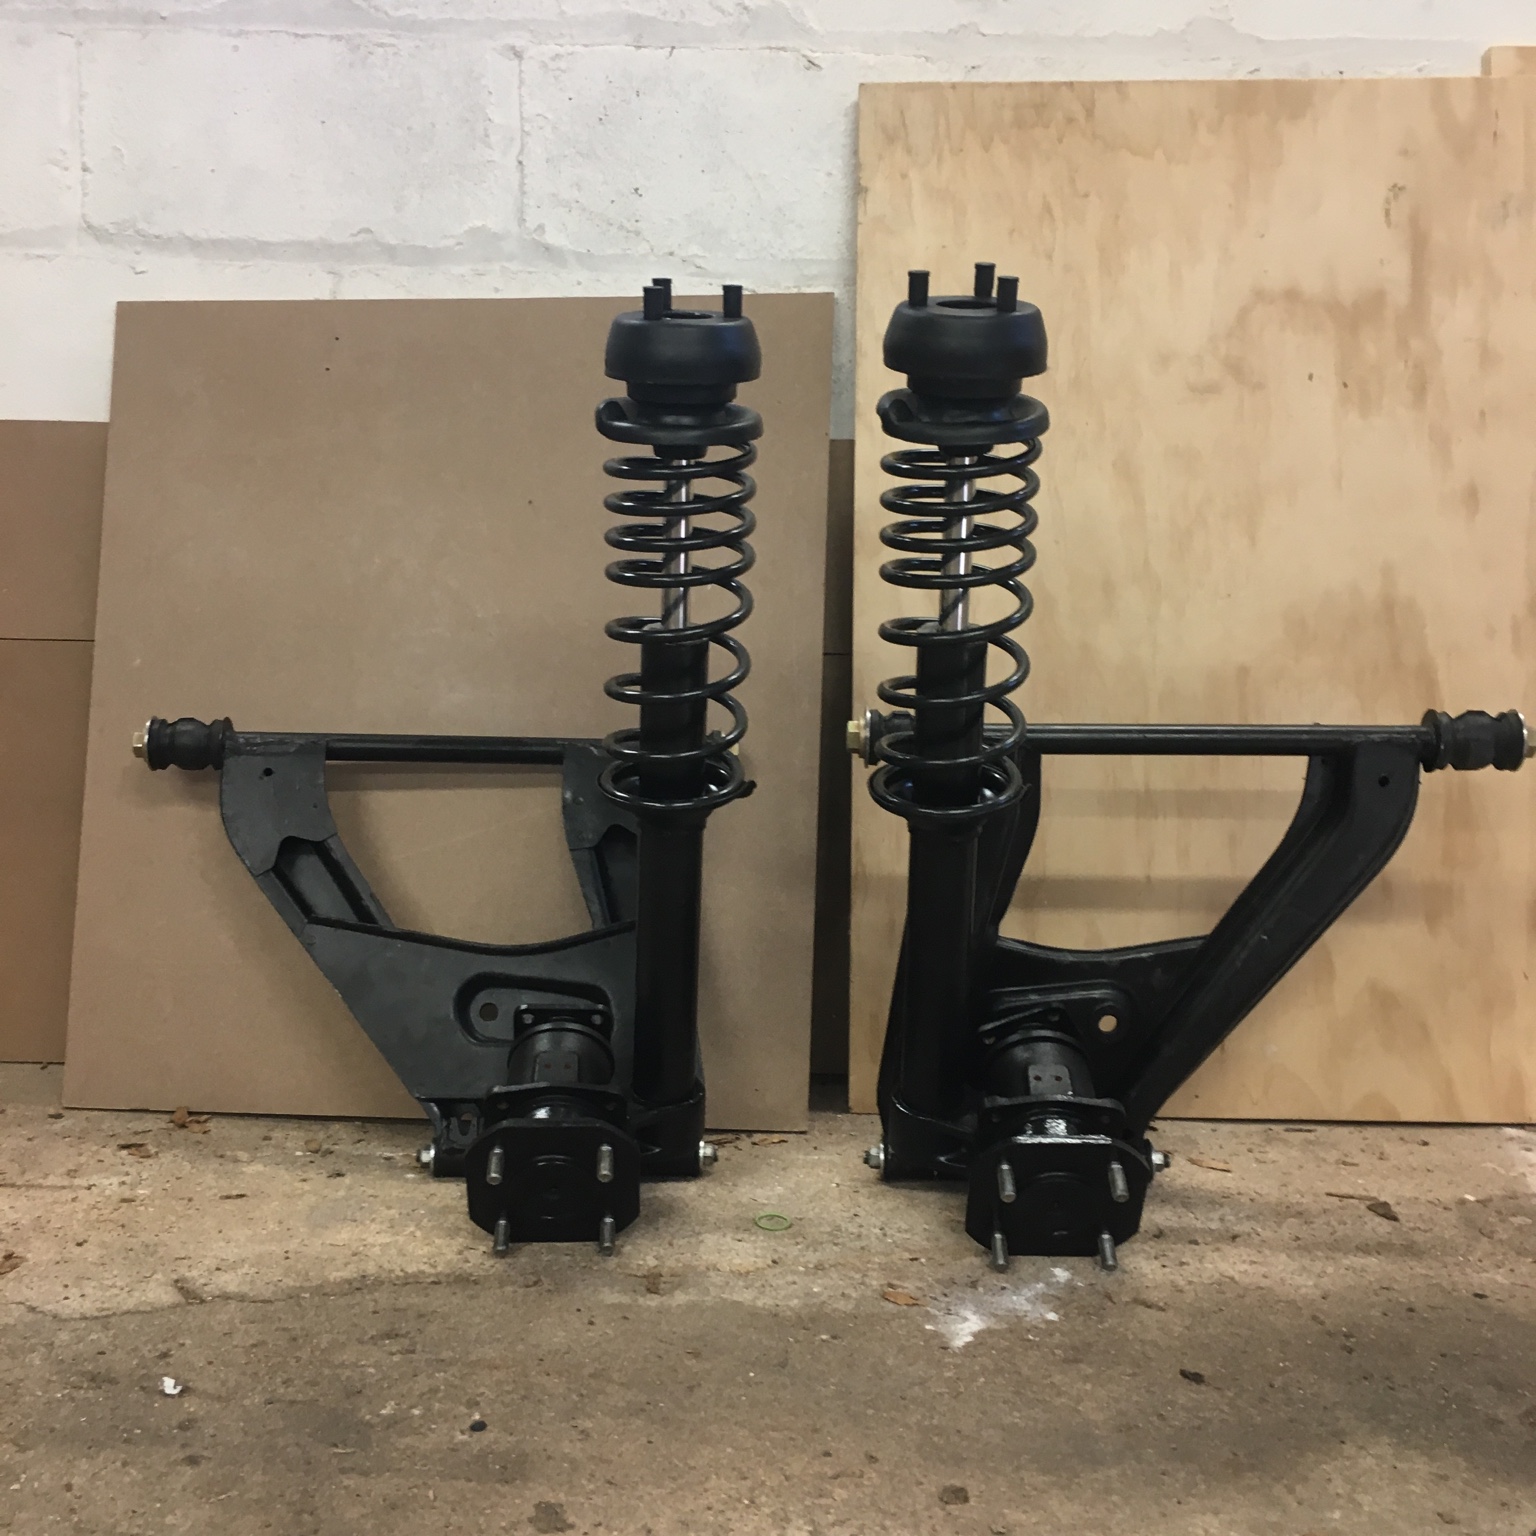
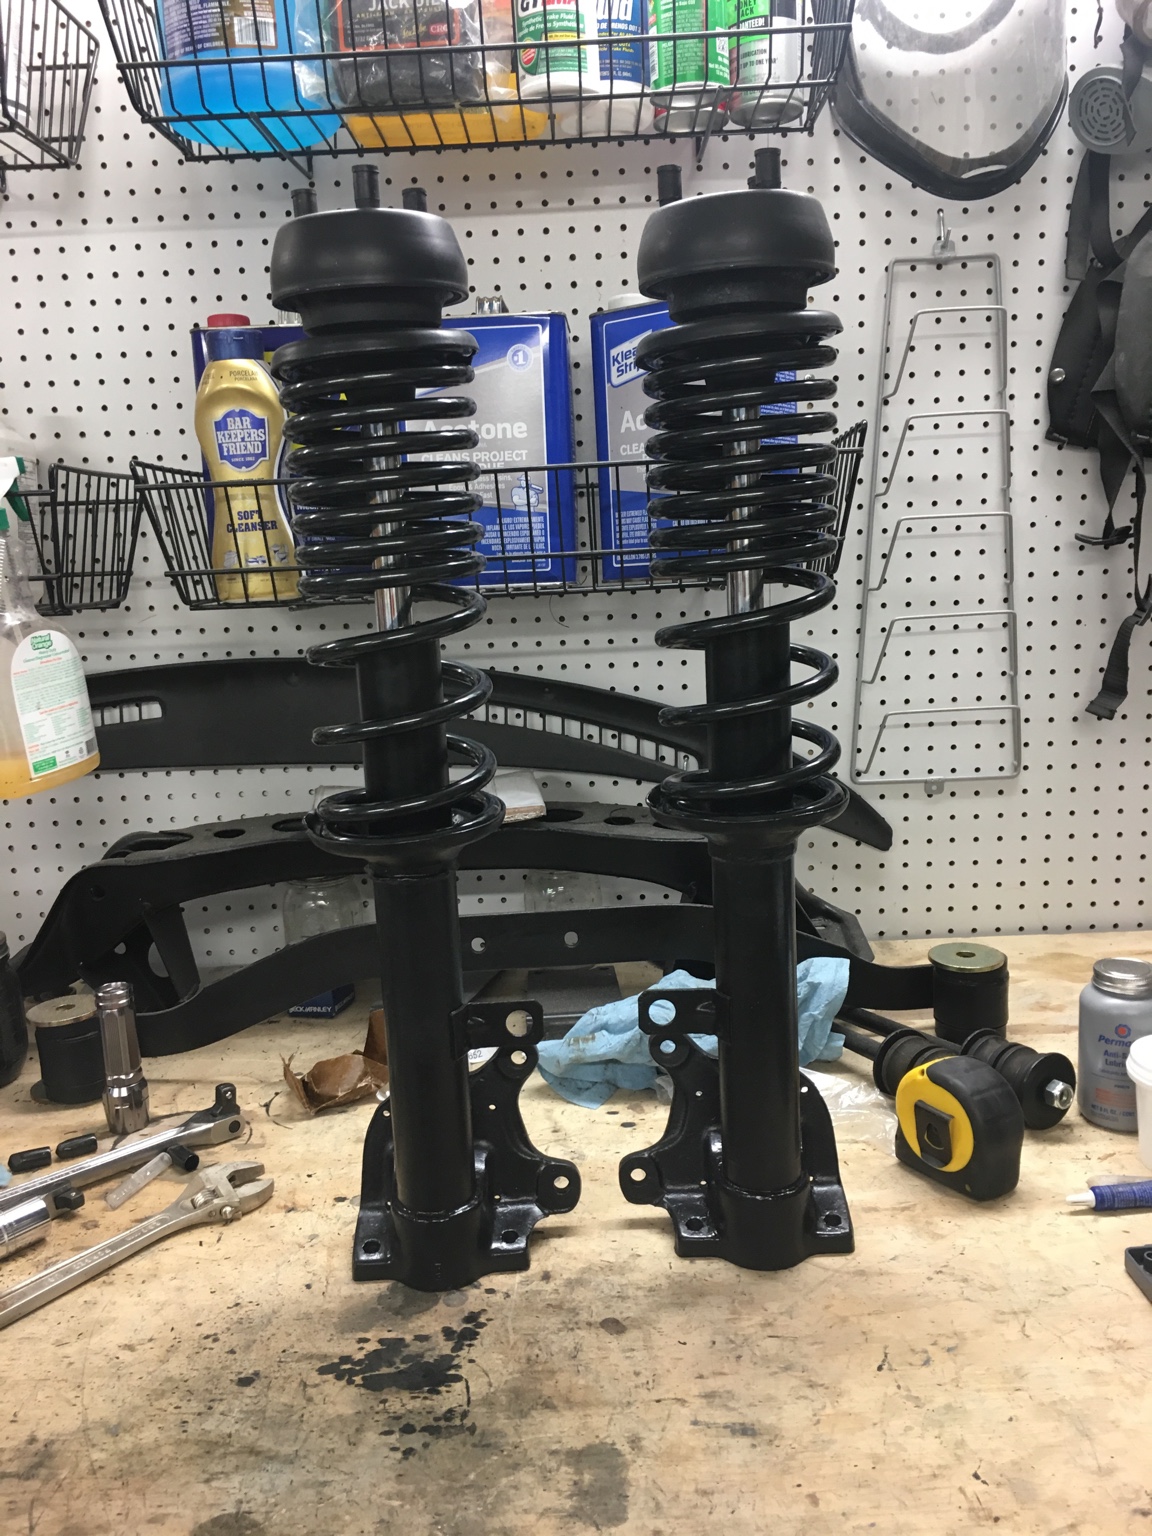
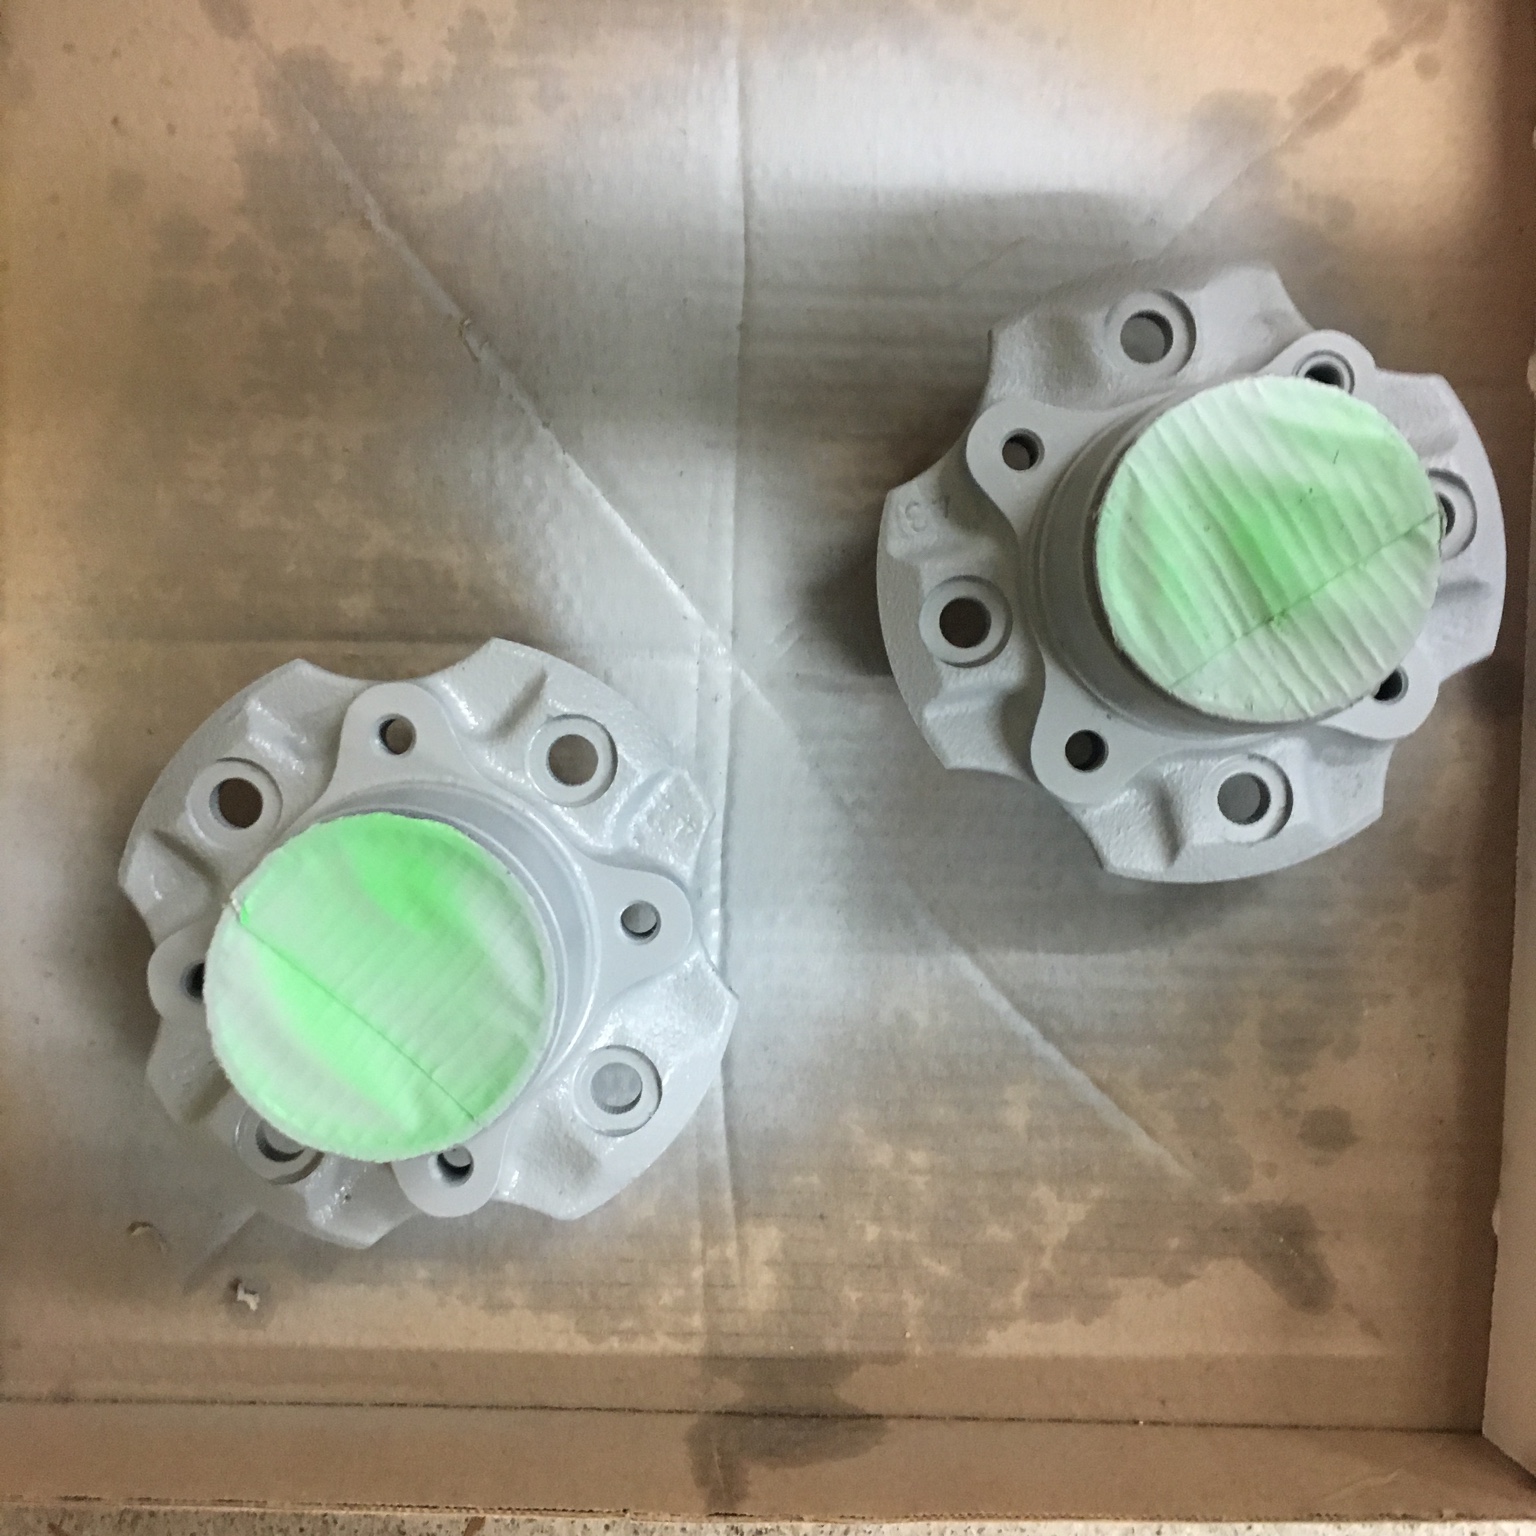
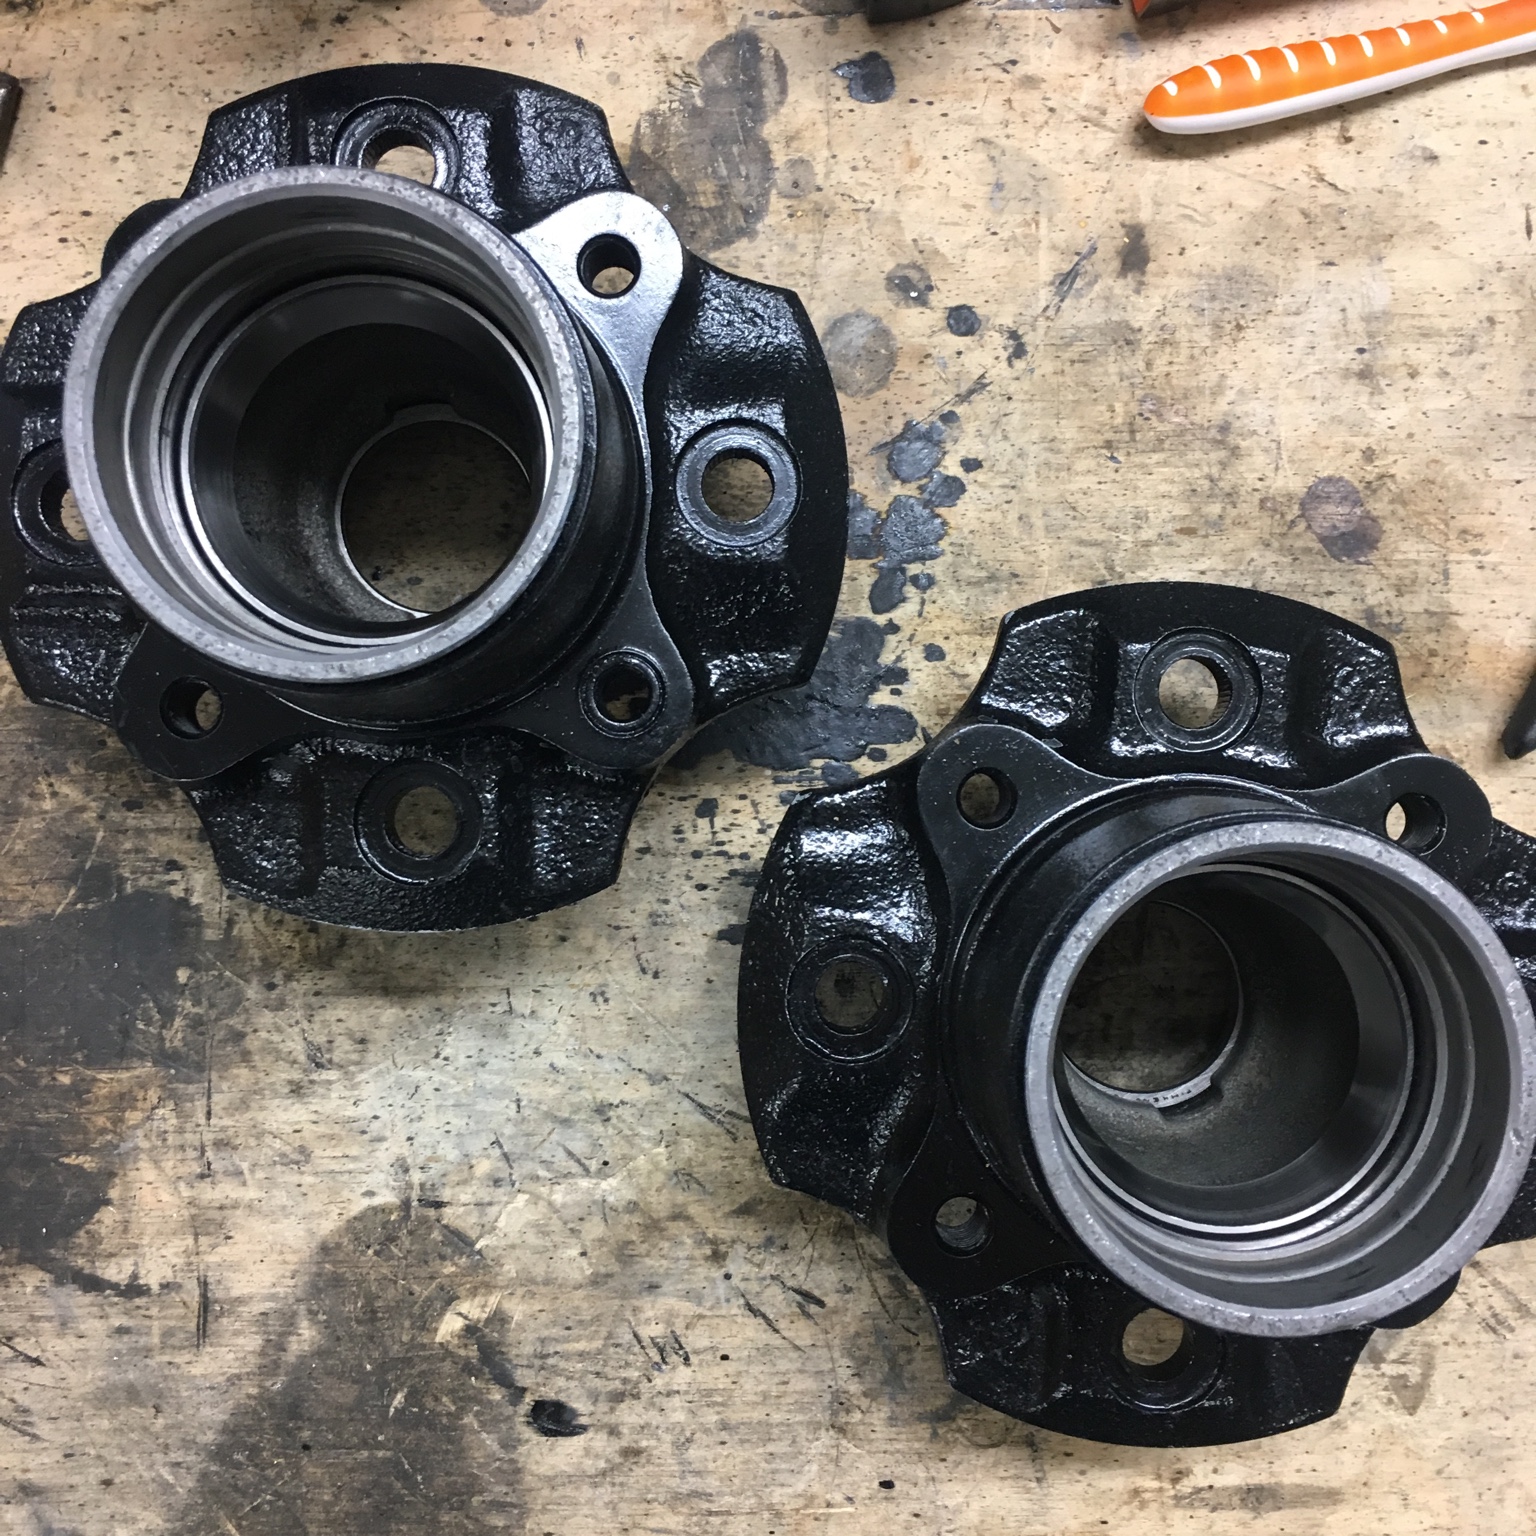
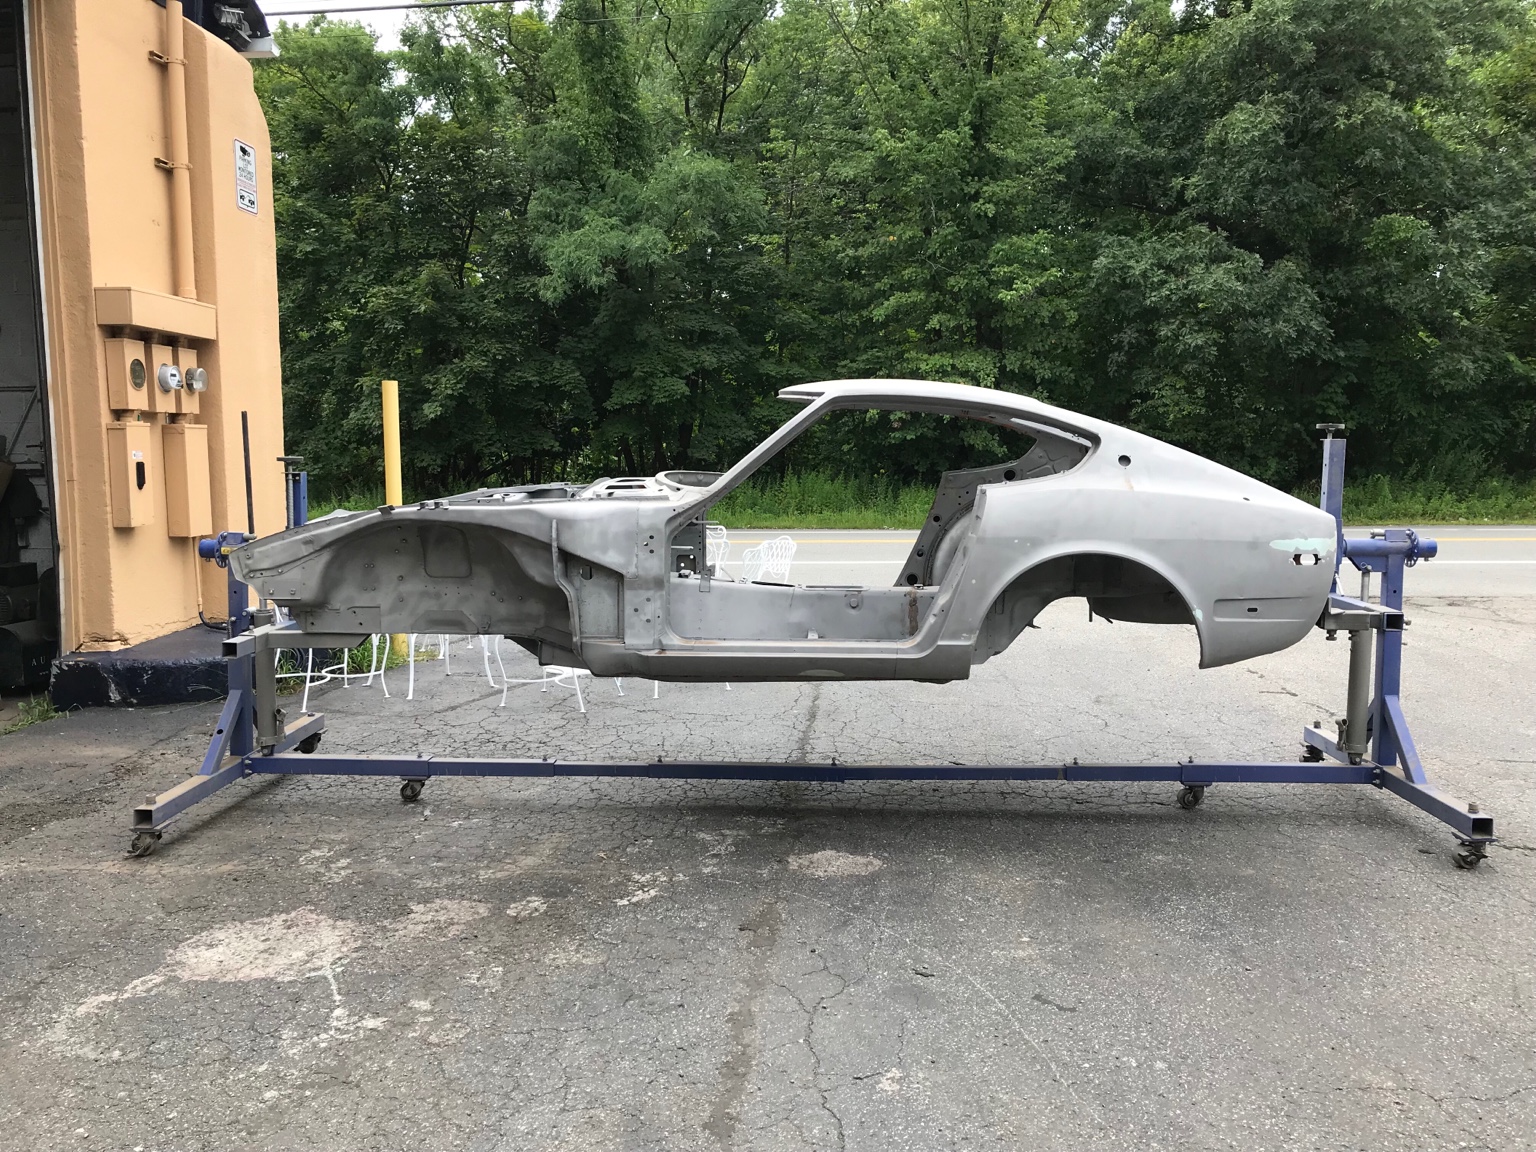
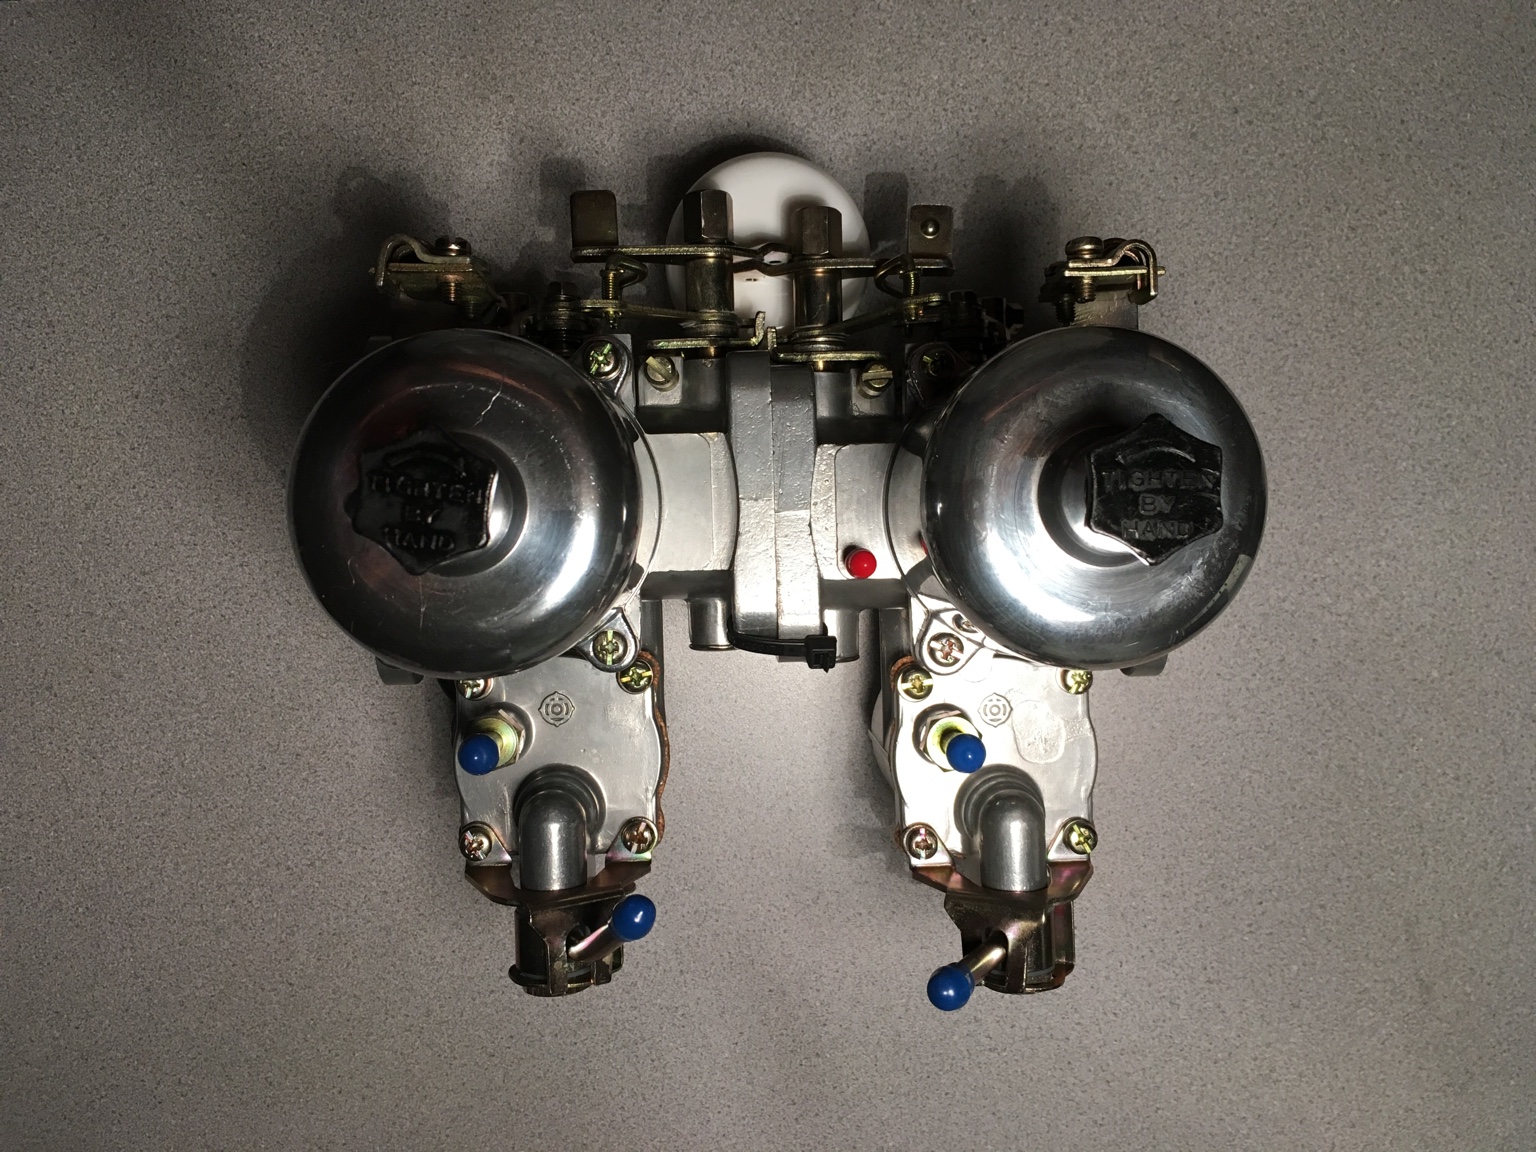
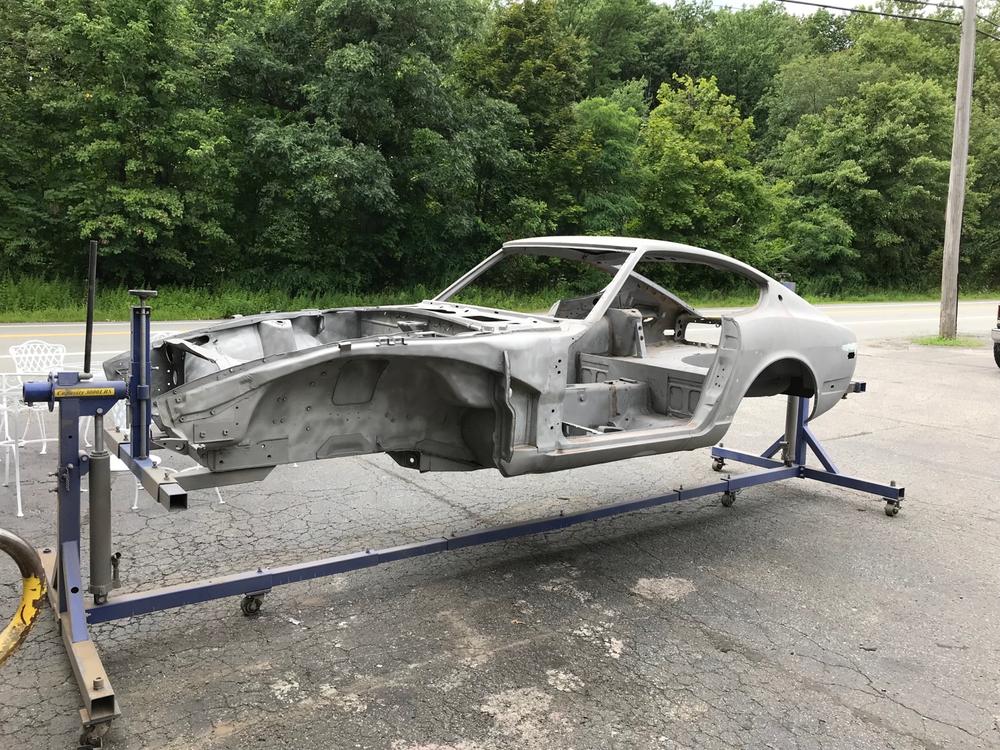
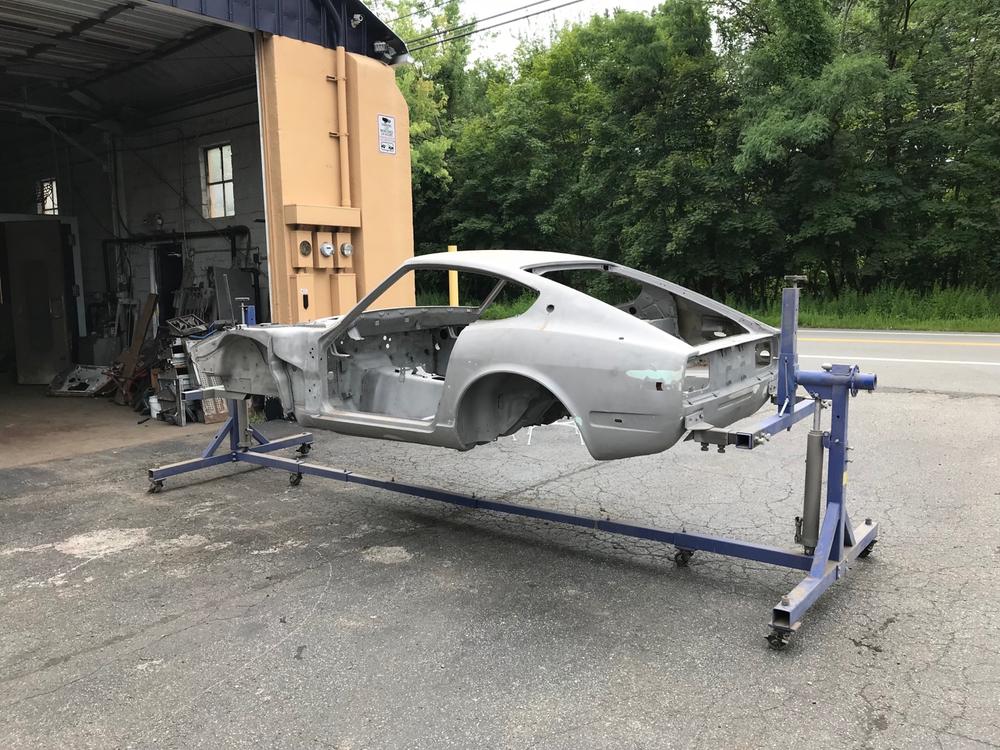
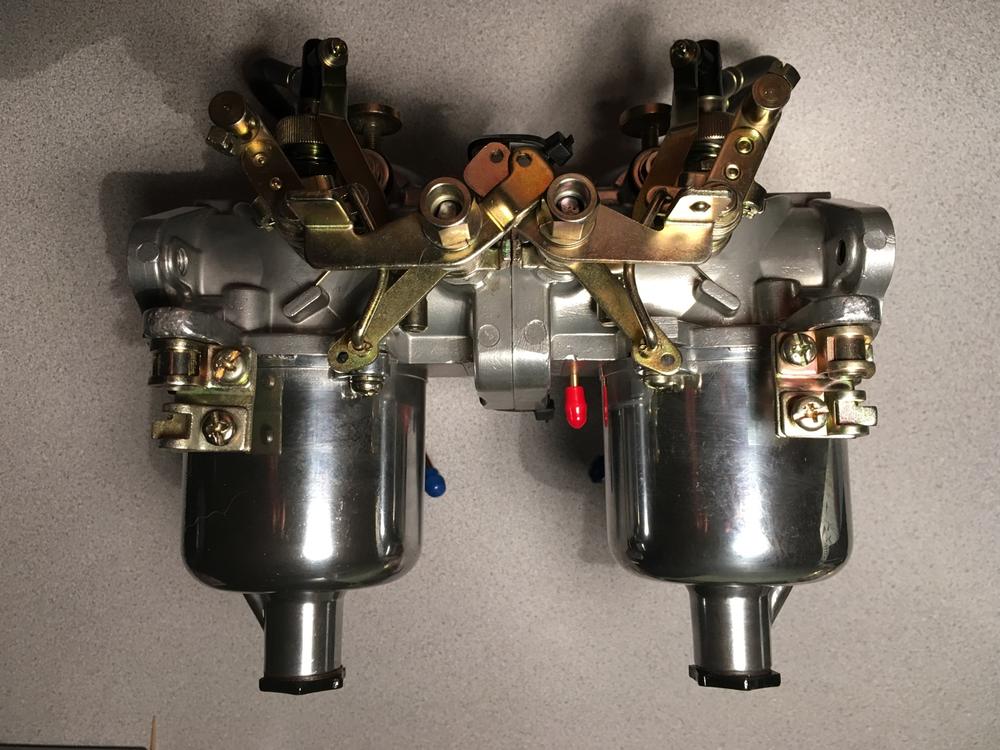
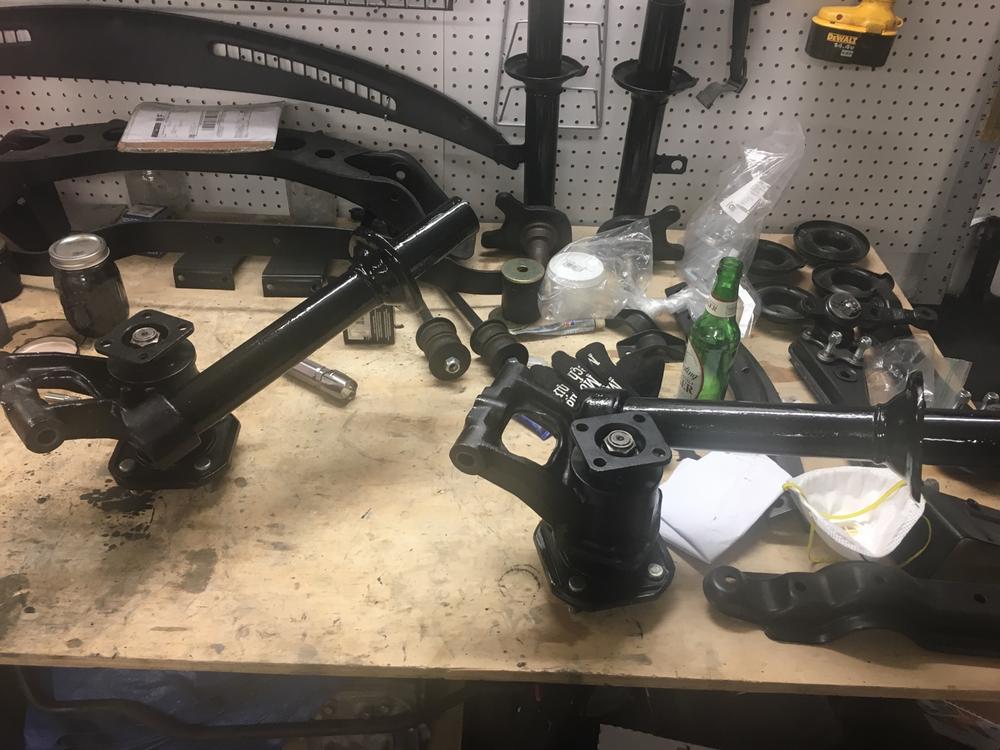
It’s been a while since I posted progress, so I thought I would throw some photos up: Note the helicoil that came out with this bolt: Time-sert installation: Finishing: New bearing cups in: Body status: Carbs back from Z Therapy: Hoping to have the rotors and hubs on the struts by the end of the weekend. The weather has been hot and humid so I’m not certain the paint will be cured on my dust shields by then, though. After that is scrounging up the hardware that holds the suspension on the car, getting some cheep tires on the old mags, and getting the suspension out to the painter after the undercoat is on.


-
Got a lot going on, which I will post up when I finish, but in the mean time I have a question. I almost started a thread for this but I melt like I should ask here first. I am planning to spay ceramic sound deadener, heat shield, and undercoat on the car. My question is where would you guys put these? The painter suggested: • heat shield just on the firewall and over the forward part of the transmission hump, inside the cabin • Sound deadener inside the doors, on the floor inside the whole cabin, and inside the roof • And undercoat under the entire car stopping where the transmission jump bends and you can see it from the engine bay, as well as inside the wheel wells and the inside of the front fenders. I am not super knowledgeable on these three things and totally willing to entertain suggestions on changing this. Please hit me with what you think is optimal. Remember this is a resto-mod, so I am going for function driving form, not historical accuracy. Sent from my iPhone using Classic Zcar Club mobile
-
Bummer. Maybe I’m just overtightening it. Sent from my iPhone using Classic Zcar Club mobile
-
Can anyone recommend an alternate gland nut to the ones that came with my illuminas? I’m not happy with how soft the metal is nor how thin the edge is where the wrench grabs. I’m seeing some rounding and I haven’t even tightened them that hard. The ones that were on the car before won’t work. They were mismatched and in terrible condition.
-
Great! Thanks. Sent from my iPhone using Classic Zcar Club mobile
-
Does anyone know the size of the lock nuts for the ends of the spindle pins? I want to get some that aren’t locking to temporarily hold everything together, which I would replace with the locking nuts later. I had been looking at these 12mm 1.25 pitch ones but I’m not sure that’s the right size: https://www.boltdepot.com/Product-Details.aspx?product=6878
-
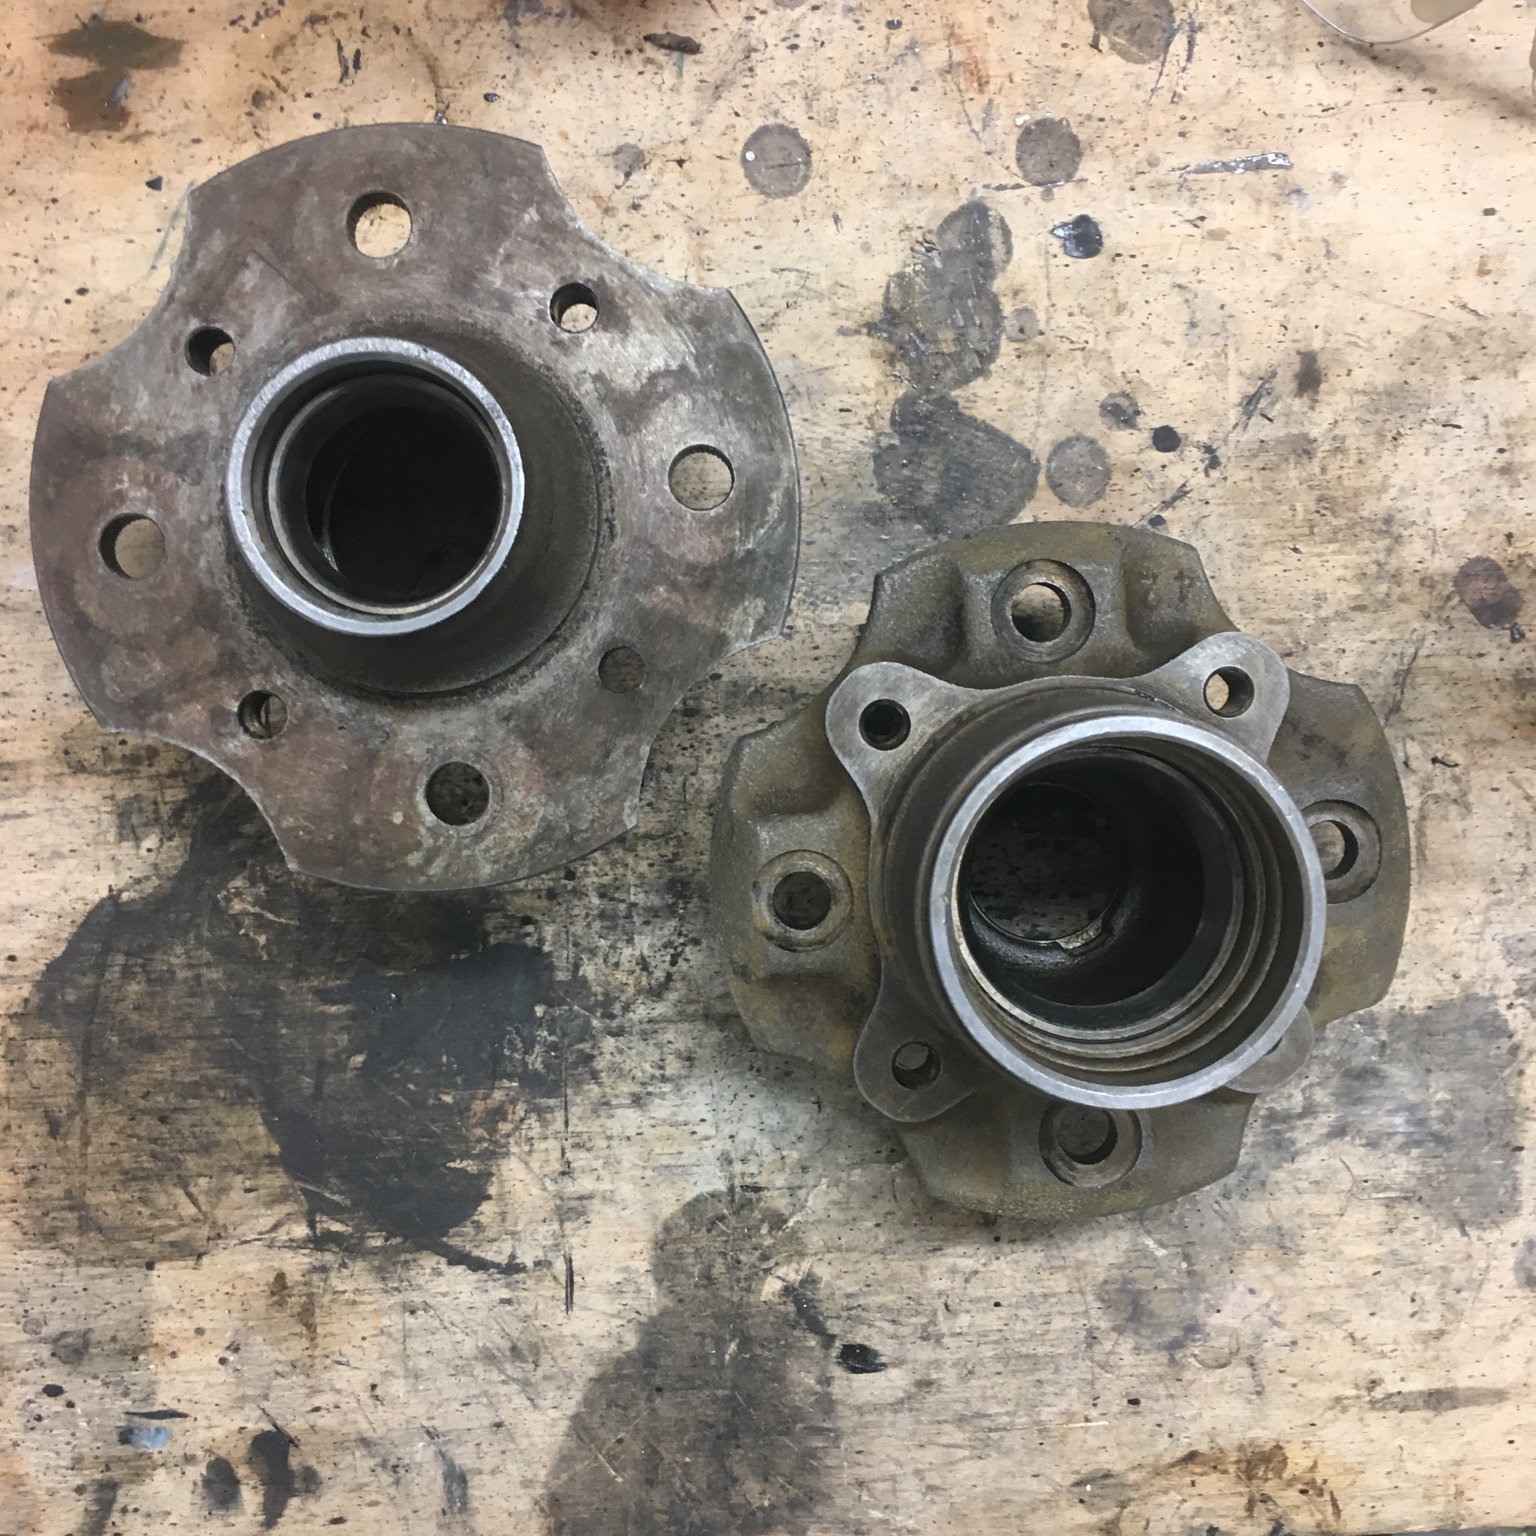
Back on track thanks to Captain Obvious and his buddy Gary. Thanks Bruce! —- We identified the problem(s). They had pressed the inner bearing in at an angle and then forced it down. This did some gnarly but repairable damage to the inside of the hub and is why the bearing was uneven and destroyed. They also screwed up my spindle pins and all the hardware that went with them. I have new hardware on the way. The spacers Jim K sent me were perfect and went right in. Everything is now back together (minus the drum brake backing plates) and ready to continue, but first I’m cleaning up my paint.
-
Looks great! Did you trial fit the header? I’m trying to find out whether the Fujitsubo one has the same fit issue around the steering as the Spirit Garage header and don’t see it in this thread. Or is the header unchanged?
-
Side comment: I was thinking about the issue with the header interfering with the steering and was wondering if anyone has investigated using the Trust GReddy TR NA Ex Header with one of these exhausts. Supposedly it is bolt on with no mods needed on LHD cars. Whitehead Performance offers it for $648 and recommends the Fujitsubo exhaust for it. I’ve seen people mention pairing with with the Spirit Garage exhaust, but I don’t think I’ve seen anyone actually post pictures of this set up or write up a review. You can also get it from Revmatch for $623. If I had to pull the trigger on an exhaust setup right this second without a chance to do any more research, it would be this header paired with a Spirit exhaust, just based on forum comments (bolt on, fits around diff, tucks high, looks period correct, well regarded manufacturers, sounds good, not insanely expensive). I just wish Trust made it in stainless. I am digging deeper on the full Spirit Garage system, though. If the handful of fitment things mentioned aren’t too onerous and I can find it for less than RHD wants maybe that’s a better choice. Again, it would be cool if someone who understands this and can be objective put together a sticky post doing a compare and contrast with links and dyno charts off the same car.
-
None taken because that’s the plan, and also it was a shop that messed up.
-
Yeah, when everything was together it was shy of coming all the way through, so the flange was putting lateral load on the inner bearings when torqued. The shop wanted the spacer shorter to get the bearings closer together. Sent from my iPhone using Classic Zcar Club mobile
-
Yet another example of where I only half followed my father’s advice. I went with the lowest imperial measurement but did not check it against the lowest metric measurement. (Edit: no need, they are the same when converted). I think my plan now is the freeze the spindle and warm the outer bearing to 120 degrees, press it on myself with my floor jack hacked together home made hydraulic press, then freeze the inner and do the same. Taking these parts to shops is only giving me grief. Sent from my iPhone using Classic Zcar Club mobile
-
I’d love to see someone compile all of this info into a sticky... hint hint. Also, Sean, you said you had a theory on the benefits of twin pipes a few pages ago. Let’s hear it. Sent from my iPhone using Classic Zcar Club mobile
-
Yes, I agree. And yes, zKars saved my arse again. The last question I need to answer out of this mess is did torquing the nut to 181 pounds like the FSM says crush my brand new OEM bearings or was it the idiot who ground my spacer? The shop insists the Chilton manual is correct at 28-32 pounds and pointed to the F-350 spec of 110 pounds as a supporting argument, but they also ground down a NLA part by hand, so... Sent from my iPhone using Classic Zcar Club mobile
-
They are type B spacers. You can see the amount of material removed here:
-
NLA. They just haven’t updated their site.
-
Update: all parts retrieved. I will asses them tonight and post a picture of the damage to the spacer. The hubs say B but I haven’t checked to see if the spacers match. Regardless I have one that is messed up. Sent from my iPhone using Classic Zcar Club mobile