dogma420
Free Member
-
Joined
-
Last visited
Everything posted by dogma420
-
 Well that's it. Some things I learned, and some rambling: 1. POR15 stuff is the real deal. This stuff is great. 2. All pictures were taken with a Canon SD500 Digital elph. Auto Focus, because I bought it for my girlfriend. 5 megapixels. Great Camera. Easily takes good pictures. 3. The sending unit is doomed to suck, as I found out a new one still has the same issues--goes up to 1/2 tank very quickly, sits there, and slowly goes to E....the wire piece on the sending unit is wound evenly through its motion, so I deduce that this is why this occurs...but I don't think I'll have to question its operation anymore. 4. Car runs great, no issues from my tank operations. Does need a new exhaust/brakes/tie rod ends replaced, but it runs great! Please respond now if you'd like.
 -
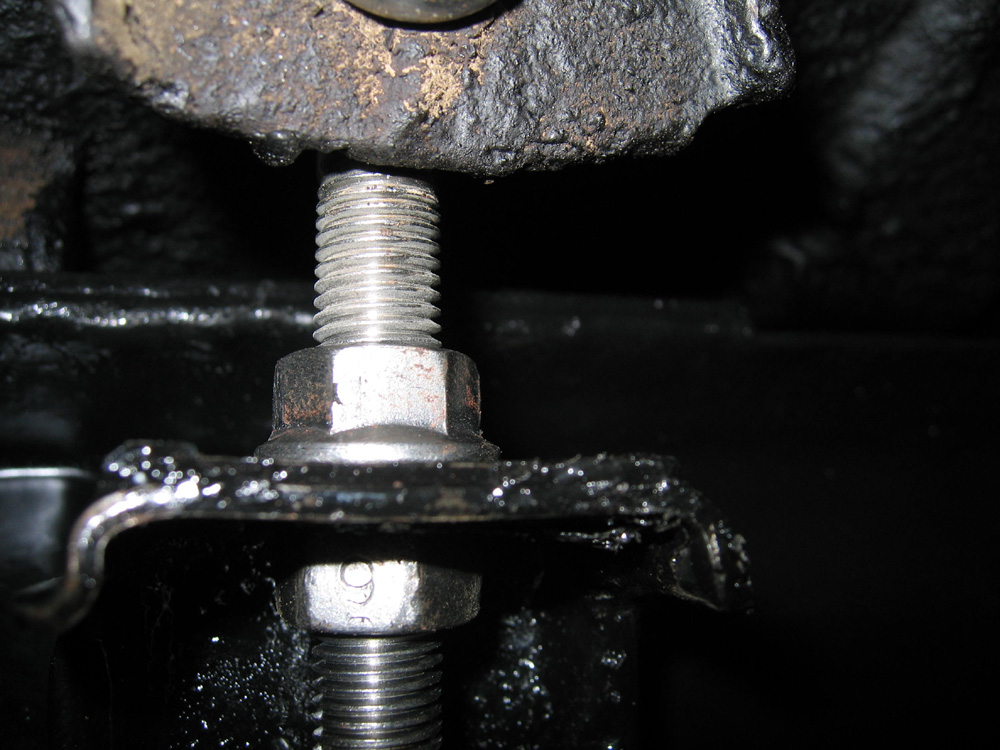
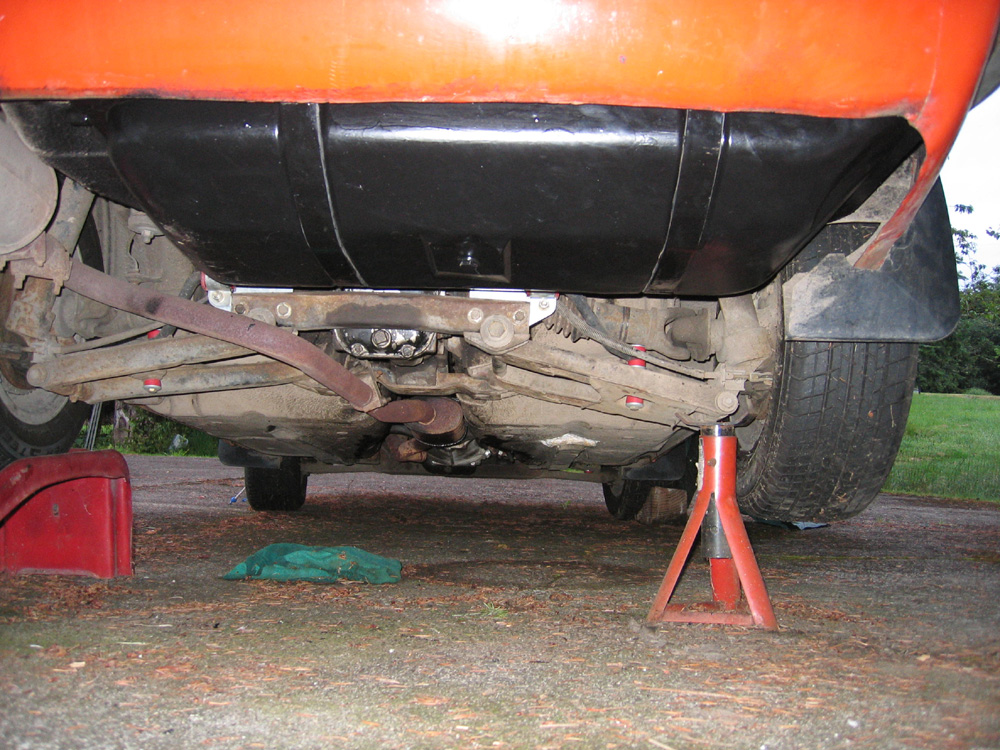
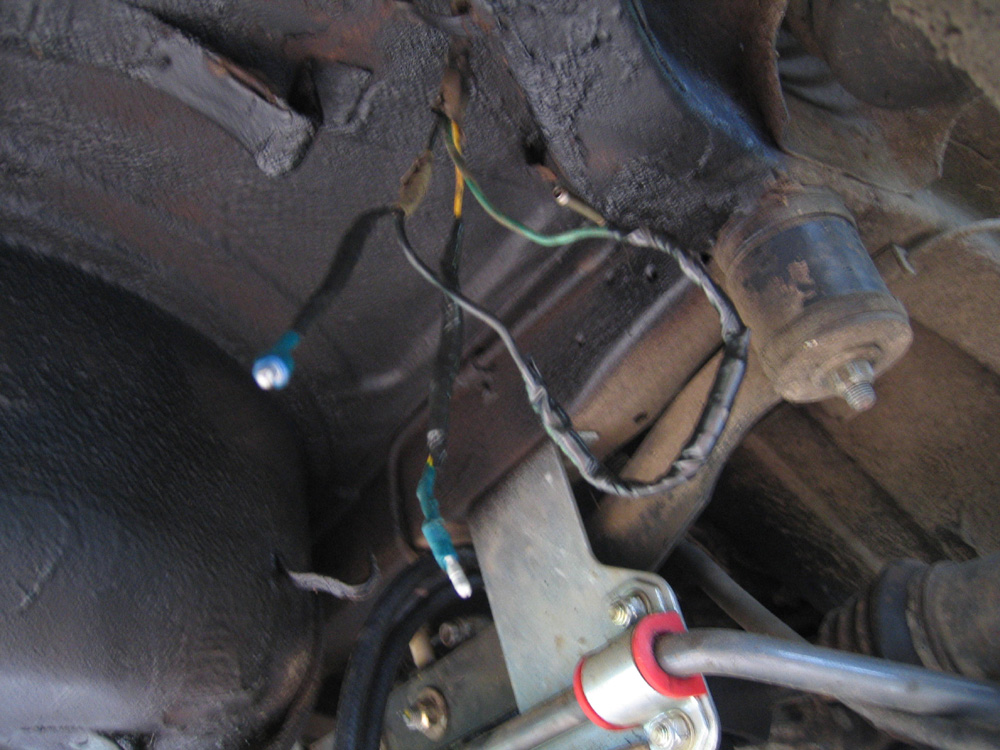
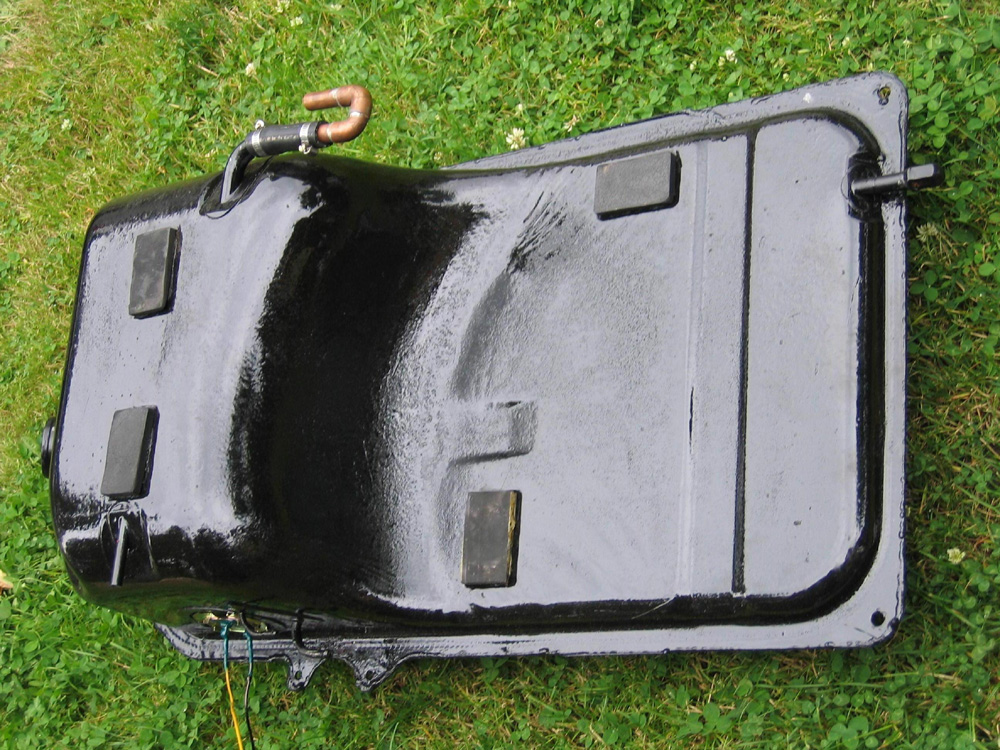
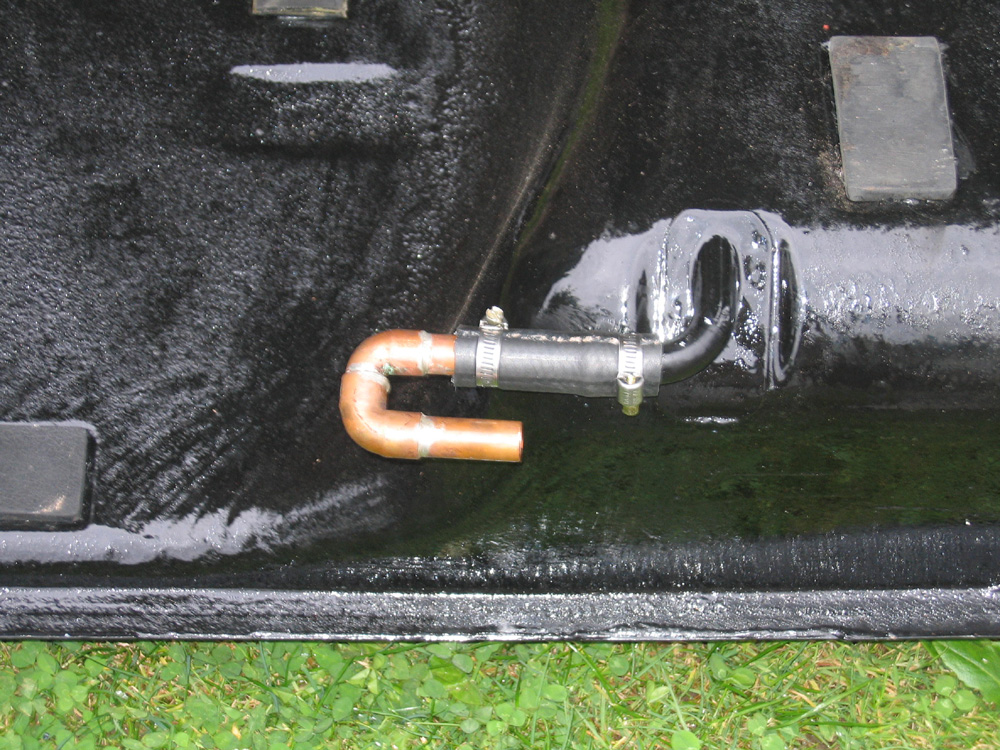
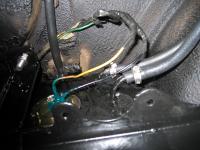
Almost done. Pictures: 1. show how the strap attached to the small adjusting bracket. Essentially you tighten the lower nut until tight, and then tighten the top on onto it to lock it in placed. 2. Shows how everything in the sending unit area looks when installed. Note the top hose, the strap arrangement, and how the wires looked. I couldn't get the shrink toobs to shrink as well as I'd like so I electrical tape sealed them up as well. 3. Shows the copper mating tube I used between the emission hose (the 90 degree bent tube) and the gas filler neck--I took out the plastic joint and put in a copper plumbing tube. 4. The FINAL PRODUCT! I felt like I just had a baby when I looked at this. Very proud. Now in a thousand years, the car will be gone, but the tank will be sitting there and nice and rust free looking!

-
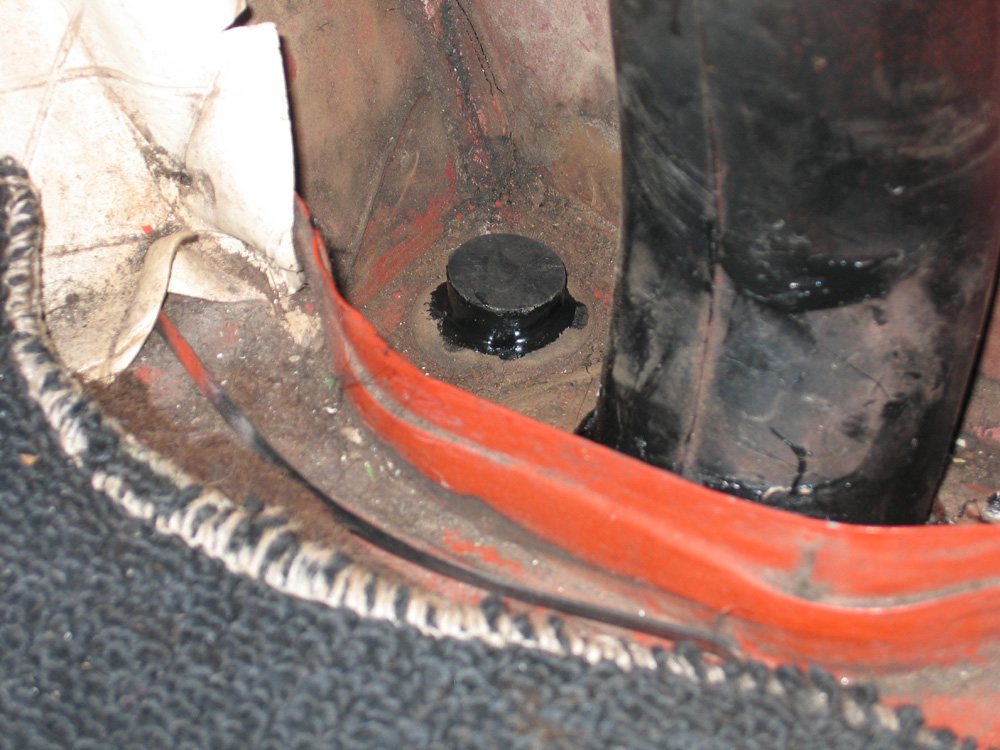
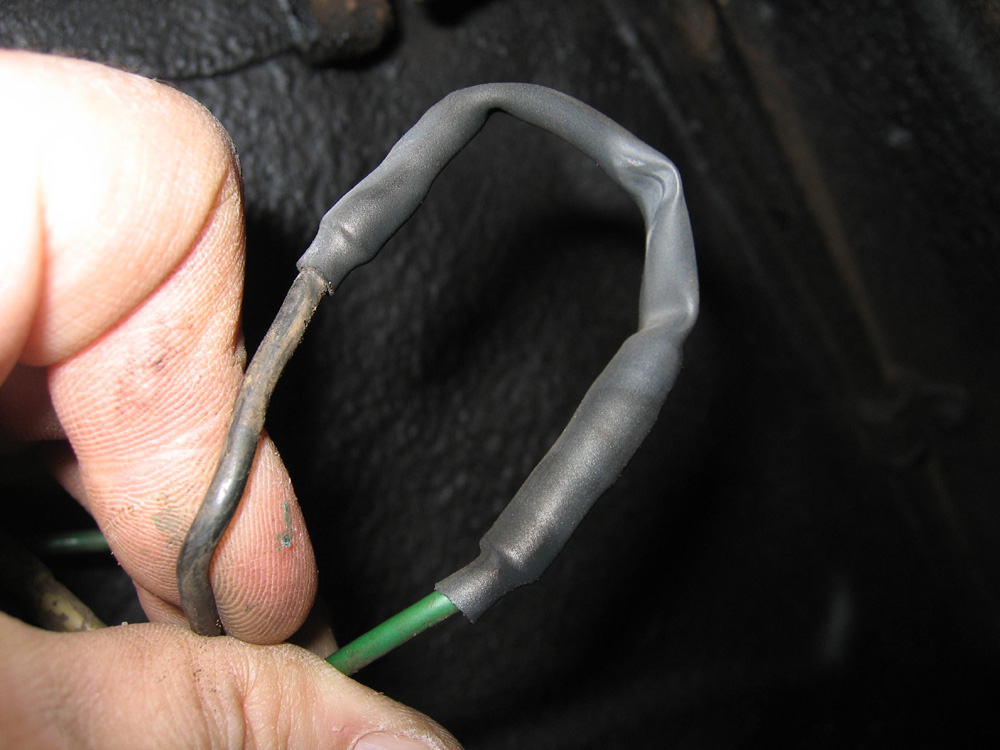
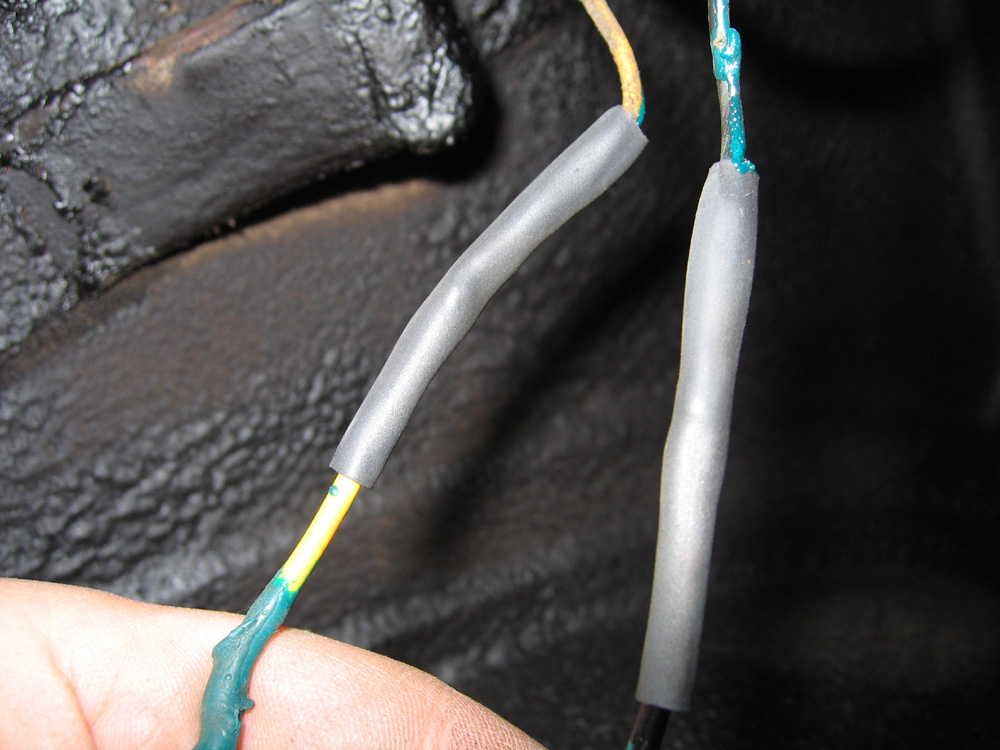
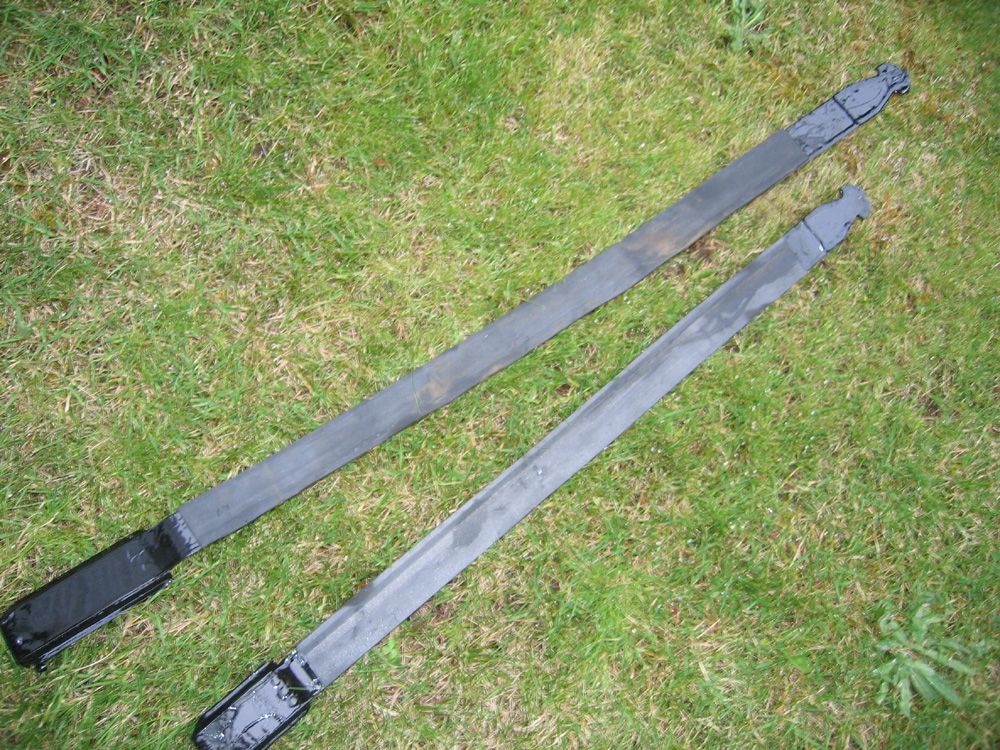
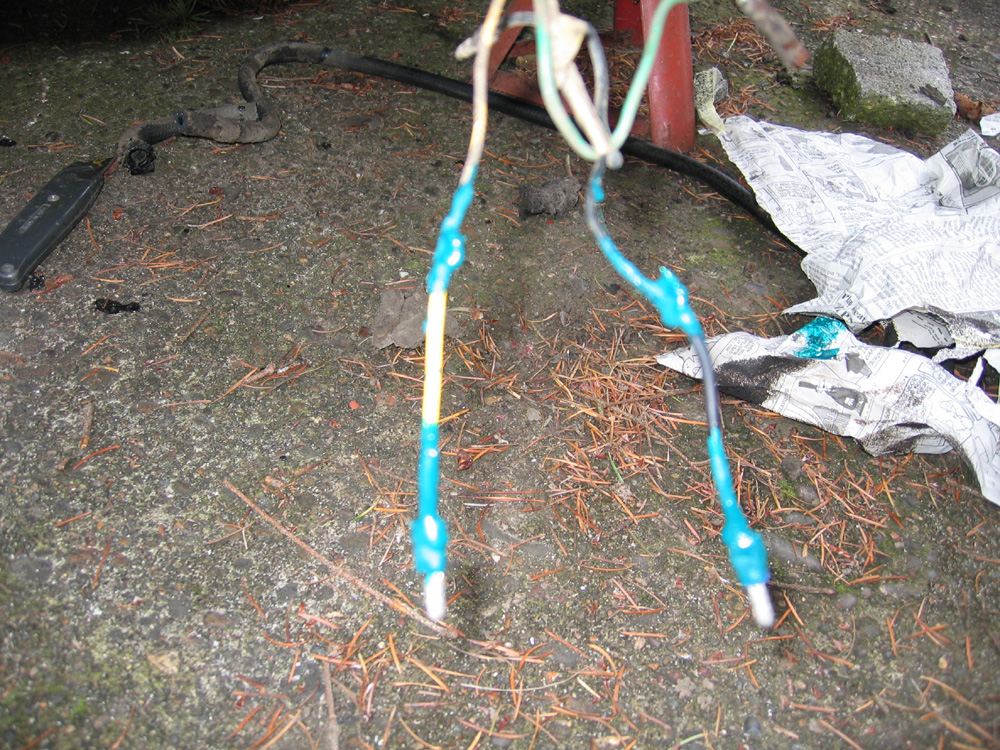
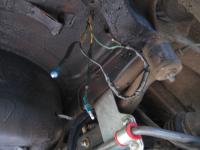
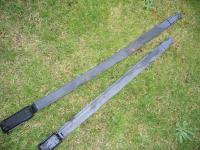
The next pictures show: 1. How one of the corks look from inside the car (blocking one of the holes that the evap tank hose went through. 2/3. Not only did I use liquid electrical tape after soldering the wires of the sending unit together, I used the black rubber toobs that shrink when you light them. 4. shows how the wiring looks in the general area, note the male end snap connectors (which were shrink toobed as well, but I can disconnect if need be). 5. shows the tank straps completely done, and ready to go in....the longer one goes on the passenger side (the larger part of the tank side).


-
I'd like to go too...my rig isn't in good driving condition until Jan or Feb though...(exhaust/brakes/tie rods)....
-
Awesome! A definite [future] classic!
-
just curious... Looks like the grill piece (that covers part of the grill) was added or fab'd when the paint was done (which looks recent)... wouldn't the car have a tendency to overheat with this piece attached? Looks like there isn't a lot of space for air (vs. normal setup)....
-
why don't we use some common sense here... When you tighten the brackets on the bushings, it should feel tighter (harder to tighten) BEFORE you are completely done tightening down--you need to use more torque on the last 1/4 of the tightening process...is this happening? if the bolts tighten down the brackets with no resistance, then they are the wrong bushings.
-
it was blue oyster cult recording 'don't fear the reaper'...(the skit on Sat night live)...hilarious It was Wil Ferrill at his dummest--I think Wil was the cow bell performer of the band (could be wrong) but they kept starting up the reaper and the cow bell wasn't loud enough and they got into an argument about 'more cowbell' and such...if you listen to dont fear the reaper, there is a prominent cow bell through the song and its a play on that...'more cowbell dude'.
-
that roll out stuff, if it doesn't need adhesive, what will stop it from coming undone or scrunching up if you push it with something....just seems like it would work...
-
what are you talking about Nigel? Datsuns have SUs ...Hitachi bought the rights to reproduce them...they are SU's...you can put them on an mg if you wanted to, you can put british SU parts on them....they are SUs.
-
FYI-- My rig has had a head gasket leak for years, it doesn't froth the oil and I don't lose coolant...it is just enough to cause a little bit of the billowy white smoke at times (under load, heavy acceleration)....so a minor head gasket blow can cause the symptoms you have.
-
well do a comp check and get back to us. Without it, it's hard to move on to saying that the problem is that it is too rich...SM needles by themselves aren't going to cause it to be too rich at all settings, IMO. The adjusters on the bottom of the carbs, screw those in all the way (UP) so its running technically lean...if its still yellow, I would say honestly that it isn't the carbs (if they are in good shape).... do a regular compression test and write all the numbers down. Do a 2nd compression test by pouring a capful of oil into each cylinder (one by one) and turn over a few times....this seals the rings....then do the 2nd comp test--if it is a lot higher, then your rings are shot....if it doesn't change much (it'll change some, no matter what unless it has a new ring job)....it it doesn't change much, and the 1st test isn't at least 125 or greater, then your valves are compromised. I think 125 is a good number, any one out there want to interject? Also, even if it is low on either test, as long as all cylinders are consistent, that is what you want....if 4 are low, and 2 are normal comp rates, then that is what can screw up a motor, imo. Also, if your throttle shafts are not rebuilt (and unless you get rebuilt SUs from Z Therapy or somehow get new throttle shafts) if they're not rebuilt, then they might leak air, which will screw up your air/fuel ratio and make any adjustments on the SUs be affected by it. While running, spray some 'carburetor cleaner' all over the throttle shafts right where they go into the carbs....if there are leaks, it will be sucked in and with the car idling, the rig will more than likely die all on its own. The issue is that the SUs throttle shafts are brass, and the Japanese chrome plated them because they were notorious on British cars for wearing over years if they were just plain brass. But even the improved Japanese version of the SUs after 30 years will have worn throttle shafts. Z Therapy puts roller bearings of their design into the junction hole, which helps considerably with the leakings....The rebuilds are $600 for a set with exch (last time I checked) and I am going to get some as soon as that money is available.... Read up on the carbs at www.ztherapy.com absorb everything said....great site, with a lot of good information on the carbs. I've been to Z Therapy's shop (it's only 45 miles away from my house) and they know their SUs---literally hundreds of em sitting around and they race cars with them in them and are truly sincere about the SUs...if you go the rebuilt route, you must consider purchasing through them. When making your carbs as lean as possible but still have the Zed run well, what I have done is I always adjust only to the point where if you are idling, you manually lift up the piston on the front all the way (leaving the back alone) if the car still runs, then they are fine....repeat for the other carb. Car should still idle if one of the carbs is dead, in other words. If it dies (or when messing with one carb it makes everything sound different than when you messed with the other carb) then they aren't running as lean as is necessary or synchronized. I use a syncro thingy that fits over the throat to match them, but by just using your ear and the way the motor is running, I can come within 90% of the sych meeter. I'm rambling...sorry about that....check out Z therapy...and everybody, please reply and help this guy out....let him know that SUs are part of what make owning an older Z fun! (not the other way around)....
-
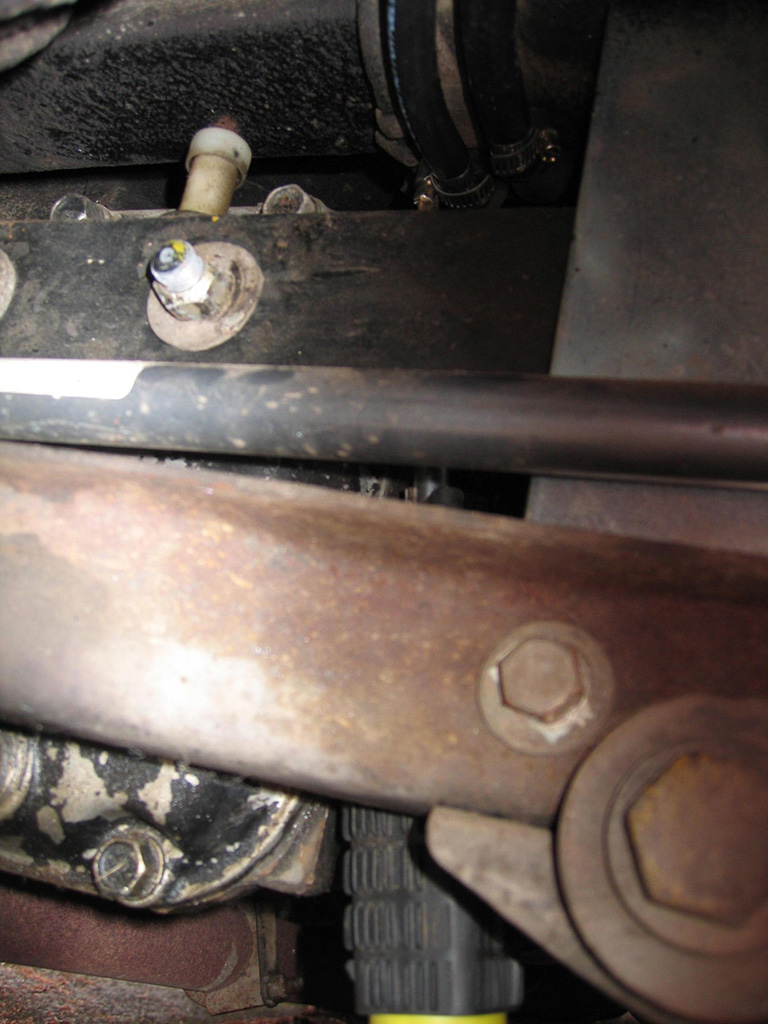
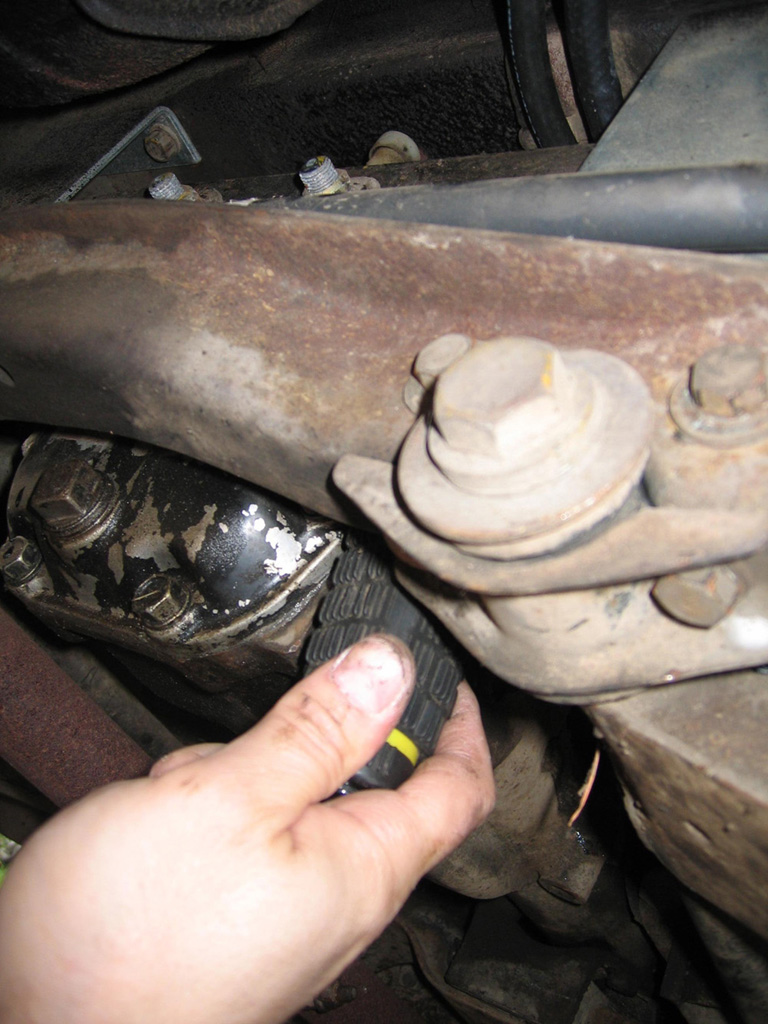
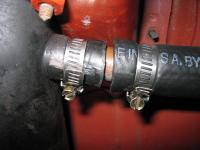
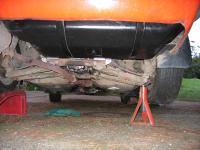
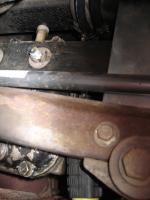
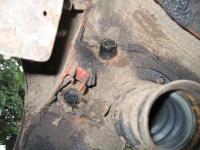
Ok, we're down the home stretch! I'm at the point where the tank goes back into the car, and the holes through the floor board in the rear that the fuel hoses went through need to be sealed up. Some tips: 1. Be sure that you add the very top hose (emission hose) to the gas tank before you put it up into place....I put a brand new piece, a little long to make sure it wasn't too short--actually install it on the tank end for permanent installation, so you tighten the hose clamp all the way...leave the other end loose. 2. Since the 90 degree hose is loose on both ends, attach the gas tank end to the 90 degree copper fitting for permanent installation. Fish the other end through the hole in the floor board, and as you install the tank, have a buddy (that'd be my dad) pull the hose through the hole to take up slack. Probably other ways to do this, but found this worked great. 3. I found that adding the inlet/return fuel hoses (the ones that actual fuel go through to the motor) BEFORE you install the tank is the way to go. And I mean tighten down the hose clamps on the metal fuel lines end only (before putting the tank in place)...so you place your hoses on the metal lines and tighten the hose clamps, and as you can see in the pictures below, these were kind of a bitch to get to, to tighten the hose clamps you have just enough space to get to them at the corner back of the diff--the pictures show me using a screw driver in the optimum place. 4. The 3rd picture shows what I used to block all holes through the floor board that are left over after taking out the evap tank....I used rubber corks, and coated both surfaces prior to installation with 3m rubber gasket adhesive, let cure, and then coated both surfaces again and stuck them in. Had to experiment with the right sizes, don't recall what they were at this time, but measuring/eying the corks didn't really work--I think I had to go with the next larger size...if they're too big they don't even fit though.

-
From the title of the post, I thought you got drunk before work...nice pictures Sleepy,
-
I second that--this kind of post is why I'm here. Thanks all.
-
Hey arne, just a quick note--be sure you put the vents in the hatch that your rig is supposed to have--without it, you have no way to release pressure in the cabin (under perfect rubber-sealing conditions)....I would think you can put the vents in yourself; I've heard the plastic covers are a pain to find however....I got a 72 so I don't have that issue or experience with it...but I do know you need those vents for ventilation.
-
rings....how old is your lower end? and these symptoms...no smoke before the needles? What do you think about the colortune device?
-
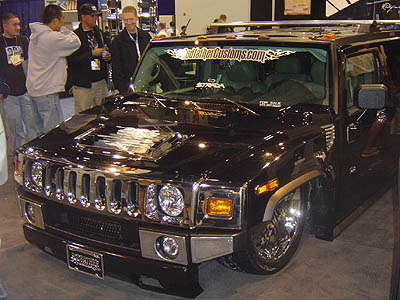
on that website, there's a LOWRIDER hummer....I had to post this...heh...

-
That's pretty amusing; but when you think about it, you only have to sell so many of them to make your $million...for something unique, it's a good idea, I hope they make some money off it. Me, I'm going with the glowing sea monkeys in the radiator.
-
I'd say the profile, along with the performance....sure, there are a lot of cars out there that kick it, but man, it is just so much fun to drive...its rough and raw and that makes the performance feel better than it really is...it's fun without being reckless, ya know? and the profile! Look at my girl in my Avatar, although she's totally defenseless, she still looks great with her arse in the air, and her clothing hanging off her chest....jeeze, sorry guys....
-
once the paint is done, looks like it will look great! welcome.
-
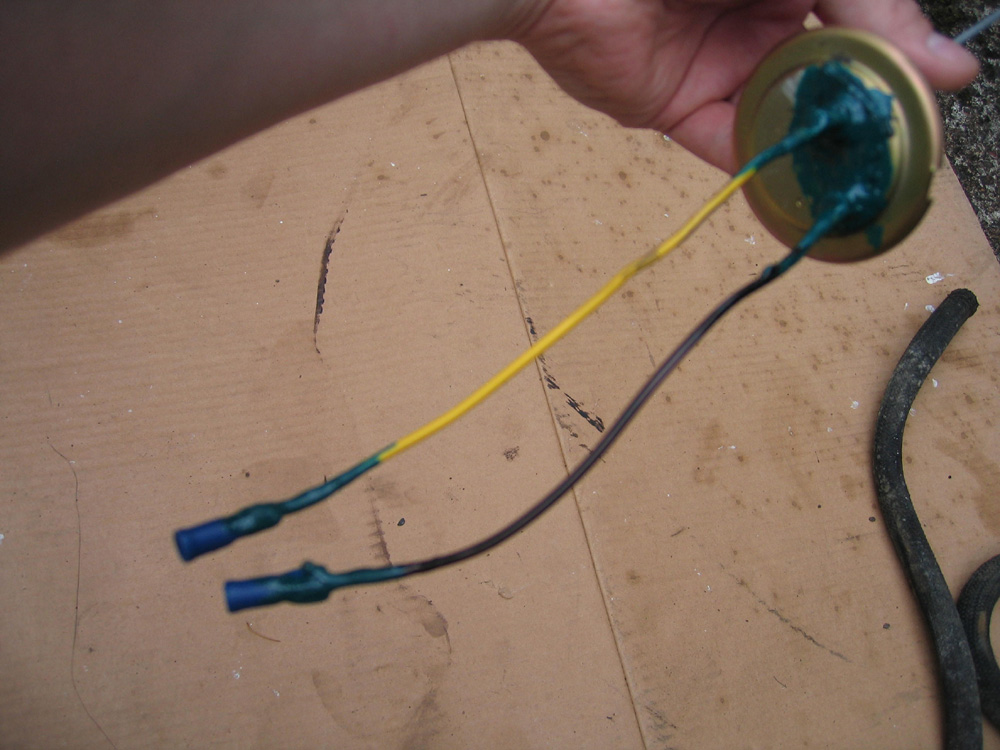
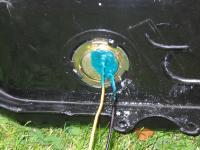
Next 3 pictures: Show the tank right before I put it back into the car. To eliminate the 90 degree bend on the top hose, I had my retired plumber dad solder me up a 90 degree copper pipe fitting as seen in the pictures. Also seen is how the sending unit looks on the tank.


-
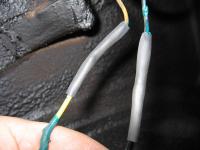
Yes, what beandip said....these are powerful chemicals! Next 3 pictures: First one shows my plastic piece on the filler next that mates the 90 degree hose to the filler neck hose piece. Most are cracked; mine wasn't, but I still swapped it with a copper pipe. Next 2 pictures show how I did the sending unit--I didn't have the connectors, so I soldered the wires, put connectors on the end of the wires, and sealed it all up with liquid eletrical tape. I also used the rubber tubes that contract with heat to add further water resistance.


-
You need to get a hold of some sort of picture program if you're using Windows OS...for instance, I use Photoshop, which easily reduces the size of your images. Try Photoshop Elements, which will run you from $50 to $100 at any computer store. Reducing the size doesn't make the images smaller (well it puts them at 1024x768) but takes out some of the detail that isn't needed...like reducing music to MP3 format.
-
pack grease check for wear--now is the time to replace if they need to be....