dogma420
Free Member
-
Joined
-
Last visited
Everything posted by dogma420
-
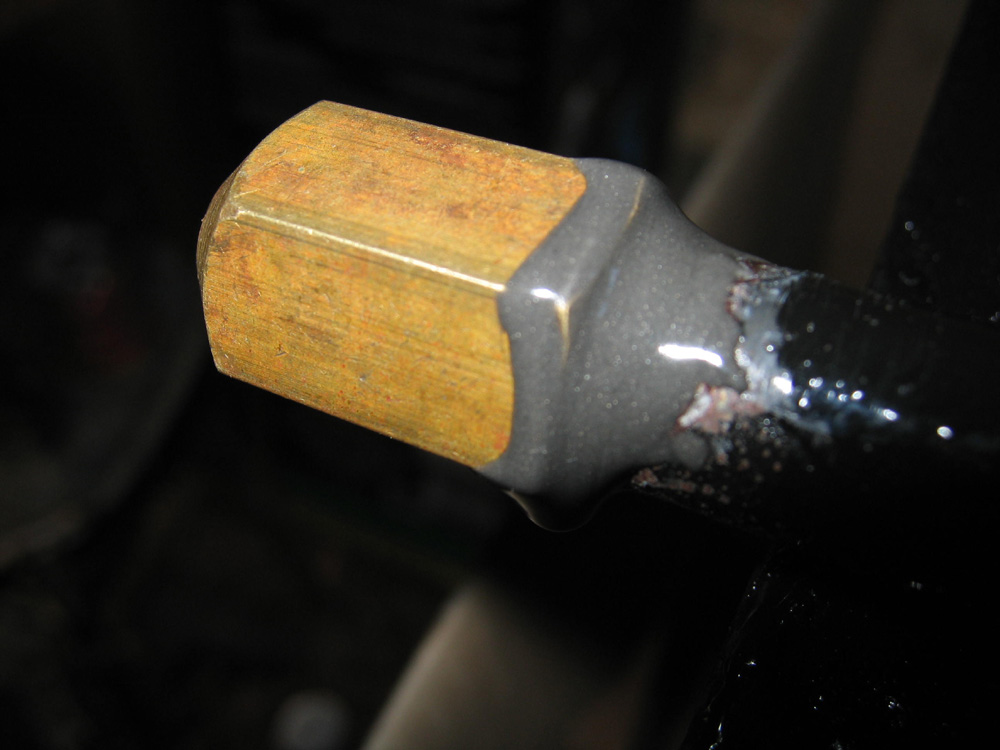
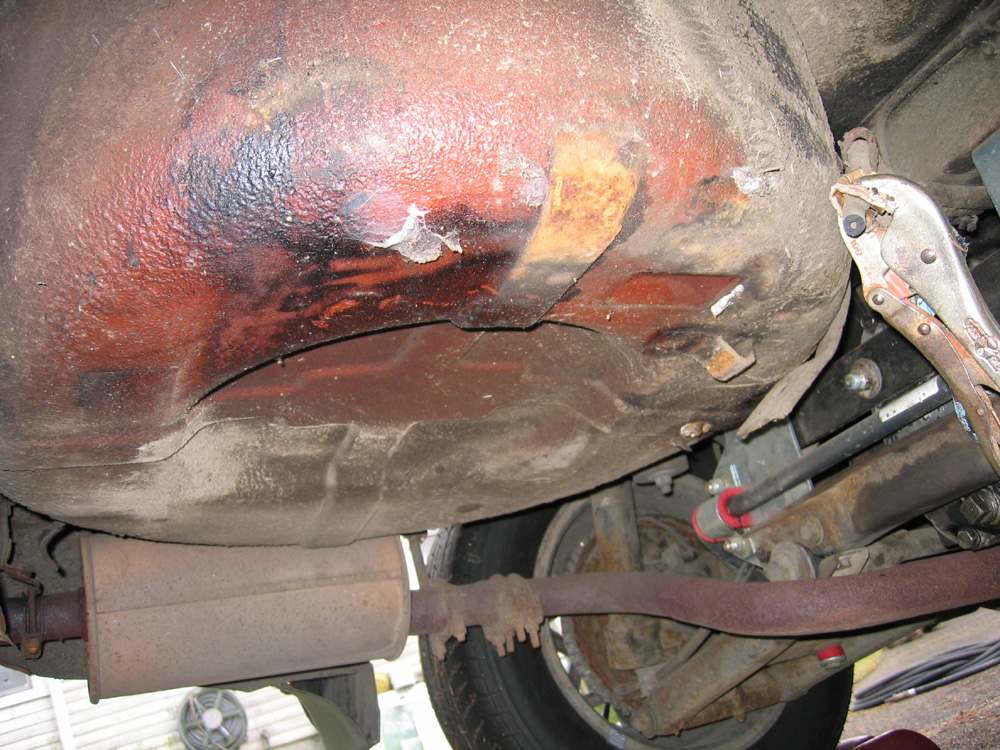
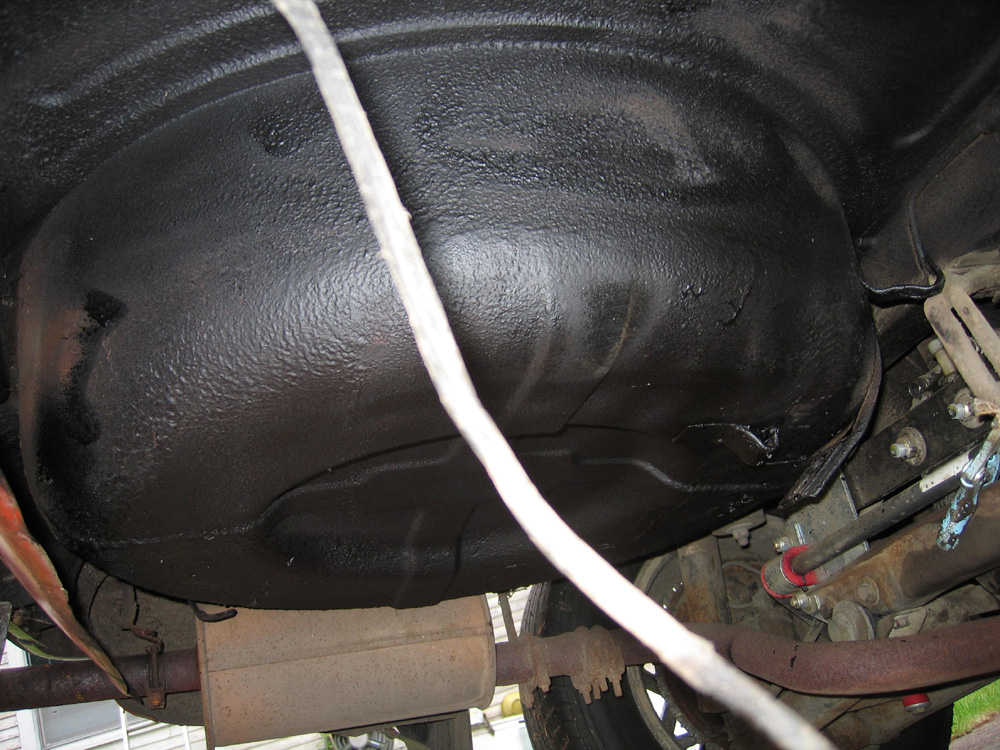
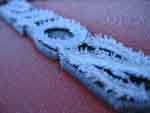
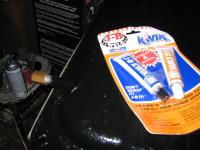
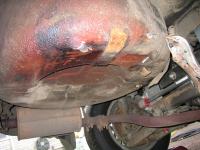
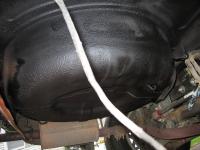
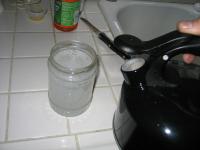
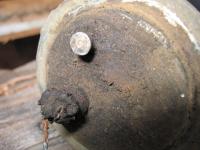
 The next 5 pictures: first 3 show how I sealed up the driver's side vent--this is the one that needs to be sealed when I remove the evaporation tank. I used a threaded nut as seen in the picture, with the inner threads grinded out--it was just something in the junk drawer, and it fit perfect. I used the 'quick setting' jb weld, hadn't tried it before, and I must say, it worked great--I'd recommend it. 3rd picture shows what the cap w/ jb weld looked like. Solid as a rock. 4th/5th pictures show what I did with the unibody right where the tank sits--I had 2 small surface rust spots on the spare tire well, so I por15'd those spots and then used some rubber undercoating to coat the rest of the area. I know some purists out there would say not to do this--my whole under area was rust free except for those 2 spots you see, so I didn't have any issues do this. I plan in the next decade to possibly rotissery the car and restore 100% so doing this now is just an ounce of prevention for a daily driver in the rain of Oregon....
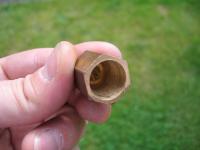

-
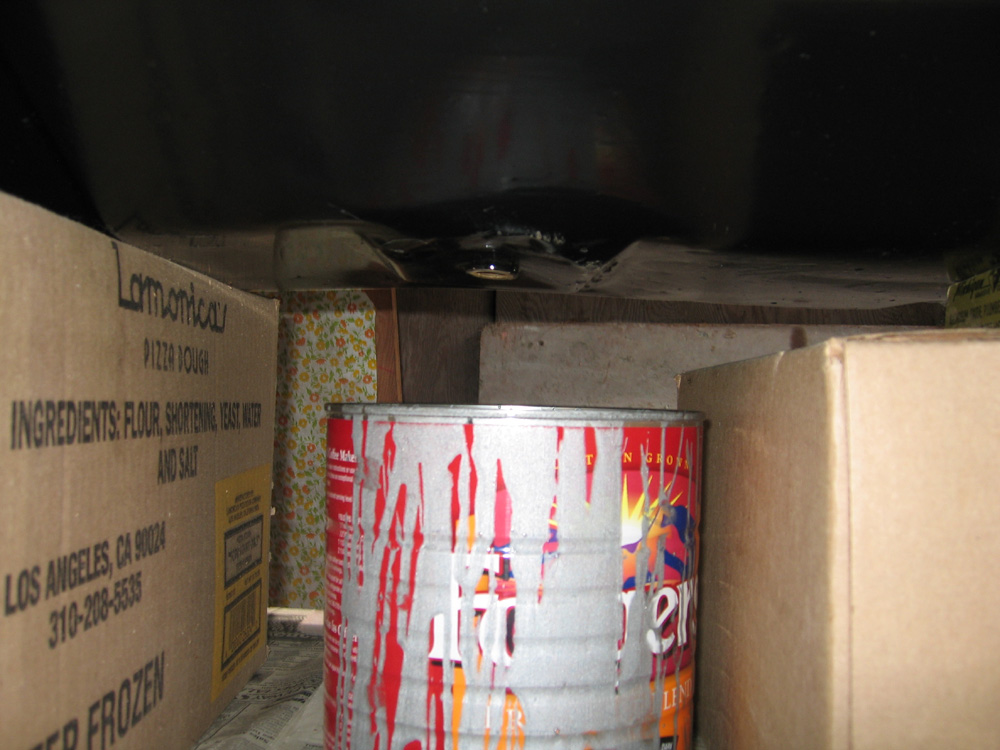
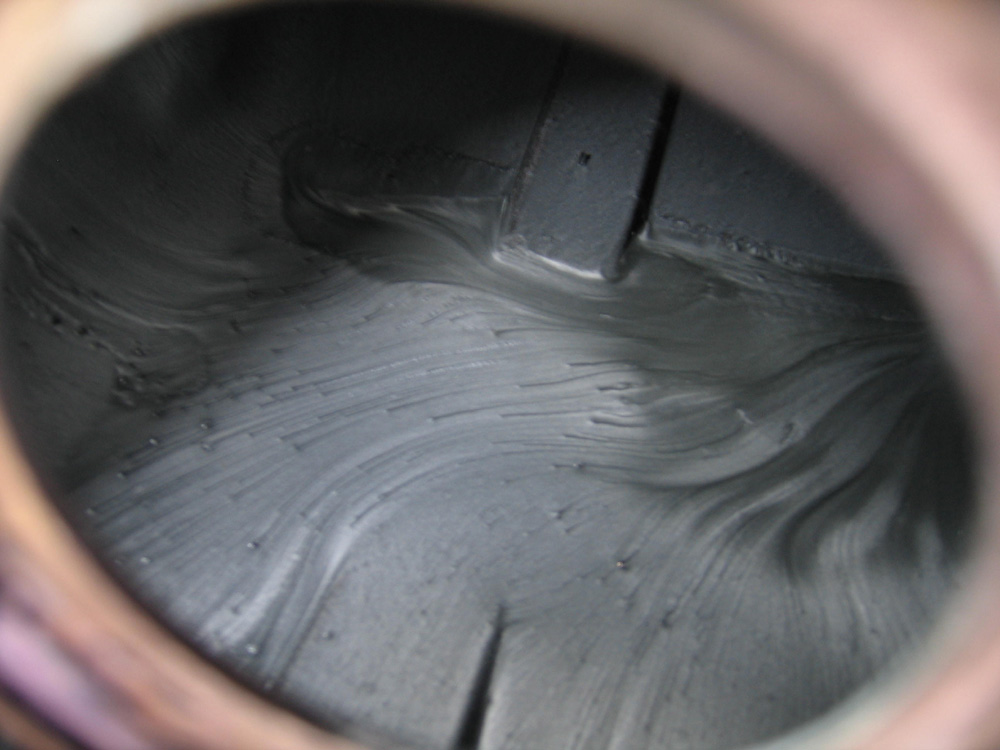
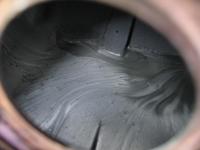
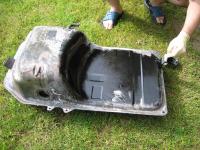
Next 2 pictures show how most people would drain their tank, from the drain plug hole--and if you do this, make sure you wear gloves and wipe the threads before it solidifies---you don't want your threads with the POR15 stuff on it--but I couldn't do this because of the dents. I had to move at many different angles (partly because of the baffles inside) the tank and drain it out of the fuel inlet--worked real good. The third picture is taken looking into tank from sending unit hole looking at the small pool of sealant I couldn't get out (in like 20 minutes of draining time)...I just left it. ...and of good note--keeping all the inlet/outlets for the gas lines sealed up tight with ziplock bags and rubber bands did the trick--no sealant got in the lines to block them up--I did blow into them, but there wasn't any sealant left in the fuel lines.
-
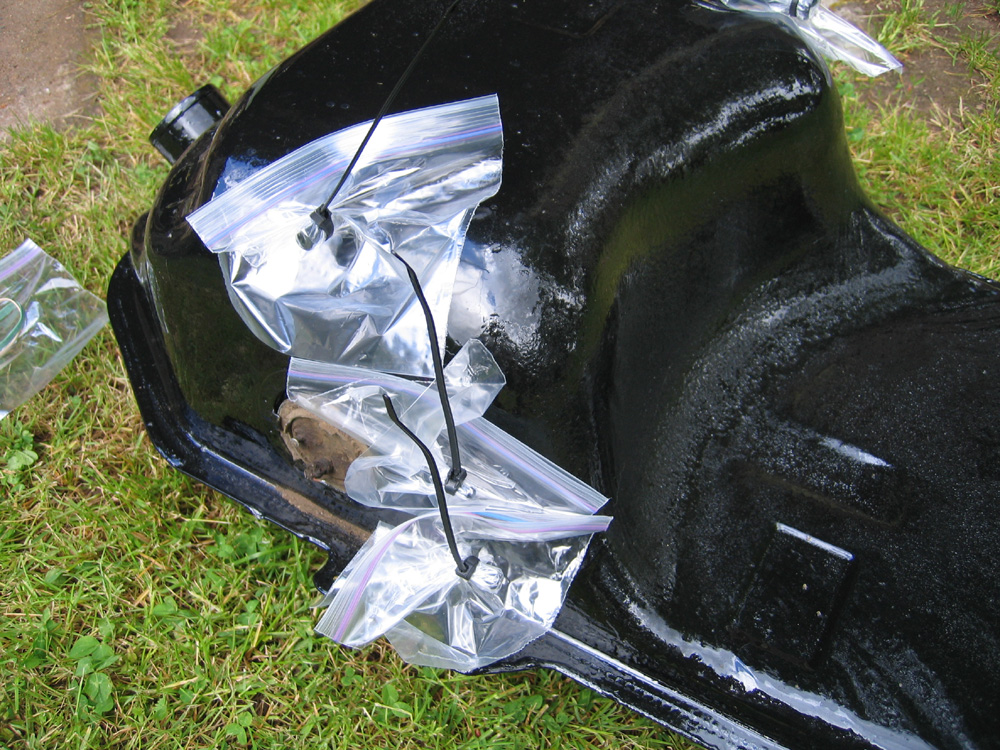
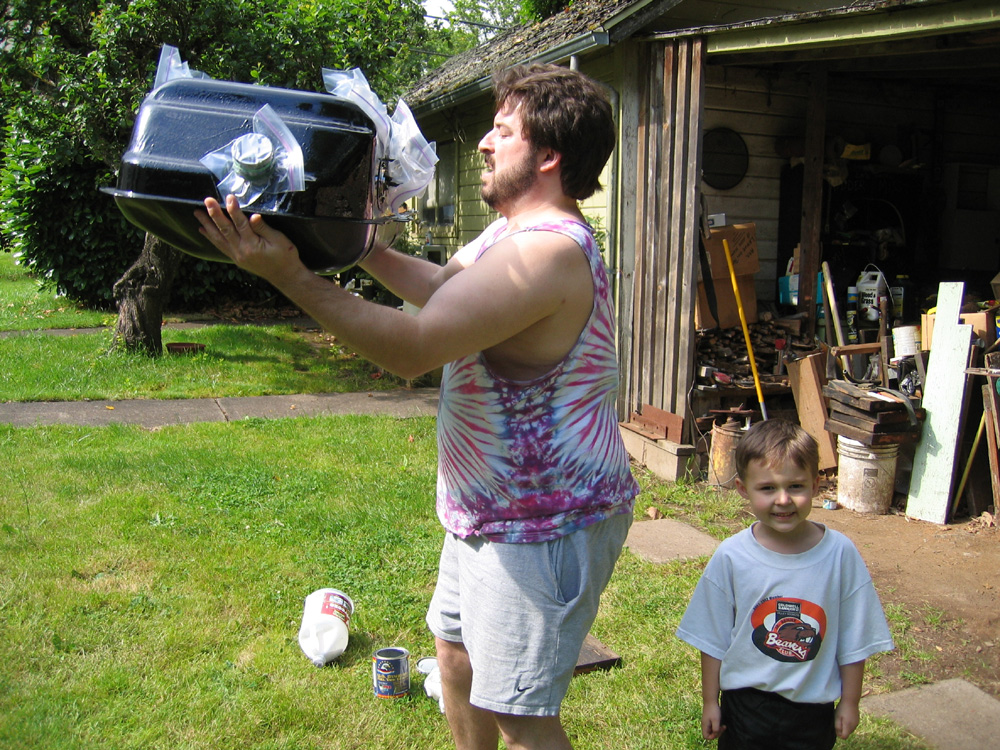
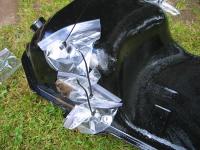
The next 5 pictures deal with sealing the inside of the tank: 1. to seal the sending unit hold, I just used the old sending unit with the old rubber o-ring and old retaining ring--can't beat this setup--also cut off the float piece. 2. to seal up all the inlet/outlets, I initially used ziplocks and tie-zips, and before I actually did it, thought about it, and thought they wouldn't seal too well...so I cut them off and used some rubber bands in place, which are 100% sealing--I forgot to take a picture of this setup though. 3. Stirring the POR15 tank sealer--this is really important, as the sealing paint was seperated (it had black / silver in it) and I had to mix it for about 5 minutes to get it all mixed up. 4. After pouring the entire can into the gas inlet, I sealed up the gas inlet with a ziplock bag and rubber band, and started shaking and shaking and shaking...notice my 4 year old son, Devin, the total poser. 5. More shaking and shaking and shaking. After about 10 minutes of shaking, I was ready to drain it all out--and because my drain hole was dented and not the lowest portion of the tank, I had to drain out of the fuel inlet and had to shake and move the tank many times to get it all out of there. I must CAUTION you--this stuff is dangerous--I probably shouldn't have had my son near this stuff--you don't want some leaking on you when you're doing it--but I was pretty sure with my setup--huge rubber bands wound around a whole lotta times, that it was 100% sealed up--and it was. If it gets on you, it doesn't come off until your skins' oils take it off (like a whole week)...so be warned.


-
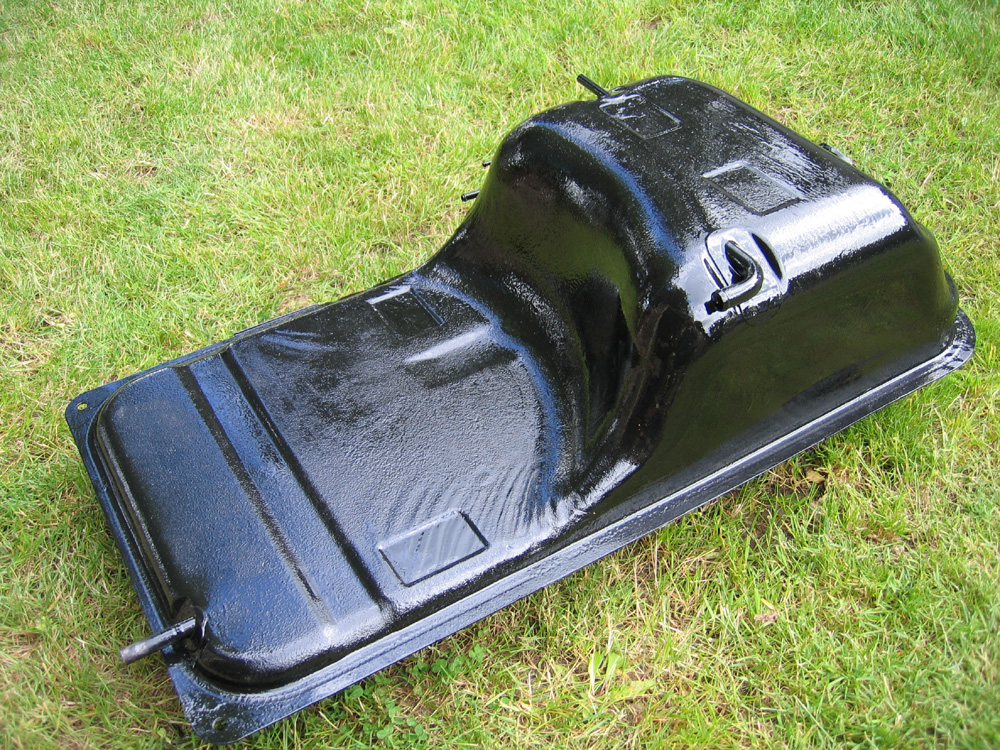
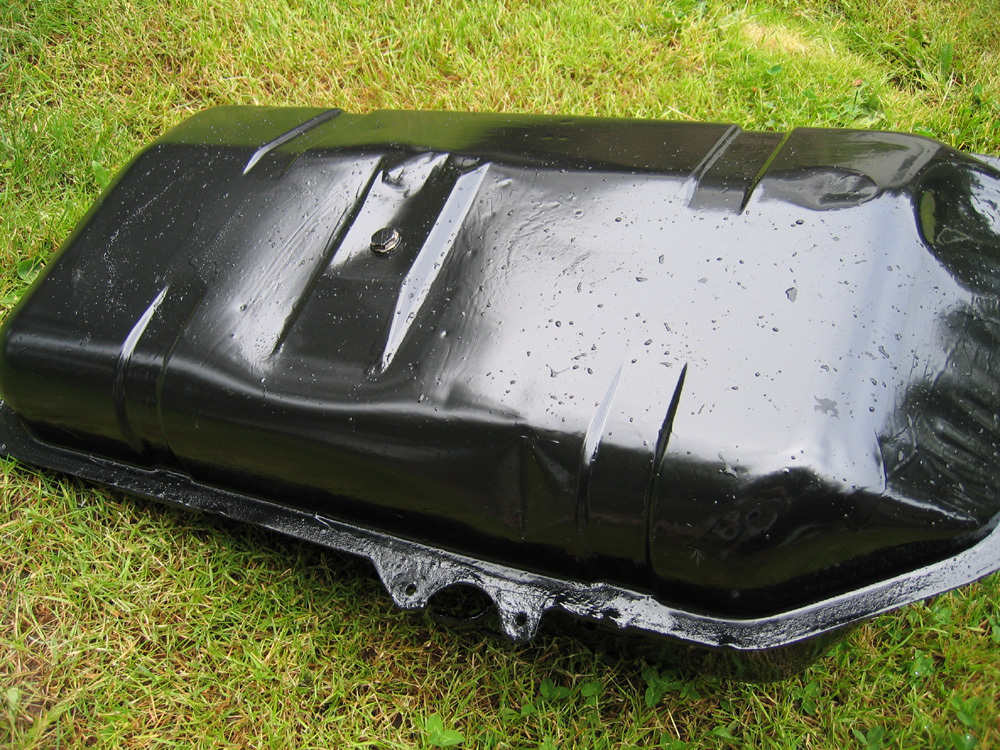
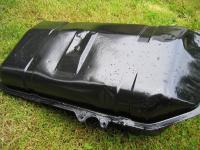
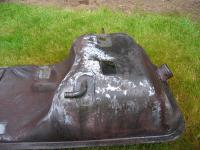
Next 3 pictures: 1. Shows first application of POR15 on the top side of the seam of the gas tank--just one good coat is all it takes. 2. Whole top of the tank done. 3. Shows the tank upside down, already 100% POR15'd, and a couple of days later, had painted the chassis coat black on the bottom from the seam up, and a couple of days later, here it is in the rain (good ol' Oregon in the Summer).... As you can see, the top of the tank is super super shiny (that's the POR15) and the bottom is a little bit duller (and that's the Chassis Coat Black applied over a coating of POR15). So if I say I put Chassis Coat black on something, that section has a coating of POR15 under it by default. (in my applications of it). Also note that my tank is dented right where the drain plug is--this came into play when I sealed the inside--I wasn't able to just take out the drain plug to drain it--it's pushed up too much--I had to drain from the fuel inlet hole.

-
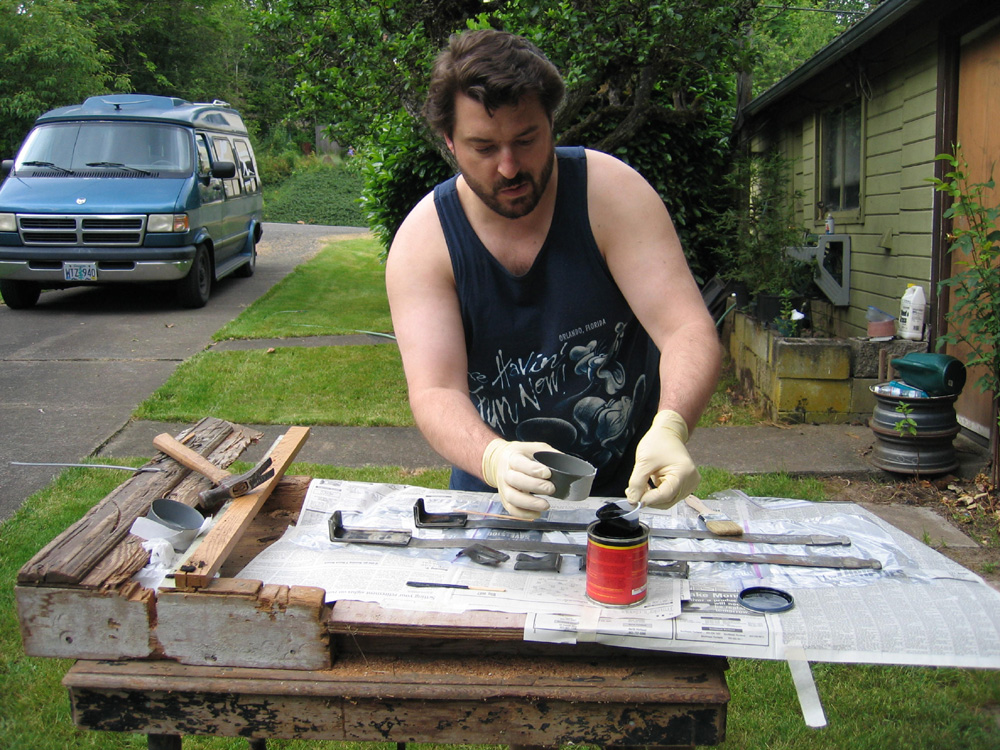
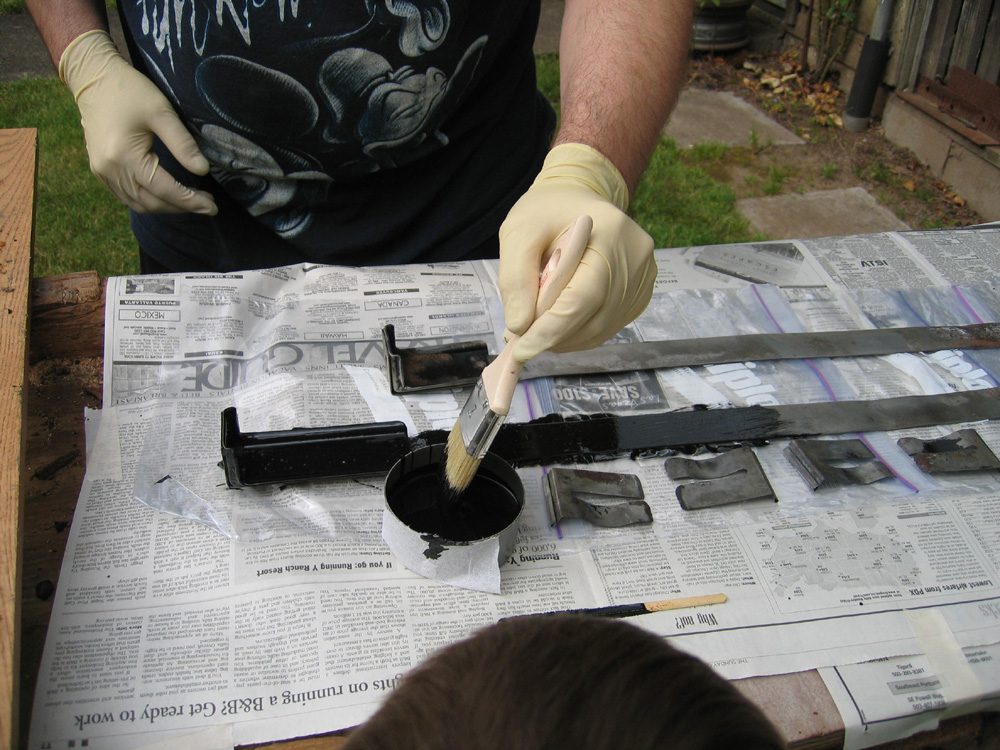
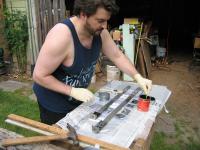
The next 4 pictures: 1/2: That's me stirring and ladeling the POR15 into my tuna can for application to the tank straps. 3: Putting the lid back on the POR15 with a ziplock style baggy between lid and can--do this between each 'episode'. 4: me painting the straps--one side, dry, flip over... ****Don't do it this way--I thought at first putting these on zip lock bags when I painted them would work, but they glue right to them. I went and wire wheel grinded off all the por15, hung the straps with baling wire from the garage roof (with paper on the floor) and painted them that way. Remember, after the POR15 was done on each strap 100%, I went back and painted the side exposed with Chassis Coat Black, which doesn't discolor due to sunlight--doing the Chassis Coat black is the same exact process as applying POR15, but it is thinner, like normal paint, and doesn't start thickening as fast as POR15. Also, as you'll see in future pictures, POR15 is very very glossy--it doesn't quite look right--the chassis coat black matches what 50s hot rods had the frame painted from the factory--not flat black, just a little gloss in it--it looks just right. POR15 likes to thicken real fast....that is why it is recommended to split up jobs into little 'episodes' with the little tuna cans and to buy a bunch of pints as opposed to getting a whole gallon of it--it will thicken over time no matter what you do once it is opened the first time. I would probably get pints even if I was spraying it on sections of the unibody, splitting it up into episodes. The stuff just thickens too quickly. I am happy to let you all know the ziplock bag between the lid/can works pretty good--my POR15 after 3 or so months is still liquidly feeling when I 'slightly' shake the can....Don't shake por15, always Stir it!!!!


-
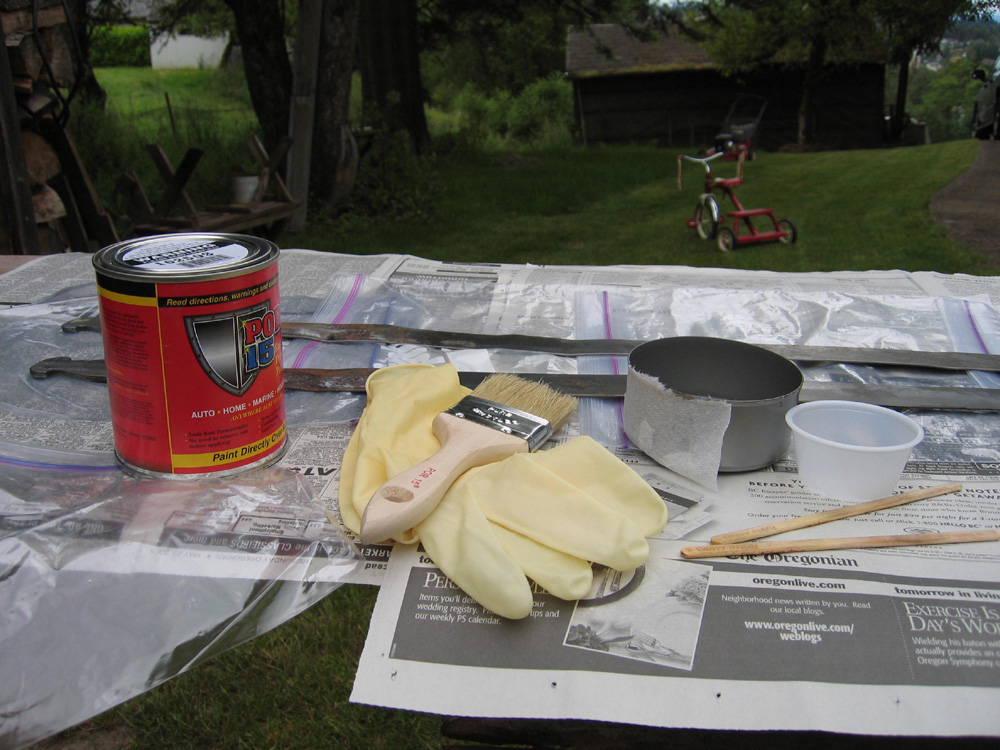
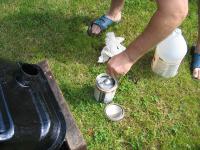
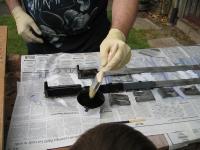
The next picture: Shows what I used to apply my POR15...I got creative with some disposable items that were cheap and relatively plentiful around my house. Supplies: Tuna Cans (or cat food cans)--have to be 100% dry--POR15 gets screwed up from moisture Small plastic cups (like the kind that sesame seeds come in from a chinese restaurant)...these were used as a ladel from the POR15 paint can to the tuna can. Plenty of Corn Dog sticks, 100% dry--to stir the por15 in the can before I scooped some out. I bought 10 paint brushes and 10 pair of latex gloves along with my order of POR15--they sell good quality--I'd recommend their stuff. Each 'episode' of POR15 painting, and I believe I had about 6 or 7 episodes, I used 1 tuna can, 1 plastic ladle cup, 1 corn dog stick, and 1 brush/pair of gloves. Zip lock bags to seal up the POR15 can--so the lid doesn't permanently seal itself to the paint can. I got 1 pint of POR15--I still have about 15% or so left in the can after my entire tank on the outside was done, so 1 pint is plenty for the gas tank job. I CAN'T STRESS THIS ENOUGH--ALL PAINTING TOOLS HAVE TO BE 100% MOISTURE FREE. What makes POR15 such a great product is that it pulls moisture from the environment and hardens from moisture--which is unique to POR15 and why its a great rust treatment product. If one of my corn dog sticks or tuna cans would've had any moisture, I would've compromised the POR15 I was applying...
-
Stop the presses! Dave replied to my email today saying I get his last set of relays....so someone should order some from British for $29 and see if they're any good....
-
If one was to replace the relays, and also want some headlights that had replaceable cartridge style light bulbs (so you don't have to go through the hassle of pulling out the whole headlight each replacement) would the ones on the front cover of the new British catalog be good to get? I'm going to be doing this upgrade soon. I also noticed that British is selling the relays now for $29...good price, but I'm still getting them from Dave Irwin (member)...can't remember his handle name wolfin32z@yahoo.com $75 + $8 shipping/handling <<< The harness's are still the same great quality unit that I'm sure you've read about and if you consider the price of your fusebox and headlight switch, the new price of my harness does'nt even compare to how much you'll pay for a stock, working fuse box or HL switch. Painless Wiring makes a headlight upgrade harness that you have to CUT your plugs off then use butt connectors to attach and that sucks if your into keeping your Z in a somewhat stock form. If you ever remove MY upgrade harness from the Z, you merely unplug it and reconnect your stock plugs and your done. >>> ...and just so you're aware, what the relays do is bypass all the current from running through the headlight switch, which by the time the current gets to the headlights, is much less than it should be. Once relays are in place, the headlight switch only serves to be a switch again (which prolongs its life) and the fuse box isn't going to get dangerously hot where those fuses are anymore either (they only provide to complete the circuit)....your lights will be superbright after putting in relays, so do what's been said--just install the relays and then test out how your lights are....you'll be surprised at how bright your lights are.
-
I also wouldn't recommend running without a battery...
-
micro 1" hard drives are mechanical.
-
Not even close; the Z body looks too good without flares......
-
Yes Stephen it is...now it would be kill if an Aussie replied (pun intended)
-
Here's a CNET review of mp3 flash players with a memory expansion slot: http://reviews.cnet.com/4520-6450_7-6210137-1.html
-
Worldwide, all 240z's (except USA) as I recall came with the 'pusher' electric rear pump...for instance, my 72 240z has the wires, and they are live, but there is no pump. They put them mandatory on the 73 240z because of the emissions of the flat tops and issues with vapor lock--pushing the fuel from the rear helps with vapor lock. The fuel pump bottom should be a screen--and cleanable... Just a FYI--I have an almost new NIssan OEM fuel pump from a 74 260z, same exact one in your 73....if you're interested in purchasing it, let me know. Brand new it was $400 bought in '95, pulled and stored in the garage since '96....in a dry place, still looks good doubt there is any issue with it.
-
Going manta, you mention that with the 'aerodynamics' of the 240 and the 4 cyl it should get 30mpg.... The S30 is one of the worse aerodynamic cars ever made....so what are you talking about?
-
Mandatory upgrade? no sycnronizing carbs? Man that is wacked; sync'ing the carbs on a Zed is actually one of the easiest items of owning a 240 I can think of; it's the lazy people out there who ignore the synching, think it is tough, and just don't learn to do it by actually doing it...once you try it a few times, man it is easy.
-
http://portables.about.com/b/a/175644.htm I'd recommend the Flash mp3 players, because if you're active like me (jogging) a hard drive based, no matter what anyone says, is either going to eventually skip, or the hard drive is going to die. I replace a lot of hard drives for notebooks; they are NOT bulletproof...if you bang them around, they ARE going to break. Being active with a flash mp3 player is what I like....and with the new generations coming out, most of them have slots for removable memory cards (like with a digital camera). I have 3 memory cards, and put my thrash metal like Metallica and Megadeth on one...80s on another, and on the 3rd whatever I want...but IMO solid state is the way to go....if ipod is what is your bag, the 4gb Nano is pretty slick; be sure to get some type of protective cover, I know somebody who's 3 week old Nano is all scratched up (new it is really shiny) it looks real bad for such a new mp3 player---but the size and color lcd kicks arse... I just don't go the Apple route because they ignore what the competitors are selling products for, and you can save quite a bit of money on your player. YES, go with 128kps..or even what I do, is all my CDs have been converted to 256kps....256kps has very little degradation sound to my ears, but it still is much smaller than a .wav file.
-
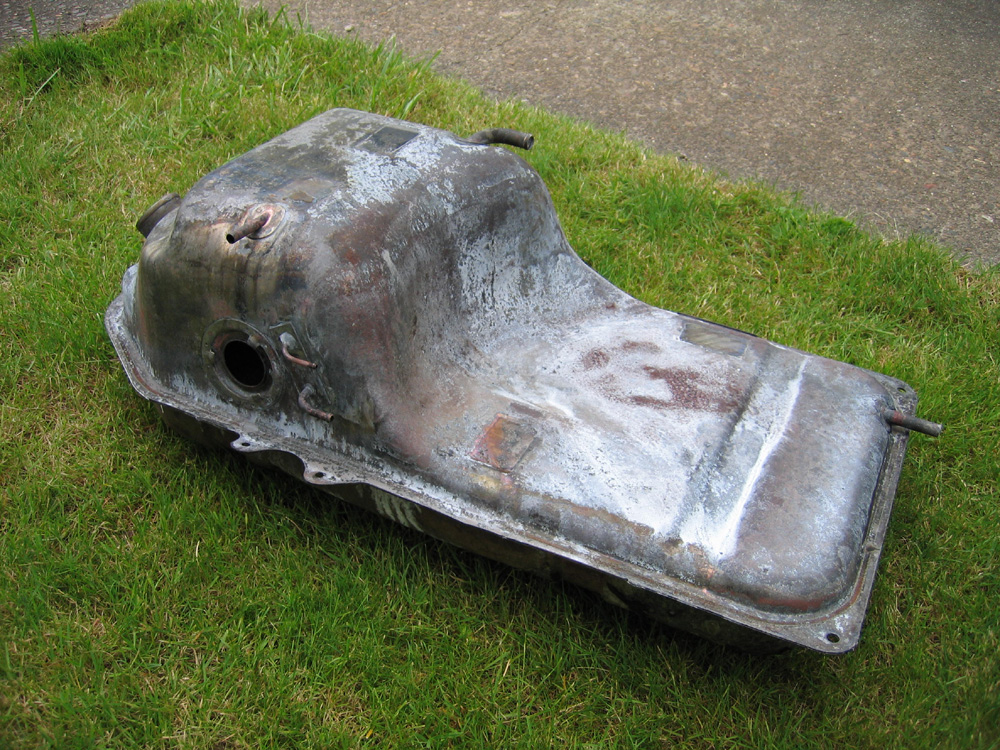
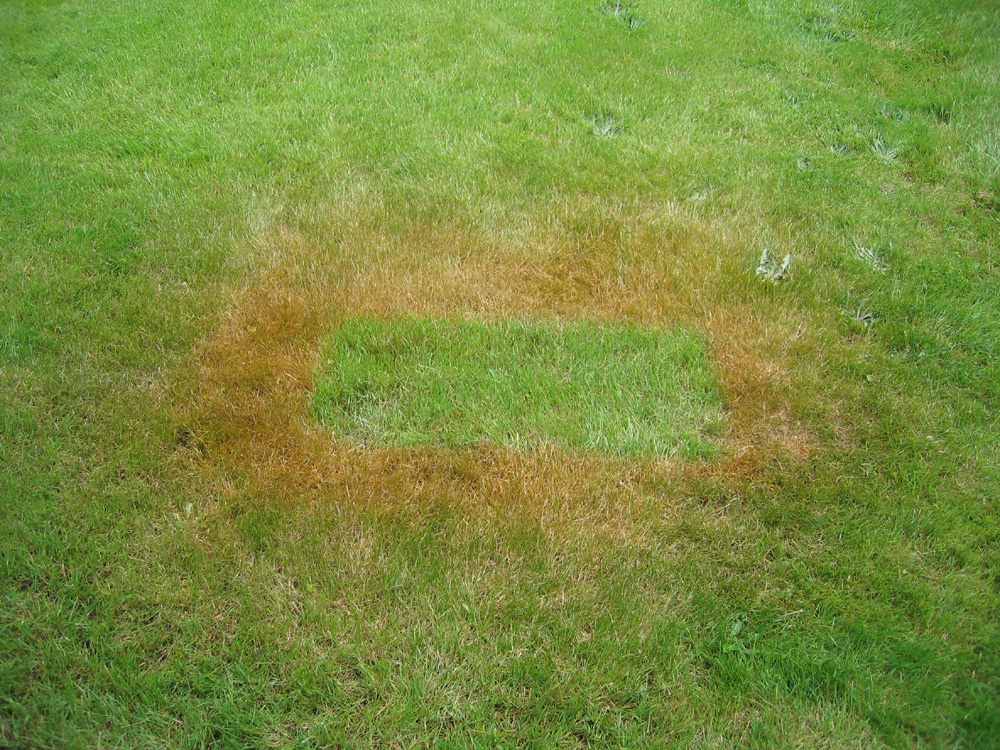
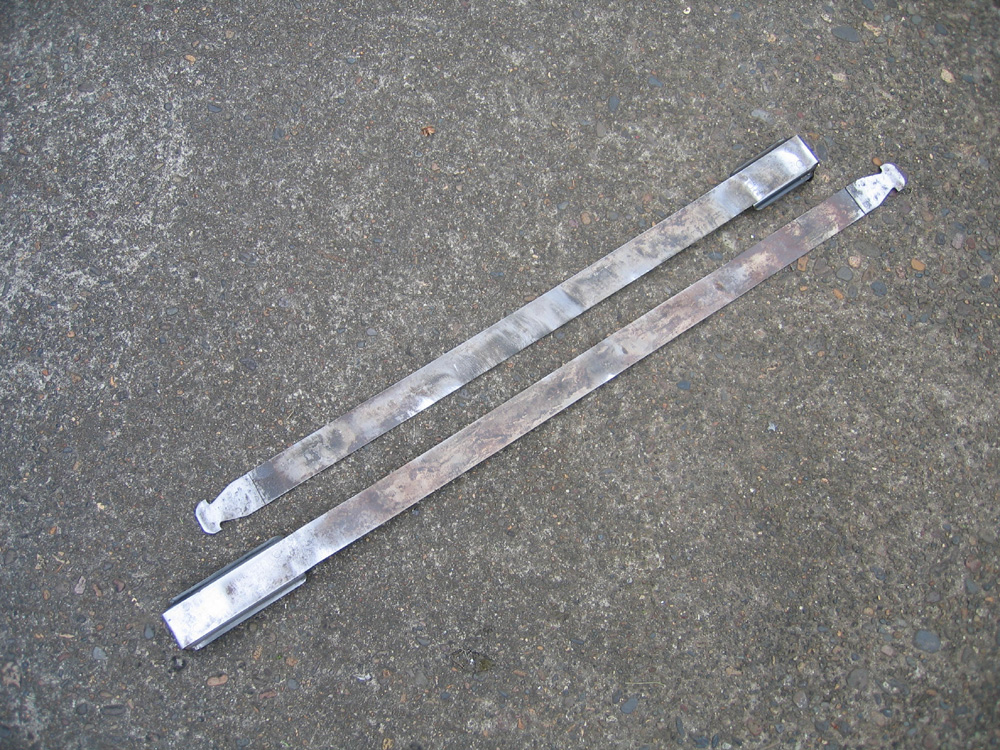
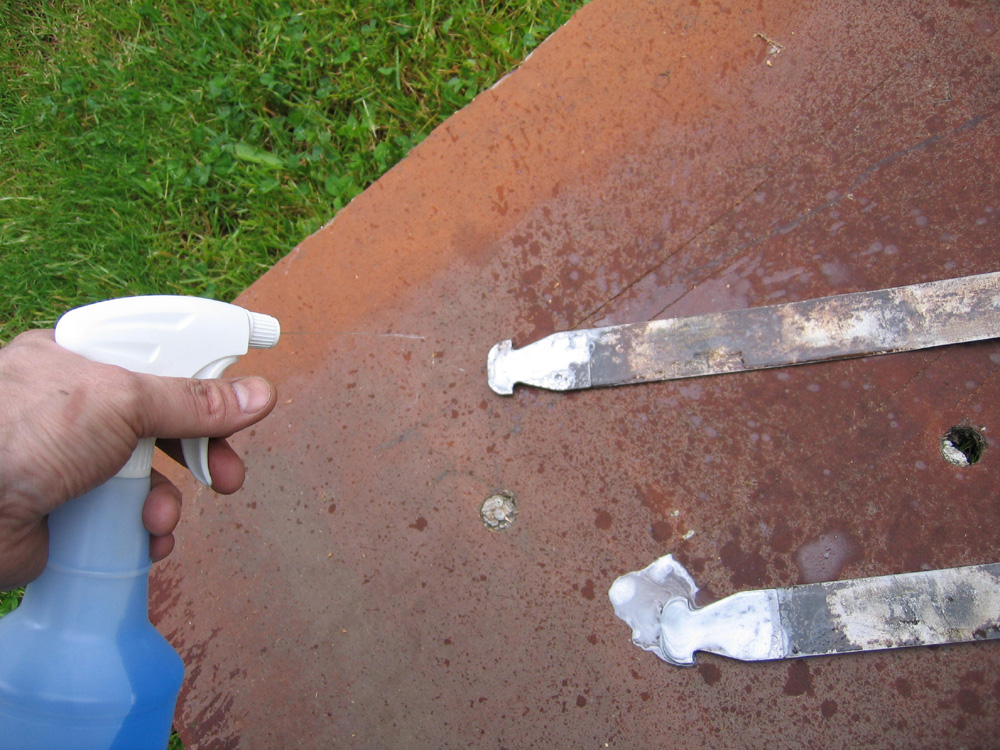
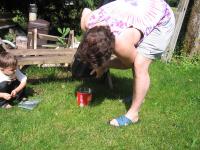
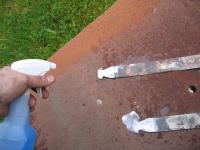
Ok, so now the outside of the tank has been scrubbed with marine clean, and all that extra crap on it is gone that the boiling didn't get rid of. The process was scrub with the 20% marine clean/hot tea kettle water using a metal 'tooth brush'....then rinsing with water and towel drying and letting it dry in the sun (it was a hot summer day in July when I did this).... So now the tank is ready to be 'etched' by Metal Ready. This is a great product! It prepares the surface of the metal to be coated by POR15. Since POR15 is a very smooth coating, it needs some help adhearing to the surface...Metal Ready makes the surface uniformly rough and also 'eats away' the last bits of grime, etc. You can actually watch it working. Pictures below: First couple show what the tank looks like when you are spraying it with Metal Ready. When you buy a gallon, they give you a free spray bottle, so I guess plastic is immune to its acid effect. I did this first spraying on the grass--DON'T DO THIS! As you can see, it leaves a nice little circle of dead grass--it did grow back though. ***Also, unlike me, use some gloves!!! Since I was just using a spray bottle at this point, I didn't use any, but if you need to touch this stuff when its wet, treat it like its battery acid--because that is what its like. I actually wire wheeled my tank straps (like I did the bolts for it) and I applied the metal ready to them as well. I had a large pad of 1/8 inch rubber and made some perfect templates for the rubber pads on the straps. After spraying the metal ready, as long as you don't overspray it, its ready for POR15ing application--no need to rinse it in my opinion, but I think I did rinse it anyways....remember once one side is done, flip everything over and do the other side. After this step, we starting painting everything with POR15.


-
actually, wait a couple of days, and you can see my completed tech article on POR15ing the gas tank inside and outside....I'm about half way done with it. Check it out here: http://www.classiczcars.com/forums/showthread.php?t=19034 The #1 thing, is get the tank boiled at a radiator shop...the tank kit from POR15 for just the sealing is like $50 and is real easy to do. I couldn't believe how easy it was, and it is permanent--you'll never have to worry about the inside of your tank again...
-
If there isn't an external fuel filter by the electric pump (at the gas tank) then there is a mesh screen on the bottom of the fuel pump (oem nissan) that comes off by pushing up on the bottom of the pump and twisting.....you just clean the screen and put it back. Each SU carb has a banjo fitting from the fuel line to the carb--there are mesh screens in there that should be cleaned (or permanently removed) as well. Nice car man!! congrats! I wish my doors had as smooth of a reflection as yours, and those doglegs! those doglegs! they look great! I mean man, you got a nice set of doglegs on her, YES!
-
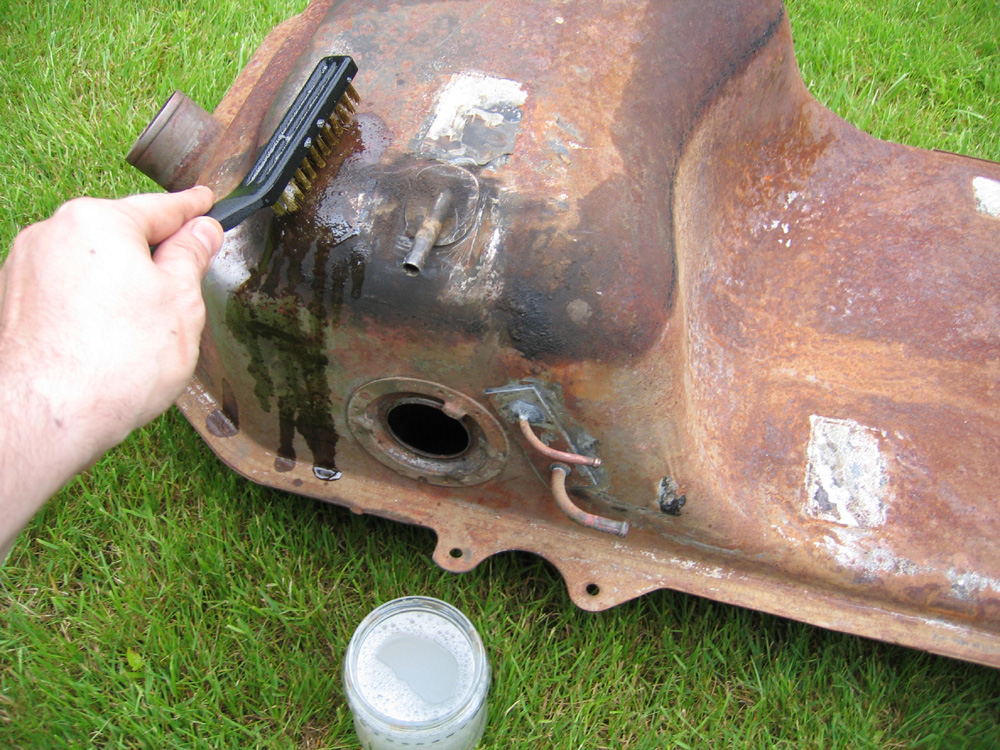
The next 4 pictures deal with cleaning the tank after getting it back from the radiator shop, having been boiled. The boiling cost I believe $80 and is well worth it. Gets 90% of grime off of it (inside and outside) and gets 100% of the nasty smell gone. I decided to do the entire outside of the tank first because I wasn't sure if I wanted to do the inside--there was very little surface rust on the inside, but the outside had a lot of surface rust. Everything coated with POR15 products are done in this order: 1. scrubbed with Marine Clean, let it soak, then rinse with water. Let it dry a little bit. Cleans all grime and oils and stuff off of the metal. 2. Apply Metal Ready and let it sit for a little while (no scrubbing), then rinse with water. Dry immediately. I did all this work on a very hot summer day so wetness wasn't a problem. Metal ready is an acid, it 'etches' the metal, giving it 'teeth' so the POR15 grips the metal better. GREAT stuff. 3. Once dry, apply POR15 like paint--its almost as thin as paint, a little bit thicker, and as it is exposed to air, it gets thicker and thicker--it will eventually be rock hard. 4. Apply chassis coat black like you would any paint--it is much thinner like paint as well. It is a rust inhibitor but not as good as POR15 (accord. to the company) so I never used only Chassis coat black but always painted it on top of POR15. **and I didn't coat everything with Chassis coat black, only items exposed and that could be seen--the only items I did this to were the tank straps and bottom of tank up to the middle seam. 1st picture shows mixing marine clean, about 20% Marine clean to 80% water and it's hot water from a tea kettle. (picture 2) Picture 3 shows the scrubbing of the tank (with wire brush) and 4th picture shows the top half of tank done. Most of this project was done by doing half of the tank per activity.


-
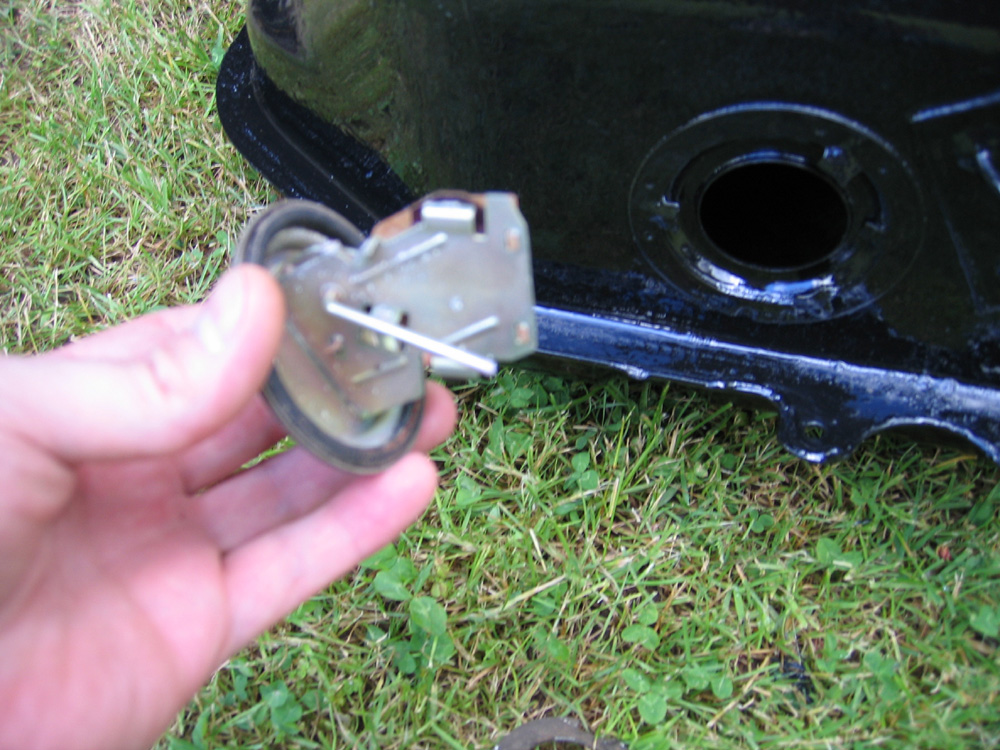
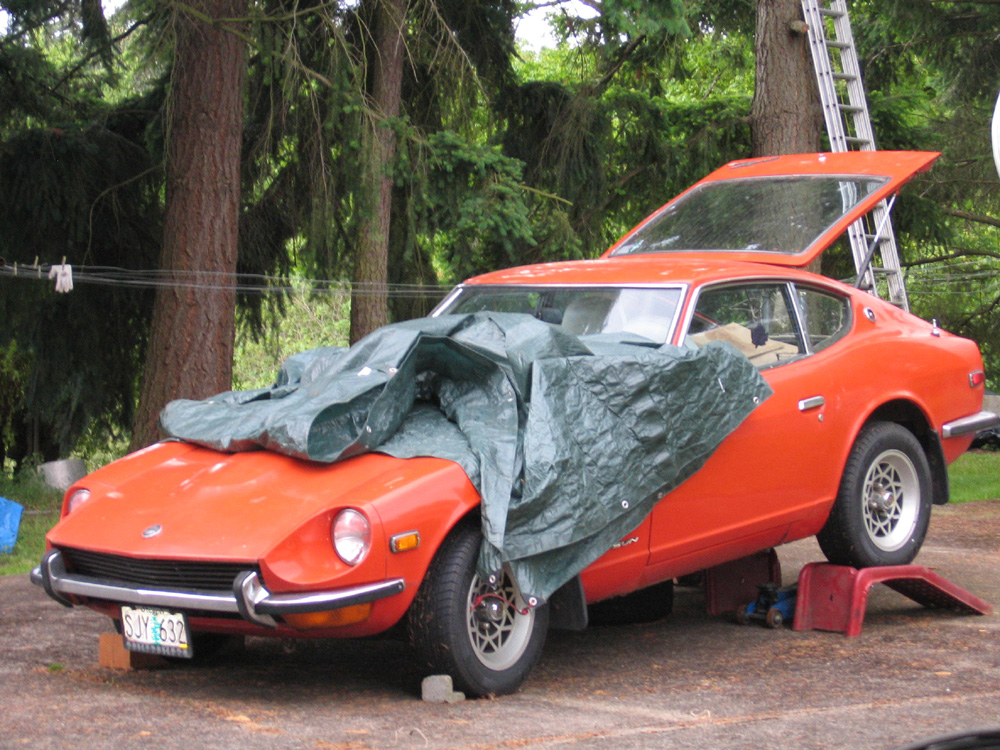
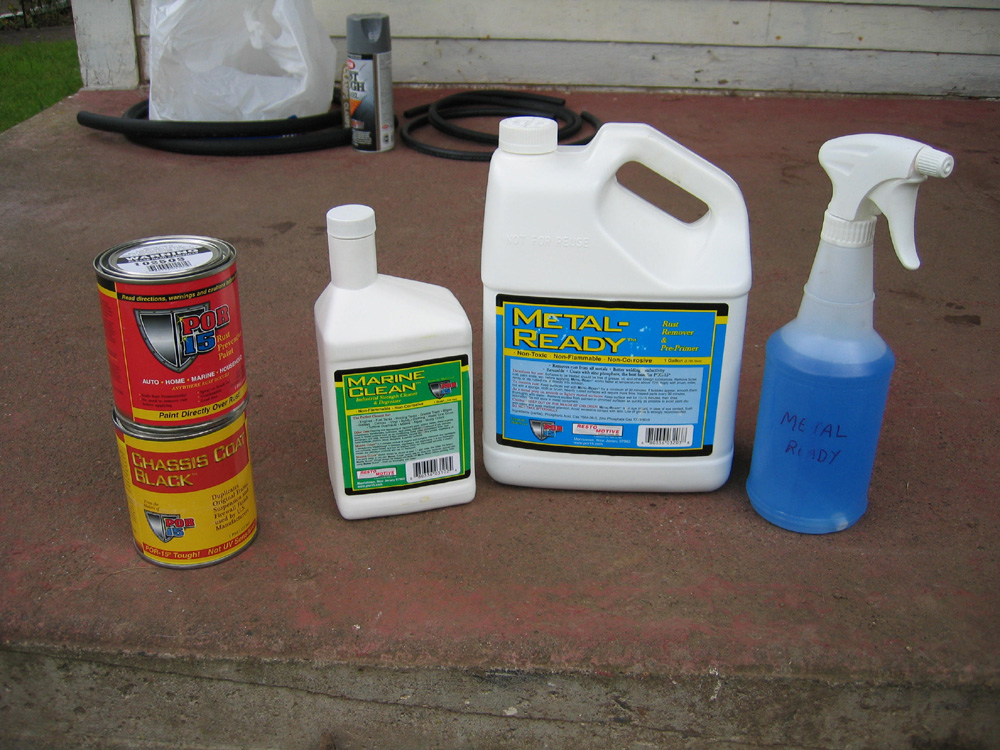
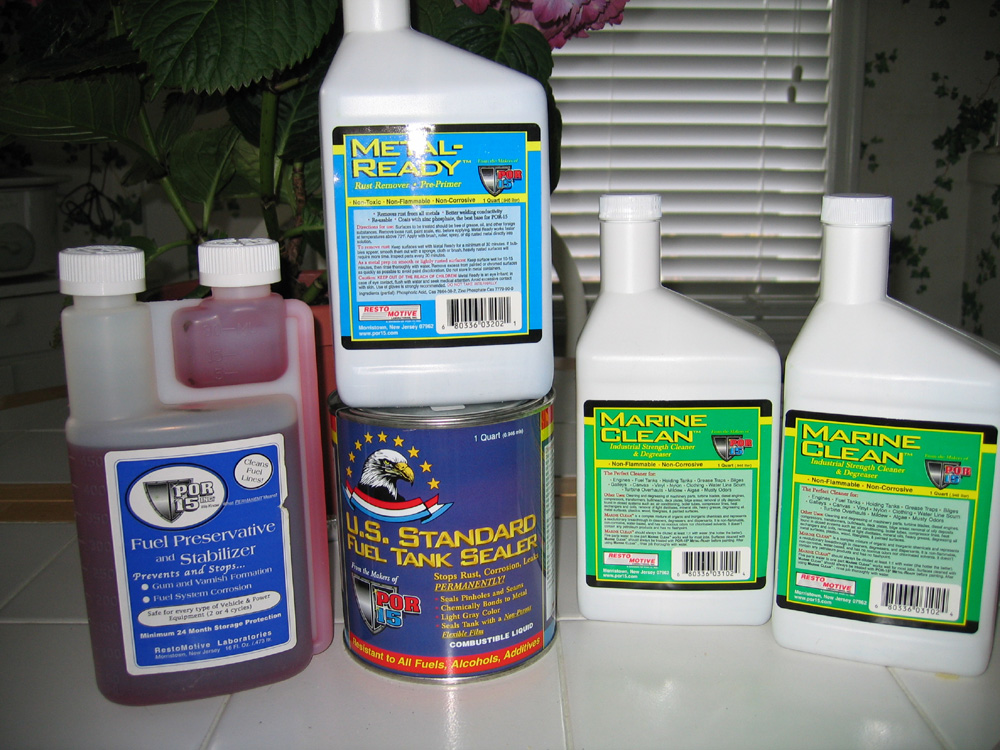
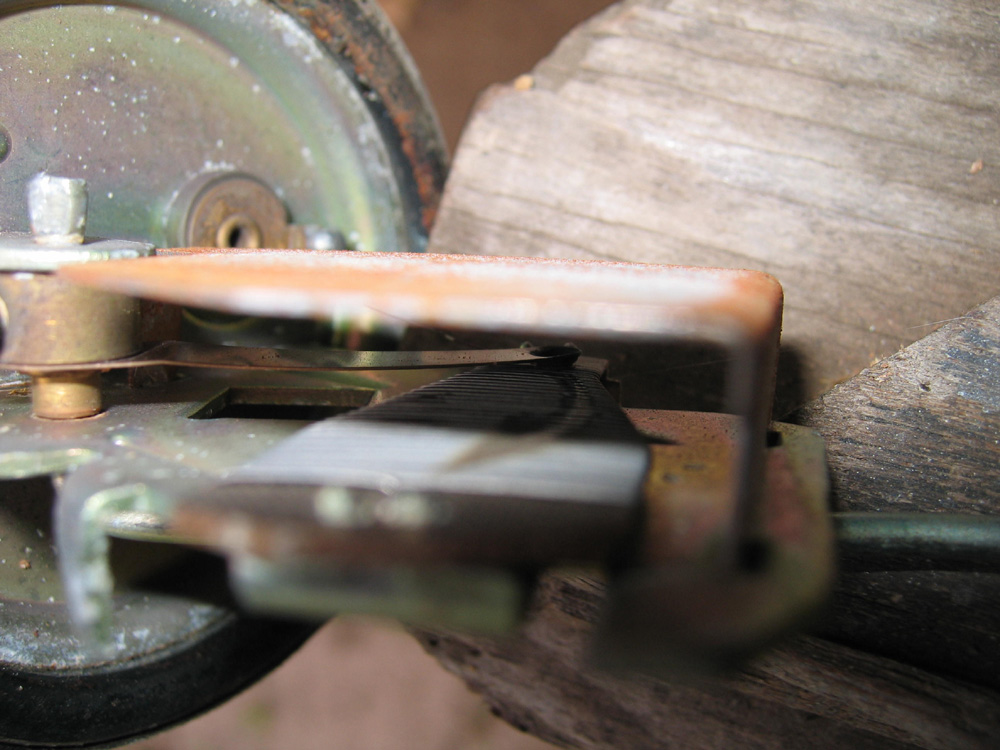
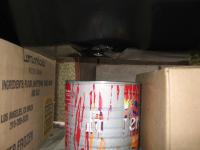
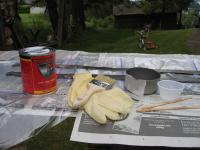
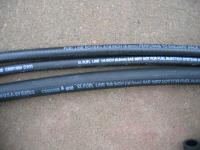
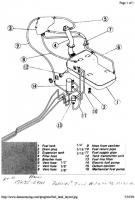
The next 5 pictures: The 1st picture shows the fuel hoses that I picked up from NAPA; 1/4 inch, 5/16 inch, and 5/8 inch. They didn't have the 5/8 inch in stock (not used much) but they got it from their warehouse the next day. Make sure you use fuel hoses, as heater hoses will be rotted eventually from gasoline. This was one of the reasons I did this project--the top 90 degree hose was leaking because it was heater hose the PO installed (can you say idiot?). 2nd picture shows how I had my car sitting during the work; jacked up the rear and placed ramps in place (you can't drive your car into this configuration). Make sure it's a sturdy situation, as you'll be under the rig; this setup was low enough that I could do some work through the hatch (as you have to do). Third picture my first order from POR15--2 pints of 1) POR15 2) Chassis coat black...a big gallon of Metal Ready and a spray bottle (included free). The Chassis Coast Black supposedly matches the exact color needed to match old style frame color on American cars (good enough for me)...Since POR15 is UV sensitive, I wanted all the items exposed under the tank to be painted with a coating of Chassis Coat black (after the POR15). If it is exposed to light, POR15 will discolor with spotches of white (pardon, I guess like M. Jackson). 4th Picture is my second order, I wasn't at first going to coat the inside of the tank, but changed my mind, 2nd order is tank sealer, more Metal Ready, 2 quarts of Marine Clean, and a gas additive that is included for free. 5th picture shows a macro shot of how worn the pickup wires on the sending unit were....


-
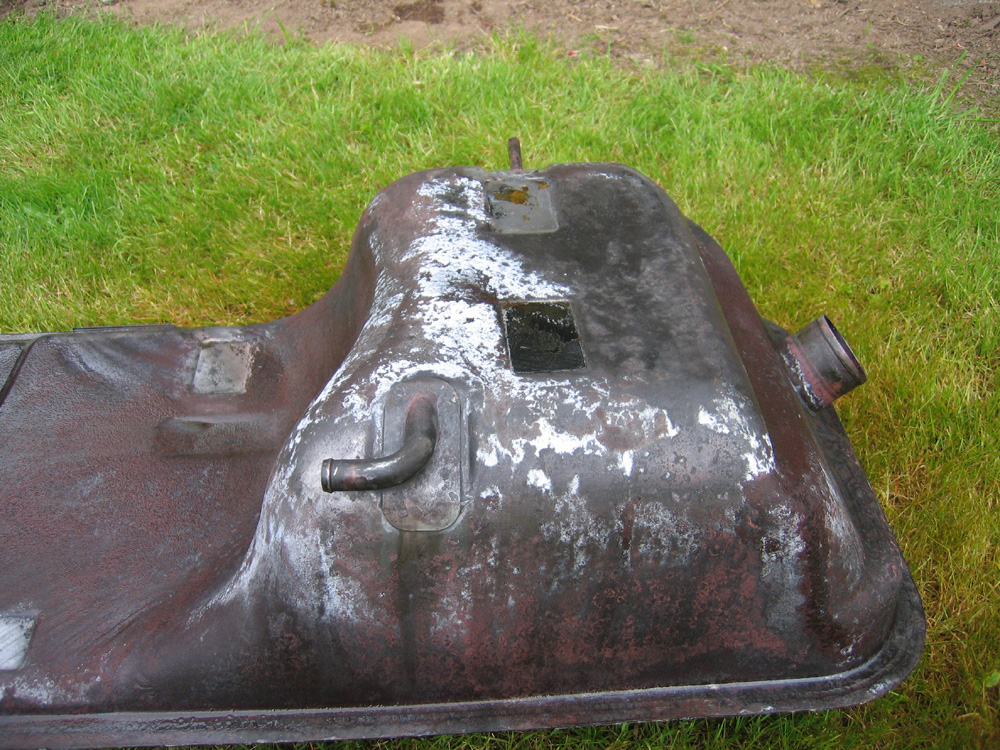
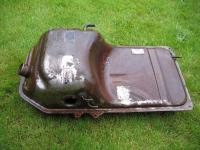
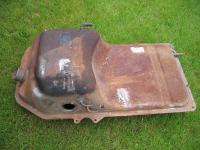
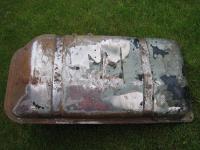
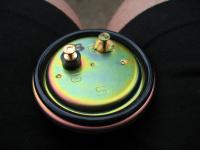
The next 5 pictures: First 2 pictures were after I got my tank back from Beaverton Radiator after having it boiled. I can't stress this enough--get your tank boiled before doing anything. I don't think my end results would be as good if I hadn't done this. My tank looked like crap before I had this done. #1 thing I found out--the 'smell' inside the cabin wasn't from exhaust--it was from this stinky tank! Before I got it boiled, I HAD to roll my van's windows down--it stunk. After boiling, it had no smell. As you can see in the pictures, it is pretty clean, but not perfect. This is where POR15 Marine Clean will come in handy, as it cleans very well. Third picture are the strap bolts, there were in bad shape--all corroded, etc...here's a picture after I simply wire wheeled them with a shop pulley driven wire wheel. They look nice, and the nuts roll very smooth. The fourth picture is of the ugly looking sending unit; I didn't keep any of the pictures, but the sending unit wiring inside that make it work, were very heavily worn. The fifth is the new OEM Nissan sending unit (with O ring and the new retaining ring) it was about $40.00 from MSA (www.zcarparts.com).

-
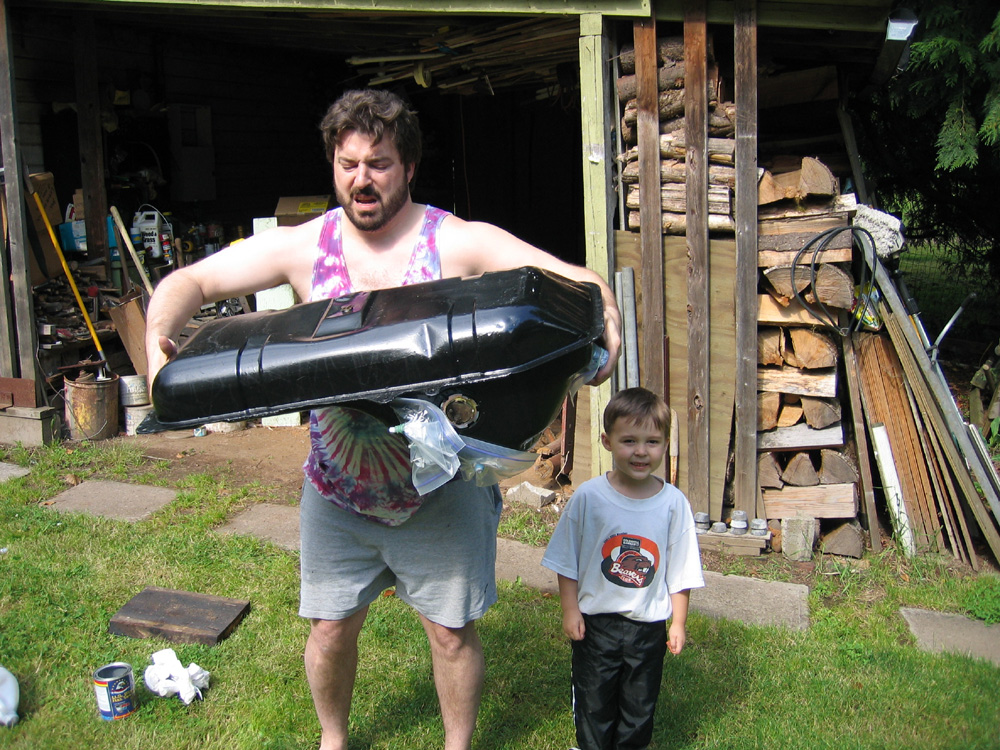
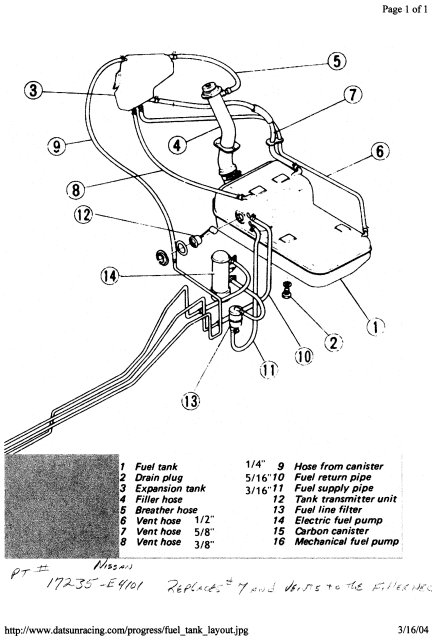
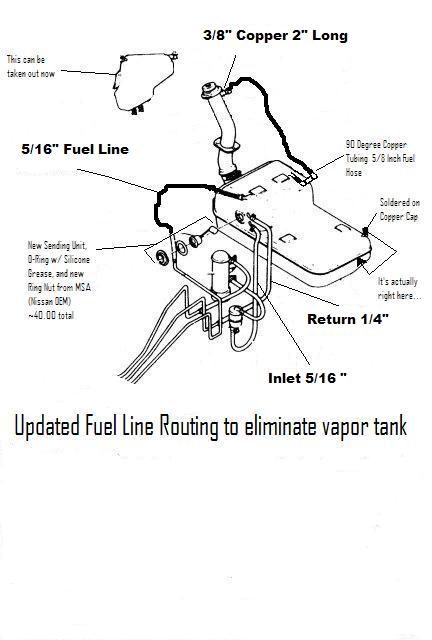
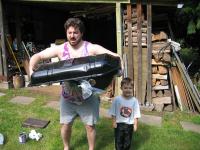
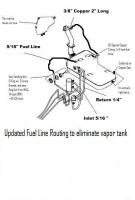
Hello everyone! I hope this article is informative to you. Please refrain from posts until I am done, approximately 10 posts. The main reason for this project for myself was because: 1. Previous owner had replaced the 90 degree hose on top of the tank with non-fuel hose and it was rotted and leaking gasoline. This HAD to be fixed one way or another. 2. Gas tank was 35 years old and, although I have never had issues with rust in the fuel lines, I know if not treated, the tank on the outside and inside would eventually rust (further). I already knew the gas tank on the outside top was rusty. 3. I enjoy working on my Z and if I can make it stronger than original and keep it looking original, I will do that! This project I think accomplishes this, and also at the same time eliminates the evaporation tank, saving about 10 pounds. I am not going to say good/bad on the evap tank, all I know is that my fuel vapors are still being burned correctly and not entering the atmosphere. I will leave it at that. Coincidentally, if anyone needs a great shape Evap tank from a 10/71 I have one! I also have a bunch of the original hose clamps (I used good ol' American style ones--new). 4. Fuel sending unit was leaking a little fuel, and the gauge has always worked oddly, and since it's original I wanted to replace all items, including connection wires, rubber o-ring, retaining ring, and sending unit. My sending unit was jimmy rigged with the wires just twisted to the sending unit posts; I wasn't able to find any of the snapping connections, so I soldiered everthing together, and made some quick releases incorporated to make it better than new. NOT original, but better than new. 5. Learn something about POR15, because I've heard a lot about it, but have never used it and I wanted to see what it was all about. Hopefully some of my tips will help somebody out there. IT DEFINITELY IS THE REAL DEAL--THIS IS A GREAT COMPANY MAKING GREAT PRODUCTS. Get one of their sales magazines, they make some great stuff to keep our Zeds working and lasting! Much thanks go to EScanlon and Beandip, both of which were instrumental in making this project become reality; if not for them, I would not have seen what POR15 could do and how it could help (in person). First 2 pictures show the before and after pictures of tank and the hoses associated. All pictures are 1024x768 reduced to under 300 kb.
-
hey man get some wheel locks! someone will want em... Quick question--if you were after performance tires, what made you get these instead of the 15x7 konig rewinds?