


dogma420
Free Member
-
Joined
-
Last visited
Everything posted by dogma420
-
 if they were so good, manufacturers would do it. More than likely you have experienced a placebo affect or at best a temporary feeling of improvement. Does the gas additive have an octane booster in it? That would make it feel better... Just good ole motor oil is what I'd recommend, IMO.
 -
 now that I think about it, that shot above has got to be AFTER I applied chassis black, because I'd have to be an idiot to get it wet before I was finished....anyways, the black is duller than POR15's shiny look, so I believe this picture is after chassis coat black was applied.
 -
My prayers are with Great Britians. What a horrible act. God Bless.
-
check out my gallery, there's some pictures of my suspension technique rear sway bar...I went with it because it doesn't require drilling any holes. Check it out, link in my signature. Pictures are on page 6 in the gallery.
-
No problem Mike--I just looked, and I can't find a 'reviews area'...what heading is it under?
-
Yeah, you're right...I had a chip on my shoulder about something else... I was just trying to state--driving defensive helps a lot--might not mean anything on a blind head on, and the Zed might not have the crumble zones like a modern car, but I concur that you have to drive very defensive in a z, they are very hard to see for other drivers (esp ones driving tanks...err SUVs)....
-
Geeze Guys, Talk about a lot of p****-talk on here! Like this is the first accident a 240z has ever been in....you as a good driver is the most important thing. If you won't drive your Z as you would a normal car, why do you have it? Would nobody here drive an old Shelby Cobra on the highway? I'd say that's just about as bad. Driving a Z has always been like driving a motorcycle...you have to be defensive, but then again that's good for anytime you're driving anything.
-
I'd be tempted to get one if it stayed on continuously, because it does what it says as long as the 2 forks have their circuit complete...but with it only have 4 AA batteries in it, it's no surprise that they set it up that way. I highly recommend the 400watt Craftsman gun...got it for I believe $25 on sale at Sears...awesome soldering gun, you probably won't ever have to get another one!
-
Dreco--that's a pretty sweet lookin car if you're referring to your Avatar.... Bemmerguy---Dreco's avatar--is that the front end look you're after, right? Just BE careful....I love using the clutch with my Zed....it's really easy to knudge things with the front bumper without tweaking anything...but that's just not a possibility with that front end you got. Once its painted please post pictures...A while back I made a post with the title 'what does everyone think of this front spoiler?' and the picture was the spoiler you got....I like it, but alas, I am choosing the BRE spook spoiler....it, by itself, seems to change too much of the look of the car...but I like it, and I'd like to see what it looks like on your rig when its painted and done. Have a good 4th!!!!!
-
There's a real good code listing in VB's catalog as well guys....in the front.
-
No problem by me...it's tall enough for me, and I get better gas mileage with the 3.5...if I was racing it or wanting real fast acceleration off the line, it'd be different...the 4 speed (and my 77 5 speed) has real low gearing, so I think imo that it works great with the 3.5.... Just my .02 dollars...
-
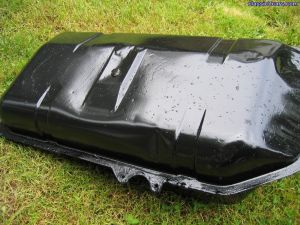
 Phew....all done...Now in 200 years my car will be all rusted away except the tank will still look great!
 -
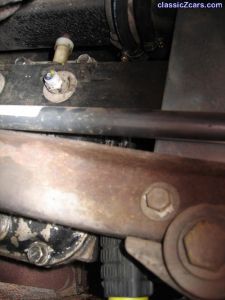
 Copper connector for 5/8 fuel line (from the 180 degree copper on top of tank) to the Filler hose...fits great.
 -
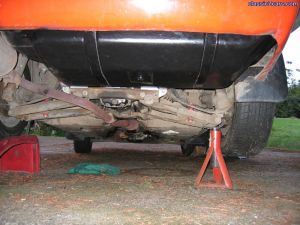
 Make sure the top hose...all the hoses, are all in place before putting it up in place (except actual fuel lines) or you'll be taking it down a couple of times like I did!
 -
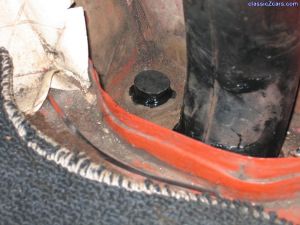
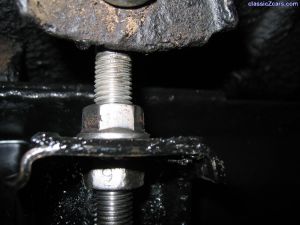 To install straps, have the top nut loose, tighten the bottom as much as you should to make the strap tight, and then tighten the top nut down to secure in place.
 -
 Tank straps right before going back on...new rubber cut out of some rubber my Dad had lying around. Both undersides of straps (and gas tank) were coated with 2 coats of chassis coat black (POR15) to protect from UV and also gives it a duller black color (POR15 is super super shiny, doesn't look quite right...)
 -
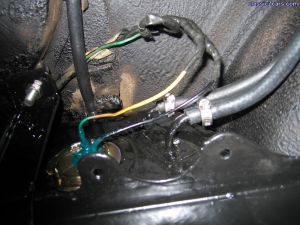
 Just about ready to put tank back up, took a nice little picture of what the wiring looks like...I will be putting a 1980 RX7 carb'd fuel pump in sometime in the future by the way....
 -
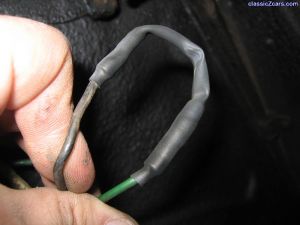
 Used more shring hose between the car's original yellow and black wires for sending unit to 2 new wires that will connect to sending unit's male/female connectors.
 -
 I used some of the rubber shrink tubes to seal up the fuel pump wires (I use mechanical right now)....making sure they have about 1.5 inches between them....
 -
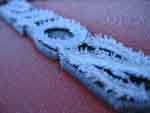
 Another cork shot....
 -
 Had to seal up hose holes because there's no hose there now! Used 3M weatherstrip adhesive to cement them in.
 -
 See Title....
 -
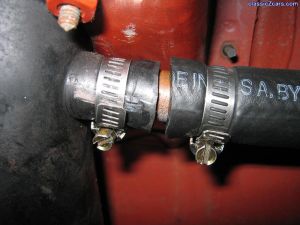
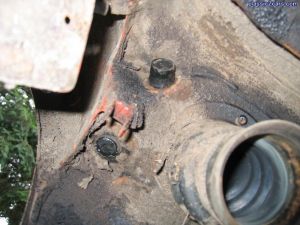
 This was a 'oh sh@t' thing at first, how to tighten the hose clamps...fortunately a screw driver fits right in front of the mustache bar...phew....
 -
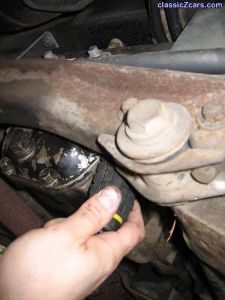
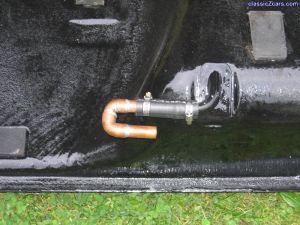 Copper works great--Fuel doesn't affect it, and my Dad's a retired plumber, so got this done for free!
 -
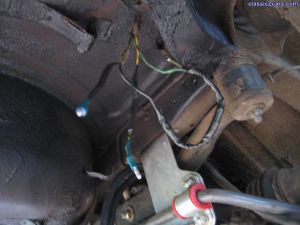
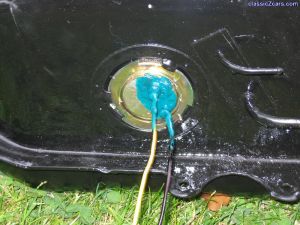 Showing the liquid electrical tape work...messy looking but rock solid on not having to worry about it...