sweatybetty
Free Member
-
Joined
-
Last visited
Everything posted by sweatybetty
-
 that is chrysler tor-red.
 -
-
thank you. i found a few that are close to my serial #. nearest i can find puts me at january 1972
-
no door plate
-
how do you figure the build date from the serial #? thanks all sb
-
try entering "automotive rubber grommets" in your search engine http://www.rakuten.com/prod/125pc-rubber-grommet-plug-assortment-includes-solid-plugs-automotive/277183646.html?listingid=498744622 http://shop.advanceautoparts.com/p/wilmar-125-piece-rubber-grommet-hardware-kit-wlmw5214/99984347-P http://www.steelerubber.com/firewall-grommets http://www.wurthusa.com/web/en/website/produkte_1/electrical/rubbergrommets/rubbergrommets.php
-
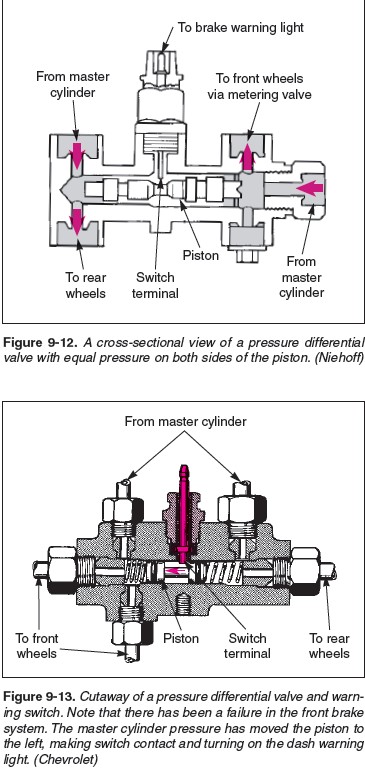
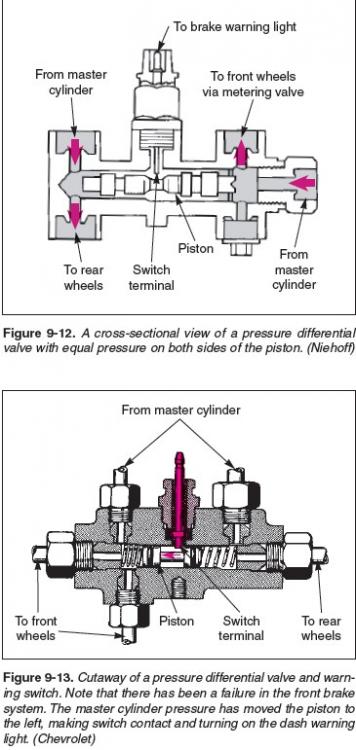
sound like the warning switch is bad. there is a part inside the kind of floats in the center. in your case that part should have moved toward the rear brake side and closed off fluid to the rear brakes. if your fronts didnt work, that tells me that part is stuck in the center. did the brake warning light come on?
-
the weather here is still holding out on the cold, wet side. perfect for painting. i have only painted 1 other car before, and that was with single stage paint. this is a base-clear, so it is a kind of practice session, so i decided to do the engine bay first. the base went on a bit dry, so there is some orange peel. over-all i am pleased. the body comes next week-end. base coat before clear after clear (sorry for the blurry pic)
-
2500-3000 my opinion
-
i wondered about that, but it makes sense. great idea. why not go all the way up to the bottom of the radiator support?
-
on my 72, there is sealer between the panels i dont know how they managed to do this and then spot weld without burning the sealer? i replaced the pans and sealed the outside and then did the inside with bedliner. my 2 cents
-
once again http://www.autobody101.com/forums/
-
anyone tried these? http://www.ebay.com/itm/Datsun-240Z-280-fits-R180-open-diffs-Limited-Slip-Differential-Conversion-Kit-/262292336254?hash=item3d11d76e7e:g:gyMAAOSwnDZT9CVj&vxp=mtr
-
im not concerned with that happening in my lifetime anyways. the sandblaster did a great job on the cowl. it was free of paint and rust, leaving a fairly rough surface, perfect for this stuff to adhere to. i can pretty much guarantee it will never fail or rust. we use this stuff at work for sealing metal roof penetrations and have yet to see it fail when properly applied.
-
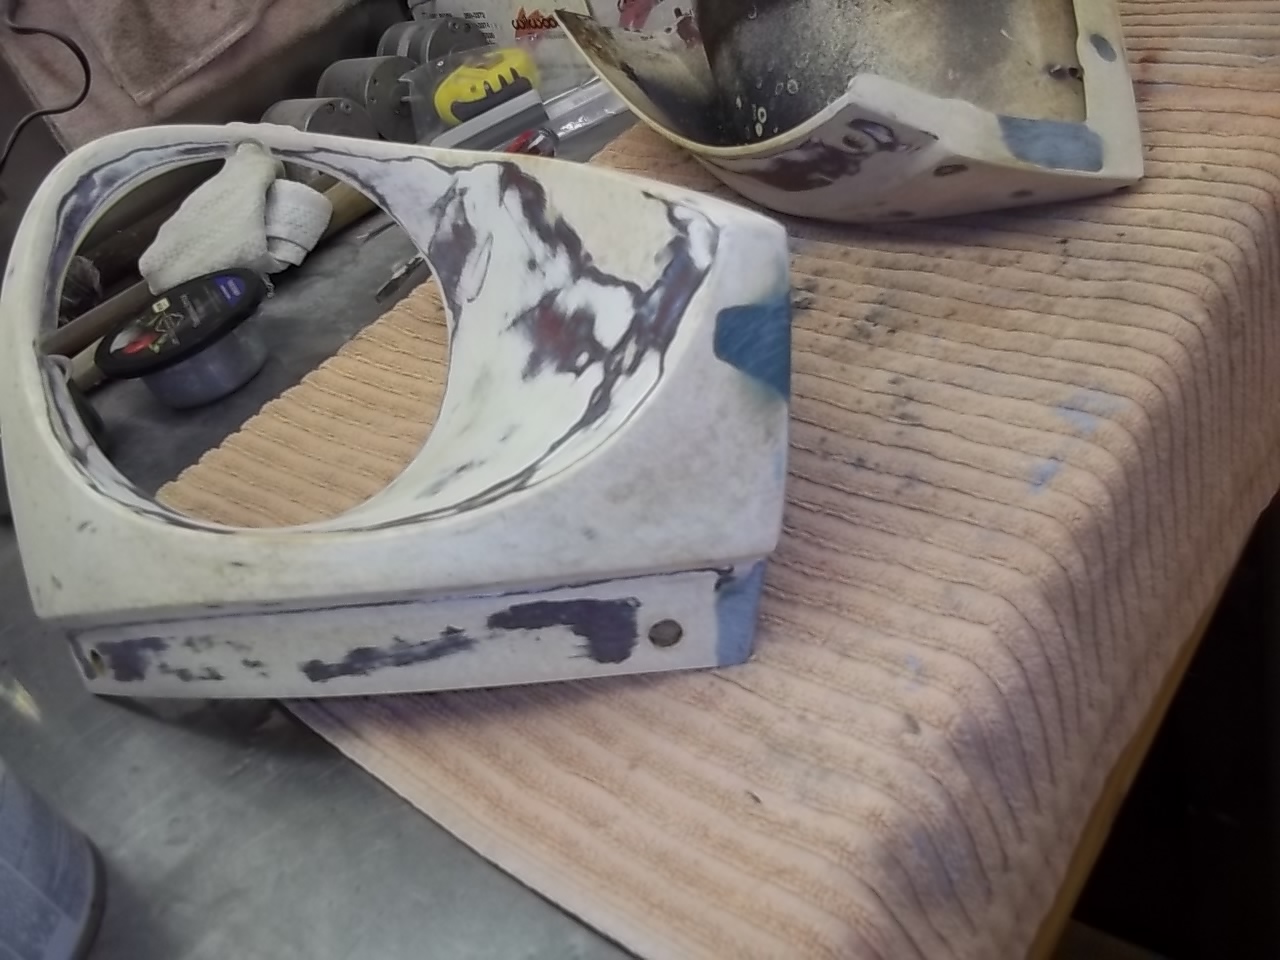
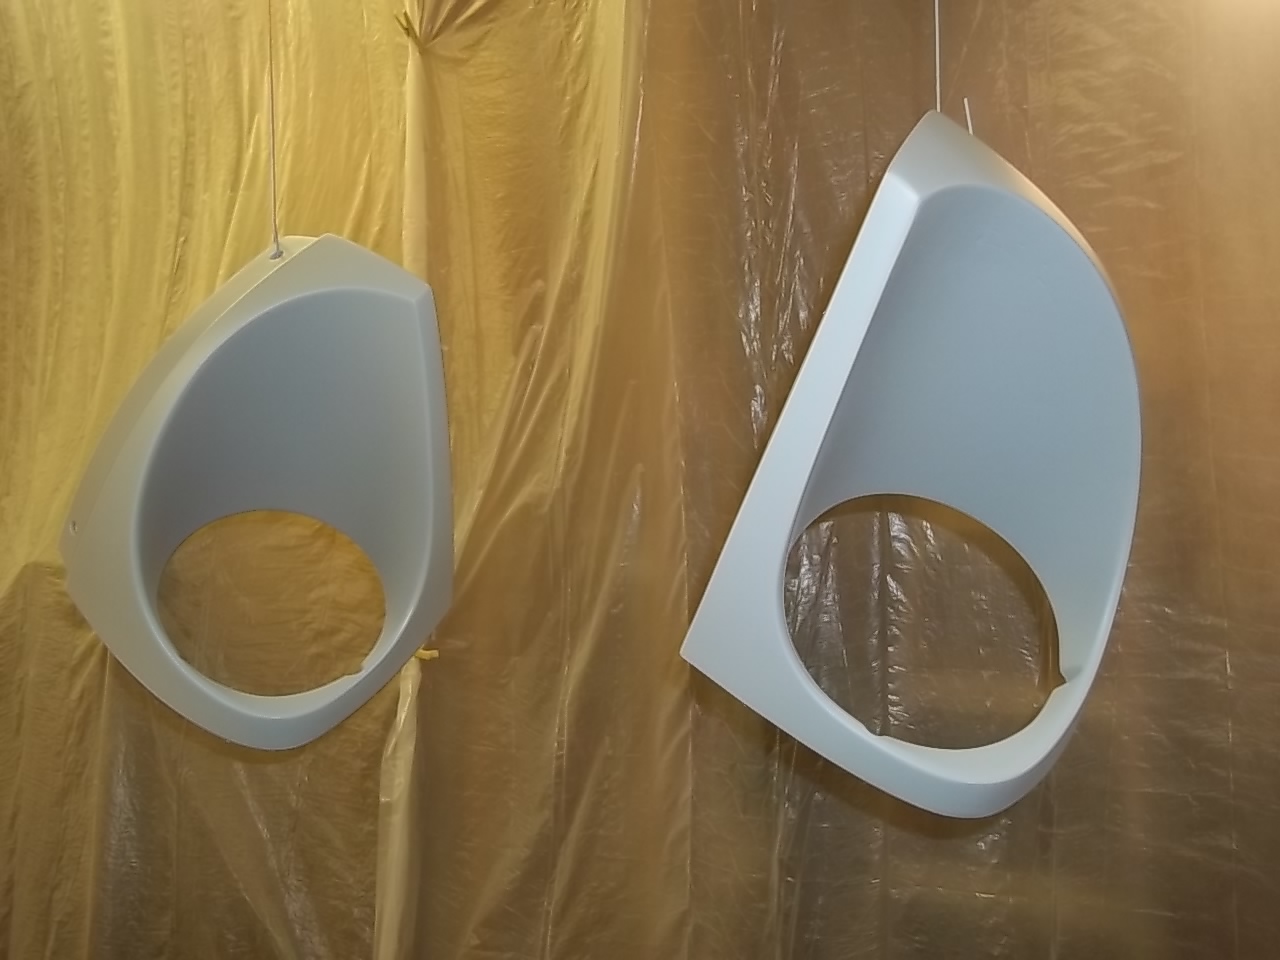
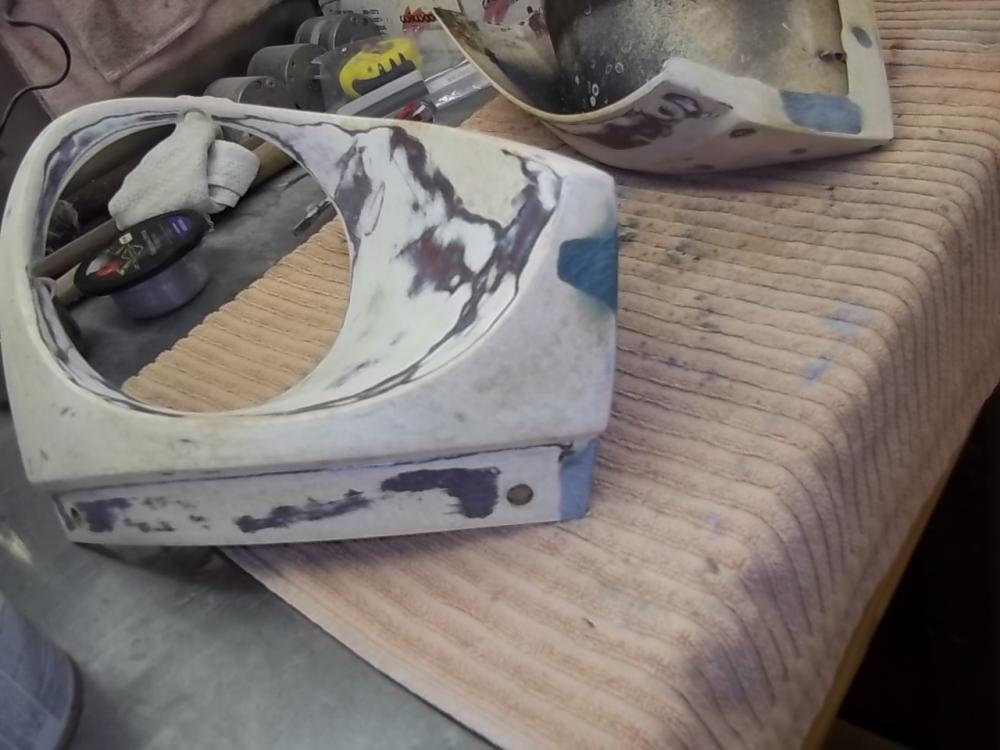
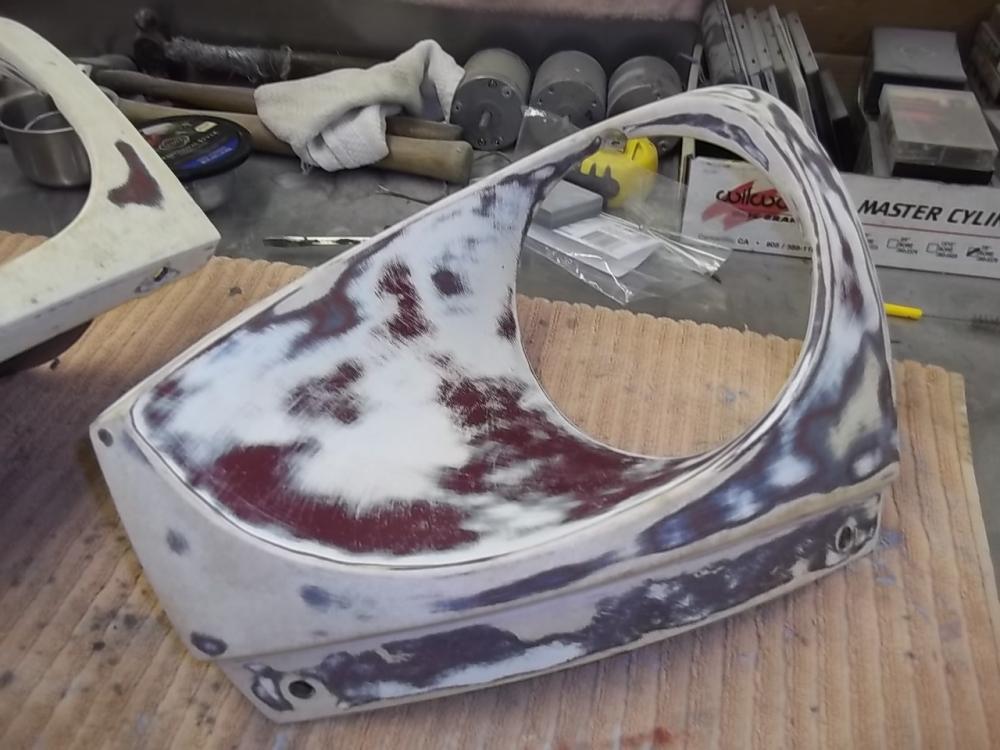
headlight surrounds (fiberglass) repaired and epoxied. they both had several cracks and the lh side mounting holes were broken.

-
sell it to someone and buy an aftermarket universal harness. my 2 cents
-
i would like a link to that stuff also. looks excellent.
-
http://www.tremcosealants.com/products/vulkem-801.aspx basically liquid rubber.
-
which way are they supposed to be?
-
well it has been a while since i posted anything, but i have gotten quite a bit done. the body and doors are ready for paint. i hope to have that done in the next couple of weeks before the weather warms up and the bugs come out all bodywork done, and black epoxy applied before primer and blocking primer over black epoxy block sanding. the darker area is guide-cote by 3M. it leaves a dark spot in any low spot while sanding. those few spots get filled with glazing putty and re-sanded new battery tray all welded up cowl area rubber sealed. there wasnt any rust here but this stuff will seal against any leaks
-
do some reading here https://www.autobody101.com/forums/ lots of very good advice
-
i can lift the front end of my car easily. it is a rolling chassis, nothing else. i would guess 6-700 pound range
-
95% of all electrical problems are related to a bad ground or corroded connections
-
im curious as to why the strut isnt just attached to the part that this bracket is attached to. any ideas? thanks all sb
-
hello all! things have slowed a bit, but i have gotten quite a bit done. ordered and installed the lower quarters and the center section above the tail lights. i bought these parts from tabco, and they did need trimming for a good fit. all in all, they fit ok. im just about done with the body work and should have another coat of epoxy and then primer by next weekend. thanks all sb rear hatch piece. this was a pita to get fit correctly lower quarter before and after and all smoothed out