MattSaint
Free Member
-
Joined
-
Last visited
Everything posted by MattSaint
-
-
Hey Guys, Looks like I inadvertently deleted the images of the exploded view of my 280Z horn I am restoring. Based upon scouring the web, I've assembled them in the order I believe is correct. See image below. Can anyone confirm? Thank you! Cheers! ~Matt

-
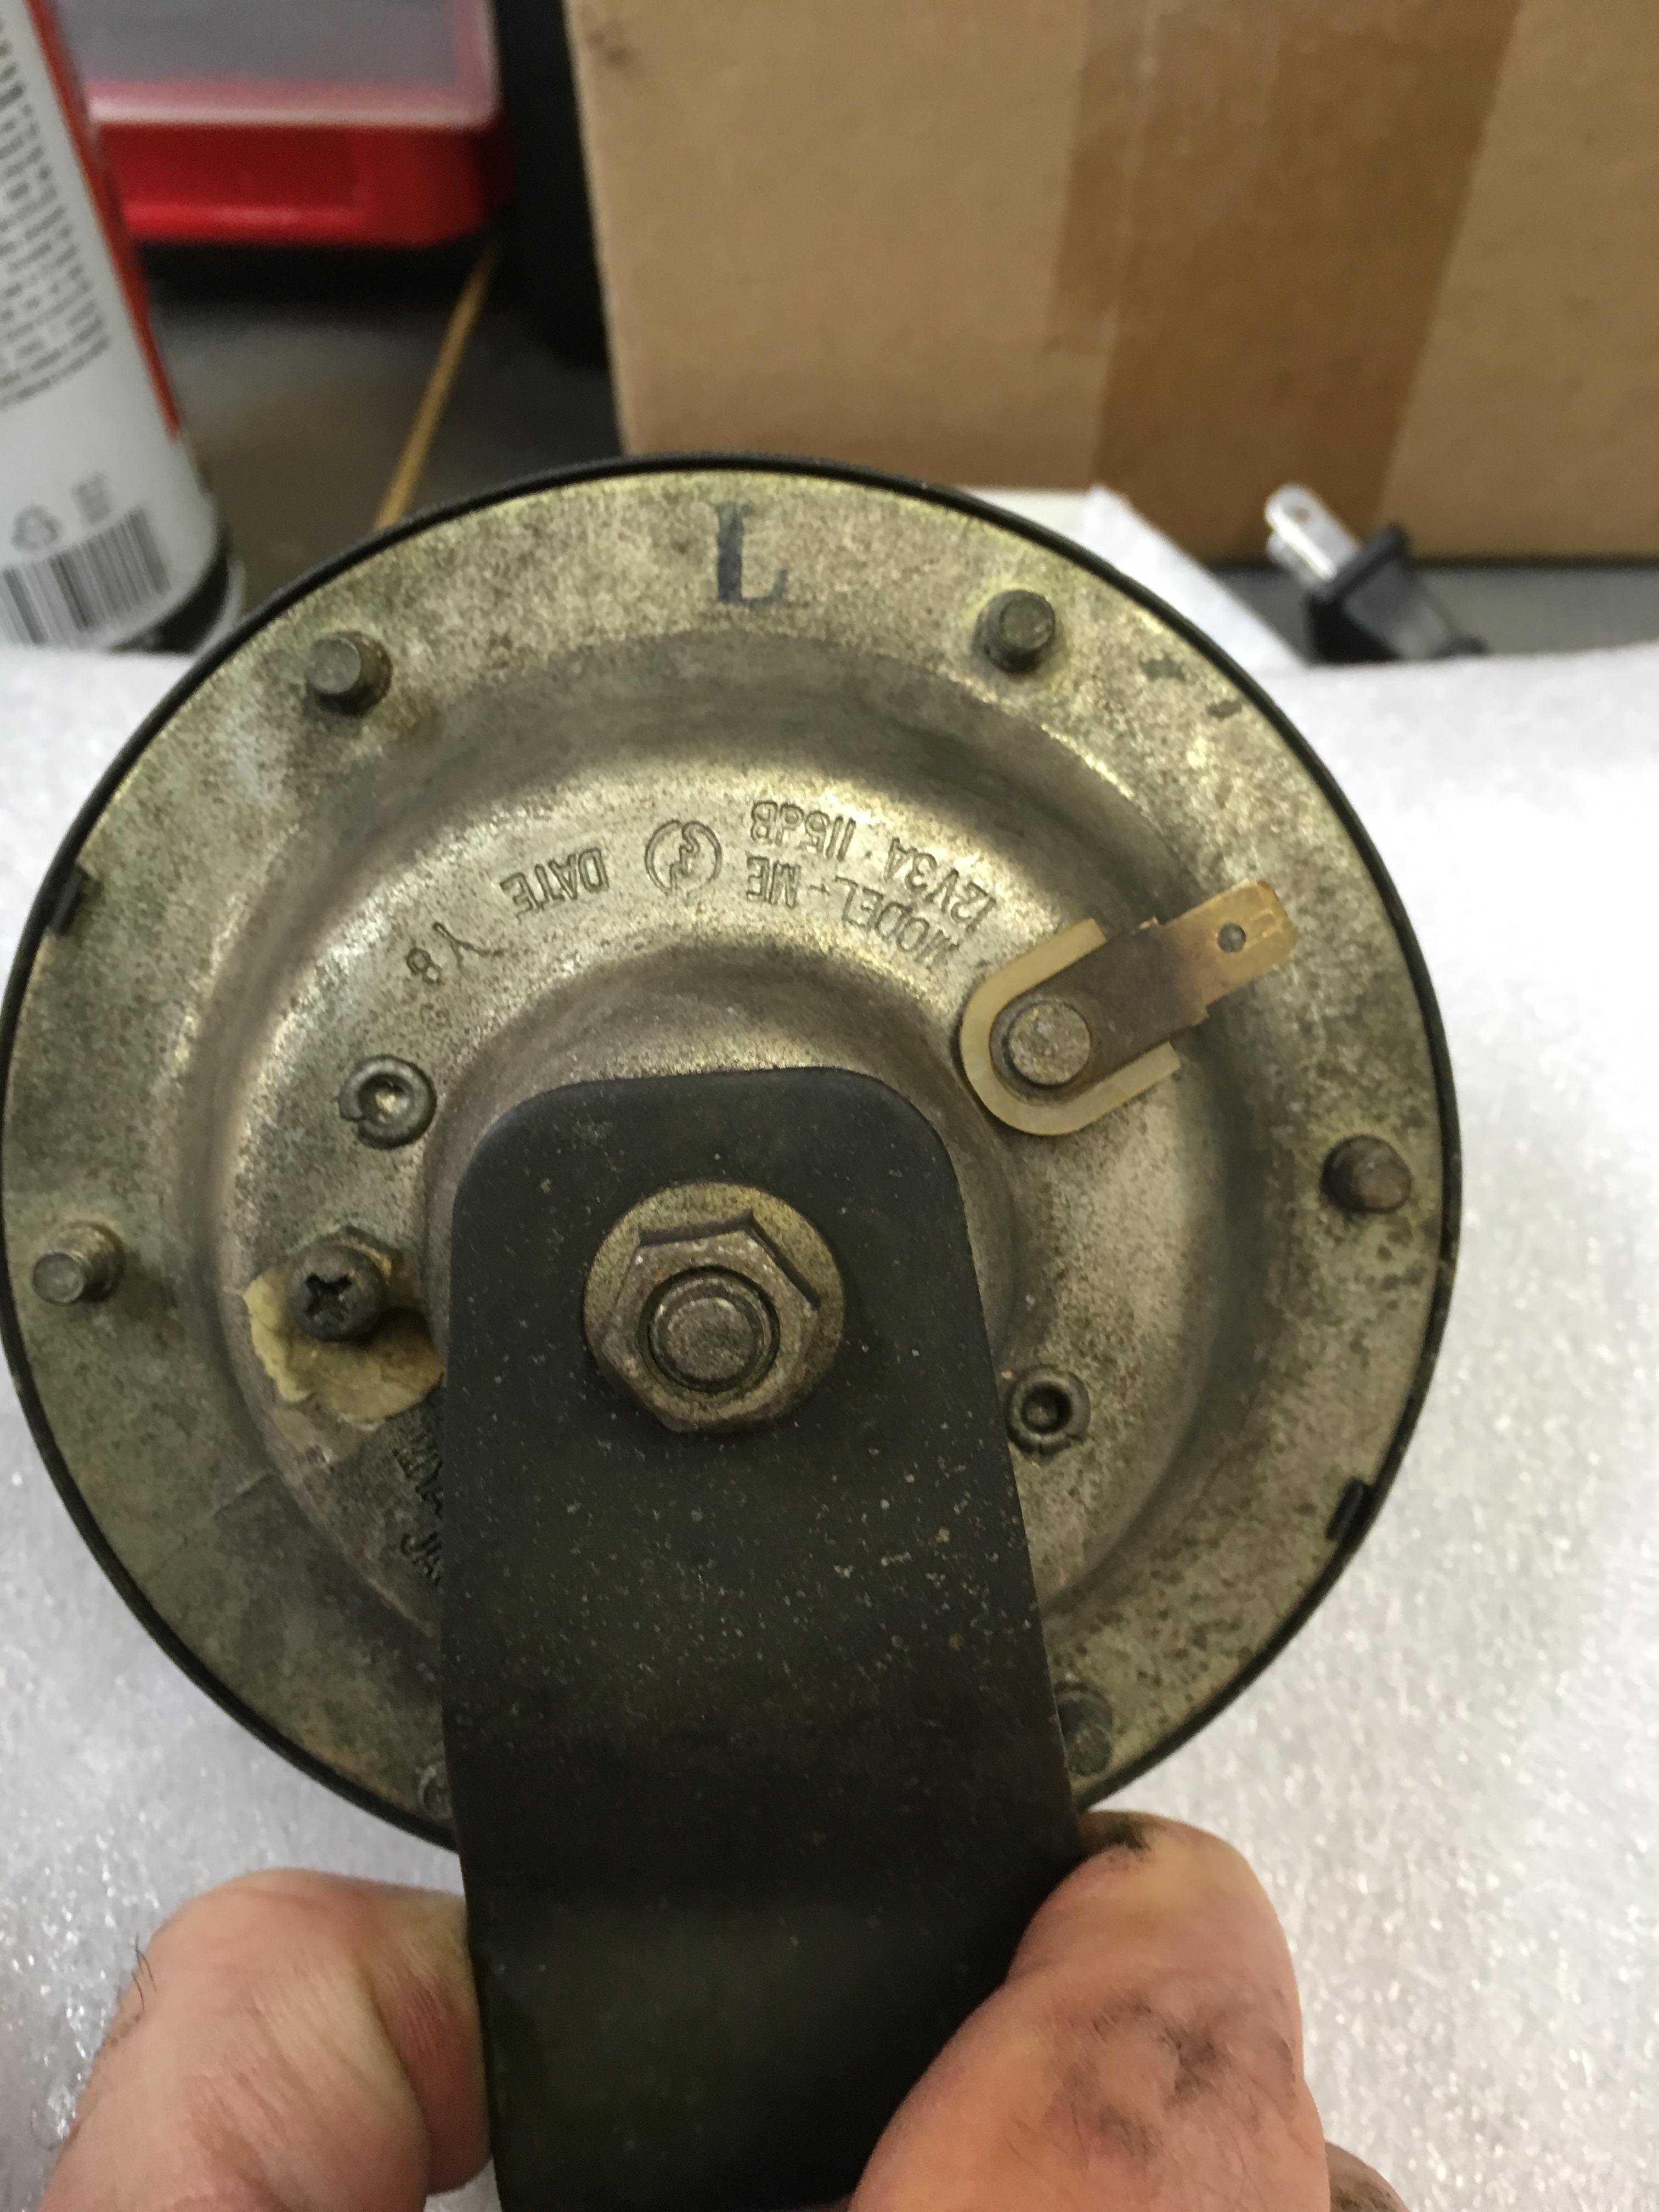
Update: I took my remaining horn off and found out that it is the L horn. Also note that the front color is almost a hunter green, while the back appears to be cadmium plated? So, the horn I purchased is the H horn, so I now have a matching set. I am in the process of cleaning it up. I've taken the horn apart, cleaned the face and back as well as removed the pitting from the bracket. I have the front face and bracket primed. I am now in the process of making a paper gasket. One last question, my horn has a Date Code of Y8, the horn I purchased has a Date code of Y7. I've tried to search and find a place that talks about the parts date codes for Datsun. Can someone point me to it or enlighten me on how to decipher them? Thanks!


-
@siteunseen - No worries. I was able to locate 1 horn. I am in the process of cleaning it up as it was quite rusty. Still not sure if it is H or L or what I have. It will work itself out in the end.
-
They aren't for sale, I was joking around...
-
Those look good to me, I'll take them! ;-)
-
I found an ebay auction for a 77/78 version and the H and L are painted on the bracket. I'll pull the bracket on mine to see if it is there. I don't see anything on the horn itself.
-
That is it exactly! I just wanted to make sure I wasn't missing something.
-
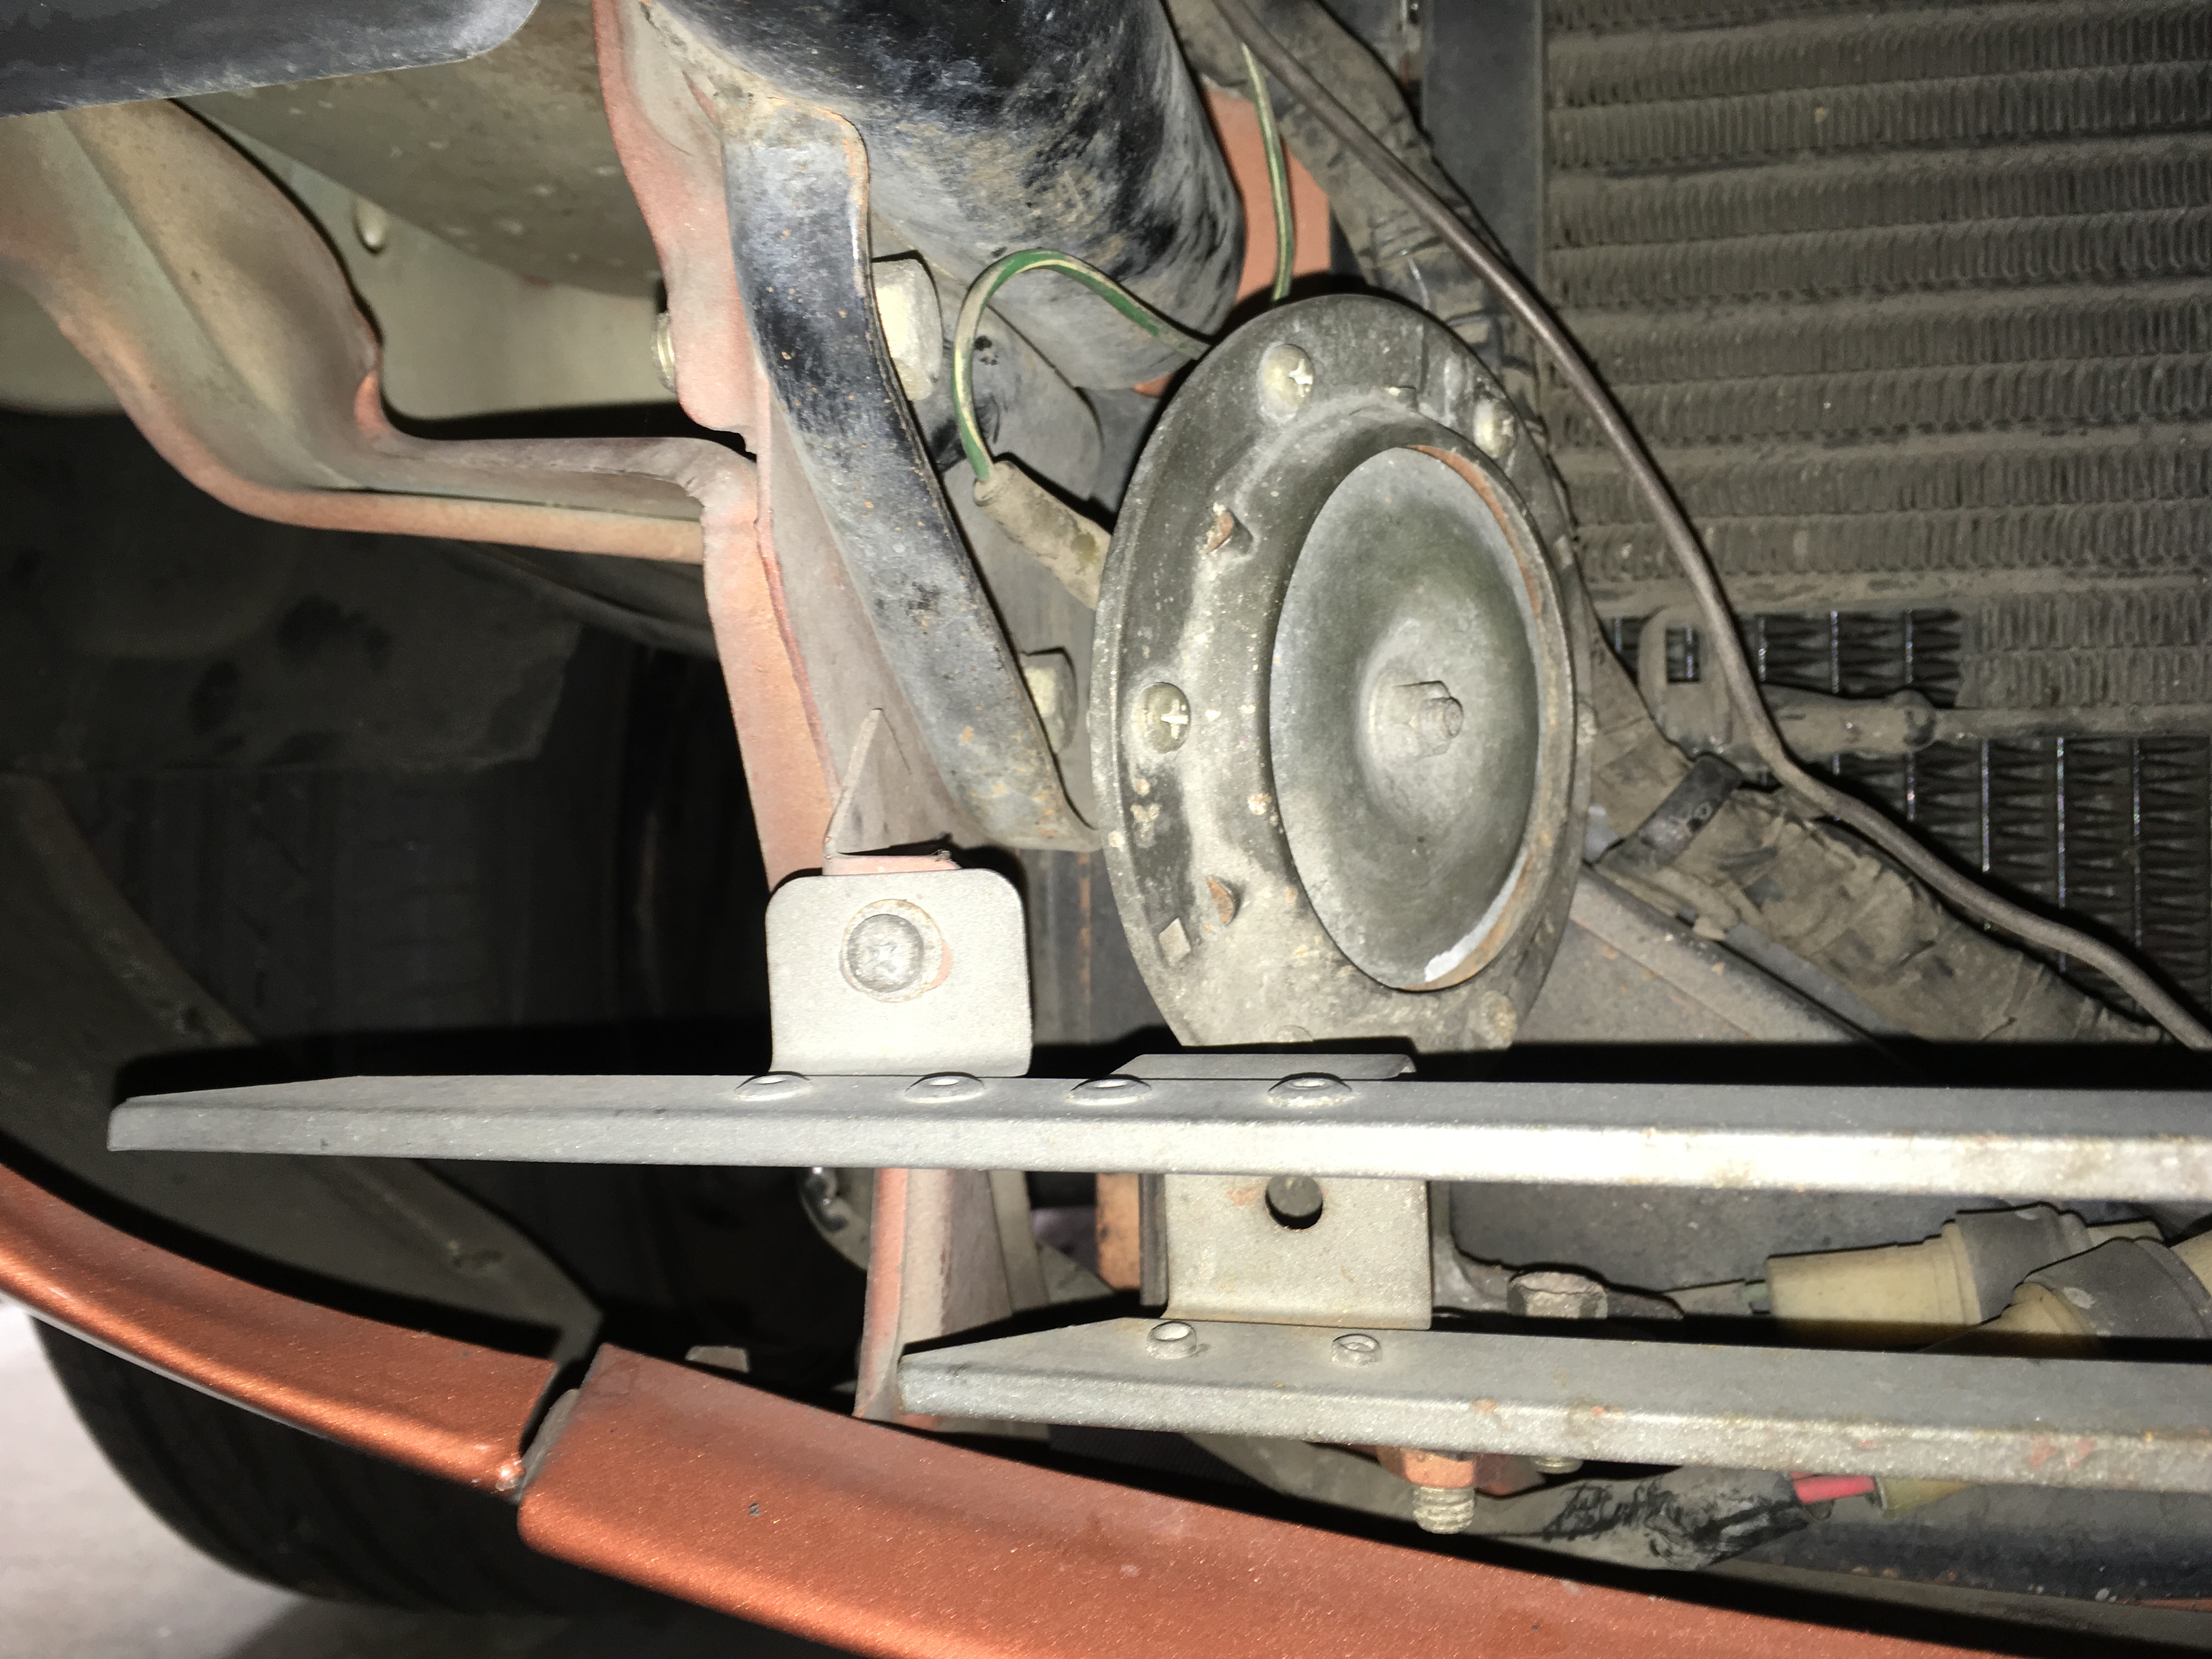
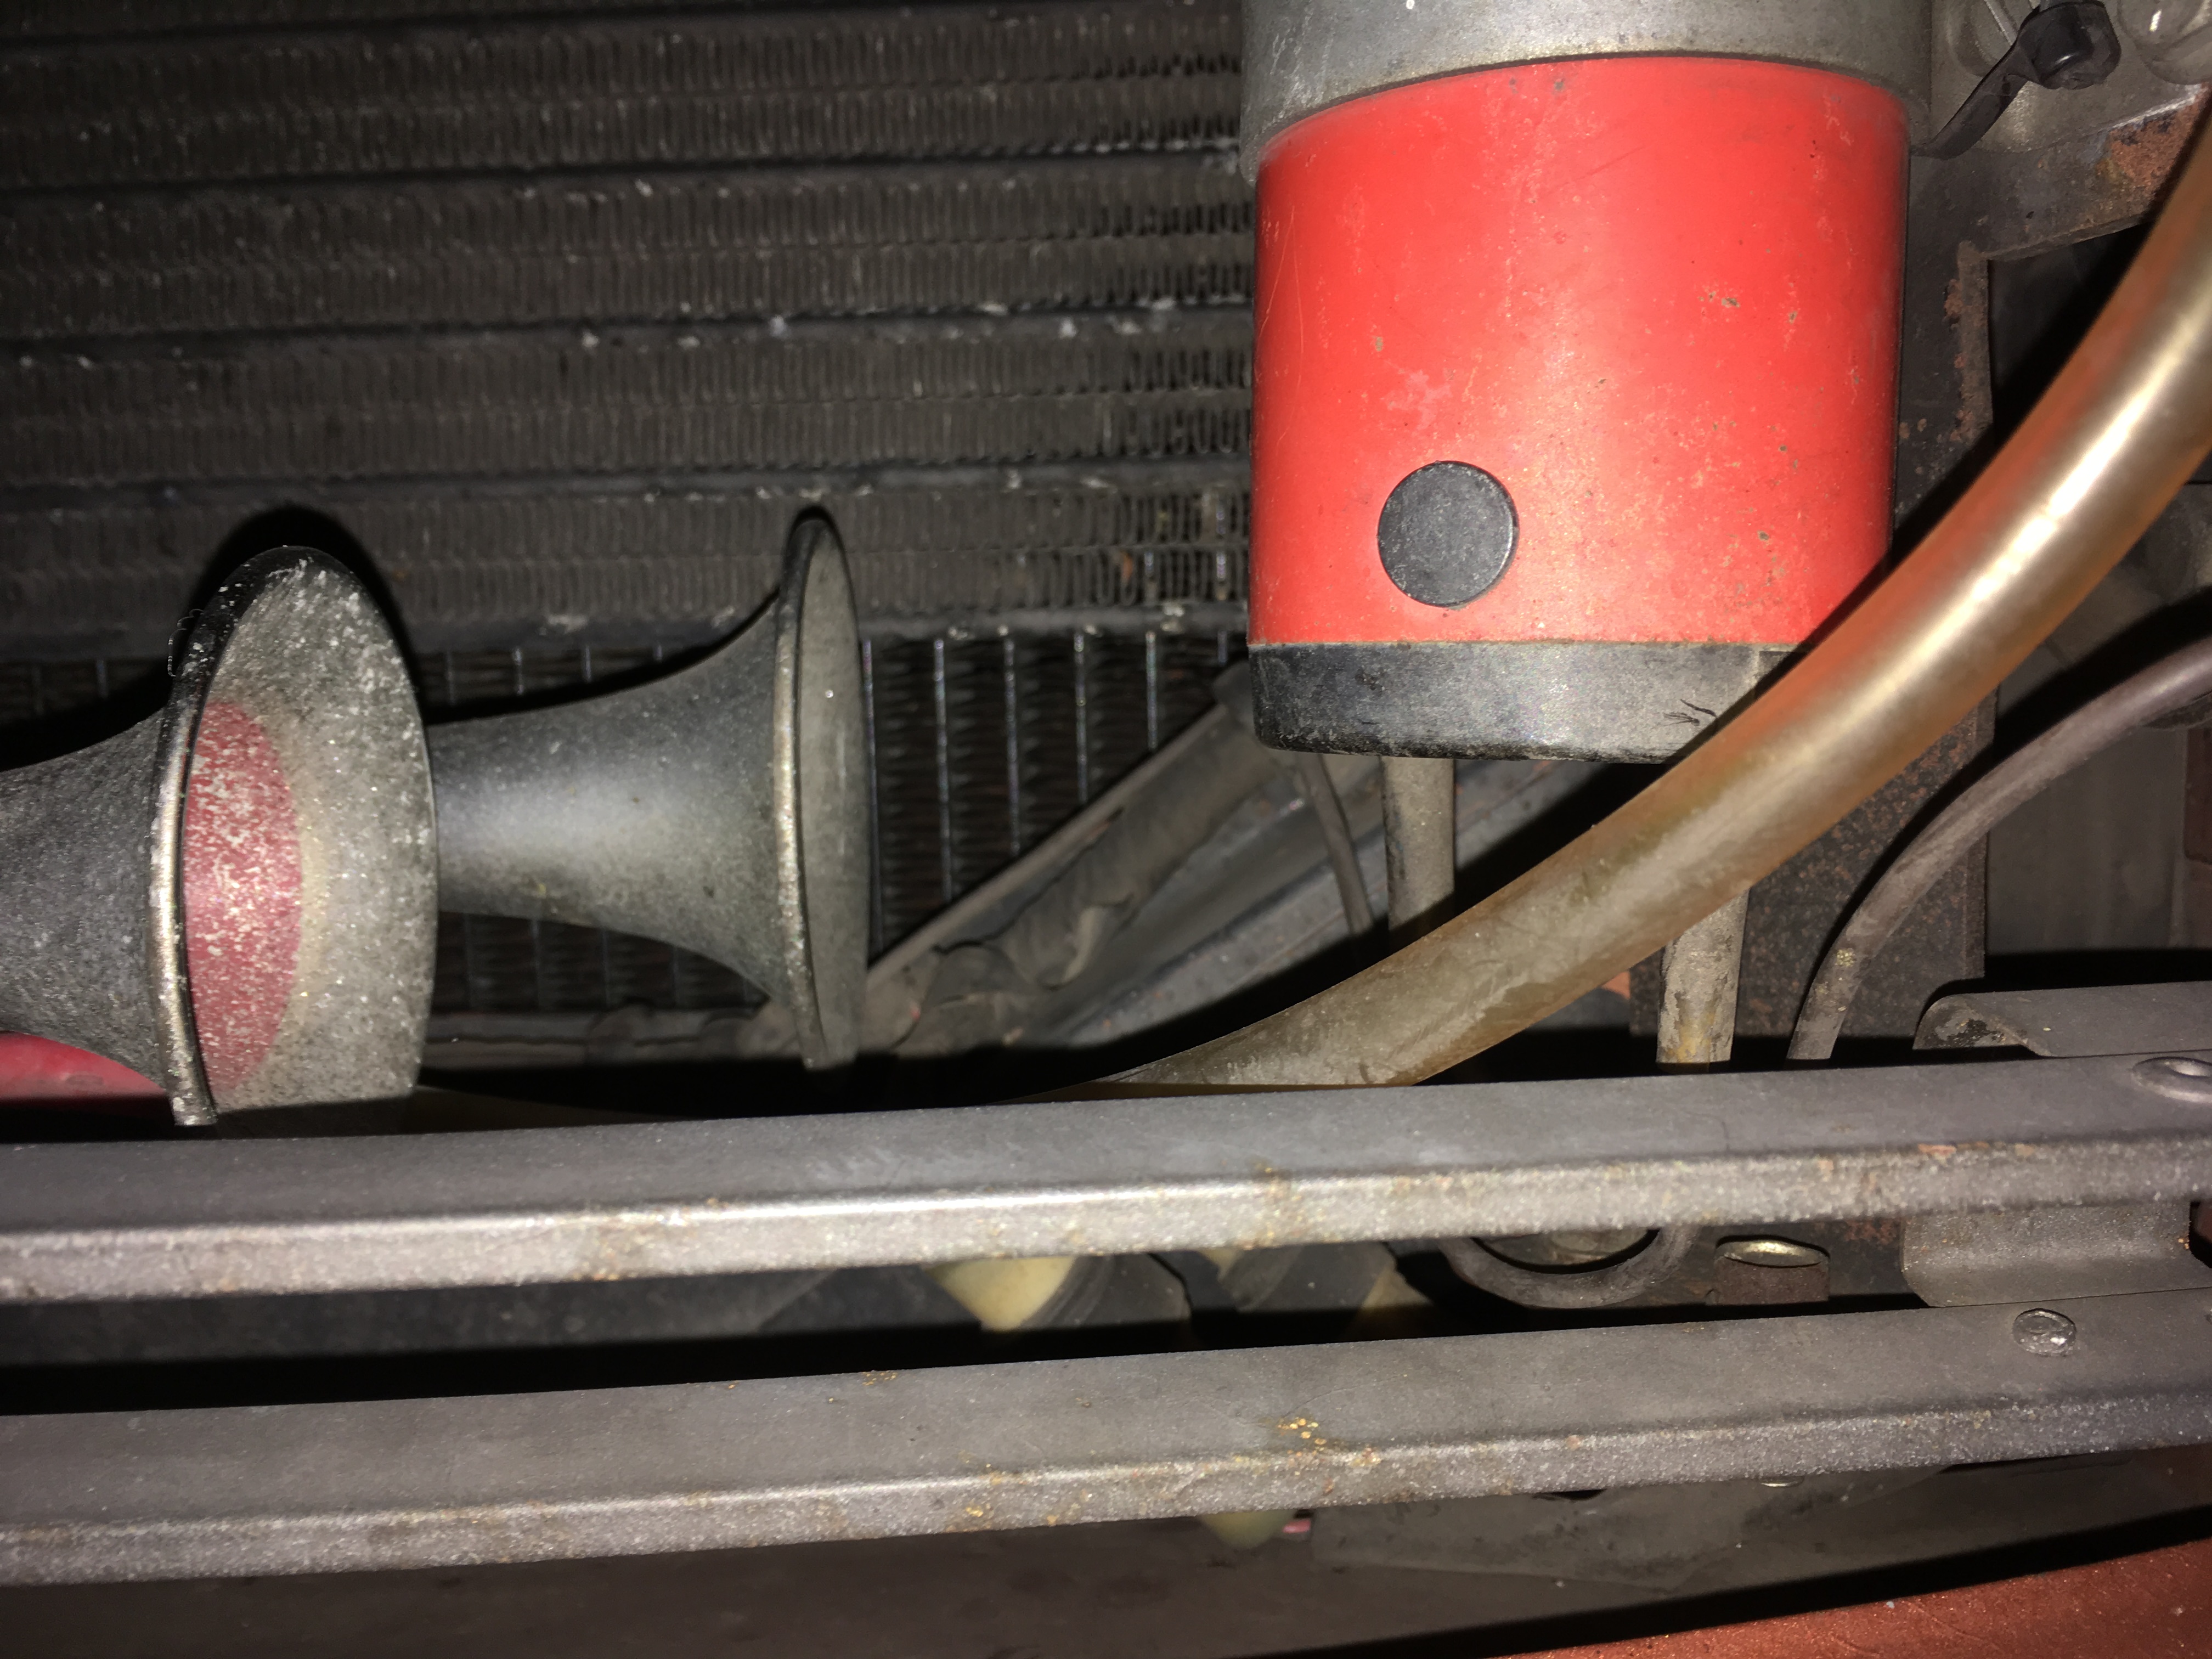
Ok, here goes. The first picture is the passenger side horn. The second and third picture is of the air horn. Upon closer examination, it looks like the OO removed the horn bracket, but reattached the bolts. So, I think I just need to figure out which horn tone I have and get the opposite. Wiring appears to be there also, just taped together.


-
@ramsesosirus - Thank you for the pictures. That helps a lot. You are correct, I was trying to explain that the brackets and mounting locations changed for the 77 and 78 model year. I am also trying to figure out which side is High note and which is Low as I can't find the painted H or L on mine. @Zed Head - I should have (and will) take a picture of the drivers side that has the air horn, my bad. I was trying to deduce what modifications if any the OO made in order to fit the air horn. I'll go take a picture and post it here.
-
Hi @Zed Head Per your advice, I reviewed the FSM, specifically pg BE-59. The picture is only of one side and does not really show how it is mounted. I also reviewed the diagram on pg BE-61, but it only refers to Right and Left and not High and Low. Is there a better page I can refer too? Any chance someone can help me out with a picture? Thank you!
-
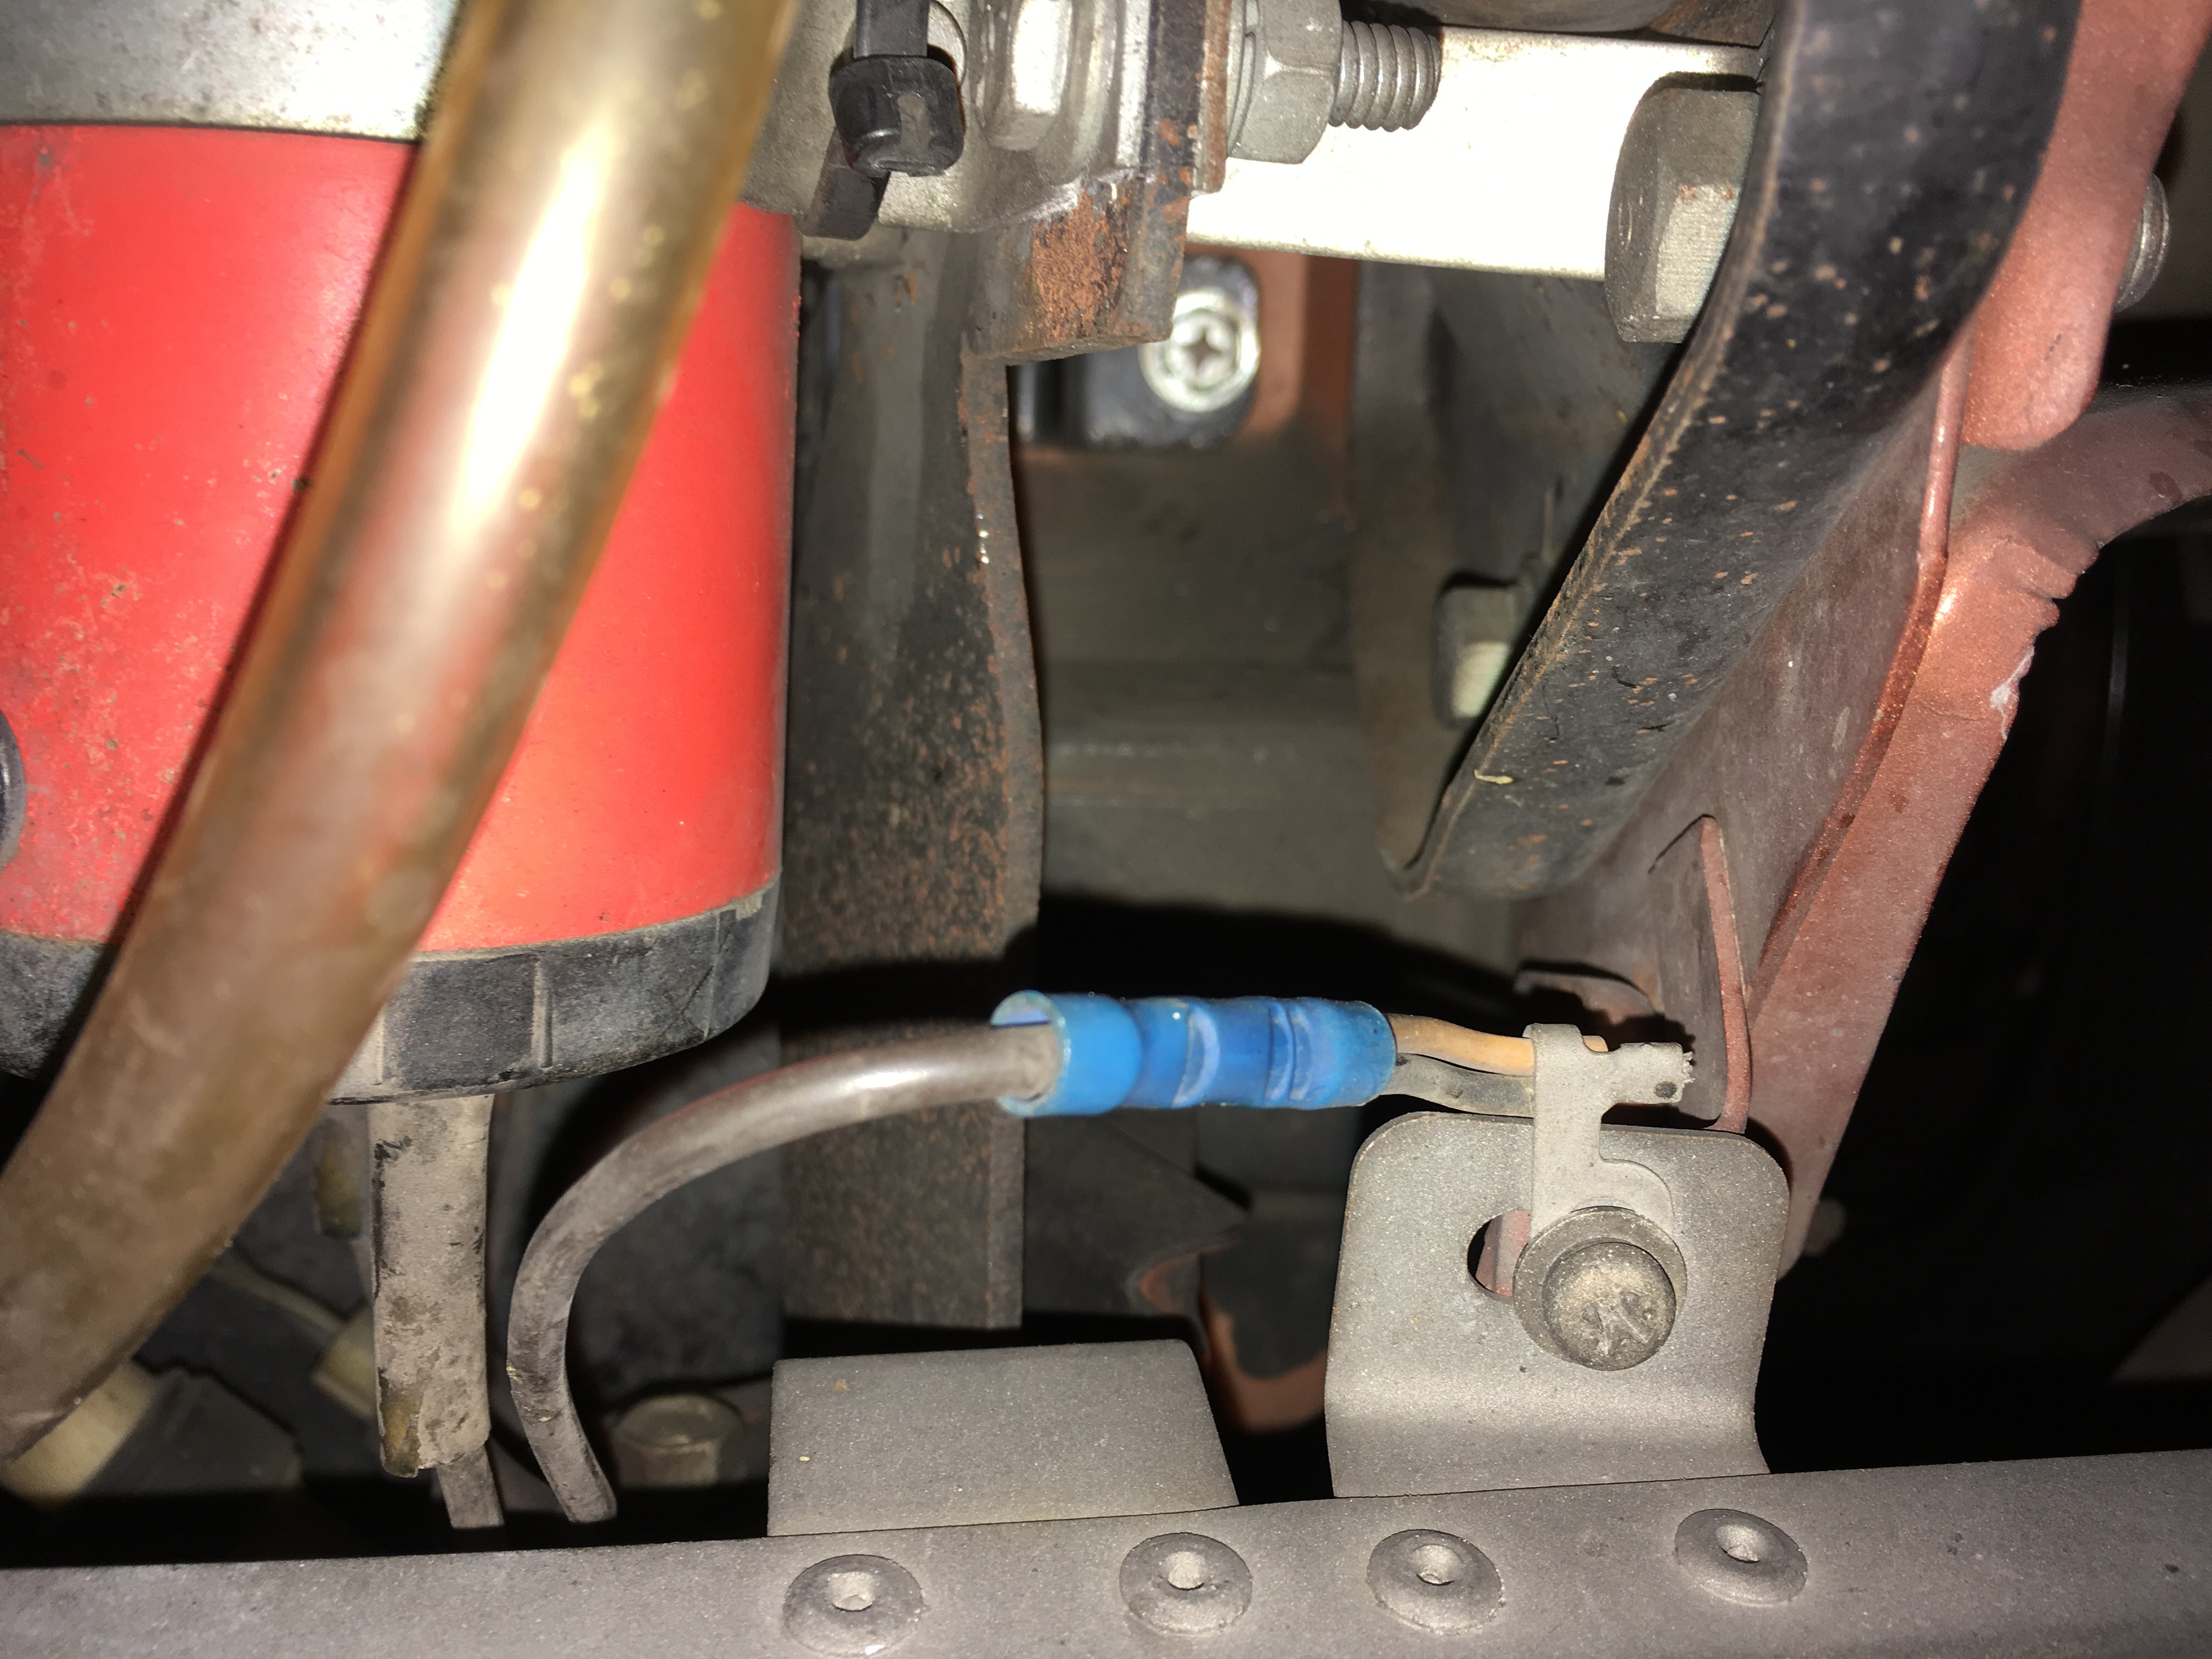
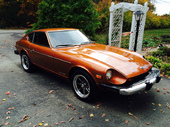
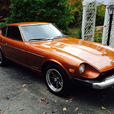
Howdy Folks, The original owner of my 280Z decided to replace the drivers side horn with a Sears brand air horn. While I don't mind how loud it is I would like to remount an original horn in that location. I am thinking that the mounting of the drivers side horn is the same as the one one the passengers side? (i.e. it uses a bracket with a bend). I know they changed the style of mounting brackets for the 77 / 78 model years such that they are straight without a bend. If someone could please post a picture here, that would be great. Also, I am trying to determine which was the High and which was the Low? Thanks! ~Matt
-
So, I took the Z for a good ride today. The weather was fantastic up here in NH for late October. The car really behaved itself. No more hanging high idle. It was a real pleasure. Thanks again to everyone for their input. Cheers! ~Matt
-
That is a great idea! Thank you.
-
Hi Capt, Mine had the spring, the one I purchased did not. Mine was completely frozen because of all the coking surrounding the adjuster screw. There is a hole which reveals some of the coils of the altitude adjuster that I sprayed PB Blaster into, but it never freed it up. I was having the crazy RPM hang at high idle. It made life difficult driving in a parking lot at slow speeds and coming to a stop. I would keep the car in gear until the last possible minute and then go to neutral. Making sure I was below 10 mph. Thank you for the description of what it does. I had a rudimentary understanding of its function, but that does clear up some of the mystery of this troublesome device. As I mentioned it isn't one hundred percent fixed but it is so much more drive-able now and behaves way better.
-
In conclusion. I cleaned everything up, after removing all the diaphragms, and reassembled the BCDD with my spring and got it back into the car. A little fiddling later and the car now operates much better than it did. Is it perfect, no, but now I don't keep the high idle when coming to a stop and the car is in neutral. I think I can still do some minor tweaking as the idle is a tad high now. I am going to pull the solenoid harness and see what the RPMs are at at idle. I was doing everything by feel and hearing. Need to put some eyes on the tach. Thanks everyone for your input!
-
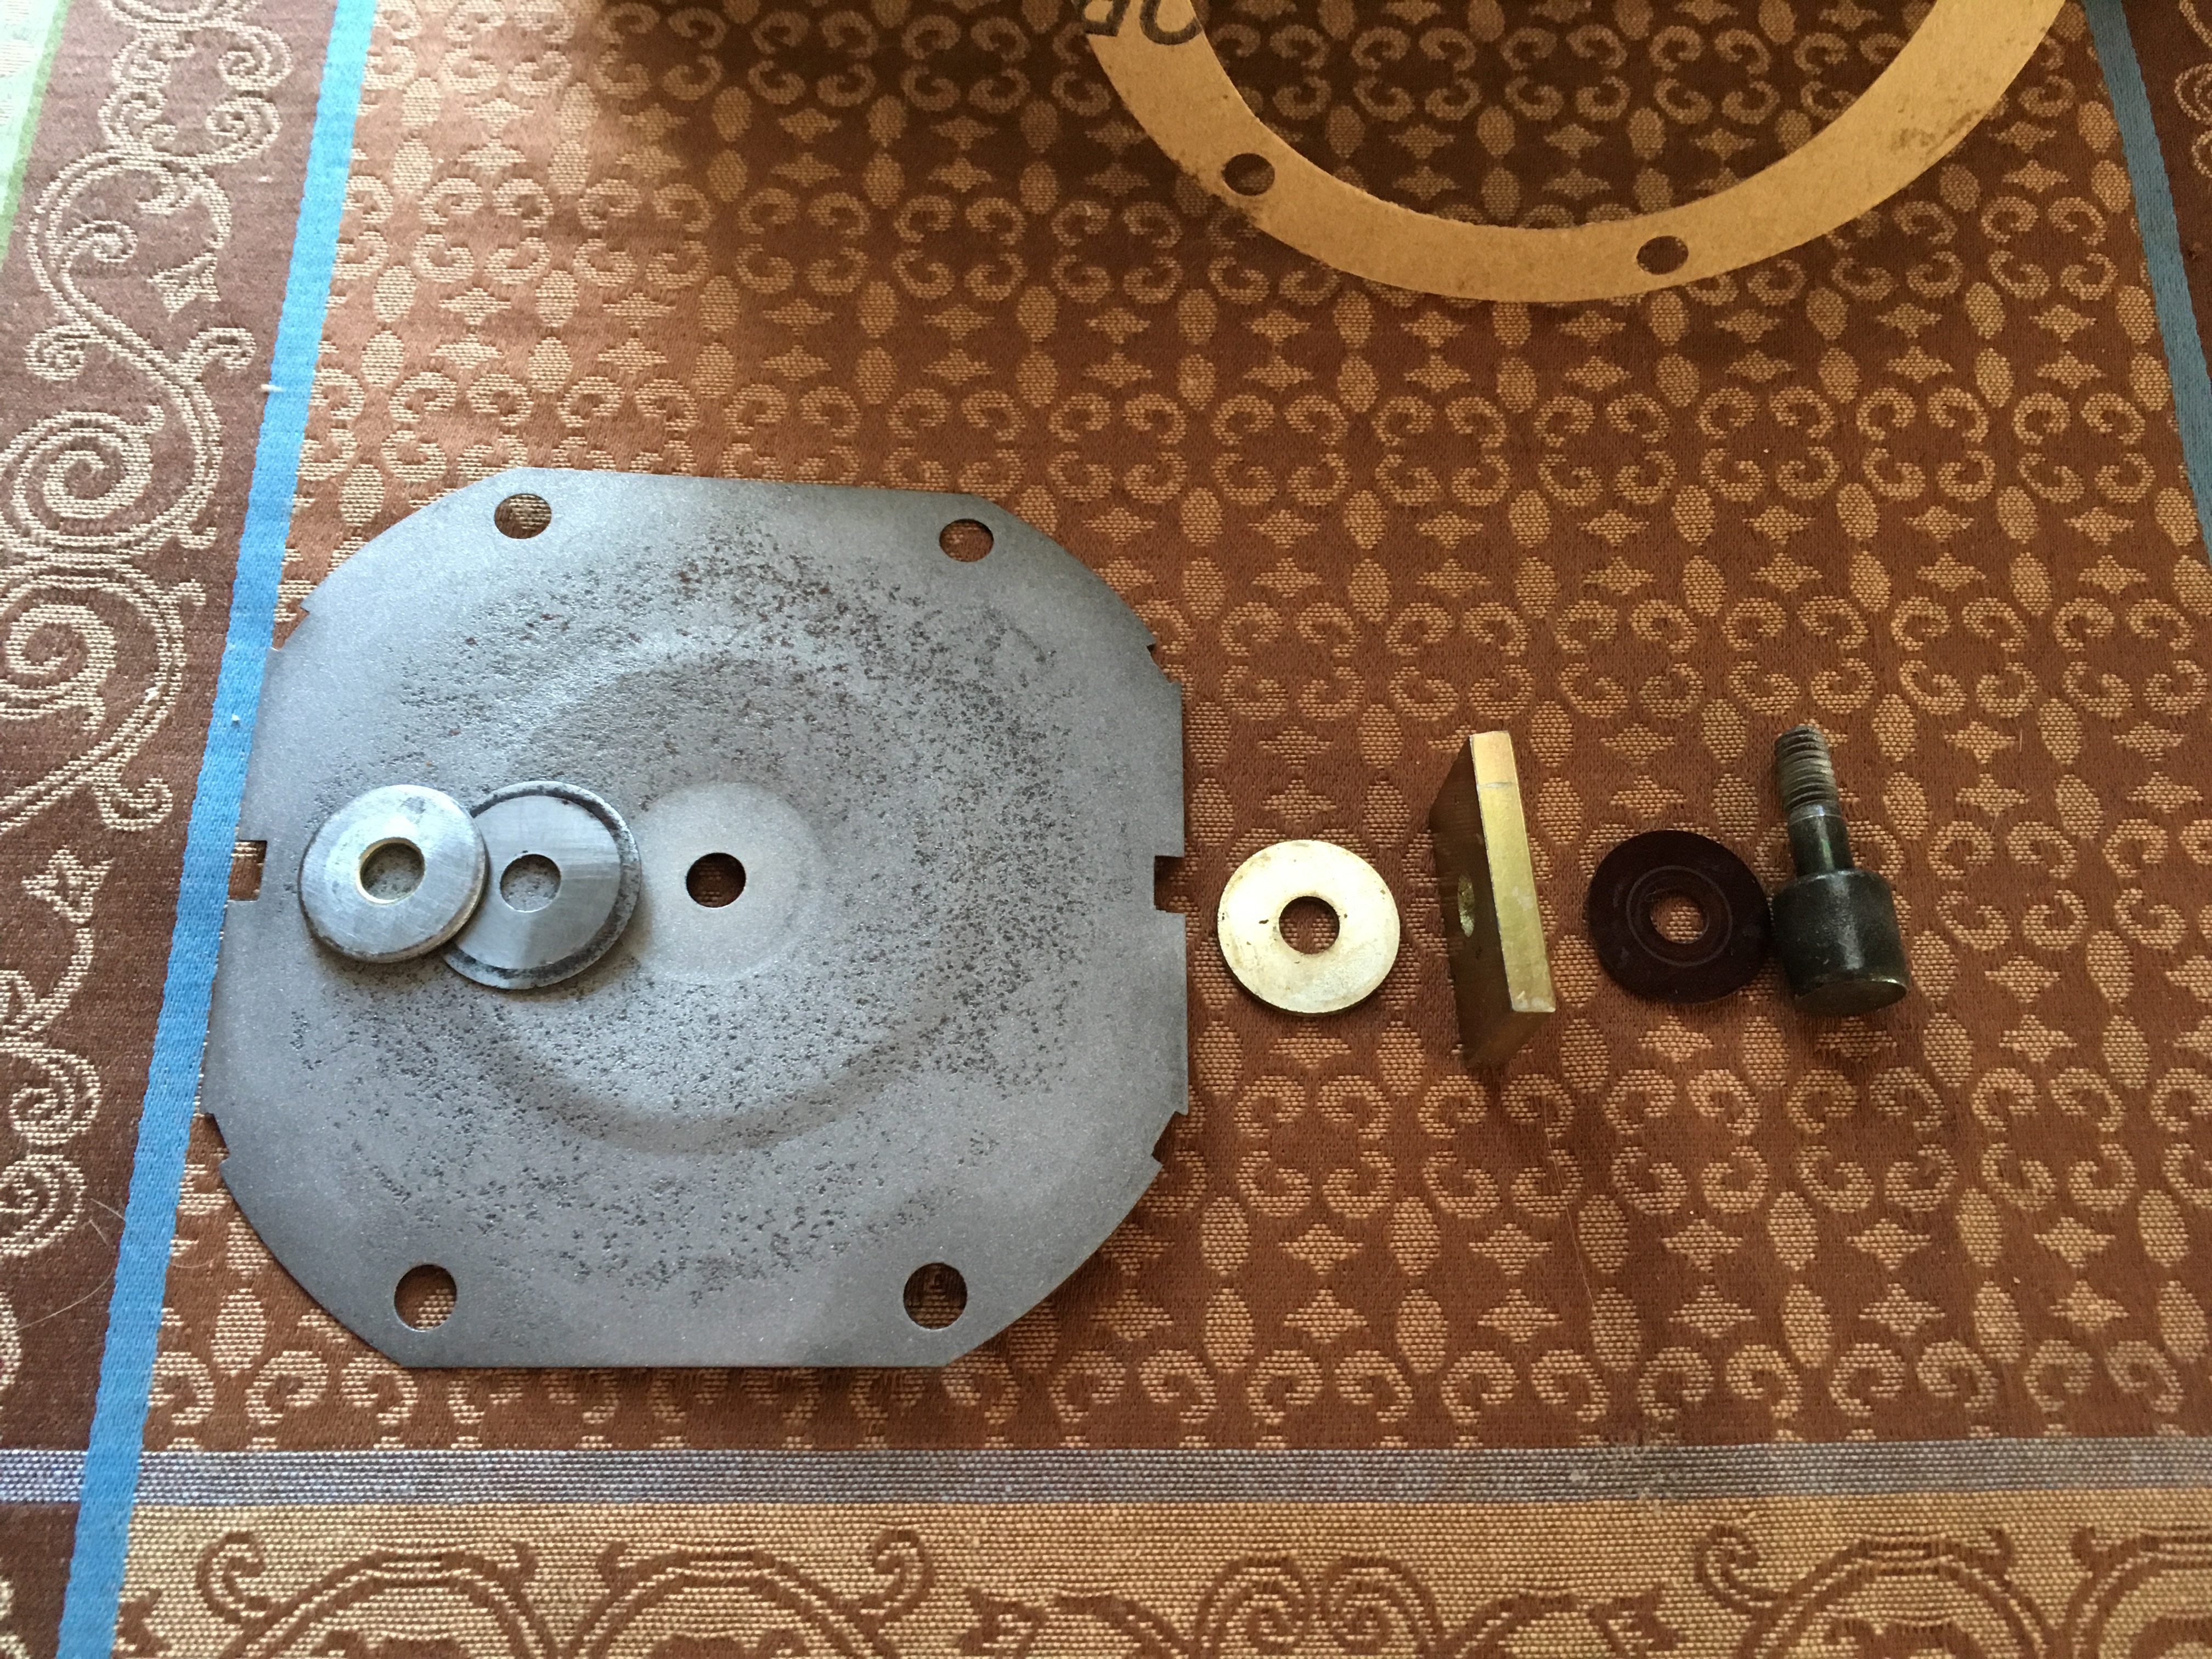
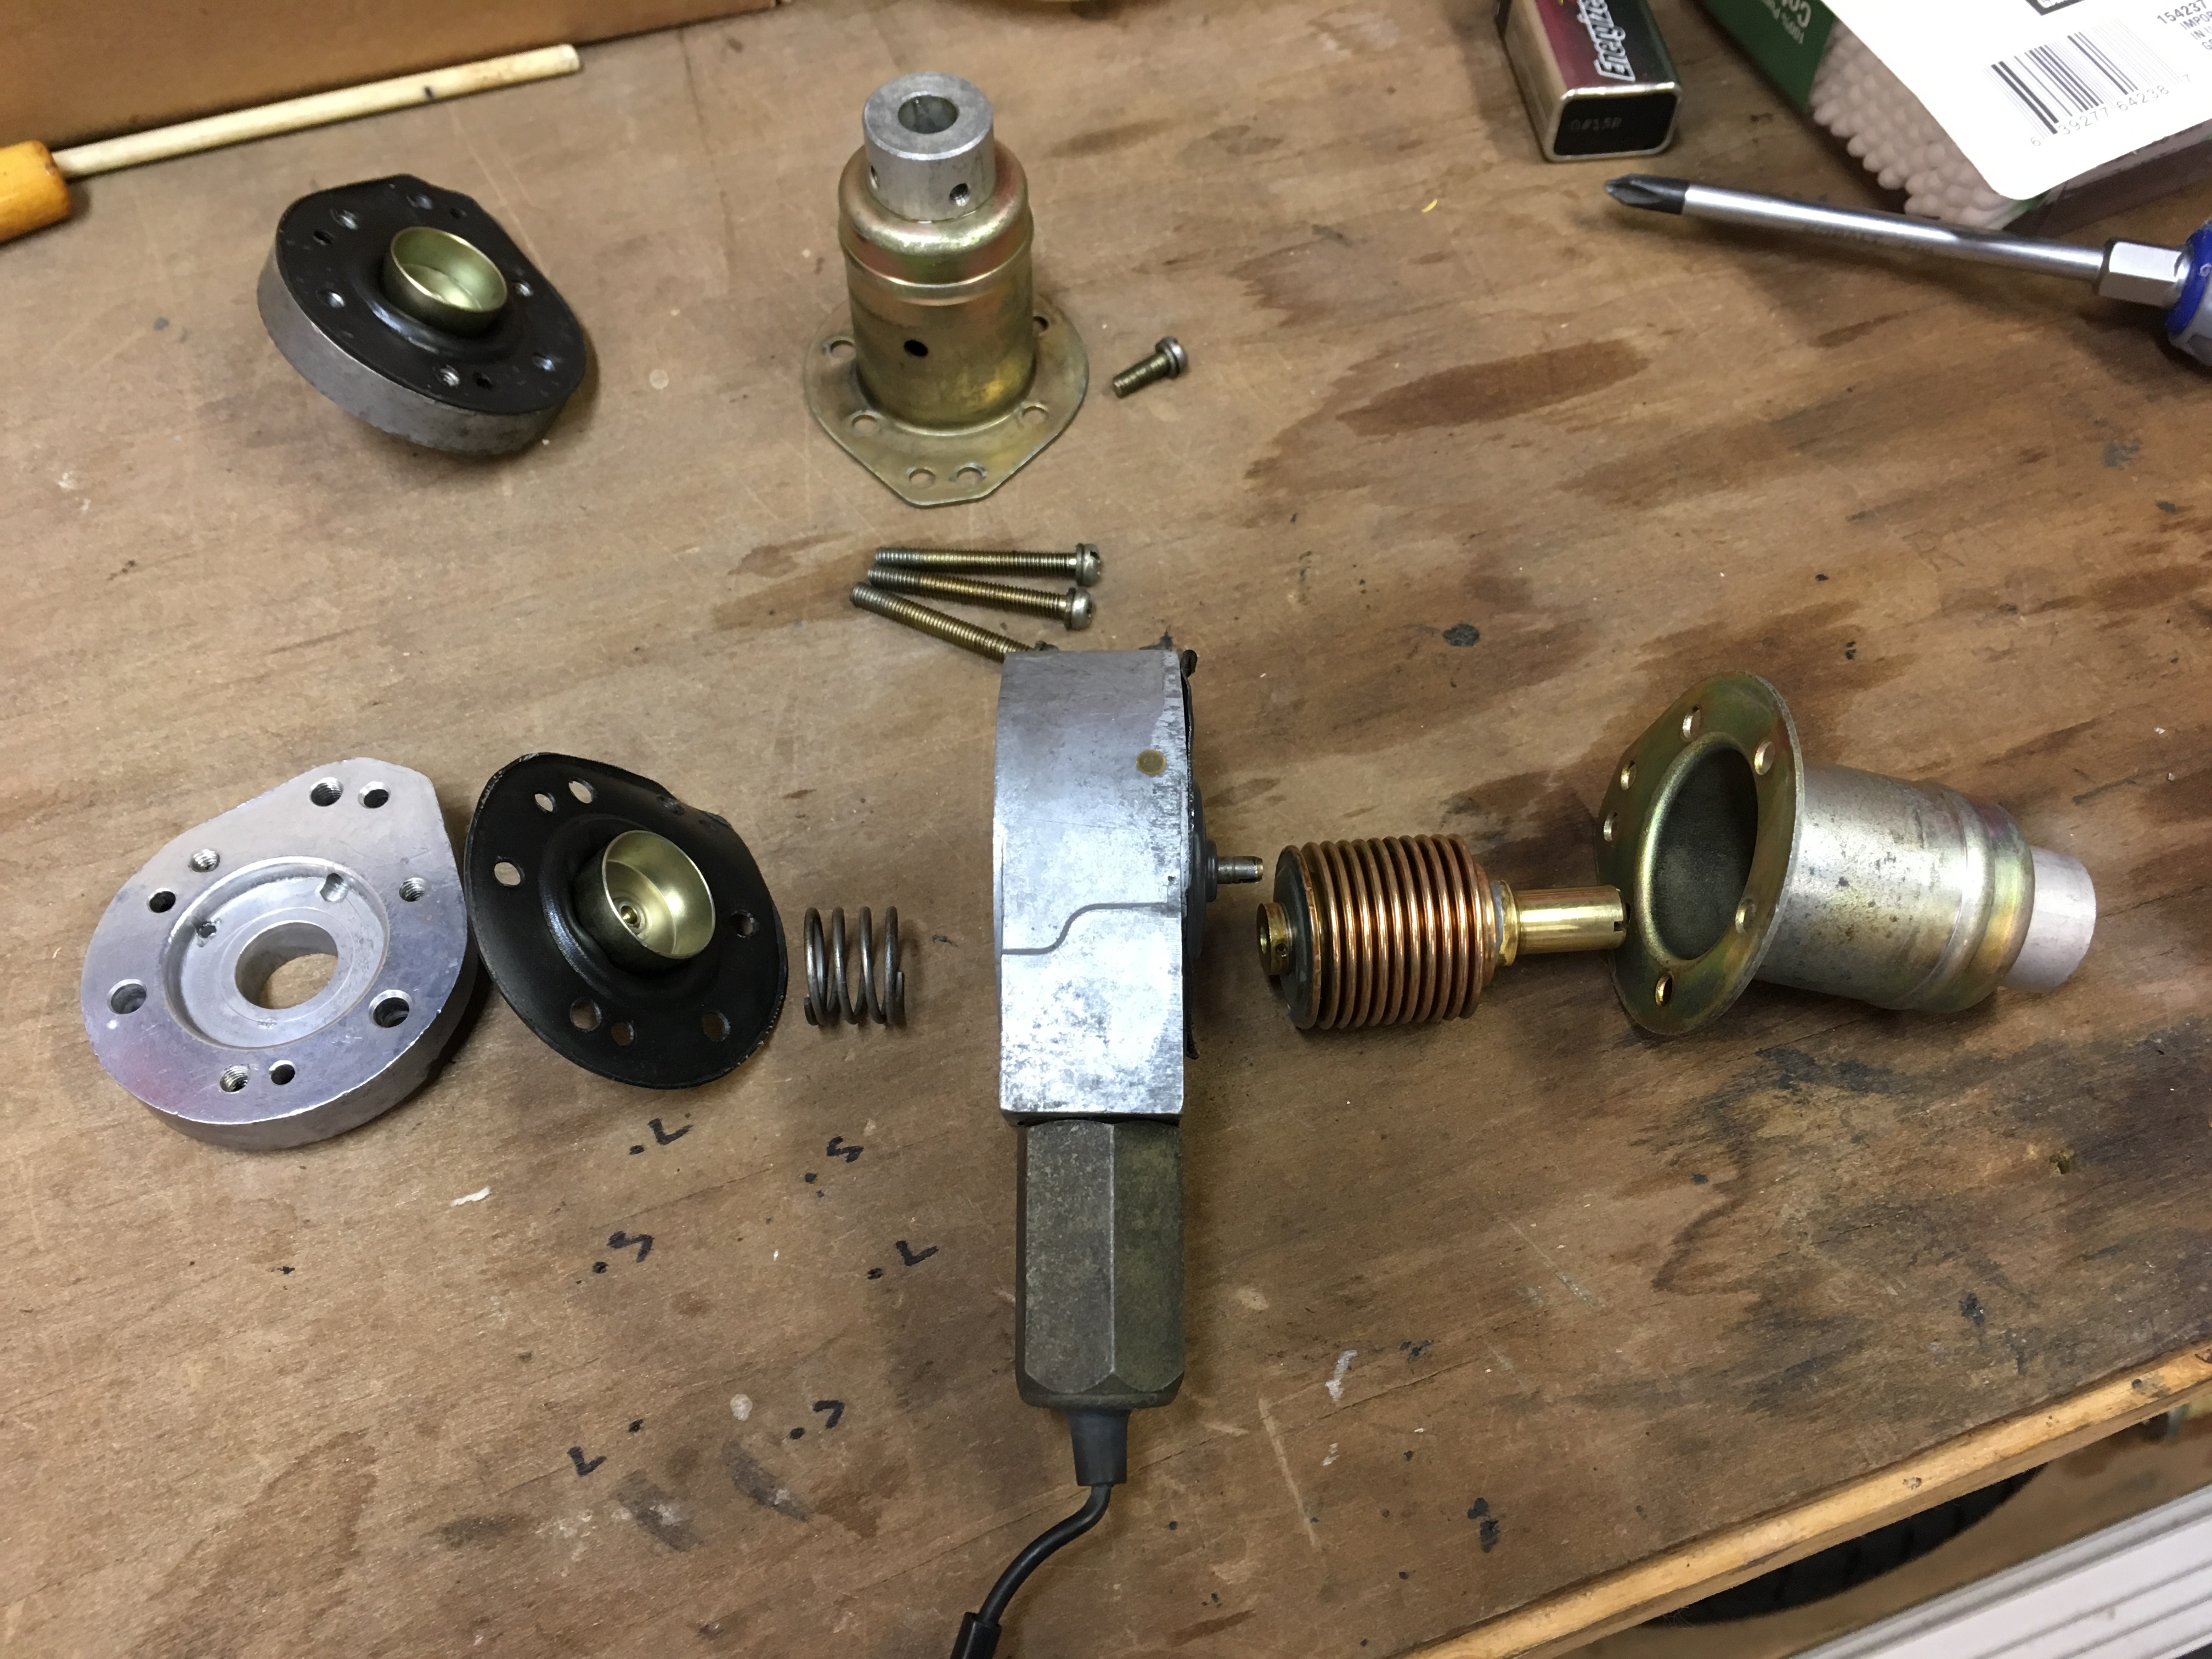
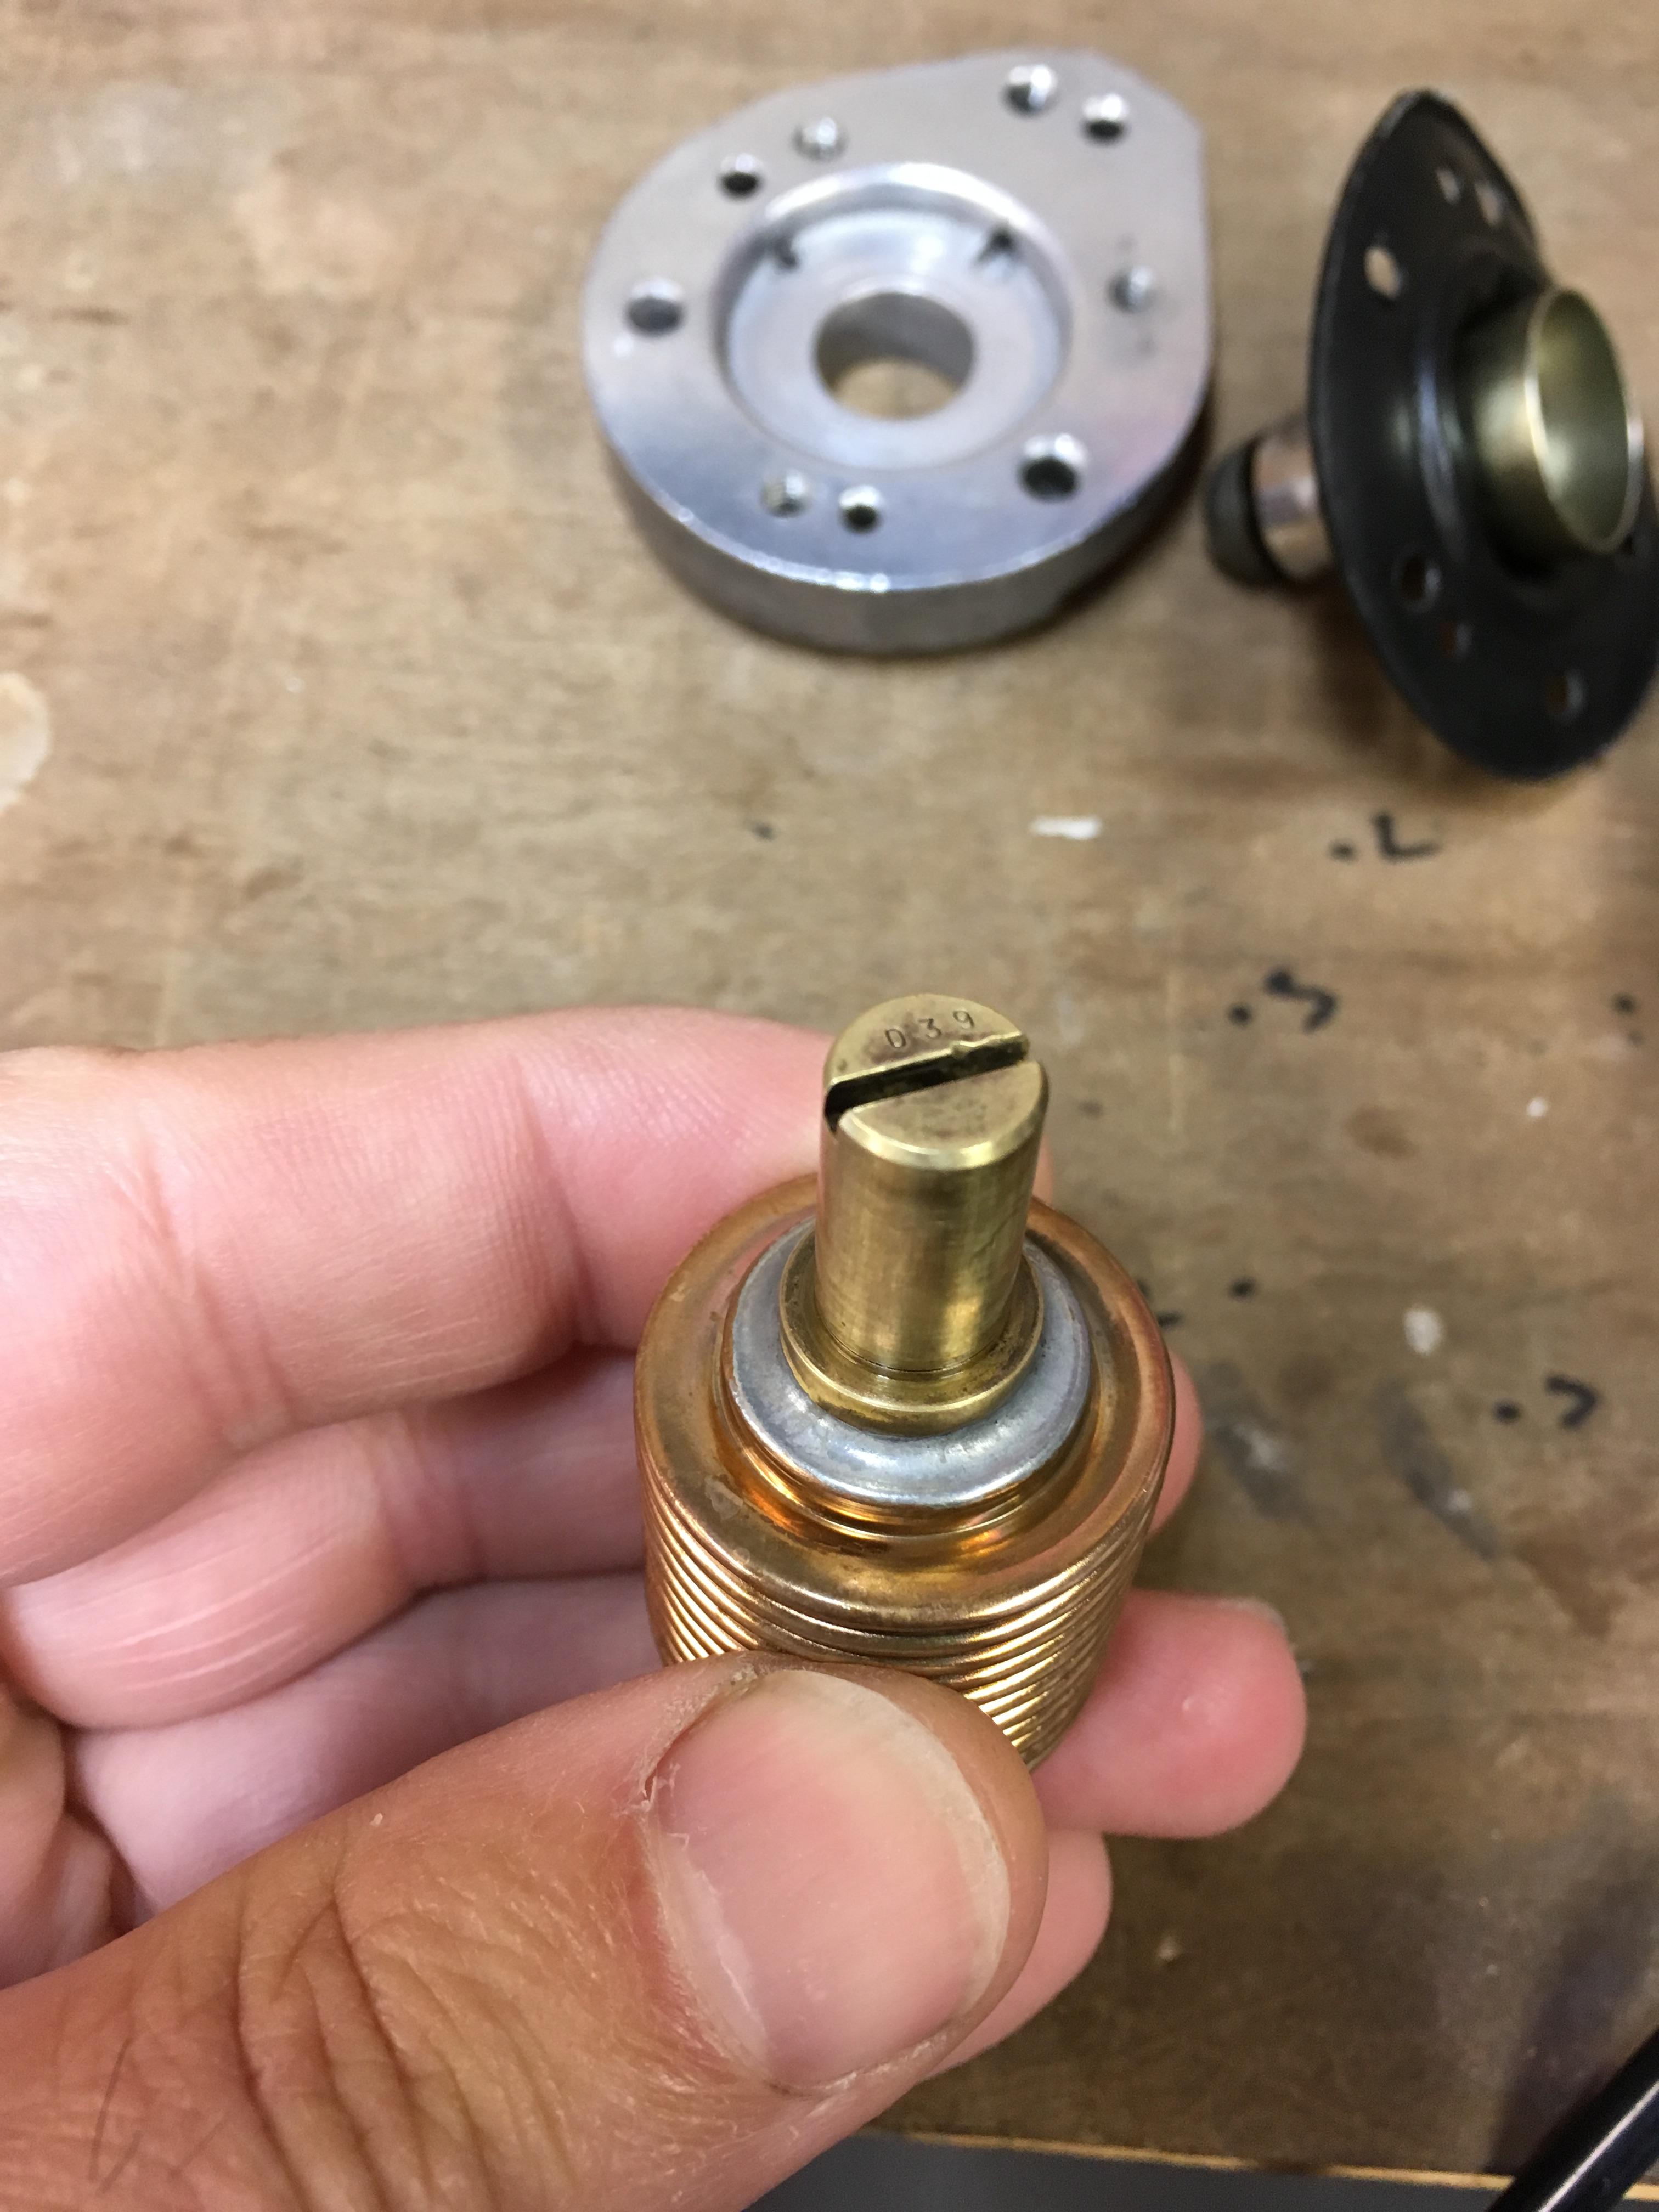
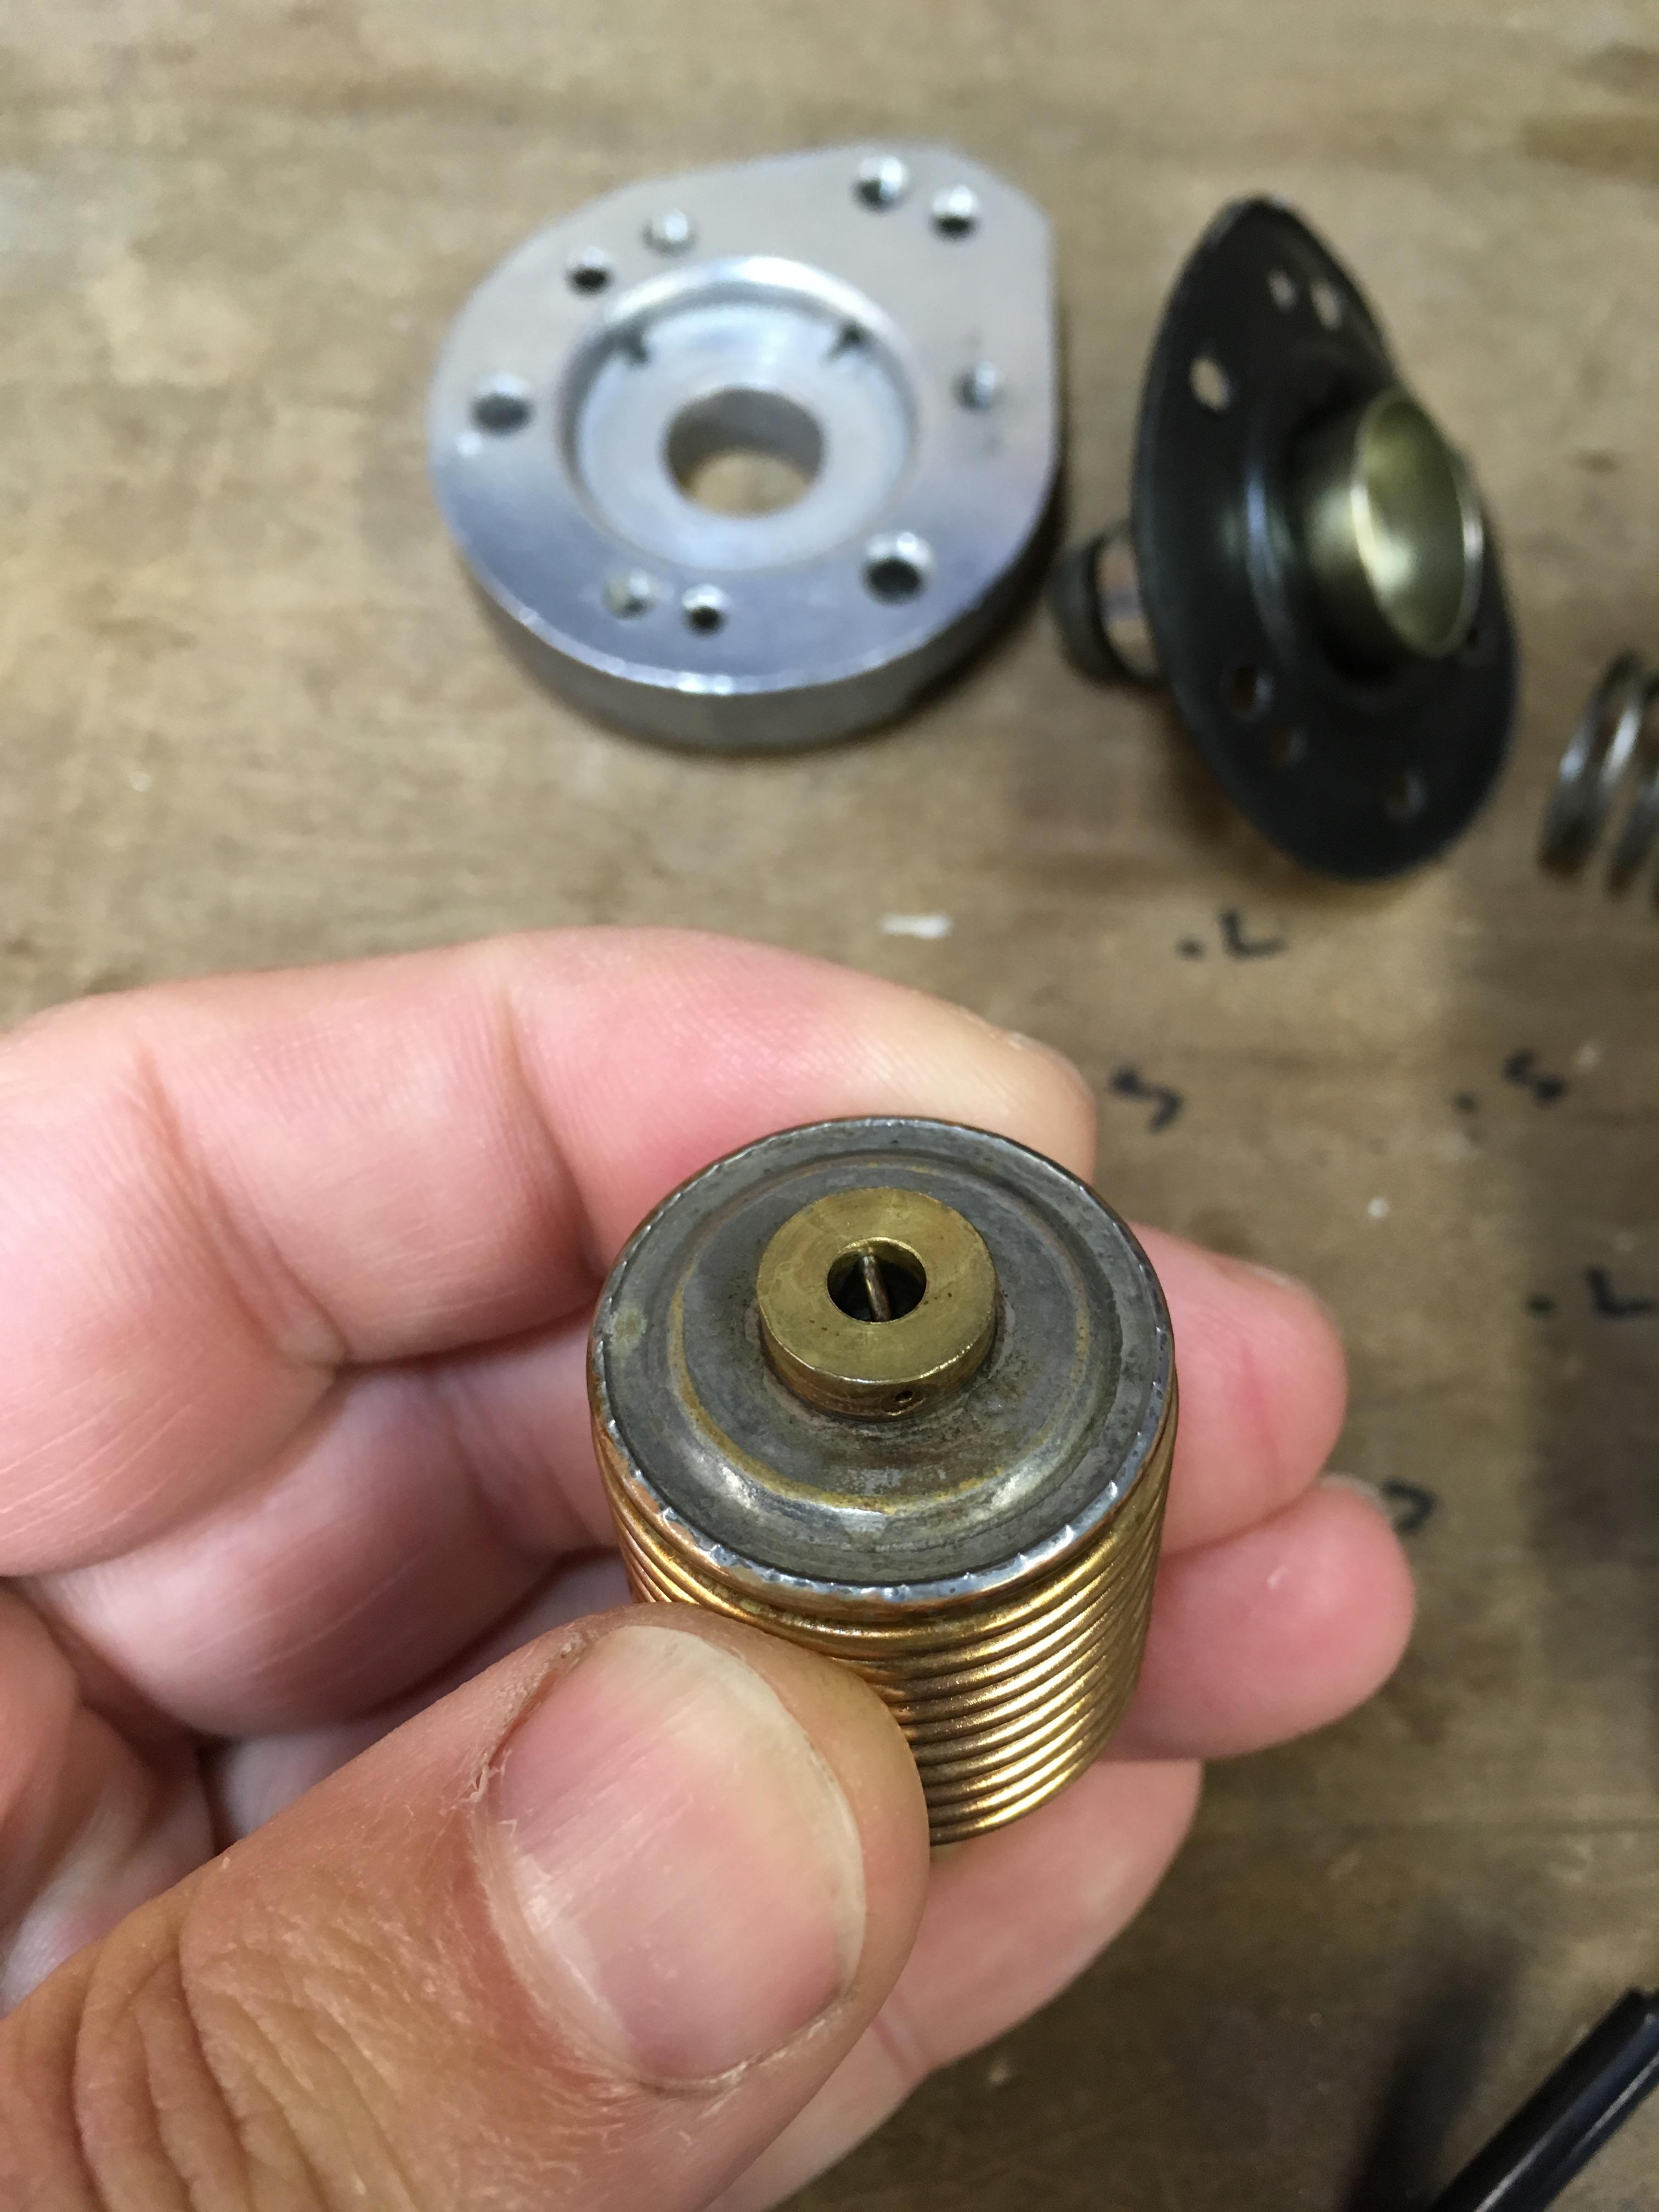
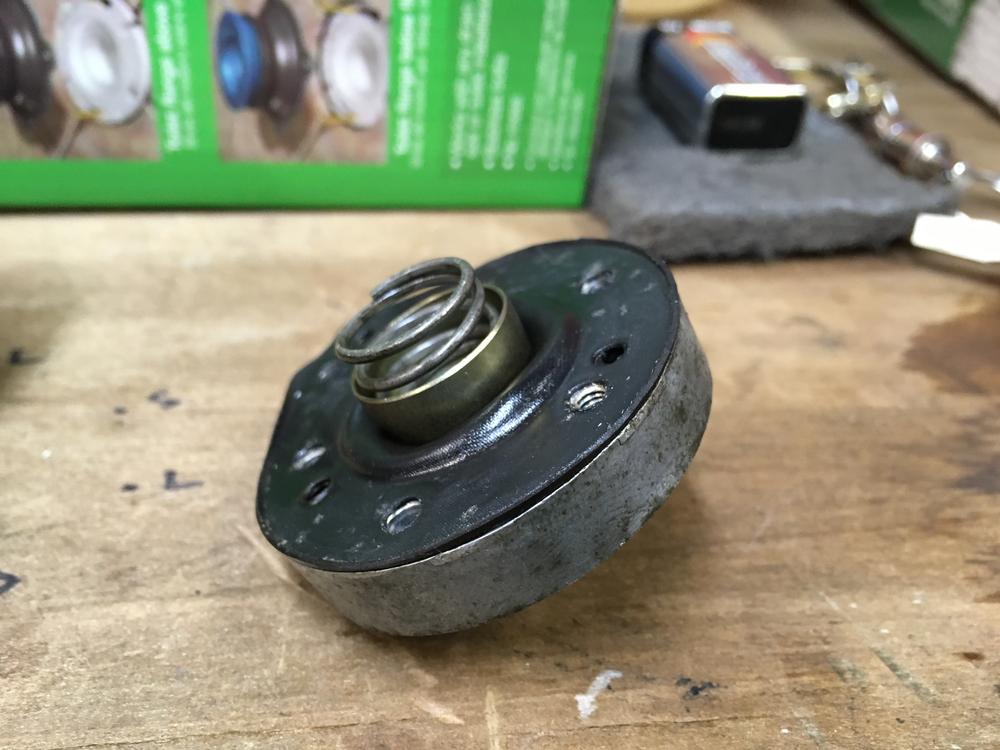
Here is an exploded view of the BCDD. Note that 1 of them had the spring and the other did not. Here is a close up of the altitude corrector. Note that both sides are soldered... So the adjuster screw isn't really a screw.


-
I confirmed that the adjustment screw is just an extension of the altitude corrector. Everything is soldered together on both of the ones I have. They spin together.
-
I'll have to take a closer look, but on first view the adjuster screw appears to be just an extension of the altitude adjuster. In other words just a single unit and the entire thing turns when you turn the screw. I had wanted to leave mine intact, but alas I took it apart and ended up damaging the altitude adjuster. The diaphragms are all unharmed and in really good shape, the altitude adjust not so much.
-
No Sir, Non taken. I really do appreciate your input. So much so that I went and grabbed the FSM and re read the pages. So, what you said struck a cord about differences for CA cars. The original owner purchased the car in NJ, but it appears to have been a 'partial' CA car as it had for example the floor temperature light in the dash, but did not have the temperature sensor in the floor. Maybe there was a variance in other parts of the car as well, i.e. the BCDD. Both have the side lock screw and aside from the presence of the internal spring they appear identical. I had good luck taking mine apart, accept for the screws which help the BCDD itself together. i.e. the diaphragms are all intact. I think I will try and put it back together with the spring and see what happens. I'll take and post pictures tomorrow in the AM.
-
An interesting find... After cleaning and reassembling the new (to me) BCDD, I decided to take mine off of the car. I was able to separate it easily from the Throttle Body, the difficult part was separating it into it pieces. The Altitude Corrector was frozen to the outer housing so badly that I had to use a screw driver and hammer to get it out. When I finally did I was surprised to discover that there was a spring! The other one didn't look like it had ever been taken apart, but there was no spring inside that is for sure. The only differences to note was that mine had a number 8 stamped on the housing and the other had a 7. Thoughts?
-
Capt Obvious, Thank you very much for the reply, insight and corrections. I will correct my language above so the terminology is correct for future reference. It is much appreciated. I started this thread for a several reasons. The first was that I wanted to give back to the community for all the help I have been given. The second was there is still, after all these years, an air of mystery around the internals of the BCDD. I took this one apart by accident, but was glad that I did because it needed a good cleaning. I am just very thankful that I didn't ruin the diaphragms in the process. I will take what is left of the BCDD to Throttle Body gasket to the local parts store and get as close a replacement as I can. Once I get it installed I will let everyone know the results. Fingers crossed.
-
Thanks siteunseen for the links. I had read those posts previously when I initially tried to adjust mine. As stated above, the one in the car is frozen in place. Any thoughts on the BCDD to Throttle Body gasket? It appears to be made of rubber similar to the diaphragm, although it has hardened with time. I tried to carefully cut/scrap it off with a razor blade, but didn't have much success. Can I just use a good gasket material? Not sure if it was intended to have some flex to it?
-
Ok, that makes sense. That is why there was a lot of coking where the altitude corrector passes through the external housing. Hence the reason the one in my car has frozen and cannot be adjusted.
-
Thanks for the reply. There was oil and such throughout the entire unit and I wasn't sure if I should add oil to all the various pieces/parts or wipe everything down? I did make a note of the starting positions and can also see where the lock screw was tightened against the adjuster. I was surprised at the condition of the rubber seals. The only rubber gasket that I need to replace is the one that is used to mate to the throttle body itself. Do you think I can make it out of regular gasket material or do I need to find a rubber replacement?