DaveR
Free Member
-
Joined
-
Last visited
-
I ran into the owner of that Z on the Merritt Parkway highway rest stop in CT 2 weeks ago. I was pulling my plugs to check my fuel mixture and thought I had toasted my Pertronix pickup. He was driving with his son, in a new Maserati. Needless to say after he mentioned he owned one that was to be auctioned at the Barrett Jackson in Mohegan, I asked him about the color of my plugs to see if he thought they were too lean and his eyes told me he had no idea what I was talking about. Not sure what that says about his authenticity in the video, but that was my take on him. Seemed like he had the bankroll, but not the wrenching experience I was expecting. Too bad too, I could have used some experienced feedback on my mixture.
-
Is the tan color still attainable with unleaded fuel? I run 93 octane and its clear when the mixture is too rich as they are dark, but the lean condition seems like it might be harder to diagnose with the plug color using unleaded fuel?
-
This right here. The troubleshooting has just been going around and around in the same loop. If he had done this from the start he'd have had his car running well over a week ago. You guys are being real good sports stinking around, kudos. Carbs look nice and clean though, once you get this all sorted out... should run well!
-
I know you are frustrated, but I'm not sure anyone is going to be able (or willing) to say your fuel levels are okay based on a picture of the tubing fluid level. I personally think you should give up on the sight glass method you are using, and try something else. or at least check your levels with this method and see if you are way off base. The problem is this diagram shows the level with the float sitting in the fuel, which would bring it further up than it would be when the lid is off. This is why the method i used of 10 turns down of the nozzle checks this... as that would equal the 1cm down shown on the right side. Use a flashlight to check the fluids position on top of the nozzle. See these references: http://datsunzgarage.com/engine/index.htm THE TRICK: I did some measuring with a straightedge and found that on my 4-screw SUs a 23mm fuel level in the float bowl corresponds to exactly 1 centimeter (10 millimeters) below the fuel nozzle "ledge" in the carb. But how do you see to measure fuel 1 centimeter down inside the fuel ozzle? See below. - Remove the dome and main piston from each carb so you can look down the tip of both fuel nozzles. - Screw each mixture nut exactly 10 turns down from fully up. Each full turn drops the nozzle tip 1 mm, so 10 turns puts the tip of the fuel nozzle 10 mm (1cm) down....which happens to be the 23mm float bowl level. - Then look down the tip of each fuel nozzle and adjust each float to set the gas level at the fuel nozzle tip. I ended up taking mine to 9 turns down and set the fuel at the meniscus of the tip. Then when I went to 10 turns the fuel was exactly at the tip. A bit of a juggling act but after a few minutes you will get the hang of it. When you get them to match it's a great feeling. NOTE #1: if your mixture nut won't go down more than a few turns, it's because the factory "stopper" next to the nut is still in place. Unless originality is a concern, you can permenantly remove both stoppers from the bottom of the carb. NOTE#2: if the fuel level is too high and overflows the nozzle tip, you will need to drain each float bowl a bit before starting again. The result was a lower, more solid idle and less choke needed at startup. I get no stumbling off idle and part-throttle acceleration is smoother, acceleration more powerful. Cruising on the interstate requires a lighter touch on the accelerator. Interesting.
-
For what it's worth I tried this before my above method and it wasn't as accurate as I liked... But it was better than a blind guess. I still prefer the check and adjust with the nozzle 10 turns down
-
Fuel adjustment all the way up. Turn it down 10 turns with everything assembled except the domes and pistons. Let the fuel pump fill up the bowls without the car starting. Check the fuel levels relation to the top of the nozzle by eye shining a flashlight in. If it's above the top of the nozzle, remove the float lid, bend the Tang in correspondence with raising or lowering the fuel level, suck out some fuel so it's back below the nozzle top. Reinstall float bowl top. Run the fuel pump again. Check. Repeat until done. You want the fuel level right at the top of the nozzle hole and right on the verge of flooding the top on the nozzle which is now 10 turns down into the bushing. You want the fuel to remain down inside the nozzle but right the the top. I unplug the dizzy and use my starter motor and battery to cycle the fuel pump and check what it fills to. After you are happy with the level... Reassemble everything. Undo all 10 turns so the fuel adjustment is at the top. Then go down 2.5 turns and use that as starting fuel level for tuning.
-
There are solutions posted that don't require anything but an initial ballpark for the float position. This is what I had to do. I would suggest not even bothering with a measurement, and instead install it, fill the bowls and see how high they are. Then adjust the float up or down and repeat. This is the only way I could get mine properly set, and I well understood why my original measurements weren't working. Bite the bullet and forget about the 14mm etc. I stand by the 10 turns approach and set as I detailed above. This didn't originate from me, but it did work well for me.
-
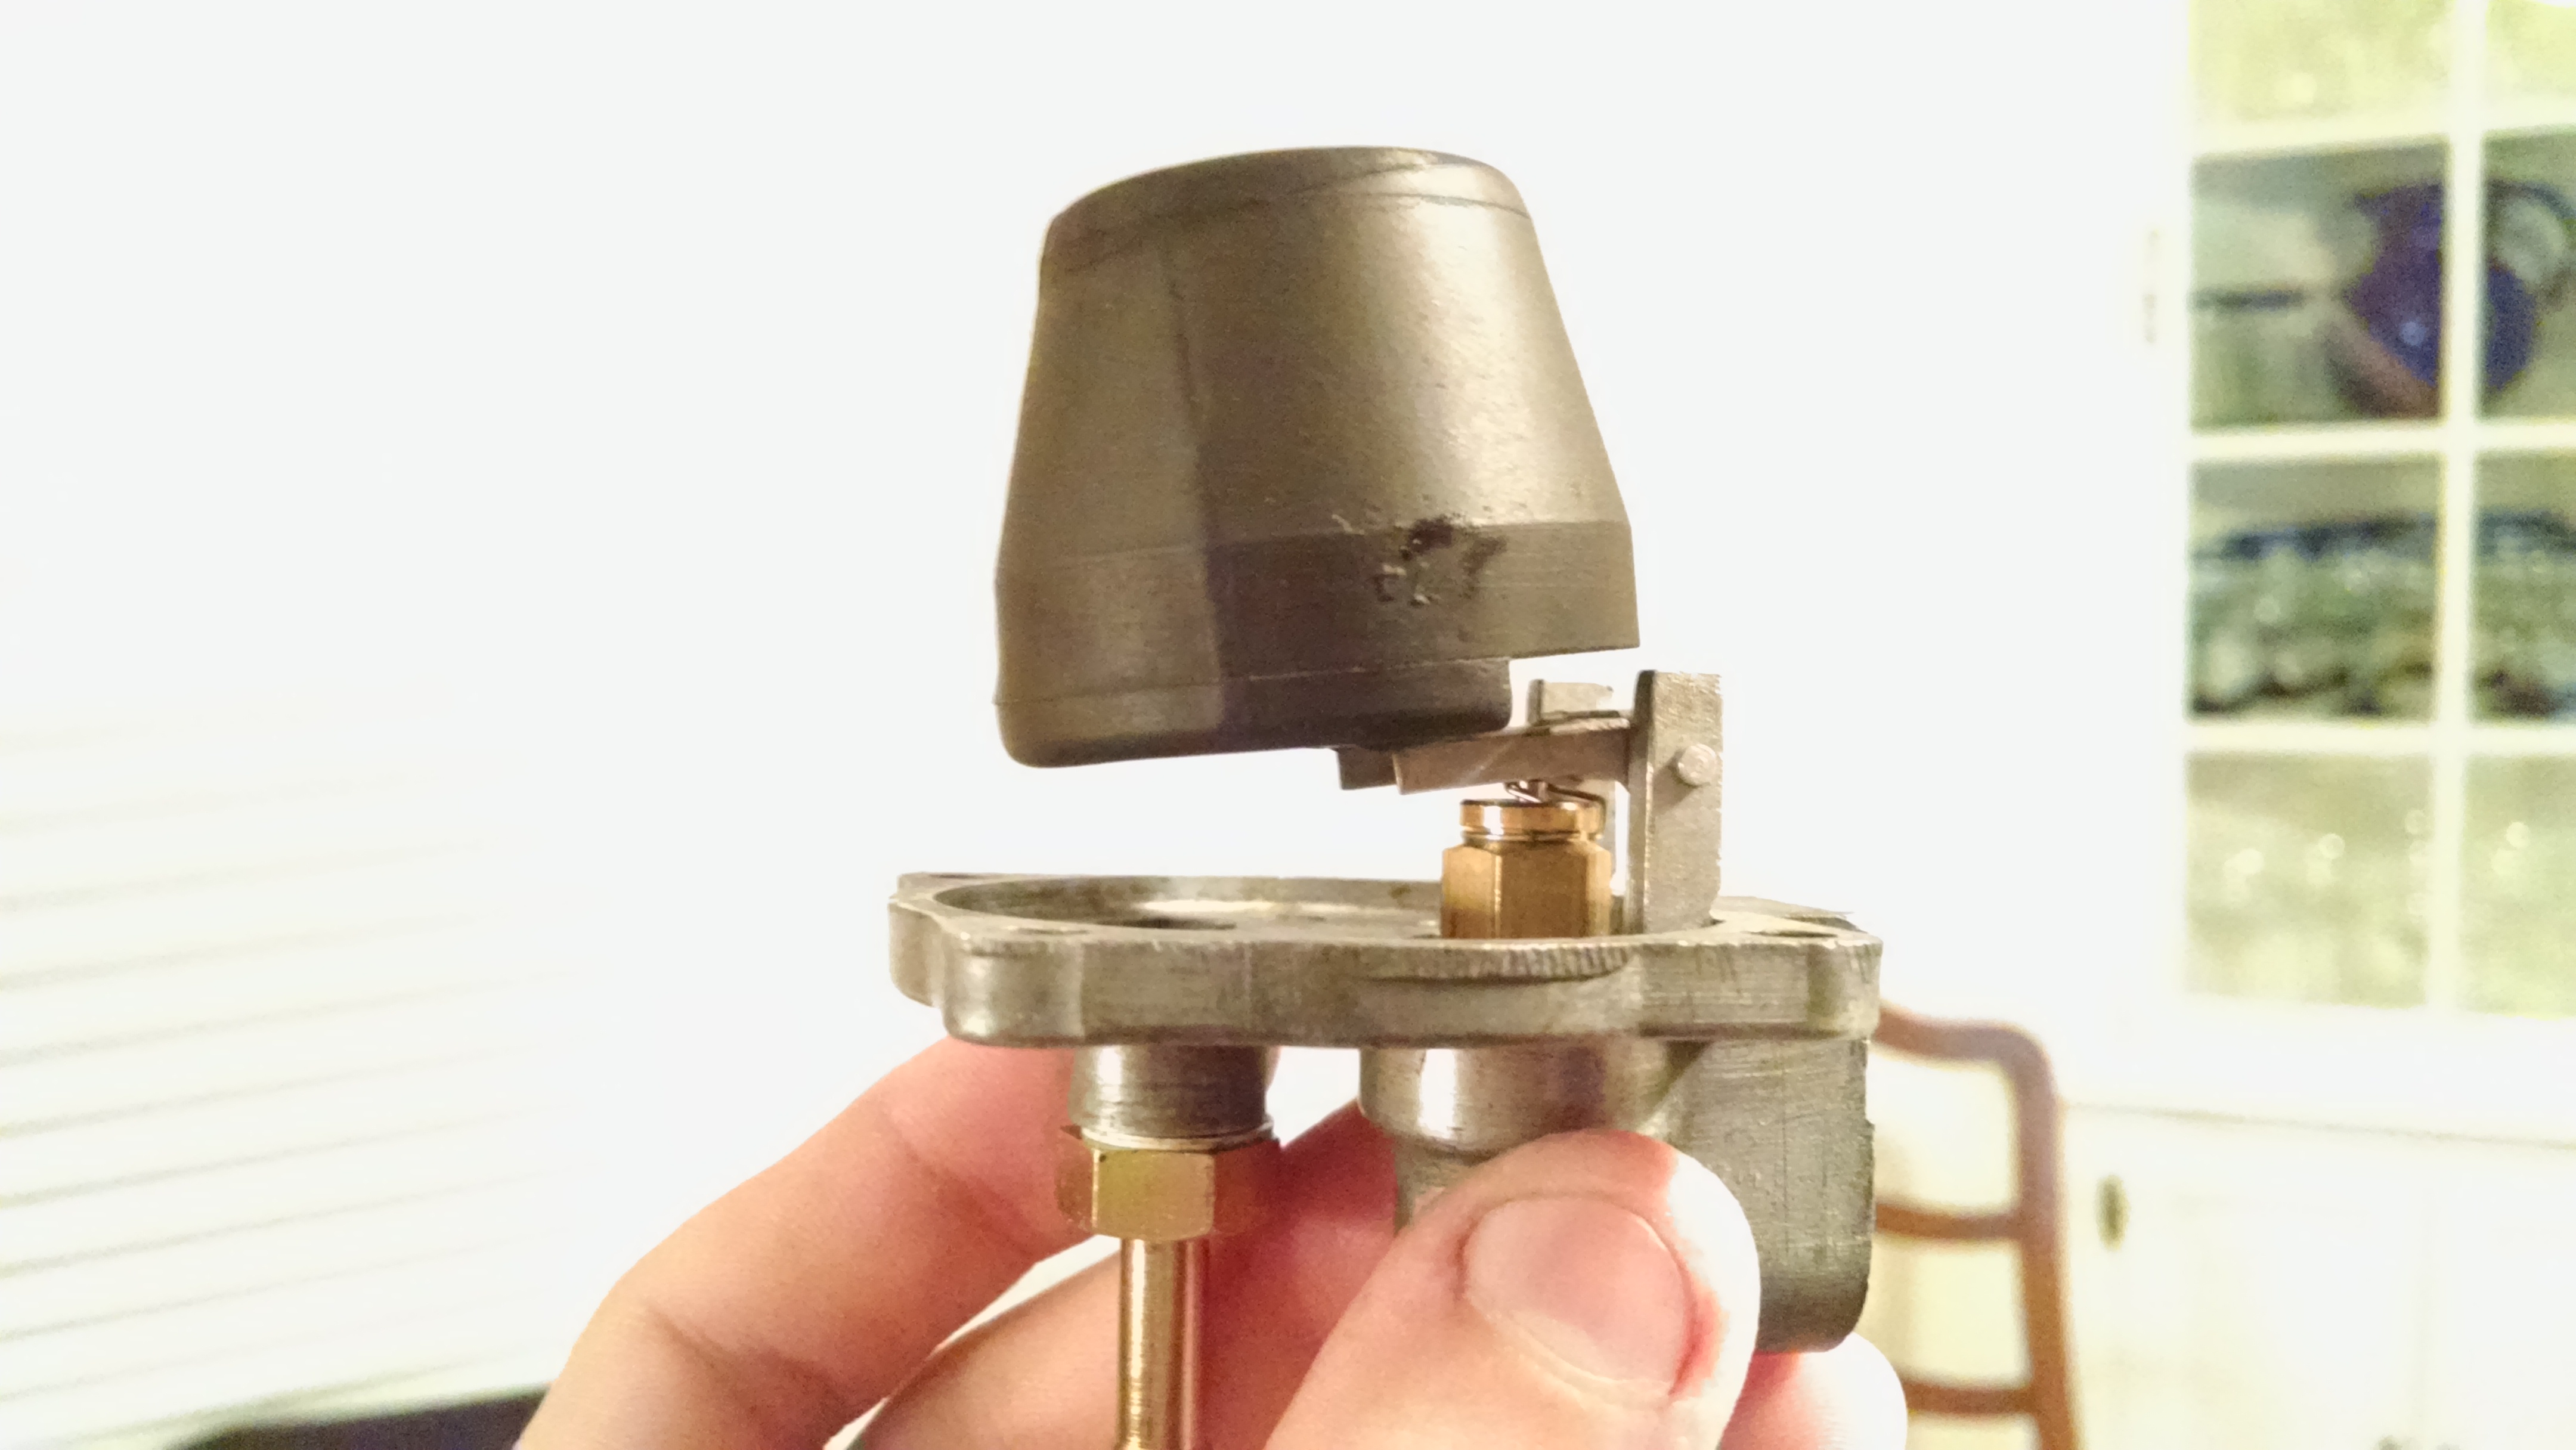
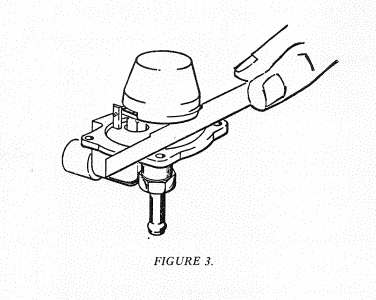
The attached image is the method often called for to set it initially, including what ZTherapy's DVD shows. This is what did not work AT ALL for me, because the grose jets that Ztherapy sent me no longer can support the weight of the float and made the adjustment very different from what the original intention was. If you use original jets with stronger springs then you can probably still use the original method. ---- For the Z therapy jets....technically what this image is illustrating is that at this height of the float, you want the grose jet to close and the fuel to shut off. I tried to simulate this by running a hose to the inlet port and pressurizing it by blowing in to. As I moved down the float I noted when the grose jet closed, and at THAT point in the travel, the gap from the lid to the float should be the 9/16" In actuality this didn't work and my levels were way off. So I did it the more cumbersome way by replacing the lid and float assembly each time I needed to adjust the tangs. ---- I even called Ztherapy to ask about this and was basically told that the adjustment method used in the video wasn't valid any more with the style of grose jets they use now. (I can't swear this applies to anyone else besides me, but that's what they said to me) I attached a picture of my float assembly which shows it being very droopy because the spring that forces the grose jet open wasn't strong enough to hold up the additional float weight so it just compressed. I had to bend my float bracket to such an extreme level to get the measurement that it didn't look right. If I recall correctly it made my fuel level way too low. As for the grose jet... I don't know if the Nissan one went NLA... I used the Ztherapy ones.

-
If you look around this forum, (it may have even been in this thread or posted by those I am replying to) the method I found for setting the proper float levels was... 1) Adjust your fuel nozzles all the way to the top, so the top of the nozzle is flush with the bushing in the carb housing. (If its not maybe there are pieces missing in the stackup of hardware, not sure.) 2) From there back the nozzles down a full 10 turns of the fuel adjustment. Its quite far. 3) At this point you want the fuel level when the bowls are full to be at the exact top of the nozzles in their lowered position. If you shine a flashlight you can see the fluid kind of "doming" as it reaches the top but hasn't spilled over. (I found it easier to actually go like 9-9.5 turns and have the fluid lower in the nozzle. Then as it turned it to 10 turns watched to see if the fluid changed or spilled over the top as I passed 10 turns.) 4) Once you have this fuel level set correctly your floats are done. You raise the nozzles up all the way to the top, and then back them down the 2.5 turns which is your "starting point" for tuning. From there you can adjust to get maximum airflow and maximum RPM (richness/lean-ness) I'm far from a carb expert, I'm only 34... but this is what my research on this exact forum showed as the most foolproof way to set the float levels especially given my inconsistent results with the Float to Bowl Lid gap method that Ztherapy's DVD calls for. I could be totally off on all this, but my car runs pretty well and tuned as expected so I don't think I am way off base.
-
(This is for 4 Screws if that matters) For what its worth, with Ztherapy's new grose jets... the old method of setting the gap above the floats to the the Bowl lid didn't work at all for me. The jets didn't shut off at the expected height or anywhere near it. They also didn't hold up the weight of the float because the new design was not sprung open the same way. It was a futile effort. The way I did it was the hard way, eyeball the tang location, install the Lid and pulse the starter motor with the Dizzy plugs undone so the mechanical pump filled up the bowls but the car didn't start. If I overshot I sucked fuel out of the bowls, adjusted the tang to lower the fuel level and did it again. Rinse and repeat until the fuel level was barely above the top of the Nozzles top edge when it was 10? turns down. Took a while but worked the best of all the methods considering how far I was off doing the other methods. I'm not sure where the 2.5 turns in this thread comes from, but when I was doing it this past summer everywhere I read used 10 turns for the method I used, and the car feels good and tuned well once I returned the nozzles to their original location and tuned from there.
-
Its an actual 2005 Subaru WRX STI that I drive Its my DD. Maybe if/when it dies I can steal my own differential to put into my Z.
-
I use Motul PA90 in my 2005 STI's differential. (R-180)
-
Bump on this because Arne went through a process I was looking at in regards to modifying the MSA exhaust with magnaflow mufflers and resonators. I liked the idea of dual tip outlets and the spacing Arne has done, but I too fear the smaller muffler would be too loud for my tastes. Arne, did this set up use headers or the stock exhaust manifold? I've read that it makes a large difference to the noise. I would be using it with the stock manifold. I also wonder if there is a good reason for or against getting a matching 4" magnaflow resonator for the tunnel, versus something more generic. Thanks
-
Yea that might work. I'll keep it in mind. I was considering the MSA one specifically because it already had the flange on it and if I ultimately got headers from MSA maybe the shape and position of the OEM Exh. Manif. + the MSA headpipe would occupy the same space as the new MSA header and might slot right in. May I ask what muffler you have on that car with the stacked pipes? Edit: Nvm I found all the info here: Thanks
-
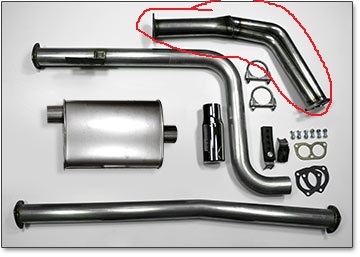
As the topic says, I'm looking to purchase just the MSA Premium exhaust headpipe. It adapts the stock exhaust manifold flange to the 3 bolt flange used in the MSA exhaust kits. It will let me create a custom exhaust with the flange, that should be compatible with the MSA 6-1 headers down the road. Also I would be interested in the mating flange for for it as well, but I imagine this is often already going to be welded to another pipe. Thanks all Dave