Dave WM
Free Member
-
Joined
-
Last visited
Everything posted by Dave WM
-
 new pump in, rad in, test drive no leaks around pump or rad, but I still seem to have some seepage that appears under the water inlet housing. I figure the possibilities are loose hose fittings corroded inlet leaking housing gasket leaking from the weep hole on the timing cover. I hope its not the last since that would require removal of the timing cover. The plan now will be to drain the coolant down and disconnect the hoses at the housing, get the alt out of the way and do a careful visual inspection to see if I can determine the exact source of the leak. I have new OE TC gaskets in case I have to go down that path.
 -
installed the "new" rad, looked rebuilt but it was clearly OE tanks. fitment was just ok, I had to grind a bit off the bottom flanges to fit between the frame rails, there were extra welded on nuts. the bottoms did not line up that well, about 1mm two wide. Took some effort but I was able to make it work. the petcock was in the correct spot, so the hole in the bottom pan will allow access to drain. I am now waiting on delivery of my Nissan gaskets, should have been here Friday.... If this new tank leaks I think I will have to search out a good rad shop that knows how to recore, my last shop I had used in the past was something of a let down.
-
I noticed a small coolant leak, had drops on bottom of oil pump (lowest point I presume). Added dye, checked after getting up to temp, and pressurized when cold. No spurters but I did see dye evidence bottom of water pump, around the gasket, some under the pulley, and what I think is a small leak out of the timing cover where there is a galley that I presume is there to dump any leakage from the water pump holes in the timing cover. I replaced all this stuff when I got back from my pikes peak trip and had to replace a broken TC guide. I used some sealant around the water and oil pump holes on the TC cover gasket, both sided IIRC. Perhaps I did not use enough or the correct amount (hence the water leak on the side of the TC cover). I am 99% sure its from there, but 1% is from the water inlet housing (seems lower than that). No matter the plan is to use NISSAN TC and water pump gaskets, new water pump, Permatex aviation gasket sealer (did not use that before). and for grins a new rad (brass/copper). The rad is because I see some blockage in the core that was not cleaned out when I had it rodded out. the brass/copper is because I prefer that over alum (Jeff I can give you back your alum since I will now have a spare for the test stand). I will leave the front crank seal (its a year old) alone, hope I don't regret that. I can't stand to see a leak. I have a brand new TC cover I am thinking of using, just because I have it and may as well use it. If I go that route I will have to install a new front gasket, will have to get a Nissan if I do, Darn, should have ordered that with the other Nissan gasket..... will let you know how it goes. 'Anyone use this Permatex aviation sealant think pn is 800019?
-
I ended up using the one ZH mentioned that he sent me (on yet another trans rebuild I did). That being said, I doubt those chips will make any real diff, even with the good gear installed its "balky" at times. this is most likey due to design, its a crash box setup. I would recommend you just dress them up a bit, a flat file to take off the sharp edges, but again I don't know if it will matter any.
-
what you don't want to do is just start replacing stuff, plugs ok since they become dirty and hard to read (more about that after you get it running). everything else should be tested per the FSM. As parts get replaced, the likelihood of an error in the replacement creep up, Often its a single point of failure that keeps the car from starting. Now once its running it may run poorly and other things can be wrong, but again you want to test 1st, if there is a defect check the replacement before installing, then see if there is an improvement. The issue with these cars is the fuel injection is open loop by design, so any defective part can mess up the fuel mix, the ECU can not learn or detect any problems, there is no limp mode etc... it just fires injectors based on limited input parameters, mostly coolant temp and throttle position (idle mid range, high range) and rpm. No O2 feed back to monitor the fuel air mix, that is where reading the plugs comes into play. Once its fully sorted the system works very well, Your main issues typically will be corroded/broken wires and bad grounds. This is were a visual inspection is a must.
-
welcome to the world of old cars. You will become a old school mechanic, prob a better one than a modern era mechanic that works on modern era cars, if you keep the car. There is no OBD, so you have to learn the old school way, using your eyes, ears, nose, brain, and the FSM. A few simple tools like a VOM (DMM today), a test light, will go a long way. The upside is these cars are VERY simple when compared to modern OBD cars, the down side is just about every system can be suspect since you are dealing with not only 40+ year old wiring and parts, but also prior owner hacks. Still the basics apply, compression, fuel, air, spark, timing. Get those right and it will run, has too. You should start compression, a base line reading just so you can scratch that off the list. Next spark order, again easy stuff, prob not the issue, but check off the list. fuel, get a pressure gauge and read the FSM air, new air filter, smoke out the system to find vacuum leaks, make sure the throttle is opening, easy stuff Spark, start with some new NGK plugs, verify they actual spark by pulling one, lay it on the valve cover and crank the engine. Injectors working, you can listen for them clicking with a stethoscope or even just a long screw driver on the injector and listen to the other end. They could be clogged so look at the new spark plugs see if they are getting wet with fuel. common issues NOT addressed in the FSM, faulty intermittent start switch, bad grounds, corroded wires. So look into those as well. there are YouTube videos on how to check start switch.
-
no learning involved, its not like a modern ECU.
-
get a close up of the tight side timing chain guide. looking for wear in the plastic part. Note using the wrong bolt in thermostat housing can ruin your day, its a through hole that can allow a too long bolt to press that guide into the chain. Check your water pump for play in the shaft. I agree with the others, the engine looks pretty clean to me.
-
A few things do NOT use any kind of abrasive to clean the gasket surfaces. a razor blade on the block would be ok, but I would only use solvents and a plastic razor blade on the alum head, you don't want to scratch or nick it with a steel implement. the block is cast iron but you still do not want to use an abrasive like a ro loc type attachment. if no machine work needs to be done the head do NOT remove the cam towers. They would only need to come off if the head has to be machined flat. chase the block threads. A proper thread chasing tap is preferred over a thread cutting tap. if you reuse the bolts, make sure they are clean with no residue that could effect torque specs. Only use the washer that are on the head, don't lose them and try to substitute. Also I think they maybe dished inspect when you remove to be sure. inspect the head for warps, when removing work for the outside to the inside. Use a long precision straight edge designed for this kind of work. If its warped you will need to find a shop that knows what its doing for L engines. The overhead cam complicates the process. during reassembly make sure block and head are clean and dry. Install the bolts with oil, but go easy on this, you don't want a flood of oil transferring from the bolt to the freshly cleaned surface/gasket. follow the torque procedure outlined in the FSM When all said and done you can use a exhaust leak test that sniff for exhaust gas in the radiator (head leak into coolant passage). Do a good job of burping the system, test with water, if all good, then use antifreeze.
-
-
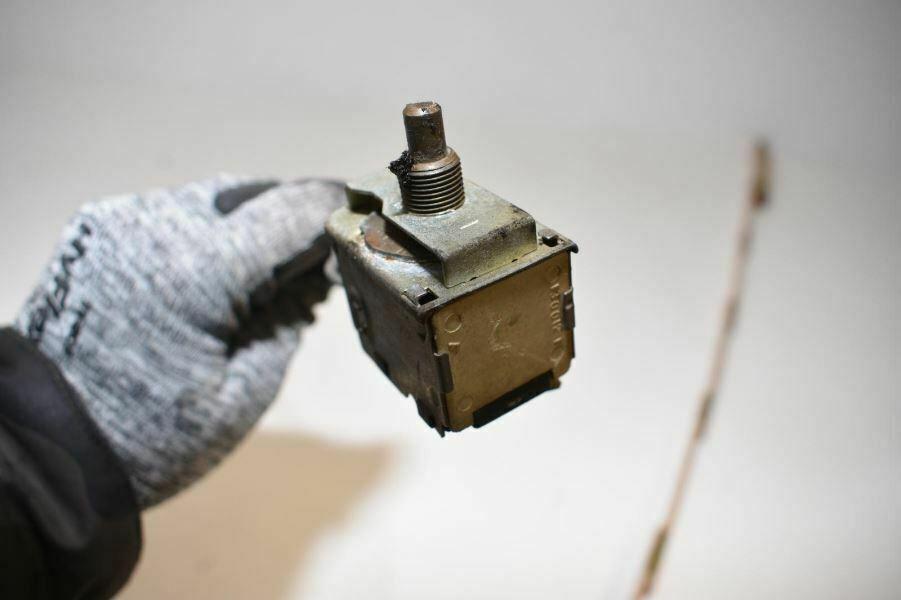
here is me testing the tvx not sure if this is a fool proof test but should at least let you know if its completely bad. Sorry for he noise.
-
Yes I would suggest going all new under hood, that is the SD709 comp a PF condenser to fit the opening (looks like you can go a bit taller here over stock per my video) and a generic drier with the trinary switch. I good local AC shop maybe some help here unless you know someone in the biz that can aid. The only down side to the in dash setup is the status of the evap and more importantly the expansion valve. If you go that route you should be prepared to have to replace those parts, I don't like the high prices folks are asking currently on ebay since they are selling untested. But it maybe the only way to go if you want OE. as far as playing nice 134a "should" be ok but you really should flush the evap if you use the old one. the best way to do this is with a the expansion valve out of the way (not easy). since all the under hood stuff is new you should be ok there. lastly check with ac pros, but I think using an ester oil vs pag would be a way to go if you reuse the old evap, ester is compatible with both mineral and pag IIRC. IF you go with a new evap as well then pag is ok, prob the way to go since its more commonly used. Personally I would go with all new under hood, look for a good deal on the under dash stuff and replace the evap with a brand new unit(unless you found someone that can actually attest the evap status as in I just pulled it and stored in a climate controlled (dry cool) area was working and has been leak tested. An open evap in a humid area with an untested TVX would be something I have issue with. Its a LOT of work, without knowing this I would not want to take the dash apart. A good ac shop prob could test for leakage of the evap. I did some testing on the tvx on an old video, not sure it is fool proof but it does show if the tvx is at least responding to temp changes. Again I would suggest consulting someone local with some AC experience to look over any work you do. You want barrier hoses, good fittings, for a leak free setup. the barrier hoses are a R134a thing, smaller molecules or something like that. fittings get confusing, you will prob have o ring style on the compressor/condenser/drier and compression on the firewall for a stock evap.
-
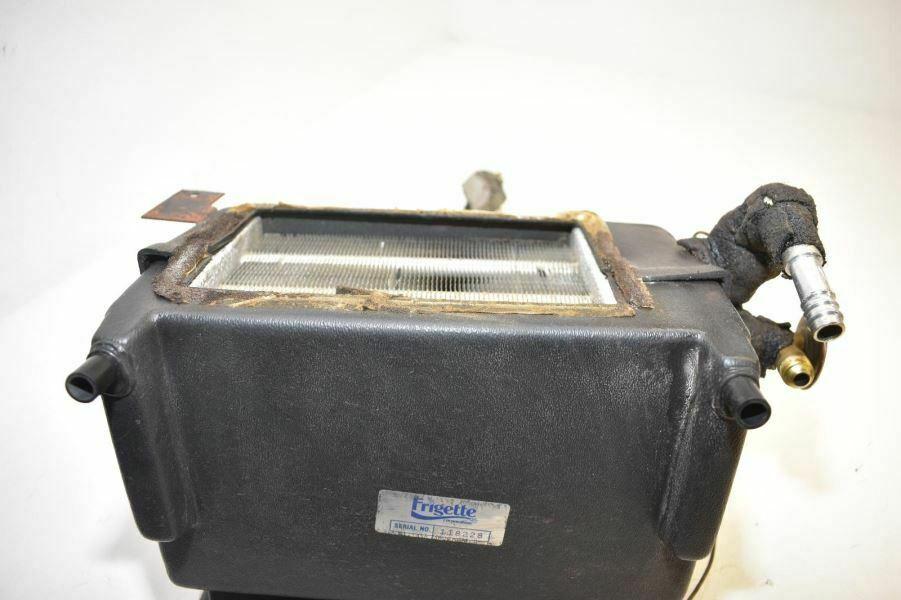
here is a factory kit (also from ebay) note the thermostat on the bottom of the evap housing. Note the evap housing uses clips to hold it together (after market boxes useds screws). the Tstat uses a metal rod that connects to the "TEMP" slide lever to adjust the turn on point for the compressor, it cycles on and off to adjust how cold the air is (the non OE do the same) unlike modern cars that often employ a "blend door" to mix hot and cold air on and keep the compressor running all the time to adjust temp out of the vents.

-
here is the one I am thinking of non OE for a 280z, I kept some pics for when the ebay list goes away. You can see the standard TVX, and the simple thermostat controller. Has dual drain holes that I presume you plug one as there is only one exit hole in the 280z. This is about a s simple as it get, someone good at fabrication could prob make one along these lines out of sheet plastic and a plastic welder. https://www.ebay.com/itm/1975-1978-DATSUN-280Z-FAIRLADY-Z-AIR-CONDITIONING-AC-EVAPORATOR-AND-HOUSING/283752033766?_trkparms=aid%3D111001%26algo%3DREC.SEED%26ao%3D1%26asc%3D225074%26meid%3Dcc86117503dc45adb46116c4aab794e7%26pid%3D100675%26rk%3D1%26rkt%3D15%26mehot%3Dnone%26sd%3D164541840945%26itm%3D283752033766%26pmt%3D1%26noa%3D1%26pg%3D2380057%26brand%3DNissan&_trksid=p2380057.c100675.m4236&_trkparms=pageci%3A8c73dc55-3322-11eb-85ae-c6b4a0f0a2da|parentrq%3A19d11fcb1760aaecb06889e6ffd1c456|iid%3A1
-
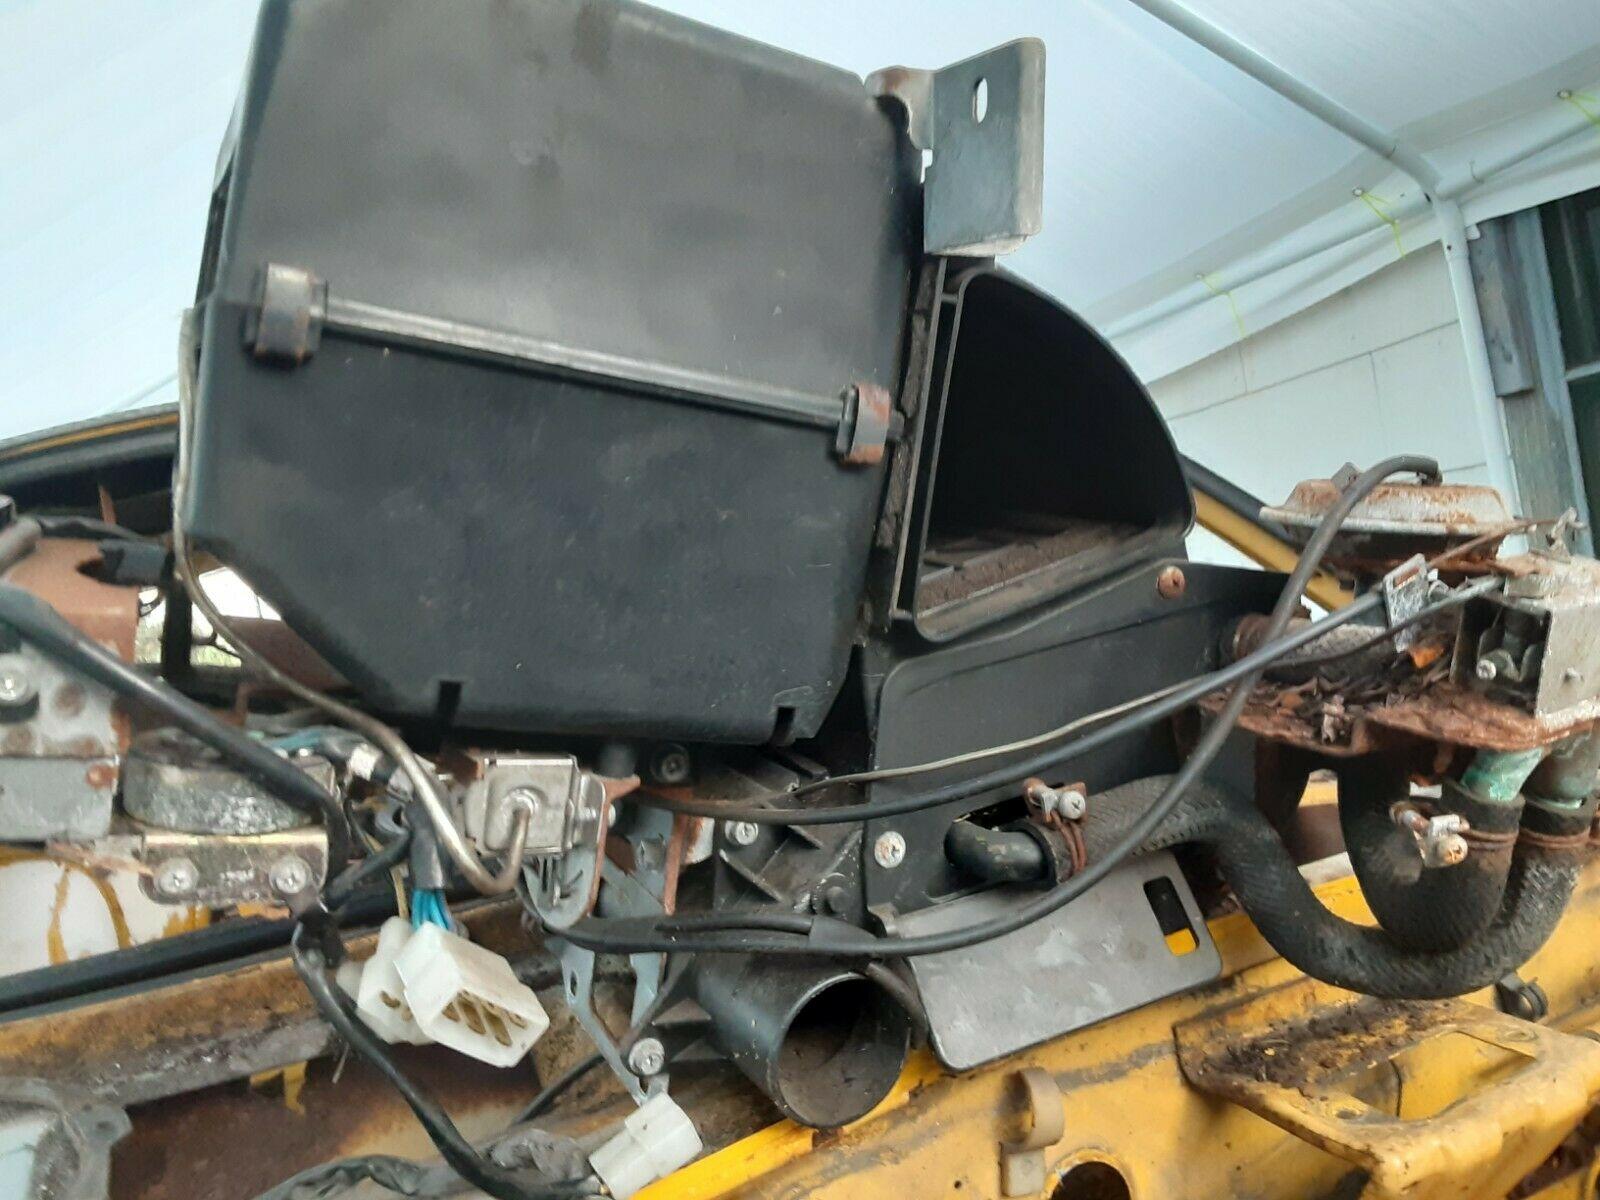
Video Datsun 280z factory AC - YouTube as you can see you should have a unused connector coming off the alternator wire harness. A close look a the FSM should show this I presume. It connect to the magnet switches. There is a harness that also turns on the compressor clutch, this one is a shared harness with the BCDD so you should find it where the BCDD plugs in. I did not touch on the fuse box, I have a separate fuse called AC but my guess is its just the same fuse that would be labled for the air box fan on non AC equipped cars. The evap has a linear type thermostat with a cap tube going to the fins, make sure this is mounted on the evap box. there are add on kits designed for the 280z style, a bit simpler as they seem to be just an evap and a round T stat controller that would mount somewhere off the main panel (like the 240 kits). I presume you just set the panels to what ever you want that blows air thru the top vents and then engage the round knob controller. A bit cruder than the OE but prob works just fine. I the one I saw on ebay had a simple TVX (easy to get). You would still want to remove dash to install in place of the duct box from the heater box to the front panel. I assume it had no idle up, but that is not a big deal, you can just rev the engine up sitting at a light I suppose. Prob has its own relay for clutch engagement as it would not be incorp from the panel. Just something to watch out for, if you only wanted OE. I am not sure if the slide controls are different, I know the non AC does not have the "AC" label perhaps there is something diff in the vacuum switch, but I doubt it. The FSM goes in to a lot of detail on how to install AC as it was something done after the car was built. One thing to watch out for is if you are buying off ebay, there are NON factory AC add ons out there they do not funtion the same maybe thats a good thing, dont know, but just be aware of it. I recently saw a add on evap box that would fit where the factory evap box for a 280z goes, but it was def not a factory box, could tell by the construction AND it used a rotary thermostat switch. I bet it did not have any of the other stuff (magnet switches/idle up) but rather was just something you turn on (rotate the switch) and set the existing controls to vent. Maybe that is a good thing, I mean it would work and it is simple....for me I like OE since I prefer to be a survivor. I will post up some pics of what an OE evap and box looks like later.
-
heat. I have an induction heater just for this kind of thing.
-
IF a capacitor was bad I would be more suspect of the electrolytic I think I see (cylinder shaped plastic cover wrap) should have polarity markings voltage and uF (capacitance) number on it. they are chemical in nature and can dry out/leak. I have never oped a tach so not sure if that is what I see in your pics. The others are unlikely to be bad. It would be best to test out of circuit, a crude test can be done with a VOM, some modern DMM have a cap test feature to check for loss of capacity. Best way is with a proper cap tester for electrical leakage, ESR, capacity or just replace and try, but you want to use the correct uF amount and equal or greater voltage rating.
-
assuming its not a reverse lockout mechanism issue, then as Zed Head mentioned earlier it could be you just need to rotate either the input or the output shaft. The reverses is not sychromesh that is they are not always engaged like the rest of the gears (which rely on selecting the gears you want to use with locking hubs). Its more of a "crash box" style system where the gears are literally engaged to a reverse idler by moving the entire gear cluster. they are straight cut gears with bevels on the sides that slip together. that being said sometimes the bevel will exactly line up preventing the meshing of the gear teeth. Generally this is not a problem in a installed system as the slightest movement of the gears will clear the jam (just clutch in and try again, with the engine running the drag in the gears will move them the tiny bit needed to clear the contact point of the bevels). IF moving input or output shaft does not clear the issue, then I suppose it would be worth trying unbolting the reverse lockout mechanism from the side (two small 10mm bolts holding on diamond shape cover) on the outside chance that something has malfunctioned and is not allowing it to work as designed and is keeping you from going into reverse. The way it works is when you shift into 5th it trips a lever (any other gear will not trip the lever). shifting from 5th back to any other gear (beside reverse) clears the tripped lever. the idea is since 5th and rev share the same shift fork, you could with out this protection easily shift from 5th into reverse (perhaps forgetting what gear you are in and trying for a 3/4 shift when your are actually in 5 causing the potential for a 5/R shift.. disaster....
-
Put some new plugs in it, and try it. read the plugs after 100 miles (and listen to the engine for odd noises like backfires).
-
you should NOT be able to go from 5th to reverse, the reverse lockout mech prevent that. You have to shift into some other gear (besides reverse) to clear the mech then you can go into reverse.
-
well if you happen to come to O town to see the mouse, give me a call. One last thing I thought of, does your wire harness support the AC as an option. I will see if I can get some video of mine this weekend, just the AC stuff that is.
-
Its going to be a big job anyway you cut it. If you know someone nearby you that has a stock system it would be a good idea to look it over. You can find drop in replacements for both the cond and the evap (an evap that uses a standard expansion valve). so you have 3 basic options to consider 1) All new stuff aftermarket AC system pro should work great, con will require a lot of fabrication, will not be OE (could hurt value if you care about that) 2) Used system pro will work OK will be OE, will likely require least of all fabrication (just have to have all the parts) ie drop in. con will work ok NOT great (I don't know if aftermarket is great so I just assume it is, I know OE is ok, not great, don't expect it to work like a new car that can freeze you out). con may have faulty parts (leaks, blockages etc... quality can be from works great to does not work at all 3) hybrid new compressor SD709 with mount designed for this compressor, new aftermarket cond, generic drier, custom hard/soft lines, new OE style evap new expansion valve old controls/servos/housing/electromagnetic air switches idle up servo. Pros no faulty parts to deal with, will work ok, adapt to R134a right off so no contamination issues, preserves the OE look and function, most correct approach IMHO. con expense (well compared to aftermarket prob about the same) as the cond and evap alone will be 600 is) con in the end you have a like new OE unit which as mentioned before will be OK not freeze you out like you can store frozen goods inside (my 2001 suburban could substitute for a meat locker). Take your time, look around, see if you can find a actual example of the aftermarket and a functioning OE before making up you mind. Its going to be expensive and its going to be difficult, so I would want to know the end result before starting down a path.
-
for fun you should find out of they have a manual showing the install of the under dash parts. See just what the "Datsun" package is comprised of.
-
if you want wife acceptable AC, then the OE in the 240z a likely fail. Hopefully you can modify the duct work enough to get more volume, that and the better evap setup of an after market will no doubt get you closer to reasonable. Getting the limited front ducting to work well seems like it would be the biggest hurdle. Perhaps just dumping some of the cold air down into the foot wells. Hopefully someone can chime in with some useful data on this. Like I said I have a 280z and my 240z statements are based on a 40 yr memory of my 240z.
-
the 73 came with draw thru evap, and poor ducting. So if you want a factory orig style for that era (dealer added factory approved iirc) then you should also know that it was a LOUSY AC system. the evap is so far from the outlets, and the outlets so small that at best it takes the edge off serious hot days (90+). So you have to decide how orig you want vs how good an AC system you want. this is one of the reasons a prefer the 280z over 240z. In Florida if you want to drive your Z you have to have good AC. The 280z system is ok, not great but ok. as far as fan upgrades you can move more air that way, but you have to be aware of overtaxing wiring and also you still have the draw thru evap, plus generally speaking for AC to work well you want volume at lower speeds (duct work). this enables the system to deal with humidity better, which makes for a more pleasant conditioning of the air.