


882993md
Free Member
-
Joined
-
Last visited
Everything posted by 882993md
-
 ok here are the results. I attempted to get the rear carburetor running (stumbling along) with the front disabled and I couldn't. Even with full choke it will run really rough for a few seconds and quit. I again checked the fuel level at 10 turns down and it now it was way low by 3 to 4 mm . I bent the float tab down (it is now much lower than the front tab) was able to get the fuel right at the opening after two tries. I tried to start it again on just the rear and same result-stumble for a few seconds then quit. I had the mixture at 3 turns for the rear and 2.5 for the front. I enabled the front carburetor and the car started with no problem. I noticed the following with both carbs running: -Rear carburetor is sucking A LOT of air versus the front (sounds like a jet almost) -Rear carburetor was back firing. When I blipped the throttle at the rear it back fired even more. Howard
 -
Just want to make sure I understand... You mean that you increase the idle on the rear carb and the overall idle speed goes up. But even after doing that, if you disable the (FRONT) carb, it shuts down immediately? Yes that is correct How much did you raise the idle? Maybe you just need to go a little more? Depends on how far out of balance the two of them are. Open the rear carb some more, and then close the front one to compensate and bring the idle back down to where you want it? I went up two full revolutions on the #10 screw. What happens if you push on the linkage for each carb independently Does the engine speed come up about the same for each? When I do that the rpm's do increase but I noticed that it's not quick and instant like in the past. It seems sluggish for each but the rpm's do increase. I'm going out outside now to try again. I will see if the car will start with the front carburetor disabled and try to get the rear to idle. Howard
-
When I hold my hand over the mouth of each carb the engine will stumble then recover. The suction was about the same for each carb. If I leave my hand too long over the mouth the engine will die. If I move my hand away fast enough it will stumble then recover. I tried increasing the idle on the rear carb. When I restart the engine the idle is high but as soon as I disable it shuts down immediately.
-
Hi everyone: I spent three days using the 10 turn down method to set my float levels. It’s maddening but I was so happy when I finally did it. I'm trying to set idle and sync the carbs. Both jets are set at 2.5 turns. I am able to get the engine to stumble along when I disable the rear carb. However when I disable the front carburetor the engine quits immediately. I lowered the rear jet by a 1/4 to 2.75 turns and still quits. Lowered rear jet to 3 turns and still quits. So I took off the rear dome and turned down the jet ten turns to check the float level. The fuel level is just a hair below the opening. I called it the day at that point and now I’m hoping for some insight. Thank you. Howard 1974 260z
-
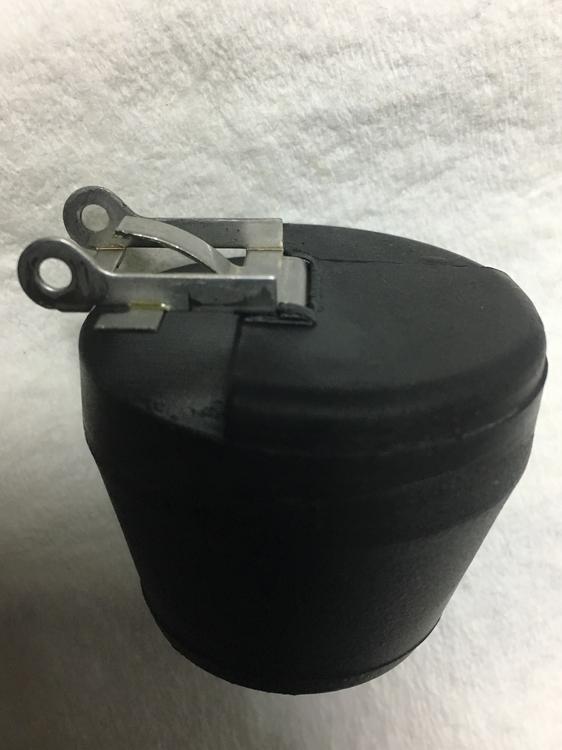
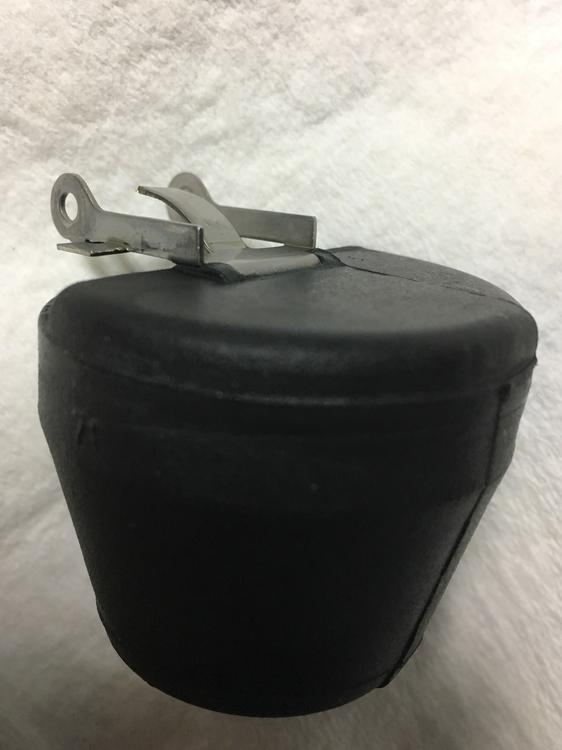
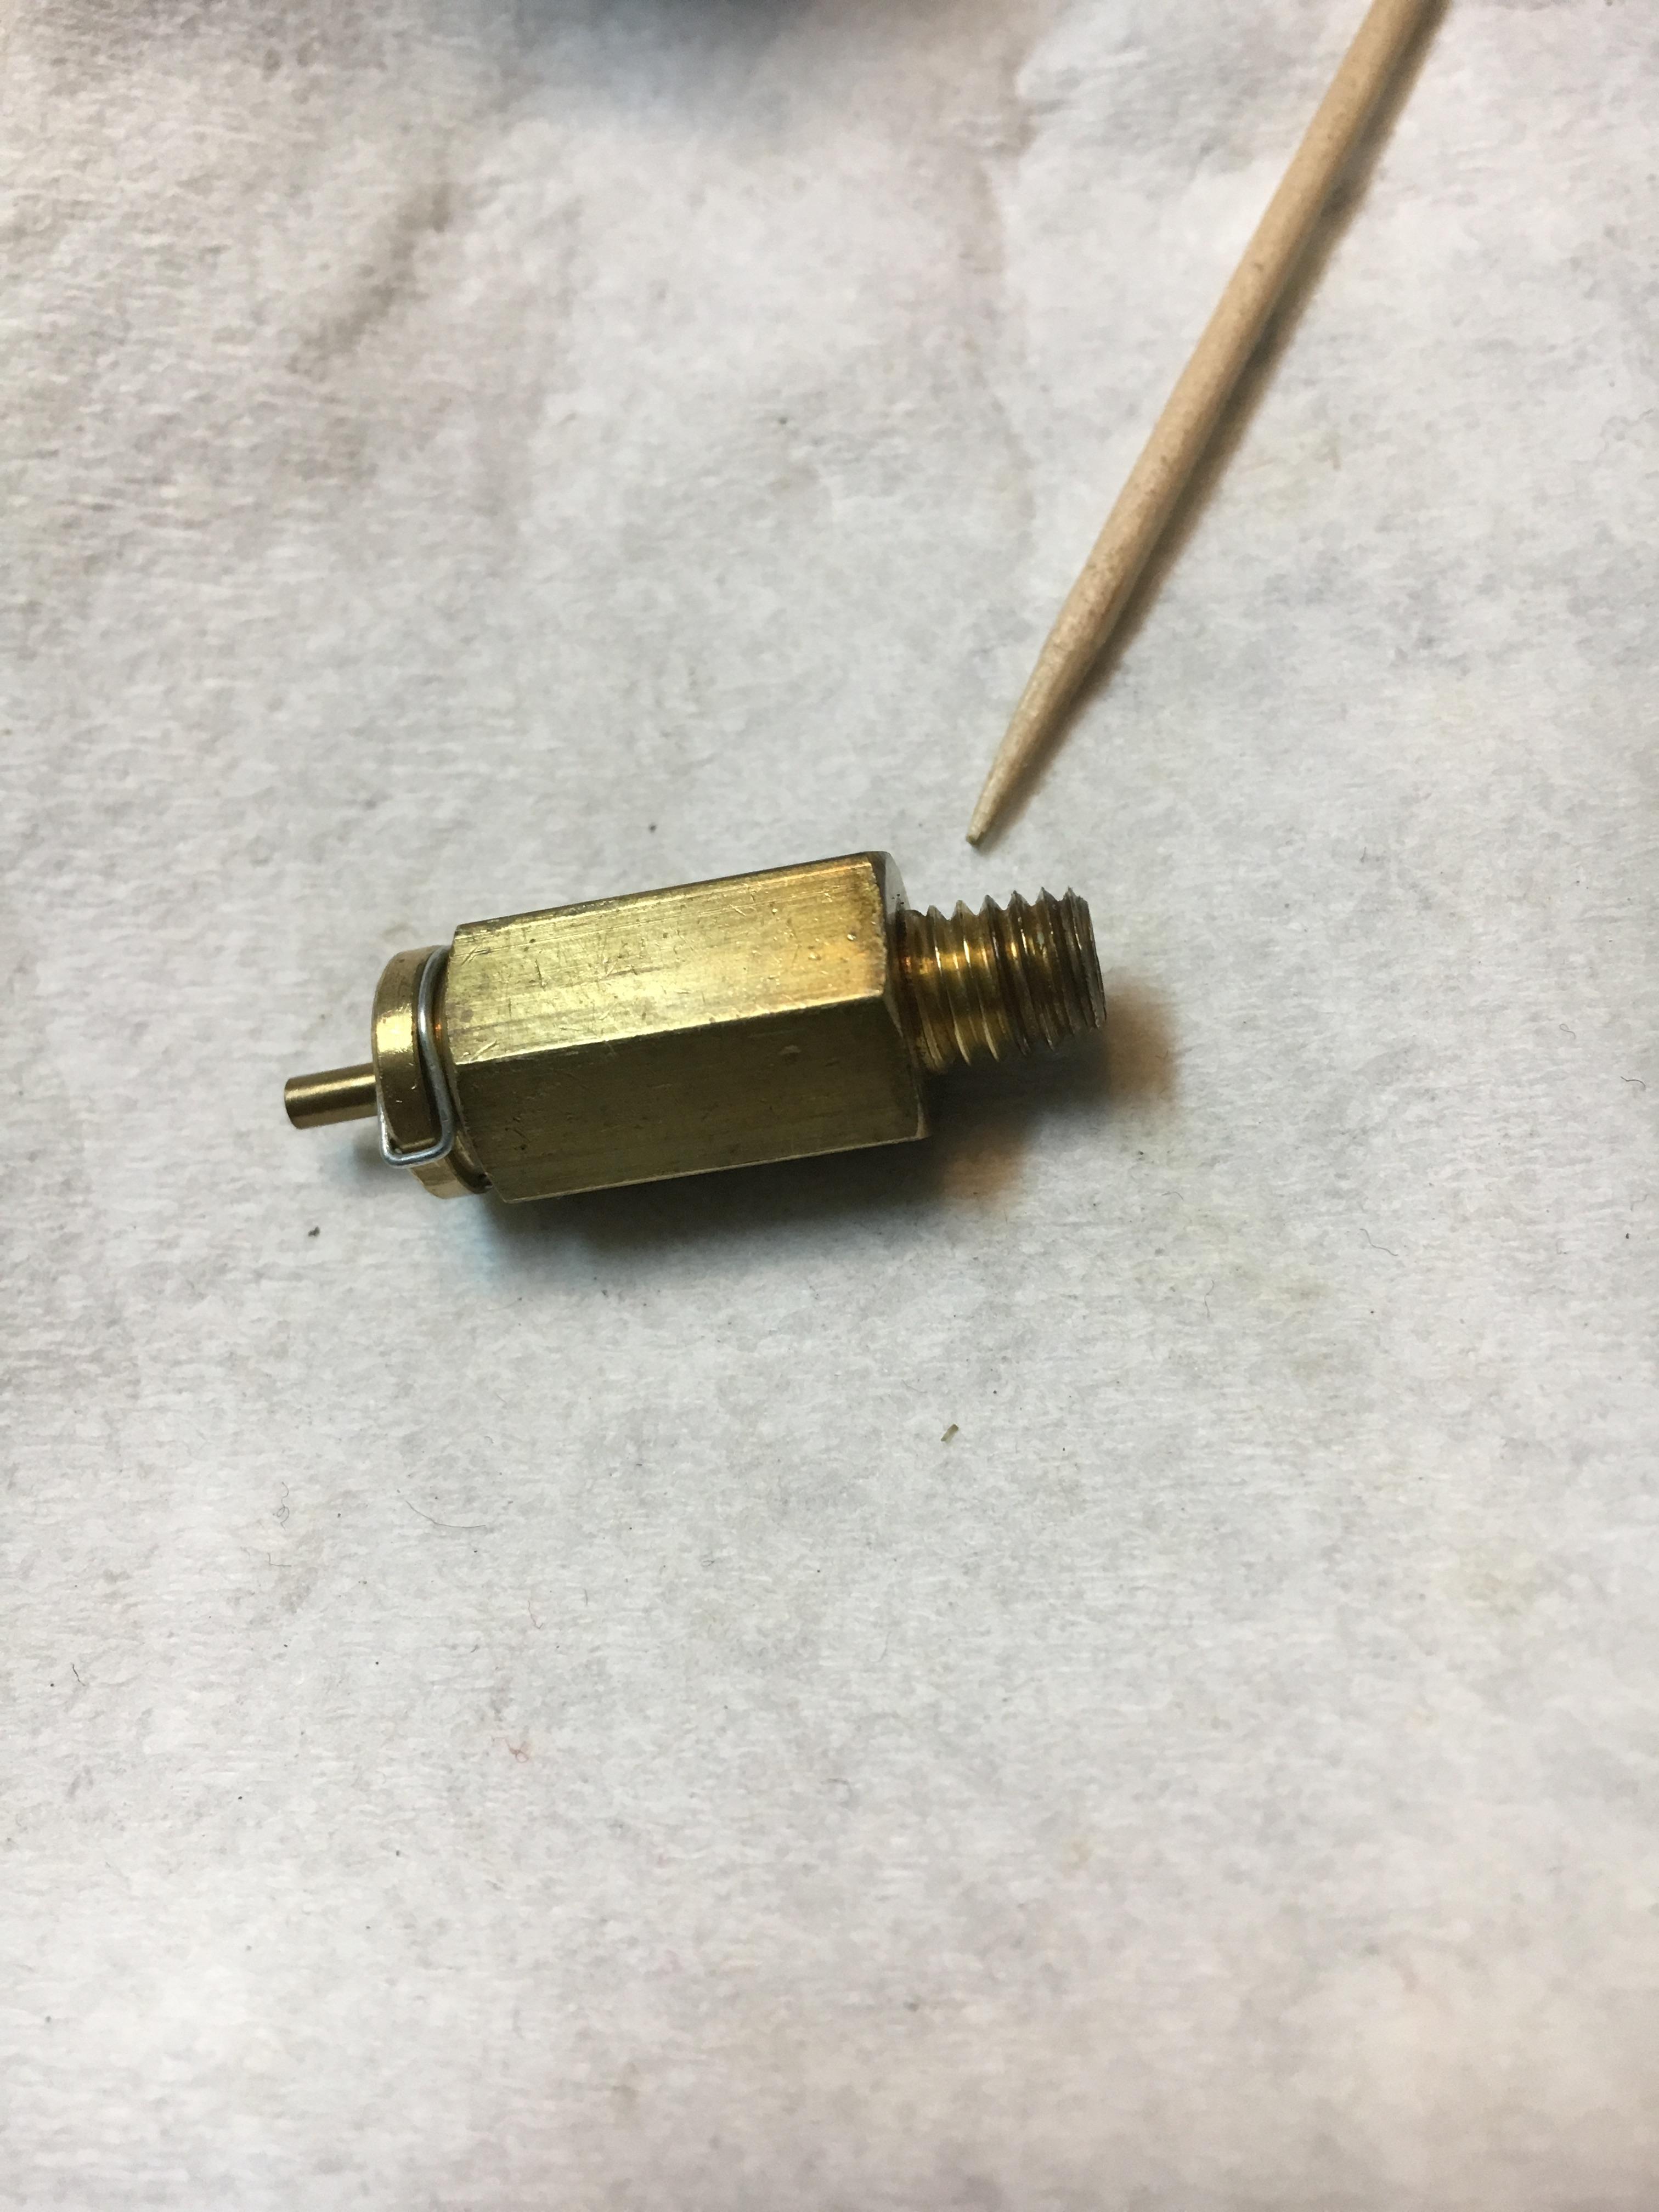
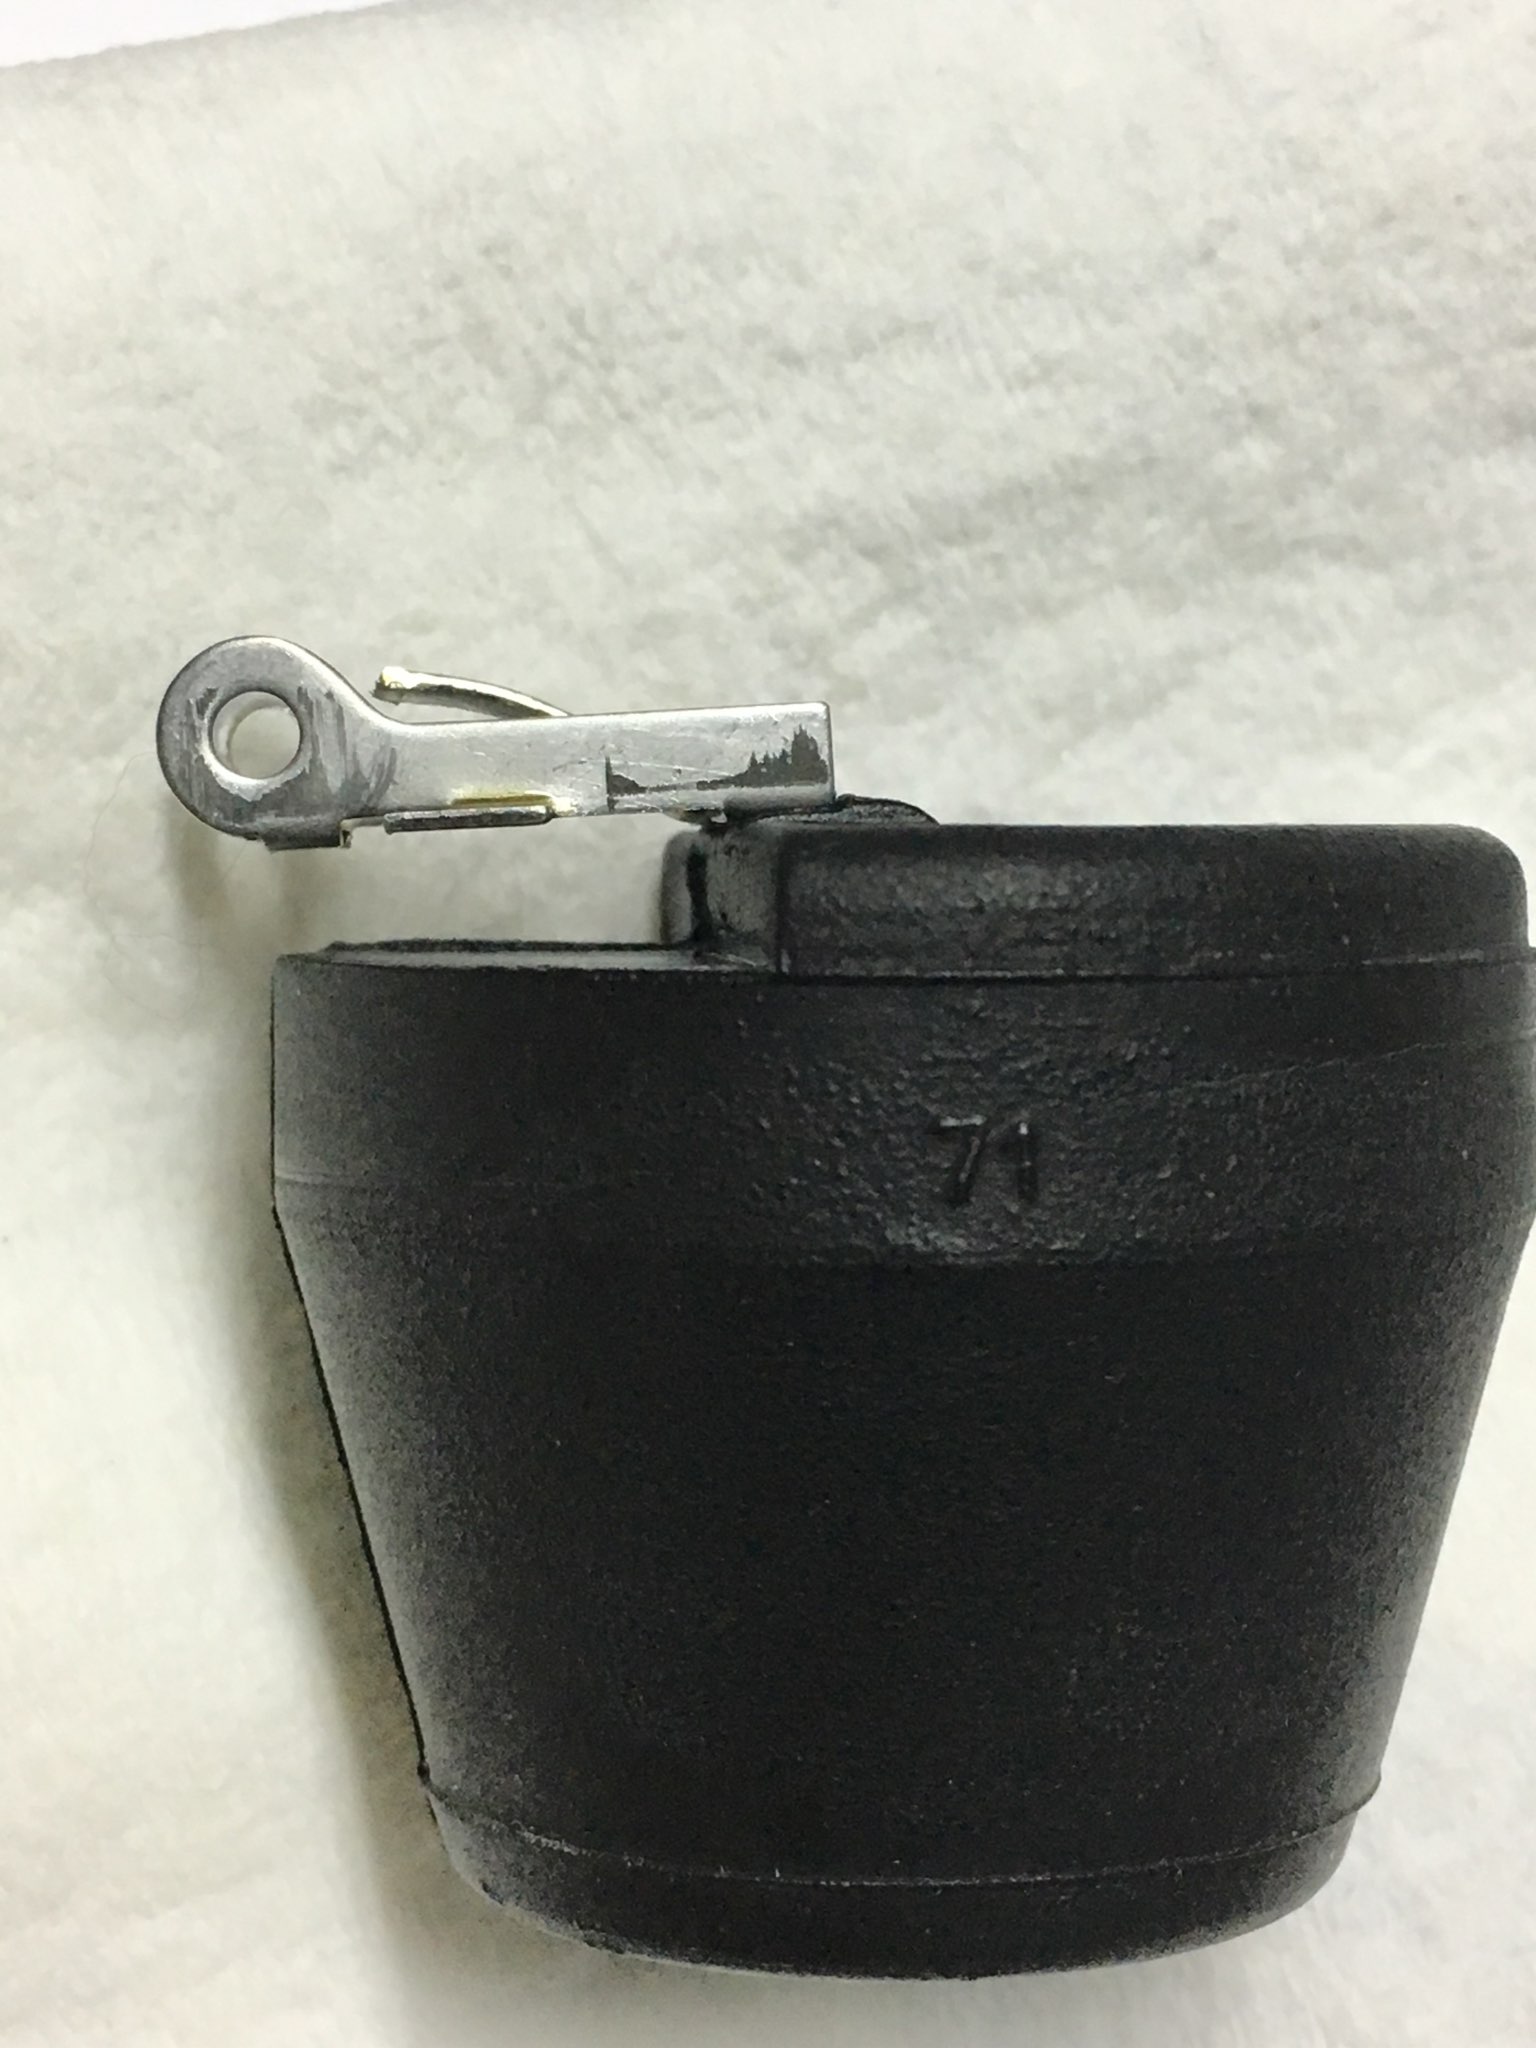
Hi everyone, I took off my needle valve on the front carb to clean and I stupidly dropped the brown washer into the engine bay. I have searched under the car and inside the engine bay (in the nooks and crannies) for one hour and I can’t find it. ☹️ Does anyone know if this is a ztherapy only part, or would a Napa or Pep Boys stock the washer? I was hoping to have my car on the road tomorrow and now this happens. Howard ‘74 260z

-
I don't know how accurate a drill bit will be as the bit will straddle the cover from edge to edge. Your measurement is supposed to be from the bottom of the inside cover-not the edges as they are lower than the inside cover by several millimeters. 9/16" converts to 0.5625 so you will be even more out of spec. (But what the hell do I know I've been trying to get this car on the road for two years)
-
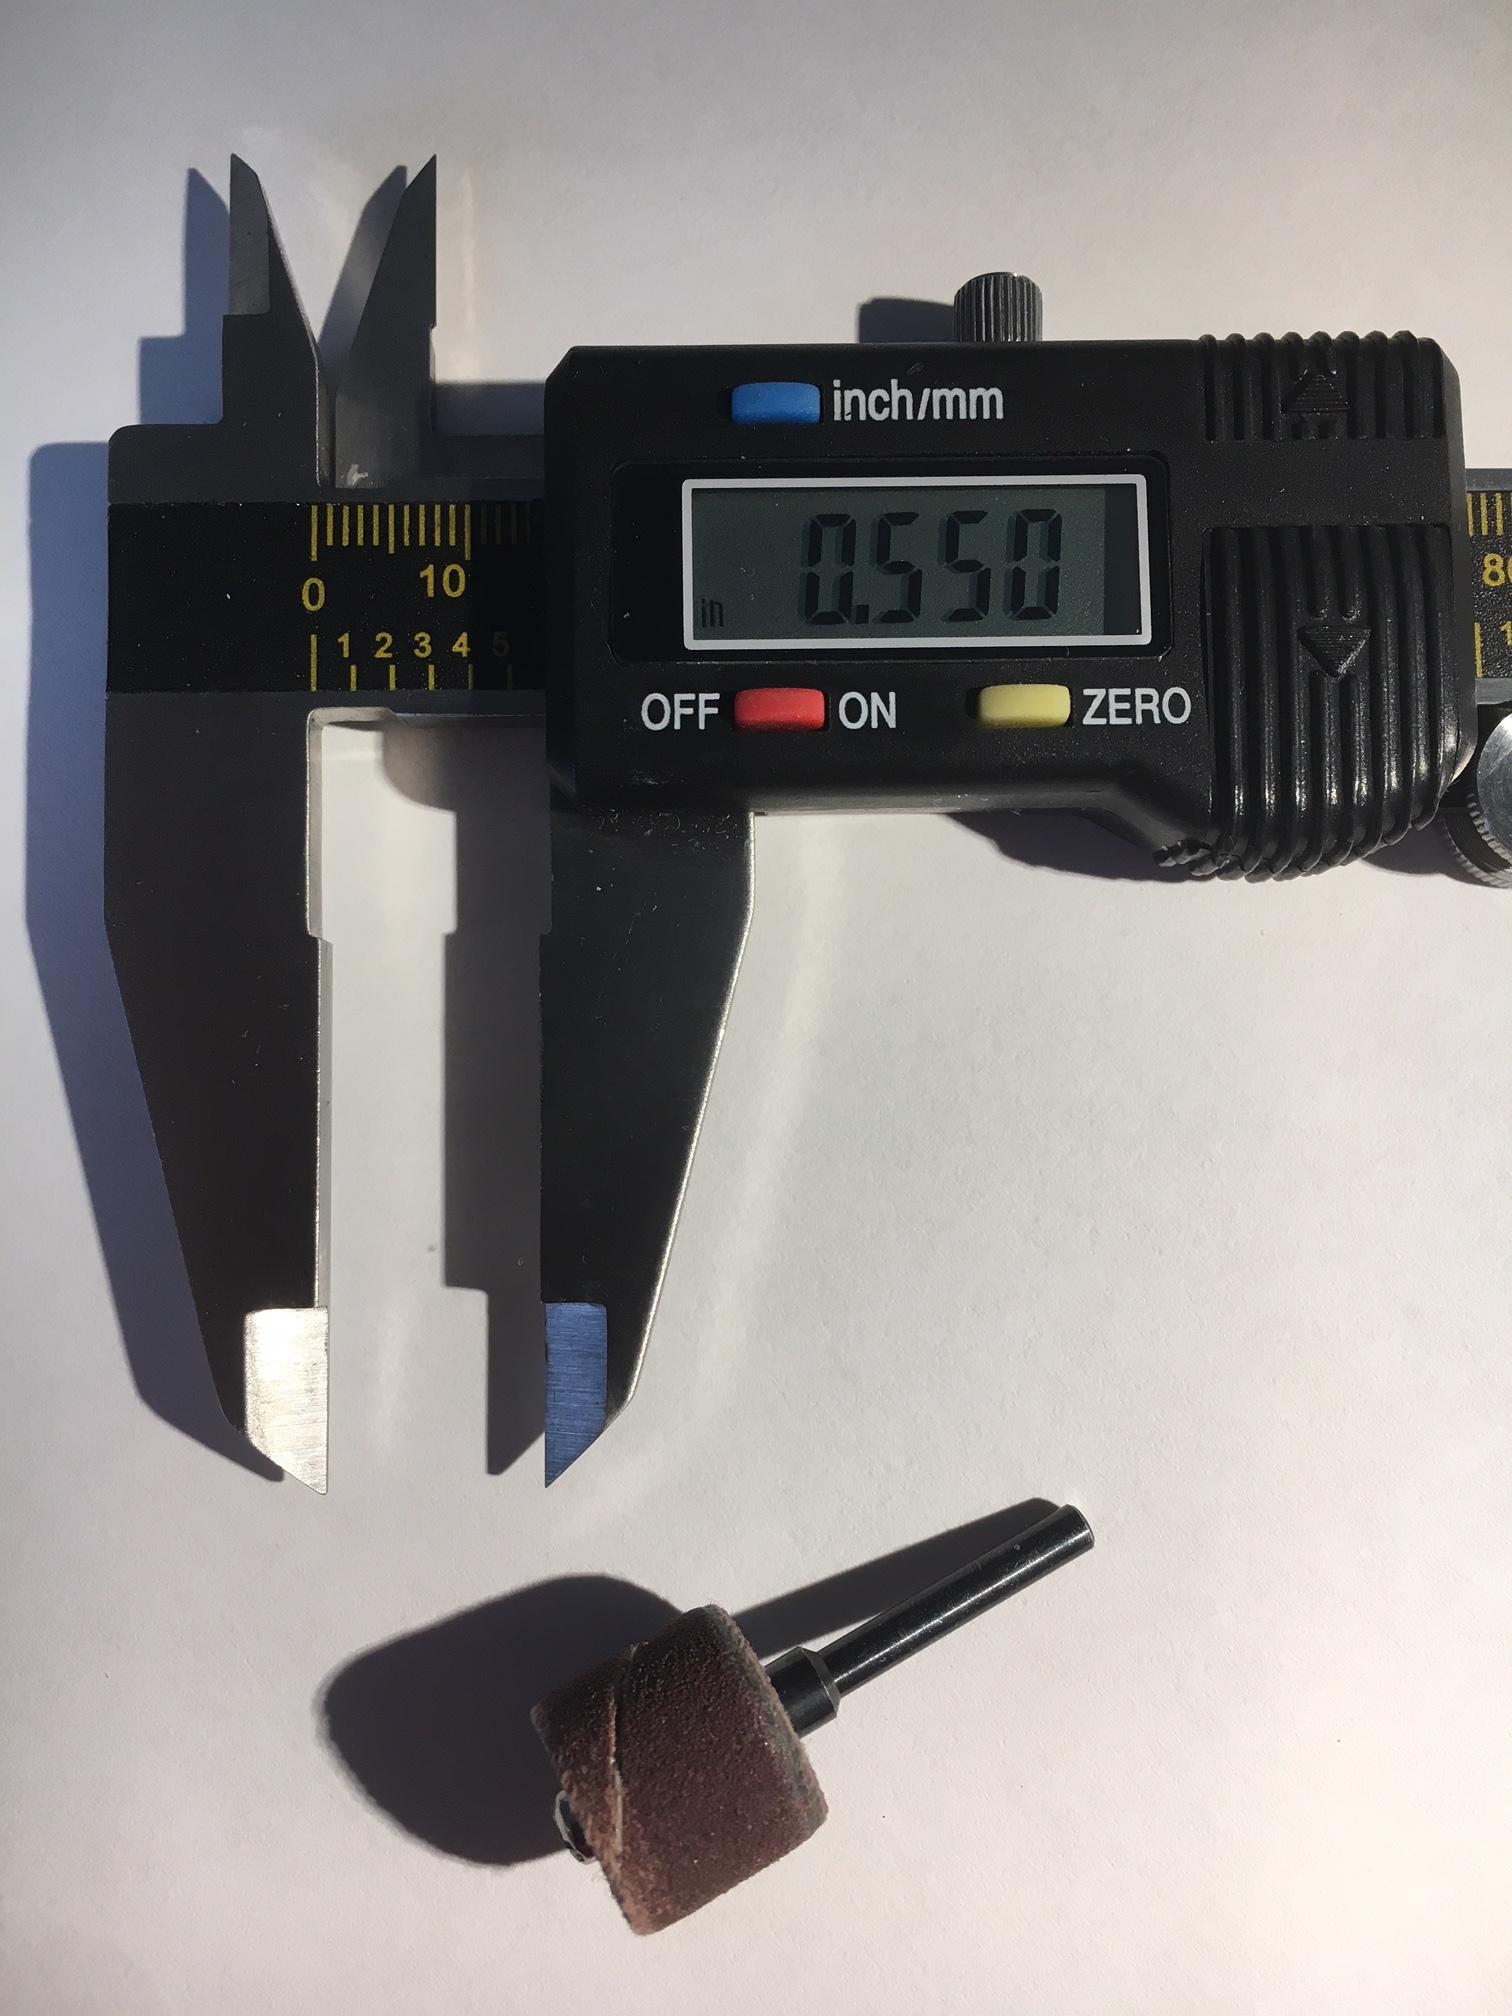
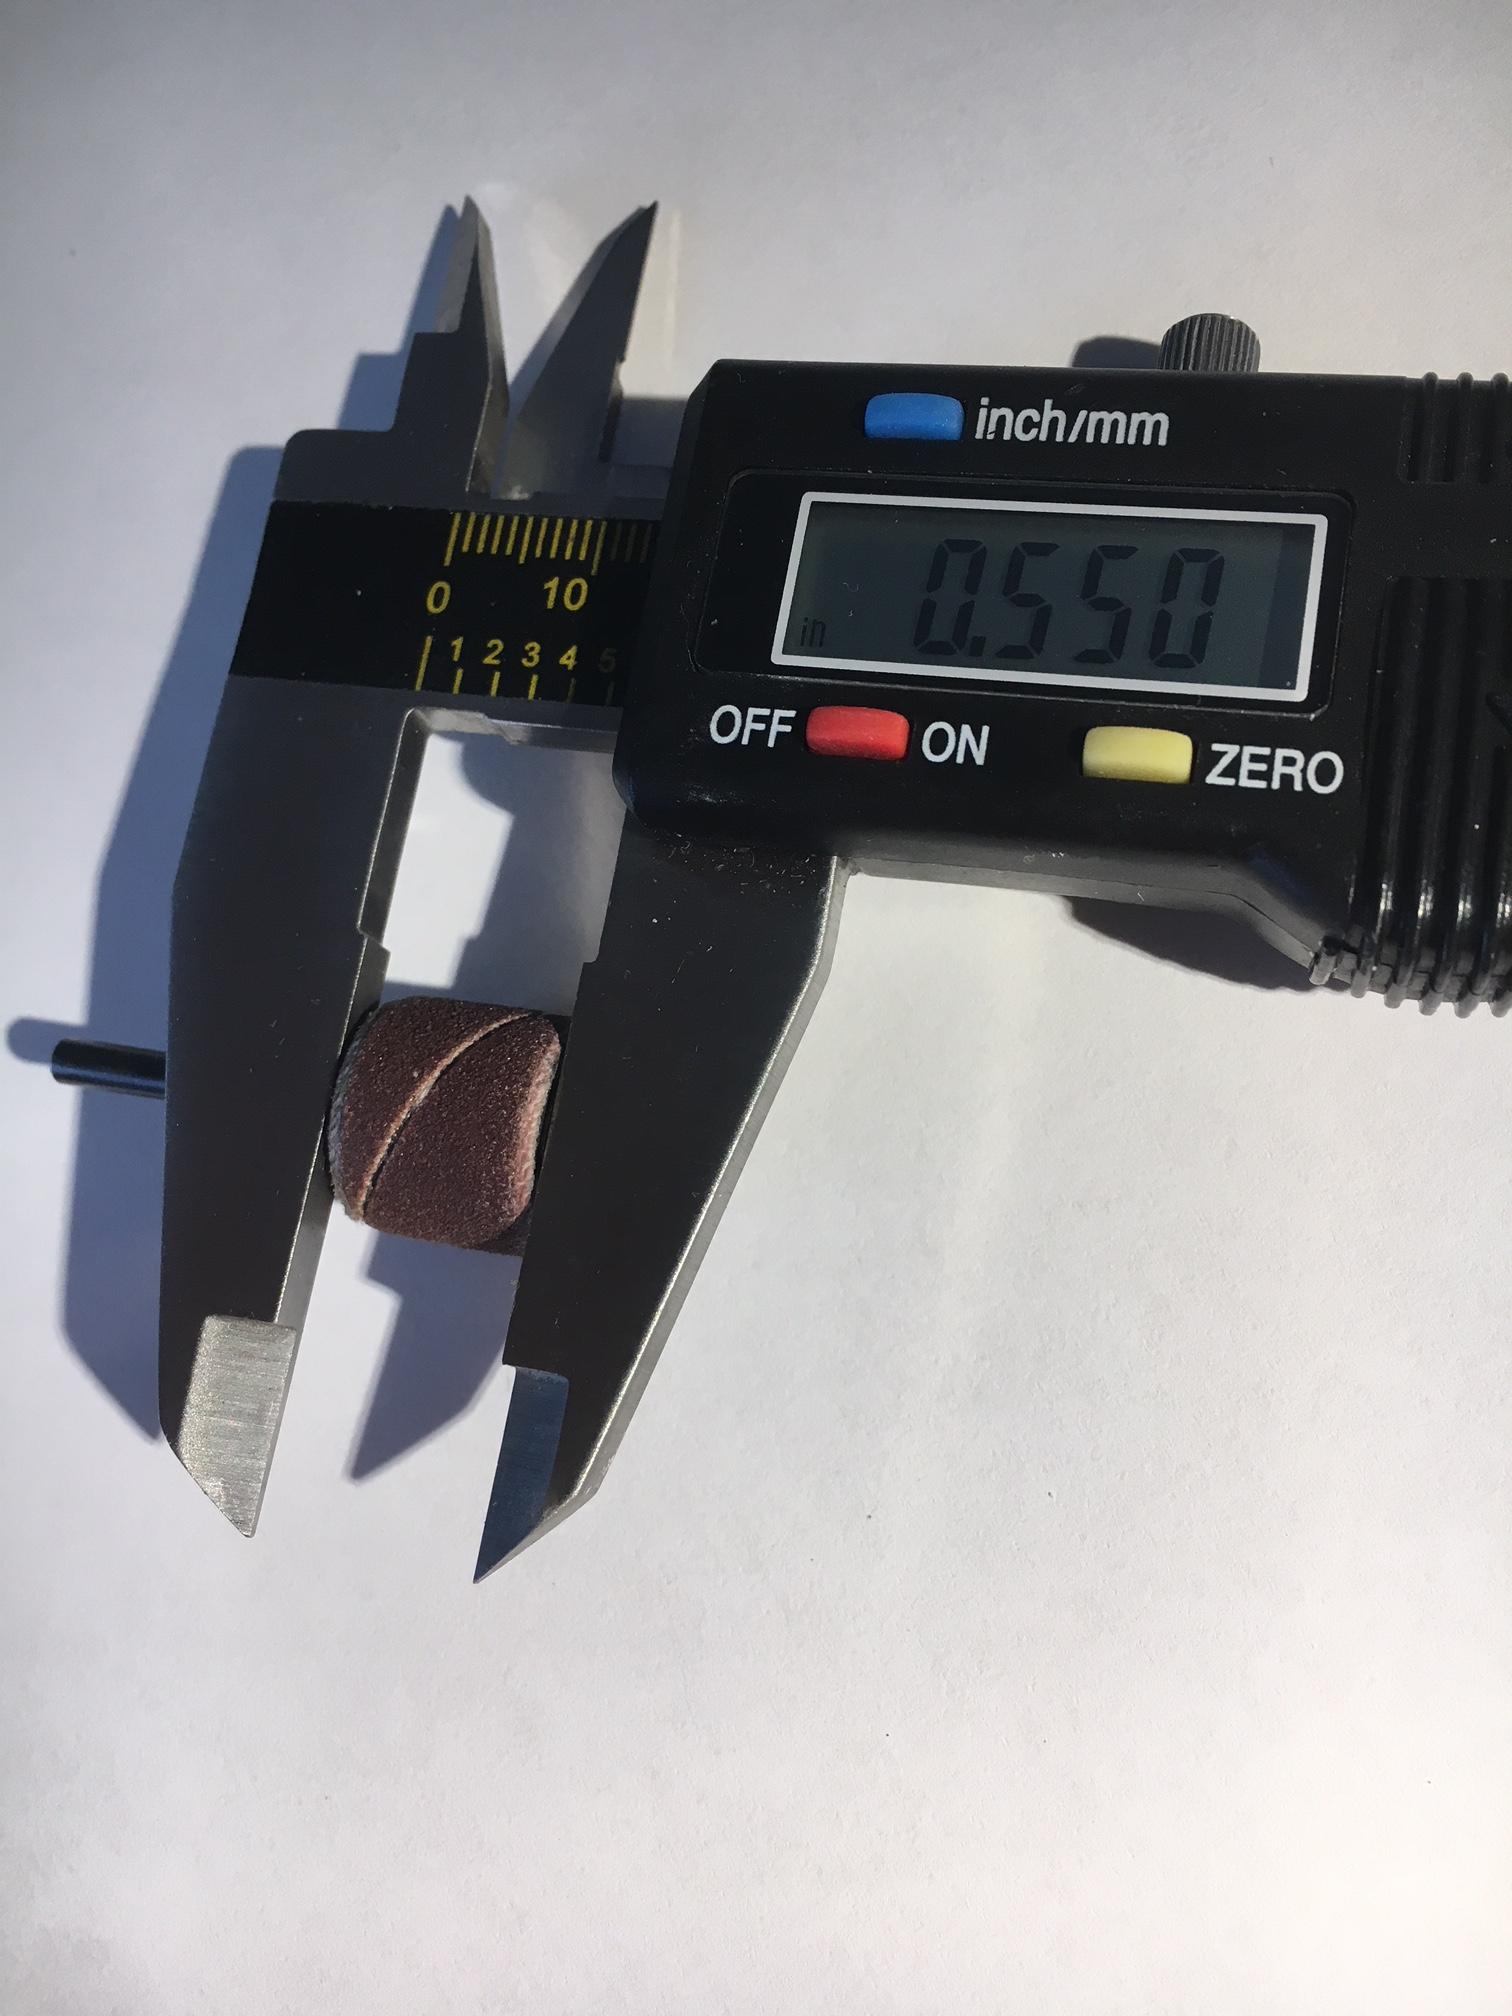
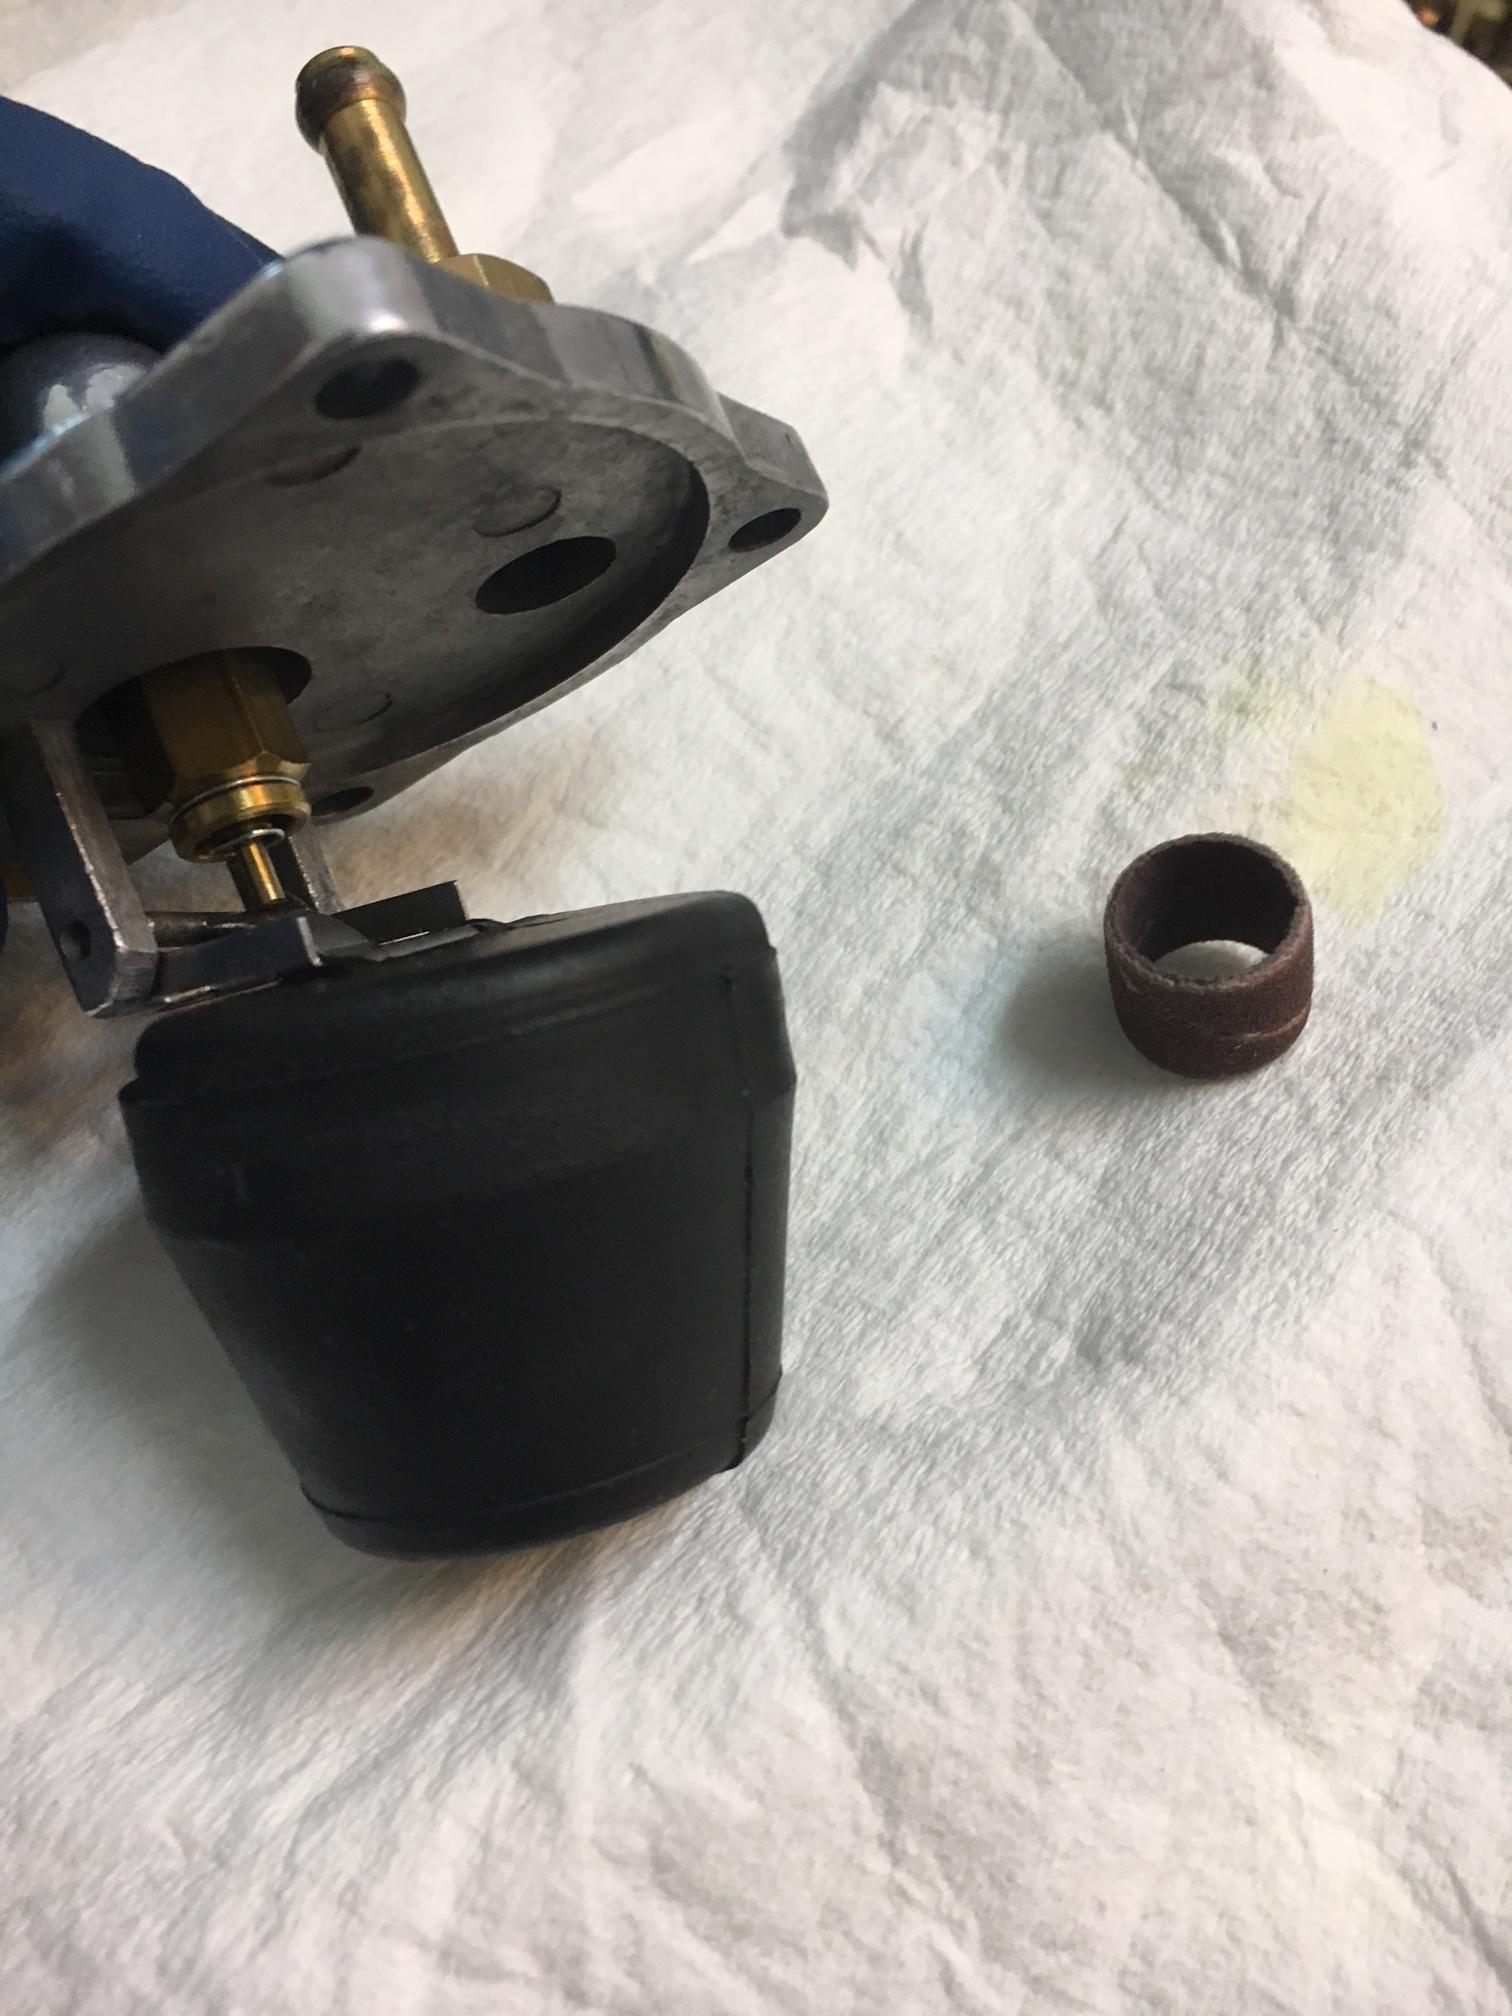
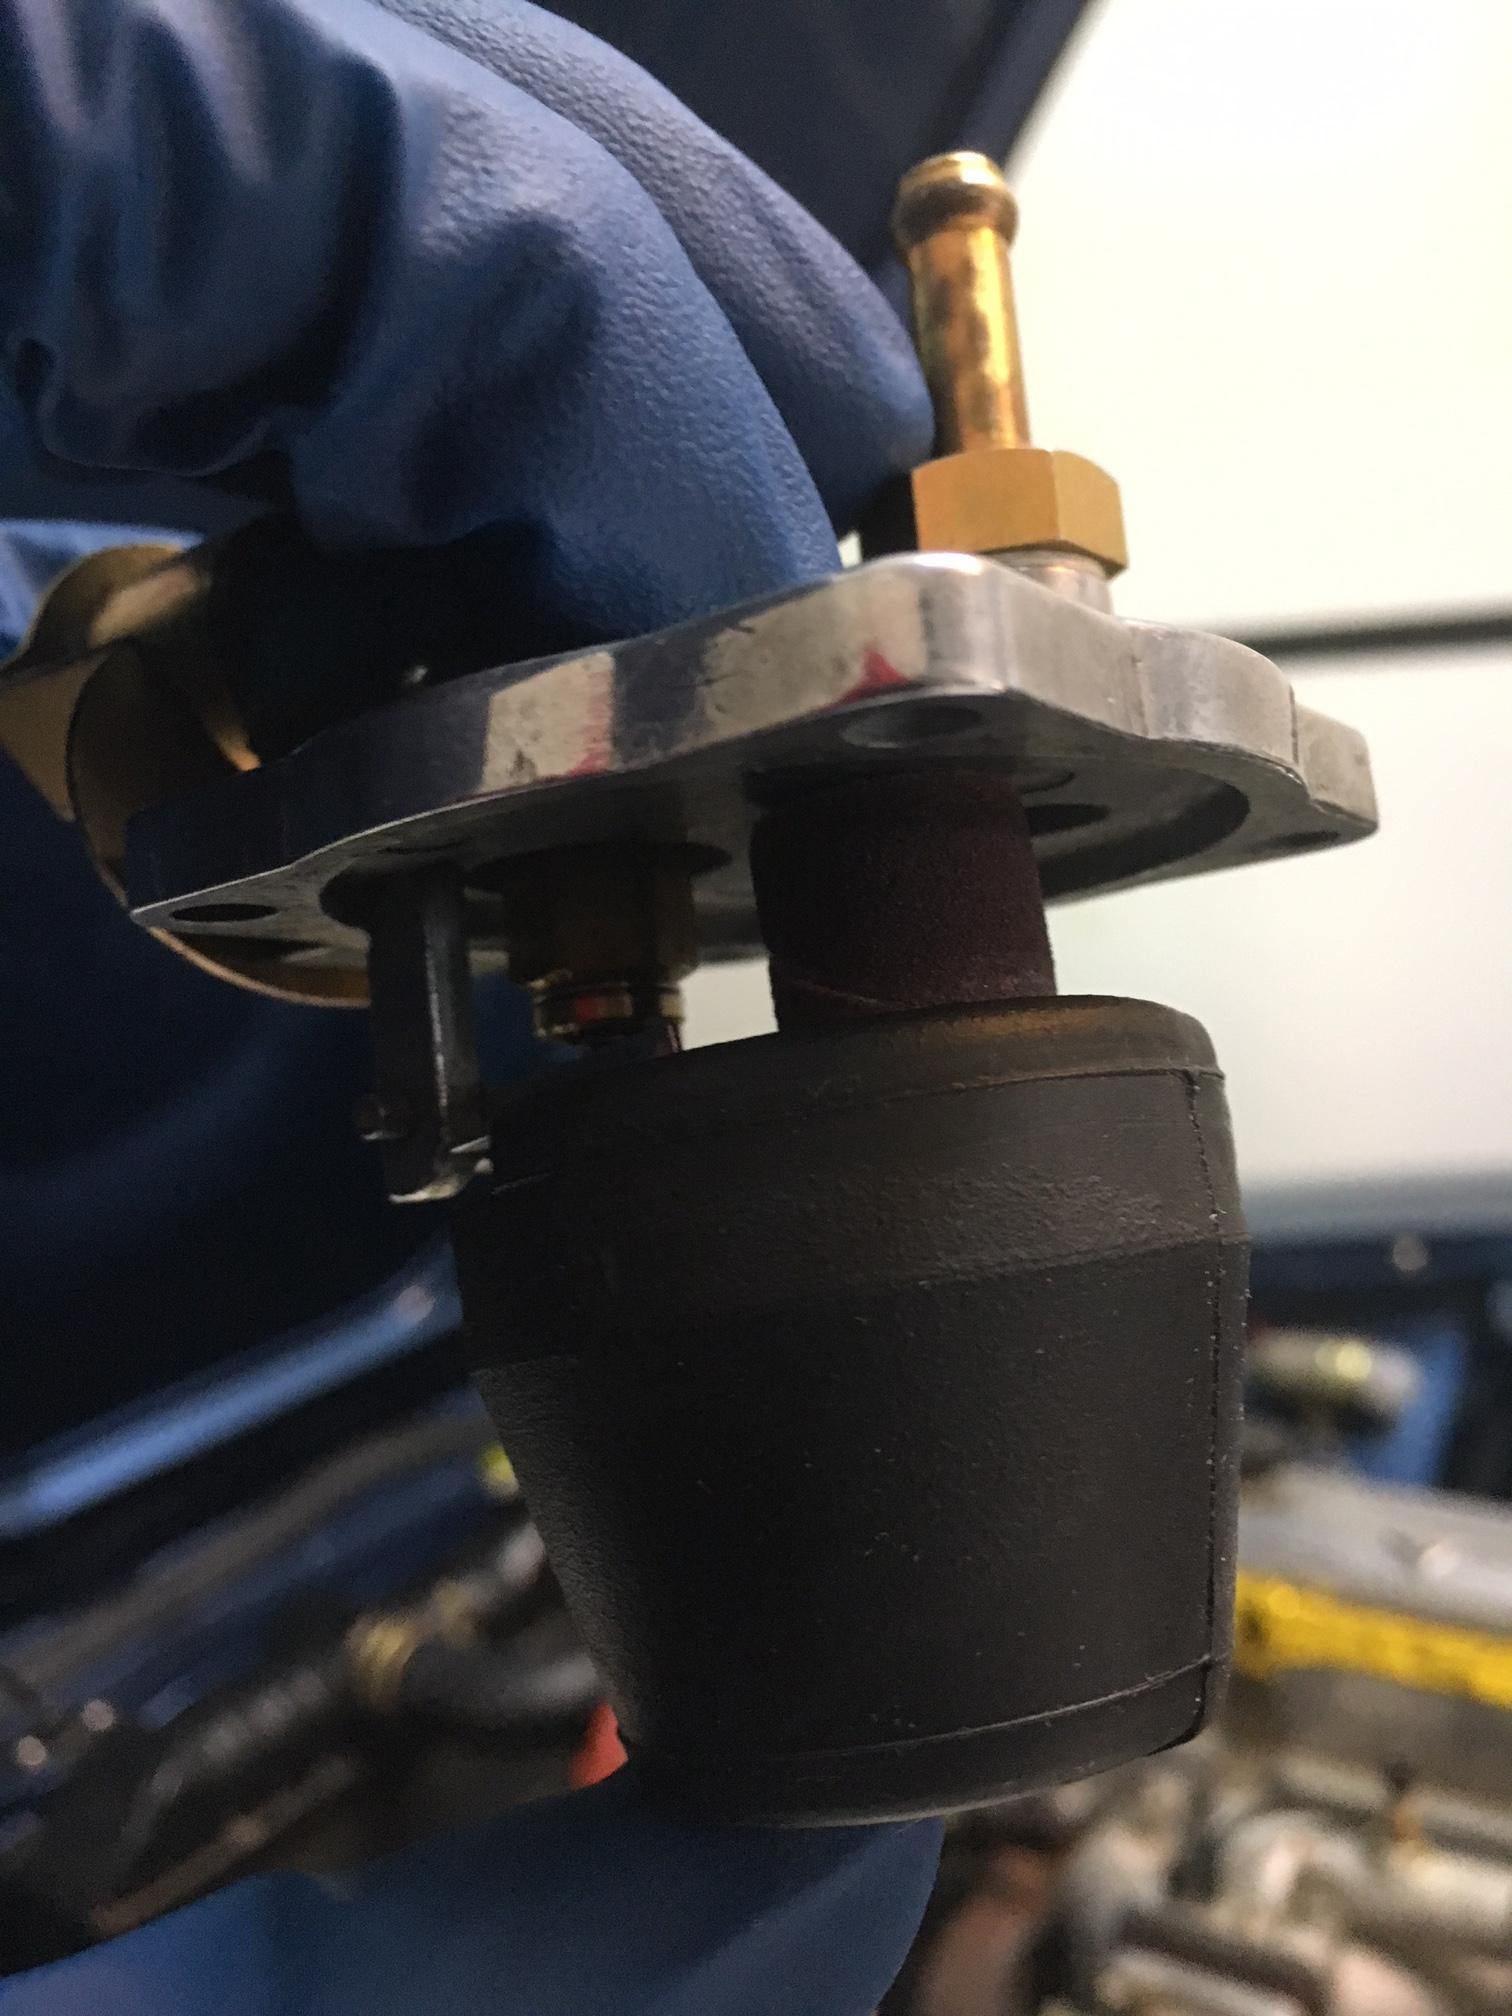
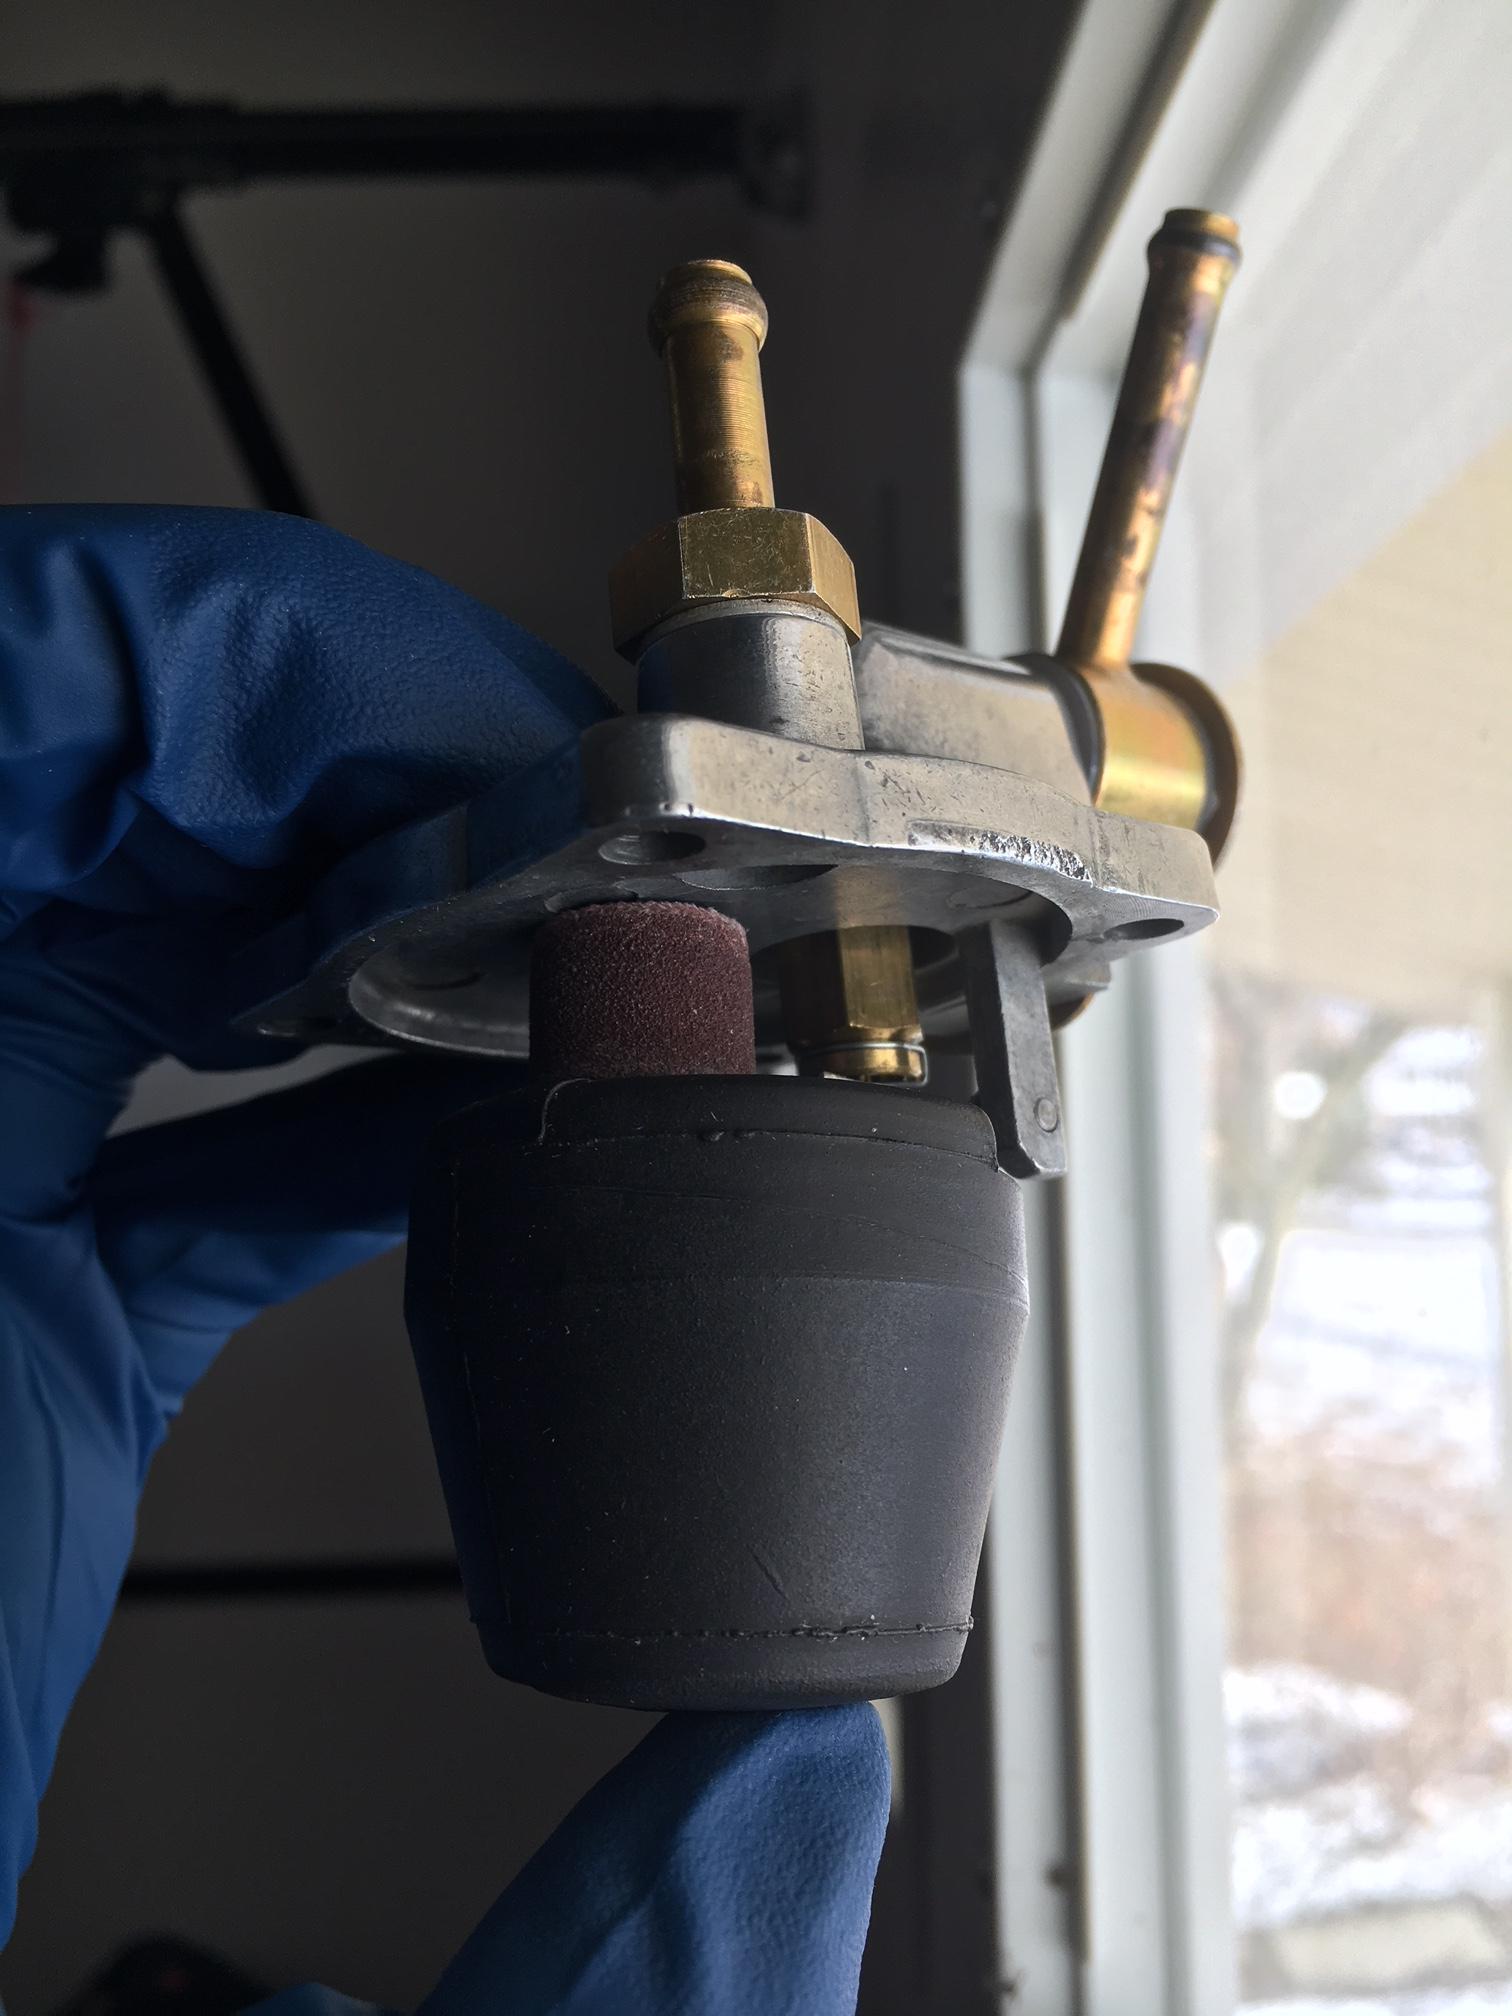
Hi JALEX: Here is a simple way that I set the .55" on my float tabs. Make or find something that is .55" that will sit on top of the float. You can use a wooden dowel rod that you cut down and sand it to exactly .55". I happen to have a sanding drum attachment for my Dremel moto-tool that just happens to measure .55". 1. Place your .55" object on top of the float 2. Raise up the float until the .55" object contact the underside of the cover. You are now exactly at .55" 3. Blow on the fuel inlet pipe. 4. If your breath circulates then the float tang is not pushing the pin and you have to adjust it up to push the pin. (i.e. stop fuel flow at .55") 5. If your breath stops and you can't blow that is good. HOWEVER you must ensure float tang is not bent too far up (i.e. pushing the pin to far in at .55"). You want your breath (fuel) to stop at exactly .55". 6. All of this is performed with the float right side up-exactly like it would be when installed on your carb. Forget the upside down stuff. 7. You also need to fix your float tab angle first. I haven't adjusted my rear carb. float tab yet and it is like a ramp. It should be like a speed bump
Thanks I’m looking for a ball bearing. Hopefully I don’t mangle the tab in my attempt. [fingers crossed]
It appears I don't have that tang on the end of my tabs and they do go up like ramps.

 Thank you I'll give it another try.
thanks guys
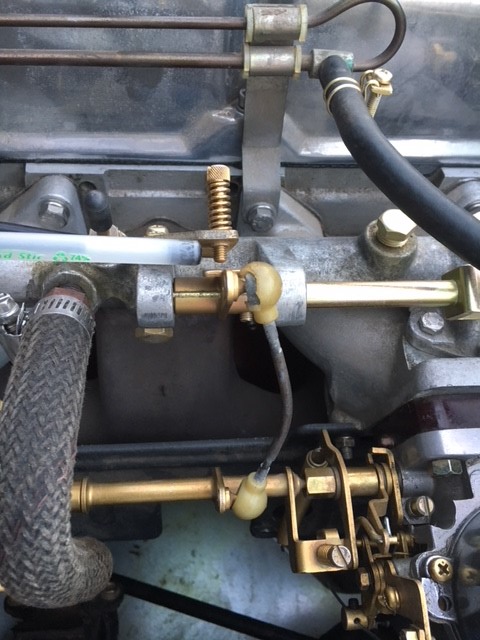
What is the hose size on the two coming off the fuel rails to each carb, and also on the inlet and outlet on the mechanical fuel pump. Thank you.
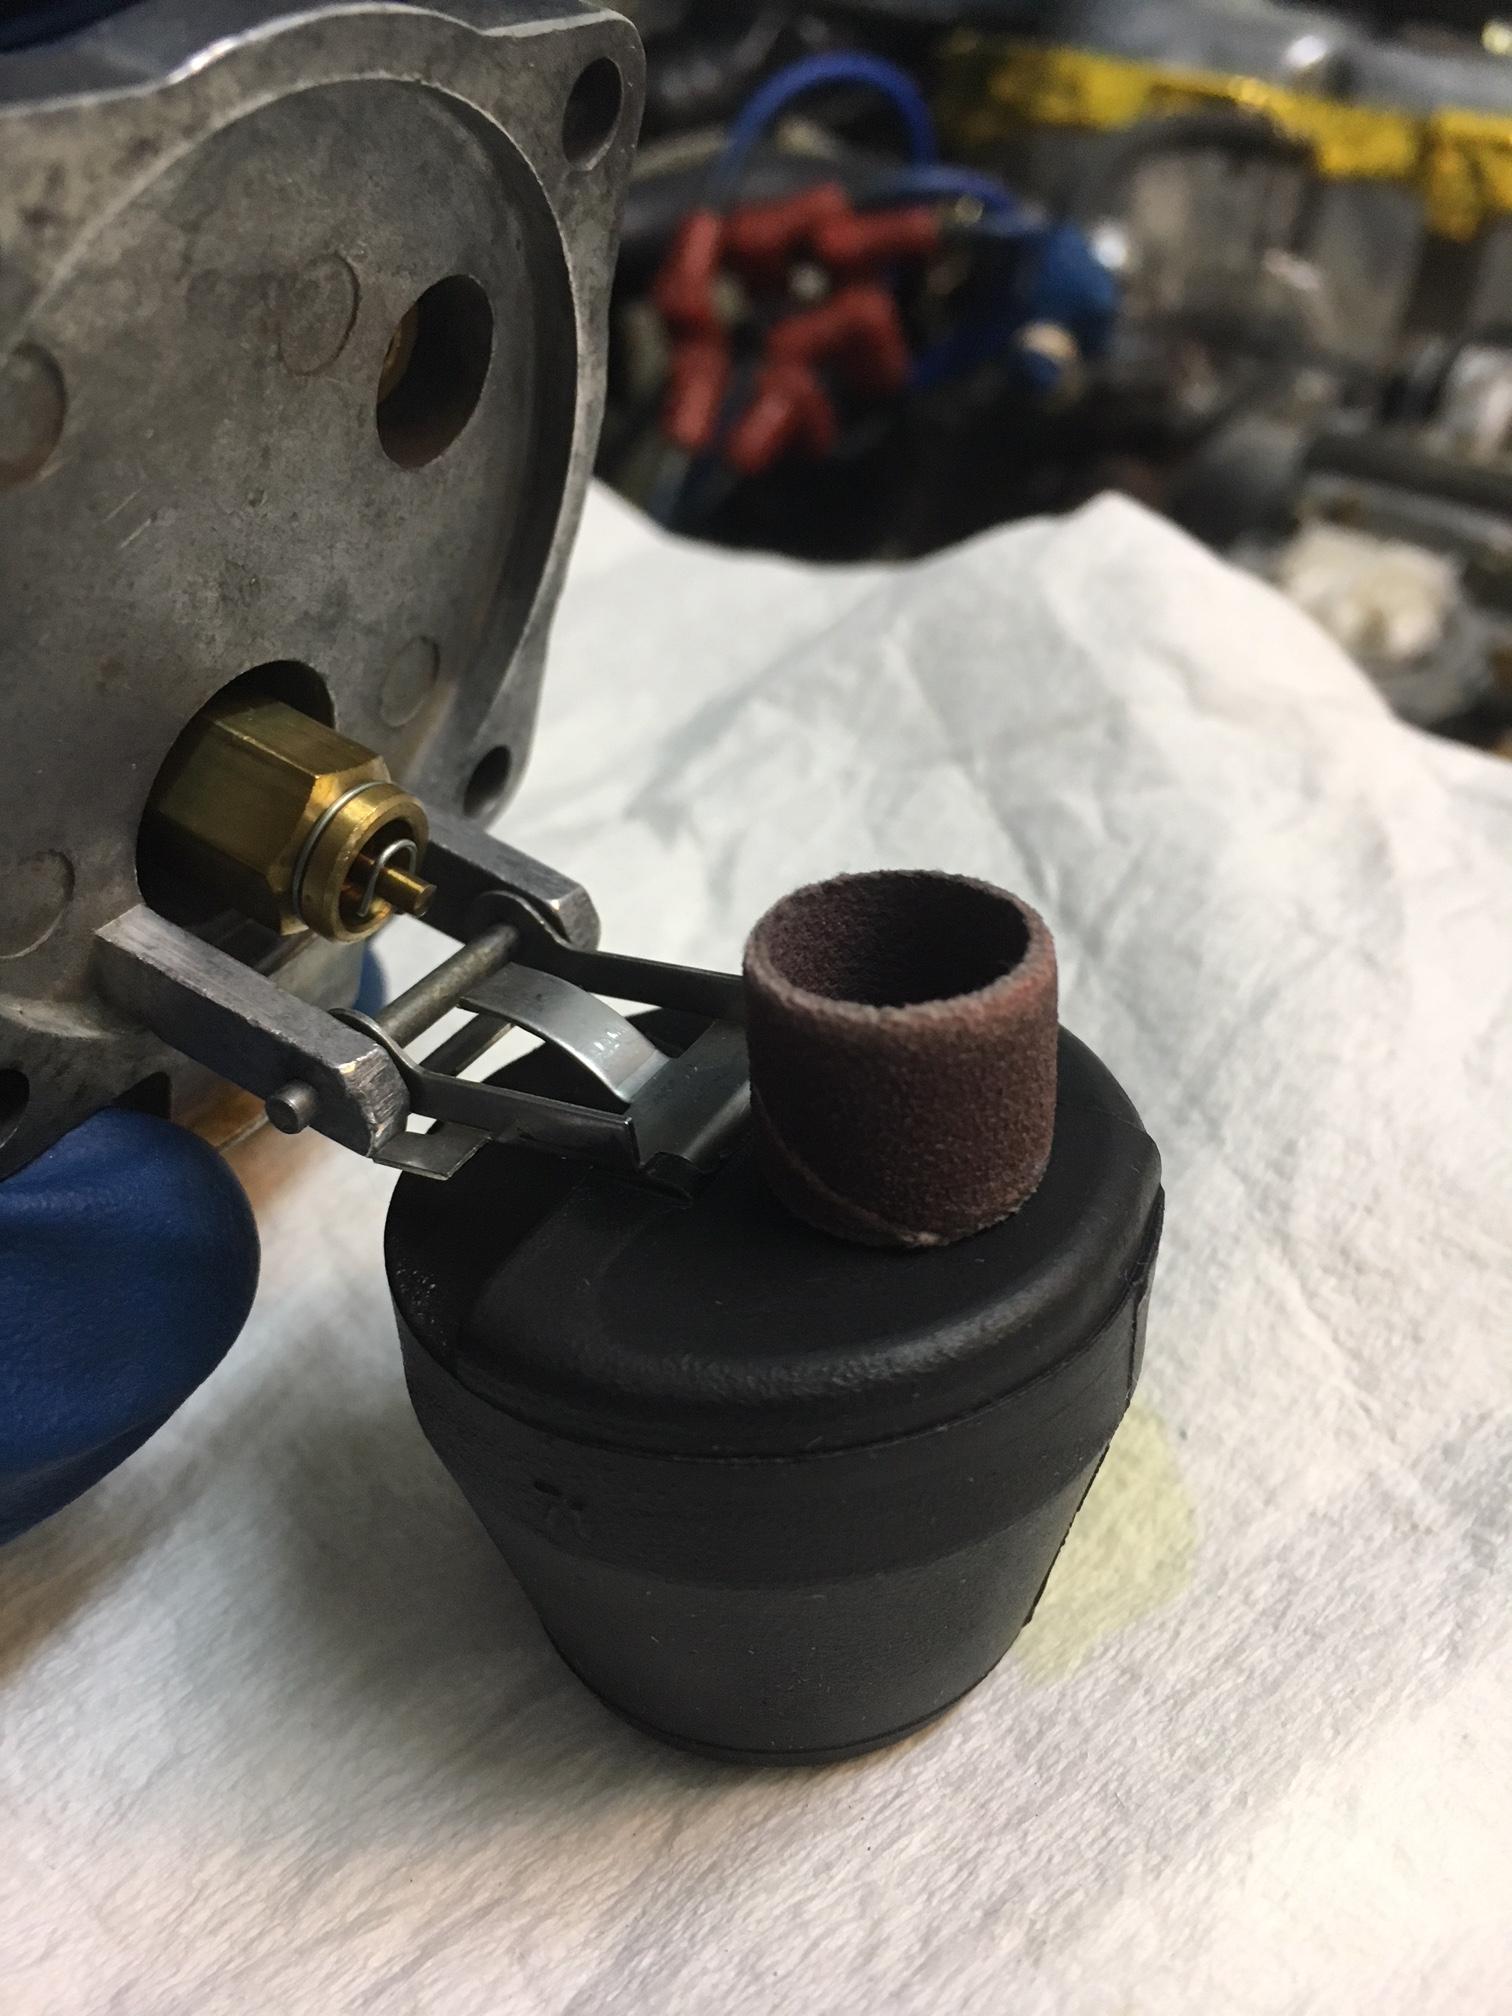
Hi: I am adjusting my floats using the method where the adjustment nut is turned down ten turns. After cranking the engine when I peer down into the hole I see that the fuel is low. If I'm correct I want to bend the tab down to allow more fuel? Additionally I haven't installed the cork gasket as I don't want to damage my new gaskets from repeated removal and install. How will the gasket (once installed) affect the fuel level? Will it go slightly higher or lower? My guess is that is will raise the lid and increase the fuel level? Thank you.
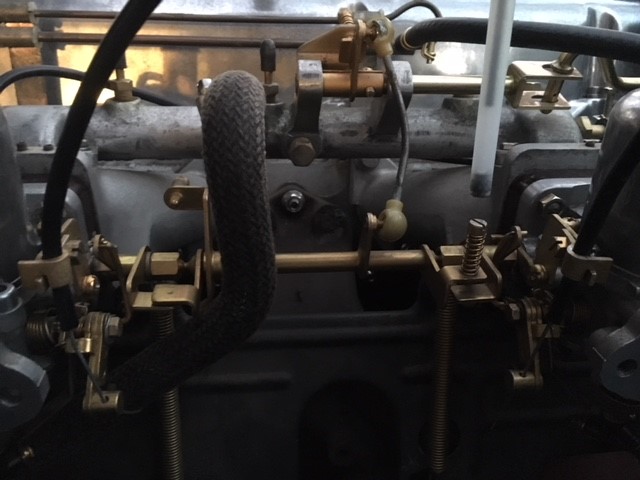
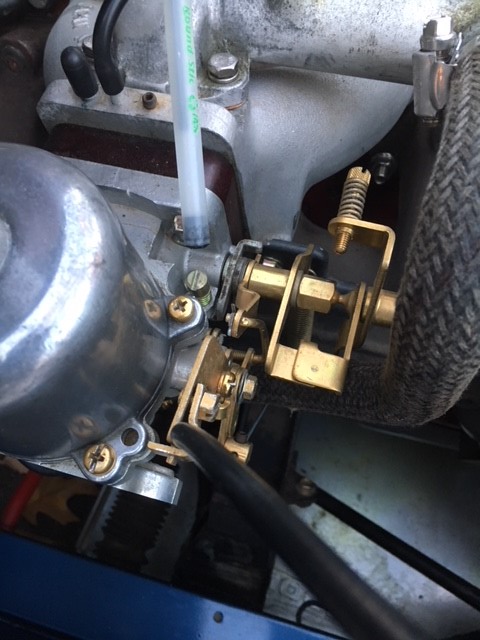
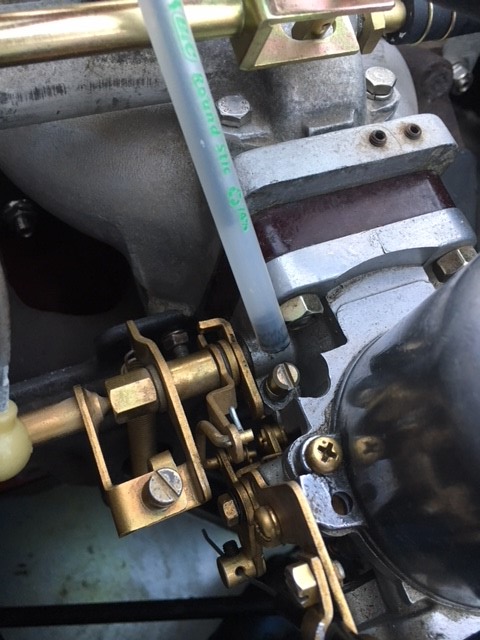
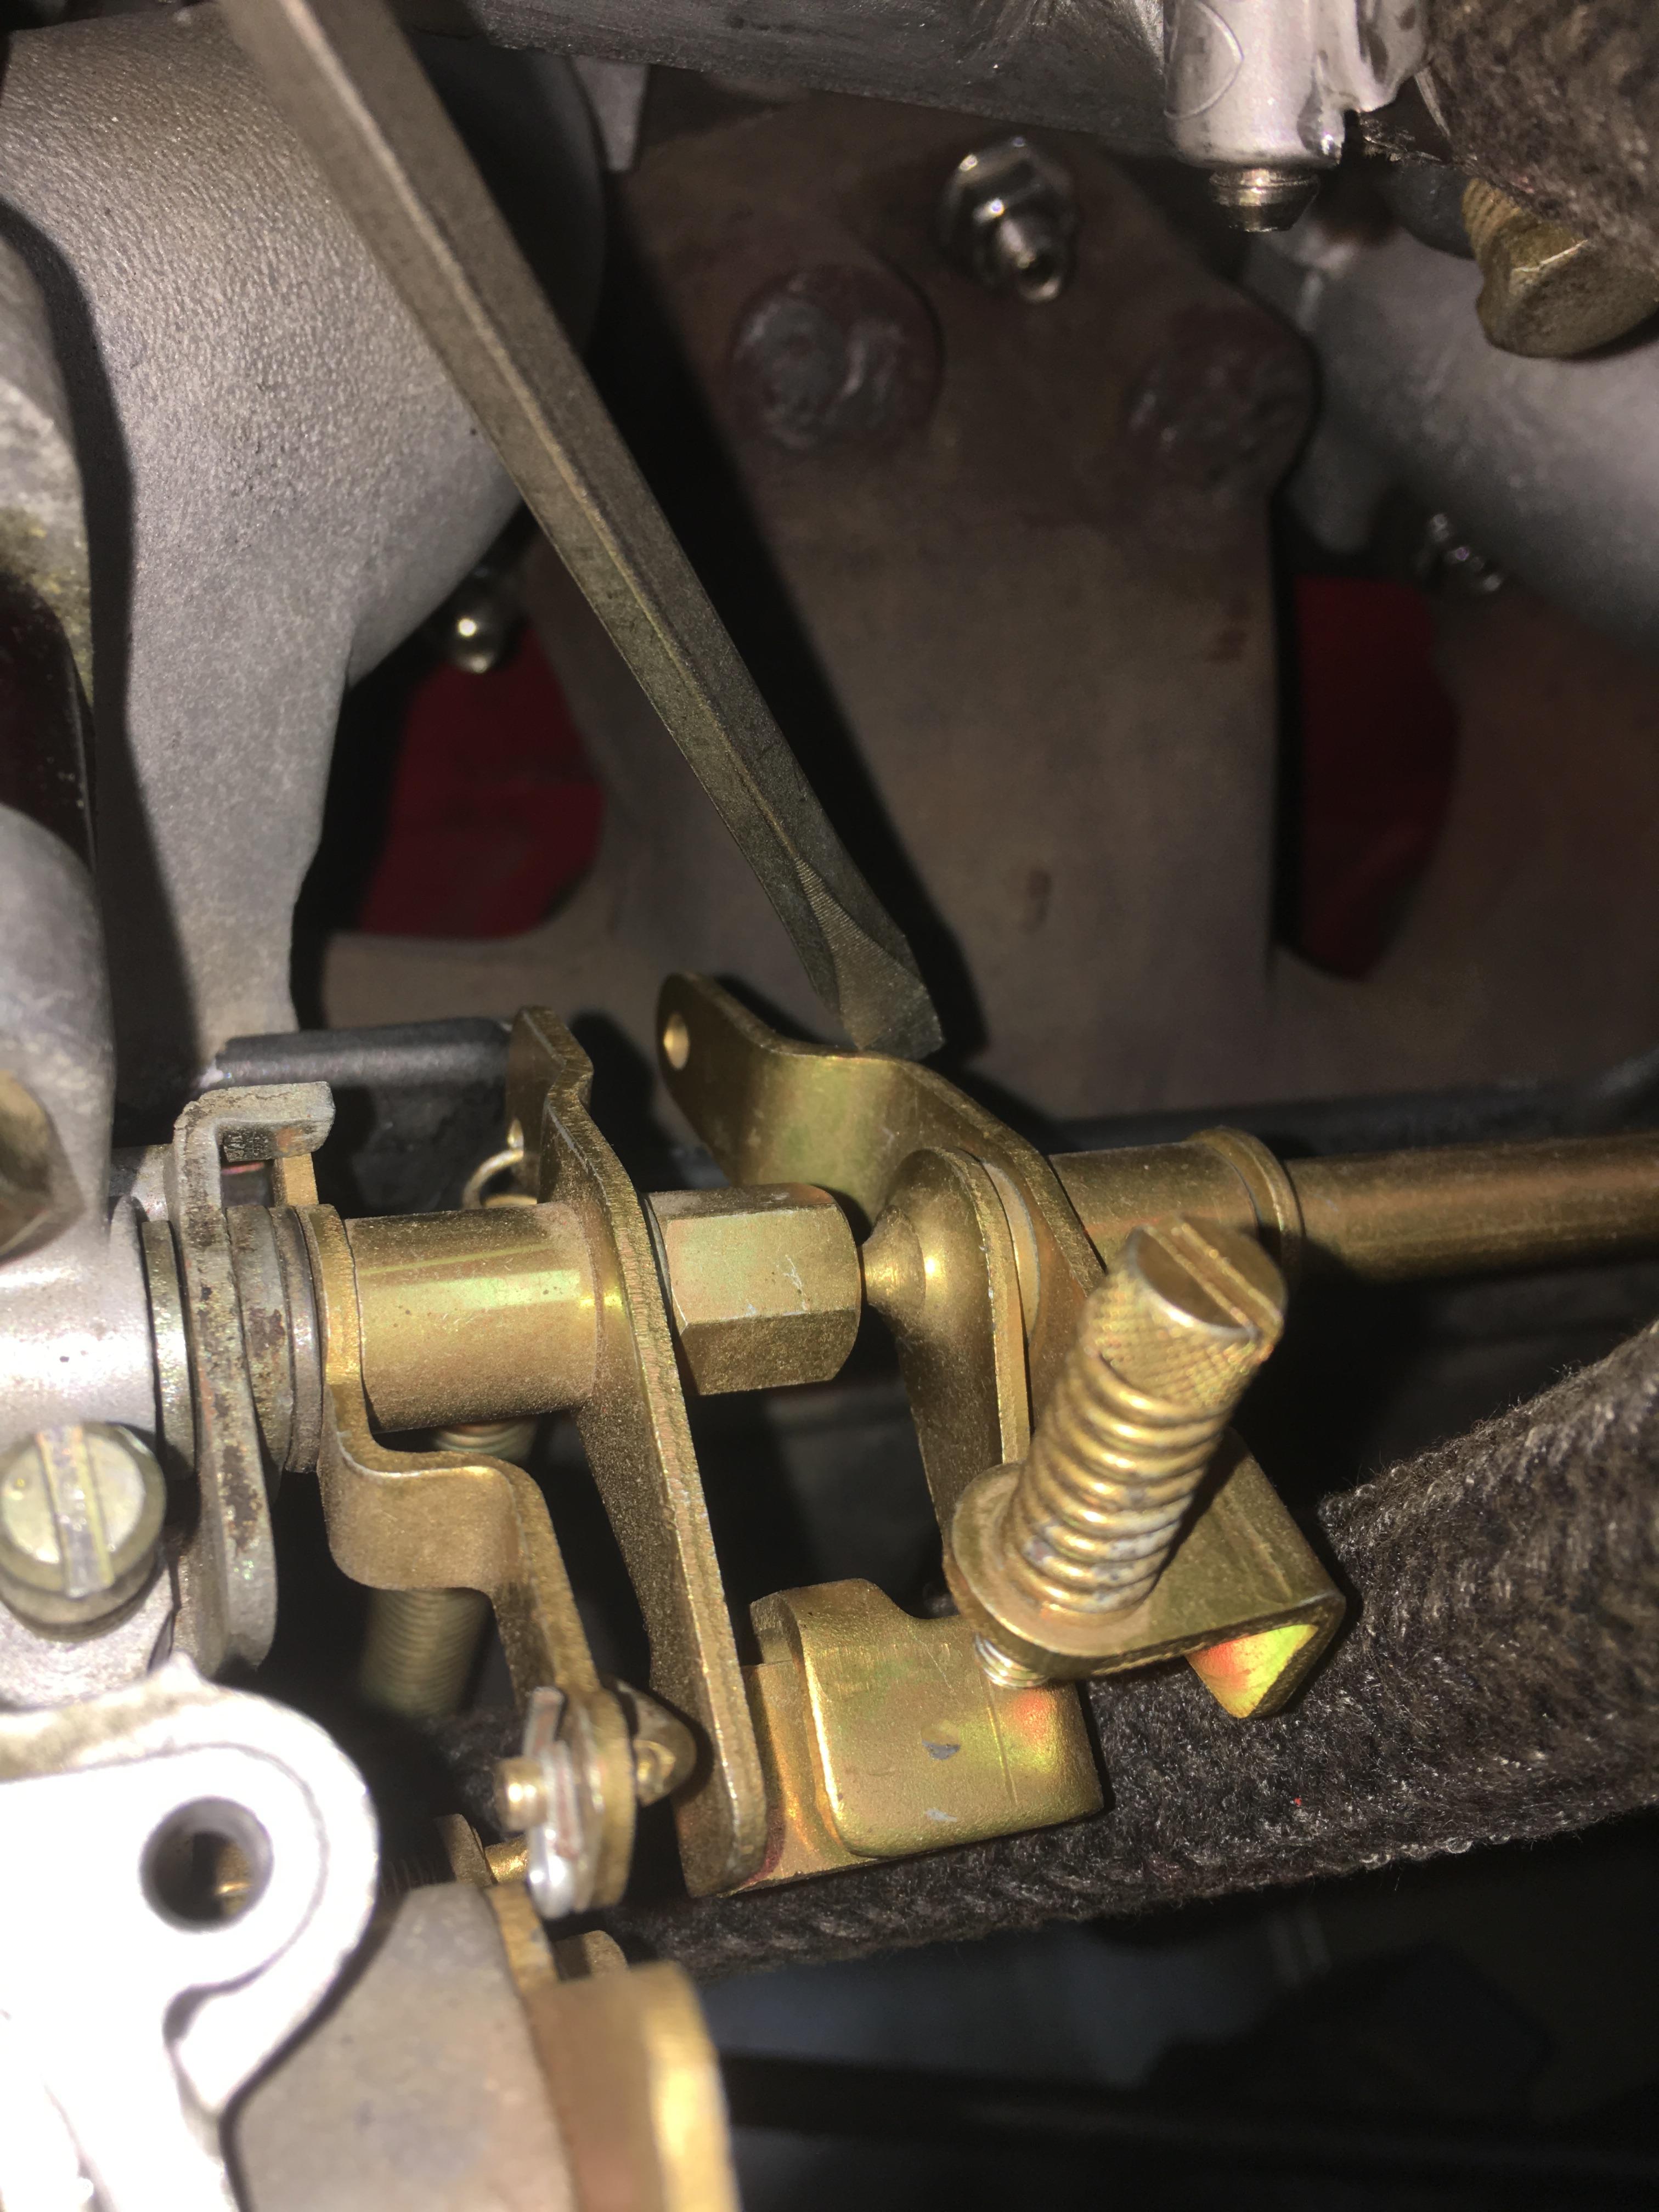
Hi: I'm reading the carb tuning how-to's on this site and I realize I may be turning the wrong screws and going around in circles. My setup does not have any emissions from (#1 to #6 and #13) in the diagram, so I have four screws I may adjust #8, two #10's and #14 (excluding the mixture nuts but I understand how they work). Adjust idle fuel and balance: I don't know what the screw at #8 is called but I'm supposed to disconnect the ball and socket there or back off the screw? Then I use the individual screws at #10 to balance air flow and by disabling front/rear. Should #14 be backed off the tab? Off-Idle Fuel and Balance: Turn the fast idle screw to 3,000 rpm. Is this the screw at #14? When at 3,000 rpm do I use the #10 screws to balance and by disabling front/rear? Any help is appreciated. Thank you. Howard 1974 260z
Thank you I'll give it another try.
thanks guys
What is the hose size on the two coming off the fuel rails to each carb, and also on the inlet and outlet on the mechanical fuel pump. Thank you.
Hi: I am adjusting my floats using the method where the adjustment nut is turned down ten turns. After cranking the engine when I peer down into the hole I see that the fuel is low. If I'm correct I want to bend the tab down to allow more fuel? Additionally I haven't installed the cork gasket as I don't want to damage my new gaskets from repeated removal and install. How will the gasket (once installed) affect the fuel level? Will it go slightly higher or lower? My guess is that is will raise the lid and increase the fuel level? Thank you.
Hi: I'm reading the carb tuning how-to's on this site and I realize I may be turning the wrong screws and going around in circles. My setup does not have any emissions from (#1 to #6 and #13) in the diagram, so I have four screws I may adjust #8, two #10's and #14 (excluding the mixture nuts but I understand how they work). Adjust idle fuel and balance: I don't know what the screw at #8 is called but I'm supposed to disconnect the ball and socket there or back off the screw? Then I use the individual screws at #10 to balance air flow and by disabling front/rear. Should #14 be backed off the tab? Off-Idle Fuel and Balance: Turn the fast idle screw to 3,000 rpm. Is this the screw at #14? When at 3,000 rpm do I use the #10 screws to balance and by disabling front/rear? Any help is appreciated. Thank you. Howard 1974 260z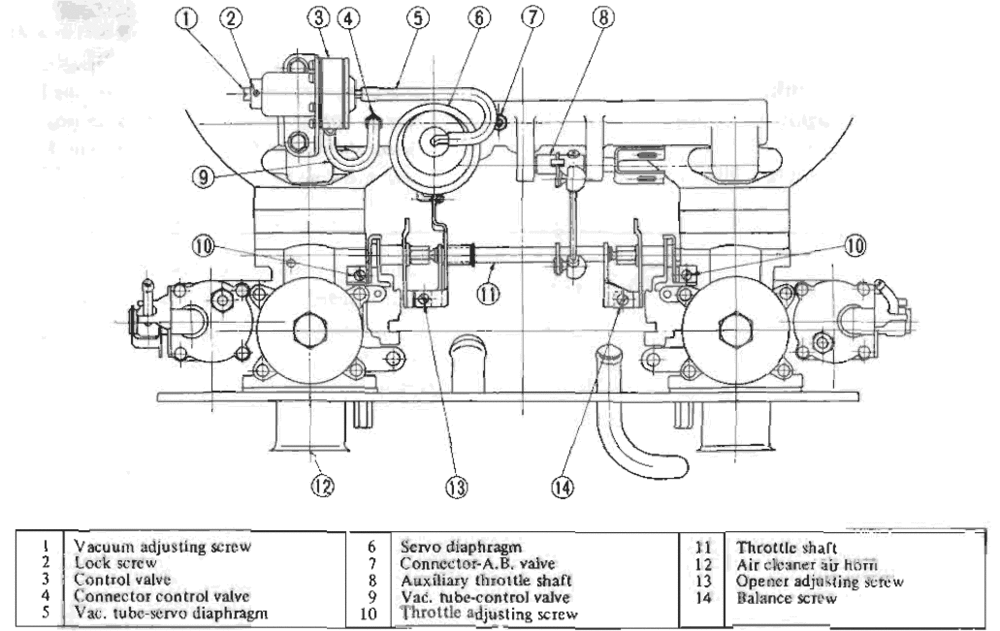
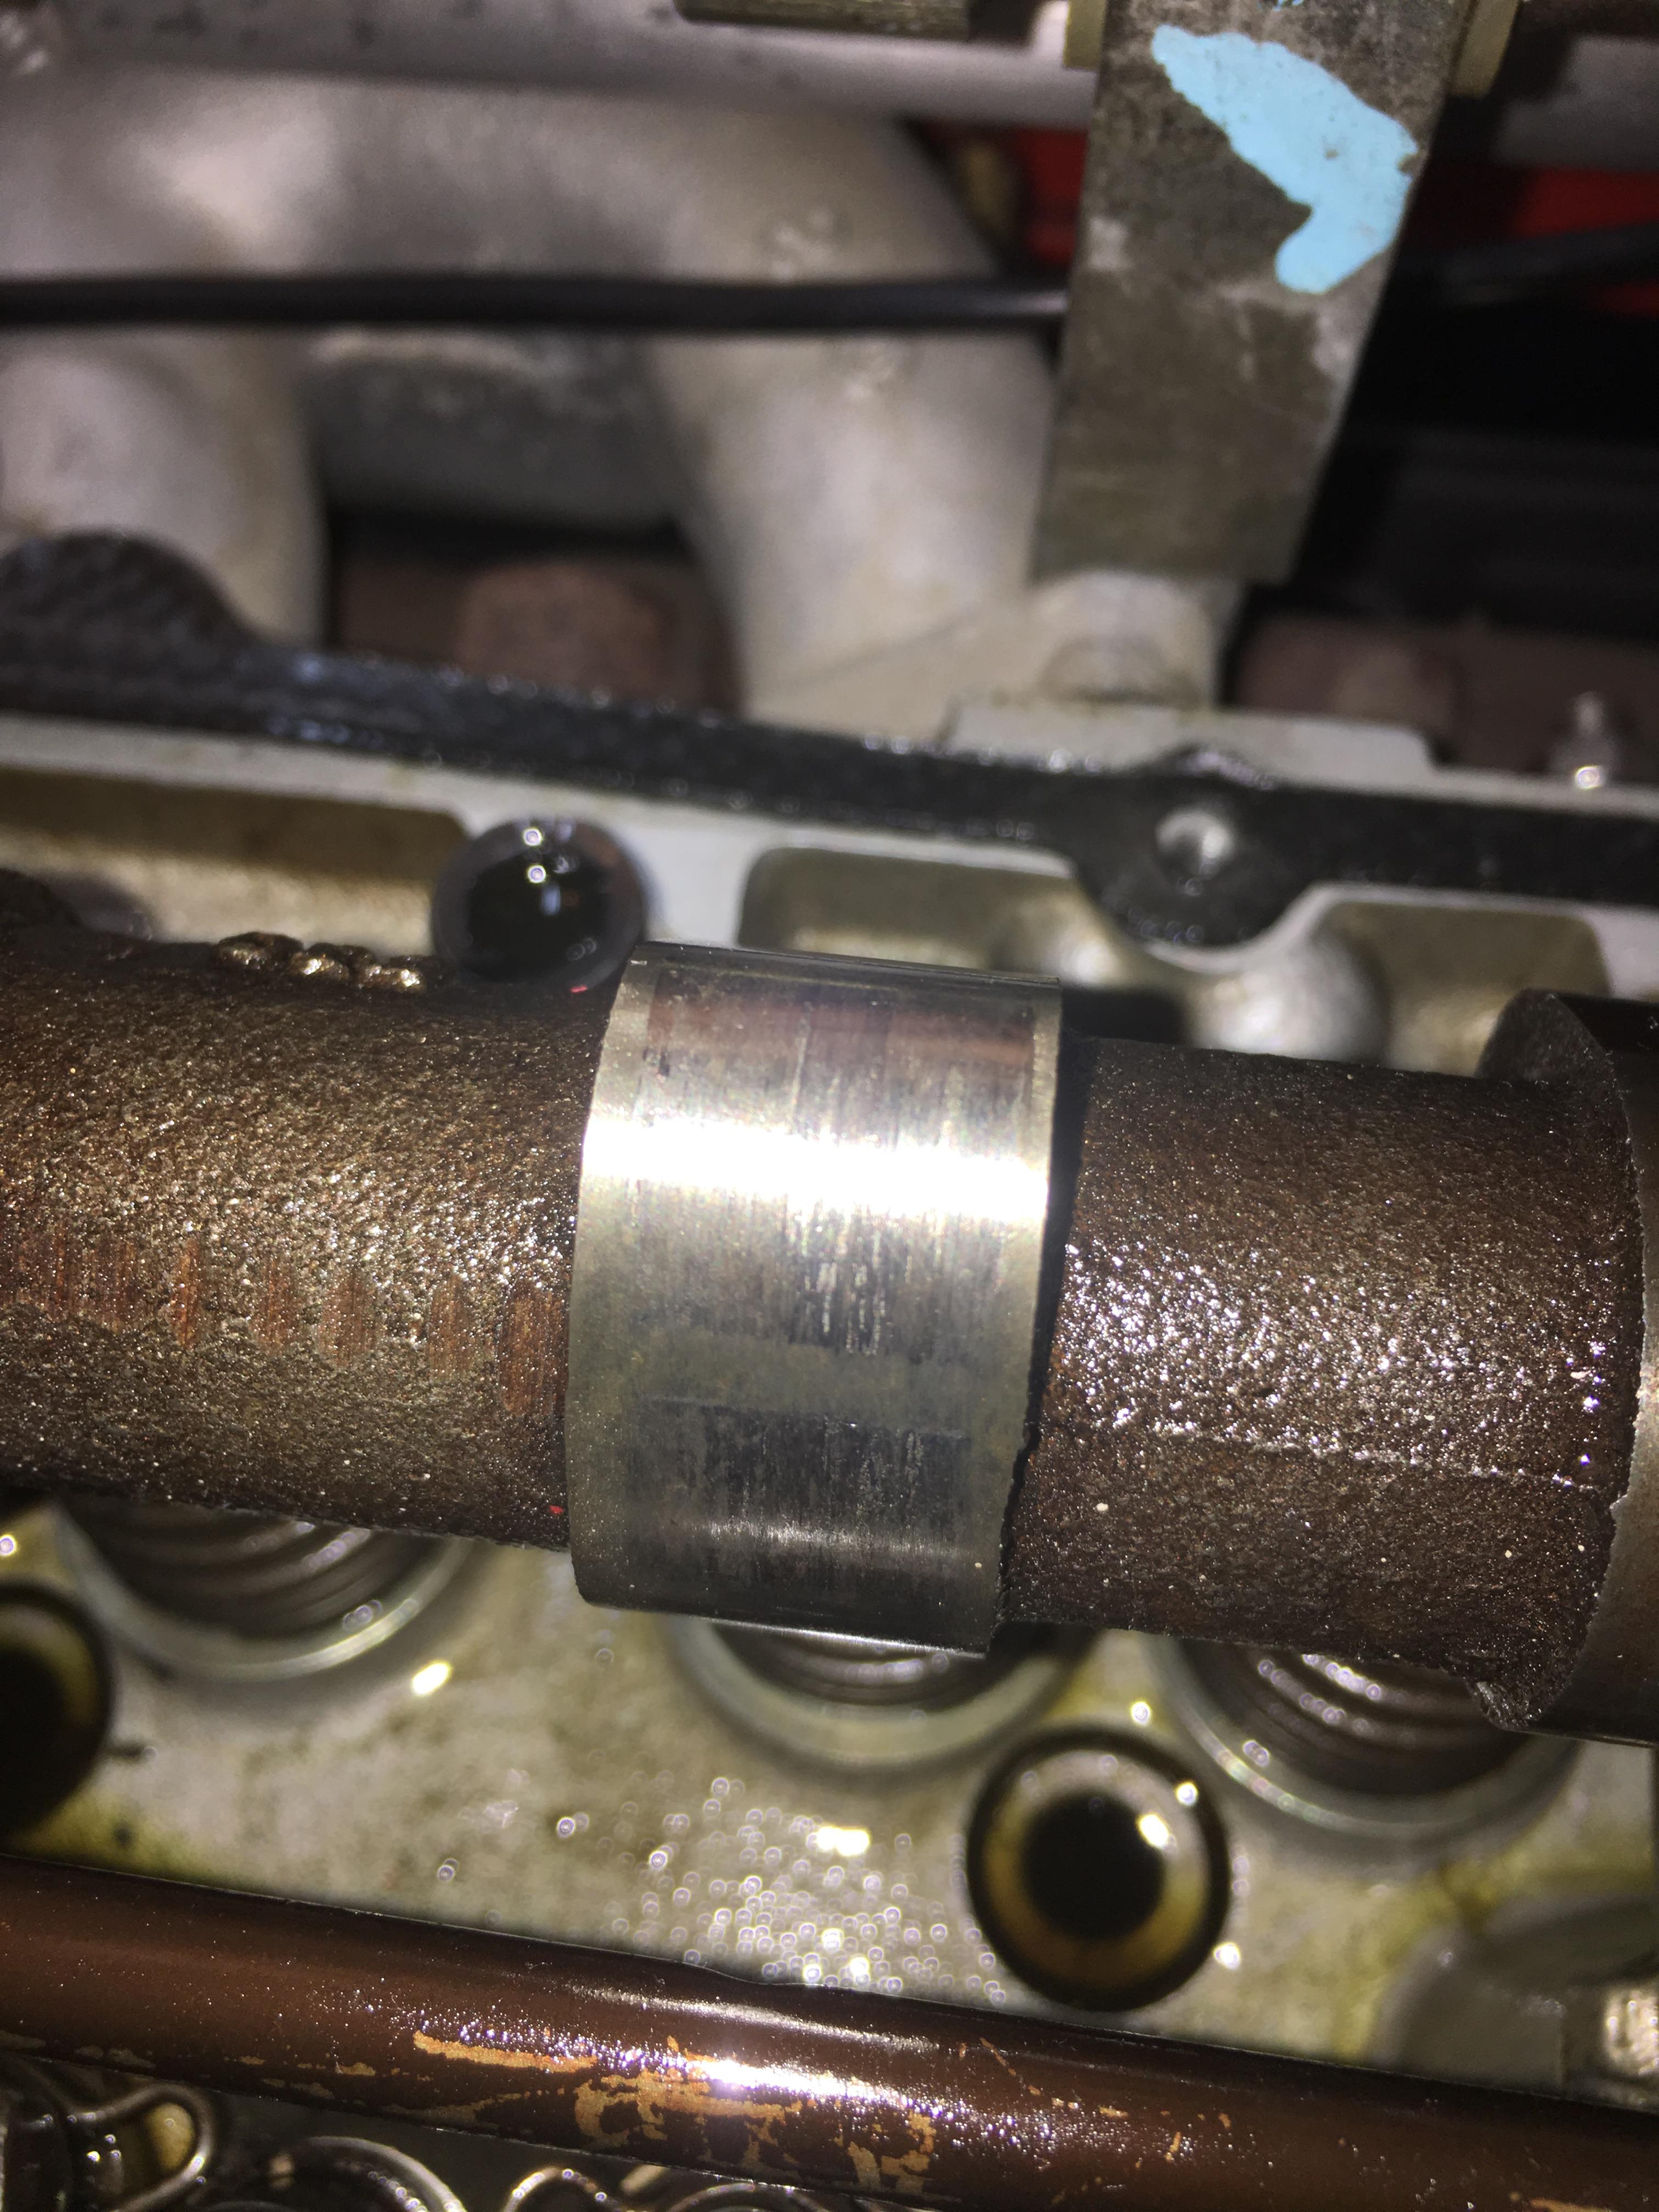
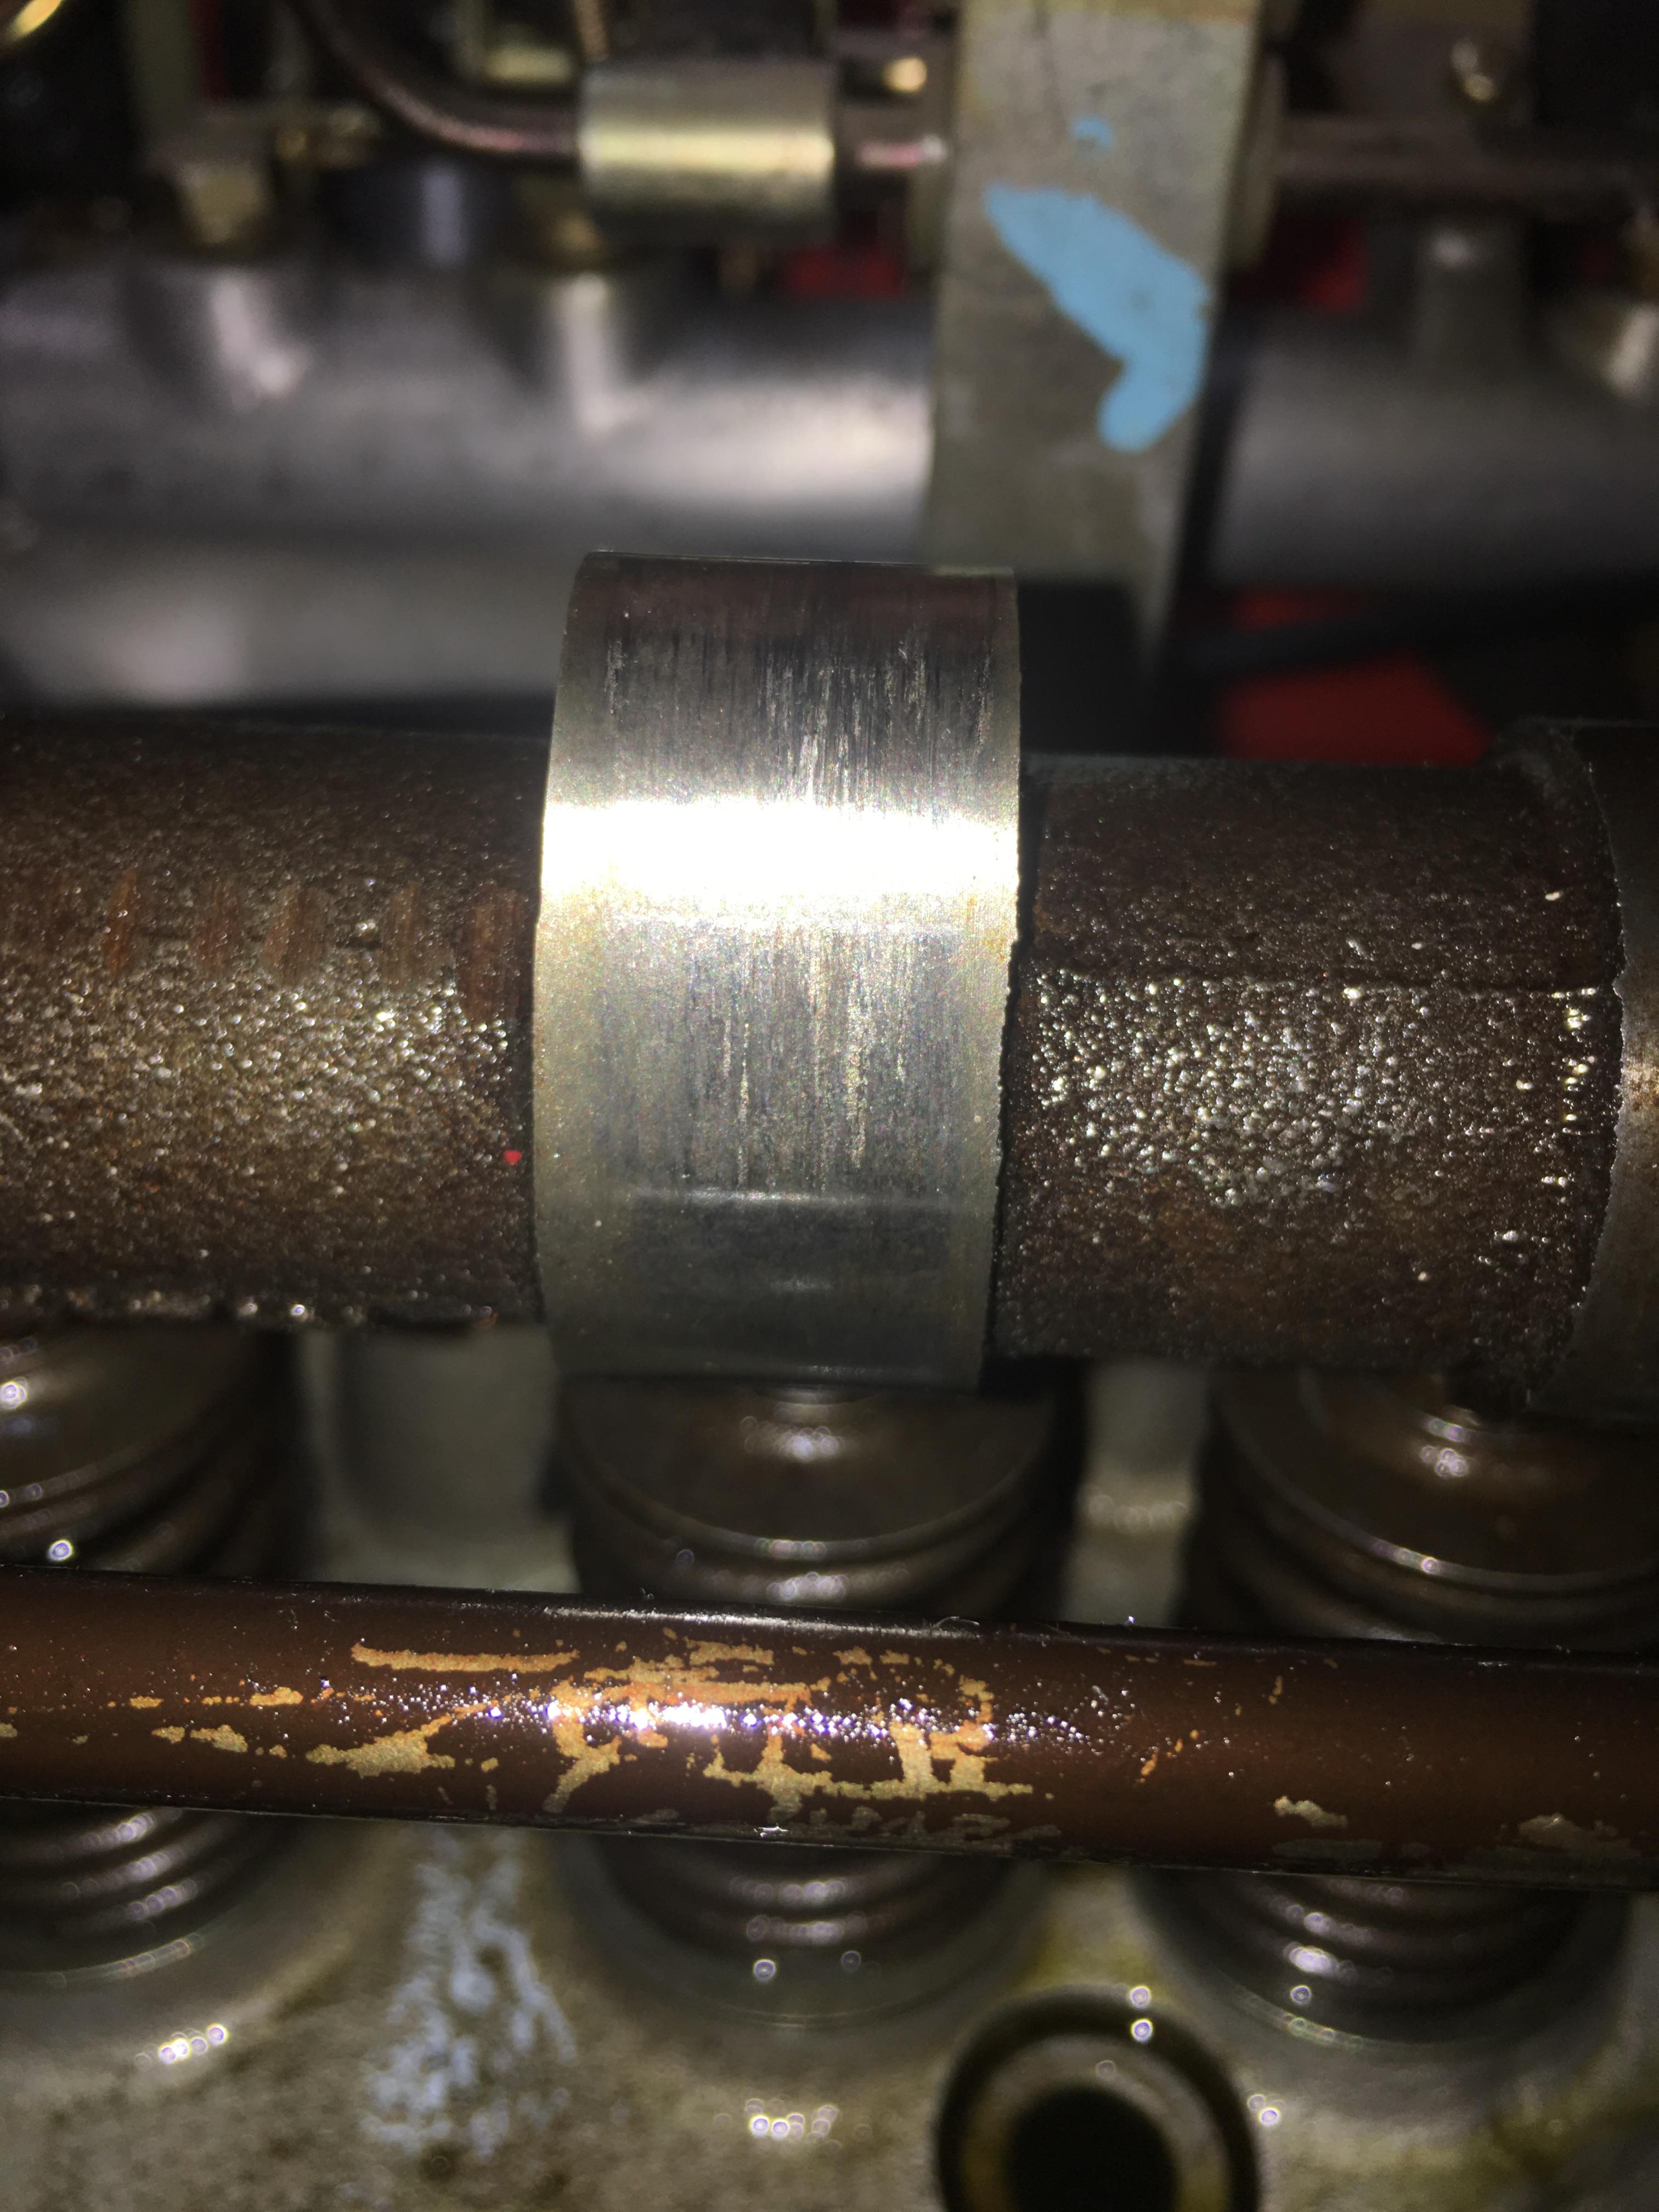
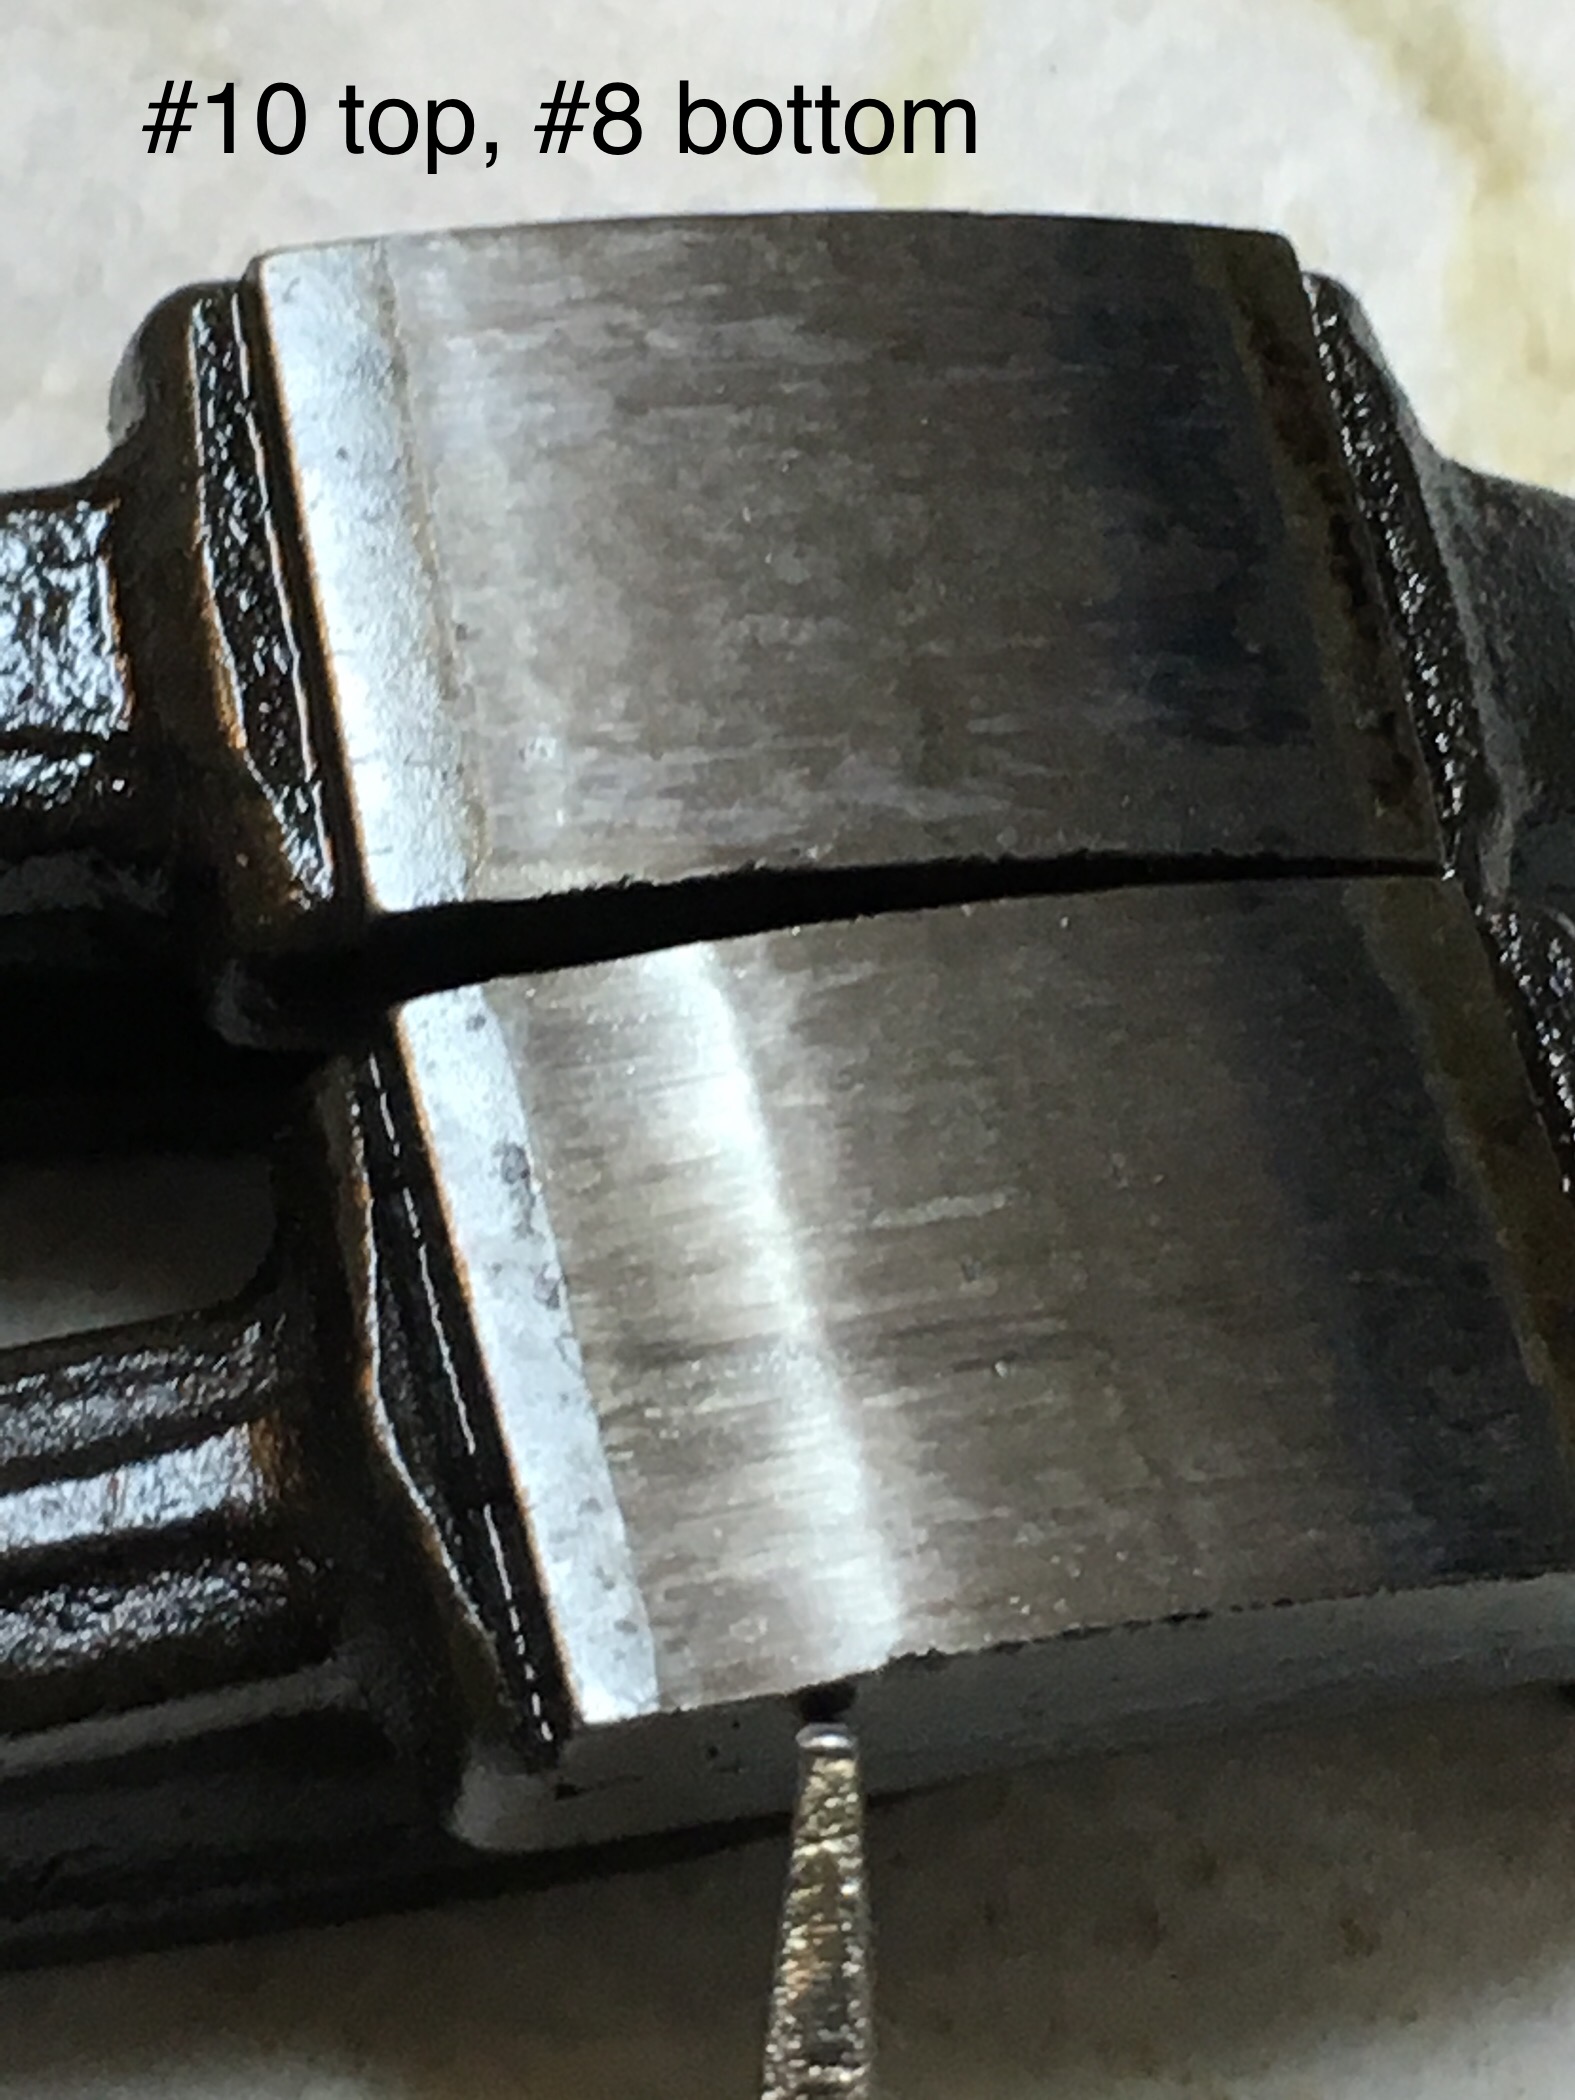
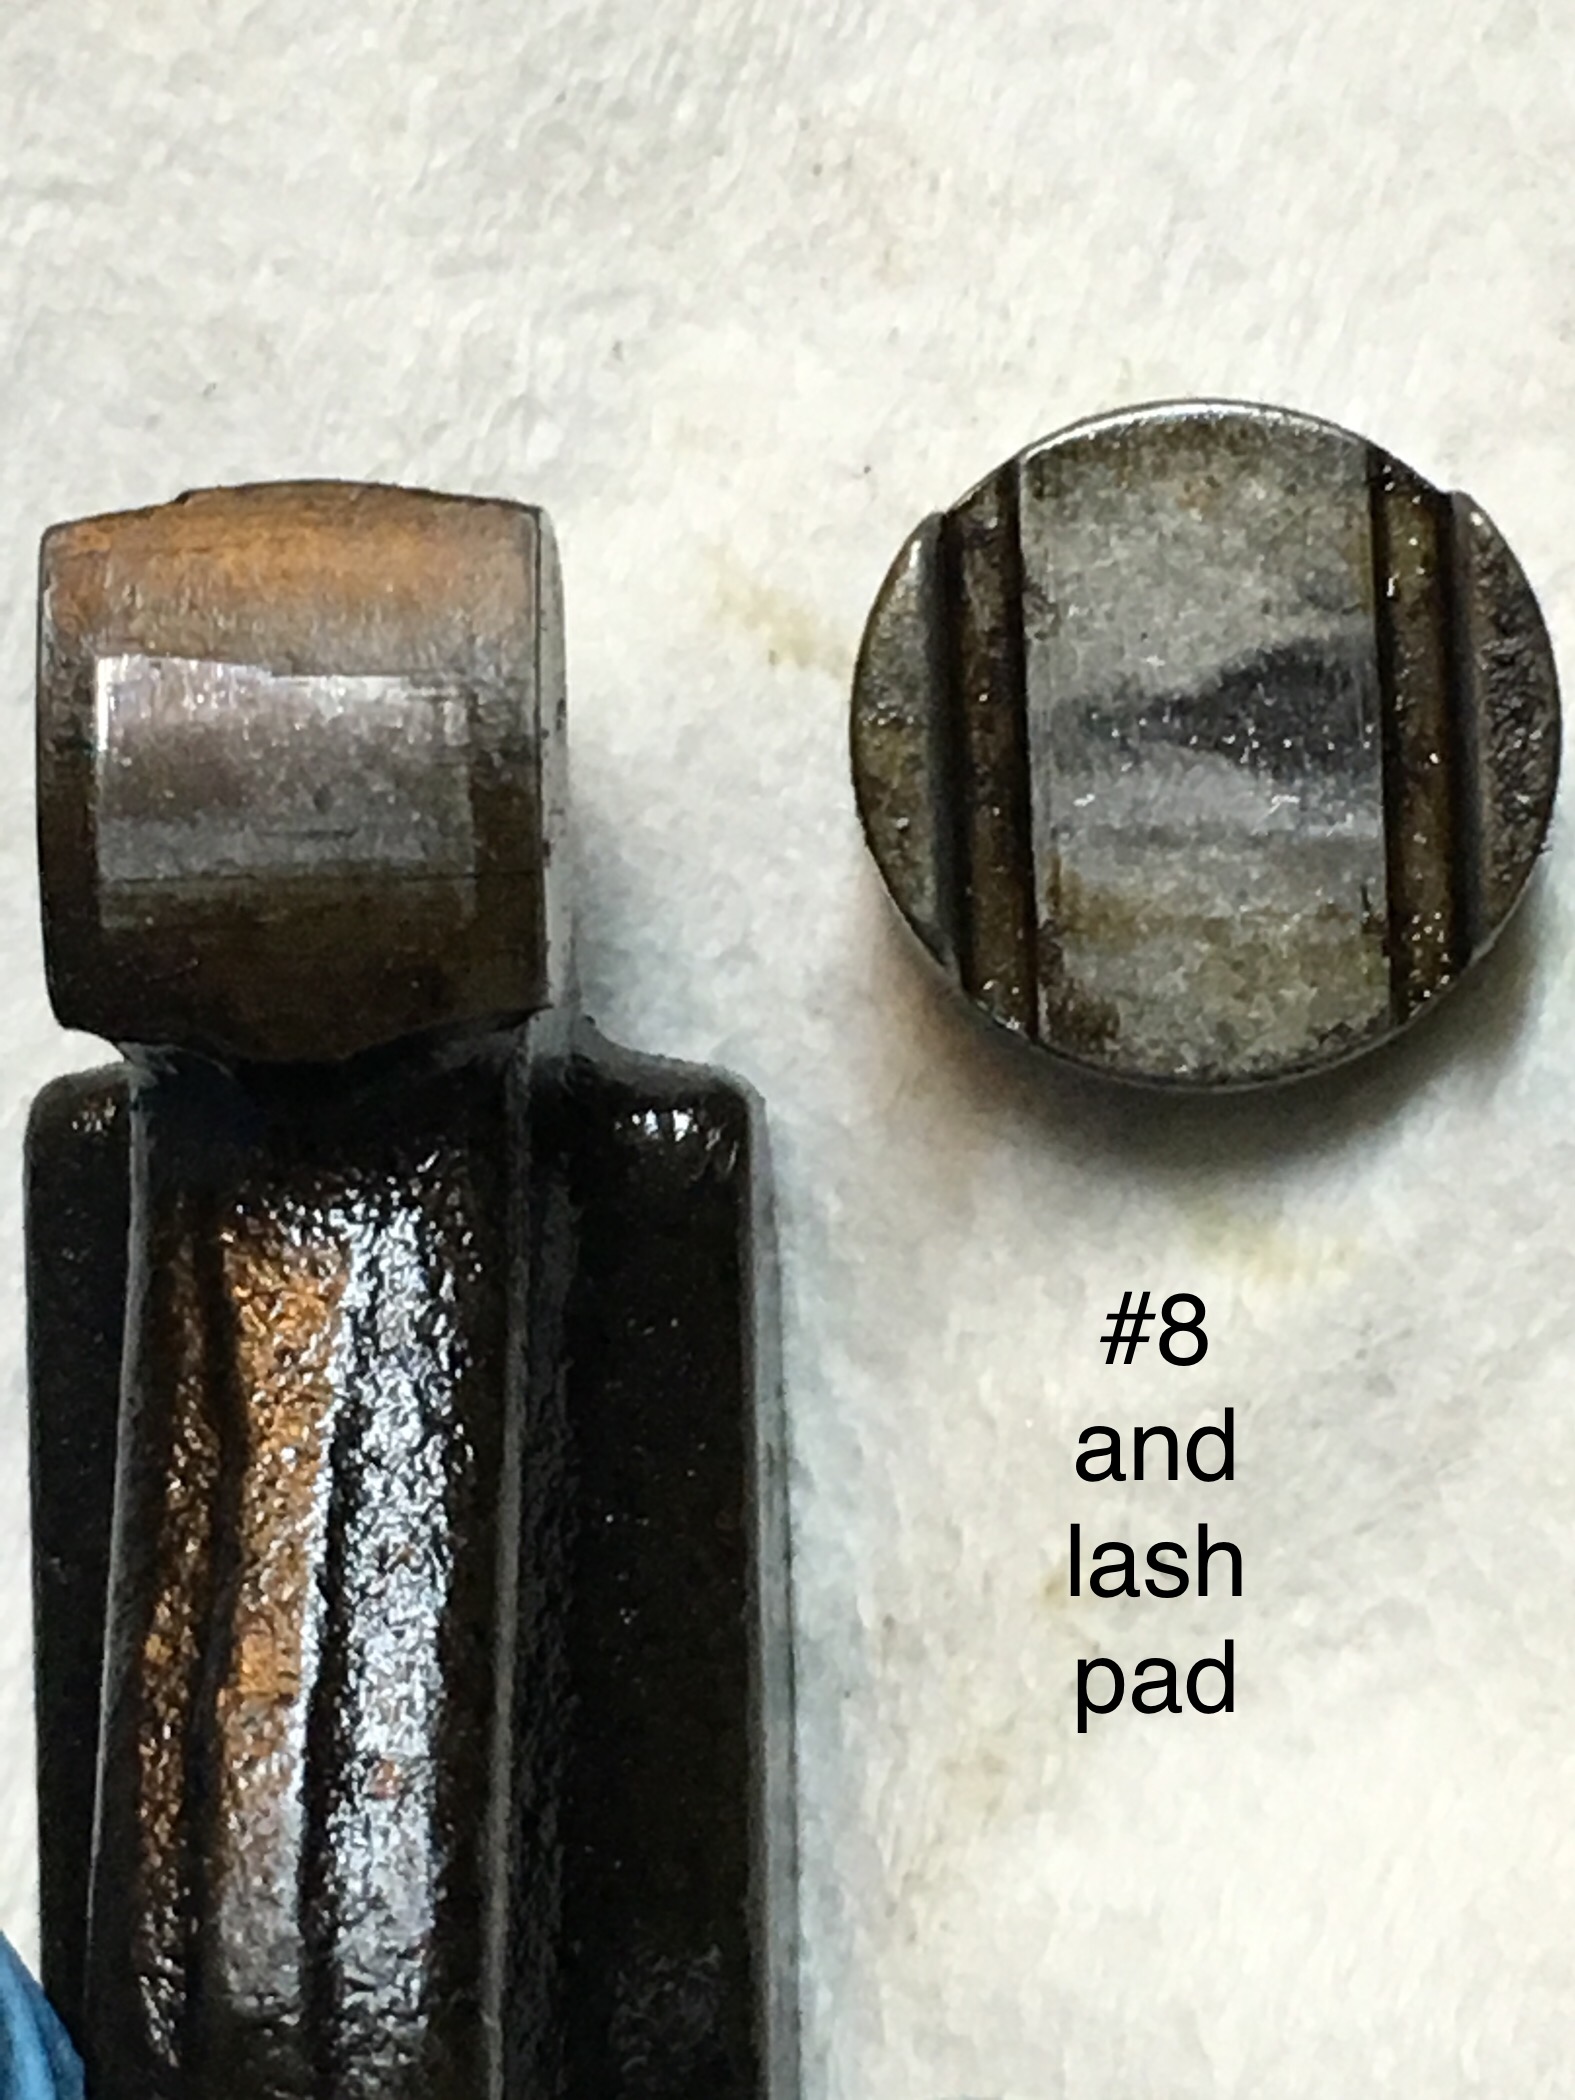
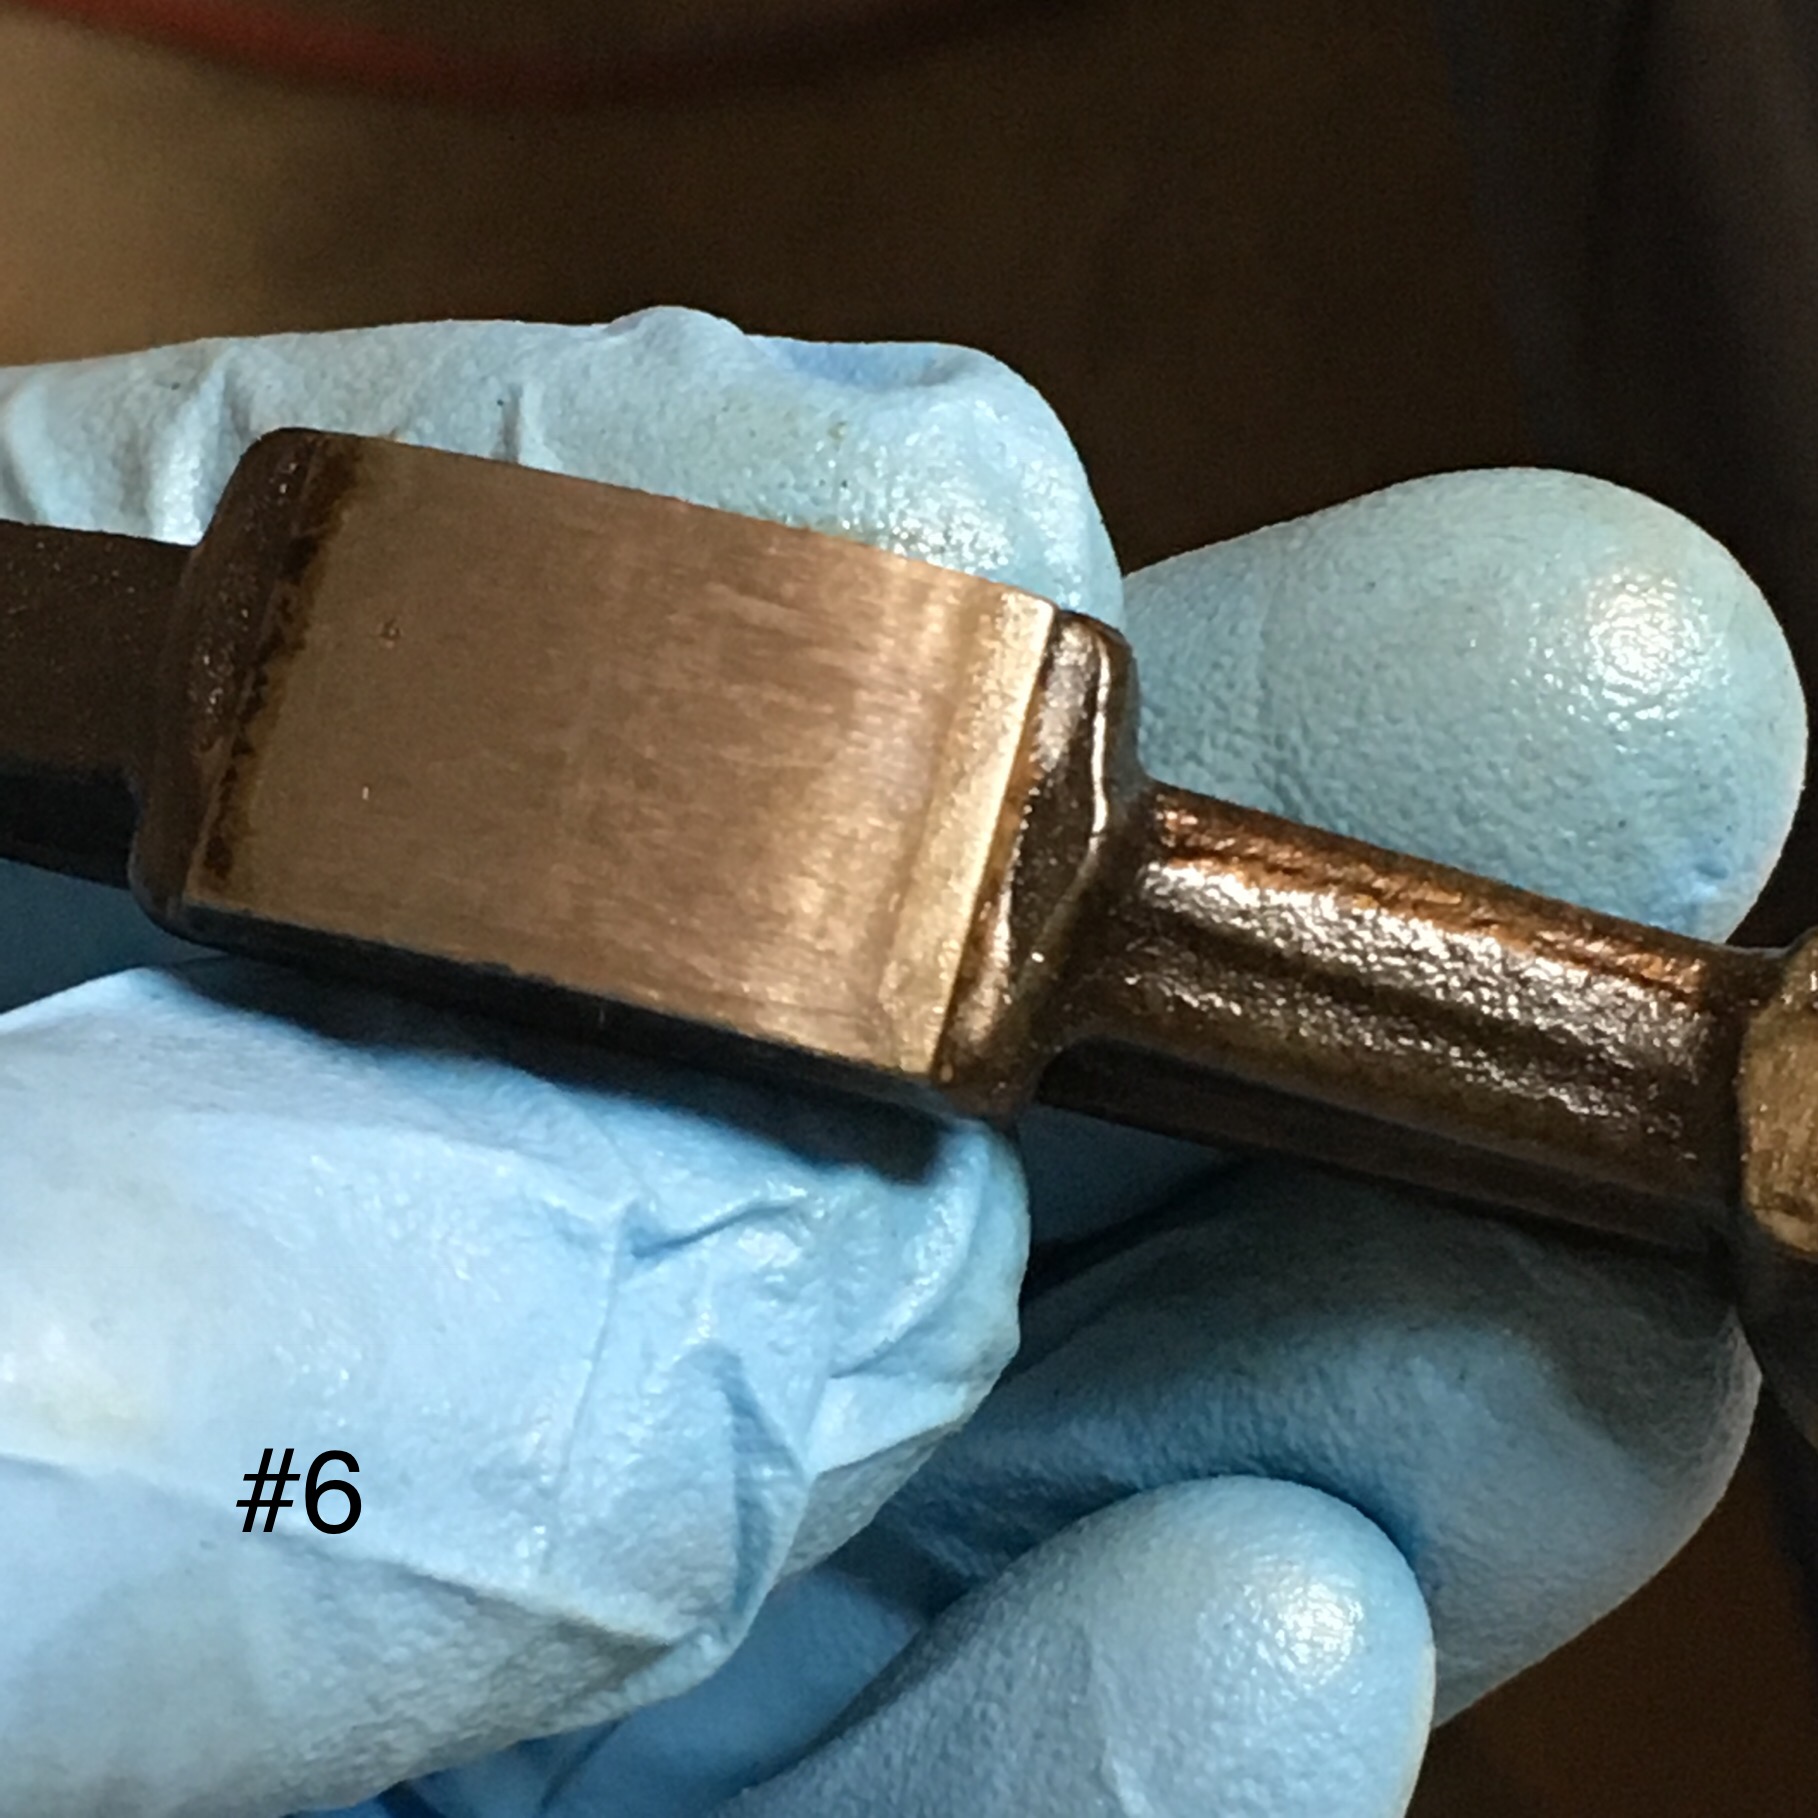
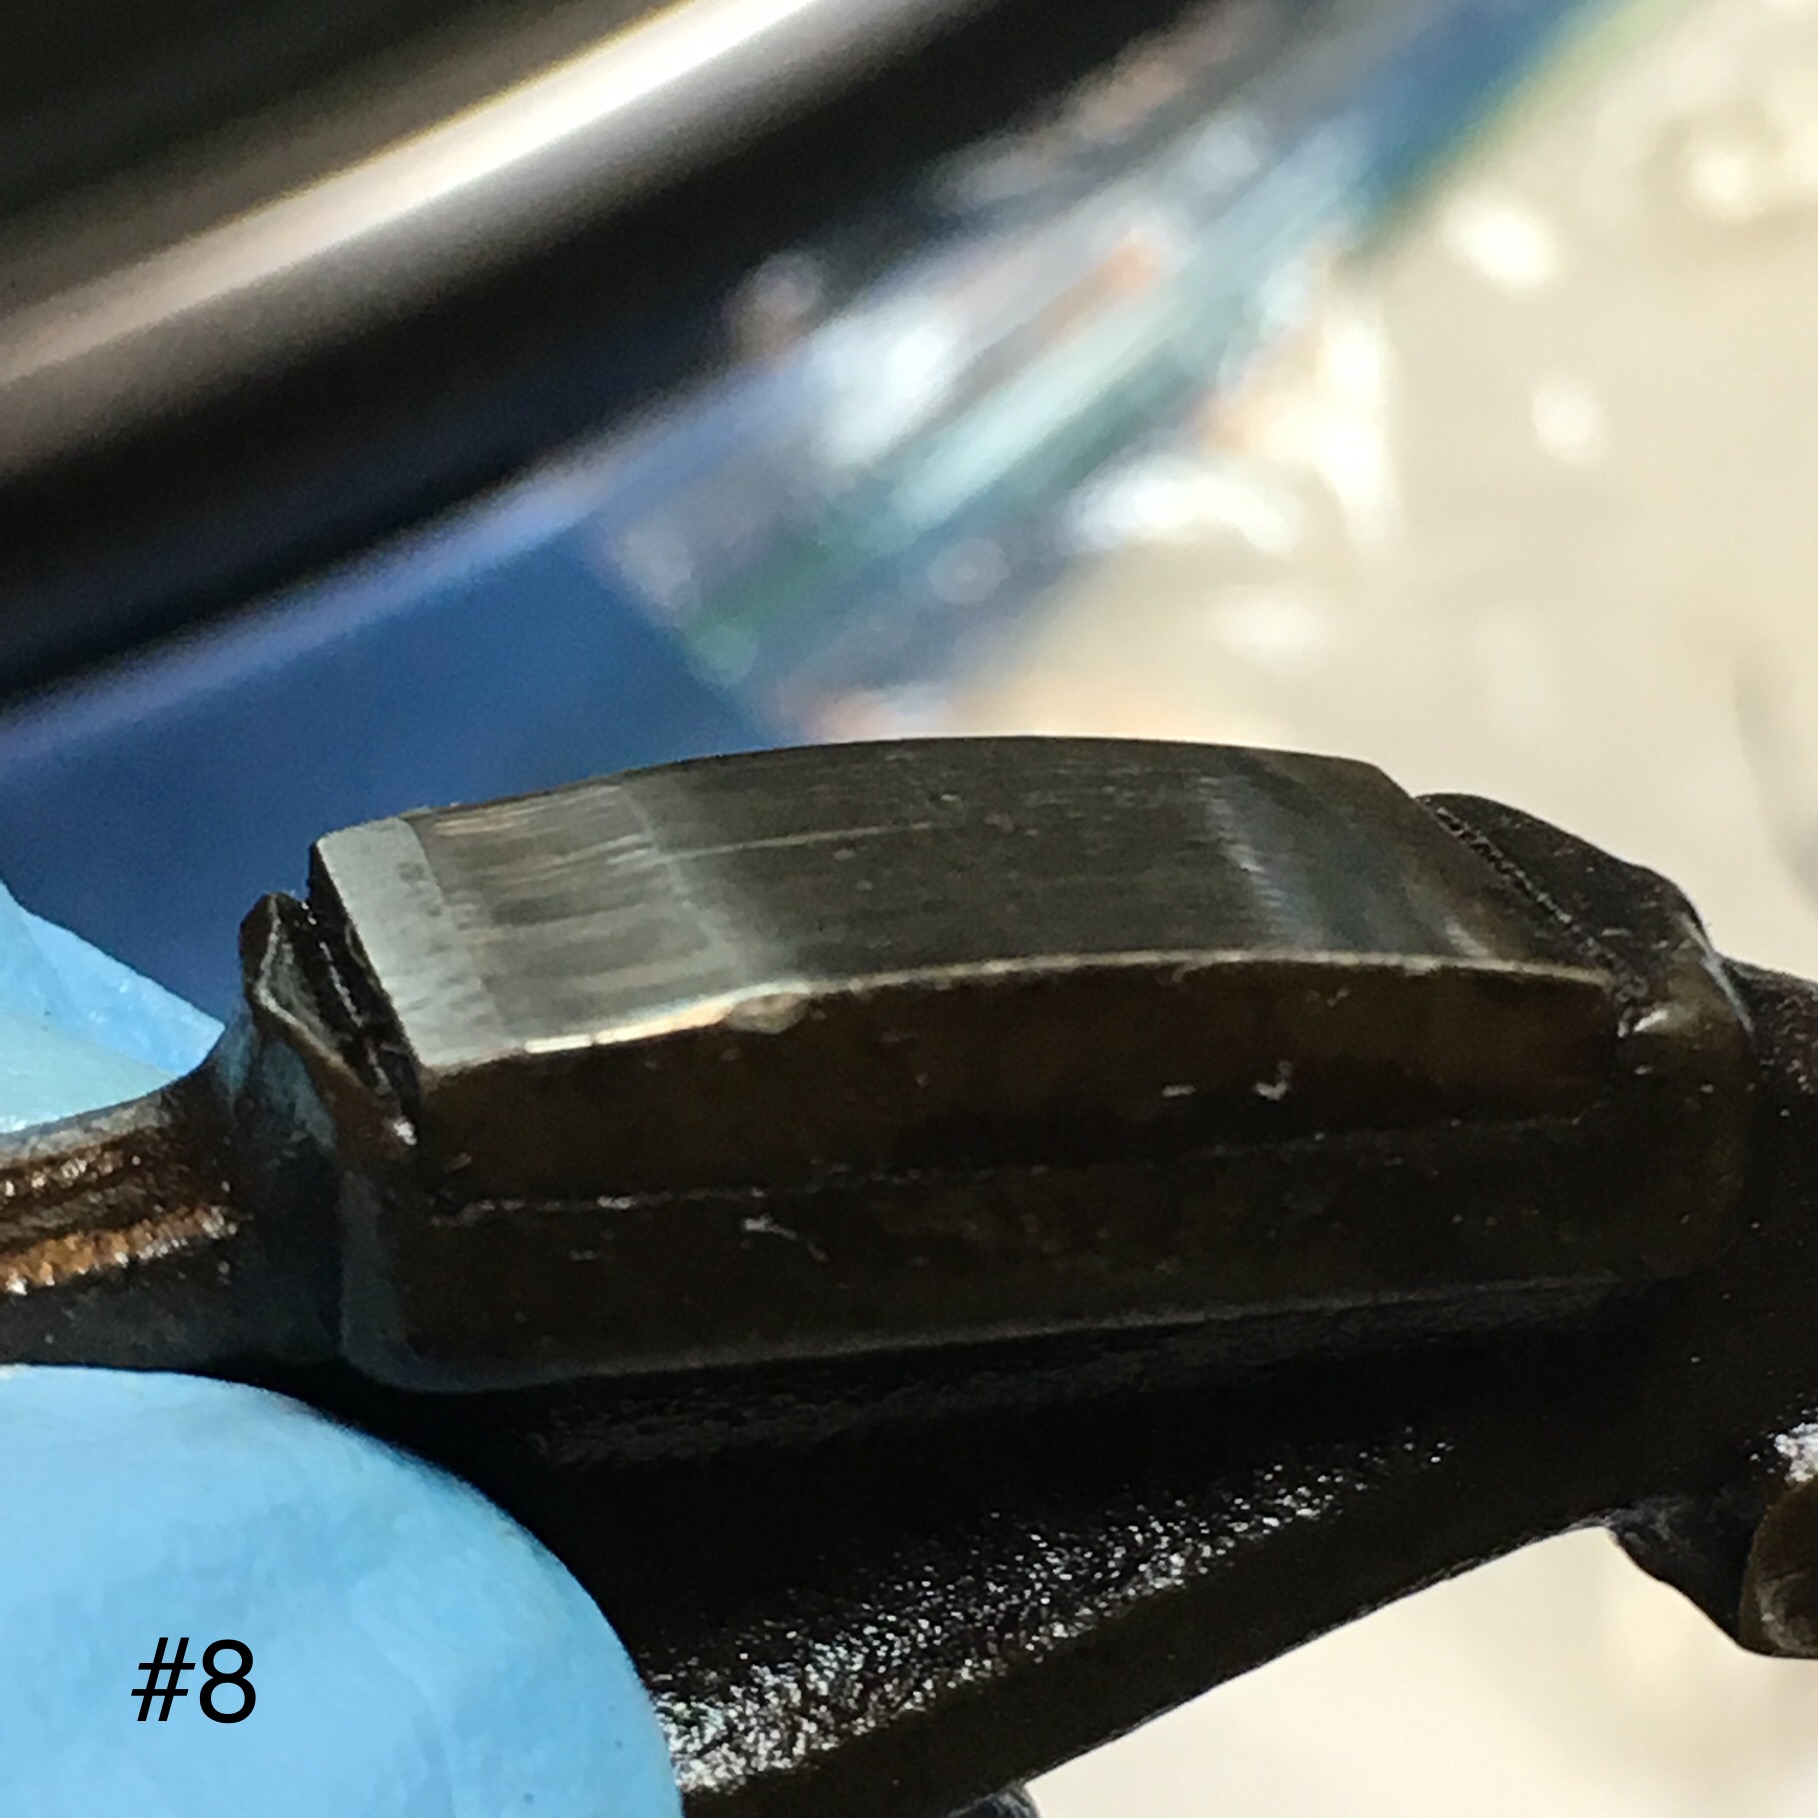
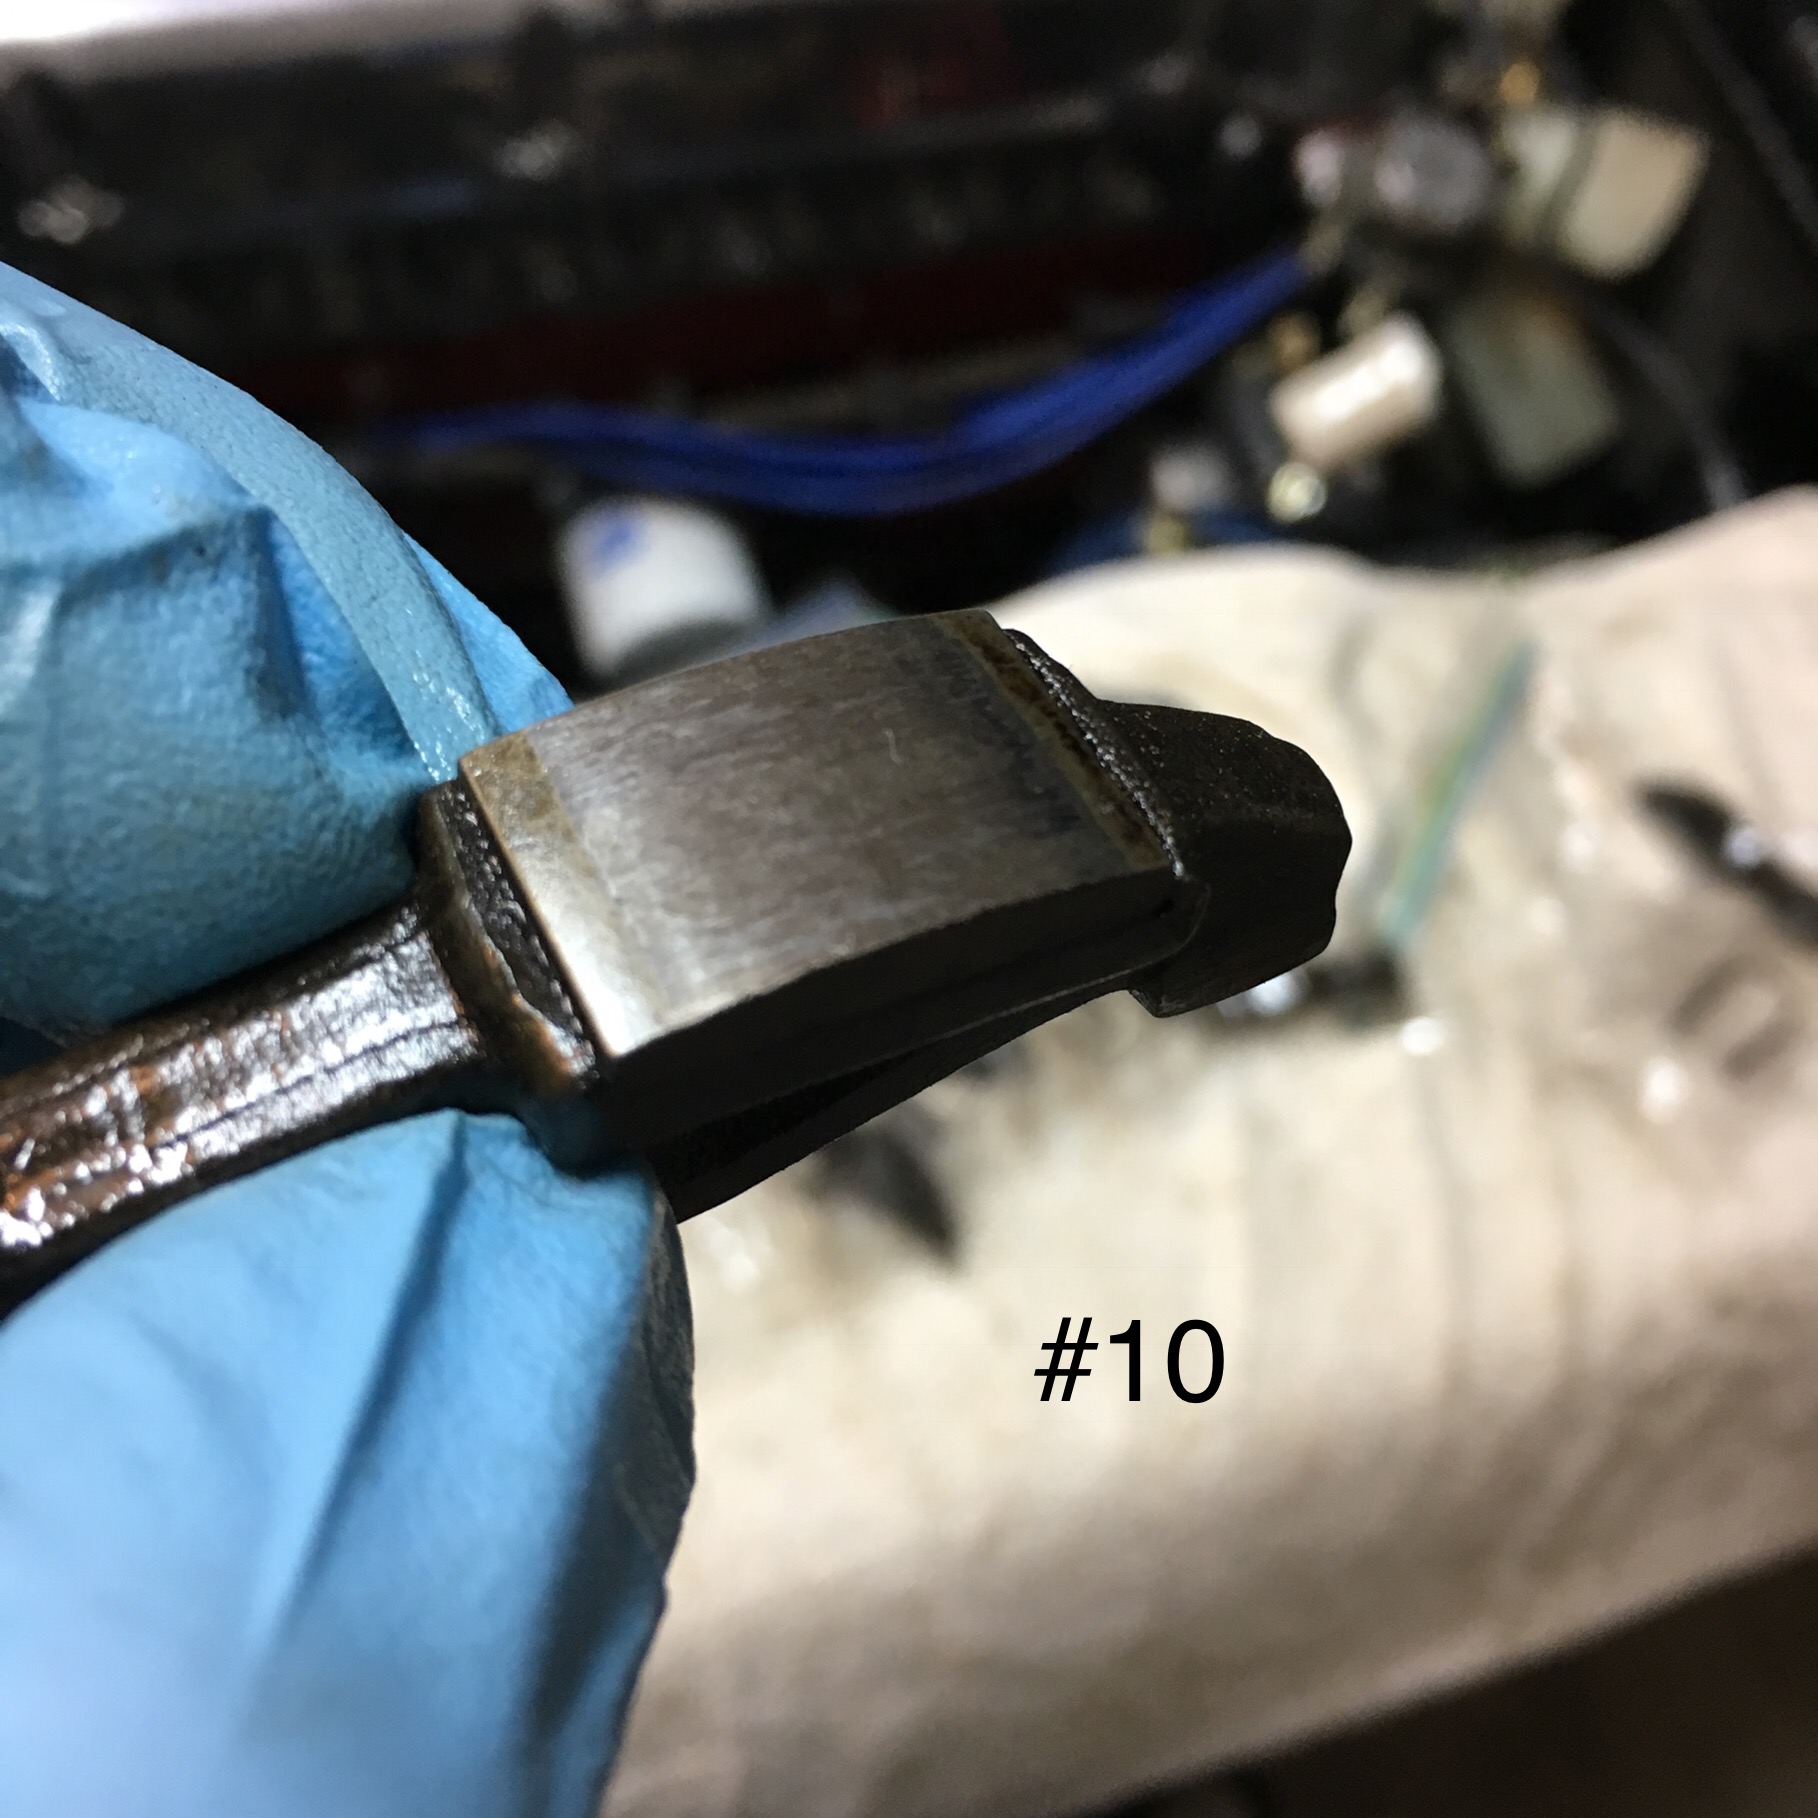
 I have a tapping sound that seems to originate from the valve train. Used a big screwdriver handle to my ear and it was coming from somewhere in the middle portion of the valve cover. I adjusted my valves three times and the tapping persisted. There is a thread on hybridz about a valve train tapping and several people found that the portion of their rocker that contacted the lash pad was contacting the side of the lash pad and not the middle. I thought I was in the same situation so I removed all my rocker arms. This is what I found: Rocker #8 has a groove that is huge. Also the lash pad for #8 has lopsided wear. I posted a thread a few days ago about finding all my passenger side camshaft bearing bolts totally loose. I guess this is the result of unsecured cam shaft bearings. I carefully inspected my cam lobes and they look and feel perfect. I am going to order a replacement rocker and lash pad on Monday. Will I have issues since I am not replacing my cam? I also carefully inspected all the rocker arms and they are perfect except for #6 and #10. They have almost indistinguishable lines that are hard to capture on camera. They are perfectly smooth to the touch and their lash pads have perfect wear. Howard 1974 260z
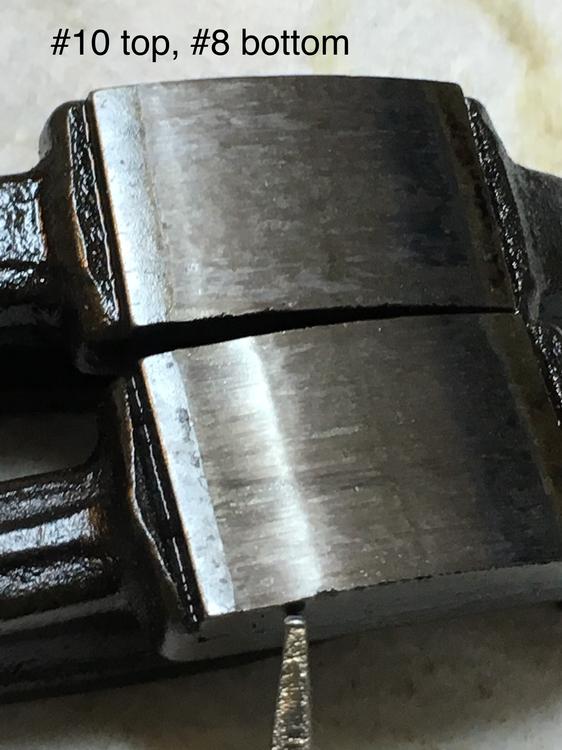


 It has an N42 head so someone (before I bought it) forgot to tighten the bolts after the head swap as all were hand loose. Howard
I’m curious about the shorter bolts that share space with the head studs. Why have them at all if the head stud is torqued to 60 lb/ft on that side? Possibly to keep the cam bearing in place if you pull off the head is my guess?? Howard
It has an N42 head so someone (before I bought it) forgot to tighten the bolts after the head swap as all were hand loose. Howard
I’m curious about the shorter bolts that share space with the head studs. Why have them at all if the head stud is torqued to 60 lb/ft on that side? Possibly to keep the cam bearing in place if you pull off the head is my guess?? Howard


Important Information
By using this site, you agree to our Privacy Policy and Guidelines. We have placed cookies on your device to help make this website better. You can adjust your cookie settings, otherwise we'll assume you're okay to continue.