ramsesosirus
Free Member
-
Joined
-
Last visited
Everything posted by ramsesosirus
-
 Good luck, it's crazy that there are 3 strong hurricanes in a row. Nebraska does have it's fair share of hail and tornadoes, but there's only been a few bad hail incidents in the last few years. No hurricanes or earthquakes... actually we did have an earthquake this spring, it was in Oklahoma, but we felt the effects. I woke up and my bed was shaking into the wall, I thought it was some kind of Exorcist dream haha! We had a hail storm 2 months ago that broke my windshield and ruined my hood in my DD Tahoe. Thank God I spend the money on a garage for the Z! Take care!
 -
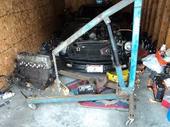
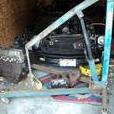
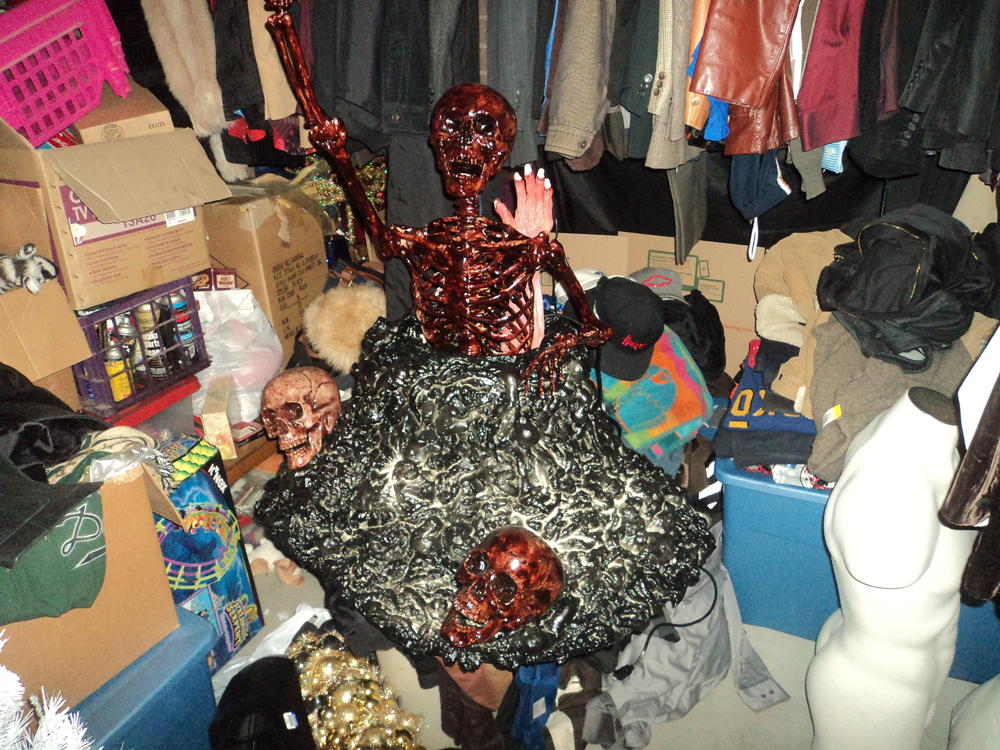
I've always been a pretty creative and aesthetic minded individual. I always receive compliments about this, whether it is art I made, Halloween stuff I set up, or how my classic cars (Z) look. I must have developed a good eye. Anyways, I've always loved halloween and started doing a display a few years ago. It's grown, and we had over 500 Trick or Treaters last year. And starting in October, the Z will have a special passenger riding shotgun... my corpsed skeleton with sunglasses and maybe Michael Myers later in the month... while playing the Halloween theme song... So I thought I'd share a few one-of-a-kind props I've made this year. Yes, it's an all year thing. Pick up clearance items in November, then break until about April. Then the preparation begins! Enjoy


-
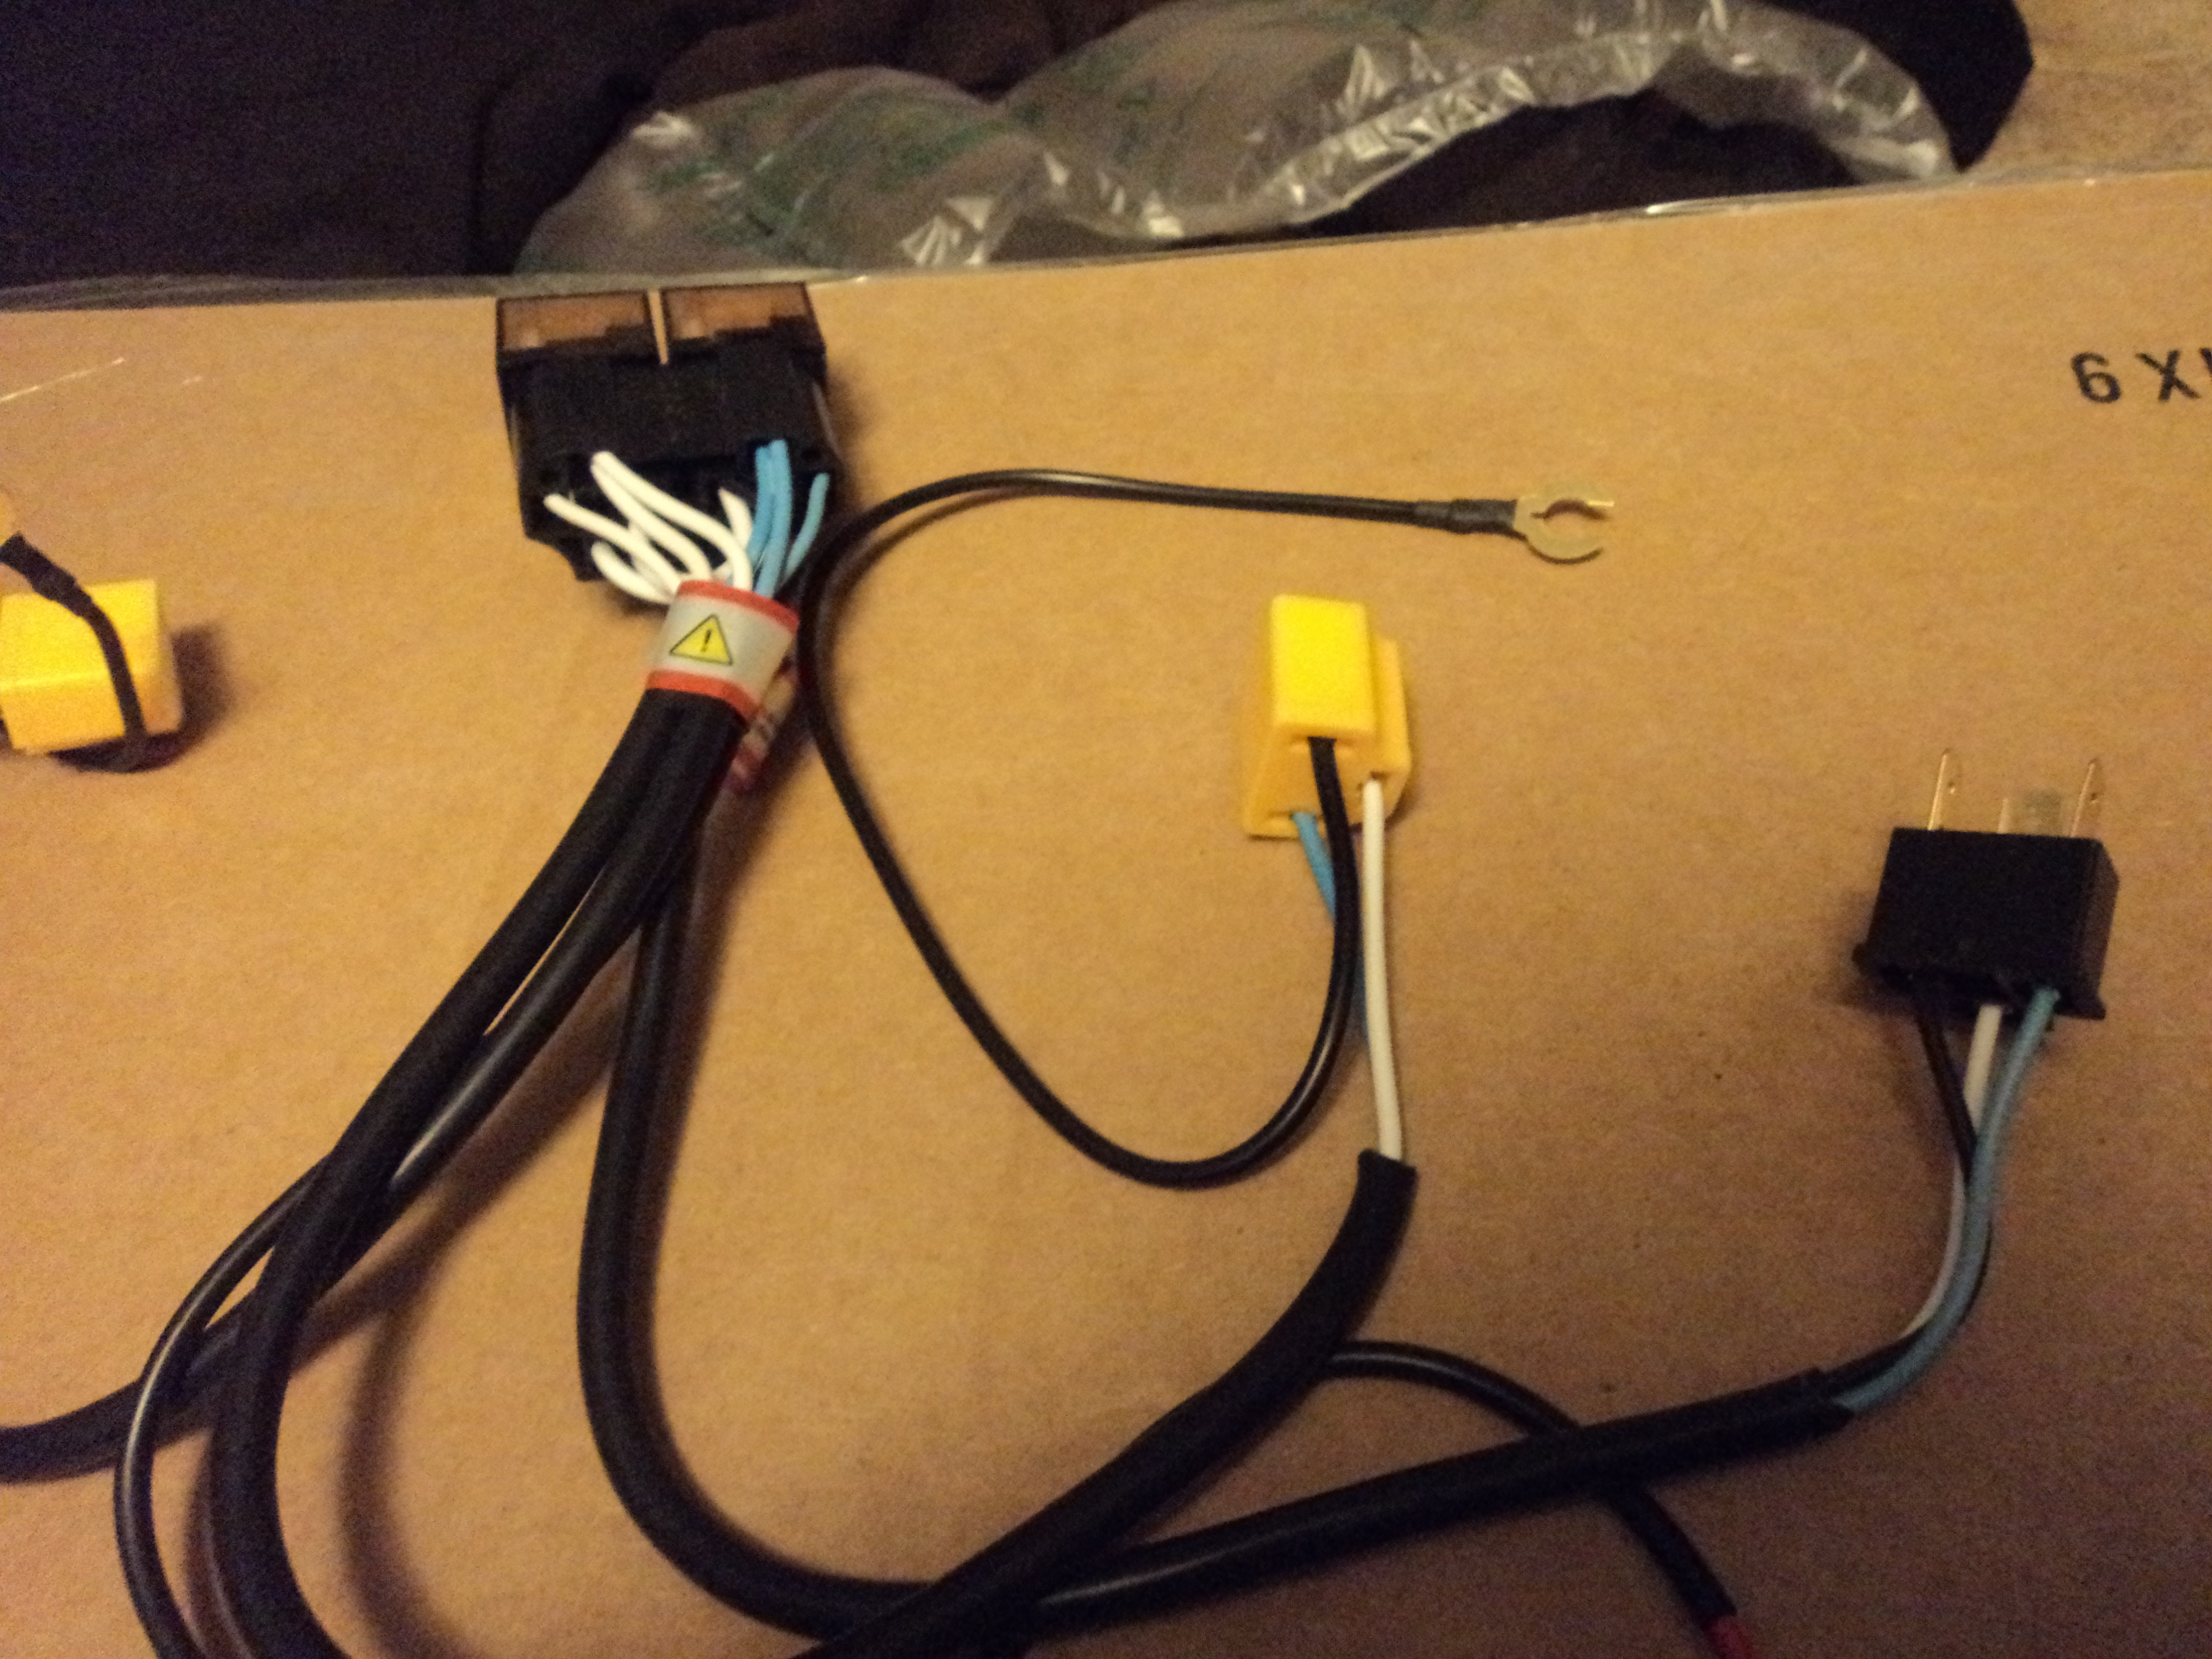
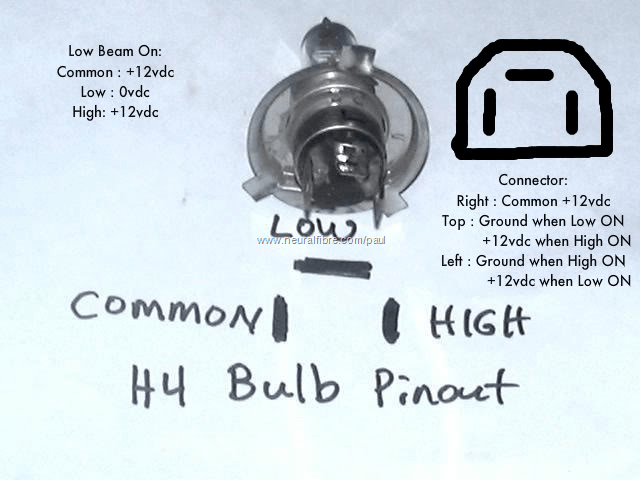
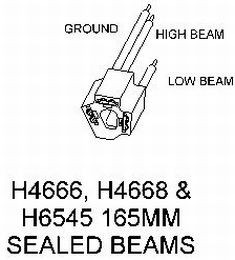
Thanks for all of the replies, I appreciate it. I guess a lot of people are probably deterred from doing this project since, like I found, all of the research points to splicing wires into the stock system. I finished the install and did not cut any stock wire. Only added some length to the new harness, which is just a generic H4 harness you can find online, with the connector to your car being a male sealed beam 3 prong connector. Captain, I found conflicting info on the sealed beam terminals. A few showed they were the same, a few showed the Hi and LO switched. I'd have to verify this, but the bottom line is that the H4 all showed the top being the LO beam. So upon install, I verified that the top spade has 12 V with the lights on, and then (one of) the side spades had 12V with the brights on. I guess my actual measurements were about 11.8V, not too bad. Either way, switching on of the pinout wires is easy if the terminals are different. If you google it, you'll see that certain sealed beams did seem to have the Hi/Lo switched. See the below pics, I know 4656 is a rectangle sealed beam. Can't confirm this change, just be aware when you are testing the terminals. I'm glad I did, I managed to switch the wires somehow when splicing the driver's side. Testing with a voltmeter allowed me to see this, and correct it. FYI the stock connectors need the pin pushed from the wire side, while the new connectors need the pin pushed from the other side (headlight terminal/female) side. I did plug in my Sylvania Silverstar sealed beams to see, and they definitely are brighter (albeit still somewhat yellow). I'm hoping to get some nice white (modern looking) light with the H4's (I got some 7000K bulbs, which I know is very high and supposedly blueish, but halogens have a hard time not producing yellow light). We'll see.... I guess I'm still confused as to why you would even mess with finding 240z or 280z connectors when you just plug the kit into an existing HL socket? What I did works exactly as it should: 12V (nearly) at the sockets, and the ability to change to different H4 bulbs, as well as upgrade the HL system even further in the future if wanted, due to the new harness. Yes, the drawing the harness seller supplied showed 2 fuses, one for each relay (HI/Lo).. but the product I got only had one 30A fuse for the whole system (one wire to battery). If you look at the pic of the harness early in this post, you'll see it's only 1 fused wire. I contacted the seller about this, since it was not what was advertised. The thinking is that if you have 2 fuses, and one blows, you would at least still have either your Highs or Lows to get off the road. I'm expecting my housings tomorrow, and will post some pics and details about the bulbs. As well as some general pics of my car's progress, I've had it for 10 years now! I like to think I saved it, as someone had obviously had a gigantic wing and underglows on it at some point... Thanks again, if all goes as expected (or close to it...) I'll have a nice upgrade for about $100 (plus a few hours of work and scratched knuckles). Anyone who would like more details or information on this great upgrade is more than welcome to contact me.

-
Thanks all; I did the install of the harness after work today. When the H4 lens and bulbs arrive, we will see the result, and measure some voltage/pics. When I did all of my research, (weeks) again and again I found what @Zs-ondabrain and @Zed Head said, being that there is no PnP solution and cutting wires because 280z round connector... etc... again and again, but the 240z connector is available... While this kit I bought online was too short, all I ended up having to modify was adding about 6' or so of wire to the wires (12' total: 2 wires) (16gage wire and butt connectors) I expected to be splicing into the harness due to the connector issue. And I didn't care, mines not mint and I see it as a permanent upgrade. But as @Captain Obvious and @zKars advised, I just plugged the connector into the OEM headlight connector, leaving the Driver's side one taped up and zip-tied in place. I was able to very easily use a small pointed pick tool to release the terminals from the connectors, both the OEM and the new ones were very easy. Learned that today, prior I would have spliced the wires, not knowing you could obviously remove the terminals. I did have the bend the tabs a little to get them to stay when reinstalling into connector. The stock wire has a hard to describe crimp in the sheathing that makes it tough to pull out of the housing. I tried cutting it, but after 42 years it almost started pulling the wire insulation off with it. But you can get it out by twisting/pulling. Removed and inserted wires one at a time, the stock hole is small. Pulled the stock RH wires to near the vacuum tank, plugged into new connector. Placed relays under existing relay cover (by fusible links)NOTE: Apparently the sealed beam and H4 connectors are the same size/configuration, but the HI/LO pinouts are switched. The new harness I got looked like it corrected this. On an odd SIDE NOTE, the looks like some type of liquid had leaked a little under that black relay cover plate..???? No idea. Only electrical components/relays/voltage reg. under there I thought. hopefully it's some magical Z fluid... Ok continue... I still don't understand how by doing this, power is pulled from the battery. I'm still technically still using the OEM stock system: I turn on the lights in the car, the stock system operates all the way to the Passenger OEM headlight connector, and then begins going through the relay system. Electronics are not my strong point. So technically, could I use this "3rd" headlight that is physically hanging, to power a third light or another upgrade/component/light? It's still (supposed to be delivering) 12V? Should I change the OEM fuses in the stock fuse box to a lesser amperage, since nothing??? runs off these fuses now? Or does it? 5A? 10A? (stock is 10 per headlight) So now all I have to do (supposedly), is receive my new housings, and connect the new plugs to the H4 bulbs, install ring, bucket, and splash shield. Where does the round connector cause an issue? Or is there a problem with this setup? It seems like a super easy install (which it was basically), yet all of my research says it shouldn't be? It's like picture me with stacks of electrical drawings, wires, tools, etc... sweating as I carefully track each 4 decade old wire routing, surely the designers of which are long gone. My hands trembling with the wire snippers in my hand. Red? Or is it the green?? A bead of sweat drips in slow motion off of my face. I look at the tire shaped clock in my storage unit... I squint my eyes as I position the no-return wire cutters around the suspected wire. If I'm wrong, there's no going back... And then, I see it, in the sky, is it a bird? A Plane? NO! NO Way! it's freaking Captain Obvious riding in the sky, in a Z being pulled by 6 unicorn reindeer with tie dyed antlers with sunglasses. And he says "Just plug it into the old headlight. Which one? Well, my lad, either one really, but pick the closer one!" Cue product. Really though? What am I missing???
-
Cool, thanks. Perhaps I was way over thinking this? How then, does this make the power come from the battery instead of through the stock system? Is this just what relays do, controlling where power comes from?? The new relay harness has a single 30A fuse, you're recommending to use a smaller fuse here? (Or to replace the stock ones in the panel with something less? I think the stock fuse panel has 2 10A, one for Left, Right) Ok, I think you were recommending exactly what the Captain said, to use the actual headlight plug. Sorry I missed that, makes it much easier and hack free. That must mean the the stock sealed beam and the H4 halogen bulbs have the same wires in the same place?
-
Thanks, great info on both posts. So, since the "new" relay harness only has one 3-wire connector that goes to the car, do I just plug it into one or either of the OEM headlight connectors? And then leave the other one "hanging" (taped up)? I would connect to the passenger HL connector since it is closer. I would have to lengthen the wire (again) so no problem with passing the wires through the bucket housing. I suppose I subconsciously knew I would likely have to "make this generic harness work", which is fine since it wasn't nearly expensive as some I've seen. Wiring is currently my weak point, trying and doing is the best way that I learn. I already had to splice one of the headlight leads (not nearly long enough...) so I'll pass them through the HL housing. I'd much rather "hack" or modify the "new" relay harness than the stock. I also now realize I've been erred in my thinking, the control from the headlight switch would be OFF, Parking Lights, Lights and then the other lever controls HI/LO beams. I thought that was pretty funny myself...
-
Here are a couple potential options/sources. I also have the auto, so someday I may need parts! https://www.transmissionpartsusa.com/3N71B_4N71B_Transmission_vacuum_modulator_p/820-00082885a.htm https://www.ebay.com.au/sch/i.html?_from=R40&_trksid=p2487218.m570.l1313.TR0.TRC0.H0.Xcommodore+vacuum+modulator.TRS0&_nkw=commodore+vacuum+modulator&_sacat=33727 http://www.ebay.com/itm/like/252607583365?chn=ps&dispItem=1 Hope this helps. I believe the brand of transmission is "Jatco". Autos are great for cruising.
-
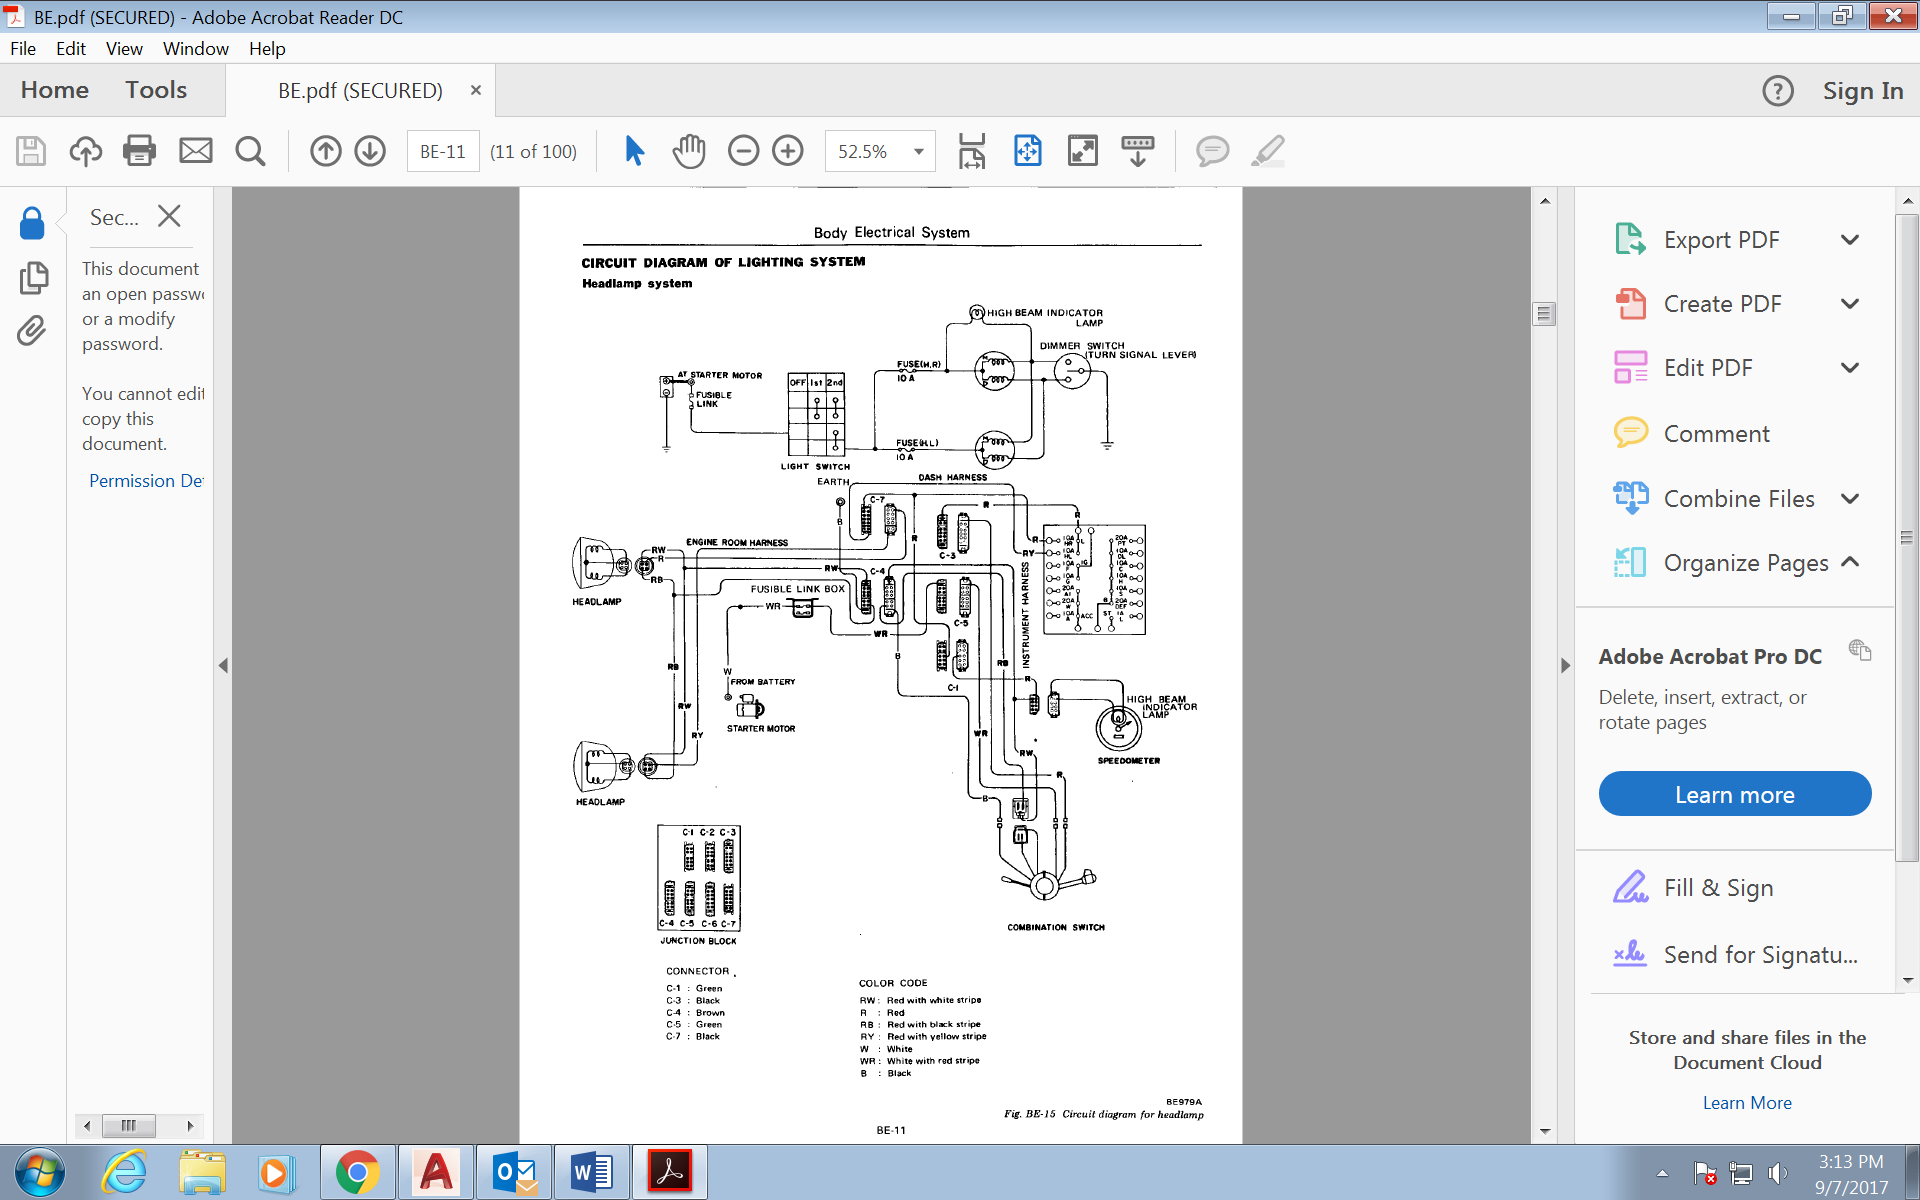
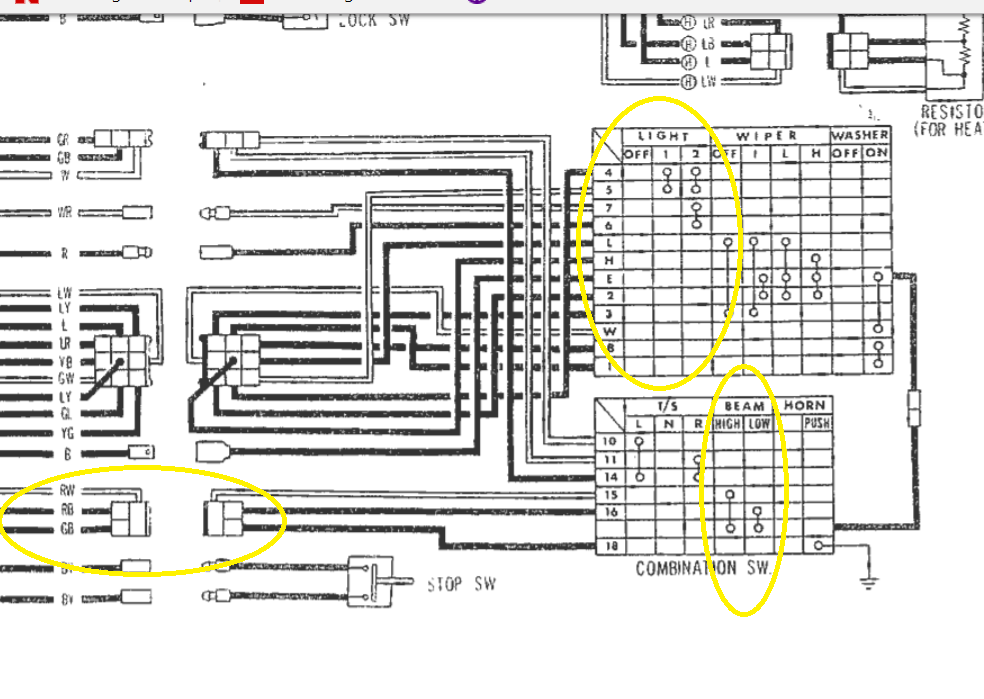
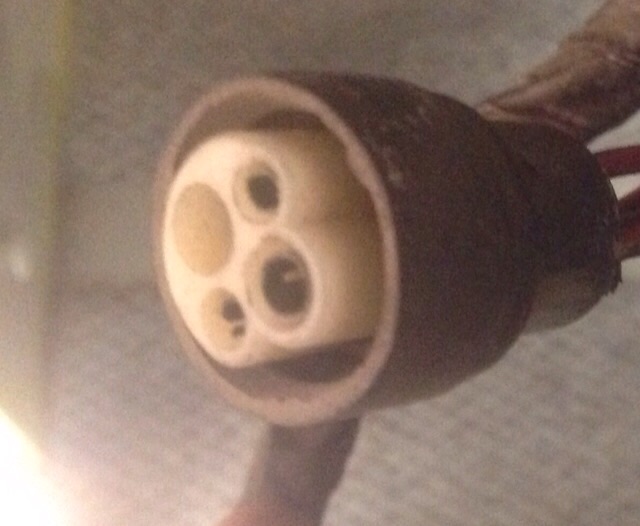
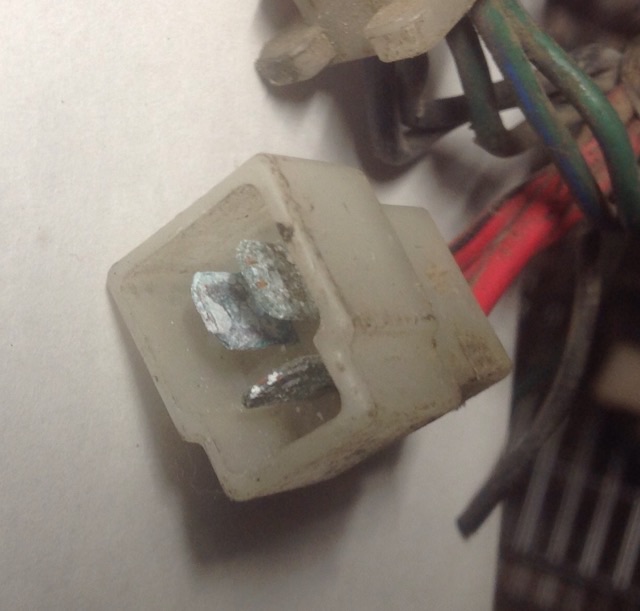
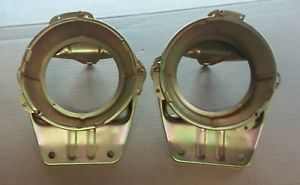
Thanks for the reply. I'm not sure what you mean by this, which connectors are you referring to? (Ones on the radiator support?) It's really not that difficult to use this harness, I just need to know where (location wise) and what wires will allow me to connect the 3 wires from the generic harness. Here is the full, detailed wiring schematic. I've circled what appears to be lights. I think the bottom one is what I need to find. If I can find that 3 wire connector with the RB, RW, GB wires, I at least know where I need to tie into, and can then proceed to evaluate connector or splicing options. (If I am looking at this correctly). I also have a guy around here who has several "shells" at his shop, I might see if he has extra wiring/connectors to use, instead of hacking my original one(s). I would like some confirmation from someone @Zs-ondabrain possibly, that I am looking at this correctly. I do plan on trying to find/track down these wires tonight, by getting under the dash and following them, but that doesn't always work. Thanks! Here are 2 pics of Z connectors. I believe the round one must be the 280z HL connector? 3 wires, one of the terminals looks to be empty. Are these going to be near the firewall, or inside of the cabin?
-
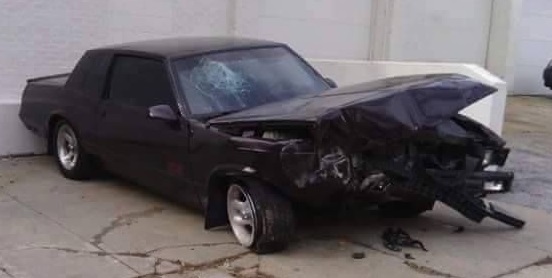
Great quote, exactly how I feel. No matter what I'm driving, it seems I avoid catastrophic accidents (due to other drivers) almost every day, if not multiple times! I really don't care if someone hits my DD car, accidents happen... but sometimes it's blatantly clear that certain cars are more than cars, and I personally enjoy merging behind "nice/collectible/classic/etc.." cars when I see them, just to be the guy that drives good behind them. Knowing how I appreciate it, when i'm driving "my" car. My Z isn't restored or super nice, but it looks great for what it is. So I want to enjoy it, drive it! But things like this really make you want to park it... Yep, it's like "Sorry, I can't modify the laws of physics and go THRU the car in front of me!". And it's not like my DD Tahoe, where you can't really see what's happening in front of the car, Z's are so small and low, it is usually #obvious what's occurring in front of the car. That is the kicker, you really can't do anything. I wouldn't mind pulling this in most cars, it's their insurance and my back... but the whole point in classics is that really, I don't want you to hit me and I'll usually do whatever I can (turning, pulling over, changing lanes, flooring it) but sometimes I have no where to go!
-
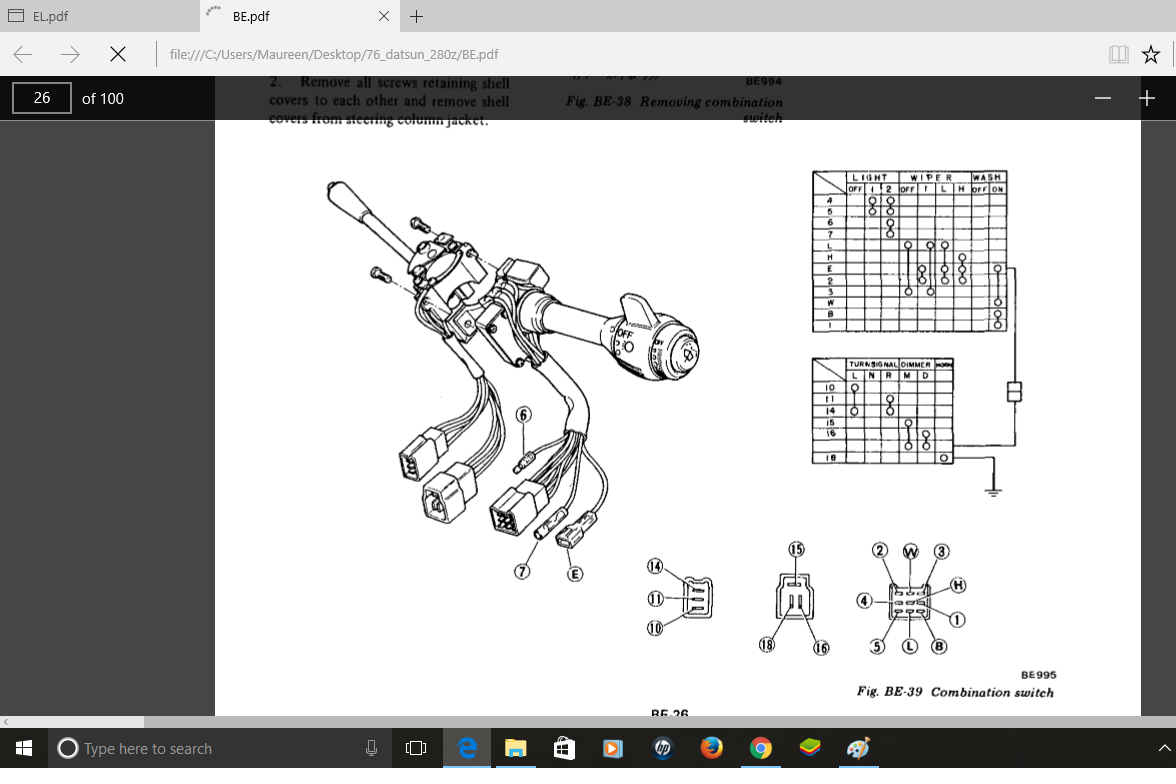
Thanks, yeah I knew I would either have to cut the housing, or splice the lead wires. I did lots of research on this HL project, and I heard that was an issue for the H4 plug. The other option is to use ZX housings, which have a large cutout. But expensive. After determining that I had to splice one of the headlight leads anyway, since this was apparently designed for a go kart judging by the wire length haha I have to use the "long" headlight lead to go to the RH light (the short side...) and add about 10' of wire per wire to reach the passenger side. So I already plan on not splicing the wires until I pull the housings, and not hole saw the buckets. I actually kind of liked the idea of easier headlight bulb access since these bulbs sometimes burn out quickly I've heard, but plans always seem to change. I know there is no plug in kit for the later 280z. My question is does a harness of any configuration exist in the bay that has 3 wires from the headlamp switch (I assume OFF, LO, HI). Then the black wire that comes from the relay goes to the "OFF" function for the switch. ??? From that, schematic, I can't seem to locate such a harness. Maybe I'm missing a detail schematic for the HL switch... I'm just not sure of where (at all) to tie these 3 wires into a harness or multiple harnesses, and where in the engine bay, OR is it under the dash? I plan to post some pictures after with different Halogen and potentially other bulb types (for testing), since this H4 housing has the exact OEM look, not a clear or flat lens. I also looked into the HID and LED projects, but both are much more expensive to do right, and upon my research (and engineering knowledge) that each bulb really is specifically designed for a specific housing. That's just how photometrics and optics work. Don't want to be blinding other drivers, and don't want tickets for blue lights. I have, however, wanted to have white light for many years, but the Silverstars were the most I ever tried... which are still quite yellowish. Well here is the Combo Switch detail.... So we have wires 4,5,6,7 controlling the headlights. But nothing controlling the Off function? Or is the "O" meaning open, and it's closed unless there is and "O" in the box? And they're obviously (Calling @Captain Obvious , giant Z logo spotlight in the sky to call for assistance) must be another/more harnesses down the line for the HL. Hopefully they all conjoin the a single harness of 3 wires. EDIT: Upon further review of the schematics, it appears that wires 15, 16, 18 actually control the headlights, and the three are in the 3 wire connector as shown. It is a square-ish connector. Is the "round" connector further down the line? Where do these wires go to further down the way, like in the engine bay? This doesn't specify their colors either...

-
That's not bad for everything you get in the kit. Do update with pics when you get it installed. Most members here stick with the original look for the most part, some of the other sites would probably have more info. on aftermarket and non-OEM looking components. I'm interested to see how those lights work, is it half circle for lows, both half circles for brights? Is there a "border" too, like a circle outline (like some new BMW's)? I've been looking into upgrading headlights for awhile, should have the relay wiring kit and H4 conversion lenses (stock looking) this week. I wanted to do HID or LED, but both are more costly than I can spend right now (and I don't want to hack something together that blinds other drivers...) You might already know this, but I discovered through my research that 4300 K (slightly yellow) is the best color temperature for visibility. Higher numbers (cooler color temperature) decreases "usable" light, but often has a cooler look to it. I had tried Silverstars in my past 2 classic cars, hoping for the white light, but they are pretty much still yellowish. Perhaps upgrading my headlight harness with relays with deliver more power to the lights.
-
I am getting a headlight harness, some Autopal H4 housings, and some halogen bulbs in the mail this week. I can take more pics as I get them. If someone could be so kind as to help me (us) figure out how to install the harness on a stock 76 280z, I'd really appreciate it! Here is a pic of the "typical" install of the relay harness. I know the plug won't plug into the 280z harness. Should I connect the two powers directly to the battery +, or the alternator? Which wires should I splice and to where on the stock harness? The one on the radiator support? I thought only one wire would need to be spliced, the headlight on/off switch, but this shows 3 wires.... And the FSM schematic isn't making things very clear as to what I need to do... Basically the relay system just gets its power from the battery I also just read that the 280z switches the ground on/off, while the 240 switches the power on/off? What does this change/mean?? I'm working on figuring it out too, but I'd hate to hack up the harness if someone can help! Thanks Edit: Got the harness in the mail. Looks pretty stout. The relays are 40A. One single 30A Fuse by the power. Looks like the wires that need to go to the car are one black that only comes from the relay to this plug, one light blue that is the other side terminal for the H4 Headlight (low or high beam?), and the other is the white that comes from the single top terminal for the H4 (low or high beam?). So that means splicing into several of the engine harnesses as per FSM? I'm assuming a low beam on wire, a high beam on wire, and what is this black wire? Ground? Thanks for any advice


-
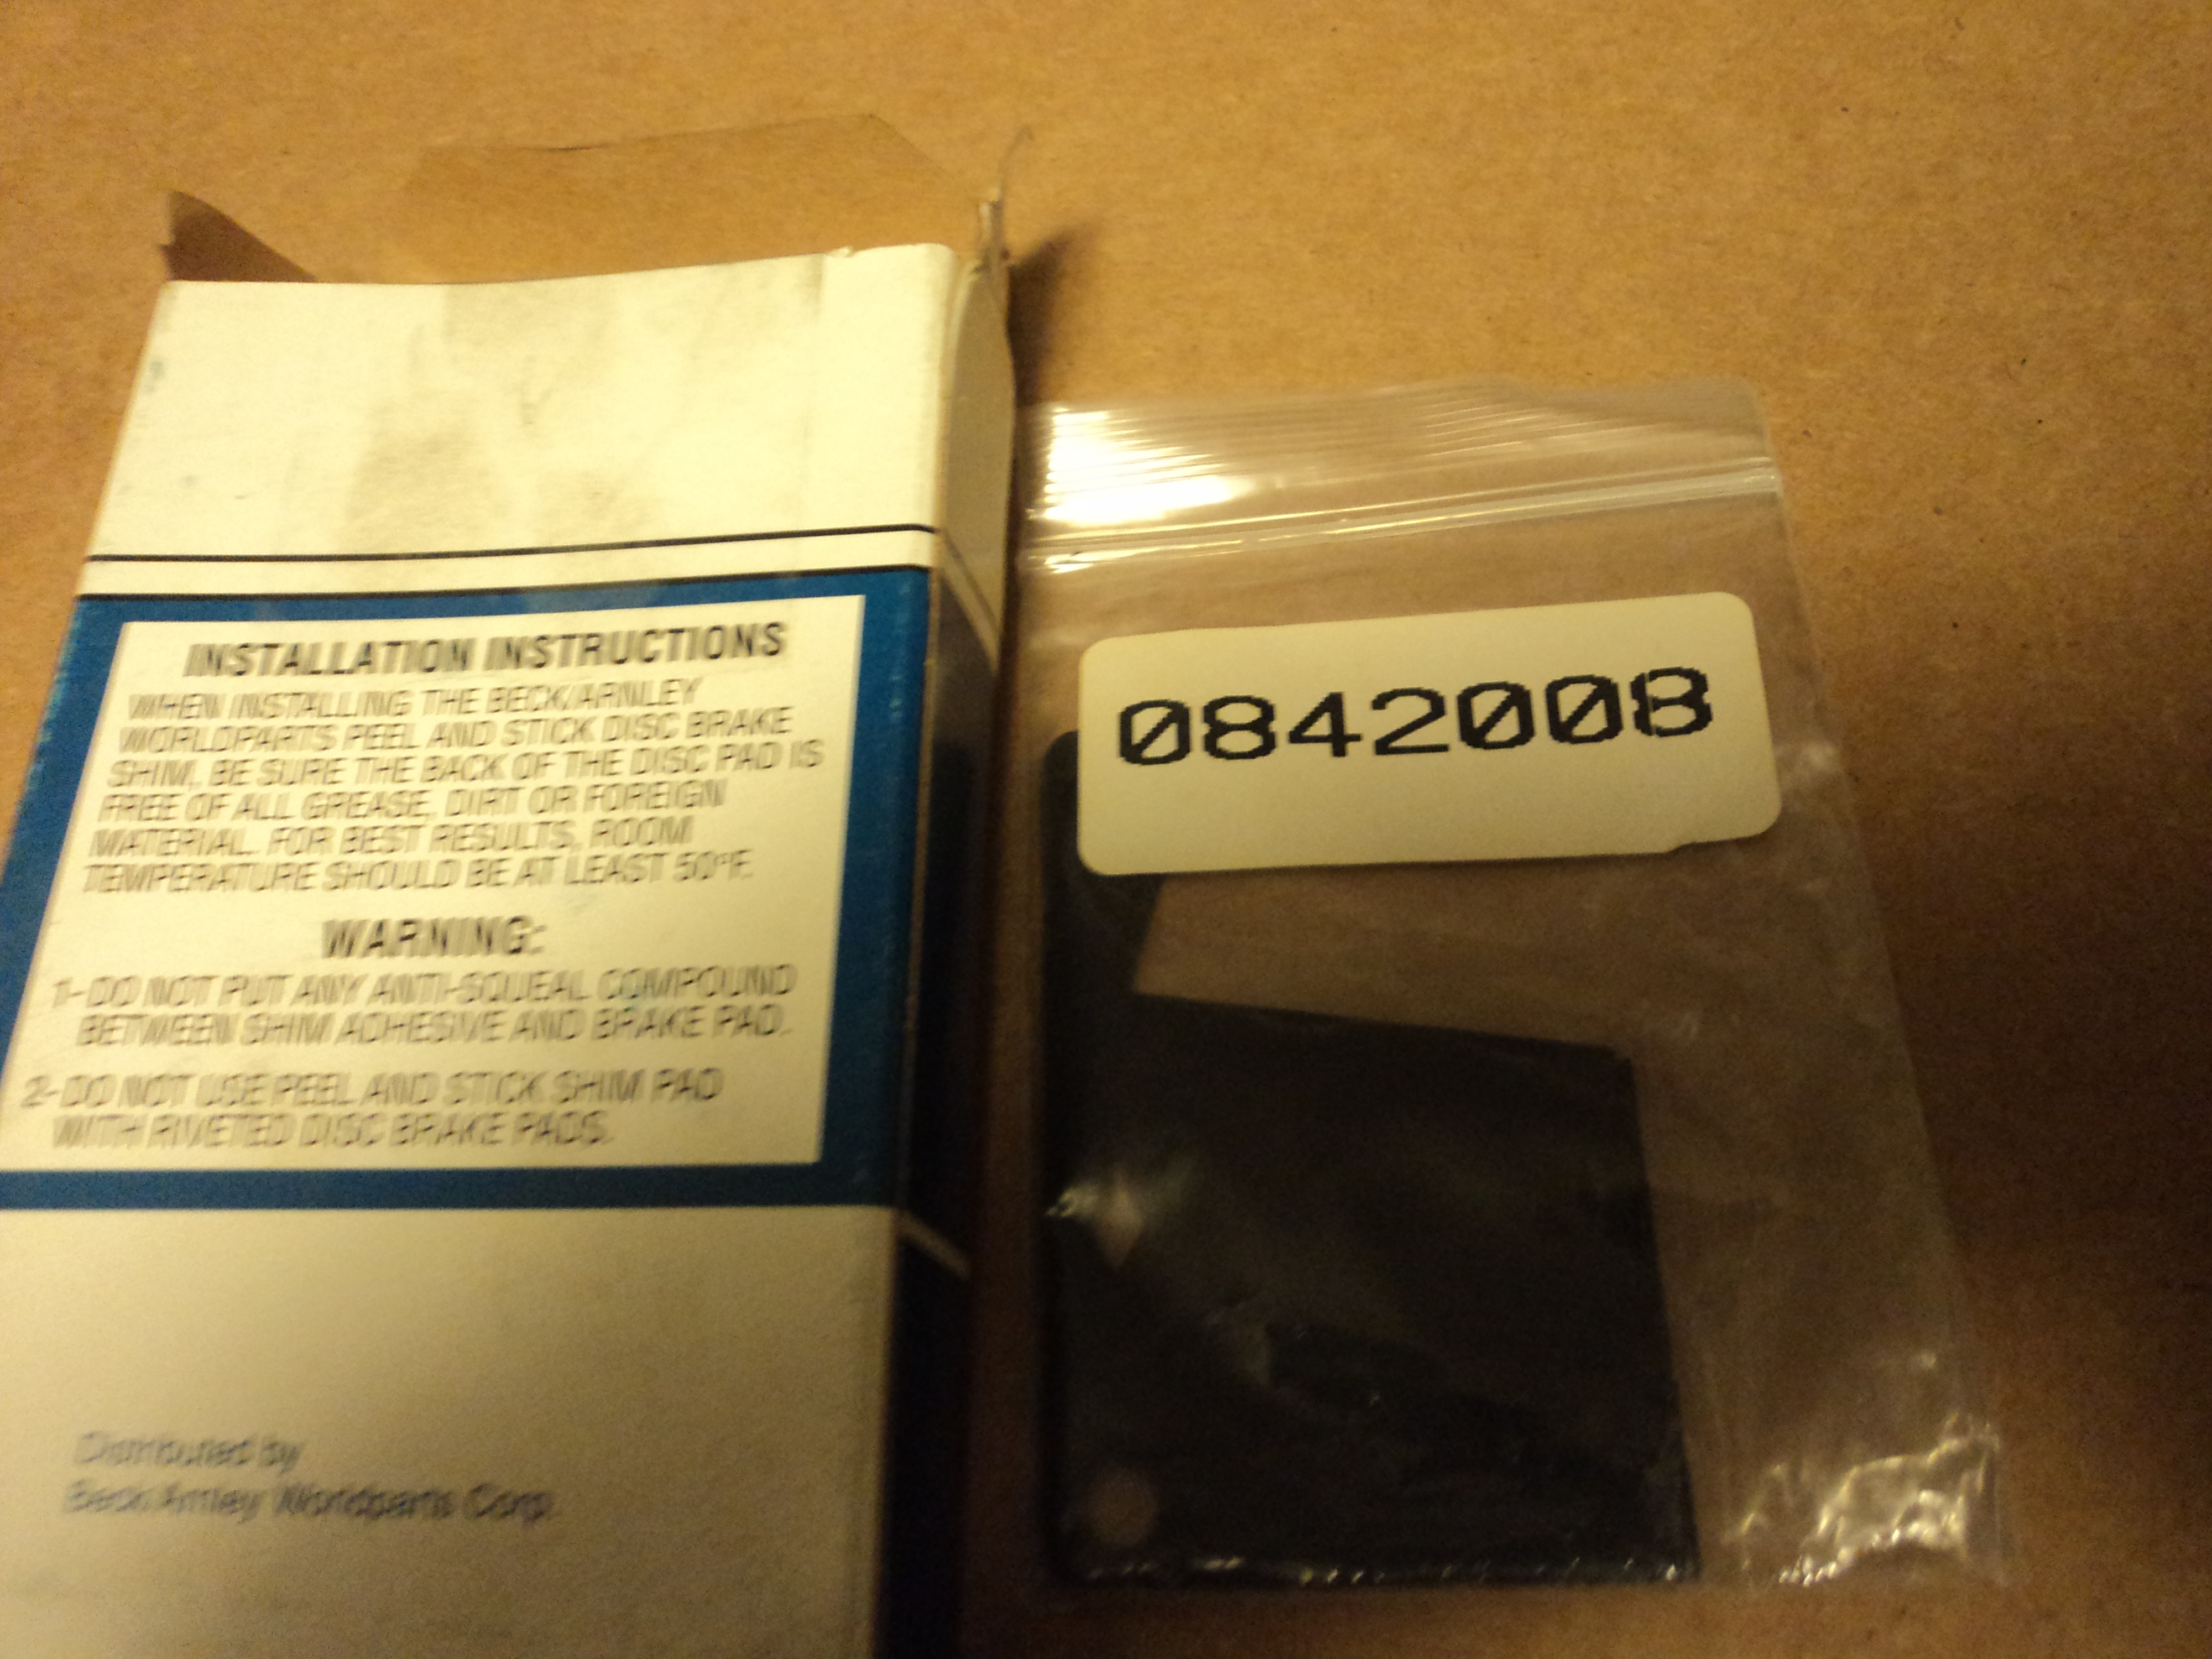
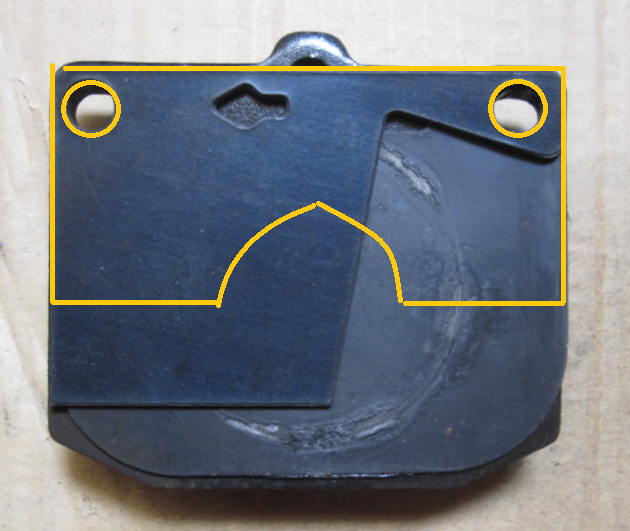
The amber lines show what the shim I got looks like, for reference. Symmetrical, no tabs, the center rounded portion should be a half circle, but far smaller than the piston lip. I still plan to try to make stuff on those machines. Update: Here is the set I ordered on ebay, Beck-Arney PN 084-2008, they look exactly like the ones ZedHead got (Wagner). 4 per box, mine were about $7. The box is really old looking in both design and age. They're pretty lightweight, maybe aluminum? Not very thick. Feels like I could probably bend it up pretty easily.

-
Did you get a set ordered or installed? I've started looking into new headlight options and LEDs are usually great all around as lighting components. I'm also interested in the wiring/etc.. relay req's for LEds, since they use less power.
-
I went ahead and ordered a set on ebay of the autopal housings (with some assuming crap bulbs). They are e code. I plan to get other bulbs. I also ordered that wiring harness. There is a guy in my city that used to build Datsuns for Nissan, and he has a few shells and lots of parts. I got my engine from him. I plan to see if he has an OEM 280z headlight harness, so I can use the connector piece. Is this the one I should connect the new harness to? The one on the front radiator support? I can post a pic of the new harness when I get it, to see which wire goes to what on the connector. My eyes are not as great at night as they once were. And the Z is older than me, so I can only imagine how that would be. Whoa that rhymed. Maybe I should be the first white rapper, hmmm my stage name can be Zagnut. Yessss.
-
Zedhead my fault, the Autozone D161 pads didn't include any shims. The Semi Metallic "BrakeBest" ones from I believe Oreilly (online) were the ones that included the non-OEM shims. I plan to reuse them, probably will need to glue it to the pad. I got put these pads on earlier, but didn't use the shims it had since I was unsure. I was confused because I used the organic Autozone ones when I put on the shims to see if that helped also with the squeal. Some say organic is easier on the rotors, but semi metallic is better. I have a full set of both so I can swap them back and forth, really is pretty easy on stock Z discs.
-
I've driven my stock 76 Z about 20 times since June, and it seems that I not only: 1) have many people stay far back from me 2) have many people tail gating me far too close Neither happens in my DD Tahoe. I have vanity plates "76 Z" mostly because our state plates are usually ugly. It is not an offensive message or anything. It really infuriates me, mostly since I know 240z bumpers are not worth anything protection wise. And I drive respectfully, not cutting people off or that sort of thing. Has anyone else noticed either item above? Sometimes I want to get out of the car and inform them of exactly the risk they are taking if they hit me. I try to mind my own business and stay calm, but clearly people are sometimes following or stopping behind me FAR too close. This is why I do not carry a gun, because I can't use it if I don't have it.
-
Thanks, I hope the squeal stays away as well. Those were the only set of pads I've gotten for the Z that included shims, or I wouldn't even have known it needed them (or that they can have such a profound affect on noise) The shims do have holes for the pins at the top, (no arrow) AND have a peel away sticky backing. They were not attached to the pads in the box. Basically, the shim is symmetrical and has a round cutout, but is far smaller than the piston.... so it really covers about half of the piston, from the pin holes. So they do cover a different area of the piston than the OEM ones. (all 4 of the shims are identical). I also ordered a set on ebay like the ones someone posted, since they are apparently very important! Hope this helps
-
Good news, took a cruise for about an hour today at various speeds and the squeal is at least temporarily fixed! All I did was add the 4 shims from the kit. It was squealing horribly, amazing such a difference... The shims I have (as I said) fit over the pins and cover about half of the piston. (So looking at the car, the left side of the piston is covered, the right is not). So for me non-original shape shims cured my brake squeal instantly. Finally feeling more confident on the road with the brake issues mostly resolved.
-
Cool, thanks. I'm starting to compile a mental list (should write it down) of things I could make, like emblems, shims, probably even things like bumpers and floorpans... We literally just opened 3 new buildings, and the one with the CNCs spent hundreds of thousands on new equipment... It is actually the largest community college project ever in America, $100 million bucks
-
Don't forget to use brake shims, see the other post in "Wheels Tires Brakes" about "Pads and Booster".... Never seen those springs...
-
haha I could make some nice cardboard shims... I'd even use that "good" cardboard. That is a good deal. I do plan on making some on our plasma/laser cutter when I can get an original. Might order one from Motorsport for the "template". I'm going to cruise today after work, I'll see if the shims I have (that only cover the top 1/2 of piston) squeal at all.
-
I guess Motorsport does have only the RH available... Yeah we do have several laser and plasma cutters. We can make nearly anything now. I plan to take advantage!
-
Wow, good input. Are those OEM style ones available anywhere? Mine are long gone, and Motorsport has none available... I just remembered the college I work at just got some new CNC milling machines that can make engine blocks... surely it can produce some OEM style shims, if I had one to scan, or the measurements. Are they made of steel, kevlar, rubber?? Oh captain my captain, which side of the piston contacts the shim? Front of car or rear of car side? Is the arrow pointing to the front of the vehicle? (This is a good point for Captain Obvious to lay down the law that yes, the arrow obviously always points to the front of the vehicle..... haha)
-
Yes I find that the oddest part, that the shim only covers about half the piston. Other cars I've done pads on, the shim is usually the size of the pad. The autozone shims I got also only cover half the piston, but they cover the top half only as opposed to the Nissan one that covered only the left or right half. I wonder if this makes a difference... Thanks