ramsesosirus
-
Posts
367 -
Joined
-
Last visited
-
Days Won
2
Content Type
Profiles
Knowledge Base
Zcar Wiki
Forums
Gallery
Events
Downloads
Store
Blogs
Collections
Classifieds
Everything posted by ramsesosirus
-
Am I supposed to be able to shift through the gears on an automatic 76 280z with the car off, no key, brake pedal not pressed? All of my other automatics had a lock that prevented shifting without the foot on the brake, key in ignition. Is this normal or do I have something amiss?
-
Haha I remember when I first got the Z 6 years ago sblake provided me with lots and lots of help! I never forget those sort of things! Also, since I assume the internet isn't going anywhere anytime soon, it's worth my time to contribute where I can, so the info will be there for others in the future. Time sure does fly by though... It feels good to finally be able to give back some information to help others.
-
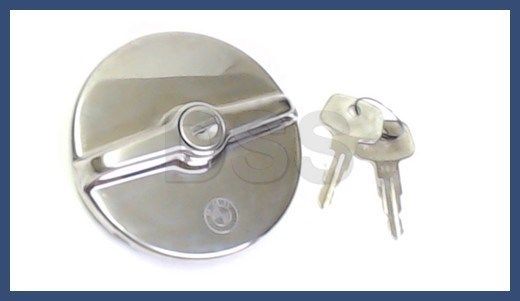
I suppose I should clarify that the BMW cap isn't just "pretty easy" to remove when locked, it just unscrews as normally. So mine is always "locked"... I spent a decent amount on it too..
-
1978 280Z barn Find / sons dream car won't stay running
ramsesosirus replied to kelly969's topic in Help Me !!
All of the above are great places to start. I was your son's age when I began working on my own car: due to not being able to afford (or trust) mechanic shops! 10+ years later, and I'm pretty darn good at it! And I find it fun! Accumulating tools is the hardest part. There are lots of great resources on the internet for these cars. They really aren't very complicated, but can seem overwhelming at first. Mine wouldn't stay running when I bought it. Things to check: pull a vacuum hose or remove oil cap while running. The car should stumble/ or almost die. If not=vacuum leak somewhere clean all electrical connectors with spray electronics cleaner check the sensors: mostly the TPS and coolant sensor. The cold start injector can be unplugged to eliminate it. I actually do this will all the sensors to test: unplug it and see if the problem is the same. After 10 years, I can almost guarantee your fuel tank is in horrible condition. I had to have mine boiled out and the stock "pickup screen" cut out by a radiator shop (you can't always do ALL of your own work, but it is a balance...) Mine would run for a few minutes, then die like yours... Having the tank professionally cleaned, adding an extra fuel filter, new fuel pump, and cleaning electrical connectors fixed mine. I would advise your son to become mechanically inclined. Almost no one is going to be able to afford to take these cars to a shop everytime. They really aren't that complicated. And I commend your son on getting his "dream car". I bet he can figure it out, and it will give him a great feeling (and a great skill) to start doing some of his own work. Safety first though, jacks, jackstands, fuel safety, glasses, e brakes, chocking the wheels, etc.... -
I bought one of those BMW locking gas caps for my 76 Z. It is the "larger" style for the large filler neck. It has the BMW logo stamped into it. However, it does not seem to lock the cap on. I mean, the key will work, and actuate the tab, but I am still able to remove it while "locked" pretty easily... I still use it though, it fits good and looks better than the old cap. It does not have a spot to attach the "hanging chain" though... FYI Not mine, but this is pretty much exactly the cap I have:
-
Hmmm....how am I "supposed" to set the idle speed first, before adjusting the timing, when adjusting the timing seems to effect my idle speed??? If I get the idle speed correct (700 rpm in D for automatic trans), then move the distributor to adjust the timing, the idle speed changes, and sometimes I have to loosen that set (spring loaded on TB) screw to keep the car from nearly dying?
-
Is this the switch that is only used on 75/76 280z's? My replacement engine has the 1-wire sensor in it's place, which I am not using. Is the function of this 2-wire sensor to adjust the ignition timing during warm up?
-
Thanks, my sticker says 7 degrees for a non-Cali 76 auto, but i'd like to go with 10 (I've read L28's like a little more advance: the "factory" timing is for best emissions so I've heard...) And I didn't really think about it, but you are right. I would only need to plug the vacuum line or port, since the canister on the distributor doesn't actually create vacuum, so leaving it "open" (with the line plugged) wouldn't actually create a leak. Makes sense.
-
I've looked in various places, done searches, all that stuff. The FSM is surprisingly vague about the ignition timing adjustment procedure. The car is a stock 76 280z, so it has the vacuum canister on the side of the distributor that has a "T" connection also. I just want to set my timing. Auto Trans. I know you want the engine warm, verified correct idle (700 rpm for auto in D, 900 for manual). After the engine is warm, do I unplug and cap the vacuum hose from the distributor, (assume cap the canister AND the hose...) and then it the timing should be 7 degrees BTDC? Or is the vacuum hose supposed to be connected to the distributor when you get the 7 degrees?? (The sticker under the hood says 7 degrees, but I've read most like 10 degrees initial....) This is a somewhat irritating question to have to ask, however I cannot seem to find a concrete answer to this. I've played with rotating the distributor to adjust, and I can hear it change. But I don't want to damage this engine with such a seemingly simple setting.... especially when it should be simple to determine the correct procedure. Apologies for such a newbie question....
-
Hello again all, Making good progress on my 76 Z. Everything is running smoothly, so I can address the "luxuries"... in this case, AC! I've gone for years without AC, but it would be nice to have in the Z, since all the equipment is there and it gets pretty hot around here sometimes... My car came with stock AC. My donor motor is from a 280zx, and it included the AC compressor, which is installed on the engine. The 280z hoses won't fit; I've read that the inlet/outlet (suction/discharge) are switched on these? I think they are different type of fittings? Can I use some sort of adapter, or make some lines? Also, anything else I need to know to get this working? I've hooked up the blue wire to the compressor, and it does run. Everything else in the AC system is the stock 1976 system. I know I would have to "retrofit" to R134A, which involves some other work. Surely someone else has done this? I'd like to have that option though, thanks!
-
Good news, tried again and I got one of the spare injectors to spray on the car; The initially bad one would only drip fuel, no spray. So I swapped it with one of the spares, and it sprayed, so I buttoned it all up and ran it, and the injector now passes the "screwdriver stethoscope" test, clicks just like the others. I think the cleaning probably helped, possibly applying 9v may have applied enough magnetic force to un-stick the spare injector. (It was not working properly on the first try either). So I suppose, in summary, what I've learned is: -9 v won't necessarily fry an injector (but it could). I only touched the connection to make it pulse though, not a constant hook up. -the screwdriver stethoscope is a great method to verify if the injector is or is not working -both pins on the injector should have 12 volts (if good) -the injector should have a resistance of about 3 ohms (if good) -the ferrules on the injectors can be a pain to remove, to replace the hose -if you can get the injector to spray/operate off the car, it should theoretically work on the car, given that other items are in proper working condition (when I did the 9 volt, I wan't able to exert 36 psi of force, so I only got a stream out of the injectors. But that is enough to verify no clogging.) However, just because it operates off the car doesn't mean it will operate CORRECTLY on the car. ie) fuel spray pattern, etc... Also, my car seems to shake less through the chassis, so the bad cylinder may have been contributing to this issue (maybe not engine mounts) I will be monitoring this cylinder's plug, as well as checking the injector via the stethoscope test as I go, making sure it KEEPS working.... I do not seem to have the missing/surging issue at higher RPMs right now, likely due to getting this injector to fire as well as adjusting the TVS to only contact at idle and very close to WOT. I may need to adjust again. Both of the TVS that I have seem to initially touch the WOT contact way too early, and one had never been opened, which I found odd. I do hear a change when I unplug the TVS at idle, so it is operating (enriching the idle mixture). Thanks, hope this comes in handy for those facing similar issues. -
-
Thanks for the feedback guys, I really like Chickenman's story about the BMW... so true, that's why I avoid "newer" cars. This is why I am not sure as to whether or not the injector is bad; I swapped the electrical connectors around on the car, so that the connector from the bad injector was on a known good injector, and that injector still fired, while the bad injector still did not. i also swapped the positions of the injectors, switching #5 (bad) and #6 (good) on the rail, just to make sure fuel was getting there. So essentially, I verified that: 1) the bad injector will not spray fuel no matter which spot on the rail it is installed to 2) the bad injector will not spray fuel no matter which electrical connector from the car it is connected to 3) the good injector(s) will spray no matter which spot on the rail the are installed to 4) the good injector(s) will spray no matter which electrical connector they are connected to 5) I can get the bad injector to spray every time off of the car with the 9 volt, or even 3 AAA (4.5 v) batteries and a hose filled with brake cleaner 6) after cranking the car with the bad injector installed, it won't spray, BUT when I push the pintle needle with a tool on the car, it WILL spray gas 7) the good and bad injectors all have (nearly) the same resistance 8) all electrical connectors have the same voltage at the pins So as you can see, I am getting somewhat conflicting info. If I could, I would gladly just buy 1 (or 6) new injectors, but $$$ is real tight right now. Even the $40 for 1 injector... I'm looking for work after a few years from hell. Thank god for the Z, keeps me sane (or is it zane, maybe inzane ... hmm that's a good license plate idea) Working on the Z is not only fun for me, but usually costs me nothing since I have most of the tools, waxes, etc... that I need. It gives me something "free" to do that I love doing, and am getting pretty decent at (hopefully...). Also, I know certain items will HAVE to be purchased, such as the wheel cylinder (leaking, gotta have brakes...)brakes, and probably engine mounts (vibration through car) and the key cylinder. And maybe U-joints and fixing the fuel tank/sender leak, which is still leaking... So I'm hoping to minimize the costs if there is any hope that existing parts are ok, or usable. On a side note, I have a Bachelors Degree in Architectural Engineering, good work history, and good references (and can fix cars...sometimes) if anyone around Nebraska is looking to hire good people. Not a whole lot of engineers (or auto technicians, as Chickenman was discussing) can think "outside of the bocks", or even turn wrenches. I think that is an advantage for me. And I also make art too. Anyhow, I think I might try cleaning the bad one a little more before spending any money. I can't drive the car yet anyways, need plates and insurance etc... and brakes But who needs to stop? Honestly I'm a little proud of myself for getting this engine this far, to running decently. A lot of it is due to help, advice, and experience I hear from people here!
-
I will check the part numbers. All of them have the same tip, and the "blue" colored connector. One had obviously been replaced at some point, since it has 2 hose clamps, the rest had the stock "ferrule" at the injector end. The "spares" that I spoke of were from the donor engine's intake, from a 280zx (can't be sure of the year, but it was an N47 head, non turbo). These looked the same, but had the "black" colored connectors, and the larger, one piece "spacers"'. The one I am trying to salvage IS the blue connector one, from the car originally. Even when I'm looking online for new or remanned injectors, they don't seem to have the blue connector. Do you think I burned them up with 9v? Ironically, I've seen that exact equation before during my engineering studies. I should have recalled that, I must be losing my edge. So you don't have to worry about getting too complex here, I've seen some pretty "deep" equations before... not that I could solve them, but yeah haha.. Surprisingly, the engine is actually running pretty well on 5 cylinders, after adjusting/disconnecting the TVS. (I reconnected it after adjusting). I don't plan on being too rough on this engine (since I blew up my stock one), but I would like it to run as good as it can. Thanks~
-
Yeah, I knew going into it that I ran the risk of frying the injector with more voltage, however I'd read that sometimes to get a clogged injector open again, using more voltage (temporarily touching contacts, not constant) will apply more magnetic force to the pintle to lift it. My initial thought was that I need a new/different injector. So I mght as well try to get these "bad" ones going. It was fun, I learned some stuff, and didn't spend any money... yet haha Thanks Does the 12 v that you see at the connectors not actually get applied to the injector? Trying to visualize this....
-
The Captain is right, just studied this for my Z. It's the TVS (Throttle Valve Switch) (Some call it the TPS, which is what it is on some cars) on the side of the throttle body (?). It has 3 pins on the connector. Some great info about it here: http://atlanticz.ca/zclub/techtips/tps/index.html IF it is working correctly, it enriches the mixture a) at idlie and b ) at or near WOT . Like the Cap'n said, it also cuts the fuel around those RPMs, sensing that you are trying to slow down. I just adjusted mine, it seemed to go directly from the idle contact to the WOT contact. I read that it wasn't supposed to contact either side between about 1400 rpms (or 5 degrees) and 2/3 or 3/4 of WOT.
-
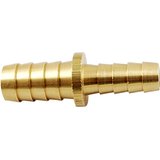
FYI when I did the G3 filter, I used a few barbed connector adapters. This way I could use the appropriate sizes for each, then transition them using the barbed adapters. Basically like these: And made sure all clamps were tight. Several years later and it's still good, no leaks (OK, no leaks from these, but I am chasing a fuel tank/sending unit leak that is unrelated... )
-
1976 280z, stock system. Had some bogging at around 3000 rpm, adjusted the TVS. Checked plugs (which are new, only been run when test firing engine). I assume the best option will be to "GET A NEW INJECTOR", but I'm trying to avoid that right now... (I know I might have to eventually....) All the plugs looked the same except one, Cylinder #5 was brand new looking. Could be no spark, no fuel, or possibly being "steam cleaned" from a water (head gasket) leak. Checked spark, swapped plugs, wires, etc... SPARK IS GOOD TO ALL CYLINDERS. Tested in multiple ways. Did the screwdriver test. Verified all the other injectors have good "tapping" noise, the "bad" one was muffled or no "tap".... Pulled the fuel rail, disconnected coil, turned engine over with rail connected with longer hose and set to spray on cardboard. Confirmed that #5 fuel injector not spraying. The others were. Took bad injector off, and used the 9v method to get it opening/spraying off the car with spare injector connector. i did this to my "spare" used injectors too. Off the car, they all clicked and were not clogged. Measured resistance on the "bad" injector and the known good ones, about 3 ohms for all. I've read most injectors should be 10-14 ohms, but maybe these are low impedance ones? Either way, the ones that were working and the "bad" ones had the same resistance values. Anyways, still no fuel from the bad injector. Swapped injector connectors to make sure it wasn't them. Same result. So I know the connectors are good. I then swapped the #5 and #6 injector on the rail. Same issue, the "bad" injector (now in cylinder 6 position) wasn't spraying, the others were. So this pinpointed the problem to the injector itself (not the fuel rail, not the electrical connections) Manually pressed the "pintle" on the bad injector with a dentist-type tool. Voila, a nicely patterned fuel spray came out! Cranked again, no spray from this injector, others are good. So I know this "bad" injector is not clogged, had same resistance as the other injectors, can spray, and has good power supply/input. (as verified by switching connectors and position). (I also moved the clean spark plug to #6 so I can monitor it). The other "spare" injectors I have seem to do the same thing (I thought it was odd that not 1 of the 4 spares were good, but will spray manually???) What voltage does the injector get from the ECU? I know they always have 12v, but the "pulse" is less? I can get them to operate fine off of the car with 9 volts. Maybe less voltage isn't enough? But then why the same resistance as the others? (V=IR) What am I missing? Or is it possible this/these injectors are still dead, despite the successful tests? Thanks
-
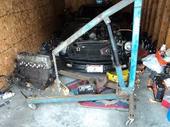
Doing some late night (early morning) research, and saw this. I just got done putting a ZX engine with the 3 row pulleys in my 76 Z. Didn't notice the 3 row pulley and it's clearance problem til it was installed... I could have tried to remove it by removing the crank etc... Didn't want to do that. I ended up making a "spacer" with longer bolts (with a short hex cap) installed from the back, then added 2 nuts from the front, moving the fan about 1" forward. This cleared the pulley, and didn't touch the radiator. Yes, it sticks out about 1/2' from the shroud, which isn't ideal, but it works for now. Made sure everything was tight and lined up good. Engine has run and does not loosen the connections. While testing the timing, the strobing of the timing light showed that all the nuts/fan connection line up almost perfectly, so it is balanced. HTH those who need some improv ideas. Also I believe the 3 row pulley is needed for power steering only. I can get an AC belt on mine now, but it goes on the 2nd pulley.
-
Putting it back together after 2 years....
ramsesosirus replied to ramsesosirus's topic in Open Discussions
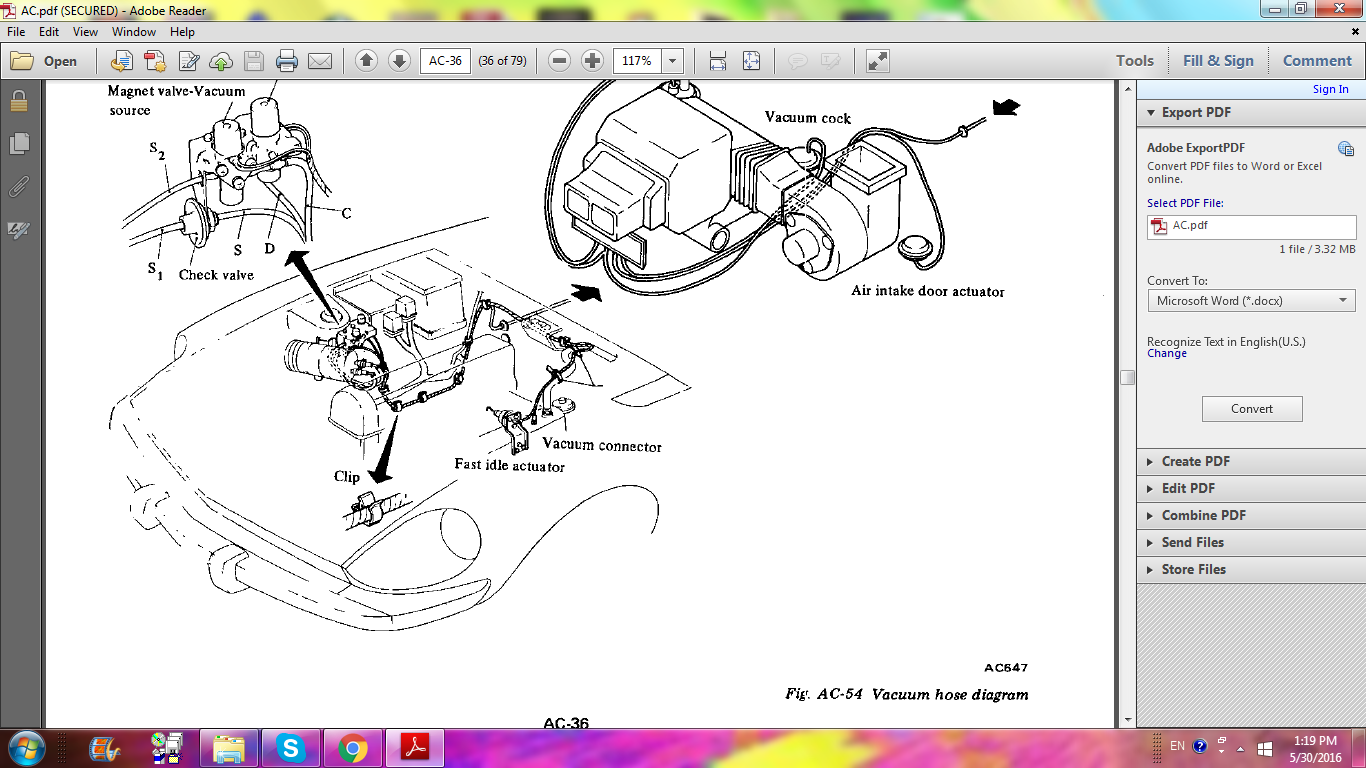
Found this the FSM today... some vacuum routing. It was in the "AC" Air Conditioner section. HTH
-
Thanks! That was one thing on my "TO DO" list, to take apart the door and get it to work.. DONE! That was easy.
-
Darn. So, my 1976 doors ARE NOT supposed to lock from the outside without the key?
-
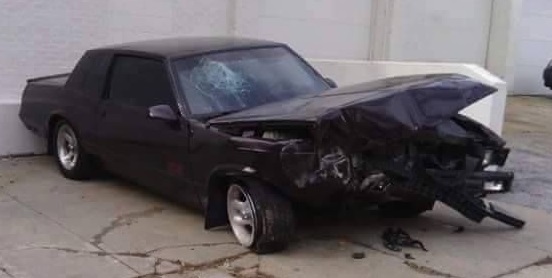
I used POR-15 on my 87 Monte Carlo SS that I had. Great stuff. I got the starter kit, which included 3 things: The "Cleaner/Marine Clean", the "Metal Prep", and the actual black "POR-15". I just sanded down the loose rust, followed the instructions. I put it over a large rust hole, and along the bottom seam of my doors, which had rust holes also. I put it on around 2003, and as of last year when I wrecked the car, it had held up great! It never lifted or chipped, and I did not see any further rust formation in those ares. I did NOT paint over it on the door seams. HOWEVER, the instructions mention that it is UV sensitive, and needs to be painted over if exposed to sunlight. So there's that. Overall, I think it is a great product. Obviously removing all rust and using new metal is the optimal solution, but I think this stuff is the second best option. Wear gloves, try not to get it on your skin. It will NOT come off until your skin is shedded, or you scratch it off. FYI. The theory of it is that is seals out the water and air, so it slows or stops rust as much as possible. I would also not hesitate to use it on clean metal, as a preventative. It is thick, tough stuff, that resists chipping etc.. better than paint. And looks better than undercoating.
-
Wow this is interesting, I'll have to try it! i've never been able to lock my doors without using the key from the outside. Which is actually kind of nice, not being able to lock your key in the car. I can push the lock pegs down, from the inside, IF the door is closed. If the door is open, the lock pegs won't go down. Cool piece of info for sure!
-
Thanks, yeah I'm lucky my dash cap wasn't glued/secured down or it would have been more tricky. It just kind of popped off with a little effort. Obviously had to watch the dimmer/trip knobs, and I had one screw holding it on. Also the steering column fit was tight, as mentioned, helps to remove the plastic column cover, which I'll do to install. The cap I have definitely prevents the speedo and tach from coming out. My dash had 3 big cracks under it. Funny thing is that without the dash cap, I have a much better "view" out of the windshield. The cap must be sitting high on the cracks or something... As for oiling the clock, yes I was aware of that info about NOT oiling them, however I did use the "proper" oil for those things, which is a clear, thin oil ("sewing machine" oil). My clock had never worked, so it was more of a trial thing If it gums up, that's fine with me. I don't really mind if it works. Thought I'd give it a shot for now. I had good luck getting a music box going again with this type of oil, which uses the same kind of gearing etc... That's good info. I know what you are referring to, those metal arms are what was stopping it from coming out. On a good note, with the glove box removed, I was able to see that most of my vent ducts had fallen off, or not been connected. So I can get those hooked up again. No problem, I enjoyed doing it. Like I said, I've never done something of this magnitude before, so I think it will help others decide if they should try to do it. I really can't think of anything that really held me up, pretty "easy" I thought. The center gauges were pretty easy, didn't even need to remove the dash cap for those. You mean someone swapped different gauges, or put them elsewhere on the dash, or just have the fuel/volt in the wrong place? I forgot which one went where... but I know the clock is furthest to the right, and the middle one has two electrical connectors, so that means the Fuel/Volt one goes in the center. Therefore the Oil/Temp is the furthest to the left. I have some blue incandescent bayonet (BA9S) style bulbs coming in (hopefully) this week, so I'll get some photos of the final results. I forewent the LED route mostly because I didn't want to deal with the wiring/cost/etc.... I can always change later. Also, there are so many options for LED's, and some of them aren't bright enough, some are too bright, etc... We'll see how this works out. I plan to remove the green filters for the blue bulbs. I plan to do a photograph of 1) stock bulbs and green filters with white gauges (I did a test fit, and this looks pretty good) 2) stock bulbs, no green filter with white gauges (I did a test fit, and it's brighter, but has a yellowish hue) 3) blue bulbs, no filter, white gauges for reference.
-
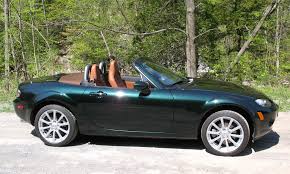
Haha no problem, we're all trying to find out the same stuff The Z's really do look good in green I think. But my color is definitely not either the #303 or the #240. After looking more closely under the rear tool compartments, I'm wondering if my original paint was the #240. If so, the re-spray as actually pretty thorough, as the bottom of the hood, door jambs, under the hood "flaps" (washer/battery) are the same as the rest of the car. Still, it would be odd for the original stickers to be so old looking... I wish I could read the "color code" sticker! Oh well, either way I like the paint I have. Much appreciation for the comments and photos! This picture is an image of a Miata in stock "Highlander Green", which looks really close to what I got. Might use this as a reference for touch ups/etc...