


240260280
Free Member
-
Joined
-
Last visited
Everything posted by 240260280
-
 @psdenno The website says I can not like you today.... maybe tomorrow:
 This thread is very quiet. Are there others following it? Curious to know. Please chime in.
@blodi Heads Up! F19 tubes enroute to you from Europe ?
I drool sometimes, and live in the sticks... can I join the club too.
You can try coating seams with soapy water and pressurize with a few psi then look for bubbles.
I thought it was to protect something in the fuel system. I remember someone describing it a long time ago on zcar.com Maybe legacy 260z fuel pump
This thread is very quiet. Are there others following it? Curious to know. Please chime in.
@blodi Heads Up! F19 tubes enroute to you from Europe ?
I drool sometimes, and live in the sticks... can I join the club too.
You can try coating seams with soapy water and pressurize with a few psi then look for bubbles.
I thought it was to protect something in the fuel system. I remember someone describing it a long time ago on zcar.com Maybe legacy 260z fuel pump We are metric in Canada but lumber is not....except what you buy at Ikea. When I lived in Ireland I recall posted road speed being mph but posted distances being km.... sort of mixed like in Canada. For weather, wind speed was mph in Ireland but kph in Canada.
Rotate the wheel: Does the wheel spin on the same plane or does it wobble?
Maybe TimN was the buyer and wanted to bluff/scare other potential buyers away?
Ahmmm.... direct chamber injection from a 2018 civic turbo sir? ? Just teasing. I am excited as the rest of the gang here... go Jim go! We will all learn together.
We are metric in Canada but lumber is not....except what you buy at Ikea. When I lived in Ireland I recall posted road speed being mph but posted distances being km.... sort of mixed like in Canada. For weather, wind speed was mph in Ireland but kph in Canada.
Rotate the wheel: Does the wheel spin on the same plane or does it wobble?
Maybe TimN was the buyer and wanted to bluff/scare other potential buyers away?
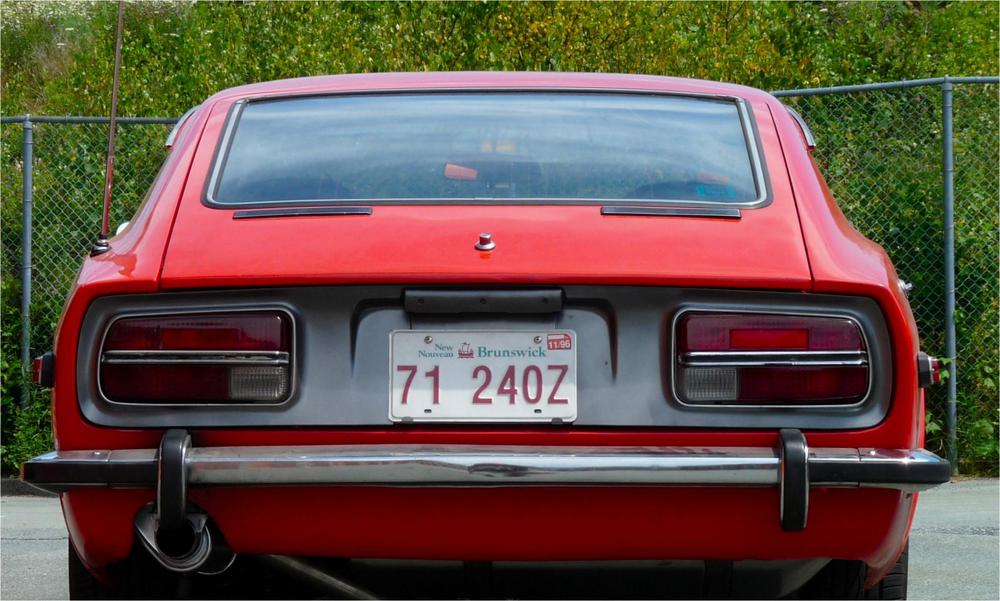
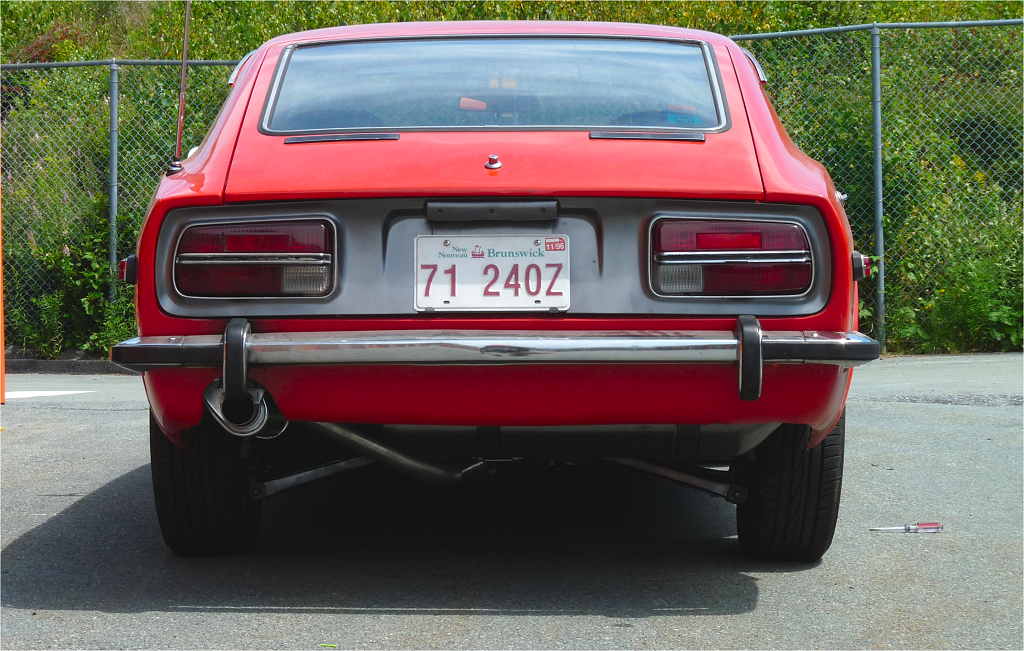
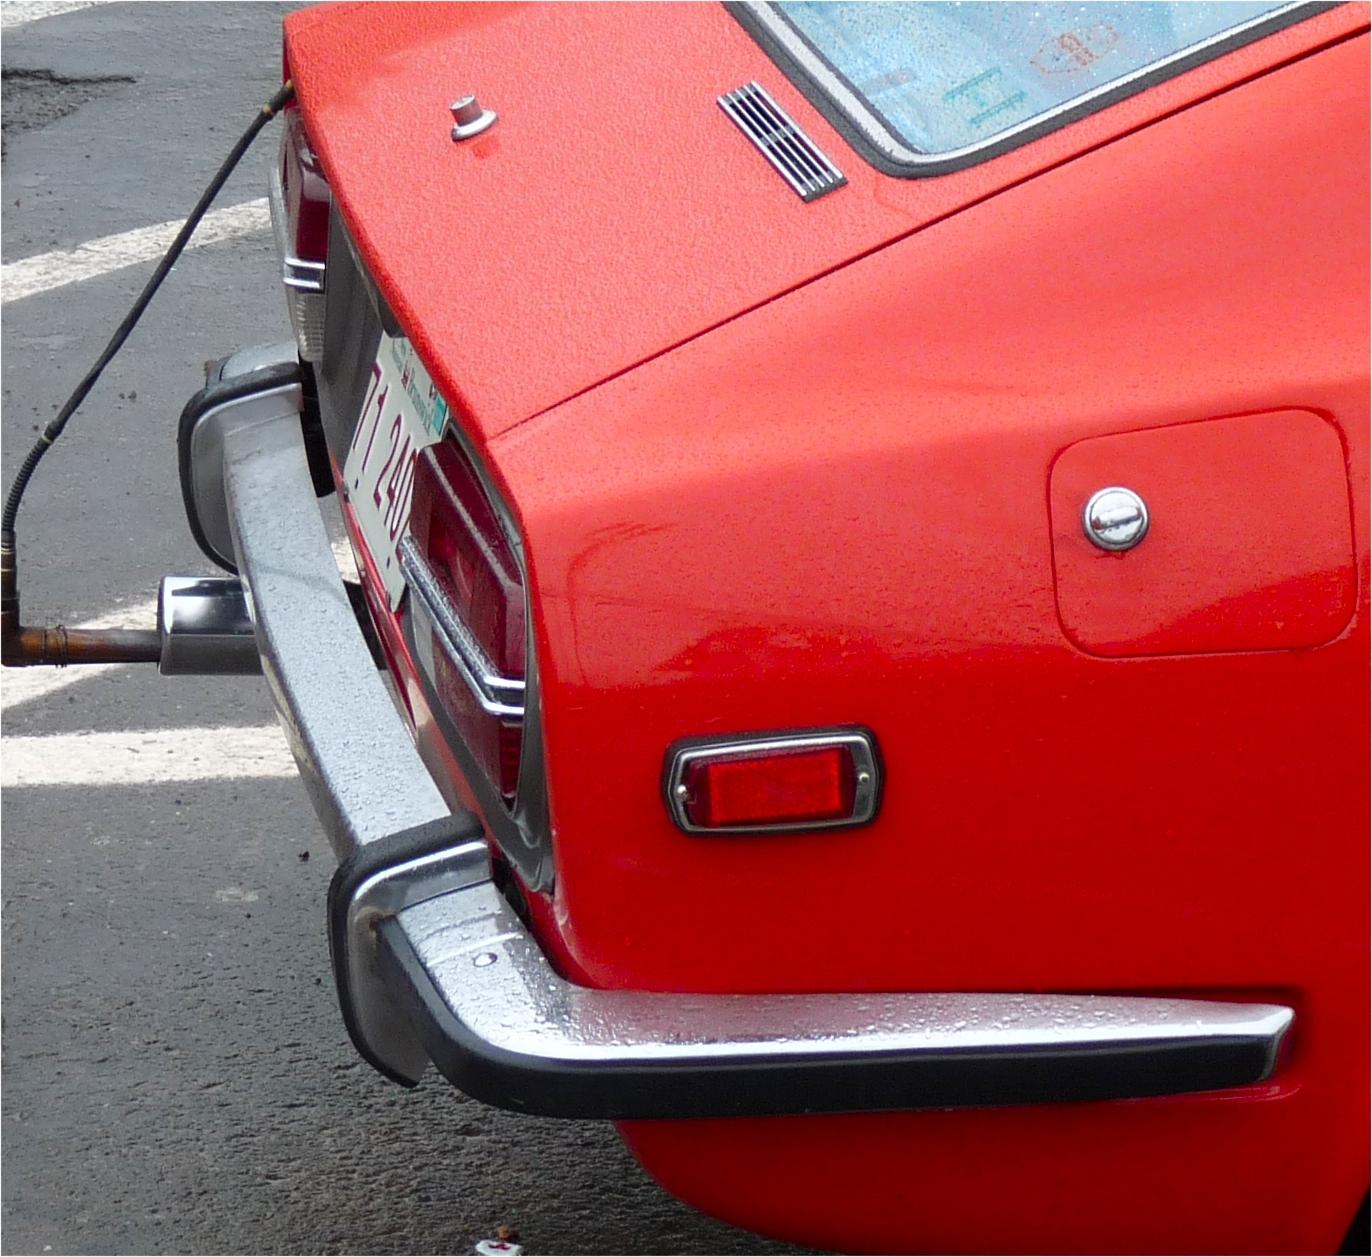
Ahmmm.... direct chamber injection from a 2018 civic turbo sir? ? Just teasing. I am excited as the rest of the gang here... go Jim go! We will all learn together. Two key points when doing anything with suspension or steering (lifting car off ground or replacing parts): 1. If car is just lifted off ground, the wheels will camber in when lowered. It must be rolled a few feet back and forth to settle into its natural position. 2. When unbolting and/or replacing any part, the bolt or part must be re-torqued after doing the above and/or loading the part (e.g. if the wheel is off, and a strut is being replaced, a jack must be placed under the strut and the strut lifted enough to simulate loading it before torquing the strut bolts.). In your case I would just loosen all the bolts to just snug and roll the car back and forth to see if the wheels better align. Here is a 240z that was lifted then lowered without rolling. The camber of the rear is very positive.
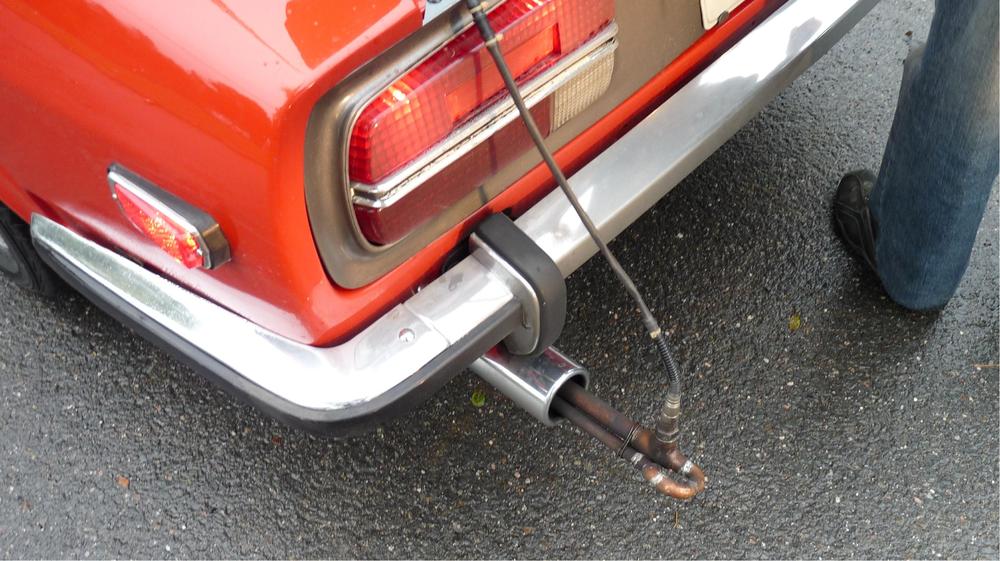
 The reason for the double back design and long length is to ensure the sensor is sampling undiluted gas at idle. If an opening in the sniffer tube is exposed to fresh air, or if the openings are close to the tip, it is possible for reversion of fresh air to contaminate measurements at idle. Shorter tubes or a straight tube with inlet in the pipe and outlet behind the car are ok at speed.
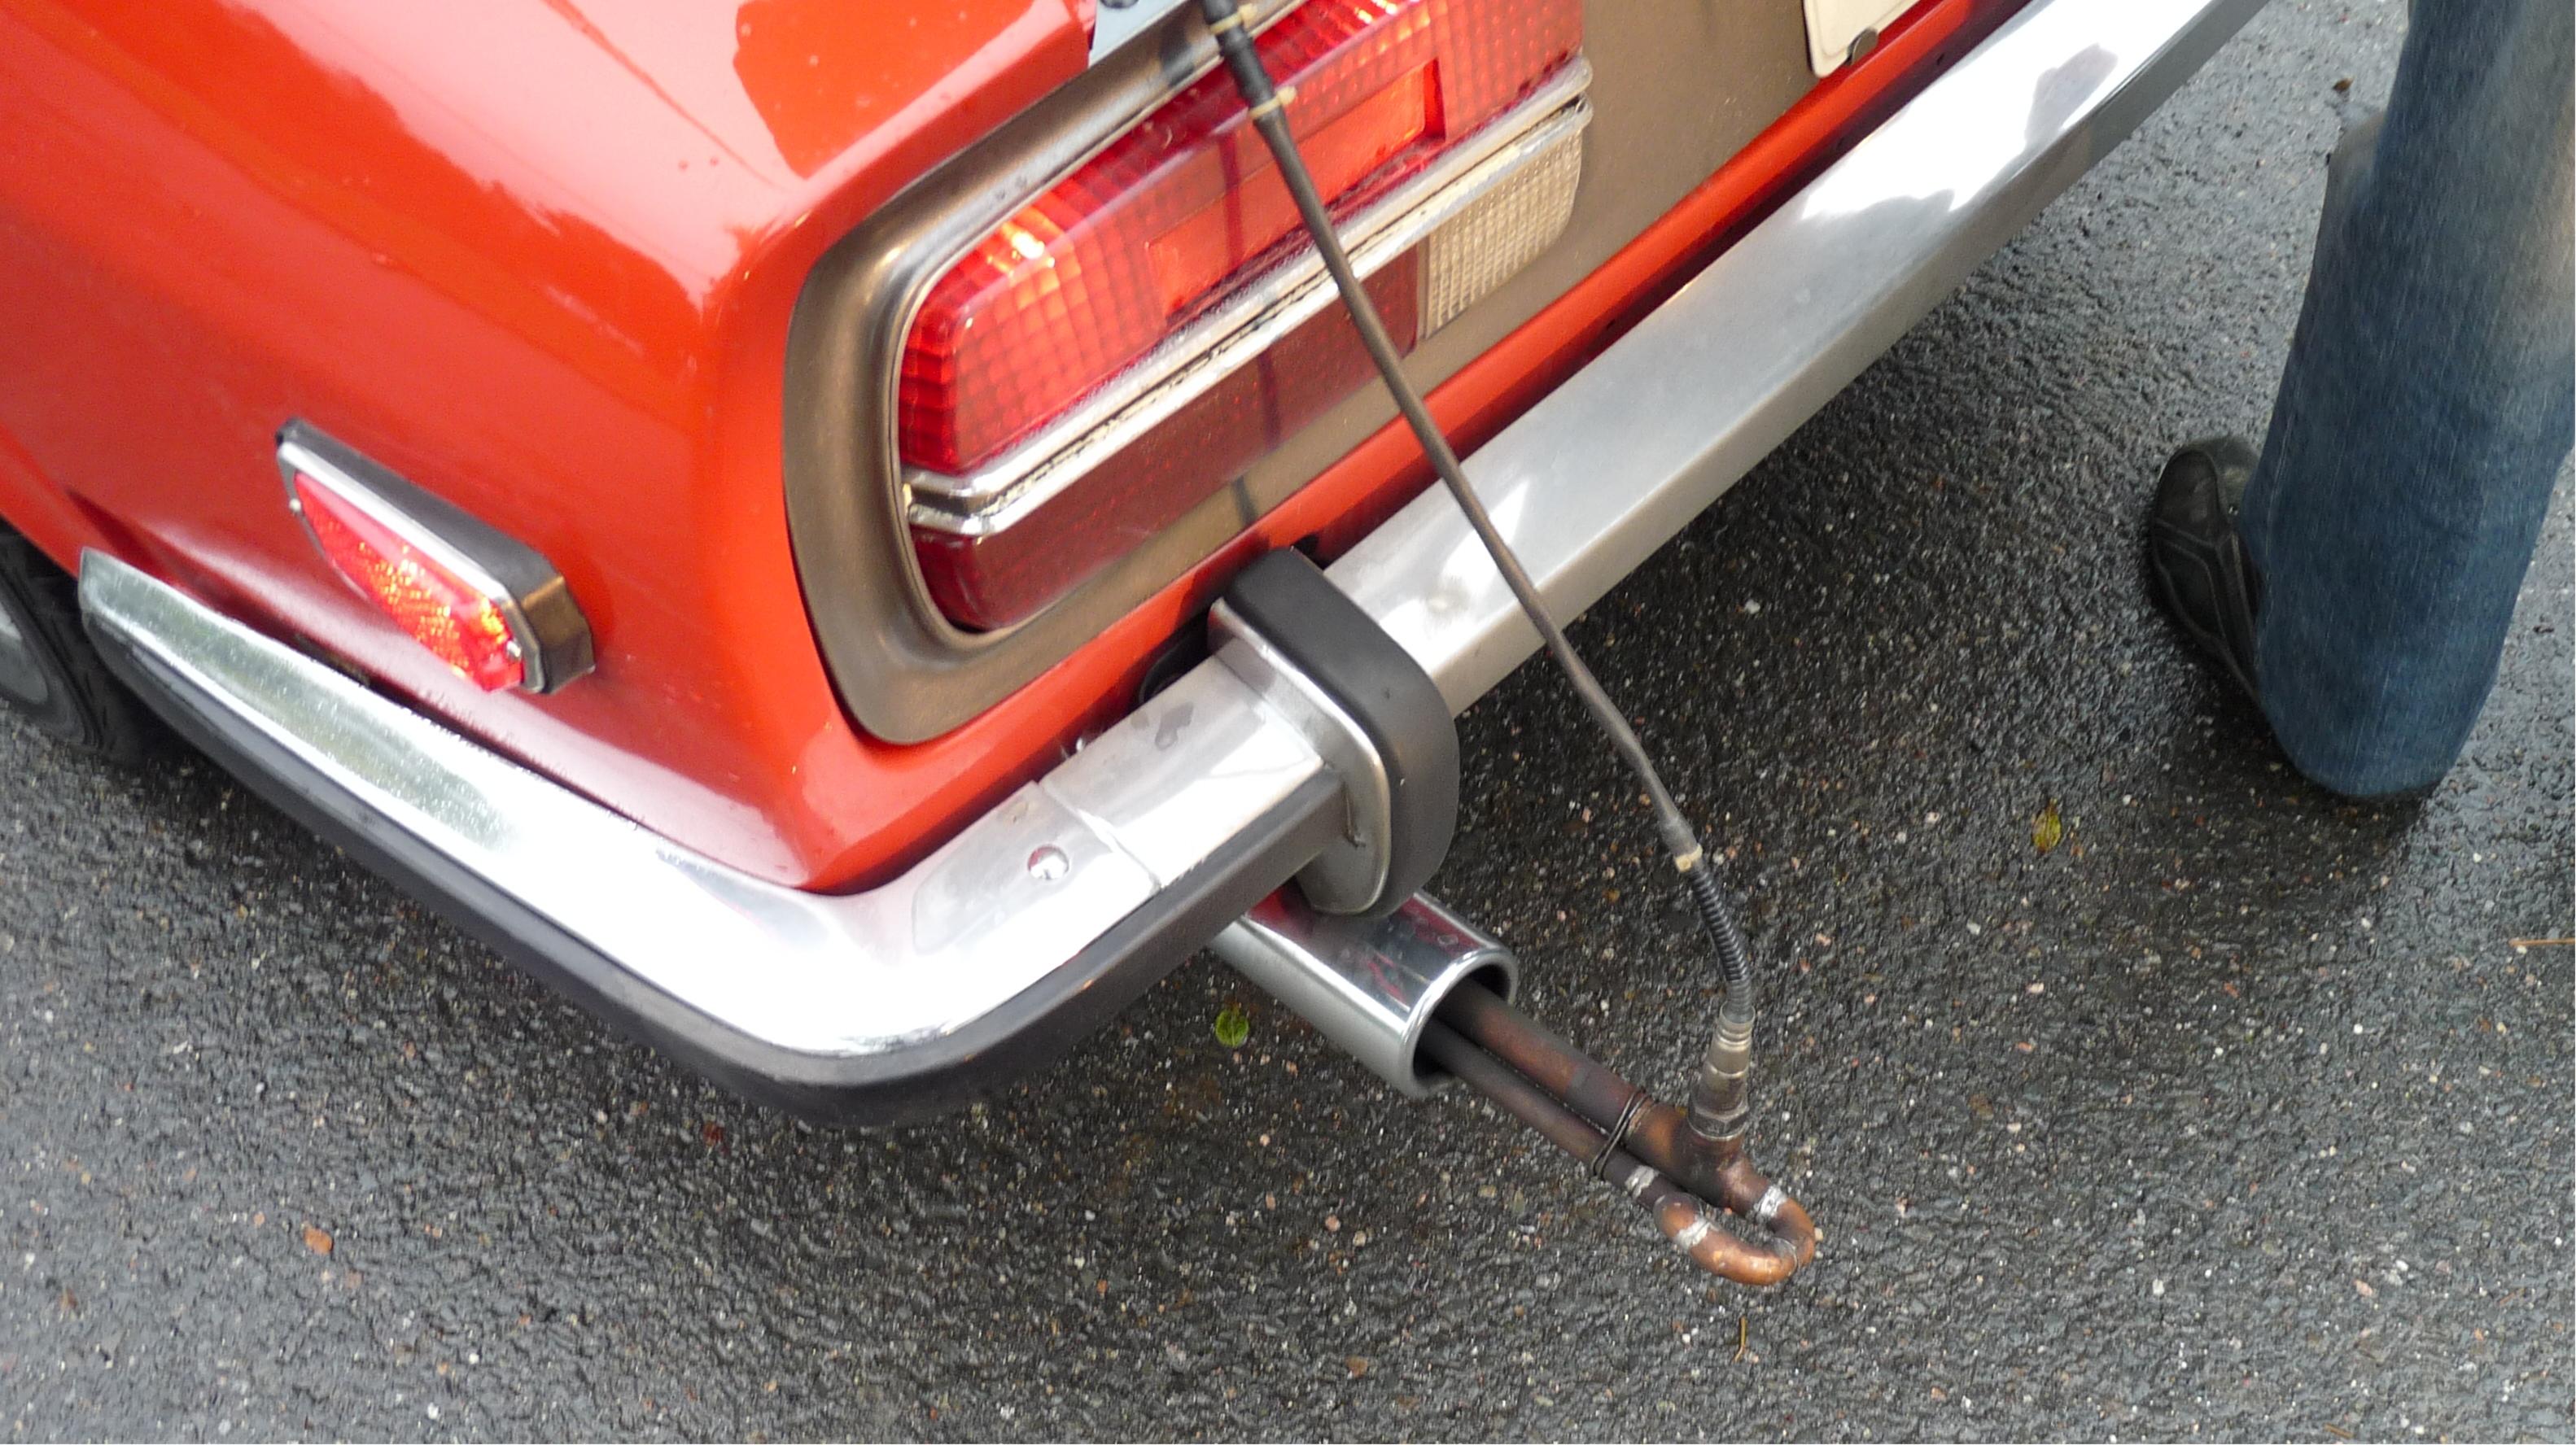
Braze or screw rather than solder... the solder weakens in the heat. The top pipe is the intake 3/4" copper ~ 2' long. I used a 1/2 to 3/4" coupler at the nose to capture the exhaust correctly. The bottom pipe is the exhaust. It is ~ 2" shorter than the top tube. It is 1/2" copper with the end (front most part) capped with a 1/2" copper cap. There is a 1/4" hole drilled ~ 2" back from the 1/2" cap. This is where a venturi effect sucks the exhaust out of the pipes. I used an O2 sensor tap (spark plug hole tap) to put a thread on a copper ring that was placed in the junction T (2 X 3/4" and 1 X 1/2"). 4 90degree street elbows make the loop and are adjustable to bring the two long pipes tightly together. It works well on large exhausts. For small, just use the top part don't double back; just extend a 1/2" pipe a foot behind the T.
If you have the timing components off and are rebuilding, you do not have to use shims. Simply be sure to remove all slack in the chain (as normally done when installing these components) then check the timing mark on the cam sprocket at TDC. You can use the 3 adjustable holes in the sprocket or even jump a link to get the timing marks correct.
It is easy to do. Just connect the mityvac to the port on the booster and draw vacuum. It just takes ~ 30sec to pull 15". There are adapters in the kit to connect larger diameter vinyl tubing to the smaller tubing on the gun. Pressing the clevis will release the vacuum. It does not really test much apart from checking normal functioning. The two main tests are: 1. [Basic Leak Test] Will the booster hold vacuum for 10min with the rod in relaxed position. 2. [Rod to Rubber Seal check] Will the booster hold vacuum as the rod is manually pulled out a couple of inches and returned. Pitting in the rod will leak air. You may have to move a rod seal, lubricate a seal, or even sand down a rod to make one work nicely.
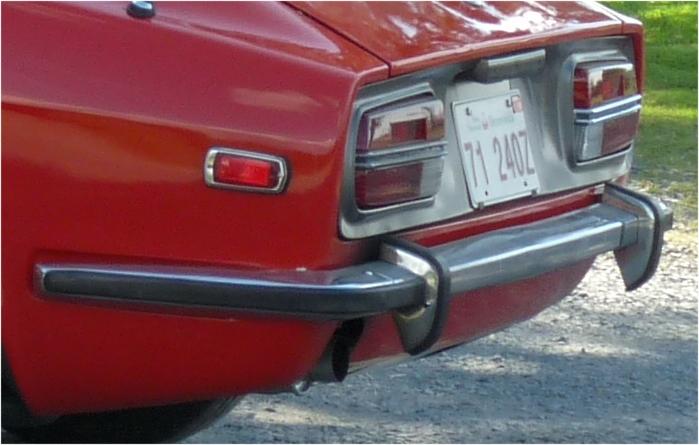
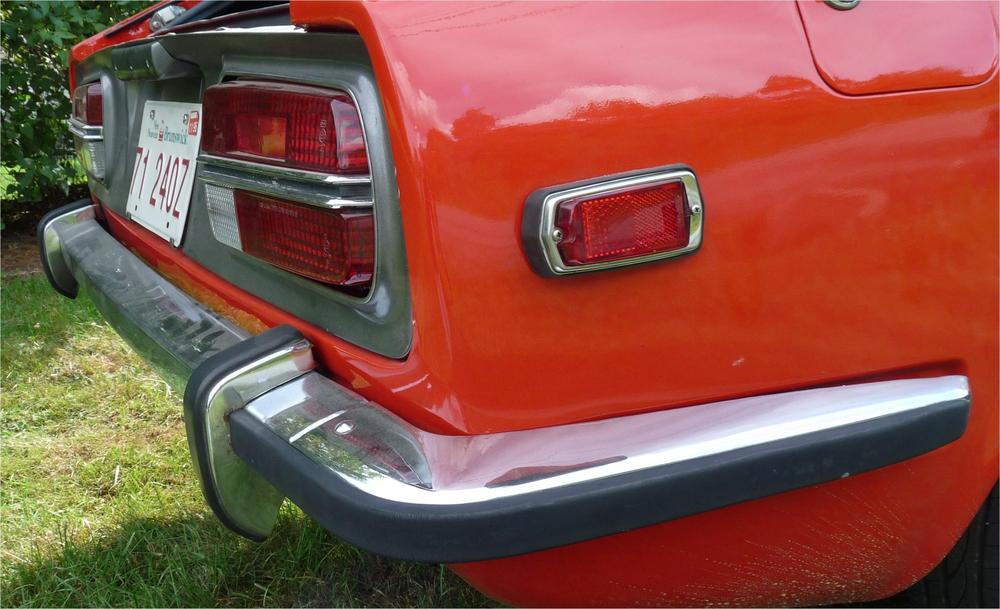
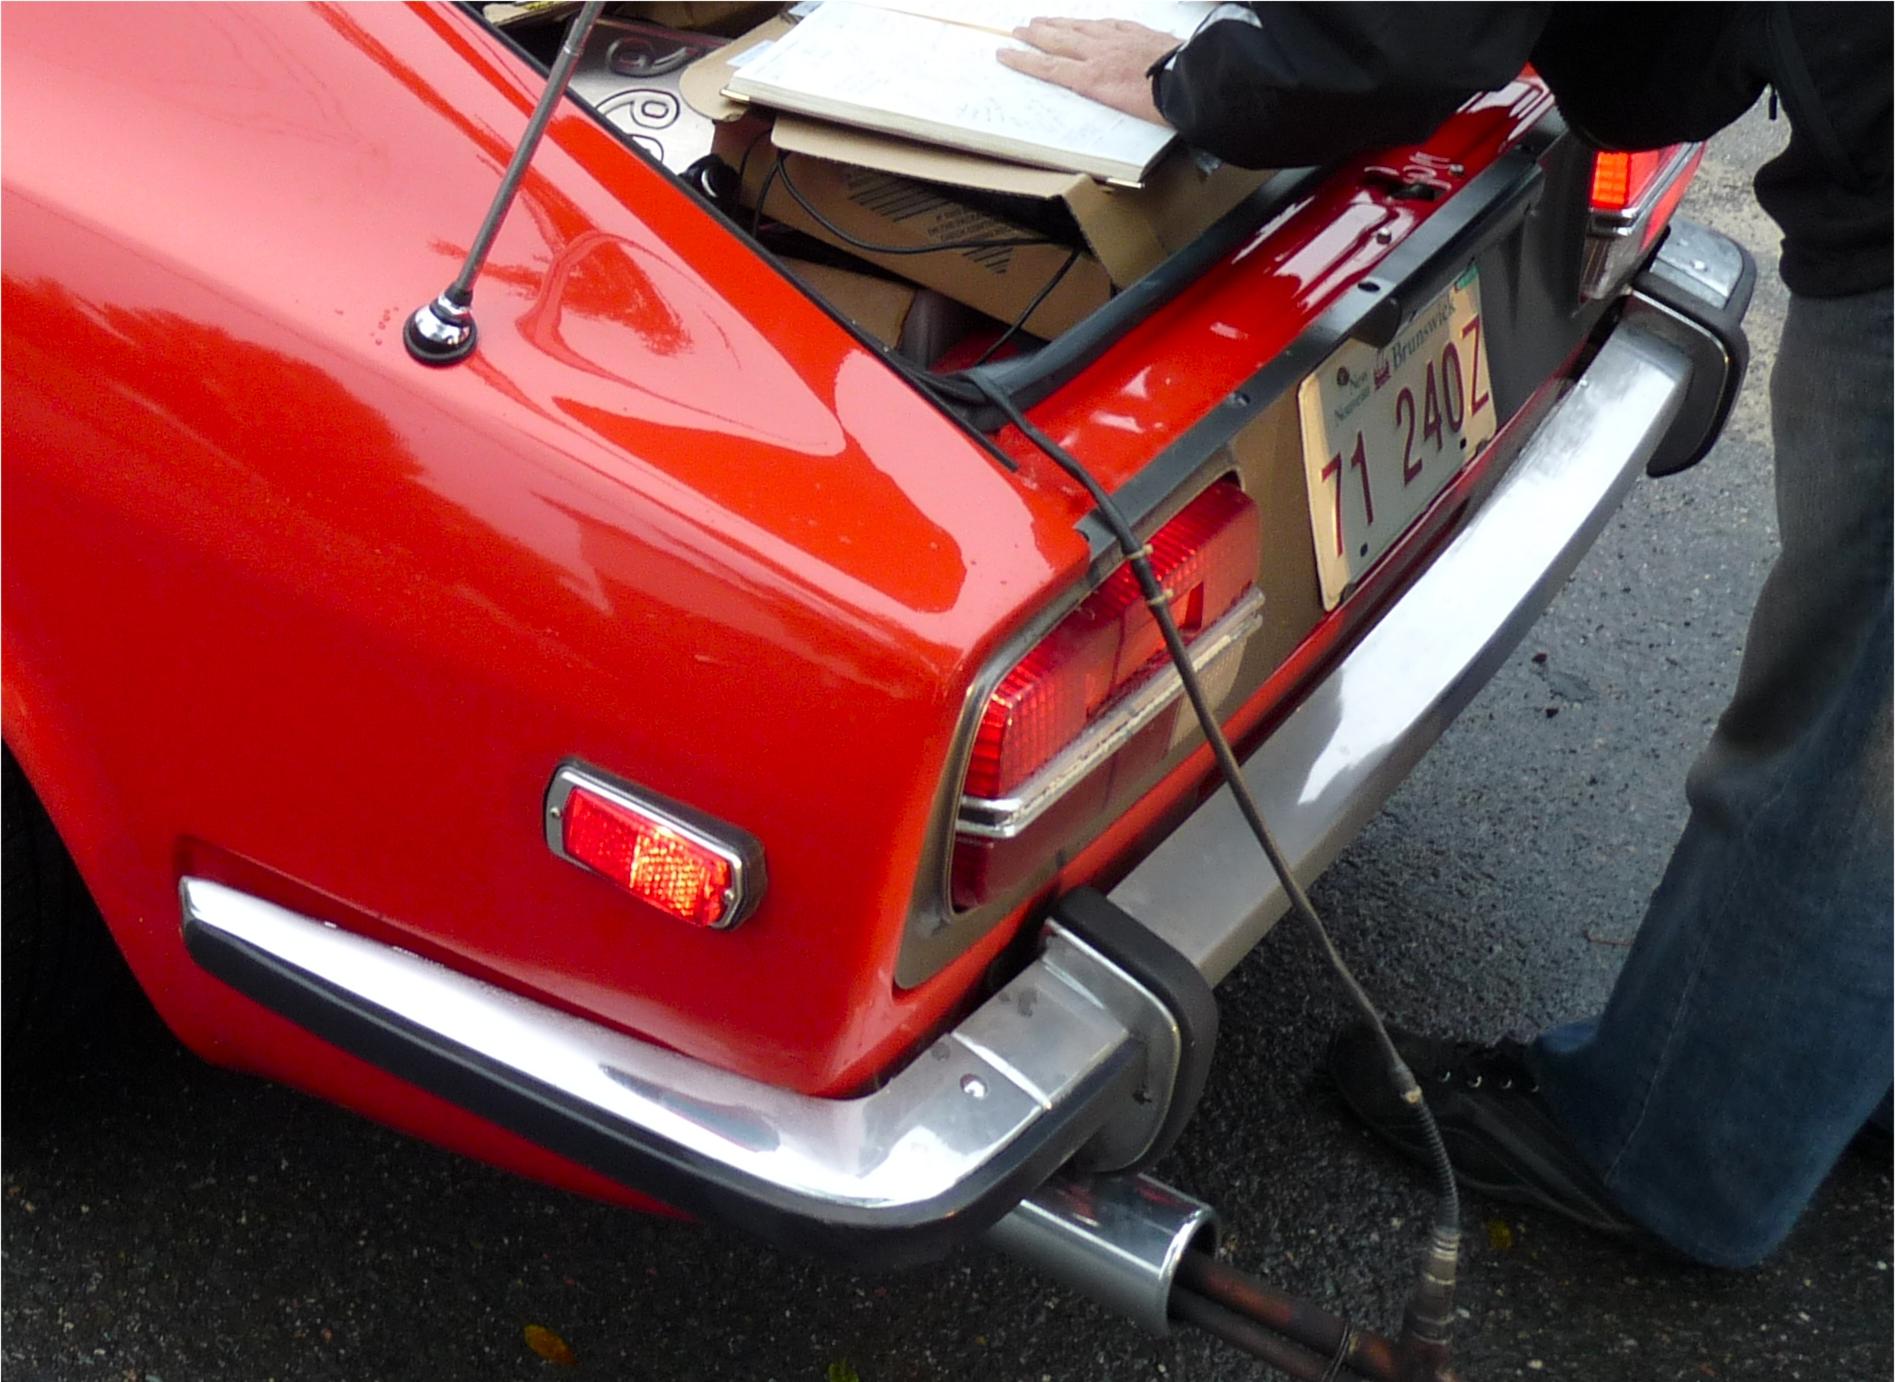
Nice visiting with you tonight. Here are pictures of a 71 240z @Dr. 240Z
The reason for the double back design and long length is to ensure the sensor is sampling undiluted gas at idle. If an opening in the sniffer tube is exposed to fresh air, or if the openings are close to the tip, it is possible for reversion of fresh air to contaminate measurements at idle. Shorter tubes or a straight tube with inlet in the pipe and outlet behind the car are ok at speed.
Braze or screw rather than solder... the solder weakens in the heat. The top pipe is the intake 3/4" copper ~ 2' long. I used a 1/2 to 3/4" coupler at the nose to capture the exhaust correctly. The bottom pipe is the exhaust. It is ~ 2" shorter than the top tube. It is 1/2" copper with the end (front most part) capped with a 1/2" copper cap. There is a 1/4" hole drilled ~ 2" back from the 1/2" cap. This is where a venturi effect sucks the exhaust out of the pipes. I used an O2 sensor tap (spark plug hole tap) to put a thread on a copper ring that was placed in the junction T (2 X 3/4" and 1 X 1/2"). 4 90degree street elbows make the loop and are adjustable to bring the two long pipes tightly together. It works well on large exhausts. For small, just use the top part don't double back; just extend a 1/2" pipe a foot behind the T.
If you have the timing components off and are rebuilding, you do not have to use shims. Simply be sure to remove all slack in the chain (as normally done when installing these components) then check the timing mark on the cam sprocket at TDC. You can use the 3 adjustable holes in the sprocket or even jump a link to get the timing marks correct.
It is easy to do. Just connect the mityvac to the port on the booster and draw vacuum. It just takes ~ 30sec to pull 15". There are adapters in the kit to connect larger diameter vinyl tubing to the smaller tubing on the gun. Pressing the clevis will release the vacuum. It does not really test much apart from checking normal functioning. The two main tests are: 1. [Basic Leak Test] Will the booster hold vacuum for 10min with the rod in relaxed position. 2. [Rod to Rubber Seal check] Will the booster hold vacuum as the rod is manually pulled out a couple of inches and returned. Pitting in the rod will leak air. You may have to move a rod seal, lubricate a seal, or even sand down a rod to make one work nicely.
Nice visiting with you tonight. Here are pictures of a 71 240z @Dr. 240Z

 The art seems inspired from this video:
 I just did this. Put a mityvac tool with a gauge on the booster's port then draw 15" vacuum. See how long it holds. Also with the vacuum at 15", you can slide the push rod in and out to see if the shaft to seal leaks under simulated operation.
Interesting on the 4mm data point. I always wondered when the water passages at the bottom margin would loose their shape and also when there would be too much heat for the now thinner base of the head.
Most HG are a bit more than 1mm. Here are measurements reported on the internet (1.1mm, 1.15mm, 1.20mm). Run this newer engine builder version from your desktop. It comments on squish. Just open file with any browser. S30 Engine Modeller V3 Beta 3.zip You can easily edit the html with a text editor to customize the lists. Here is HG section with (Name, diameter, thickness) format.
I just did this. Put a mityvac tool with a gauge on the booster's port then draw 15" vacuum. See how long it holds. Also with the vacuum at 15", you can slide the push rod in and out to see if the shaft to seal leaks under simulated operation.
Interesting on the 4mm data point. I always wondered when the water passages at the bottom margin would loose their shape and also when there would be too much heat for the now thinner base of the head.
Most HG are a bit more than 1mm. Here are measurements reported on the internet (1.1mm, 1.15mm, 1.20mm). Run this newer engine builder version from your desktop. It comments on squish. Just open file with any browser. S30 Engine Modeller V3 Beta 3.zip You can easily edit the html with a text editor to customize the lists. Here is HG section with (Name, diameter, thickness) format.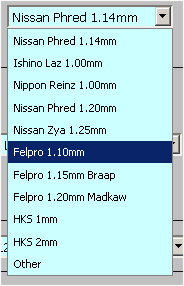
 I just bought a full 240z ss hardline brake set and NOS Nabco 15/16 master for $150 USD
I like the Maxima N47 head. It is one of the later heads and seems to have the same geometry as modified E31's for racing. The exhaust ports are fine. Larger intake seats will help it. btw it is nice to get a HP data point from your work! 185HP 10.2CR 2.82litre
This one is newer one: S30 Engine Modeller V3 Beta 3.zip. Just unzip and run in any web browser. If you look at the html code in a text editor you can easily see where the tables are and you can add your special configs. btw Moelk, have you considered using 88mm VW pistons to increase displacement? ? - Crank: Stock L28 offset grind (1mm extra stroke) - Pistons: VW 88mm pistons shaved 1mm - Rod: Stock L28 small end enlarged to 22mm for VW piston pin. Its working length needs to be shortened by 0.5mm so an offset bore on the small end or big end will do it, (or skim more off the piston top) - HG: Stock - Head: your current E88 - Rod bearings: -1mm to adapt to offset grind. This configuration optimizes squish, mildly strokes, and increases displacement with mostly stock parts and some common machining work. It will bump up your compression to 11.1
I just bought a full 240z ss hardline brake set and NOS Nabco 15/16 master for $150 USD
I like the Maxima N47 head. It is one of the later heads and seems to have the same geometry as modified E31's for racing. The exhaust ports are fine. Larger intake seats will help it. btw it is nice to get a HP data point from your work! 185HP 10.2CR 2.82litre
This one is newer one: S30 Engine Modeller V3 Beta 3.zip. Just unzip and run in any web browser. If you look at the html code in a text editor you can easily see where the tables are and you can add your special configs. btw Moelk, have you considered using 88mm VW pistons to increase displacement? ? - Crank: Stock L28 offset grind (1mm extra stroke) - Pistons: VW 88mm pistons shaved 1mm - Rod: Stock L28 small end enlarged to 22mm for VW piston pin. Its working length needs to be shortened by 0.5mm so an offset bore on the small end or big end will do it, (or skim more off the piston top) - HG: Stock - Head: your current E88 - Rod bearings: -1mm to adapt to offset grind. This configuration optimizes squish, mildly strokes, and increases displacement with mostly stock parts and some common machining work. It will bump up your compression to 11.1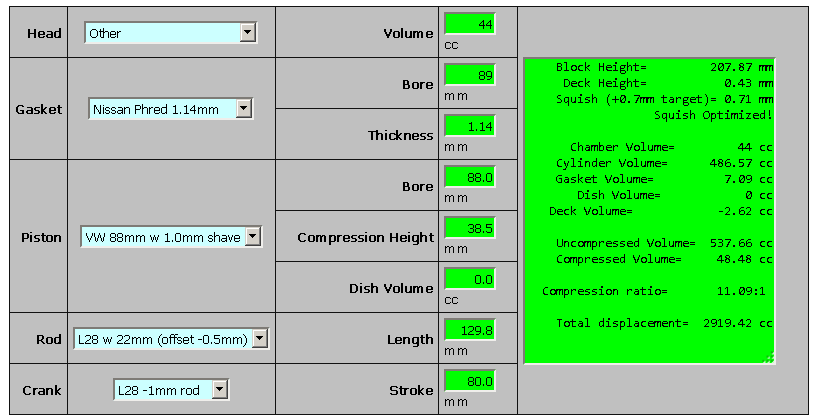 No big difference (which is good). The middle peak is moved but that is artifact of X axis as time. It is still rich. A calibration or 160 or 155 main will fix that.
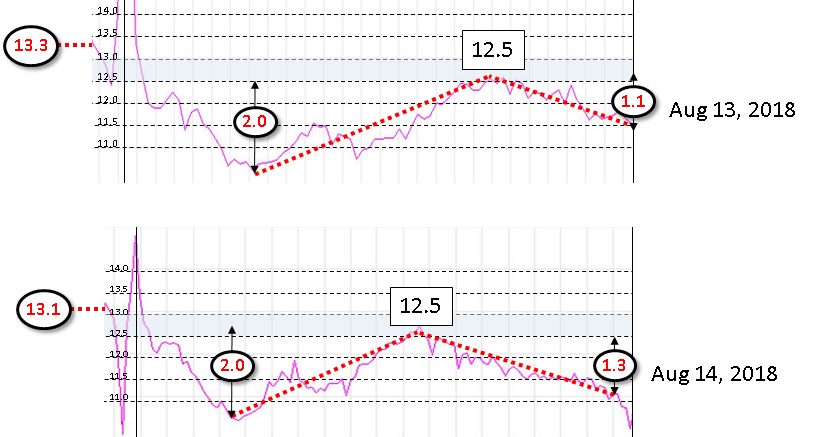


Important Information
By using this site, you agree to our Privacy Policy and Guidelines. We have placed cookies on your device to help make this website better. You can adjust your cookie settings, otherwise we'll assume you're okay to continue.