Ed
Member
-
Joined
-
Last visited
Everything posted by Ed
-
Would this be the one?
-
Yes this would be the correct way to extract a broken bolt IF you already have access to the broken bolt. But unfortunately to be able to drill the broken bolt the cover must be removed to gain access to the bolt. Once the cover is off spray the broken bolt with PB Blaster. Let it soak. Then use an EZ-out. Do a search on ez-out and you will find several threads on how to correctly go about removing the broken bolt.
-
Dude, do the right thing and call the cops. Let them worry about it. If it is stolen they will ensure the rightfull owner gets his car back.
-
Good to hear your going to do it right. You can remove the cover without having to remove the head or the pan. Loosten the front and side bolts of your pan and just lower it 1/2". Don't forget the two small bolts at the front of your head that bolt to the cover. Use a new gasket set, they are available with new front oil seals. Depending on how many miles and how well the engine was taken care of will determine if you should change your timing chain and such. Carefully inspect their condition. BTW the guides will have grooves in them. Are you using a manual?
-
There is a 50/50 chance that it will seal without that bolt. But if you have the time I'd say do it right the first time. Set the timing at TDC, remove the cover, remove the broken bolt and replace them with some stainless steel bolts and use plenty of anti-seize on your bolts when you re-install. The last thing you want is for your water pump to start leaking when your hours from your home.
-
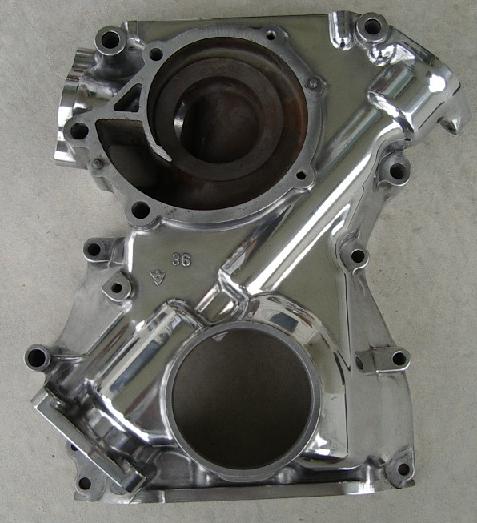
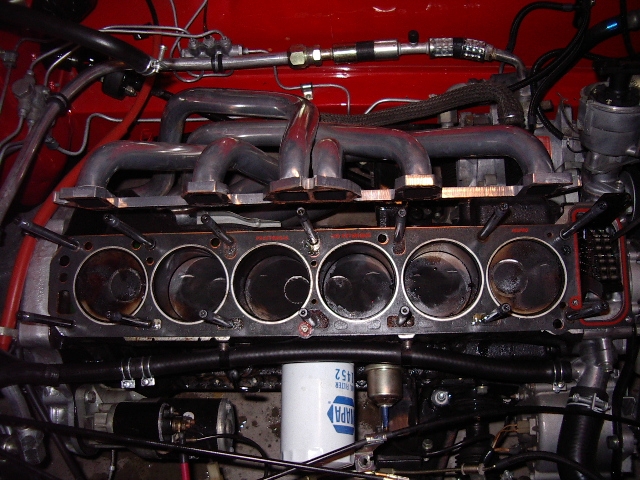
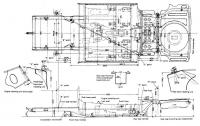
Which bolt broke on you? If you notice on the attached picture there are 5 bolts that hold the pump. The two on the right at the 1 oclock and 4 oclock position are threaded into the cover. The two large and long bolts at 7 oclock and 9 oclock are bolted to the block and then there is the long skinny bolt at 11 oclock which is also threaded into the block.
-
No, just the valves. And I got a compliment on my port work.
-
Philip, My hat goes off to you. You are doing an outstanding job. You show true passion for your Z. Keep up the good work and keep those excellent video's coming. They are great! Here is a little something that will hopefully help you: (If it's too small let me know I can email you a larger size picture 2200 x 2000)
-
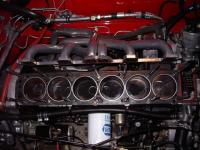
Well I got the head back today. All 12 valves were bent. I guess this is the price I pay for a high compression engine. So $200 bucks later I'm back in buisness. I'll put the head back on tomorrow after I give it a good cleaning and polish it back up again.
-
Wouldn't it be more like gallons? Also wouldn't the oil spill out of the crankcase vent tube?
-
Appearantly a decal is worth a couple of grand.
-
Dave, I installed power windows in my 73. I used the motors out of a 81ZX. The rest was home fabrication. Sorry I don't have any pictures with me right now. Basically, I mounted the motor in the lower front corner. I also used the original regulator. 1. I cut the serrated gear off the regulator so that it would move freely. 2. I welded a bracket onto the regulator where the serrated gear was. 3. Attached a bar from the motor to the bracket. Sounds a lot easier than it was. I had the benefit of using an old door which I cut the skin of so I could work on proper geometry. I left the window crank in place. Although none functional it retains the stock look. I mounted the switches on the center console between the ashtray and the shifter. And I will agree with you. It is NICE!!!
-
There might be a chance your not getting good oil pressure or it might be something else. To check your oil pressure do the mechanical guage as you mentioned and, take the spark plugs out and spray a little oil into the chamber walls. You might also want to remove the valve cover and inspect all rockers and such. Pour a little oil over the cam. Turn the engine over for about 15-20 seconds, don't let it start, keep the plugs out. If you have oil spraying out of your cam spray bar then you should be ok on oil pressure. Z's are notorious for the guage indicating low pressure at idle. You can also make sure all your valves are opening and closing as they should be.
-
Steve in nutshell. Most door seals being sold now no matter who sells it, is an after market one. For some people they work fine for most they don't. You won't know until you try. OEM seals are the way too go but $$$ and there are still a few out there. The J C Whitney seals don't require the welting and are softer then the aftermarket ones. (The aftermarket ones are solid and the C ones are hollow). HTH Ed
-
-
Park your car on a flat surface and measure from the top of the wheel arch to the ground. Also the condition of the shocks has no impact on ride height. The springs determine the ride height. You can also count the number of coils on each spring. Some have more coils front to rear. The only way to know if your springs are wrong is to take them out and measure the height of the individual spring.
-
Well I gave those other seals 6 months and they were still tight. The drivers door wouldn't seal and you could hear the wind blowing while driving. Sooo I pulled the old seals and installed the J C Whitney seals. I ordered two seals and had about 1 1/2 feet left over on each side so there is plenty. They look pretty close to the OEM seals. And they are softer than the last ones I had. I was able to close the drivers door a bit more than before but it is still tight. The passenger door is much better. I'll get back with you in a couple of weeks. I want to see if the drivers door improves. When I get my car running again I'll see if the wind noise is gone.
-
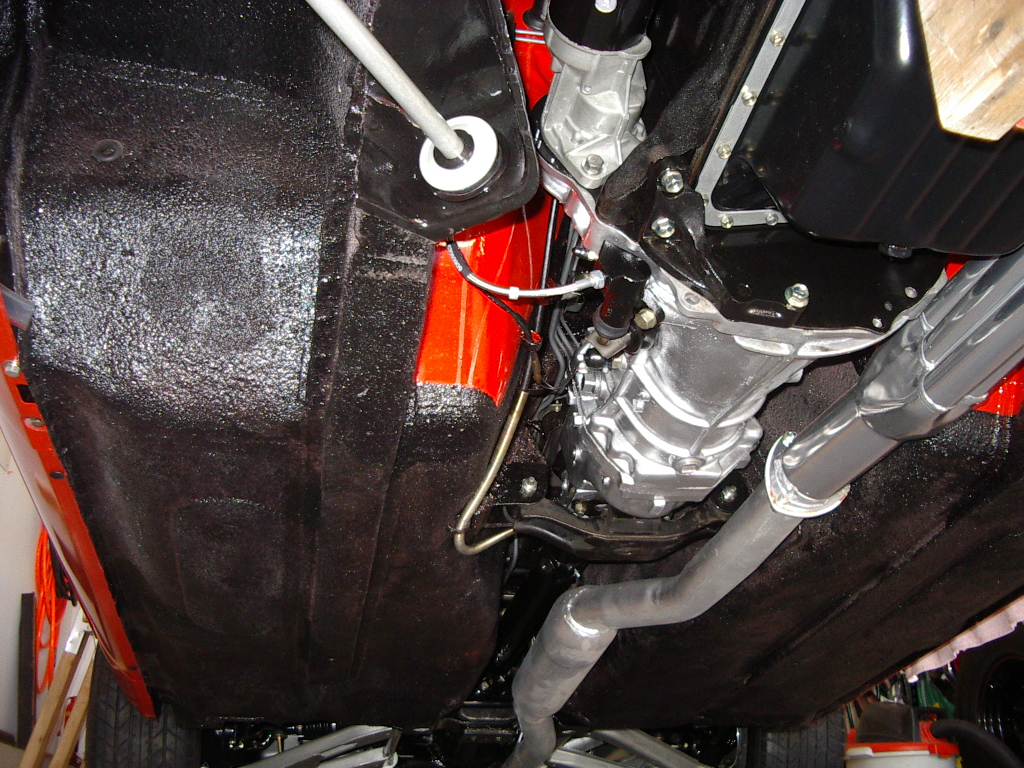
What each person uses for undercoating is up to them. Some won't use it at all because it hides what is happening underneath. Others use if for sound insulation or to protect the paint. Personally I didn't use the rattle can undercoating because of the facts previously mentioned. Basically it's tar in a can, it gets hard over time and it is pourus. Marduke, your at a stage right now where you have to think about what kind of finish you want. Clean painted or undercoated. Eather way you have to protect the bare metal. This is your # 1 priority. Use a paint that has been tested and recommended. I used the POR-15 product because it was easy to apply (paint brush) and it was recommended. Over the POR I applied chassis coat black which is another POR-15 product. And to finish it off I used the Herculiner. Overkill? Probably. Worth it? Yes. Will I have to do this again? Not to this car. I'd bet money that this undercoating will last 30+ years. And another benifit of using the Herculiner is that if you have to repair some part of your car or part of the Herculiner chips you can patch and repair that part and cover it with a fresh coat of Herculiner. It will adhere to itself. Marduke, I'm sure you don't want to go through the process of having to strip your underbelly again. So do some more homework and do it right the first time. Oh yea, my car still looks great! Like the day I applied it.
-
 Now this is nice! Great work!
 -
No he won't ship, he does UPS however, .
-
Great to hear another Z has survived. The longer the work the greater the satisfaction.
-
I'm down here for 6 months, working. I couldn't pass up the opportunity to get out of the snow. Unfortunately I left most of my tools and my "spare engine" at home. Not to make you feel bad or anything but it was in the 60's yesterday.
-
I agree with Arne, If you want it done right you have to pay the piper. I took mine to a guy that did custom exhausts for race cars. He also does roll cages. I was 100% satisfied with his work and you can't find him in the phone book, he's a word of mouth guy and very busy. Too bad he's down east of San Diego otherwise I'd tell you to give him a visit.
-
Here is a picture of the pistons with the head off. You can see where the valves left there print. Only 11 out of 12 got bent. I feel lucky, one valve probably survived . Off to the machine shop the head goes....
-
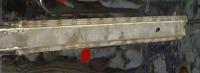
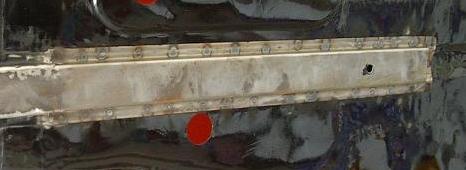
When I drilled out my rusted frame rails: first I center punched the weld, then I used a 1/8 drill to help guide the larger 3/8 bit to remove the weld. I purposely welded through both pieces of metal. After it was all cleaned up, treated and ready for the new metal I secured the new metal in it's place. Then I would use the same holes to weld in the new rails. The result is a very clean looking weld almost identical to the spot weld.