Ed
Free Member
-
Joined
-
Last visited
Everything posted by Ed
-
When you start to drill the broken bolt do as previously suggested and center punch the broken bolt. Accuracy is very important. Then start drilling first using a small bit 1/8, 9/64, or 5/32 will do. It is VERY important that you get the hole in the center and that you drill parallel with the bolt. After you have drilled out the center of the bolt spray some blaster in there. Then progressively increase the size of the drill bits (spraying blaster after every step) until you feel you are getting close to the threads. Now is the time to use the EZ out. Depending on the size of the last bit you used get the largest EZ out bit you can. DO NOT force the EZ out, they will break! Use some more heat if you have to but usually the heat generated from all the drilling will do. If you still can't get the bolt to budge then it's time to drill and tap ( If memory serves the bolt is a 8 X 1.25 so don't drill bigger than 9/32). The LAST thing you want is a broken EZ out on the frame. Don't forget your safety glasses.
-
I bought some tie rod ends from VB about 6 months ago. They are repro's made in Taiwan or China and NOT Nissan.
-
I don't think the clock works.
-
 I've got a place in my garage for that add when they are done with it.
 -
 Very nice! Beautiful car!!
 -
The chrome strips were in decent shape. I polished them up a bit with some "never-dull" and repainted the black strip. Ed
-
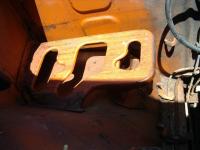
On the e-brake handle, can I take a saw from the cabin area and cut the tube that is in the fenderwell area. Other wise it's going to take me a bit to get underneath to disconnect the linkage.
-
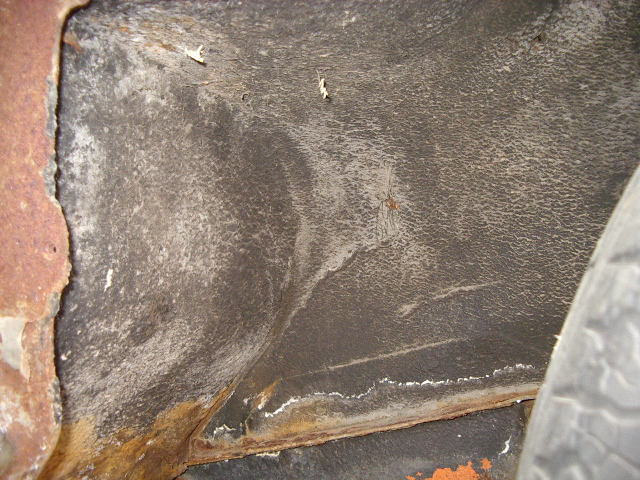
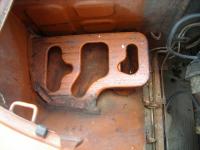
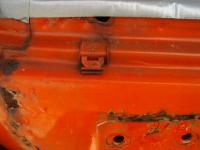
Here are the pics of the battery tray. The last one is from the underside wheelwell area. I scrapped it with a screwdriver and it felt pretty solid. It would definately have to be taken appart and cleaned.

-
Nice, one can dream
-
Yea, I've never seen stealth mirrors before. :laugh:
-
On my engine which took me almost a year to complete I would spray WD-40 on a regular basis and very liberally all over the engine. Then I would bag it in a 39 gallon trash bag. The bores I wiped down with motor oil just in case. I never had any problems. I would spray WD-40 all over (especially in the bolt holes) then wipe it down with motor oil, then bag it. Ed
-
Hey, the tool compartment doors (the ones behind the seats) are intact. Anyone need to replace some speeker hole ones?
-
 Looks good! Brings back memories. BTW I hope that rag isn't there just in case the M/C leaks brake fluid. I left mine off until all the brake lines were installed. I didn't want to chance a drop getting spilled. Keep up the good work!
 -
I'll get a better picture soon and I'll scrape away at the surface rust to make sure that there aren't any rust through holes. If it looks good to you take the picture and draw a line where you want me to cut. Price? it all depends on how long it takes me and a sawzall .
-
It's broken. There is one on ebay right now.
-
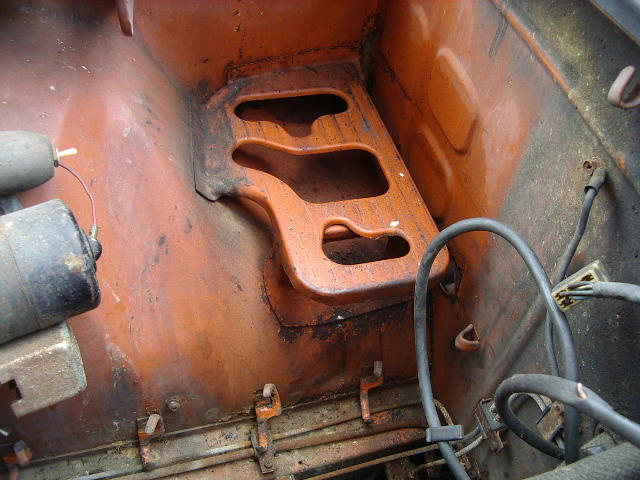
Oh, o.k. I was thinking the body :stupid: Do you want the glass too? They all look pretty good. On the ebrake the grip and the chrome look good. I looked at the HVAC area from the interior, there is rust where the vertical portion meets the bottom. I haven't looked at the part under the cowling. Send me a pic of what you need. Ed
-
Go back to my post # 17 to see the finished lenses. Pic # 1 is just the passenger side clean and the drivers original. Pic #2 is both rebuilt and ready for installation. Pic # 3 is right before assembly. I painted the inside of the housing next to the reflectors white, what a difference.
-
Zup, I'll get that radiator out and packaged up for you along with the fuel filter bracket. The rear tail light finisher's don't look too good. I'll cut them out and give them to you, then you can be the judge.
-
Eric I have one available. It's from a 72 (a little different than the 73) the mounting plate is plastic vs. the metal one on a 73 and the foot pedal portion is one flat piece of sheet metal vs. the stamped piece welded to the flat piece of the 73.
-
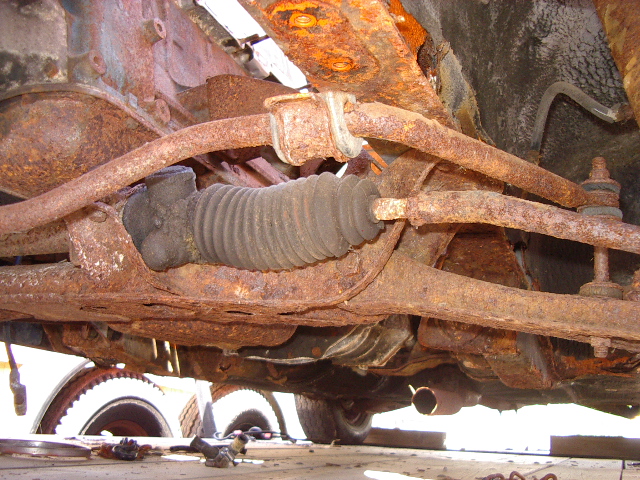
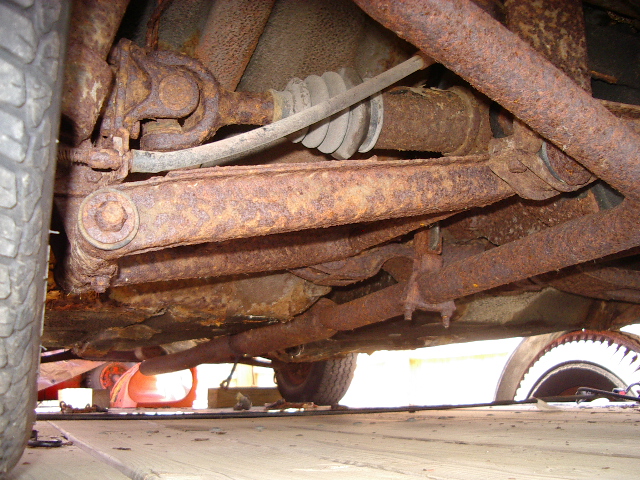
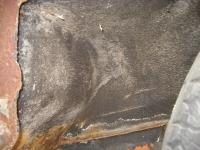
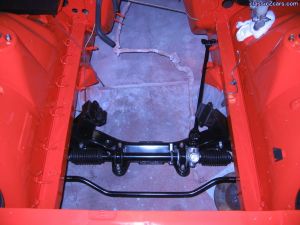
These pictures are not for the faint at heart. This is what happens to the undercarrage of your car when you drive it in Buffalo, NY. salt,snow,time etc...


-
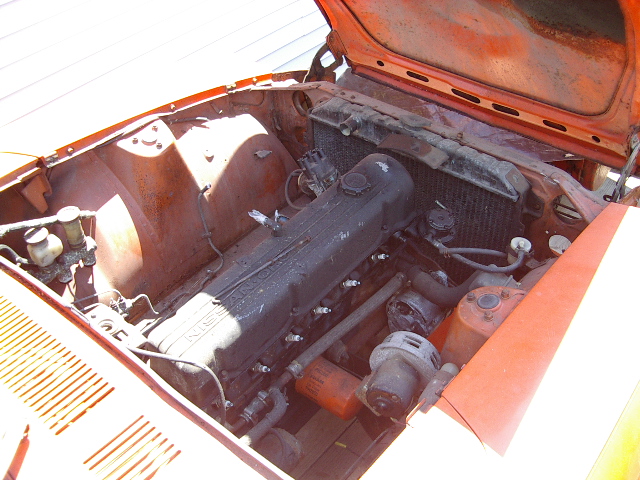
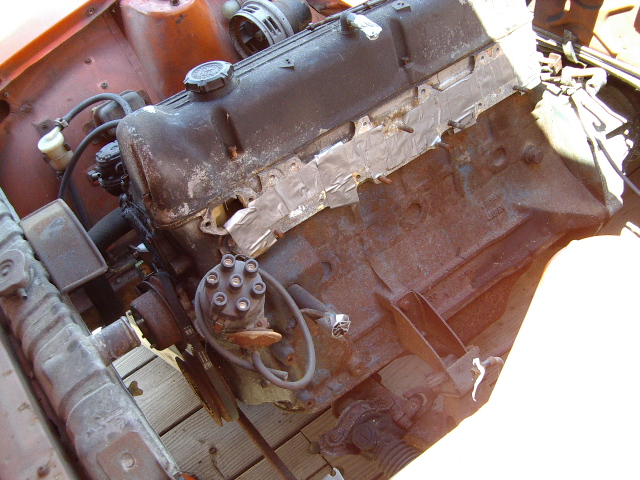
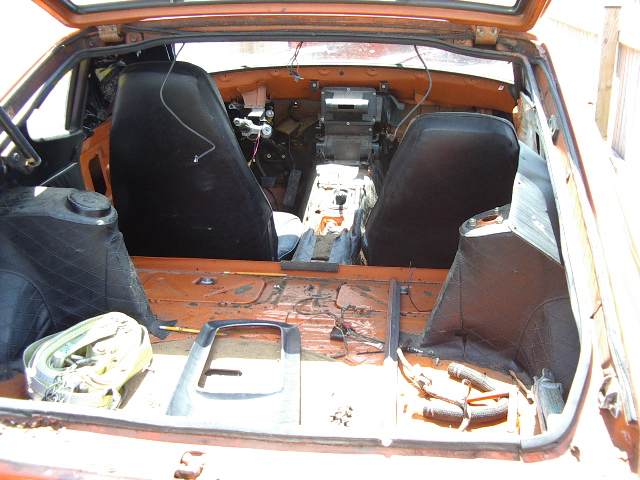
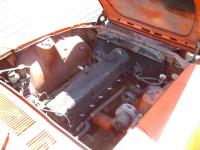
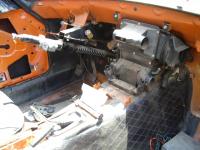
Here is a picture of the engine bay, there is the radiator that's still available, distruibutor (points) and the engine & tranny. Interior, steering column, heater core, seats, headliner.


-
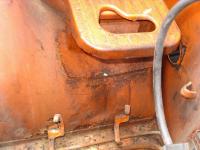
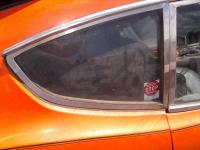
Jason, I'm sorry my bad. It's a E88 not a E31. I'll edit my original post. Will, The drivers side quarter window frame looks real good, no signs of rust the passenger side has two bubbles that I can tell. I'll have to pull the windows to be 100% on the condition. I'll get back to you with the condition of the brake handle (more than likely it will be rusted down in the transmission tunnel. The HVAC area I will look at later. Texasz, The battery tray is not rust free. It is in decent shape. There is a little bit of rust where the tray meets the fender well. Sorry the picture isn't so good maybe later in the day when the light changes.

-
I'm getting close to getting rid of my 72 parts car. There are a few things left that I'd like to see go to a good home instead of the crusher. I'll post some pictures tomorrow. Some items left: L24 with a E88 head (condition unknown, turns over) 4 speed (condition unknown) R-180 (ratio unknown) All suspension components (mostly rusted) Gas tank (exterior rusted, interior unknown) Steering column E-brake handle Both seats (backs o.k., seats ripped) Some of the interior pannels, black, fair condition Some glass Window mechanisms I will also take requests on any sheetmetal parts that anyone wants, for instance the battery tray/firewall area is in decent shape, no rust through holes. The quarter windows appear to be in good shape also. This was a northeast car and the salt roads did it's job on the metal.
-
Is this one of those weekly car shows? Where about is it?
-
When I reassembled mine I did just that one layer at a time. As you add a layer try and push the shaft into the bore a little to move the balls down. I had trouble getting the last layer of balls to fit. It was a pain. Pushing, pulling, trying to get it all together. But once it was assembled it worked just like it was supposed to.