240zadmire
Free Member
-
Joined
-
Last visited
Everything posted by 240zadmire
-
Hi all I’ve been so religious lately. This week alone, I’ve reading bible, well fuel injector that is, couple of time already. I read, read and reread the high idle section particularly. Check, test, double check.... I’ve readjust the AAR couple of times a ready, and I don’t think I’ve got to the original factory yet. I’ve narrow down 2 area that might be faulty. The AAR and the thing underneath the throttle body. It calls BCDD (boost control decelerate device) either one or both of these let a little air in. the screw on the throttle body still completely screwed in and now idle is approximately 950. If the car is fully warm up or rev up a few time. Idle is 1000 or 1050 or so. Still not quite yet. Perhaps I’ll take a closer look at my dead center as well. Who knows it might be off a degree or 2. stay tune folks. Thanks for all great suggestions
-
Will do will do
-
All great suggestions ladies and gents. I just did all those things before jumping on the forum. I narrowed down to 5 places. the rubber boot surface cracked but not cracks all the way through. 1. EGR not 100 closed. I removed the hose while plugged the 2 ends. Rpm slightly lower. Maybe 50 rpm. Blow in one end with great resistance but still some air can get through 2. hose from the valve cover to body throttle has a tiny leak. Probably at the elbow where it connects to the valve cover. 3. Don’t know the thing call but the thing underneath throttle body that has screw at the end. Under the throttle body has 2 hoses. One connect to the distributor and the other to the canister. 4. The throttle butterfly flapper rod might have air sip through 5. the vent under the thermostat body where the hose connect to the EGR breather the oil cap and dipstick seem to be ok. its going to be something obvious that I can’t get my hands/brain wrap around it. pre-test. 100% will do. If the car has any of my personality, it will almost guarantee fail. Just like me. Even while I was I school. I did very well up to the exam point. The professors has to call me out numerous time slapped my hand why I made such stupid mistakes. They know I knew the subject but never get 100%. sorry guys but I’m not satisfy/give up just yet, not even for the pre-test. Will need to look from another angle. will keep everyone up to date regards
-
Did a complete tune up based on the FSM. Went over the fuel injector bible once more time just to make sure. The Tune Up chapter is talking about dashpot adjustment, well, I don’t have one and mine also a manual tranny. Another one is to check the CO to have 0.5%. How do you do that? That is kind of special tool that only shop has? One more thing. Adjust BTDC to be 10 degree, my idle is hovering 1000-1200rpm and the screw adjustment on the throttle body is all the way down. Is there another screw somewhere to lower RPM to 800 base on the FSM? another thing I noticed is the smog on the tail pipe smell like my Honda Odyssey 2014. Which is no smell at all. Which I think is good? Smell meaning I scoop a handful and sniff with my nose. I know, I know it is not scientific and stupid even, but somebody got to do a dirty work. what do you guys think? any feedback is great. regards
-
@dutchzcarguy I did put a smile on you didn’t I? Did you tell your friends, coworkers about this as well? Am I right? Cheers mate!
-
@dutchzcarguy at some point in far future, I’ll “buff” to the prime layer, lay base, metallic and clear coat. for now, people from a far will say something like this, “what a cool car, but I hate the ugly bumper”. As they approach close to the car, and start noticing few orange peel spot, they’ll say “what a paint job! Must have done by an amateur, yada yada yada....” and they’ll tell everyone they know about my car... Possibly during thanksgiving dinner, they’ll bring my story to their table and might tell a joke too ? I’ll be smile ear to ear. I got free press! Put a smile or a start conversation for somebody. That’s right! I’m comfortable in my own skins. Kakakaka
-
I screwed up. Simply as that. No excuses. ??
-
I drove the car around the neighborhood for a good 45 minutes. Top speed 35mph when allow. Took the adventure to highway and able to do 70mph for a good 2 miles. What a rush. Don’t tell cops I did that please. Brought the car home and while it is idle, took a temperature at the catalytic ends. The end from the down pipe is about 330 degree Fahrenheit. The end to the muffler is way up to 560 degree Fahrenheit. Right where it connect to muffler drops to 320 degree Fahrenheit or so. The exhaust manifold from the engine is 770 degree Fahrenheit. so the cat is working as expected as it cook the smog longer before it release to the muffler/air? can someone explain the science in layman term? It is really interesting learning new stuff best regards
-
Have you noticed I misinterpret rollers as in put car in a trailer and haul it to the smog... silly me.;) all good info. Definitely will look for the pretest station. in California, there is a regular smog test station and there is the STAR only test station. I had the yearly reminder letter from DMV saying if I want to drive, I need to pay x amount. It didn’t say I need smog test on the letter. But I believer even if I pay the x amount, they will send a letter asking for the smog before issue the sticker. I misplace or lost the letter should I just pay DMV and wait for next set of instructions ?
-
@Zed Head how do you know the cat is in good shape? Shine a flashlight? Dip in water? Please elaborate regards
-
look like there is a Temporary Operating Permit with $50 for a 60 days. https://www.dmv.ca.gov/portal/handbook/vehicle-industry-registration-procedures-manual-2/permits-and-decals/temporary-operating-permit-top-reg-19f/ California. Golden goose state. Milking money when/wherever they can!
-
Another thing, for the valve job. I did put the grinder material on the lip, use the drill attach to valve stem with a rubber hose and pull the trigger for a few seconds. Again, Religious rather than science ? about roller, there isn’t a temporary permission for driving the car to smog test center?
-
@conedodger sorry for not being clear. The cam just clean up and “feel” with the finger nails to see any groove or hill. Just cleanup and wrap a 3000k sand grid where it meets the tower and use the shoe lace run on it a few time. I don’t think it made a dent. for the crankshaft. Same thing. Wrap around the 3000k sandpaper, loop shoe lace a few round and pull the shoelace back and forth couple of times. I watched YouTube and people did that. I’m just like new believer in a cult. Just do it whether it make sense or not. I don’t why people on YouTube keep saying it’s a must to rebuild the engine... blah blah blah. Take it to the shop to have actual equipment and measure the out is specs... I guess that. Pulling shoe lace for hours on end, perhaps made some dent... The crankshaft must be 50lbs running thousands of RPM for years with direct metal bearing contact granted lube..... and it is still one piece let alone a few shoe lace pulling. The sandpaper disintegrated long before it will made a dent.... what do I know. I’m a new believer in a cult. I’d do anything if I may say so. No free pretest. Honest work! like I said, I’m it is not a rebuild/mod by any stretch. A simply improvement to the deteriorate parts by replaced them. regards
-
Hello everyone, I'm at the state of getting the car for the smog check and would like tips and suggestion to get the car smog check pass the first time around. History of the car: Long story - short and for lack of better words, I don't consider the car is restored to its glory days nor do I consider myself as car restorer. I am at best is improve the car from a none-ops, none working to operational, working state base on my standard. If you saw some of my posts, you'll notice I'm more of a monkey see monkey do without a brain sort of speak. Grease elbow at best and lot of times did stuff wrong or reverse. What I did to the car. Engine: - Replace piston ring set using Hasting parts - Replace valve seal, valve spring set - Polish cam, shaft, hone engine (all manual by hand, by me) - resurface header (machine shop) - replace all engine bearing and seals - check engine cylinder to the specs base on FSM (primitive, cheap tools) - spark plugs and spark wires - thermostat - radiator hoses - reuse fuel injectors - replace all fuel injectors hoses - new head gasket - oil pump gasket - oil sending unit - new fuel filter - new connectors (fuel injector, water temperature, CSV, throttle body ...) - cleaned and DeOxit Gold 5 for all connectors. - Air regulator clean up - new ignition coil - air filter - fuel hoses replaced - vacuum hoses replaced - heater hoses replaced Body/suspension/brake: - Replaced KYB Excel-G on all. - Replace all bushing include the 2 spindles on the rear (the ones that uses index and thumb to pull out as described in the manual. Who needs sled hammer, torque and lot of rant and foul language to get it out???! Professional does that. Real men just use a thumb, push one end in and pull the other end ?) - ball joints - outer tie rod ends - both front and rear wheel bearings - new brake pads and shoes - new rear brake cylinder - rebuild front brake cylinders - reuse master brake boost - new master brake - new clutch - new clutch cylinder - new fan clutch and water pump Electrical - All lights/gauges seem to work. I mean, they light up and gauges movement. - all light bulbs replace where possible. - KEEP the Fuel light bulb as is. DO NOT change to LED. You're asking unnecessary problem to your list. Exhaust - Muffler probably original or at least decade old - Catalytic probably original or decade old - exhaust pipe show external rusting but no leak - No white smog when start the engine even in the morning. (Morning in Southern California is like high noon somewhere else. Nevertheless car start up high RPM and drop down in minute or so. Car starts every time, morning or warm) - no foul smog smell. Though the smog definitely stronger than modern car/sedan. - spark plugs seem to be OK as no black powder on the tip nor white color. I think the engine is running on the rich end rather than lean. The car is mostly idling and rev up every now and then in the garage. It ran 30 mins to an hour each time depend on what I had to do in the garage. When the car is off the garage, at most I driven was 30-35 mph in residential area. Since the car is back to life, I've driven approximately 15 miles total. Original parts: - 5 speed. I did nothing to the transmission except replace the oil - Fuel pump - Fuel sending unit - all the gauges Differential: - took a part, clean up, and new oil Not working part at the moment: - AC As you can see, I'm merely replacing wear and tear parts. The only thing that I needed machine shop involved was to resurface the cylinder head. I'm sure you guys gone through this thousands of time. Question is, what is your secrets or tips to get the car pass smog? Do I need to do more? replace catalytic, muffler ... please share your experience regards,
-
Yep, I crewed up the paint job. Need to respray a few spots. Might respray the whole car at some point again I’m afraid ;(
-
Which mast did you end up using? I’m looking for one too. Antenna is next on the list. regards
-
@dutchzcarguy, @grannyknot I figured I must have done it reverse ... it’s the right/left brain thing I guess ?. Will try on hatch your way. @carcrazyken I got the kit from a gentlemen on OfferUp. Same price at $300. Just convenience ... otherwise would take some time to ship..
-
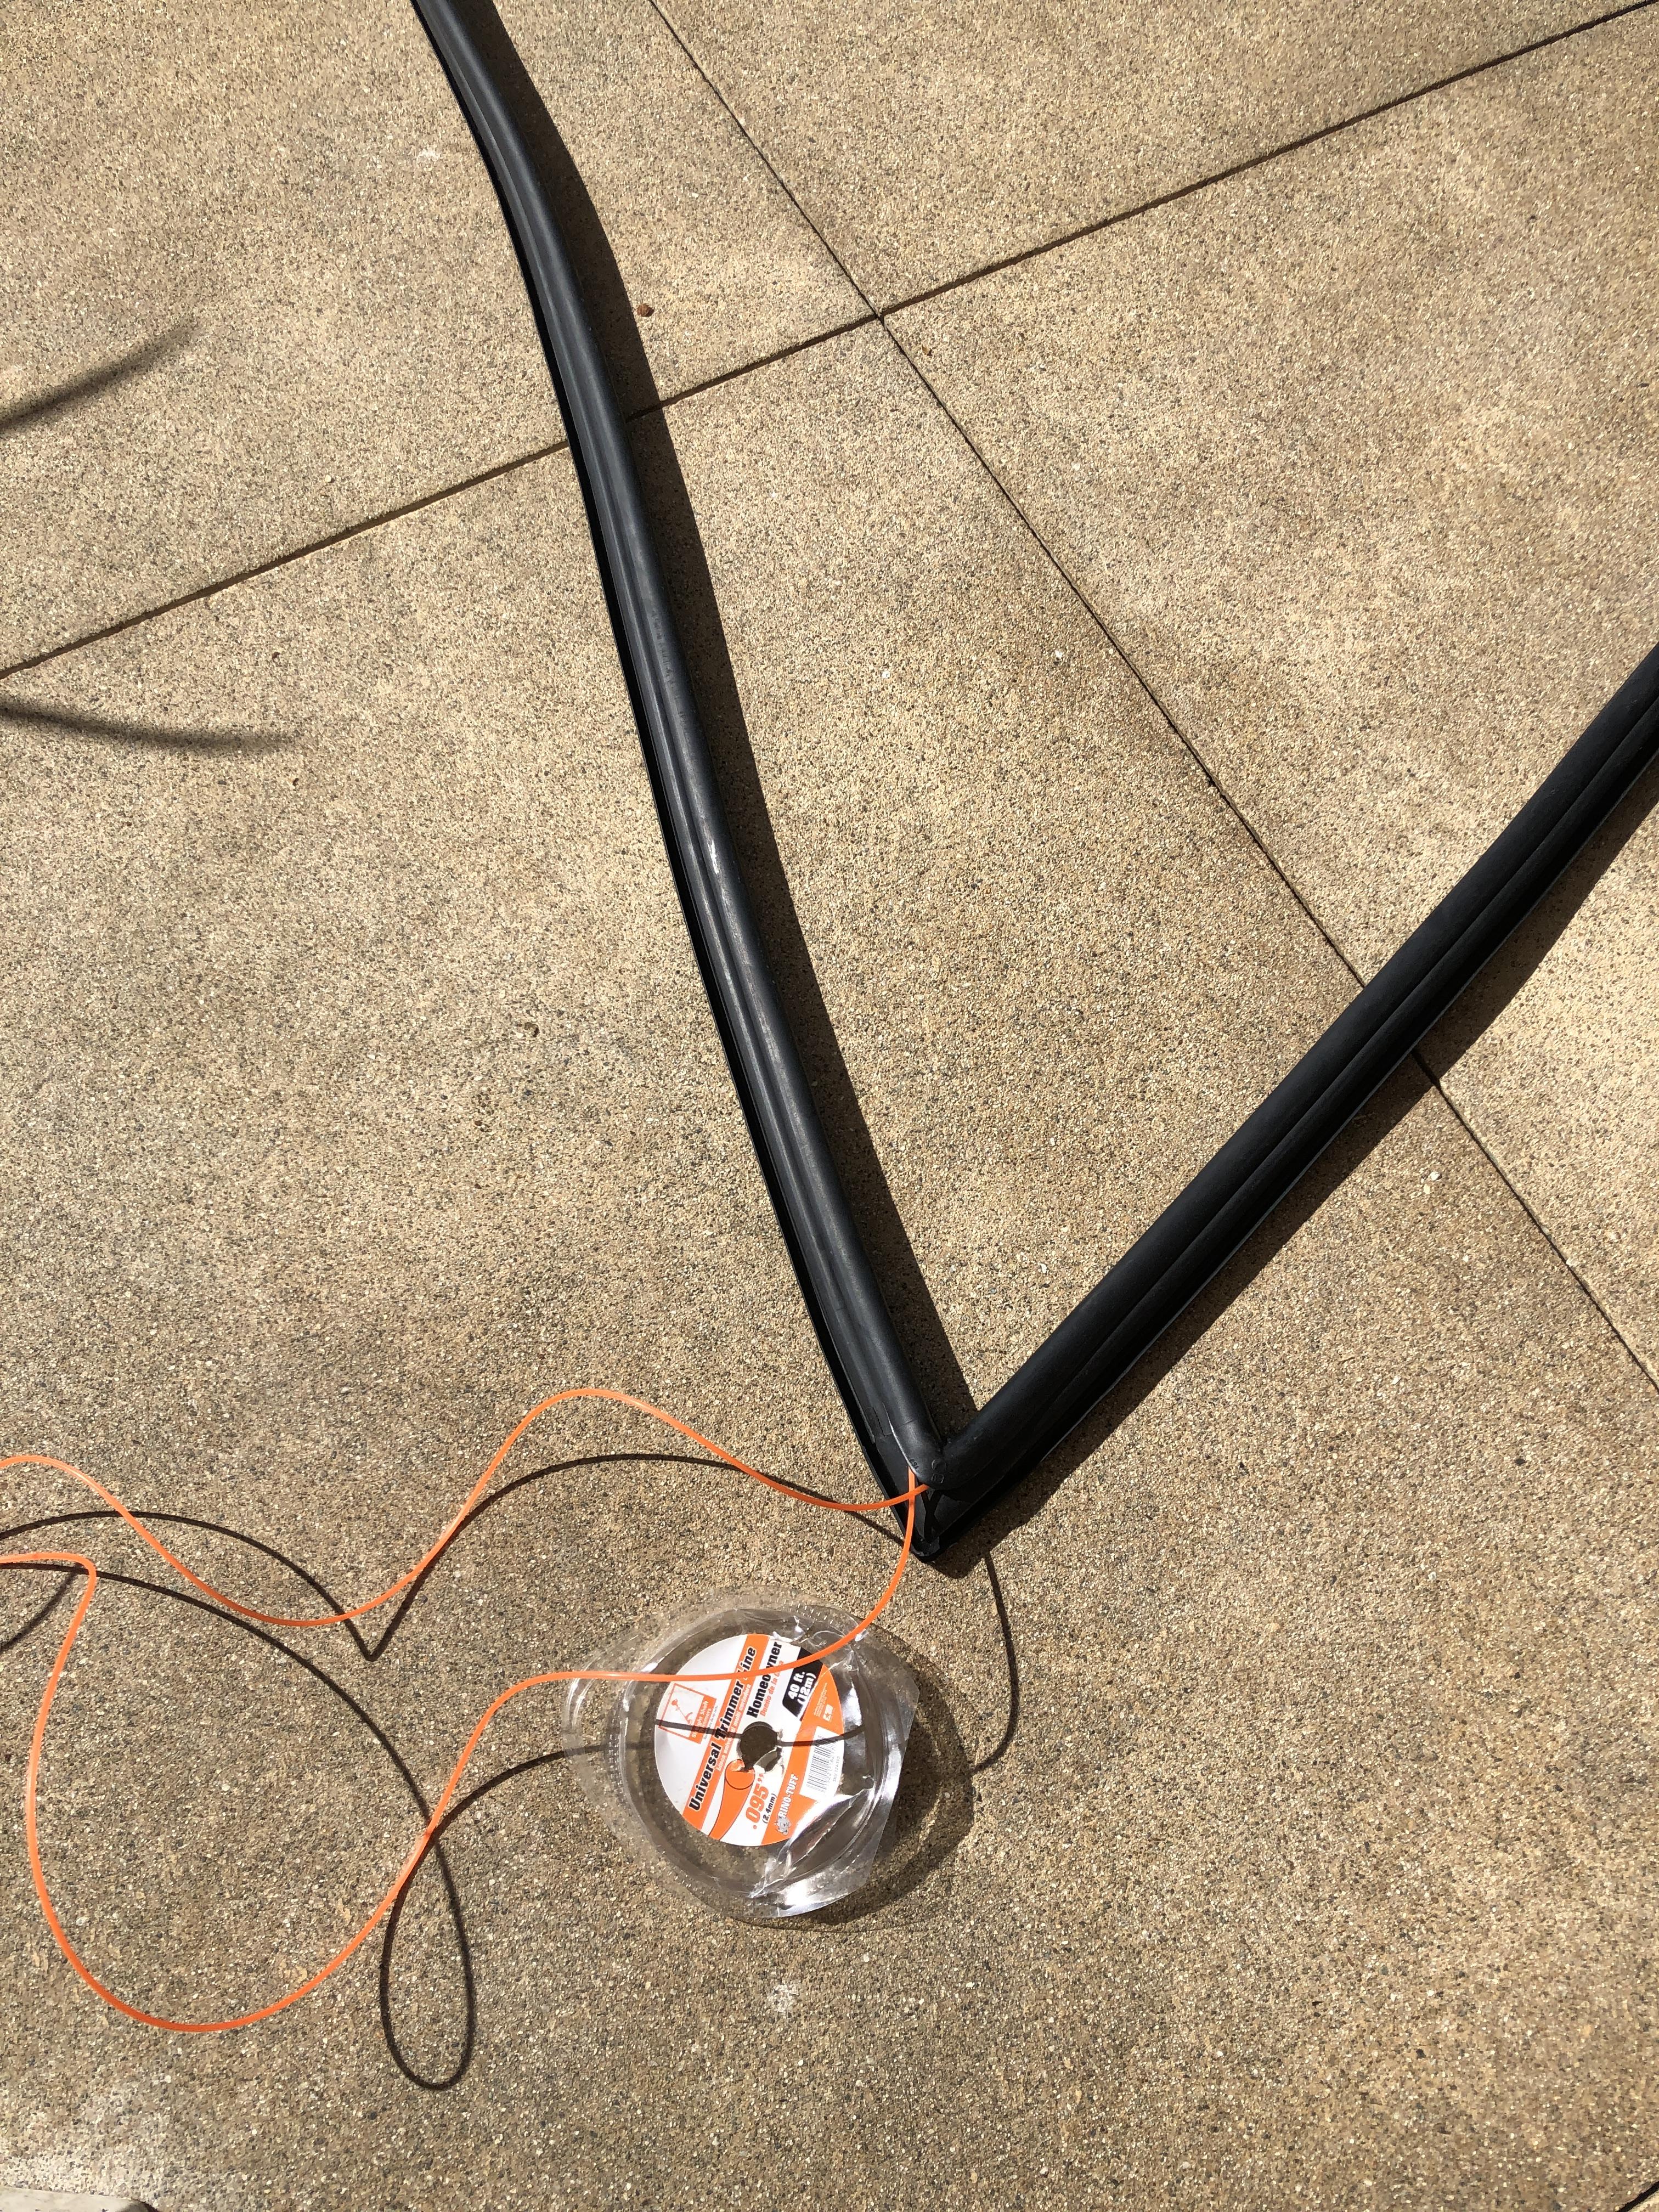
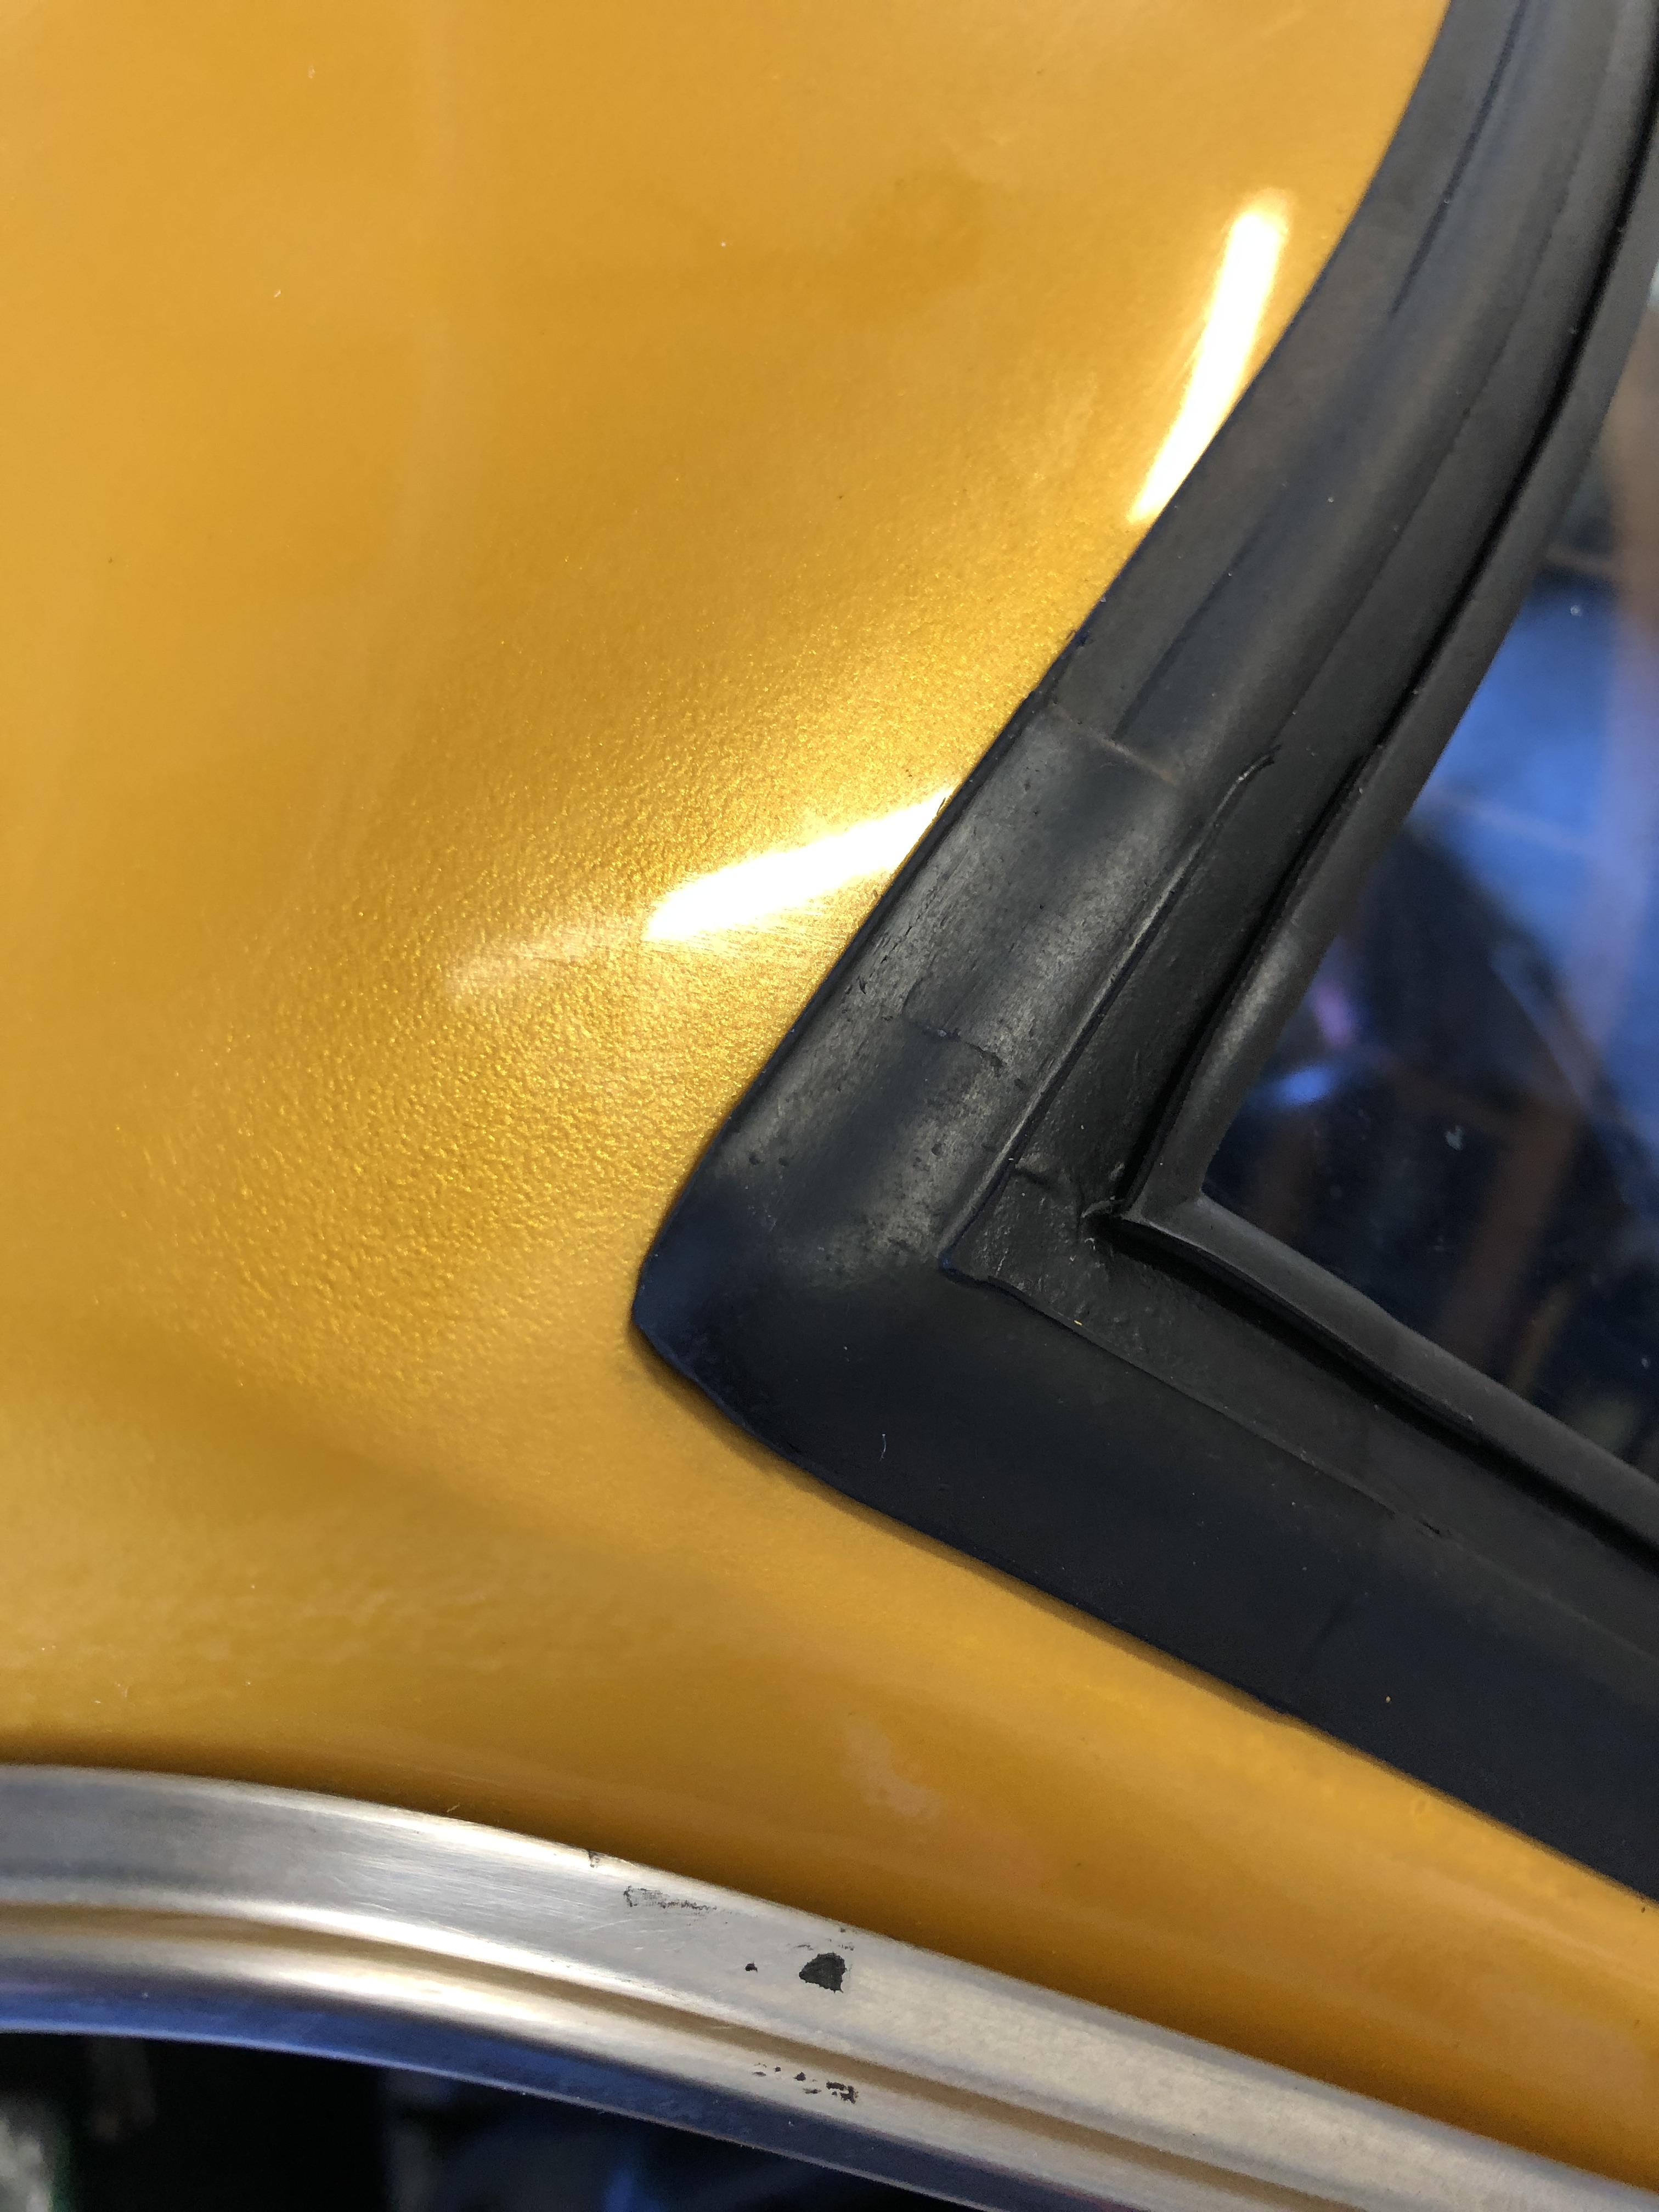
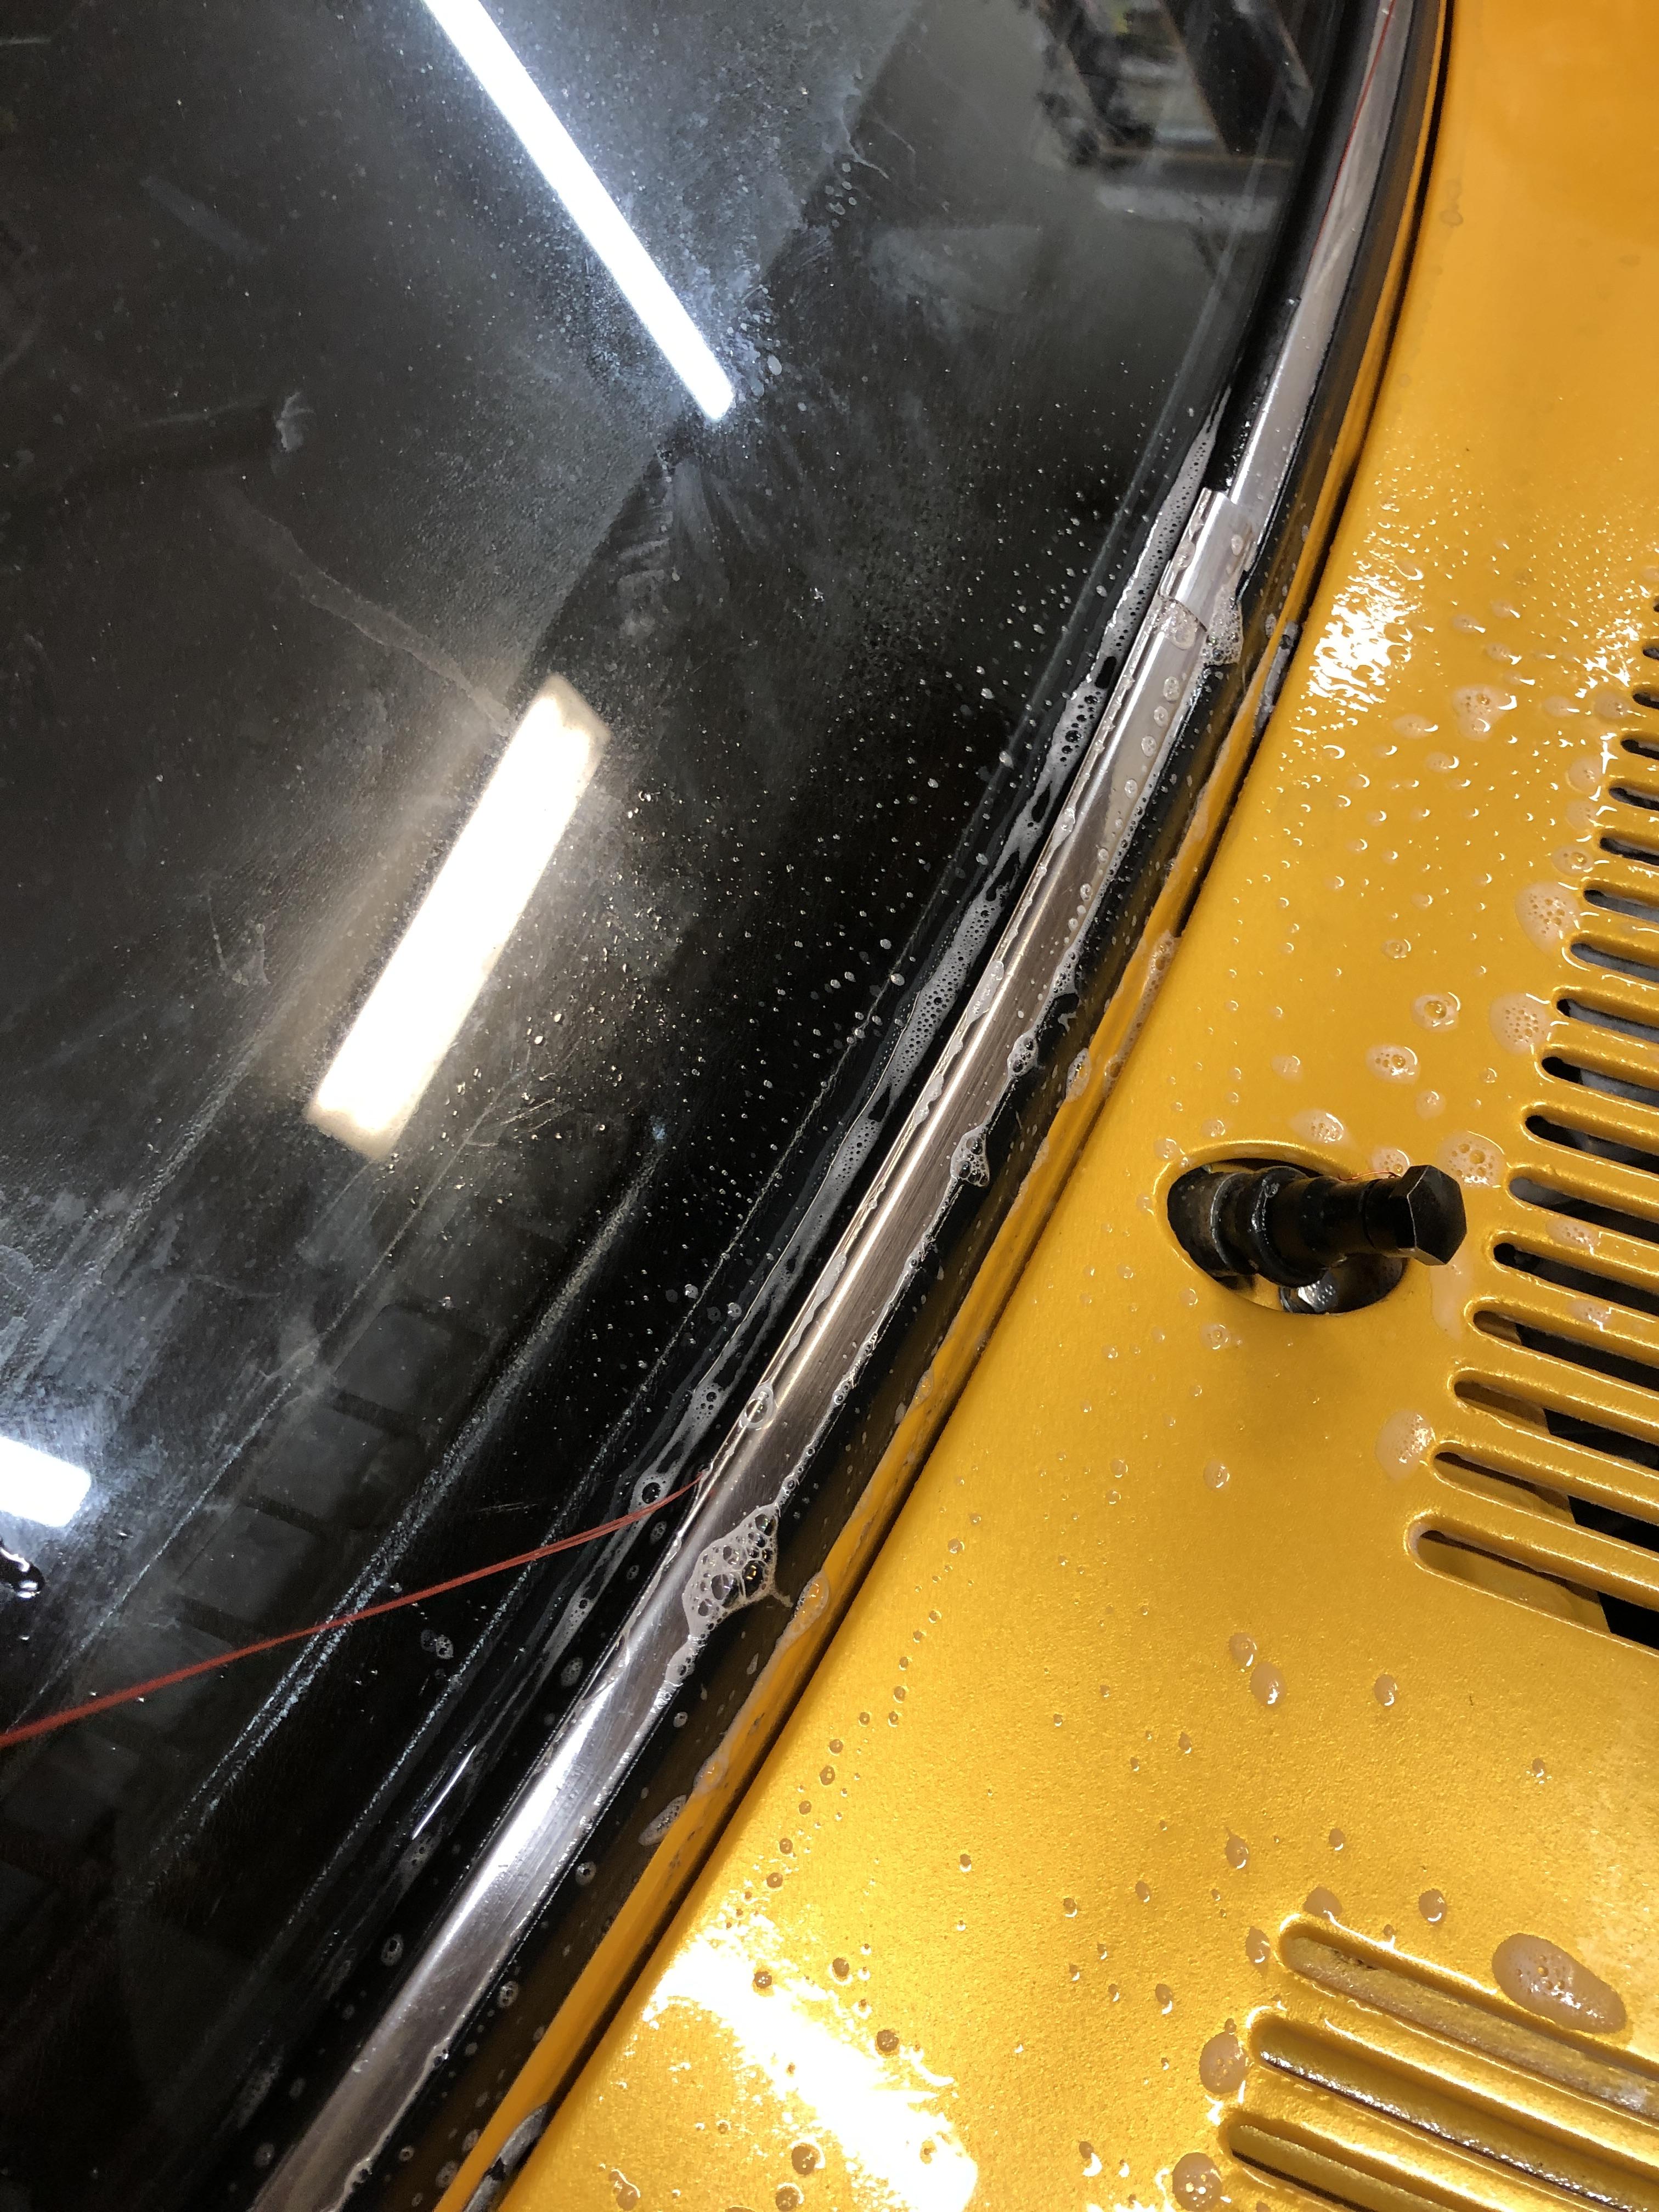
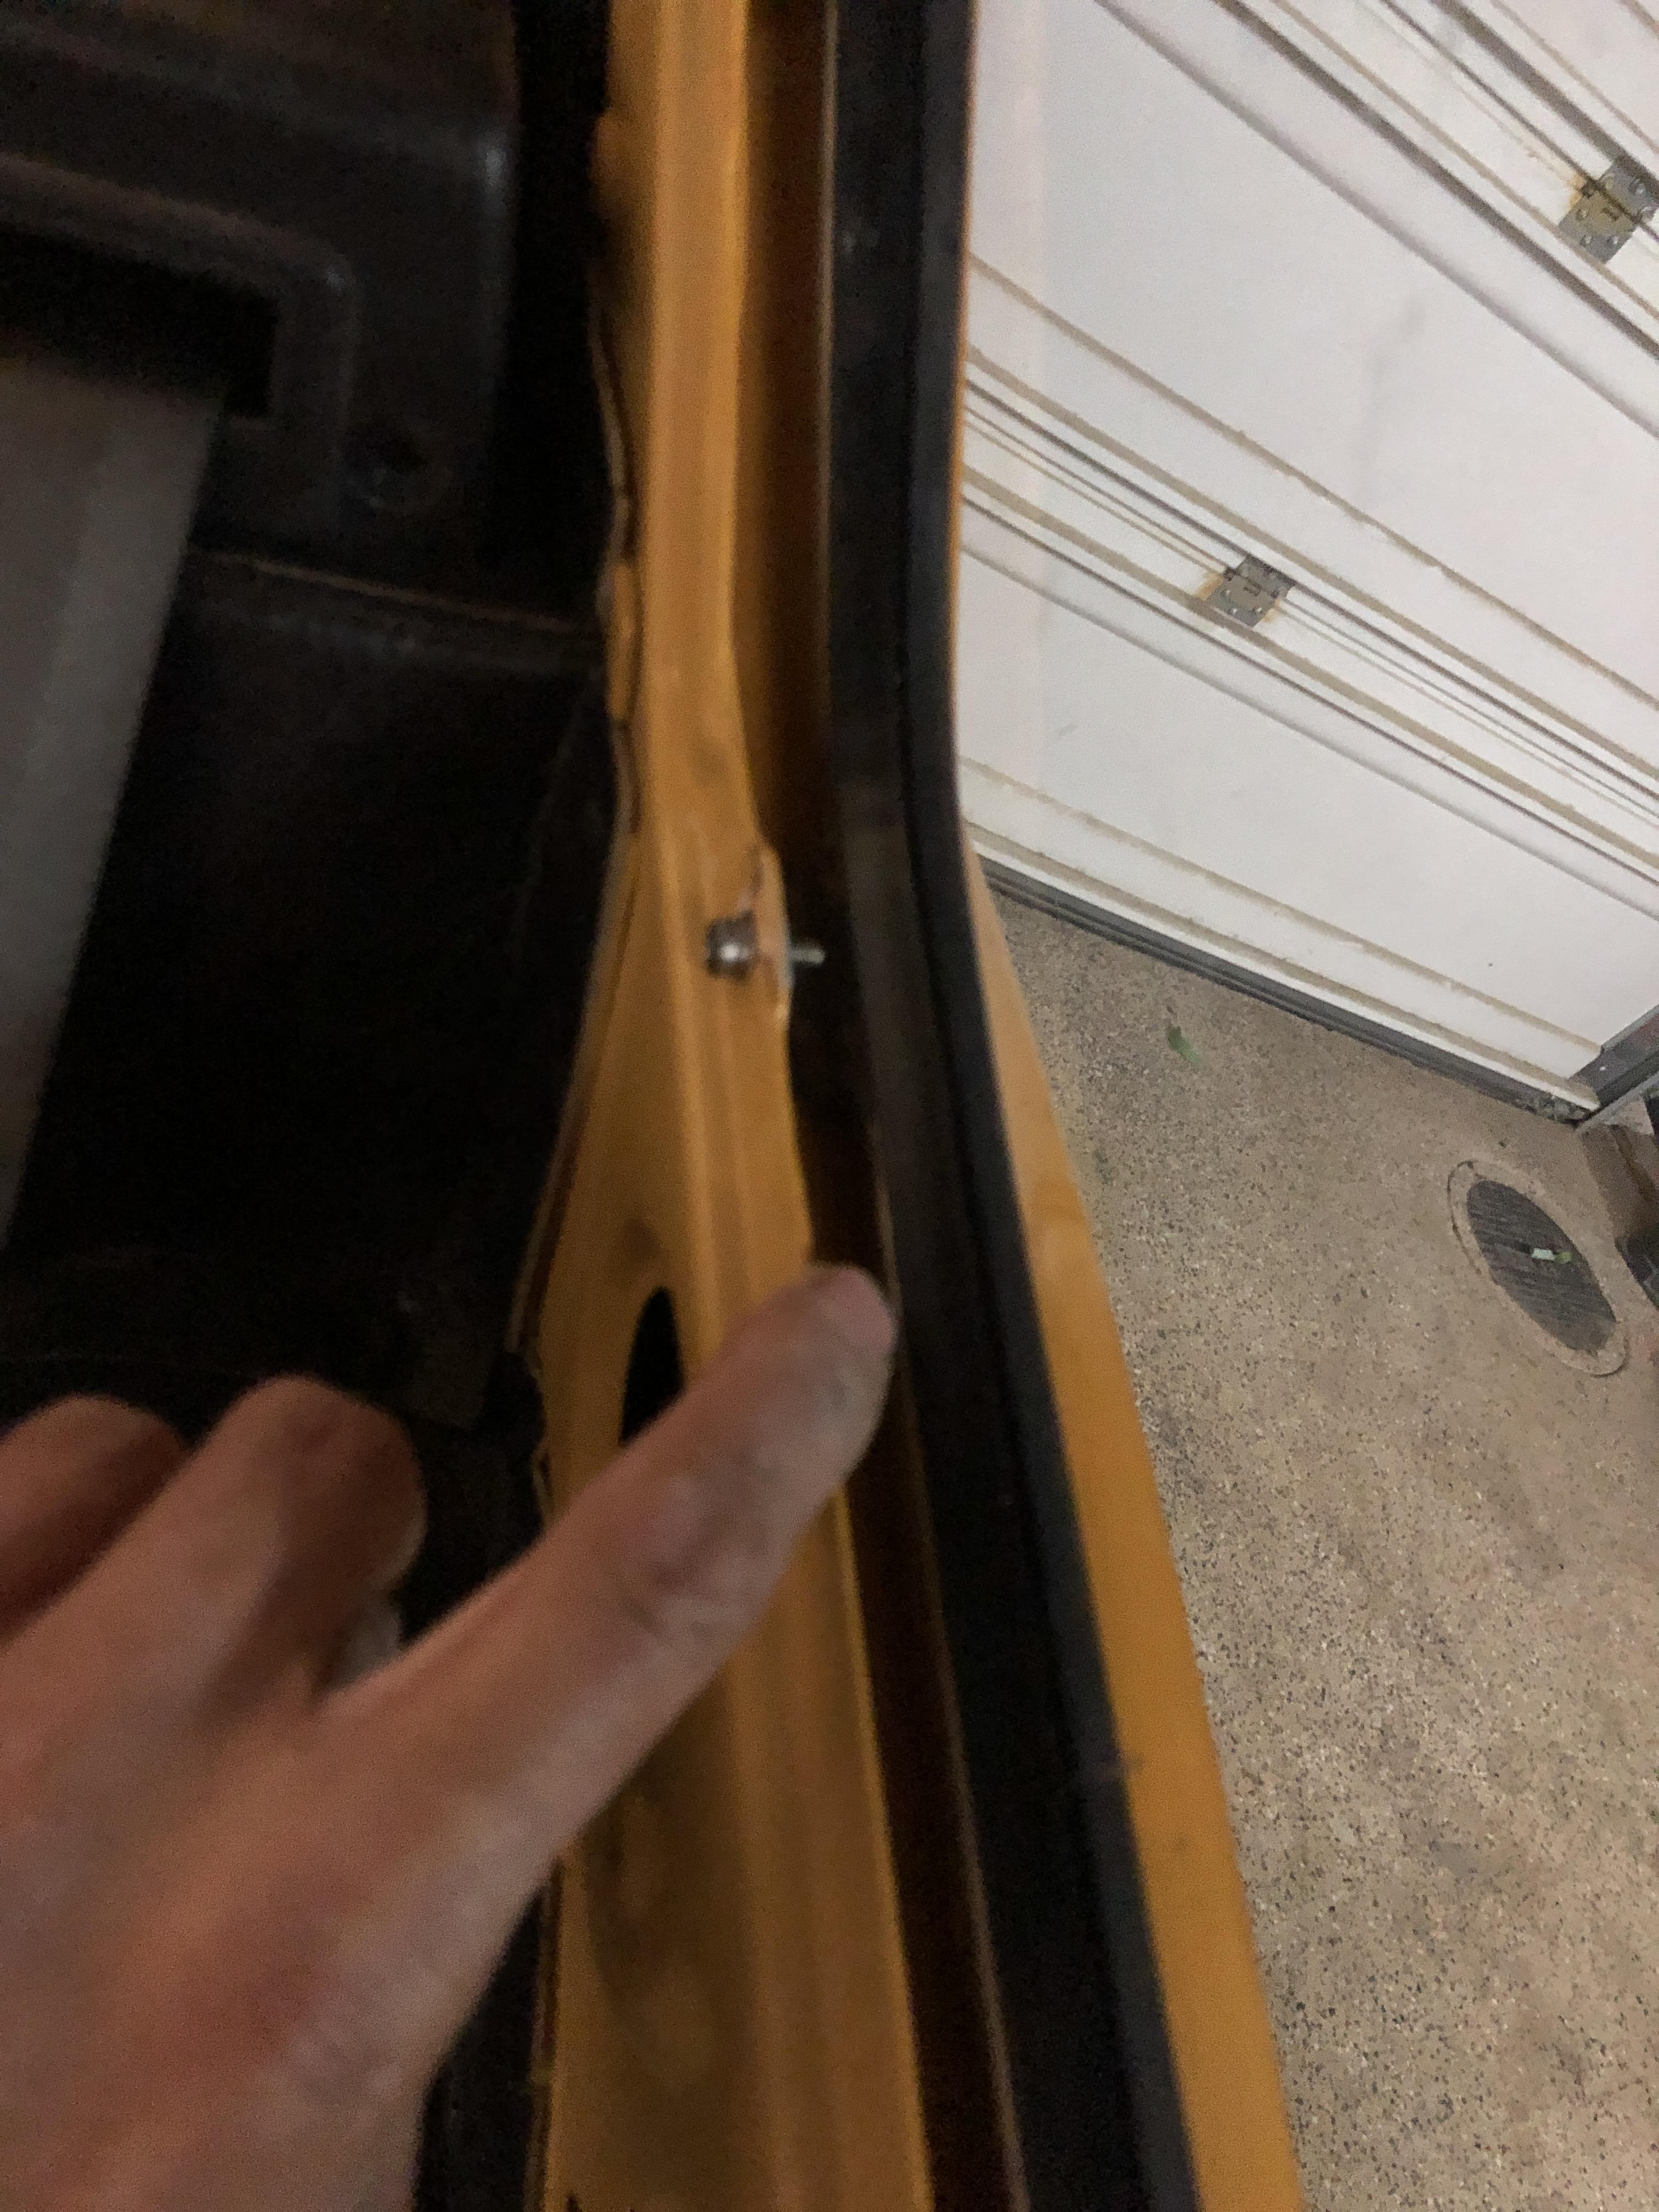
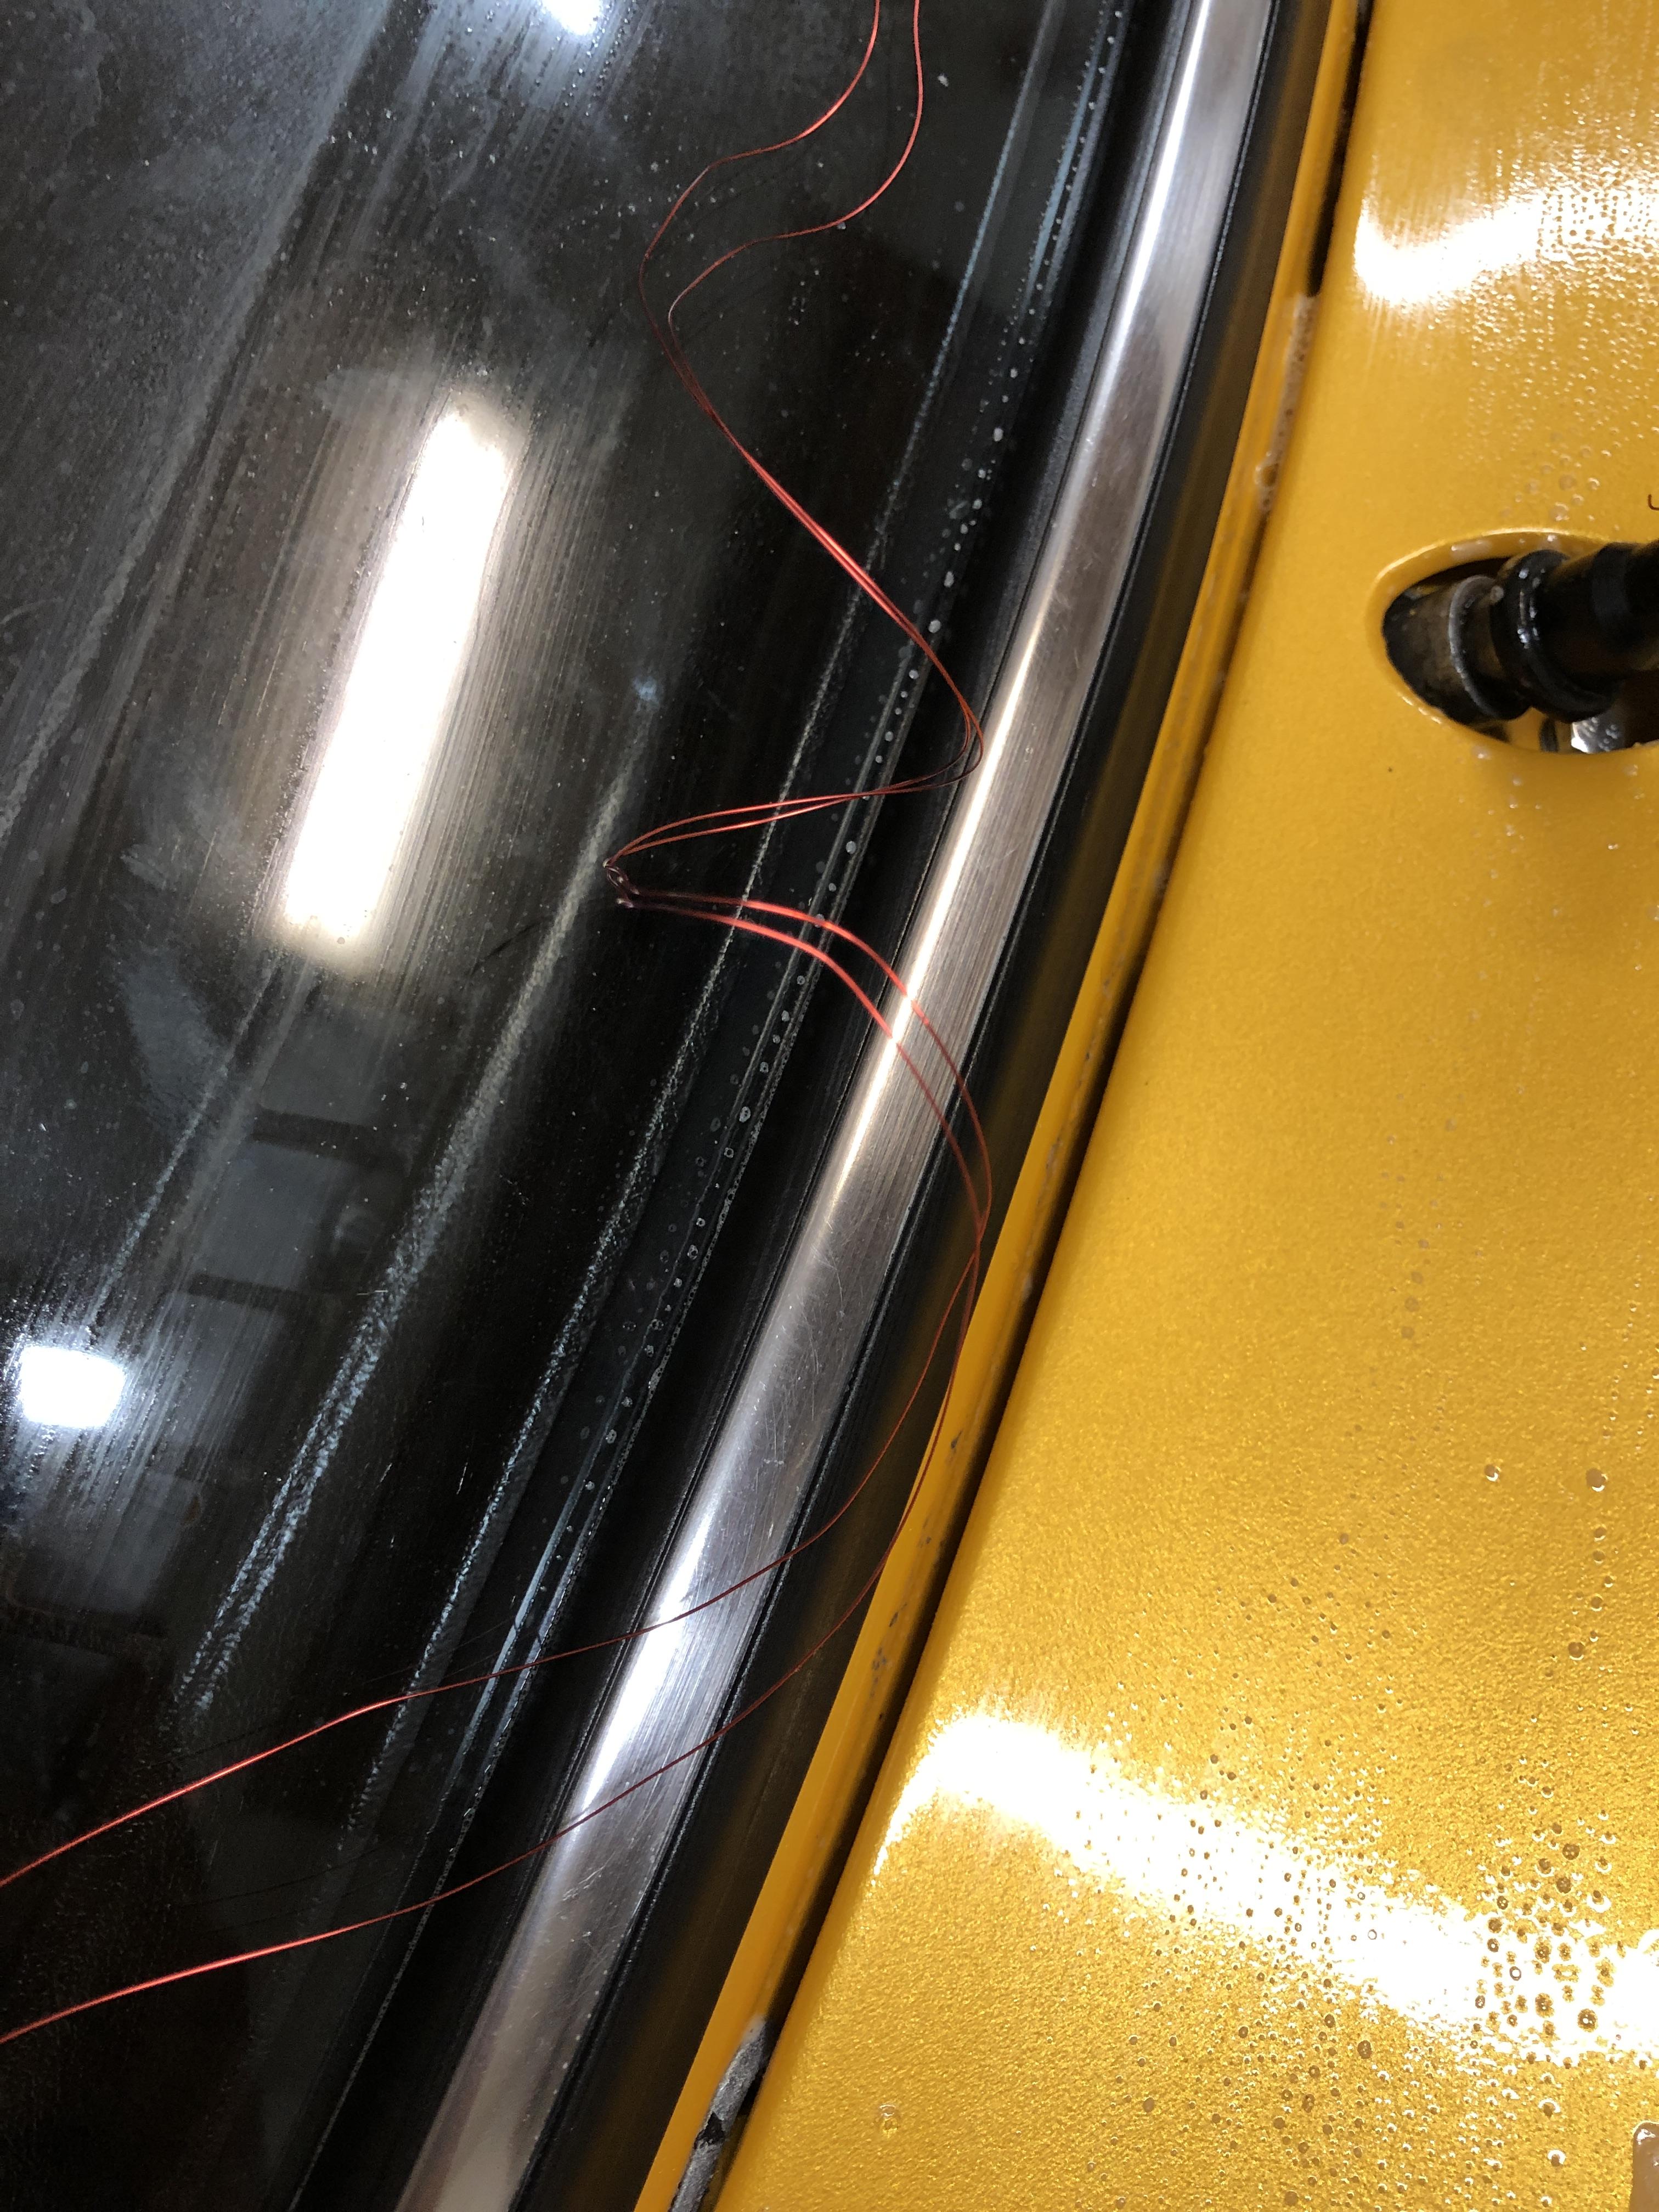
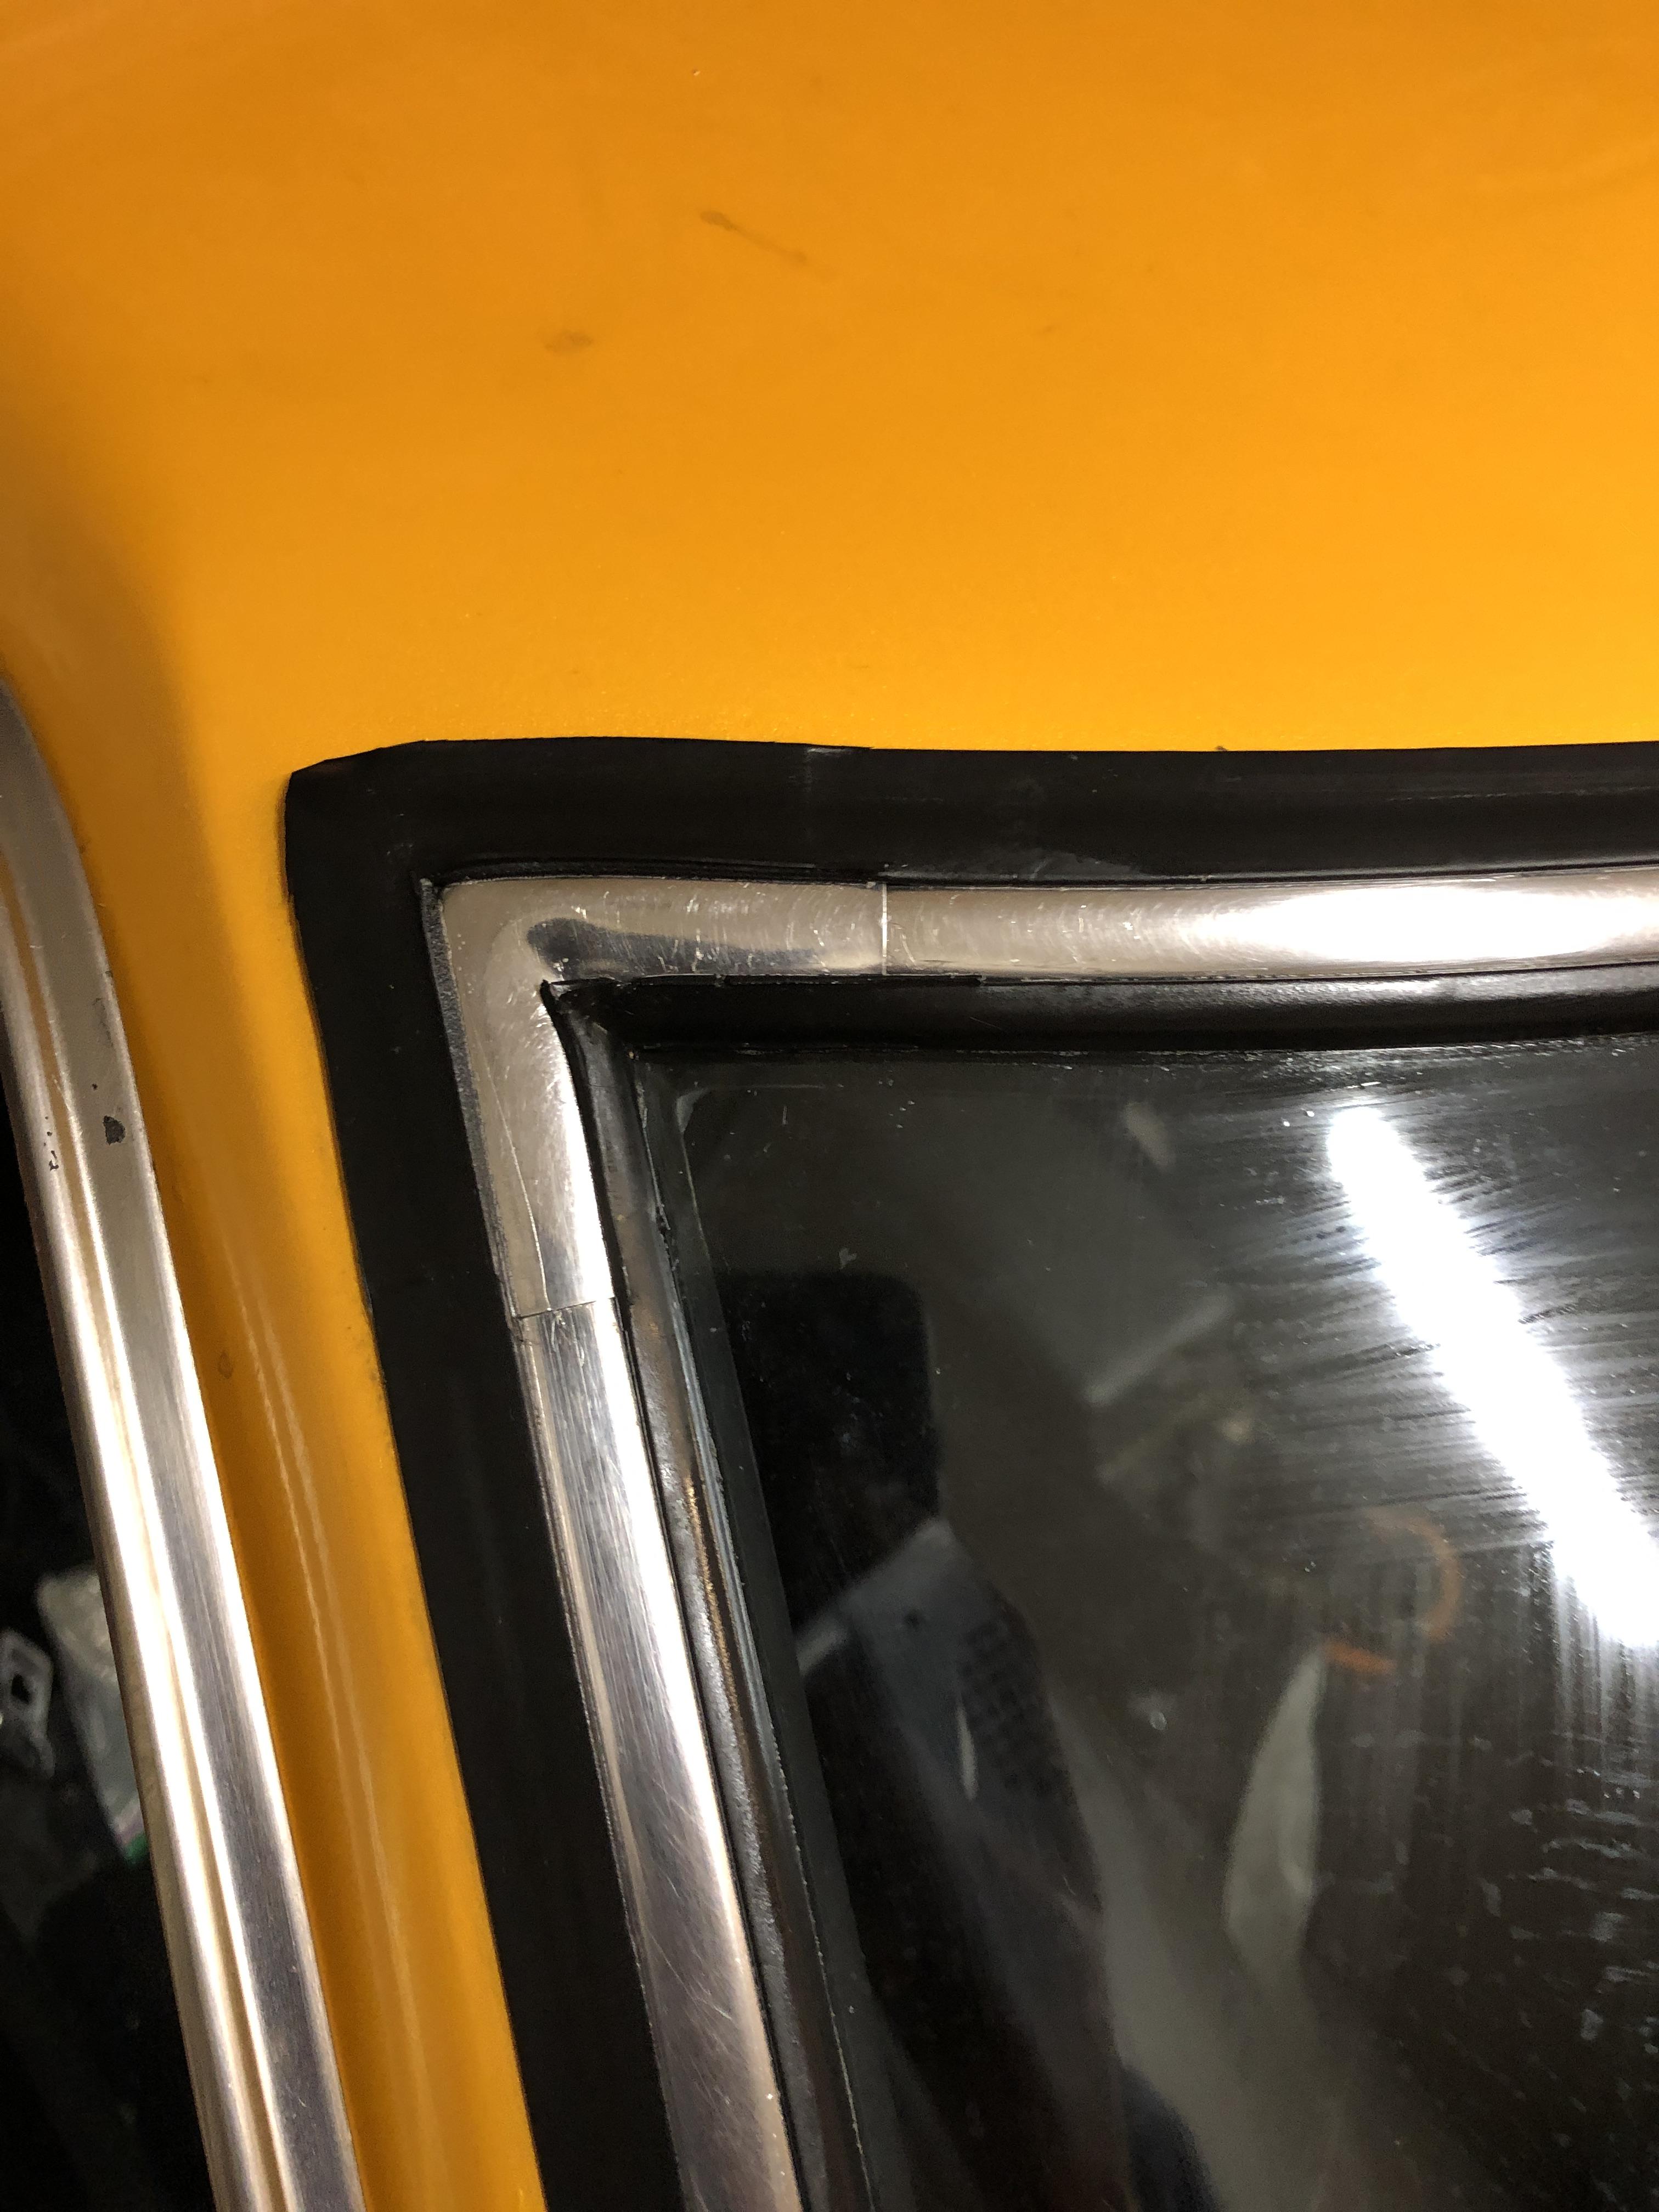
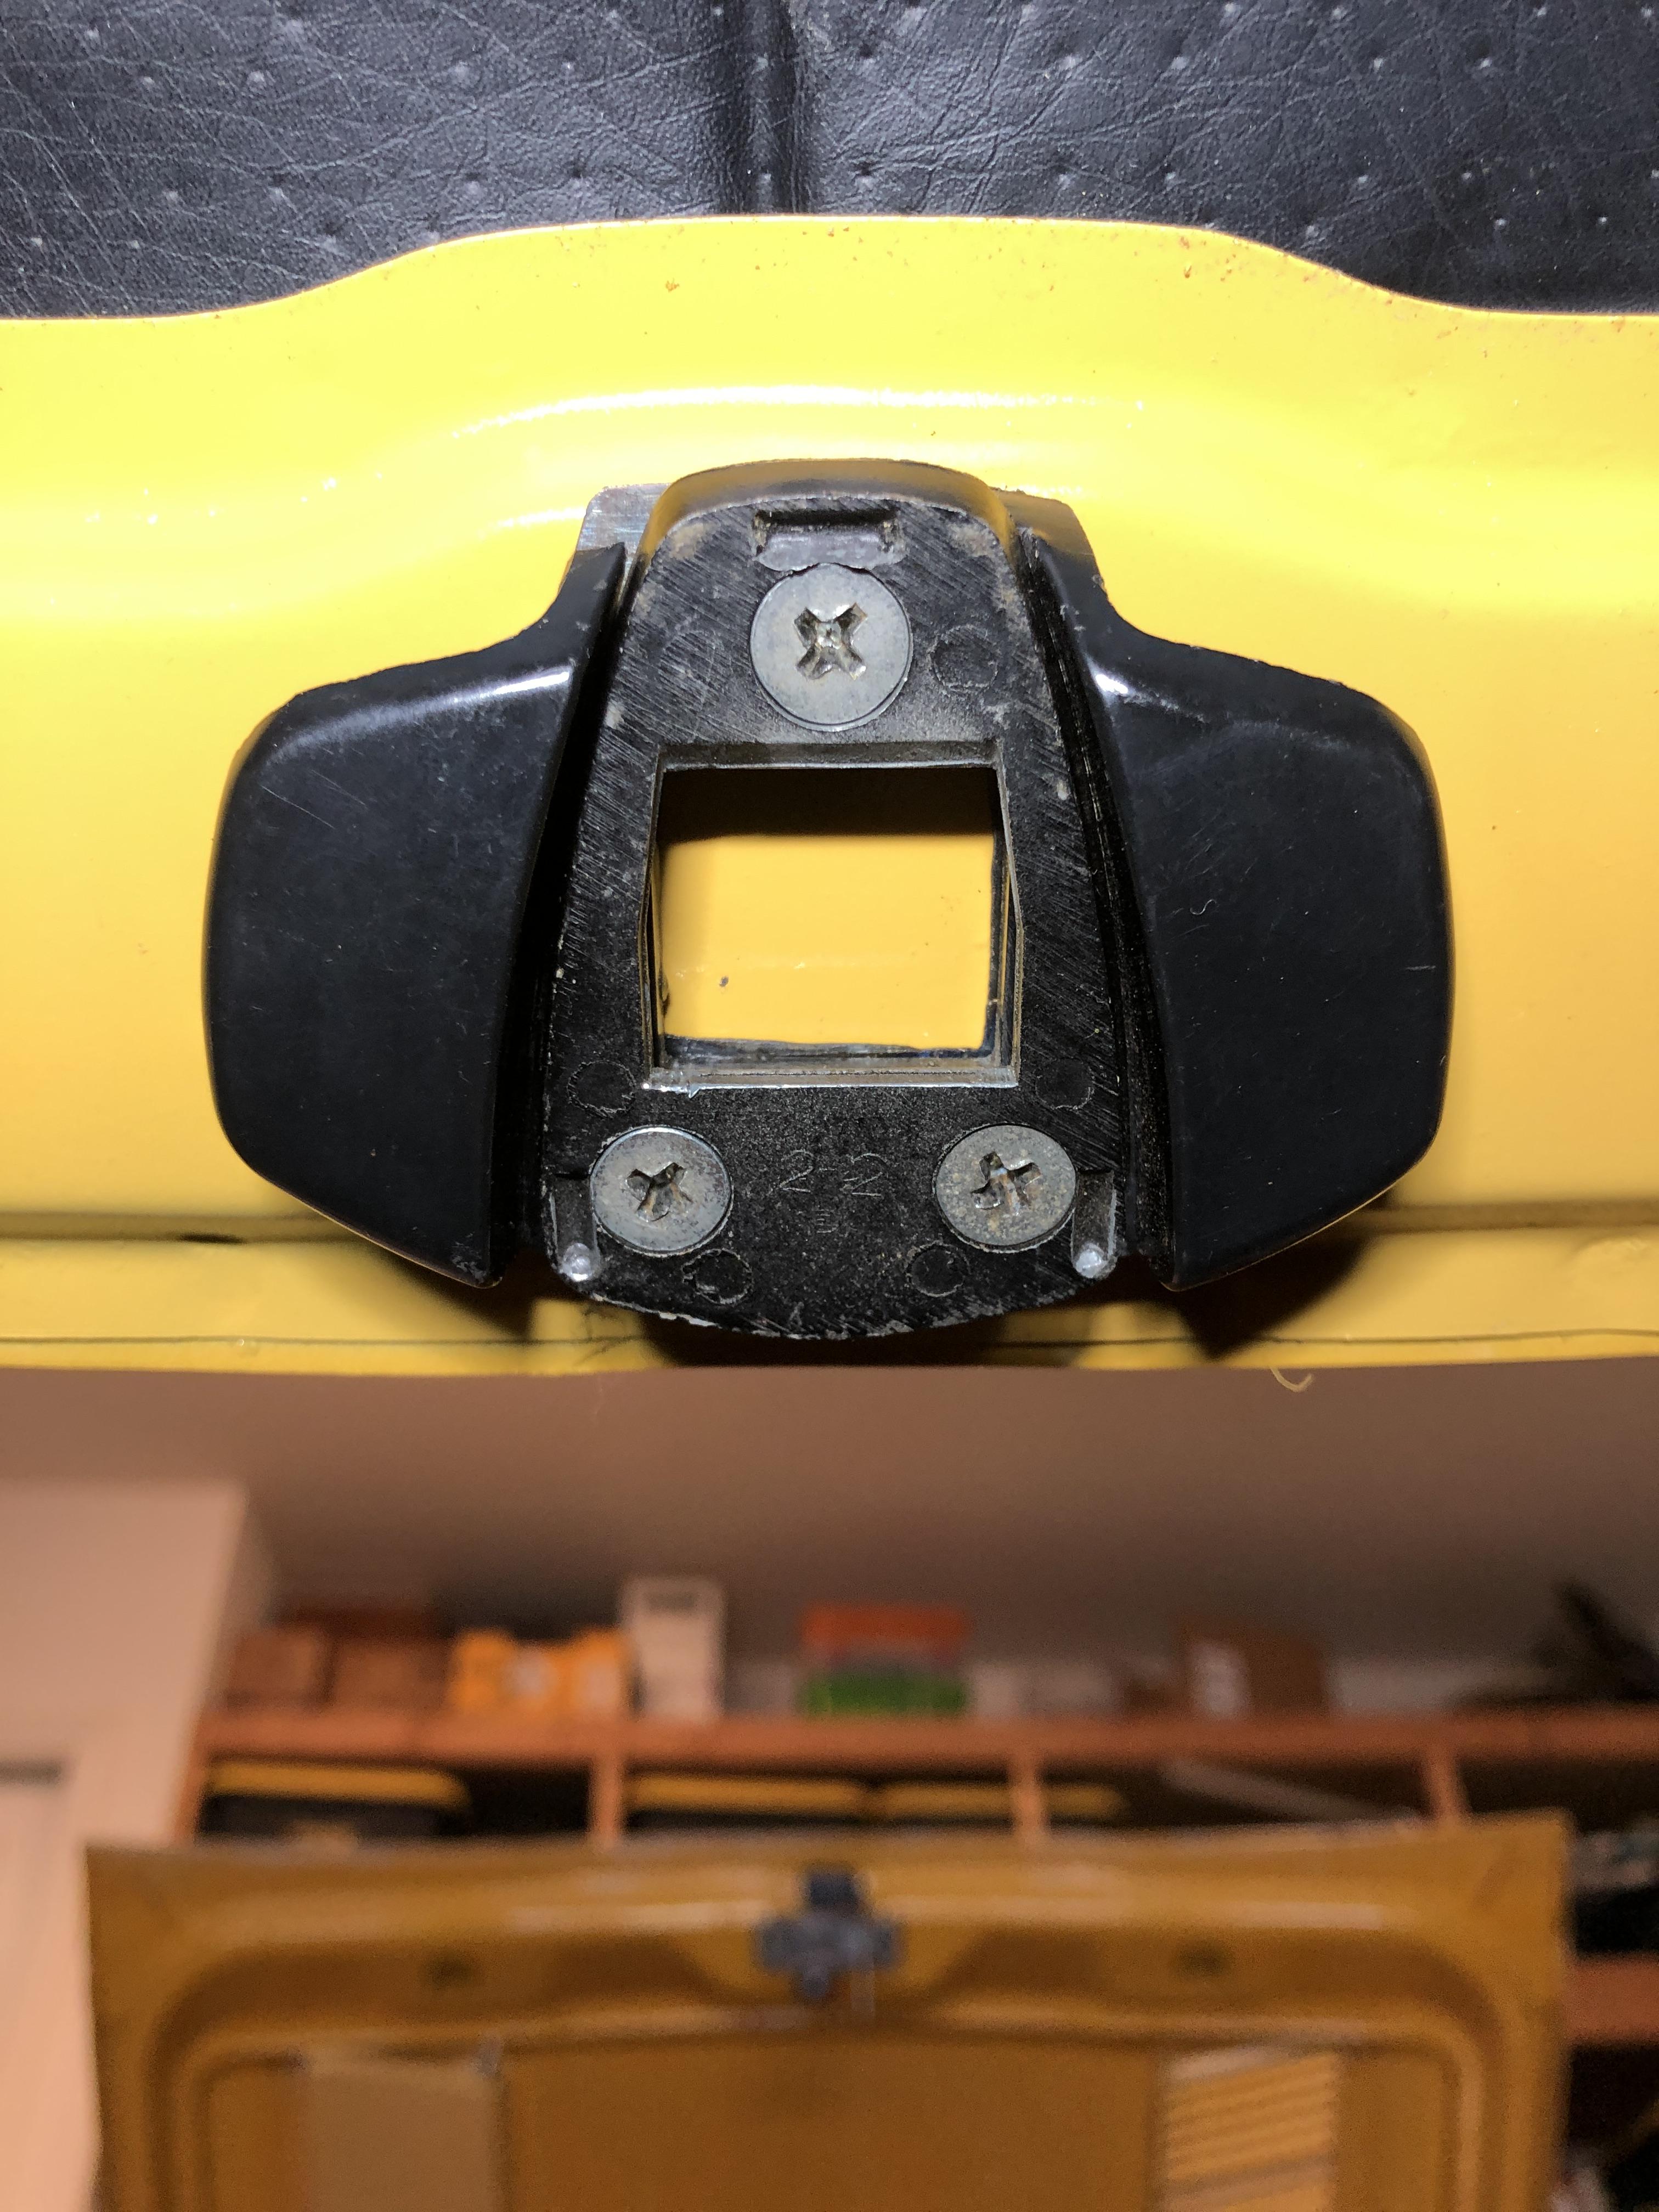
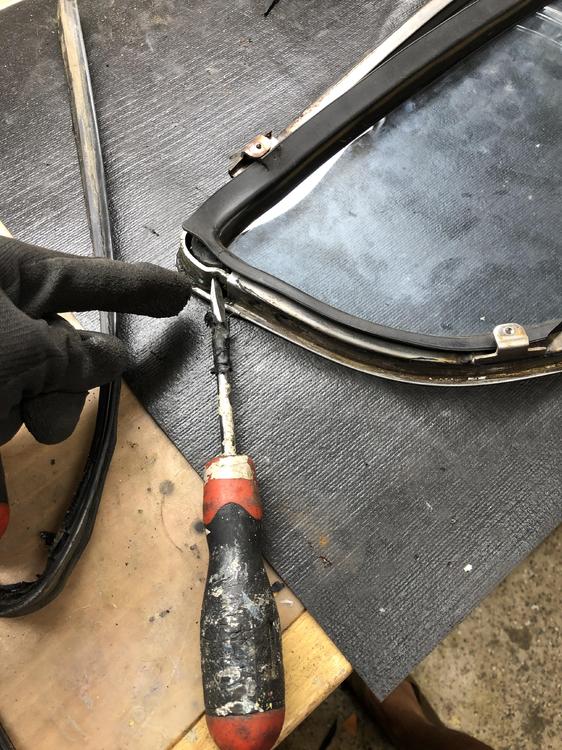
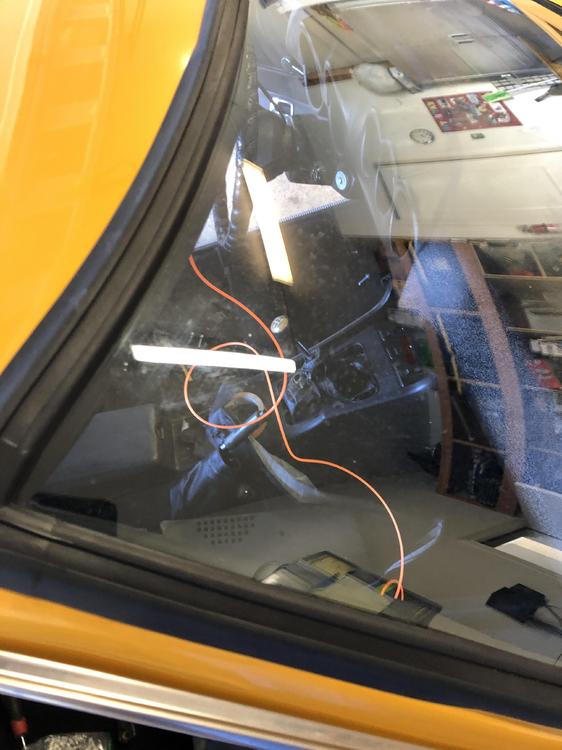
Hi everyone, got the kit made by Precision. there are many ways to install the kit to windshield and quarters. I like to share how I open the housing for the quarter and how I installed windshield and trim. Hope you find it useful and don’t repeat if you see I did it wrong. the quarter housing is pretty self explain. However, after 40+ years, or rubber hardening and make it a bit hard to open. Precision YouTube clip shows show to open it as well. I had to use a flat screw and gently tap on the L bracket to loosen it up. I don’t want to spread the housing as I afraid i would widen the chrome. the new rubber seem to be slightly thinner and not exactly identical to the old one. The over all structure is the same. The flapper toward to inside is missing from the original. It creates a gap between the quarter housing and the chassis. That can be filled in with a thin strip foam. No big deal. For the windshield. I use the trimmer line I had instead of robe. Whatever available in the garage.... seem to work well for me. remove the vent guard on the dashboard for easy access and allow the windshield rubber to drop in. Line up the windshield as best as you can before pulling the trimmer line. Press the windshield down gently but not too hard to allow the lip to bite the chassis as you pull the trimmer line. I did all by myself so take your time. Once the windshield is in, try to adjust the 4 corners to fill in the gap. What I did before drop the windshield in is to push the rubber to the corners as much as possible. This will allow you to fill in the gap easier if any. The windshield is easy part. The trim on top on the windshield is tough. I’m sure there is a tool for it. What I did was using the same principle when install the windshield. I used the wire I instead of the trimmer line. I have 28 gauge wire but it’s too thin. I double it. But perhaps a 24 or even 22 gauge wire is better..... tie one end to the wiper, or whatever. Position/slide the shim to one side. Push down the shim, not too hard, and pull the wire up slowly. Be generous with the soap to allow the wire lift up the rubber. Carefully not to cut the rubber with the wire... take your time and you’ll get it in nicely. stay tune for doors and hatch next regards


-
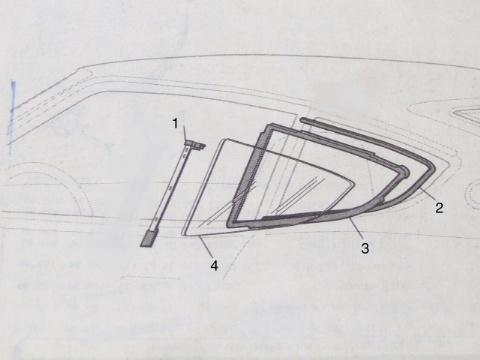
That piece, by look at the diagram is to complete the #2 seal. of course #1 is the metal piece a long with 2 screws to help tighten the housing of the glass. The ends rubber on top and bottom are to fill in the gaps I suppose. What I meant is to have a sheet of rubber between the metal bar and the housing. It should give same functionality/intended. ? No?
-
say, if the compression is what we're looking for, can we run a vacuum hose in inside to achieve the "hardness"? got to experience it.
-
https://zcardepot.com/collections/weatherstripping/products/quarter-window-rubber-vertical-seal-260z-280z?_pos=1&_sid=07efb0f87&_ss=r this piece is quite pricey. Sort of molding the rubber with the metal inside. Anyone attempt to just "glue" the ends part? MSA $61. ouch.
-
One more thing, for the door seals issue, is the issue relate to door not able to completely close that water leak in? Is it too thick that doors hard to close? is the seal a one piece that not fit at all? regards
-
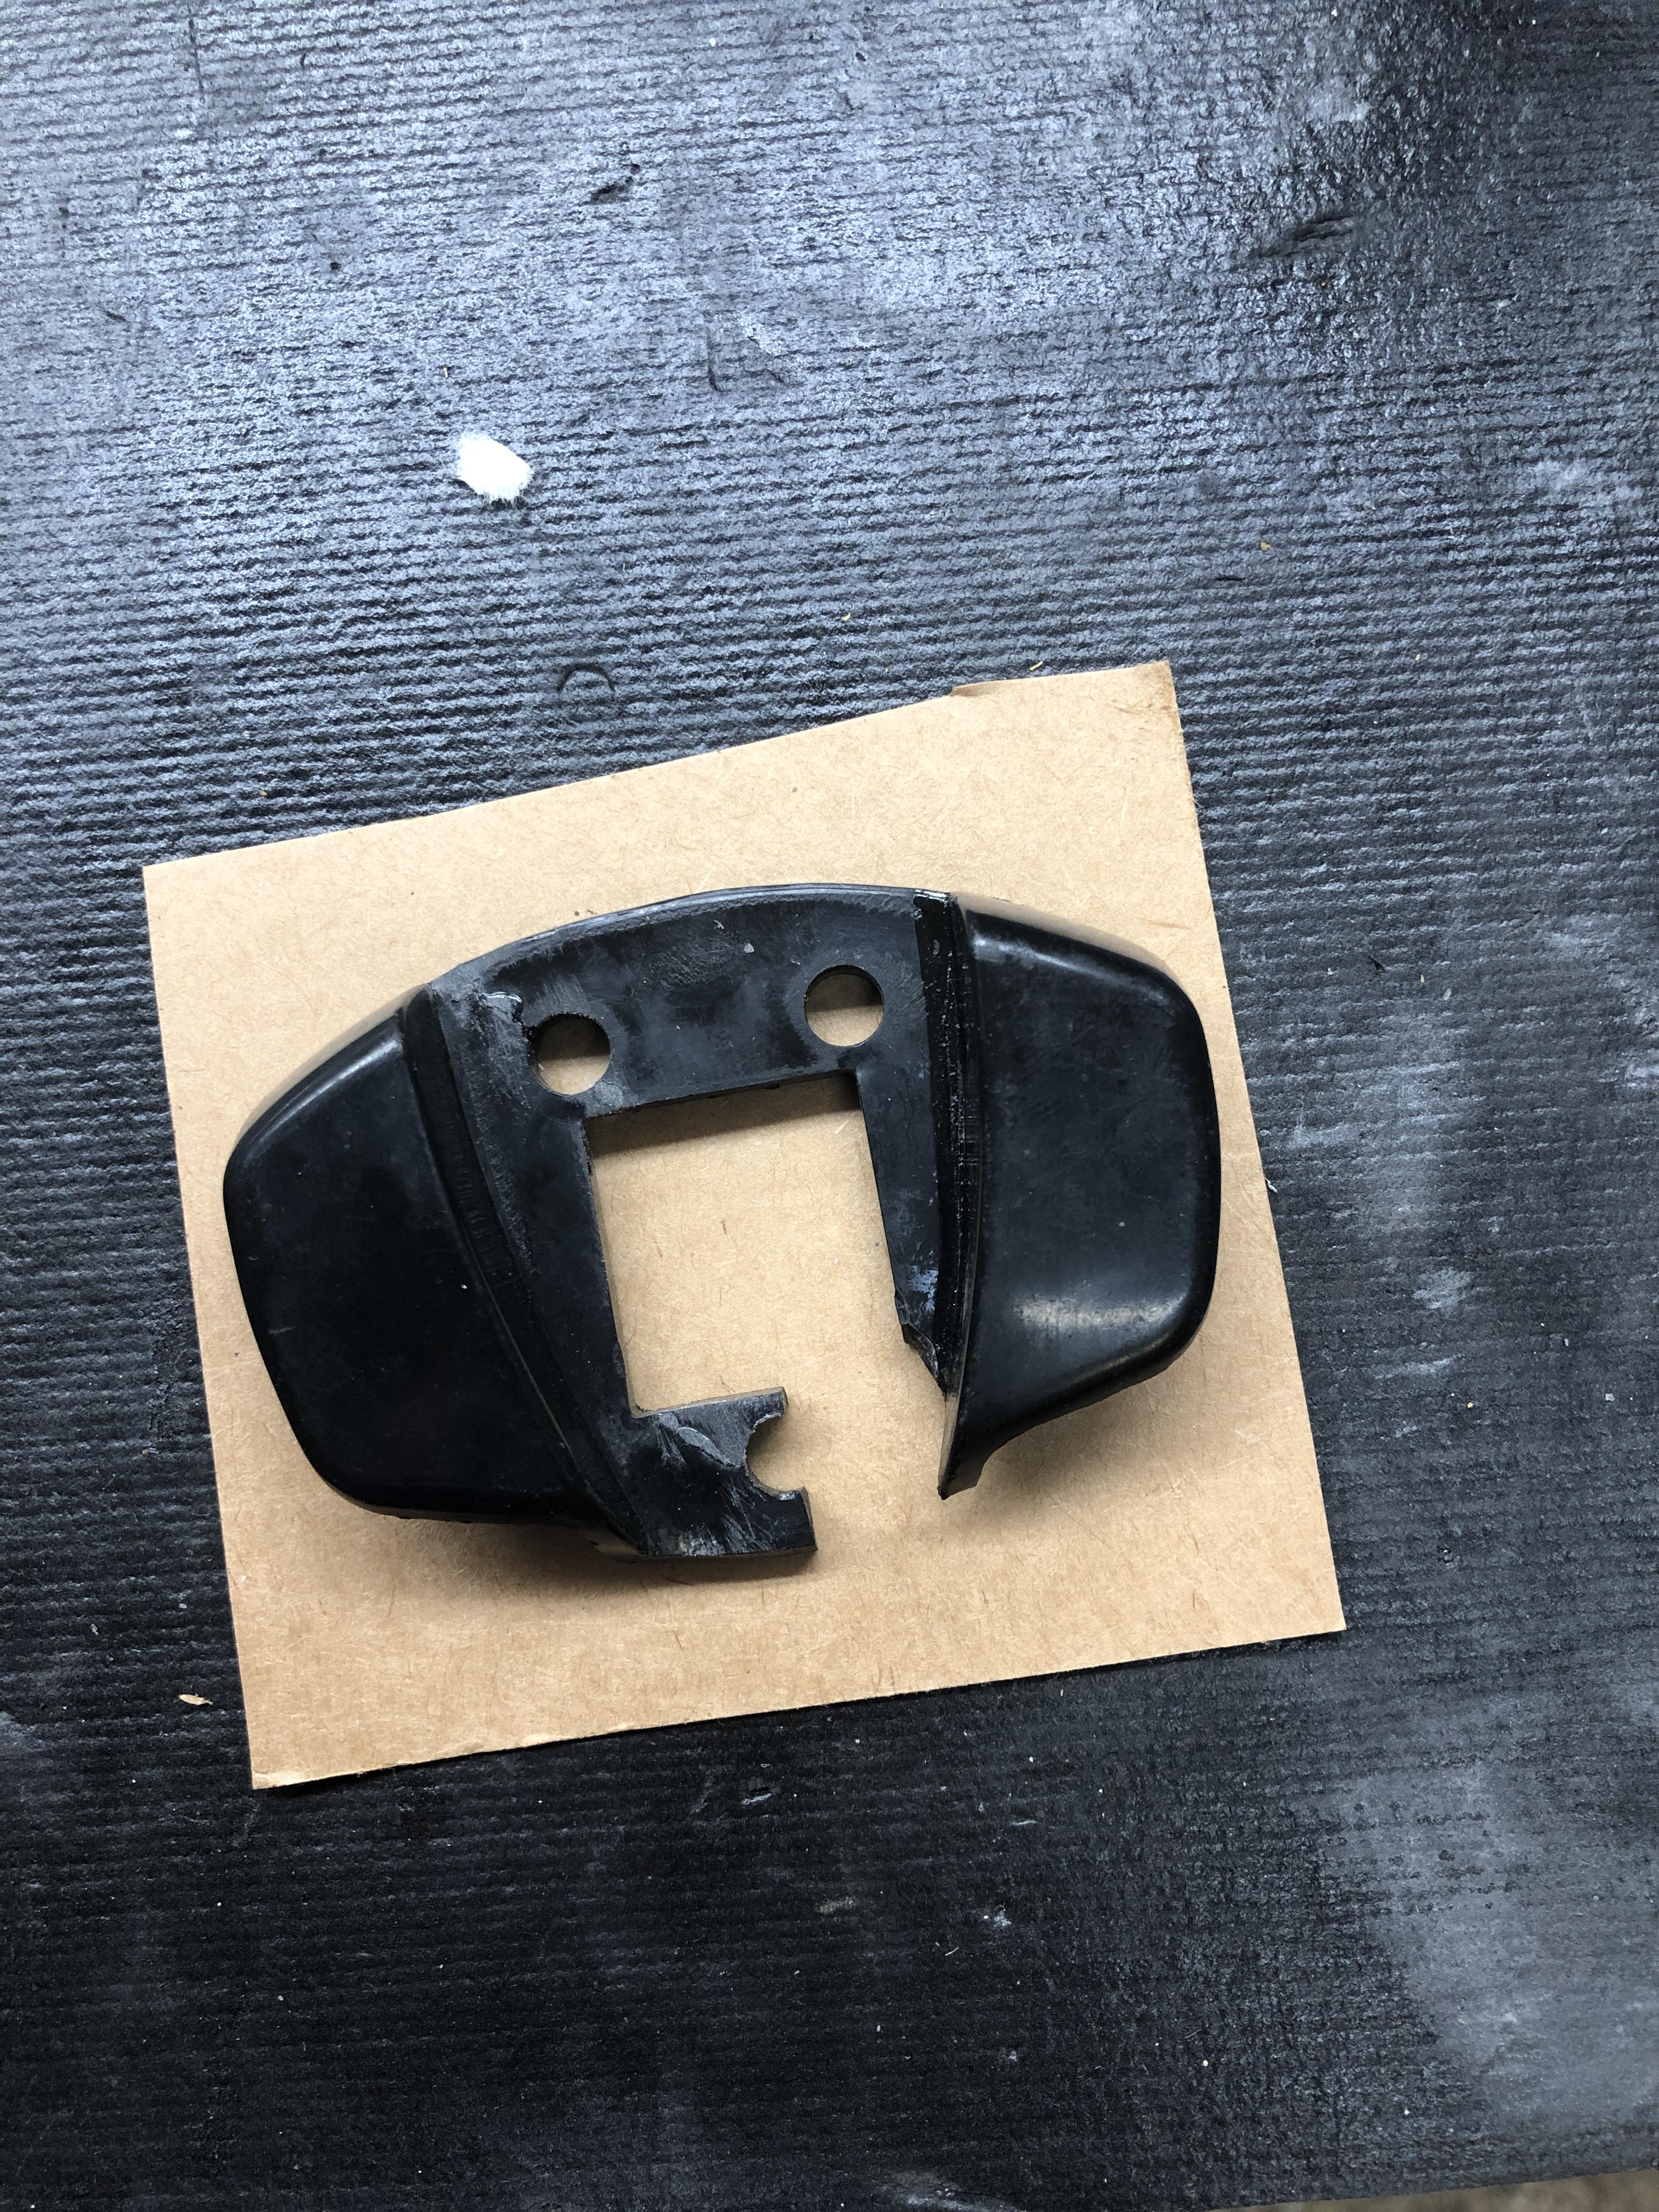
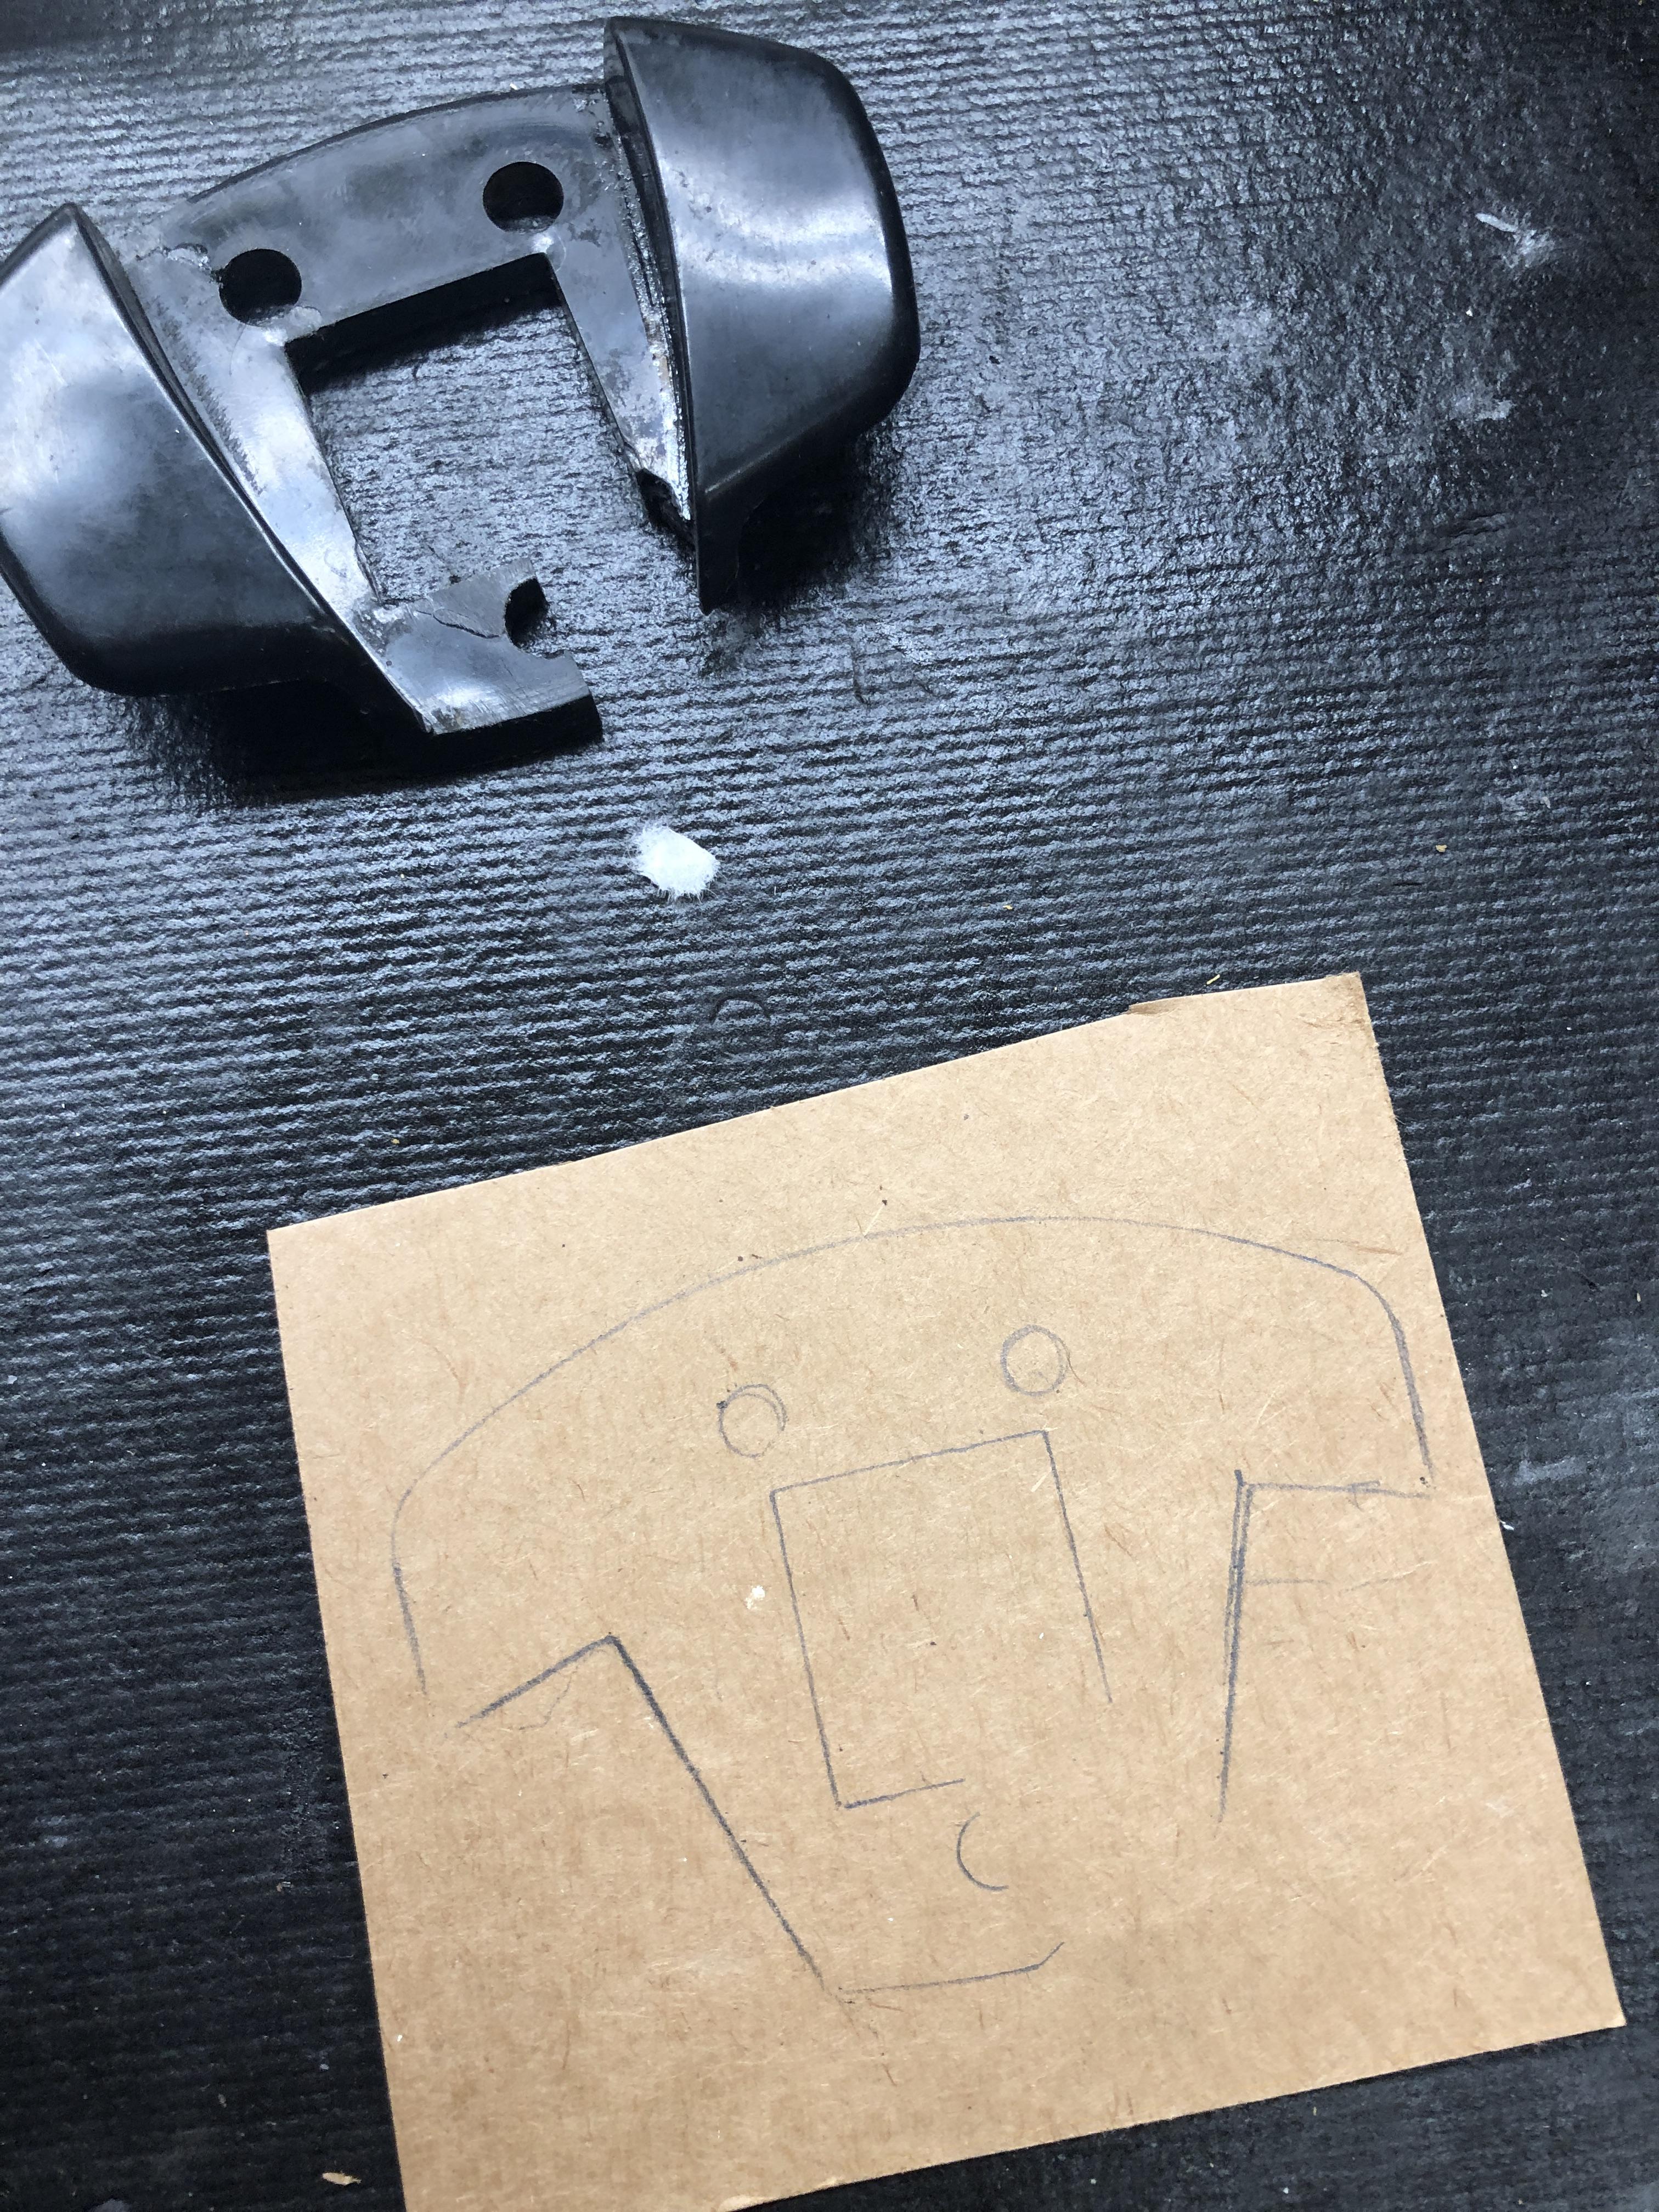
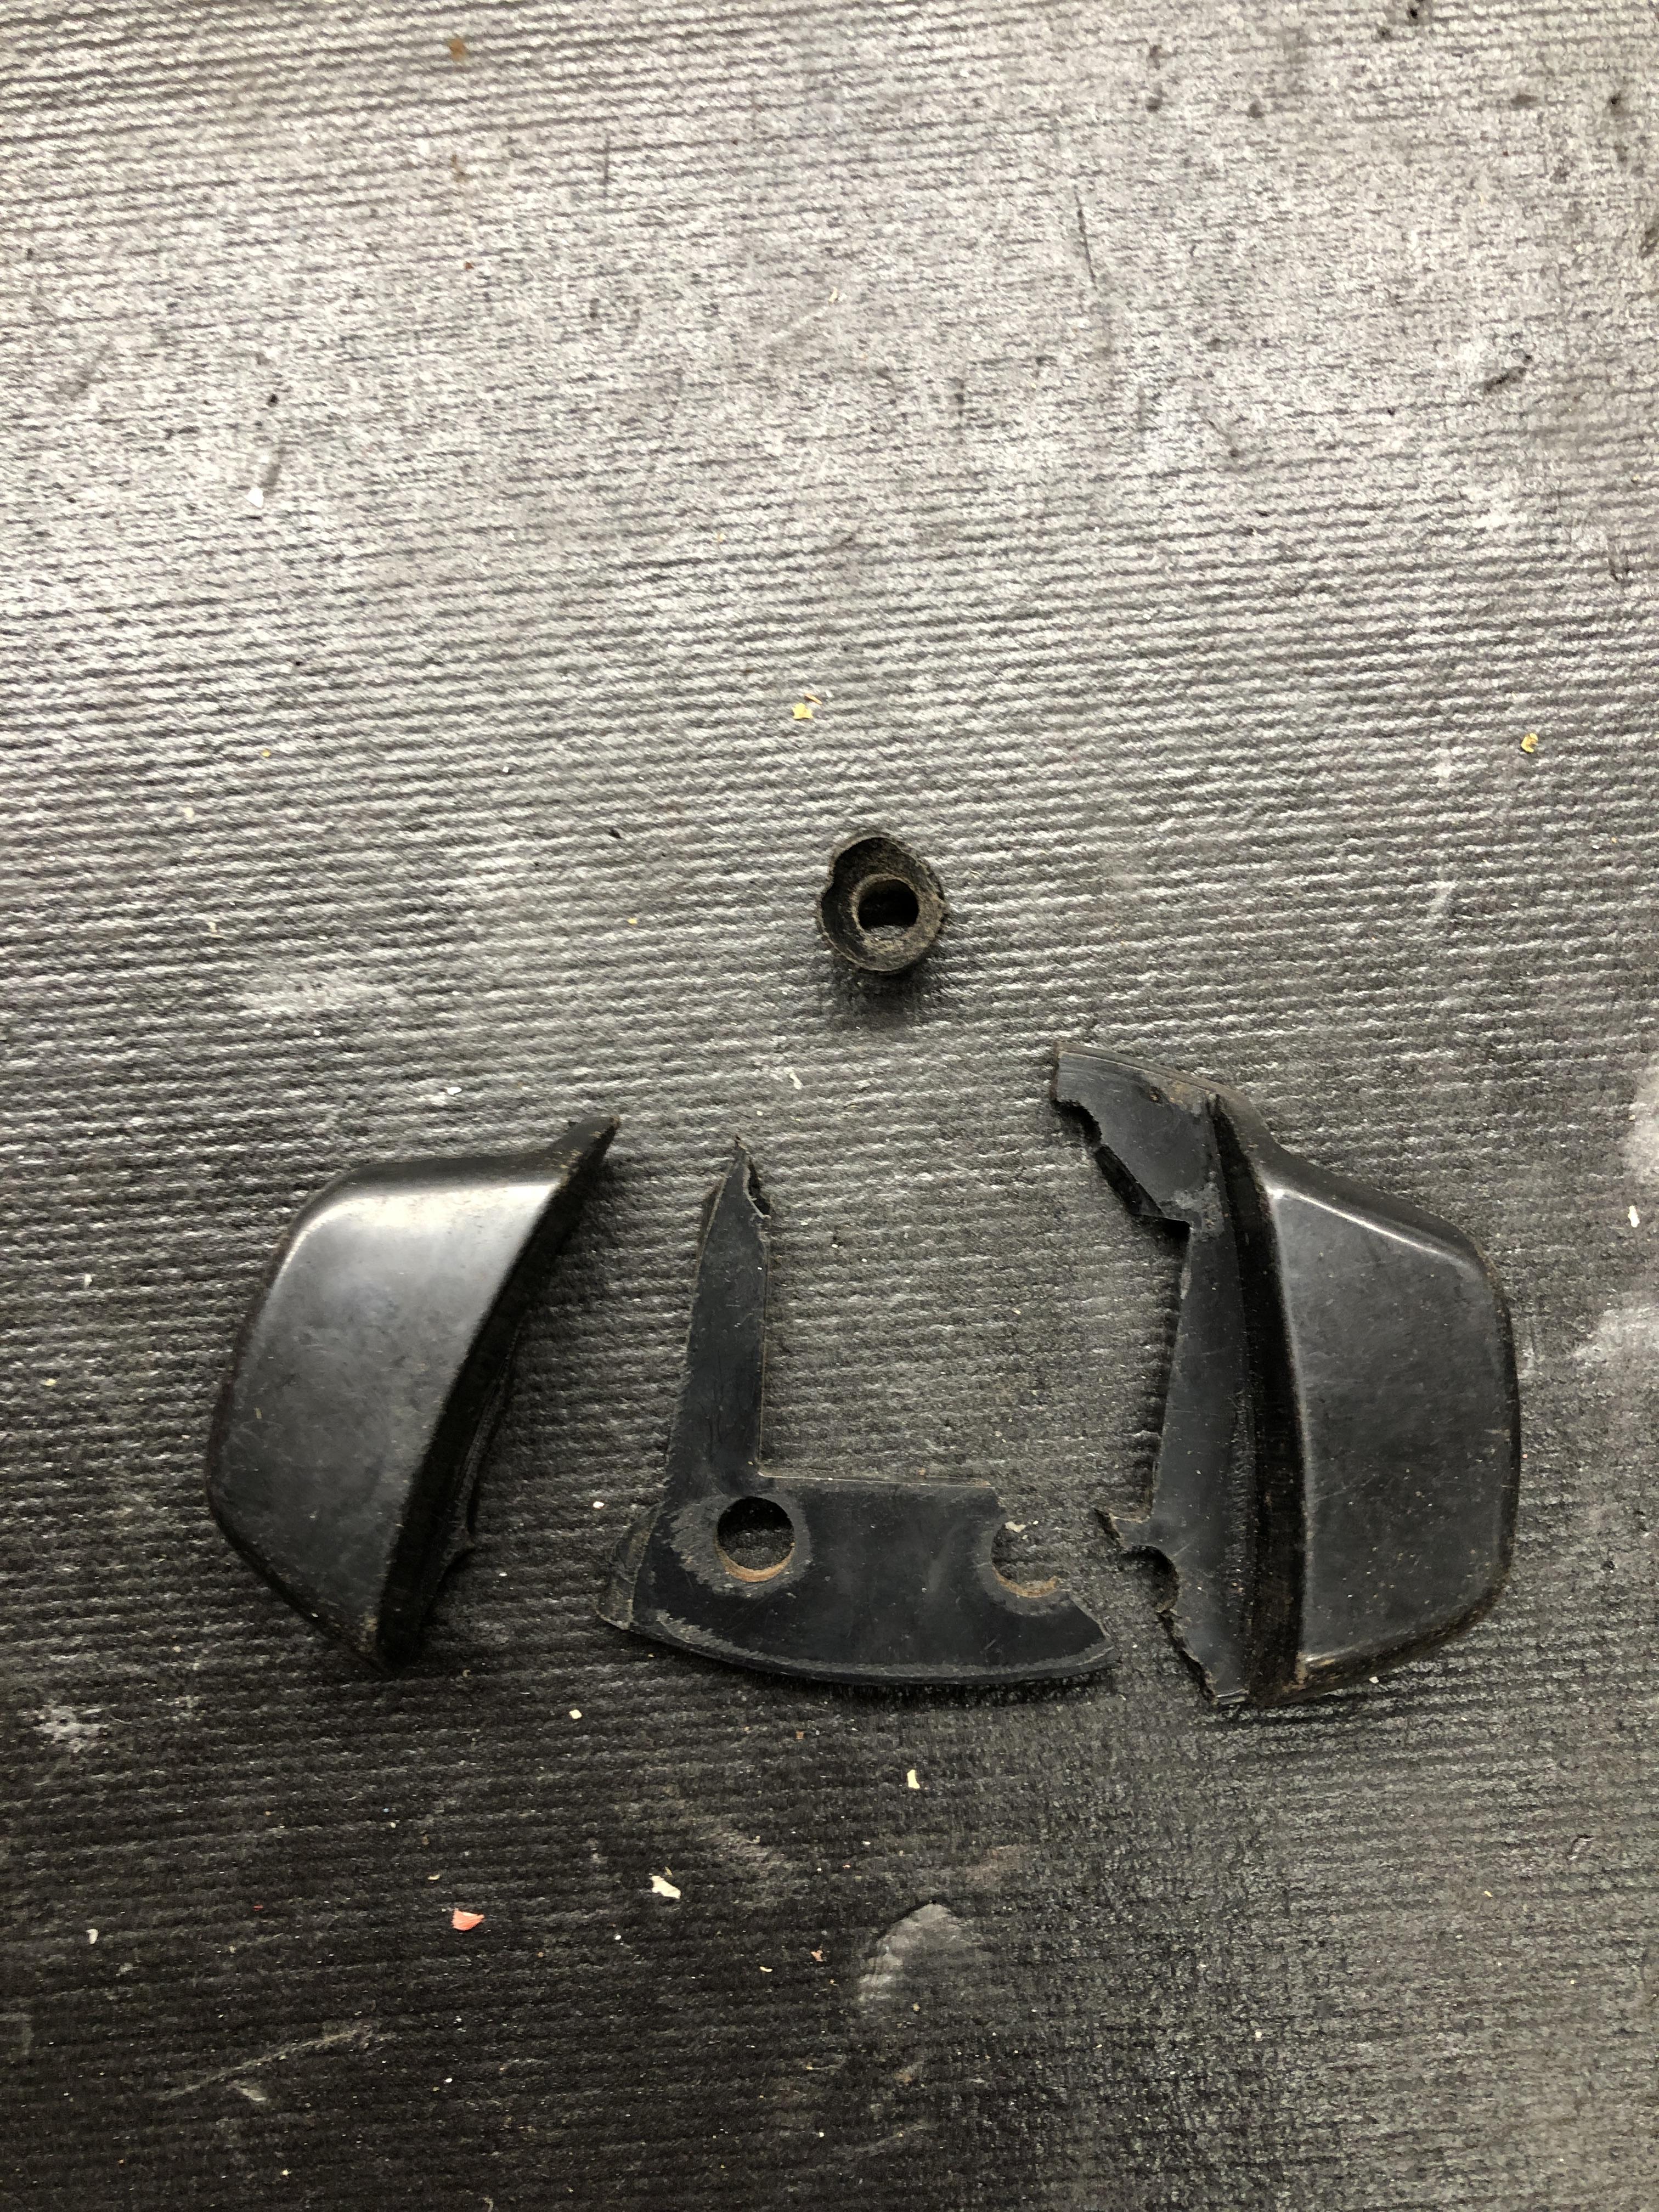
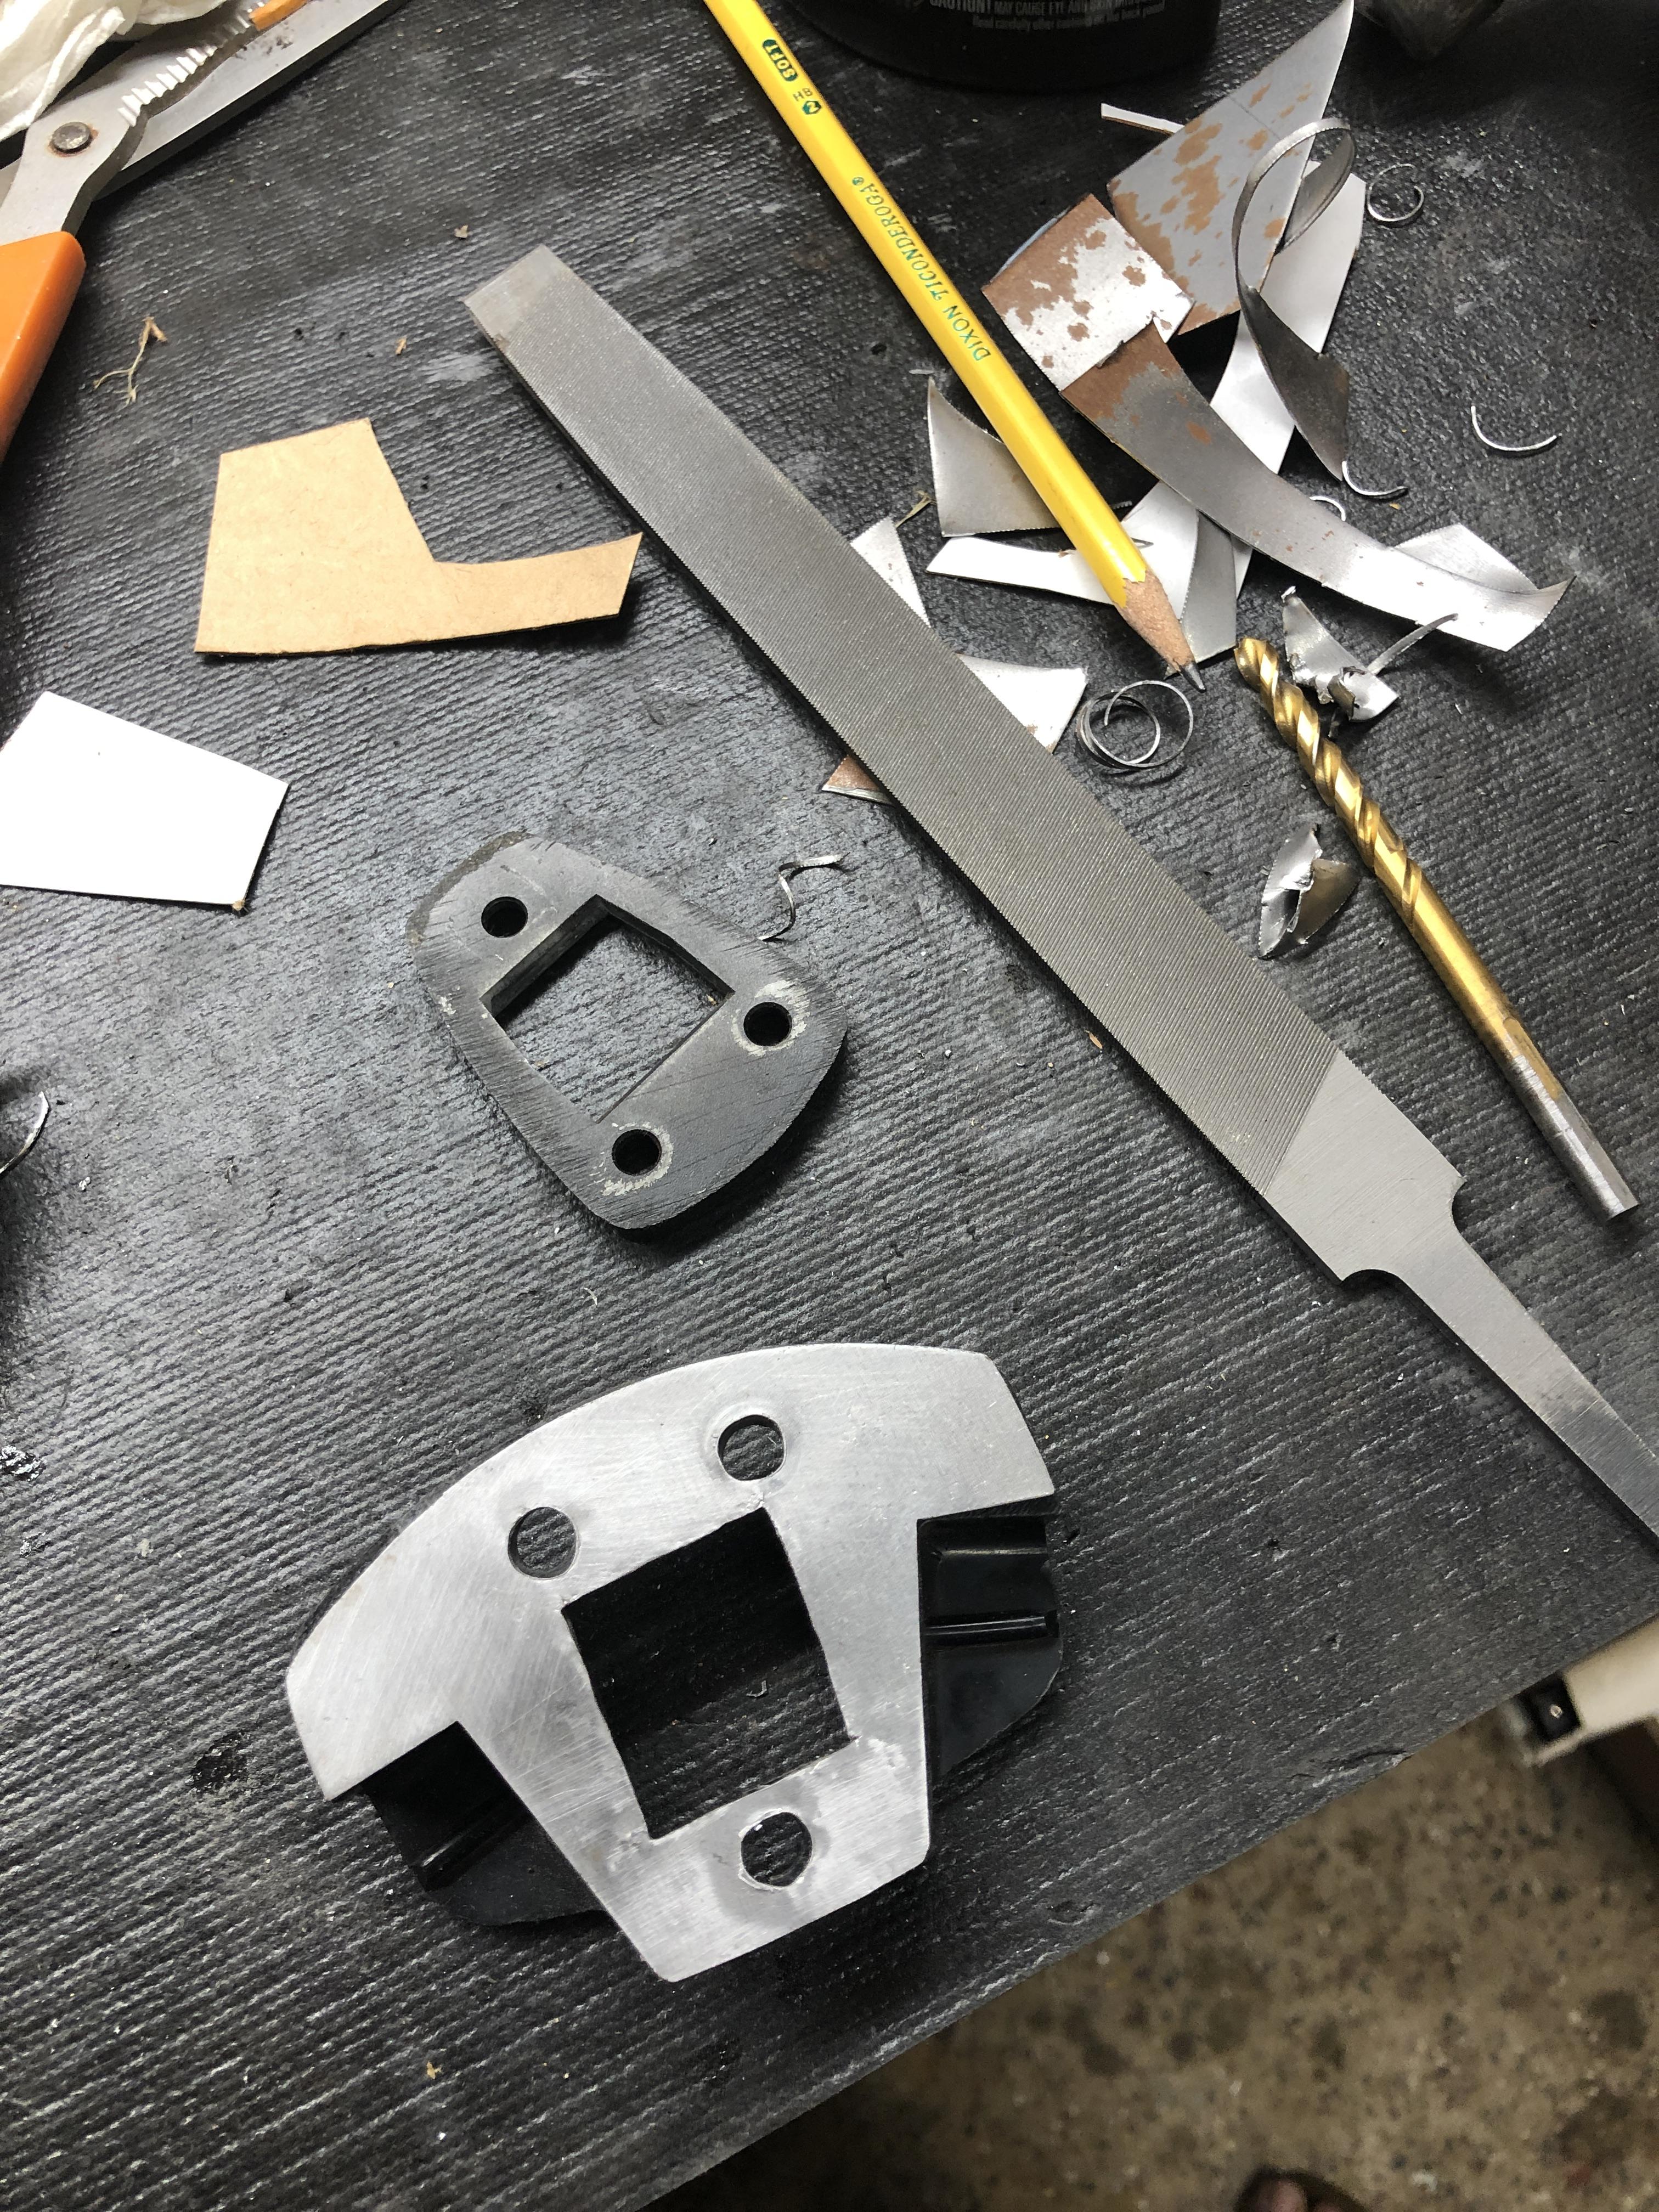
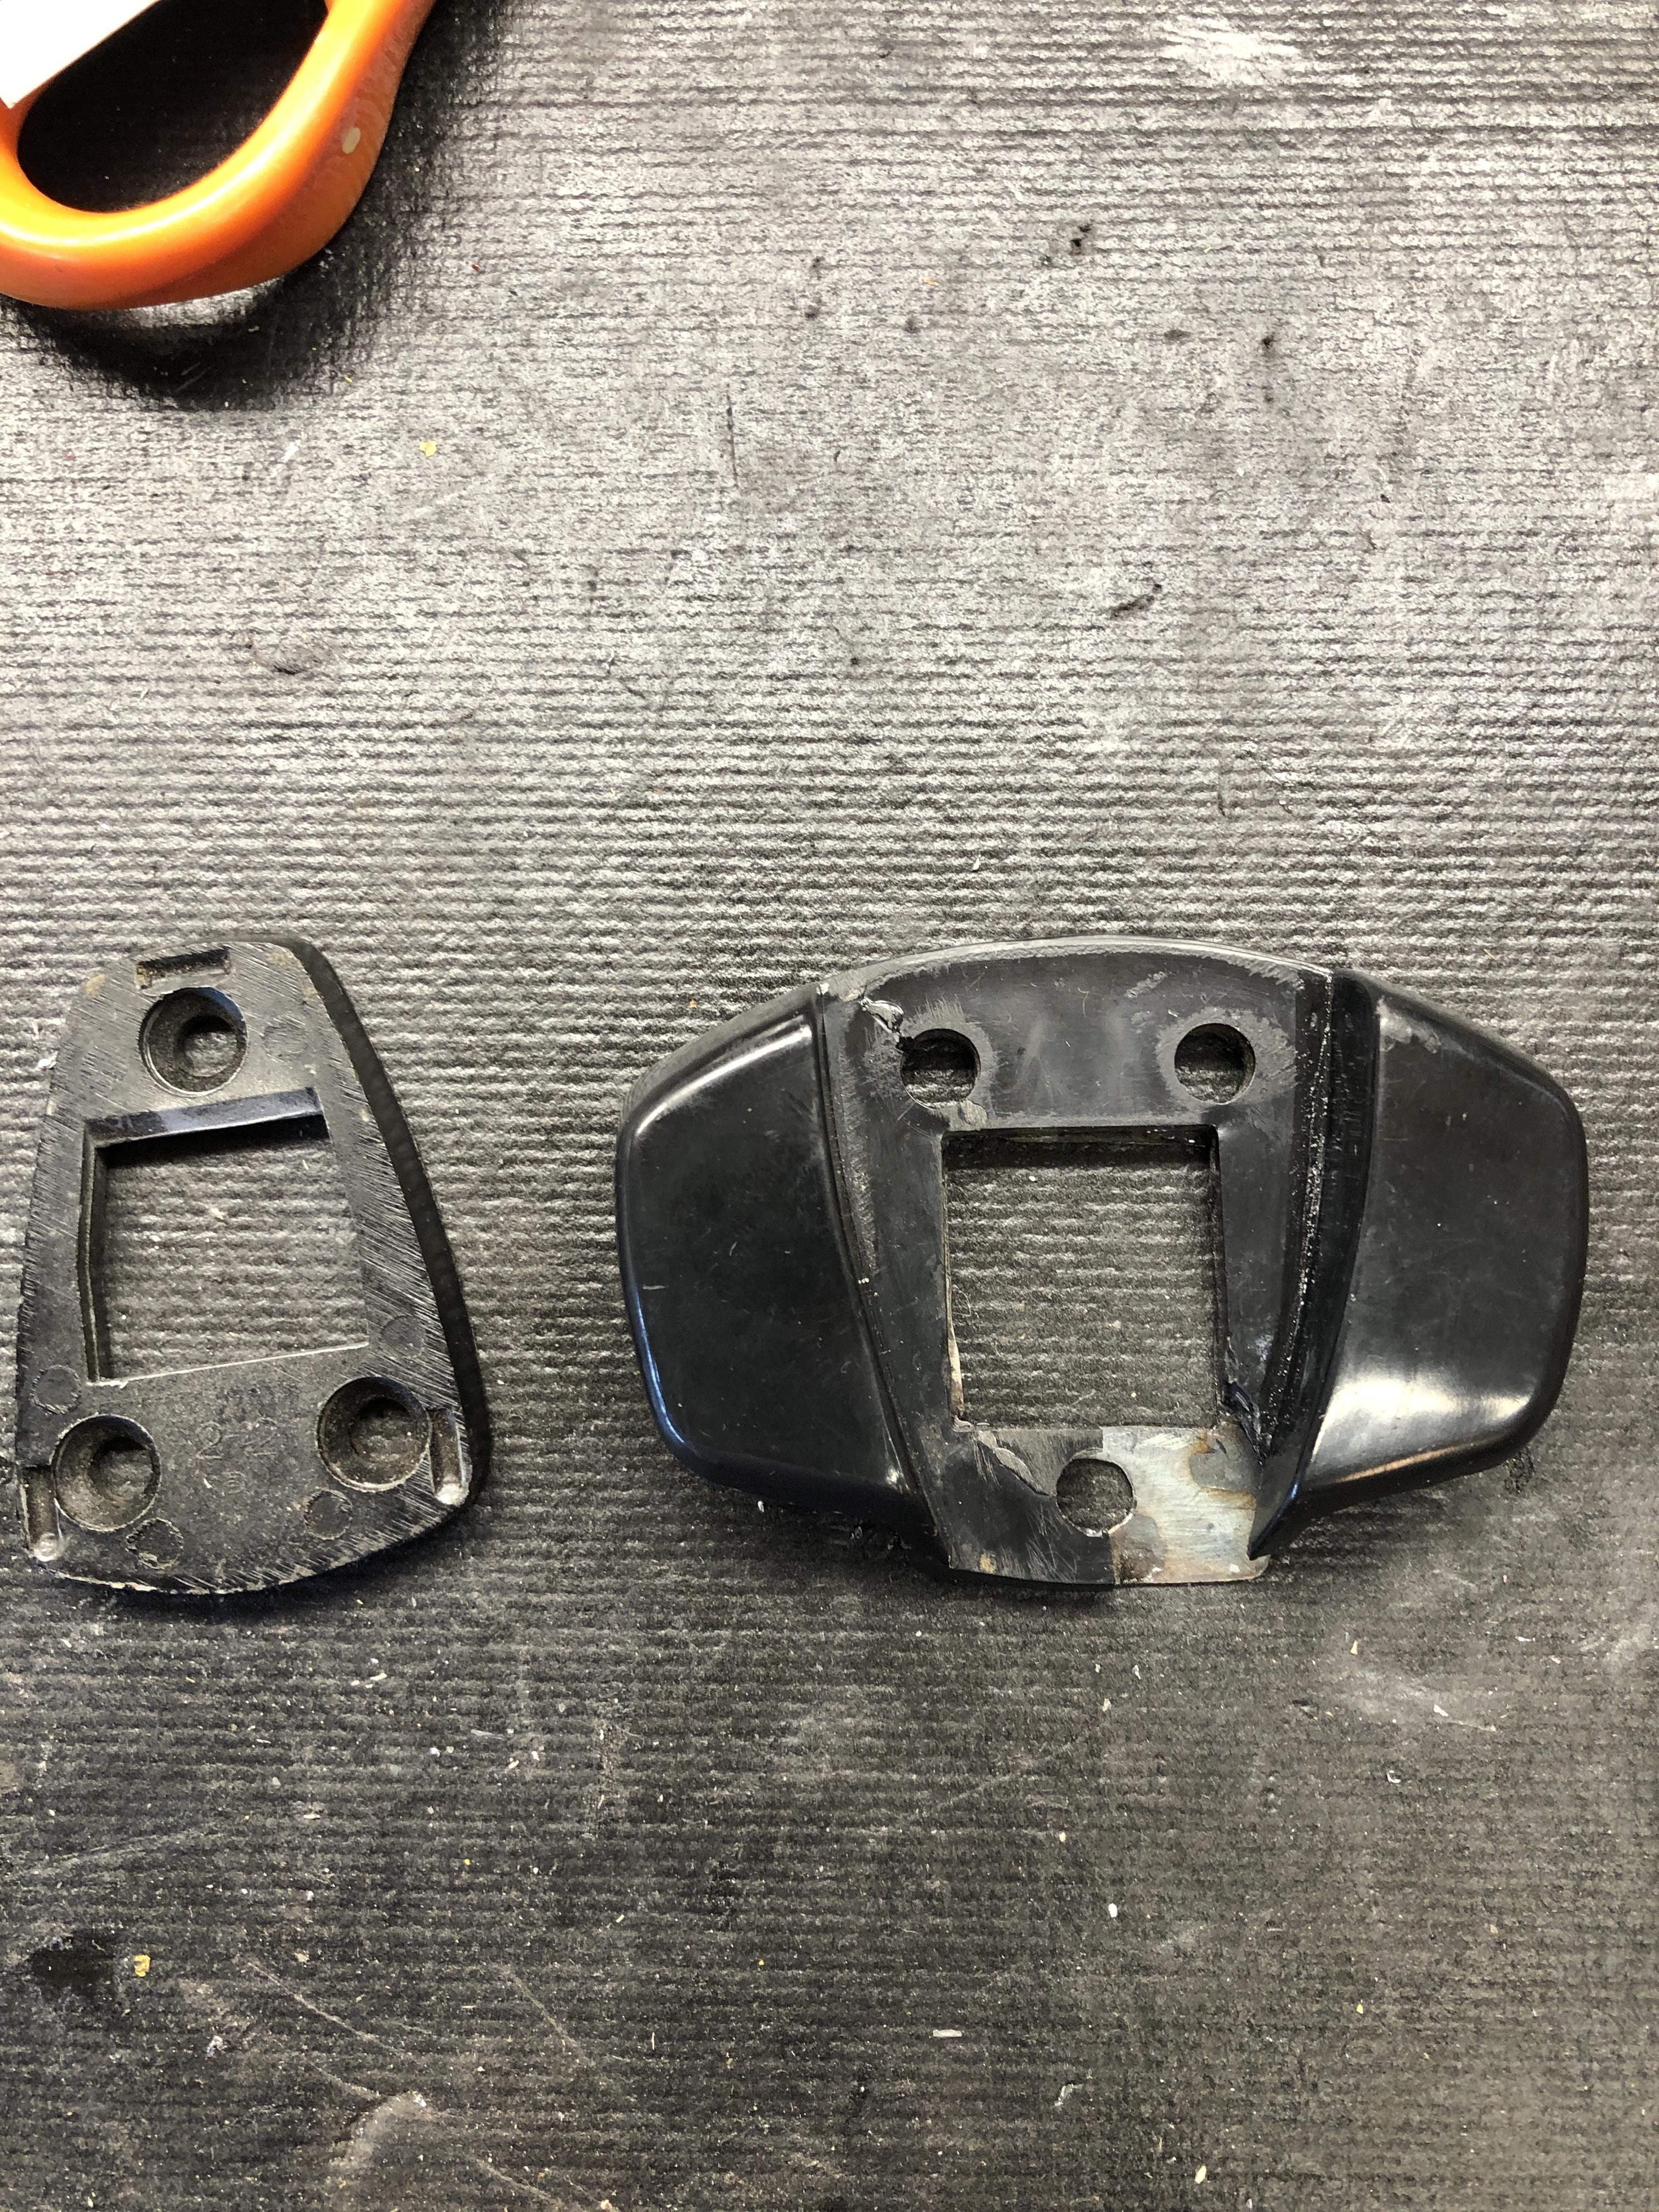
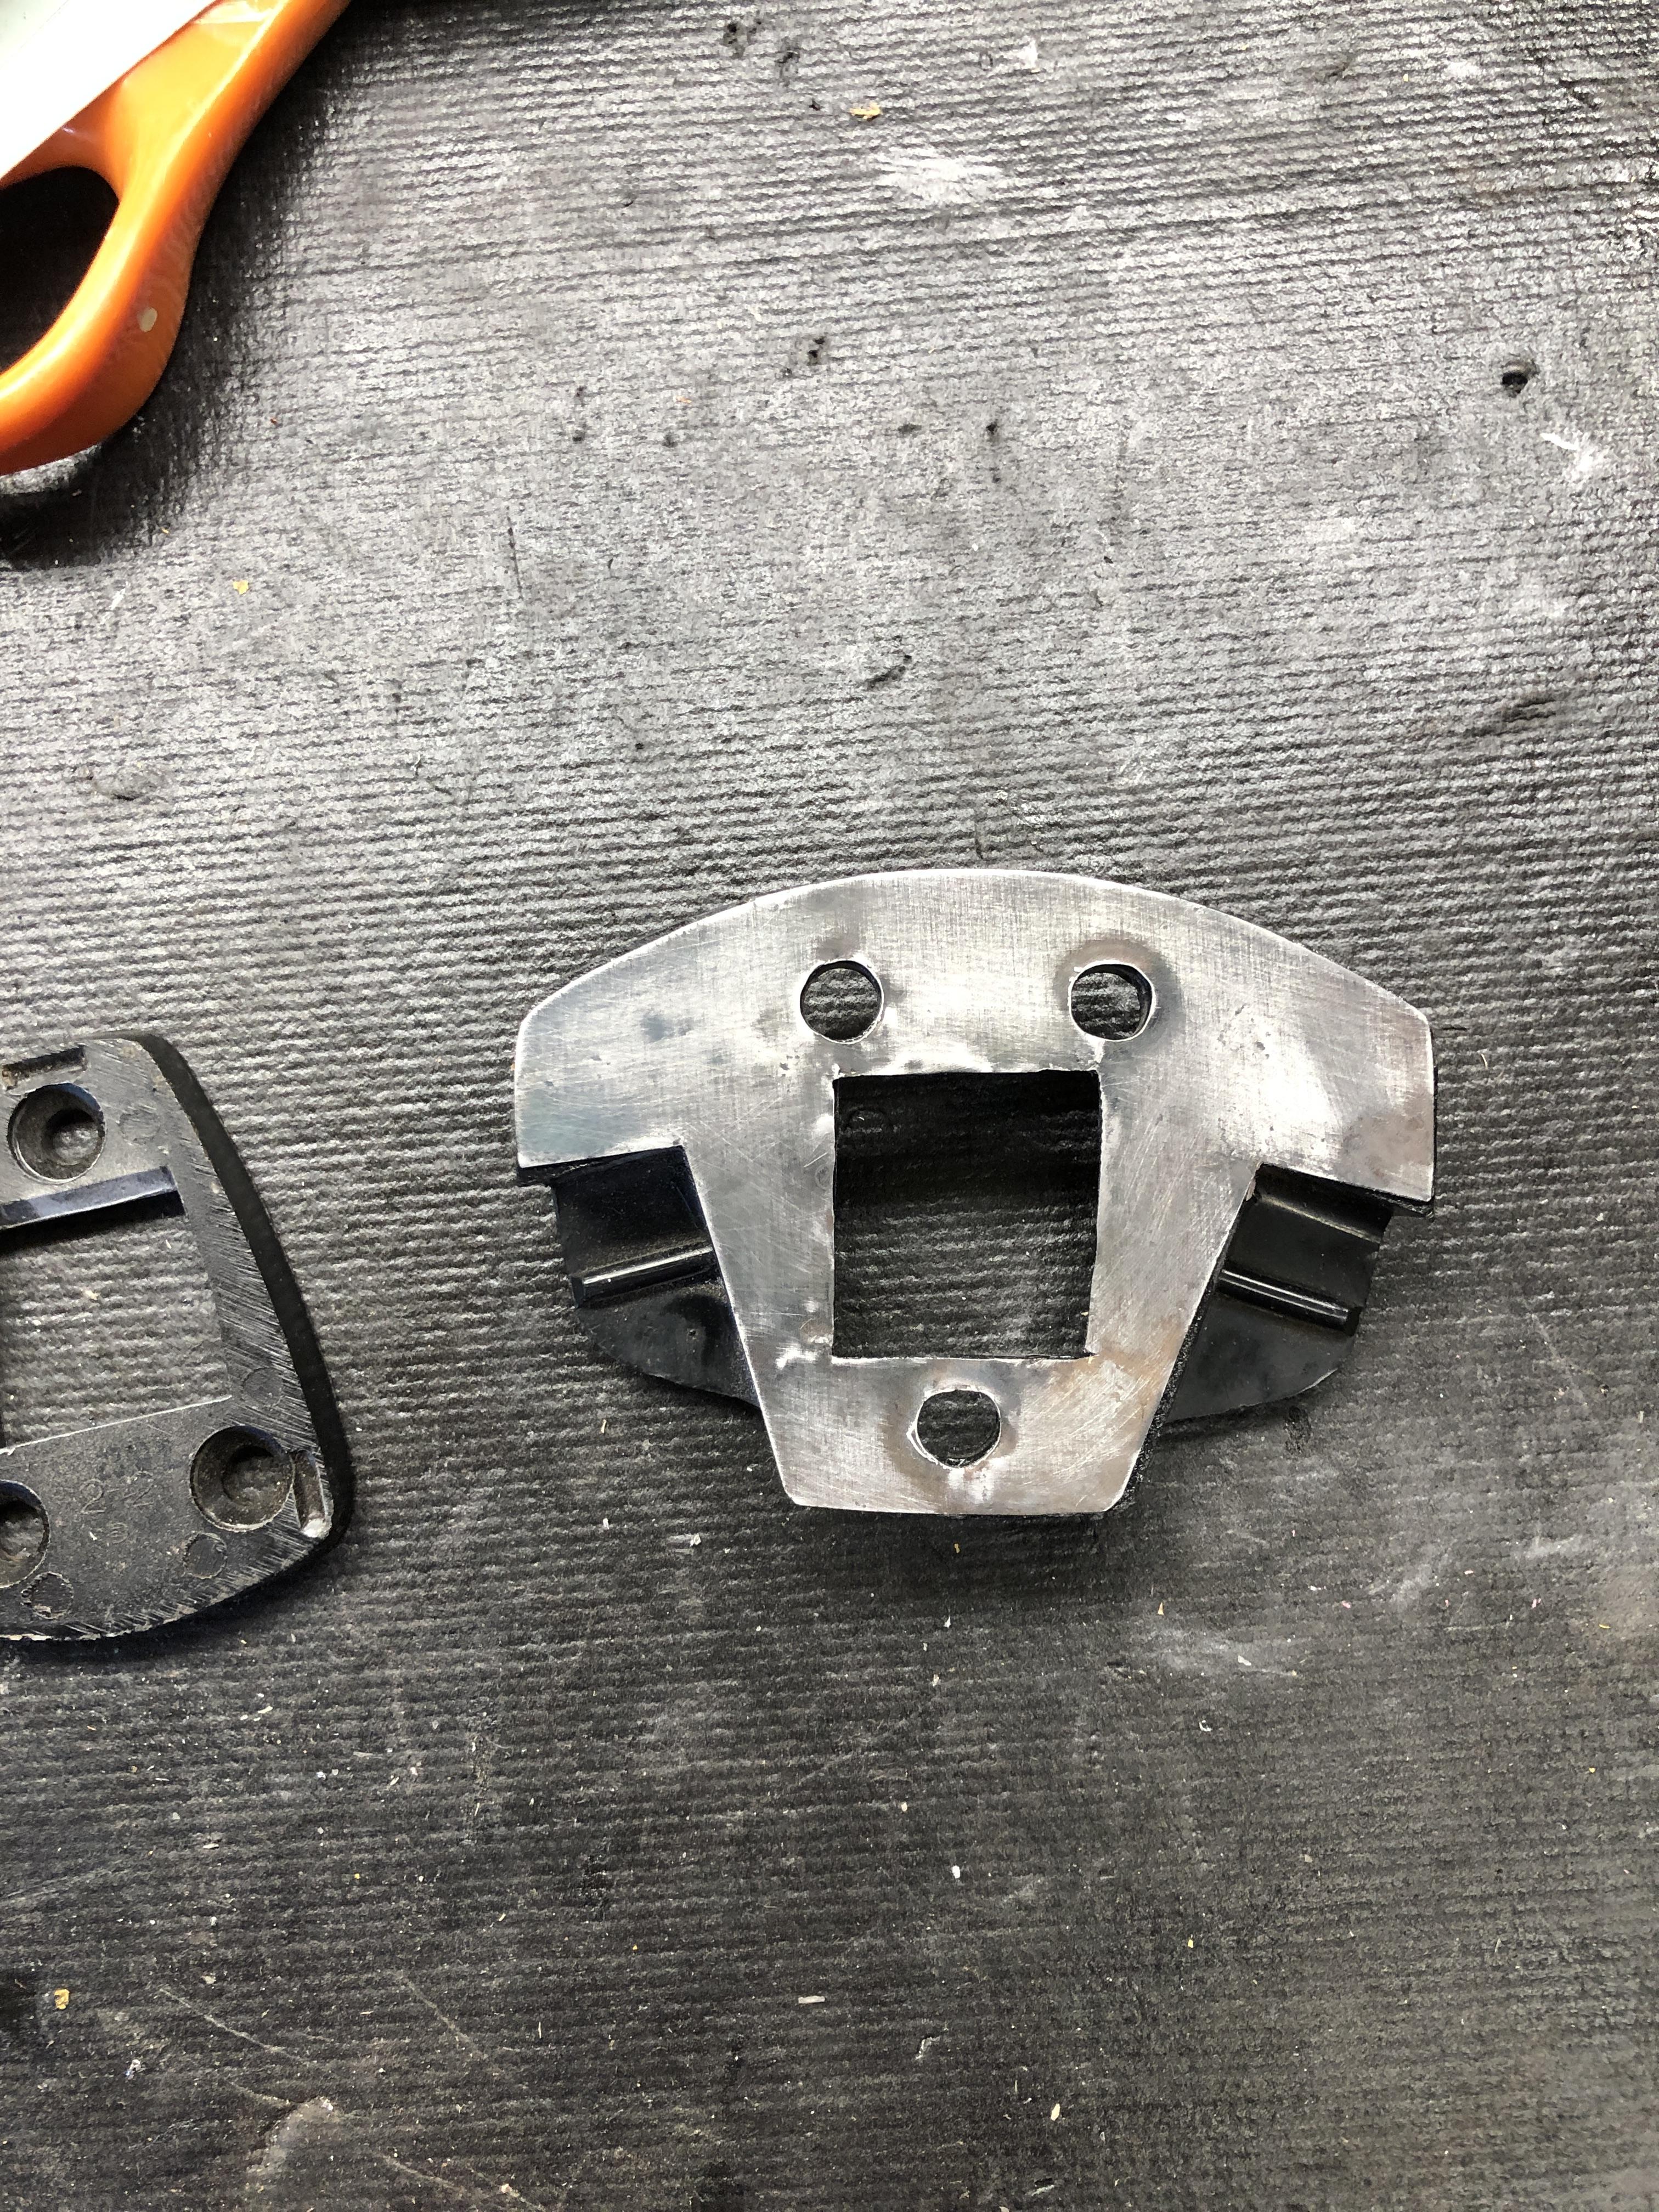
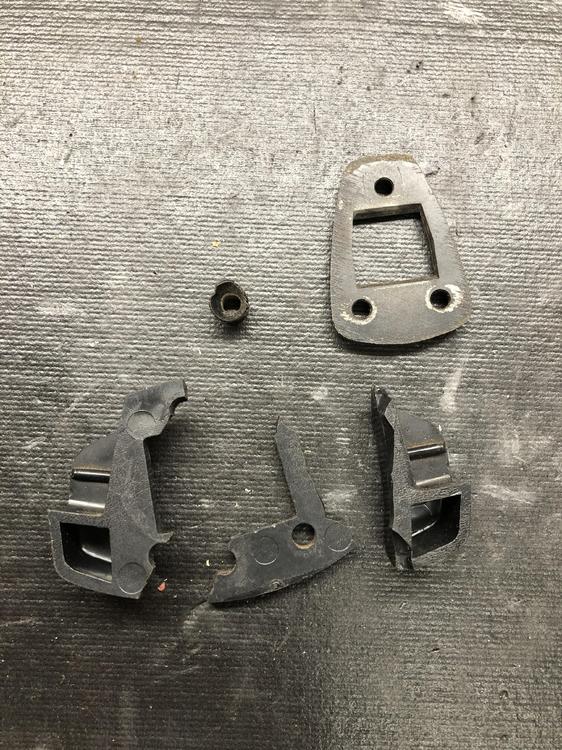
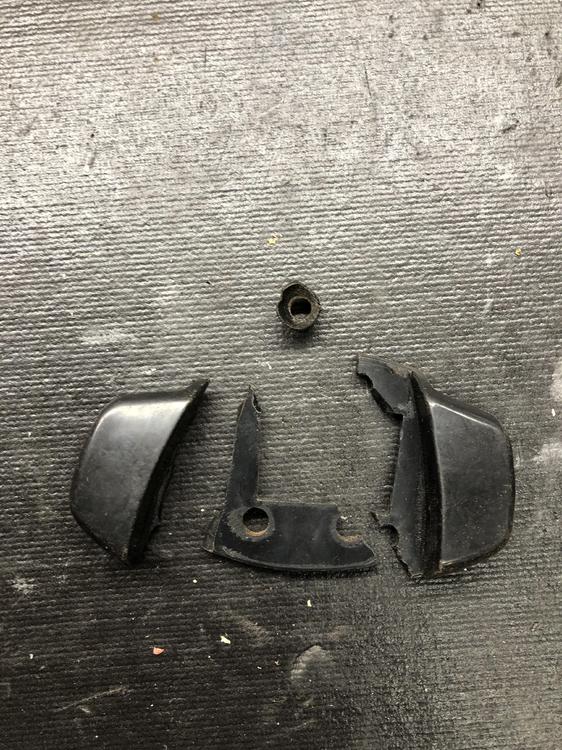
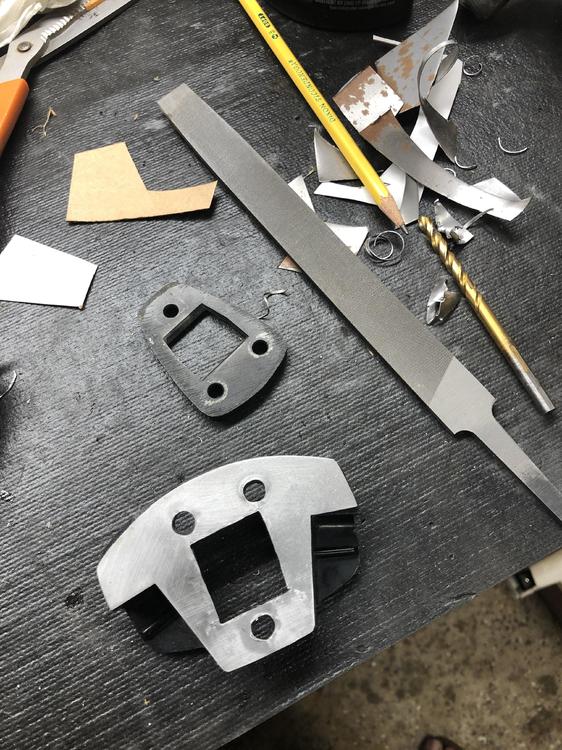
Folks, bored last night got nothing else todo, while waiting for parts for other stuff. my rear mirror’s mounting/base point is broken in few pieces and missing big chunk as well. Only if I have access to CNC or a 3D printer... what the fun in it? what I did was common sense I suppose. Super glue all the remaining pieces together. create a paper template. find a scrap piece of metal. Mine is very thin. Perhaps 24 gauge. trace the template and start snipping it. a press, sharp flat chisel might be better for the center opening. File it as best as you can. It’s hidden inside so long no obstruction when insert the mirror. heat treated the metal. I don’t know why I did that. Like the color. Found a piece of stainless steel but too hard to cut as it is thicker. Probably I like heat treated because I did a project awhile back on the stainless... gave a good color ? super glue the metal to the mount. Make sure holes are align. Clamp it or put something heavy to ensure good mating. The metal piece should hold everything together nicely. enjoy


-
If I had to do or against, I would install the ball joint into the gas pedal first and make sure it is firmly in. Put a grain of grease there for lubricant. Then pull the other end to the engine and put the boot on. i did the opposite. ? like everything i do .... had a hard time put it in the gas pedal. Used all my might thinking it was in. Drove around the block couple of times no problem. Getting closer to home on the last round... suddenly no acceleration ? it dropped off from the gas pedal. Dash home about few houses to get a long nose pliers and secure it this time. Imagine it on freeway Phew
-
@S30Driver thats very informative. I’ll just pull the plug and get the kit. Figure still cheaper than buying one at a time. What doesn’t fit, doesn’t fit and will source some other alternatives. I really want the windshield and hatch to have that slot for the chrome. After all, that’s what stand out of our car era. From reading, look like there shouldn’t be any need for the glue on the windshield and hatch at all. It should just drop in. please keep us posted on your project as well. and thanks for the part number of the doors seal regards