Racer X
-
Posts
1,877 -
Joined
-
Last visited
-
Days Won
33
Content Type
Profiles
Knowledge Base
Zcar Wiki
Forums
Gallery
Events
Downloads
Store
Blogs
Collections
Classifieds
Everything posted by Racer X
-
I’ve tried these. It is difficult to hold them where you want them. They tend to walk around.
-
I bought mine in 1989, off of the MAC tool truck that used to come to the shop I worked at. The cutters are brittle, and don’t last long. I wound up buying a few dozen replacement cutters. As far as brand, again, it was a very long time ago, so I don’t recall a brand. It is my observation that this type of tool has been copied an sold under many names since then. The plus side of using this type of tool is it doesn’t cut through both panels, only the top one. This leaves a nice round hole in the part getting removed, so if you are putting it back on, you have a convenient round hole to “spot weld” it back on. I removed the battery tray and the rear hatch slam panel, cleaned up the rust, treated and applied weld through primer, and then welded everything back together.
-
Never assume. I made my recommendation.
-
 You’re an exception. The air compressor is the most ignored tool in any shop. The only time most mechanics even think about the shop air compressor is when they need air, and there isn’t any. Usually, at that point, it is too late.
 -
Yep, 30wt non detergent motor oil. Getting harder to find these days, but it should cost quite a bit less than the stuff at the hardware store.
-
So in 27 years, have you ever changed the oil in the compressor?
-
Yes. Wait. Does your car have an electric fuel pump also? Sorry, I had to think about that for a moment, because on the race Z there isn’t a mechanical pump, only two electric pumps at the fuel cell. My stock 72 Z only has the mechanical pump, in fact the system is the original equipment from 1972, no electric pump, and no added regulator. So if your car has both an electric and a mechanical pump, between the electric pump and the mechanical pump should be OK. The stock mechanical pumps shouldn’t produce too much pressure, as they were designed to supply the carbs without a regulator. You might want to check the pressures in the system. That will help you understand what is happening, and why fuel is spilling out from the carb throats. As dirty as the float bowls were, the problem may not have been too much fuel pressure, but rather dirt in the needle and seat, allowing the bowls to overfill.
-
Pressure is the result of resistance to flow. So, a small hole in the return line would only serve to increase pressure in the fuel system, and do nothing to regulate it. The pressure regulator needs to be inline before the carburetors to manage fuel system pressure. Providing correct system pressure is important because excessive pressure will force the fuel past the needle and seat, overfilling the float bowls and increasing the risk of a fire.
-
There isn’t any provision for adjustment to the stock mechanical pump, and electric pumps usually don’t have a regulated output. You need a fuel pressure regulator and a gauge (0 to 10 psi). The cheap regulators with the round adjustment dial aren’t worth the money or the trouble. I recommend the Holley regulator (there are two, one for low psi settings, one for high psi, get the low psi one). SU carburetors won’t tolerate pressure over 2 or 3 psi. This is similar to what I have, 1 to 4 psi. The gauge can be plumbed into one of the outlets.

-
I’m just saying that if a sweet biscuit wants to pose on my Z, I’m doing the horizontal mambo with her.
-
I’ve used these with great success. I use a spring loaded center punch to set a dimple to hole the center point of the cutter.
-
Regarding the orientation of the grease fitting plugs: Did the original trunnions have them? If so, what was their relationship? Also, after greasing the joints, removing the zerk and installing the plugs would be a good idea. The joints are pretty small on these shafts, and a grease zerk might interfere with the joint as it rotates. Regarding the various thickness keepers. You are correct that they are for setting the clearance, between the inside of the caps, and the ends of the trunnions. If there isn’t any clearance, the parts will rub and get hot, causing failure of the bearing (a u joint is a complex bearing). If the clearance is too great, the end play will result in vibrations, and premature failure. If you are concerned about the balance after replacing the u joints, take the assemblies to a drive shaft shop and have them balanced. Oh, and get some brass soft jaws for your vise. Way better than wood sticks.
-
I see the girl with the green Z (in the caption the guy says she is “just a friend”, yeah right), and lately Mikes Z with triple SUs.
-
Woah! Easy there.
-
Replacement front turn signals from Resurrected Classics
Racer X replied to Yarb's topic in Body & Paint
Looks nice. The bulb holder looks different than an original 240Z. So, you're adapting these to a 280Z? -
240ZBUILTBYME 1971 240z HS-001063 Project Georgia
Racer X replied to 240ZBUILTBYME's topic in Build Threads
You can do the continuity testing yourself, with a volt/ohm meter. -
No worries. If the OEM setup was mono, then using it would not provide stereo, and may also lead to the premature failure of the speakers. I strongly suggest you get some speaker wire and run dedicated right and left circuits to the speakers.
-
I asked previously if the speakers were using the OEM wires or have proper dedicated wires been installed from the stereo to the speakers, and you never responded. Do you know which it is? It is important too.
-
Because they are overdriven by the amp?
-
From the owner's manual: "Use speakers over 50 watt output value, between 4 and 8 ohm rating." I see in the specifications the output is 50 watts into 4 outputs (two front, two reatr). The Rockford Fosgate speakers you have had fail twice are rated at 30 watts and 4 ohms. These might be better suited to the stereo: https://www.crutchfield.com/p_20647KSC40/Kicker-47KSC404.html?tp=105
-
So the car has an aftermarket stereo, correct? Given that, and that these cars didn't come with much in the way of hi fidelity audio systems back then, the OEM wiring shouldn't be relied upon to get the audio signals to the speakers. And the speakers. Rockford Fosgate speakers are typically good, better quality speakers. Rather than rely on the less than adequate OEM wiring, you should have dedicated, proper gauge wires running from the stereo to the speakers. Also pay close attention to polarity, and keep the phasing the same right to left. This is more of a sound quality thing than a longevity issue, but still important. Impedance is also important, the speakers need to match the impedance of the stereo output. If the stereo has 8 ohm output, then the speakers should be rated for 8 ohms, if it has 4 ohm output, the speakers should be 4 ohm.
-
What valve specs y'all like for adjusting
Racer X replied to Jabronie's topic in Engine & Drivetrain
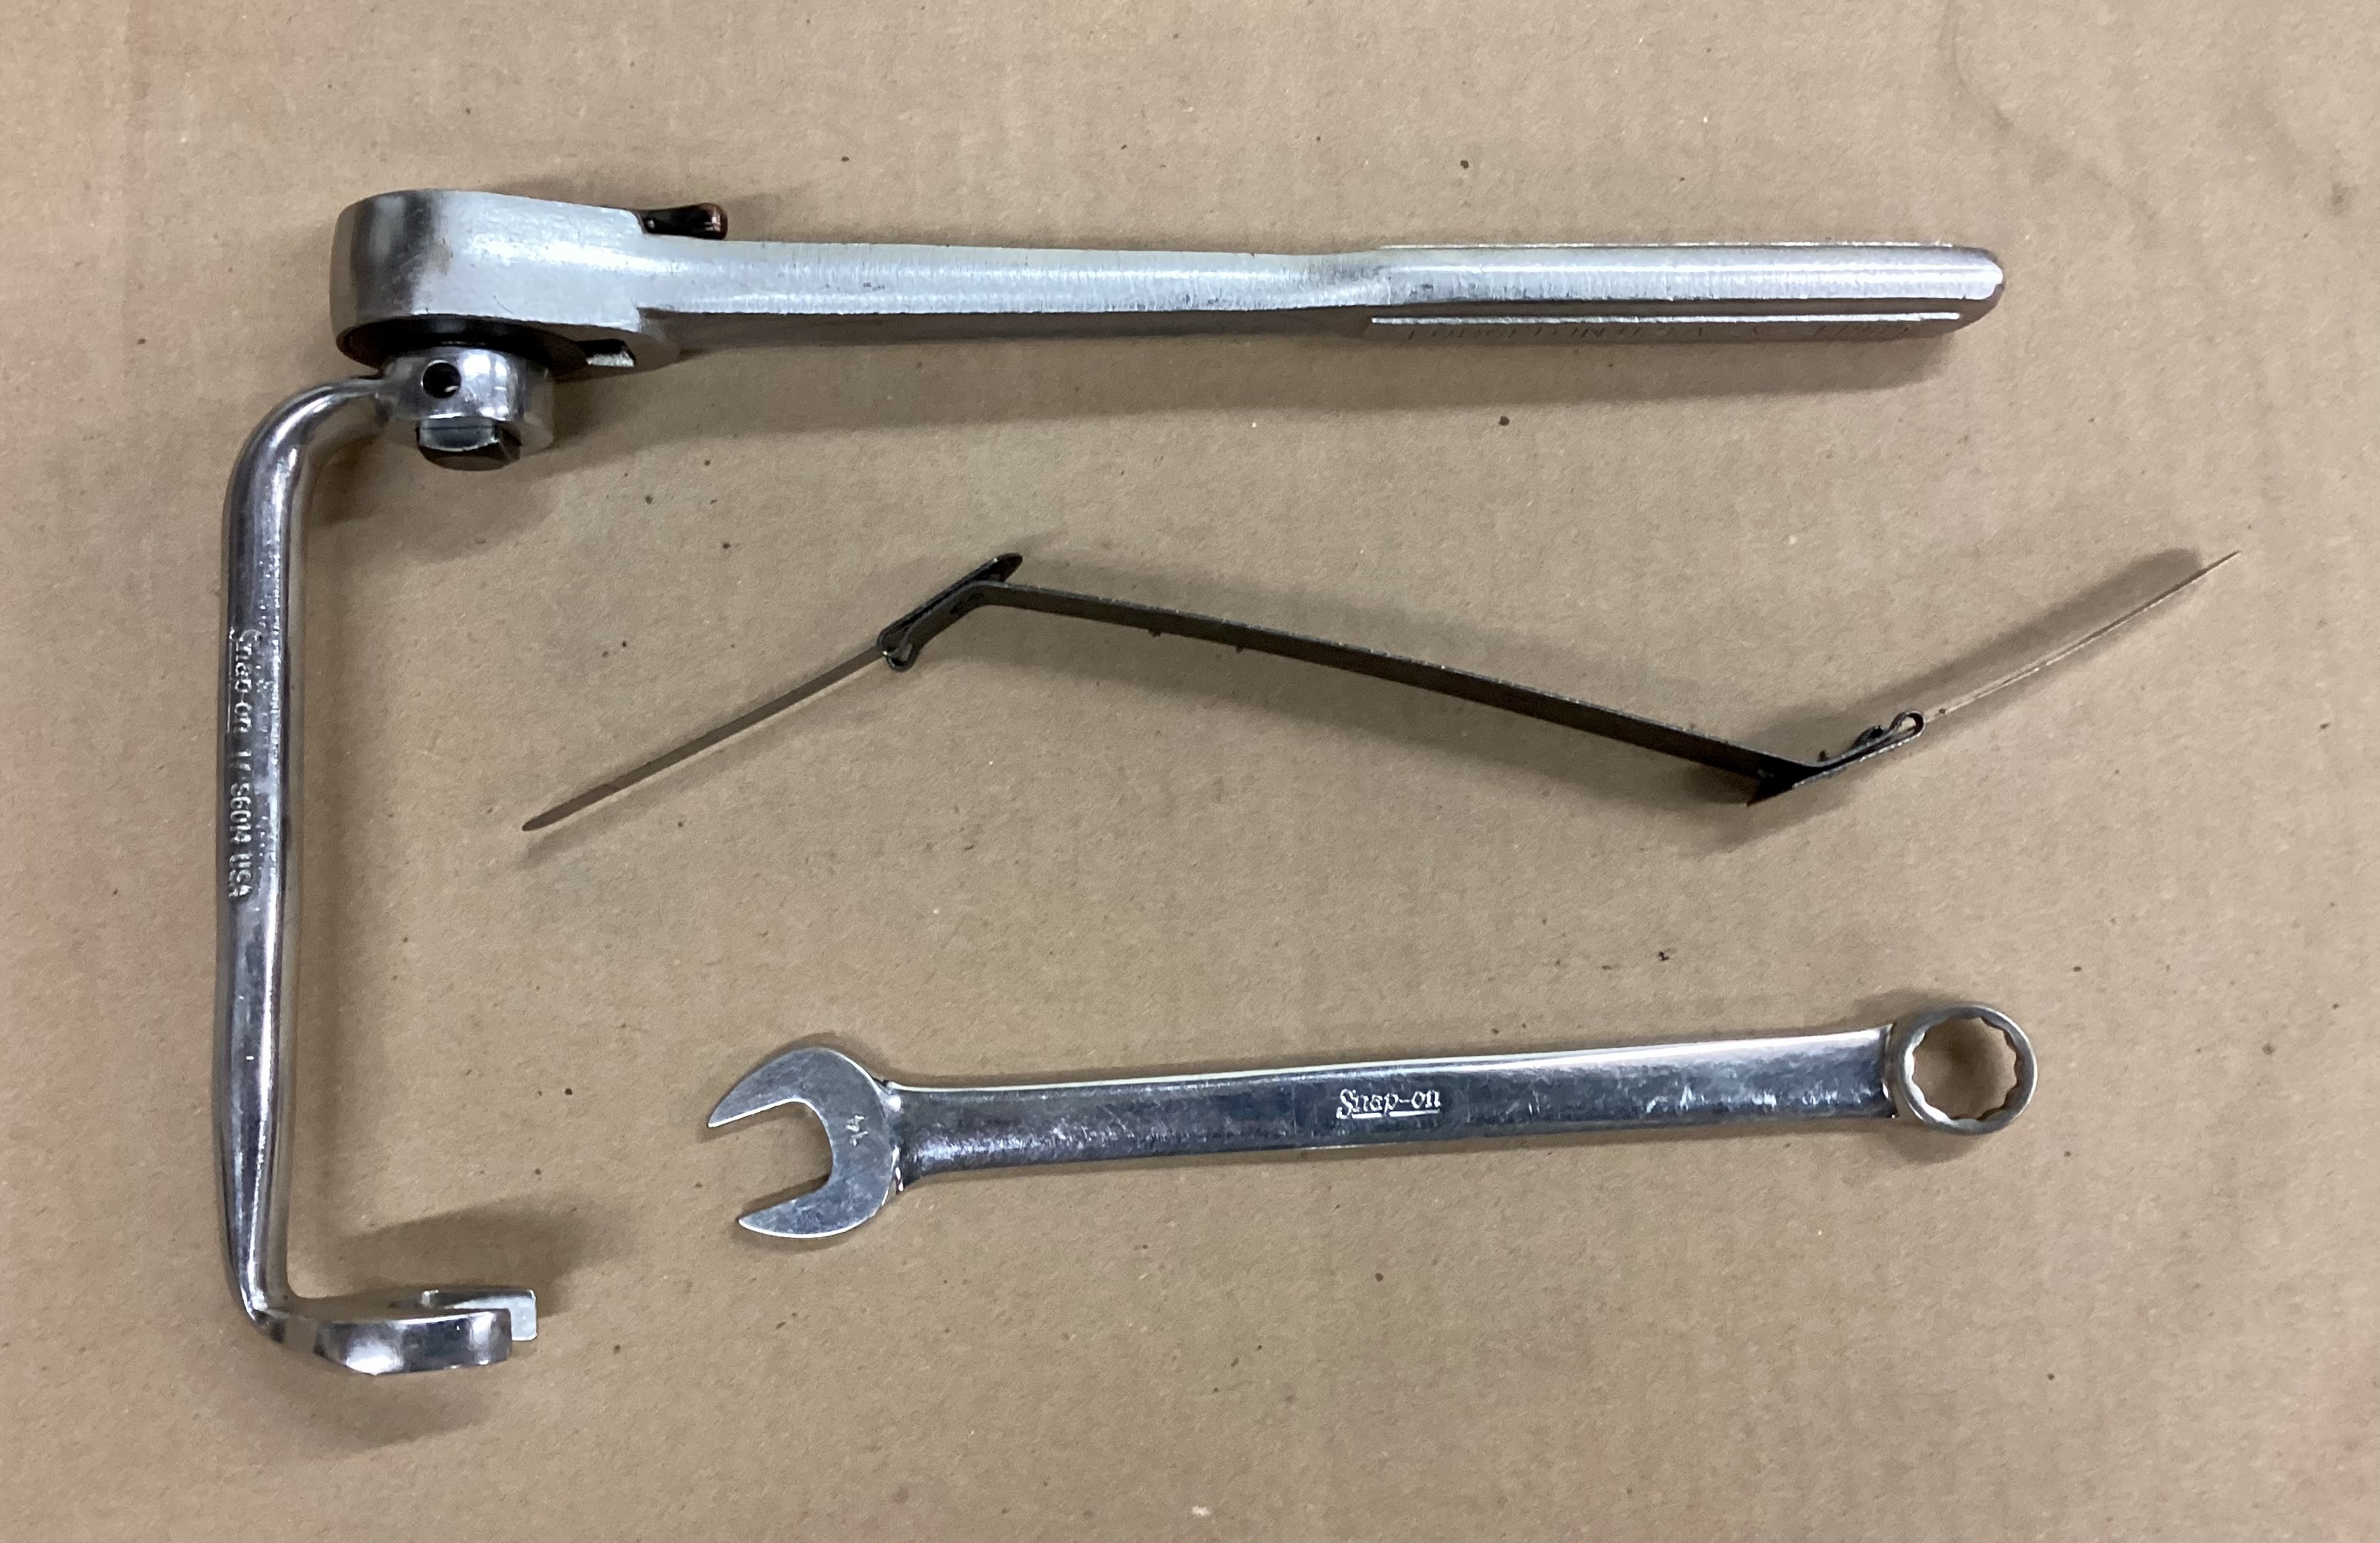
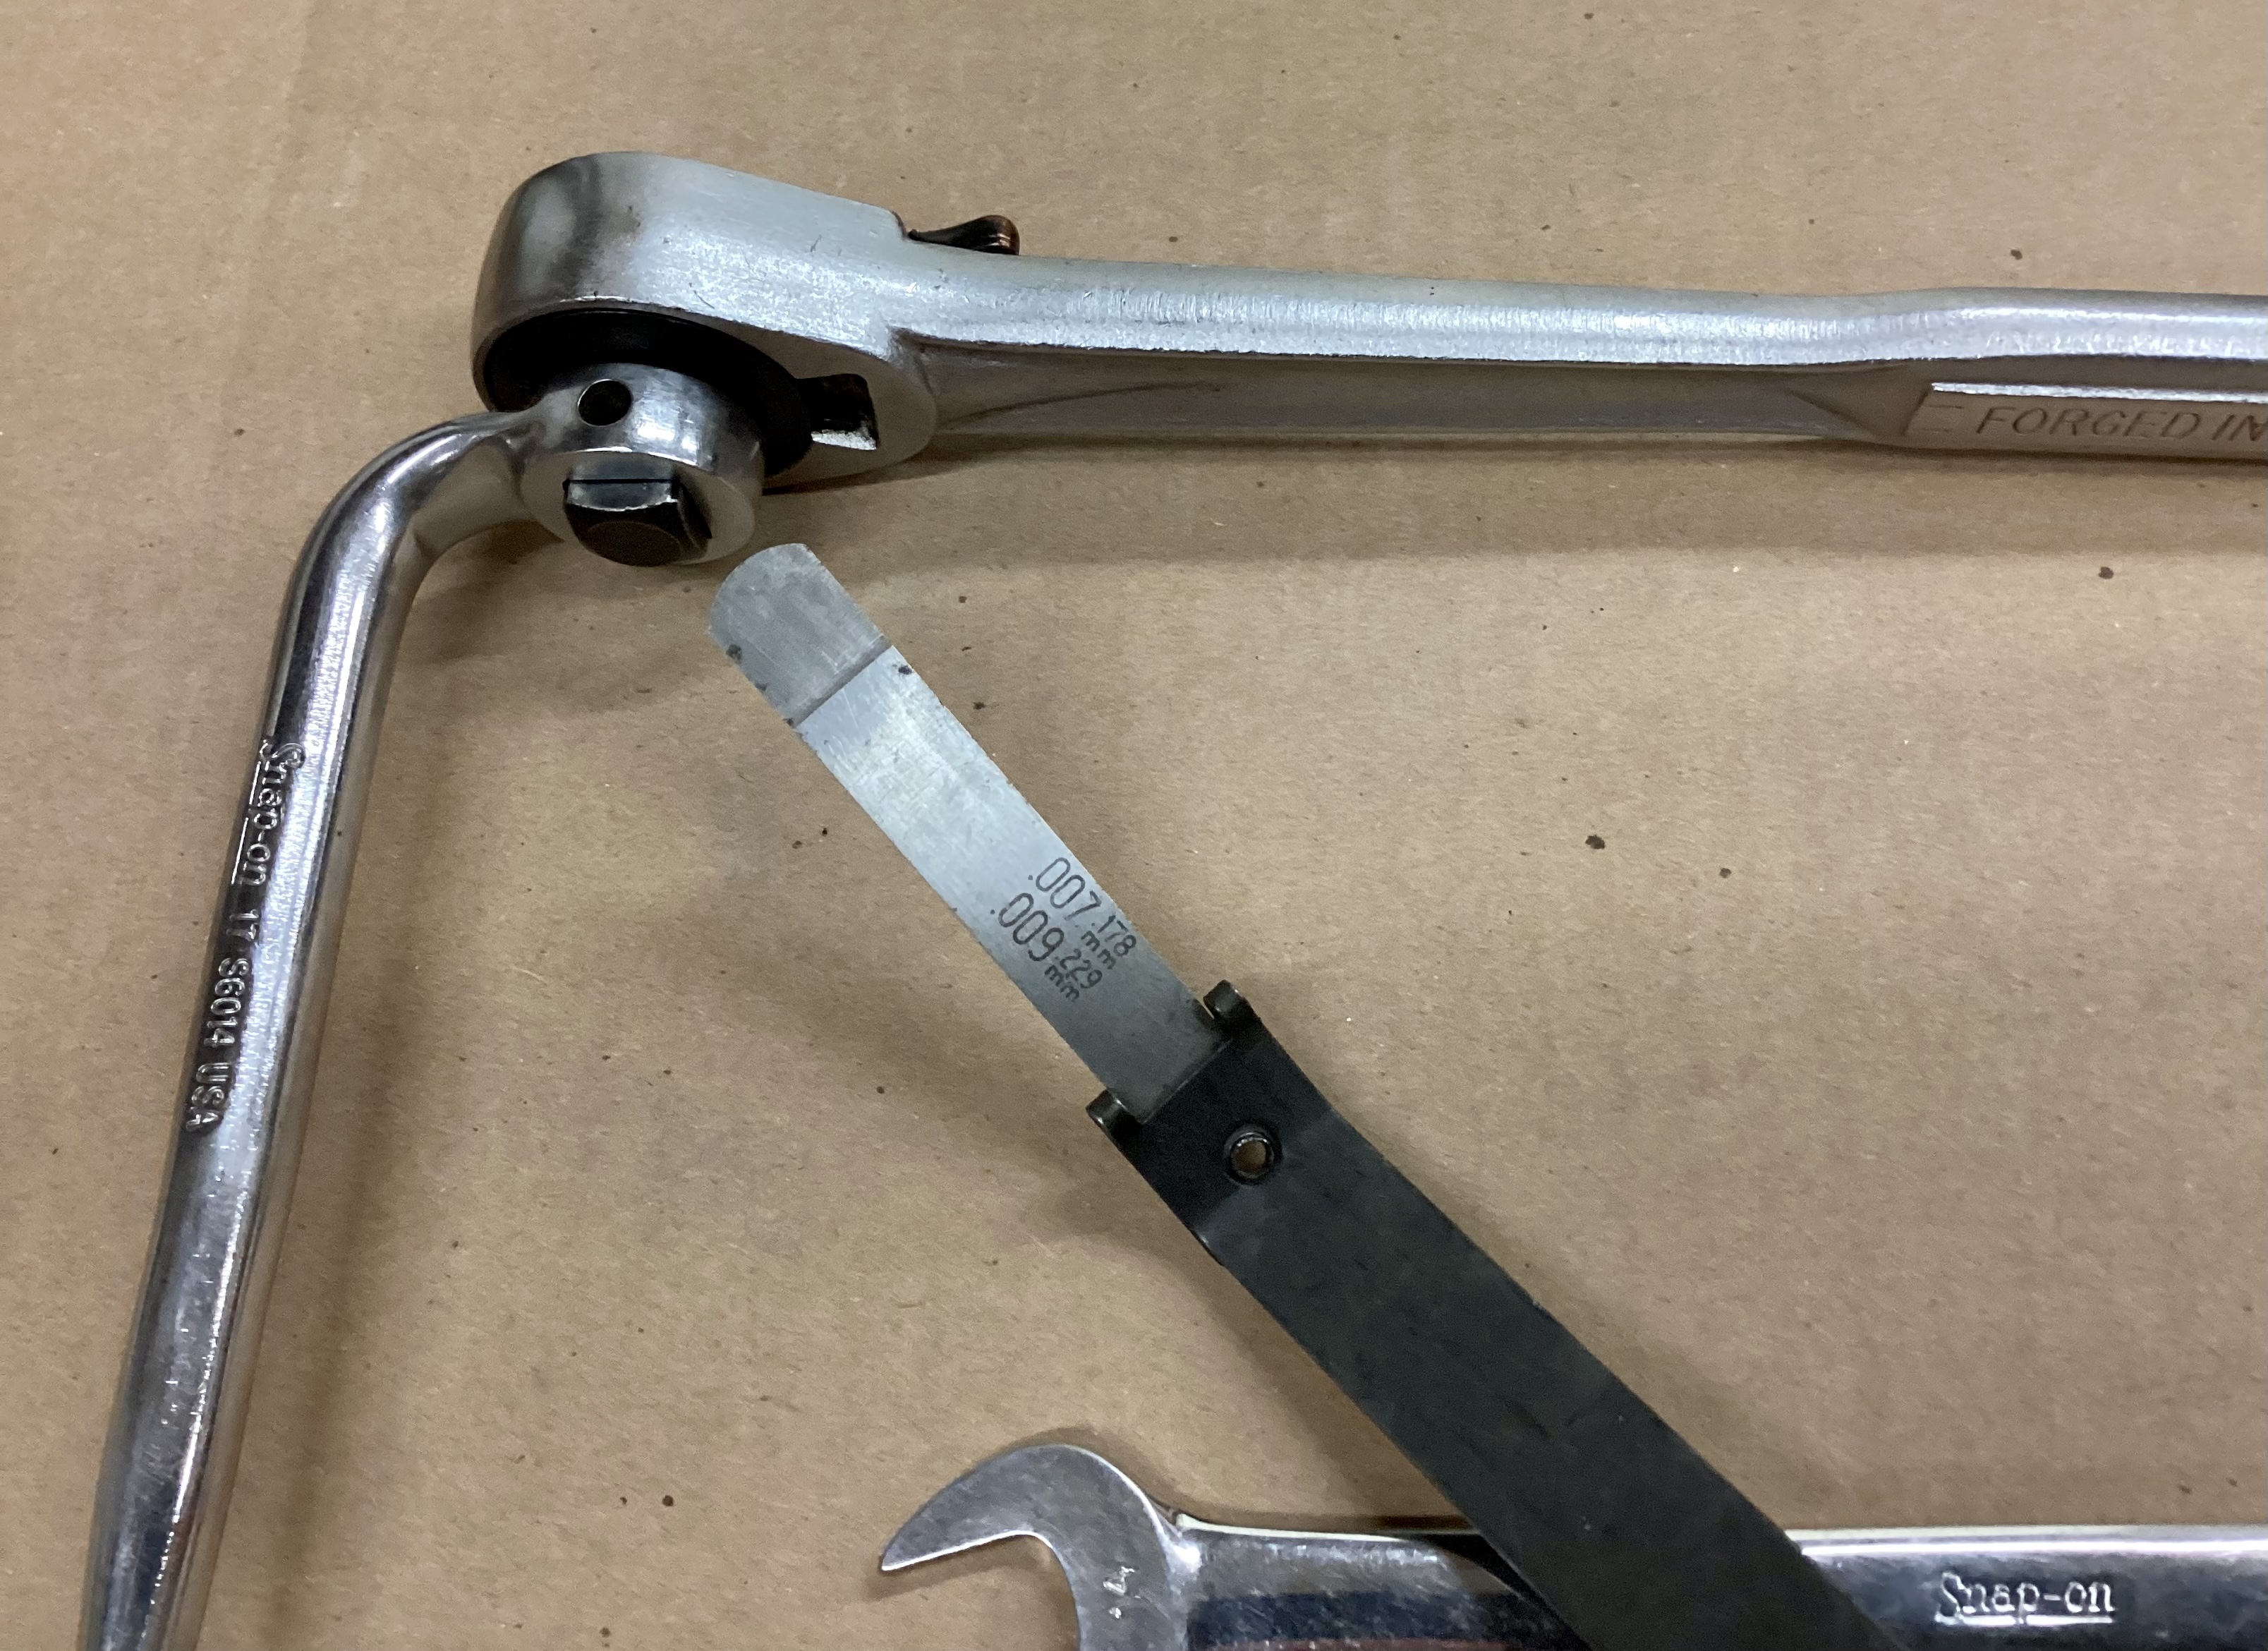
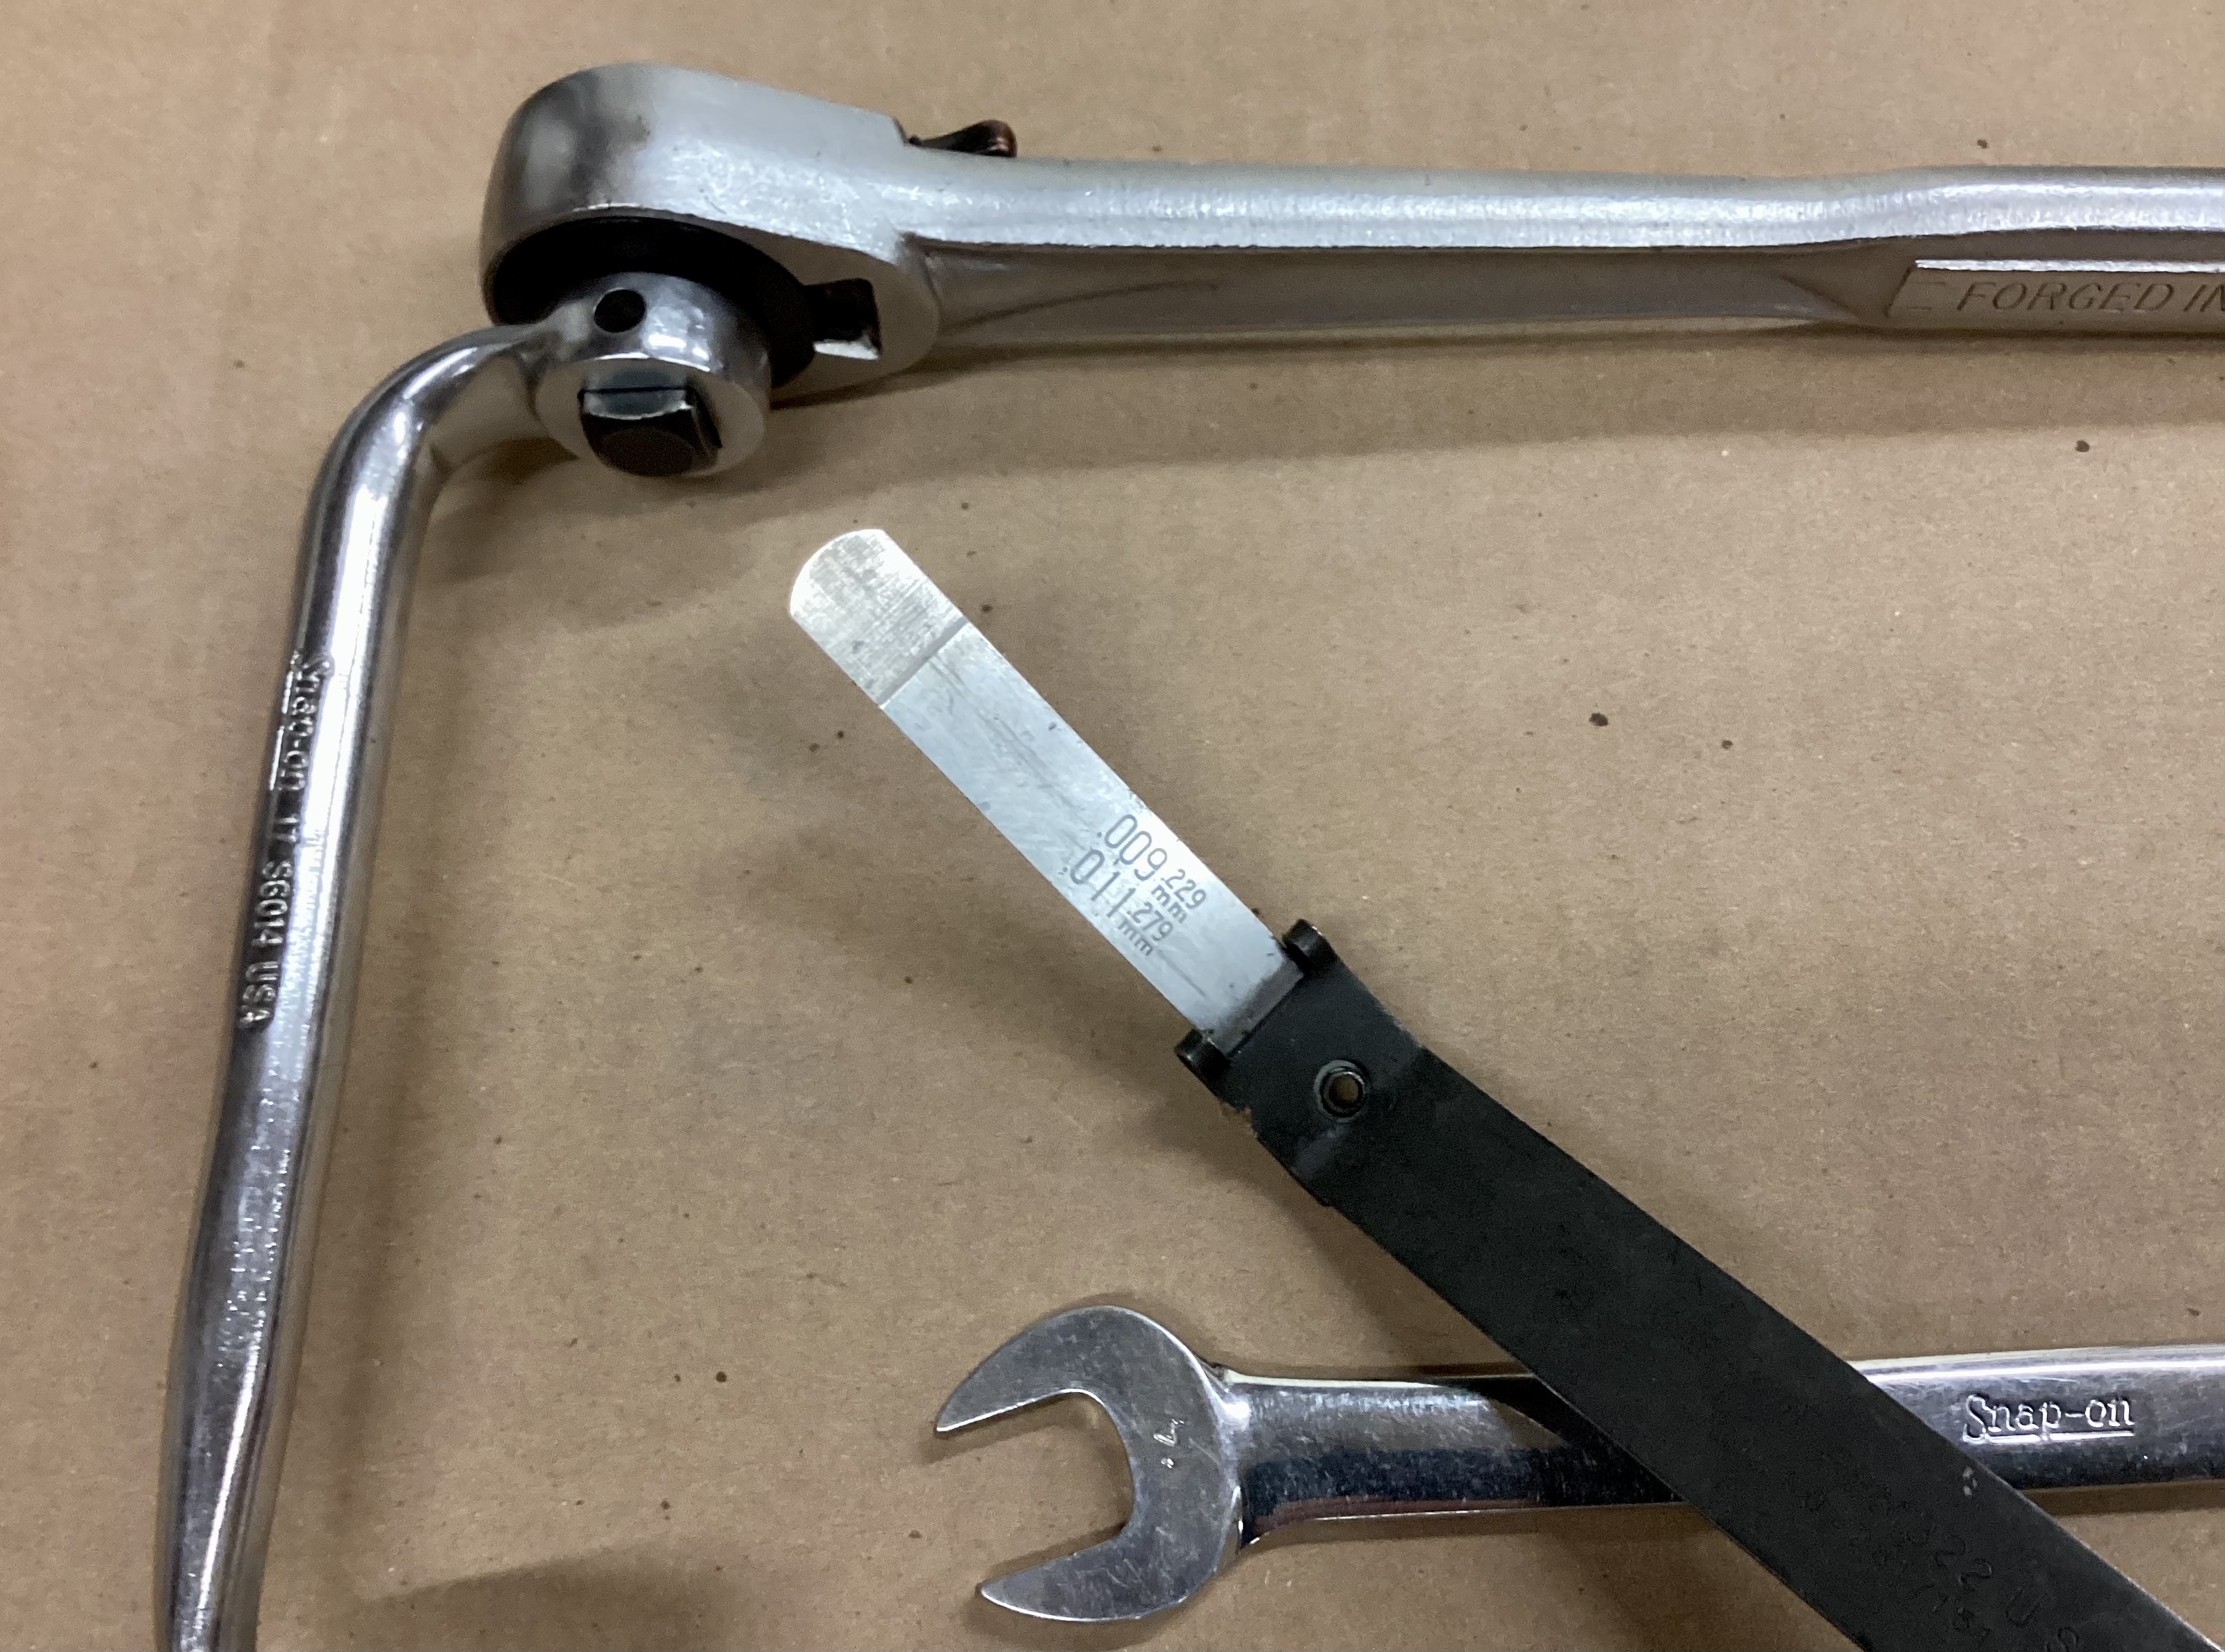
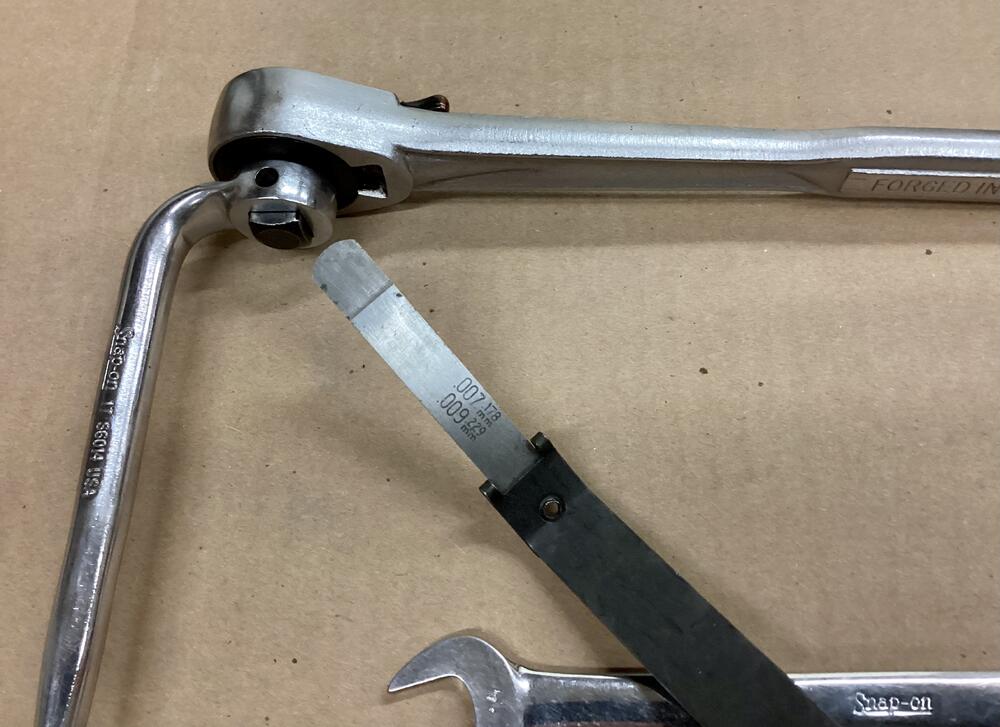
The tools I use for adjusting L series engine valves. Snap On S6014 17mm offset crowfoot adapter, 1/2” drive ratchet, 14mm open end wrench, feeler gage holder with two stepped “go-no go” feeler gages, .007”-.009” (for .008”), and .009-.011” (for .010”). Not shown is the starter button I use for rolling the engine to get the cam in position to set the lash, or the speed wrench I use for removing the cam cover. Also, when number 1 cylinder is at TDC, several other valves can also be set. The base circle of the camshaft lobes is at zero lift for more than 180 degrees of rotation, and as long as the follower is in that area, it can be set. I haven’t run a set of valves for a long time, but it stick in my head that I could get all of them adjusted and only set two or three cylinders at TDC.

-
What valve specs y'all like for adjusting
Racer X replied to Jabronie's topic in Engine & Drivetrain
It doesn’t take much to get the nut tight enough to stay put. Unfortunately, some hacks think if some is good, more is better. In this case, it isn’t. -
240ZBUILTBYME 1971 240z HS-001063 Project Georgia
Racer X replied to 240ZBUILTBYME's topic in Build Threads
Great grandkids too! -
What valve specs y'all like for adjusting
Racer X replied to Jabronie's topic in Engine & Drivetrain
Yes, the 17mm nut is the lock nut, the 14mm is the adjustment. I’ve never torqued the locknut when adjusting the clearances, but as Zed points out, some people tighten the locknut way too tight. As for tools, there is a wrench made specifically for loosening and tightening the locknut. It is made to be used with a ratchet, 1/2” drive if memory serves me. The Snap On part number is S6014. I see them on eBay occasionally. I’ll try and post a picture of the tools I use shortly.