Warty
Community Member
-
Joined
-
Last visited
Everything posted by Warty
-
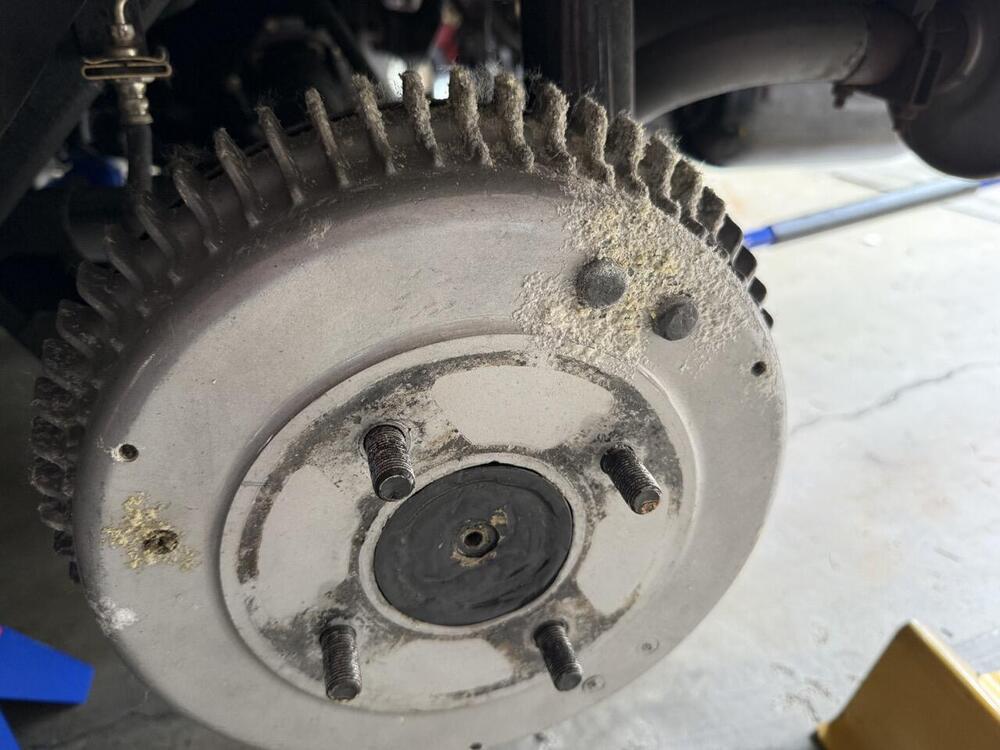
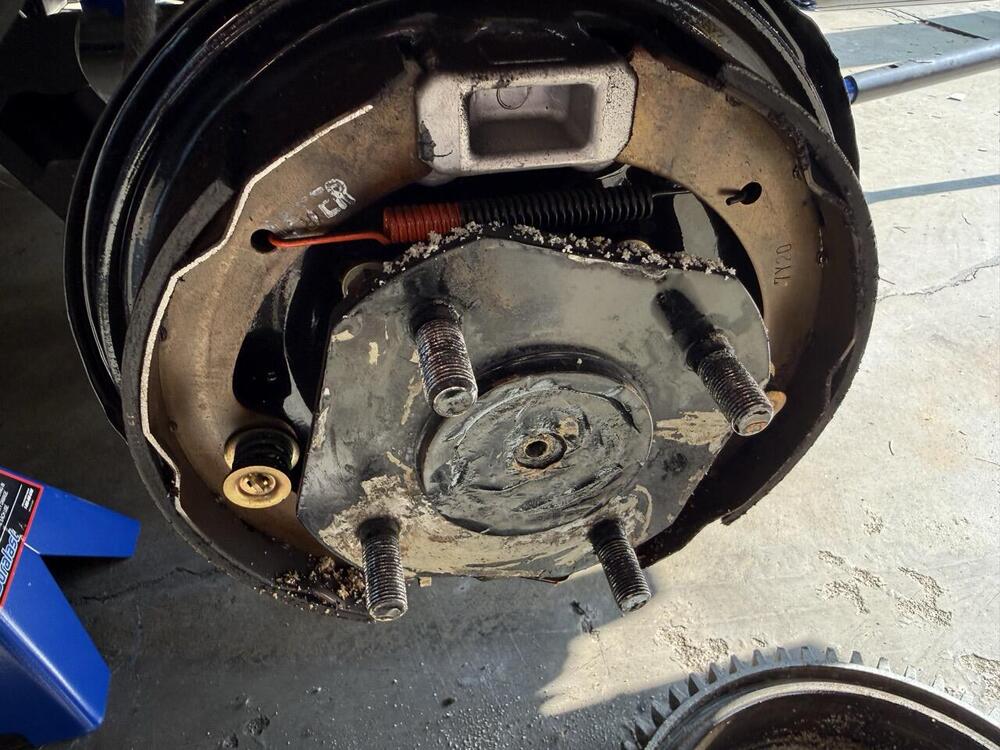
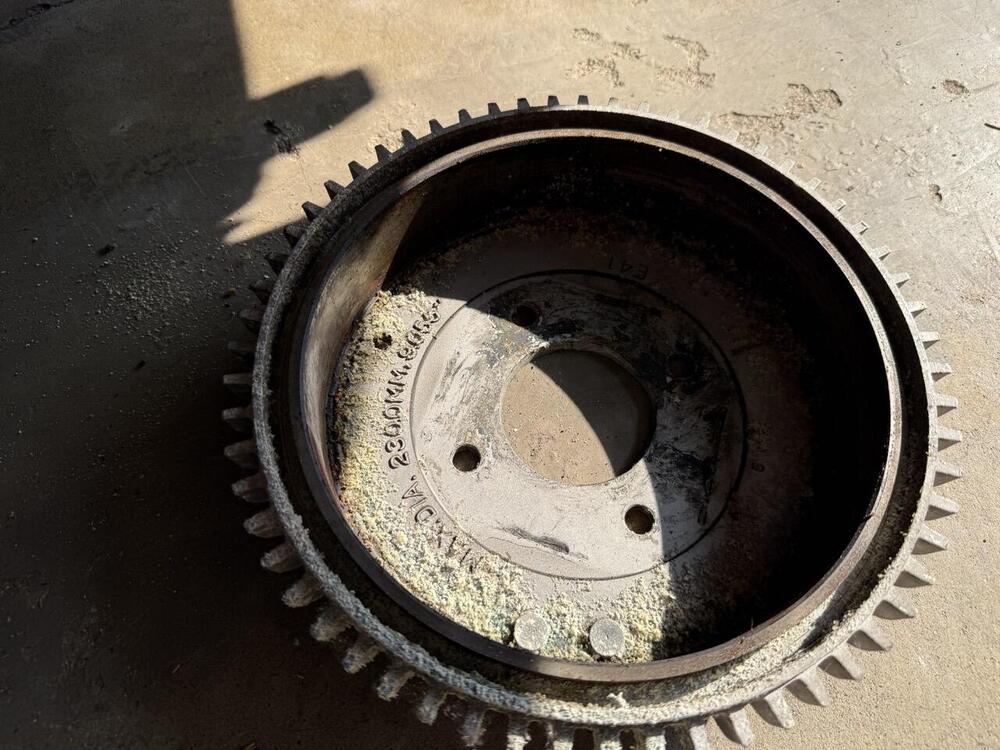
So I've been working on a 1970 car for a long time. I am trying to get it actually back on the street by end of summer (short build season here in Minnesota!). I've finished the interior, and last Sunday I got the engine to run again for the first time in 8-9 years. Working on the brakes next. Just to set the stage: I don't know ANYTHING I didn't learn in the process of trying to fix up this car. So knowledge is also skin-deep. Ok, I checked out the brake fluid reservoirs. The front one is yellow and has some dried sediment on the bottom of the tank. The rear one is completely empty. So where did it go? Wheels off... turns out driver rear wheel doesn't turn. There is some kind of corrosion visible from the outside, on the drum. Is that where the. missing brake fluid went? Brake drum removed, the inside looks remarkably clean, but some corrosion or perhaps corrosion after-effect flakes in there. What am I looking at? What should next steps be? Can I clean this up (neutralize it with something?) and put the cover on again, put in more dot3, and see what happens? If this is where the fluid went, why did it happen, and how do I prevent that from happening again? The emergency brake was removed from the car for something like that last 6 years, and it was up on wheel dollies that whole time. So wheels didn't turn. But also, I think that probably means the brake wasn't actually "on" during that period. (no tension, should have been off?). What would people recommend? This is an early 1970 car, but it has so much unoriginal parts, I'm not trying to get it to perfect condition. So if some kind of brake swap would be better, I could look into that instead. Given my choice, I'd just try to get the original setup working. I'm not planning on swapping the engine for something more powerful any time soon.
-
I just wanted to say thanks for posting this. This made it trivial and stress-free to get my drums off!
-
The great thing about this hobby is all the opportunities to gain humility. you know like if you spend a lot time trying to get an engine to fire when you have disconnected one of the little wires that connects to the distributor and you don’t notice and then can’t figure out why you are getting no voltage readings. I don’t even know when I did that, probably 3 weeks ago when working on hoses. it fired right up! First time in 9 years. Beautiful sound. Thanks everyone! now to work on flushing radiator…
-
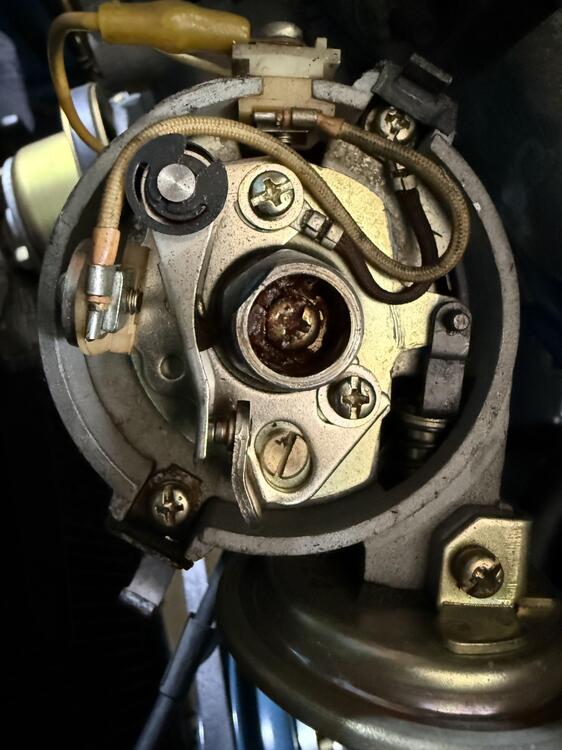
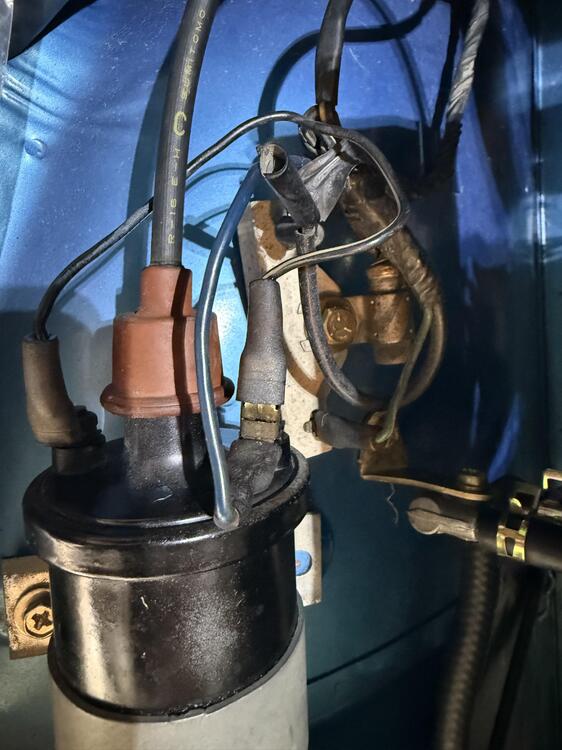
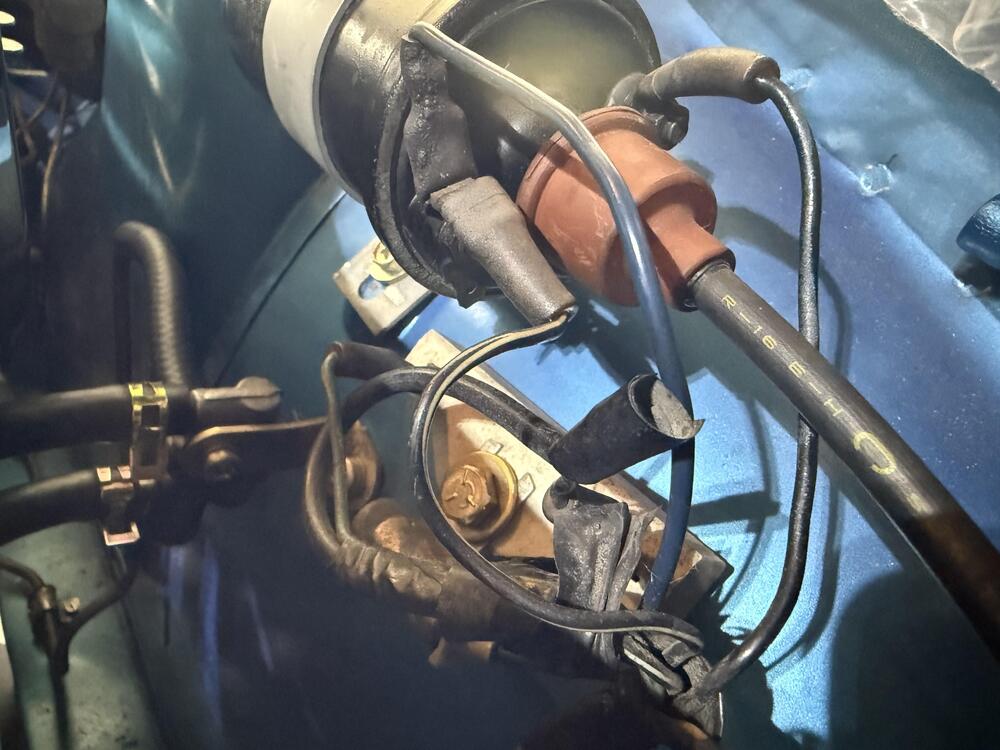
So fuel is getting from mechanical pump to the carbs inlets. At least when connected to an external fuel can. what’s not happening as a spark. I pulled a plug and reconnected and grounded it but no spark. The pos and negative coil terminals are both measuring about 12V with key in ON. I pulled the distributor cap and cleaned the contacts on the bit that revolves. Didn’t know what else to try. I read a couple threads here about no spark but not sure where to go from here.
-
Yep once the last filament bulb came out the flashers stopped working. I forget what I ordered with the LEDs from Amazon but they worked fine. I pretty much ordered from your post about LEDs. A few links didn’t work anymore I had to do a little digging but everything looks great.
-
This is a 1970 car, with an L24 that I think maybe was bought crated from Nissan, there are no numbers on the block where they should be stamped. Has the dual Hitachi domed carbs. "was running when parked". here's what I've done so far: Drain and drop fuel tank, interior looked really good. A PO had put some kind of yellowish sealant in there. Replace all (soft) fuel lines. Blow out the hard lines. Replace all hoses in the engine bay Drain oil, replace with new oil and new oil filter. Radiator was drained, just put regular water in today (thinking I'll do some flushing before putting in a mixture. ) Remove spark plugs, put a little oil in each cylinder. Confirm oil pump is getting oil to the crankshaft. Replace fuel filter Put new NGK spark plugs in (gap: 0.030) Put gas (E0) in. Car does not have an electrical pump, only the mechanical one up front. Choke out. Cranked it a bit. No firing. Didn't see gas in the fuel filter. Tried to put some gas in there directly, but didn't have enough left over so it didn't get full. Cranked once or twice more, no joy. Didn't want to do anything else, so stopped there. Didn't expect it to start, but hey, you never know... What should next steps be? I haven't looked at the carbs. The only carburetor I've ever worked on was my snowblower. Not saying it's the carbs, I have no idea.
-
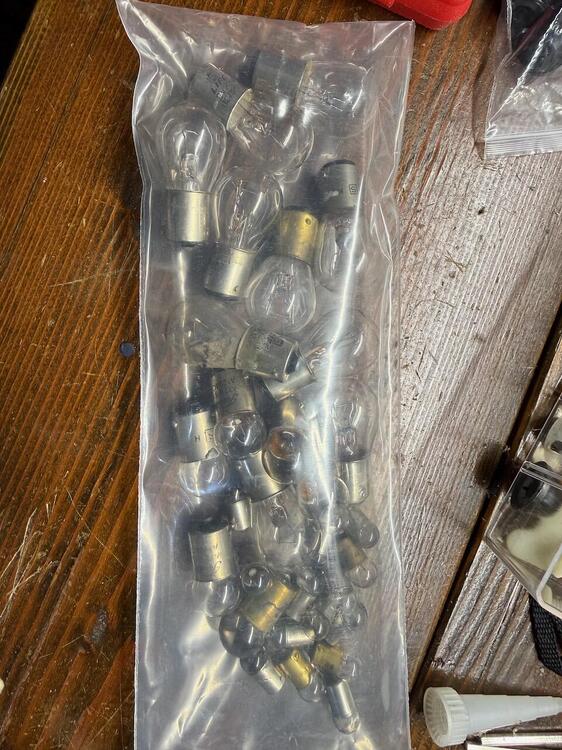
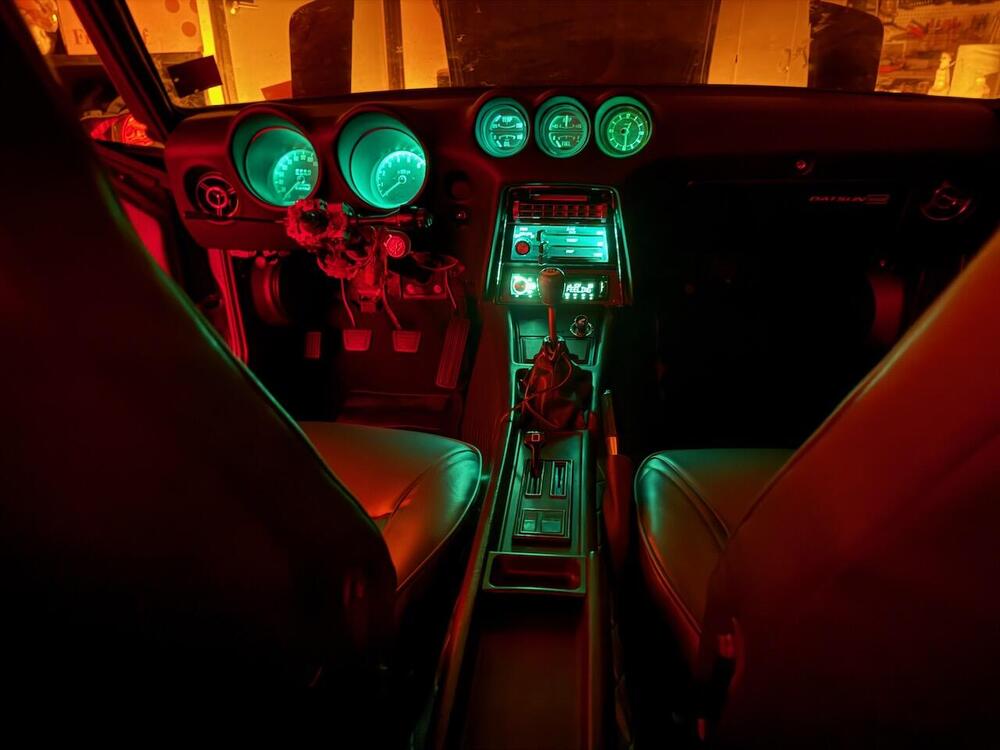
I can't quite close this conversation, because I'm still waiting on the headlight upgrade harness from MSA, but I did replace all the (other) external lights with LEDs, and the dash gauge lights, heater control panel lights, etc. I'm not a huge fan of LEDs, but have to say these do look better (more readable!). Also, of course, reducing heat in this old car is #1. It was a lot of light bulbs...
-
Well that's a bummer. It's newly bought this summer. pfft.
-
My maintainer was only 1a. New one is 10a and has a supply mode. With that on, neither hazards nor blower makes the radio turn off. Even when grounded to where it was, no dedicated ground wire. What does that mean?
-
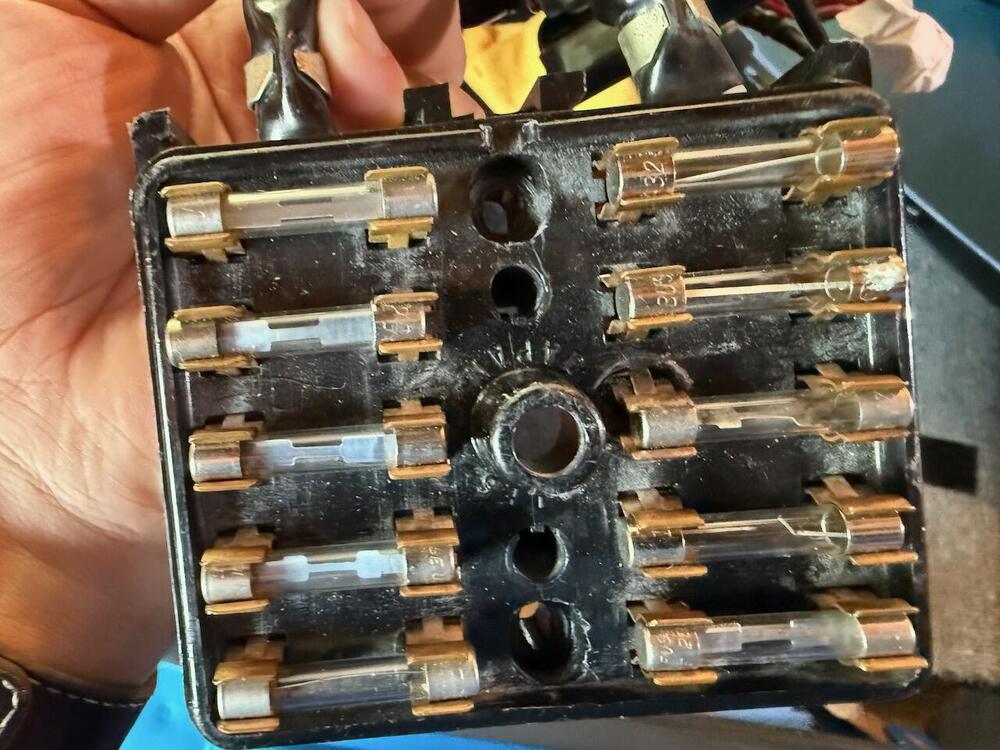
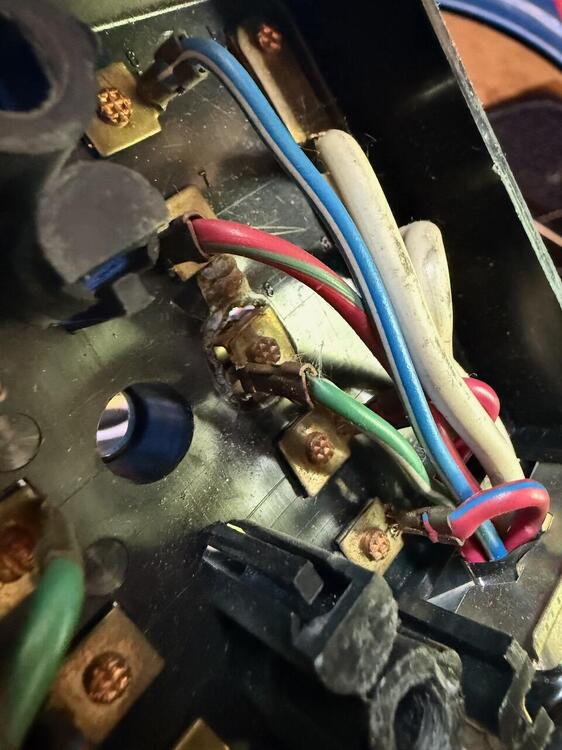
https://www.thezstore.com/product/4749/msa-fuse-box-long-pigtail-70-71-240z will do more testing tonight and report back. That’s a great graphic of the fuse box, thanks. I wasn’t planning on doing LEDs but I think I will if it will reduce load in fusebox and under dash wiring. That fuse box point is not the only heat problem I’ve seen in the wiring. I replaced the ammeter/alternator blade connectors already but…
-
The engine isn't running at this point. Trying to get electrics sorted first. I have battery on a maintainer. It measure 12.6V at the battery. I did this test yesterday, and this is from memory, but at the stereo, when using ground point near the stereo, it was getting something like 11.2V when hazards were in the "off" part of the cycle, and 9.8V maybe when hazards were in the hi power part of the cycle. Might have been 11.8 and 9.2. I didn't measure them with a dedicated ground for the stereo, just observed that stereo didn't shut itself down. Probably obvious at this point, but this is an aftermarket head unit.
-
hmm.
-
Putting together a car that hasn't run in 8 years or so. with the harness back together, everything "works": signals, hazards, brakes, headlights, radio, blower, etc. I found out in another thread I have a problem with the headlight circuit, and I have the upgrade from MSA on order (3-5 weeks, time enough for me to possibly get engine going). I'm also going to order the alternator upgrade because I have the original 40A one, but that's kind of less urgent as car is not yet running. Setting that aside, what I noticed: when the hazards are on, the glovebox light pulses in sync with the hazards, and the stereo turns it self off during the hazard cycle, then tries to restart in the trough, hazard hits peak, it stops again, etc. Also, with hazards off, but blower on, the radio looses too much power and shuts down. Some things I've tried/experimented with: 10 AWG dedicated line from stereo ground to bolt in engine bay (not negative terminal, just a bolt that would have held a hood bumper): stereo survives hazards. Does not survive blower. Sanding down the main ground point on engine side wall near starter motor, including shining up the bolt: with stereo ground back in "normal" position connected to a bolt under the dash: same results. no benefit detected. I could route a permanent ground wire for stereo through the firewall to the battery, but doesn't sound like it's going to solve problem of the blower. Any advice?
-
Normal sealed GE lights. I ordered the lighting harness. I’ll check out the alternator one too.
-
Thanks! reading... I was trying to track down information on that harness but all the links are dead except to MSA, and it just has the one small photo. Looks like it is designed (and made?) by someone here... cool! Patience is a virtue they tell me, but man... I was so excited to see all the electrical come back on after 8 years of darkness. ah well, I'll go replace some hoses or something...
-
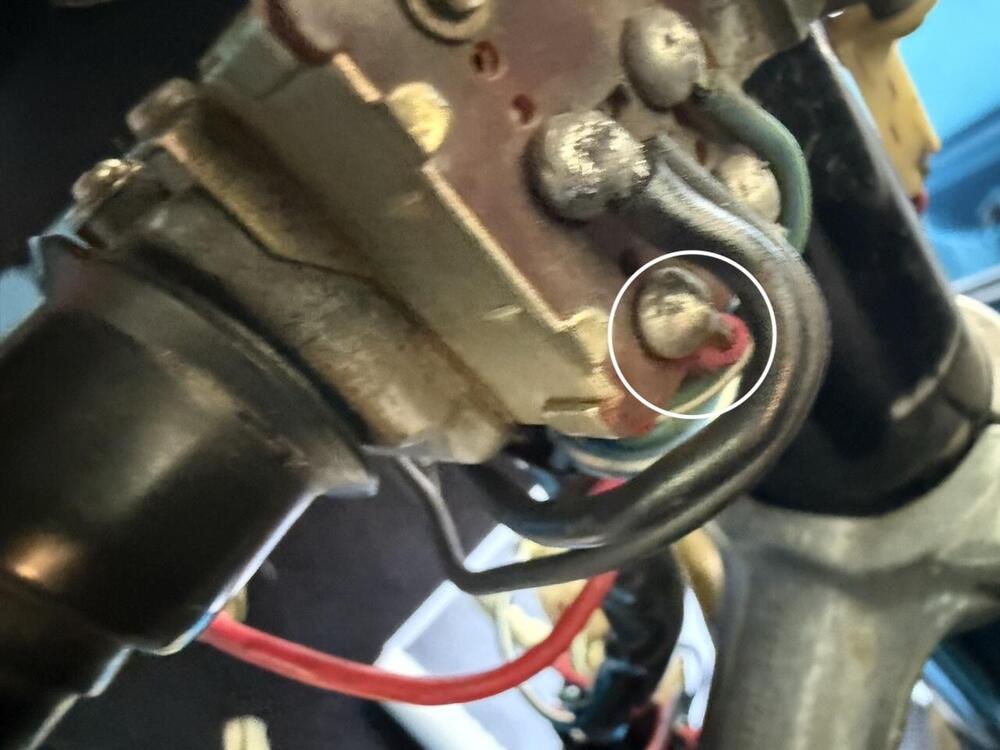
I found this site, which has a pretty clear picture of what I'm trying to show. Looks like my PO substituted a spare white-blue wire for the thicker black ground wire in this case. Too much resistance = builds up heat when headlights on = melt. https://woodworkerb.com/home/datsun-240z-rebuild/blinker-detail/ I haven't had a chance to drive the car at night yet, looks like that was a blessing. if 30 seconds can make it smoke... I'm thinking I get some new 10 AWG black wire, solder it to back of hi/lo beam rocker switch, replace the bullet connectors with a new pair. But do I need to be aware of anything else? Presumably the PO did that change for a reason? I see MSA has a replacement headlight harness that takes power right from battery. not sure what changes that would require on the steering column wiring. Presumably the point is to NOT have high power for this purpose up on the steering col. Anybody have the instructions for that? I'm not super awesome at soldering, don't want to bit more than I can chew...
-
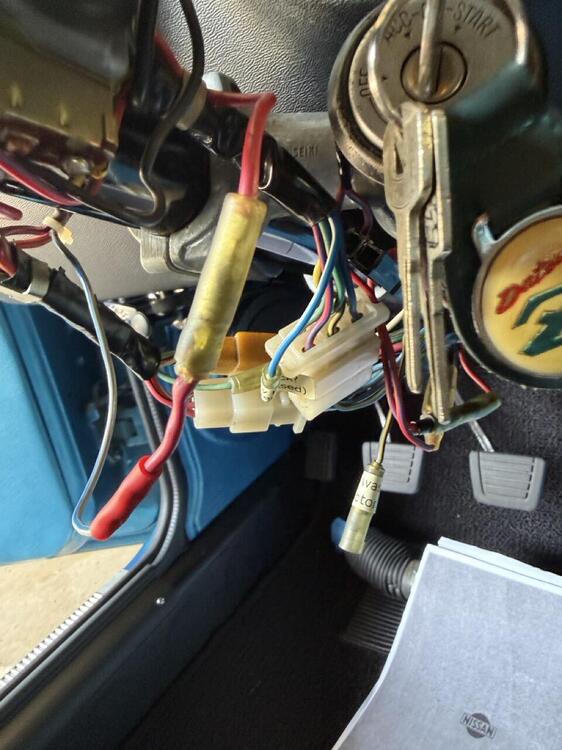
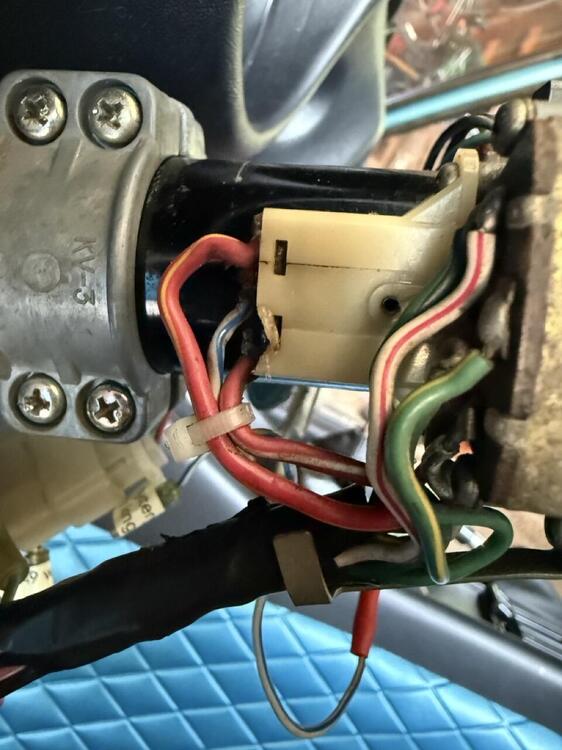
Made a lot of progress... everything I want to work works (key buzzer doesn't work, great). BUT... in testing, the last thing I did was blower and headlights. both worked fine, but... the headlights being on (hi or lo beam doesn't matter) causes a wire on the steering column to get HOT. This wire is some kind of bodge by a PO I think. It has a WL (small) line going from left stalk into a full sized red line which goes into the right stalk. Only got hot when headlights were turned on, and it got hot fast. Probably better just to look at the pictures. I disconnected battery, turned off ignition, etc. After taking pictures, I see some burning of the 6 pin plastic holder on back of stalk. I don't think that was from today, but don't know. What is going on with this splice? What should I do here?
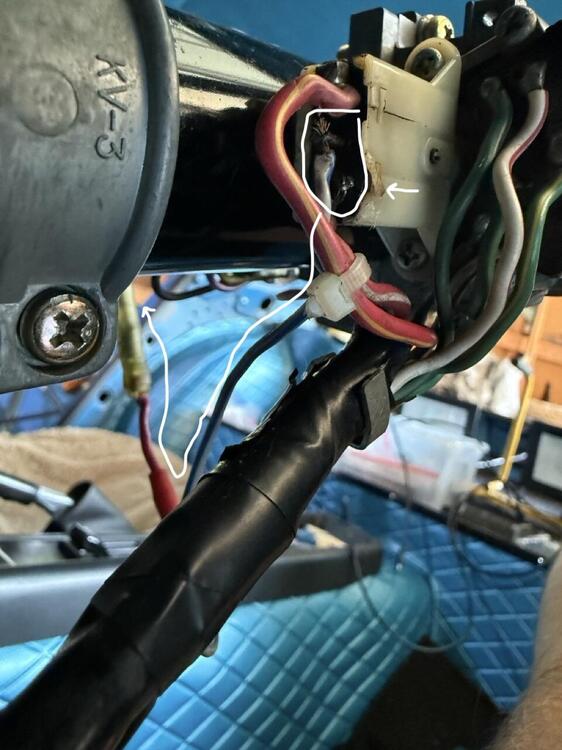
-
The glovebox light was coming from a different wire in this car, kind of bundled with the map light power and ground. I couldn't tell you if that's right or wrong tho. I replaced the vintage connections spades with powerwerx power poles, and they have been very stable. the Vintage connections ones didn't look vintage anyway because they don't have the soft vinyl cover, only modern locking hard plastic covers.
-
My Z currently has 280z wheels on it, which are nice (nicely restored) but I’m looking for something more early 70s.
-
This is the one I have. Same tool but only one die set came with it. https://a.co/d/06Q5t9Kj the short wings that wrap the bare metal can’t get around all the wire.
-
ah. defroster switch. that would make sense. this particular car doesn't have switch or wires [in the hatch window]. The thing that's confusing me really is that SOMETHING was connected to the illumination blade connector: it has a numbered paper label I put on there 5-6 years ago. I only put those on ones were I was disconnecting it from something. unfortunately, the other side fell off at some point. On an aside, I got new 7.8mm blade connectors from vintage connections for the 10 AWG(ish?) ammeter lines, as the originals showed heat damage and oxidization. The wings that crimp are a bit short, and the pieces themselves are thinner metal than the originals. They aren't biting very well because the wings are short for wire thickness. Anybody else with them notice that? I think I'm going to try Anderson Power Pole connectors instead for those wires. Not original looking, but it's' writing I don't want anything coming apart.
-
mine has Floor label which seems to reflect the very last version of 240z panel if I trust googles AI. I’ll add that to the list of “what is THIS doing in this car?” Items.
-
hmm well using a later panel wouldn’t be the first unoriginal thing about this car. The dash harness does seem to conform to the early 240z setup shown in FSM but I admit I haven’t actually tried to compare against the later 240z wiring diagrams.
-
Power is ready to go. Just don’t have it connected at the moment so I’m only testing continuity with multimeter ATM.
-
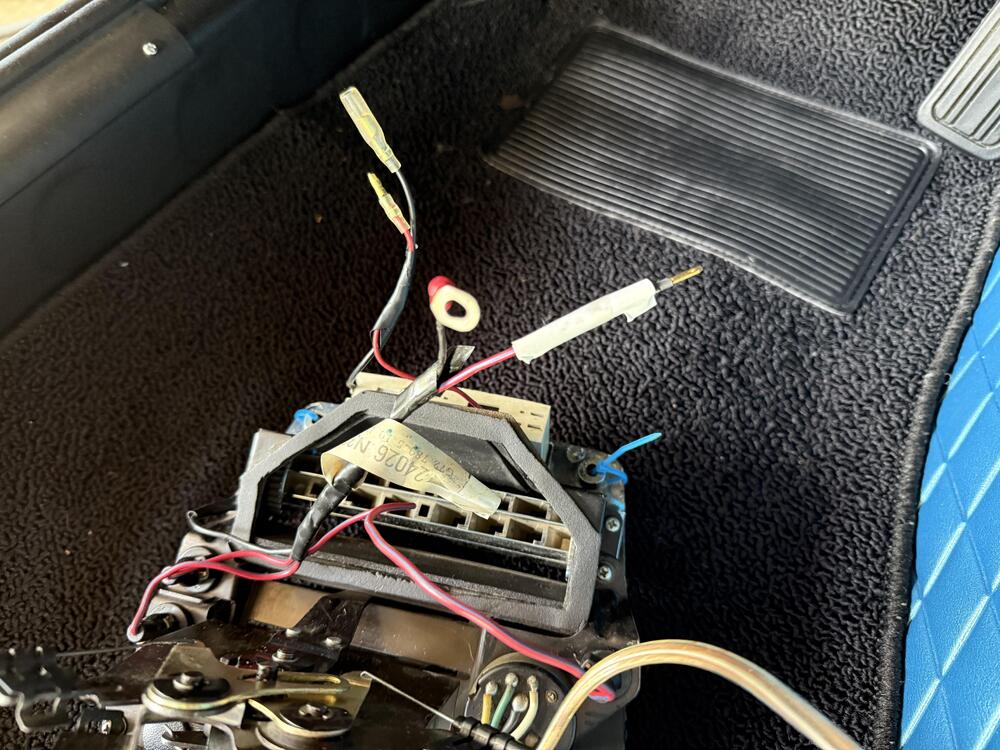
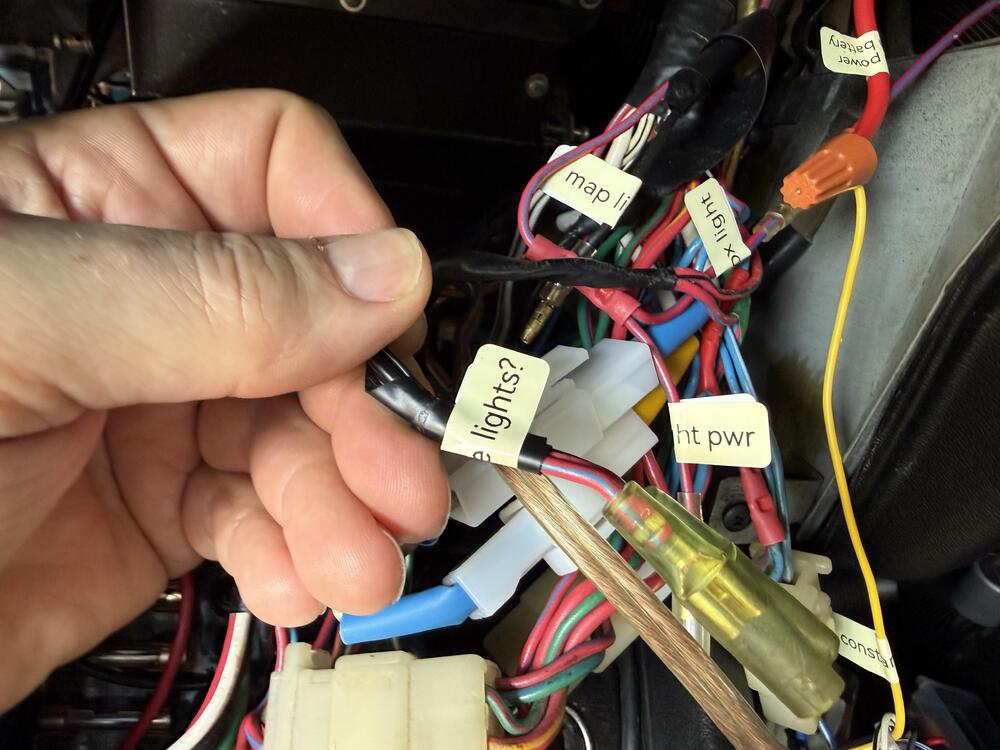
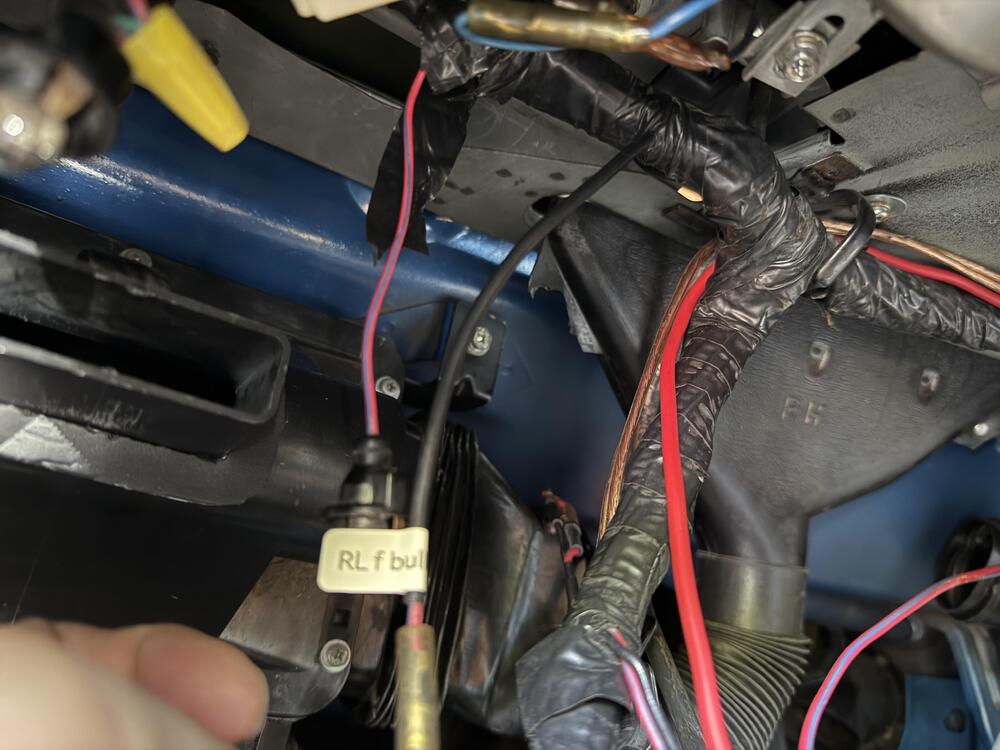
trying to reassemble wiring harness after several years. The paper tags I used mostly worked except for where they fell off and got lost. I’ve been working through the FSM supplement and I have it mostly figured out but a few mysteries. I don’t have battery connected right now as I had some ugly heating issues with the ammeter lines and had to replace the connectors. 1: power for the illumination on the heater control unit- RL male spade. To where? 2: two female spade connectors from dash harness, RL and RB. Are these 39 and 40 on figure V1-1? Reverse lights. If so what are they supposed to connect to? They dump out right in the middle but don’t seem to go to fuse box. Can I safely use the RL one for heater control unit? Seems weird but if it s just ACC power… 3: RL female bullet hanging down from right near the clock. But from dash bundle. Don’t see anything that would have connected to that.