Jeff Berk
Free Member
-
Joined
-
Last visited
Everything posted by Jeff Berk
-
 Its still running very rough. I suspect that maybe I knocked something out of whack with the carbs when I removed/reinstalled the intake manifold. Like I said above, It's going in to the mechanic for repair of the cam shaft so I'll have him look at the SUs. He knows them inside out. Thanks for the help.
 -
As long as we are talking about fuel pressure and orifices, can I hijack this tread for a personal issue? My 260z has both mechanical and electric fuel pumps, no fuel rail, and the fuel return line was disconnected. I'm at 4.5 psi using an old Holley fuel pressure regulator who's adjuster is not working (internal spring worn out?). I'm using two round-top SUs. I'd like to lower the pressure to see if it correct a rich mixture situation. If I don't run the electric pump, the pressure drops to 3.5 psi but I periodically have the engine start to miss until I switch the electric pump back on. Any opinions on if I should just replace the fuel pressure regulator with a new non-return one or with a return type and reconnect the return line?
-
Thanks, I'll give that a try.
-
I need help getting my 260z with round-top SU’s running again. Symptoms: It cranks and pops but no start. Leading up to this, the engine would stumble. This was after I did some work on the car and I’m assuming caused the issue. In order of repairs, there’s the list: 1) Replaced the transmission. 2) Replaced the intake/exhaust manifold gasket. 3) Replaced the oil pan gasket. 4) Adjusted valves, discovering a damaged cam lobe. Spark plugs were coated with carbon, so I cleaned them with a propane torch. <this is when stumbling was first notice, but car not driven since before transmission was changed> 5) Removed rocker in contact with the damaged lobe for inspection and reinstalled. 6) Retorqued intake/exhaust manifolds and discovered several loose nuts. 7) I tested the vacuum that showed an average vacuum of 12 in Hg at 1300 rpm and 13.3 in Hg at 1570 rpm. 😎 I pulled the car out of the garage and turned it off. Later, I was unable to restart the car. 9) The spark plugs were removed and had gas on them. The fuel pressure gage showed 4.5 psi and I can hear the electric fuel pump running. 10) The Mallory Unilite (LED triggered) distributor’s ignition module tested out as working. 11) The Mallory 29440 coil is assumed to be working because a spark tester showed spark at cylinders 3 and 4. I didn’t test the other cylinders for spark. 12) Firing order was checked. 13) I don’t expect the timing has changed on its own, so I don’t want to mess with it. Also, for some reason, I have yet to find the timing mark on the harmonic balancer. The car is due the week after next to have the mechanic that installed the cam shaft repair the damaged cam shaft so worse comes to worse, I can have it towed in. Any idea what I should try next?
-
I have a regulator and assumed it was on all 260z's. I attached a fuel pressure gauge and was told to keep the fuel pressure below 4.5 psi. I guess what I'm saying is to check your pressure especially if you have an electric fuel pump and mechanical pump both running.
-
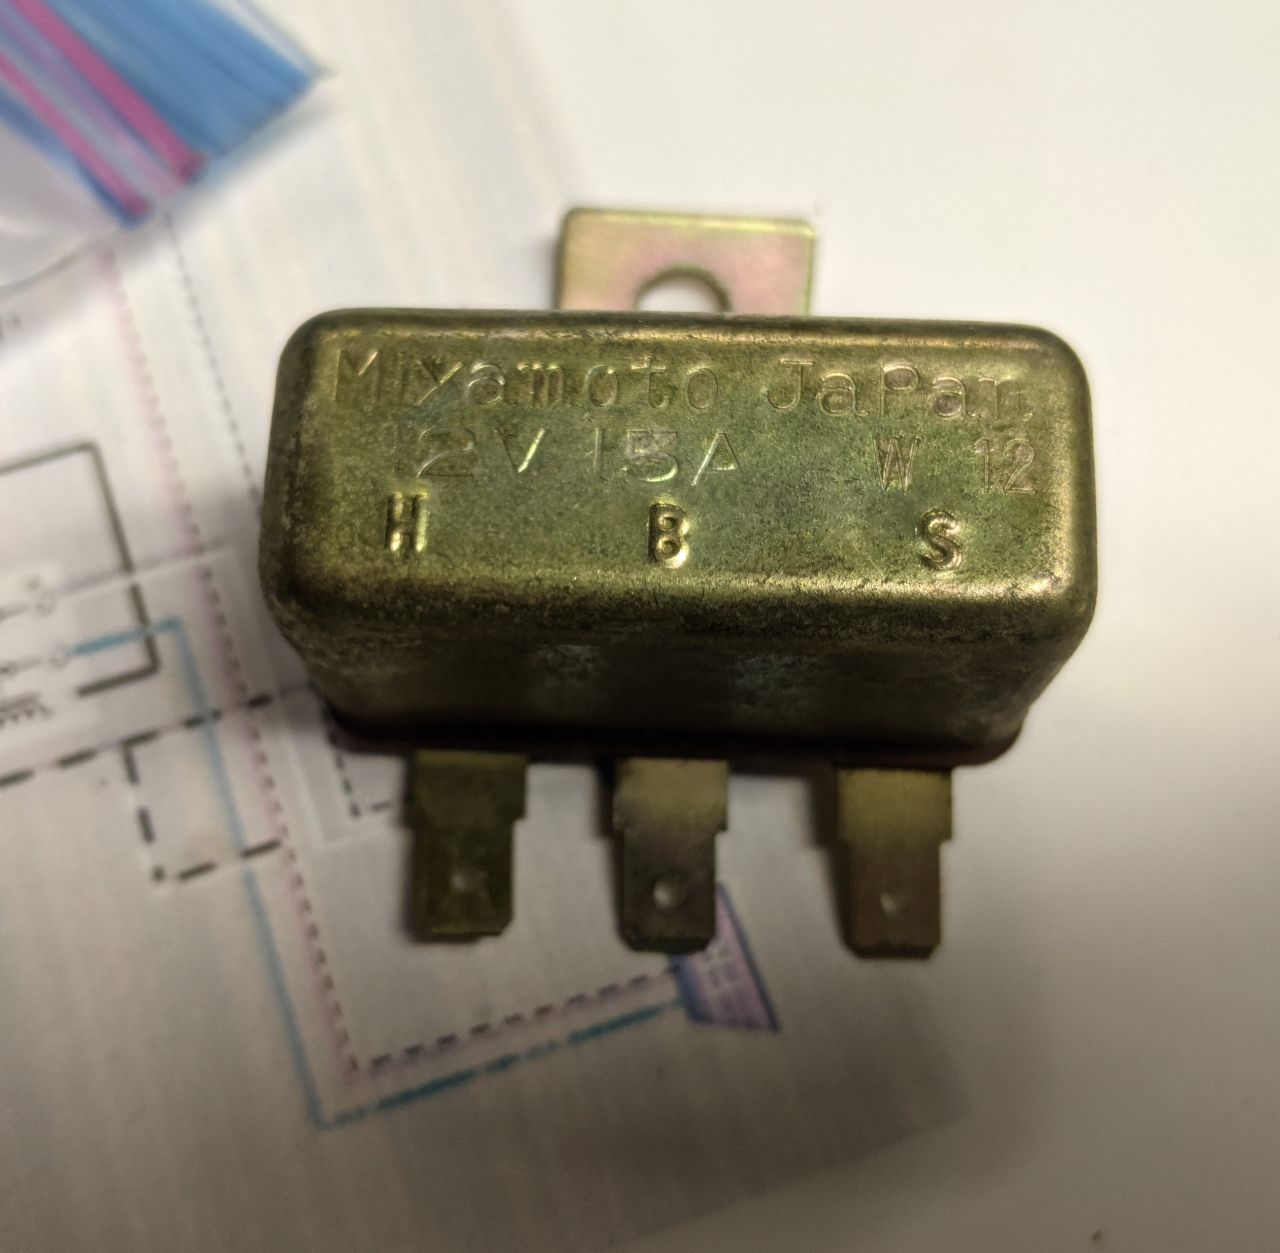
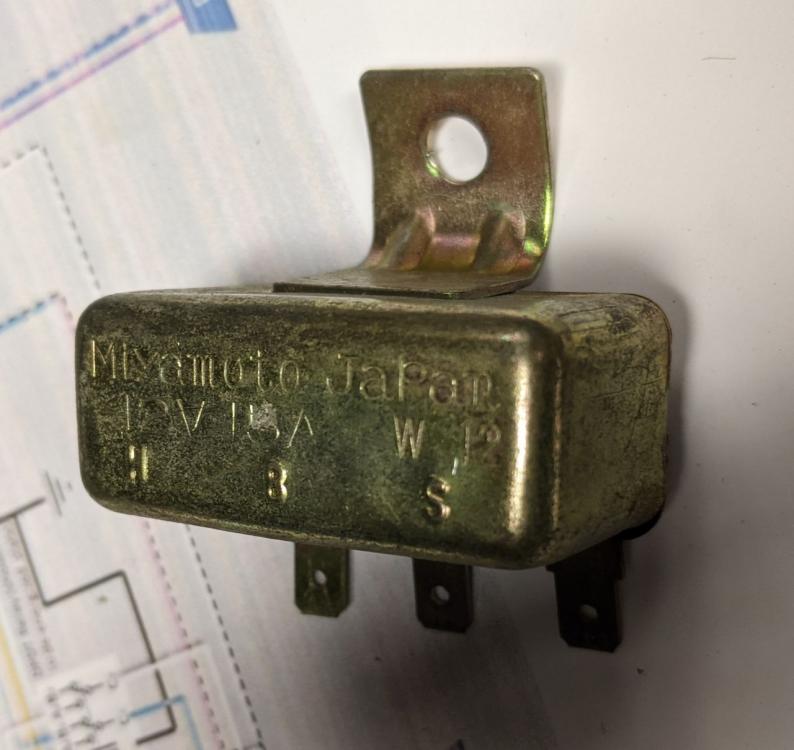
It sounds like its likely a relay problem as Zed H pointed out. Did you get the relay open yet? Zed H: Any idea how a relay can get so corroded? How bad were the rest of the relays in that relay panel?
-
Here's a concise explanation of how a relay works if you need it. https://www.12voltplanet.co.uk/relay-guide.html I have a box of generic 12v relays to replace mine as they become faulty or for rewiring circuits (e.g. lights) that over tax the frail wiring of my Z. I saw you had a continuity light, do you also have an ohm meter? You may need it to check the fan on your heater.
-
The horn and wipers use the 10 amp fuse in position 10. You can look up the others in that table I posted. I've attached an Excel copy in case anyone wants it. This table is specific to the 260Z and has not been reviewed for accuracy. Wiring Cross Reference.xlsx
-
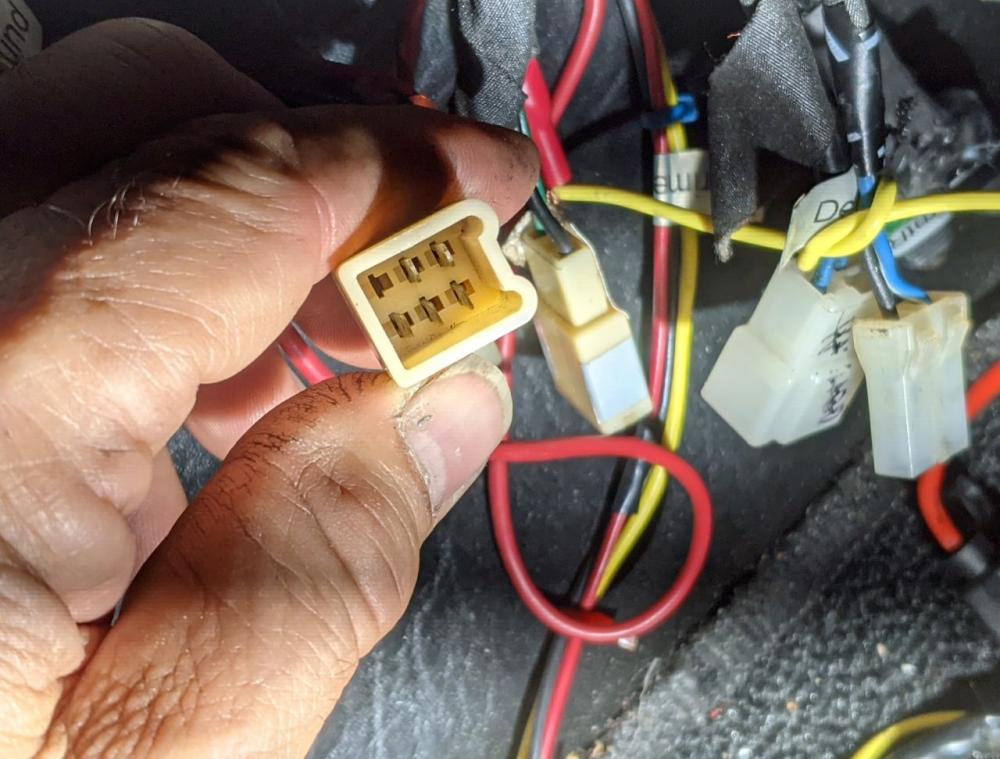
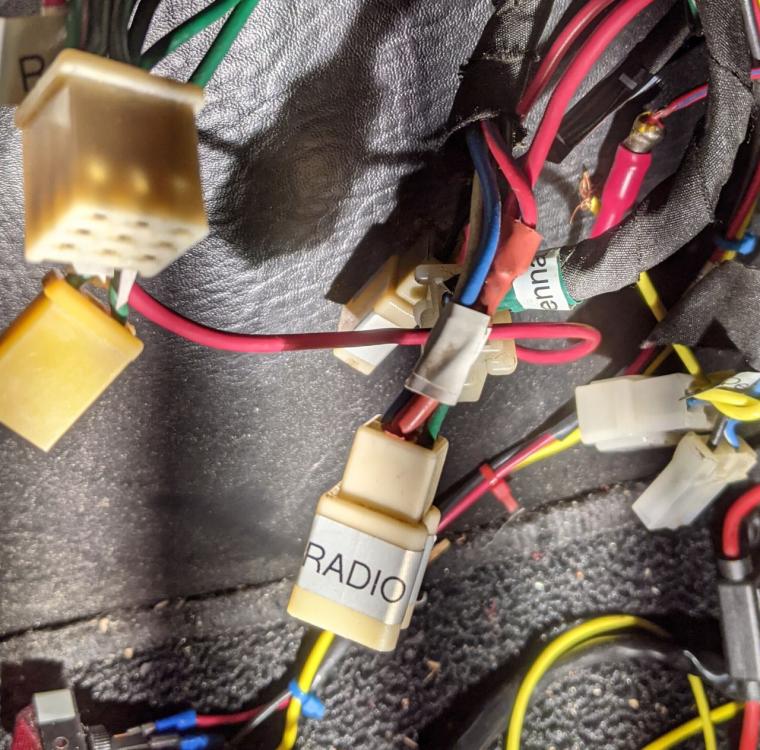
By chance, my center console and radio are out of the car so I can see my wires. I have a green/white female, and a red/blue male bullet, but they are not being used in my car. I capped off the male to be on the safe side. That multi-connector, if it's a 6-pin with 5 places used, looks a lot like my radio connector for the OEM radio (see photos). I noticed an in-line fuse in one of your photos so I think someone got creative with the electrical wiring on your car. When asking questions about where a wire gets plugged into, indicate the number of connectors and wire colors including the color of the stripe if there is one. Good luck.
-
I don't know if this helps or makes it more complicated, but here's a chart I started a few years ago. It's never been QC'ed so be forewarned. As an example on how to read this, the "Turn Signal" circuit is on page BE-11, involves junction connectors C-2, 3, 4, and 5, Fuse #3, which is 10 Amps, uses white, green and black wires (specifically white/red, green/red, green/black, black, and black/white). The way I've used this is to try and match up the colors, then go the the FSM page BE-xx to read the wiring diagram. Junction Fuse Wire Color (primary, secondary) System Page (BE-) Block Connectors No. Amp Red White Green Blue Yellow Black Head Light 10 1345 1 10 R, RB, RW W, WR Head Light 10 7 2 10 R, RB, RW, RY W, WR Turn Signal 11 2345 3 10 WR GR, GB B, BW Haz Warning 12 12346 11 10 WR GW BY Stop Lamp 13 26 11 10 W, WR B, BW Clearance & Tail Lmp 14 1256 5 20 W, WR GW B Reverse Lamp 15 3567 9 20 RB W, WR LB Meter Lights 16 246 5 20 RL W, WR GL, GW B Console Lights 17 12346 5 20 RL GW Interior Lamp 18 16 6 10 RL, RB W, WR B Glovebox & Cig Lighter Light 19 246 5 20 W, WR GL, GW B Map Light 20 46 6 10 RL W, WR B Tachometer 30 345 3 10 W, WR G LB B, BW Water Temp/Pressure Gauge 34 234 3 10 W, WR G YB, YW B, BW Amperage/Fuel Gauge 35 345 3 10 W, WR G Y B, BW Brake Warning 36 156 NA #N/A W, WR G, GY BW Heater Illumination 53 12346 5 20 RL W GR, GW B Heater 54 35 8 10 W, WR G L, LR, LW Heater 54 6 13 20 W, WR G L, LR, LW Heater (resistor) 54 NA #N/A B Horn 58 16 10 10 W, WR G, GB, GR Washer 64 3457 9 20 LR, LW Wipers 67 234567 10 10 W, WR L, LW, LY Y B Lighter 69 146 7 20 W, WR LW B Clock 70 146 6 10 RL W, WR B Window Defogger 74 3567 8 10 R W, WR LR, LW B Radio 78 357 8 10 W, WB, WR L, LR, LW B Theft Protection 81 146 6 10 RL W, WR B Choke Warning Light 85 357 3 10 W, WR G B, BW Interlock 99 7 14 10 W, WR B Ignition 102 35 4 10 WR BW, BY Interlock Relay 103 457 NA #N/A WR L, LR BR, BW, BY Neutral Switch Warning 105 457 NA #N/A LgB BY B Engine Revolution Sensor 106 6 14 10 W, WR B Emergency Switch 108 45 NA #N/A WR L Y, YB B, BW, BY Battery (Power Inlet) 106 14 10 W, WR B Junction Blocks Green C-1 Blue C-2 Black C-3 Brown C-4 Green C-5 White C-6 Black C-7
-
The second picture shows a 3-contact connector with only the top and bottom connectors used, both wires are green. If so, that might be the map light above the vents. For the other connector in the 2nd picture, how many contact positions, how many are actually used, and what are the wire colors?
-
In the first picture, that looks like a green/white and red/blue into a T 2 conductor connector female for the heater control's light. I also have a similar connector but with green/white and red that is not plugged in right now.
-
I just pulled out my spare from the garage. Mine only had one screw. Getting it out is not half as fun as getting it back in.

-
ZH, correct me if I'm wrong, but I think the relay panel can be unbolted. This might make it easier to get to the relay. Remember these relays are old so they can wear out. Once you figure out the terminals, (i.e. which one does what) you can substitute a modern relay.
-
I’d expect this from Captain Obvious.
-
I think it is solid.
-
Look for the fuse values on page BE-5 figure BE-7. I'm assuming you don't have the fuse box cover or its labels are worn off. If you start subbing 10 AMP's for 20's, you better have a lot of spare fuses. Good luck. The wiring can be very challenging. At least it's inexpensive to fix usually. Wait until you get to the mechanical issues.
-
As for the fuses, some will have power all the time, others, only when the ignition is on. Focus on one circuit at a time Grasshopper.
-
Was the ground wire grounded?
-
Sometimes it's best to start at a connector and work your way through the wiring harness. In the case of the ground you circled in red, unplug the front combination connection and probe the ground to see if it is a ground. Check for continuity between connectors along a wire's path. At some point there will be no continuity and you'll know at least what wire segment is at fault. You might find that some of your grounds are not grounded due to rust. I ended up having numerous corroded connectors (get some terminal cleaner), melted wires, wire splices from some long forgotten accessory a PO had installed/removed. In the end, I think I've removed and rewrapped every wiring harness except for those in the engine compartment. I also have a spare dash and cabin harness hanging in my garage that I sometimes use to trace wires. If it hasn't been done already on your car, you might want to upgrade the headlight circuit (http://www.zhome.com/ZCMnL/HeadlightRelays/JudkinsRelay.htm)
-
I just checked, CarFax is 1981 and newer. You'll have to go to your friend.
-
You should check with the Erie agent. You might get lucky. So if you do get the VIN, are you going to try and do a CarFax to trace the owner?
-
ZH: I'll check it again in Fall and see what it looks like. Thanks for the help (once again).
-
Jeff G, what does it mean to chuck a rocker. The lash pads look ok to my untrained eye. I'll clean the rocker in an ultrasonic cleaner, stain it with ink, and see if the apparent cracks are still there. ZH, There's 395 miles on it. I'm assuming the chip on the lobe occurred during the machining as it's not very noticeable. I'm not familiar with (or know) the machine shop and relied on the mechanic to select one he was familiar with. What I think might be happening is the lobe got chipped possibly due to a defect during machining. The rocker was chattering due to the uneven surface and created the cracks. Possible solution? I was thinking that I'd replace the rocker (they are inexpensive) and grind away just enough on the trailing edge to miss the chipped area of the lobe. Then I'd protect the area around the cam shaft with rags and smooth out the lobe chip with a small grinder to lessen the potential for propagation of the damage. I'm waiting for the mechanic to get back to me with his suggestion(s). This is my third shaft in 2 years. Jeff
-
Jeff G 78, I looked at the Aug 2020 receipt and the rockers were shown as being replaced. That was 400 miles ago. (I need to get this out on the road more) The fractures on the "S" side of the rocker running parallel with the face don't bother you? Jeff