Jeff Berk
Free Member
-
Joined
-
Last visited
Everything posted by Jeff Berk
-
 Sorry, but I had to look it up. I'm assuming you meant the first definition and not the last ?: Sakura (桜 (kanji), 櫻 (old kanji), さくら (hiragana), サクラ (katakana)) is the Japanese term for ornamental cherry blossom trees and their blossoms. Sakura may also refer to: Sakura, raw horse meat, usually prepared as sashimi called basashi
 -
I was doing some electrical work on my '74 today and realized that the way I resolved my dash light was to install a second fuse panel and ran the dash lights off of it. I kind of recall that I had fuse blowing issues so I split up the components leading to the circuit using the second fuse panel with four separate circuits. I figured that the component causing the fuse to blow would be narrowed down but no fuse in the second panel popped. So I just kept the troublesome circuit split into multiple separate circuits. So, I guess I never figured out the reason why my lights were not working but found a workaround.
-
Crshowes It's been a long time since I had that issue so I don't recall the details. The only problem with a new relay is that the plug will not match. It's just a "standard" relay. I don't think the relay replacement corrected the dash lights but I cannot recall the fix. Just wondering, did you install LED dash lights like I eventually did? You can't use a standard rheostat to control them.
-
Regarding the odd fuel hose: I think I used some cloth-covered hose (common on some German cars) and something like this (not this one specifically) to get that U-bend: https://www.fastenal.com/products/details/0421896 Make sure all replaced hoses if not OEM are rated for fuel. I also looked at universal molded fuel line by RetroMotion Innovations but didn't go that route. https://www.retromotioninnovations.com/products/3-8universalmolded you just cut out whatever part you need and splice a standard fuel line to it.
-
Are you going to try and match the diamond pattern on the vinyl? I'm in the process of gutting and redoing the interior of my 260 but I just went with basic black. (https://www.joann.com/artic-vinyl-54in-black/3526274.html) . The 2 yards covered the tunnel, the strips along the door openings, the rear panel, and the emergency brake lever. The back of the vinyl has a diamond pattern printed on it I guess to use as a sewing guide. What's holding me up now is a source for horsehair for the seat bottom. The original horsehair disintegrated. I think I finally found a source. The horsehair in the seat backs is in good condition.
-
With the crank off, buy the clip removal tool and play around with it until you see how it should work. I've never had any problem but then again, I used to have a '66 Chevy and had a lot of practice with it.
-
Dadsun, The door handle requires a special tool to unclip the handle. You slide the tool behind the pivot point of the handle and push the clip partially out. https://www.autozone.com/test-scan-and-specialty-tools/window-handle-remover-tool. The door latch has a plastic cover that has to be carefully pried off. I cracked one of mine. https://zcarsource.com/handle-cover-insert-240z-260z-280z After removing the cover, you can see the screw holding the escutcheon in place. https://zcarsource.com/door-escutcheon-240z-260z-280z
-
It seems like the procedure would be to test if you have power at one point, perhaps the combo switch like what Siteunseen suggested. If you have power going into the switch, see if you also have power going out. If you do, then work your way to the next connection and see if power makes it that far. I've got a '74 so the electrical system should be similar. There is a 3 blade connector on the combo switch with a red/white wire that I think should be hot when the headlights are on. Check to see if it is. If not, and power goes to the combo switch, the switch is the problem. If it has power, work your way to the C4 (Brown) connector and see if there is power going in and if power is going out the other side. Keep looking for where power should be and if it's not there, you've isolated the fault. It's a long shot, but try cleaning your fusible links. When you are done and found the issue, look into adding a headlight relay. Good luck. Jeff
-
The only fog machine I'm familiar with uses glycerin. I have no idea if that's a problem or not with a catalytic converter but why not wait for the engine to be installed. Run it, then look for leaks by holding your hand near joints in the exhaust? If you can borrow a thermal IR gun, you'd "see" the heat escaping from a leak.
-
After looking around, I think I'm setting my sights on a leather kit sold by Interior Innovations for $350. I need to hold off for a few months at least while I wait to be called back to work so I'm gluing the stretch marks from the inside to stabilize the damage and adding new horsehair and padding for now. AK260, I like your interior but someone moved your steering wheel to the wrong side of the car ; ) Jeff
-
I purchased the correct rails for my 260. Thanks for all the input.
-
I just came back from an upholsterer for vintage cars and he said that my seat bottom was dry rotted. I'm going to need to either replace the original covering (his suggestion) or glue backing somehow to give it strength my inexpensive alternative. At least I'm furloughed so I have some free time.
-
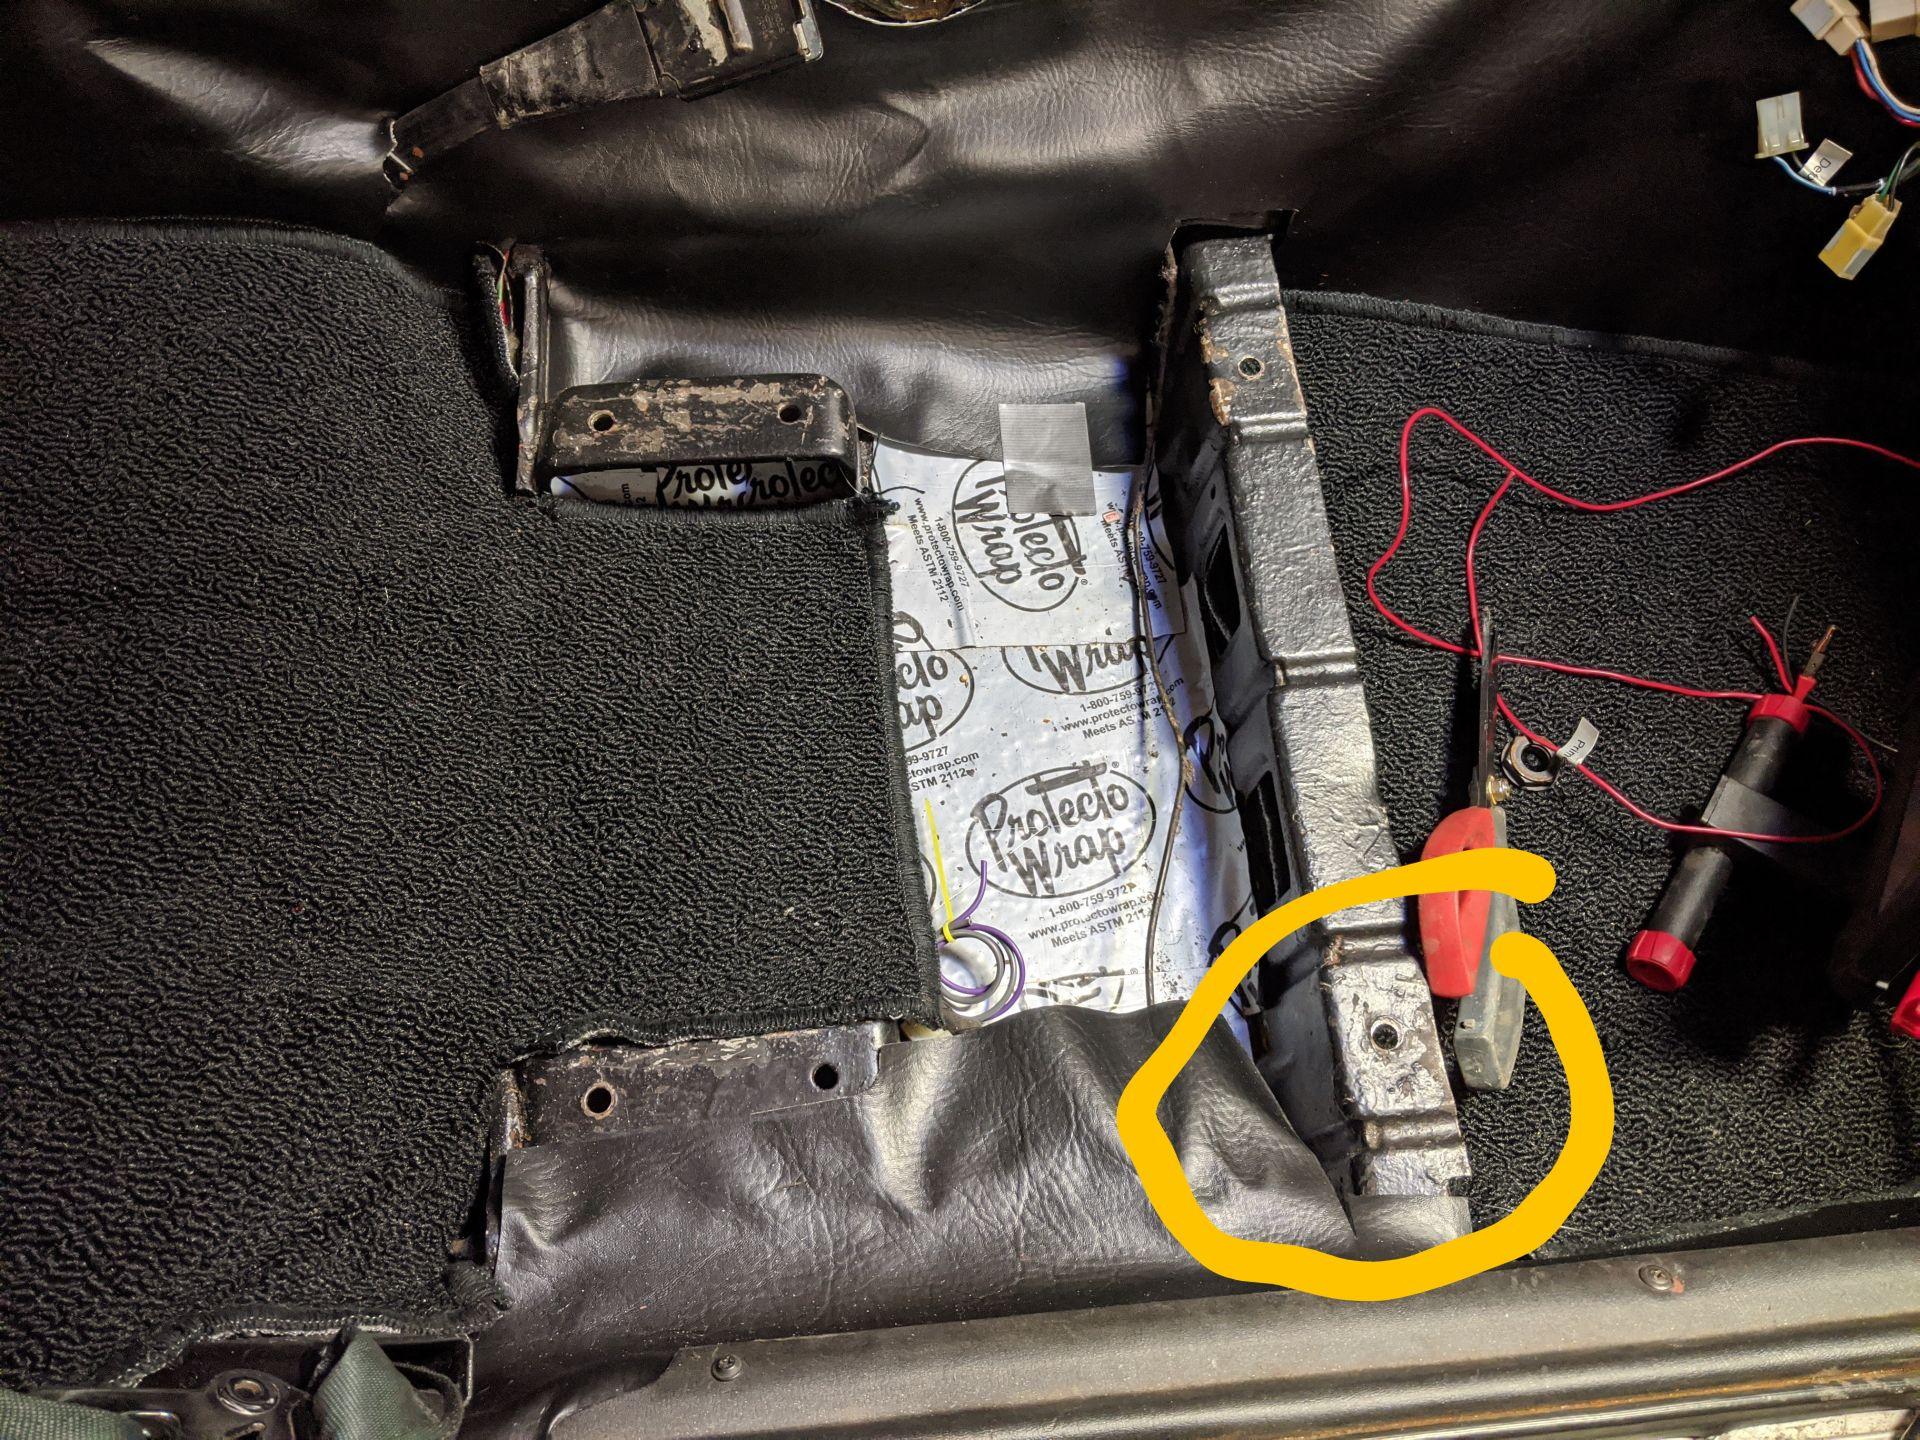
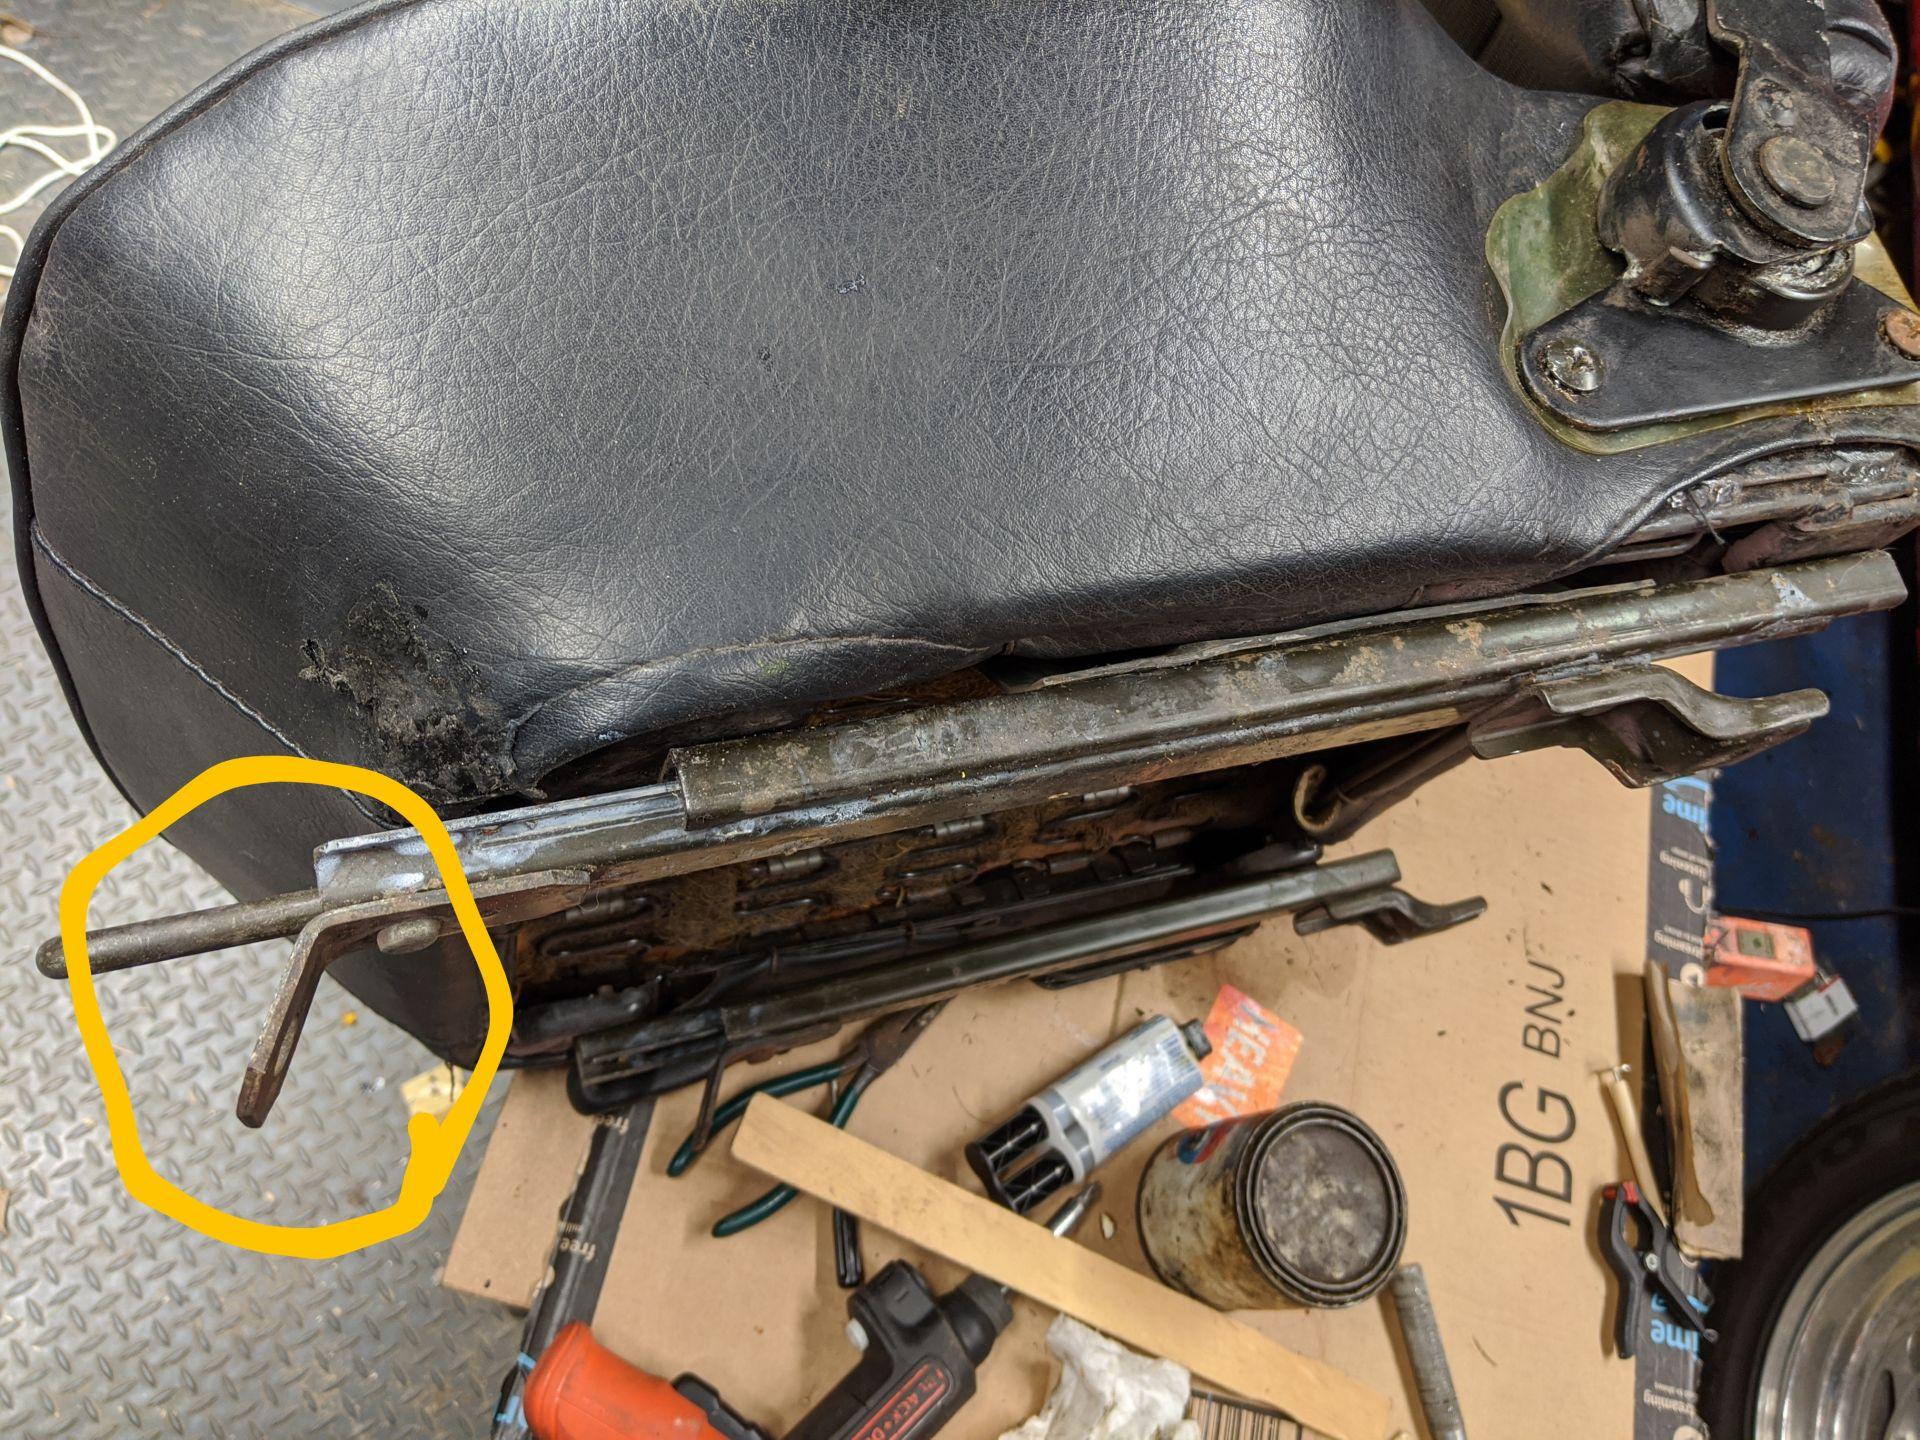
My 260 is a 4/74 manufactured so the source vehicle must of been a late build. Does anyone see a problem in just bolting a 60 degree metal tab or should I replace the rails? I unfortunately have lost access to my metal brake until who know's when. I'll likely have to purchase 45 degree angle braces and hammer them to get 60 degrees. On a side note, I found one of the nylon bolt-shaped spacers used to adjust the seat height. It was hidden beneath the 1980's vintage carpet. Earlier, I found a pack of camel's in one of the tool compartments that has been hidden by the 1980's carpet. This car is a time capsule. Stay Safe Everyone and Thank You for the Help.
-
I'm in the process of putting my 260's interior back together with seats I purchased from someone that said that they came out of a 260. The rear bolts line up but the seats have a tab that tilts down at 60 degrees in the front that doesn't line up with anything. I'm likely going to just bend a steel bar and drill a couple of holes in it to make it fit. Is there a part missing or is this just a variation in seat design?


-
I did the drop, clean and coat thing a couple of years ago. The product I used was: https://www.summitracing.com/parts/KCO-53000 It seems to of worked out OK. I had dump some bolts in the tank and rolled it around to break up any loose rust. I used a shop vac to dry it out.
-
I just noticed this thread. I tried to switch the passenger/driver seat bottoms on my 260z today and the mounting holes for the reclining mechanism don't line up. So the foam might be identical, but you'll need to switch the entire seat unless you want to pull out the foam. Switching the entire seat could work but the reclining mechanisms with be on the wrong side of the seats.
-
I'm considering getting fancy with that vinyl and quilting the diamond pattern on it. Can someone give me the distance between the parallel lines for the early (large) diamond pattern? I'm assuming the lines cross at about 60 degrees. I should have a lot of scrap to practice on as I've never quilted before but luckily my wife has. Maybe her helping me on this will get her to be more accepting of having "that stinky car in the garage".
-
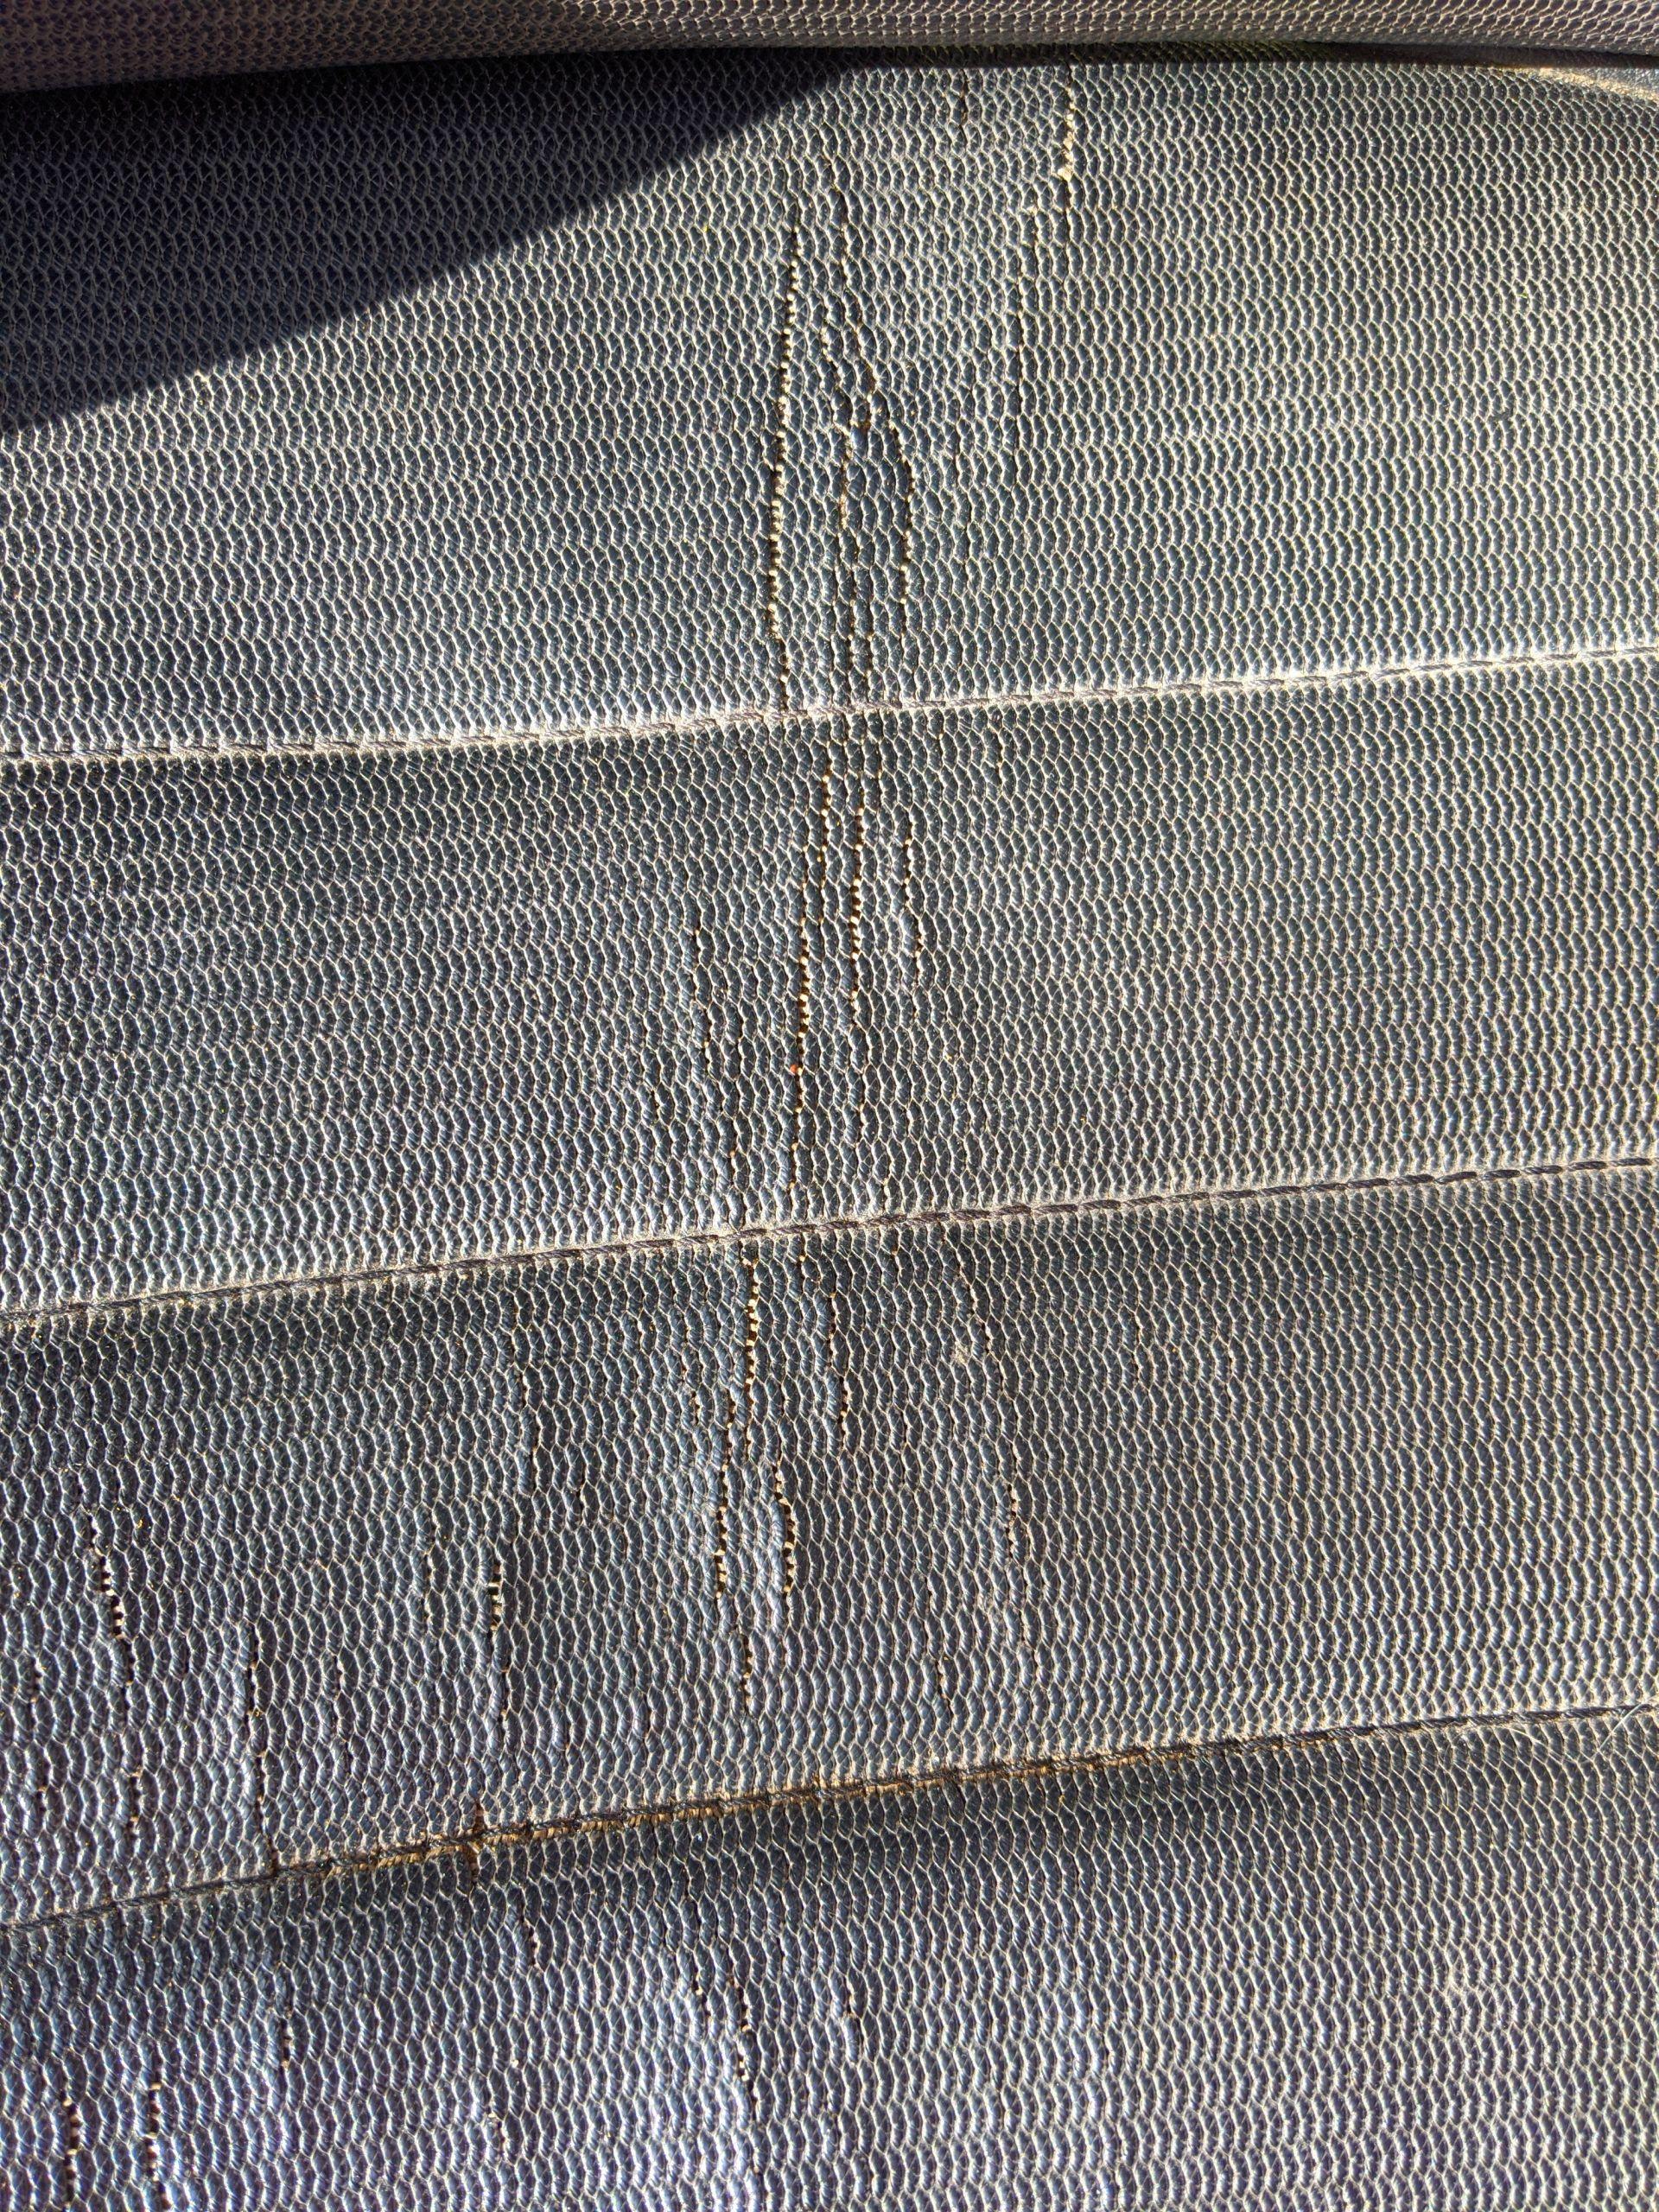
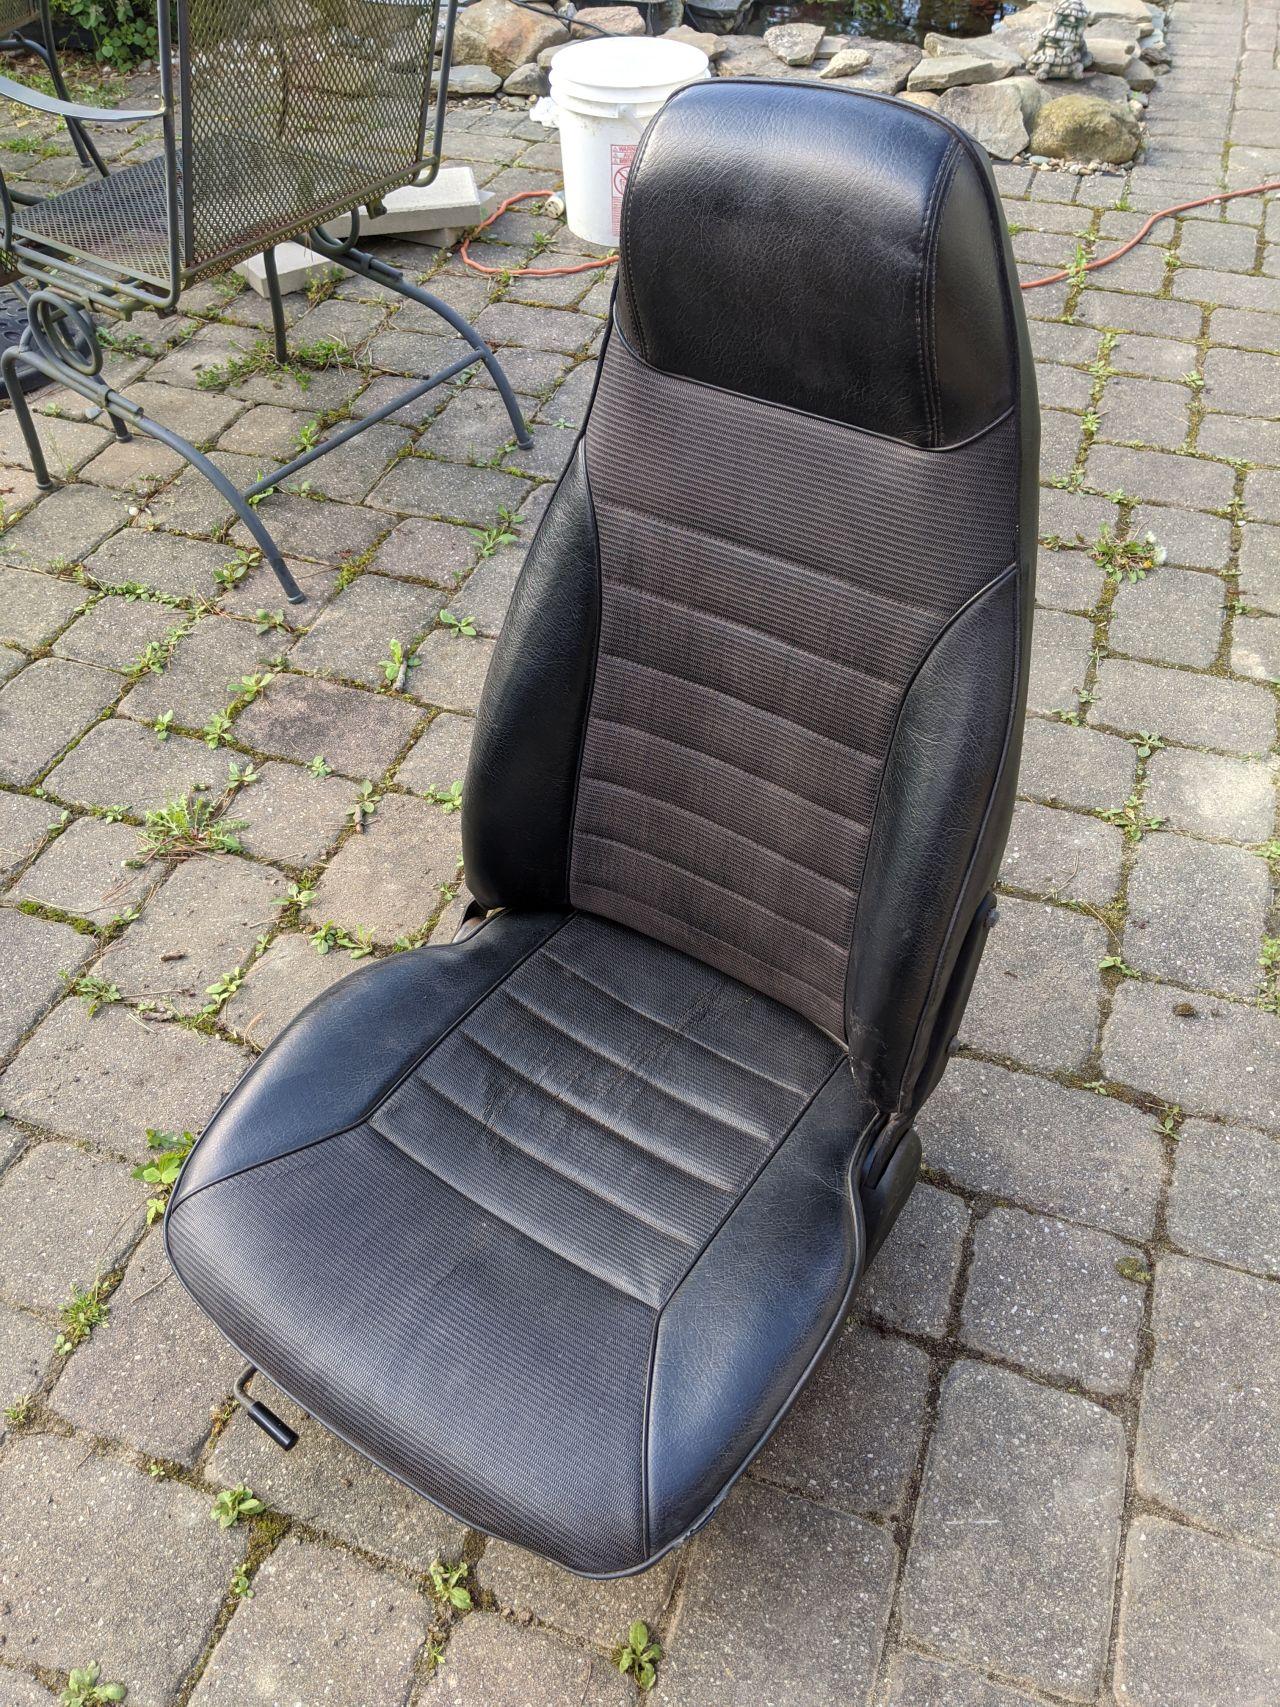
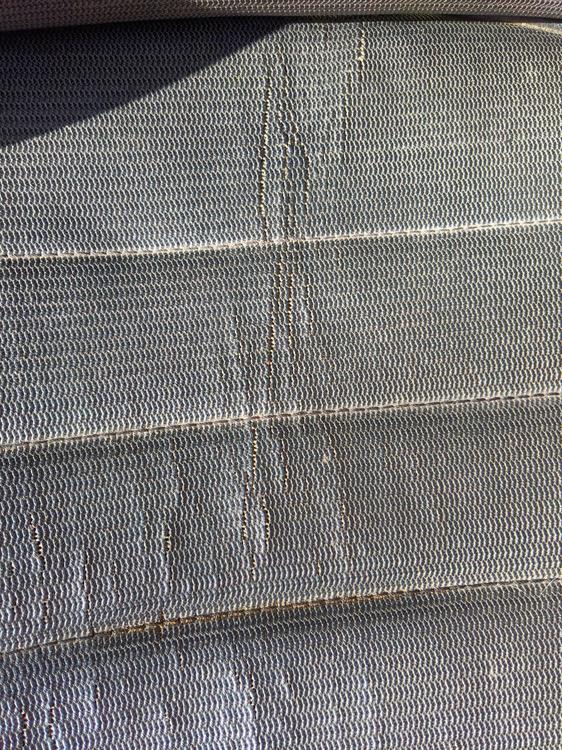
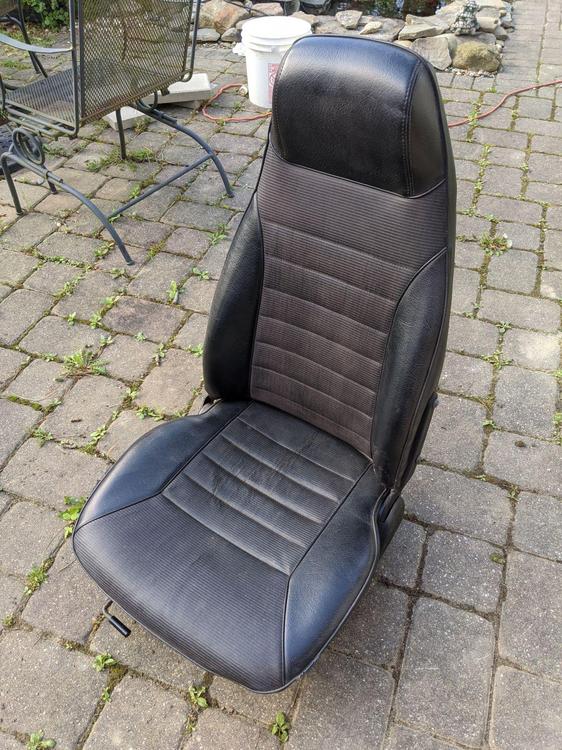
I had a pair of old seats in my 260z that I'm replacing with what I think is a pair of OEM 260z seats that were removed after minimal use. They lack the vent holes so I'm not sure if they are in fact OEM. Can anyone tell me if the 260s' seats came without vent holes? The more important issue is that the driver seat has a few separations in the vinyl fabric.These are not rips but I'm concerned that they may turn into rips because the vinyl is so old. Should I take the seat somewhere to get reinforcement for this spot? I'm assuming I can switch driver and passenger seats to even out the wear and that may help. Jeff
-
GK: Thanks for the reply. I ended up using a vinyl from JoAnn Fabric rated for 50,000 double rubs meaning it is very abrasion resistant. A reviewer said they used it for boat seats 10 years ago and it was still holding up. Total cost with shipping and several stacked discounts was $26. At that price I can afford to make some mistakes.
-
I'm taking my car's interior back to the way it was in 1974. It was update to red shag carpeting in the early 1980's. The carpet was installed wall to wall, or actually sill to sill. That being the case, when I installed the new carpet, I have a bare transmission hump, 1/2 wall behind the seats, and along the sills. I know I can purchase pre-cut vinyl or leather to recover these areas, but due to my combination of wanting to do as much as I can myself and being short on cash (I'm furloughed), I'd like to DIY if possible. It seems that all that is needed is some upholstery vinyl at $20 per yard or am I missing something? Jeff
-
The layer issue is that I recently lost access to the current version of Adobe Acrobat Pro. I can create separate pdf's of each layer using the software I have on hand but as of yet, I'm unable to then combine them into a single pdf while maintaining separate layers without Adobe Pro. I'm looking into some work arounds.
-
The wiring diagram is taking longer than I thought but here's where I'm at so far. Feel free to poke holes in it as I'm working through the remaining wires and fixing errors. The wires are grouped by sub-system but for now that feature gets stripped off during the conversion to pdf. wire drawing pg3.pdf wire drawing pg4.pdf wire drawing pg2.pdf wire drawing pg1.pdf
-
I'm not sure if this is the ultimate source of the problem but following Kenward1000's suggestion, I think the problem was the connections on the fusible links. I cleaned them up and the Z's running again. Unfortunately, one of the solder joints on the gray link is loose. The wire is too dirty to re-solder so I was going to cut the blade connection off and install a new one. It looks like 0.33 inch (8.6 mm) wide which I haven't been able to locate. Any idea where I can find a suitable connector? Happy Turkey Day Everyone Jeff
-
I'm using Inkscape, an open source drawing program similar to Adobe Illustrator. The wires are grouped in layers by system (e.g. lighting, ignition) but I haven't figured out yet how to keep the layers separate when I export them to acrobat. wire drawing pg1.pdf I have tomorrow night and a couple days next weekend with nothing to do and I hope to have it 75% completed by then unless it's already been done by someone. The wires are colored according to the diagram's designation and I use a dashed colored line to designate the secondary wire color so LY would be a blue line with a yellow dash as an example.
-
I have some time on my hands so I've started coloring in a wiring diagram for a 260z. Before I sink too much time into this, has anyone come across a COLOR 260z wiring diagram?