Jeff Berk
Free Member
-
Joined
-
Last visited
Everything posted by Jeff Berk
-
 Could adjacent plugs mean a gasket breach between them?
 -
Fixed it! I had a cap and rotor sitting around and once I installed the new ones, it started right up. The contacts didn't look all that bad on the old pair and the car ran fine up until it stopped working. I'll take it out for a few files once the weather clears up to see if we have a heat related issue. Thanks Zed Head and SteveJ for the advice.
-
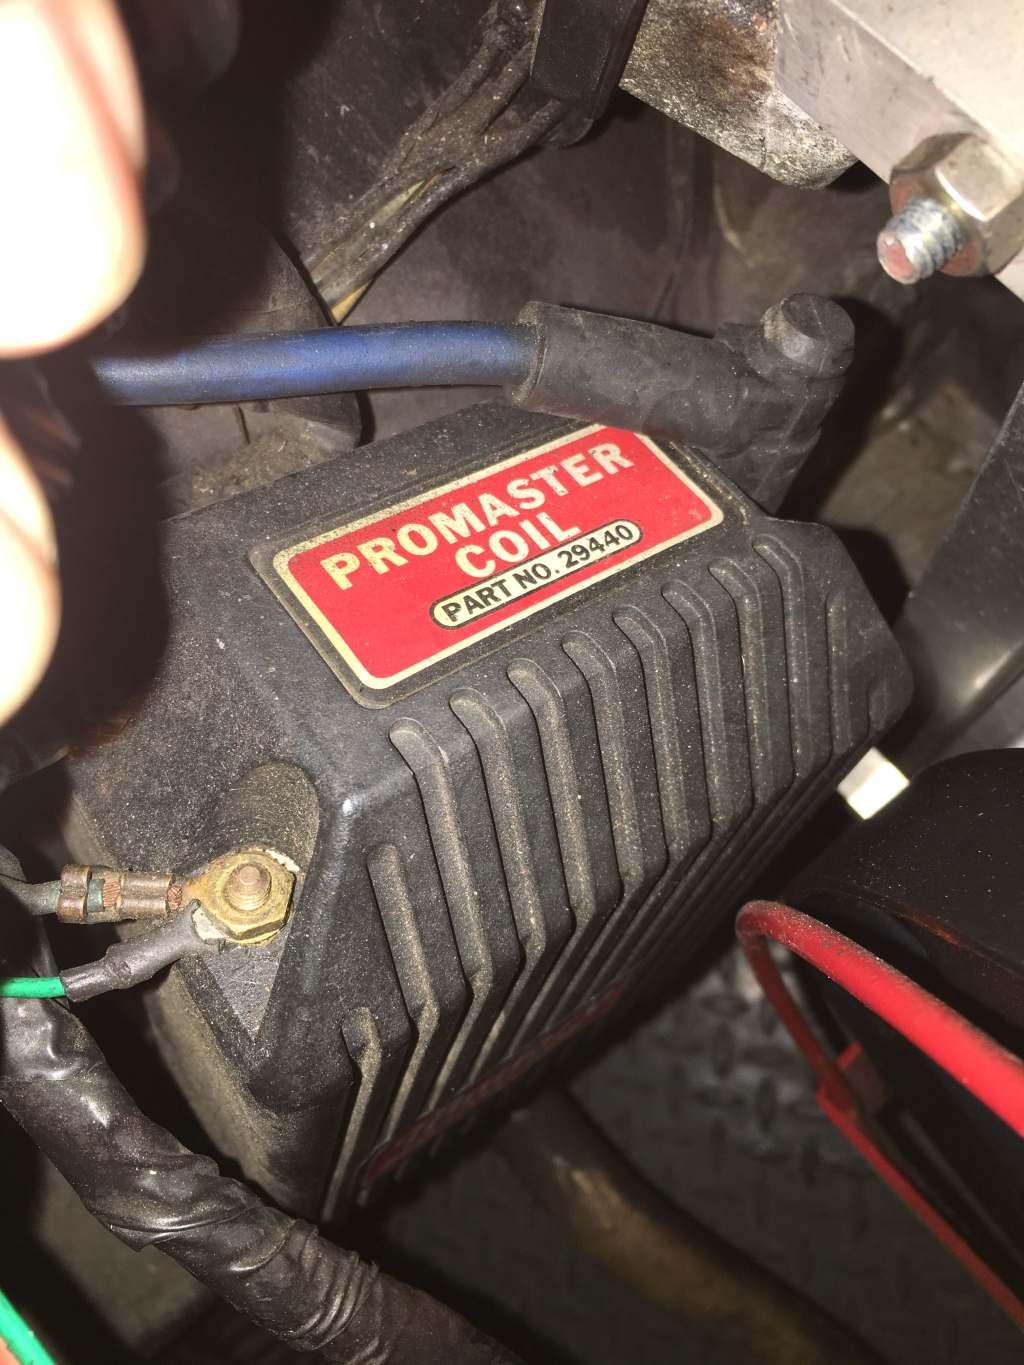
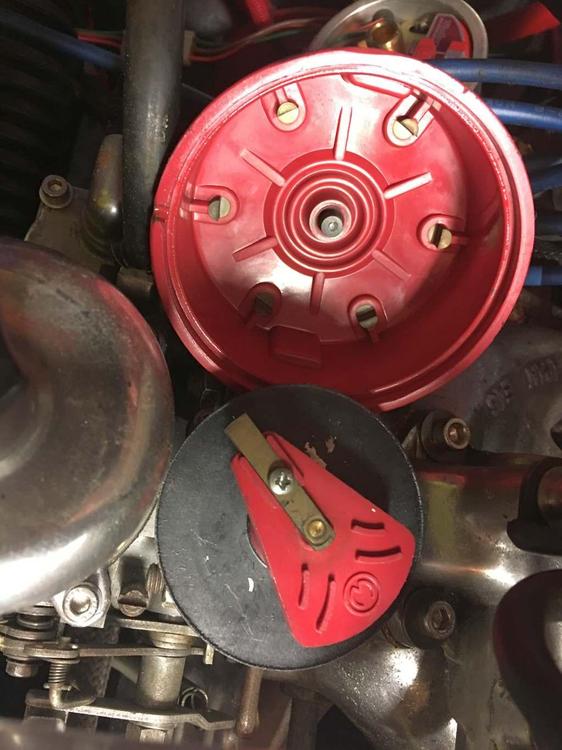
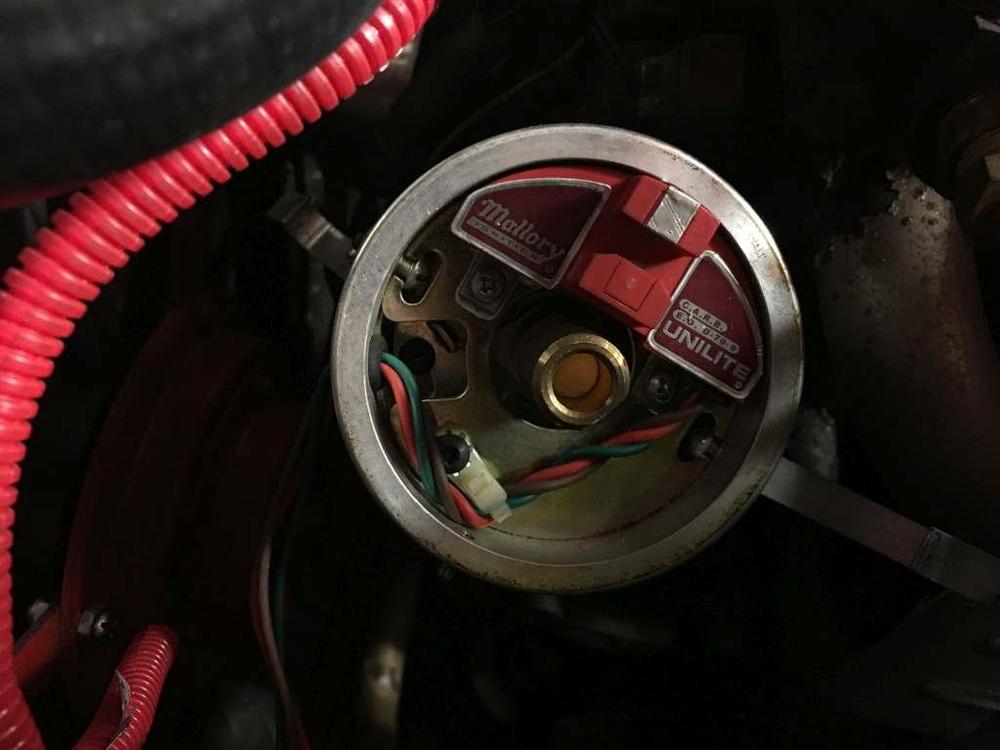
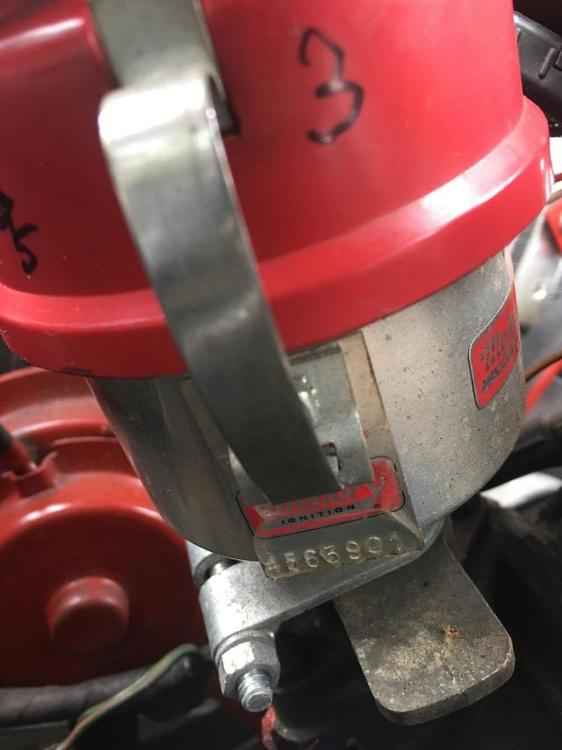
I ran through the Unilite test procedure and There is 12 volts coming off the negative side of the coil. The voltage drops drops to 1 volt when a card blocks the LED. I think that means the ignition module is working. I remember that thread. I commented on it related to the availability of the Mallory cap and rotor. I've attached photographs of the distributor with the cap/rotor removed, the cap & rotor to show their condition, and the coil.

-
It’s beginning to come back to me from my auto shop class in the early 1970s when only Chrysler had pointless ignitions When the breaker points open or in this case When the electronic switch opens the circuit, that cuts the power to the coil causing the magnetic field to collapse and generate a very high voltage. I think we used to observe this on a Sun oscilloscope in auto class. Craigs list has a Snap On oscilloscope for $150 nearby me that I’m tempted to get but I’m not too sure I can figure out how to use it.
-
Thanks for the input. Am I correct in my understanding that the ignition module and coil are one in the same?
-
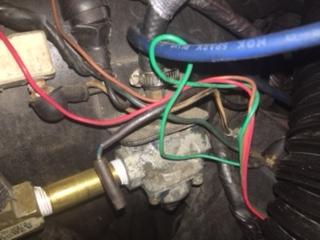
I started a short drive, in one mile I noticed the tachometer was bouncing around, especially on acceleration. At four miles I hear a lot of backfiring on engine braking. I stopped at an intersection, then the engine cut out and couldn't be restarted. I had full pressure, but no spark. It was flatbedded back home and now the fun begins. I'm confused where to start since the ignition has undergone an electronic upgrade using a Mallory coil and distributor. There are two ballast resistors one with three contacts and the one with two contact just below it. One wire from the upper (three contact) resistor connects to the lower resistor. The other end of the lower resistor connects to the positive side of the coil. The resistance across the lower resistor is 1.7 ohms. With the ignition on, I get 3.3 volts to the coil from the ballast resistor. I think the resistance is high and the voltage low (then again, what do I know) so I'm wondering if there is a problem with one or both resistors. I am also confused if a ballast resistor(s) is even needed with an electronic distributor. I was hoping to get in one more Solo event this year, so please point me in the right direction. Jeff 260z with many old performance upgrades. 280 engine/5-sp transmission
-
Thanks to all. Parts on ordered.
-
Until it runs with out the choke?
-
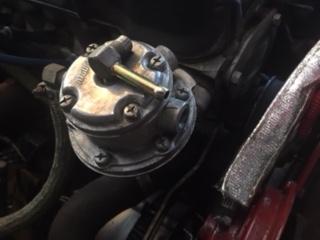
I found a 1/4 to -6 AN for the mechanical fuel pump (see photo IMG_1017)at https://www.pegasusautoracing.com/productselection.asp?Product=3230 I'm surprised that the pump outlet is only 1/4-inch. The fuel regulator (shown in photo IMG_1016) already has an NPT pipe stuck in its outlet so should I assume it is truly an NPT in and out or that someone made it fit? What is a dead-head FP regulator? Yes, it's between the pump and the carbs.
-
I just came from Summit Racing in Tallmadge, OH and they have nothing in BSP. Earl's performance site is slim pickings as well as Jegs. So far some China suppliers on e-bay and Pegasus racing are my best options so far.
-
The line coming off the mechanical fuel pump is threaded as 1/8" and it leads to what I believe is the pressure regulator with a 3/8" inlet. The pressure regulator has a 3/8" outlet. I checked with ANPlumping.com and they no loner carry 3/8" BSP. Can anyone suggest a good source? I stopped by Summit Racing but they had nothing in BSP. Thank you zKars for the info on the banjo fitting. Jeff
-
What’s a “shaved” valve cover.
-
I think I might go to Summit Racing tomorrow and take a diagram of the layout and my threaded fittings and see if they can provide a list of what I need. I’m not sure if they a selection of limey thread.
-
I rearranged some items under the hood of my 260z and I need to replace several fuel hoses. I though I'd go with AN-6 instead of rubber hoses and worm clamps but I'm a bit confused on the connections. I'm assuming the threaded connections are all tapered BSP since the components are Japanese and nothing had O-rings. Because the vehicle traded hands a few times there is a strong possibility that some fittings (pressure regulator in particular) had NPT used where BSP should of been. If I use BSP now will that be a problem or will teflon tape fill the gap. It looks like there is a lot of pipe dope there now to seal the thread and it seems to have held up to the low pressure of the carbureted system. What is the best way of dealing with the banjo bolts? I've seen a few AN-6 banjo bolt ends. Any suggestions on which ones will work on a Hitachi SU? Thanks in advance for the help! Jeff
-
I did my own rebuilding but with ZTherapy parts. Their kit was much more expensive than others out there. It was also much more comprehensive and when I had some questions, they freely offered technical advice over the phone. The only complaint I have is that their video was a bit out of date. I'll be visiting them next time I rebuild my SU's.
-
Thanks for the detailed diagnostic decision tree.
-
I've got a '74 260z and I just realized that the electric fuel pump was not functioning, just the mechanical. I'm not getting power to the pump and have yet to test the pump by applying power directly to it. The double relay system in the car from the factory that uses the engine speed to kill the fuel pump seems like a complicated setup. Would I be better off switching to a combination oil pressure/fuel cutoff switch? It seems more straight forward and would offer protection if I lost oil pressure. My son wants me to install a fuel pump switch on the dash, but I think he likes the idea of having to flip switches. Jeff
-
OK, I got it off but I think I'm going to remove the window to make it easier to put back on. Thanks all for the input.
-
Is it possible to remove the lock and handle from the 260z's doors without removing the window & regulator? The FSM (pg BF-18) doesn't mention anything about removing the window but getting to the two bolts holding the handle and the clip attached to the lock cylinder seem to be inaccessible with the window in place. Note, I'm getting ready to wrap the car and need to pull this off to get a clean wrap. Jeff
-
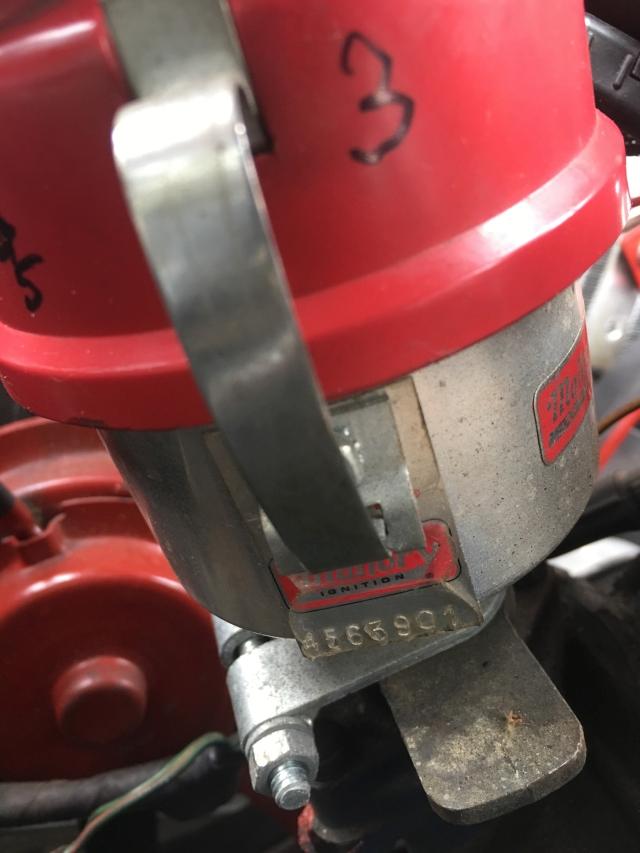
My Z uses the 270/339 combination and I think they are still available. I called Mallory last Friday about determining which cap/rotor to use and they had me read them the part number on the distributor. To be sure you are getting the right cap and rotor, look for a 7 digit part number etched on the distributor tag just below one of the two cap retaining clips.
-
I went with LEDs and they are great. I had to pop out the little domes covering the bulbs and then opening up the gauges to fish out the domes because my LED's were taller than the original bulbs. As per SteveJ, you need to replace the flasher relay. With the lower wattage, it also puts less stress on your old wiring system.
-
In my case, I think I'm going to go with the wrap. The last time my car was painted was in the 1980's but was very well done. The finish, however, is faded so I cannot touch up the paint without it sticking out like a sore thumb. The fade was also uneven so I cannot even get the paint "shot" to try and match. The car is garage stored and never goes out in the rain so I should be able to get reasonable life out of the wrap. I'm a few months away from attempting this so I'll keep you up to date on the progress.
-
-