
duffymahoney
Free Member
-
Joined
-
Last visited
Everything posted by duffymahoney
-
-
-
-
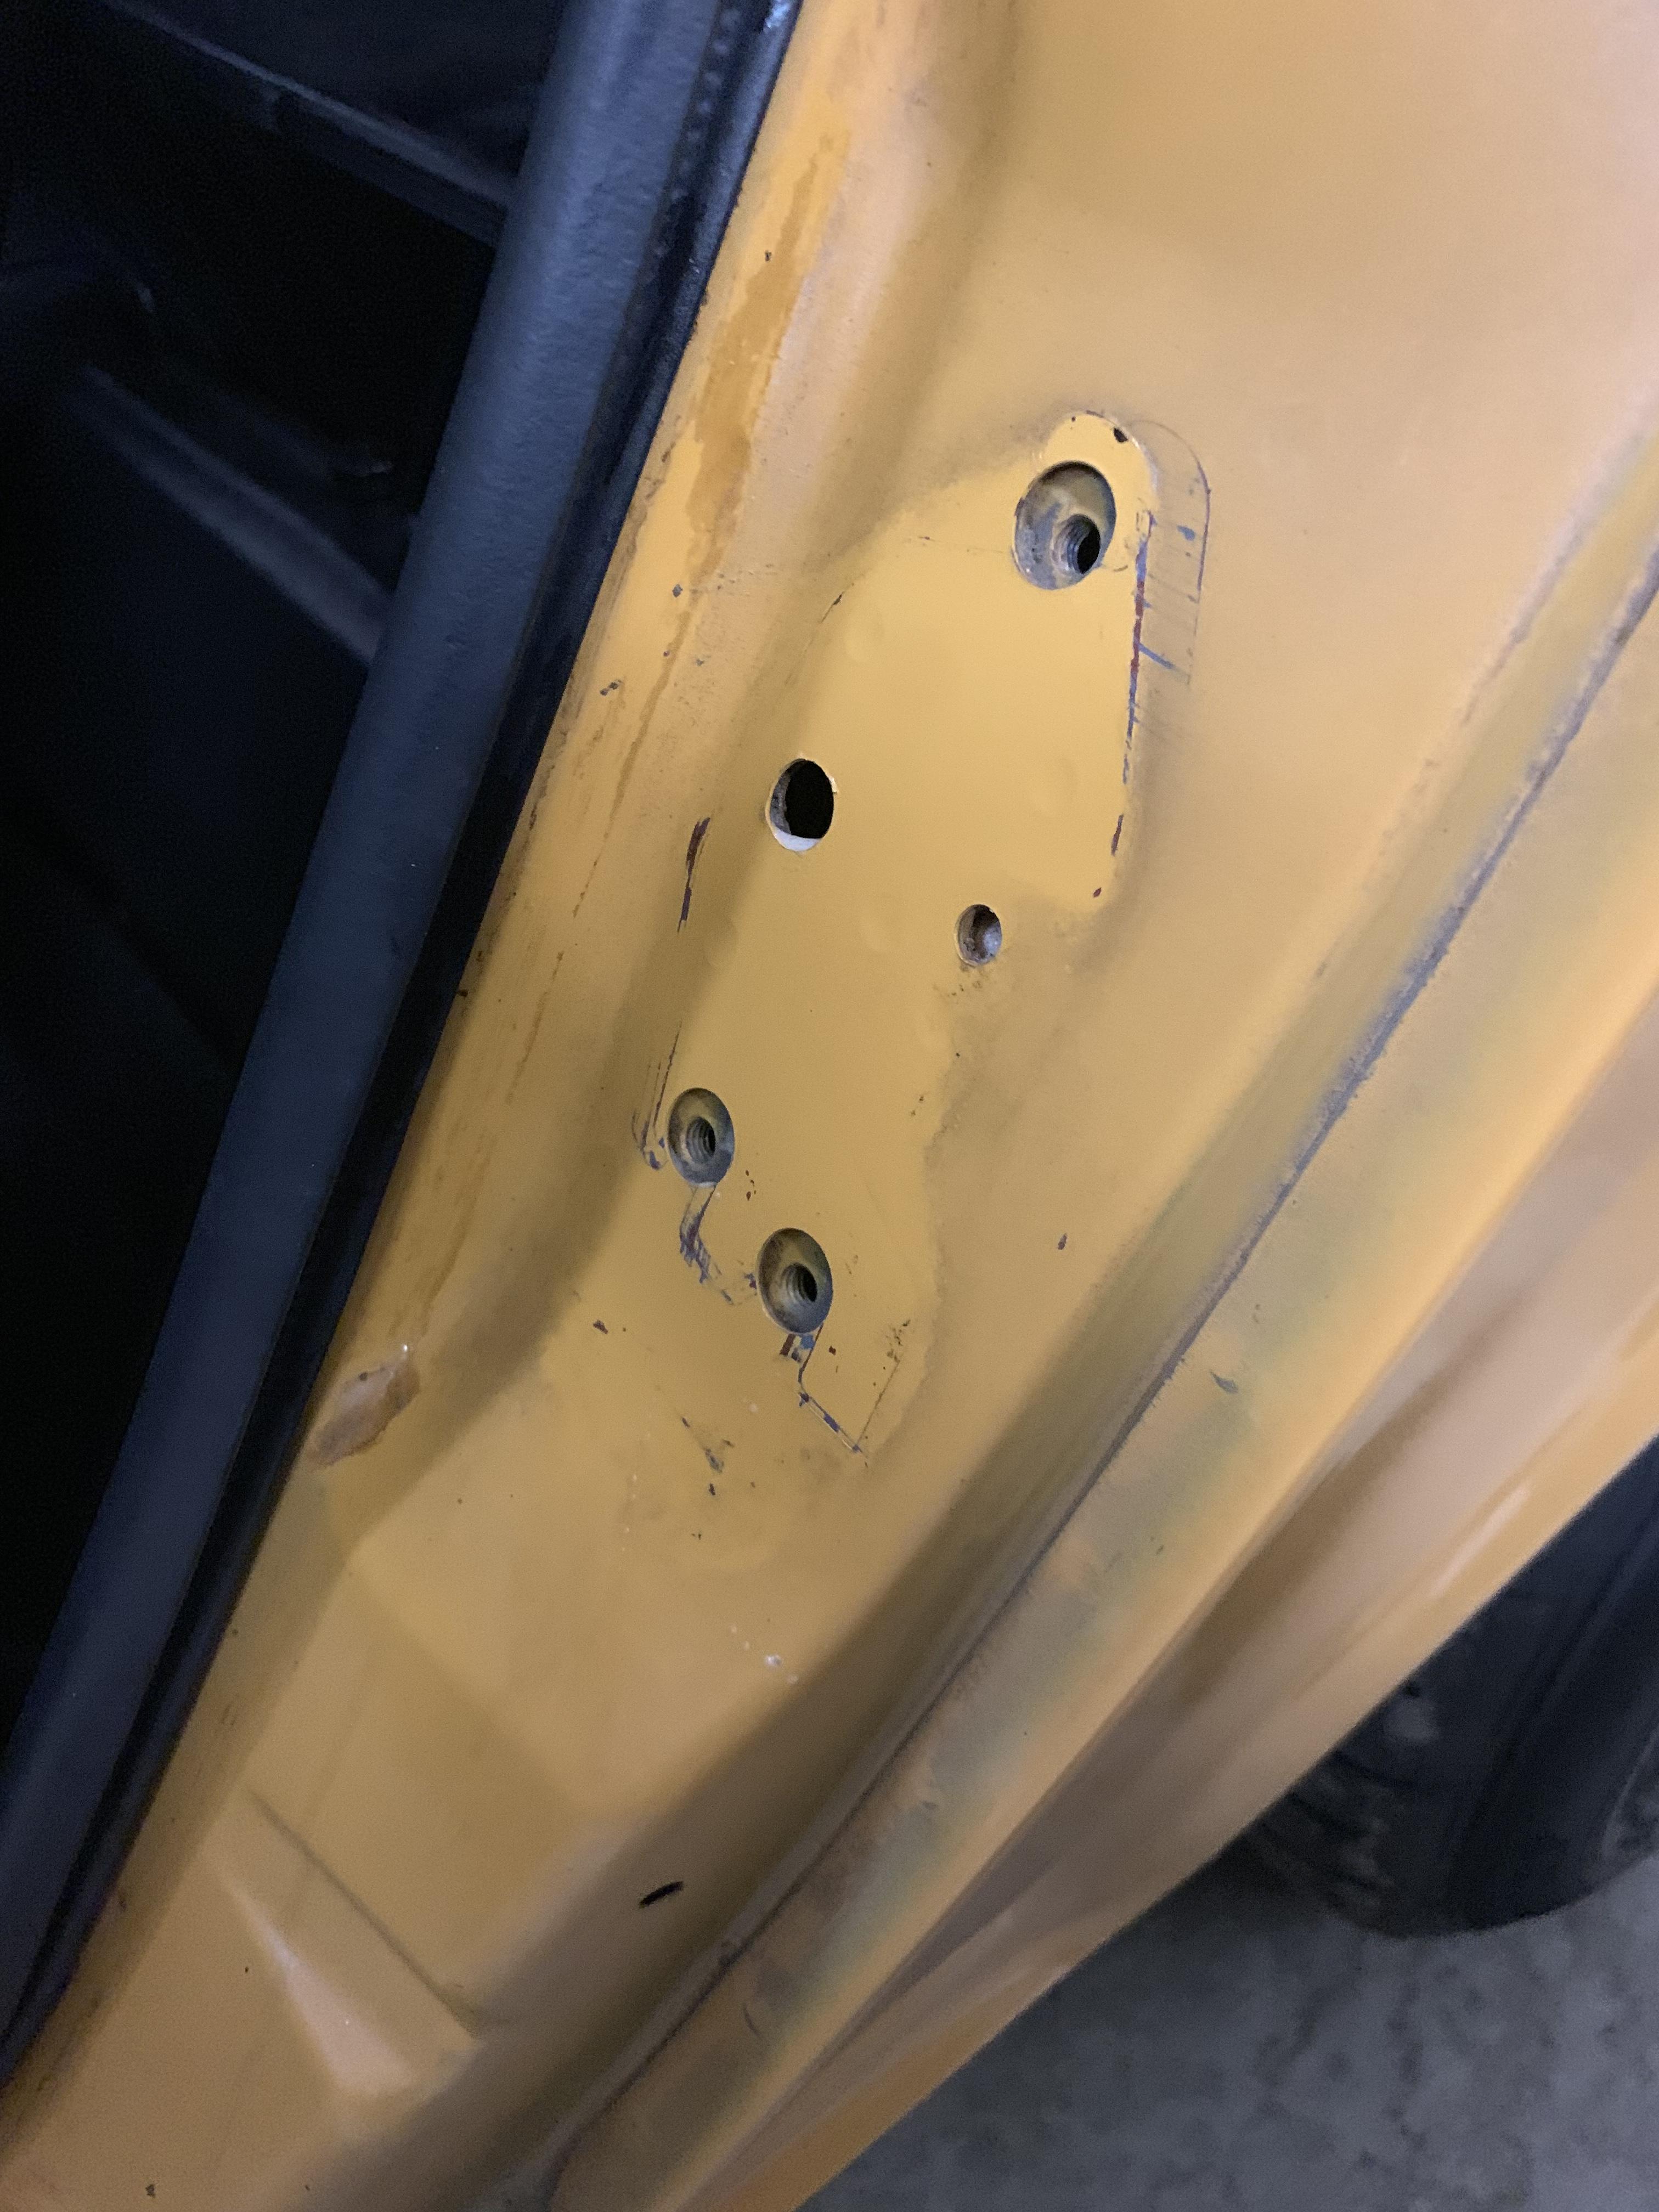
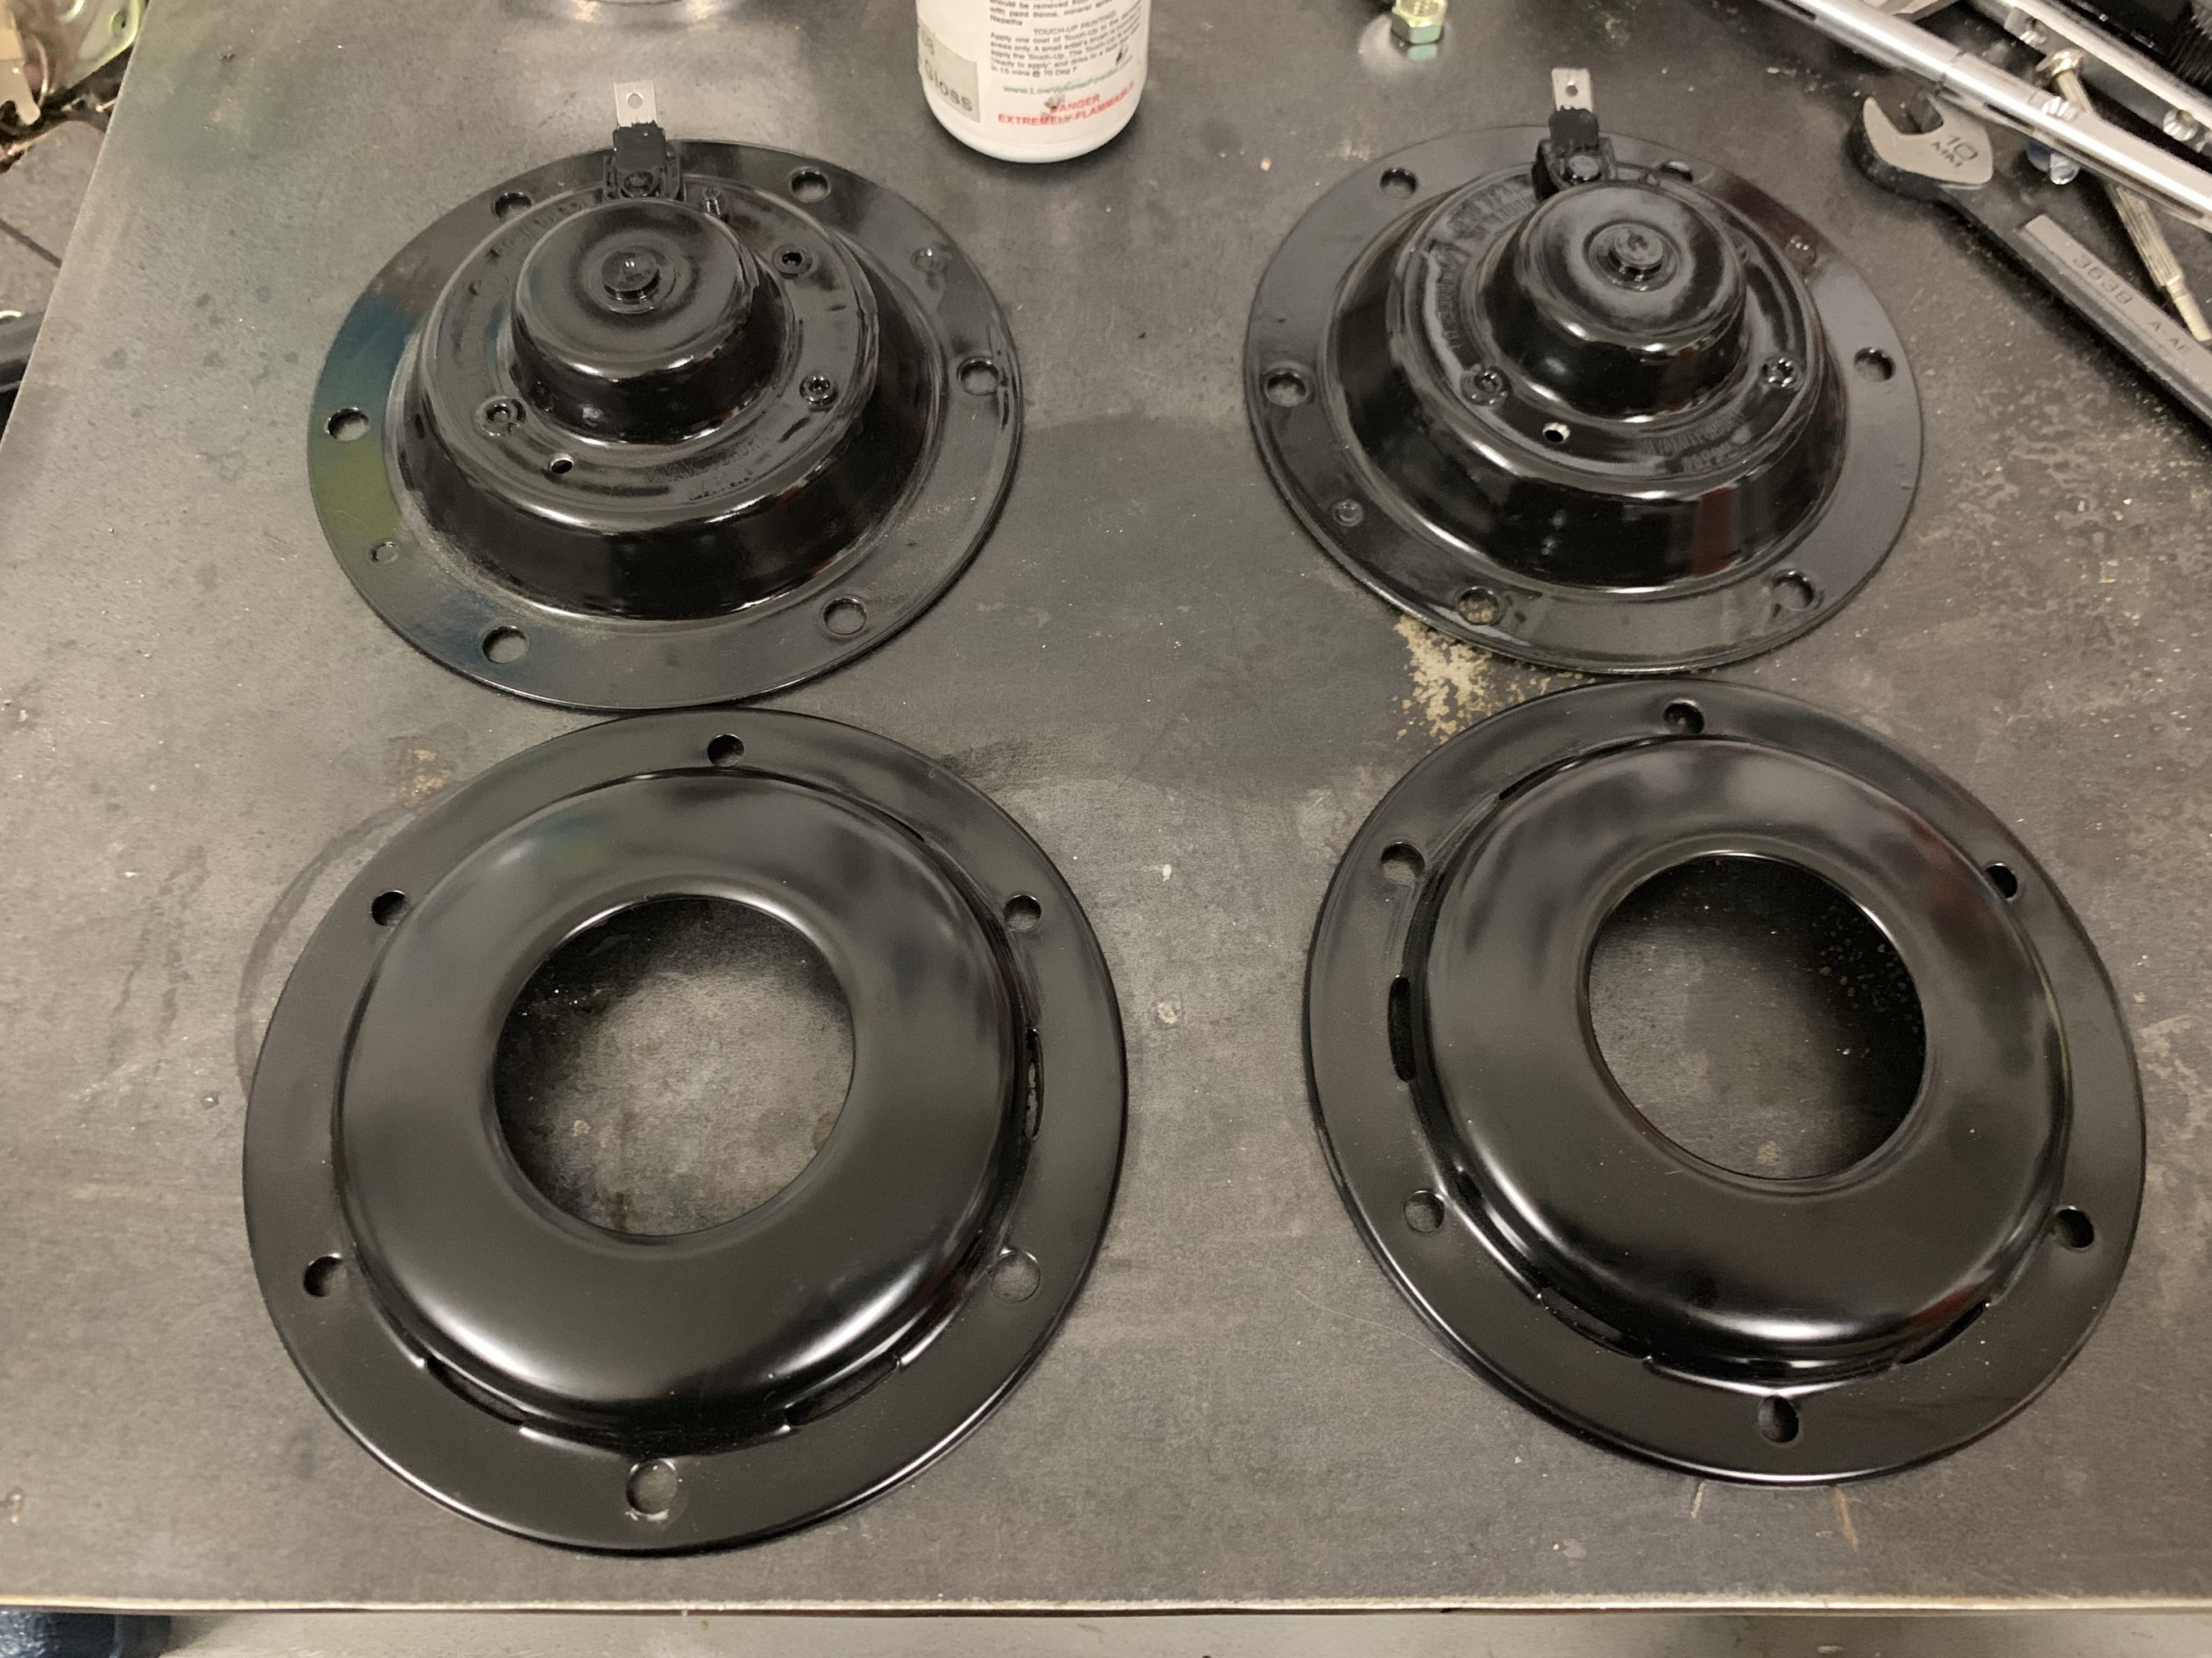
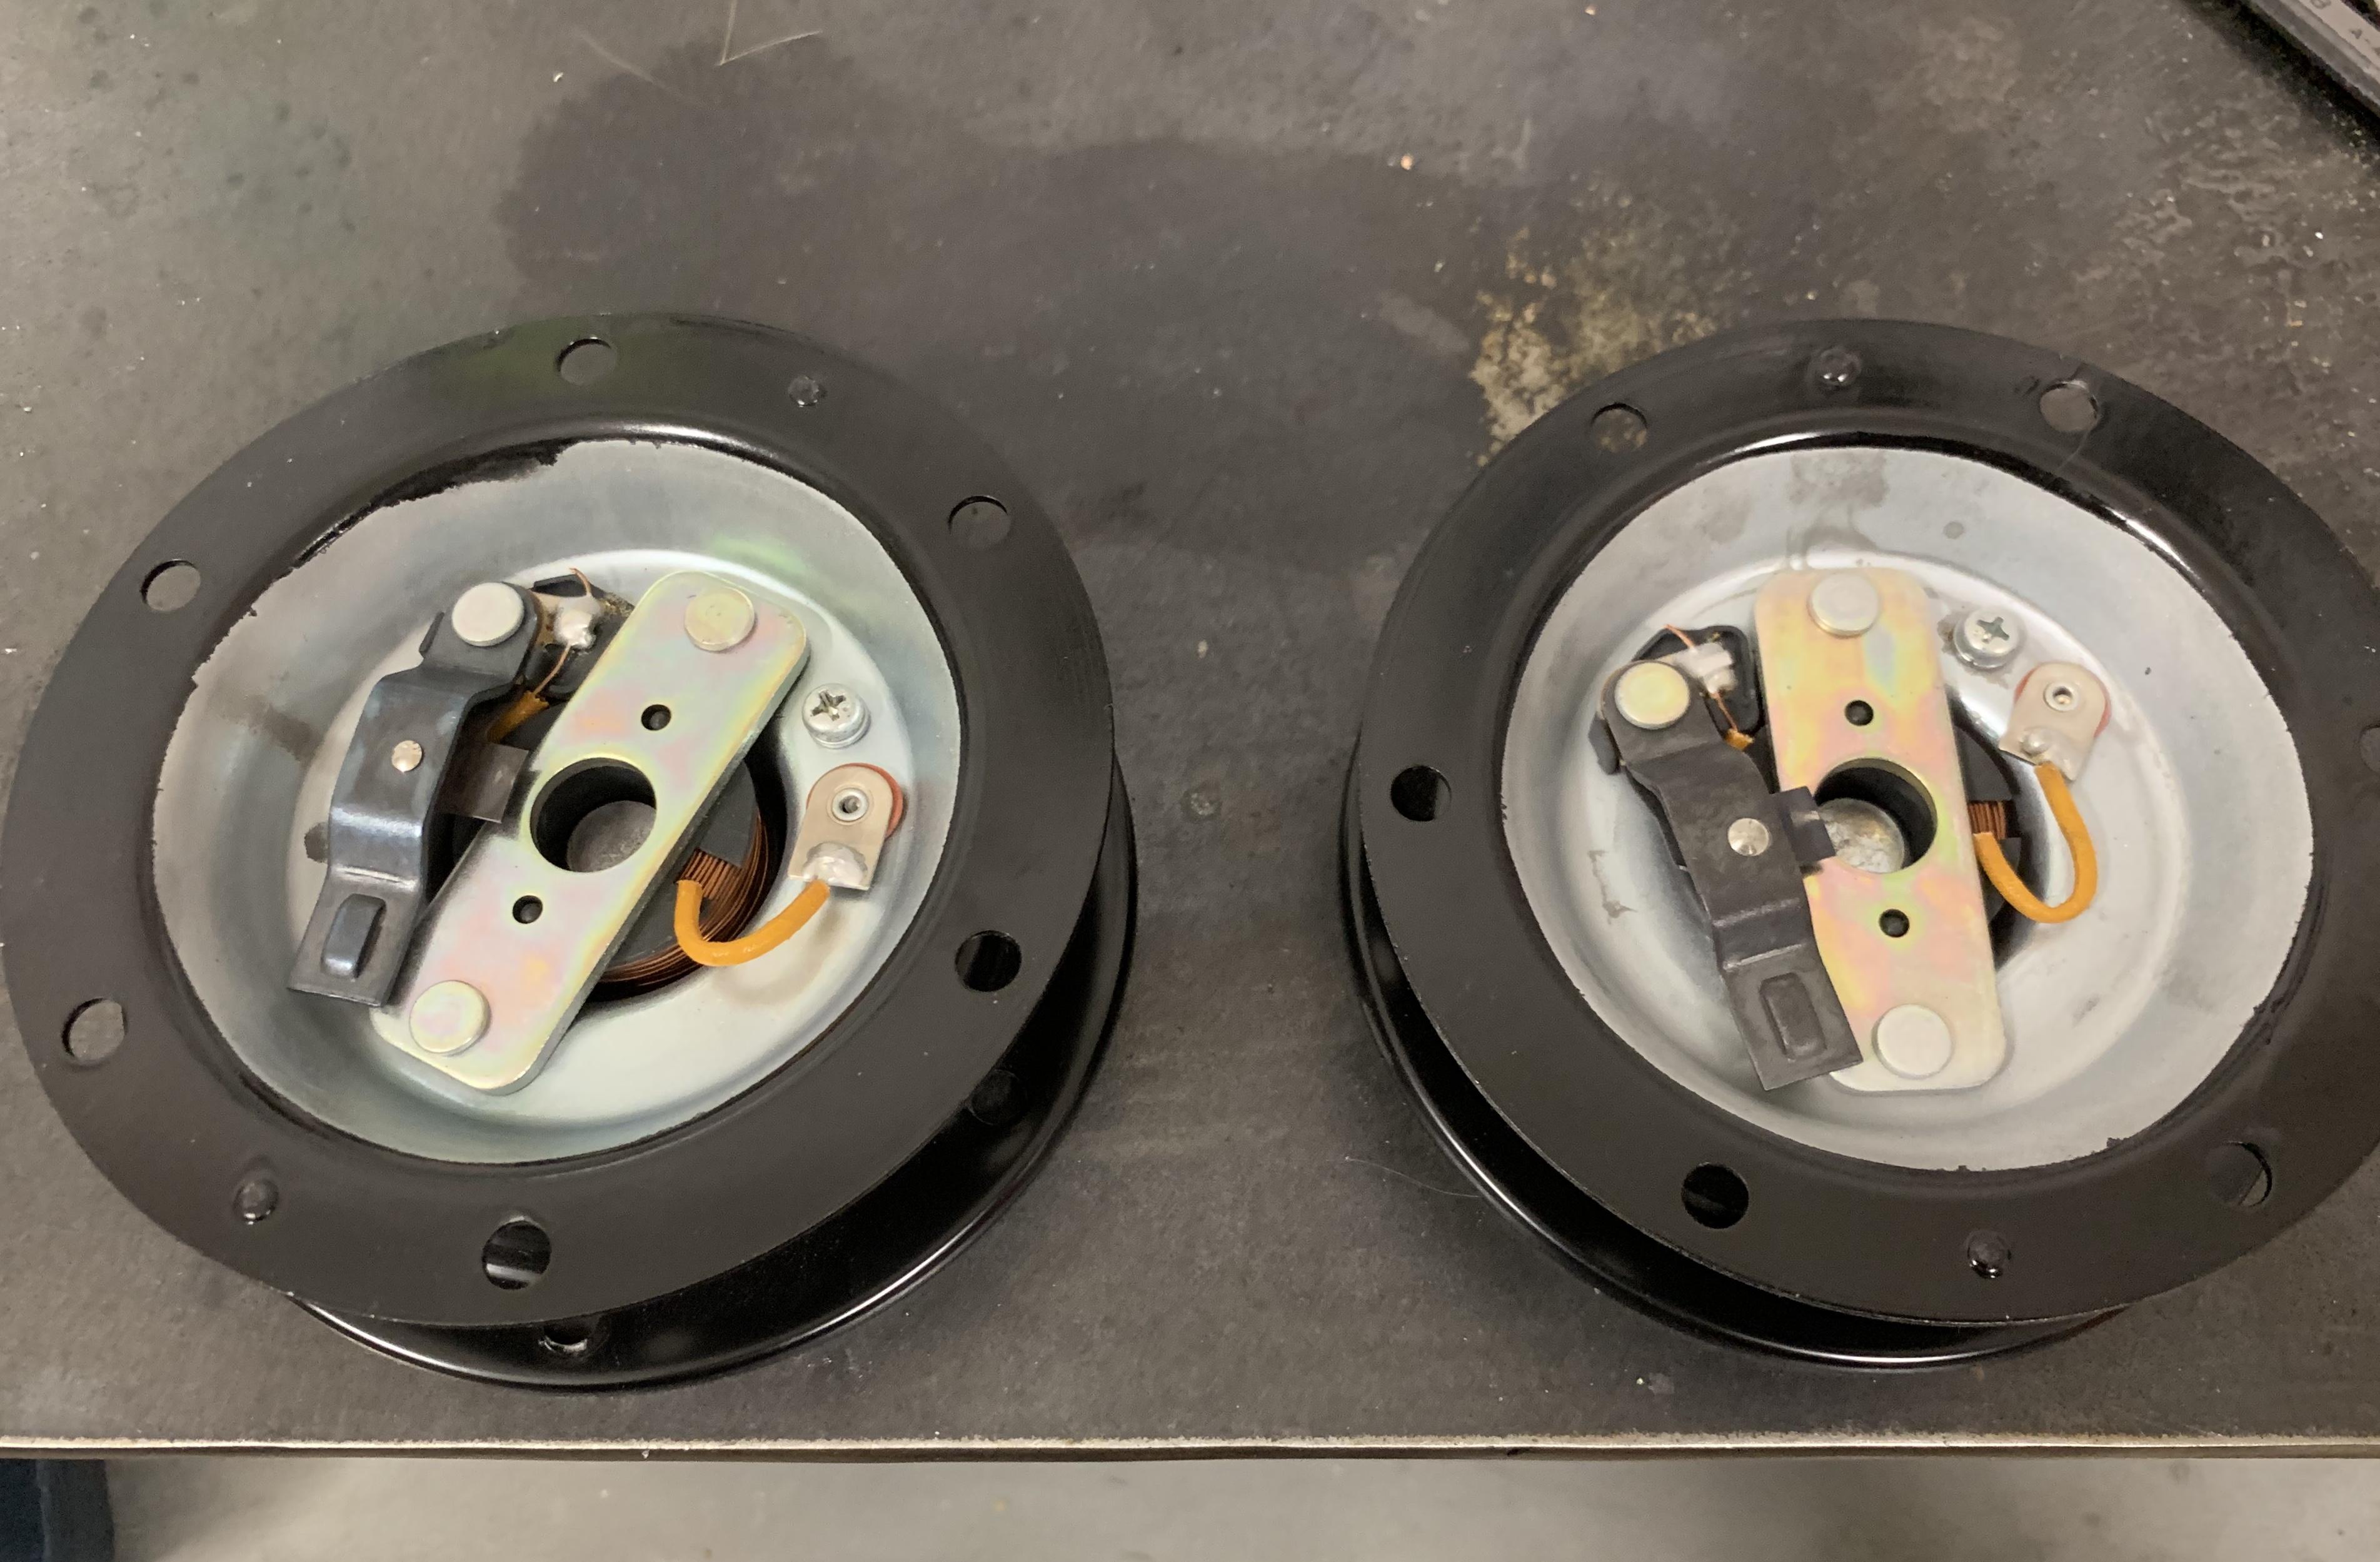
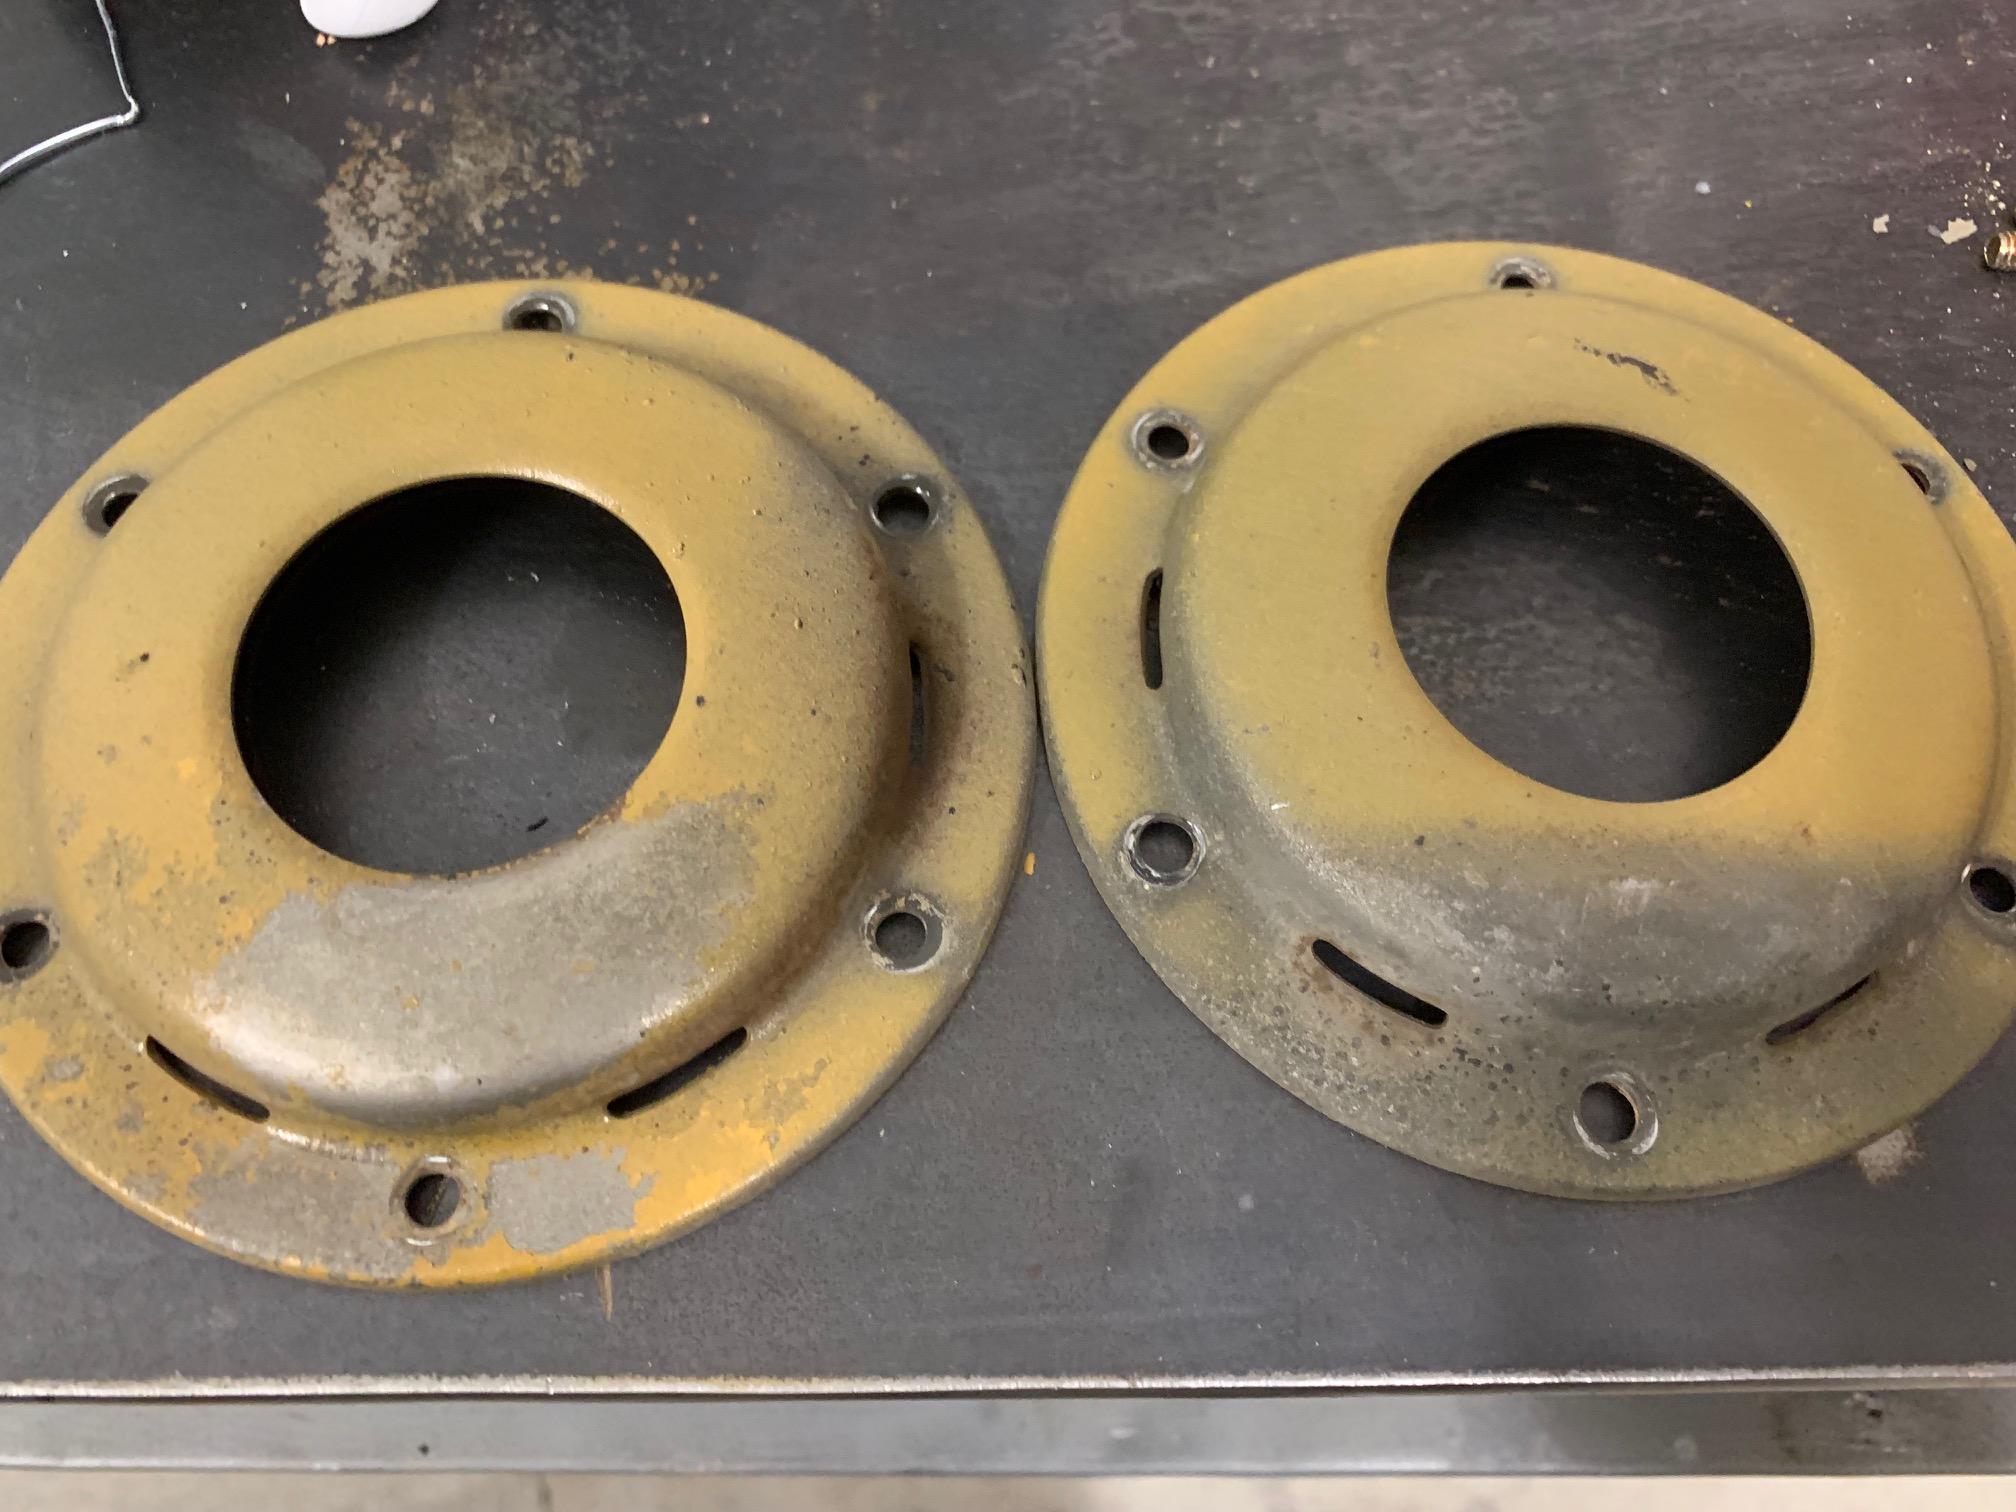
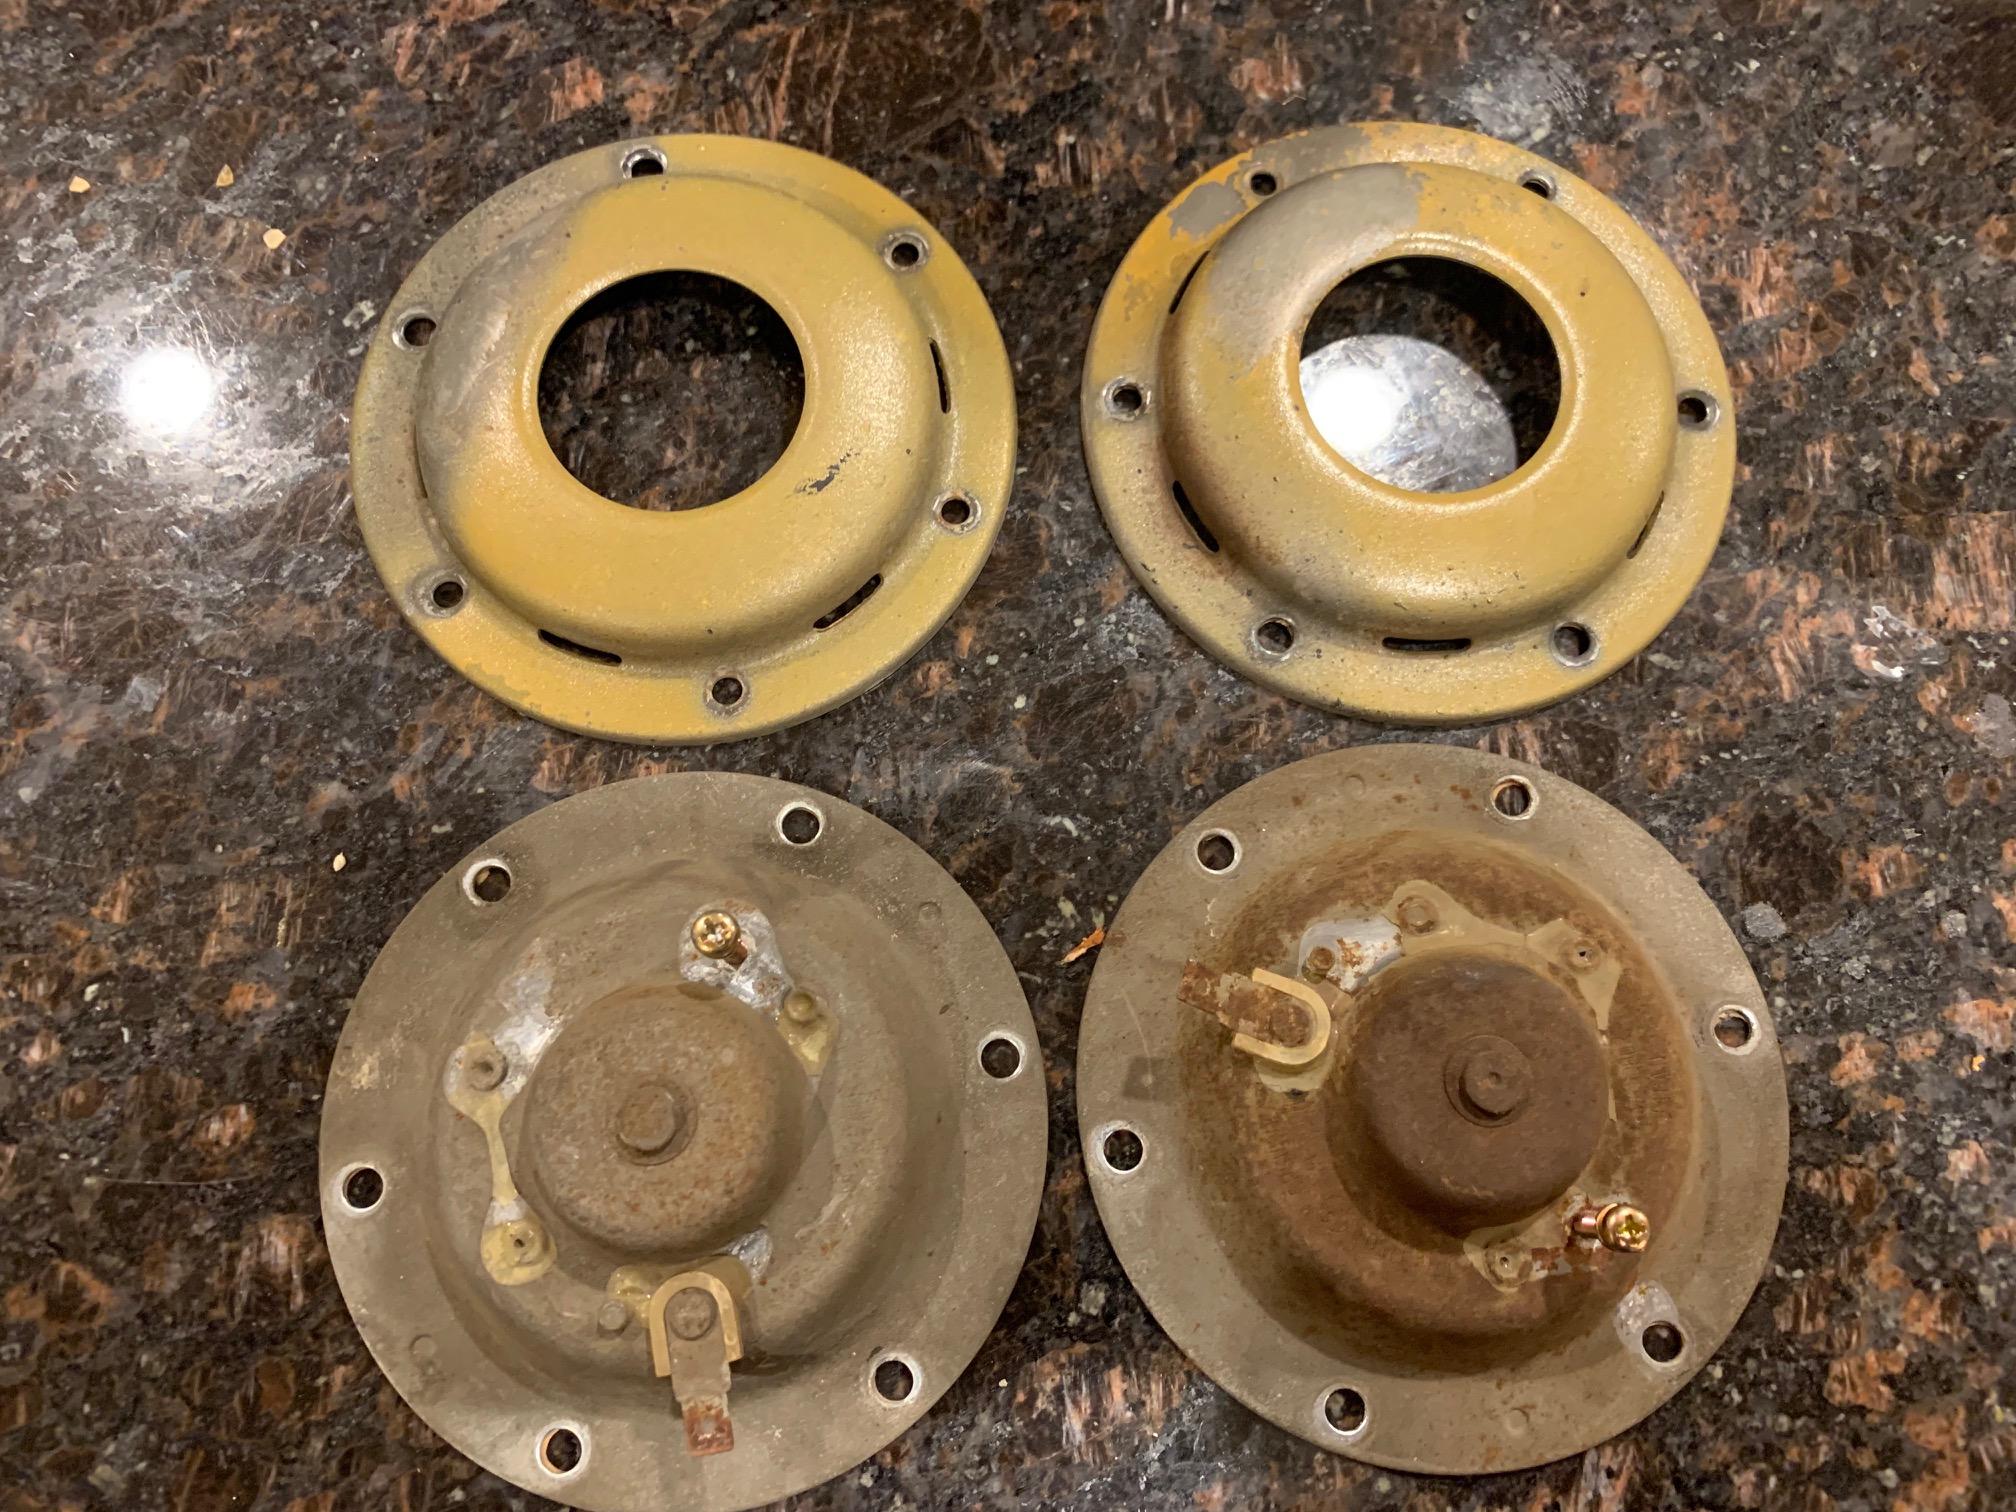
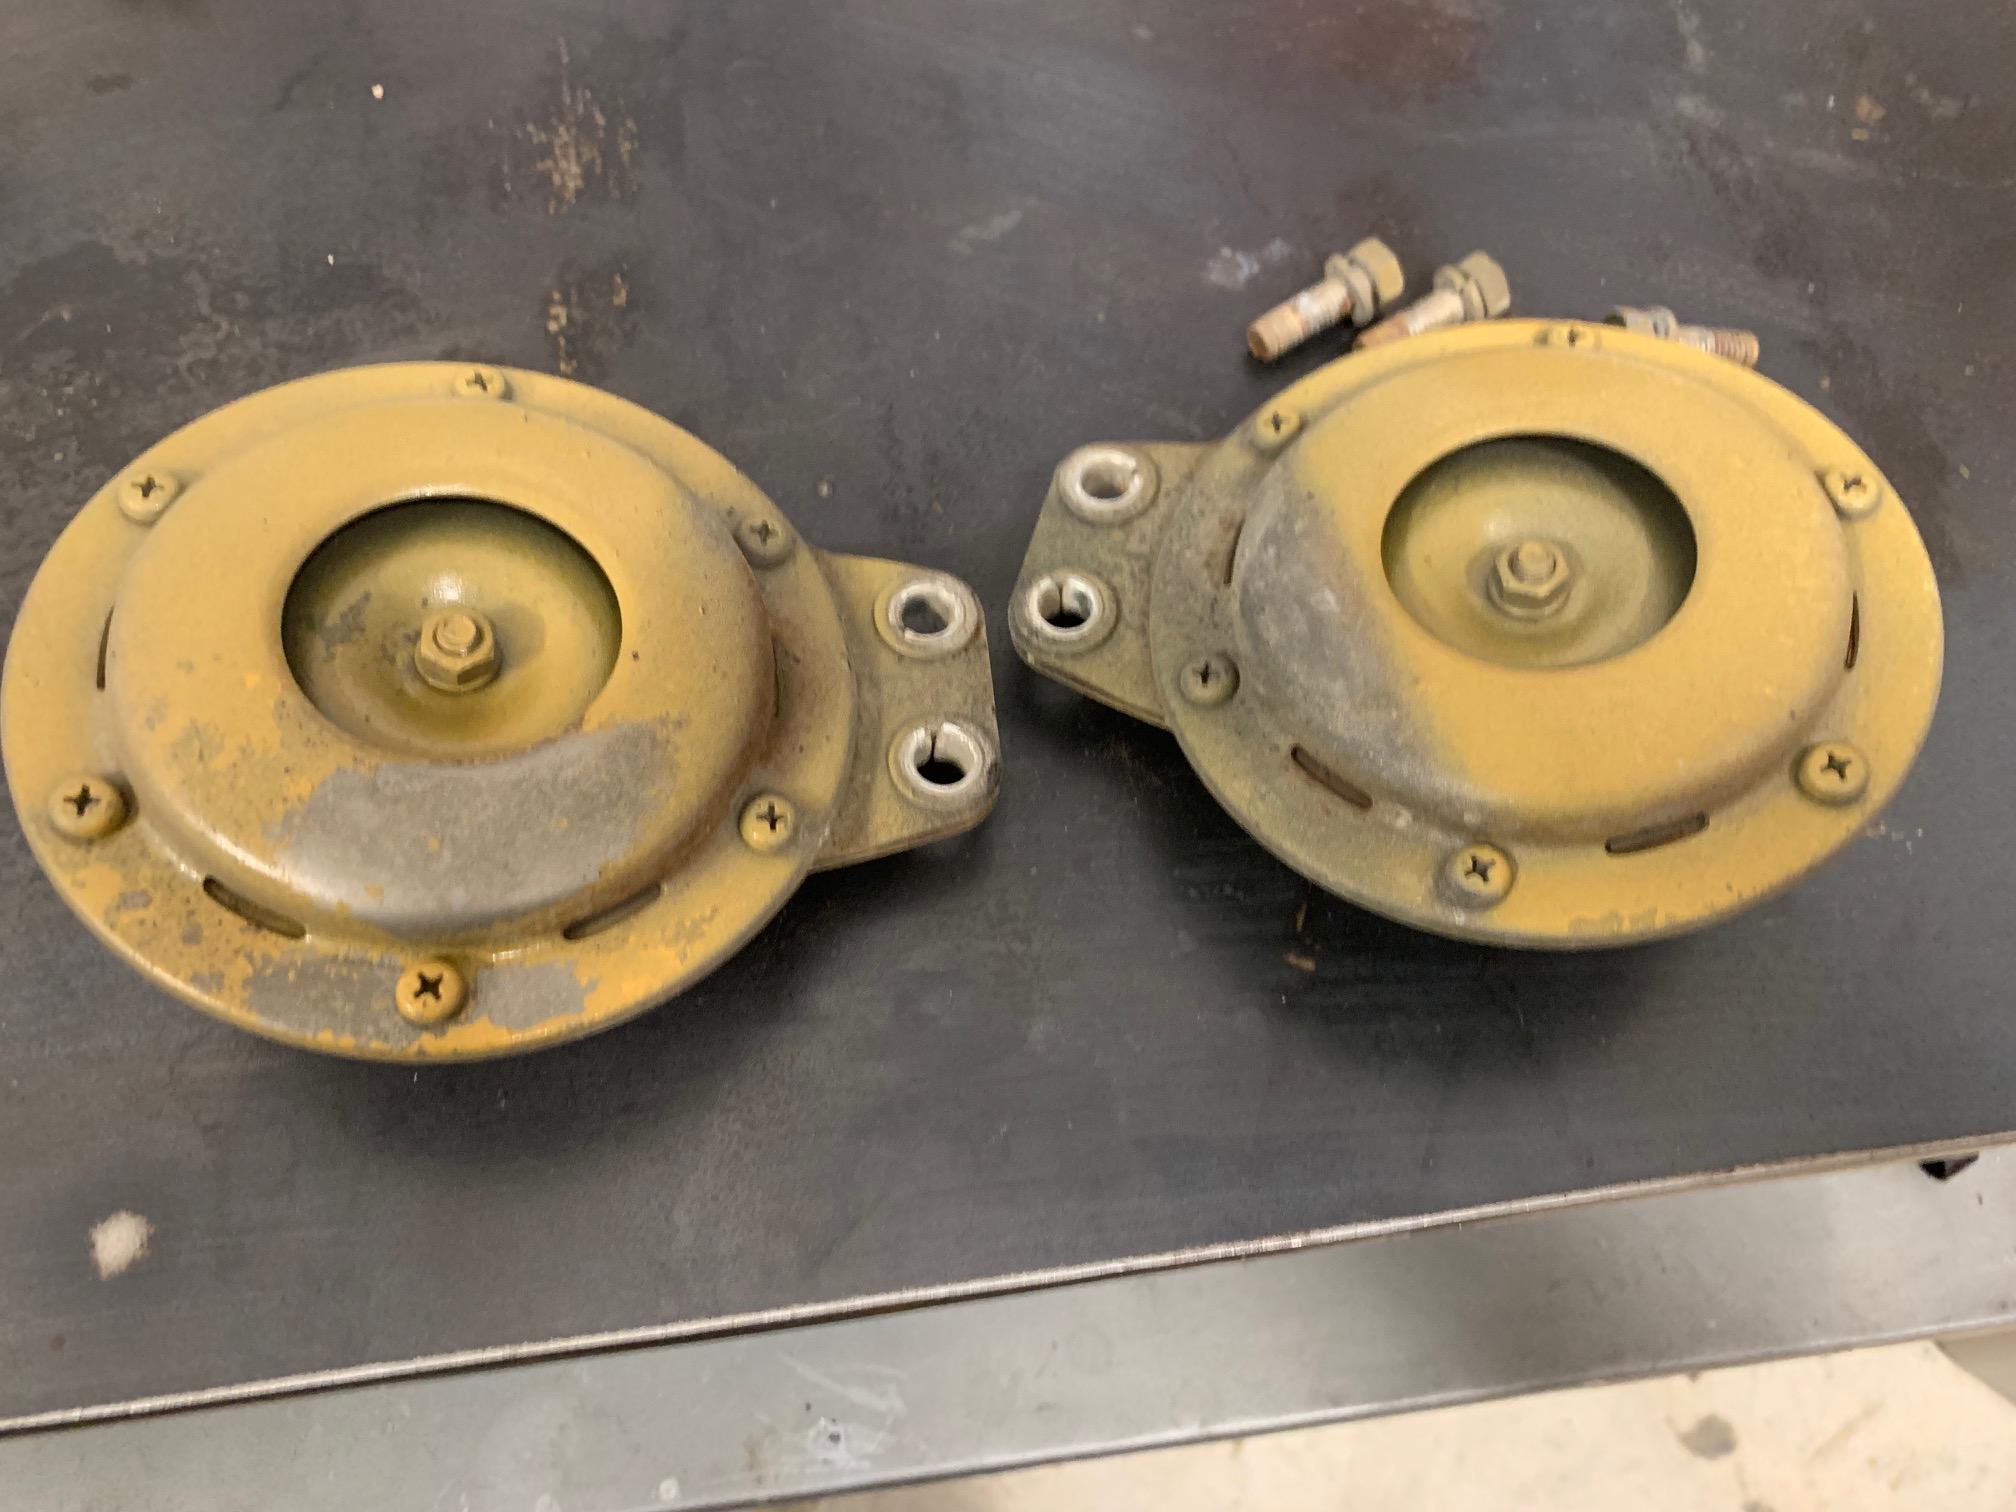
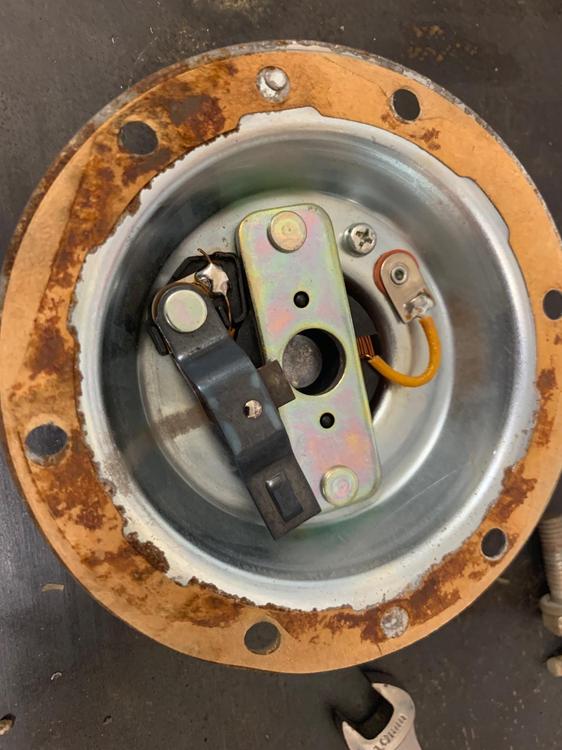
So I believe the horns came with green zinc on them. Or maybe part had no coating? I decided on powder coating the fronts in black, the backside of them has some deep pitting and I would rather not zinc them. Plus I think gold zinc in the front will look goofy. Then inner parts you see gold zinc. Then back with all the electronics will just need to be media blasted and a nice 2 part paint. I can't figure out a good way to take it apart.


-
Rebello has made 2- 3.5L motors to my knowledge. I don't know a lot about it. But I know he used the diesel block.
-
-
The block is not what is getting used for the 3.5L builds that Rebello is doing. It's worth some money.
-
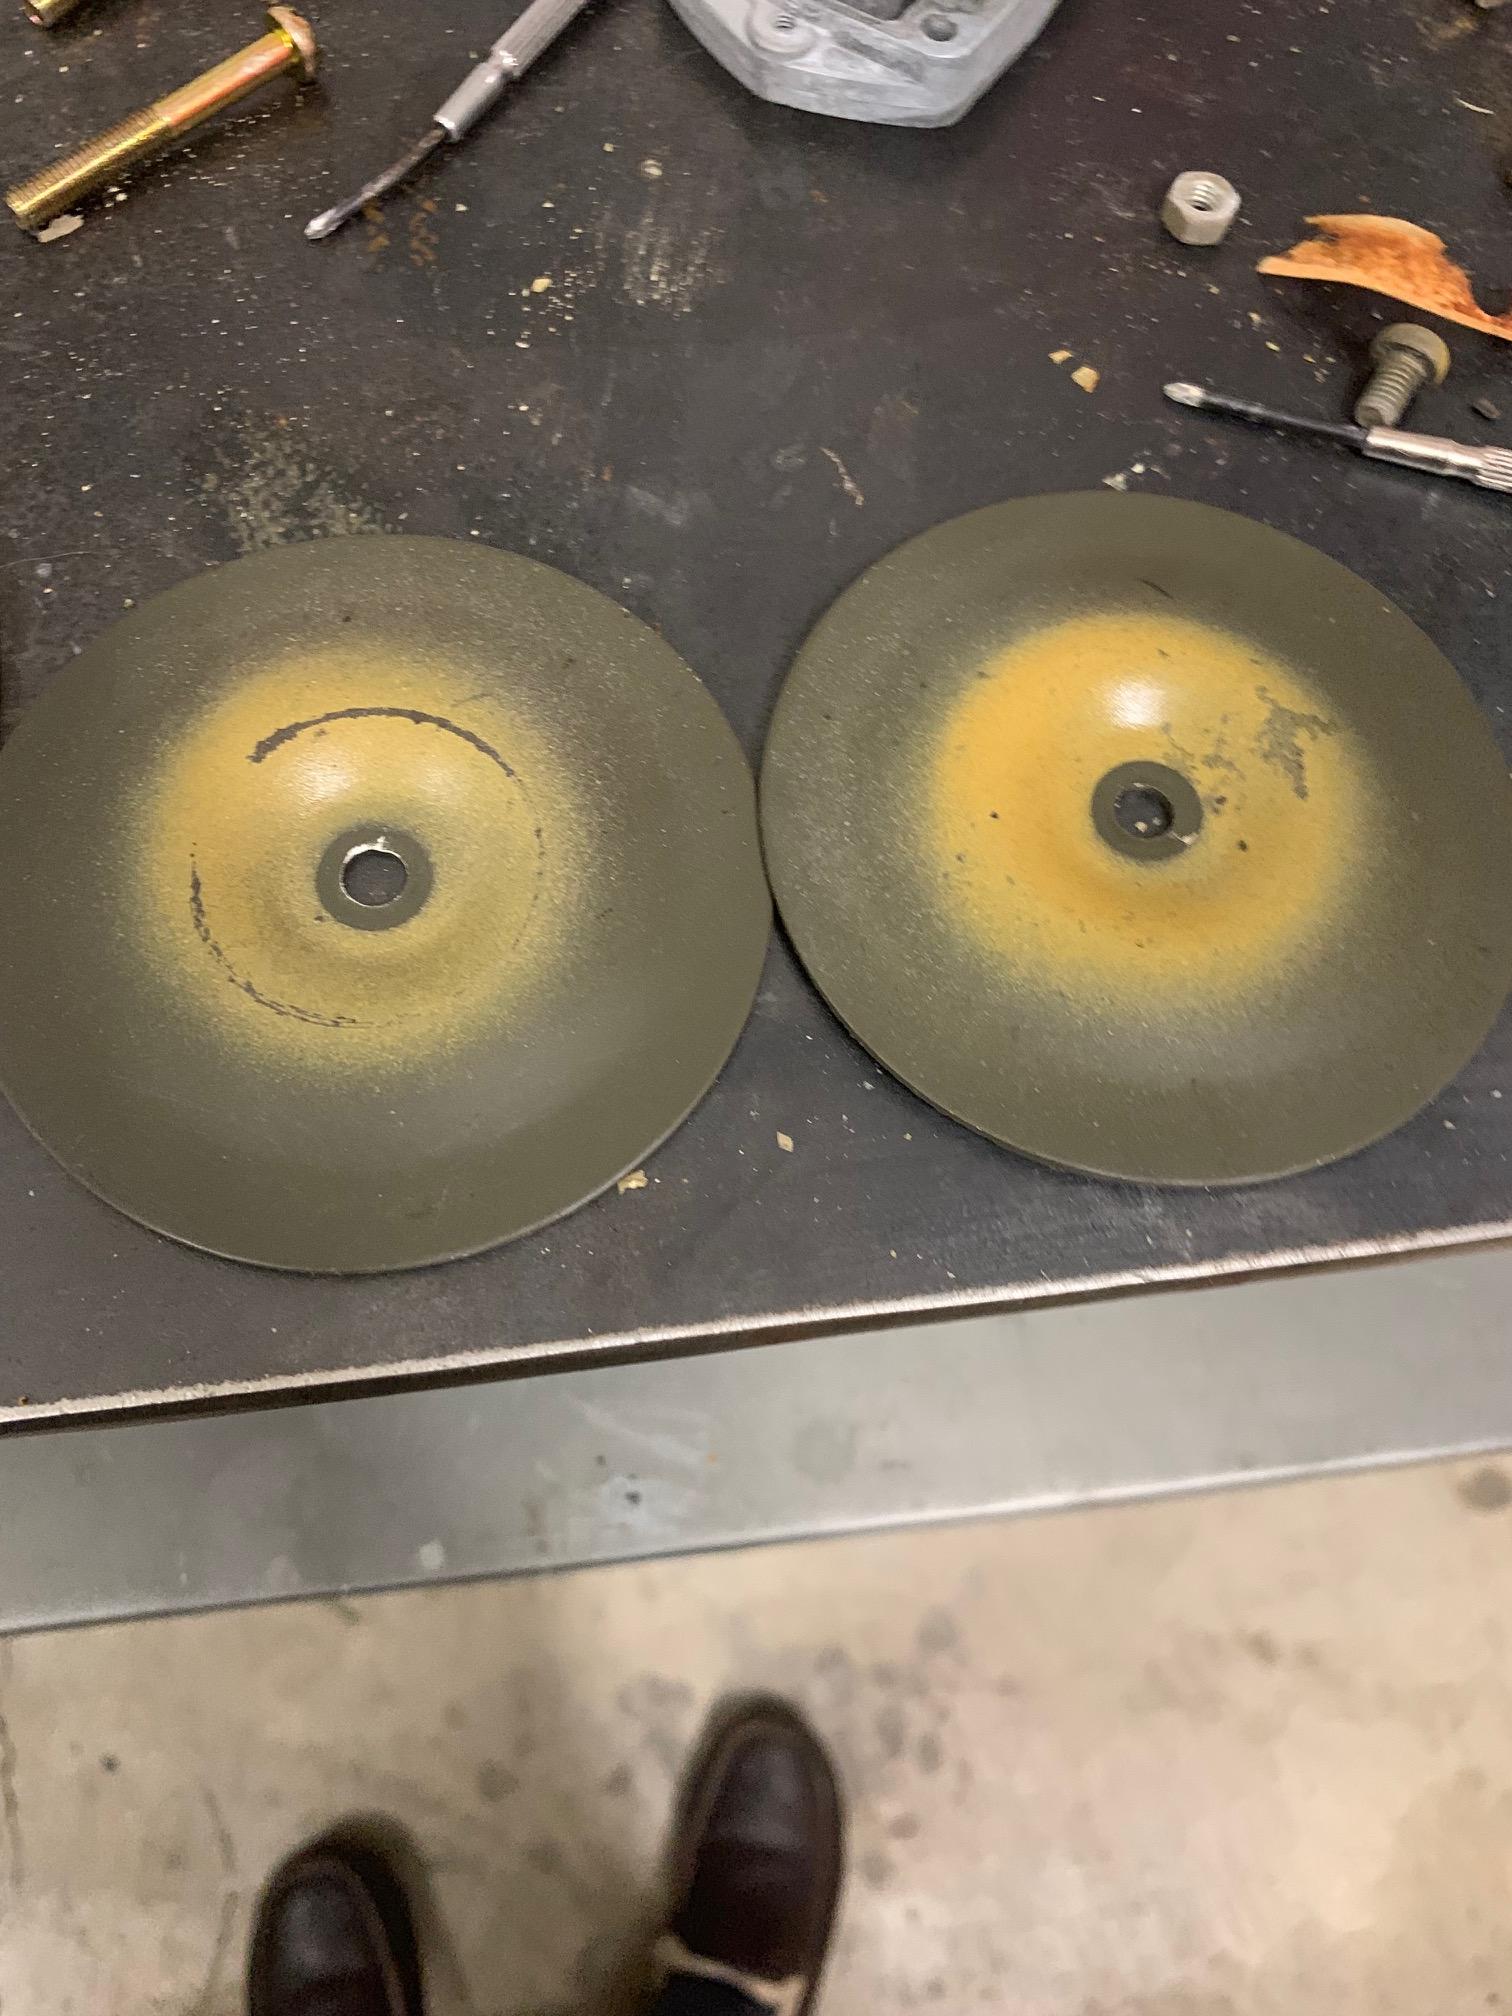
Ok, now onto my horns. I always hated how they look. Poor repray covering them. Interesting that the front of the horns looked to have been the dark green zinc. Then sometimes from the factory with some over spray. Same zinc as the seat sliders. ZedSaver does gold zinc. I am a little torn on what to do. Also how to take this fully apart to zinc? You can see in the blue z picture the green really showing through.


-
-
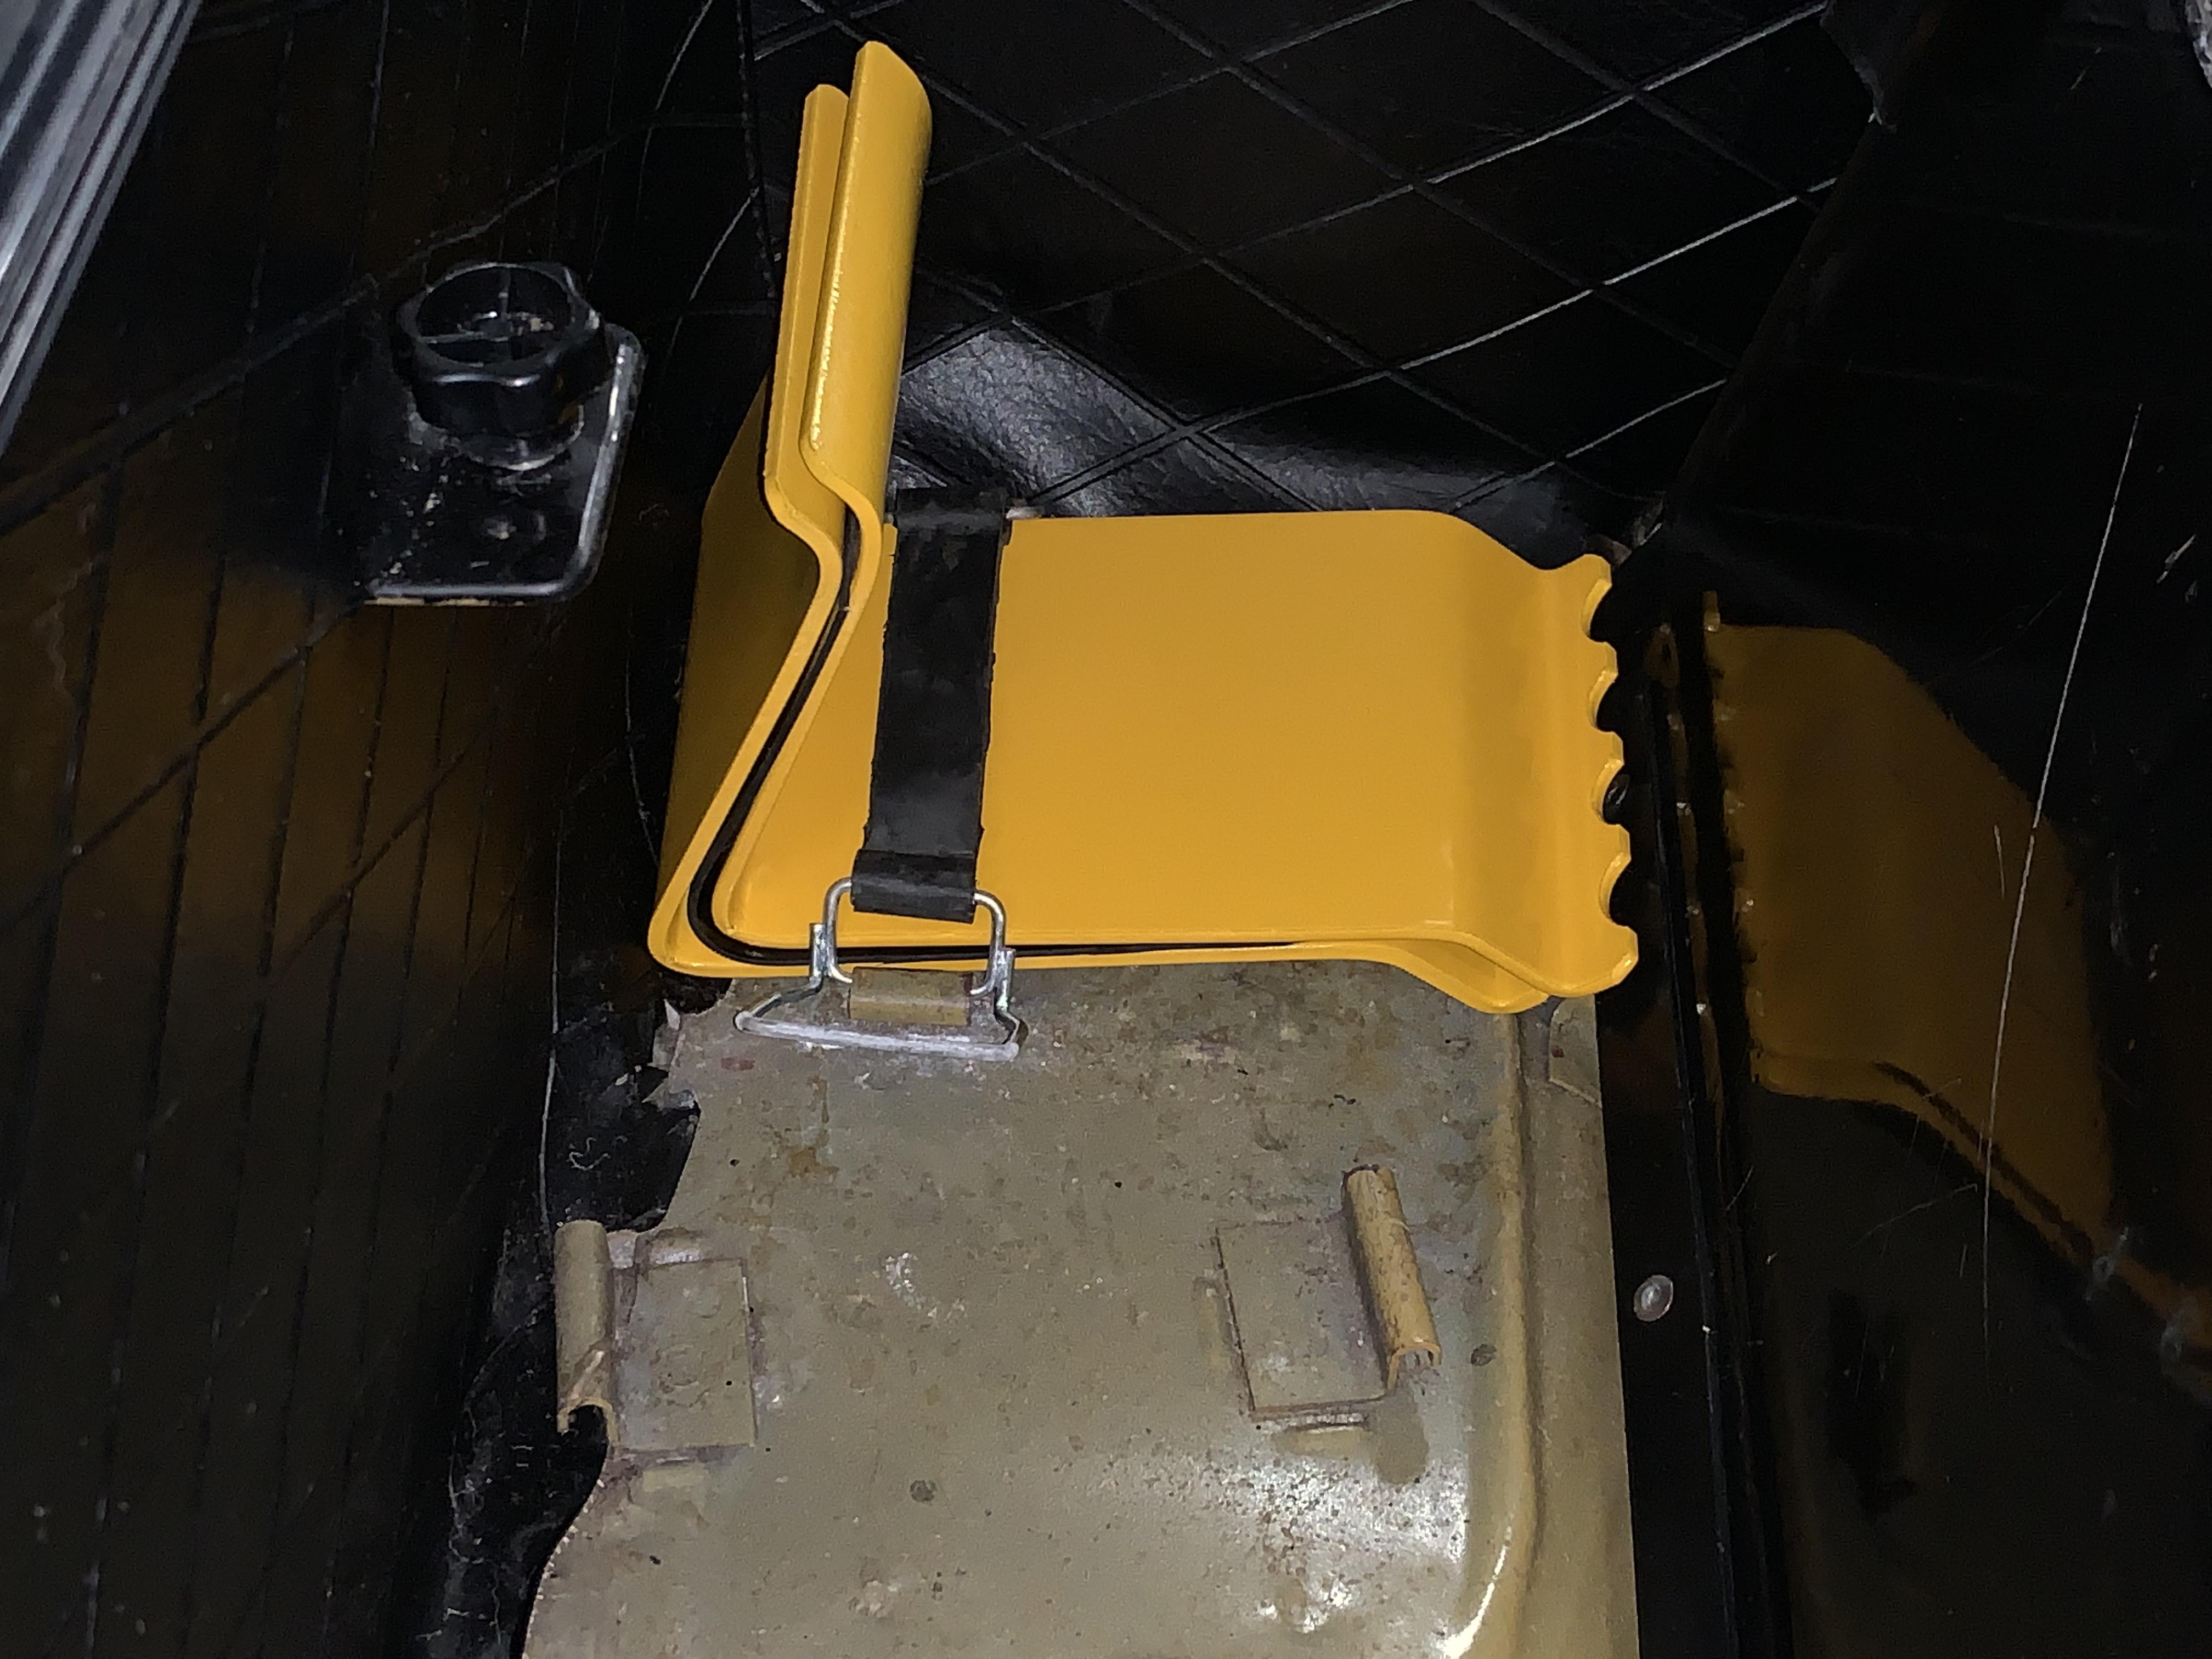
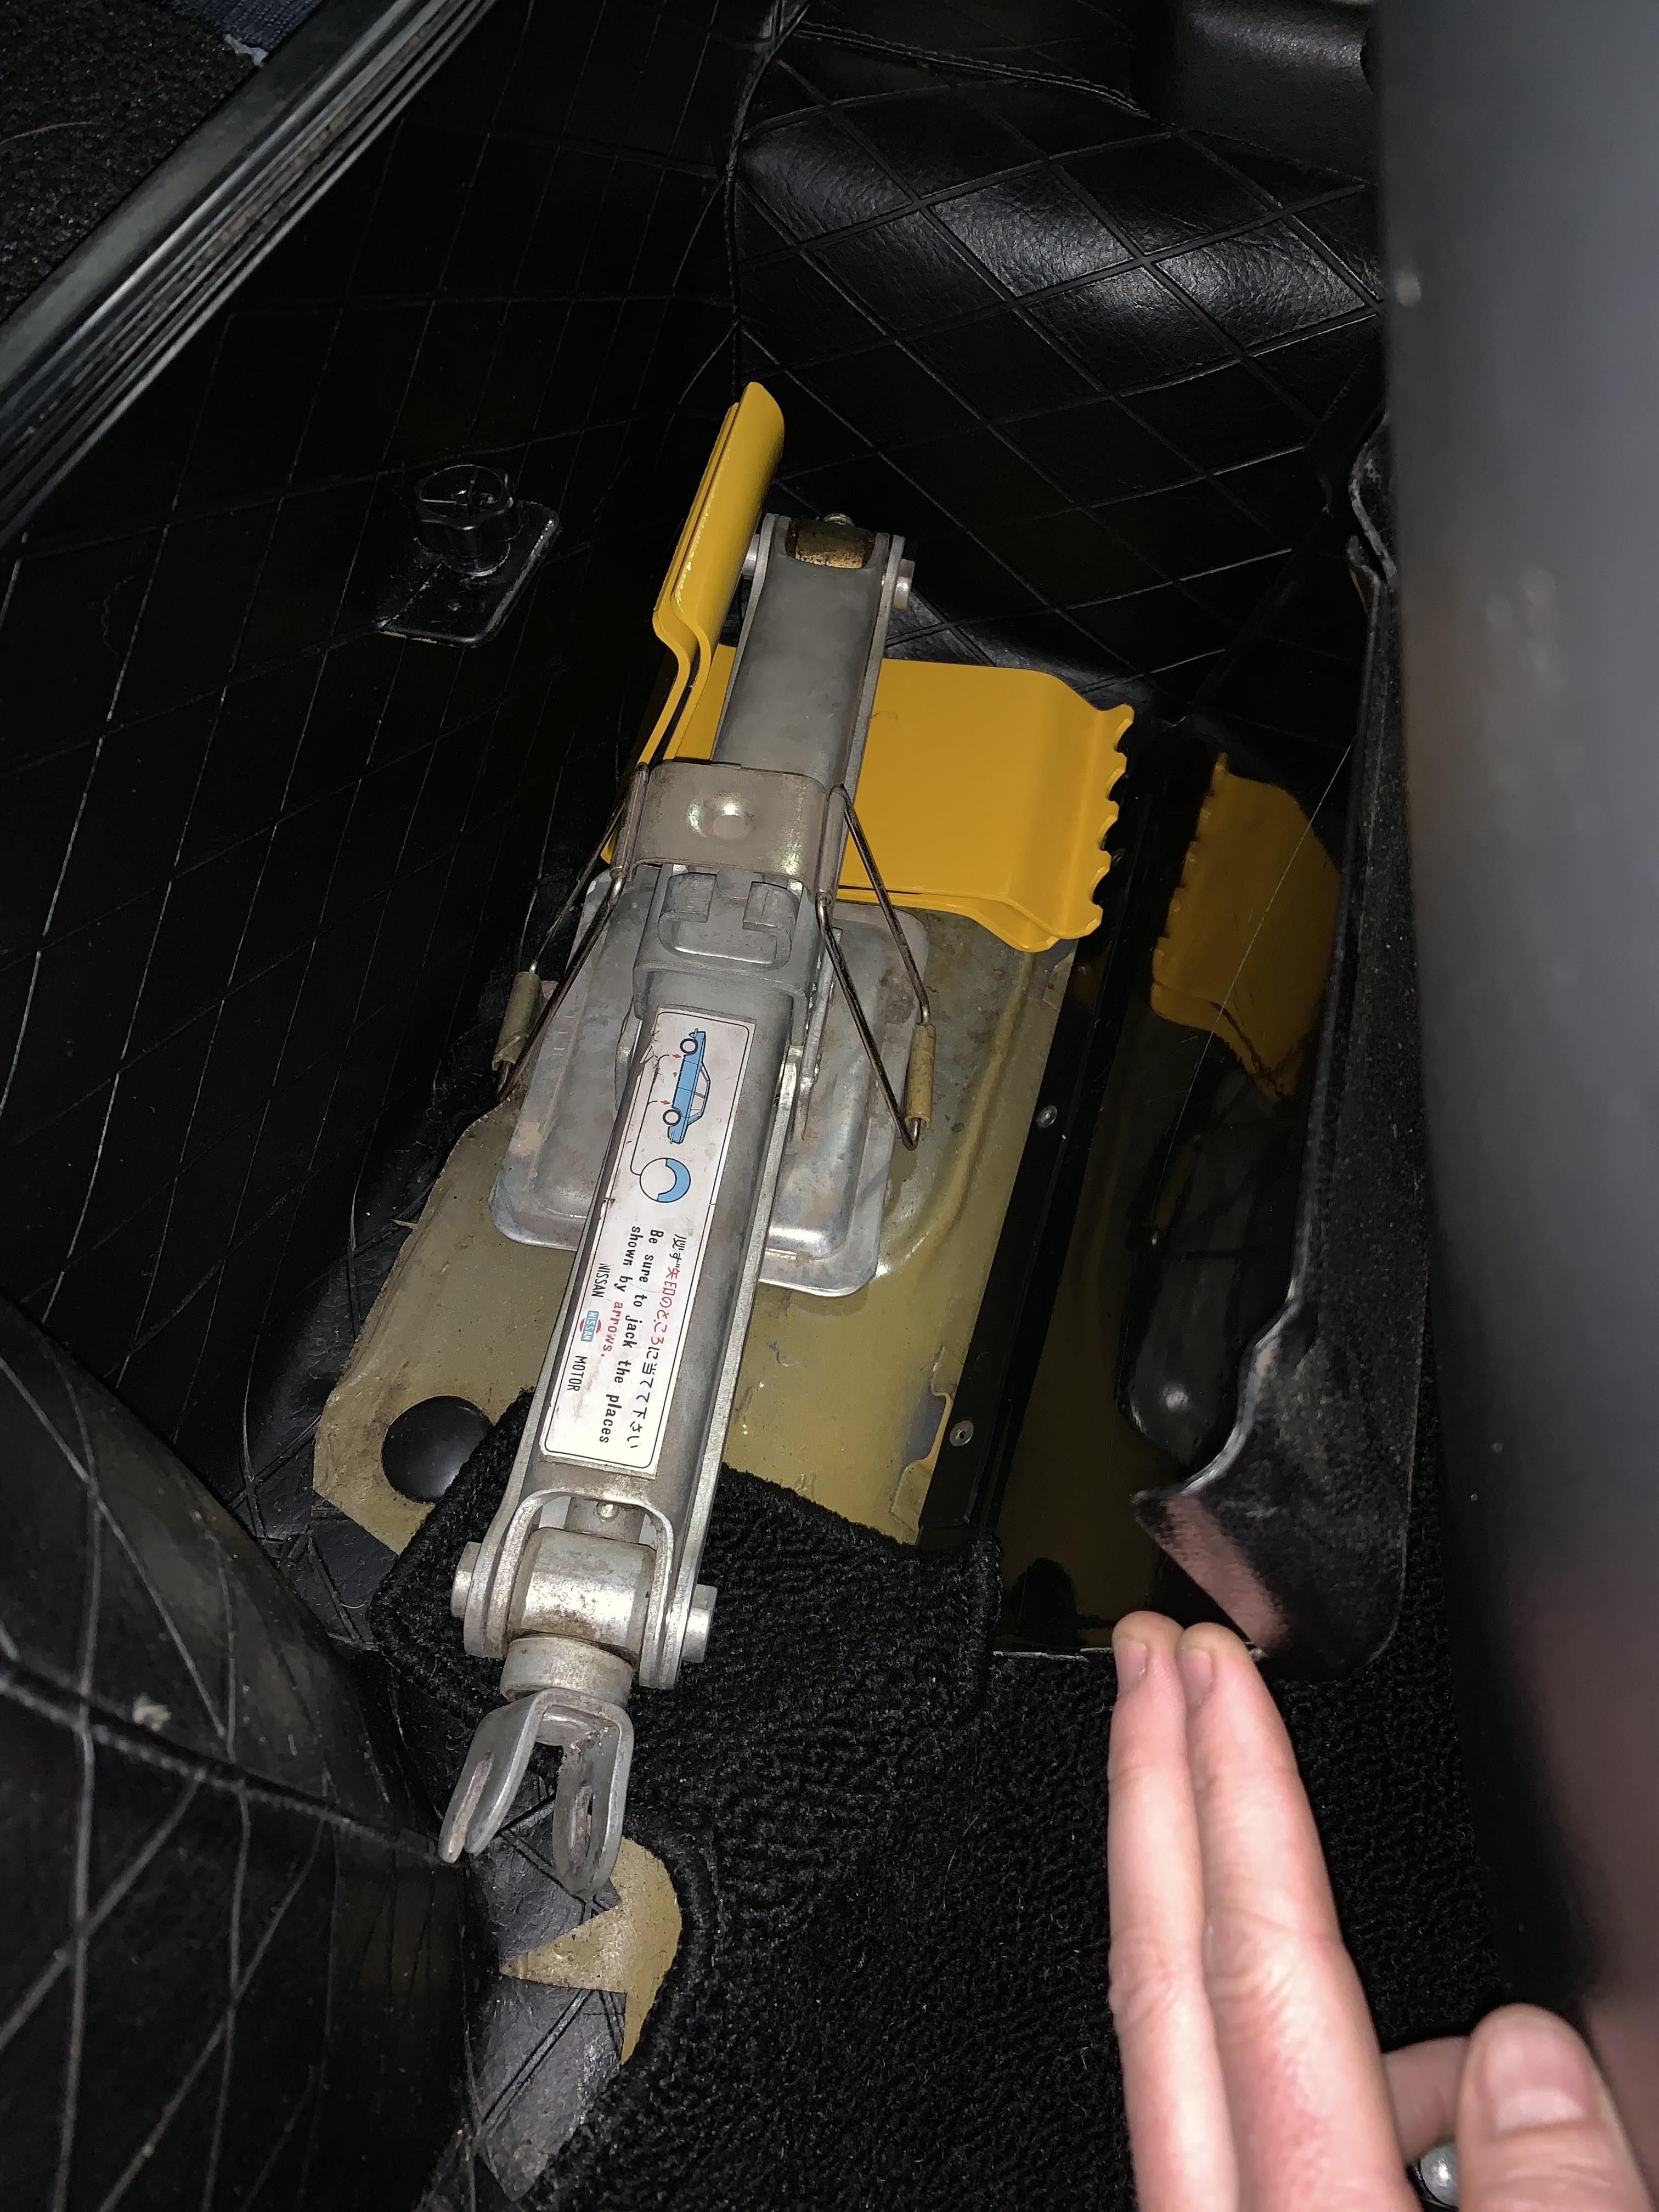
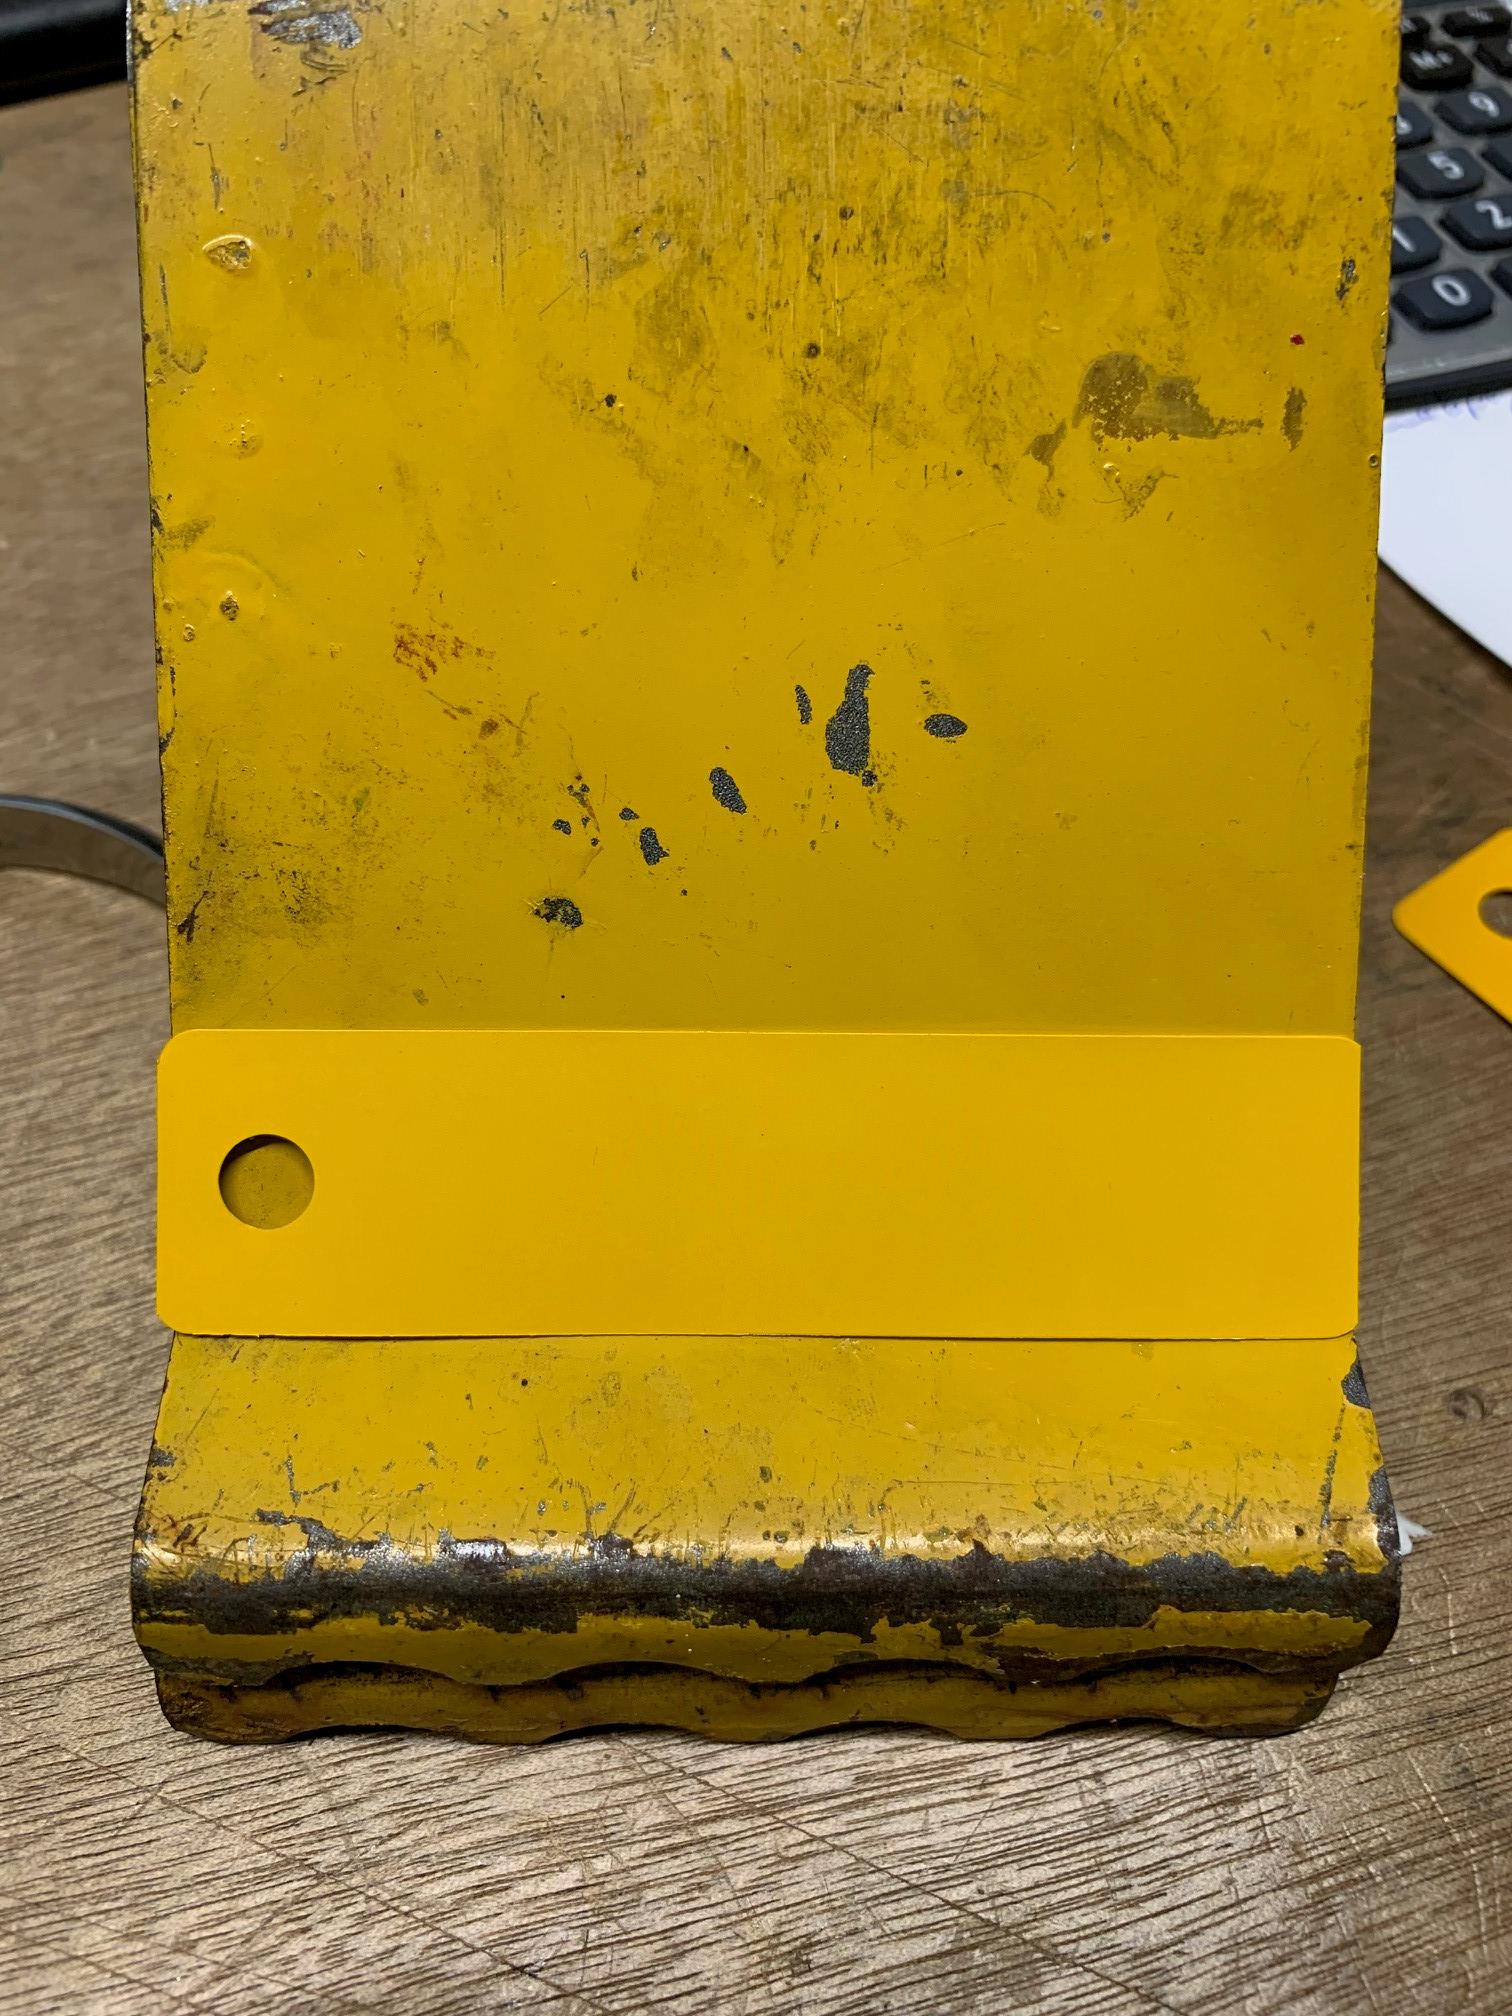
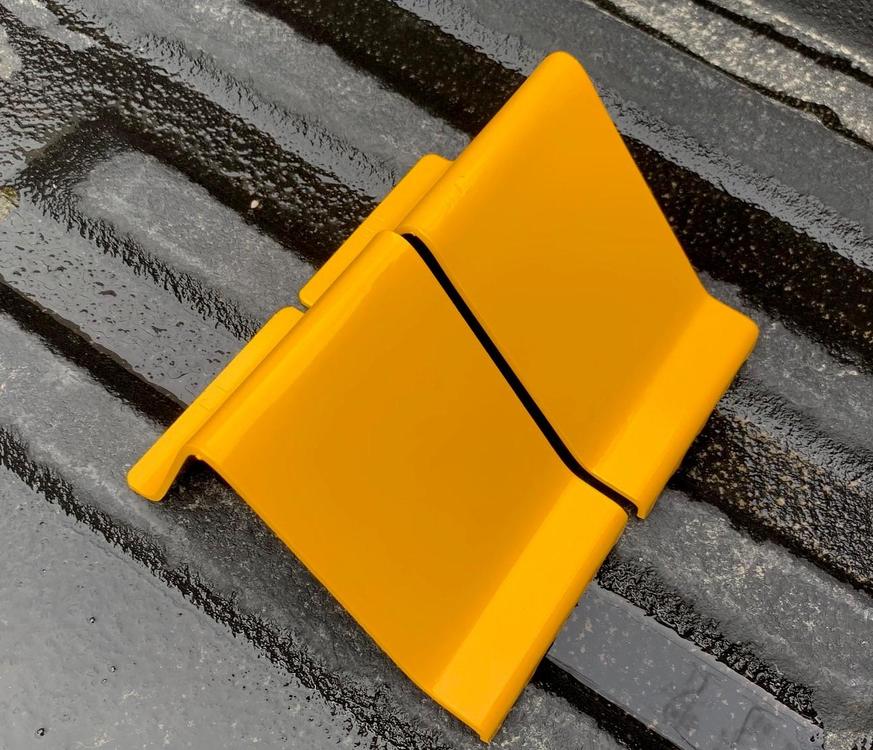
Finally found some series 1 wheel chocks. I sent off for around 30 yellow powder samples. I decided on 02 VETTE YELLOW by Prismatic powders. It was close, just slightly brighter, I think when new this would have been almost identical. First picture was taken indoors under terrible lighting. This finishes off my series 1 tool kit.

-
-
-
-
-
-
-
It's just a great color:)
-
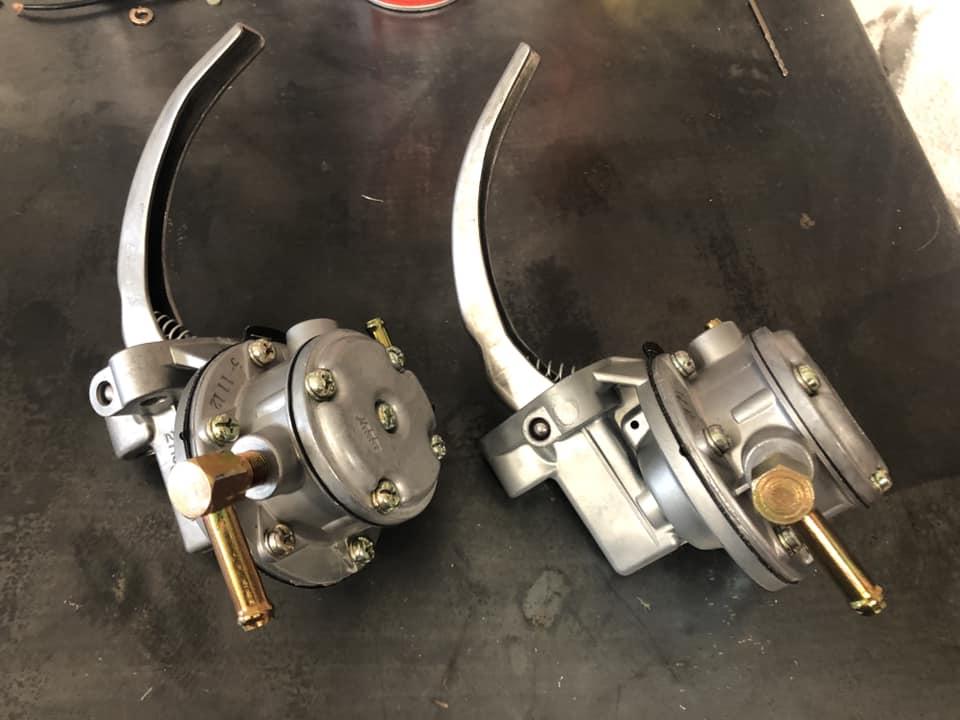
200$ shipped. Nikki 2.4, 2.6 and 2.8 fuel pumps. Most of the parts are Nos. All internals are new. Only issue is the zinc on the hose barbs don’t perfectly match the screws. Base that attaches to the block and hose barbs are the only parts not NOS. PM me.
.jpg.3022cc8156fb0304cce63a240f534e2e.jpg)
-
A few z builds I follow on instagram have them. They look pretty sweet. I hope they do OER/ Mikuni copies as well.
-
-
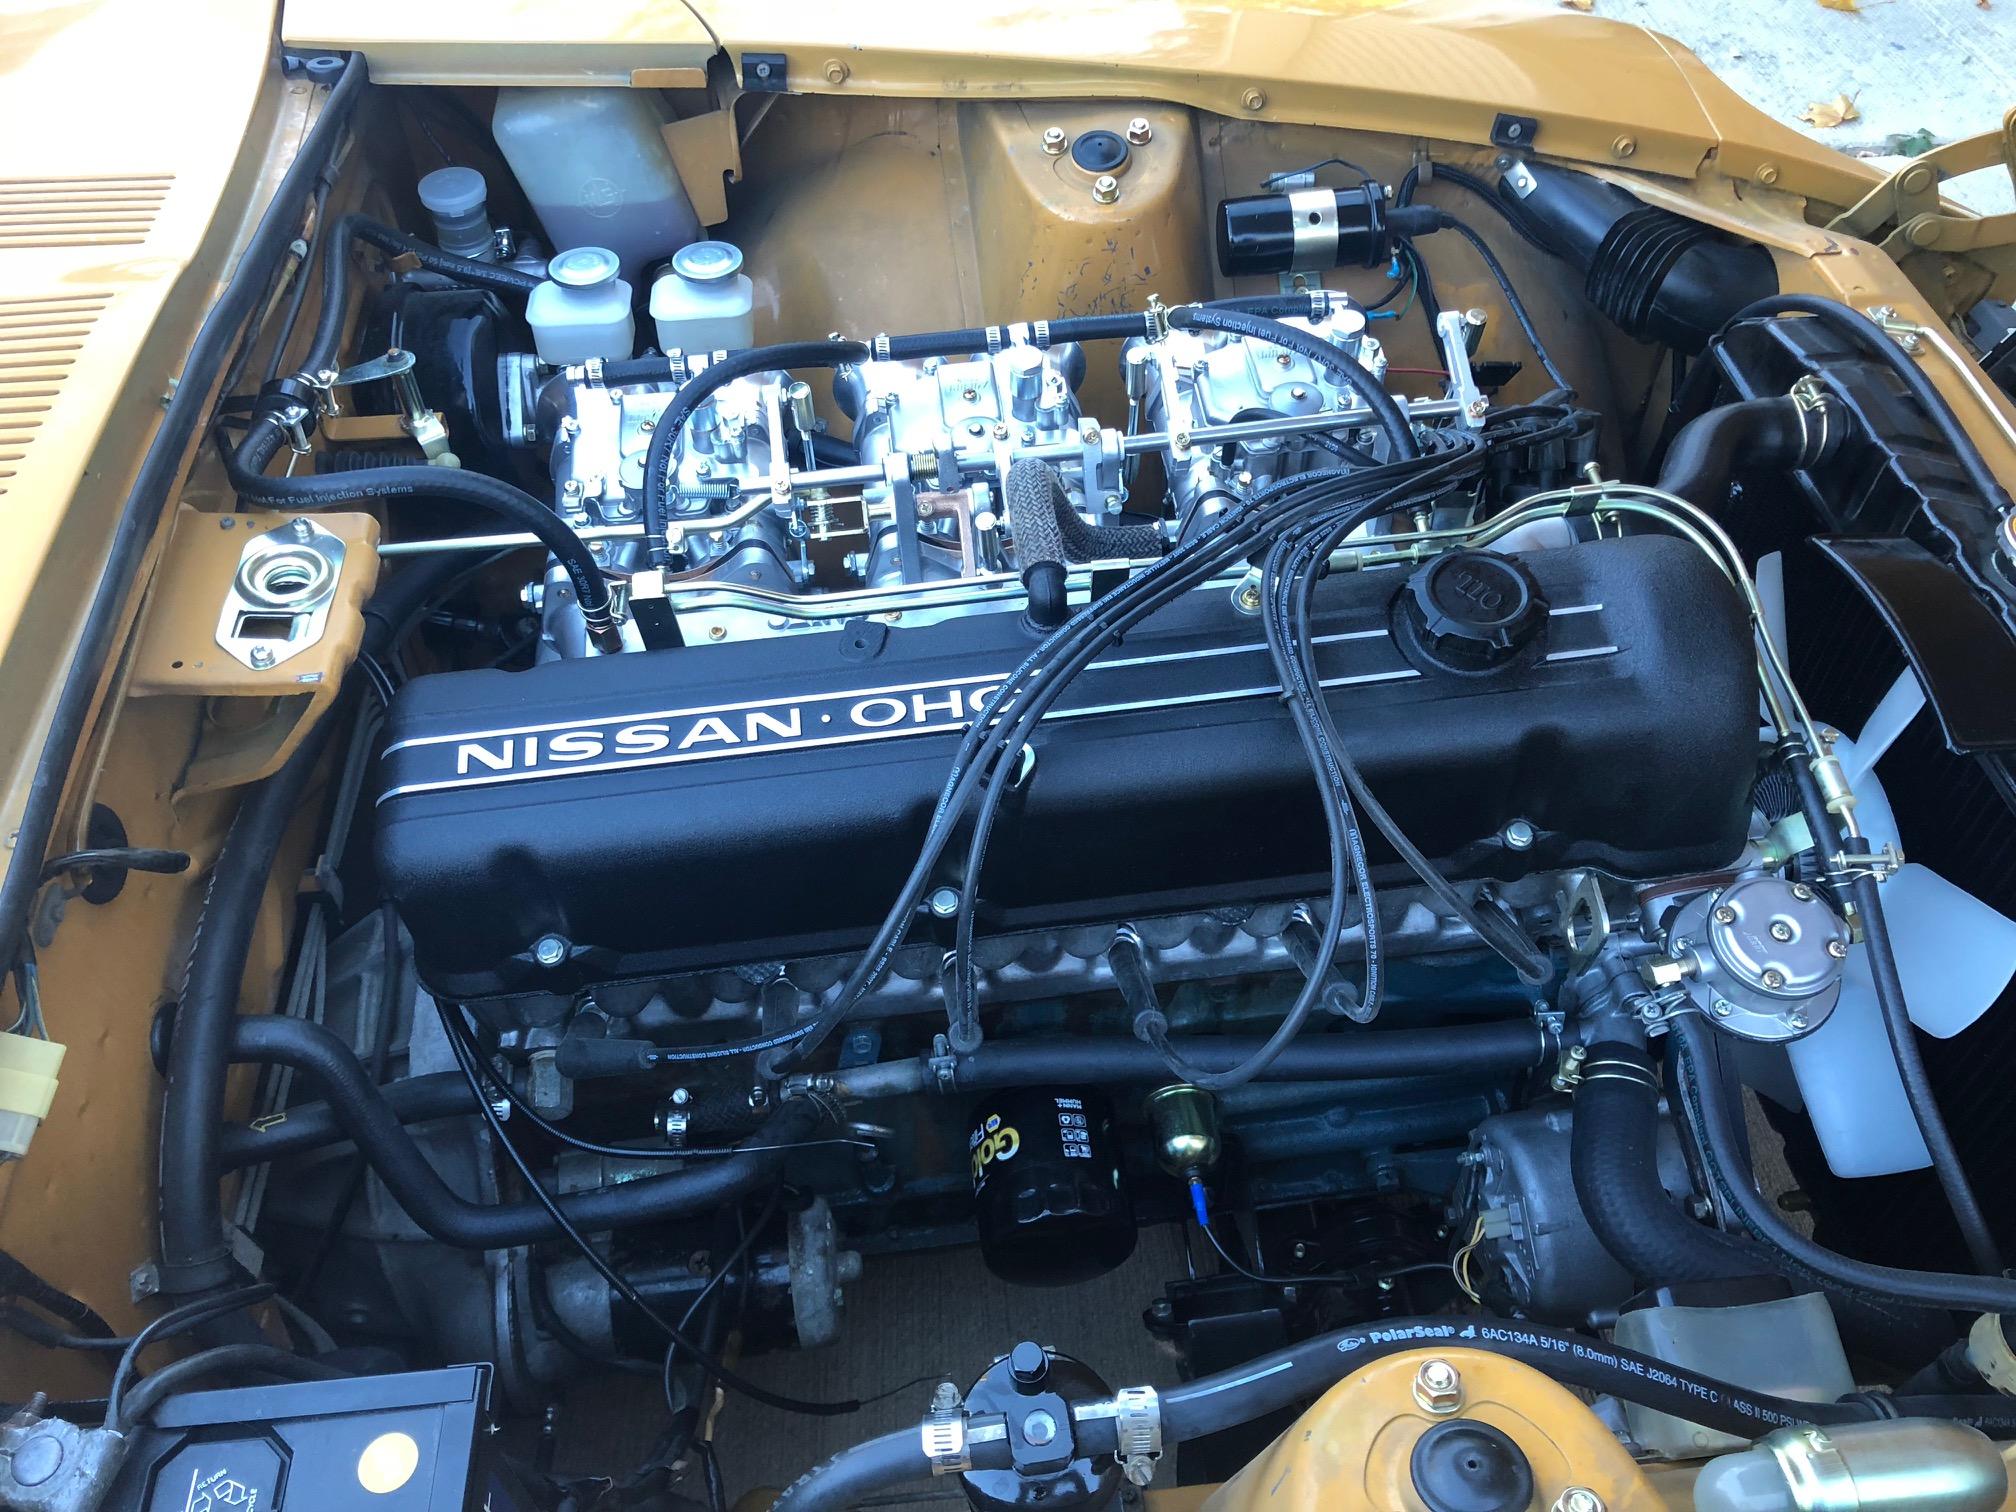
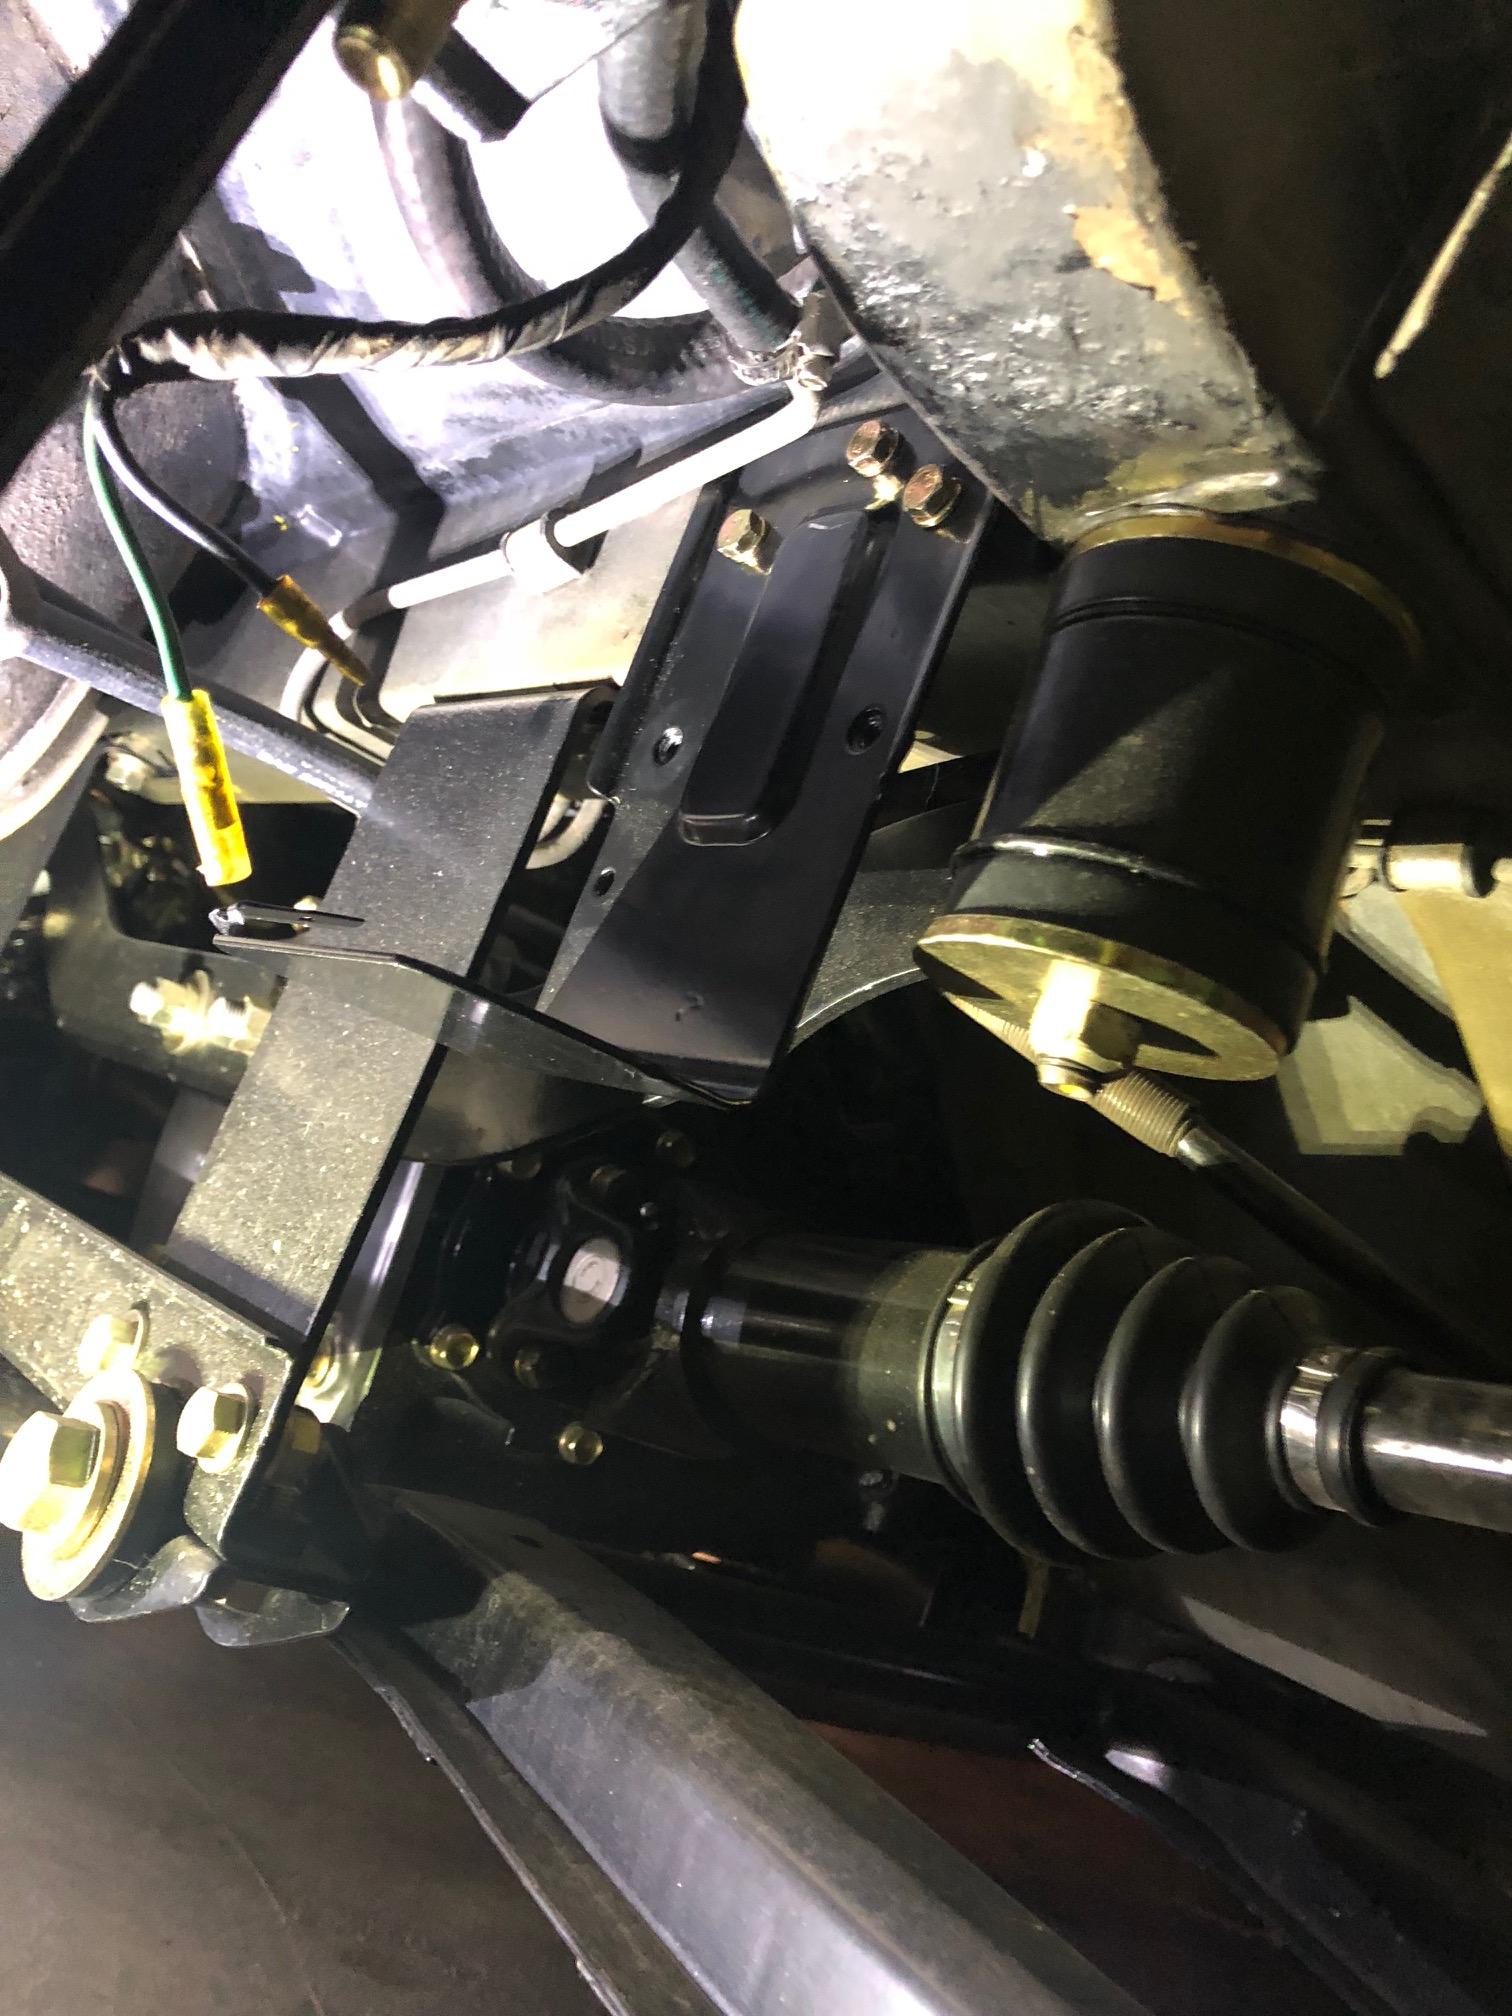
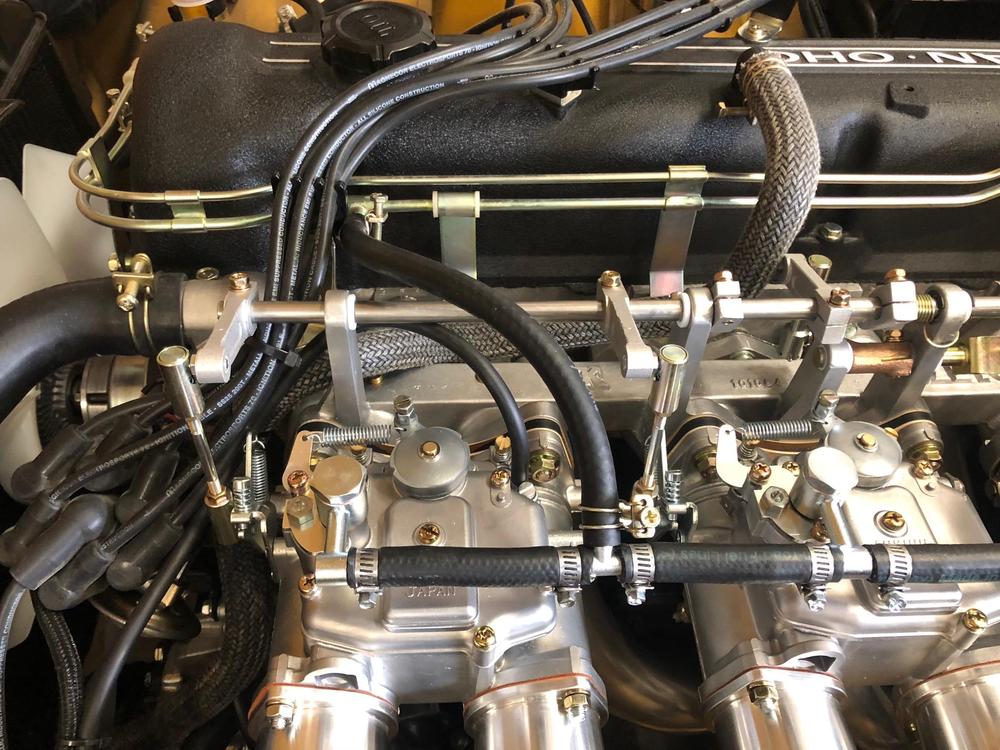
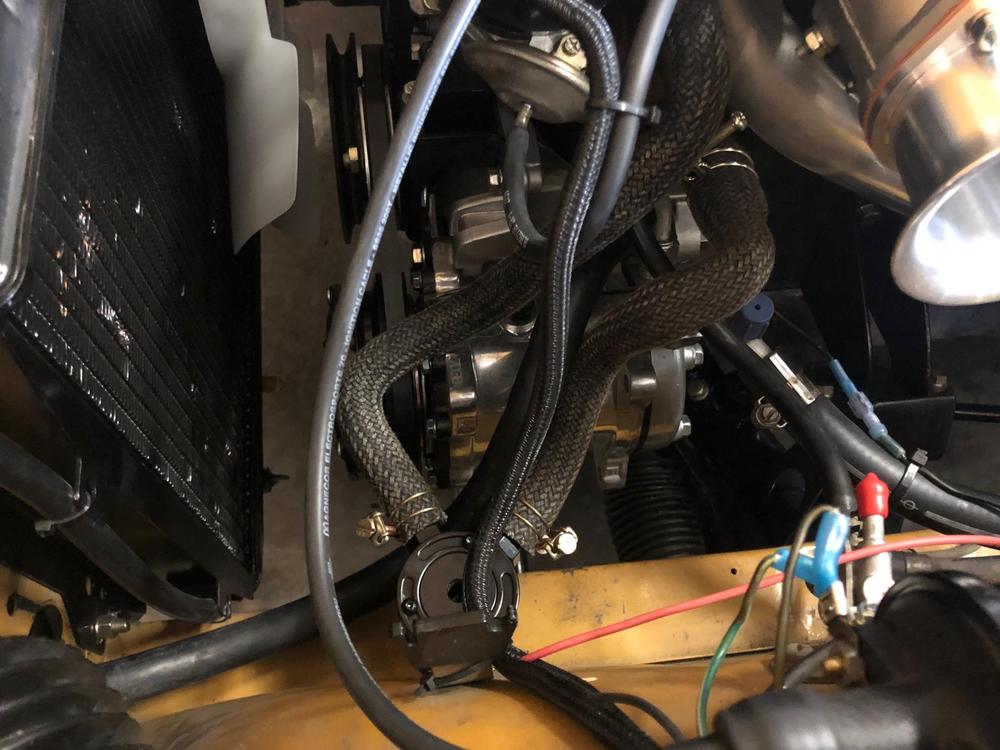
Oil catch can is done (some ebay smaller aluminum one). Time to drive it! The goal was stock looking as possible, also no holes drilled. This is two pvc hoses spliced together with a 5/8 brass union, the pre- bends worked awesome and looks like I meant it to happen. Catch can has a nice little drain on the bottom.

-
-
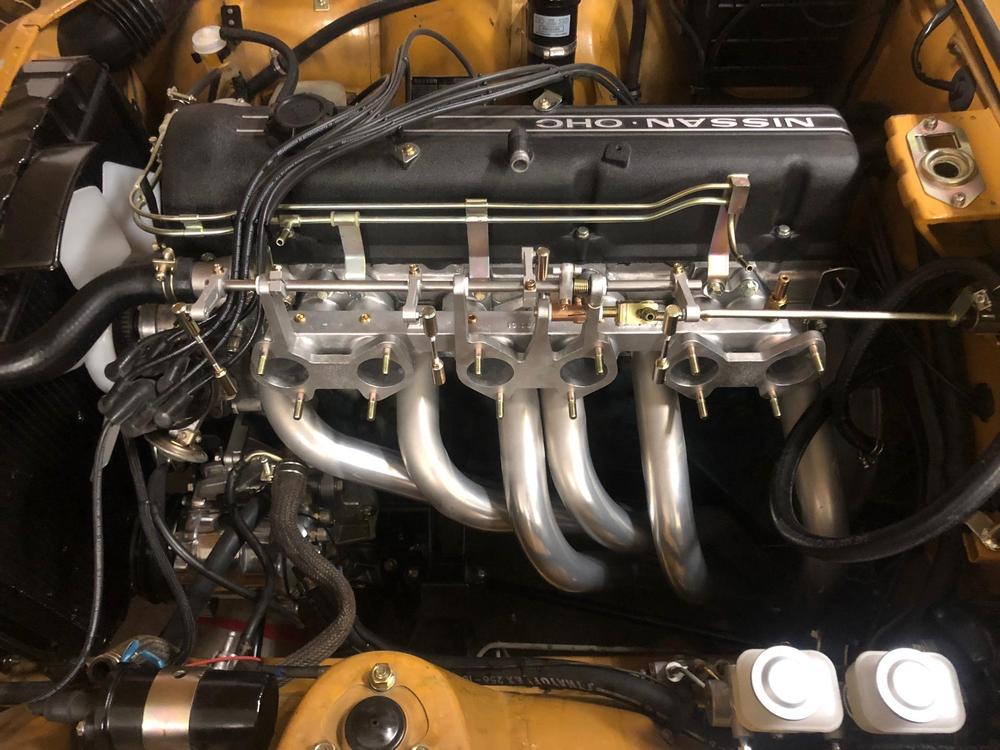
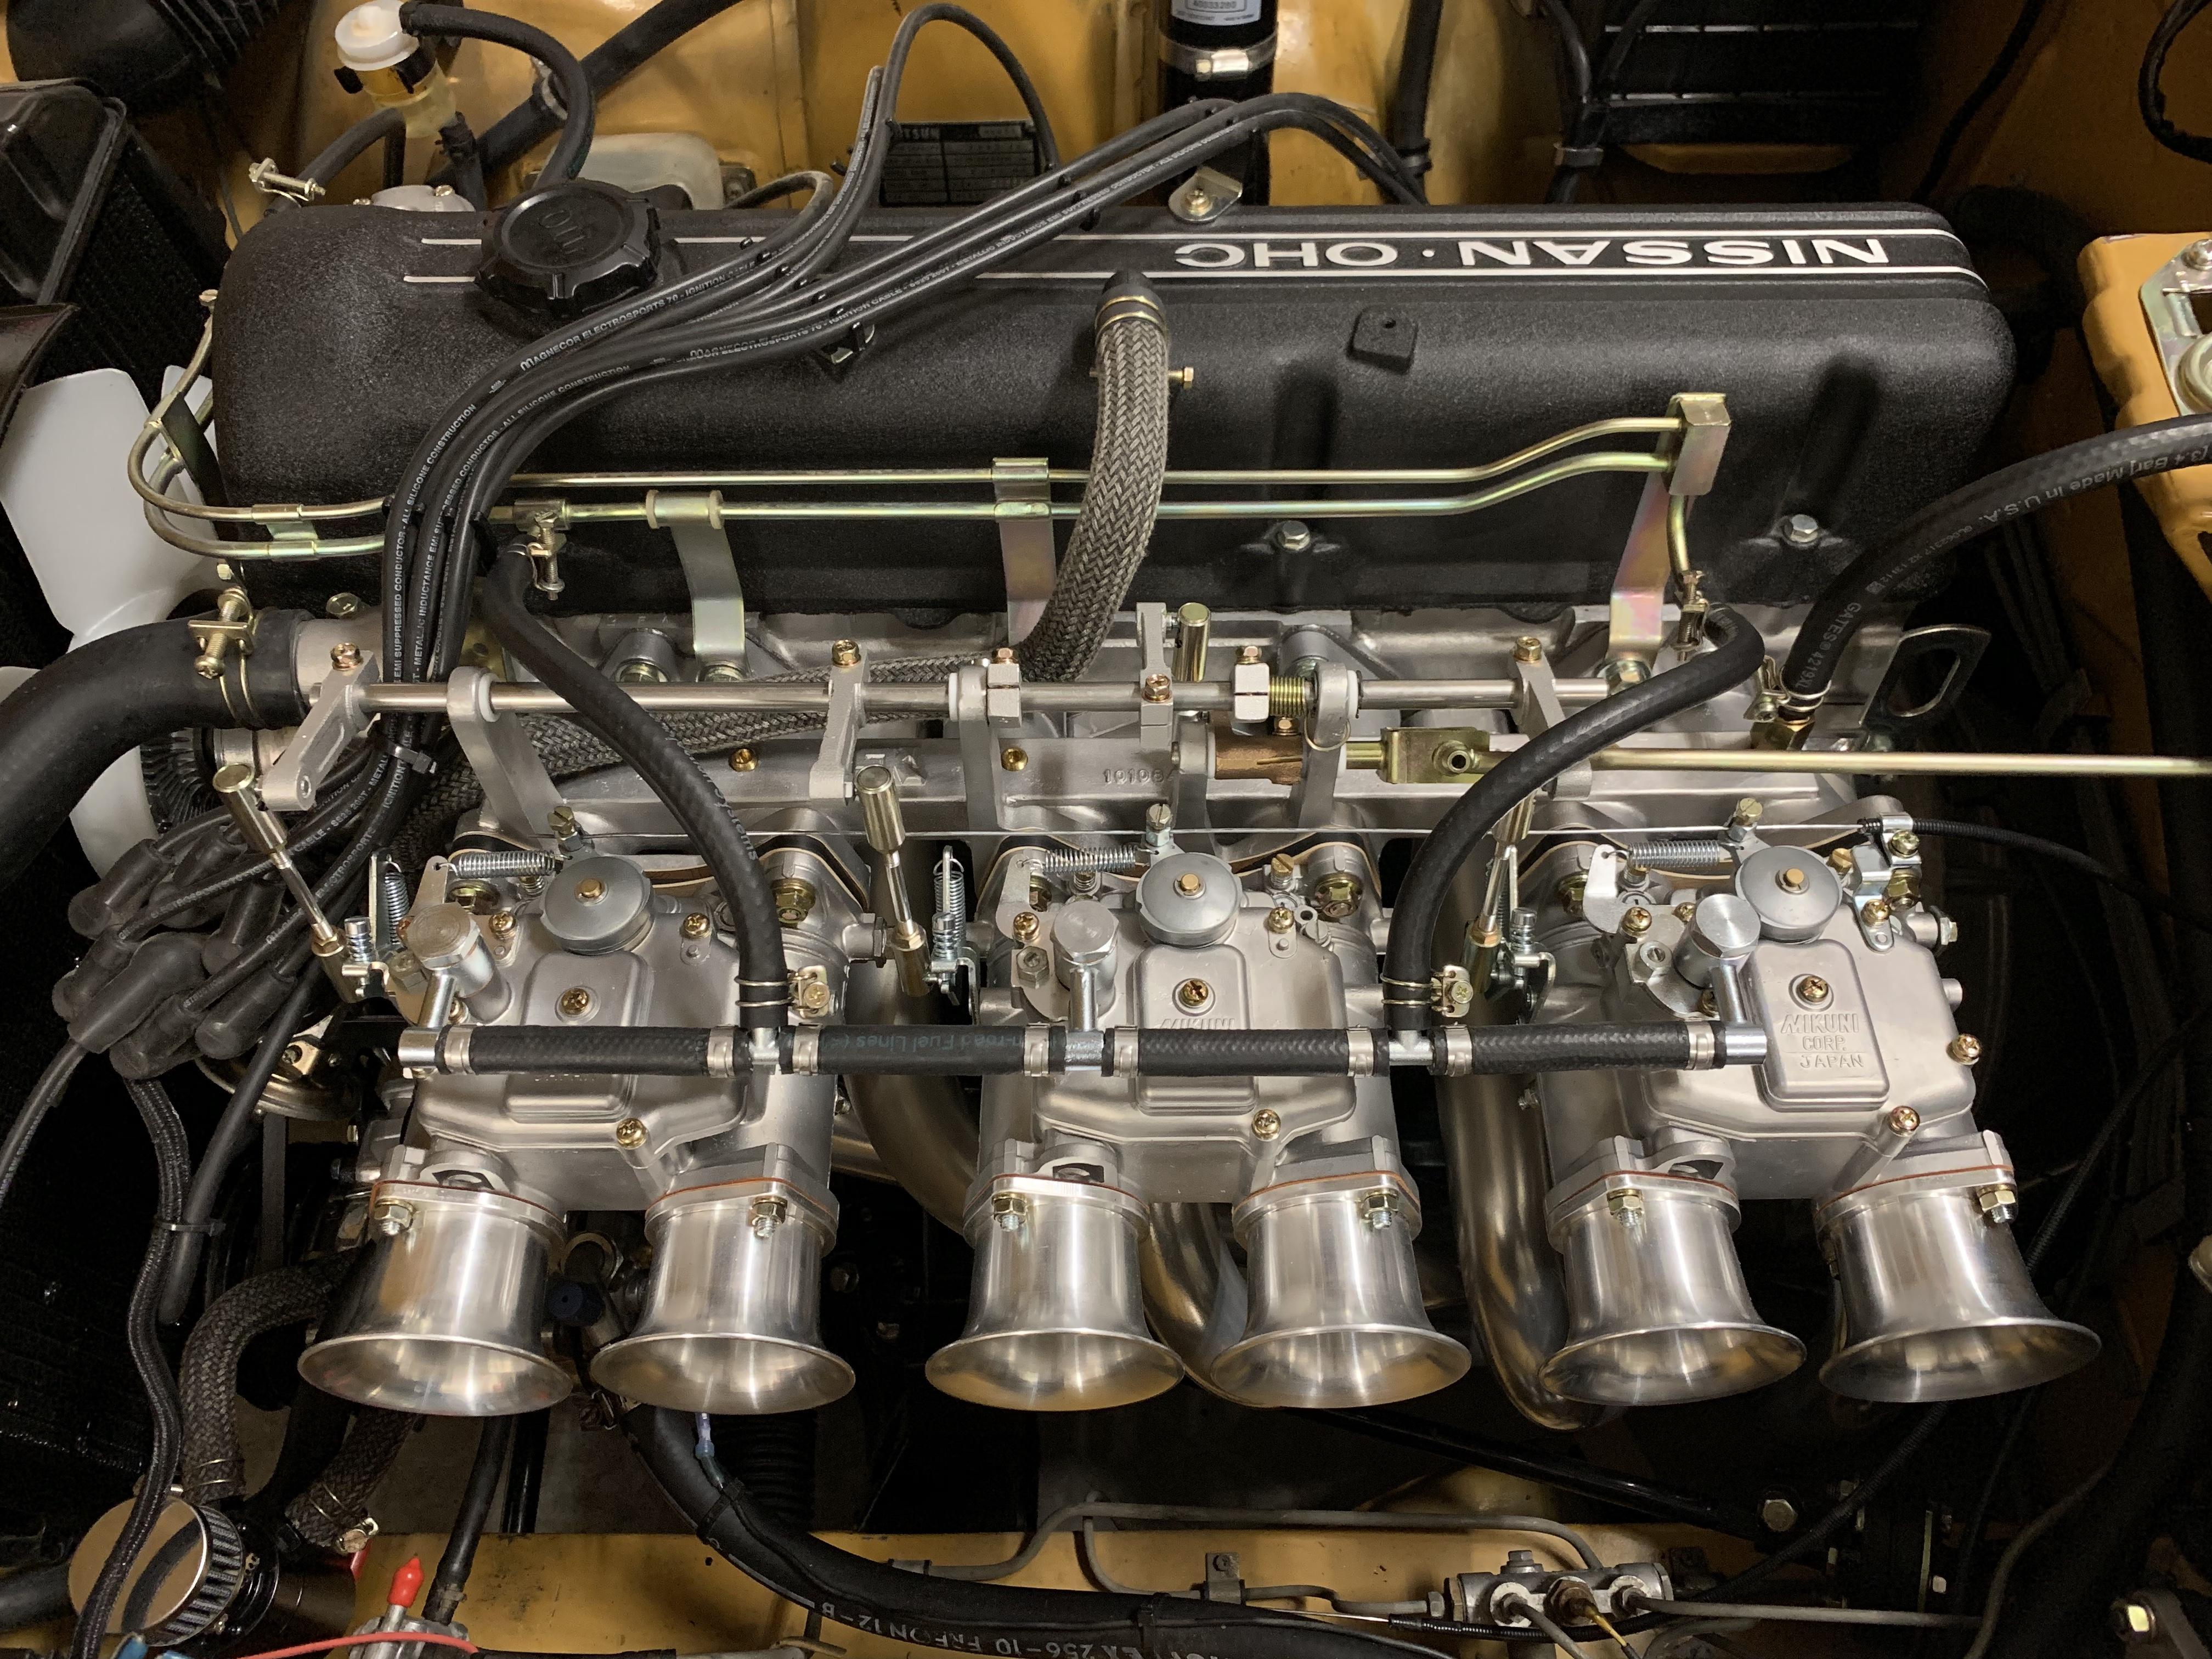
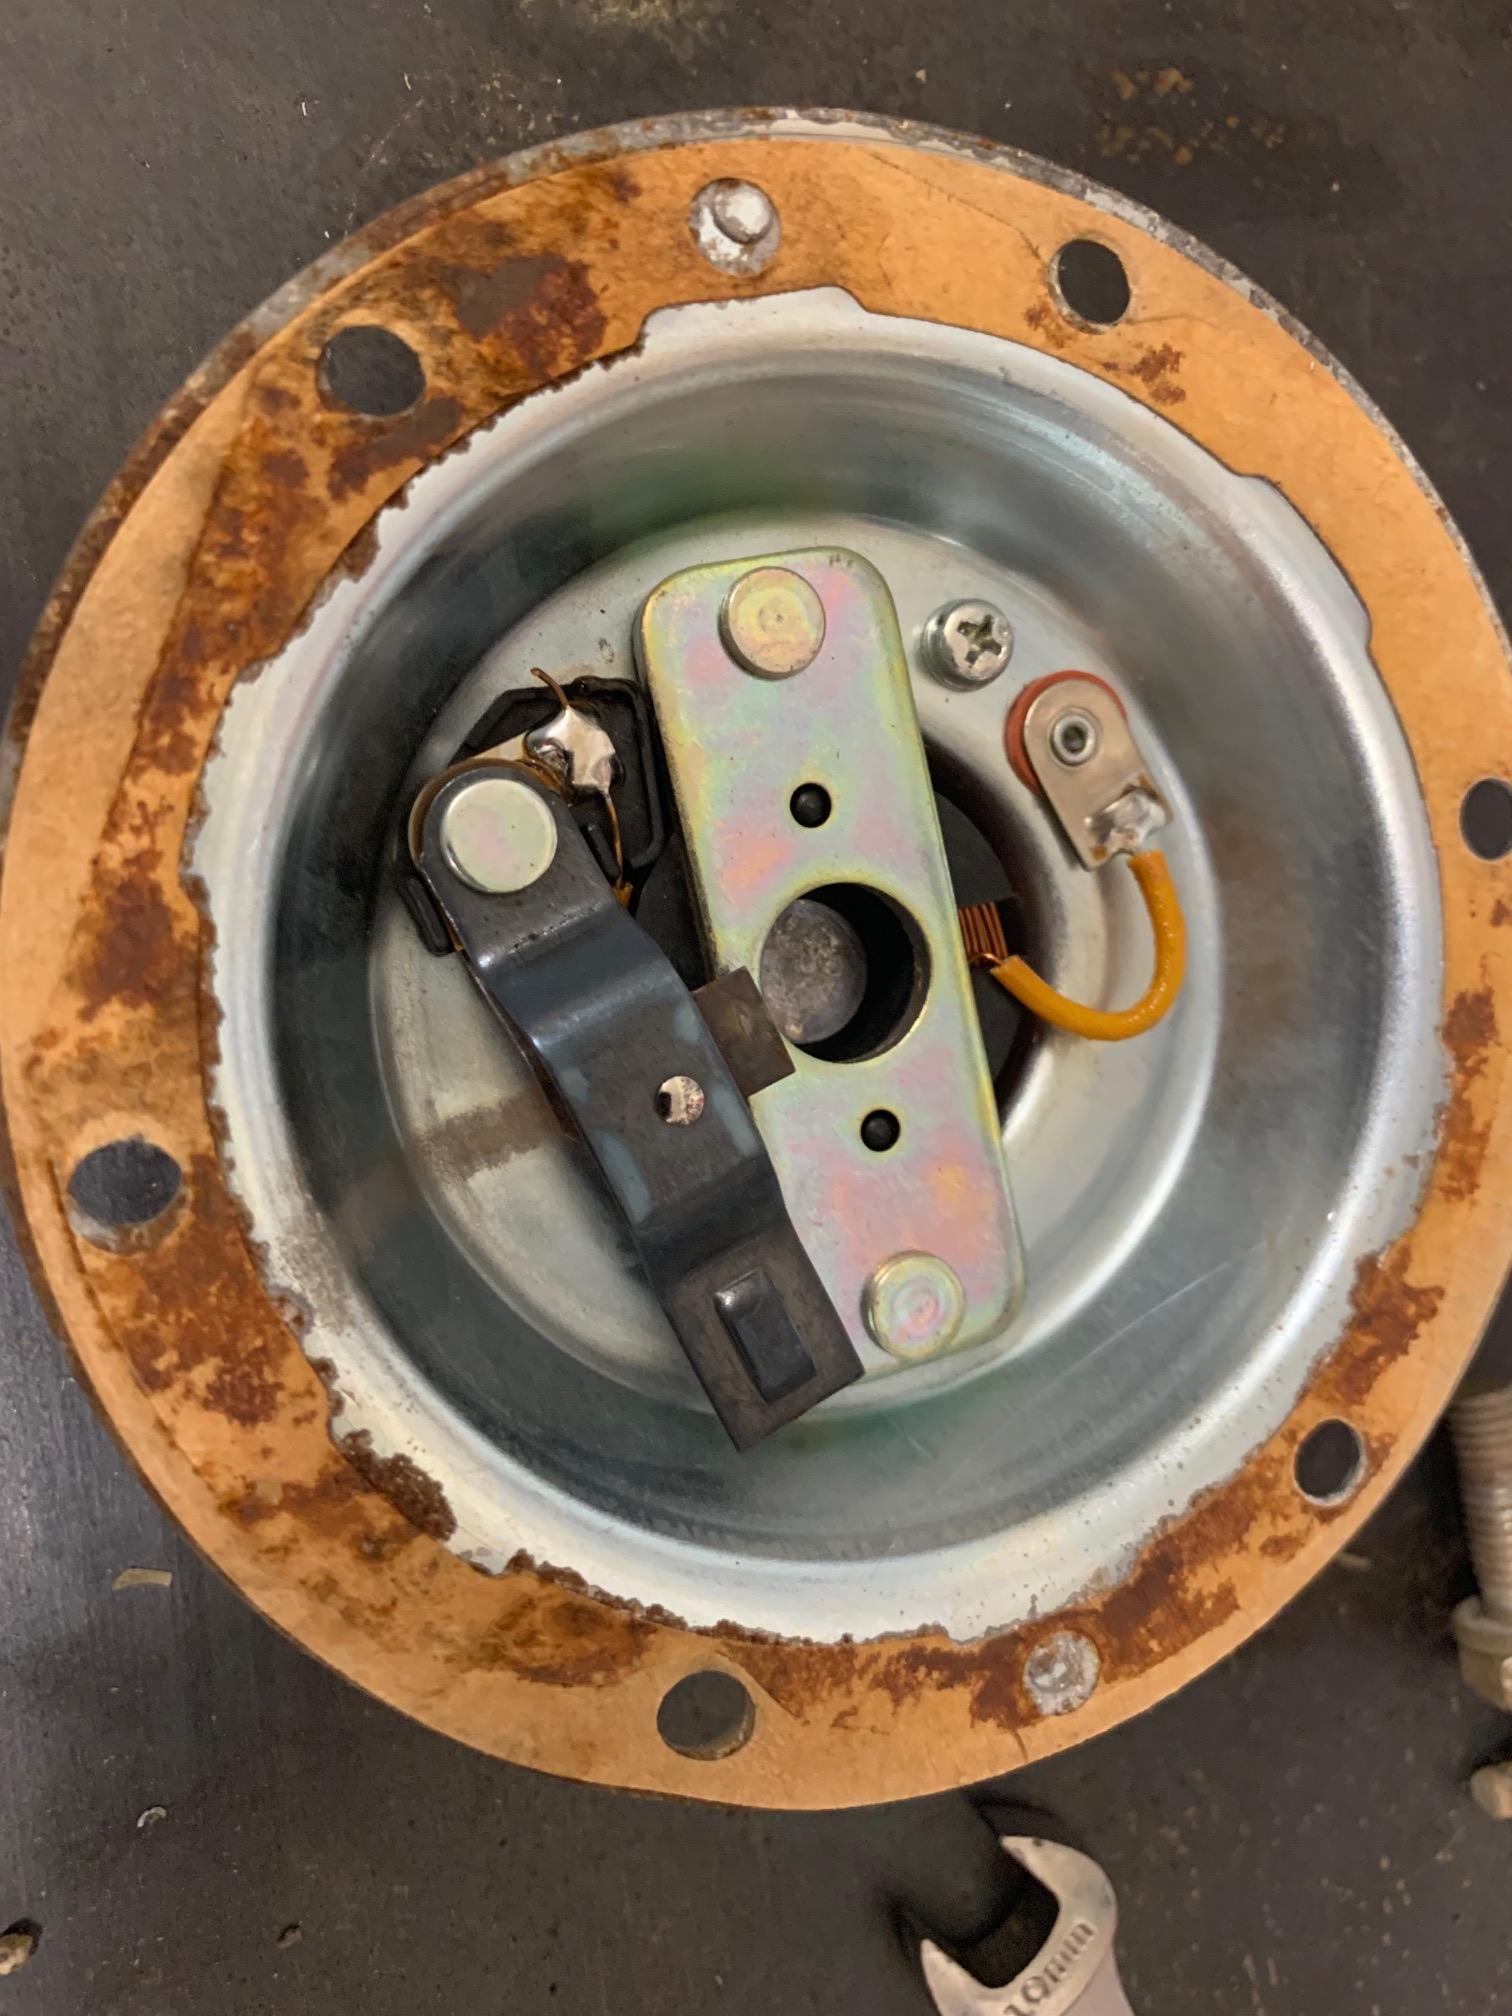
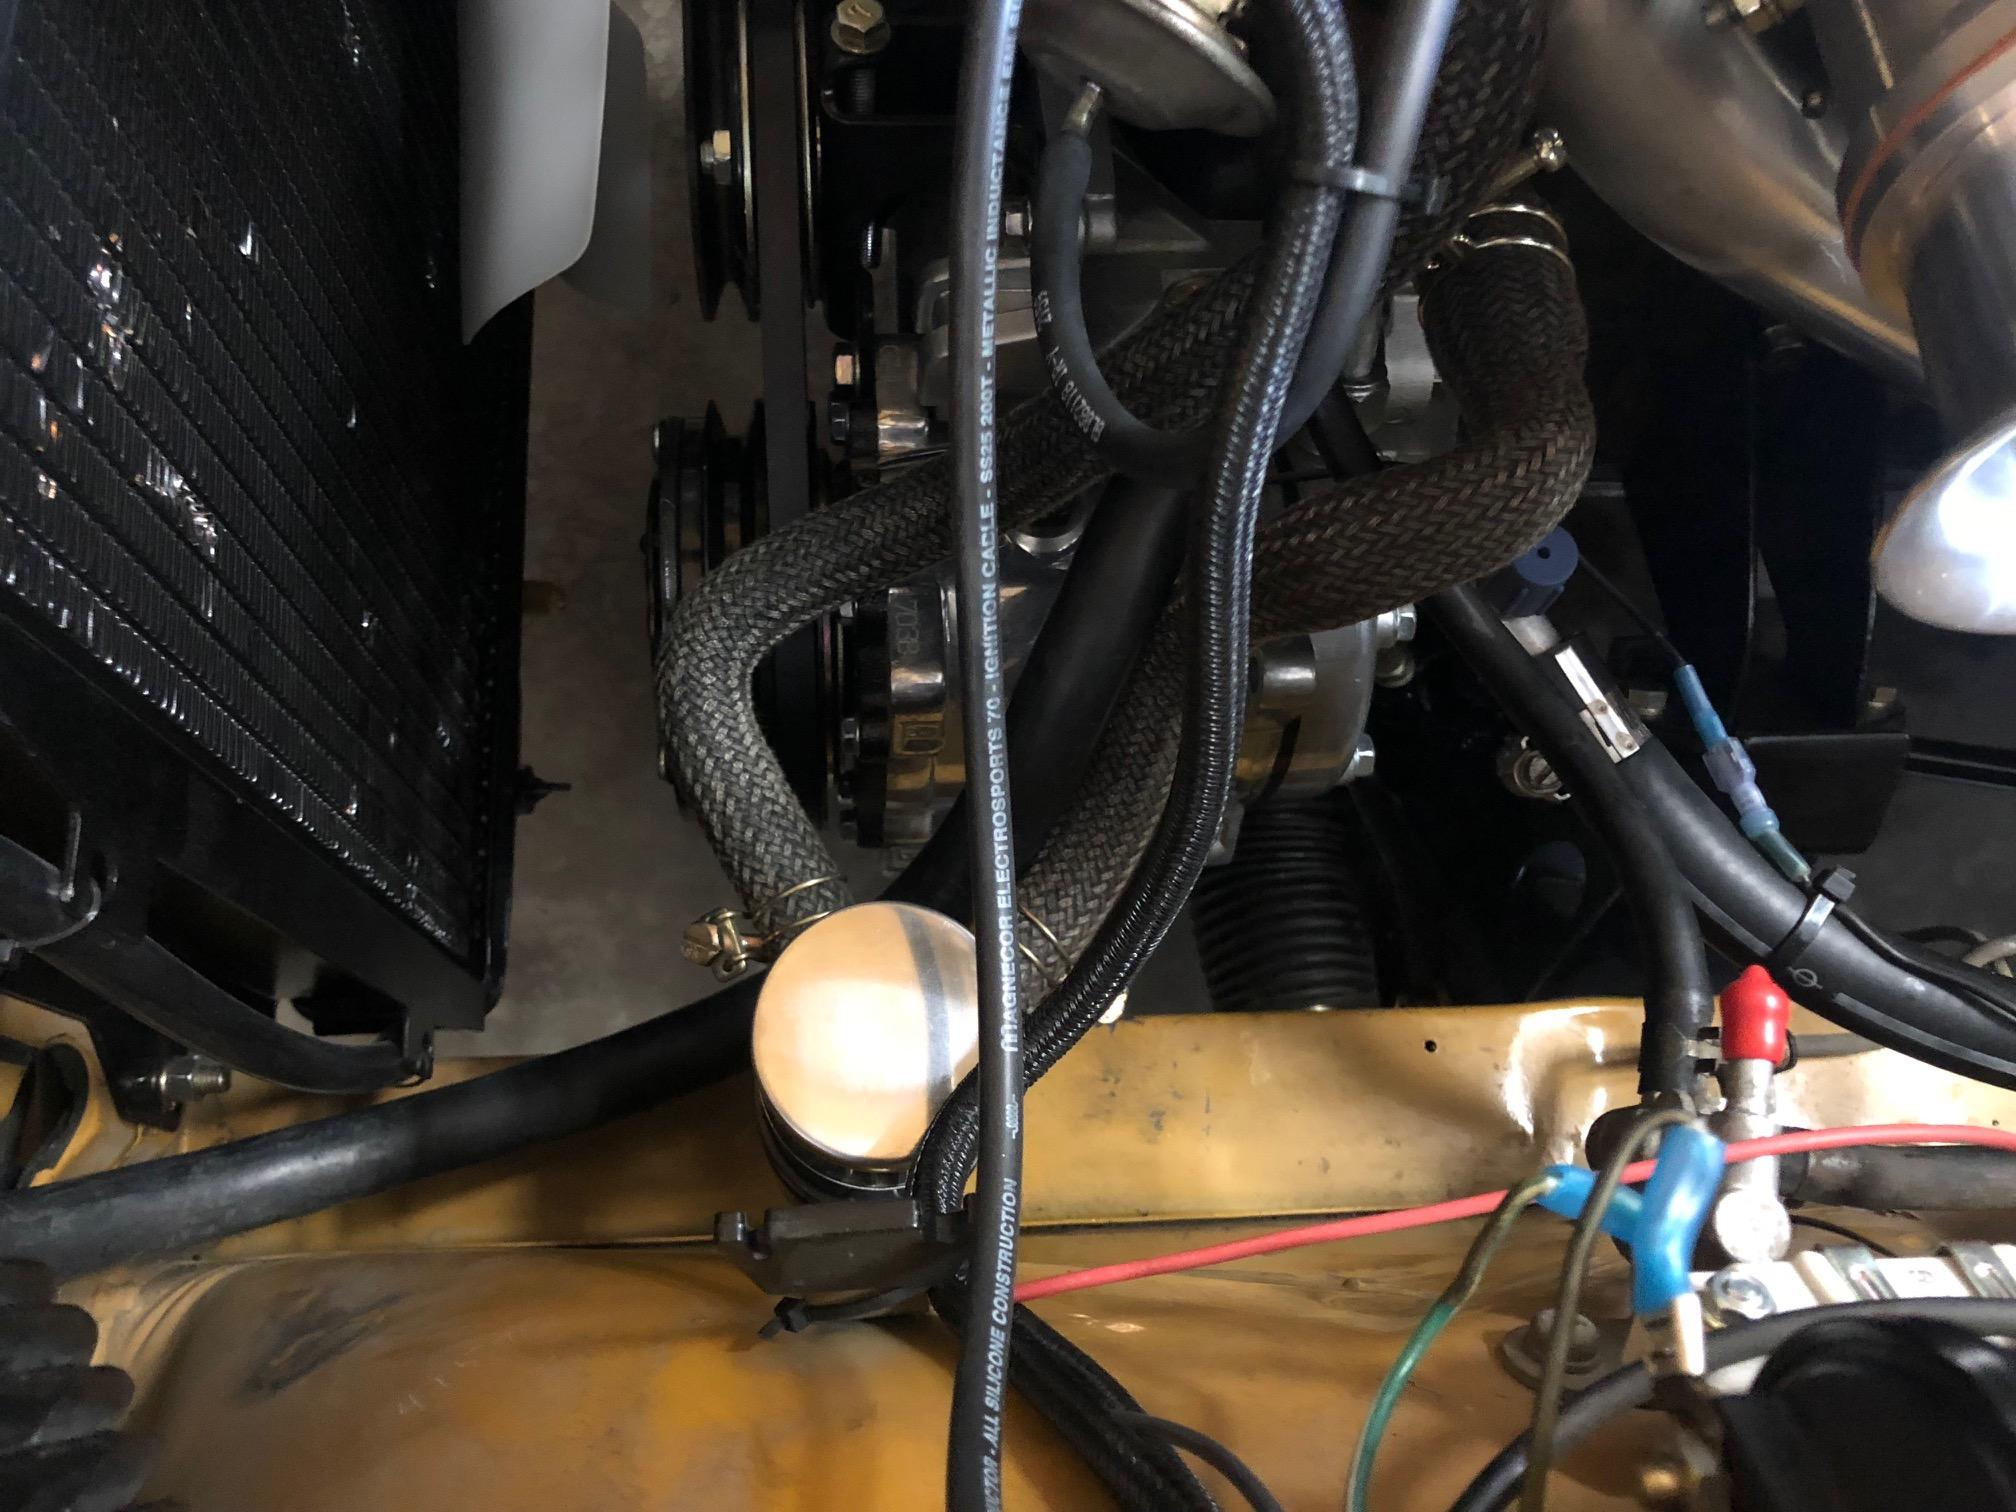
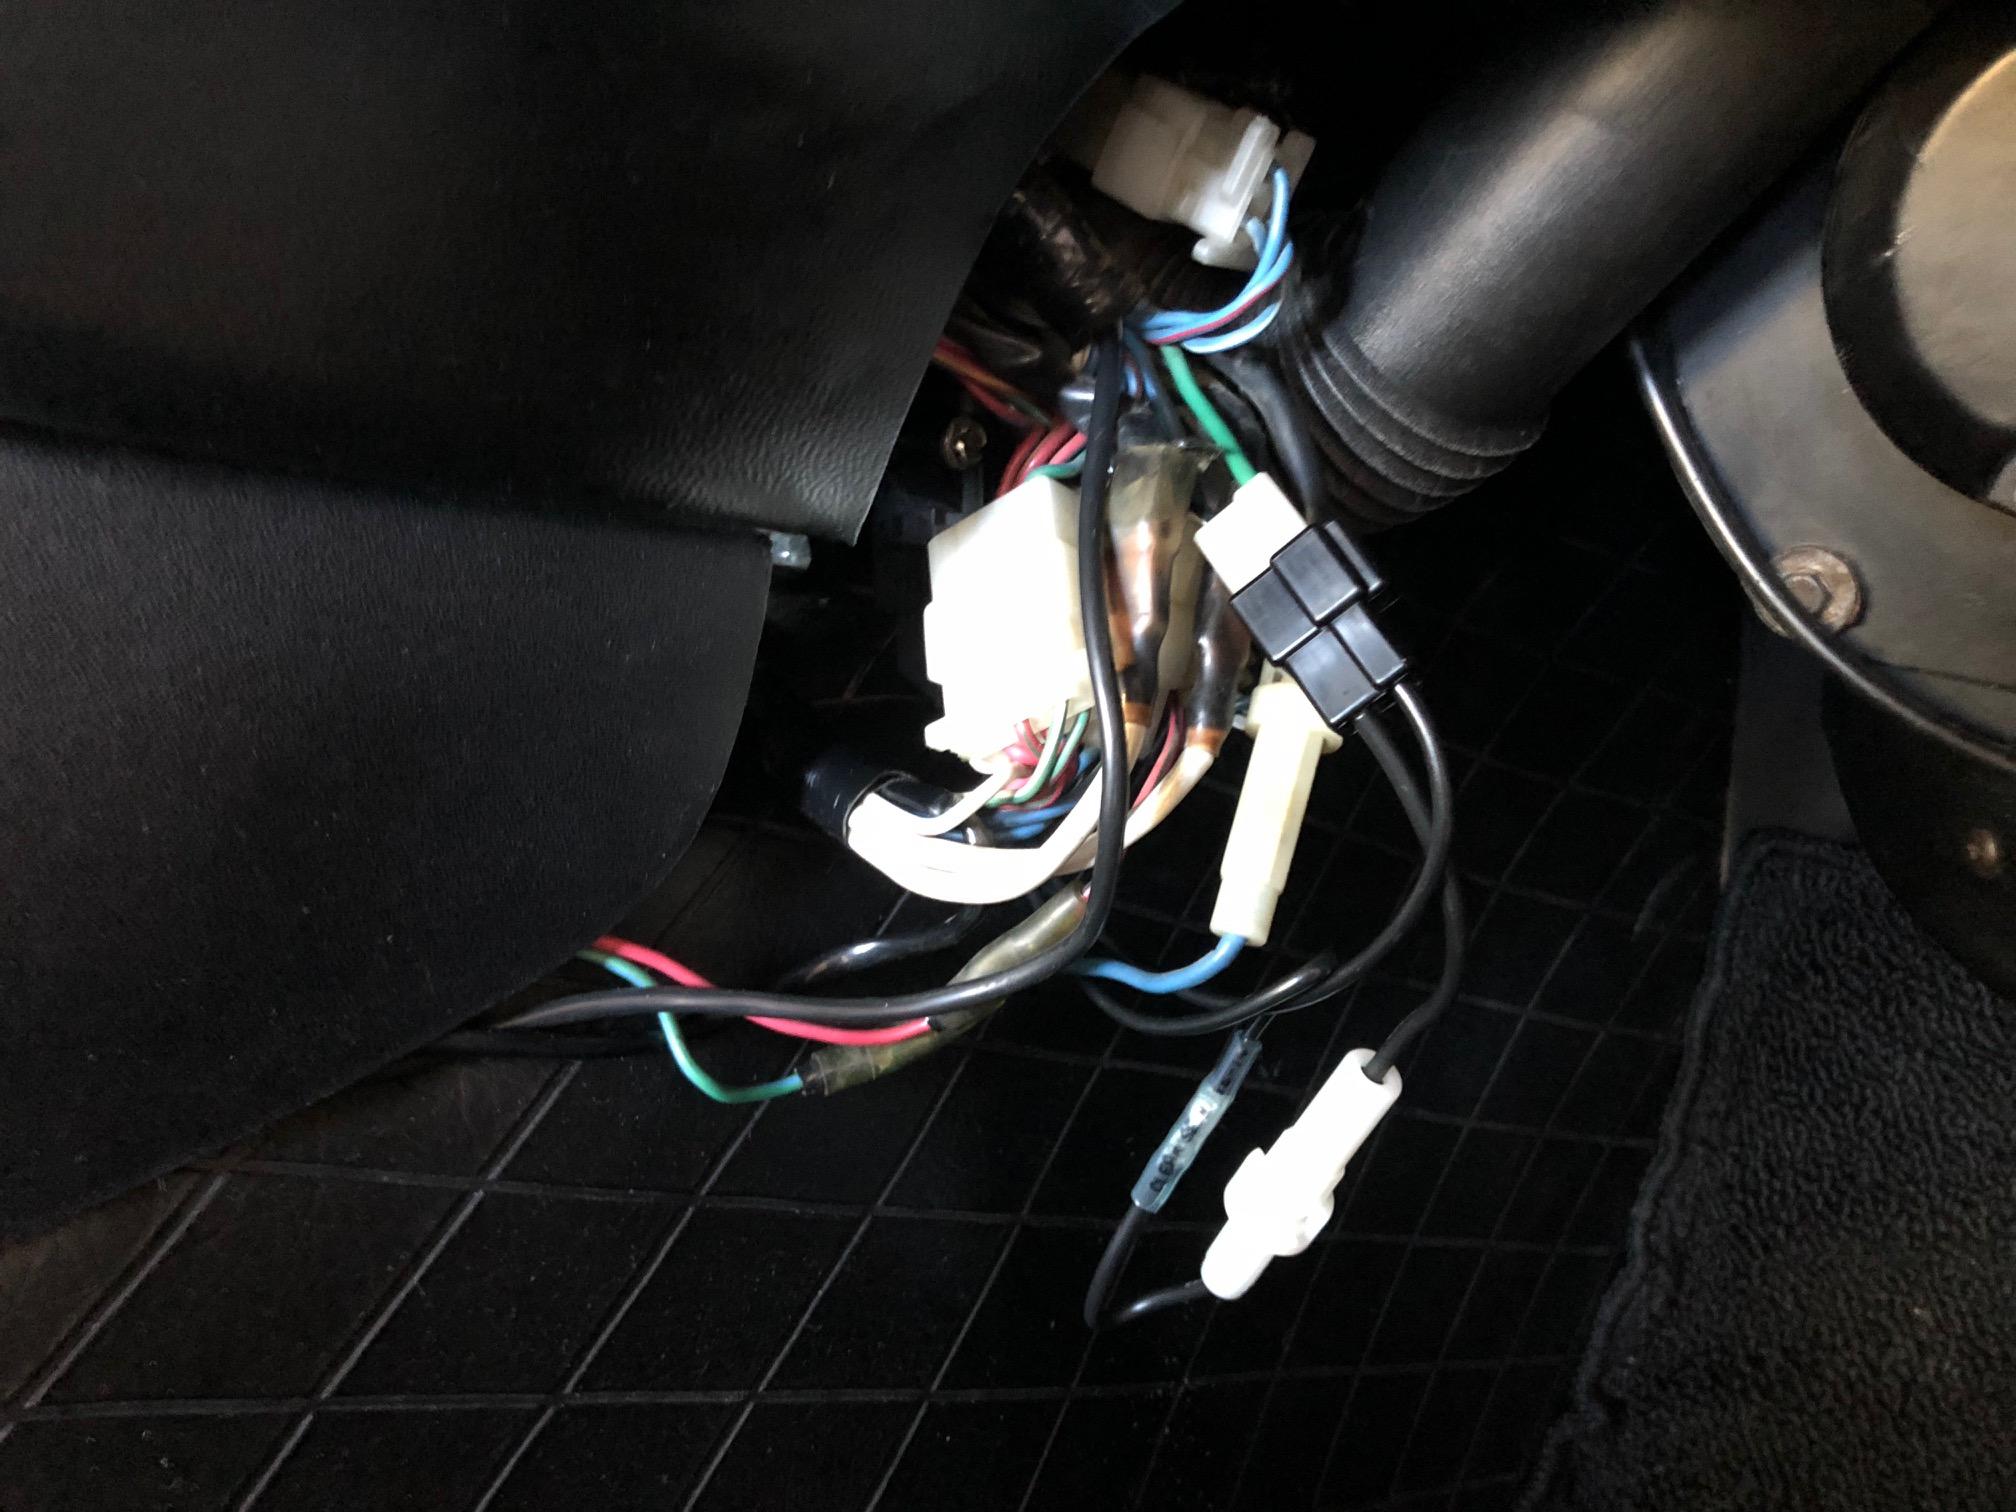
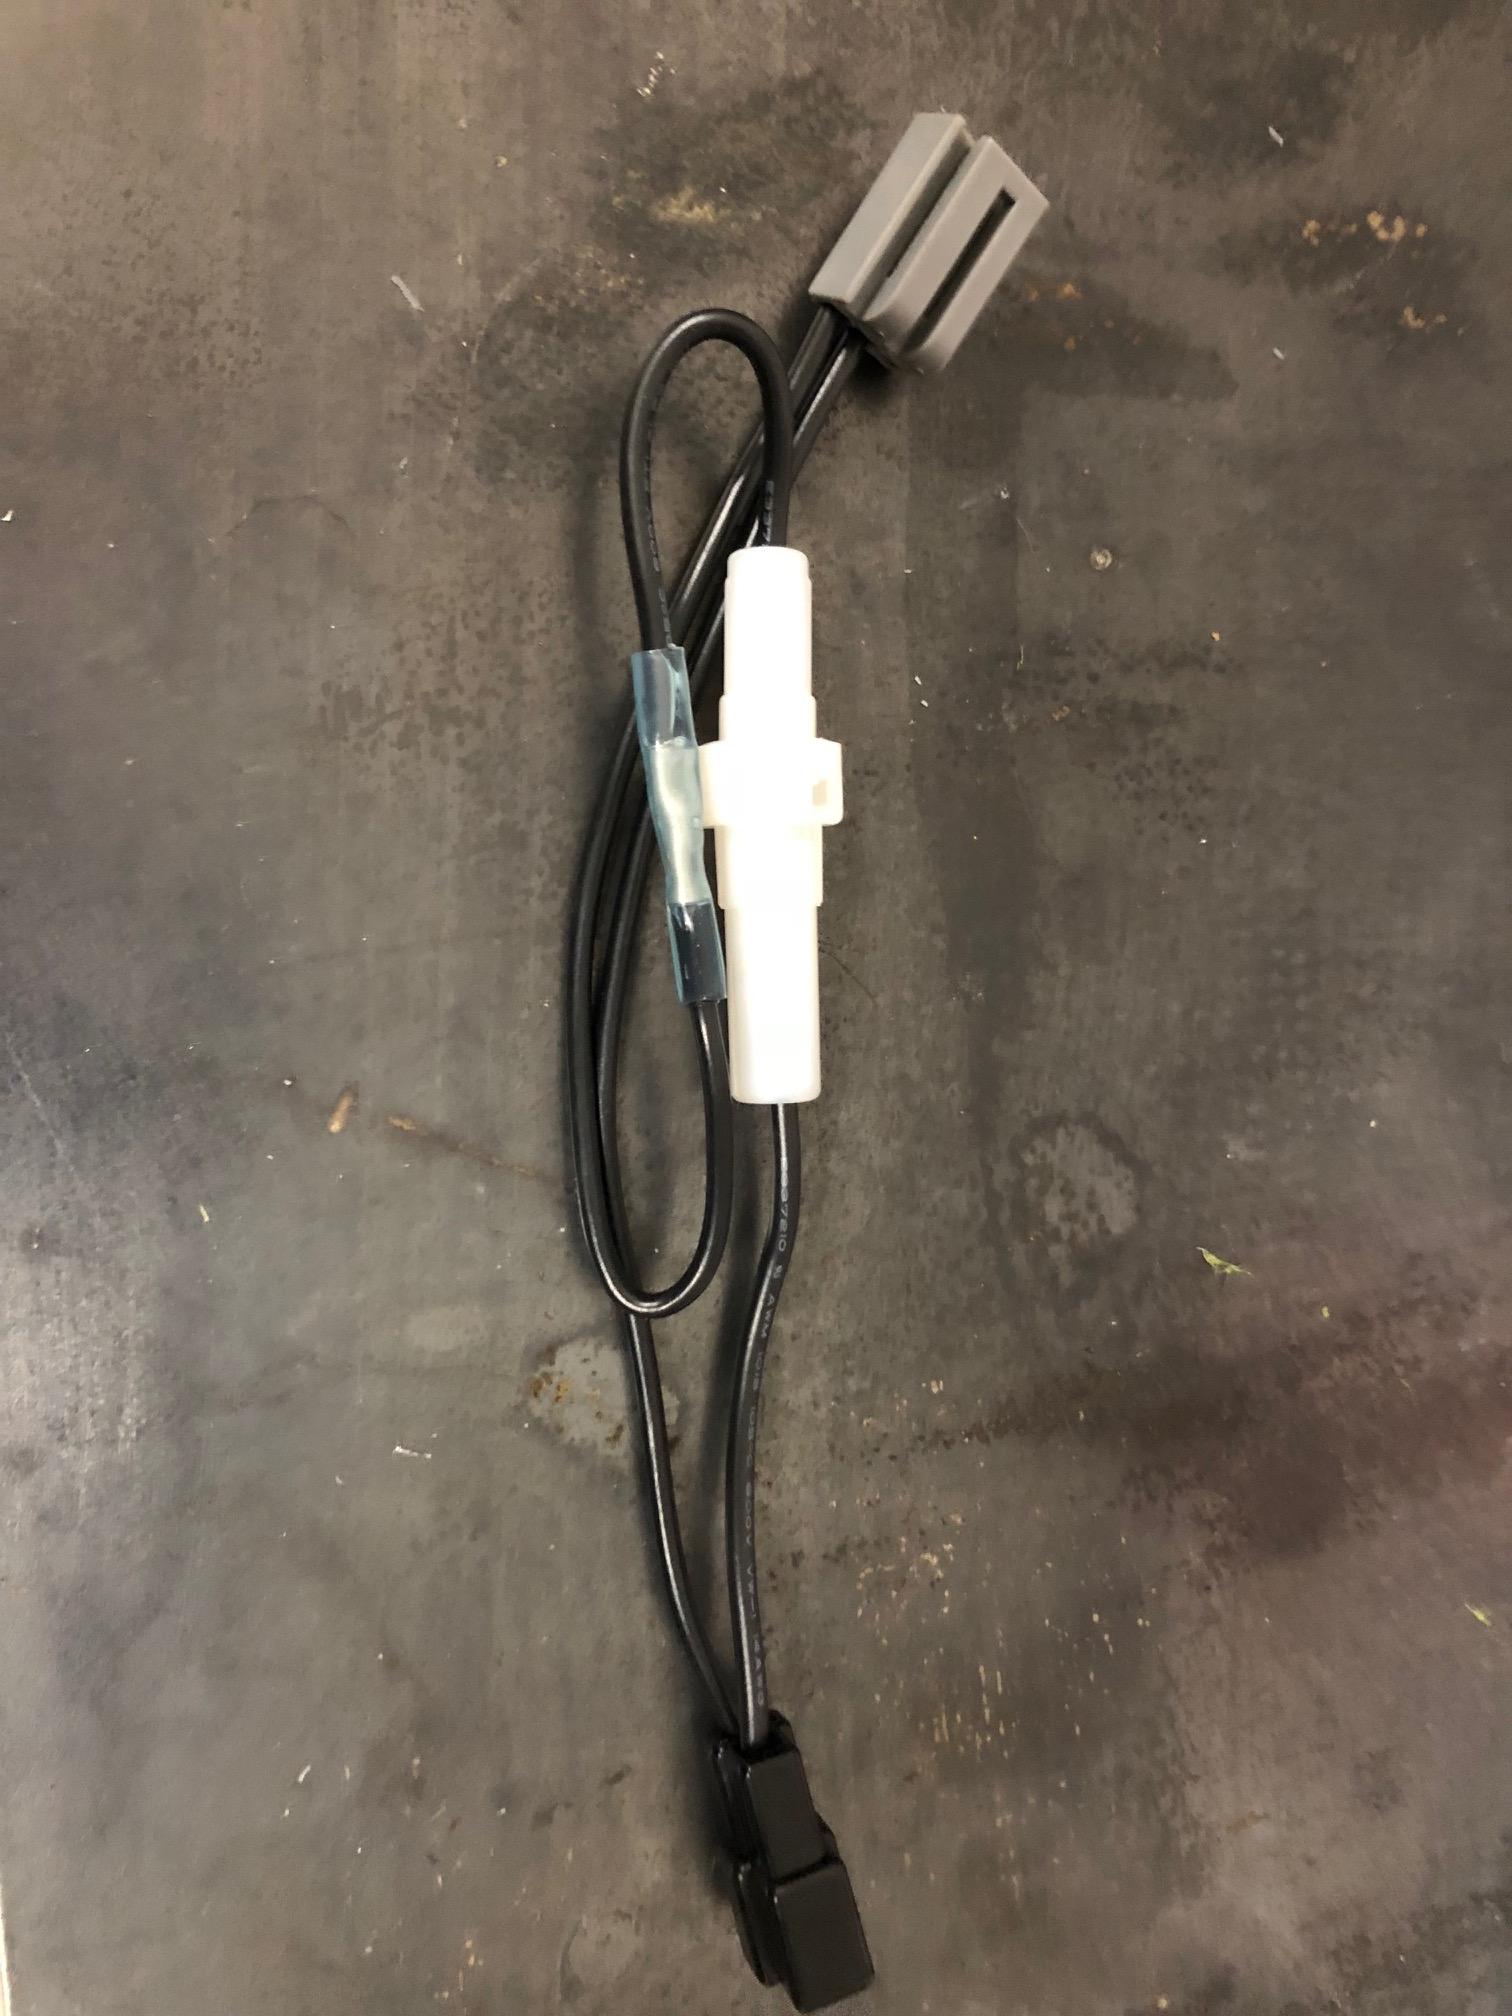
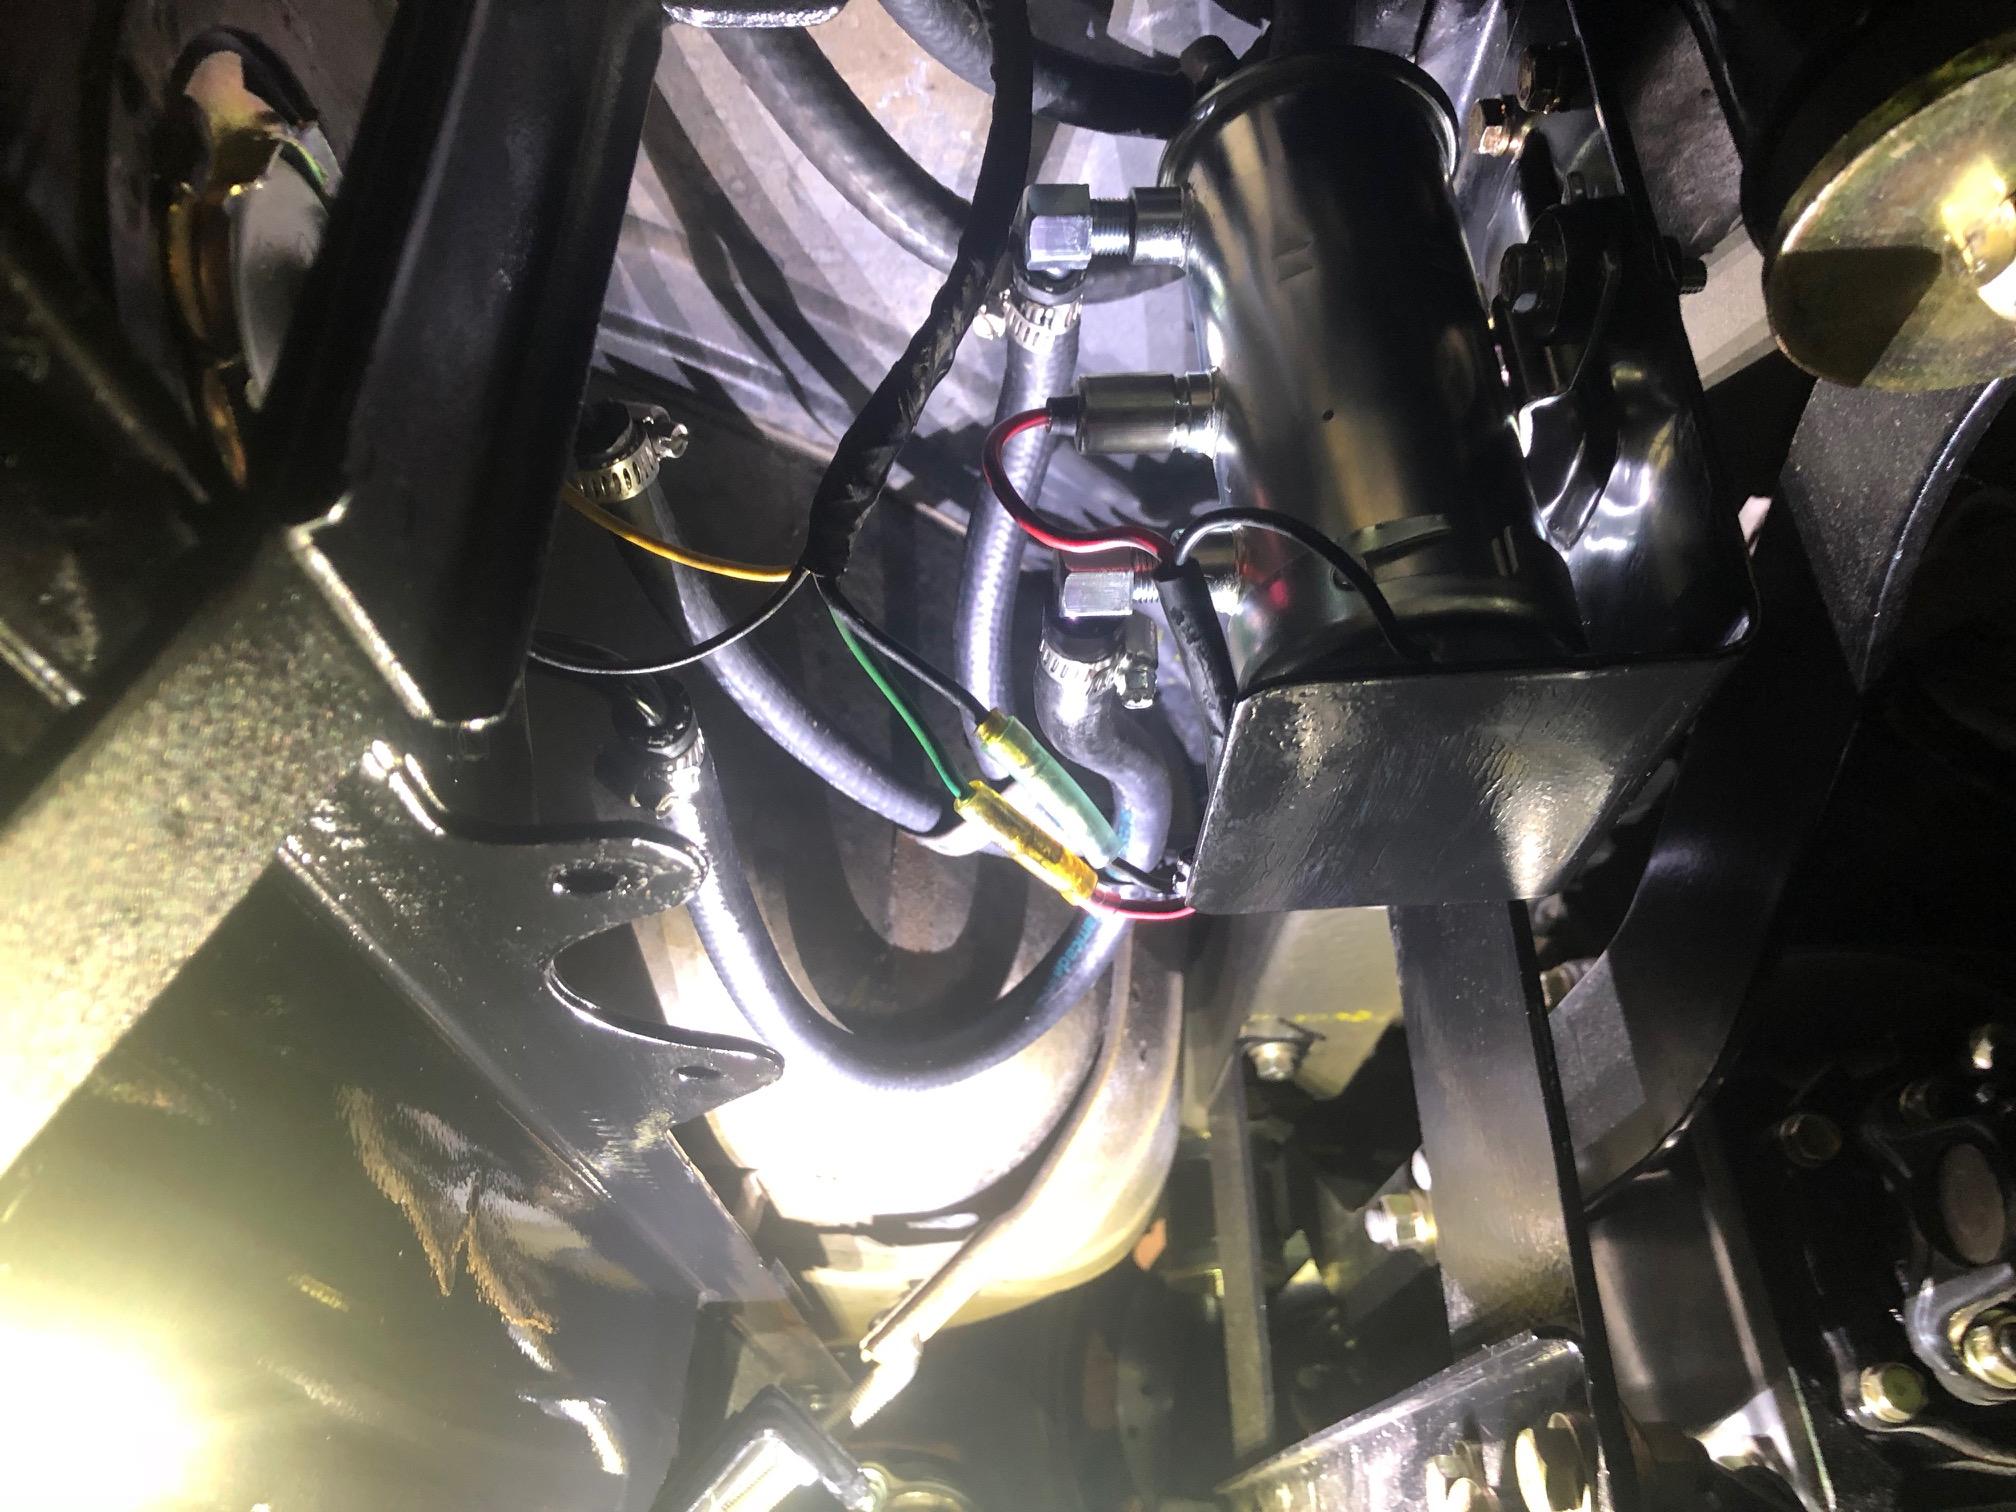
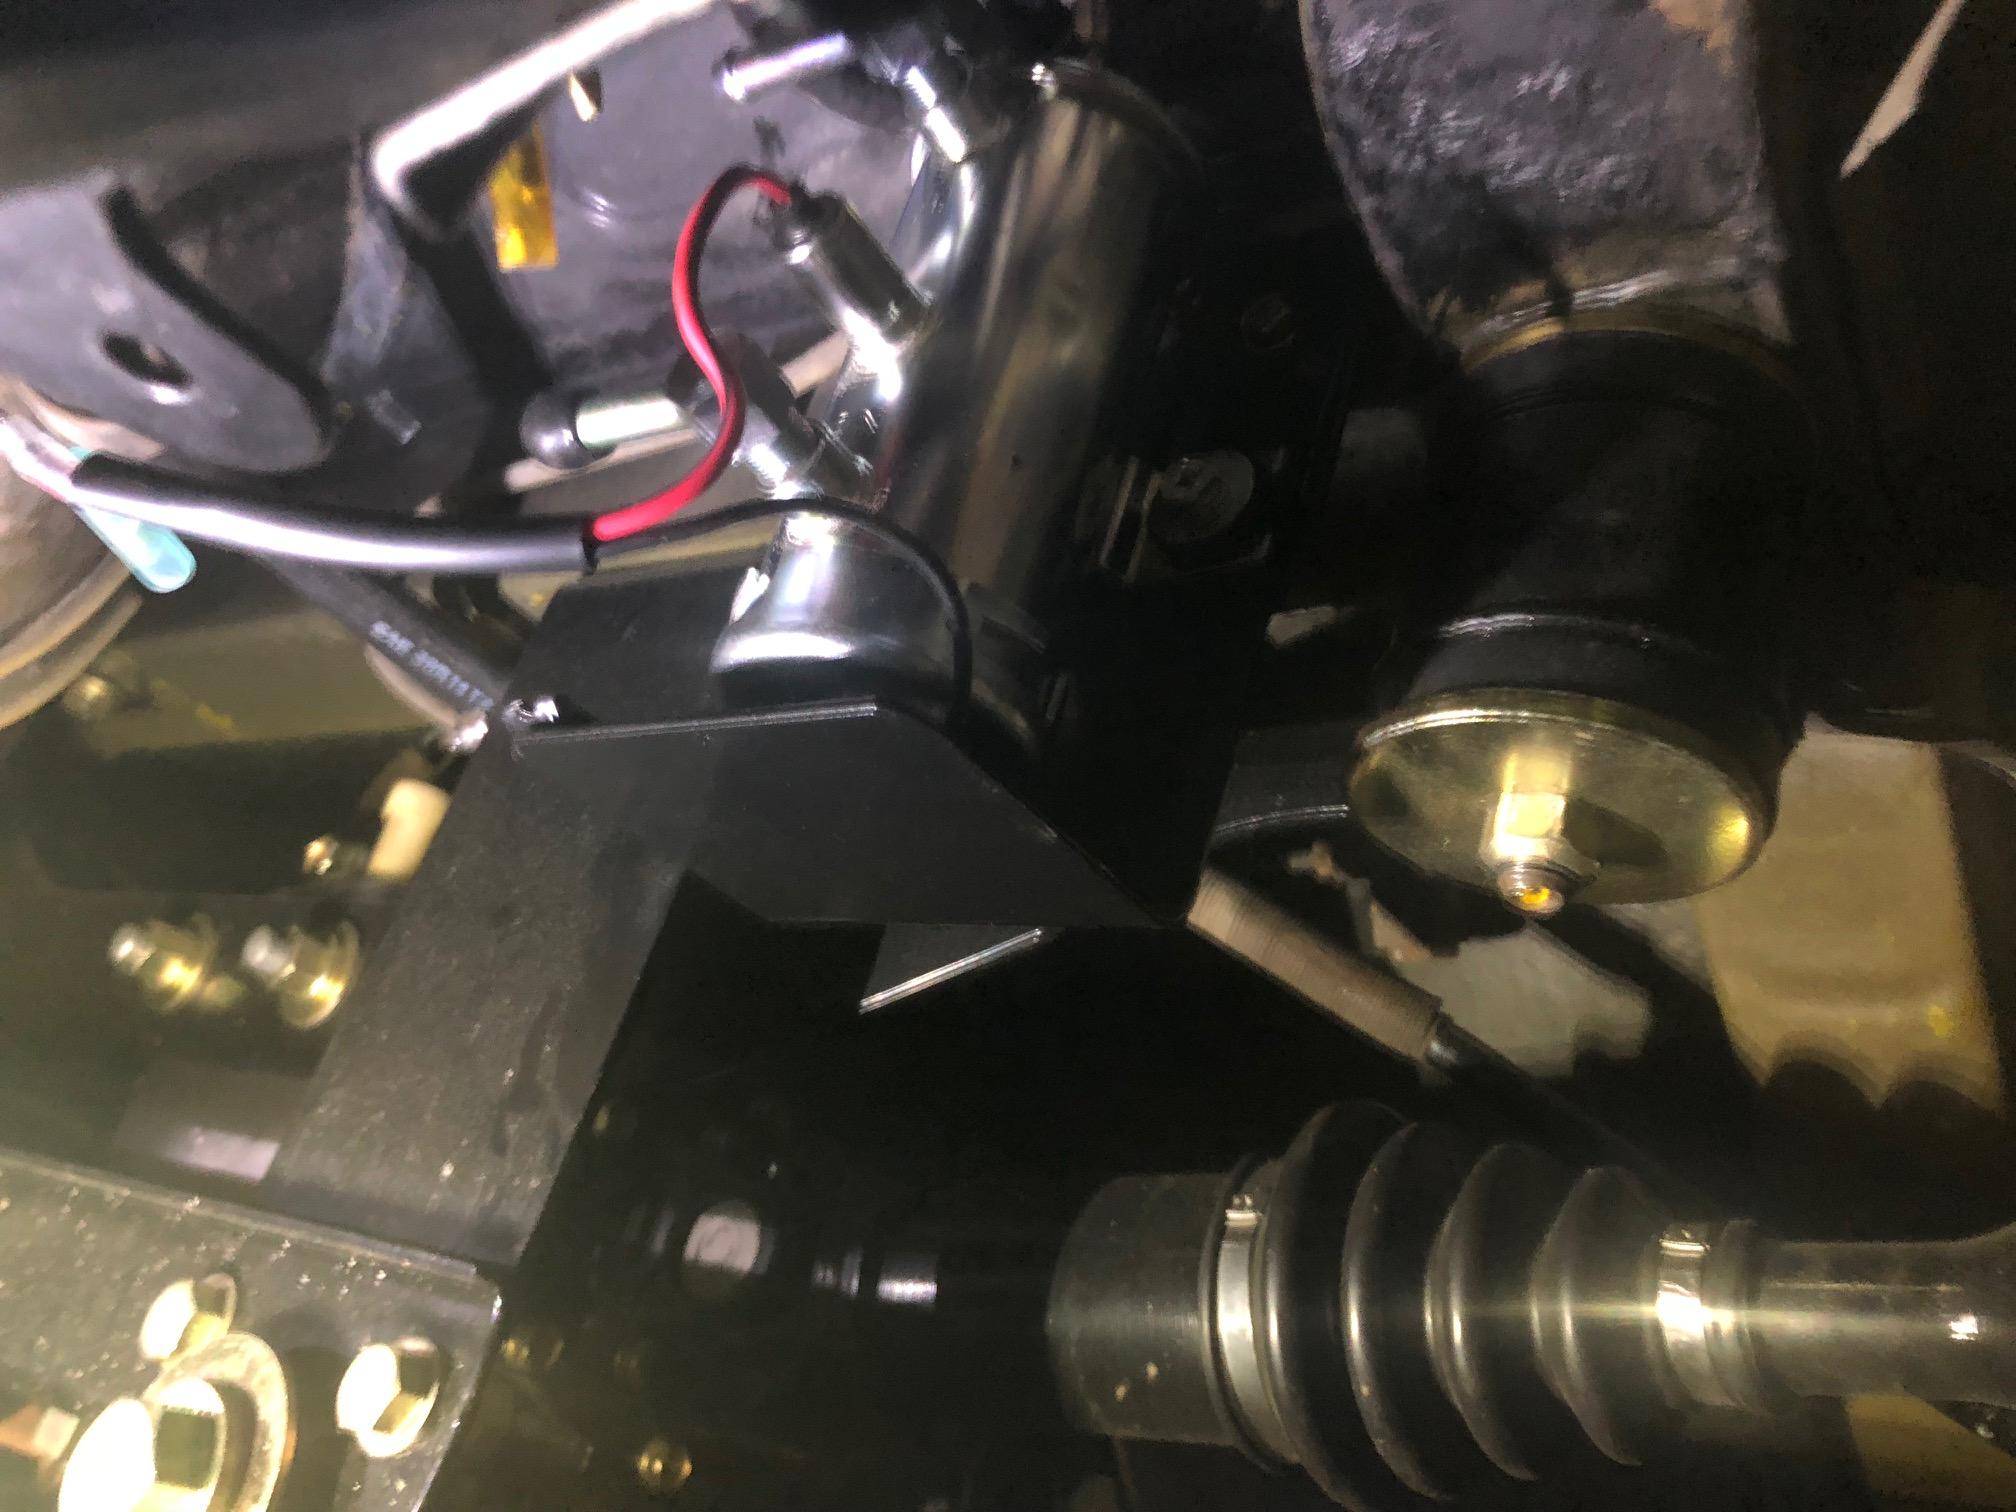
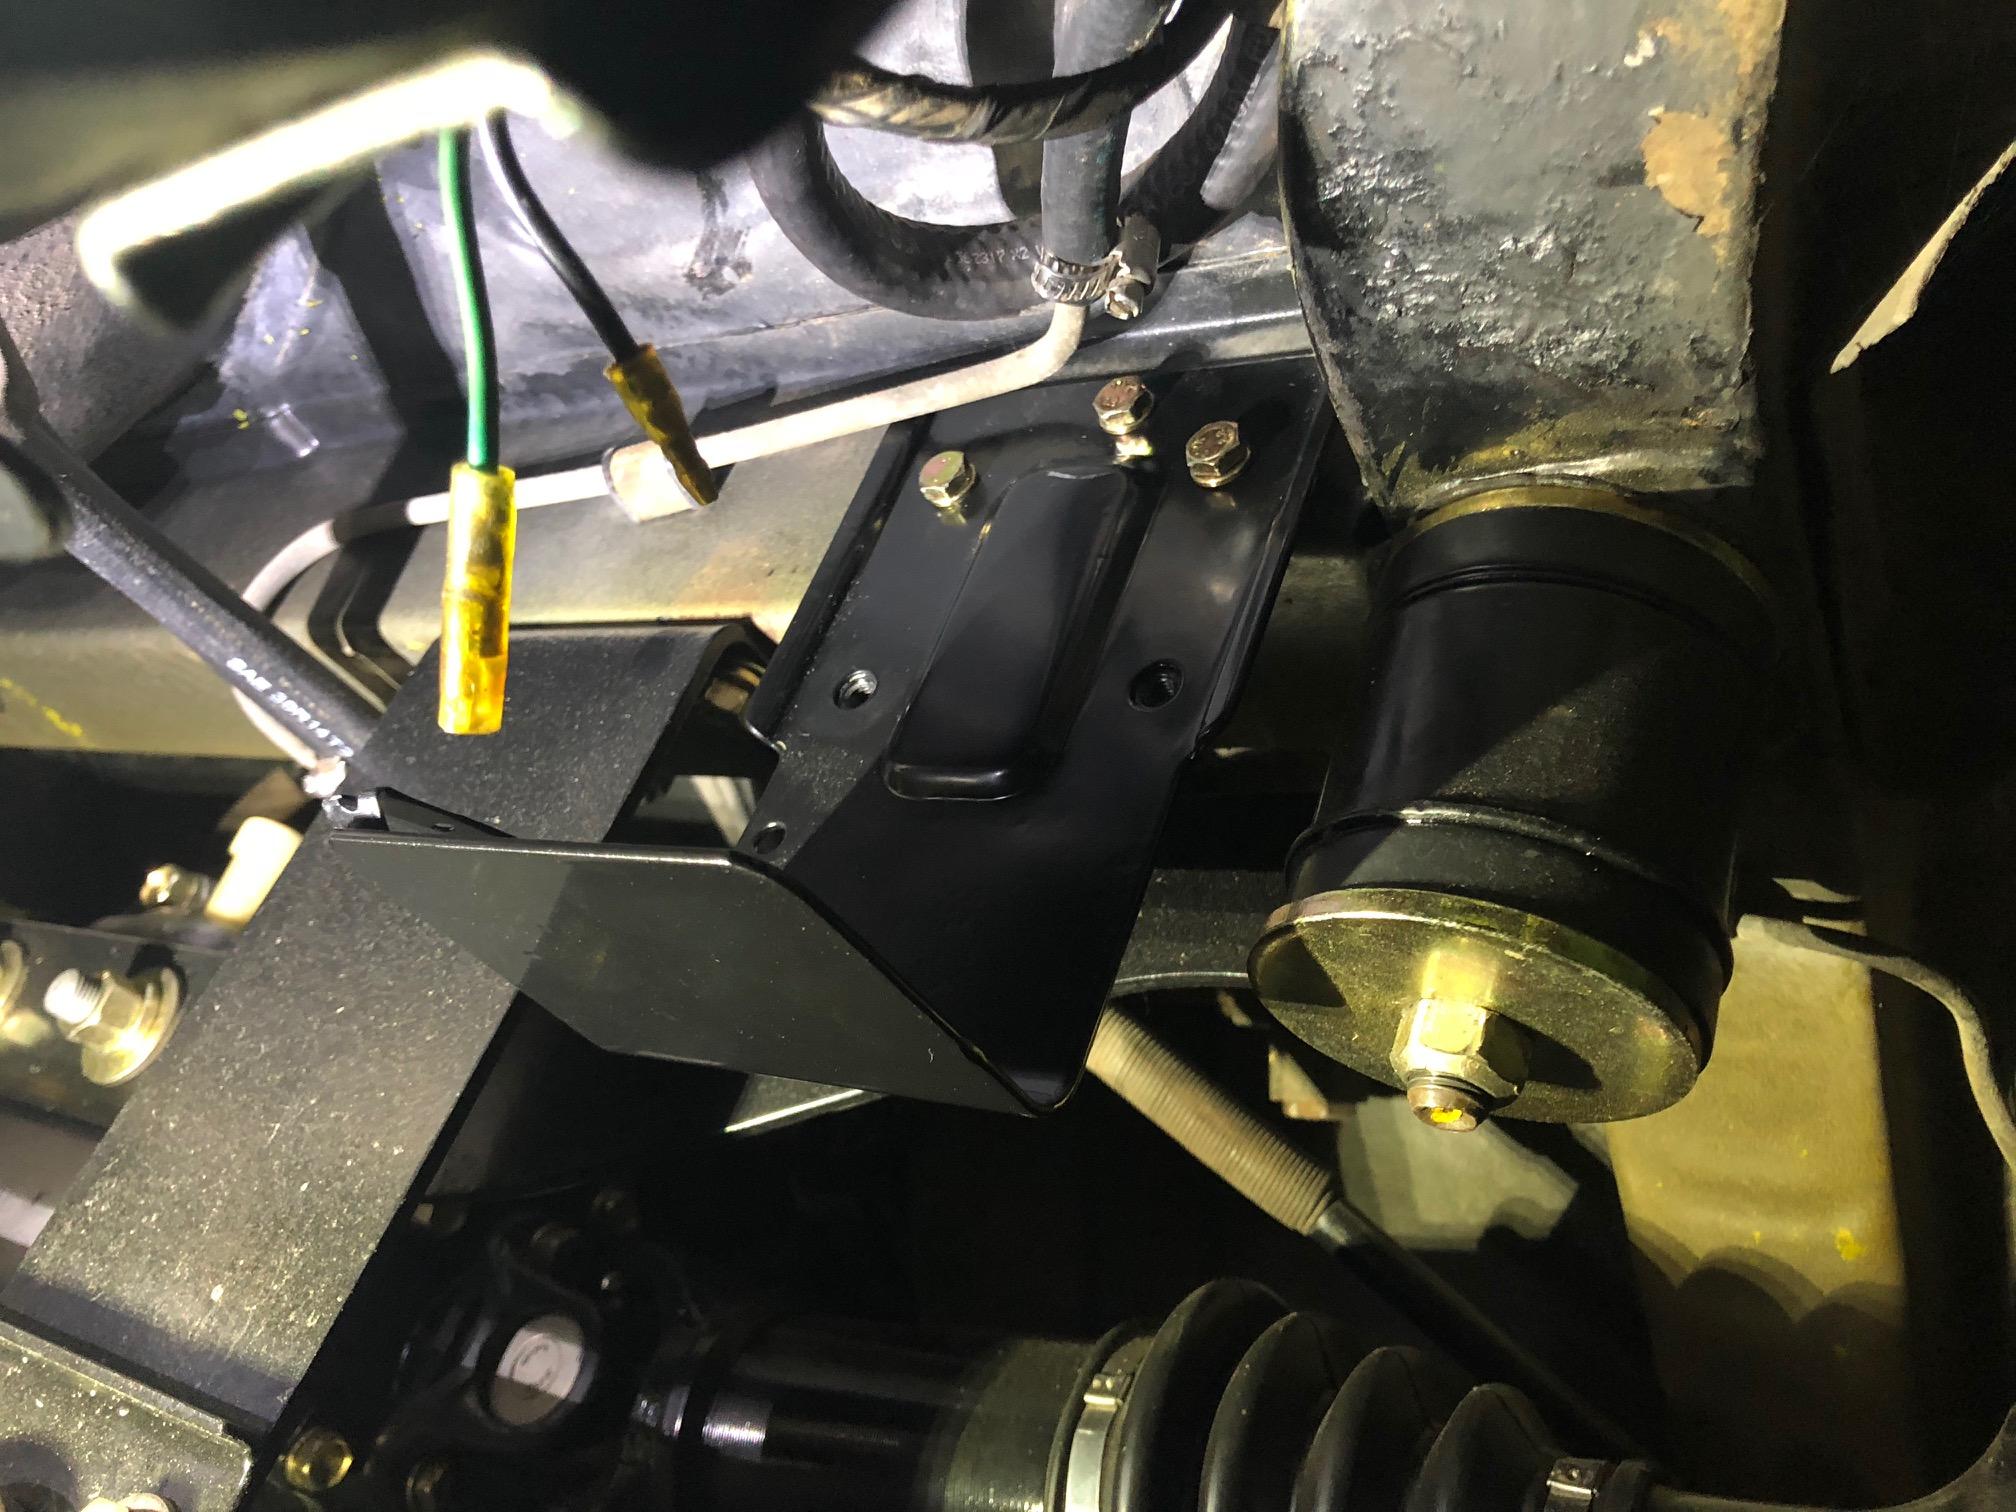
Thank you. I am trying to make whatever i do as nice as it can be done. By a hobbyist .The interia switch was actually the first hole I have drilled in my z. It worried me a little. I screwed up the the butterfly’s a little on the Mikuni’s. They are now all set pretty perfect. I can see a sliver of light when closed. The heat shield I bought doesn’t fit. Weirdly the carbs stay nice and cool. My header is ceramic coated. Maybe that’s enough? Also the header design keeps the pipes pretty far away from the carbs. Thoughts? Anyone? Next goals. Next is taking the starter apart and zinc, vapor blast and paint it. Re zinc the horns, they have over spray on them. Pull oil pan, powder coat and re zinc all the bolts
-
-
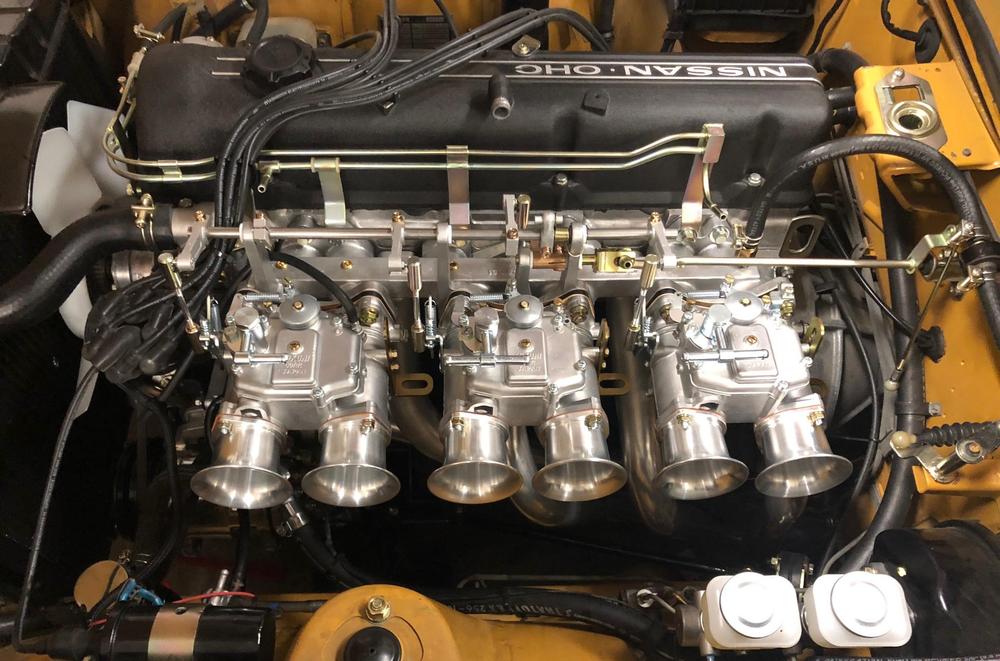
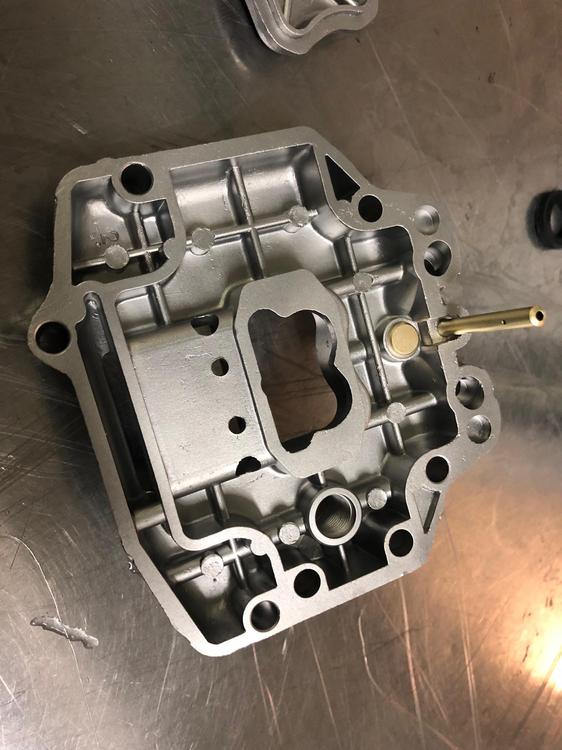
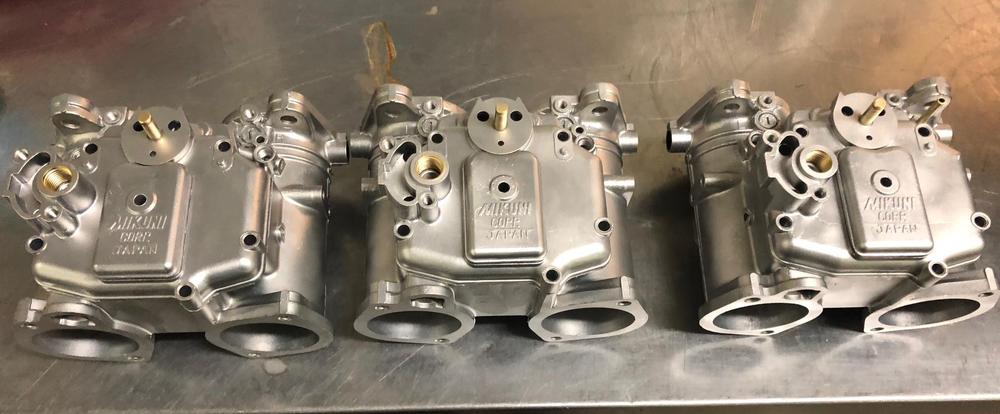
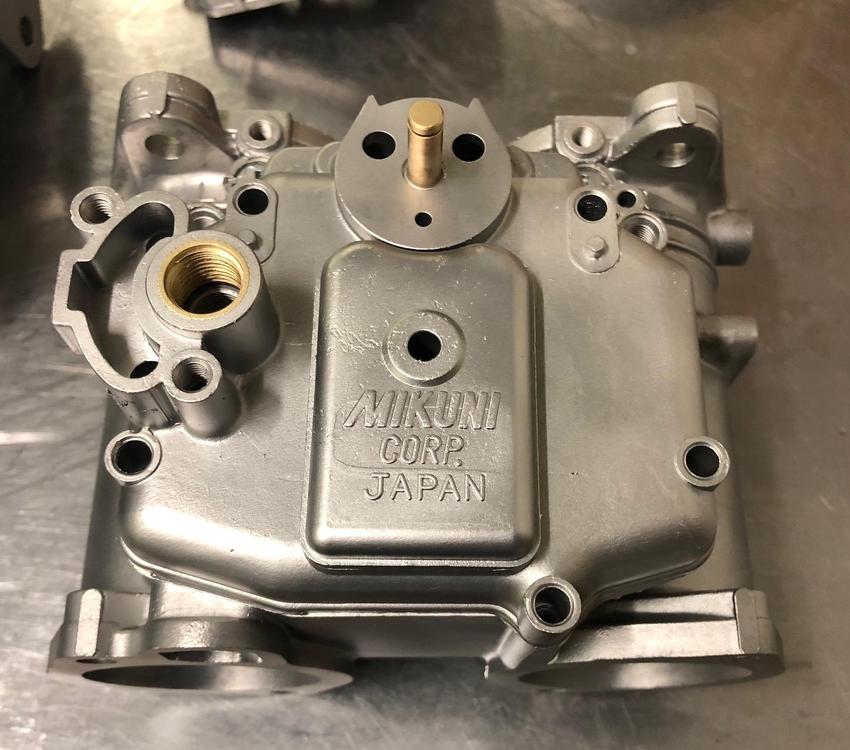
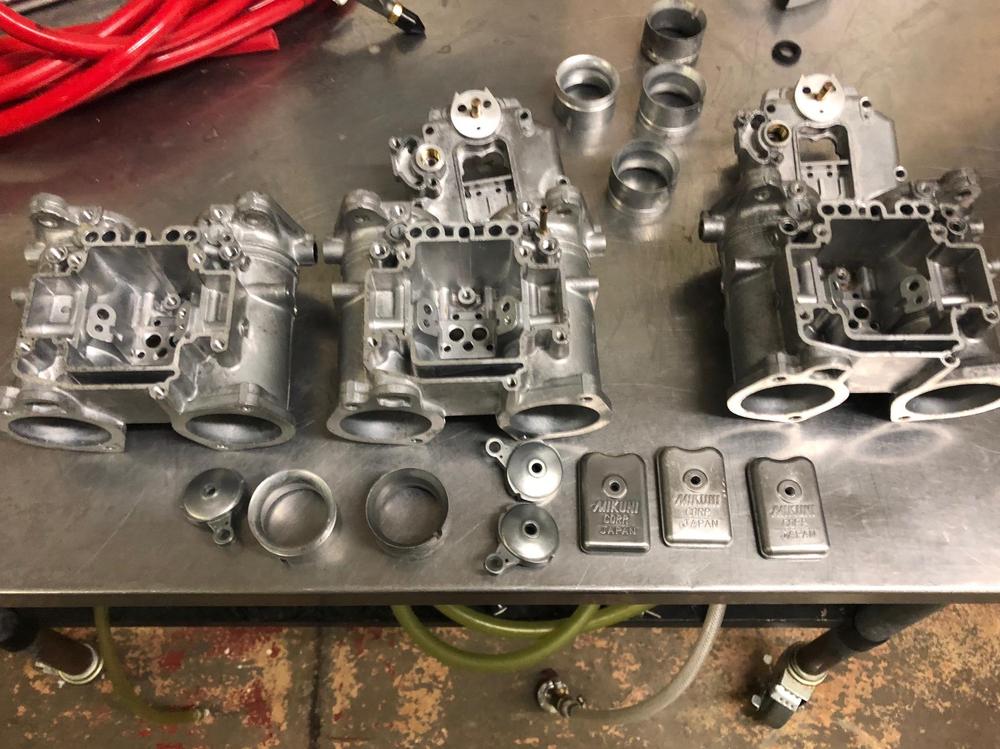
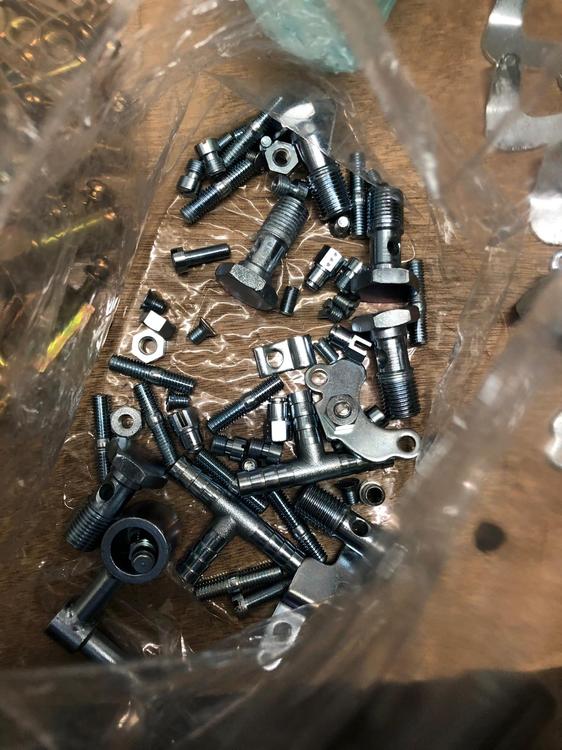
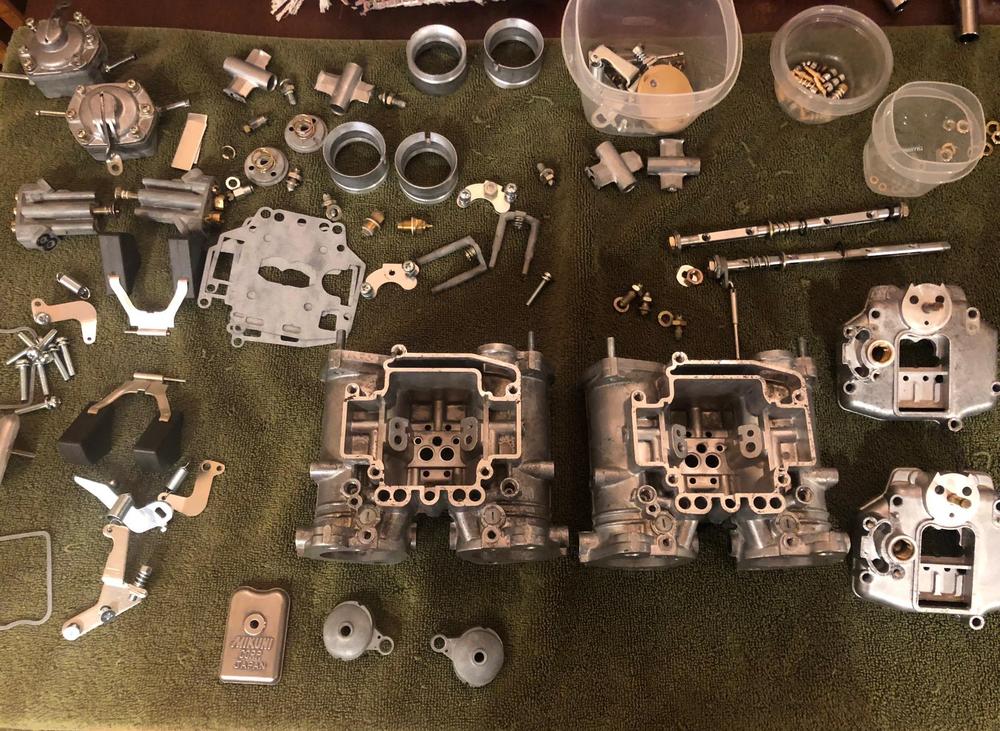
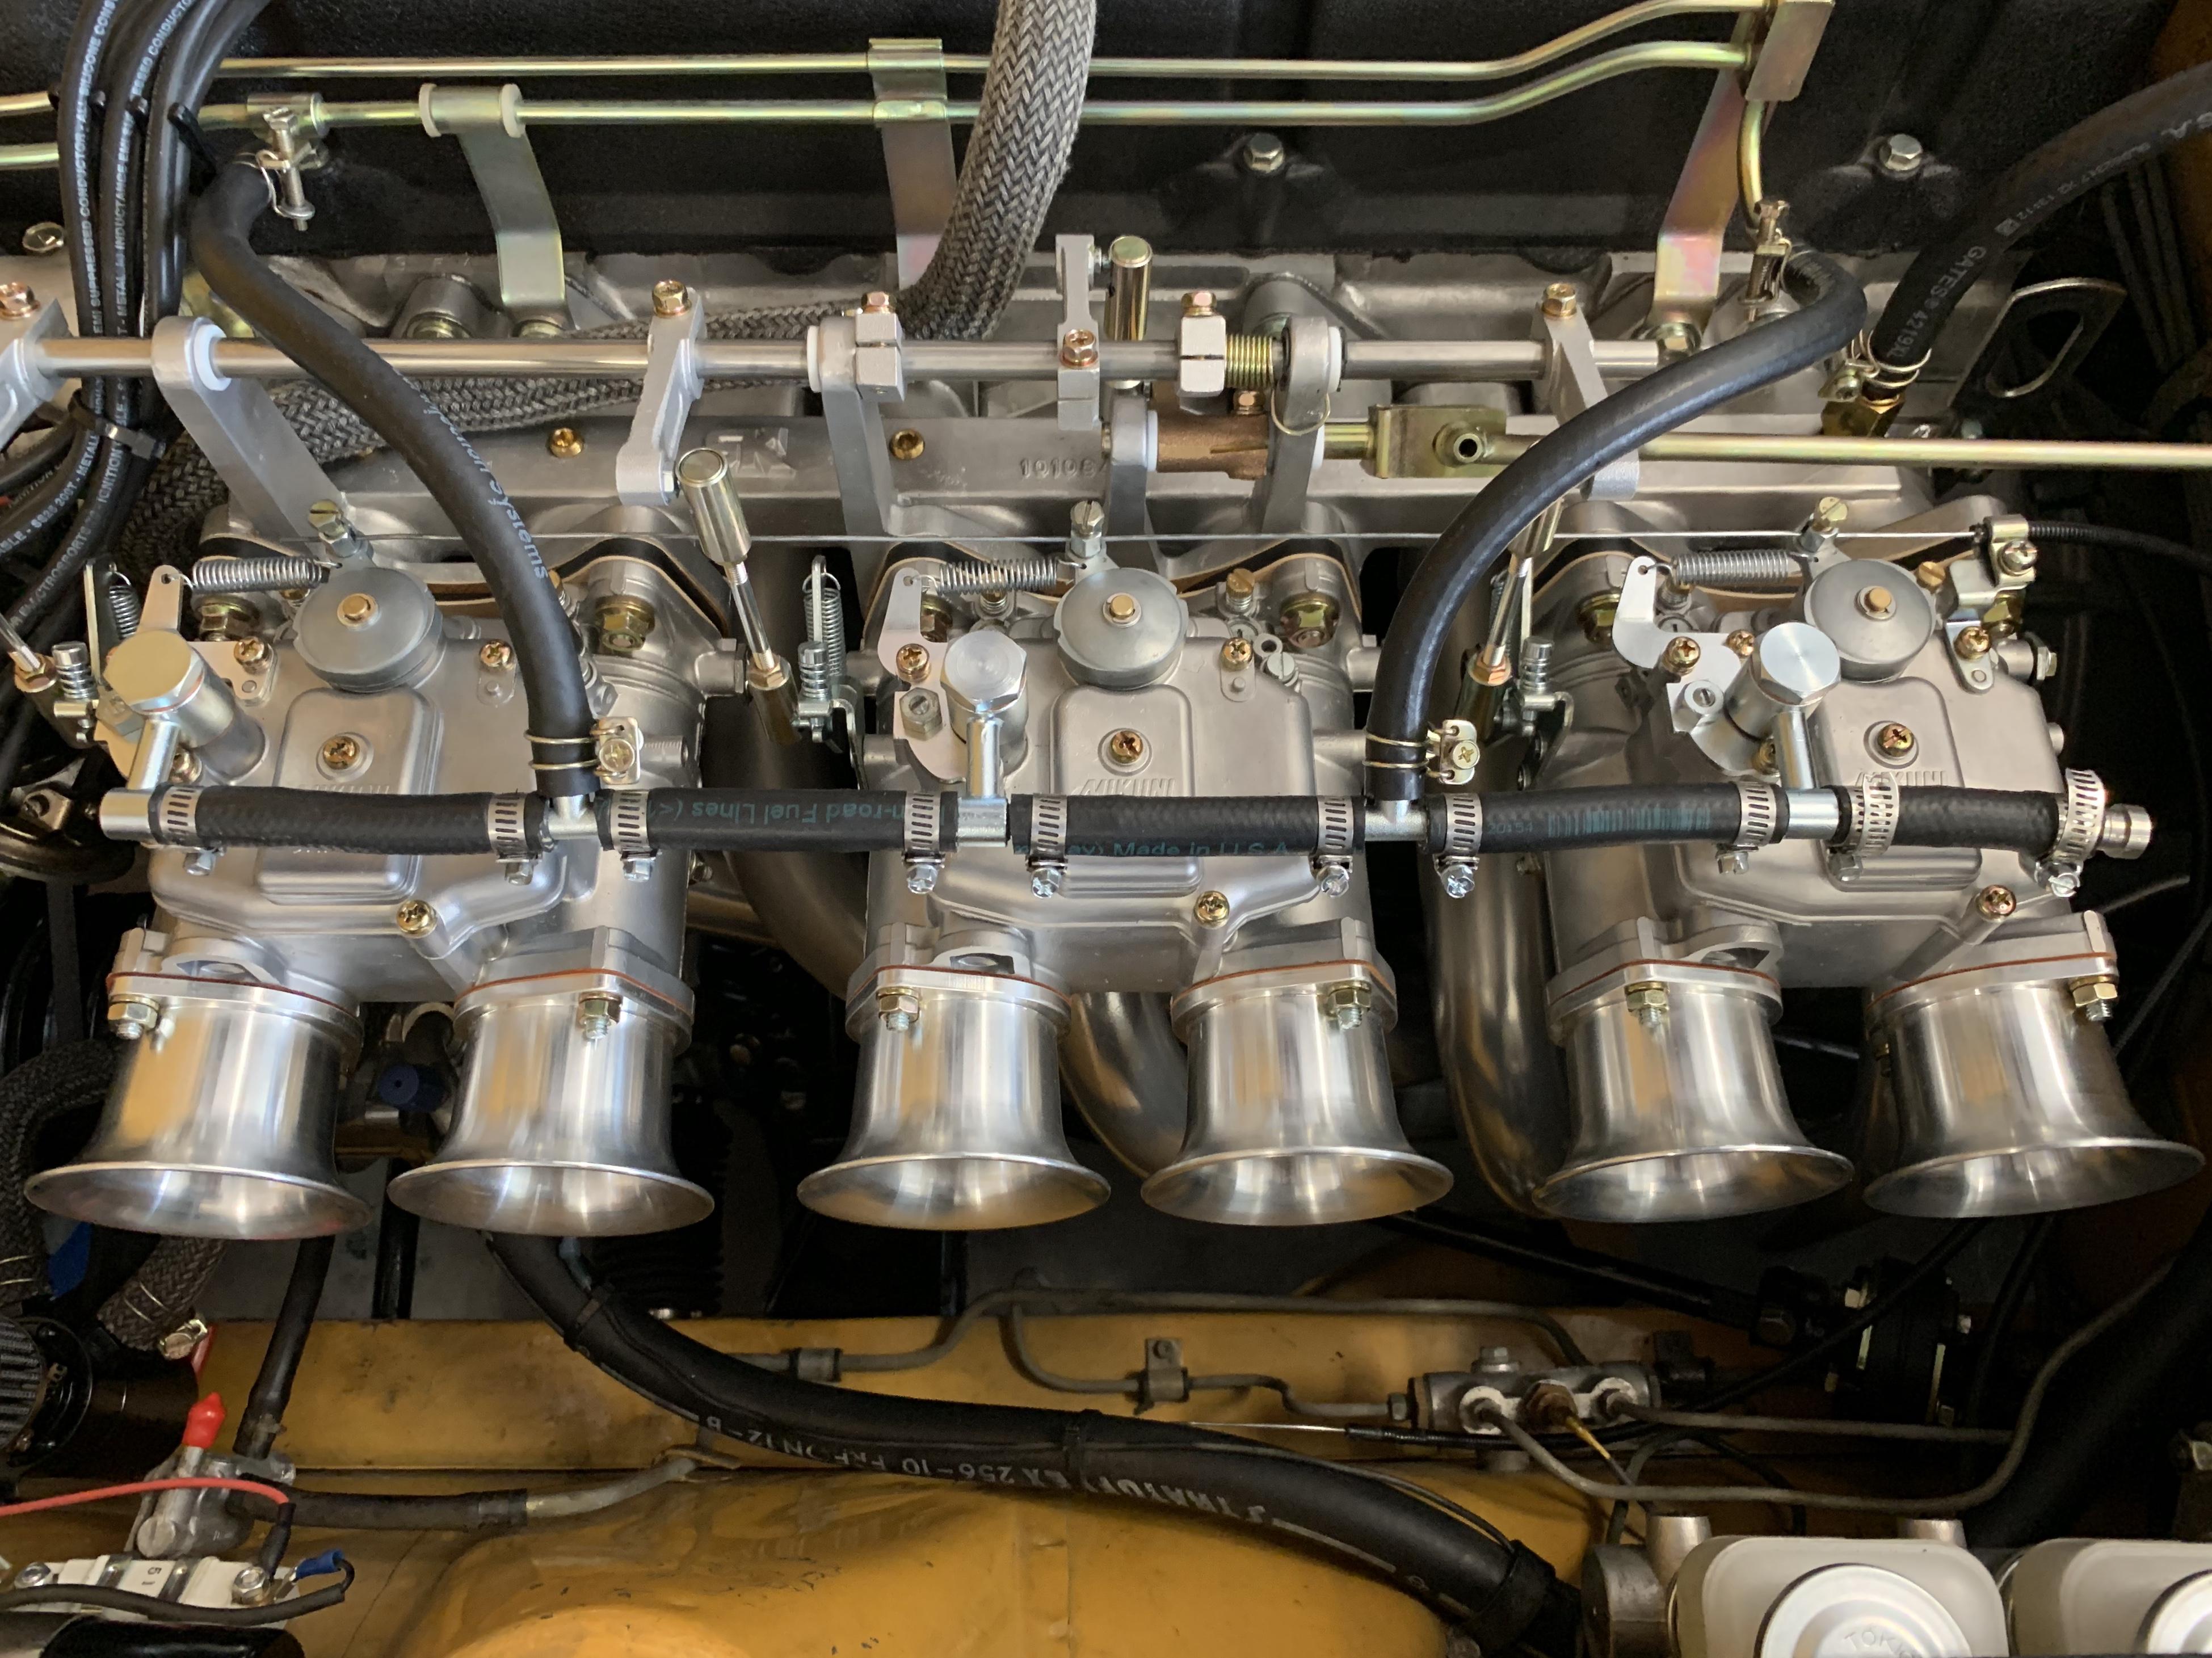
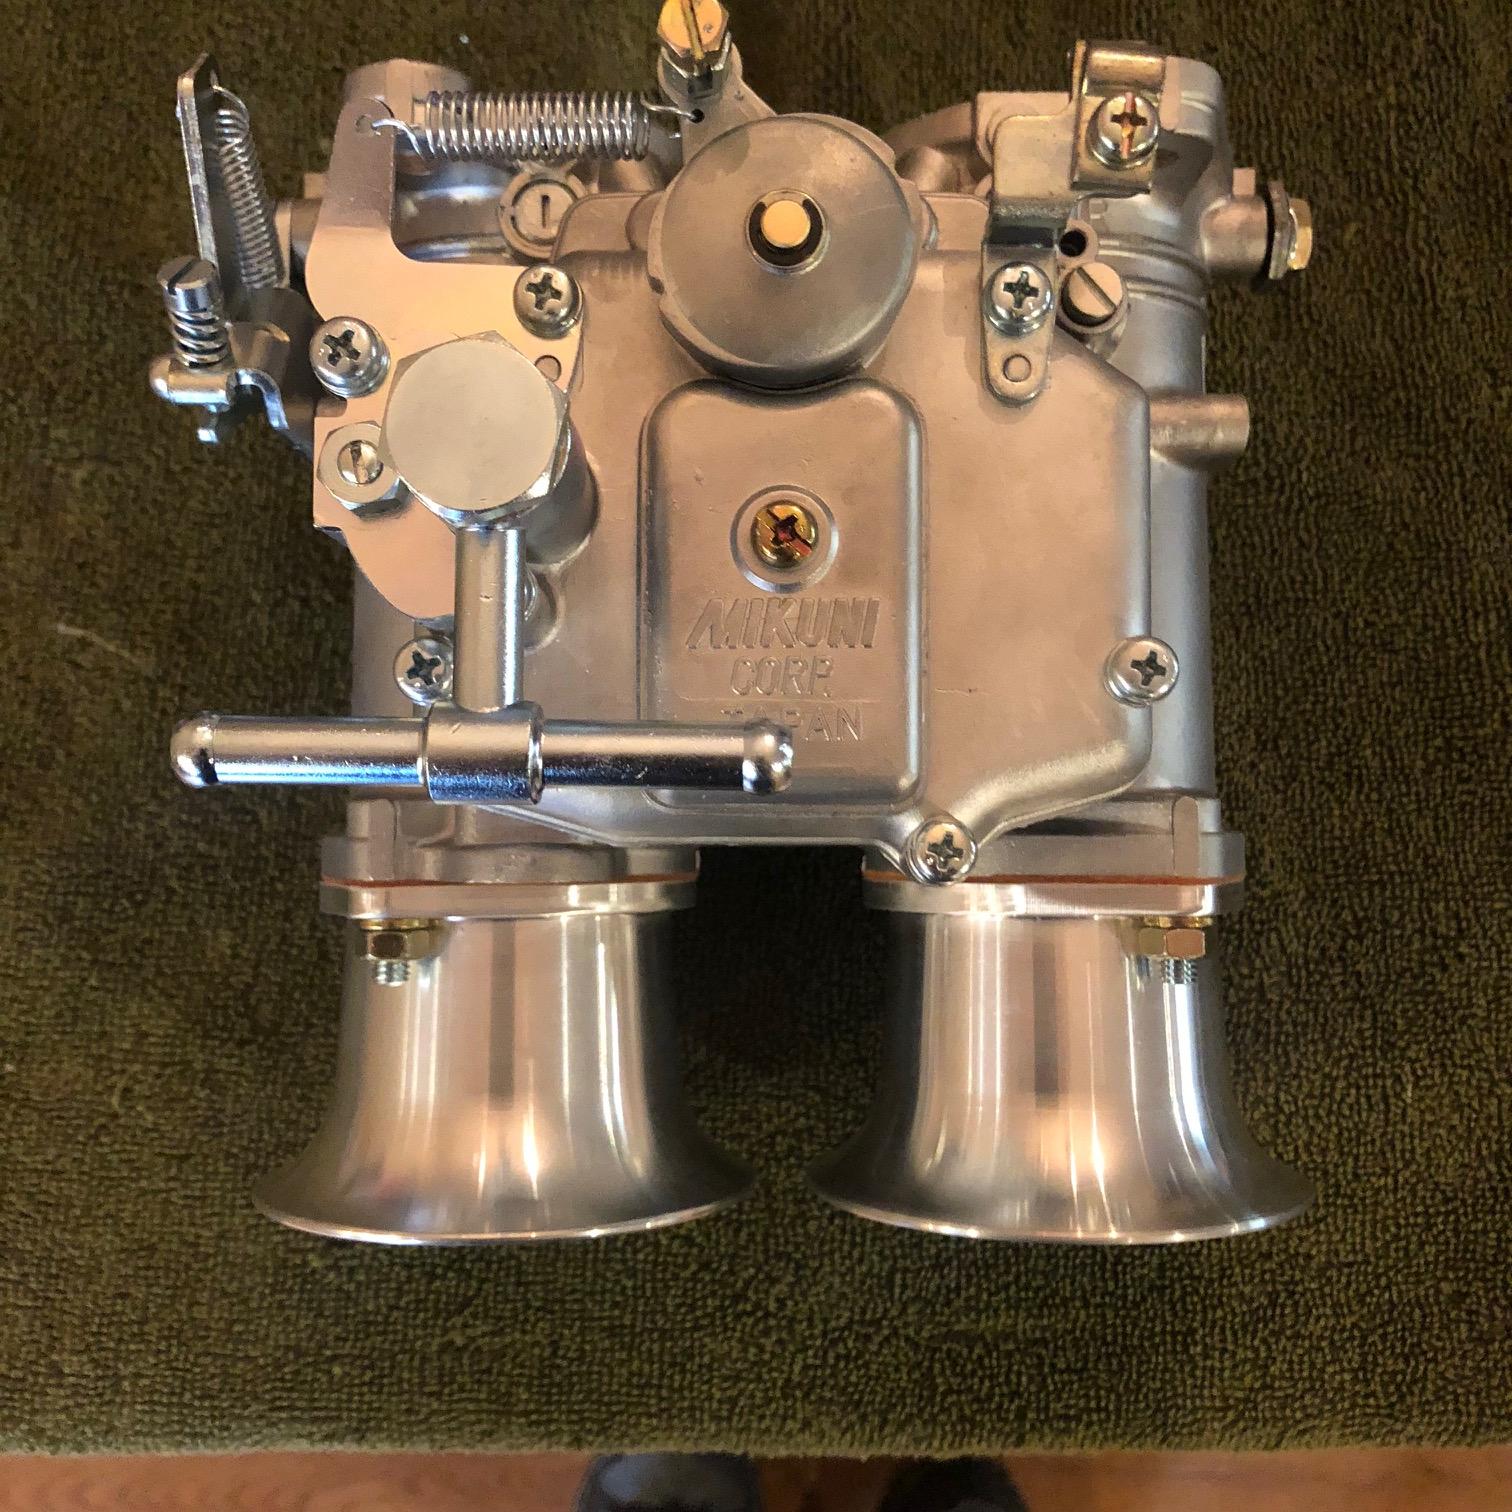
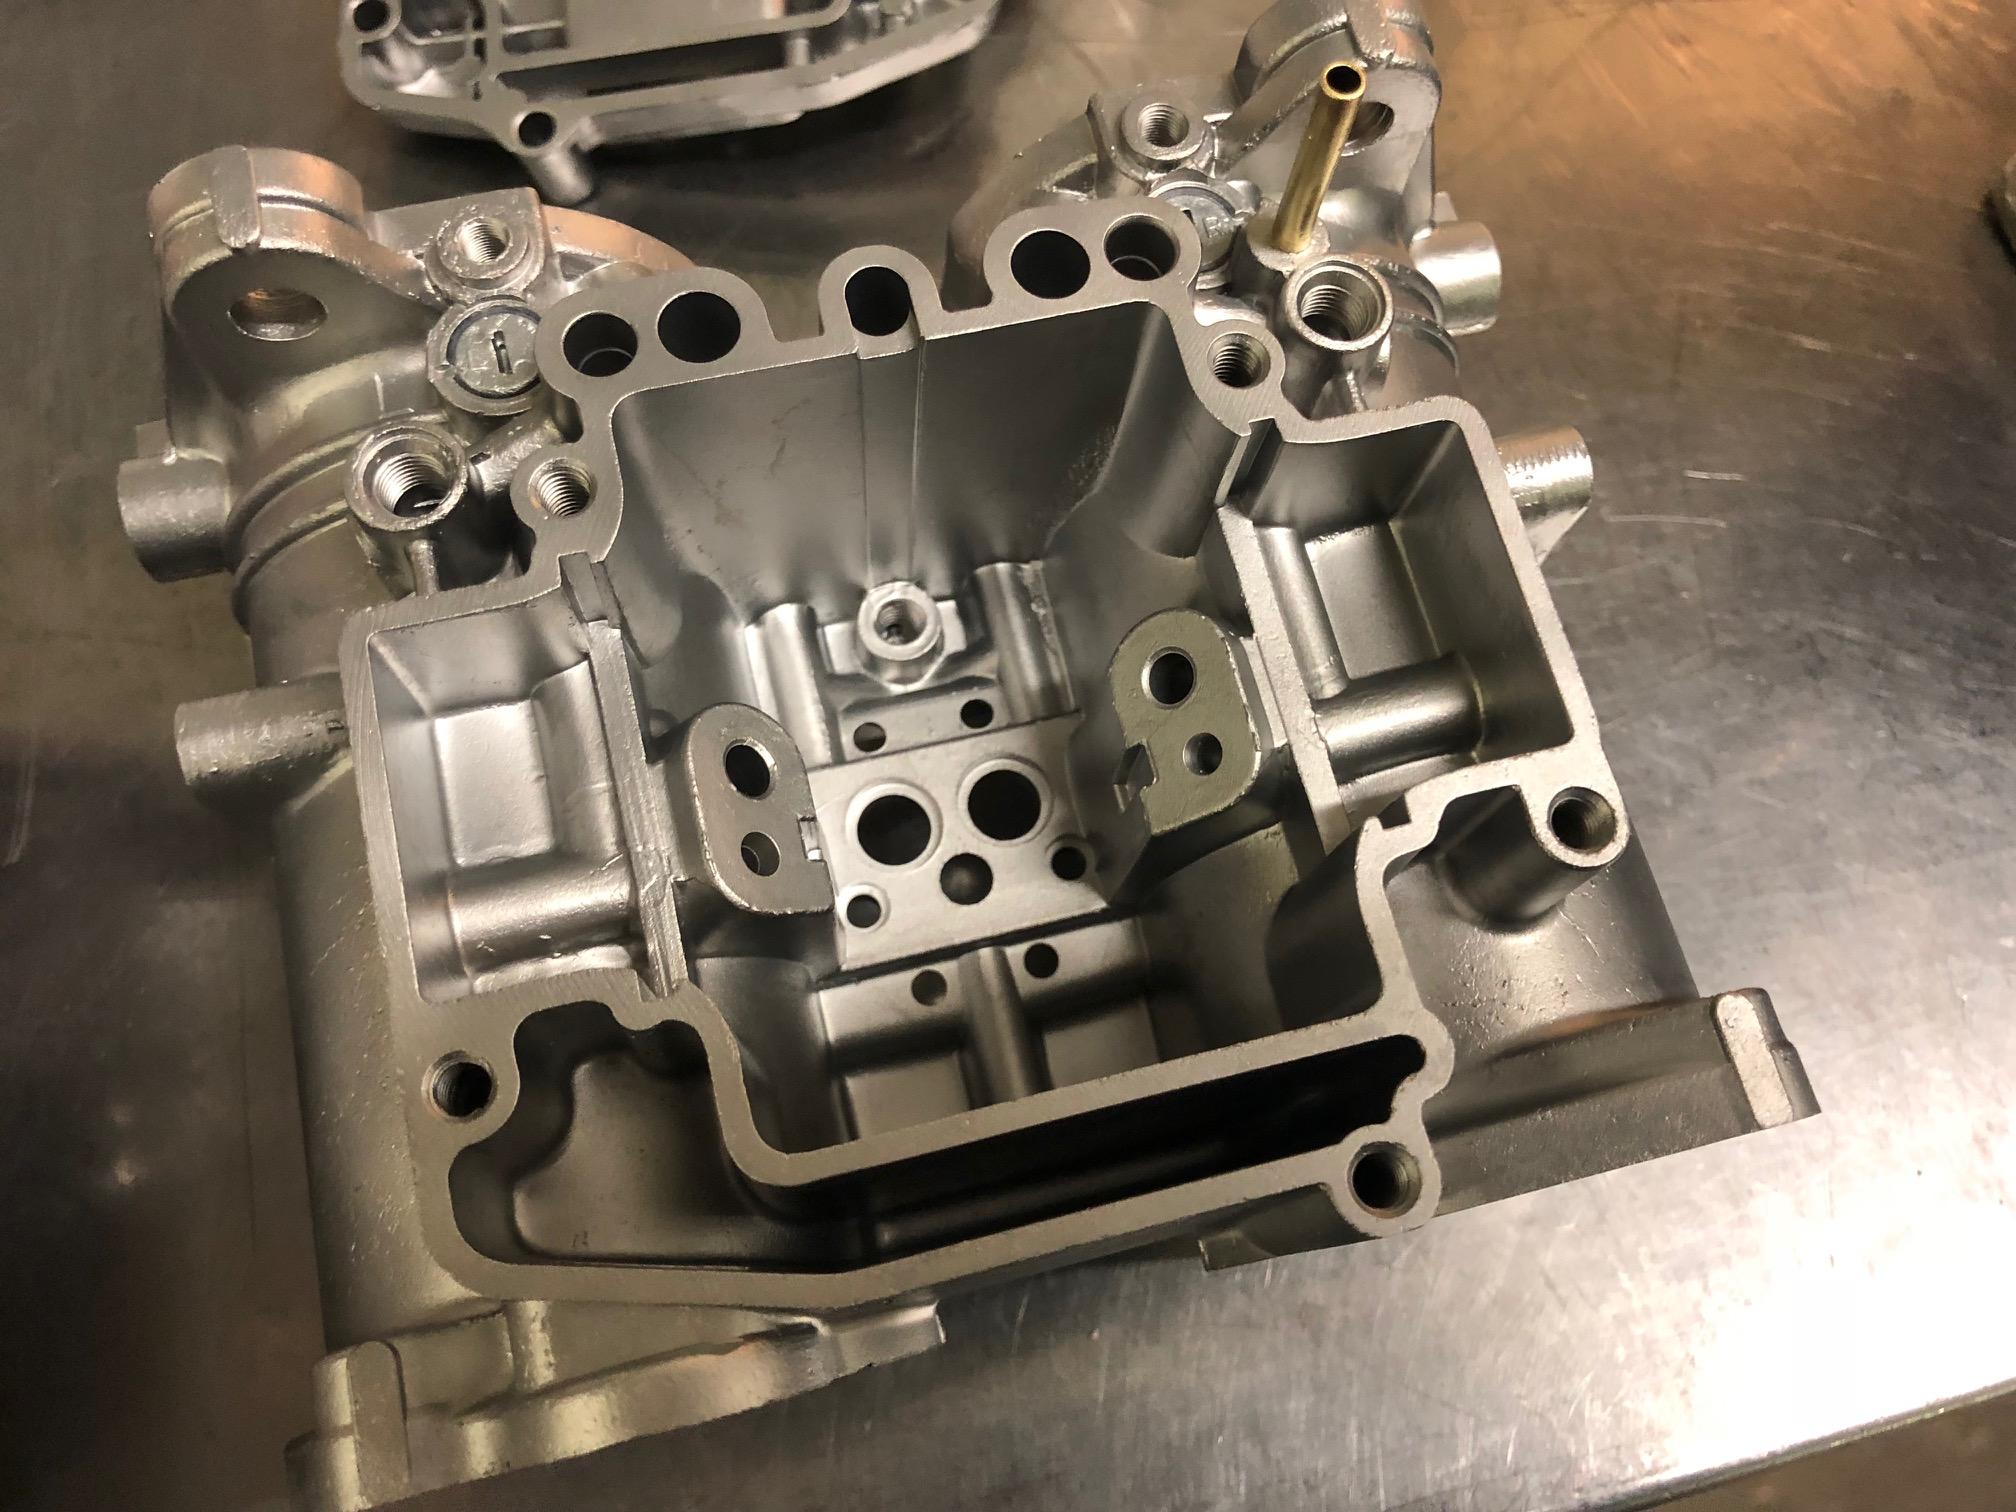
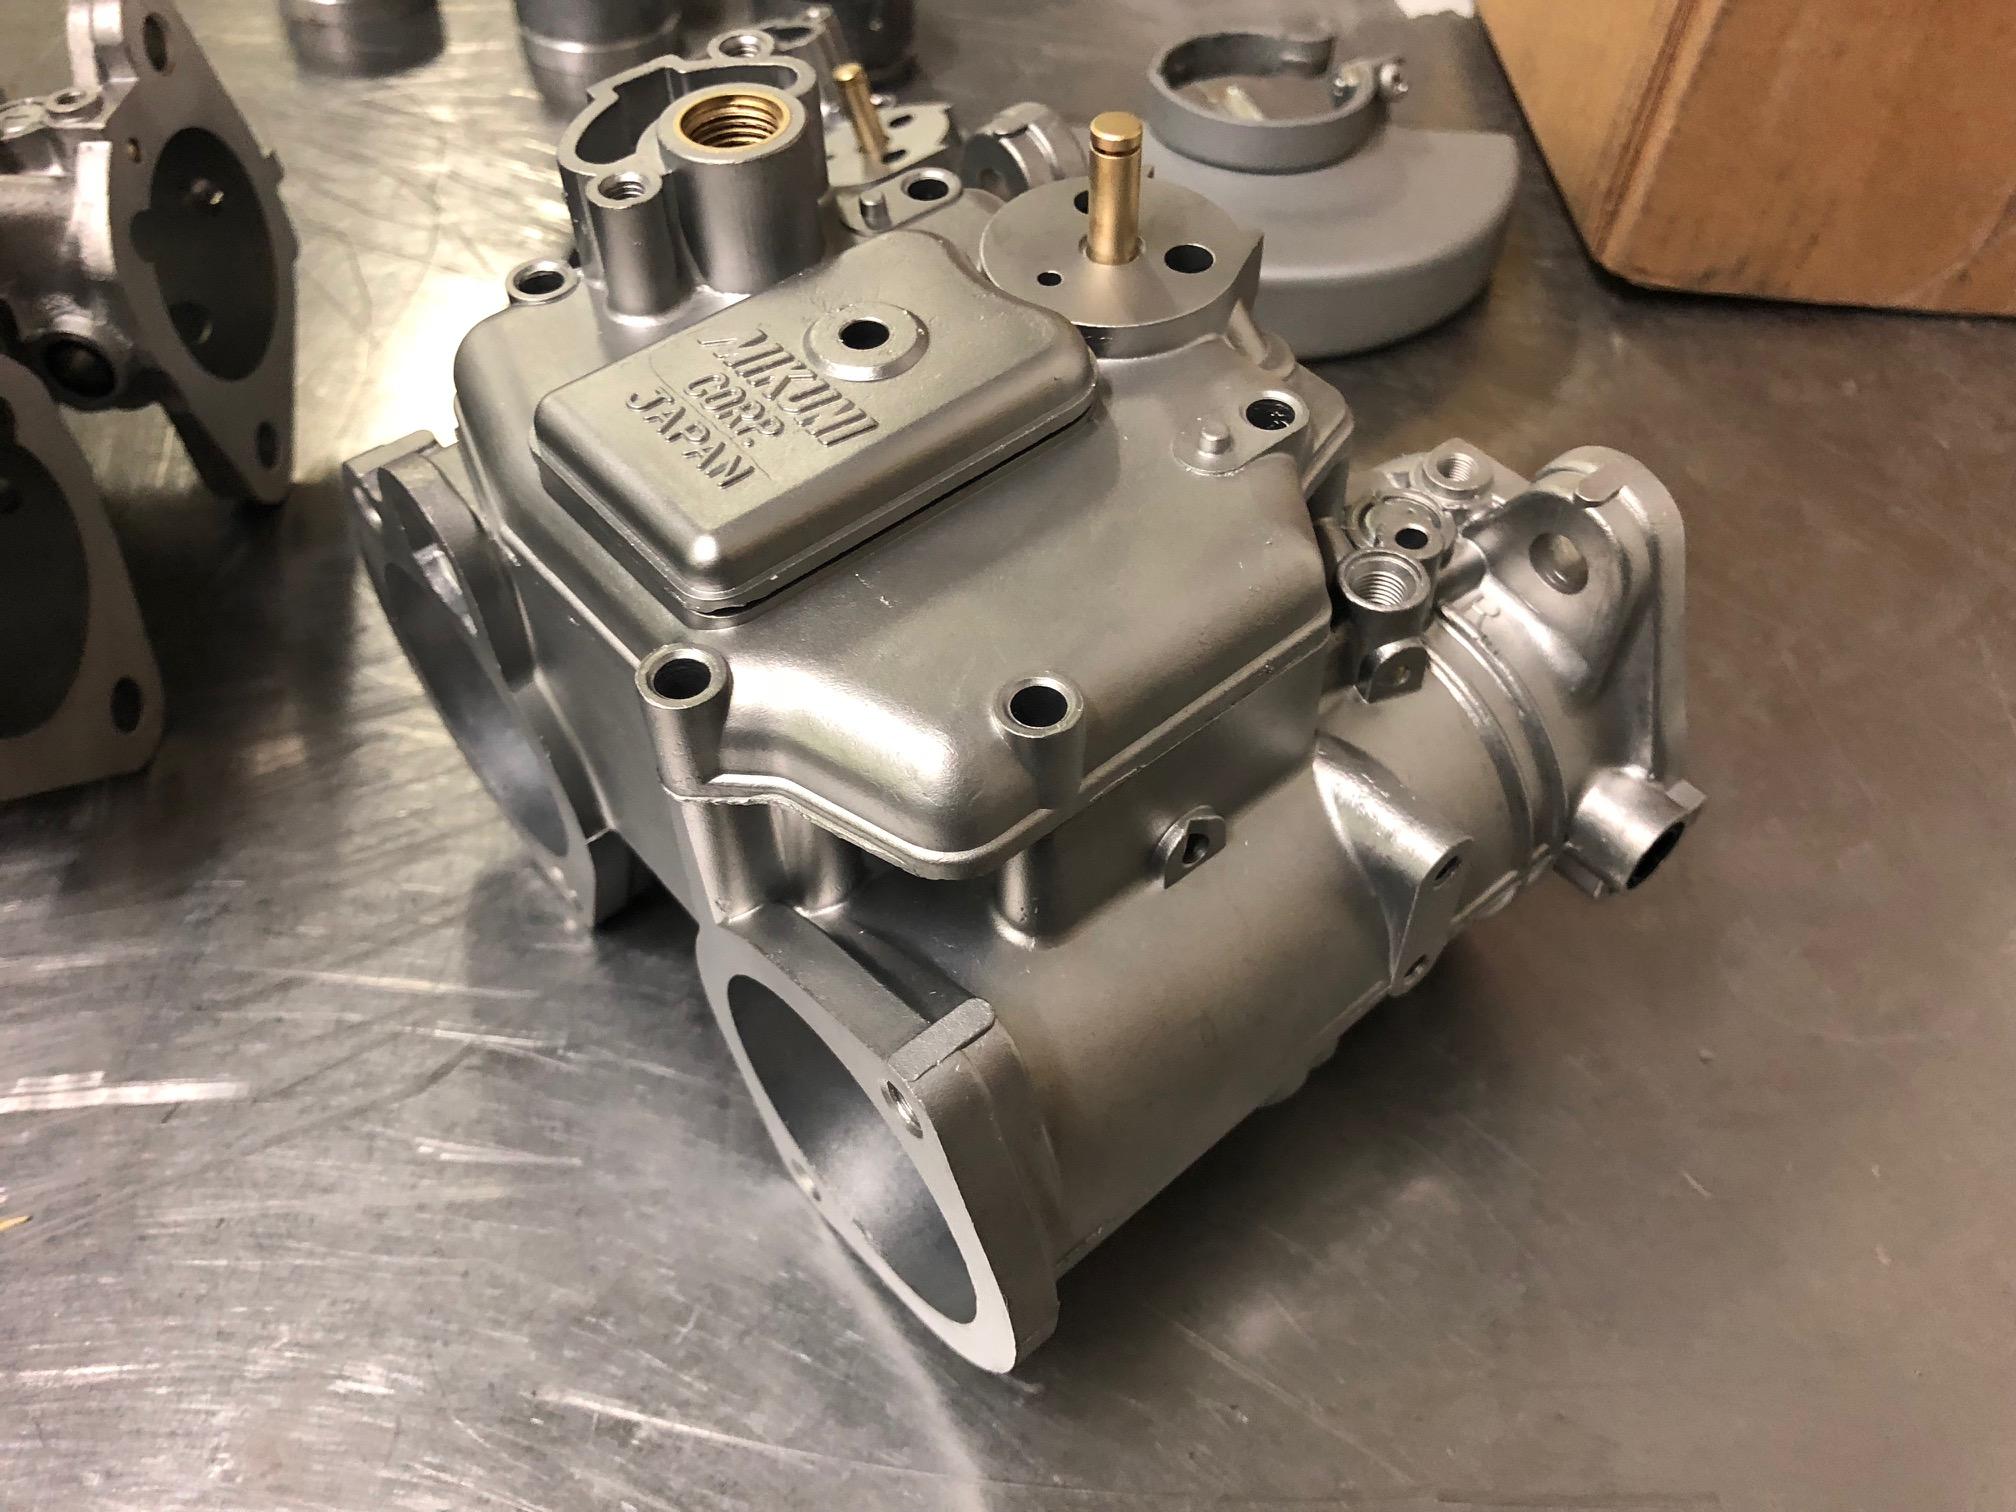
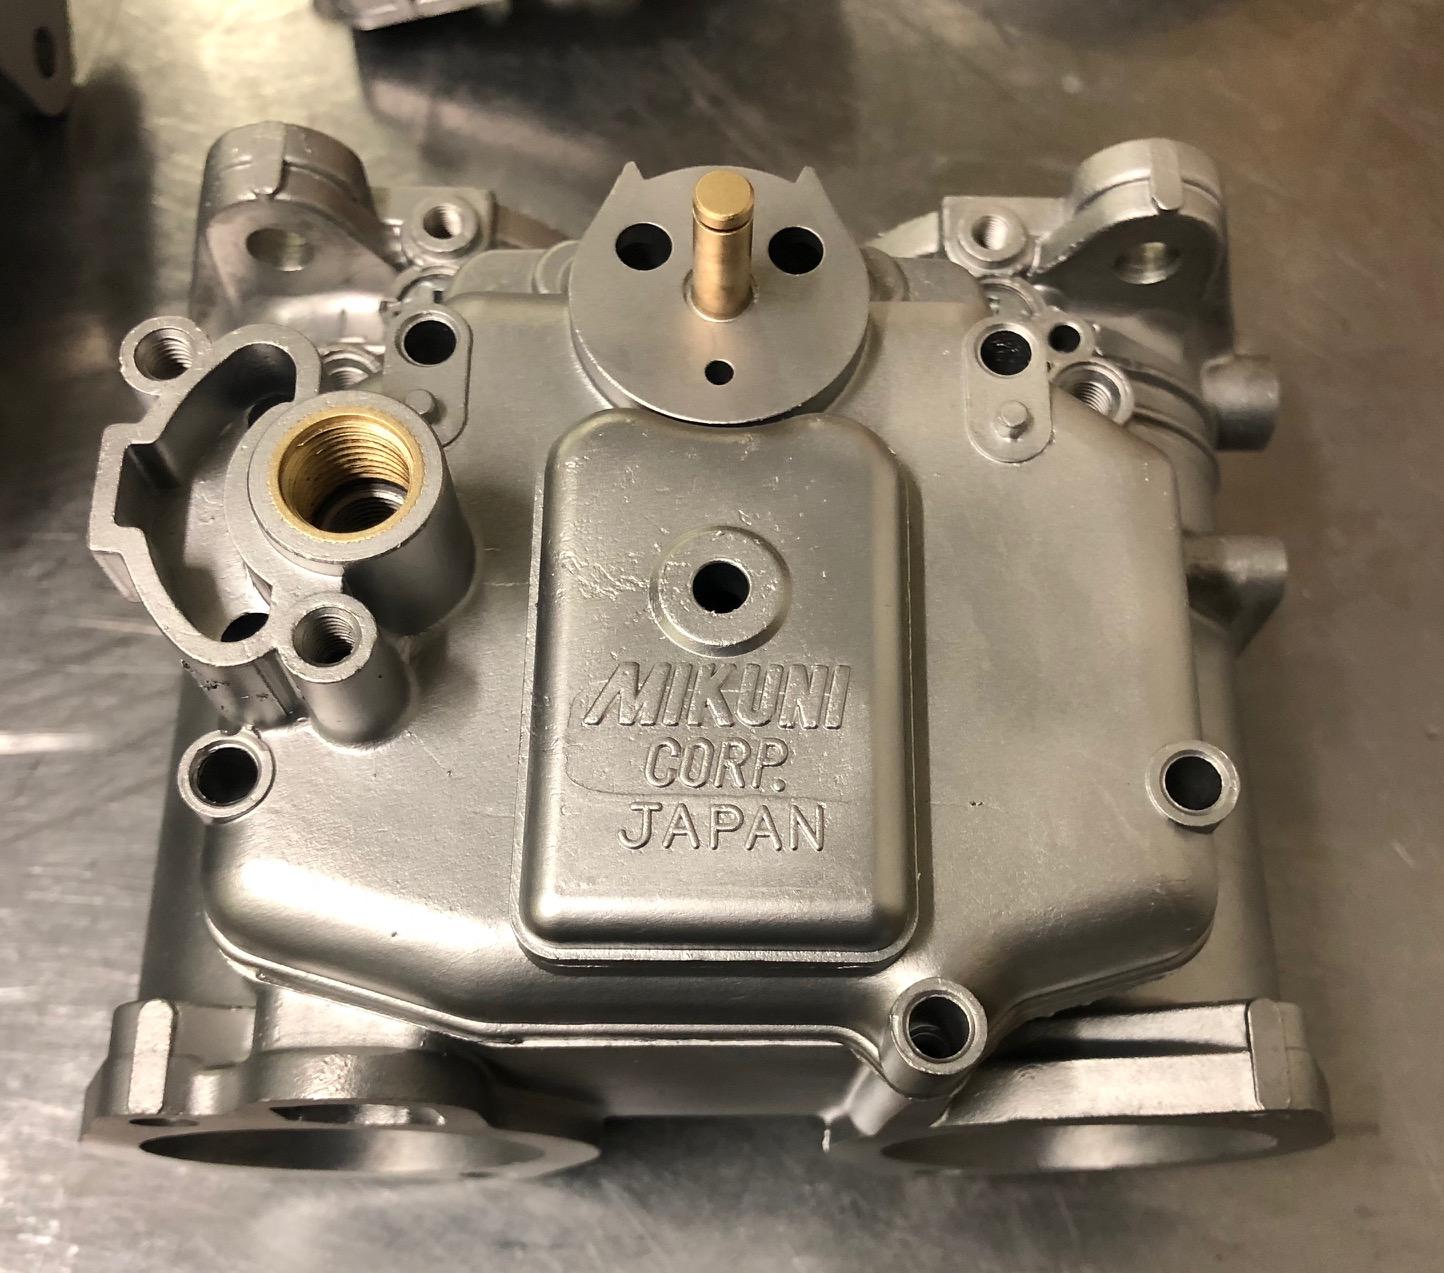
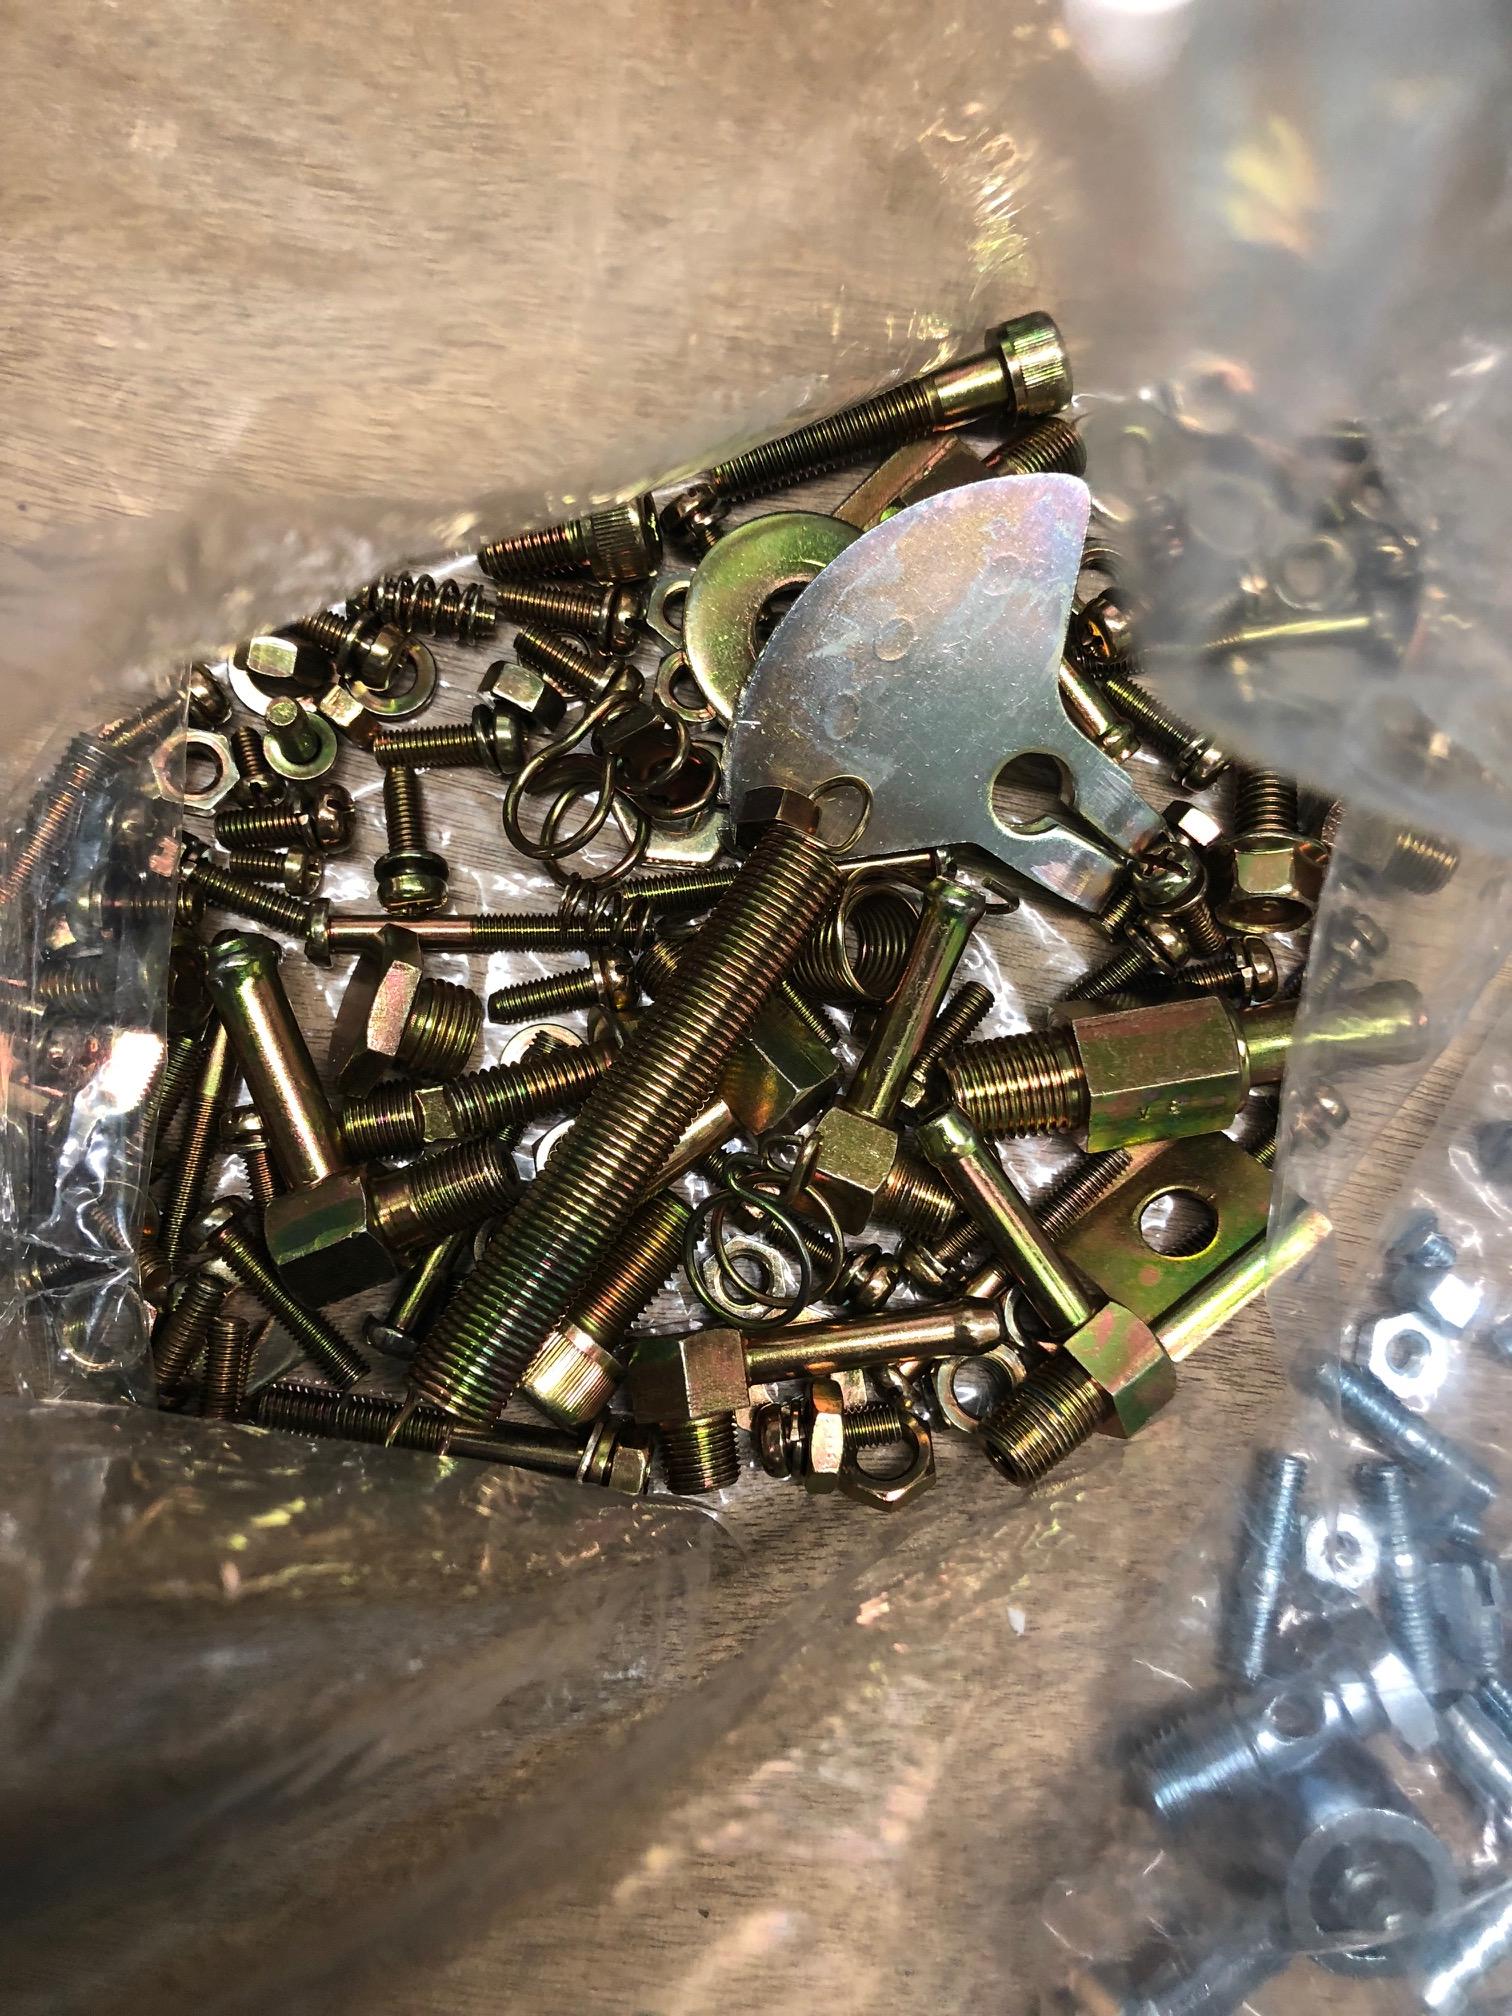
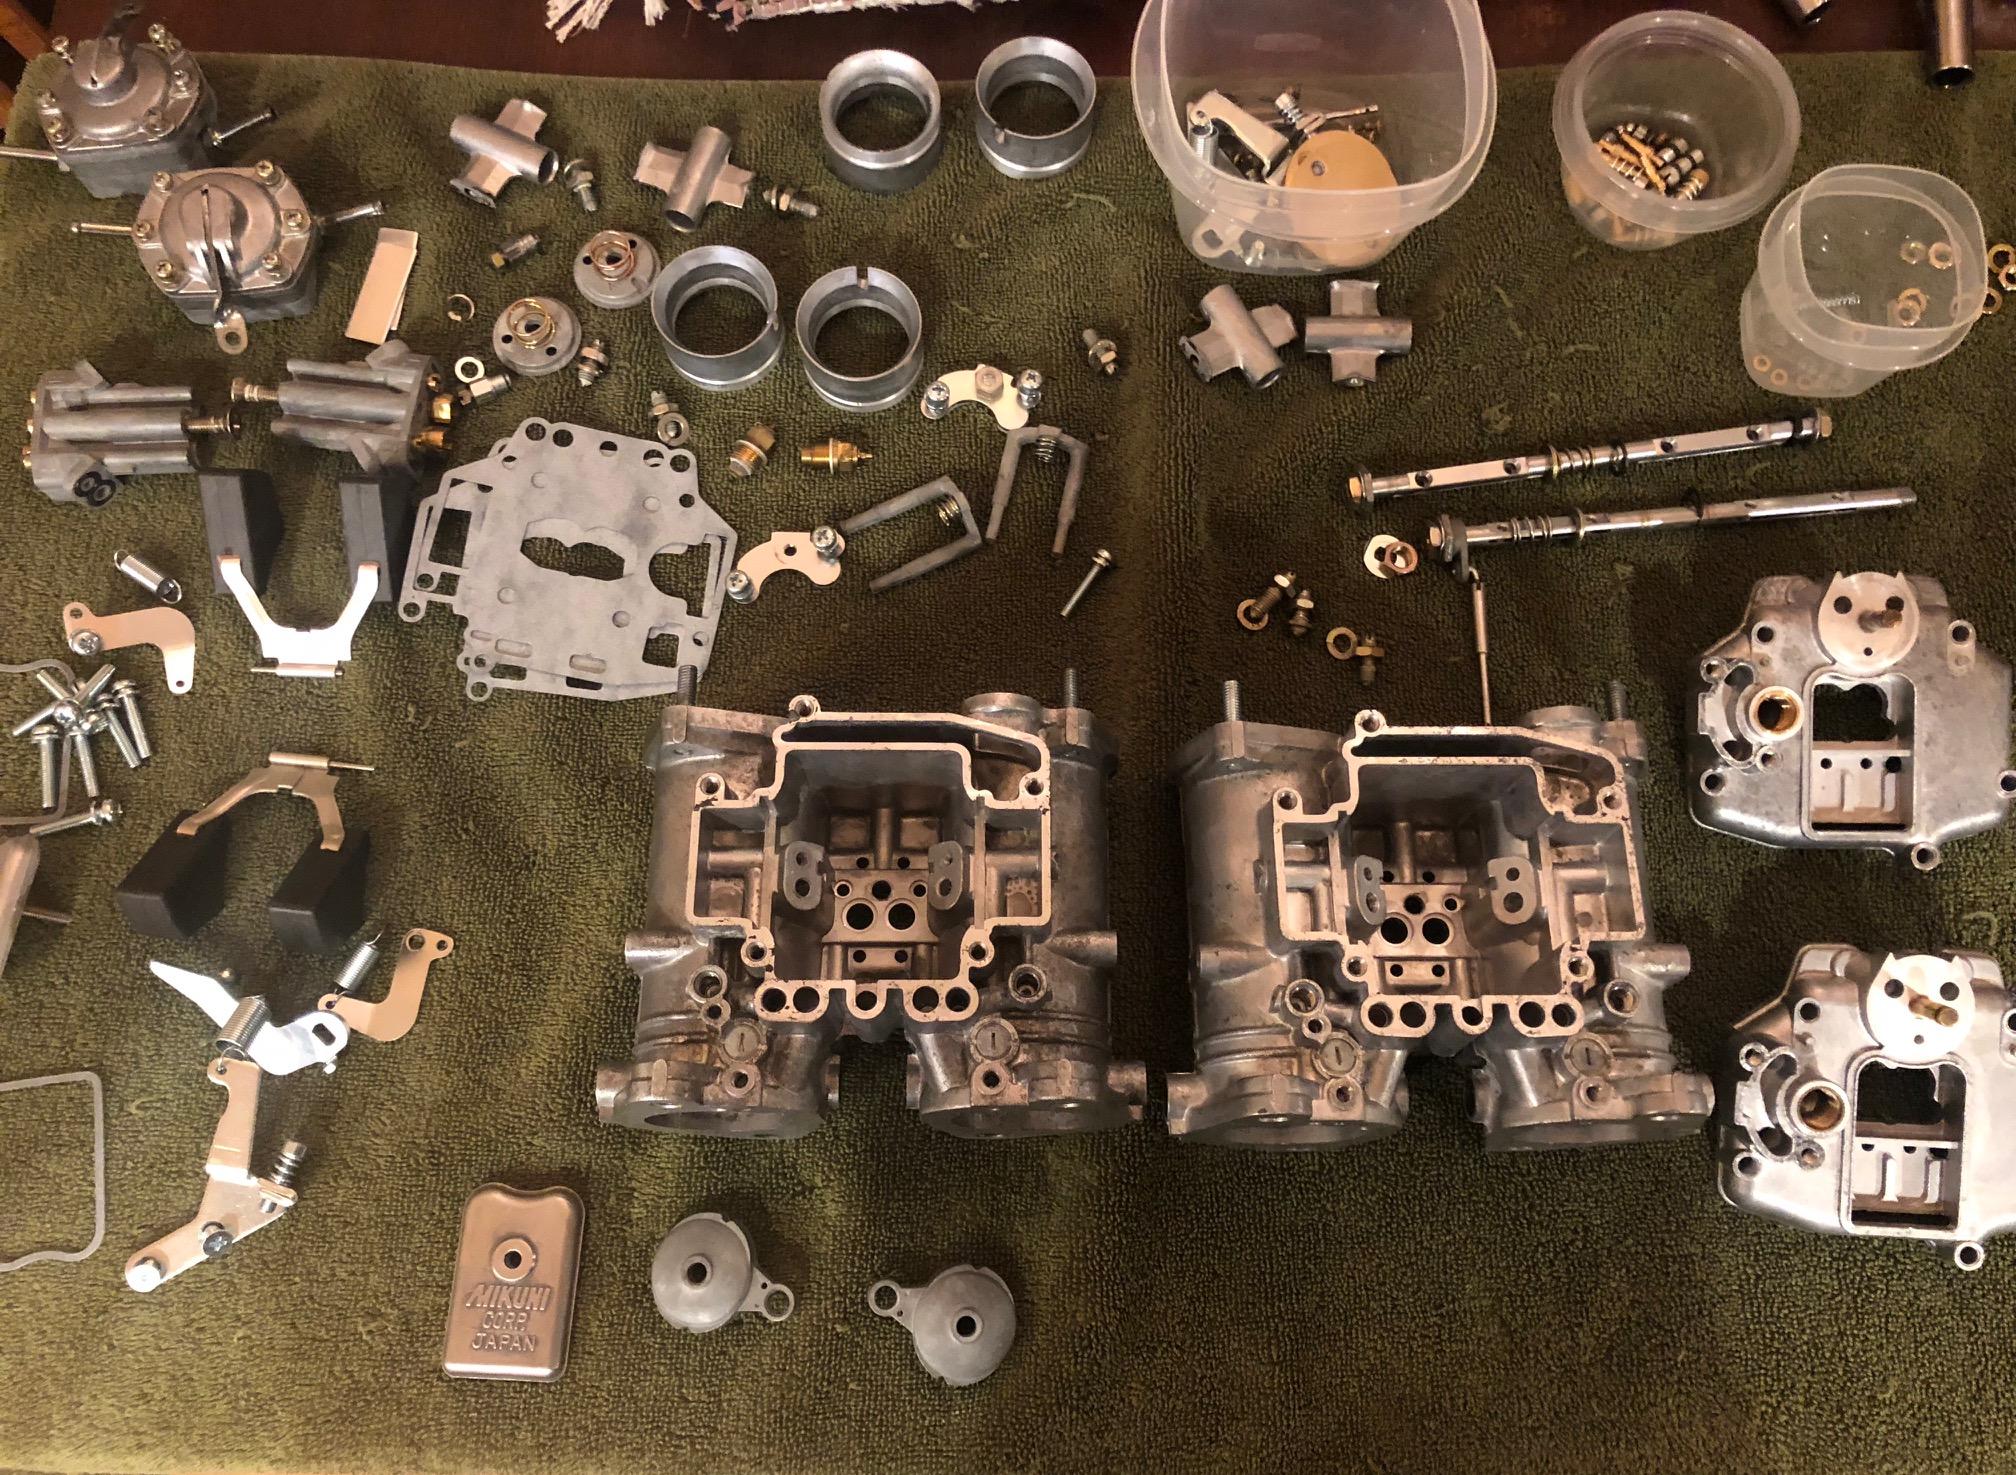
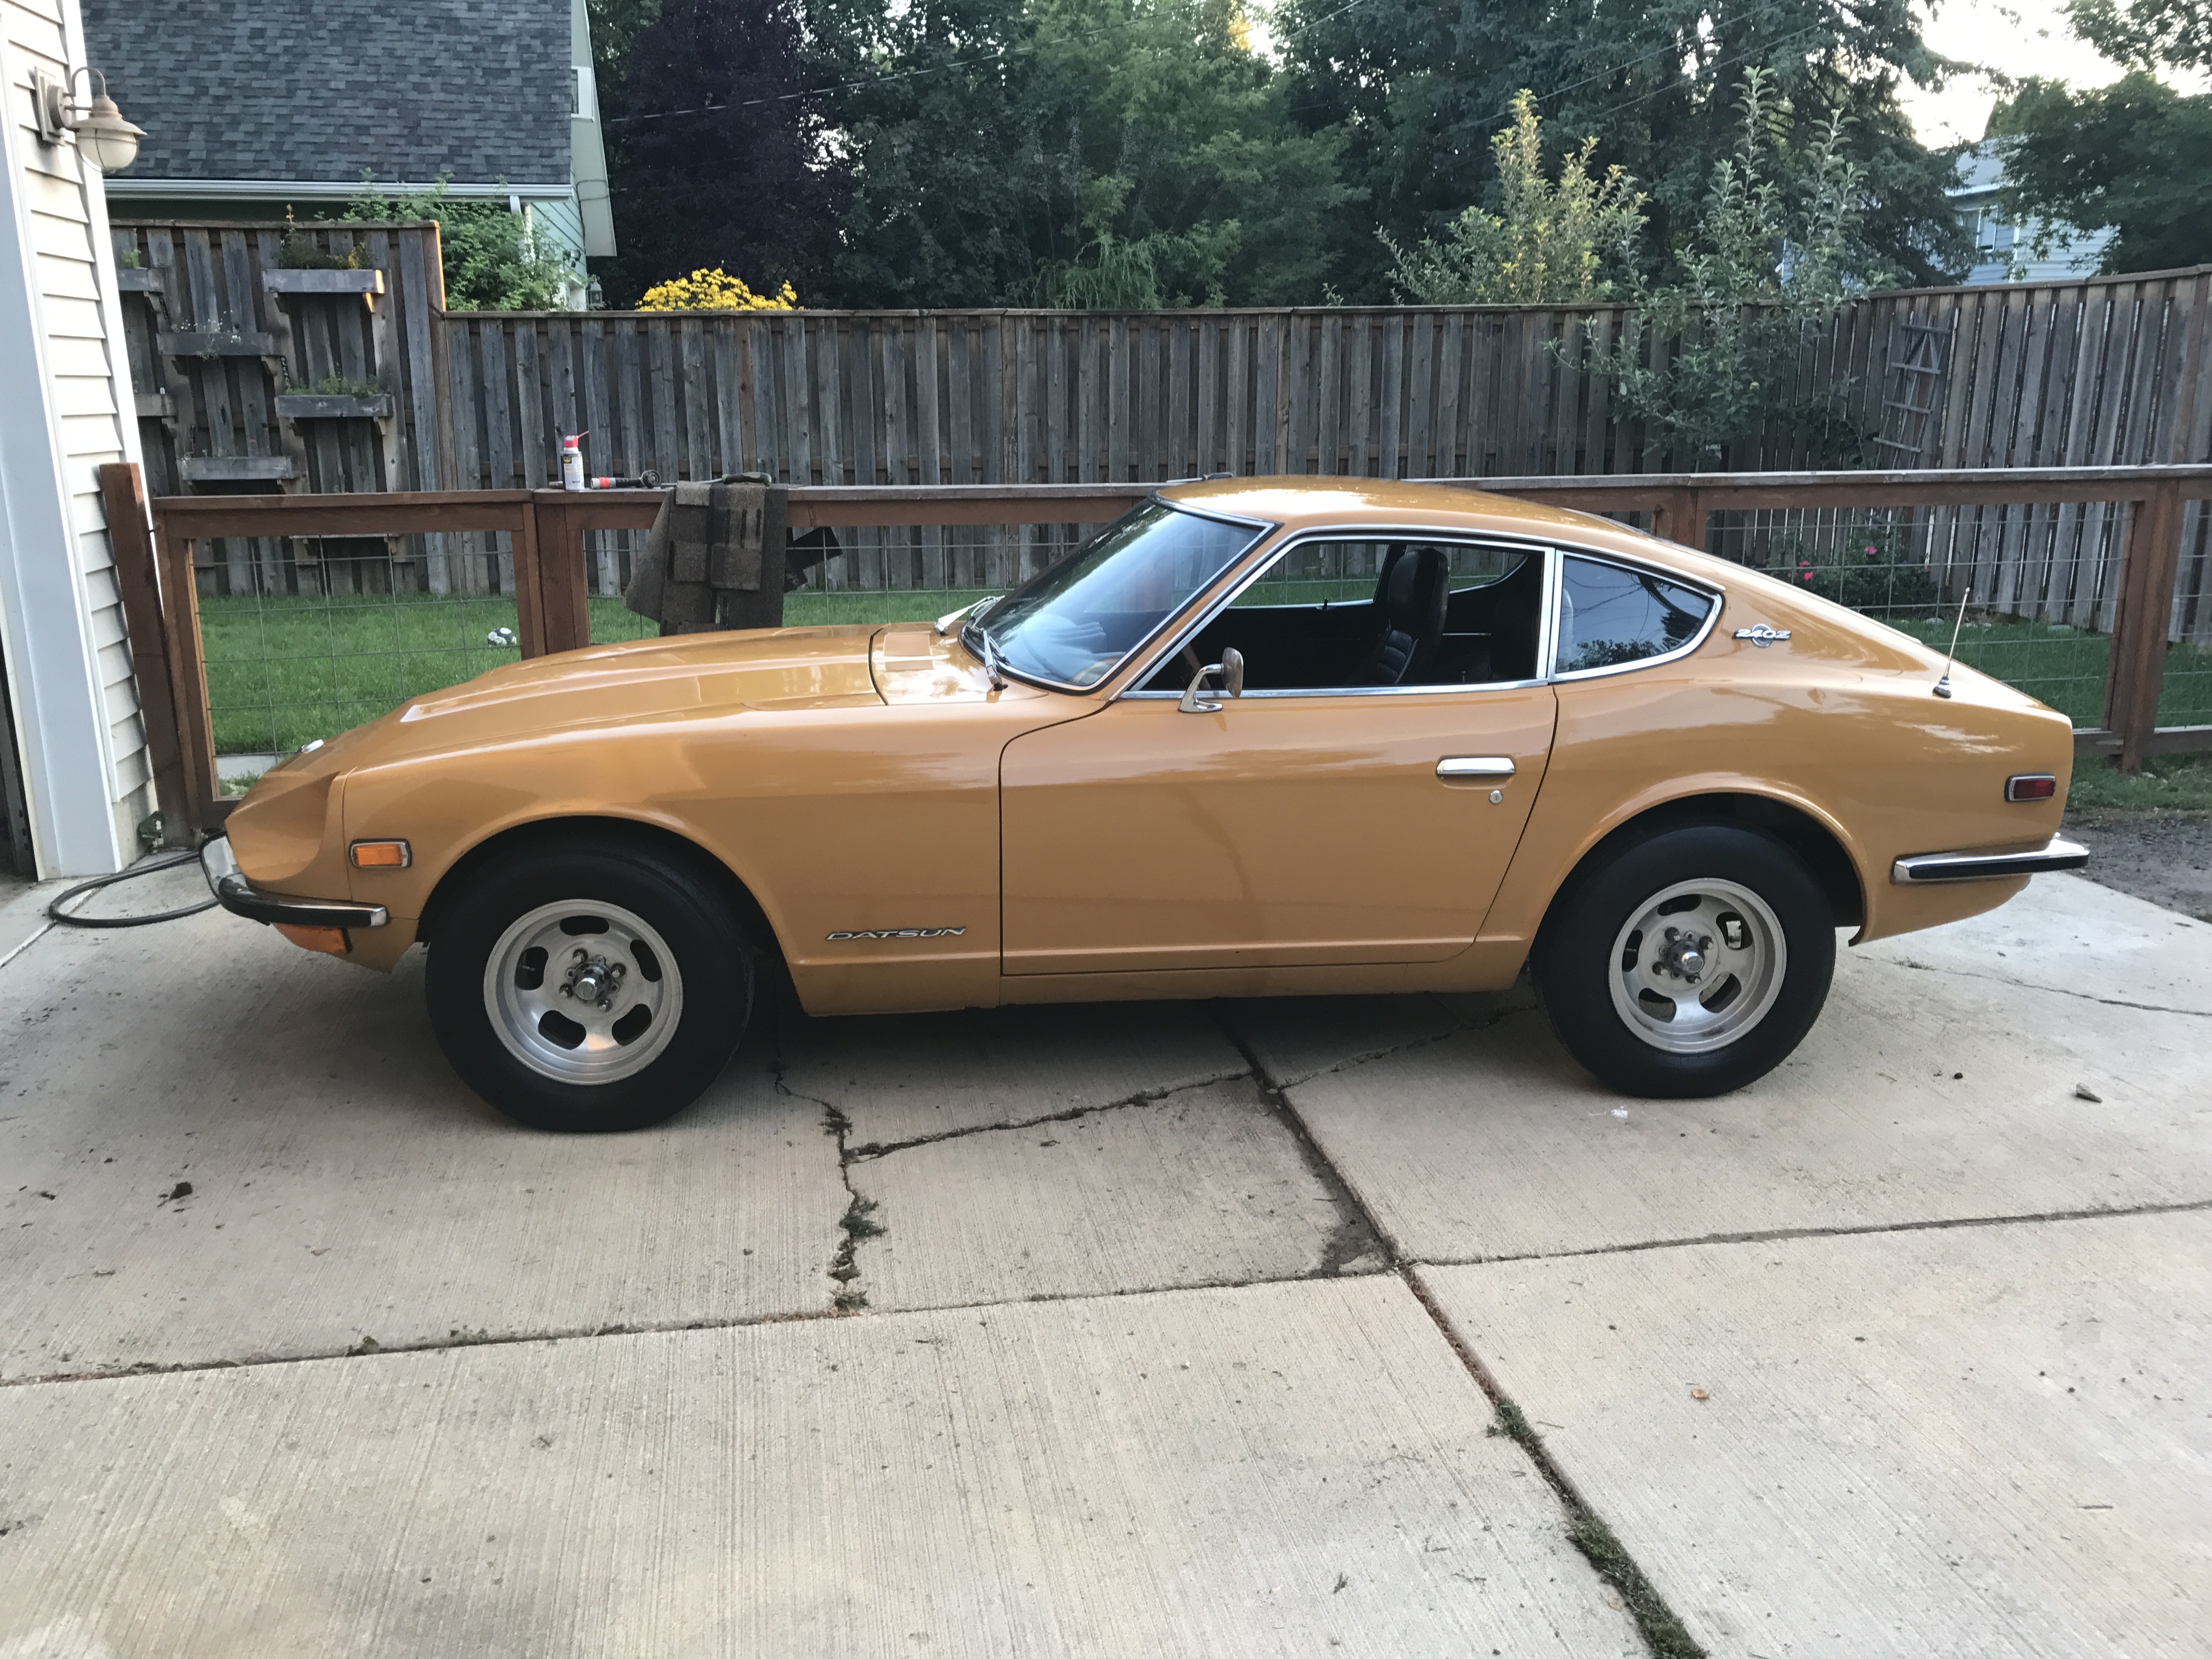
So my 3 best mikuni 44's didn't have the same patina, these had been rebuilt by a legend. I made the decision to try and take them 95% apart myself, vapor blast and put them back together. Honestly most of the process made perfect sense. I am pretty detail oriented, so I just took my time and took lots of pictures. The throttle shafts and pins are the hardest part. So far the only thing I think i screwed up is one of the butterfly valves isn't seated 100%. I am going to take each carb off and double check no light passes by when closed. I am getting a high idle, which I believe is from that. I installed a nismo fuel pump with my 73 bracket, bolted right in. Hoses were easy to install. I installed a inertia switch/ rollover switch for the electric fuel pump (factory used a oil pressure switch). Since I have it attached to the stock spot on the ignition. Also a 14amp fuse. Looks factory. I wanted to use the stock fuel rail, I like the way it looks. I also re- zinc'd a bunch of smalls for the intake and carbs. So far I am very happy with how they sound. Now time to sell my z therapy carbs. Don't judge the fuel fitting. The correct one is on order.